class project end of term assembly authors: sheridan glenister, jane hill, holly hyde and amanda...
TRANSCRIPT
Class ProjectClass Project
End of Term AssemblyEnd of Term Assembly
Authors: Sheridan Glenister, Jane Hill, Holly Hyde and Amanda Parr

Class AssemblyClass Assembly
Brief overview on Assembly ItemBrief overview on Assembly Item Lesson PlansLesson Plans Google CalendarGoogle Calendar Pivot Stickfigure AnimatorPivot Stickfigure Animator GlogsterGlogster WikispacesWikispaces

Fairytale PlayFairytale PlayThe class assembly item is going to be the The class assembly item is going to be the students remake of a classic fairytale. You as students remake of a classic fairytale. You as
the teacher will read the students two fairytale the teacher will read the students two fairytale stories and the students will then decide which stories and the students will then decide which story they want to show for the assembly. The story they want to show for the assembly. The work leading up to the final performance will work leading up to the final performance will give the students the opportunity to practice give the students the opportunity to practice
their creative, organisational and technological their creative, organisational and technological skills.skills.

Lesson PlansLesson Plans Lesson one: Lesson one: Read two fairytales to the children. Read two fairytales to the children.
A couple of suggestions would A couple of suggestions would be My Treasury of be My Treasury of FairytalesFairytales and and Fairytale Treasury Fairytale Treasury both books have both books have several fairytales in them and are quite nice several fairytales in them and are quite nice books.books.
Lesson two: Lesson two: As a whole class, As a whole class, discuss and decide on the script for discuss and decide on the script for the assembly item, decide who is to the assembly item, decide who is to play which character and what type of play which character and what type of costumes the actors will wear.costumes the actors will wear.
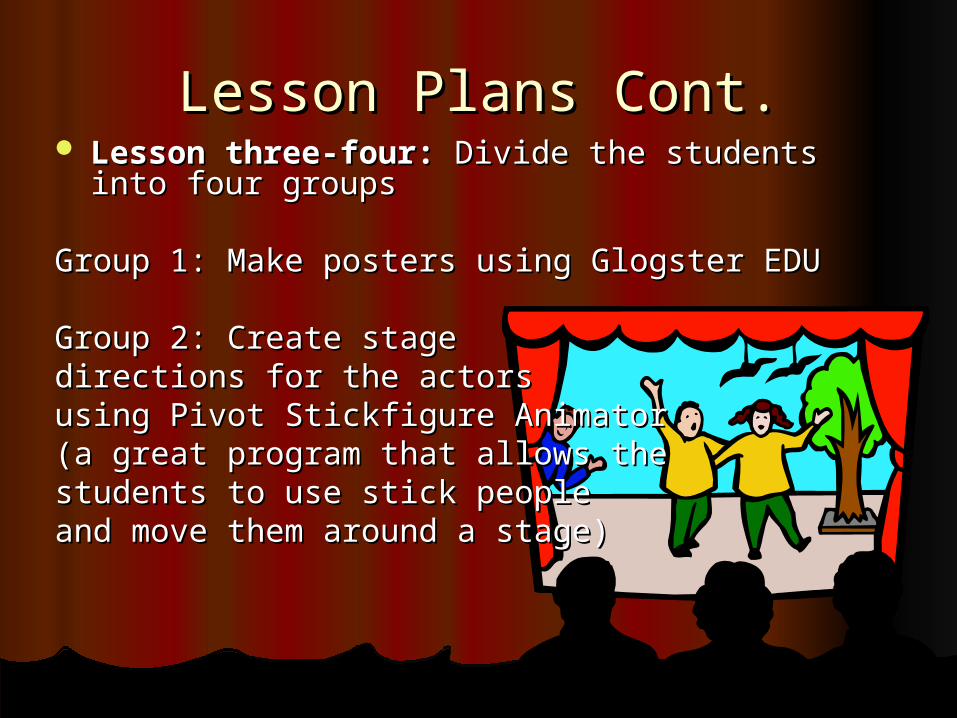
Lesson Plans Cont.Lesson Plans Cont. Lesson three-four: Lesson three-four: Divide the students into four Divide the students into four
groupsgroups
Group 1: Make posters using Glogster EDUGroup 1: Make posters using Glogster EDU
Group 2: Create stage Group 2: Create stage directions for the actors directions for the actors using Pivot Stickfigure Animatorusing Pivot Stickfigure Animator(a great program that allows the(a great program that allows thestudents to use stick people students to use stick people and move them around a stage)and move them around a stage)

Lesson Plans cont.Lesson Plans cont.Group 3: Make a timeline using Google Calendar. This Group 3: Make a timeline using Google Calendar. This
will be to organise when they need to practice and will be to organise when they need to practice and what they will focus on each practice session (this will what they will focus on each practice session (this will help work on the students organisation skills)help work on the students organisation skills)
Group 4: Create a class website to display the final Group 4: Create a class website to display the final product of the class assembly (video and pictures) product of the class assembly (video and pictures) and the work they have been putting in during the and the work they have been putting in during the build up eg. poster art work, stage directions and the build up eg. poster art work, stage directions and the timeline they havetimeline they have
created. I would suggest you make the websitecreated. I would suggest you make the websitepassword protected to keep the privacy of password protected to keep the privacy of the children and only hand out the the children and only hand out the password to the children’s parents. Also password to the children’s parents. Also don’t forget to check permission with don’t forget to check permission with parents to show children’s photos first.parents to show children’s photos first.

Lesson Plans Cont.Lesson Plans Cont. Lessons five-eight: Lessons five-eight: Students will use these lessons to Students will use these lessons to
practice their assembly piece they will have already practice their assembly piece they will have already decided which part they will practice through each decided which part they will practice through each
lesson.lesson.
Lessons nine-ten: Lessons nine-ten: Students will write aStudents will write a
reflection on what theyreflection on what theydid and how it turned out did and how it turned out
these will then be put up onthese will then be put up on their website for parents totheir website for parents to
read along with the timeline,read along with the timeline,stage directions, posters, finalstage directions, posters, final
production pictures and theproduction pictures and thevideo of the performance.video of the performance.

Google CalendarGoogle Calendar
Google Calendar is a tool students are Google Calendar is a tool students are able to use to keep track of what they able to use to keep track of what they are up to in an assignment and when are up to in an assignment and when something is due. It allows you to insert something is due. It allows you to insert events and alarms, which will then be events and alarms, which will then be sent to your email inbox. On the wiki we sent to your email inbox. On the wiki we have created there is an attached have created there is an attached document which shows a step by step document which shows a step by step example of how to use Google example of how to use Google Calendar.Calendar.

PivotPivot
Pivot is a stick figure animator which your students Pivot is a stick figure animator which your students can use to figure out stage directions. The software can use to figure out stage directions. The software can be downloaded for free from http://pivot-can be downloaded for free from http://pivot-stickfigure-animator.en.softonic.com/. stickfigure-animator.en.softonic.com/.
There are some videos on our wiki page that will help There are some videos on our wiki page that will help to show how to use the animator. The first one shows to show how to use the animator. The first one shows you how to create a new figure type. For this task, a you how to create a new figure type. For this task, a stage would be necessary which is what I have stage would be necessary which is what I have modelled in the video.modelled in the video.
The next video is a quick example of how to move the The next video is a quick example of how to move the figures and make it look almost realistic.figures and make it look almost realistic.
Show these videos to the children so that they can see Show these videos to the children so that they can see what they need to do and how to do it. This would be what they need to do and how to do it. This would be a great activity to do using an electronic whiteboard if a great activity to do using an electronic whiteboard if you have one available to you.you have one available to you.

Glogster EDUGlogster EDUThe students will be using Glogster EDU to create a poster The students will be using Glogster EDU to create a poster
to take home to their parents and put up on the students to take home to their parents and put up on the students website. Glogster EDU is a special version of Gloster website. Glogster EDU is a special version of Gloster which has been created for teachers and their students.which has been created for teachers and their students.
Glogser is a great site students can add pictures, change Glogser is a great site students can add pictures, change backgrounds, add sound and movies to the posters backgrounds, add sound and movies to the posters made. Glogster EDU ranges in price from free (which made. Glogster EDU ranges in price from free (which includes 50 students) up to $99 a year (includes 200 includes 50 students) up to $99 a year (includes 200 students) or a whole school from $2 a year per student students) or a whole school from $2 a year per student depending on what services you are looking for. depending on what services you are looking for.
Brief video: users guideBrief video: users guide

WikiWikiWiki’s are a tool that allow multiple users/authors to Wiki’s are a tool that allow multiple users/authors to create, add, change and share their work all at the same create, add, change and share their work all at the same time. We thought, for this reason, a wiki would be a great time. We thought, for this reason, a wiki would be a great tool to demonstrate our work, as all members of the tool to demonstrate our work, as all members of the group can add their part, as well as see, add and correct group can add their part, as well as see, add and correct any other group members work. any other group members work.
For this assignment we used ‘Wikispaces’, which is a very For this assignment we used ‘Wikispaces’, which is a very easy to use, basic site for creating wikis. It shows, easy to use, basic site for creating wikis. It shows, collectively, what the group has accomplished, having a collectively, what the group has accomplished, having a page for each different technology looked at, Pivot, page for each different technology looked at, Pivot, Glogster and Google Calendar. On these pages the Glogster and Google Calendar. On these pages the technological tool in question is explained, and technological tool in question is explained, and demonstrated. The wiki also includes an outline of lesson demonstrated. The wiki also includes an outline of lesson plans, and references used.plans, and references used.
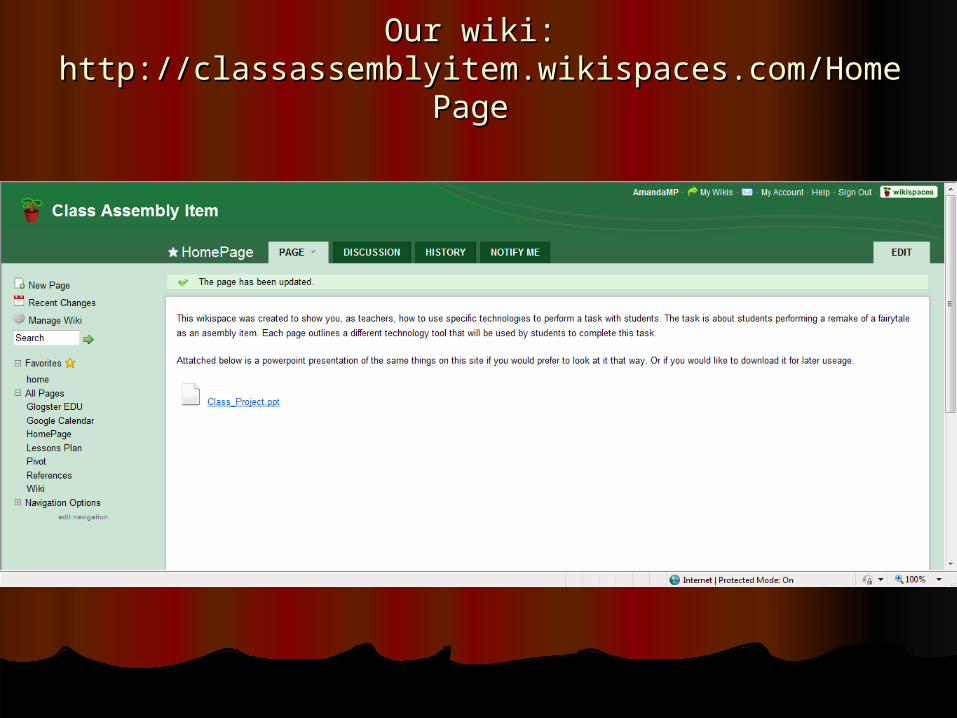
Our wiki: Our wiki: http://classassemblyitem.wikispaces.com/HomePaghttp://classassemblyitem.wikispaces.com/HomePag
e e

Thankyou.Thankyou.