click studios · passwordstate web server, or if the install-gateway-internal.ps1 installer script...
TRANSCRIPT
Click Studios
Passwordstate Remote Session Launcher
Gateway Automated Installation Instructions
This document and the information controlled therein is the property of Click Studios. It must not be reproduced in whole/part, or
otherwise disclosed, without prior consent in writing from Click Studios.
Click Studios Passwordstate Installation Instructions
Table of Contents
1. SYSTEM REQUIREMENTS - GENERAL .................................................................... 3
2. ARCHITECTURAL OVERVIEW ................................................................................... 4
3. CHANGES MADE TO YOUR SERVER DURING THIS AUTOMATED INSTALL ....... 5
4. INSTALLING GATEWAY ON PASSWORDSTATE WEB SERVER ............................ 6
5. INSTALLING GATEWAY ON A SEPARATE SERVER ............................................... 7
6. EXPORTING CERTIFICATE FROM PASSWORDSTATE SERVER ........................... 8
7. CONFIGURE GATEWAY SETTINGS ........................................................................ 12
8. SESSION RECORDING FOLDER PERMISSIONS ................................................... 13
9. TROUBLESHOOTING A FAILED INSTALL.............................................................. 14
Click Studios Passwordstate Installation Instructions
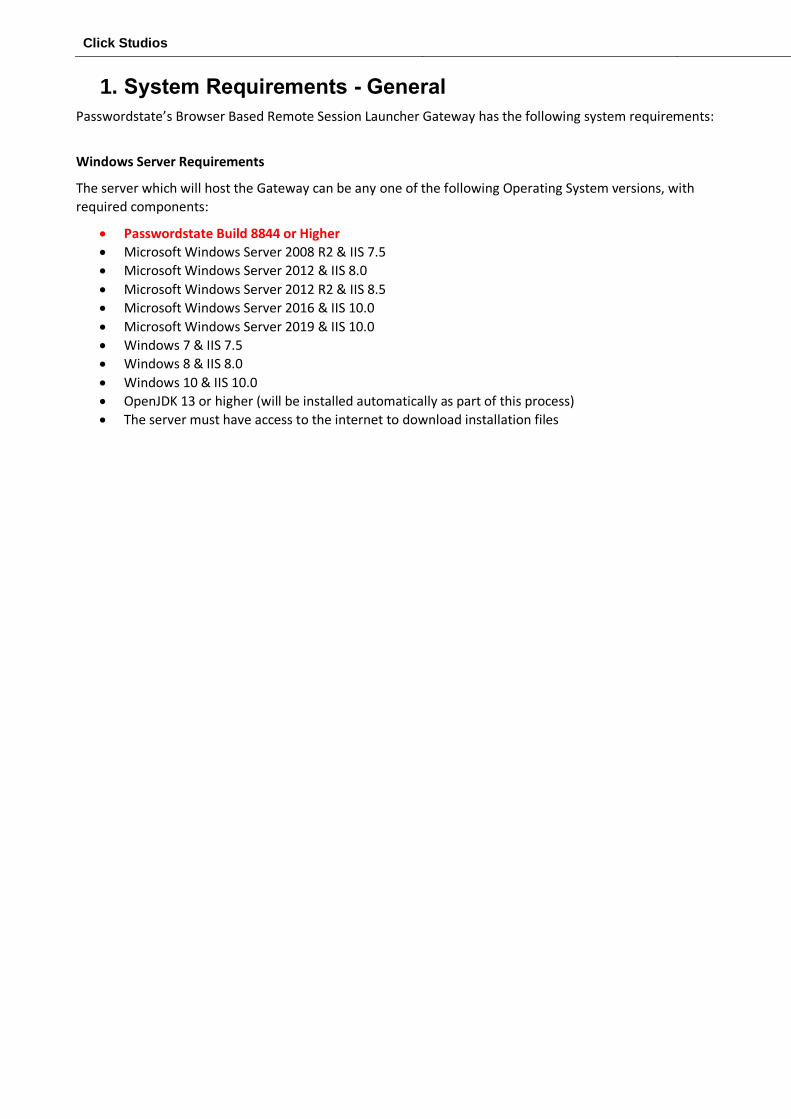
1. System Requirements - General
Passwordstate’s Browser Based Remote Session Launcher Gateway has the following system requirements:
Windows Server Requirements
The server which will host the Gateway can be any one of the following Operating System versions, with
required components:
• Passwordstate Build 8844 or Higher
• Microsoft Windows Server 2008 R2 & IIS 7.5
• Microsoft Windows Server 2012 & IIS 8.0
• Microsoft Windows Server 2012 R2 & IIS 8.5
• Microsoft Windows Server 2016 & IIS 10.0
• Microsoft Windows Server 2019 & IIS 10.0
• Windows 7 & IIS 7.5
• Windows 8 & IIS 8.0
• Windows 10 & IIS 10.0
• OpenJDK 13 or higher (will be installed automatically as part of this process)
• The server must have access to the internet to download installation files

Click Studios Passwordstate Installation Instructions
2. Architectural Overview
When you install Passwordstate, the source files for the “Browser Based Gateway” are already located in
your Passwordstate install directory. By default, this is c:\inetpub\passwordstate\hosts\gateway.
There are extra steps you need to perform to finalise the set up of the gateway, which are documented in
Section 3 of this guide. Alternatively, you can install the gateway on a completely separate server if
preferred.
After you have completed the setup, all SSH and RDP sessions are tunnelled through the Gateway, and
does not require any client installs for this feature to function. You will be able to initiate RDP and SSH
sessions through your HTML5 browser, from any device that can access your main Passwordstate website.
Click Studios Passwordstate Installation Instructions
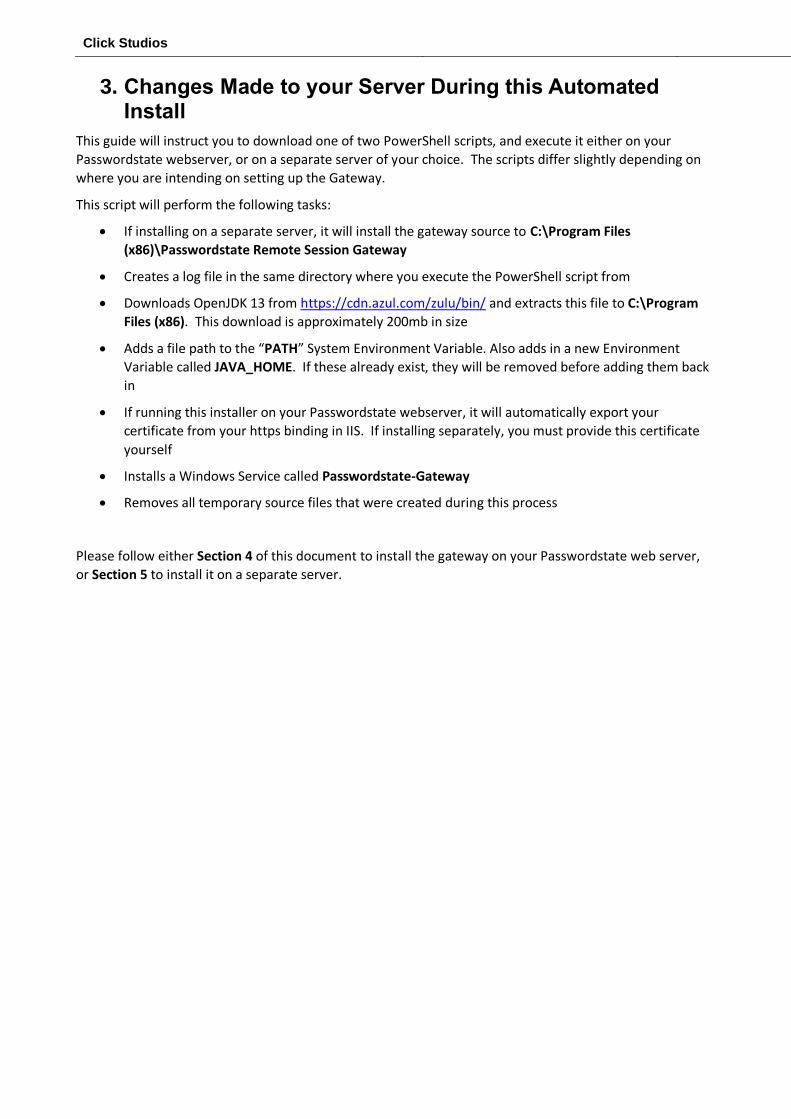
3. Changes Made to your Server During this Automated Install
This guide will instruct you to download one of two PowerShell scripts, and execute it either on your
Passwordstate webserver, or on a separate server of your choice. The scripts differ slightly depending on
where you are intending on setting up the Gateway.
This script will perform the following tasks:
• If installing on a separate server, it will install the gateway source to C:\Program Files
(x86)\Passwordstate Remote Session Gateway
• Creates a log file in the same directory where you execute the PowerShell script from
• Downloads OpenJDK 13 from https://cdn.azul.com/zulu/bin/ and extracts this file to C:\Program
Files (x86). This download is approximately 200mb in size
• Adds a file path to the “PATH” System Environment Variable. Also adds in a new Environment
Variable called JAVA_HOME. If these already exist, they will be removed before adding them back
in
• If running this installer on your Passwordstate webserver, it will automatically export your
certificate from your https binding in IIS. If installing separately, you must provide this certificate
yourself
• Installs a Windows Service called Passwordstate-Gateway
• Removes all temporary source files that were created during this process
Please follow either Section 4 of this document to install the gateway on your Passwordstate web server,
or Section 5 to install it on a separate server.
Click Studios Passwordstate Installation Instructions
4. Installing Gateway on Passwordstate Web Server
Steps to execute the automatic installer on your Passwordstate web server
1. Download the installer from https://www.clickstudios.com.au/downloads/Install-Gateway-
Internal.zip and place it in a temporary folder on your Passwordstate web server
2. Extract the zip file to the same folder, revealing a 7za.exe and an Install-Gateway-Internal.ps1 file
3. Open PowerShell ISE “As Administrator”, and then open the Install-Gateway-Internal.ps1 script
4. Press F5 to run the script, or use the button in PowerShell to run the script
A log file will be created and placed in the directory where you executed the PowerShell script from
and can be used to troubleshoot any issues.
There will also be an output in the PowerShell console advising what step the installer is up to. Once
the script has finished, the Gateway is ready to be used and this video is a quick tutorial on how to do
this: https://www.youtube.com/watch?v=E_PHLAfQe7c
Note 1: If you receive an error during the install stating:
“It appears the certificate on your Passwordstate website may not marked for export and could not
be exported automatically”
You will need to export your certificate manually, or provide another certificate that you can export to
a password protected .pfx file. See Section 6 in this document on how to export certificates manually.
If you have to export your certificate manually, you’ll need to place it in the same folder where you are
executing this PowerShell installer from. During the installation process, you’ll be prompted for a
password which is the one you set during the exporting of the certificate.
When exporting the certificate, it must be called “Passwordstate.pfx”.
Click Studios Passwordstate Installation Instructions
5. Installing Gateway on A Separate Server
Steps to execute the automatic installer on a standalone server:
1. Download the installer from https://www.clickstudios.com.au/downloads/Install-Gateway-
External.zip and place it in a temporary folder on your server
2. Extract the zip file to the same folder, revealing a 7za.exe, PasswordstateGatewayInstaller.exe and
an Install-Gateway-External.ps1 file
3. Export a copy of your certificate from your Passwordstate web server by following the instructions
in Section 6 of this document. Place this exported certificate in the same folder that you are
extracted the zip file to, in the above step
4. Open PowerShell ISE “As Administrator”, and then open the Install-Gateway-External.ps1 script
5. On line 17, enter your URL for your Passwordstate website. I.e. https://passwordstate.contoso.com
6. On line 18, enter the password you set for certificate (see Section 6 below)
7. Press F5 to run the script, or use the button in PowerShell to run the script
8. In Passwordstate, navigate to Administration -> Remote Session Management -> Browser Based
Gateway Settings, and enter in your Gateway URL. By default, a URL is set up using the DNS name
of the server. An example of this is if you install the gateway on a server called “AppServer01” that
belongs to the “Contoso.com” domain, then the URL created for you is
https://appserver01.contoso.com.
If you manually create a URL for your Gateway in DNS, then use that URL on this screen instead.
A log file will be created and placed in the directory where you executed the PowerShell script from
and can be used to troubleshoot any issues.
There will also be an output in the PowerShell console advising what step the installer is up to. Once
the script has finished, the Gateway is ready to be used and this video is a quick tutorial on how to do
this: https://www.youtube.com/watch?v=E_PHLAfQe7c

Click Studios Passwordstate Installation Instructions
6. Exporting Certificate from Passwordstate Server
You only need to follow this process if you are installing the Gateway on a separate server to your
Passwordstate web server, or if the Install-Gateway-Internal.ps1 installer script cannot automatically
export your certificate.
Method #1 to export certificate:
1. On your Passwordstate web server, open IIS and Select your server in the left-hand side
connections pane
2. Double click Server Certificates button
3. Find the certificate you are using on your Passwordstate website, right click it and select “Export”
4. Choose a path to store the certificate, and make sure the file is saved as “Passwordstate.pfx”
5. Set a password for the certificate, confirm the password and then click OK
Note 1: If you have multiple certificates on the machine, but you do not know which one is being used on
your Passwordstate website, open the https binding of your Passwordstate website in IIS:
Note 2: If you do not see the Export option on the right click menu, this means your certificate is not
marked for exporting. Try using Method #2 below as an alternative way to export your certificate,
otherwise you’ll need to source a certificate that can be exported.
Click Studios Passwordstate Installation Instructions
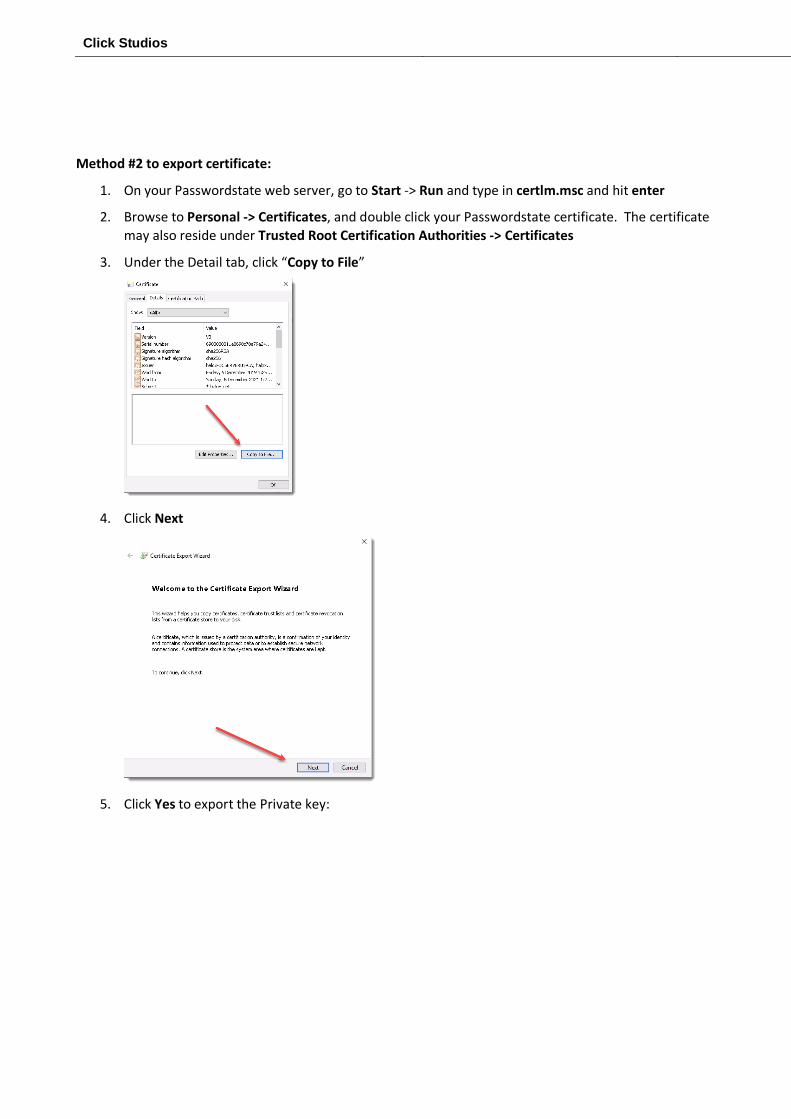
Method #2 to export certificate:
1. On your Passwordstate web server, go to Start -> Run and type in certlm.msc and hit enter
2. Browse to Personal -> Certificates, and double click your Passwordstate certificate. The certificate
may also reside under Trusted Root Certification Authorities -> Certificates
3. Under the Detail tab, click “Copy to File”
4. Click Next
5. Click Yes to export the Private key:

Click Studios Passwordstate Installation Instructions
6. Select Personal Information Exchange
7. Set a Password and click Next
8. Ensure you name the certificate Passwordstate.pfx

Click Studios Passwordstate Installation Instructions
9. Click Finish
If you cannot export your certificate, then you will need to go to your certificate source and mark the
certificate as exportable. You can then try to export again using one of the methods above.
If you would like to set up an Internal Certificate Authority, and generate a new wildcard certificate from
there that can be exported to a .pfx file, please see these links below:
Set up Certificate Authority: https://www.clickstudios.com.au/community/index.php?/topic/2934-how-to-set-
up-a-internal-certificate-authority/
Request a certificate that is marked as “Exportable”:
https://www.clickstudios.com.au/community/index.php?/topic/1952-generate-a-new-certificate-from-active-
directory-certificate-authority/
Click Studios Passwordstate Installation Instructions
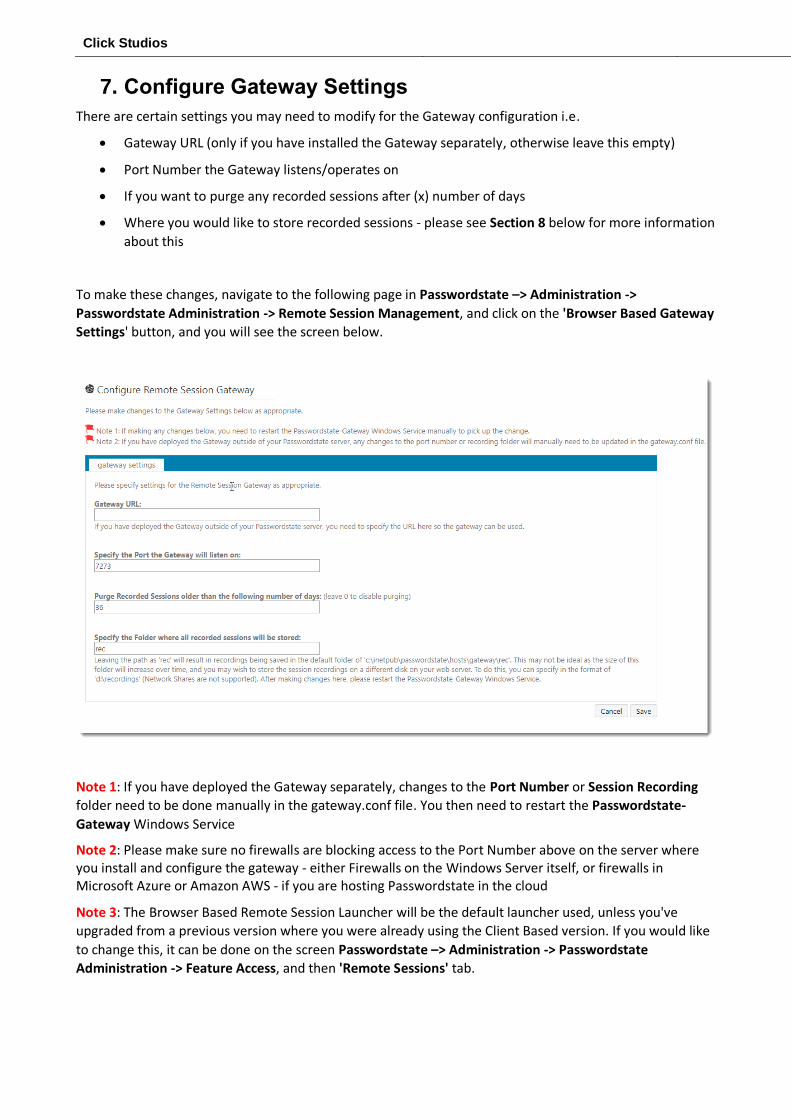
7. Configure Gateway Settings
There are certain settings you may need to modify for the Gateway configuration i.e.
• Gateway URL (only if you have installed the Gateway separately, otherwise leave this empty)
• Port Number the Gateway listens/operates on
• If you want to purge any recorded sessions after (x) number of days
• Where you would like to store recorded sessions - please see Section 8 below for more information
about this
To make these changes, navigate to the following page in Passwordstate –> Administration ->
Passwordstate Administration -> Remote Session Management, and click on the 'Browser Based Gateway
Settings' button, and you will see the screen below.
Note 1: If you have deployed the Gateway separately, changes to the Port Number or Session Recording
folder need to be done manually in the gateway.conf file. You then need to restart the Passwordstate-
Gateway Windows Service
Note 2: Please make sure no firewalls are blocking access to the Port Number above on the server where you install and configure the gateway - either Firewalls on the Windows Server itself, or firewalls in Microsoft Azure or Amazon AWS - if you are hosting Passwordstate in the cloud
Note 3: The Browser Based Remote Session Launcher will be the default launcher used, unless you've
upgraded from a previous version where you were already using the Client Based version. If you would like
to change this, it can be done on the screen Passwordstate –> Administration -> Passwordstate
Administration -> Feature Access, and then 'Remote Sessions' tab.
Click Studios Passwordstate Installation Instructions
8. Session Recording Folder Permissions
By default, the session recording folder is located at c:\inetpub\passwordstate\hosts\gateway\rec – your
path may be different if you’ve installed Passwordstate into a different folder, or deployed the Gateway
separately.
When located in this default folder, the folder has the correct NTFS permissions in order to save recorded
sessions. If, however you specify a different location e.g. a different disk than the C drive is recommended,
then you need to ensure at least ‘Authenticated Users’ has Modify rights to the folder.
Note: Session Recordings will not be included in the standard Passwordstate backup functionality, due to
the potential size of the files. If you have left the recording folder in the default path, then you need to
organize your own backups of these files if required.
Click Studios Passwordstate Installation Instructions
9. Troubleshooting a Failed Install
If you run into any errors with this installer within the PowerShell output, this could cause other parts of the
script to also fail. We’ve seen examples where proxy servers have blocked the download of the Java files
form the internet.
If you run into any issues like this, please follow the Manual Install instructions which are available here:
https://www.clickstudios.com.au/downloads/version8/Passwordstate_Remote_Session_Launcher_Gateway_
Manual_Install_Guide.pdf
If the script seemed to run successfully but the service did not start, this would most likely be caused by an
incorrect encrypted password being set in your gateway.conf file. To manually run through this process,
see this forum post: https://www.clickstudios.com.au/community/index.php?/topic/2971-how-to-encrypt-the-
certificate-password-for-use-with-the-browser-based-gateway/