cloud infrastructure virtual server … · the storage device we provide to you is pre-configured...
TRANSCRIPT
CLOUD INFRASTRUCTURE VIRTUAL SERVER (SHARED) DATA IMPORT GUIDE

CHAPTER 1
ABOUT THIS GUIDE
This guide provides you with the required steps and instructions to transfer your data to your desired virtual
server(s). It is written for technically astute personnel who would ordinarily coordinate or manage the support of
your company’s computing platforms.
Data import is only available to customers based in Australia.
NEED GENERAL SERVICE SUPPORT?
For general service support, call 1800 620 345 or email any questions to [email protected].
Service support is available Monday to Friday, 9AM to 5PM (AEST).
NEED TECHNICAL SUPPORT?
For general technical support, call 1800 620 345 or email any questions to
Technical support is available 24/7.
Note: we don’t provide assistance with issues specific to a customer’s local network,
servers and operating systems. Specialist technical support may be charged as an
additional service.
CONVENTIONS USED IN THIS GUIDE
The following typographical conventions are used in this guide for simplicity and readability:
Web addresses, e-mail addresses and hyperlinks are shown in bold italics, for example
www.telstraenterprise.com.au.
Button names and titles/features on your computer screen are shown in italics.
User input is shown in typewriter font.
Virtual Server (Shared) Data Import Guide, Version 1.0
© Telstra Corporation Limited (ABN 33 051 775 556) 2012. All rights reserved.
This work is copyright. Apart from any use as permitted under the Copyright Act 1968, information contained within this
manual cannot be used for any other purpose other than the purpose for which it was released. No part of this publication
may be reproduced, stored in a retrieval system, or transmitted in any form or by any means, electronic, mechanical,
photocopying, recording or otherwise, without the written permission of Telstra Corporation Limited.
Words mentioned in this book that are known to be trademarks, whether registered or unregistered, have been capitalised or
use initial capitals. Terms identified as trademarks include Linux®, Microsoft Windows
® and TrueCrypt
®.

CHAPTER 1
WHAT’S INSIDE
CHAPTER 1 THE DATA IMPORT PROCESS 4
CHAPTER 2 COPYING YOUR DATA TO THE STORAGE DEVICE 7
CHAPTER 3 COURIER INSTRUCTIONS 20
CHAPTER 4 RETRIEVING DATA FROM THE STORAGE DEVICE 21
CHAPTER 5 SYNCHRONISING DATA 27
CHAPTER 6 INDEX 28
CHAPTER 1
CHAPTER 1 THE DATA IMPORT PROCESS
FIRST, BACK UP YOUR DATA LOCALLY
We recommend you back up your data locally before starting out. This safeguards against any complication with
the initial transfer onto the storage device.
DATA SECURITY
The security and privacy of your data is important to us.
Our experienced courier partner will securely deliver a data import pack to you and return the pack to us after
you’ve finished copying your data onto the import storage device(s).
As this process involves the physical transportation of your data on the device, there is a remote risk it becomes
lost in transit and exposed to unauthorised access. To mitigate this, you must encrypt your data before returning
the device(s) to us.
Make sure you follow the steps in this guide to encrypt your data. If you choose not to we cannot be responsible
for any resulting loss.
The storage device we provide to you is pre-configured with both an network file system (NFS) and CIFS
(common internet file system) share and to DHCP (dynamic host configuration protocol) unless you’ve informed
us earlier of specific configuration instructions.
HOW TO RETURN THE DEVICE
Once you’ve copied and encrypted your data onto the storage device, contact your Telstra representative to
schedule and organise our courier partner for secure pick-up of the device(s). If you provide the request before
9AM, we can schedule a pick-up for the next day. If you require the transfer to occur on the same day or out of
business hours, additional charges apply. Depending on where you’re based (metro, regional, interstate or
international) connection times can vary.
WHAT HAPPENS TO YOUR DATA ONCE IT’S TRANSFERRED?
The process of encryption creates a disk partition that has 256-bit encryption. We cannot decrypt your data.
Once your data transfer into your cloud service is complete, we wipe the encrypted data from the storage device.
PROCESS OVERVIEW
Before following the process detailed below you need to have already requested the data import service from us
by completing the details under the ‘Infrastructure > Data import’ section of the management console. We’ll then
courier to you a storage device for you to store your data on. This device must then be couriered back to us.
CHAPTER 1
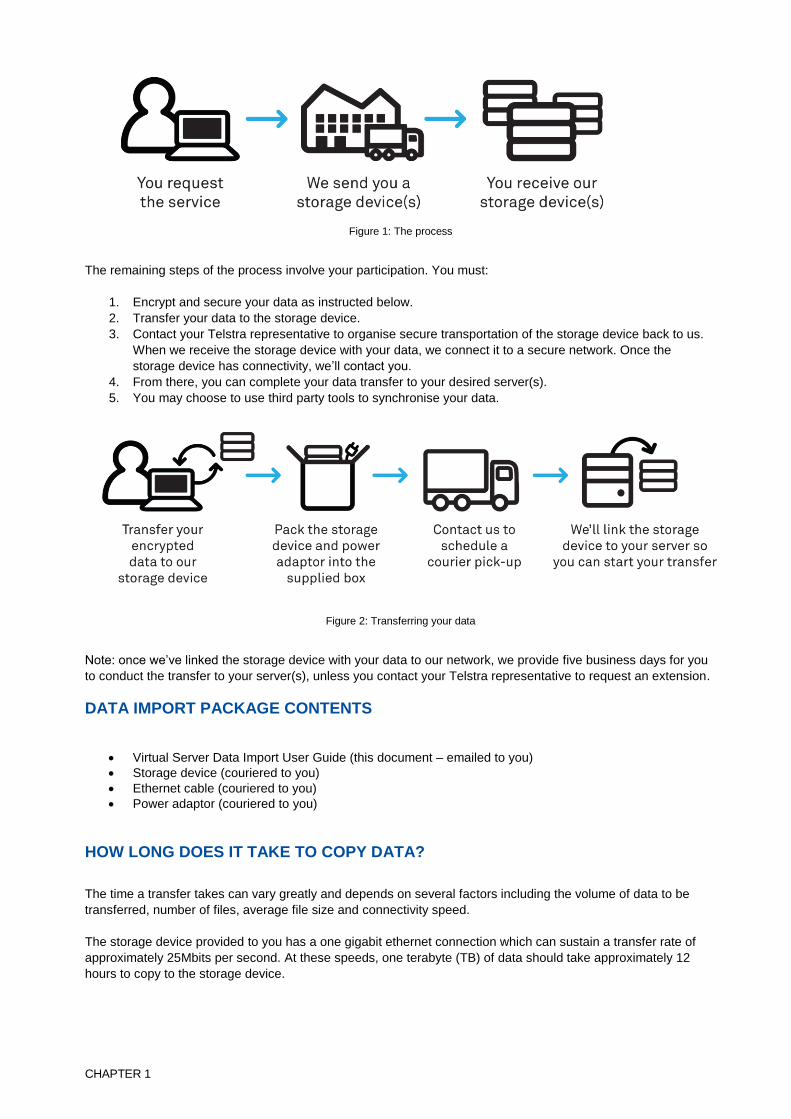
Figure 1: The process
The remaining steps of the process involve your participation. You must:
1. Encrypt and secure your data as instructed below.
2. Transfer your data to the storage device.
3. Contact your Telstra representative to organise secure transportation of the storage device back to us.
When we receive the storage device with your data, we connect it to a secure network. Once the
storage device has connectivity, we’ll contact you.
4. From there, you can complete your data transfer to your desired server(s).
5. You may choose to use third party tools to synchronise your data.
Figure 2: Transferring your data
Note: once we’ve linked the storage device with your data to our network, we provide five business days for you
to conduct the transfer to your server(s), unless you contact your Telstra representative to request an extension.
DATA IMPORT PACKAGE CONTENTS
Virtual Server Data Import User Guide (this document – emailed to you)
Storage device (couriered to you)
Ethernet cable (couriered to you)
Power adaptor (couriered to you)
HOW LONG DOES IT TAKE TO COPY DATA?
The time a transfer takes can vary greatly and depends on several factors including the volume of data to be
transferred, number of files, average file size and connectivity speed.
The storage device provided to you has a one gigabit ethernet connection which can sustain a transfer rate of
approximately 25Mbits per second. At these speeds, one terabyte (TB) of data should take approximately 12
hours to copy to the storage device.
CHAPTER 1
HOW LONG DOES IT TAKE TO UPLOAD DATA?
The whole process from receipt of your data import service request to completing the transfer of data to your
chosen server(s) depends on any special data import requests or where phased migrations are project based.
If there is 1TB of data to transfer, indicative timing for each step is:
Your receipt of the storage device following your request for data import: 1-2 business days (depending on where you’re based)
You copying data to the storage device: 1-2 days
You returning the storage device to us: 1-2 business days (depending on where you’re based)
Our receipt of storage device to mount the device to your server(s): 3 business days

CHAPTER 2
CHAPTER 2 COPYING YOUR DATA TO THE STORAGE DEVICE
CONNECTING THE STORAGE DEVICE
1. Connect the network cable from the storage device to a port on your existing network. The term
‘existing network’ in this document could be a switch (same VLAN) or a direct connection between
host and storage device. Consult your internal network support staff if assistance is required.
Next, plug in the power cord to an available socket and turn on the power. The storage device will beep
once. Wait 2-3 minutes for the device to complete its power-up sequence. A beep indicates the storage
device has started up successfully.
The storage device is pre-configured to DHCP (dynamic host configuration protocol). To identify the device
on the network, install and run QNAP Finder (utility) on a host connected to your ‘existing network’.
The QNAP Finder returns the storage device IP address obtained from DHCP. If more than one device is
connected to the existing network at the same time, use the MAC address found on the back of the device
to indentify which storage device you want to connect to.
Figure 3: QNAP Finder
CHAPTER 2
ACCESSING THE SHARED FOLDER
For Microsoft Windows or Linux-based servers, the following describes how to provide access to the storage
device shared folder. This allows you to load your data by mapping or mounting the device to your systems.
FOR WINDOWS
Map a drive using any available drive letter to the network address below, exchange xxx.xxx.xxx.xxx for
the storage device IP address:
\\xxx.xxx.xxx.xxx\DataImport\
Follow these steps to encrypt your data and transfer it to the storage device using Windows.
Your mapped network drive should be available in ‘My Computer’. Follow these steps to encrypt your data and
transfer it to the storage device using Windows.
FOR LINUX
The network file system (NFS) share needs to be mounted with the Linux commands below.
Make a new directory:
mkdir /mnt/nfsmount
Use the following command to mount the storage device once you have physically connected it to your network.
Exchange xxx.xxx.xxx.xxx for the storage device IP address:
mount –t nfs xxx.xxx.xxx.xxx:/DownImport/mnt/nfsmount
Your mounted network share should be available in /mnt/nfsmount/. Follow these steps to encrypt your data
and transfer it to the storage device using Linux.
WINDOWS
Follow these steps to encrypt your data and transfer it to the storage device using Windows.
ENCRYPT AND TRANSFER YOUR DATA
We recommend TrueCrypt encryption software. Follow these steps to encrypt your data and transfer it to the
storage device.
1. Find and install TrueCrypt on your host from the storage device, which can be found at:
\\xxx.xxx.xxx.xxx\DataImport\Encryption\Windows\TrueCrypt Setup 7.0a.exe
Note: exchange xxx.xxx.xxx.xxx for the storage device IP address.
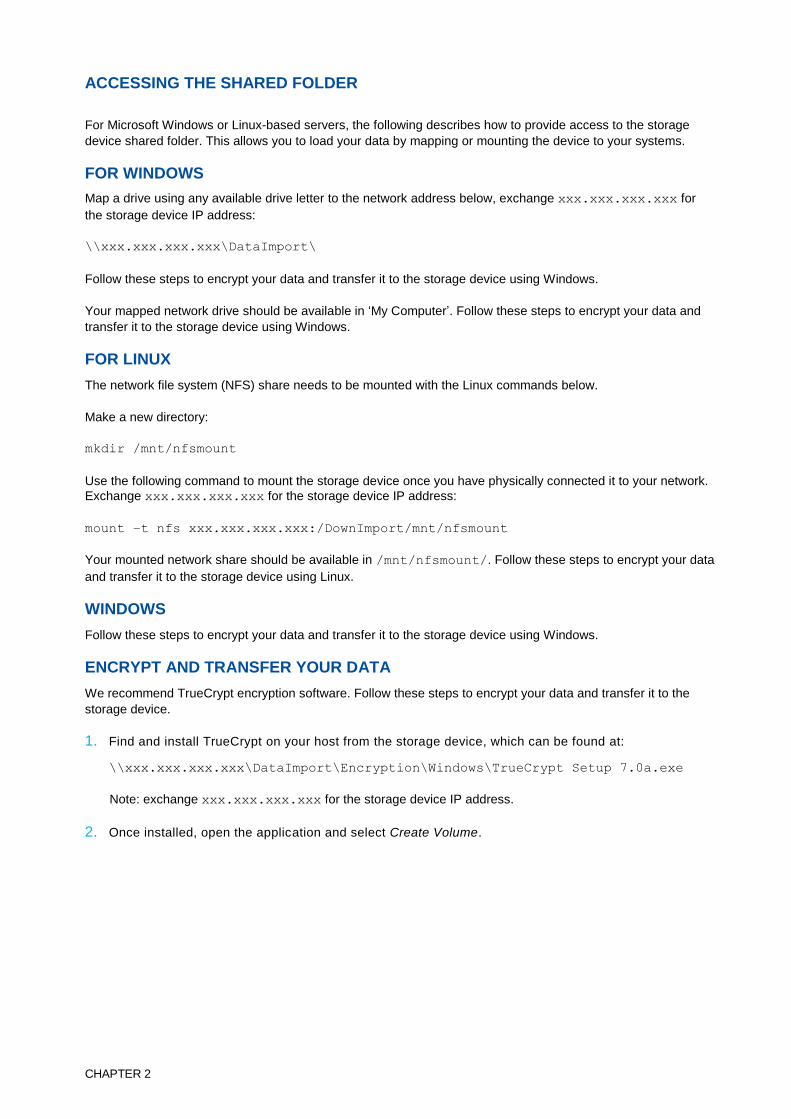
2. Once installed, open the application and select Create Volume.
CHAPTER 2
Figure 4: Create volume
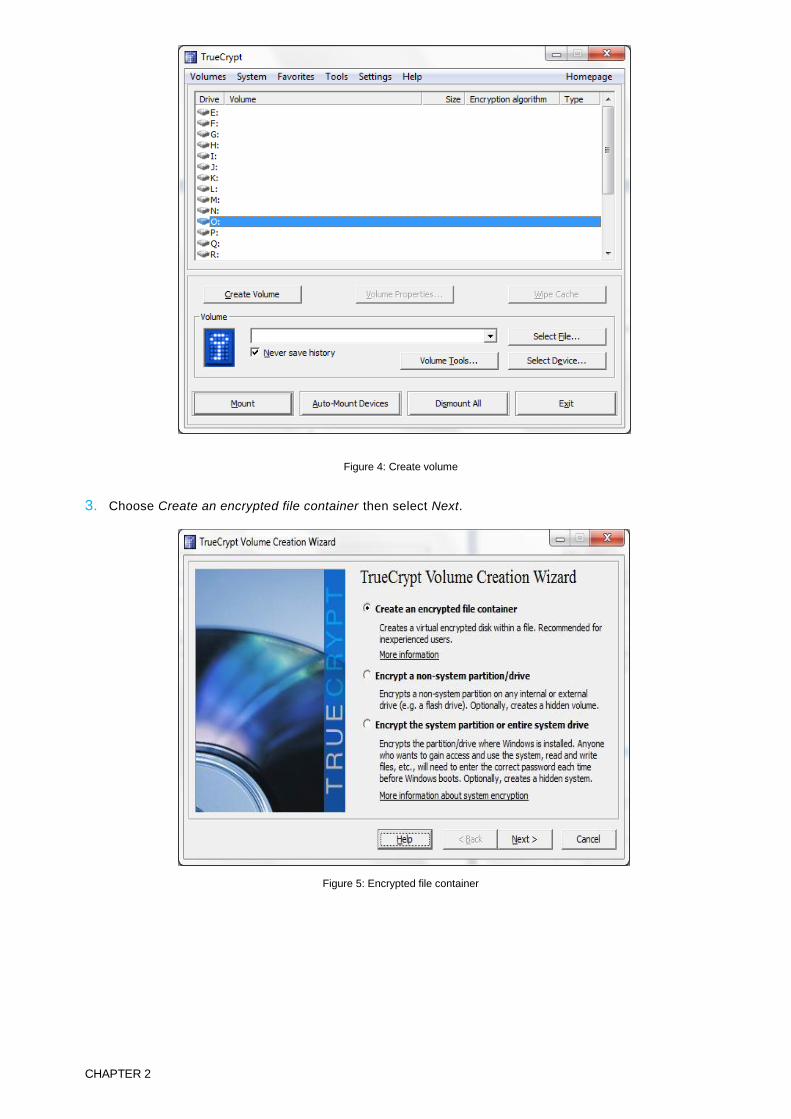
3. Choose Create an encrypted file container then select Next.
Figure 5: Encrypted file container

CHAPTER 2
4. Choose Standard TrueCrypt Volume then select Next.
Figure 6: Standard TrueCrypt volume
5. Choose Standard TrueCrypt Volume then select Next.
Choose Select file.
Navigate to the previously mapped drive and manually type in NASTRANSFER as the file name, then click
save.
Select Next.
Note: you can choose to create the volume on your own local disk first, then manually copy the volume to
the NAS later.
CHAPTER 2
Figure 7: Volume location
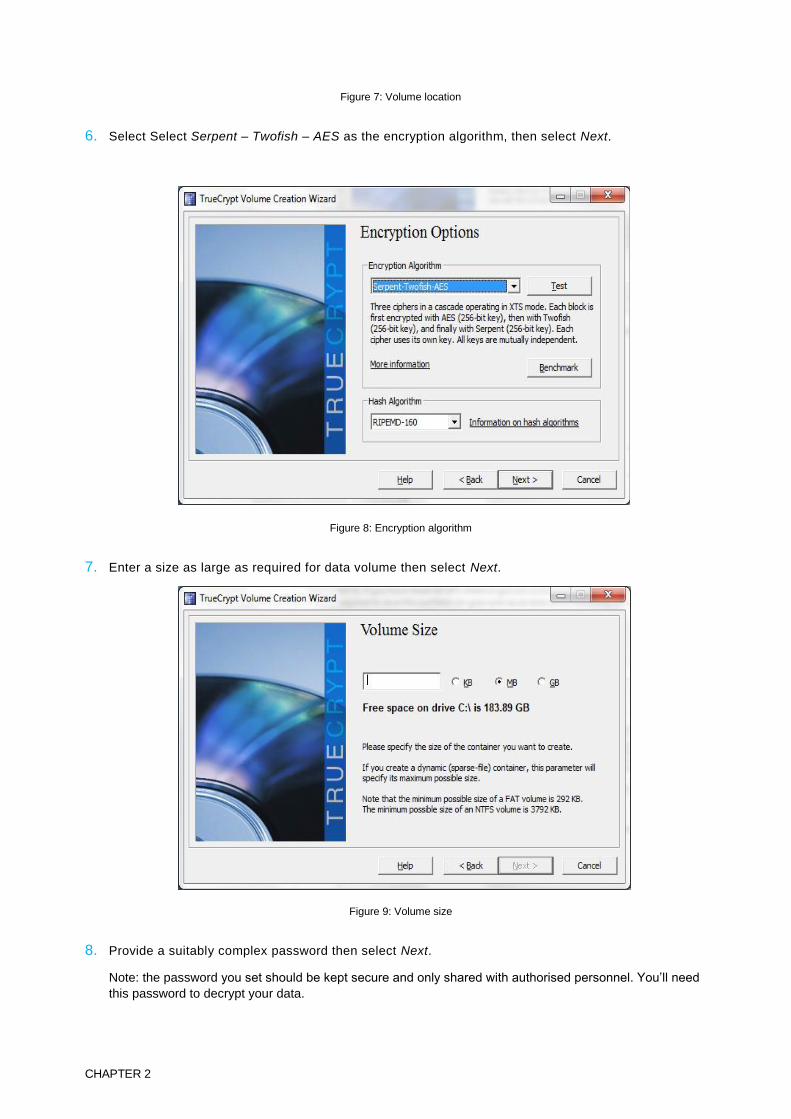
6. Select Select Serpent – Twofish – AES as the encryption algorithm, then select Next.
Figure 8: Encryption algorithm
7. Enter a size as large as required for data volume then select Next.
Figure 9: Volume size
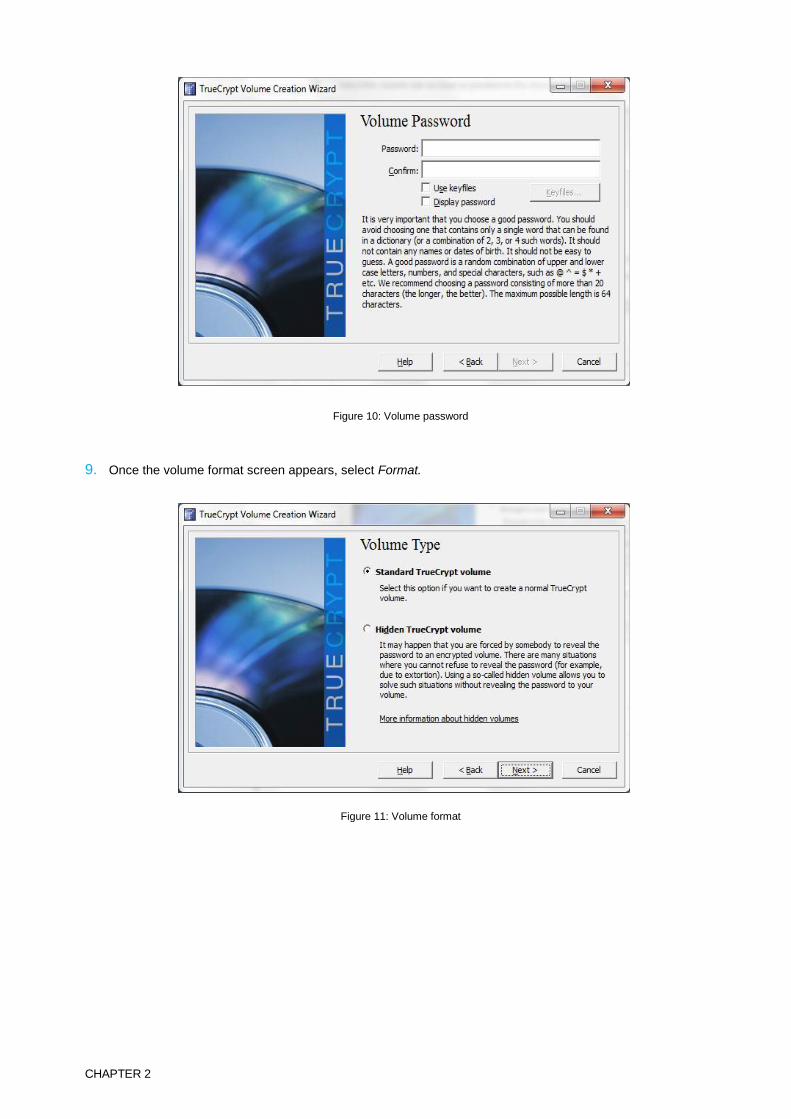
8. Provide a suitably complex password then select Next.
Note: the password you set should be kept secure and only shared with authorised personnel. You’ll need
this password to decrypt your data.
CHAPTER 2
Figure 10: Volume password
9. Once the volume format screen appears, select Format.
Figure 11: Volume format
CHAPTER 2
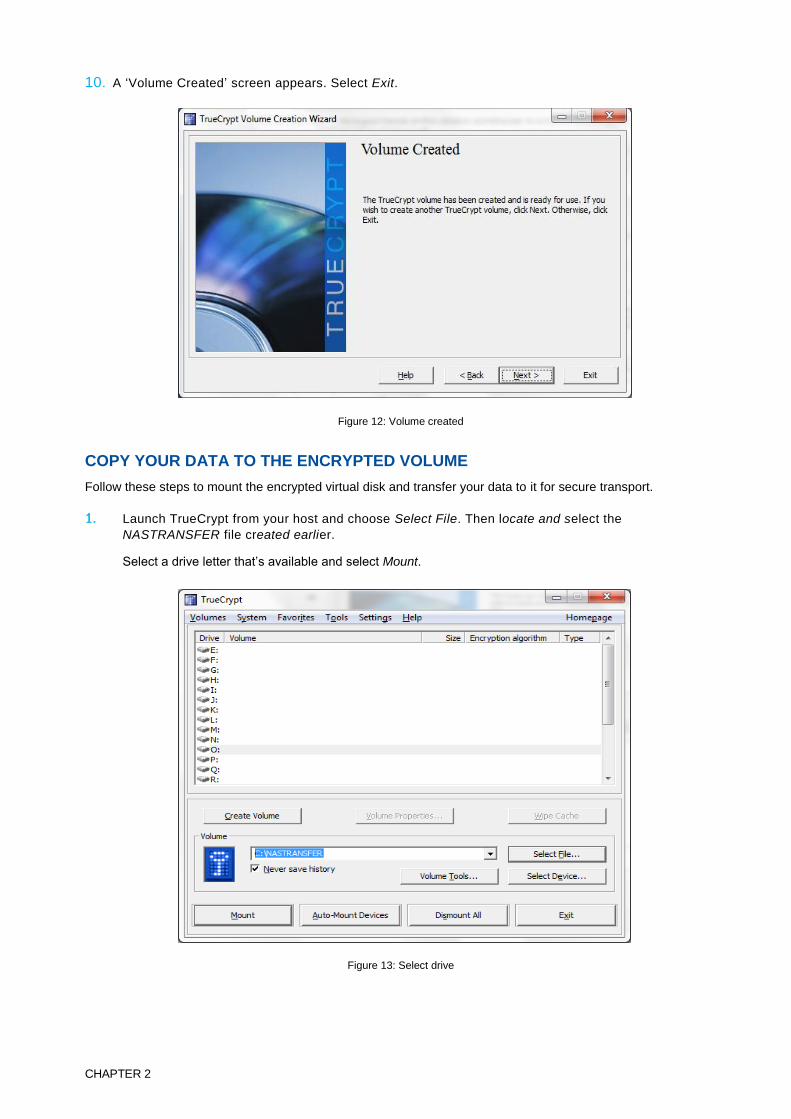
10. A ‘Volume Created’ screen appears. Select Exit.
Figure 12: Volume created
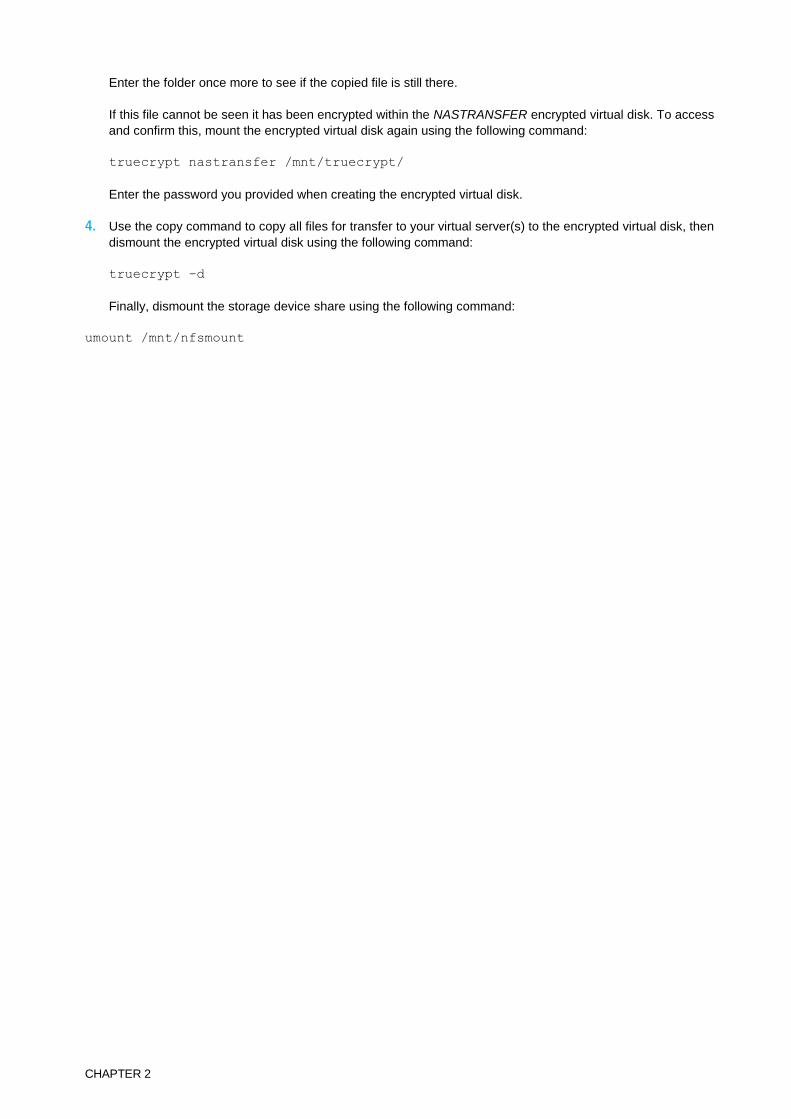
COPY YOUR DATA TO THE ENCRYPTED VOLUME
Follow these steps to mount the encrypted virtual disk and transfer your data to it for secure transport.
1. Launch TrueCrypt from your host and choose Select File. Then locate and select the
NASTRANSFER file created earlier.
Select a drive letter that’s available and select Mount.
Figure 13: Select drive

CHAPTER 2
2. Enter the password you provided when creating the encrypted virtual disk and select OK.
Figure 14: Enter virtual disk password
3. Double-click the selected drive that’s been mounted to open the directory.
Figure 15: Mount directory
4. Now you can begin transferring your data to this folder directory. Any data transferred to this
directory is securely encrypted on the storage device.
5. Once all your data is transferred to this directory ensure the mounted drive letter is highlighted
then select Dismount (as shown in the above screenshot) to close and lock the partition.
Once you’ve completed these steps, pack up the storage device and contact your Telstra representative
who will schedule a courier to return it to us (see courier instructions). Upon receipt, we connect the
storage device to your virtual server(s) in our data centre and allow you to decrypt and transfer your
data.

CHAPTER 2
Figure 16: Dismount drive
LINUX
Follow these steps to encrypt your data and transfer it to the storage device using Linux.
ENCRYPT AND TRANSFER YOUR DATA
We recommend TrueCrypt® encryption software.
1. Create a new directory on your Linux server:
mkdir /mnt/nfsmount
2. We’ve provided the installation files for Linux on the storage device. Once you physically connect the storage
device to your network, use the following command to mount it. Exchange 000.000.000.000 for the storage
device IP address:
mount –t nfs 000.000.000.000:/Download /mnt/nfsmount
3. If you’re unsure which installation is right for your local server, type the following command:
Uname –a
Below is an example of the output you may see:
Linux cs-centos 2.6.18-92.1.22.el5 #1 SMP Tue Dec 16 12:03:43 EST 2008 i686athlon
i386 GNU/Linux
32-bit version will have:
i686 and/or i386
64-bit version will have:
x86_64
Once you’ve identified the correct installation, install the appropriate version using the following steps.

CHAPTER 2
4. Find TrueCrypt in the provided storage device at one of the following locations:
“Encryption\Linux\ truecrypt-7.0a-linux-console-x64.tar.gz” for 64-bit installation
“Encryption\Linux\ truecrypt-7.0a-linux-console-x86.tar.gz” for 32-bit installation
“Encryption\Linux\ fuse-2.8.5.tar.gz” for both 32-bit and 64-bit installation
Select the correct files for installation and copy these to a directory of your choice on your Linux host.
5. Install the fuse (filesystem in userspace) library if you haven’t already done so.
Within an ssh session, change to the directory where you copied the files above and unpack the tar.gz file
using the following command:
tar -xzf fuse-2.8.5.tar.gz
Browse to the unpacked fuse folder using the following command:
cd fuse-2.8.5
Use the following commands to install the library:
./configure
make
make install
The library fuse is now installed.
6. For a 64-bit version installation, create a symbolic link using this command:
ln -s /usr/local/lib/libfuse.so.2 /lib64/libfuse.so.2
For 32-bit installation proceed to Step 7.
7. Begin the TrueCrypt installation using the following commands:
For 32-bit:
tar -xzvf truecrypt-7.0a-linux-console-x86.tar.gz
sh truecrypt-7.0a-setup-console-x86
For 64-bit:
tar -xzvf truecrypt-7.0a-linux-console-x64.tar.gz
sh truecrypt-7.0a-setup-console-x64
8. These are the default installation steps recommended by us. These are recommended settings however you
may choose to install as appropriate for your environment.
Select option 1
Press Enter
Press Enter/Space until you reach the end of the terms

CHAPTER 2
Enter Yes to licence terms
Press Enter to continue
Press Enter to continue
Figure 17: Installation
9. Launch TrueCrypt using the following command:
truecrypt –c
Note: if you receive an error such as “-bash: /usr/bin/truecrypt: accessing a corrupted shared library”, refer to
the steps above to install the fuse libraries.
10. When prompted to choose the volume type, select option 1:
1) Normal
2) Hidden
11. Enter the volume path. This is the mount path of the storage device and the name of the encrypted volume.
For example, for a storage device mounted under “/mnt/nfsmount” and a desired encryption volume named
NASTRANSFER, enter:
/mnt/nfsmount/nastransfer
12. Choose as large a size as required to cater for data volume transfer (sizeK/size[M]/sizeG). For example, to
transfer 900 gigabytes enter 900GB.
13. Choose encryption algorithm Serpent-Twofish-AES by selecting option 7.
Encryption algorithm:
1) AES
2) Serpent
3) Twofish
4) AES-Twofish
5) AES-Twofish-Serpent
6) Serpent-AES
7) Serpent-Twofish-AES
8) Twofish-Serpent
14. Select hash algorithm SHA-512 by selecting option 2.
Hash algorithm:
1) RIPEMD-160
2) SHA-512
3) Whirlpool

CHAPTER 2
15. Select option 4 as the filesystem type:
1) None
2) FAT
3) Linux Ext2
4) Linux Ext3
5) Linux Ext4
16. The password you set should be kept secure and only shared with authorised personnel. You’ll need this
password to decrypt your data. We recommend choosing a password of more than 20 characters otherwise
you’ll be prompted to confirm a short password.
Enter password: <enter a password>
17. Re-enter password: <re-enter password>
The keyfile path can be left empty. Press Enter.
Enter keyfile path: <none>
18. To help create a strong encrypted volume, type a random set of 320 characters to secure your data. This
random input creates unique data that’s not machine generated and can’t be replicated. Note: these 320
characters are not a password – you don’t need to remember the characters.
19. As TrueCrypt starts creating the encrypted volume, a progress indicator is displayed. When this reaches
100%, the encrypted volume is successfully created.
Figure 18: Installation complete
COPY YOUR DATA TO THE ENCRYPTED VOLUME
Follow these steps to mount the encrypted virtual disk and transfer your data to it for secure transport.
1. Mount the encrypted virtual disk named NASTRANSFER to a folder in Linux. This will become your
encrypted virtual disk and allow you to copy your files.
Create the folder to be mounted using the following command:
mkdir /mnt/truecrypt/
2. The command required to mount the encrypted virtual disk is:
truecrypt nastransfer /mnt/truecrypt/
Next, enter the password you provided when creating the encrypted virtual disk. A successful mount
shows no errors and creates an accessible folder in /mnt/truecrypt
3. To verify the virtual disk, copy a file to the mounted encrypted virtual disk using the following command:
cp file.txt /mnt/truecrypt/
Then exit this folder using the following command:
cd ..
Next, dismount the encrypted virtual disk using the following command:
truecrypt –d
CHAPTER 2
Enter the folder once more to see if the copied file is still there.
If this file cannot be seen it has been encrypted within the NASTRANSFER encrypted virtual disk. To access
and confirm this, mount the encrypted virtual disk again using the following command:
truecrypt nastransfer /mnt/truecrypt/
Enter the password you provided when creating the encrypted virtual disk.
4. Use the copy command to copy all files for transfer to your virtual server(s) to the encrypted virtual disk, then
dismount the encrypted virtual disk using the following command:
truecrypt –d
Finally, dismount the storage device share using the following command:
umount /mnt/nfsmount
CHAPTER 3
CHAPTER 3 COURIER INSTRUCTIONS
Once all the files have been copied to the data import device(s), re-package the data import pack in the original
data import box for safe return to us.
The following items must be returned:
Data import device(s)
Ethernet cable(s)
Power adaptor(s)
Contact your Telstra representative to schedule a courier pick-up. Allow up to three business days for collection
by our secure courier from your site, depending on your location. Once we receive your data import pack, we’ll
connect your device to our data centre and send you access details.
Retain this guide for instructions on the final data transfer process to your virtual server(s).
CHAPTER 4
CHAPTER 4 RETRIEVING DATA FROM THE STORAGE DEVICE
We notify you when the storage device has been received and successfully connected to our infrastructure. We
provide you with an IP address to access the device. Once notified, log in to your virtual server(s) and install
TrueCrypt.
WINDOWS
Follow these steps to retrieve your data and transfer it from the storage device using Windows.
1. Go to my computer and map a network drive to the network path xxxxxxxxxxxx provided by us in your
notification email:
\\<ip>\<naspath>
Where:
<ip> = Provided in email from Telstra
<naspath> = Provided in email from Telstra
Example: \\192.168.0.1\nas1\
When prompted for a username and password, use the one we provided in your notification email.
Xxxxxxxxxxxx
2. Find and run TrueCrypt in the storage device under Encryption\Windows\TrueCrypt Setup 7.0a.exe
3. Open TrueCrypt, select the NASTRANSFER file and click Mount. Enter the password you entered when
creating the encrypted virtual disk.
Once mounted, copy your data to your virtual server.
Once the transfer is complete, we highly recommend you delete your encrypted file to ensure the data is
cleared from the storage device.

CHAPTER 4
Figure 19: Mount storage device
4. Ensure the mounted drive letter is highlighted then select Dismount (as shown in the screenshot) to
close and lock the partition.
Figure 20: Dismount drive
5. Contact your Telstra representative once you’ve successfully validated your data transfer is complete.
Note: if we receive no notification via email or phone from you, we’ll disconnect the storage device from
your virtual server after five days of connectivity. The storage device will undergo an extensive security
wipe of all your data.
CHAPTER 4
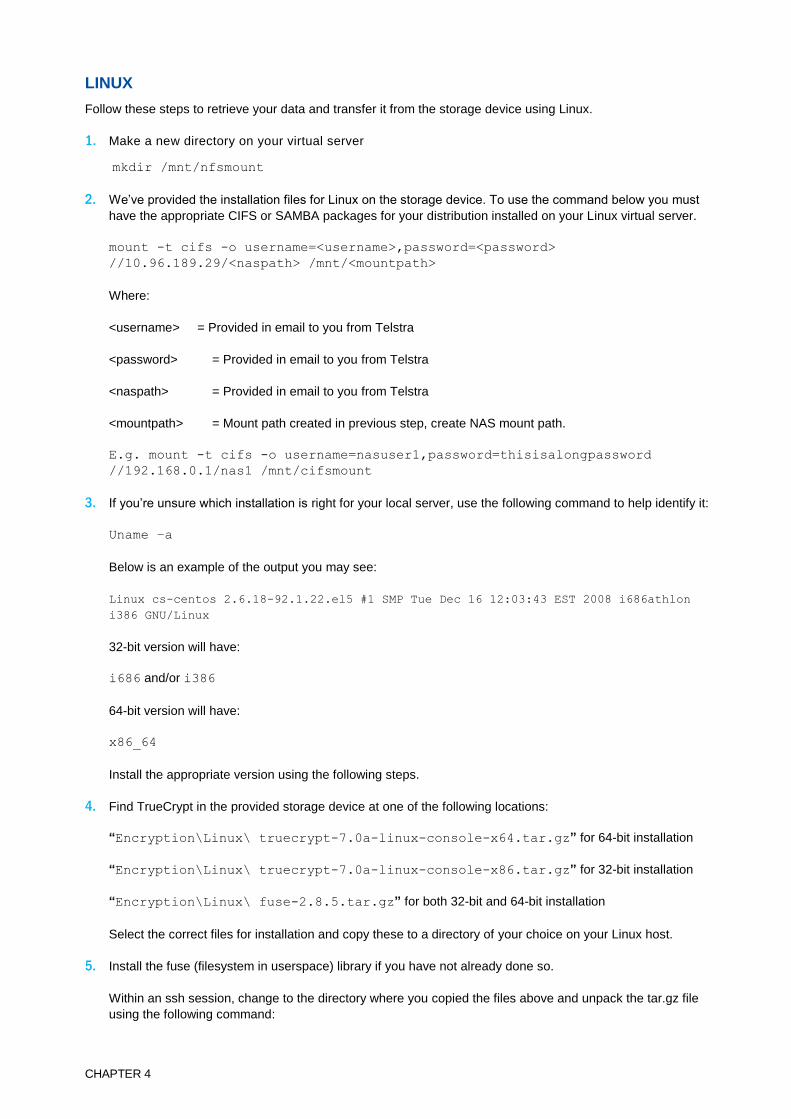
LINUX
Follow these steps to retrieve your data and transfer it from the storage device using Linux.
1. Make a new directory on your virtual server
mkdir /mnt/nfsmount
2. We’ve provided the installation files for Linux on the storage device. To use the command below you must
have the appropriate CIFS or SAMBA packages for your distribution installed on your Linux virtual server.
mount -t cifs -o username=<username>,password=<password>
//10.96.189.29/<naspath> /mnt/<mountpath>
Where:
<username> = Provided in email to you from Telstra
<password> = Provided in email to you from Telstra
<naspath> = Provided in email to you from Telstra
<mountpath> = Mount path created in previous step, create NAS mount path.
E.g. mount -t cifs -o username=nasuser1,password=thisisalongpassword
//192.168.0.1/nas1 /mnt/cifsmount
3. If you’re unsure which installation is right for your local server, use the following command to help identify it:
Uname –a
Below is an example of the output you may see:
Linux cs-centos 2.6.18-92.1.22.el5 #1 SMP Tue Dec 16 12:03:43 EST 2008 i686athlon
i386 GNU/Linux
32-bit version will have:
i686 and/or i386
64-bit version will have:
x86_64
Install the appropriate version using the following steps.
4. Find TrueCrypt in the provided storage device at one of the following locations:
“Encryption\Linux\ truecrypt-7.0a-linux-console-x64.tar.gz” for 64-bit installation
“Encryption\Linux\ truecrypt-7.0a-linux-console-x86.tar.gz” for 32-bit installation
“Encryption\Linux\ fuse-2.8.5.tar.gz” for both 32-bit and 64-bit installation
Select the correct files for installation and copy these to a directory of your choice on your Linux host.
5. Install the fuse (filesystem in userspace) library if you have not already done so.
Within an ssh session, change to the directory where you copied the files above and unpack the tar.gz file
using the following command:

CHAPTER 4
tar -xzf fuse-2.8.5.tar.gz
Browse to the unpacked fuse folder using the following command:
cd fuse-2.8.5
Then use the following commands to install the library:
./configure
make
make install
The library fuse (Filesystem in Userspace) is now installed.
6. Installation of a 64-bit version requires a symbolic link to be created (for 32-bit installation proceed to step 7).
Use the command below to create the link:
ln -s /usr/local/lib/libfuse.so.2 /lib64/libfuse.so.2
7. Begin the TrueCrypt installation with the following commands:
For 32-bit:tar -xzvf truecrypt-7.0a-linux-console-x86.tar.gz
sh truecrypt-7.0a-setup-console-x86
For 64-bit:
tar -xzvf truecrypt-7.0a-linux-console-x64.tar.gz
sh truecrypt-7.0a-setup-console-x64
8. These are the default installation steps recommended by us however you may choose to install as
appropriate for your environment.
Select option 1
Press Enter
Press Enter/Space until you reach the end of the terms
Enter Yes to licence terms
Press Enter to continue
Press Enter to continue
Figure 21: Installation
9. Enter Linux directory
CHAPTER 4
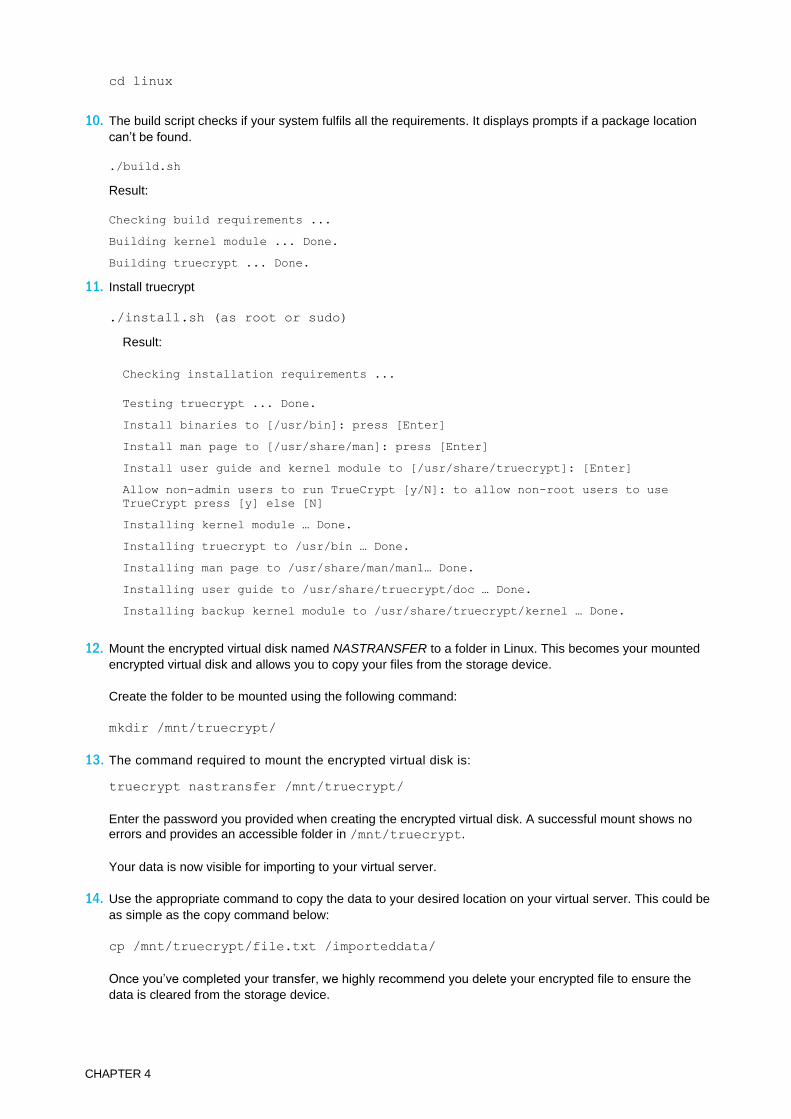
cd linux
10. The build script checks if your system fulfils all the requirements. It displays prompts if a package location
can’t be found.
./build.sh
Result:
Checking build requirements ...
Building kernel module ... Done.
Building truecrypt ... Done.
11. Install truecrypt
./install.sh (as root or sudo)
Result:
Checking installation requirements ...
Testing truecrypt ... Done.
Install binaries to [/usr/bin]: press [Enter]
Install man page to [/usr/share/man]: press [Enter]
Install user guide and kernel module to [/usr/share/truecrypt]: [Enter]
Allow non-admin users to run TrueCrypt [y/N]: to allow non-root users to use
TrueCrypt press [y] else [N]
Installing kernel module … Done.
Installing truecrypt to /usr/bin … Done.
Installing man page to /usr/share/man/man1… Done.
Installing user guide to /usr/share/truecrypt/doc … Done.
Installing backup kernel module to /usr/share/truecrypt/kernel … Done.
12. Mount the encrypted virtual disk named NASTRANSFER to a folder in Linux. This becomes your mounted
encrypted virtual disk and allows you to copy your files from the storage device.
Create the folder to be mounted using the following command:
mkdir /mnt/truecrypt/
13. The command required to mount the encrypted virtual disk is:
truecrypt nastransfer /mnt/truecrypt/
Enter the password you provided when creating the encrypted virtual disk. A successful mount shows no
errors and provides an accessible folder in /mnt/truecrypt.
Your data is now visible for importing to your virtual server.
14. Use the appropriate command to copy the data to your desired location on your virtual server. This could be
as simple as the copy command below:
cp /mnt/truecrypt/file.txt /importeddata/
Once you’ve completed your transfer, we highly recommend you delete your encrypted file to ensure the
data is cleared from the storage device.

CHAPTER 4
15. Once you’ve finished transferring your data, dismount the encrypted virtual disk using the following
command:
truecrypt –d
16. Contact your Telstra representative once you’ve successfully validated your data transfer is complete. We’ll
schedule a courier to come to you and securely transport the storage device to us. If you provide the request
before 9AM, we can schedule a pick-up for the next day. If you require the transfer to occur on the same day
or out of business hours, additional charges apply. Depending on where you’re based (metro, regional,
interstate or international) connection times can vary.
When we receive the storage device with your data, we connect it to a secure network. Once the storage
device has connectivity, we’ll contact you. From there, you can complete your transfer of data to your
desired virtual server(s).

CHAPTER 5
CHAPTER 5 SYNCHRONISING DATA
The following open source software allows your existing live server data to be synchronised with any virtual
server(s) you may have recently imported data to.
RoboCopy (For Windows)
DeltaCopy (For Windows)
Rsync (Linux)
Note: these software options may require external assistance to correctly configure. We cannot provide
assistance or support for them.
ROBOCOPY
Short for ‘Robust File Copy’, this Windows-based command-line directory replication command is available as
part of the Windows Resource Kit. Robocopy allows for network interruptions and resume copying, copy file data
and attributes correctly, and to preserve original timestamps, as well as NTFS ACLs, owner information, and
audit information using command-line switches. (/COPYALL or /COPY:). Copying folder timestamps is also
possible in later versions (/DCOPY:T).
DELTACOPY
DeltaCopy is a Windows-based application capable of copying changed data within a file to a target server. This
allows for fast synchronisation of files from machine to machine and connectivity over a variety of networks. You
may need external assistance to configure DeltaCopy correctly.
The installation file is included in the storage device under:
/synchronisation/windows/
RSYNC
Rsync is a Linux-based application that allows data to be copied and synchronised to other Linux servers. Rsync
has a variety of detailed configuration options. You may need external assistance to configure Rsync correctly.
The installation file is included within your storage device under:
/synchronisation/linux/

CHAPTER 6
CHAPTER 6 INDEX
CONVENTIONS USED IN THIS GUIDE 2
FIRST, BACK UP YOUR DATA LOCALLY 4
DATA SECURITY 4
HOW TO RETURN THE DEVICE 4
WHAT HAPPENS TO YOUR DATA ONCE IT’S TRANSFERRED? 4
PROCESS OVERVIEW 4
DATA IMPORT PACKAGE CONTENTS 5
HOW LONG DOES IT TAKE TO COPY DATA? 5
HOW LONG DOES IT TAKE TO UPLOAD DATA? 6
CONNECTING THE STORAGE DEVICE 7
ACCESSING THE SHARED FOLDER 8
FOR WINDOWS 8
FOR LINUX 8
WINDOWS 8
ENCRYPT AND TRANSFER YOUR DATA 8
COPY YOUR DATA TO THE ENCRYPTED VOLUME 13
LINUX 15
ENCRYPT AND TRANSFER YOUR DATA 15
COPY YOUR DATA TO THE ENCRYPTED VOLUME 18
WINDOWS 21
LINUX 23
ROBOCOPY 27
DELTACOPY 27
RSYNC 27