clutch removal... · • dsg clutch exchange tool kit • soft hammer • plier for snap rings...
TRANSCRIPT
w w w . s a n d b l o m n e w h a m m e r. c o m
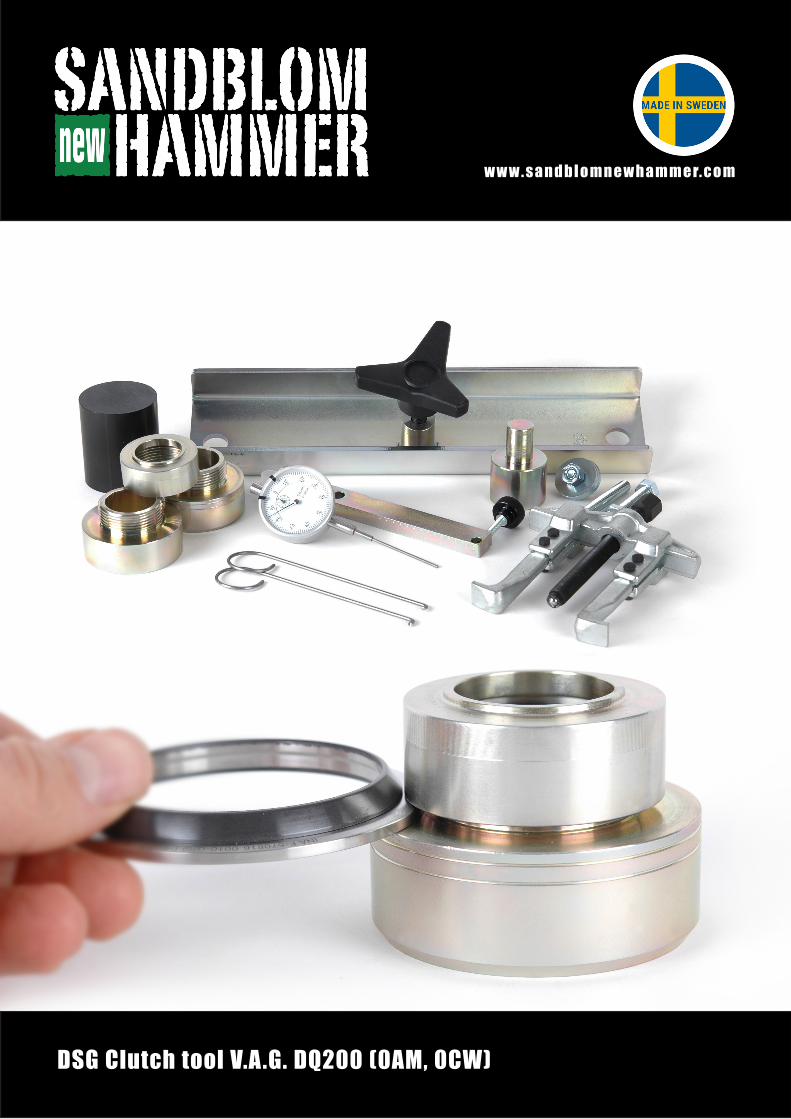
DSG Clutch tool V.A.G. DQ200 (0AM, 0CW)
w w w . s a n d b l o m n e w h a m m e r. c o m 2
Tools
Required tools for changing dual clutch
• DSG Clutch exchange tool kit• Soft hammer• Plier for snap rings
Removal and installation of dual clutch
Application
The 7 speed dual clutch gearbox DQ200 (0AM, 0CW) in Audi, Seat, Skoda and Volkswagen
Brief instruction
1. Remove the dual clutch by pulling it out of the gearbox with the tool.2. Replace old clutch assembly with new parts.3. Adjust position of the thrust bearings with correct shims.4. Push the new clutch into correct position with the tool.5. Check the clearance on both clutches.6. Install the gearbox in the car.7. Perform an adaption of the clutch with a diagnosis tool.
Important information
The breathing holes on the gearboxes must be plugged to avoid leakage. If the mechatronic oil leaks out the complete mechatronic unit must be changed. If the gearbox oil leaks out a complete oil exchange needs to be performed.
A clutch can only be installed once since removal of the clutch damages the clutch. Once removed the clutch cannot be reused. When changing the clutch it is recommended to check the dual mass flywheel. Change it if nescessary. A clutch must not under any circumstances fall out of place. Any shocks on the clutch may damage the adaption mechanism.
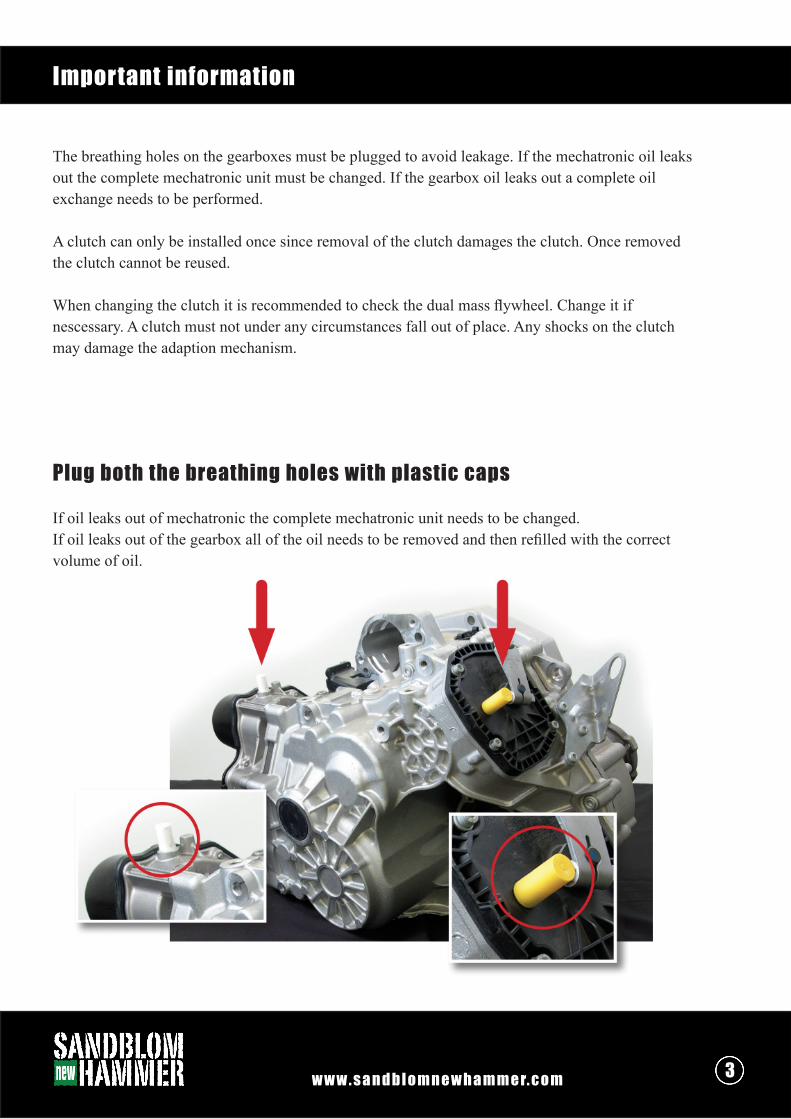
Plug both the breathing holes with plastic caps If oil leaks out of mechatronic the complete mechatronic unit needs to be changed. If oil leaks out of the gearbox all of the oil needs to be removed and then refilled with the correct volume of oil.
w w w . s a n d b l o m n e w h a m m e r. c o m 3
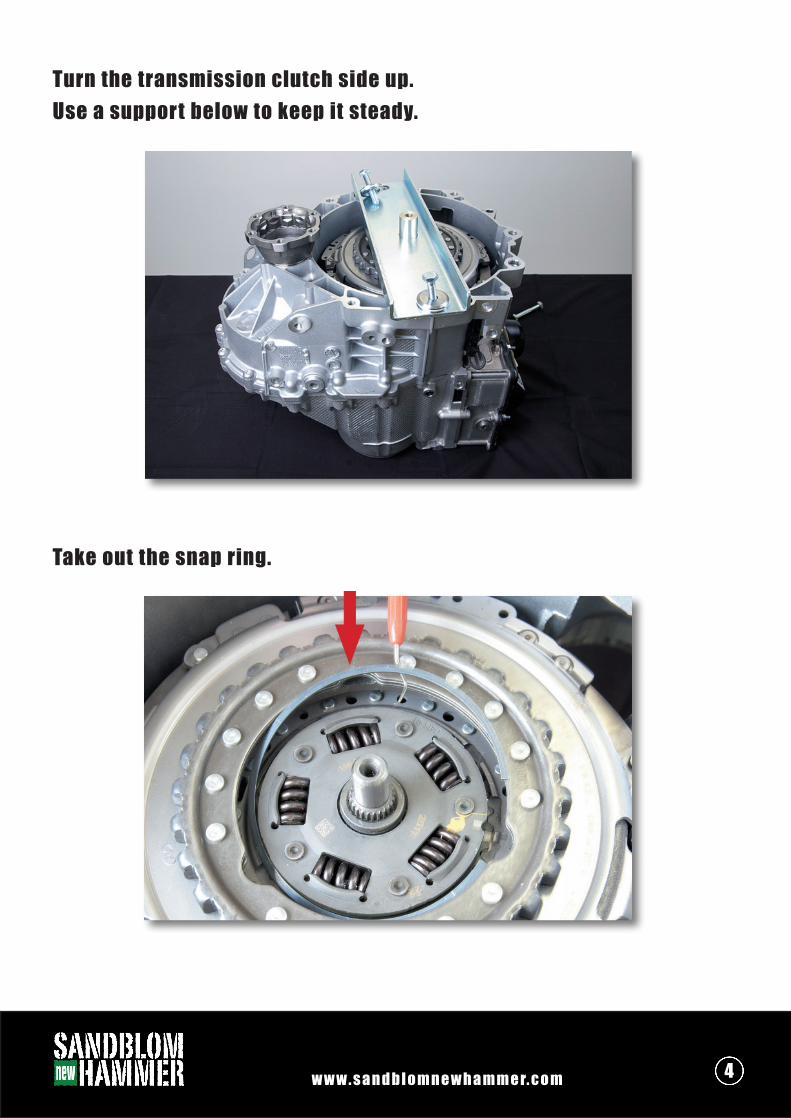
Turn the transmission clutch side up.Use a support below to keep it steady.
Take out the snap ring.
w w w . s a n d b l o m n e w h a m m e r. c o m 4
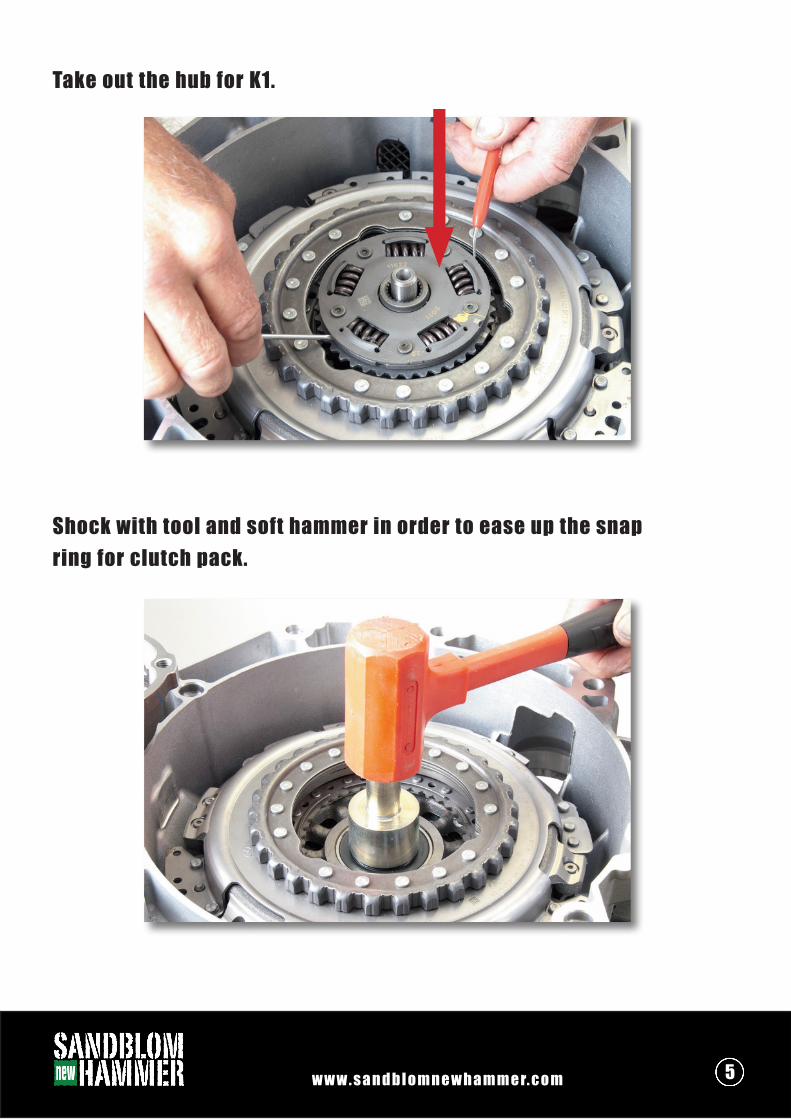
Take out the hub for K1.
Shock with tool and soft hammer in order to ease up the snap ring for clutch pack.
w w w . s a n d b l o m n e w h a m m e r. c o m 5
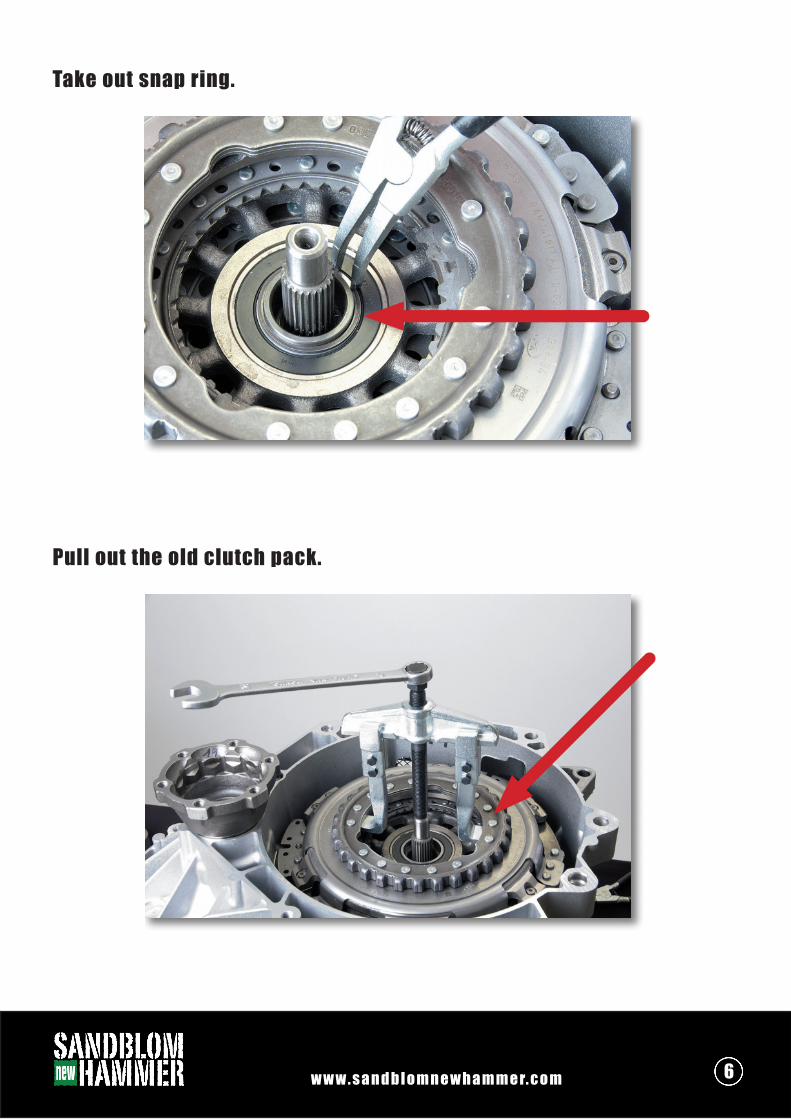
Take out snap ring.
Pull out the old clutch pack.
w w w . s a n d b l o m n e w h a m m e r. c o m 6
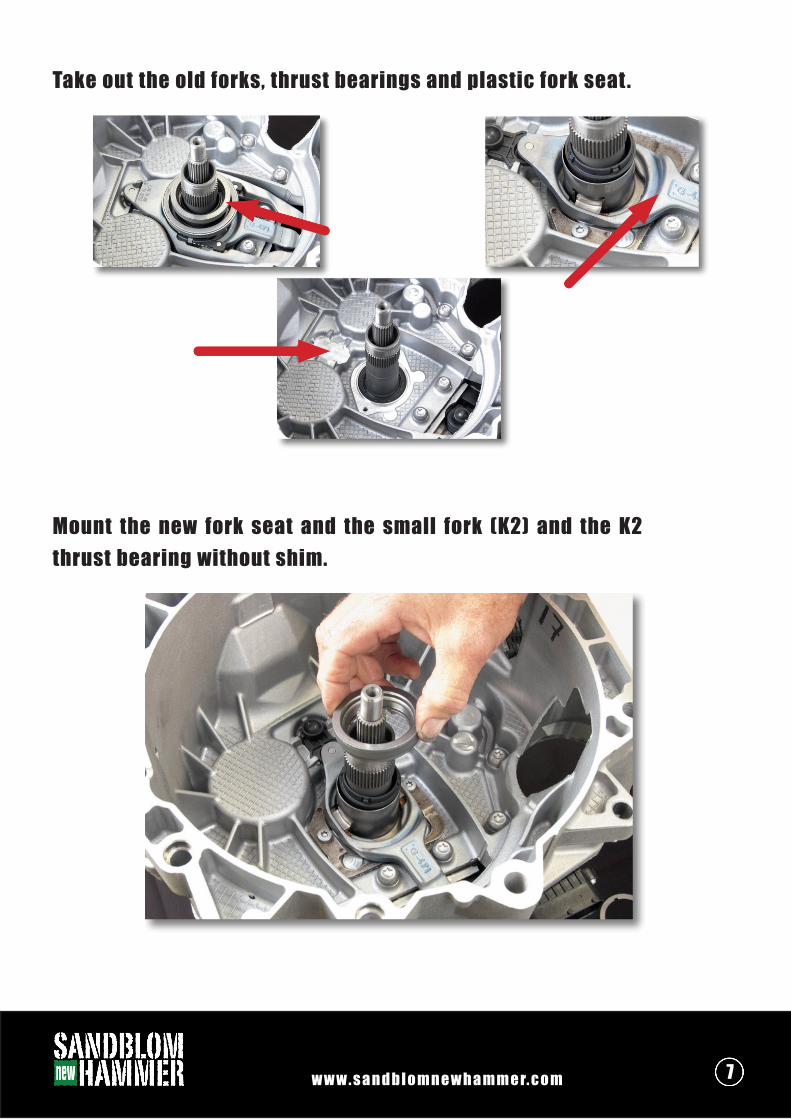
Take out the old forks, thrust bearings and plastic fork seat.
Mount the new fork seat and the small fork (K2) and the K2 thrust bearing without shim.
w w w . s a n d b l o m n e w h a m m e r. c o m 7
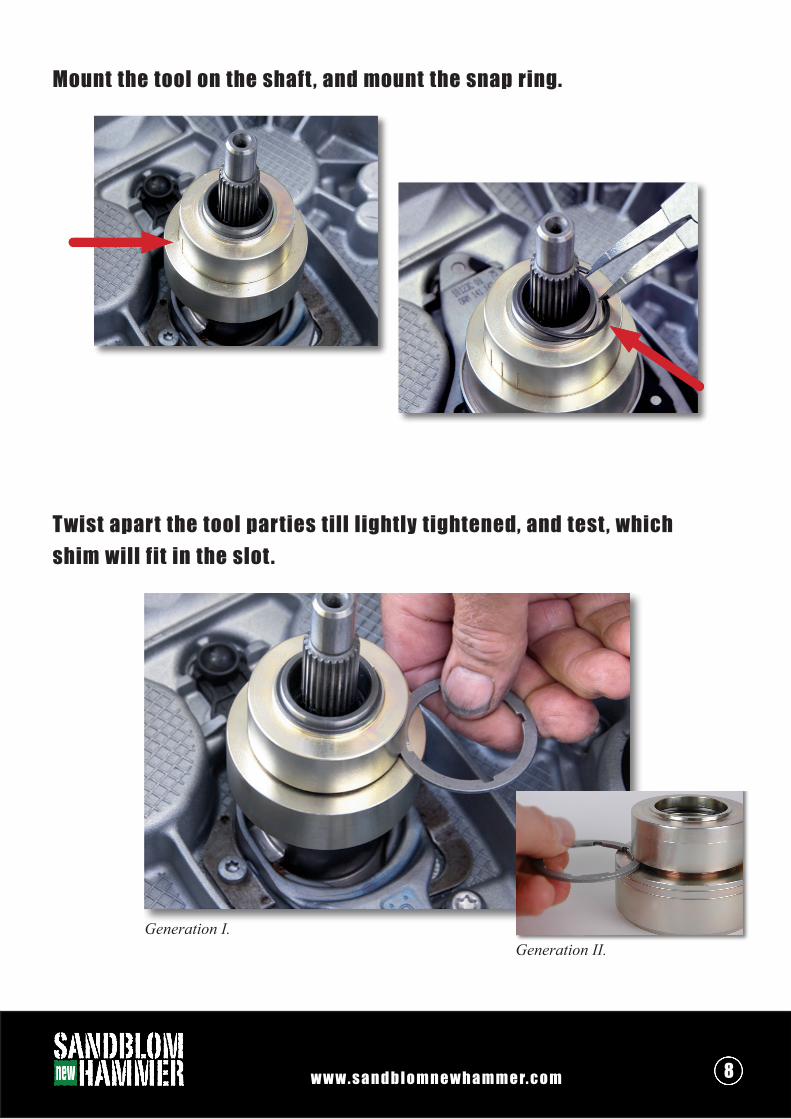
Mount the tool on the shaft , and mount the snap ring.
Twist apart the tool parties till lightly tightened, and test, which shim will fit in the slot.
Generation II.Generation I.
w w w . s a n d b l o m n e w h a m m e r. c o m 8
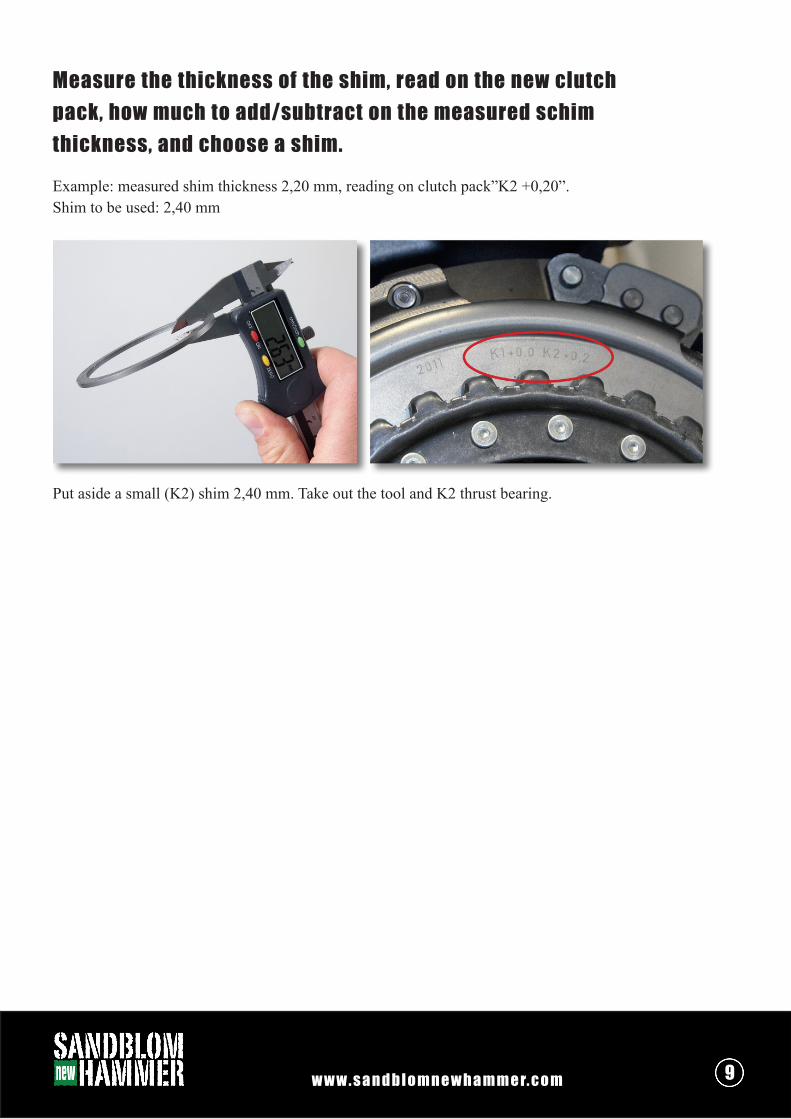
Measure the thickness of the shim, read on the new clutch pack, how much to add/subtract on the measured schim thickness, and choose a shim. Example: measured shim thickness 2,20 mm, reading on clutch pack”K2 +0,20”. Shim to be used: 2,40 mm
Put aside a small (K2) shim 2,40 mm. Take out the tool and K2 thrust bearing.
w w w . s a n d b l o m n e w h a m m e r. c o m 9
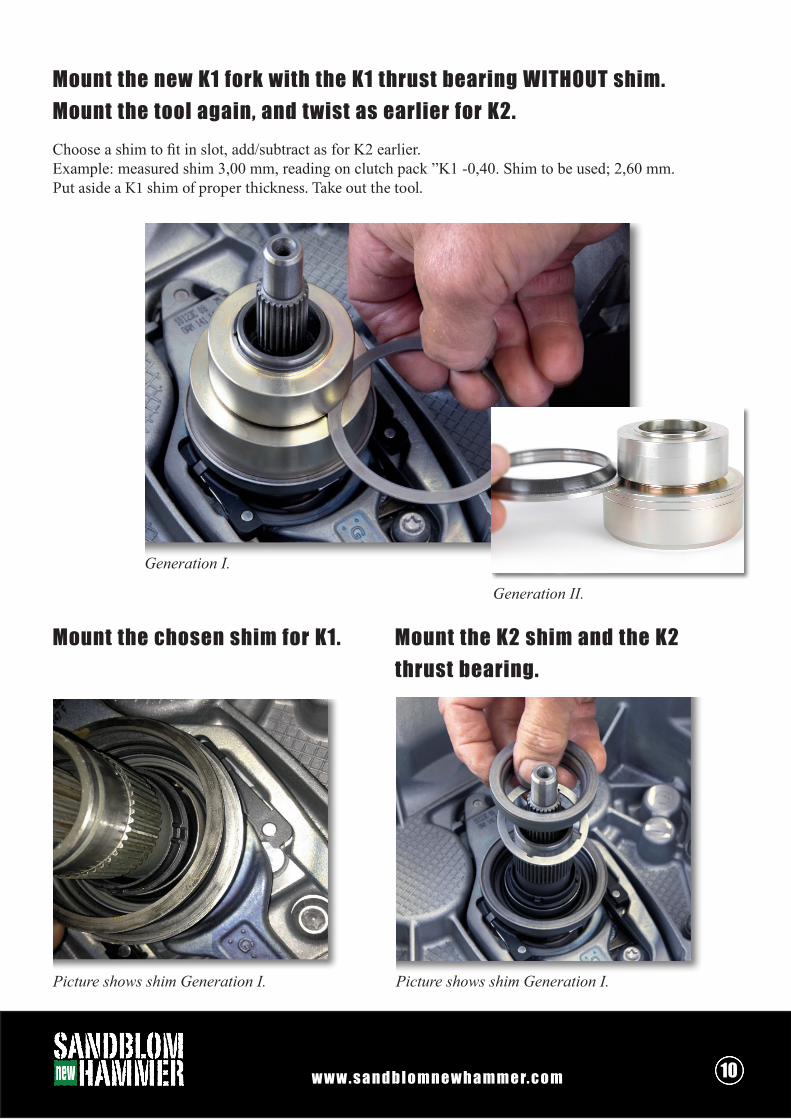
Mount the new K1 fork with the K1 thrust bearing WITHOUT shim. Mount the tool again, and twist as earlier for K2.
Mount the chosen shim for K1.
Choose a shim to fit in slot, add/subtract as for K2 earlier. Example: measured shim 3,00 mm, reading on clutch pack ”K1 -0,40. Shim to be used; 2,60 mm. Put aside a K1 shim of proper thickness. Take out the tool.
Mount the K2 shim and the K2 thrust bearing.
Generation II.
Picture shows shim Generation I.Picture shows shim Generation I.
Generation I.
w w w . s a n d b l o m n e w h a m m e r. c o m 10
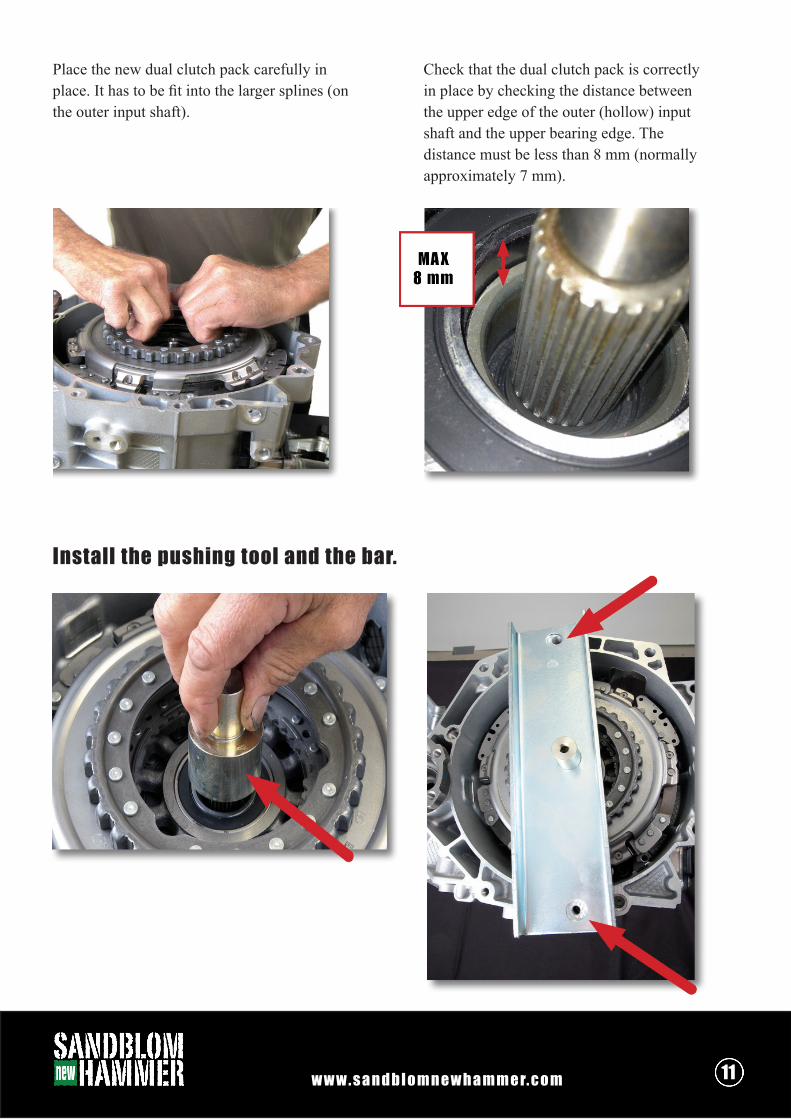
Install the pushing tool and the bar.
Place the new dual clutch pack carefully inplace. It has to be fit into the larger splines (onthe outer input shaft).
Check that the dual clutch pack is correctlyin place by checking the distance betweenthe upper edge of the outer (hollow) inputshaft and the upper bearing edge. Thedistance must be less than 8 mm (normallyapproximately 7 mm).
w w w . s a n d b l o m n e w h a m m e r. c o m 11
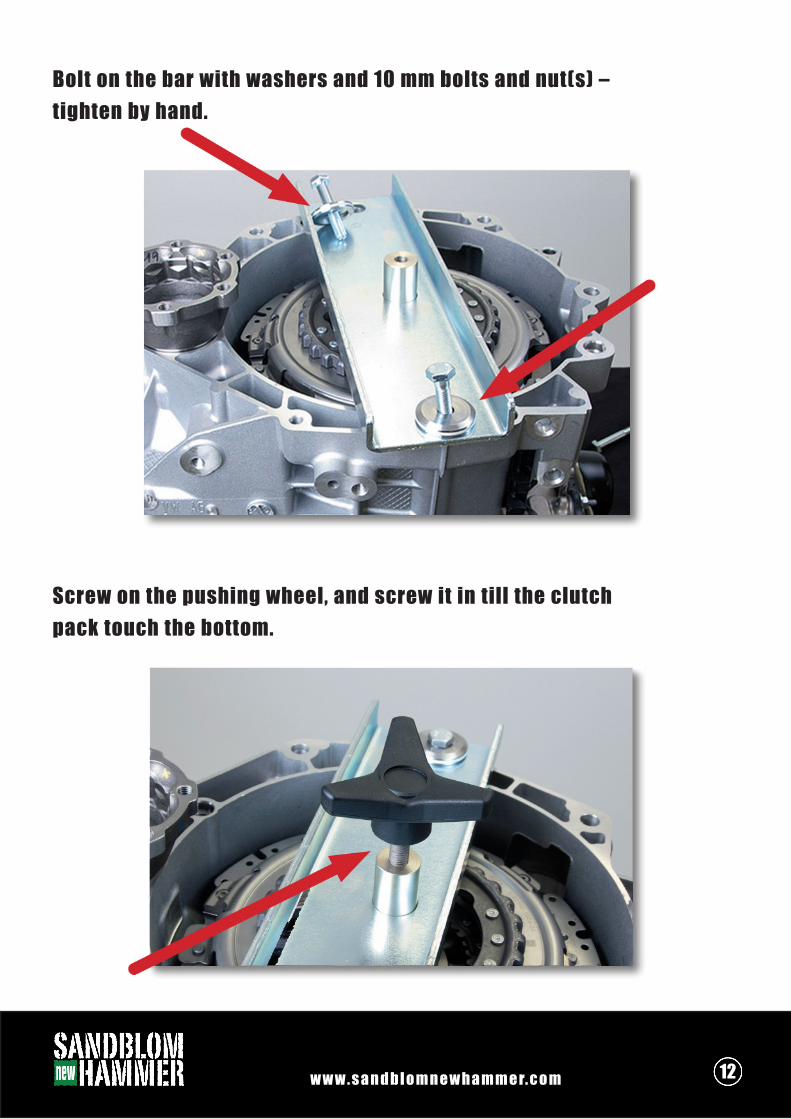
Bolt on the bar with washers and 10 mm bolts and nut(s) – tighten by hand.
Screw on the pushing wheel, and screw it in till the clutch pack touch the bottom.
w w w . s a n d b l o m n e w h a m m e r. c o m 12

Install the snap ring.
Pointed side of snap ring upwards.
Install the dial indicator with bar by attaching the dial indicator holder and then attaching the dial indicator to the holder. The dial indicator tip shall hit the K2 clutch plate.
w w w . s a n d b l o m n e w h a m m e r. c o m 13
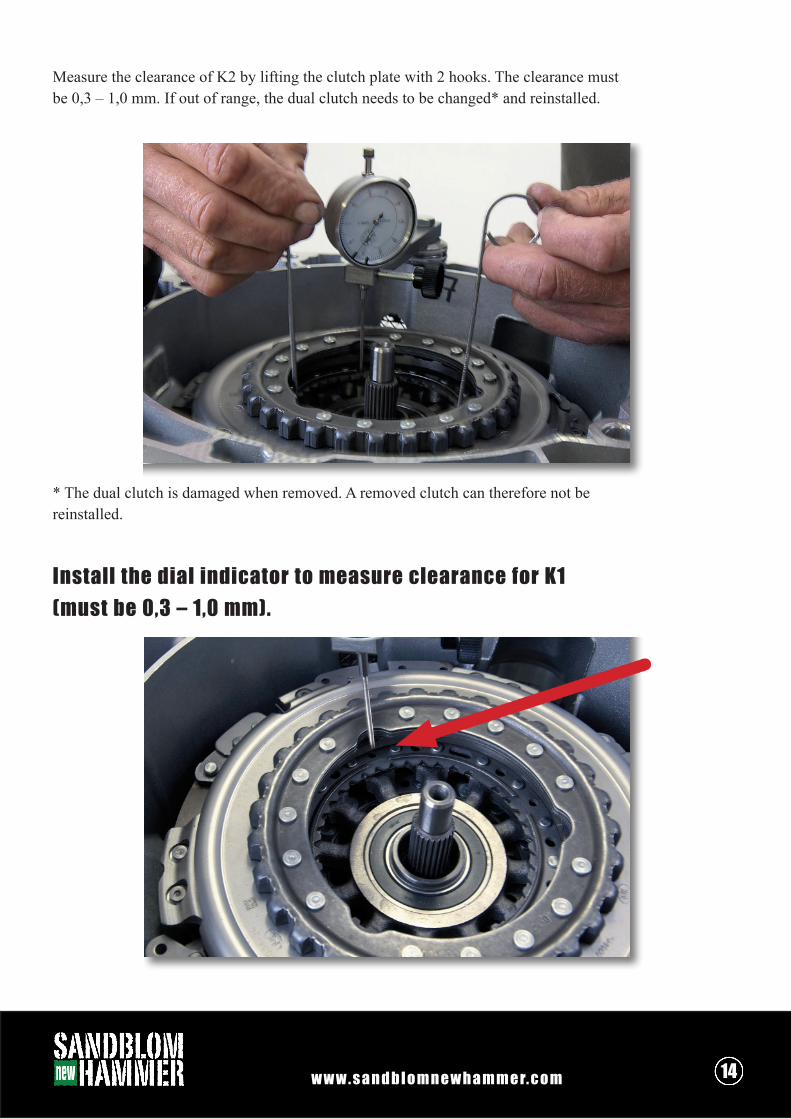
Install the dial indicator to measure clearance for K1 (must be 0,3 – 1,0 mm).
Measure the clearance of K2 by lifting the clutch plate with 2 hooks. The clearance must be 0,3 – 1,0 mm. If out of range, the dual clutch needs to be changed* and reinstalled.
* The dual clutch is damaged when removed. A removed clutch can therefore not be reinstalled.
w w w . s a n d b l o m n e w h a m m e r. c o m 14
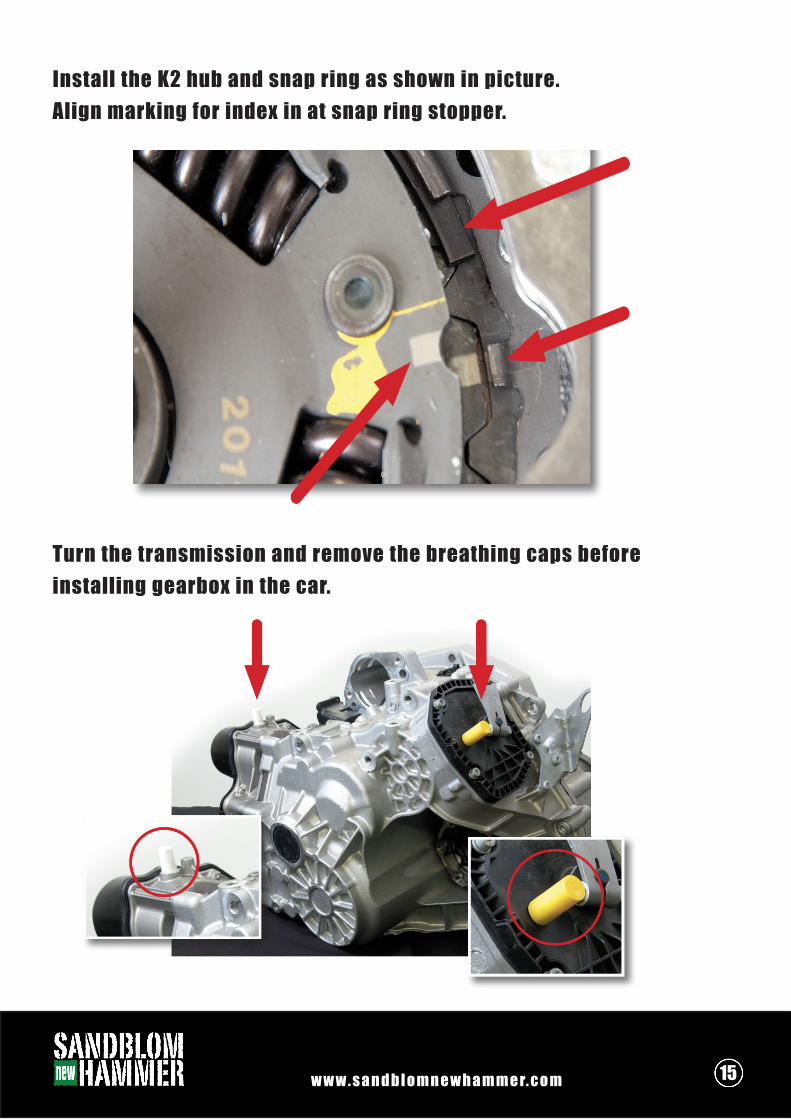
Install the K2 hub and snap ring as shown in picture.Align marking for index in at snap ring stopper.
Turn the transmission and remove the breathing caps before installing gearbox in the car.
w w w . s a n d b l o m n e w h a m m e r. c o m 15