coca-cola freestyle freestyle 8000 / 9000 cleaning · this document is intended for use by any...
TRANSCRIPT
CCFS 8000_9000 Cleaning Rev 10-0-0-42-20160125
COCA-COLA FREESTYLE
Freestyle® 8000 / 9000 Cleaning
Copyright 2015, The Coca-Cola Company
CCFS 8000_9000 Cleaning Rev 10-0-0-42-20160125
Classified – Confidential Page i
Document History
Date Version Author Comments
12/29/2015 20151229* Kurt Zettlemoyer Complete conversion to new format
01/19/2016 10-0-0-42-
20160119
Kurt Zettlemoyer Added buildable cleaning cartridge
instructions
01/25/2016 10-0-0-42-
20160126
Kurt Zettlemoyer Added Glossary and Index, added
spider and drain cleaning, updated
building cleaning cartridges
5/19/2016 10-0-0-42-
20160519
Lindsey Bozung Updated Daily Cleaning Instructions.
*Version number is: <Software Version separated by dashes>-<Year><Month><Day revision was initiated>
© 2015-2016 The Coca-Cola® Company
All rights reserved. No part of this work may be reproduced, copied, adapted, or transmitted in any form
or by any means without written permission from The Coca-Cola Company. This manual is the
confidential information of The Coca-Cola Company.
The Coca-Cola® Company makes no representation or warranties with respect to the contents hereof and
specifically disclaims any implied warranties or merchantability or fitness for any particular purpose.

CCFS 8000_9000 Cleaning Rev 10-0-0-42-20160125
Classified – Confidential Page ii
Further, The Coca-Cola Company reserves the right to revise this publication and to make changes from
time to time in the content hereof without obligation to notify any person of such revision or changes.

CCFS 8000_9000 Cleaning Rev 10-0-0-42-20160125
Classified – Confidential Page iii
Table of Contents
INTRODUCTION ......................................................................................................................................................................... 1
CLEANING FOR A CARTRIDGE OR SWEETENER CHANGE ............................................................................................................ 2
DAILY CLEANING ....................................................................................................................................................................... 3
EQUIPMENT REQUIRED ........................................................................................................................................................................ 3 CLEANING PROCEDURE ........................................................................................................................................................................ 5
I. Prepare Sanitizer ............................................................................................................................................................... 5 II. Remove Parts to be Cleaned Separately ............................................................................................................................ 6 III. Clean the Remove Parts ................................................................................................................................................. 7 IV. Sanitize the Removed Parts ........................................................................................................................................... 8 V. Clean the Nozzle ................................................................................................................................................................ 8 VI. Clean the Dispensing Area ............................................................................................................................................. 9 VII. Reinstall all Parts ......................................................................................................................................................... 10
WEEKLY CLEANING .................................................................................................................................................................. 11
EQUIPMENT REQUIRED ...................................................................................................................................................................... 11 CLEANING PROCEDURE ...................................................................................................................................................................... 12
I. Prepare Sanitizer ............................................................................................................................................................. 12 II. Clean the NNS Compartment ........................................................................................................................................... 13 III. Disassemble the Ice Chute Assembly ........................................................................................................................... 14 IV. Wash the Ice Chute Parts ............................................................................................................................................. 15 V. Reassemble the Ice Chute ................................................................................................................................................ 16
MONTHLY CLEANING .............................................................................................................................................................. 17
EQUIPMENT REQUIRED ...................................................................................................................................................................... 17 CLEANING PROCEDURE ...................................................................................................................................................................... 18
I. Prepare Sanitizer ............................................................................................................................................................. 18 II. Disassemble the Ice Bin (9000) ........................................................................................................................................ 19 III. Clean the Ice Bin Parts (9000) ...................................................................................................................................... 20 IV. Disassemble the Ice Bin Parts (8000) ........................................................................................................................... 21 V. Clean the Ice Bin Parts (8000) .......................................................................................................................................... 21 VI. Restore the Dispenser to Service ................................................................................................................................. 22
ANNUAL CLEANING ................................................................................................................................................................. 23
EQUIPMENT REQUIRED ...................................................................................................................................................................... 23 CLEANING PROCEDURE ...................................................................................................................................................................... 26
I. Prepare Sanitizer ............................................................................................................................................................. 26 II. Fill Cleaner Cartridges with Sanitizer ............................................................................................................................... 26 III. Assemble Cleaner Cartridges ....................................................................................................................................... 27 IV. Assemble Flush Adapters and Tubing .......................................................................................................................... 29 V. Prepare the HFCS Line...................................................................................................................................................... 30 VI. Fill the HFCS Line with Sanitizer ................................................................................................................................... 30 VII. Clean the NNS Connectors and Surfaces...................................................................................................................... 32 VIII. Connect Sanitizer to the NNS Circuit ............................................................................................................................ 33 IX. Prepare the Microdose Subsystem .............................................................................................................................. 34 X. Run the Sanitization Process ............................................................................................................................................ 34 XI. Return the Dispenser to Operational State .................................................................................................................. 36
WATER CIRCUIT CLEANING ...................................................................................................................................................... 38
EQUIPMENT REQUIRED ...................................................................................................................................................................... 38

CCFS 8000_9000 Cleaning Rev 10-0-0-42-20160125
Classified – Confidential Page iv
CLEANING PROCEDURE ...................................................................................................................................................................... 39 I. Prepare Sanitizer ............................................................................................................................................................. 39 II. Carbonated Water Circuit Prep ....................................................................................................................................... 39 III. Remove Carbonated Water from the System .............................................................................................................. 40 IV. Remove CO2 from the System ...................................................................................................................................... 40 V. Cycle the Carbonator ....................................................................................................................................................... 41 VI. Repeat “Remove and Cycle” Processes ........................................................................................................................ 42 VII. Flush the Sanitizer........................................................................................................................................................ 42 VIII. Empty the Water Booster ............................................................................................................................................ 43 IX. Clean the Water Circuit ............................................................................................................................................... 43 X. Flush the Water Circuit .................................................................................................................................................... 44
GLOSSARY ............................................................................................................................................................................... 46
INDEX ...................................................................................................................................................................................... 49
Chapter 1: Introduction
Classified – Confidential Page 1 of 50
Introduction
Scope
This document is intended for use by any person required to clean the Coca-Cola Freestyle® 8000 or
9000 dispensers. Technical information can be found in the Coca-Cola Freestyle® 8000 Technical
Manual and Coca-Cola Freestyle® 9000 Technical Manual.
Purpose
This document contains cleaning processes for the Coca-Cola Freestyle® 8000 and 9000 dispensers.
Requirements
Proper Personal Protective Equipment (PPE) must be worn at all times in accordance to the Safety
Data Sheet (SDS) for any materials the operator may encounter, including but not limited to product /
ingredients, detergent cleanser, and Sanitizer.
Additional Assistance
If you need assistance, you can reach a Freestyle Subject Matter Expert 24 hours a day, 7 days a week by dialing 1-800-817-2653 option 8.
Chapter
1

Chapter 2: Cleaning for a Cartridge of Sweetener Change
Classified – Confidential Page 2 of 50
Cleaning for a Cartridge or
Sweetener Change
CLEANING TO BE PERFORMED WHENEVER SWEETENER OR PRODUCT CARTRIDGES ARE CHANGED
Follow these steps before inserting a new cartridge, NNS Bag in Box, or HFCS
Bag in Box. This process is applicable to both the Coca-Cola Freestyle® 8000 and Coca-Cola Freestyle® 9000 dispenser.
Step Action
1.
Remove the Product Cartridge(s) or NNS Bag in Box.
2. Carefully clean the IPN connector(s) with a clean cloth dipped in Sanitizer until the cloth
comes away clean.
3.
When changing NNS, clean the compartment and connector with a clean Cloth dipped in
Sanitizer.
4.
Wait 5 minutes to allow the Sanitizer to work and the IPN(s) to air dry.
5.
Perform Steps 1 through 3 again.
Chapter
2

Chapter 3: Daily Cleaning
Classified – Confidential Page 3 of 50
Daily Cleaning
CLEANING PROCESS TO BE COMPLETED EVERY DAY THE DISPENSER IS IN OPERATION
This process is applicable to both the Coca-Cola Freestyle® 8000 and Coca-Cola
Freestyle® 9000 dispenser.
Equipment Required
Ensure you have the following equipment before beginning Daily Cleaning
Equipment Required
5 Gallon Bucket with Gradations (Coca-
Cola Part #: 143317 recommended)
Detergent Cleanser appropriate for
food grade surfaces
Chapter
3
Chapter 3: Daily Cleaning
Classified – Confidential Page 4 of 50
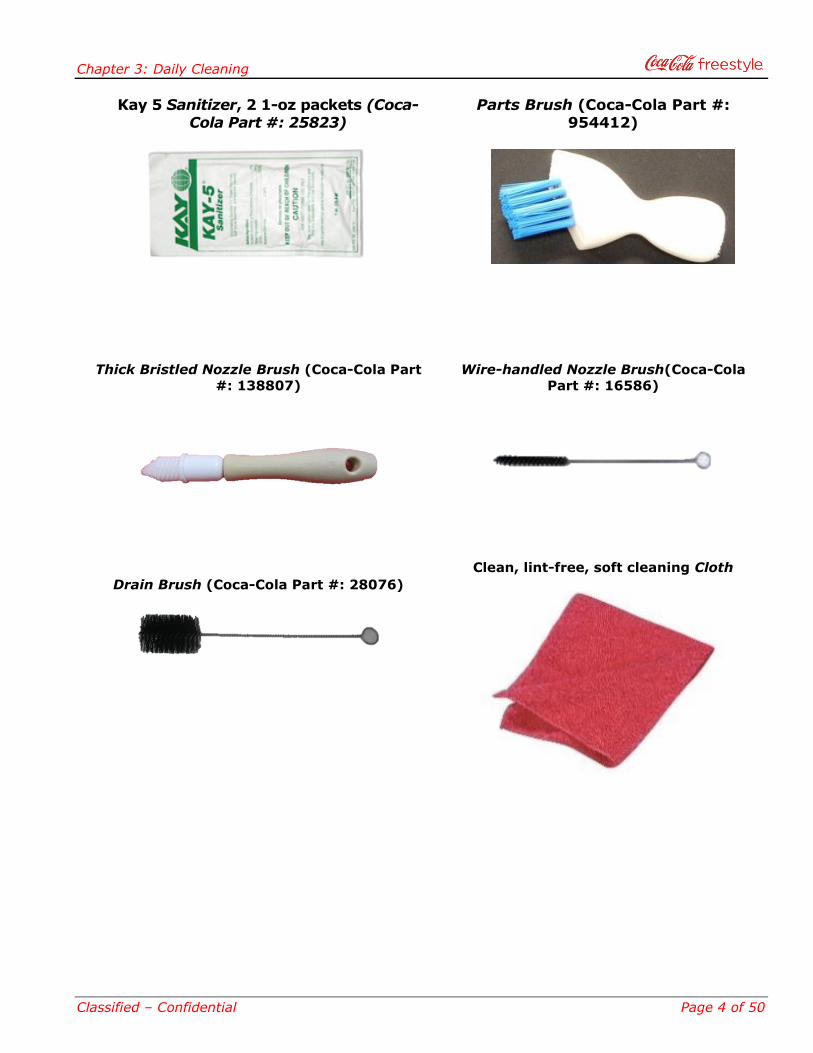
Kay 5 Sanitizer, 2 1-oz packets (Coca-Cola Part #: 25823)
Parts Brush (Coca-Cola Part #: 954412)
Thick Bristled Nozzle Brush (Coca-Cola Part
#: 138807)
Drain Brush (Coca-Cola Part #: 28076)
Wire-handled Nozzle Brush(Coca-Cola
Part #: 16586)
Clean, lint-free, soft cleaning Cloth

Chapter 3: Daily Cleaning
Classified – Confidential Page 5 of 50
Cleaning Procedure
I. Prepare Sanitizer
Step Action
1.
In a clean 5 gallon Bucket, prepare 5 gallons of Kay-5 Sanitizer (two 1oz packet of Kay-
5). Use hot water.
Note: Do not exceed 100 ppm Sanitizer strength as this causes damage to the
equipment.
2.
Mix the solution well.
3.
Bring the Bucket to the dispenser.

Chapter 3: Daily Cleaning
Classified – Confidential Page 6 of 50
II. Remove Parts to be Cleaned Separately
Step Action
1.
Remove the Nozzle Tip by rotating it counter clockwise, and pulling it down from the
Nozzle.
2.
Remove the Cup Rest.
3.
On the CCFS 9000, remove the black plastic drain Spider from the drain at the back of
the Drip Tray by grasping the Spider and pulling it straight out.

Chapter 3: Daily Cleaning
Classified – Confidential Page 7 of 50
III. Clean the Remove Parts
Step Action
1.
Wash your hands thoroughly with hand soap and warm water.
2.
Wash the Nozzle Tip, Cup Rest and Spider in the sink using warm water and Detergent
Cleanser. Rinse thoroughly with warm water.
3.
Clean the Nozzle Tip, Cup Rest, and Spider (CCFS 9000 only) with warm water and
Detergent Cleanser using the Parts Brush. Rinse thoroughly with warm water.

Chapter 3: Daily Cleaning
Classified – Confidential Page 8 of 50
IV. Sanitize the Removed Parts
Step Action
1.
Submerge the parts in Sanitizer for 2 minutes.
Note: Shake the Nozzle Tip when submerging into the Sanitizer to ensure no air pockets
remain.
2.
Remove the parts from the Sanitizer and allow them to air dry on a sanitary surface.
V. Clean the Nozzle
Step Action
1.
Clean the outer Nozzle with the Thick Bristled Nozzle Brush dipped in Sanitizer until it is
visibly clean.
2.
Clean the inner Nozzle with the Wire-handled Nozzle Brush dipped in Sanitizer until
visibly clean.
Chapter 3: Daily Cleaning
Classified – Confidential Page 9 of 50
Step Action
3.
Repeat Steps 1 and 2.
VI. Clean the Dispensing Area
Step Action
1.
Clean the drain in the Drip Tray with the Drain Brush dipped in Sanitizer.
2.
Using a clean Cloth dipped in Sanitizer clean the following:
Ice Lever
Drip Tray
Upper Door
User Interface
Interior surfaces of the Ellipse
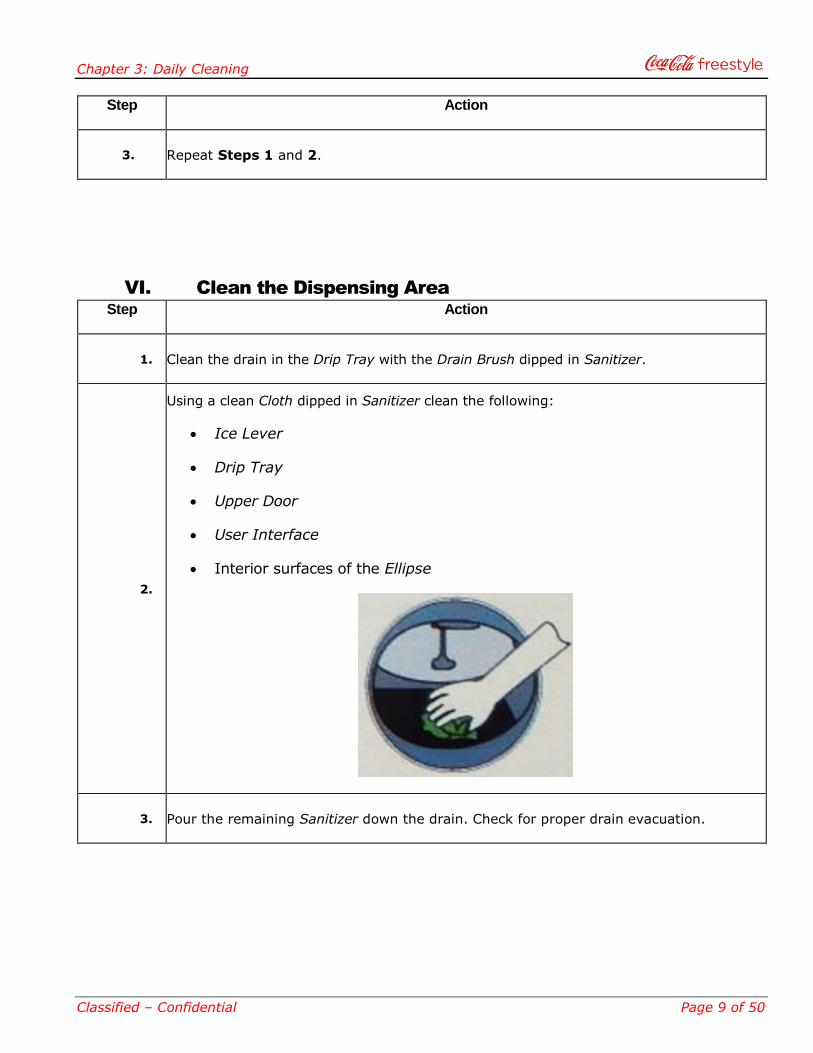
3.
Pour the remaining Sanitizer down the drain. Check for proper drain evacuation.

Chapter 3: Daily Cleaning
Classified – Confidential Page 10 of 50
VII. Reinstall all Parts
Step Action
1.
Reinstall the Nozzle Tip using a sanitary cloth.
2.
Reinstall the Drip Tray.
3.
Replace the Spider (CCFS 9000 only).

Chapter 4: Weekly Cleaning
Classified – Confidential Page 11 of 50
Weekly Cleaning
CLEANING PROCESS TO BE COMPLETED ONCE PER WEEK WHILE THE DISPENSER IS IN OPERATION
This process is applicable to both the Coca-Cola Freestyle® 8000 and 9000
dispenser.
Equipment Required
Equipment Required
5 Gallon Bucket with Gradations (Coca-Cola Part #: 143317 recommended)
Detergent Cleanser appropriate for food grade surfaces
Kay 5 Sanitizer, 2 1-oz packets (Coca-
Cola Part #: 25823)
Parts Brush (Coca-Cola Part #:
954412)
Chapter
4

Chapter 4: Weekly Cleaning
Classified – Confidential Page 12 of 50
Ice Chute Brush (Coca-Cola Part #: 143257)
Clean, lint-free, soft cleaning Cloth
Cleaning Procedure
I. Prepare Sanitizer
Step Action
1.
In a clean 5 gallon Bucket, prepare 5 gallons of Kay-5 Sanitizer (two 1oz packet of Kay-
5). Use hot water.
Note: Do not exceed 100 ppm Sanitizer strength as this causes damage to the
equipment.
2.
Mix the solution well.

Chapter 4: Weekly Cleaning
Classified – Confidential Page 13 of 50
Step Action
3.
Bring the Bucket to the dispenser.
II. Clean the NNS Compartment
Step Action
1.
Remove the NNS BiB from its compartment. Ensure the connector on the BiB does not
contact the floor or other surfaces.
2.
Clean the NNS Compartment with a clean Cloth dipped in Sanitizer.

Chapter 4: Weekly Cleaning
Classified – Confidential Page 14 of 50
Step Action
3.
Clean the NNS Connector with a clean Cloth dipped in Sanitizer. Wait 5 minutes.
4.
Perform Steps 2 and 3 of this section.
5.
Return the NNS BiB to the compartment and reconnect it.
III. Disassemble the Ice Chute Assembly
This process applies to the Coca-Cola Freestyle® 9000 dispenser only.
Note: If there is an ice maker on the dispenser, follow the manufacturer’s instructions for cleaning
schedules and process.

Chapter 4: Weekly Cleaning
Classified – Confidential Page 15 of 50
Step Action
1.
Turn off power to the dispenser.
2.
Remove the Lower Chute by carefully pulling on the front lip of the Lower Chute.
3.
Remove the Upper Chute by carefully pulling on the upper lip of the Upper Chute.
IV. Wash the Ice Chute Parts
This process applies to the Coca-Cola Freestyle® 9000 dispenser only.
Step Action
1.
Wash the Upper Chute and Lower Chute in the sink using warm water and Detergent
Cleanser. Rinse thoroughly with warm water.
2.
Clean the Upper Chute and Lower Chute with warm water and Detergent Cleanser using
the Parts Brush. Rinse thoroughly with warm water.
3.
Submerge the parts in Sanitizer for 2 minutes.
Ice Chute Body

Chapter 4: Weekly Cleaning
Classified – Confidential Page 16 of 50
Step Action
4.
Remove the parts from the Sanitizer and place them on a sanitary surface to air dry for
5 minutes.
5.
Clean the Ice Chute Body area with a clean Cloth dipped in Sanitizer. Wait 5 minutes.
V. Reassemble the Ice Chute
This process applies to the Coca-Cola Freestyle® 9000 dispenser only.
Step Action
1.
Re-install the Upper Ice Chute by pushing up and into the Ice Chute Body.
2.
Re-install the Lower Ice Chute by pushing up and into the bottom of the Upper Ice Chute
until it clicks.
3.
Turn on power to the dispenser.

Chapter 5: Monthly Cleaning
Classified – Confidential Page 17 of 50
Monthly Cleaning
CLEANING PROCESS TO BE COMPLETED ONCE PER MONTH WHILE THE DISPENSER IS IN OPERATION
This process is applicable to both the Coca-Cola Freestyle® 8000 and 9000 dispenser.
Equipment Required
Equipment Required
5 Gallon Bucket with Gradations (Coca-
Cola Part #: 143317 recommended)
Detergent Cleanser appropriate for
food grade surfaces
Kay 5 Sanitizer, 2 1-oz packets (Coca-Cola Part #: 25823)
Parts Brush (Coca-Cola Part #: 954412)
Chapter
5

Chapter 5: Monthly Cleaning
Classified – Confidential Page 18 of 50
Clean, lint-free, soft cleaning Cloth
Drain Brush (Coca-Cola Part #: 28076)
Cleaning Procedure
I. Prepare Sanitizer
Step Action
1.
In a clean 5 gallon Bucket, prepare 5 gallons of Kay-5 Sanitizer (two 1oz packet of Kay-
5). Use hot water.
Note: Do not exceed 100 ppm Sanitizer strength as this causes damage to the
equipment.
2.
Mix the solution well.

Chapter 5: Monthly Cleaning
Classified – Confidential Page 19 of 50
Step Action
3.
Bring the Bucket to the dispenser.
II. Disassemble the Ice Bin (9000)
This process applies to the Coca-Cola Freestyle® 9000 dispenser only.
Note: If there is an ice maker on the dispenser, follow the manufacturer’s instructions for cleaning
schedules and process.
Step Action
1.
Place a cup under the ice lever and dispense all the ice in the Ice Bin.
2.
Unplug the dispenser and remove the ice bin lid.
3.
Pour warm water slowly into the bin to melt the remaining ice on the cold plate. Never
use hot water as this may damage the equipment.
Note: Water must be poured slowly to prevent it from overflowing the Ice-Bin drain.)
4.
Remove the Agitator Bar:
i. Unscrew the agitator lock plate.
ii. Slide the Agitator Bar towards the back of the dispenser to disengage the shaft
from the motor.
iii. Pull the Agitator Bar forward to remove shaft from rear bearing.
5.
Remove the Ice Bin Divider by grabbing the hole in the bottom of the bin and lifting the
divider out of the bin.

Chapter 5: Monthly Cleaning
Classified – Confidential Page 20 of 50
III. Clean the Ice Bin Parts (9000)
This process applies to the Coca-Cola Freestyle® 9000 dispenser only.
Step Action
1.
Wash the Agitator Bar and Ice Bin Divider in the sink using warm water and Detergent
Cleanser. Rinse thoroughly with warm water.
2.
Clean the Agitator Bar and Ice Bin Divider in the sink with warm water and Detergent
Cleanser using the Parts Brush. Rinse thoroughly with warm water.
3.
Clean the Agitator Bar and Ice Bin Divider with a clean Cloth dipped in Sanitizer.
4.
Place the Agitator Bar and Ice Bin Divider on a sanitary surface to air dry for 5 minutes.
5.
Clean the Ice Bin Drain with the Drain Brush dipped in Sanitizer.
6.
Clean the inside of the Ice Bin with a clean Cloth dipped in Sanitizer.
7.
Clean the outside panels of the dispenser with a clean Cloth dipped in Sanitizer to
remove any buildup on the outside of the dispenser. Wait 5 minutes.
8.
Perform Steps 6 and 7 again.
Chapter 5: Monthly Cleaning
Classified – Confidential Page 21 of 50
IV. Disassemble the Ice Bin Parts (8000)
This process applies to the Coca-Cola Freestyle® 8000 dispenser only.
Step Action
1.
Unplug the dispenser and open the Ice Bin Lid.
2.
Scoop all the ice out of the Ice Bin.
3.
Pour warm water slowly into the bin to melt the remaining ice on the cold plate. Never
use hot water as this may damage the equipment.
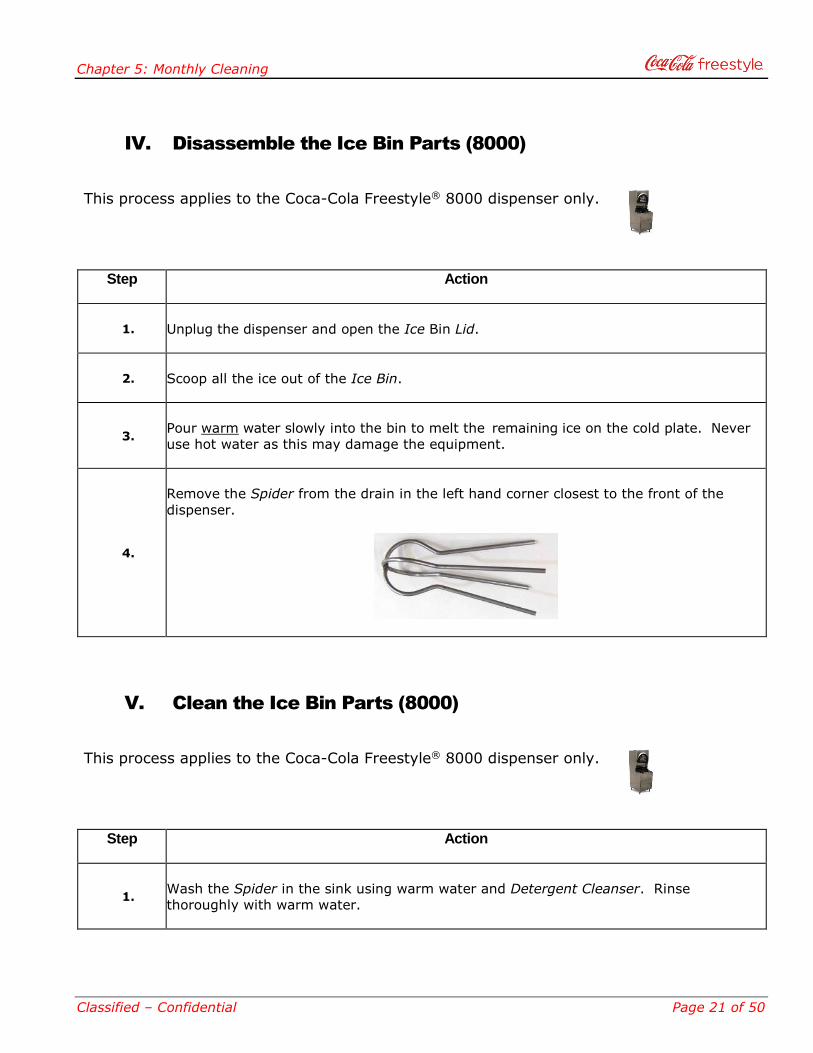
4.
Remove the Spider from the drain in the left hand corner closest to the front of the
dispenser.
V. Clean the Ice Bin Parts (8000)
This process applies to the Coca-Cola Freestyle® 8000 dispenser only.
Step Action
1.
Wash the Spider in the sink using warm water and Detergent Cleanser. Rinse
thoroughly with warm water.
Chapter 5: Monthly Cleaning
Classified – Confidential Page 22 of 50
Step Action
2.
Clean the Spider with warm water and Detergent Cleanser using the Parts Brush. Rinse
thoroughly with warm water.
3.
Submerge the Spider in Sanitizer for 2 minutes.
4.
Remove the Spider from the Sanitizer and place it on a sanitary surface to air dry.
5.
Clean the Ice Drain Bin with the Drain Brush dipped in Sanitizer.
6.
Clean the inside of the Ice Bin with a clean Cloth dipped in Sanitizer.
7.
Clean the outside panels of the dispenser with a clean Cloth dipped in Sanitizer to
remove any buildup on the outside of the dispenser. Wait 5 minutes.
8.
Perform Steps 6 and 7 again.
9.
Pour the remaining Sanitizer slowly into the Ice Bin to flush the unit.
VI. Restore the Dispenser to Service
This process is applicable to both the Coca-Cola Freestyle® 8000 and 9000 dispenser.
Step Action
1.
Reinstall all components.
2.
Fill the bin with ice
3.
Restore power to the dispenser.

Chapter 6: Annual Cleaning
Classified – Confidential Page 23 of 50
Annual Cleaning
CLEANING PROCESS TO BE COMPLETED ONCE PER YEAR WHILE THE DISPENSER IS IN OPERATION
This process is applicable to both the Coca-Cola Freestyle® 8000 and Coca-Cola Freestyle® 9000 dispenser.
Equipment Required
Equipment Required
5 Gallon Bucket with Gradations (Coca-
Cola Part #: 143317 recommended)
Detergent Cleanser appropriate for
food grade surfaces
Kay 5 Sanitizer, 2 1-oz packets (Coca-Cola Part #: 25823)
Parts Brush (Coca-Cola Part #: 954412)
Chapter
5

Chapter 6: Annual Cleaning
Classified – Confidential Page 24 of 50
Flush Adapters (2) (Coca-Cola Part # 28688)
Clean, lint-free, soft cleaning Cloth
14.5 Oetiker Clamps (2) (Coca-Cola Part #
10464 recommended)
Cleaner Cartridge Refill Kit (Coca-Cola
Part # TBD)
High Range Chlorine Test Strips
Empty Pouches (36)

Chapter 6: Annual Cleaning
Classified – Confidential Page 25 of 50
Empty Double Cartridge Boxes (12 left-side
#391P1, 12 right-side #391P2, RFID tags set
to “Sanitizer”)
Empty Single Cartridge Boxes (12, RFID
tags set to “Sanitizer”)
Empty Cartridge Holders (12 double and 12
single)
3/8” Tubing, ≅ 36” in length (2)
Oetiker Tool
Double
Single

Chapter 6: Annual Cleaning
Classified – Confidential Page 26 of 50
Cleaning Procedure
I. Prepare Sanitizer
Step Action
1.
In a clean 5 gallon Bucket, prepare 5 gallons of Kay-5 Sanitizer (two 1oz packet of Kay-
5). Use hot water.
Note: Do not exceed 100 ppm Sanitizer strength as this causes damage to the
equipment.
2.
Mix the solution well.
3.
Bring the Bucket to the dispenser.
II. Fill Cleaner Cartridges with Sanitizer
Step Action
1.
Insert the IPN of the Pouch Filler into an empty Pouch.
Chapter 6: Annual Cleaning
Classified – Confidential Page 27 of 50
Step Action
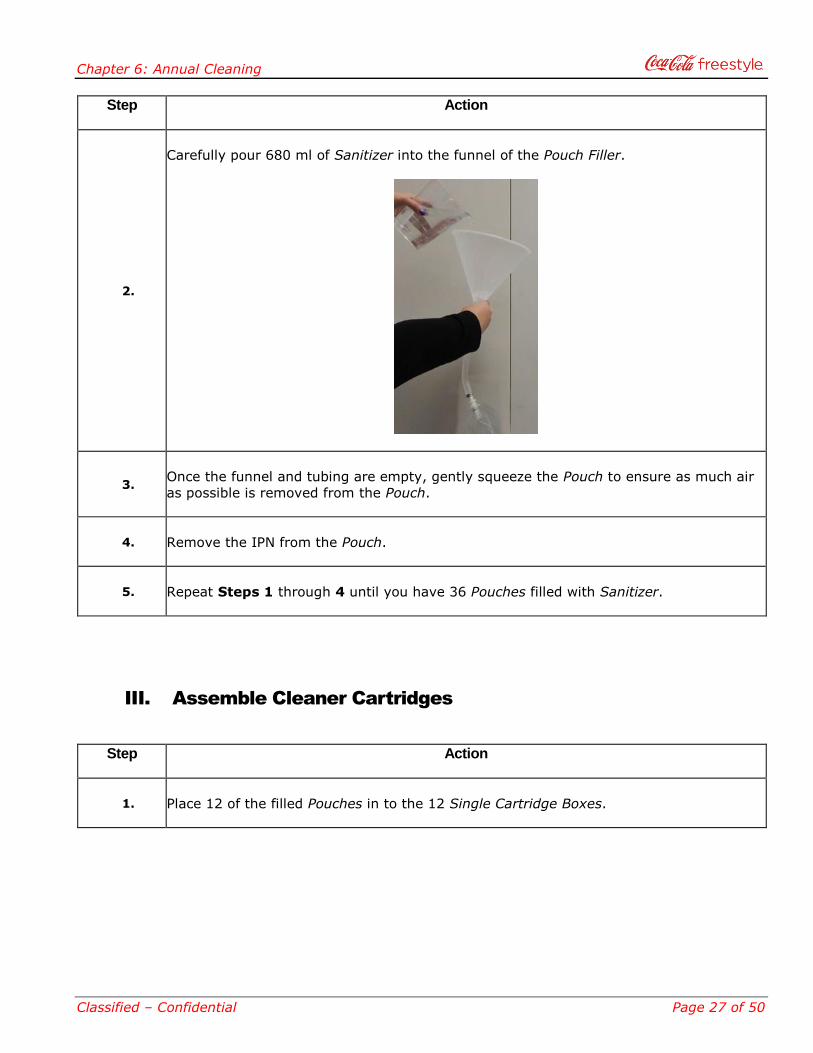
2.
Carefully pour 680 ml of Sanitizer into the funnel of the Pouch Filler.
3.
Once the funnel and tubing are empty, gently squeeze the Pouch to ensure as much air
as possible is removed from the Pouch.
4.
Remove the IPN from the Pouch.
5.
Repeat Steps 1 through 4 until you have 36 Pouches filled with Sanitizer.
III. Assemble Cleaner Cartridges
Step Action
1.
Place 12 of the filled Pouches in to the 12 Single Cartridge Boxes.
Chapter 6: Annual Cleaning
Classified – Confidential Page 28 of 50
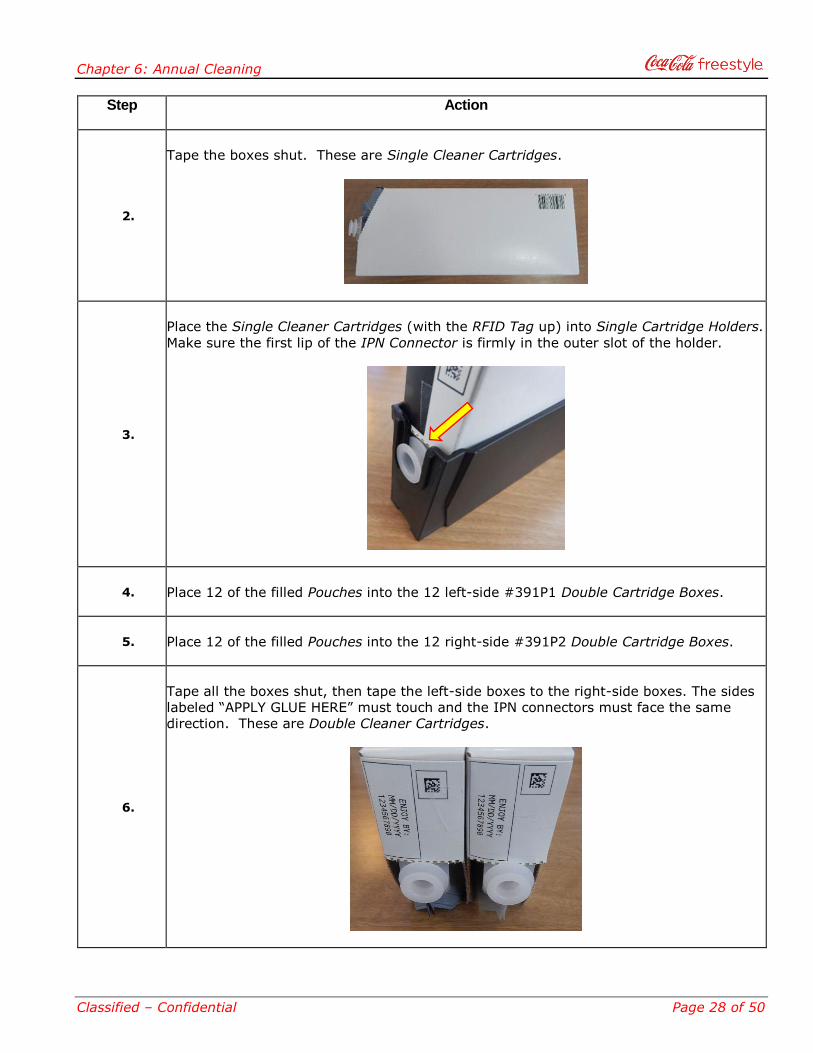
Step Action
2.
Tape the boxes shut. These are Single Cleaner Cartridges.
3.
Place the Single Cleaner Cartridges (with the RFID Tag up) into Single Cartridge Holders.
Make sure the first lip of the IPN Connector is firmly in the outer slot of the holder.
4.
Place 12 of the filled Pouches into the 12 left-side #391P1 Double Cartridge Boxes.
5.
Place 12 of the filled Pouches into the 12 right-side #391P2 Double Cartridge Boxes.
6.
Tape all the boxes shut, then tape the left-side boxes to the right-side boxes. The sides
labeled “APPLY GLUE HERE” must touch and the IPN connectors must face the same
direction. These are Double Cleaner Cartridges.

Chapter 6: Annual Cleaning
Classified – Confidential Page 29 of 50
Step Action
7.
Place the Double Cleaner Cartridges into the 12 Double Cartridge Holders with the RFID
Tag up. Make sure the first lip of the IPN Connectors are firmly in the outer slots of the
holders.
IV. Assemble Flush Adapters and Tubing
Step Action
1.
Affix a 3/8” Tubing to each Flush Adapter. Push the Tubing as far onto the Adapter as
possible.
2.
Use the Oetiker Tool to secure the Tubing to the Adapters with 1 Oetiker Clamp for each
assembly. Do not over-tighten the Oetiker Clamp.

Chapter 6: Annual Cleaning
Classified – Confidential Page 30 of 50
V. Prepare the HFCS Line
Step Action
1.
Verify the CO2 Supply is on.
2.
Prepare Sanitizer in a Bucket as describe in Section I: Prepare Sanitizer.
Note: Prepare 5 gallons plus 1 gallon for every 100 feet over 200 feet of line from the
Backroom.
3.
Disconnect the green HFCS Connector from the BiB of HFCS and clean it with a Parts
Brush and Sanitizer.
4.
Allow it to soak in Sanitizer for 2 minutes.
5.
Connect the Flush Adapter and Tubing you assembled earlier to the green HFCS
Connector.
6.
Insert the open end of the Tubing into the Bucket of Sanitizer.
VI. Fill the HFCS Line with Sanitizer
Step Action
1.
Log in as Technician.

Chapter 6: Annual Cleaning
Classified – Confidential Page 31 of 50
Step Action
2.
Open the Upper Door and locate the HFCS FCM on the left side.
3.
Fill the HFCS circuit with Sanitizer by turning the yellow lever on the front of the FCM
until Sanitizer flows from the nozzle. Use a High Range Chlorine Test Strip to verify the
presence of Sanitizer at 100 PPM.
4.
Run at least 64 oz of Sanitizer. Wait 10 minutes
5.
Repeat Step 4 twice for a total of 3 cycles.
6.
Refill the Bucket with Sanitizer to the 5 gallon mark as required. Prepare Sanitizer in a
Bucket as describe in Section I: Prepare Sanitizer.

Chapter 6: Annual Cleaning
Classified – Confidential Page 32 of 50
VII. Clean the NNS Connectors and Surfaces
Step Action
1.
Remove the NNS BiB and set it aside. Ensure the connector on the BiB does not touch
the floor or any other surface.
2.
Remove the Locking Collar from the tray by pressing in the tab on the back, twisting
clockwise, and pulling up.
3.
Clean the Tray Connector with a clean cloth dipped in Sanitizer until the cloth comes
away clean.
4.
Wash the Locking Collar in a sink with Detergent Cleanser. Rinse thoroughly with warm
water.
5.
Soak the Locking Collar in Sanitizer for 2 minutes, then place it on a sanitary surface to
dry.

Chapter 6: Annual Cleaning
Classified – Confidential Page 33 of 50
VIII. Connect Sanitizer to the NNS Circuit
Step Action
1.
Push the Flush Adapter and Tubing over the BiB Connector in the NNS Tray. This is a
friction fit only.
2.
Prime the Tubing by holding the open end up and carefully filling the Tubing with
Sanitizer.
3.
When the entire length of Tubing is full (with no air pockets), hold your thumb over the
end of the Tubing so no Sanitizer escapes, and submerge the open end in a Bucket of
Sanitizer.
Note: You should now have 2 Buckets with approximately 5 gallons of Sanitizer each.
One Bucket holds the HFCS Line, the other holds the NNS Line.
Chapter 6: Annual Cleaning
Classified – Confidential Page 34 of 50
IX. Prepare the Microdose Subsystem
Step Action
1.
Remove all Product Cartridges from the dispenser.
2.
Clean all the IPN connectors with a clean Cloth dipped in Sanitizer until the Cloth comes
away clean.
3.
Clean all interior surfaces of the product cartridge area with a clean Cloth dipped in
Sanitizer. Wait 5 minutes.
4.
Insert Cleaner Cartridges in Holders in all slots.
X. Run the Sanitization Process
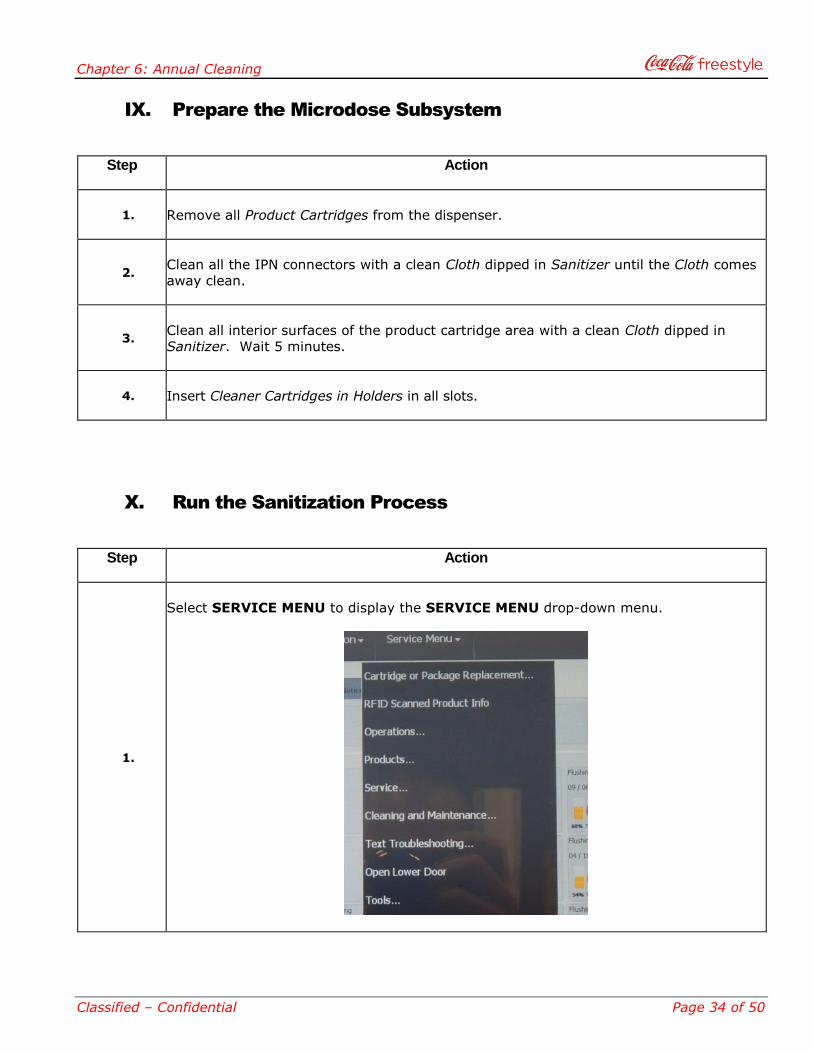
Step Action
1.
Select SERVICE MENU to display the SERVICE MENU drop-down menu.

Chapter 6: Annual Cleaning
Classified – Confidential Page 35 of 50
Step Action
2.
Select TOOLS to display the TOOLS menu.
3.
Select SANITIZATION to display the JET SANITIZER window.
4.
Select. “--Yes-- Launch the Sanitizer Utility” to display the JET SANITIZER screen.
5.
Select the START button. The cleaning process takes approximately 30 minutes.
Note: You may see a SIGNIFICANT PUMP ACTIVITY DETECTED window display. Disregard this message. Press the OK button to continue.
Chapter 6: Annual Cleaning
Classified – Confidential Page 36 of 50
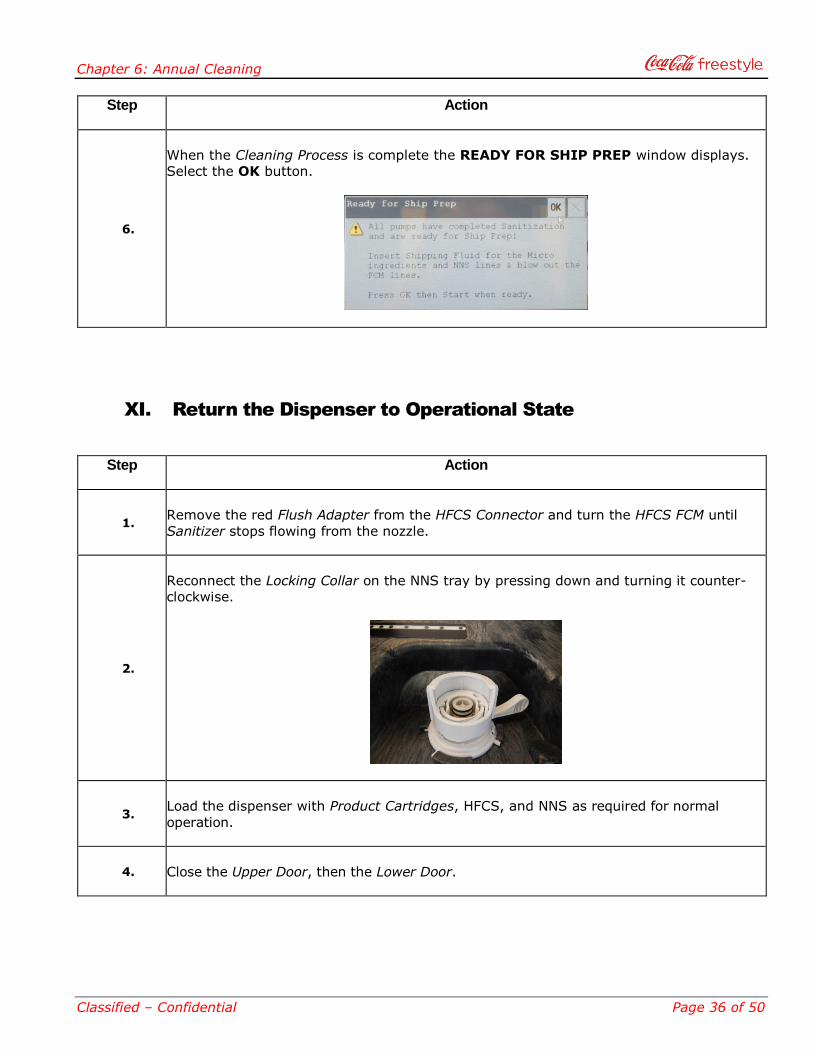
Step Action
6.
When the Cleaning Process is complete the READY FOR SHIP PREP window displays.
Select the OK button.
XI. Return the Dispenser to Operational State
Step Action
1.
Remove the red Flush Adapter from the HFCS Connector and turn the HFCS FCM until
Sanitizer stops flowing from the nozzle.
2.
Reconnect the Locking Collar on the NNS tray by pressing down and turning it counter-
clockwise.
3.
Load the dispenser with Product Cartridges, HFCS, and NNS as required for normal
operation.
4.
Close the Upper Door, then the Lower Door.

Chapter 6: Annual Cleaning
Classified – Confidential Page 37 of 50
Step Action
5.
Select the LAUNCH JET SETUP option then select the GO button.
6.
Select the START button and allow the DISPENSER STARTUP process to run. This
purges all Sanitizer and prepares the dispenser for normal operation.
7.
When the STARTUP process completes, return the dispenser to the normal consumer
dispensing screen.
8.
Perform all the steps in Chapter 3: Daily Cleaning.

Chapter 7: Water Circuit Cleaning
Classified – Confidential Page 38 of 50
Water Circuit Cleaning
CLEANING PROCESS TO BE COMPLETED FOLLOWING A BOIL WATER ALERT
This process is applicable to both the Coca-Cola Freestyle® 8000 and Coca-Cola Freestyle® 9000 dispenser.
Equipment Required
Equipment Required
5 Gallon Bucket with Gradations (Coca-
Cola Part #: 143317 recommended)
Kay 5 Sanitizer, 2 1-oz packets
(Coca-Cola Part #: 25823)
Low Range Chlorine Test Strips
Hose Cutting Tool
Chapter
6
Chapter 7: Water Circuit Cleaning
Classified – Confidential Page 39 of 50
Cleaning Procedure
I. Prepare Sanitizer
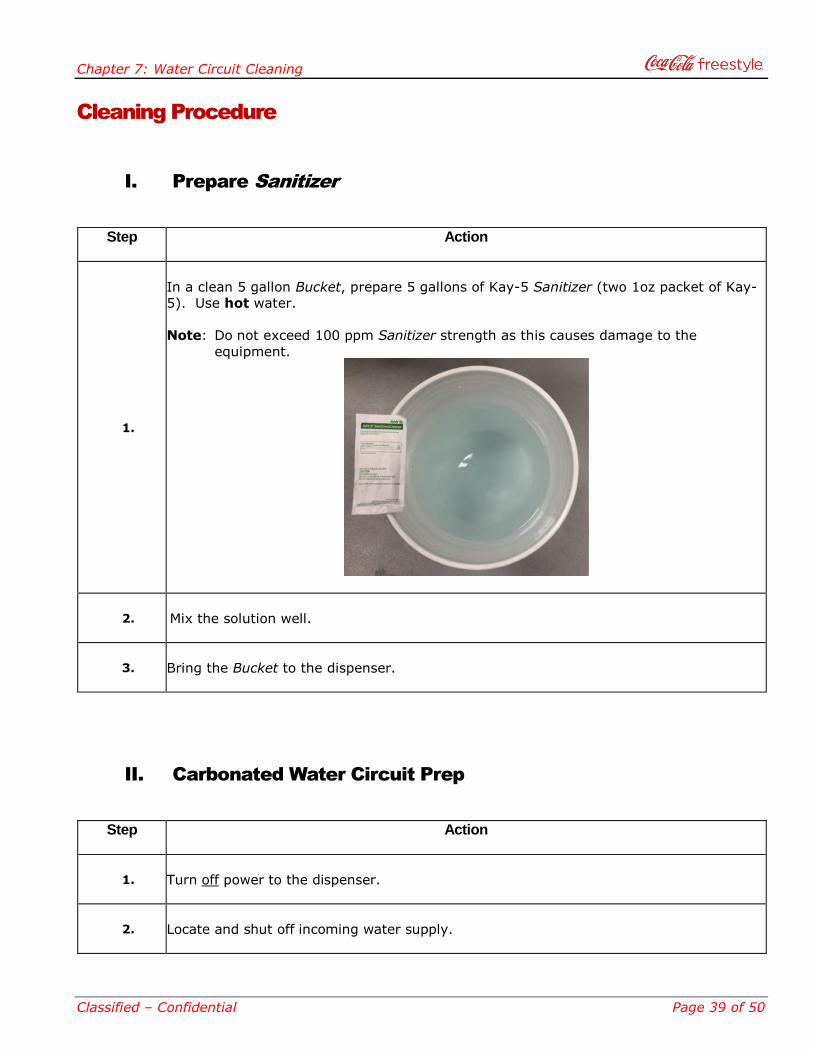
Step Action
1.
In a clean 5 gallon Bucket, prepare 5 gallons of Kay-5 Sanitizer (two 1oz packet of Kay-
5). Use hot water.
Note: Do not exceed 100 ppm Sanitizer strength as this causes damage to the
equipment.
2.
Mix the solution well.
3.
Bring the Bucket to the dispenser.
II. Carbonated Water Circuit Prep
Step Action
1.
Turn off power to the dispenser.
2.
Locate and shut off incoming water supply.

Chapter 7: Water Circuit Cleaning
Classified – Confidential Page 40 of 50
Step Action
3.
Use a Hose Cutting Tool to cut the water supply line to the dispenser.
4.
Place the end of the water line into the Bucket of Sanitizer.
5.
Turn off the plain water line inside the dispenser utilizing the ball valve on the Legacy
Module.
III. Remove Carbonated Water from the System
Step Action
1.
Turn off power to the dispenser.
2.
Locate and shut off incoming water supply.
3.
Cut the water supply line to the dispenser.
4.
Place the end of the water line into the Bucket of Sanitizer.
5.
Turn off the plain water line inside the dispenser utilizing the ball valve on the Legacy
Module.
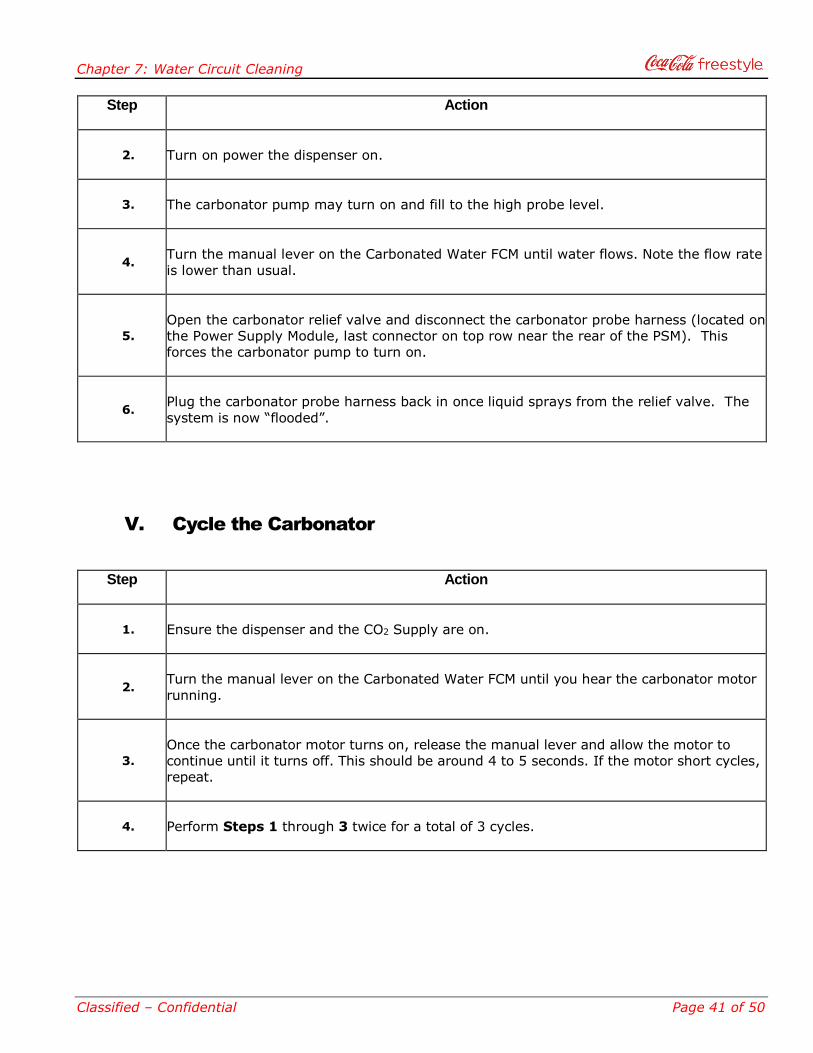
IV. Remove CO2 from the System
Step Action
1.
Turn the CO2 Supply off to the dispenser.
Chapter 7: Water Circuit Cleaning
Classified – Confidential Page 41 of 50
Step Action
2.
Turn on power the dispenser on.
3.
The carbonator pump may turn on and fill to the high probe level.
4.
Turn the manual lever on the Carbonated Water FCM until water flows. Note the flow rate
is lower than usual.
5.
Open the carbonator relief valve and disconnect the carbonator probe harness (located on
the Power Supply Module, last connector on top row near the rear of the PSM). This
forces the carbonator pump to turn on.
6.
Plug the carbonator probe harness back in once liquid sprays from the relief valve. The
system is now “flooded”.
V. Cycle the Carbonator
Step Action
1.
Ensure the dispenser and the CO2 Supply are on.
2.
Turn the manual lever on the Carbonated Water FCM until you hear the carbonator motor
running.
3.
Once the carbonator motor turns on, release the manual lever and allow the motor to
continue until it turns off. This should be around 4 to 5 seconds. If the motor short cycles,
repeat.
4.
Perform Steps 1 through 3 twice for a total of 3 cycles.

Chapter 7: Water Circuit Cleaning
Classified – Confidential Page 42 of 50
VI. Repeat “Remove and Cycle” Processes
Step Action
1.
Perform all the steps in Sections III and IV. Wait 10 minutes.
2.
Perform all the steps in Sections III through V.
3.
Perform Step 1 of this section.
4.
Perform Step 2 of this section.
5.
Perform Step 1 of this section.
Note: This process takes approximately 45 minutes.
VII. Flush the Sanitizer
Step Action
1.
Reconnect the water source to the main water supply line.
2.
Perform all the steps in Sections III and IV.
3.
Repeat Step 2 of this section until all residual Sanitizer is gone. Use a Low Range
Chlorine Test Strip to verify the presence of Sanitizer is less than 4 PPM.

Chapter 7: Water Circuit Cleaning
Classified – Confidential Page 43 of 50
VIII. Empty the Water Booster
Step Action
1.
Locate and shut off the incoming water supply.
2.
Close the Carbonated water supply line with the ball valve on the Legacy Module.
3.
Place a Bucket under the Water Valve of the Water Booster and hold the valve open.
4.
When water stops flowing from the valve, release the Water Valve.
IX. Clean the Water Circuit
Step Action
1.
Cut the water supply line to the Water Booster.

Chapter 7: Water Circuit Cleaning
Classified – Confidential Page 44 of 50
Step Action
2.
Fill the Bucket with 5 gallons of Sanitizer and place the end of the line-in to the Water
Booster in the Bucket of Sanitizer.
Note: The Bucket must be at the same height as the Water Booster or slightly higher.
3.
Turn the manual lever on the Plain Water FCM (on the right side of dispenser closest to
the wall) and hold it until Sanitizer flows from the Nozzle.
4.
Run 64 oz of Sanitizer. Wait 10 minutes.
5.
Perform Step 4 twice for a total of 3 cycles.
X. Flush the Water Circuit
Step Action
1.
Remove the Water Booster in-line from the Bucket of Sanitizer.
2.
Place a Bucket under the Water Valve of the Water Booster and hold the valve open.
Sanitizer empties from the Water Booster Tank.

Chapter 7: Water Circuit Cleaning
Classified – Confidential Page 45 of 50
Step Action
3.
When Sanitizer stops flowing from the Water Booster Tank, re-connect the Water
Booster in-line to the water source.
4.
Turn the water source on.
5.
Turn the manual lever on the Plain Water FCM and hold it for 60 seconds.
6.
Repeat Step 5 of this section until Sanitizer is no longer detectable. Use a Low Range
Chlorine Test Strip to verify the presence of Sanitizer is less than 4 PPM.
7.
Turn on the carbonated water supply line utilizing the ball valve on the Legacy Module.

Appendix: Glossary
Classified – Confidential Page 46 of 50
Glossary
GLOSSARY OF TERMS
-A- -B-
Boil Water Alert: a public health advisory given by government or health authorities to
consumers when a community's drinking water is, or could be, contaminated by pathogens.
-C-
Cartridge Box: a cardboard box used to hold microdose ingredient Pouches. Cartridge Boxes come in 2 sizes, Single and Double. Double Cartridge Boxes are slight larger than
Singles, and 2 must be glued or taped together before being inserted into a Double Cartridge Holder.
Cartridge Holder: a plastic tray that holds Cartridge Boxes. Cartridge Holders come in 2 sizes, Single and Double. Double Cartridge Holders hold 2 Double Cartridge Boxes.
CCFS 8000: project name for the Gulfstream crew-served dispenser: Coca-Cola
Freestyle® 8000
CCFS 9000: project name for the Gulfstream self-serve dispenser: Coca-Cola Freestyle®
8000
Cleaner Cartridge: a Cartridge Box containing a Pouch of Sanitizer and labeled with an RFID Tag reading “Sanitizer”.
-D-
Door, Lower: the door used to access the lower half of the inside of the dispenser
(ingredients shelves). The Lower Door must be opened before opening the Upper Door.
Door, Upper: the door used to access the upper half of the inside of the dispenser. The Lower Door must be opened before opening the Upper Door.
Dispense Lever: a protruding metal piece inside the Ellipse that, when depressed after a drink selection is made, dispenses a volume of the selected beverage
Drip Tray: the tray under the Cup Rest intended to catch drips, spills, and excess ice from the Ellipse area.
Appendix
A

Appendix: Glossary
Classified – Confidential Page 47 of 50
-E-
Ellipse: the recessed area at the front of the dispenser where beverages are dispensed.
It contains the Nozzle, Dispensing Lever, Ice Lever, Cup Rest, and Drip Tray.
-F-
Flow Control Module (FCM): the
-G- -H-
HFCS Line: the tubing that leads from the HFCS BiB in the Backroom to the Nozzle.
High Fructose Corn Syrup (HFCS): the general sweetener used as a macro-ingredient in all carbonated beverages; on the contrary, Non-Nutritive Sweetener (NNS) is typically
used as the sweetener macro-ingredient within diet beverages.
-I-
Ice Lever: a protruding metal piece inside the Ellipse of the CCFS 9000 that dispenses ice
as long as the lever is depressed (not present on the CCFS 8000)
-J- -K- -L- -M-
Macro-ingredients: fluid ingredients that generally make up larger than 10% of a given Coca-Cola beverage; Plain Water, Soda (Carbonated) Water, and Sweetener are all considered macro-ingredients for Coca-Cola products; macro-ingredients are also
generally stored externally to the dispenser
Microdose: fluid ingredients that generally make up less than 10% of a given Coca-Cola
beverage and are exclusive to Freestyle; brand components and flavor ingredients are considered micro-ingredients for Coca-Cola products.
-N-
NNS (Non-Nutritive Sweetener): the macro-ingredient sweetener used in diet beverages such as Diet Coke.
Nozzle Assembly: the component within the dispense tower that connects to the ingredient lines to facilitate the dispensation and mixing of fluid ingredients; macro-
ingredients travel down the center of the nozzle and create a uniform stream, while micro-ingredients are “shot” into the stream at a specified target to enable the mixing of the beverage with the required ingredient accuracy
NNS Line: the tubing that leads from the NNS BiB in the NNS Compartment to the Nozzle.
Nozzle Ring (Lower): the part of the Nozzle Assembly surrounding the Nozzle Tip
Nozzle Tip: a removable part of the Nozzle Assembly where water, sweetener, and ingredients meet before flowing into the customer’s cup
Appendix: Glossary
Classified – Confidential Page 48 of 50
-O- -P-
Pouch: a plastic pouch that holds Microdose Ingredients or Sanitizer. A Pouch must be in
a Cartridge Box with a valid RFID Tag before use.
Priming: the process of introducing fluid into a pump to improve the sealing of the pump
parts upon startup as well as to expel air from the pump/ingredient line
-Q- -R-
RFID Tag: a Radio Frequency Identification Tag on a Cartridge Box that tells the
dispenser the contents of the cartridge.
RFID Tag Window: the opening in the top of a Cartridge Holder that exposes the RFID
Tag on the Cartridge Box
-S-
Sanitizer: a substance or preparation for killing germs, designed for use especially on
food-processing or dispensing equipment. The Coca-Cola Company recommends Kay-5 brand (Coca-Cola Part #: 25823) for cleaning the CCFS 8000 and CCFS 9000 dispensers.
Spider: a device inside a Drip Tray drain that allows liquids to pass through while stopping most solids.
Splash Plate: the metal plate located behind the Dispense Lever in the Ellipse that
protects the dispenser from any “splashes” that may result from dispensing a beverage
Sweetener: a macro fluid ingredient that is used as a main component within beverages
to sweeten the drink
-T- -U-
User Interface: the touch screen above the Ellipse used to access the computer-controlled functions of the dispenser (dispensing beverages, sanitization functions, etc.)
-V- -W-
Water Circuit: the path through the dispensers tubing through which water may flow. It includes the plain water line, the carbonation tank, the carbonated water line, and the
Nozzle.
-X- -Y- -Z-
Appendix: Index
Classified – Confidential Page 49 of 50
Index
INDEX FOR THE COCA-COLA FREESTYLE® 8000 / 9000 CLEANING MANUAL
3/8” Tubing, 24, 28
Annual Cleaning, 22
BiB Connector, 33
boil water alert, 38
Cartridge Box, 24, 26, 27
Cartridge Holders, 24, 27, 28
Cleaner Cartridge Refill Kit, 23
Cleaner Cartridges, ii, 25, 26, 27, 28, 34
Cleaning Procedure, 6, 11, 17, 25, 39
CO2 Supply, 29, 41, 42
Coca-Cola Freestyle® 8000, 1, 2, 4, 10, 16, 20, 21, 22, 38
Coca-Cola Freestyle® 9000, 1, 2, 4, 13, 14, 15, 18, 19, 22,
38
Cup Rest, 7, 8
Daily Cleaning, 4, 37
DISPENSER STARTUP, 37
Drip Tray, 7, 9, 48, 49
Ellipse, 9
Equipment Required, 4, 10, 16, 22, 38
FCM, 30, 31, 36, 41, 42, 45, 46
Flush Adapter, 23, 28, 30, 33, 36
HFCS Bag in Box, 2
HFCS Line, 29, 30, 33
High Range Chlorine Test Strip, 23, 31
Hose Cutting Tool, 39, 40
Ice Bin, 18, 19, 20, 21
Ice Chute, 11, 13, 14, 15
Ice Chute Assembly, 13
Ice Lever, 9
IPN connector, 2
JET SANITIZER screen, 35
JET SANITIZER window, 35
LAUNCH JET SETUP, 37
Locking Collar, 32, 36
Low Range Chlorine Test Strips, 39
Lower Chute, 14
Monthly Cleaning, 16
NNS Bag in Box, 2
NNS BiB, 12, 13, 31
NNS Compartment, 12
NNS Connector, 13, 31
NNS Tray, 33
Nozzle Lower Ring, 9
Nozzle Tip, 7, 8, 9
Oetiker Clamp, 23, 29
Oetiker Tool, 24, 29
Parts Brush, 5, 8, 10, 14, 16, 19, 21, 22, 29
Personal Protective Equipment (PPE), 1
Prepare Sanitizer, 6, 11, 17, 25, 29, 31, 39
Product Cartridge, 2, 34, 36
READY FOR SHIP PREP, 36
RFID Tag, 27, 47, 49
Safety Data Sheet (SDS), 1
SERVICE MENU, 34
SIGNIFICANT PUMP ACTIVITY DETECTED, 36
Spider, 7, 8, 9, 20, 21, 49
TOOLS menu, 35
Tray Connector, 32
Upper Chute, 14
Upper Door, 9, 30, 37
User Interface, 9
Water Booster, 44, 45, 46
Water Circuit Cleaning, 38
Weekly Cleaning, 10
Appendix
B