collaborative project management guide · 2016-08-30 · collaborative project management guide:...
TRANSCRIPT

Collaborative Project Management Guide

Table of Contents
1 Introduction ...................................................................................................................................................................................................................................... 3
1.1 Intention of the Guide ................................................................................................................................................................................................................................................................................................... 4
1.2 Project Management Approach ................................................................................................................................................................................................................................................................................ 5
1.3 The SharePoint Assumption ........................................................................................................................................................................................................................................................................................ 6
2 Initiate the Project ........................................................................................................................................................................................................................... 7
2.1 Get the Project Approved, Sponsored and Resources Allocated ................................................................................................................................................................................................................ 7
2.2 Decide the Project Management Process ............................................................................................................................................................................................................................................................. 8
2.3 Create a Collaborative Project Site ......................................................................................................................................................................................................................................................................... 10
3 Plan and Setup the Project ........................................................................................................................................................................................................... 12
3.1 Plan the Project .............................................................................................................................................................................................................................................................................................................. 12
3.2 Desk Check Project Plan ............................................................................................................................................................................................................................................................................................. 15
3.3 Notify Team of Responsibilities ............................................................................................................................................................................................................................................................................... 15
4 Work on the Project ...................................................................................................................................................................................................................... 17
5 Track and Re-Plan the Project ..................................................................................................................................................................................................... 19
5.1 Check and Understand Project Progress ............................................................................................................................................................................................................................................................. 19
5.2 Find and Manage Exceptions.................................................................................................................................................................................................................................................................................... 22
5.3 Re-Plan the Project ....................................................................................................................................................................................................................................................................................................... 23
6 Close the Project ............................................................................................................................................................................................................................ 26
6.1 Close out the Project site ........................................................................................................................................................................................................................................................................................... 27
6.2 Run Project Post Mortem ........................................................................................................................................................................................................................................................................................... 27
6.3 Capture Project Site Modifications......................................................................................................................................................................................................................................................................... 30
7 Project Management and Leadership Style ............................................................................................................................................................................... 31
8 Collaborative Project Management Sites ................................................................................................................................................................................... 34
9 Recommended Next Steps ........................................................................................................................................................................................................... 35
9.1 Free Project Management Templates ................................................................................................................................................................................................................................................................... 35
9.2 Free Workshop: Manage Across Projects and Portfolios with Ease ......................................................................................................................................................................................................... 35
10 Build Your Own Project Management Approach .................................................................................................................................................................. 36
11 Feedback Welcome .................................................................................................................................................................................................................... 39
Published: October 7, 2013
© BrightWork

Collaborative Project Management Guide: Introduction Page 3 of 39
1 Introduction
BrightWork help many customers implement collaborative project management using Microsoft SharePoint and, as
needed, Microsoft Project. More initiatives than ever are now delivered as collaborative projects. We find that the world
of collaborative project management is fast changing and very challenging.
Many of our customers do have some people formally trained in project management, perhaps with models like the
PMI’s PMBOK, PRINCE2, etc. However, the vast majority of Project Managers today are what a colleague labels P-MBA’s
(Project Managers by Accident). This label describes the reality of what happens to many people in many organizations.
Furthermore project teams are staffed with smart Team Members, many of whom are part qualified to manage the actual
project. Most project Team Members have access to web-based collaboration sites where some—but often not
enough—key project information is housed. This situation can be daunting for new Project Managers when leading a
team of smart peers. It is not to say that these people are not successful or capable; it is, however, to say that they have
not been formally trained. In a lot of cases, organizations just do not have the budget or time.
On top of this, most organizations we work with do not have a defined process or set of standards for new Project
Managers to follow. You might say this does not really matter – and in some cases you are right—but what if an
organization wants to move people around to drive larger projects to success? Some common way of managing projects
would be useful. Similarly, what if an organization has problems delivering projects with these new Project Managers?
Would it not be better to have a project management process to fix than a person to blame!

Collaborative Project Management Guide: Introduction Page 4 of 39
1.1 Intention of the Guide
This guide intends to provide the following:
An easy to follow and simple to use Project Management Guide for Project Managers who are not yet formally
trained in Project Management and who may not yet have the time or budget for training
A summary of the typical stages, steps and sub-steps involved in successfully managing one project collaboratively
with a project team (including the steps for the Team Members)
An overview of a positive Project Management leadership style
A training guide experienced Project Managers may wish adapt for new Project Managers
The objective is not to have this guide replace formal project management training, but rather inspire new Project
Managers to take some training classes to gain a deeper understanding of Project Management principals. We do hope
our advice does not go the same way as that of George Harris.
The Collaborative Project Management Guide comes with a complementary training webcast which walks
through and explains each section of the guide. Watch the training video here.
“I intended to give you some advice but now I remember how much is left over from last year unused”
George Harris (1844-1922), US Churchman and Educator, addressing students at the start of a new academic year

Collaborative Project Management Guide: Introduction Page 5 of 39
1.2 Project Management Approach
In order to successfully manage a project you need an approach—you may choose to call this a process or standard but
we will not get too bureaucratic with terminology in this guide! Our very simple approach to collaborative project
management comprises the following five stages:
The process of re-planning is a constant one since in reality and by necessity project plans do change a lot.
“No plan of operations extends with certainty beyond the first encounter with the enemy's main strength”
Helmuth Karl Bernhard Graf von Moltke (1800 – 1891), Chief of Staff of the Prussian Army and Master Strategist
1. Initiate the Project
2. Plan and setup the
Project
3. Work on the Project
4. Track and re-plan the
Project
5. Close the Project
Collaborative Project Management Guide: Introduction Page 6 of 39
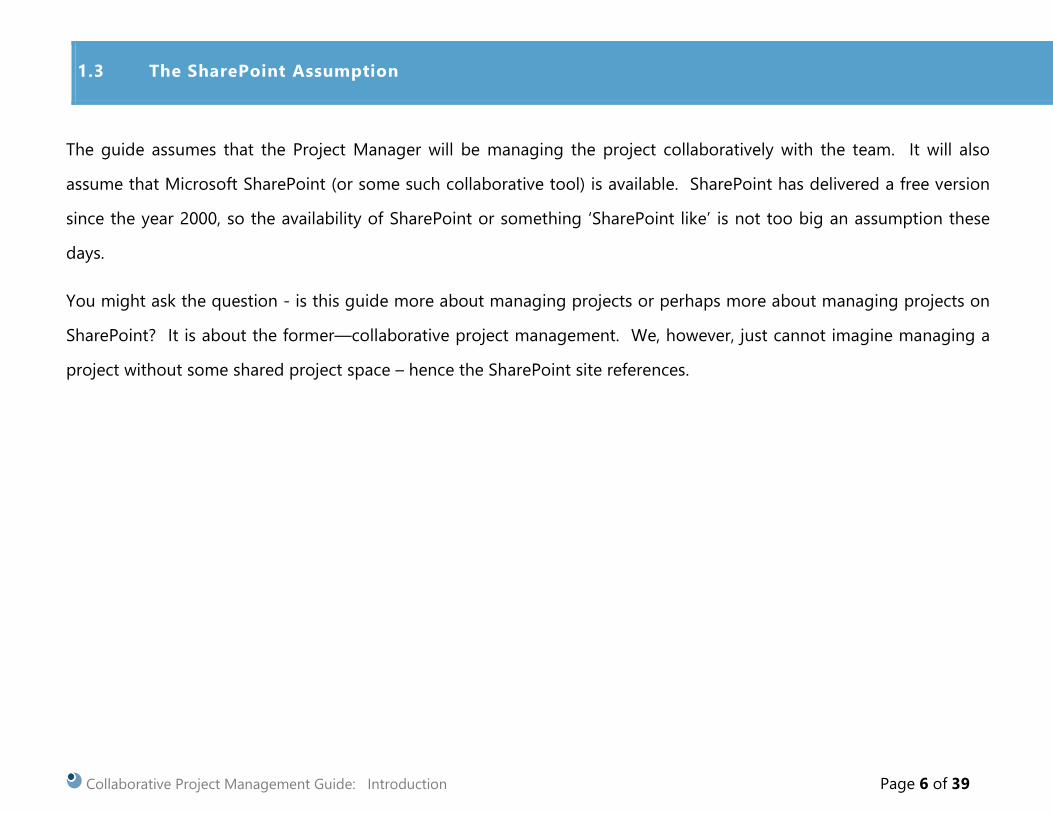
1.3 The SharePoint Assumption
The guide assumes that the Project Manager will be managing the project collaboratively with the team. It will also
assume that Microsoft SharePoint (or some such collaborative tool) is available. SharePoint has delivered a free version
since the year 2000, so the availability of SharePoint or something ‘SharePoint like’ is not too big an assumption these
days.
You might ask the question - is this guide more about managing projects or perhaps more about managing projects on
SharePoint? It is about the former—collaborative project management. We, however, just cannot imagine managing a
project without some shared project space – hence the SharePoint site references.
Collaborative Project Management Guide: Initiate the Project Page 7 of 39
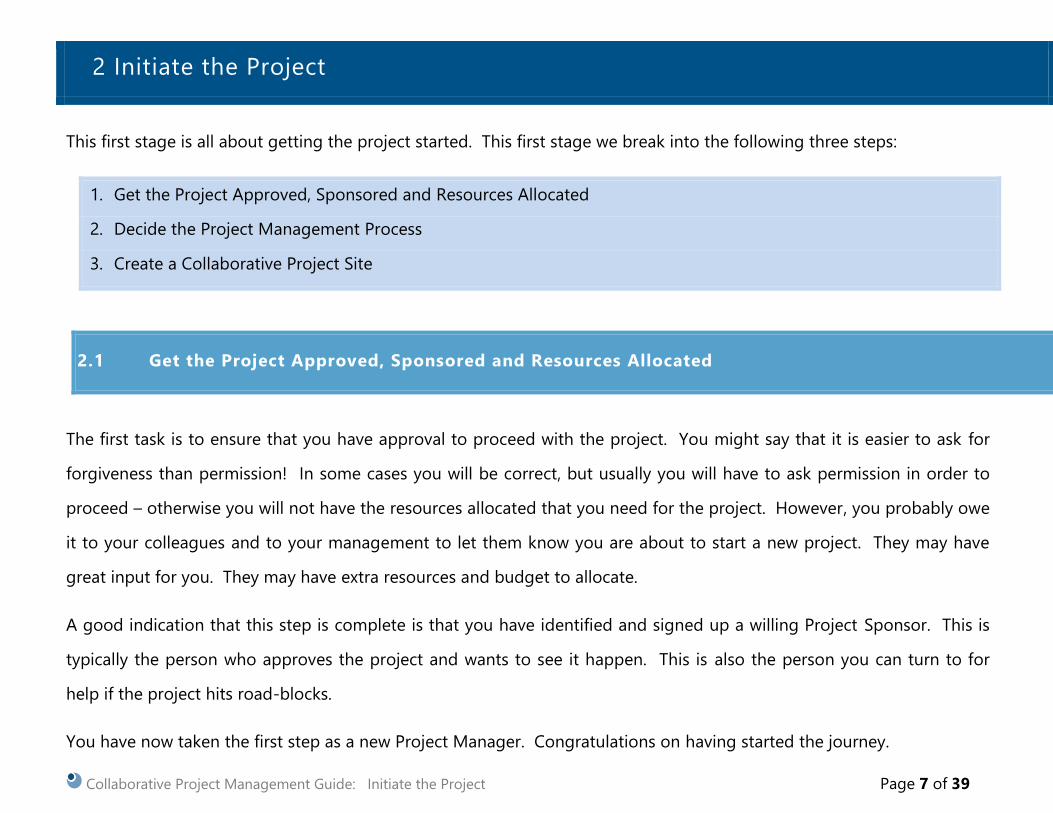
2 Initiate the Project
This first stage is all about getting the project started. This first stage we break into the following three steps:
1. Get the Project Approved, Sponsored and Resources Allocated
2. Decide the Project Management Process
3. Create a Collaborative Project Site
2.1 Get the Project Approved, Sponsored and Resources Allocated
The first task is to ensure that you have approval to proceed with the project. You might say that it is easier to ask for
forgiveness than permission! In some cases you will be correct, but usually you will have to ask permission in order to
proceed – otherwise you will not have the resources allocated that you need for the project. However, you probably owe
it to your colleagues and to your management to let them know you are about to start a new project. They may have
great input for you. They may have extra resources and budget to allocate.
A good indication that this step is complete is that you have identified and signed up a willing Project Sponsor. This is
typically the person who approves the project and wants to see it happen. This is also the person you can turn to for
help if the project hits road-blocks.
You have now taken the first step as a new Project Manager. Congratulations on having started the journey.

Collaborative Project Management Guide: Initiate the Project Page 8 of 39
“A journey of a thousand miles must begin with a single step”
Lao-Tzu (604-531 BC), Chinese Philosopher
2.2 Decide the Project Management Process
As they say—be careful what you ask for, you just might get it! Now you have a project approved and you need to
decide how to manage the project and how much project management rigor you will apply. As depicted in the diagram
below, some projects require a lighter touch and some require much more project management.
Your organization may have guidelines or templates for certain project types, which will make this step easier as you will
be selecting a pre-defined approach and then perhaps tailoring it. This will make your life easier—as long as the local
guidelines are sensible! We have found that sometimes organizations expect way too much project management. In
some of these cases the Project Manager is not experienced enough to utilize this larger amount of project management.
In other cases the amount of project management is just too large for the type of project at hand.
Unstructured
Emails, Phone
Management by Exception
Resolve Issues
Loosely Structured
Manage Projects with
a few elements,
e.g. Project Statement,
Issues, Actions
Semi-Structured
Manage project with
more elements and
a simple lifecycle
Fully Structured
Manage project with a full lifecycle
and with phases and
gates

Collaborative Project Management Guide: Initiate the Project Page 9 of 39
If you do not have local guidance then you can look at this step as selecting from these project management items and
deciding which ones you need for your project and project management processes.
Project Statement / Project Definition / Project
Charter
Formal Work Breakdown Structure
Teams, Roles and Responsibility Definition
Risks
Contacts
Decisions
Goals
Issues
Change Requests Documents / Deliverables
Action / Task list
Meetings—Agenda, Minutes, and Actions
Status Reports
Communications
Processes and Procedures
Lessons Learned
This is not a definitive list of course, but a good one to get you thinking. Here you are deciding what project
management you will sign up for—what you will make transparent to the project team. For example, you might decide to
track issues in a list but not to manage risks formally. However, this does not mean you will not naturally carry out risk
management. You may well consider and take actions to mitigate risks in your own mind but you are not committing to
document or communicate them.

Collaborative Project Management Guide: Initiate the Project Page 10 of 39
2.3 Create a Collaborative Project Site
This guide assumes a collaborative project management approach. It assumes you as a Project Manager, not Project
Dictator. It assumes you want Team Members and stake holders to know what has happened and what needs to
happen, so they are empowered to help you manage the project. This guide also assumes that you want to setup a
collaborative site to share this information. There are so many free collaborative site options available today that this is
no longer a big assumption. We at BrightWork started using Lotus Notes back in 1995 for our projects but moved to
SharePoint in 2000. And as most of you know SharePoint has a free version—Microsoft SharePoint Foundation 2013—so
you have no excuses! Get collaborative in your project management approach!
The site you set up needs to mirror the approach to project management that you will undertake. Below is a table using
some of our BrightWork templates to jumpstart your ideas. For example, on the far left you are managing a project by
merely tracking the project’s problems or issues. On the far right, you are managing everything that you can think of!
You can start out with one approach at the outset and later modify as project needs dictate.

Collaborative Project Management Guide: Initiate the Project Page 11 of 39
Management By Exception Loosely Structured Semi-Structured Fully Structured
Issue Manager Project Lite Project Standard Project Structured

Collaborative Project Management Guide: Plan and Setup the Project Page 12 of 39
3 Plan and Setup the Project
At this stage your project is approved and you have decided how to manage the project, or at least you have an outline
approach. Hopefully you have a collaborative site set up. Now it is time to earn your stripes and plan and set up your
project. For the purpose of this short guide we break this second stage into the following steps:
1. Plan the Project
2. Desk Check the Project Plan
3. Notify the Team of their Responsibilities
“In all things, success depends upon previous preparation, and without such preparation there is sure to be failure”
Confucius (c550 – c478 BC) Chinese Philosopher
3.1 Plan the Project
The thinking in this guide is that at a minimum you will need a Project Definition/Statement and a Task List (of some sort)
on most projects. What additional artifacts you will use should have been decided in the Initiation Stage of the project
(unless you skipped that stage!).
Collaborative Project Management Guide: Plan and Setup the Project Page 13 of 39
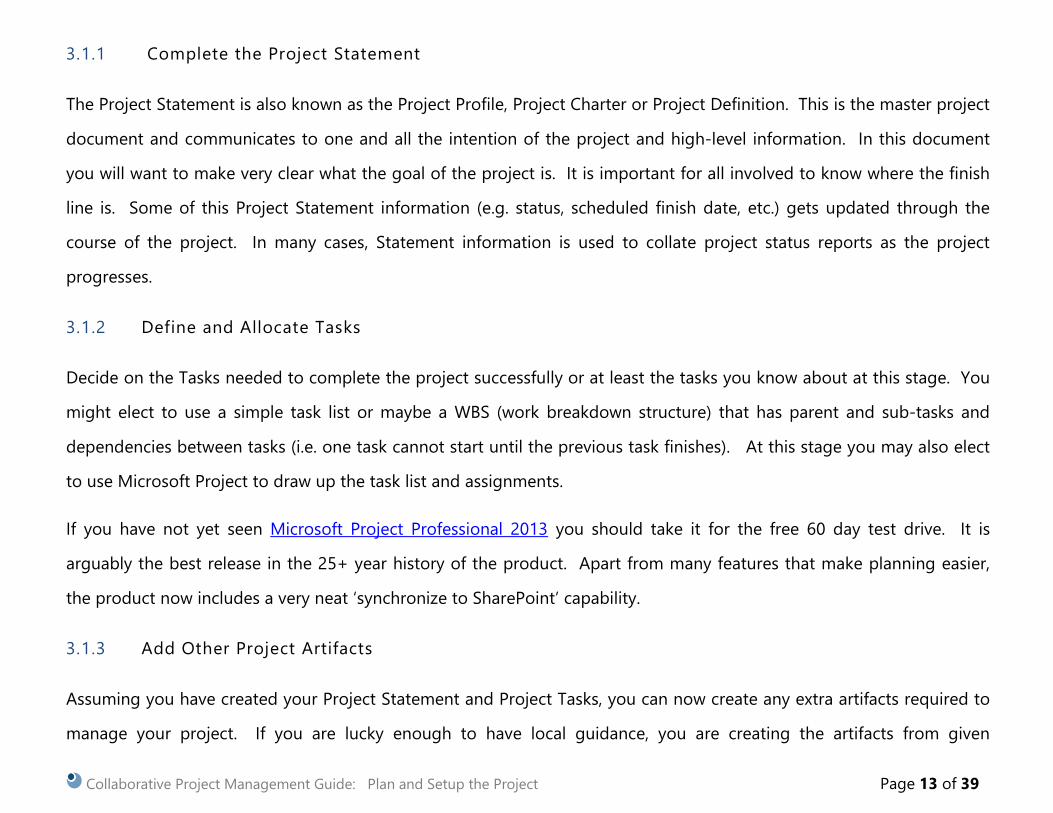
3.1.1 Complete the Project Statement
The Project Statement is also known as the Project Profile, Project Charter or Project Definition. This is the master project
document and communicates to one and all the intention of the project and high-level information. In this document
you will want to make very clear what the goal of the project is. It is important for all involved to know where the finish
line is. Some of this Project Statement information (e.g. status, scheduled finish date, etc.) gets updated through the
course of the project. In many cases, Statement information is used to collate project status reports as the project
progresses.
3.1.2 Define and Allocate Tasks
Decide on the Tasks needed to complete the project successfully or at least the tasks you know about at this stage. You
might elect to use a simple task list or maybe a WBS (work breakdown structure) that has parent and sub-tasks and
dependencies between tasks (i.e. one task cannot start until the previous task finishes). At this stage you may also elect
to use Microsoft Project to draw up the task list and assignments.
If you have not yet seen Microsoft Project Professional 2013 you should take it for the free 60 day test drive. It is
arguably the best release in the 25+ year history of the product. Apart from many features that make planning easier,
the product now includes a very neat ‘synchronize to SharePoint’ capability.
3.1.3 Add Other Project Artifacts
Assuming you have created your Project Statement and Project Tasks, you can now create any extra artifacts required to
manage your project. If you are lucky enough to have local guidance, you are creating the artifacts from given

Collaborative Project Management Guide: Plan and Setup the Project Page 14 of 39
templates. If you are really lucky, you are creating the artifacts using templates given in your collaborative site.
Candidate artifacts include goals, documents, issues, risks, etc. In essence these are the project management sub-
processes for your project.
3.1.4 Assign the Work
Some Project Managers tend to do more work on the project than they need to and often find it difficult to delegate.
Given that we are talking about collaborative project management, it is important to remember that the project work can
and should be delegated.
“The way to get things done is not to mind who gets the credit for doing them” Benjamin Jowett (1817 – 1893) English scholar, essayist and priest
If your project is simple and your project team is small and you just know who is free and not free, then you could have
assigned the tasks and artifacts to your Team Members as you created them.
Some organizations have a more formal definition of roles in use and in this case you will likely have assigned a generic
role to a task or artifact in the two steps above. In this step you will now need to assign a person in place of these
generic roles. This can be a quick way to setup a project, where a project site comes with a list of tasks and artifacts that
have generic roles pre-assigned. In this case all you need to do is assign the person to the role.
In other cases where the organization is very large and people are committed to many projects you will not know who is
free. In this scenario you will need to draft your plan to see who you need when. Then you will need to check resource
availability before you can make an assignment. In certain organizations you will even need to formally request
resources.

Collaborative Project Management Guide: Plan and Setup the Project Page 15 of 39
You might also want to check the resource loading and find and fix any over allocations due to the new work
assignments you have just made.
3.2 Desk Check Project Plan
By this stage your project should be well planned but it is no harm to have a step where you stand back and review it
thoroughly. Now that you have created lots of tasks and artifacts, you should look at the entire project in a Gantt (time
sequenced) chart; you may see adjustments it makes sense to make before the plan goes live.
It is also a good idea to have some of your colleagues peer review your plan.
“If you would hit the mark, you must aim a little above it; every arrow that flies feels the attraction of earth”
Henry Wadsworth Longfellow (1807 - 1882), US poet and writer
3.3 Notify Team of Responsibilities
It is all very well to plan a project in detail but you will need to let team members know the plan for success. The more
high quality communication on your project the better the chance your plan for success will come true. Project Team
Members are very smart and capable—so empower them by letting them know what is going on. Some mechanisms to
do this include:

Collaborative Project Management Guide: Plan and Setup the Project Page 16 of 39
Host a Project Kick-Off Meeting where you introduce Team Members to the project and walk them through the
project site
Enable your collaborative site to automatically notify all new work assignments via email
Set up an easy to find “My Work” reports or dashboards on your collaborative site
Setup scheduled emails with nudges for upcoming or late work
For example, early Monday mornings send an email of the work due for the week and then on Thursday morning
send another email with work still open and due this week

Collaborative Project Management Guide: Work on the Project Page 17 of 39
4 Work on the Project
Your project has now started and everybody (hopefully!) knows what they are meant to do. In a collaborative project you
as the Project Manager are essentially asking the team members for three commitments as follows:
1. Find work
Using one of the many notifications cited in the last stage (e.g. My Work reports, automated emails, etc.), find your
work so you know what you are committed to doing for the project.
2. Do work
Naturally enough—go do the work! In many cases the actual work products (e.g. a proposal or design) can be
created and updated in the collaborative project site.
3. Update progress on work (recording any issues)
Use the datasheets or forms provided in the collaborative site to record your progress on what is done or in
progress and use the project site to record any issues that need attention

Collaborative Project Management Guide: Work on the Project Page 18 of 39
It is very likely that the Team Members on your projects will be involved in more than one project and will have other
work responsibilities and as such will find it difficult to keep up with all the deadlines. In fact do not be surprised if some
of them are so focused on work, that they are not too worried about deadlines.
“I love deadlines. I like the whooshing sound they make as they fly by”
Douglas Adams (1952-2001) English Humorist
As the Project Manager you will want to ensure that team members understand their responsibilities. Using this simple
3-step explanation (Find Work, Do Work, Update Work) is an easy way to communicate expectations. Making this
expectation clear is something you may wish to do at the Project Kick-Off meeting. You will probably also want to give
Team Members a rhythm to follow, for example:
[Monday] Review the latest plan and your personal commitments (via dashboards or automated emails)
[Everyday!] Do lots of work and make great progress!
[Late Thursday] Make a progress update on your tasks and issues in the project site (if not already done)
[Friday at 10am] Weekly Team Meeting for 30 minutes
With some work, and a splash of hope, you can insure that your Team Members are not like Douglas Adams!
Collaborative Project Management Guide: Track and Re-Plan the Project Page 19 of 39
5 Track and Re-Plan the Project
By now the Team are working through their assignments. Some tasks may be ahead of schedule, but almost certainly,
some are falling behind. One thing you can be sure of is that the project is not running exactly to the plan you started
with. That is why it is called a plan! Allied to this, other unanticipated problems or issues may have emerged.
“There is nothing in this world constant, but inconstancy“
Jonathan Swift (1667-1745), Irish poet, essayist and cleric
In this fourth stage we will help you understand the steps needed to track where the project is now at and then to re-
plan and communicate the newly adjusted plan. We suggest you follow these steps:
1. Check and understand the project's progress
2. Find and manage exceptions (e.g. issues, risks and change requests)
3. Re-plan the project
5.1 Check and Understand Project Progress
By fair means or foul you as the Project Manager need to figure where the project is before you re-plan. You need to
know which tasks are ahead of schedule and which tasks are falling behind. Here are three simple ways that you can get
this information:

Collaborative Project Management Guide: Track and Re-Plan the Project Page 20 of 39
5.1.1 Virtual Check
Rather than calling everyone for a status update you should be able to examine the various (project, issue, work,
resource) reports on the collaborative project site you set up. If your Team Members are following the simple guidelines
in Stage 3 of this guide, then you will have plenty of project updates to review from the comfort of your own desk. A
sample set of reports to review in the project site might be:
Home Page to get a quick project overview
Overdue Work
Work by Assigned To
The full Task List (in a Gantt view)
Resource utilization
Issues
Optionally check your own work!
5.1.2 Individual Check
MBWA - Managing by walking about is one of the oldest forms of management. Literally walk about or phone about
and talk to the Team Members and Customers to get their take on the project status.
5.1.3 Team Check
You do not want to have project meetings for the sake of meetings—so you do need to be careful with how these are
run. Here is a sample agenda you as a new Project Manager might consider:

Collaborative Project Management Guide: Track and Re-Plan the Project Page 21 of 39
1. Review, discuss and resolve (in so far as possible) any open issues
Project meetings can easily get derailed and run over time—so it is key to use the "together time" to problem
solve as a team on key issues before the meeting time is used up. Not all issues will be resolved at the project
meeting, but discussing the issues will surface them for further deliberation.
2. Look at upcoming tasks
It is good to look at what is up next. It makes people aware and helps them focus on the essential work upcoming.
While the team is together it is a good time to get the varied inputs of Team Members on key tasks scheduled to
start soon.
3. Look at tasks achieved recently or at least the milestones (Time Permitting)
Most project meetings over-run in our experience! You need to be a really organized facilitator to have meetings
start and finish on time. So if we know that project meetings will over-run we should not start the meeting with
this item, as Team Members will tend to enjoy talking about what was achieved last week, and this may eat most of
the meeting. Consider saving this topic for and extra time you have in the meeting.
While you need not follow ours, it is important to have some sort of a standard agenda or meetings will not be efficient
or effective. You want meetings to be both, for your own sake as a Project Manager, but also so that the meetings give
energy to—not take energy from –your Team Members.
“There are only two qualities in the world: efficiency and inefficiency; and only two sorts of people: the efficient and the inefficient”
George Bernard Shaw (1856-1950), Irish writer, dramatist and critic.

Collaborative Project Management Guide: Track and Re-Plan the Project Page 22 of 39
5.2 Find and Manage Exceptions
Now you know where the project is at but you are not ready to re-plan just yet! You should now check for outstanding
exceptions (e.g. issues, risks and change requests). Exceptions on a project may come in many forms but issues, risks and
change requests are the most common.
You will want to resolve any open issues you can to remove schedule roadblocks; or it could be that the issue’s resolution
update your plan. Similarly, look at open risks and decide if you need a mitigation plan, so the risks do not transpire. In
some cases, what was once a risk is now a reality, and now contingency steps are needed.
You may also need to process project change requests, which often means consulting with team members and possibly
project sponsors to see what course they advise and authorize. Approving a change request will likely impact your
project, so best to know this before you start the re-planning in earnest.
Collaborative Project Management Guide: Track and Re-Plan the Project Page 23 of 39
5.3 Re-Plan the Project
As a new Project Manager, it is important not to be afraid to make adjustments to your project. Some Project Managers
are natural re-planners and do it daily as the project progresses. Other are so busy, re-planning itself needs to be logged
as a task. Styles and personalities come into play here. Some people embrace change and love re-planning and some
decidedly do not! Here are three sub-steps you might consider for the re-plan step—whether you do it as necessary or
at a set time every week.
5.3.1 Re-assign work and Send Notifications
By this stage you now have gathered enough information to re-plan the project. In reality you were probably making
changes as you went along, but now you need to perform the remaining changes before you formally re-publish and re-
communicate the plan. As a new Project Manager it is important not to be afraid to make adjustments.
“Like all weak men he laid an exaggerated stress on not changing one’s mind”
William Somerset Maugham (1874-1965), English writer, dramatist and physician.
Collaborative Project Management Guide: Track and Re-Plan the Project Page 24 of 39
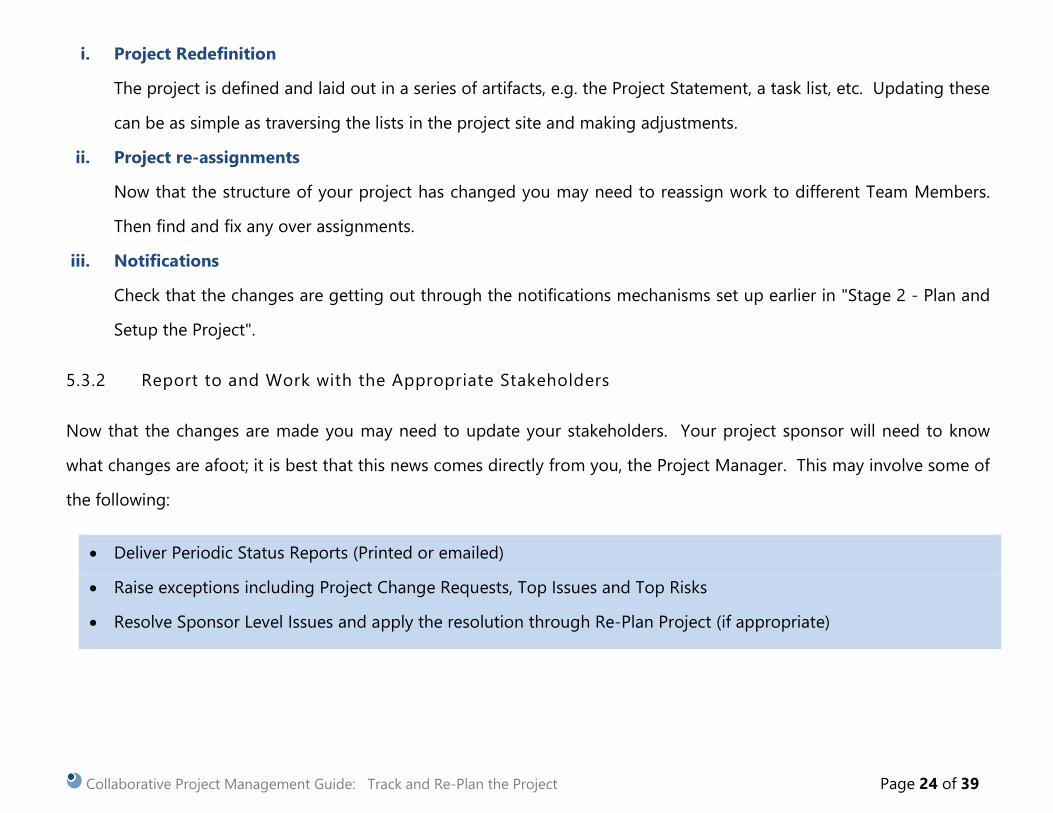
i. Project Redefinition
The project is defined and laid out in a series of artifacts, e.g. the Project Statement, a task list, etc. Updating these
can be as simple as traversing the lists in the project site and making adjustments.
ii. Project re-assignments
Now that the structure of your project has changed you may need to reassign work to different Team Members.
Then find and fix any over assignments.
iii. Notifications
Check that the changes are getting out through the notifications mechanisms set up earlier in "Stage 2 - Plan and
Setup the Project".
5.3.2 Report to and Work with the Appropriate Stakeholders
Now that the changes are made you may need to update your stakeholders. Your project sponsor will need to know
what changes are afoot; it is best that this news comes directly from you, the Project Manager. This may involve some of
the following:
Deliver Periodic Status Reports (Printed or emailed)
Raise exceptions including Project Change Requests, Top Issues and Top Risks
Resolve Sponsor Level Issues and apply the resolution through Re-Plan Project (if appropriate)

Collaborative Project Management Guide: Track and Re-Plan the Project Page 25 of 39
5.3.3 Tailor the Project Site
In "Stage 1 - Initiate the Project" you decided how best to approach managing project. As the project progresses and
naturally changes, you may decide to change how you manage the project to match the evolving needs of the project.
Maybe you decided not to manage risks very formally at the outset, but you now believe that the project is changing at a
pace that is not healthy—so you now decide to introduce risk management. Or perhaps you initially decided to manage
with issues, risks and change requests but now realize that this was too much project management for this project. In
this case you scale back the amount of project management you use. As you periodically re-plan the project you will do
well as a Project Manager to ensure you have the ‘just right’ amount of management for the project in hand.

Collaborative Project Management Guide: Close the Project Page 26 of 39
6 Close the Project
As stated in the Introduction, we can depict project management as follows:
With this in mind much of the project is about working the project, figuring what is happening, and periodically re-
planning to ensure the end goals are met. It does require a determination to keep going to the end as there will be
difficult periods on most projects.
“There must be a beginning of any great matter, but the continuing unto the end until it be thoroughly finished yields the true glory”
Sir Francis Drake (1540-1596) English navigator
There comes a time when the project needs to be shut down. As we know this is one of the hallmarks of a project—it
has a defined start and a defined end. This is what marks a project out from processes and continuous operations. A set
of steps for an orderly Project Close stage is as follows:
1. Initiate the Project
2. Plan and setup the
Project
3. Work on the Project
4. Track and re-plan the
Project
5. Close the Project

Collaborative Project Management Guide: Close the Project Page 27 of 39
1. Close out the Project site
2. Run Project Post-Mortem and track Lessons Learned
3. Capture any useful modifications made to the project site for use on future projects
6.1 Close out the Project site
On an administrative note, you now have a live project site for a project that is just closed. At a minimum you should
mark the project closed, so that anyone who visits the site can quickly see that the project is closed. You also want to
ensure that the project does not appear in any reports going to senior management. It is best not to archive and hide
the site. Normally when projects are completed it is really hard to get any information about them after a few months.
The half-life of project information is very short! It helps to look back at similar project sites when planning new projects.
6.2 Run Project Post Mortem
No project ever goes perfectly. None! If you consider the approach advocated in this guide, we suggest that you have
regular tracking and re-planning steps. This is essentially a tacit admission that we are learning as we go. So if we can
learn as we go, why not as we finish? There is a tendency to take flight when the project is over and move to the next
one. However, the more you learn from the project you have just completed, the more successful you will be with the
project you are about to start.

Collaborative Project Management Guide: Close the Project Page 28 of 39
Remember this guide is written for “P-MBAs”: Project Managers who have no formal training and no formal set of
experiences managing projects. With this in mind any learning opportunity is not one to be wasted. It is also important
to remember that as a Project Manager, we have been leader of the project, not possessor of its processes and tasks.
With this in mind it is respectful to ask Team Members what they thought of the project.
“It is a capital mistake to theorize before one has data”
The Adventures of Sherlock Homes (1892).

Collaborative Project Management Guide: Close the Project Page 29 of 39
To do a good post mortem it is helpful to have a set of open questions to ask. Questions naturally help the participants
reflect on the project from various angles, so the quality of feedback and learning is best. A sample set of simple and
open questions include:
What went well on this project?
What did not go so well on this project?
What did we not do on this project that might have helped?
What specific actions should we take to adjust the approach to the next project we do as a team?
People are very smart so the real task at this step is to give people the time and the space to reflect on the project. This
step can be carried out simply enough once the time is set aside.
A set of possible mechanisms include:
Meeting - the team meets to talk through the project in a facilitated session
Survey - you give people a survey in the collaborative project site you have been using
Meeting and Survey - you do a combination of both; people answer questions in advance and then attend a
meeting to thoroughly discuss the answers and make recommendations
Many Project Managers say they do not have time to do project post mortems. However, the same professionals seem
to have time to fall into the same traps and then spend time fixing the issues. A stitch in time saves nine!

Collaborative Project Management Guide: Close the Project Page 30 of 39
6.3 Capture Project Site Modifications
If the project site was modified as you went through the project, you will want to review the adaptations and apply those
approved to the template you use to make new project sites. This is a very pragmatic and cheap way to improve the way
you carry out project management.

Collaborative Project Management Guide: Project Management and Leadership Style Page 31 of 39
7 Project Management and Leadership Style
This section 7 on Leadership was penned by Éamonn McGuinness of BrightWork.
Success rarely arrives by accident. So it is with being a successful Project Manager, you need to work at it.
“There are no secrets to success: don’t waste time looking for them. Success is the result of perfection, hard work, learning from failure, loyalty
to those for whom you work, and persistence”
Colin Powell (1937- ) US military leader
As mentioned in the last stage, you as a new Project Manager are now a leader. If you are managing a project for the
first time, then it is like getting your stripes as we used say in the military. Way back in 1980, the first Army Chief of Staff
I heard speak in person told us that the biggest management jump was from Soldier to Corporal (where you earned your
first two stripes). It was the jump from no management / leadership responsibility to some. In 2009, almost 30 years
later, the local university MBA class had a leadership lecture from the then Army Chief of Staff. I was invited as a local
businessperson (as we recruit from the business studies department of this university). I was also invited as I am ex-
Army. The lecture was one of the best I have ever heard on leadership. It was practical and very sincere. Sadly, this great
Army General and giant of a man died in 2010 while still in service.
If you are a new Project Manager, you need to think about leadership. It is very important to have a set of steps to
follow. They will be your map for collaborative project management; without which you will get lost, your project may
fail; and your project team will be disappointed in you.
But even if you know how to navigate the project management terrain very well, you will need to do so with a leadership
style that works for collaborative project management. And if you are getting your stripes for the first time, this may be

Collaborative Project Management Guide: Project Management and Leadership Style Page 32 of 39
difficult for you. I believe if you are responsible for leading projects then you can learn from the vast experiences of this
Army General.
Here is a summary of what he had to say:
Leaders do the right thing. Managers do things right.
Leaders must be visible—must be seen to be serving with the people they lead.
Leaders need to encourage and support —say “Thanks” more often.
Leaders need to have an aura of control, yet be calm and confident.
Leaders need to create a dream—a vision—and communicate this really well.
Leaders need to know themselves—be self-aware. They need to practice what they preach and never bluff.
Leaders need to have external awareness—and should be able to express: the joy of success, the pain of failure,
and concern at slow progress. In these honest expressions leaders should empathize with people and all such
expressions should be in a calm and controlled manner.
Integrity is key for leaders. Keep your promises, earn respect and then keep it.
Set the standard and set it high. Lead your life and work your work.
Team effort is the key for greater success. Mistakes happen. Get over them, but learn from them always.
Communication is vital—listen and ask questions.
If you want to know what a person on your team is really like give them a bit of authority!
Always be fair, firm yet friendly —the 3 F's.
People are really able for lots of change and will withstand anything if everyone gets fair treatment.
As a new leader you now have weight; pull your weight; do not throw it around!

Collaborative Project Management Guide: Project Management and Leadership Style Page 33 of 39
A piece of equipment may cost millions and we pay much attention to its care and maintenance, but do we always
do the same for a human being; what value do we put on humans beings?
Finally, if you are not the leader but a team member, you need the courage to do the right thing. Do you as a
team member have the courage to:
o take the responsibility given to you
o contribute to the team
o challenge the direction
o accept the team direction
o participate in the speed of life
o take moral actions
I so wish this talk had been recorded on video as these printed words do not do justice to the energy of the ideas given
on that day. Now I know you may have seen lots of books and talks on leadership —but if you are managing people on
projects then it is no harm to see more! Feel free to spend 15 minutes reflecting on what this wise Army General talked
about and do a self-evaluation on your own leadership style.
A good leader is always open to learn from other leaders. At a minimum, select a few of the suggestions from this list
and try to actively put them into practice on your next project.

Collaborative Project Management Guide: Collaborative Project Management Sites Page 34 of 39
8 Collaborative Project Management Sites
You can and should put together a collaborative site for your project, a virtual project team room. You can and should
consider SharePoint as the platform for your project site; there is a free version so you have few excuses! You can and
should extend SharePoint for project management. To do this you can build or buy. If you want a plug-in for SharePoint
that supports the thinking in this guide then take a look at BrightWork.
BrightWork is a SharePoint solution for Project and Portfolio Management that enables any organization to instantly
deploy an affordable amount of project management, delivering immediate visibility and control, and to gradually evolve
by adding more templates and dashboards as needed and as ready.

Collaborative Project Management Guide: Recommended Next Steps Page 35 of 39
9 Recommended Next Steps
9.1 Free Project Management Templates
Practice this collaborative project management approach using two free project management templates from
BrightWork. Download the templates now!
9.2 Free Workshop: Manage Across Projects and Portfolios with Ease
Learn how to collaboratively manage across projects and portfolios with ease using the BrightWork free trial and free
training materials. Get your own private, hosted SharePoint site for 30 days and complete the training workshop at your
own pace.

Collaborative Project Management Guide: Build Your Own Project Management Approach Page 36 of 39
10 Build Your Own Project Management Approach
Now that you have got this far through this Project Management Guide, it would be important to reflect on how you
should manage your projects.
“What we have to learn to do, we learn by doing”
Aristotle (384 – 322 BC), Greek philosopher
We are not for one minute suggesting that you should follow every step in sequence as presented in this guide.
However if you are new to project management then as an exercise you could walk through the steps presented in
summary here and design your own project management approach using these as a starting point. Then try your
approach on a real project. Print this summary as a handy desktop reference.
Project Management and Leadership Style
Using the steps in the prior section on leadership write out the steps you are prepared to follow.
(1) Initiate the Project
1. Get the Project approved, sponsored and resources allocated
2. Decide a Project Management process
3. Create a Collaborative Project Site
(2) Plan and Setup the Project
1. Plan the Project

Collaborative Project Management Guide: Build Your Own Project Management Approach Page 37 of 39
a. Complete the Project Statement
b. Define and allocate tasks
c. Add the other Project artifacts needed
d. Assign work
2. Desk check the Project Plan
3. Notify the Team of their responsibilities
a. Host a Project Kick-Off Meeting
b. Enable your collaborative site with the facility to email notify on all new work assignments
c. On your collaborative site setup an easy to find “My Work” reports / dashboards
d. Setup scheduled emails with nudges for upcoming or late work.
(3) Work on the Project
1. Find work
2. Do work
3. Update progress on work (recording any issues)
(4) Track and Re-Plan the Project
1. Check and understand the project's progress
a. Virtual check
b. Individual check
c. Team check

Collaborative Project Management Guide: Build Your Own Project Management Approach Page 38 of 39
i. Review, discuss and resolve (in so far as possible) any open issues
ii. Look at upcoming tasks for next week
iii. (time permitting) Look at tasks achieved last week or at least the highlight tasks from last week
2. Find and Manage Exceptions (e.g. issues, risks and change requests)
3. Re-Plan the project
a. Re-assign work and send notifications
i. Project Redefinition
ii. Project re-assignments
iii. Notifications
b. Report to and Work with the Appropriate Stakeholders
i. Deliver Periodic Status Reports (Printed or emailed)
ii. Raise exceptions including Project Change Requests, Top Issues and Top Risks
iii. Resolve Sponsor Level Issues and apply the resolution through Re-Plan Project (if appropriate)
c. Tailor the project site to match the evolving needs of the project
(5) Close the Project
1. Close out the Project site
2. Run Project Post-Mortem and Track Lessons Learnt
3. Capture any useful modifications made to the project site for use on future projects

Collaborative Project Management Guide: Feedback Welcome Page 39 of 39
11 Feedback Welcome
We thank you for reading the guide all the way through! We hope it has helped you, as a new Project Manager,
understand a method of collaborative project management without having the time or budget for formal training.
Please do feel free to leave feedback on our blog, so we can keep improving this free Collaborative Project Management
Guide.
URLs and Other References:
BrightWork: www.BrightWork.com
Webcast Recording of this Guide: http://www.brightwork.com/cpm
Blog to give feedback: www.manageprojectsonsharepoint.com
Microsoft Project Desktop 2013: www.microsoft.com/project
Microsoft SharePoint: www.microsoft.com/sharepoint
The Collaborative Project Management Guide comes with a complementary training webcast which walks
through and explains each section of the guide. Watch the training video here.