color managed proofing and printing with photoshop...
TRANSCRIPT
Color Managed Proofing and Printing with
Photoshop CS3
Andrew Rodney aka The Digital [email protected]
1
Email me ([email protected]) if you need this presentation in PDF form.
Most of the definitions found throughout this presentation are taken from my book “Color Management for Photographers, Hands on Techniques for Photoshop Users” published by Focal Press. A table of content and sample chapter can be downloaded from the web site above. Or go to:http://www.amazon.com/exec/obidos/ASIN/0240806492/digitaldog-20/104-1213564-0901541?creative=327641&camp=14573&link_code=as1
©2007 Andrew Rodney
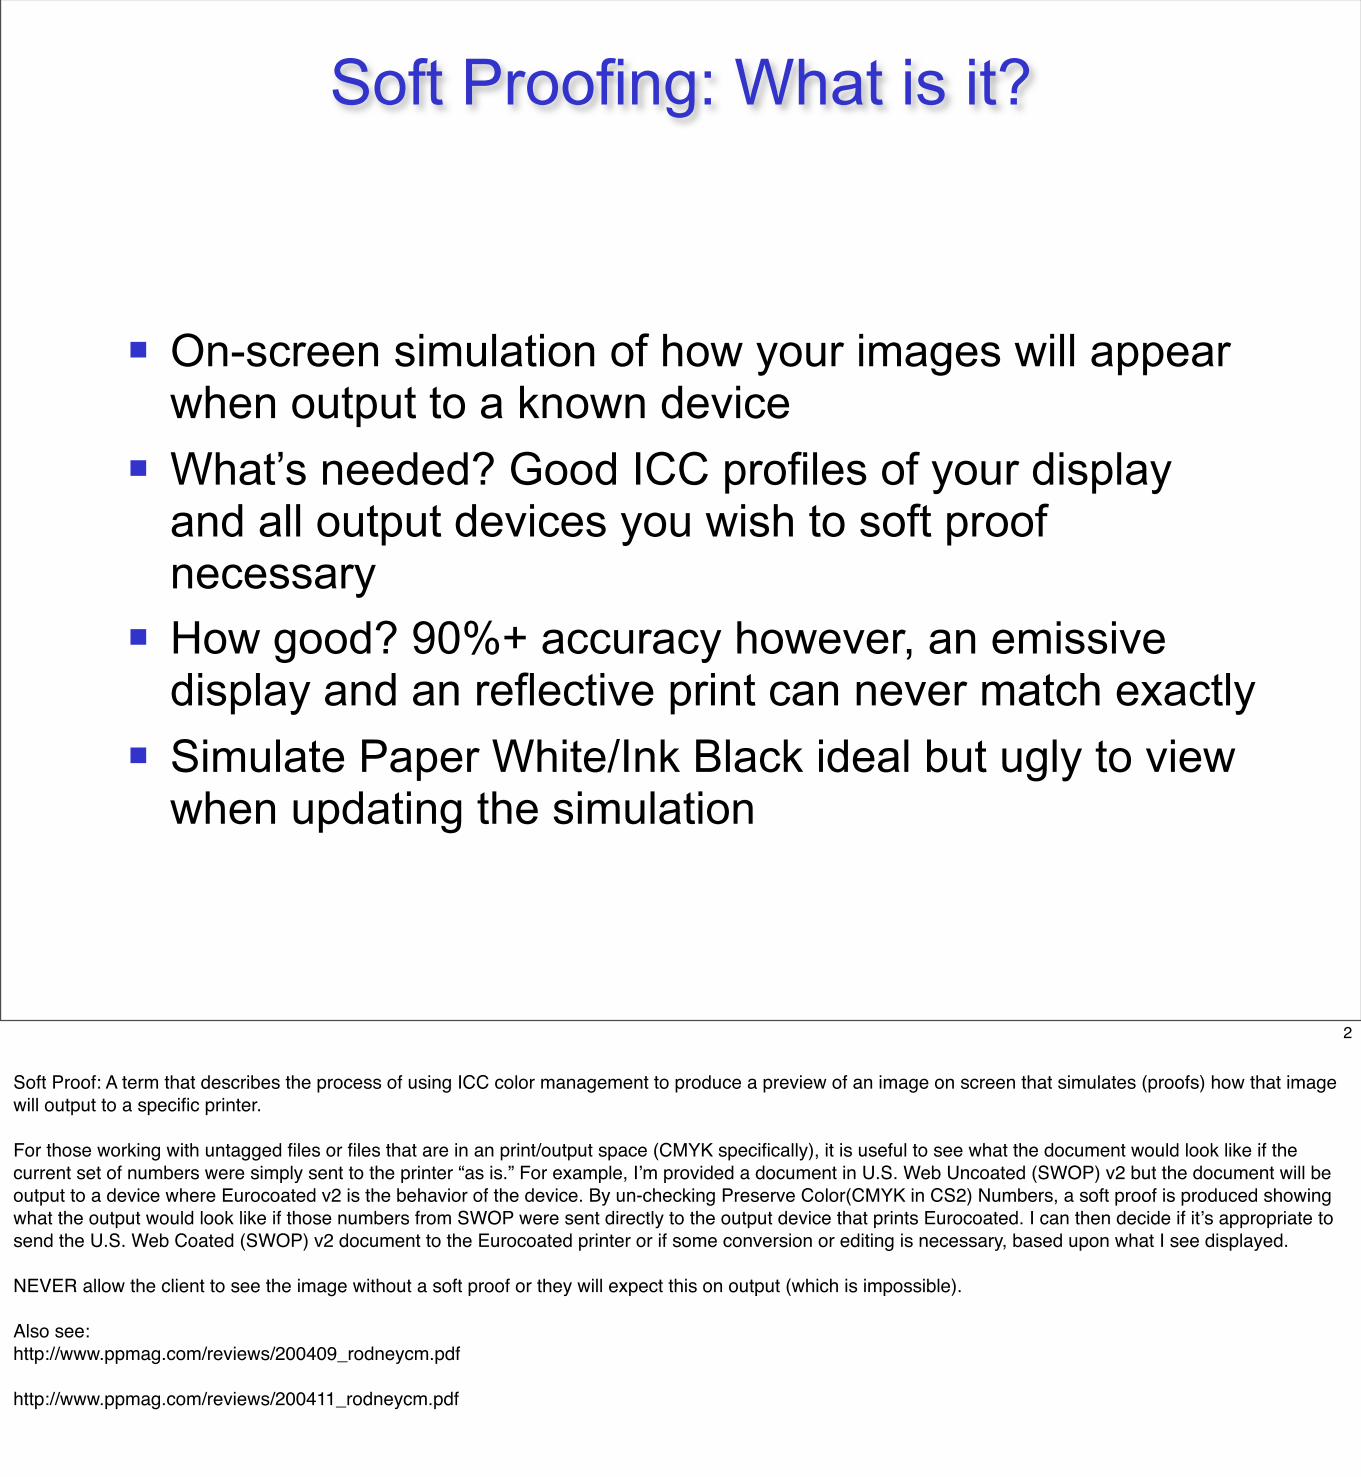
On-screen simulation of how your images will appear when output to a known device
What’s needed? Good ICC profiles of your display and all output devices you wish to soft proof necessary
How good? 90%+ accuracy however, an emissive display and an reflective print can never match exactly
Simulate Paper White/Ink Black ideal but ugly to view when updating the simulation
Soft Proofing: What is it?
2
Soft Proof: A term that describes the process of using ICC color management to produce a preview of an image on screen that simulates (proofs) how that image will output to a specific printer.
For those working with untagged files or files that are in an print/output space (CMYK specifically), it is useful to see what the document would look like if the current set of numbers were simply sent to the printer “as is.” For example, I’m provided a document in U.S. Web Uncoated (SWOP) v2 but the document will be output to a device where Eurocoated v2 is the behavior of the device. By un-checking Preserve Color(CMYK in CS2) Numbers, a soft proof is produced showing what the output would look like if those numbers from SWOP were sent directly to the output device that prints Eurocoated. I can then decide if it’s appropriate to send the U.S. Web Coated (SWOP) v2 document to the Eurocoated printer or if some conversion or editing is necessary, based upon what I see displayed.
NEVER allow the client to see the image without a soft proof or they will expect this on output (which is impossible).
Also see:http://www.ppmag.com/reviews/200409_rodneycm.pdf
http://www.ppmag.com/reviews/200411_rodneycm.pdf
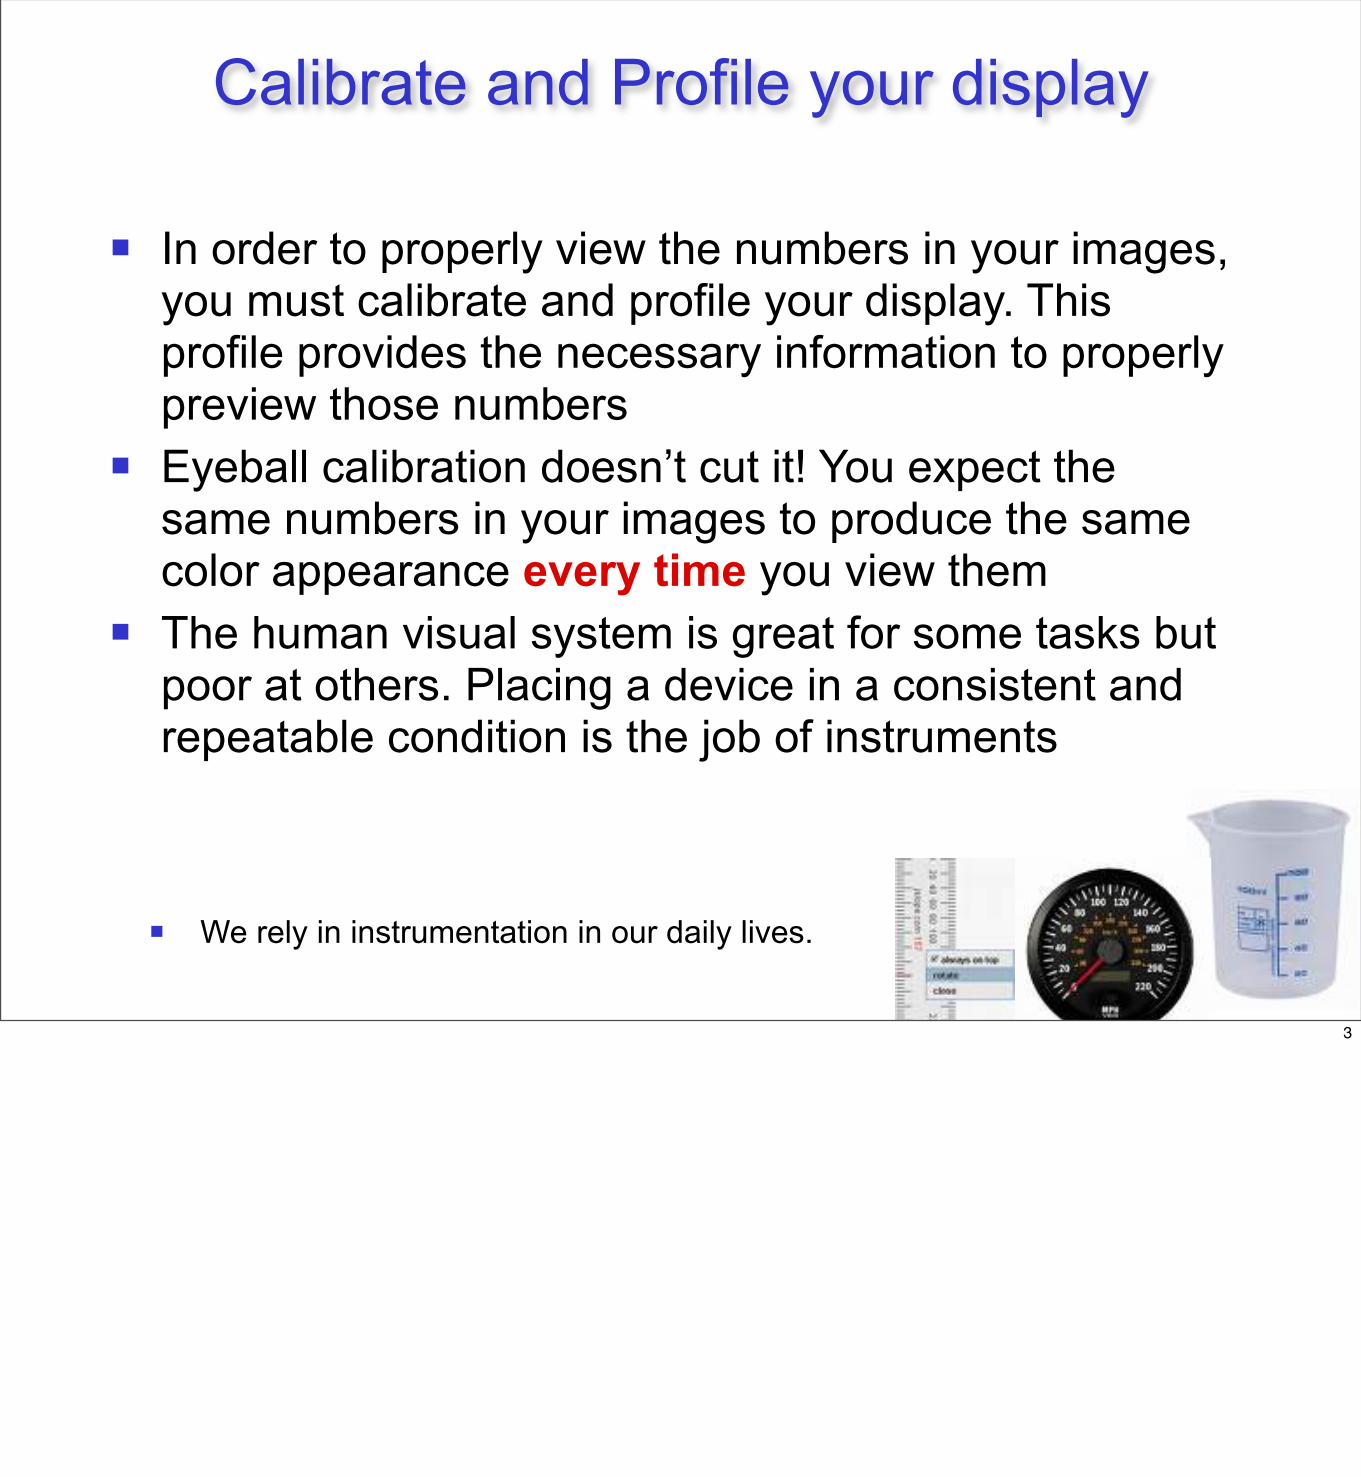
In order to properly view the numbers in your images, you must calibrate and profile your display. This profile provides the necessary information to properly preview those numbers
Eyeball calibration doesn’t cut it! You expect the same numbers in your images to produce the same color appearance every time you view them
The human visual system is great for some tasks but poor at others. Placing a device in a consistent and repeatable condition is the job of instruments
We rely in instrumentation in our daily lives.
Calibrate and Profile your display
3

Eyeball calibration doesn’t cut it!Square A and B are the same!
4
Square A and B are the same color! They don’t look the same but an instrument would correctly read the values as the same. Don’t believe me?
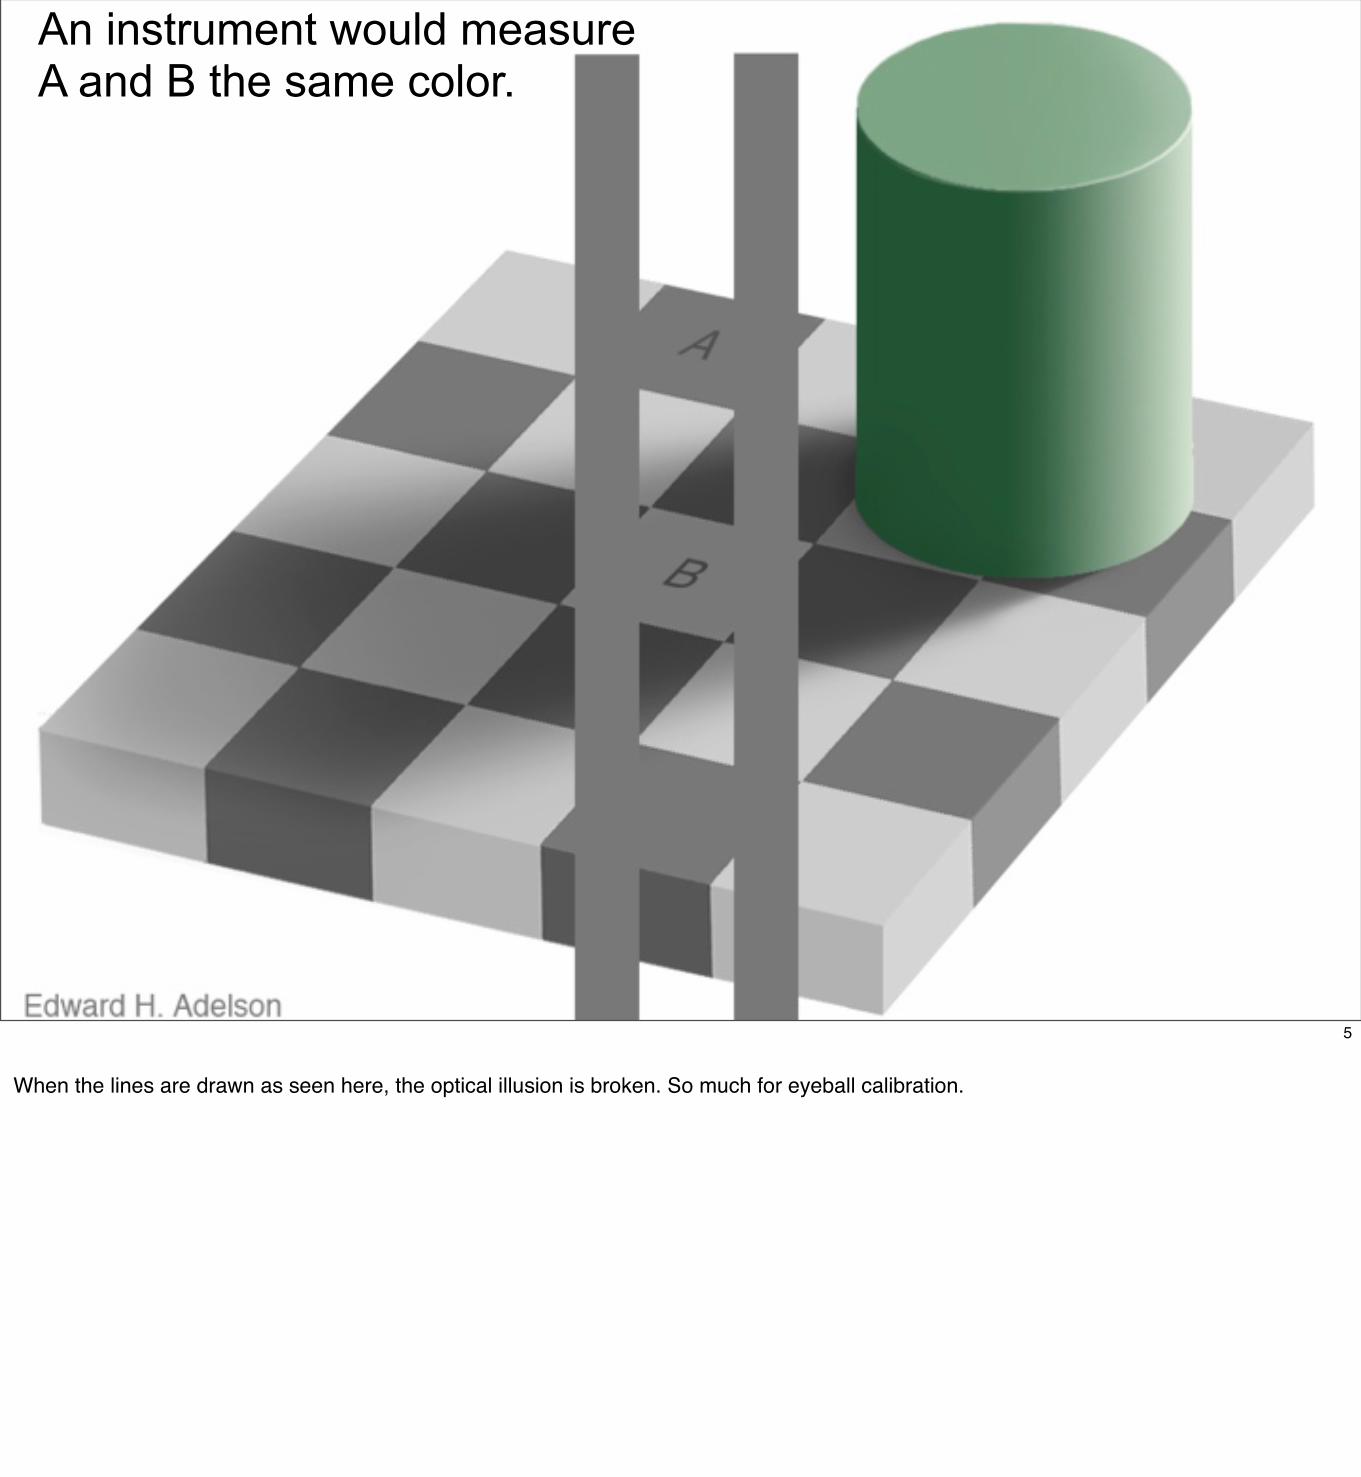
An instrument would measure A and B the same color.
5
When the lines are drawn as seen here, the optical illusion is broken. So much for eyeball calibration.
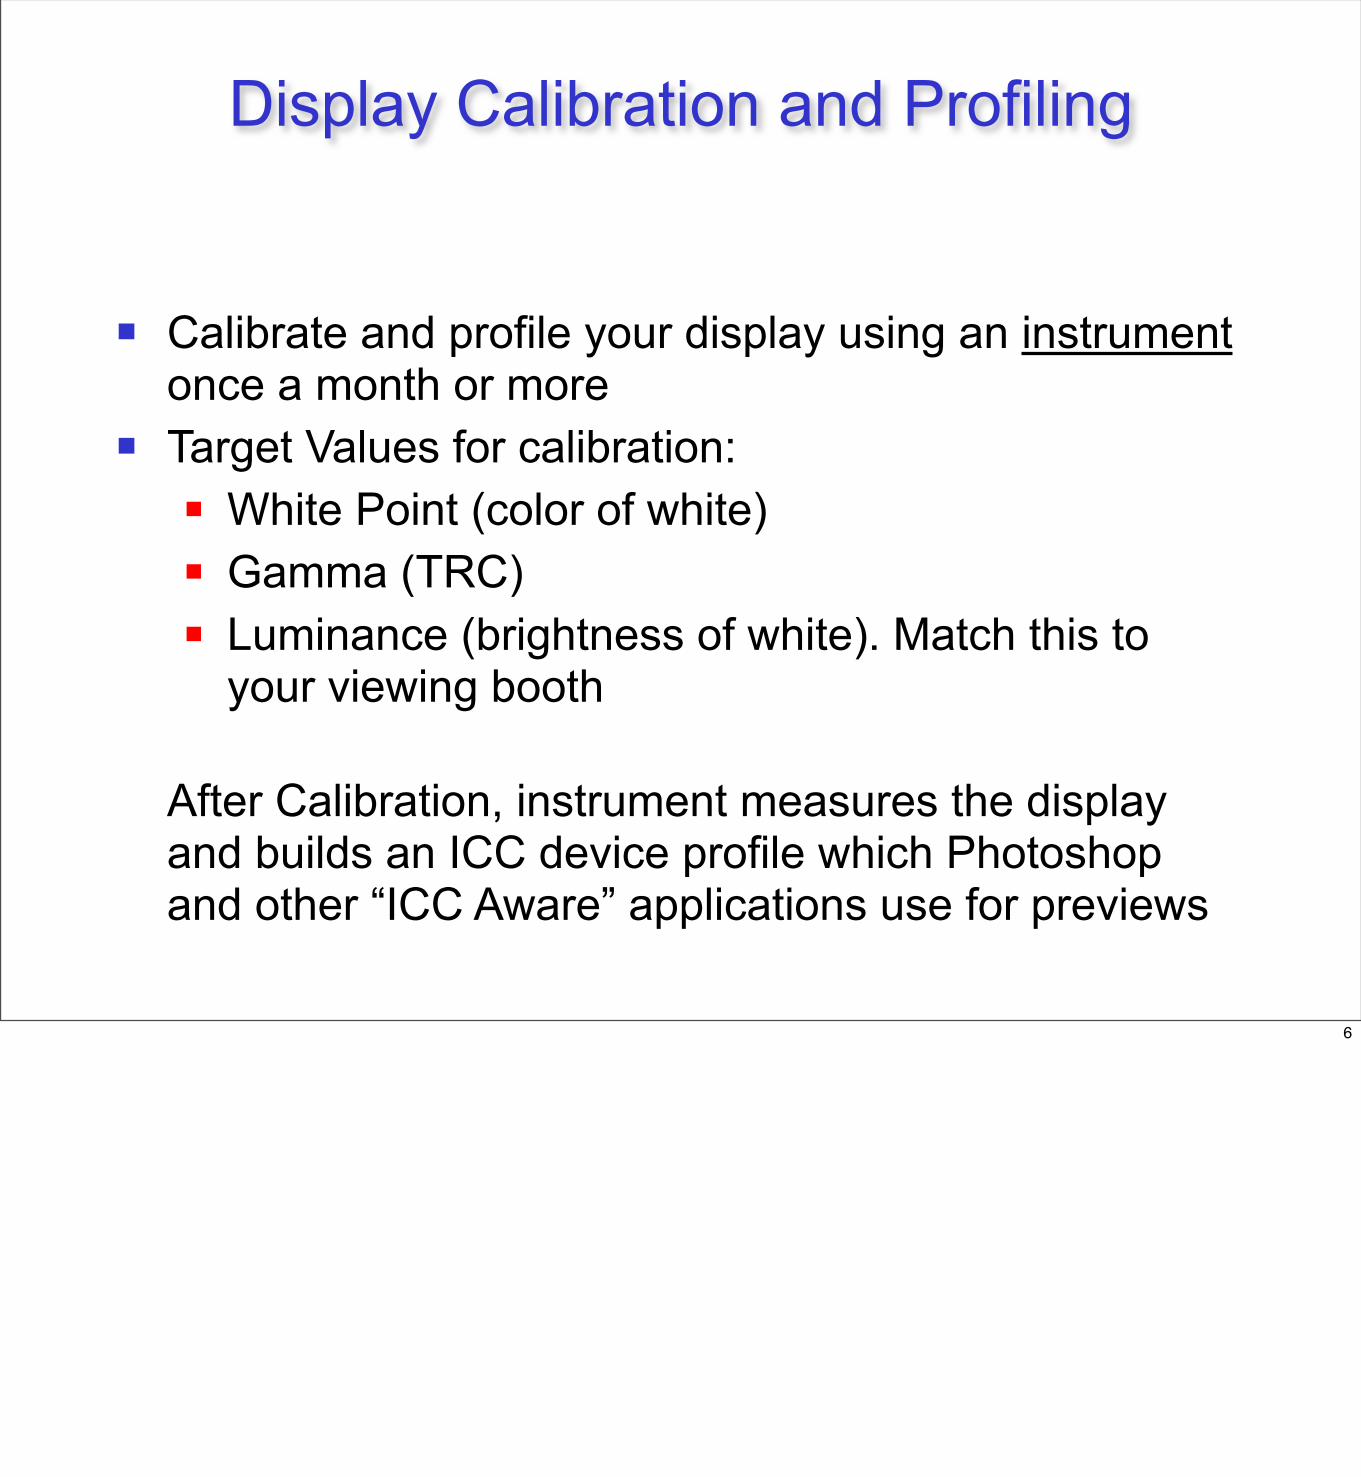
Calibrate and profile your display using an instrument once a month or more
Target Values for calibration: White Point (color of white) Gamma (TRC) Luminance (brightness of white). Match this to
your viewing booth
After Calibration, instrument measures the display and builds an ICC device profile which Photoshop and other “ICC Aware” applications use for previews
Display Calibration and Profiling
6
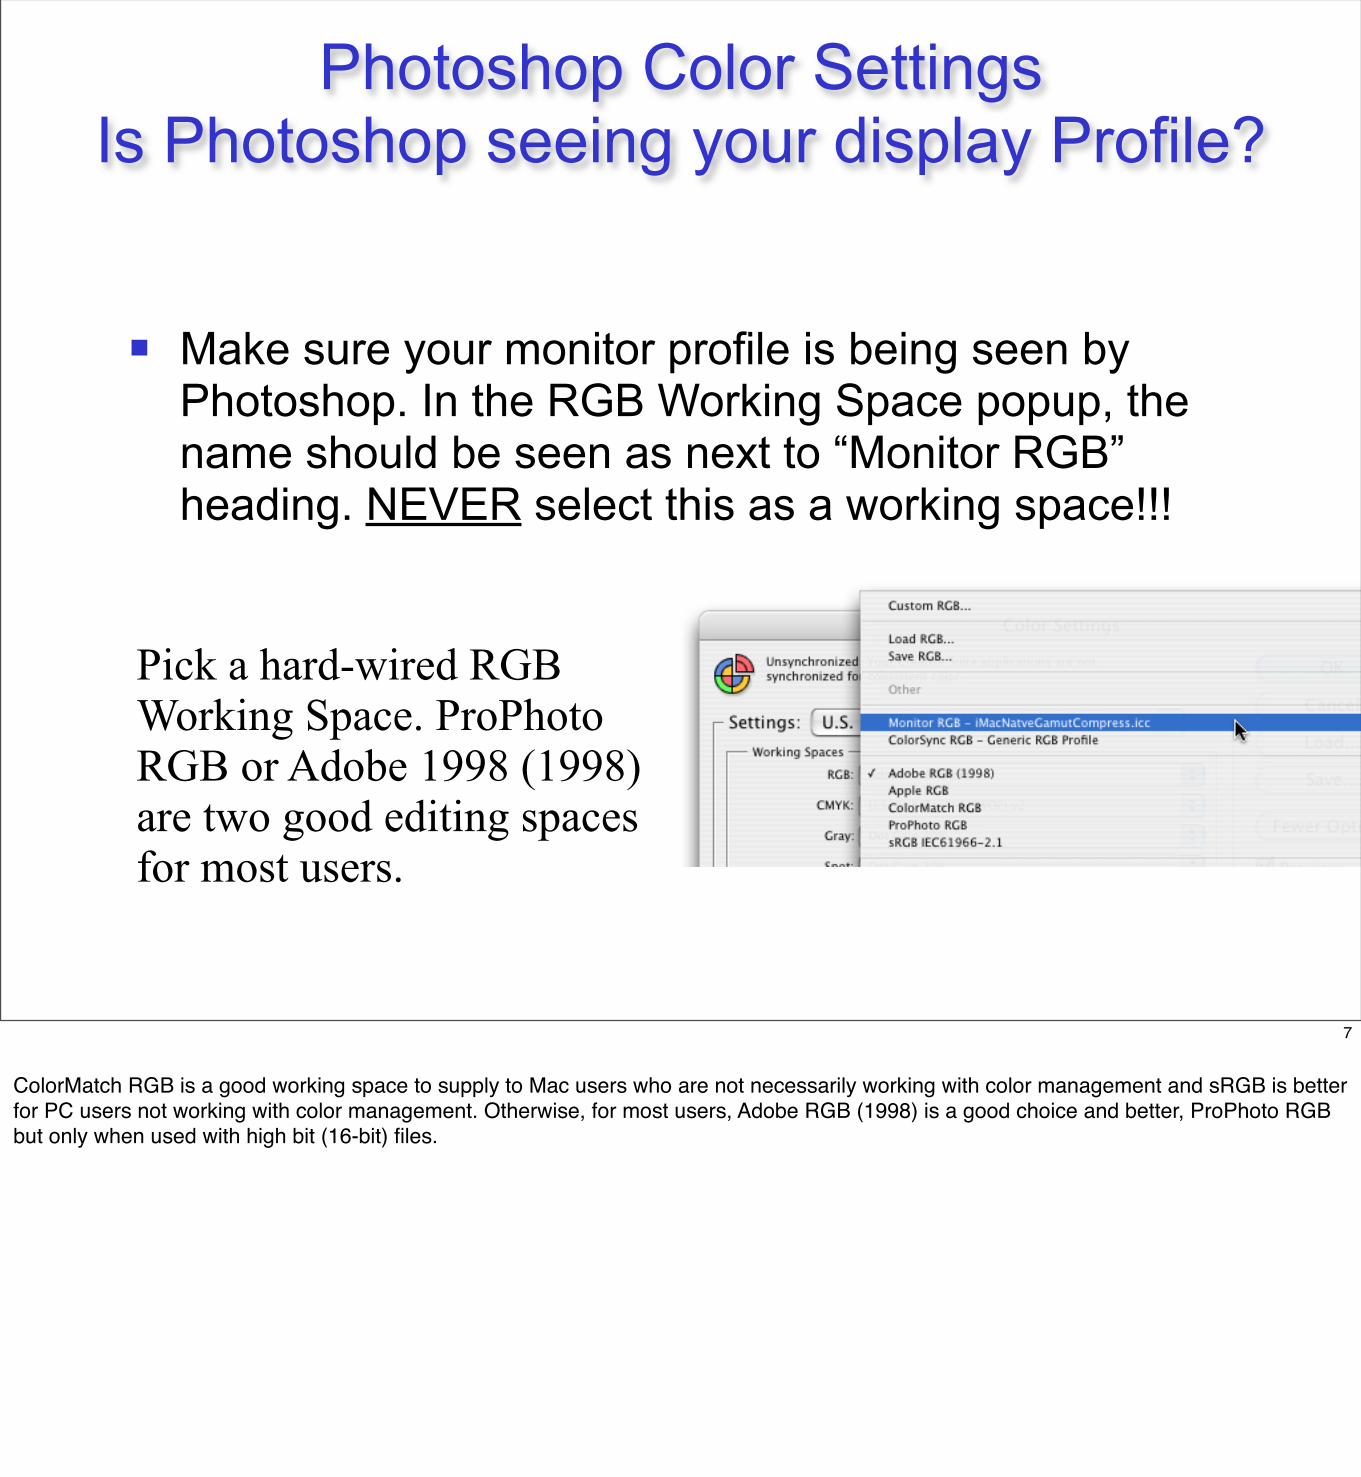
Make sure your monitor profile is being seen by Photoshop. In the RGB Working Space popup, the name should be seen as next to “Monitor RGB” heading. NEVER select this as a working space!!!
Pick a hard-wired RGB Working Space. ProPhoto RGB or Adobe 1998 (1998) are two good editing spaces for most users.
Photoshop Color SettingsIs Photoshop seeing your display Profile?
7
ColorMatch RGB is a good working space to supply to Mac users who are not necessarily working with color management and sRGB is better for PC users not working with color management. Otherwise, for most users, Adobe RGB (1998) is a good choice and better, ProPhoto RGB but only when used with high bit (16-bit) files.
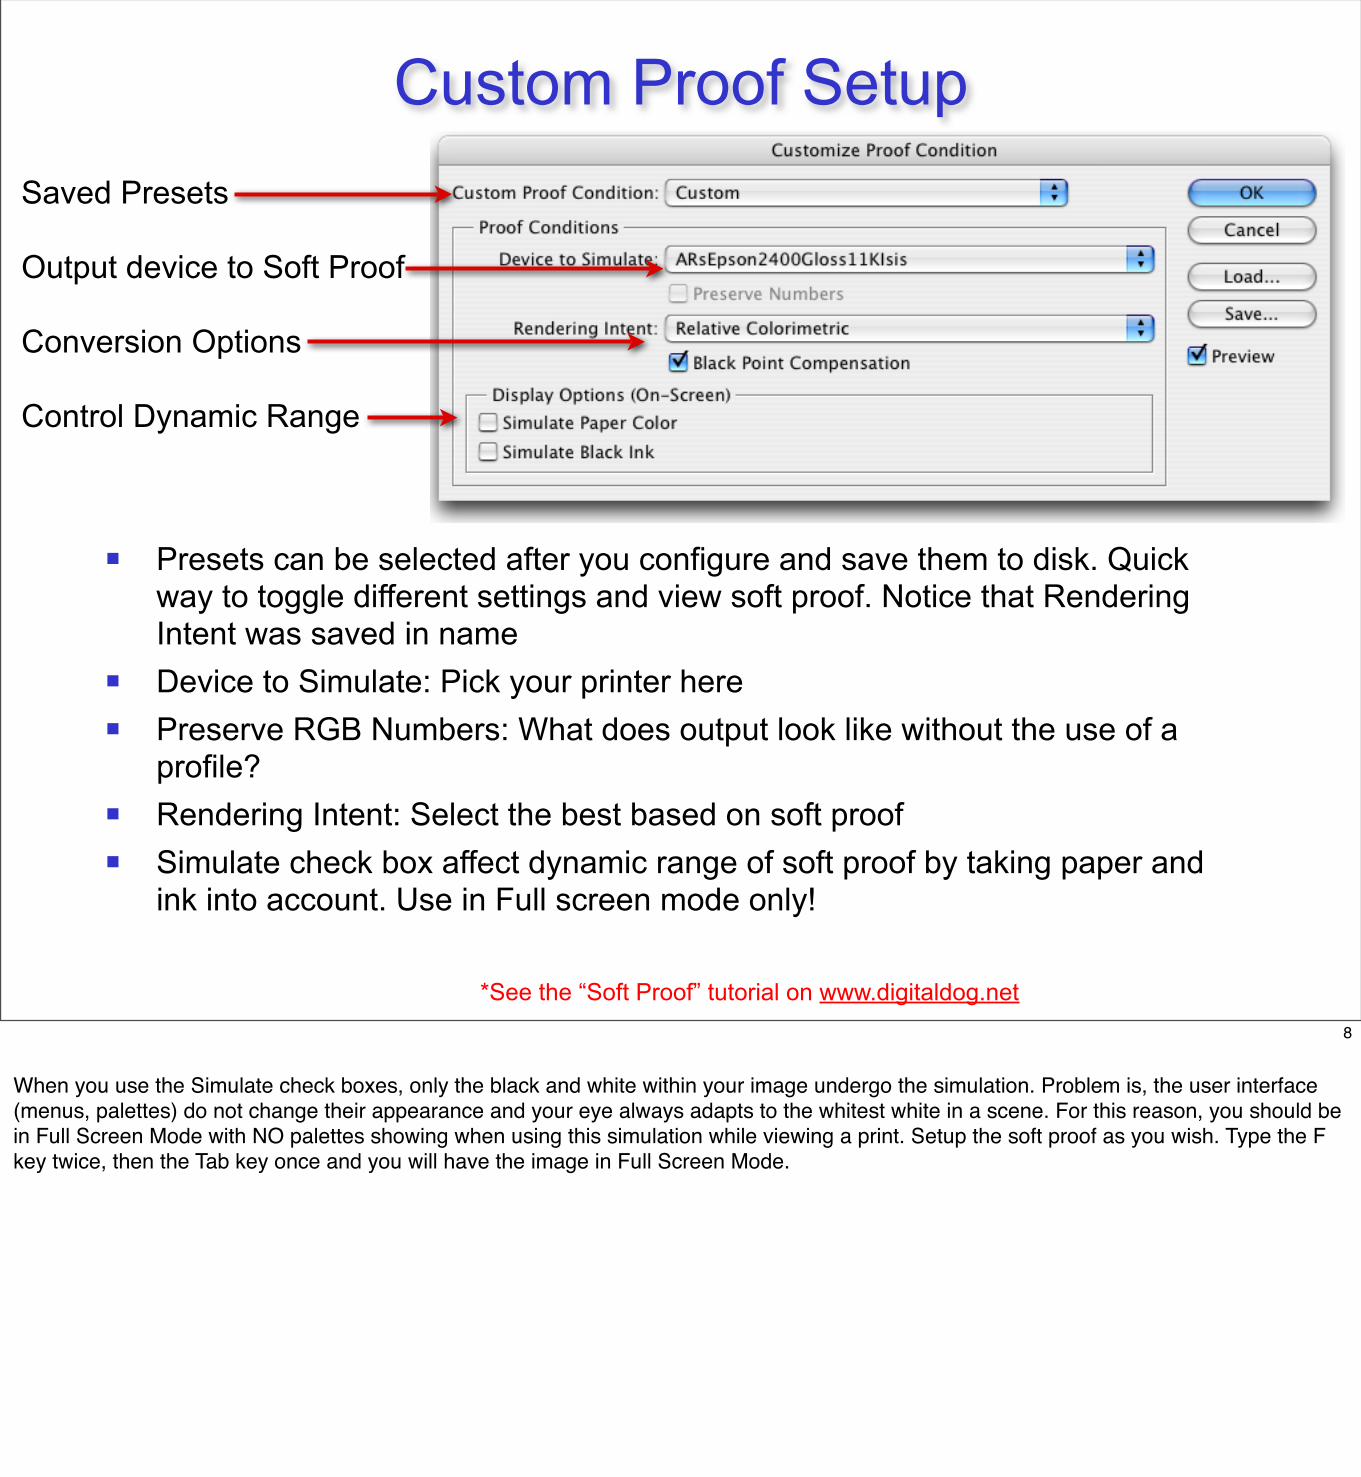
Presets can be selected after you configure and save them to disk. Quick way to toggle different settings and view soft proof. Notice that Rendering Intent was saved in name
Device to Simulate: Pick your printer here Preserve RGB Numbers: What does output look like without the use of a
profile? Rendering Intent: Select the best based on soft proof Simulate check box affect dynamic range of soft proof by taking paper and
ink into account. Use in Full screen mode only!
*See the “Soft Proof” tutorial on www.digitaldog.net
Saved Presets
Output device to Soft Proof
Conversion Options
Control Dynamic Range
Custom Proof Setup
8
When you use the Simulate check boxes, only the black and white within your image undergo the simulation. Problem is, the user interface (menus, palettes) do not change their appearance and your eye always adapts to the whitest white in a scene. For this reason, you should be in Full Screen Mode with NO palettes showing when using this simulation while viewing a print. Setup the soft proof as you wish. Type the F key twice, then the Tab key once and you will have the image in Full Screen Mode.
Use Photoshop’s Custom Proof setup and load your output profile
Edit in your RGB Working Space WHILE viewing the output simulation(s)
Once you edit for a specific output device, edit on a copy or Layer! The original file in the RGB working space is your “master” which you will go back to each time you wish to print it
Always show client images on screen with the soft proof! If you show them the RGB preview, that’s what they will expect you to provide and that’s not possible!
Soft Proofing in Photoshop
9
Preparing files for print in Photoshop
Print using ICC profiles
Output profiles provide the recipe for new RGB or CMYK numbers necessary to reproduce original color as you expect
You can use either Convert to Profile or the Print* command in Photoshop to apply your output profile. Never use both to apply the profile
Select a rendering intent based on the preview (soft proof). Profiles know nothing about images, only devices. Here is where you make the decisions that instruments cannot
*Formally known as Print with Preview in CS2 and earlier
10

Use the No Color Management setting if you previously used Convert to Profile!
NOW Color Managed!
Print in CS3
11
Unfortunately in CS3, the paper white simulation is one for this soft proof and you are still viewing the white of the user interface, hence the preview appears muddy and not accurate.

Once you select the proper printer profile that defines the printer and paper, toggle the rendering intent popup from Relative Colorimetric to Perceptual. Select the intent based on the soft proof you see and prefer visually.
The same functionality is seen in Print with Preview however, there is NO soft proof provided in that dialog so you need to predetermine this first (Customize Proof Setup)
Do NOT apply a profile in both Convert to Profile and Print with Preview. This results in double profiling. Pick one or the other method to apply the profile based on where printer resides (on site or off site)
Printing and color space conversions:Convert to Profile
Document color space
Profile for printer/paper
Use ACEToggle different intents
Keep check boxes on
12

Allow your display to warm up before calibration, profiling or color critical work. Even LCDs need 15 minutes to stabilize
Control ambient light around the display! Use a hood to keep stray light from striking the display and control the intensity of lighting
Most printer profiles assume you are viewing your prints under D50 lighting. The soft proof is only as accurate as how you view your prints! Do you have a reflective light booth?
Some Tips
13

Questions & Answers
14