colorado rock-n-logs©, inc. standard log legs 2011...
TRANSCRIPT

Colorado Rock-n-Logs©, Inc. Standard Log Legs 2011 eCourse
This Information can be used to make your own
Cabin Chair as seen in our signature
Cabin Collection
Includes dimensions for ¼ scale children’s version
Disclaimer:
1
This informational eCourse contains angles, dimensions and step-by-step instructions designed to walk purchasers of this course through the entire process of fabricating steel log legs and milling a log to create own one-of-a-kind log furniture.
Your success in this undertaking is not guaranteed. Regardless of the author’s personal results and experience applying this information in the creation of the products and projects herein described and pictured, you may or may not be able to create the same results or any results at all. The author of this material has decades of experience working with his hands and with tools described and shown in this e-course. His skills have been honed through many years of trial and error. Accordingly, there is no guarantee, expressed or implied, that by following these directions your project will achieve the exact result of furniture listed and portrayed on LogFurnitureHowTo [dot] com. Your results will depend solely upon you and your personal skills, on the tools you use and on your ability as a craftsperson to use those tools. As with any Do-It-Yourself eCourse, you -- the purchaser -- assume all risk related to personal safety based on your own discretion. By reading and/or downloading this eCourse, you further agree that you have assumed all risks associated with your personal interpretation and application of the advice and illustrations contained herein. You agree that logfurniturehowto.com, its parent company Colorado Rock-n-Logs, Inc, nor any person or persons associated with this site can be held responsible in any way for the success or failure of your log furniture project as a result of the information presented herein. You further agree that it is your sole responsibility to personally conduct due diligence regarding the safe and successful operation of your tools if you intend to apply information in any way to the execution of your log furniture project. Terms of Use : This eCourse was created and designed FOR PERSONAL USE ONLY. It is not to be resold or used to mass produce Colorado Rock-n-Logs, Inc.’s unique and crafted collection of log furniture. Under no circumstance does purchasing this information give you the right to produce and market this furniture in any wholesale or retail manner without expressed written consent from Colorado Rock-n-Logs, Inc. Use this eCourse to make log furniture for personal use and enjoyment and/or the use and enjoyment of family and friends. Licensing: This information is owned, copy-righted, licensed and distributed by Colorado Rock-n-Logs, Inc. through
2
its Online affiliate marketing program LogFurnitureHowTo [dot] com.
Contents Introduction............................... Part I Metal-shop and Metal Work 1. Required Tools2. Recommended Tools3. Metal Cut List Dimensions and Measurements4. Cutting the parts5. Laying out the parts6. Drilling and Capping the components 7. Welding the legs8. Grinding and preparing for finish9. Finishing the log legs Part IIThe Woodshed and Log Work 10.Required tools11.Recommended tools12.Cutting and shaping the Log13. Sanding 14. Staining and Finishing the Log Part IIIAssembly Room 15. Final Assembly Conclusion..................................
3

Introduction
Thank you and Congratulations for your purchase of this one-of-a-kind log furniture eCourse! This valuable information is presented to you by Colorado Rock-n-Logs, Inc. and ourOnline affiliate, LogFurnitureHowTo.com In this eCourse, you will find all the information needed to fabricate your own set of our one-of-a-kind log legs as seen on LogFurnitureHowTo [dot] com, in our Cabin Collection. If at any time during this course you should have any questions do not hesitate to contact me, Mitchell Dillman. I am always here to help you and always happy to do so. You can call me here directly during normal business hours: 719 [email protected] This eCourse offers you the information needed to complete the Cabin Chair... It is designed as an aide to help teach you how to fabricate the steel legs, mill the logs and complete the final assembly of our Cabin Chair or Cabin - Park Bench. Standard Log Legs are used to make the following pieces of furniture found in the Colorado Rock-n-Logs, Inc. signature ‘Cabin Collection’. The only difference in these pieces of furniture is how long you cut your log and how you shape it.
● Cabin - Chair (12”+ diameter log cut to approximately 24” - 26”)● Cabin - Park Bench (12”+ diameter log cut to approximately 60” - 62”)
And as an added bonus, I’ve taken time to do the math... Included in this eCourse are the ‘scaled-down’ dimensions for the kids sizes. This is an exact ¾ scale version of the full-sized Log Legs, so now your kids and grand-kids can have their very own Rock*N Log furniture. In other words, everything is reduced by a ¼
4

Part I Metal-shop and Metal work
Required ToolsWatch Video #1 My Home Metalshop Tools
As we get started, It is not my intention to sell you a garage full of new tools you don’t necessarily need or may not hardly use. In fact, I have made every effort, through my own personal trial and error, to prove that just about anyone with a standard standard duty chainsaw, a basic, entry-level welder and a few other common, household tools -- along with plenty of time and a little bit of patience, can easily complete this project to make their own beautiful, one-of-a-kind, heirloom quality log furniture. Now if you’re anything like me you know and believe in making any kind of hand-crafted, works of functional art, then you probably already understand what I mean when I say,
“No matter how big or how small your boots are always a much happier place to be when you have all the right tools for the job...” ~MD
So right now, let us take a close look at the tools I recommend you have to complete this project and many more beautiful log furnishings in the future. And understand this; just because you own a tool doesn’t mean you know how to use it properly. Sometimes it takes years to fully understand how to use a particular tool to its’ fullest. When preparing to make your first Iron-Log© or Rock-n-Log© bench, be sure to have the following tools on hand. If not, be prepared to purchase, rent or borrow them.Here is the comprehensive list of tools you will need to complete your own Iron-Log© or Rock-n-Log©. Notice items are listed from basic to more advanced.??? Basic Metal-Shop Requirements:
● Mig, Tig or Arc Welder● Metal-Cutting Bandsaw● Floor or bench-top drill-press● 4 ½ Angle Grinder● Abrasive grinding disks● Grinding and Polishing flap disk
Metal Cut List
5
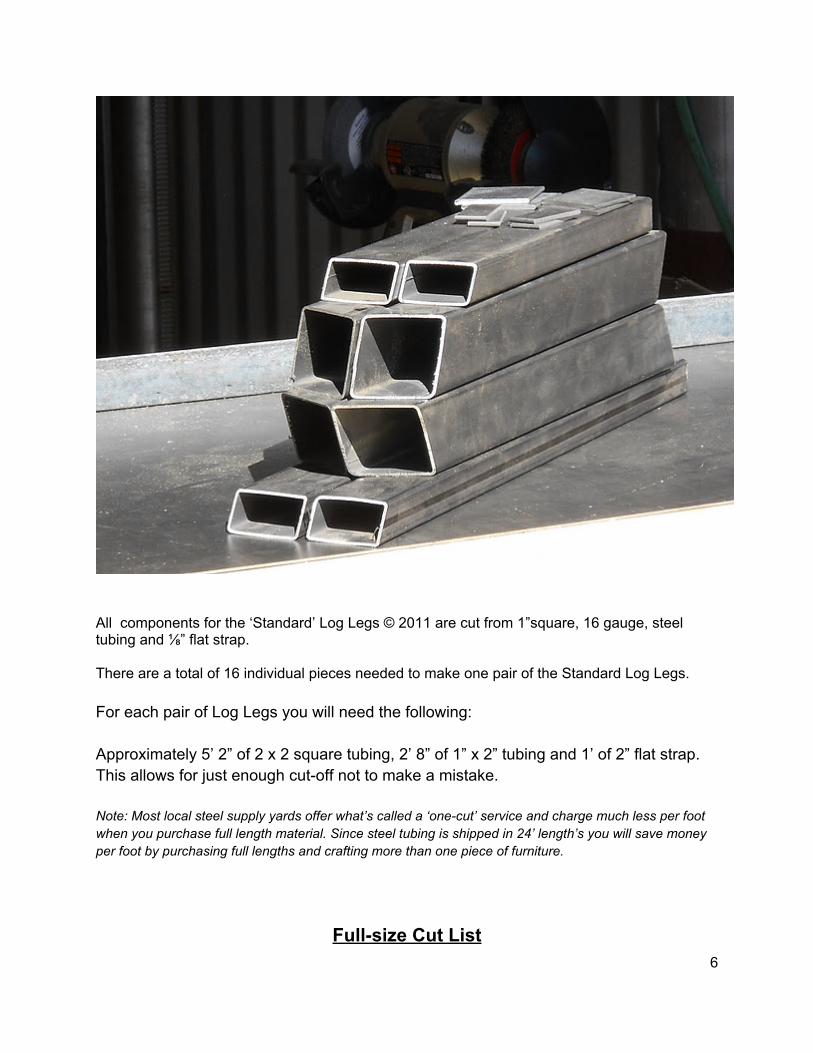
All components for the ‘Standard’ Log Legs © 2011 are cut from 1”square, 16 gauge, steel tubing and ⅛” flat strap. There are a total of 16 individual pieces needed to make one pair of the Standard Log Legs. For each pair of Log Legs you will need the following: Approximately 5’ 2” of 2 x 2 square tubing, 2’ 8” of 1” x 2” tubing and 1’ of 2” flat strap. This allows for just enough cut-off not to make a mistake. Note: Most local steel supply yards offer what’s called a ‘one-cut’ service and charge much less per foot when you purchase full length material. Since steel tubing is shipped in 24’ length’s you will save money per foot by purchasing full lengths and crafting more than one piece of furniture.
Full-size Cut List6

● Front Legs: 2” x 2” square tubing -- 2x 14” long to short. Set your metal cutting band-saw to cut on a 19 degree angle then roll the stock on edge. This will create a 28 degree compound miter cut.
● Rear Legs: 2” x 2” square tubing -- 2x 15” long to short.Set your metal cutting band-saw to cut on a 26 degree angle then roll the stock on edge. This will create a 35 degree compound miter cut.
● Seat Support: 1” x 2” tubing -- 2x 12” square to long.30 degree bevel cut*Drill ⅜” holes centered at 3 ¼” and 7 ¼” measuring from front to back.
● Backrest Support: 1” x 2” tubing -- 2x 20” square to long.30 degree bevel cut*Drill ⅜” holes centered at 1 ½” and 5 ½” measuring from top down to seat.
● Tubing caps: 1/8” x 2” strap -- 2x ¾” square cut.4x 1 ¾” long to short of an 11 degree angle -- these should fit to the inside of the square tubing.
Bonus: ¾ Scale Kids Size Cut List
7
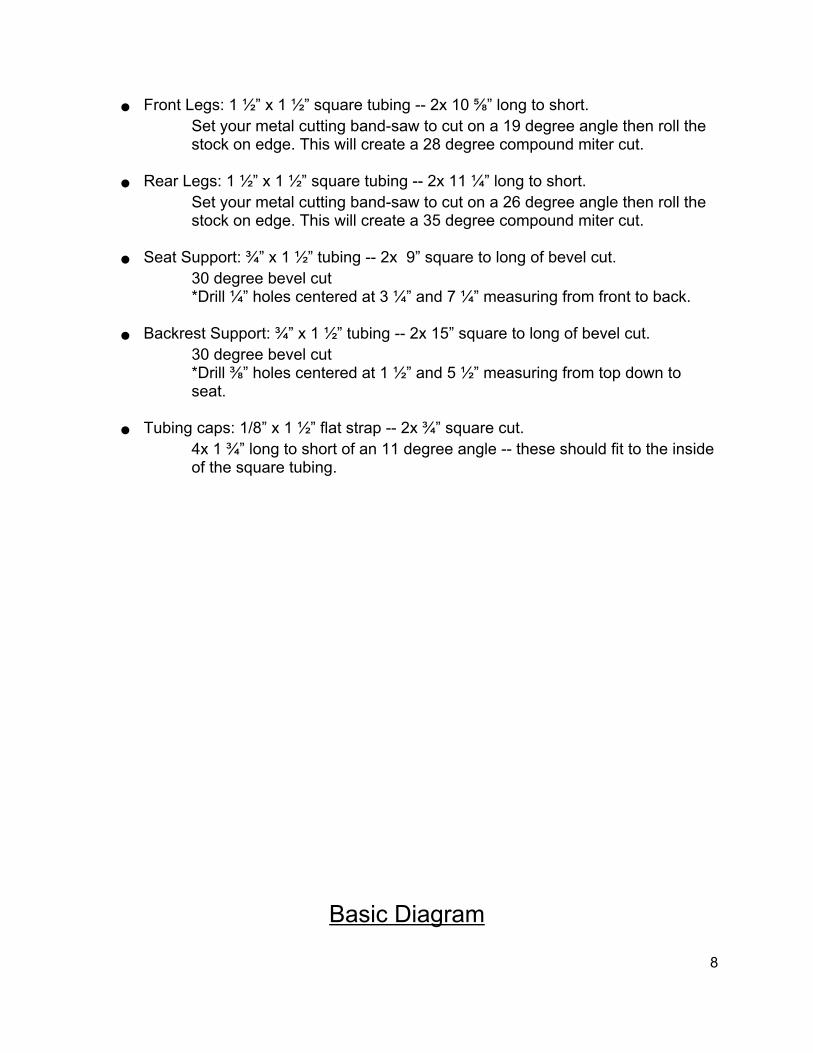
● Front Legs: 1 ½” x 1 ½” square tubing -- 2x 10 ⅝” long to short. Set your metal cutting band-saw to cut on a 19 degree angle then roll the stock on edge. This will create a 28 degree compound miter cut.
● Rear Legs: 1 ½” x 1 ½” square tubing -- 2x 11 ¼” long to short.Set your metal cutting band-saw to cut on a 26 degree angle then roll the stock on edge. This will create a 35 degree compound miter cut.
● Seat Support: ¾” x 1 ½” tubing -- 2x 9” square to long of bevel cut.30 degree bevel cut*Drill ¼” holes centered at 3 ¼” and 7 ¼” measuring from front to back.
● Backrest Support: ¾” x 1 ½” tubing -- 2x 15” square to long of bevel cut.30 degree bevel cut*Drill ⅜” holes centered at 1 ½” and 5 ½” measuring from top down to seat.
● Tubing caps: 1/8” x 1 ½” flat strap -- 2x ¾” square cut.4x 1 ¾” long to short of an 11 degree angle -- these should fit to the inside of the square tubing.
Basic Diagram
8
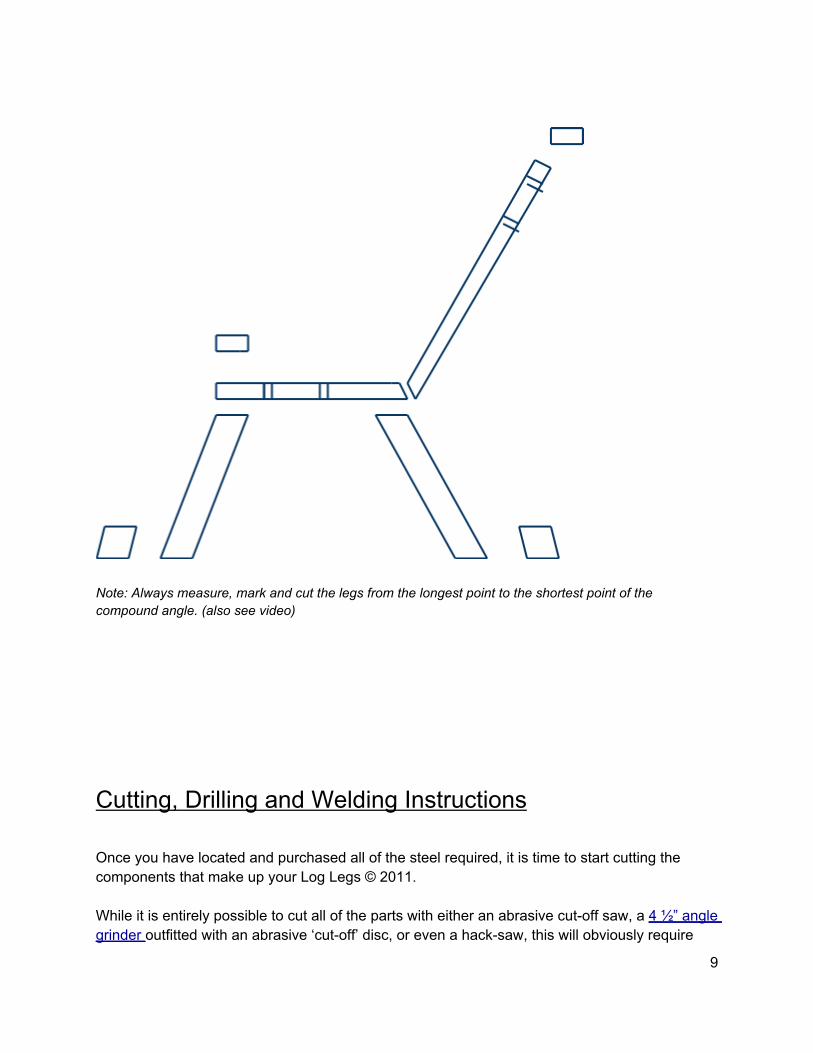
Note: Always measure, mark and cut the legs from the longest point to the shortest point of the compound angle. (also see video)
Cutting, Drilling and Welding Instructions Once you have located and purchased all of the steel required, it is time to start cutting the components that make up your Log Legs © 2011. While it is entirely possible to cut all of the parts with either an abrasive cut-off saw, a 4 ½” angle grinder outfitted with an abrasive ‘cut-off’ disc, or even a hack-saw, this will obviously require
9

more time and patience. When using an angle grinder or hack-saw to cut the compound miter angles for the legs, make sure you use a well anchored bench-vice or take time construct a ‘miter-box’ that will hold the piece of steel firmly in place as you are cutting. Now, if you plan to make more than one set of Log Legs(c) or, you are going to be doing more metal work in the future, this is a good time to invest in a metal-cutting band-saw. No shop, even your home based metal-shop, is complete without a metal-cutting band-saw. When making repetitive, precision cuts, this tool is well worth the investment and will save you hours of your time. Cutting the Steel Components Before going any further, watch this video to learn 6 easy ways how-to cut metal in your home metal shop.
Watch Video #2 6 Easy Ways to Cut Metal In Your Home Metal Shop When preparing to cut your steel, keep in mind it is always best to make all the cuts for each piece as you go. In other words, if you plan on making more than one chair, set each specific angle on your saw then cut all those components needed to complete your desired furniture. Doing this will assure your angles remain consistent so even if you are ‘off’ slightly each individual piece will have a mate. Step 1: Cutting the 1” x 2” seat and back supports Cutting the 30 degree angle in the 1” x 2” seat back and bottom support is fairly straight forward. For the seat support, simply measure and mark your stock piece of steel at 12”, pulling your measurement from the square side of the tubing to the long side of the bevel. Step 2: Cutting the flat strap (tubing caps) Cutting the tubing caps is also a straight forward process requiring nothing more than setting up your saw, measuring, then marking and cutting each piece. For the 1”x 2” seat and back support caps simply set your saw to 0 degrees or square, and cut four pieces at ¾”.
10
The leg caps are also cut from 2” flat strap. For the leg caps, set your saw to 11 degrees and cut each of the four pieces at 1 ¾” from the long of the angle to the short of the angle. Keep in mind, these may appear to be too short, but cutting them ‘shy’ allows plenty of room to get a good weld then grind smooth. Step 3: Cutting the legs Once you have cut the tubing caps and the pieces needed for the seat and back support it’s time to reset the saw and start cutting the legs. Remember to cut all the front or rear legs you require for your project before resetting the angle for the other cuts. Again, this will assure each pair of legs matches exactly. Now you may have already noticed the legs require what’s known as a ‘compound miter cut’ or multi-directional angled cut. In order to achieve this cut over and over, it is highly recommended you take time to make yourself a ‘jig’ like you will see in one of the following videos. To learn the basics about How to Make a Compound Miter Cut watch this video.
Watch Video #3 How to Make Compound Miter Cuts
Now, you are ready to watch this video and learn how-to cut your Log Legs:Watch Video #4 How-to Cut Log Legs
Setting-up and Laying out the steel components Once you have cut all 16 pieces needed to fabricate your Log Legs, take time now to match up each set of legs and lay-out each component.Watch the next video to learn how to lay-out your Log Legs:
Watch Video #5 How-to Lay-out Log Legs Now it is time for you to focus all of your attention on just one half of your set of Log Legs. Start by taking the 8 pieces needed and set the other 8 aside for now. Be certain that you have one seat/back assembly complete with caps, one front leg and one rear leg and their caps. (long leg in back, short in front) Next, take time now to measure, mark, and drill the 1” x 2” seat and back supports. To do this, simply pull the measurements from the square side of each component. For the back support, measure down from the square, or top 1 ½” and 5 ½” and mark the center point. The seat support needs to be marked at 3 ¼” and 7 ¼” in from the front or square side.
11

Now, drill all 8 holes using a ‘step-bit’ or a standard ⅜” metal cutting drill bit. These are the holes used to attach the logs to the legs. In order to maintain the rustic look, here at Colorado Rock*N Logs, we use blackened square headed lag bolts which can be ordered Online at http://www.blacksmithbolt.com/ Welding your Log Legs Now that you have laid-out and drilled your components as needed, it is time to start welding everything together. Before you start welding though, take time now to watch these short videos:
Watch Video #6 How to box metal tubing
and
Now, watch Video #7 How-to Weld Log Legs Note: Take time now, while boxing off both of the seat/back assemblies to go ahead and box the legs as well, before welding the the legs on to the seat/back assembly. Welding these ‘caps’ on now will allow you to grind them smooth before they are all welded-up as one assembly making this step much easier on you and taking far less of your time. Once you’ve welded on your ¾” caps, it is now time to weld the seat/back 1” x 2”s together before welding on the actual legs. Depending on how many sets of Log Legs you intend to make, it may also be worth your time now to fabricate a ‘jig’ that will hold these two pieces together as you weld. When you are ready to weld the legs on to the seat/back assembly, set the entire assembly up on 1/8" spacers. This will lessen the gap on both sides of the legs making it much easier to weld and much cleaner. You are now ready to take the welded seat/back assemblies and lay them down on edge so that you are looking at the side, like a lazy L with one facing to the right, the other to the left. This is important. By laying these opposing each other, you have effectively already created your left and right leg assemblies. Note: There is a right side and a left side. Lay the seat/back assembly out opposite one another to achieve these ‘sides’. When ready, be sure you are welding the legs on in the proper position relative to the front and back of your seat/back assembly.
12
The shorter of the two legs always goes to the front and the longer leg towards the back, both angling out , away and up. So this is where you will want to make sure to have one “ L” pointing one way for the left-hand legs and the other way for the right-hand legs. You will also notice if you have the seat/back assembly or "Lazy L" laying directly on the welding table you will experience a large gap at the top where the legs meet the 1” x 2”. This gap occurs because of the compound miter cut creates more surface area than the 2” square tubing. You will see this gap is almost a full 1/2". In order to split the difference and get a nice weld on both sides, simply elevate the "L" up off the welding table with 1/8" washers or some scrap pieces of ⅛” flap strap. Next, find something to use that will hold everything in place as you apply pressure while welding the leg to the seat/back assembly. For this I usually use a pair of magnets to hold the "L" in place while welding the legs on. Again, at this point, if you plan on making several sets of log legs, you may consider a simple ‘jig’ that will hold everything in place, over and over again, as you weld. Grinding and preparing the Log Legs for finish At this stage of the project it is time for you to consider how you will be finishing your Log Legs. This decision is entirely up to you. You simply need to decide how much time you want to spend and how meticulous you need to be. Some of the more experienced welders may choose to leave their welds alone and send the legs out to be powder-coated.
Powder coating is a type of coating that is applied as a free-flowing, dry powder. The main difference between a conventional liquid paint and a powder coating is that the powder coating does not require a solvent to keep the binder and filler parts in a liquid suspension form. The coating is typically applied electrostatically and is then cured under heat to allow it to flow and form a "skin". The powder may be a thermoplastic or a themoset polymer. It is usually used to create a hard finish that is tougher than conventional paint.
Others however, will want to take time now to grind down and smooth out any unsightly welds. If this is the case, watch this video now to get a quick overview of the grinding process.
Watch Video #8 How-to Grind Log Legs
Once you are satisfied with the look of your welded joints, it is time to proceed to the finish. When it comes to finishing your Log Legs, you do have options. In addition to Power-coating,
13

some may decide to leave the steel raw and allow it to start to oxidize or rust. If you choose to do this, understand if left alone, in time, this rust will eventually deteriorate the steel to the point of failure. Perhaps the most common method of finishing your Log Legs is to simply seal and cover them with a good quality primer and then apply paint. If painting the legs is your preference, watch this movie now. This video outlines your options when it comes to painting your Log Legs:
Watch Video #9 How-to Paint Log Legs Congratulations! You have now completed your first set of Log Legs. Now it is time to take off the welding leathers, set down that paint sprayer and let the wood chips fly where they may. Get ready to become a logger now because in the next segment you will be grabbing a hold of your chainsaw and getting busy on the log work.
Part IIThe Woodshed and Logwork
So you’ve got your Log Legs but now you’re asking yourself what to do next? Or maybe…even though you know how to use your chainsaw and mill your own logs you might be asking yourself, “Do I really want to?” Do I really have the time? Well that’s okay. Because WE will take time to personally harvest and mill a log for you, then drop ship that partially completed piece of log furniture straight to your front curb. Here, WATCH THIS VIDEO NOW to see how!
Video #10 How-to Mill Logs at Staggs Lumber
14
The Woodshed and Log Work
Required tools
Watch Video #11 Cutting your log Part 1: A Short List of Tools When it comes time to start milling your log there are just a few tools you will need to get started.Below is a short list of what tools you will need to have on hand.
● Medium-duty Chainsaw● 2’ construction level● 6’ Straight edge● Chalk or String Line● Tape measure● Carpenter’s pencil● 4 ½” Angle Grinder● Electric Sander (palm or orbital)
Other Recommended tools These are some additional tools that will make the processes of finishing you log much easier.
● 7” Angle grinder/polisher● Assorted abrasive sanding discs● 18” or 20” Belt Sander
Cutting and Shaping your log
Watch Video #12 Cutting your log Part 2: The Layout and Measurements
So you’ve found a worthy log for you new chair or bench. Now is the time to take a step back and look for any distinct marking or oddities on your log. Keep in mind that things like knots, knurls and perhaps broken tree limbs are often what makes log furniture stand out. Always try to work with these imperfections considering where they will be located on the finished piece of furniture.
15

Watch Video #13 Cutting your log Part 3: Chainsaw Safety Tips I know you have heard it before, yet before we go any further, this must be said again. If this is your first time using a chainsaw, or you haven’t had yours out of the woodshed awhile, be sure to thoroughly read and understand the owners manual and user’s guide that came with your saw.
Watch Video #14 How to cut a Log
● As you get started be sure the area and ground around you are clear of debris. ● Never cut you log with it laying directly on the ground.● Establish a firm footing facing the log● Start the cut using the flat, bottom edge of the saw● Avoid using the tip of the saw
Video #15 Cutting you log Part 4: How to Slab your log
For most all Rock*N Log chairs and benches all you really need is around a 12” diameter log. If you have more than a 14” log you will want to take time an remove the center cut or ‘Slab’. While this process can require a bit more time to complete consider the fact you will end up with a nice 3” - 4” wide piece of lumber which can easily be used to make a coffee or end table. Secure your log in position, find your center point and mark out 1 ½” - 2” each way. Level up the marks and repeat this process on the opposite end of the log.Next, transfer your marks to each side of the log. Then, using a straight edge or chalk line, simply connect the lines all the way around your log. Take time to mark all the lines all the way around the log. Marking continuous lines all the way around your log will assure you have a good reference and can make a good square cut.
Video #16 Cutting your log Part 5: How to Cut the Radius Now that you have ‘slabbed’, or center cut your log, it is time to start cutting out what many consider to be the most important part of the Colorado *N Logs. The “Custom Contour Cut” is what make these benches what they are. So how do you achieve this rounded cut? Follow these instructions and you’ll see that it is not that difficult.
16

Watch Video #17 Cutting your log Bonus Footage: The Radius
Sanding your Log
Watch Video #18 Smooth Sanding Your Log This is the part of making your log furniture where taking time and patience to do a good job will really shine in your finished product. Be sure not to hurry yourself through these steps. When getting started be sure to always start out with the heaviest grit sand paper that your tools
17

will allow you to effectively run. Once you have ‘knocked down’ all the heavy cerf marks left in the log by your chainsaw using a 50-80 grit, progress up to the 100-120. I always recommend sanding your log in the direct sunlight so you can get a good look at what your are doing. If sanding your log inside at least be sure you have a bright flood light available. You will thank me for this when it is time apply the stain and sealer.
Staining and Finishing the Log
Watch Video #19 Staining and Finishing Your Log So now that you’ve got all the rough spots sanded out and you are ready to stain and seal your log. This is the point when all your hard work really begins to pay-off and you begin to get a real sense of pride seeing how close you are to completing the project. When considering what type of log sealer and finish to use, it is best to ask yourself where you are planning on using your new log furniture. Indoor or out? For indoor use you may consider a simple rub on oil like this Tried and True Danish Oil. When used outdoors I highly recommend the product I have been applying to all of our Rock*N Logs™. SUPERDECK transparent wood stain and sealer is designed specifically for outdoor use and offers good protection at an affordable price.
Final Assembly Well this is it, the day you have been working towards. It’s final assembly day. At this point all you will need to have are 8 -- 3” x ⅜” lag bolts. Here at Colorado Rock*N Logs ™ we like to use blackened square head lag bolts but you may also choose to spray paint 8 standard hex-head lags. It is always best to mark and predrill each of your logs using a cordless or electric drill. When you are ready to start assembling your new log furniture be sure you have a solid, flat and level surface to work on as this will assure the bench is assembled squarely with no wobbles.
18

Take your time lining up the back and bottom log marking where to pre-drill.
Watch Video #20 Final Assembly of Your Rock *N Log Congratulations, you are now the owner of your very own Rock*N Log ™ furniture. Have a seat, you’ve earned it. Take some time to enjoy your creation, and after your break, you can start your next project. We can help you with that too. Oh, and one last step … take a picture of you and your log furniture masterpiece and send to me at support[at]logfurniturehowto.com we’d love to show your work to all our website subscribers.
19