comfort handset user manual - swisscom · pdf filecomfort handset user manual us x x= 1 2 3...
TRANSCRIPT
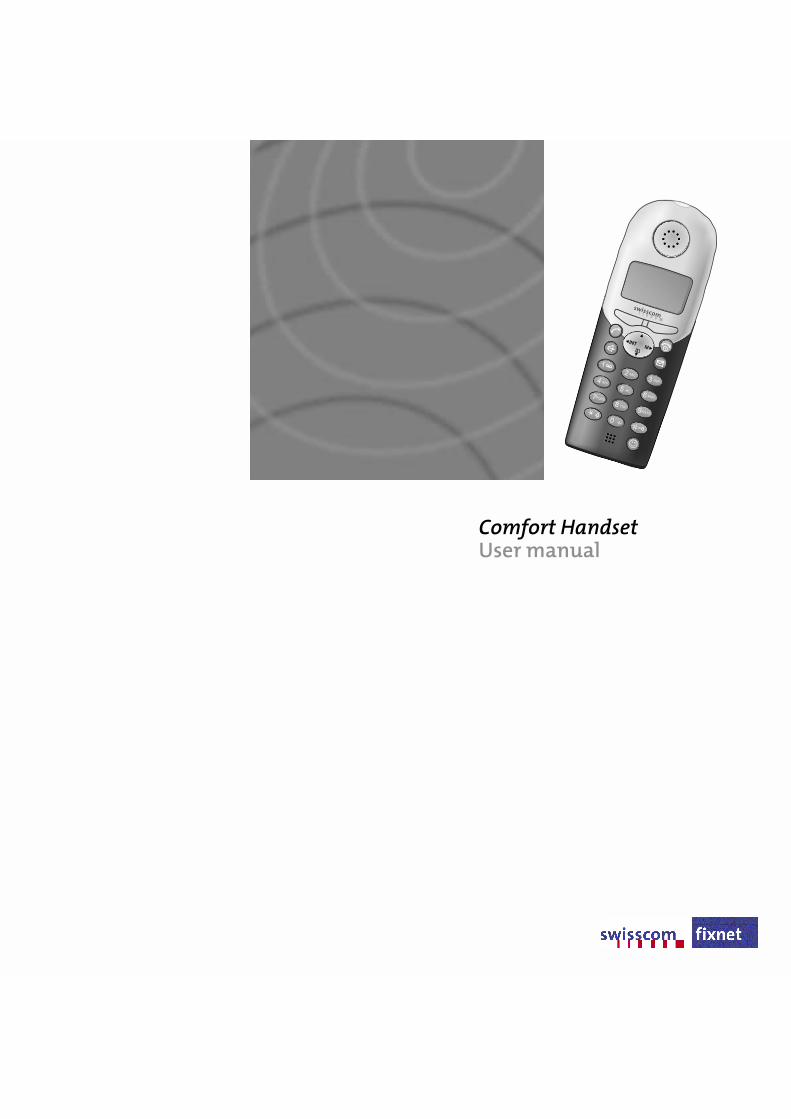
Comfort HandsetUser manual
!"§==Sinus XX=
1
23
ABC
DEF4
56
JKL
MNO
GHI
7
89
TUV
WXYZ
PQRS
0
MINTINT
2
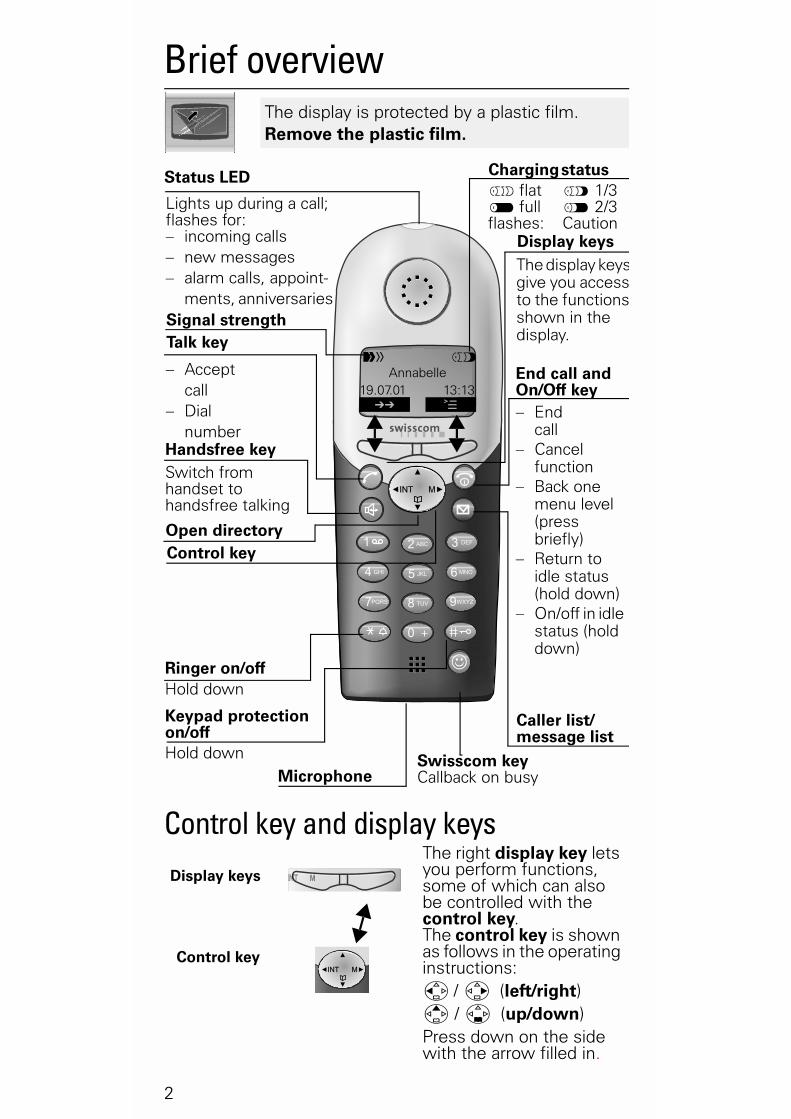
Brief overview
Control key and display keys
The display is protected by a plastic film. Remove the plastic film.
!"§==Sinus XX=
1 2 3ABC DEF
4 5 6JKL MNOGHI
7 8 9TUV WXYZPQRS
0
MINT
Open directory
End call and On/Off key
Talk key
Swisscom key Callback on busy
Caller list/message list
– End call
– Cancel function
– Back one menu level (press briefly)
– Return to idle status (hold down)
– On/off in idle status (hold down)
Handsfree key Switch fromhandset to handsfree talking
Keypad protection on/offHold down
– Acceptcall
– Dialnumber
Ringer on/off Hold down
Charging status ��flat � 1/3 ��full � 2/3 flashes: Caution
The display keysgive you accessto the functionsshown in the display.
Signal strength
Control key
Status LED
Display keys
Lights up during a call; flashes for: – incoming calls – new messages – alarm calls, appoint-
ments, anniversaries
Microphone
�� �Annabelle
19.07.01 13:13� ��
MINT
The right display key lets you perform functions, some of which can also be controlled with the control key.The control key is shown as follows in the operating instructions:�/ ��(left/right)��/ ���(up/down)Press down on the side with the arrow filled in.
Control key
Display keys MINT

3
Important menus
Display symbols The following symbols appear above the display keys depending on the situation:
Display keys
Meaning
� Menu key: Activates the main menu when the phone is idle. During a call, it activates a menu for the particular situation.
� Selects and confirms the menu function. Ends and saves an entry.
� Delete key (Backspace): Deletes characters from right to left.
� Automatic redial key: Opens a list of the last five numbers dialled.
� Displayed if answering machine or caller list is active.
� One menu level back, cancel.
�
<New Entry>
Anna
Barbara
Chris:
�
Display Number
Delete Entry
Copy Entry
Delete List
Send List
Available Memory
�
Add. Features
Calendar/Clock
Sound Settings
H/Set Settings ���
Base Settings
Voice Mail
Handset Volume
Ringer Settings
Advisory Tones
4
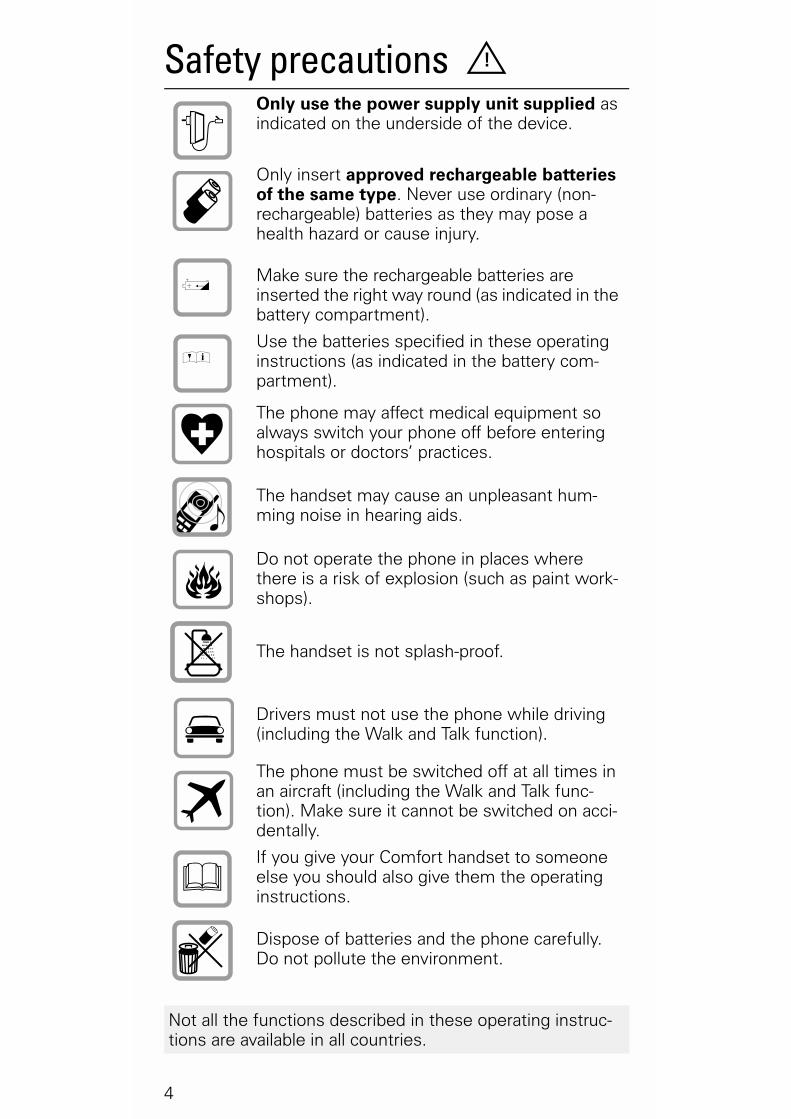
Safety precautions
Only use the power supply unit supplied as indicated on the underside of the device.
Only insert approved rechargeable batteries of the same type. Never use ordinary (non-rechargeable) batteries as they may pose a health hazard or cause injury.
Make sure the rechargeable batteries are inserted the right way round (as indicated in the battery compartment).
Use the batteries specified in these operating instructions (as indicated in the battery com-partment).
The phone may affect medical equipment so always switch your phone off before entering hospitals or doctors’ practices.
The handset may cause an unpleasant hum-ming noise in hearing aids.
Do not operate the phone in places where there is a risk of explosion (such as paint work-shops).
The handset is not splash-proof.
Drivers must not use the phone while driving (including the Walk and Talk function).
The phone must be switched off at all times in an aircraft (including the Walk and Talk func-tion). Make sure it cannot be switched on acci-dentally.
If you give your Comfort handset to someone else you should also give them the operating instructions.
Dispose of batteries and the phone carefully. Do not pollute the environment.
Not all the functions described in these operating instruc-tions are available in all countries.
!
�
�
5
ContentsBrief overview . . . . . . . . . . . . . . . . . . . . . . . . . . . . 2
Control key and display keys . . . . . . . . . . . . . . . . . . 2Important menus. . . . . . . . . . . . . . . . . . . . . . . . . . . . 3Display symbols . . . . . . . . . . . . . . . . . . . . . . . . . . . . 3
Safety precautions . . . . . . . . . . . . . . . . . . . . . . . . 4Preparing the handset . . . . . . . . . . . . . . . . . . . . . . 6
Delivery package . . . . . . . . . . . . . . . . . . . . . . . . . . . . 6Inserting the batteries . . . . . . . . . . . . . . . . . . . . . . . . 6Charging the batteries . . . . . . . . . . . . . . . . . . . . . . . . 6Attaching the belt clip . . . . . . . . . . . . . . . . . . . . . . . . 7Switching the handset on and off . . . . . . . . . . . . . . . 7Setting the date and time . . . . . . . . . . . . . . . . . . . . . 8Activating/deactivating the keypad lock . . . . . . . . . . 9Changing the display language . . . . . . . . . . . . . . . . . 9
Registering the handset. . . . . . . . . . . . . . . . . . . . 10Making calls . . . . . . . . . . . . . . . . . . . . . . . . . . . . . 11
Making an external call . . . . . . . . . . . . . . . . . . . . . . 11Making internal calls . . . . . . . . . . . . . . . . . . . . . . . . 11Answering a call . . . . . . . . . . . . . . . . . . . . . . . . . . . 12Open caller list/message list . . . . . . . . . . . . . . . . . . 12Handsfree talking . . . . . . . . . . . . . . . . . . . . . . . . . . 12Forwarding an external call, enquiry call . . . . . . . . . 13
Automatic redial . . . . . . . . . . . . . . . . . . . . . . . . . . 13Directory . . . . . . . . . . . . . . . . . . . . . . . . . . . . . . . . 15Settings . . . . . . . . . . . . . . . . . . . . . . . . . . . . . . . . . 20
Setting the alarm clock . . . . . . . . . . . . . . . . . . . . . . 20Activating the alarm clock . . . . . . . . . . . . . . . . . . . . 20Deactivating the alarm clock . . . . . . . . . . . . . . . . . . 20Turning off the alarm call . . . . . . . . . . . . . . . . . . . . . 21Setting an appointment . . . . . . . . . . . . . . . . . . . . . . 21Handset and loudspeaker volume. . . . . . . . . . . . . . 22Setting the ringer volume/melody . . . . . . . . . . . . . . 23Activating/deactivating warning and signal tones . . 24Auto talk feature on/off . . . . . . . . . . . . . . . . . . . . . . 24Resetting to the factory defaults. . . . . . . . . . . . . . . 25
Room monitoring (babyphone). . . . . . . . . . . . . . 25Setting the room monitor . . . . . . . . . . . . . . . . . . . . 26
Walk and Talk mode. . . . . . . . . . . . . . . . . . . . . . . 27Appendix . . . . . . . . . . . . . . . . . . . . . . . . . . . . . . . . 28
Operating on base stations . . . . . . . . . . . . . . . . . . . 28Looking after your phone . . . . . . . . . . . . . . . . . . . . 29Range . . . . . . . . . . . . . . . . . . . . . . . . . . . . . . . . . . . 29Guarantee . . . . . . . . . . . . . . . . . . . . . . . . . . . . . . . . 30Repair/maintenance. . . . . . . . . . . . . . . . . . . . . . . . . 30Approval conformity . . . . . . . . . . . . . . . . . . . . . . . . 31
6
Preparing the handset
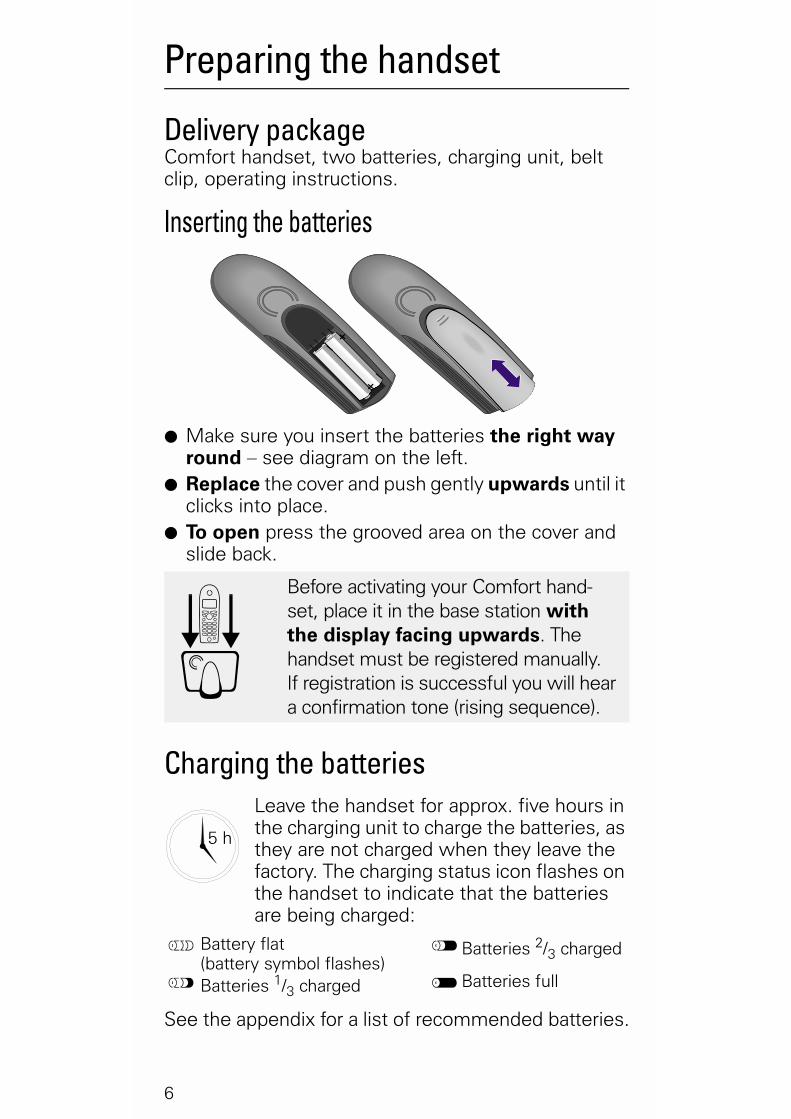
Delivery packageComfort handset, two batteries, charging unit, belt clip, operating instructions.
Inserting the batteries
● Make sure you insert the batteries the right way round – see diagram on the left.
● Replace the cover and push gently upwards until it clicks into place.
● To open press the grooved area on the cover and slide back.
Charging the batteriesLeave the handset for approx. five hours in the charging unit to charge the batteries, as they are not charged when they leave the factory. The charging status icon flashes on the handset to indicate that the batteries are being charged:
See the appendix for a list of recommended batteries.
Before activating your Comfort hand-set, place it in the base station with the display facing upwards. The handset must be registered manually.If registration is successful you will hear a confirmation tone (rising sequence).
� Battery flat (battery symbol flashes)
�Batteries 2/3 charged
� Batteries 1/3 charged �Batteries full
+
–+
–
��
5 h
7
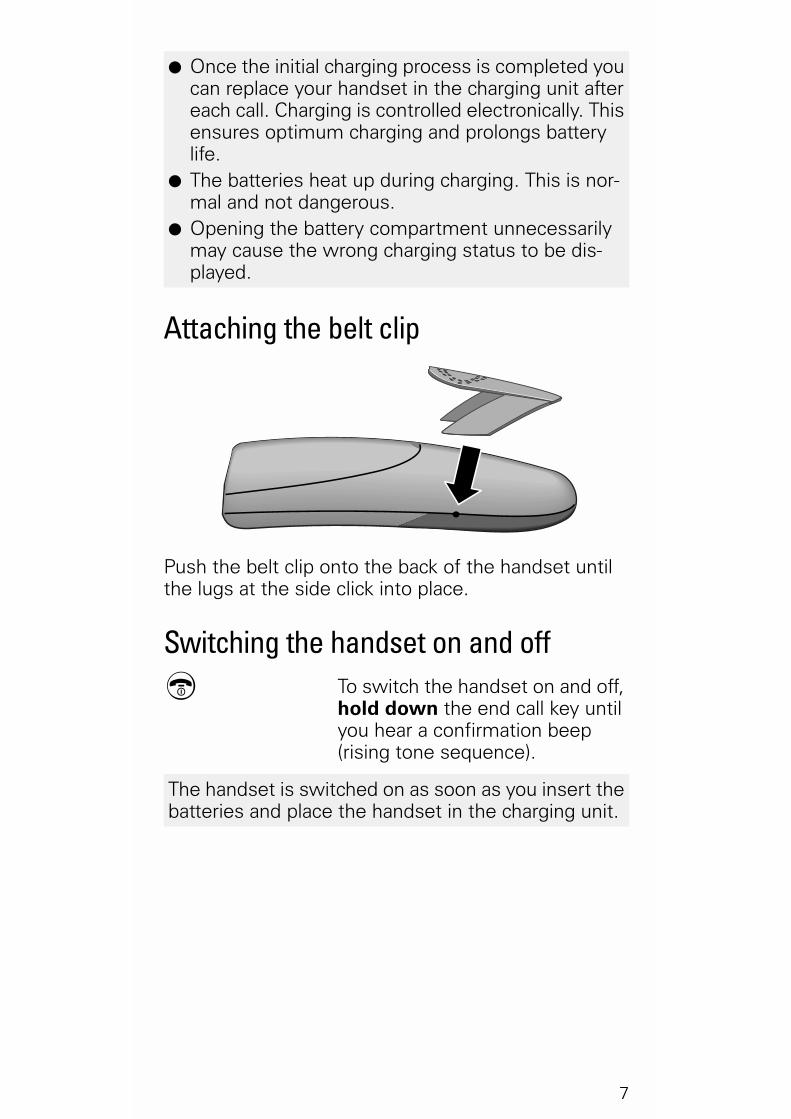
Attaching the belt clip
Push the belt clip onto the back of the handset until the lugs at the side click into place.
Switching the handset on and off� To switch the handset on and off,
hold down the end call key until you hear a confirmation beep (rising tone sequence).
● Once the initial charging process is completed you can replace your handset in the charging unit after each call. Charging is controlled electronically. This ensures optimum charging and prolongs battery life.
● The batteries heat up during charging. This is nor-mal and not dangerous.
● Opening the battery compartment unnecessarily may cause the wrong charging status to be dis-played.
The handset is switched on as soon as you insert the batteries and place the handset in the charging unit.

8
Setting the date and timeYou need to set the date and time so that the time that messages and calls are received is shown correctly.
� Open the menu.�Calendar/Clock � Select and confirm.
�Date/Time � Select and confirm.The current setting is shown.
Enter the date
Enter the day/month/year. In this case 20.05.2001. e. g.������
� Go down one line.
Enter the time
Enter hours and minutes. In this case 19:05 e. g.�������
� Go down one line.
Select the display mode
Use the left side of the control key to select the 12-hour mode (am or pm) or the 24-hour mode (default).
���� Save the settings.
9
Activating/deactivating the keypad lockYou can disable the handset keypad. If there is an in-coming call, the key lock is automatically deactivated and re-activated after the call has ended.
� To activate/deactivate, hold down key
Accepting a call: Press the talk key � .
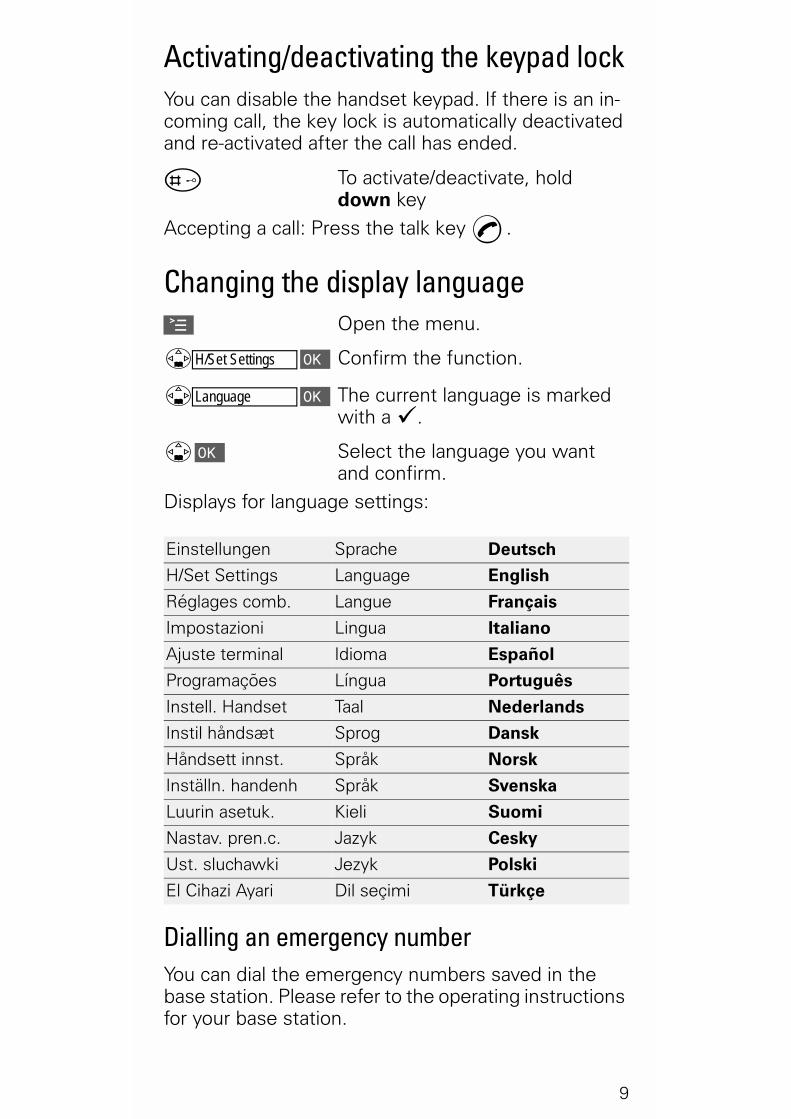
Changing the display language� Open the menu.
�H/Set Settings � Confirm the function.
�Language � The current language is marked with a �.
�� Select the language you want and confirm.
Displays for language settings:
Dialling an emergency numberYou can dial the emergency numbers saved in the base station. Please refer to the operating instructions for your base station.
Einstellungen Sprache Deutsch
H/Set Settings Language English
Réglages comb. Langue Français
Impostazioni Lingua Italiano
Ajuste terminal Idioma Español
Programações Língua Português
Instell. Handset Taal Nederlands
Instil håndsæt Sprog Dansk
Håndsett innst. Språk Norsk
Inställn. handenh Språk Svenska
Luurin asetuk. Kieli Suomi
Nastav. pren.c. Jazyk Cesky
Ust. sluchawki Jezyk Polski
El Cihazi Ayari Dil seçimi Türkçe

10
Registering the handsetTo make calls with your handset, you must "introduce" it to its base station (registering)
● if your handset has already been registered at a different base station (steps 1, 2 and 3) or
● if you want to register the handset as a new hand-set at a Gigaset base station of an older Gigaset range (steps 1 and 3).
Step 1: On the base station or on the base station telephone:
Step 2: On the handset:
� Press the display key.
�H/Set Settings � Select and confirm.
�Register H/Set � Select and confirm.
�� Select the base station.
Step 3: On the handset:
�� Enter the system PIN and con-firm (factory setting 0000) – e.g.
is displayed.
Type On the base station or base telephoneClassic S117/Top S317
Hold down the key on the underside of the base station.
Classic E104/Top E304
Hold down the paging key on the base station until you hear signal tones.
Top E414ISDN
Select ��������, �������������� and ��������� ��� in the menu at the base station telephone and confirm with ��.
Top E514ISDN
Press the LED – it will flash during regis-tration.
Non-Siemens base stations
To register at "GAP base stations", follow the relevant operating instructions (steps 2 and 3).
Regstr.Procedure Base 1
11
Your handset is now ready for operation!
Making calls Making an external call � Enter the telephone number. If
you make a mistake use the ��key�to correct individual digits.
� Press the talk key.
� Press the end call key to end the call.
Making internal calls Open the list of internal users.
Your own handset is identified by "<".
����� Select the handset you want and press the talk key.
or e. g. �� Enter the internal number of the handset.
or �or �� All handsets are called.
� Press the end call key to end the call.
Your handset can be registered at up to four base sta-tions.
● You can also press the talk key ��first and then enter the telephone number - each digit will be di-alled immediately.
● You can cancel the dialling operation by pressing the end call key �.
● You can insert a pause: After entering the prefix, open the menu using the display key ��and select "insert pause".
Call All
12
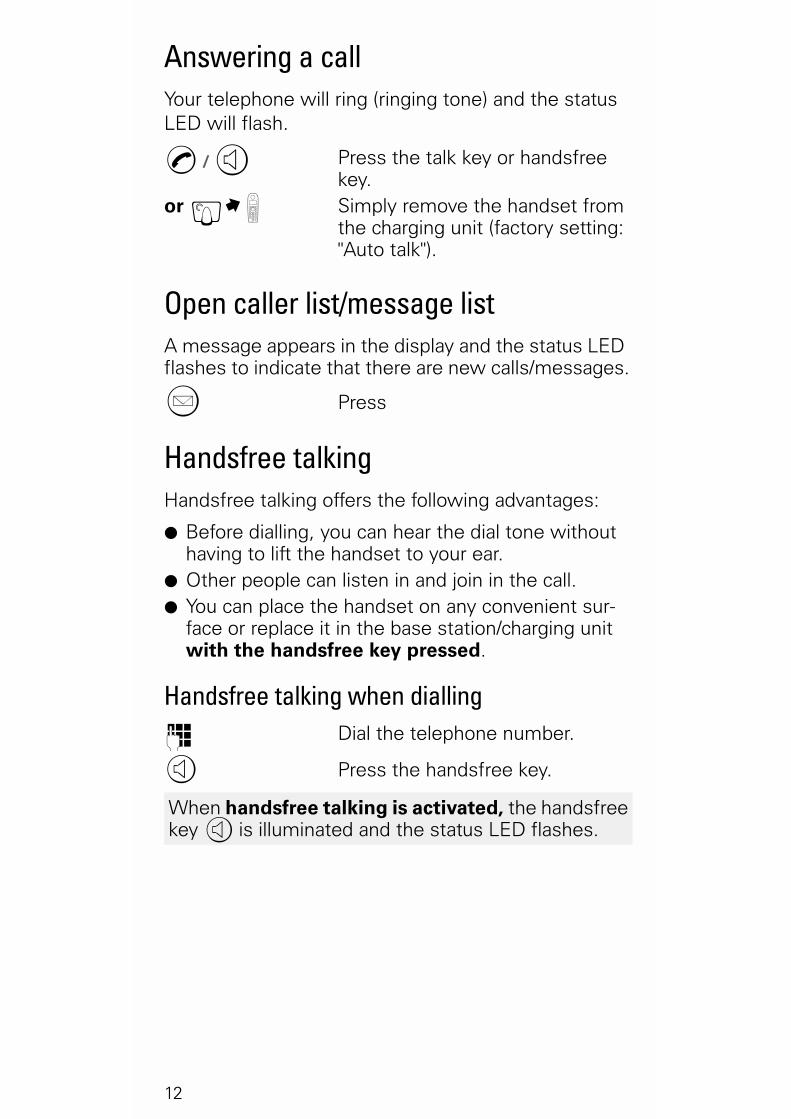
Answering a callYour telephone will ring (ringing tone) and the status LED will flash.
��/ � Press the talk key or handsfree key.
or ��� Simply remove the handset from the charging unit (factory setting: "Auto talk").
Open caller list/message list A message appears in the display and the status LED flashes to indicate that there are new calls/messages.
Press
Handsfree talkingHandsfree talking offers the following advantages:
● Before dialling, you can hear the dial tone without having to lift the handset to your ear.
● Other people can listen in and join in the call. ● You can place the handset on any convenient sur-
face or replace it in the base station/charging unit with the handsfree key pressed.
Handsfree talking when dialling� Dial the telephone number.
� Press the handsfree key.
When handsfree talking is activated, the handsfree key ��is illuminated and the status LED flashes.
13
Handsfree talking during a call� Activate handsfree talking.
To set the volume: Press the handsfree key ��once more.
� End the call.
Forwarding an external call, enquiry callYou can forward an external call to another handset or make an internal enquiry call.
Open the list of internal users.
����� Select the internal user and call.
If the internal user answers:● To forward the call: Press the end call key �.● To end the enquiry call: Use �� to return to the
waiting party.
Automatic redial
Manual redialYou have access to the last five telephone numbers di-alled.
!�� Display and select the telephone number.
� Press the talk key.
�����
�
Raise or lower the volume.
Save the volume level.
Change from handsfree talking to the handset

14
Deleting a number from the redialling list !�� Display and select the telephone
number.� Open the menu.
� Delete Entry � The telephone number is deleted.
Copying a telephone number to the directory !� Display and select the telephone
number.� Open the menu.
� Copy to Directory � The telephone number is entered.
� If you like, you can change the number and enter a name (you can also enter an anniversary see page 19).For notes on how to enter letters and characters see page 16.
� Open the menu.�Save Entry � Save the entry.
15
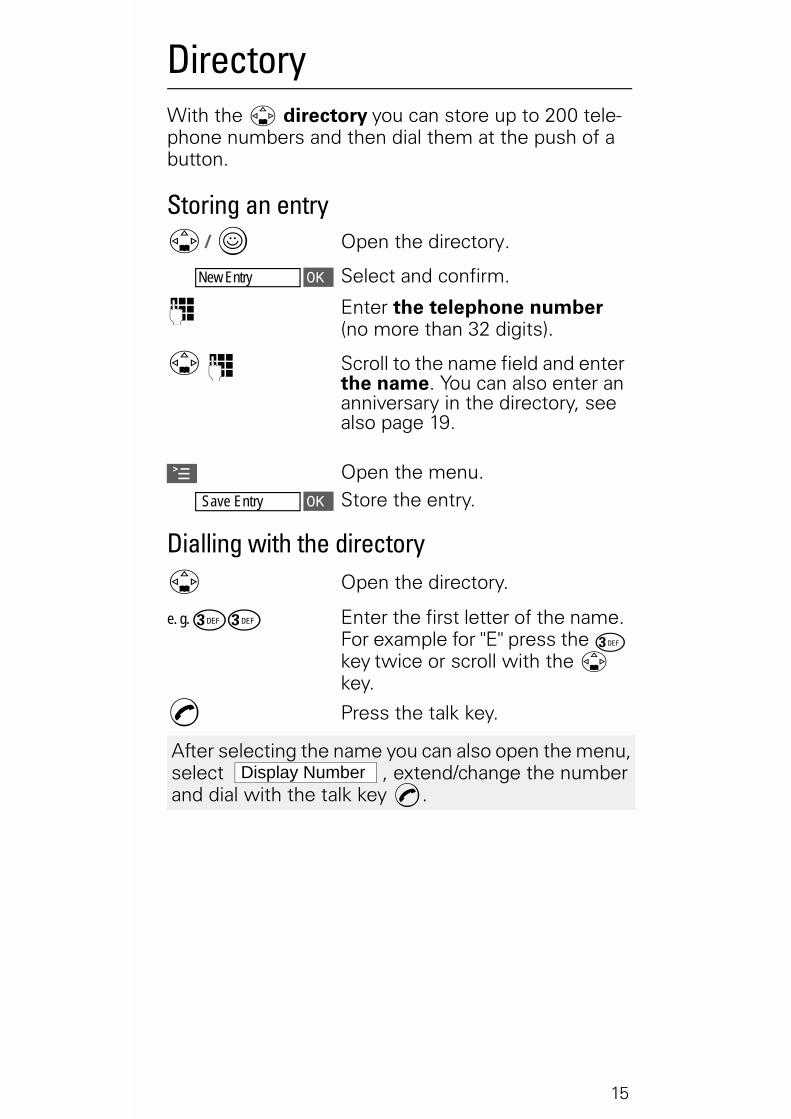
DirectoryWith the � directory�you can store up to 200 tele-phone numbers and then dial them at the push of a button.
Storing an entry��/ " Open the directory.
New Entry � Select and confirm.
� Enter the telephone number (no more than 32 digits).
��� Scroll to the name field and enter the name. You can also enter an anniversary in the directory, see also page 19.
� Open the menu.�Save Entry � Store the entry.
Dialling with the directory� Open the directory.
e. g. ## Enter the first letter of the name. For example for "E" press the#�key�twice or scroll with the ��key.
� Press the talk key.
After selecting the name you can also open the menu, select , extend/change the number and dial with the talk key �.
Display Number
16
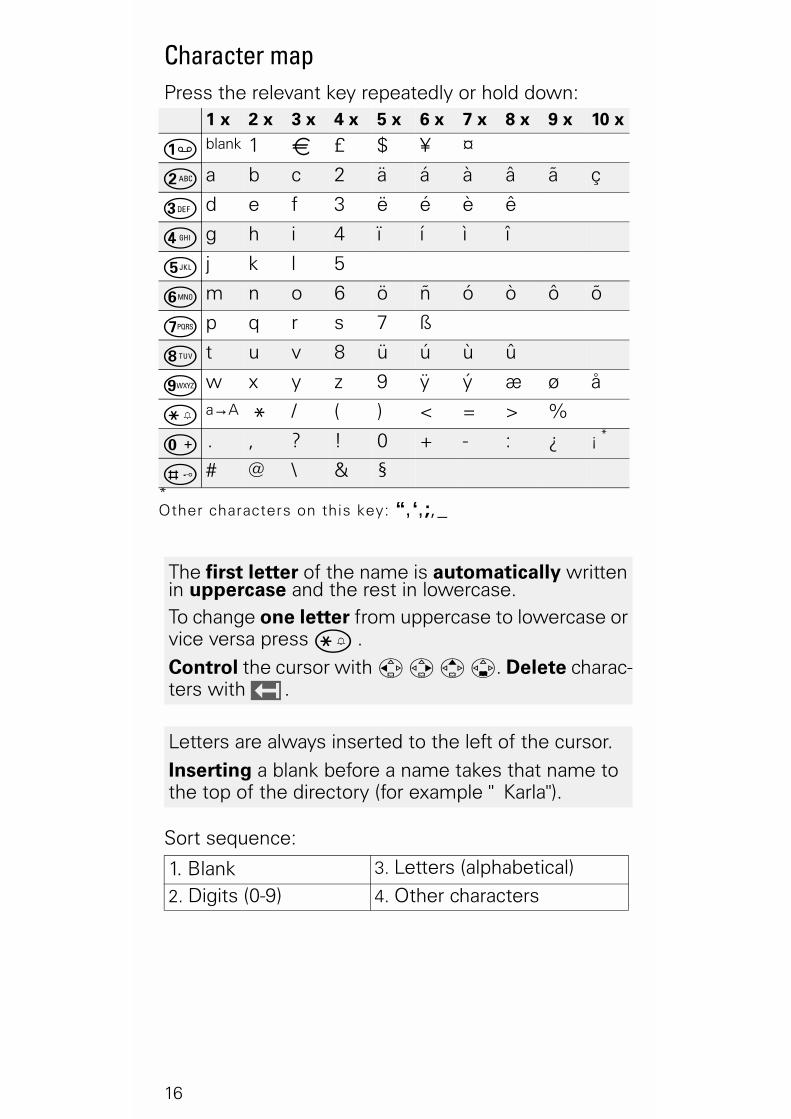
Character map Press the relevant key repeatedly or hold down:
Sort sequence:
1 x 2 x 3 x 4 x 5 x 6 x 7 x 8 x 9 x 10 x
� blank 1 $ £ $ ¥ ¤
� a b c 2 ä á à â ã ç
# d e f 3 ë é è ê
% g h i 4 ï í ì î
� j k l 5
& m n o 6 ö ñ ó ò ô õ
' p q r s 7 ß
( t u v 8 ü ú ù û
� w x y z 9 ÿ ý æ ø å
� a→A * / ( ) < = > %
� . , ? ! 0 + - : ¿ ¡ *
*Other characters on this key: “,‘,;,_
� # @ \ & §
The first letter of the name is automatically written in uppercase and the rest in lowercase.To change one letter from uppercase to lowercase or vice versa press ��.Control the cursor with �����. Delete charac-ters with ��.
Letters are always inserted to the left of the cursor.
Inserting a blank before a name takes that name to the top of the directory (for example "� Karla").
1. Blank 3. Letters (alphabetical)
2. Digits (0-9) 4. Other characters
17
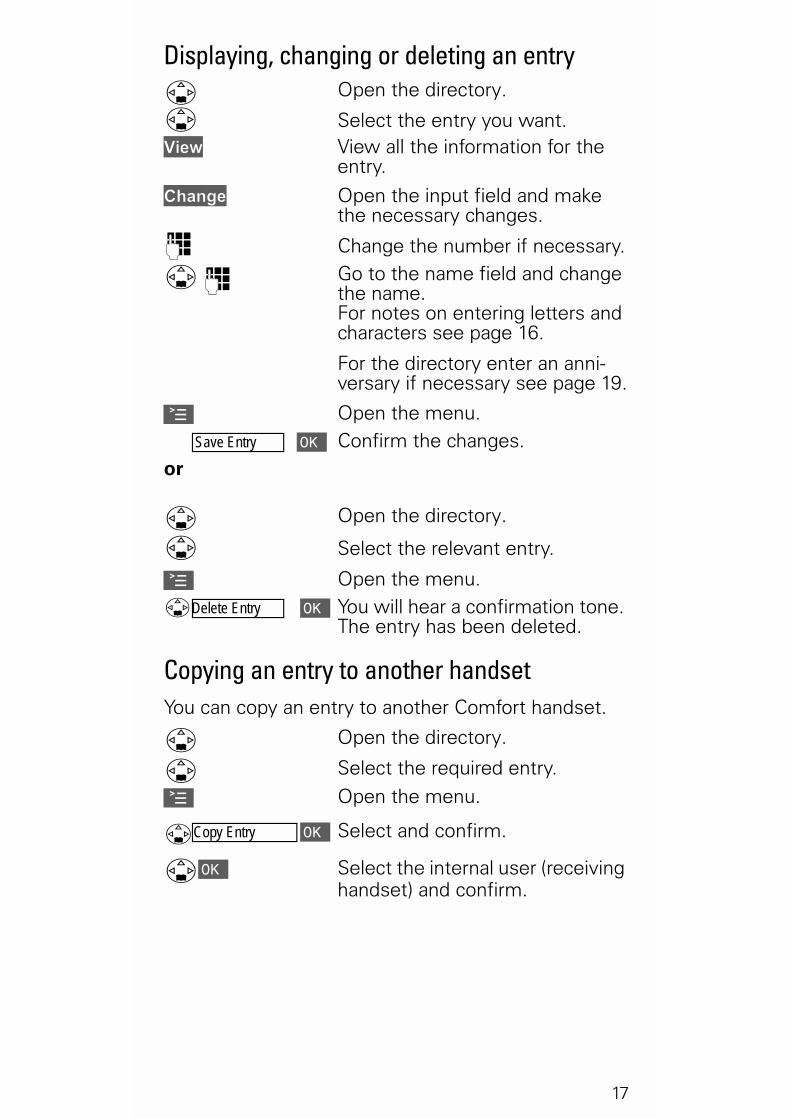
Displaying, changing or deleting an entry� Open the directory.
� Select the entry you want.���� View all the information for the
entry.
������ Open the input field and make the necessary changes.
� Change the number if necessary.
��� Go to the name field and change the name.For notes on entering letters and characters see page 16.
For the directory enter an anni-versary if necessary see page 19.
� Open the menu.Save Entry � Confirm the changes.
or
� Open the directory.
� Select the relevant entry.
� Open the menu.�Delete Entry � You will hear a confirmation tone.
The entry has been deleted.
Copying an entry to another handsetYou can copy an entry to another Comfort handset.
� Open the directory.
� Select the required entry.
� Open the menu.
�Copy Entry � Select and confirm.
�� Select the internal user (receiving handset) and confirm.

18
Copying a further entry:
��� Press.
� Select the required number.���� Initiate the copy process.
Copying the directory:
You can copy the entire directory list to another Comfort handset. See "Copying an entry to another handset".
Deleting the directory
� Open the directory.
� Select the required entry.
� Open the menu.
�Delete List � Select and confirm.
��� Confirm the deletion of all entries.
Transmission is interrupted:
● if the memory of the receiving handset is full (the last entry is displayed on the sending handset).
● if you receive a call.
Copying of an entry is completed.
19
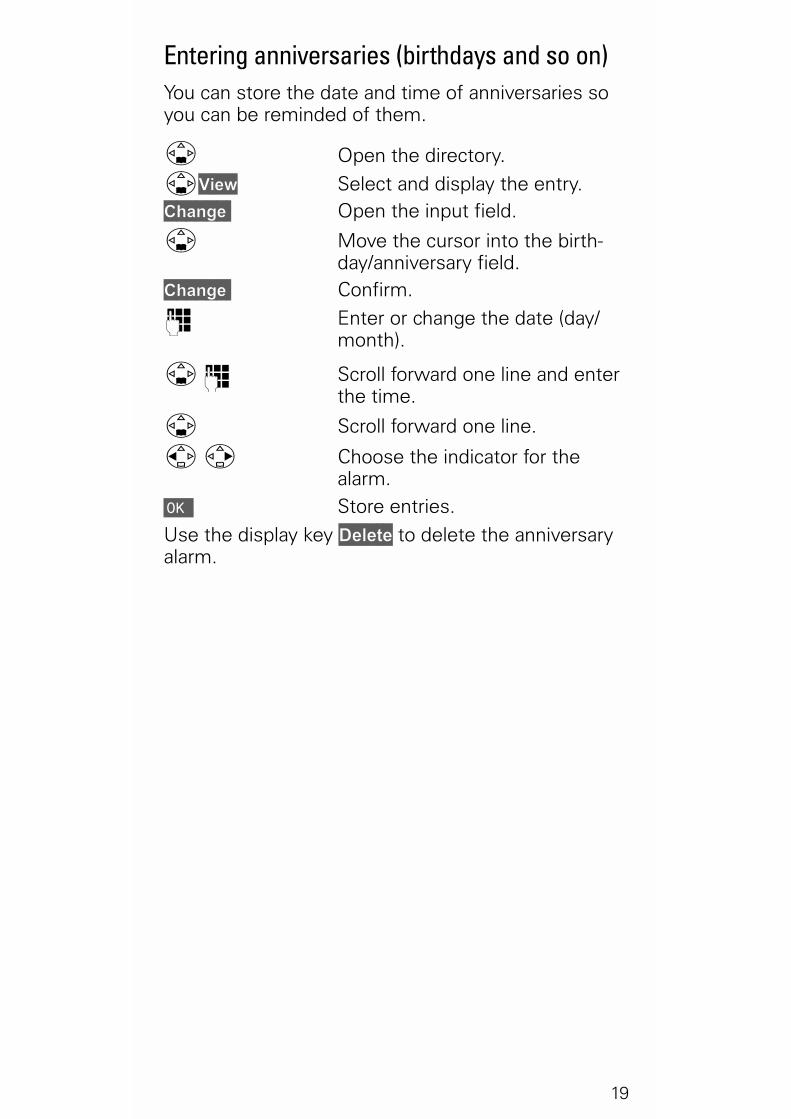
Entering anniversaries (birthdays and so on)You can store the date and time of anniversaries so you can be reminded of them.
� Open the directory.
����� Select and display the entry.������ Open the input field.
� Move the cursor into the birth-day/anniversary field.
������ Confirm.
� Enter or change the date (day/month).
��� Scroll forward one line and enter the time.
� Scroll forward one line.
� Choose the indicator for the alarm.
� Store entries.
Use the display key ������ to delete the anniversary alarm.
20
Settings
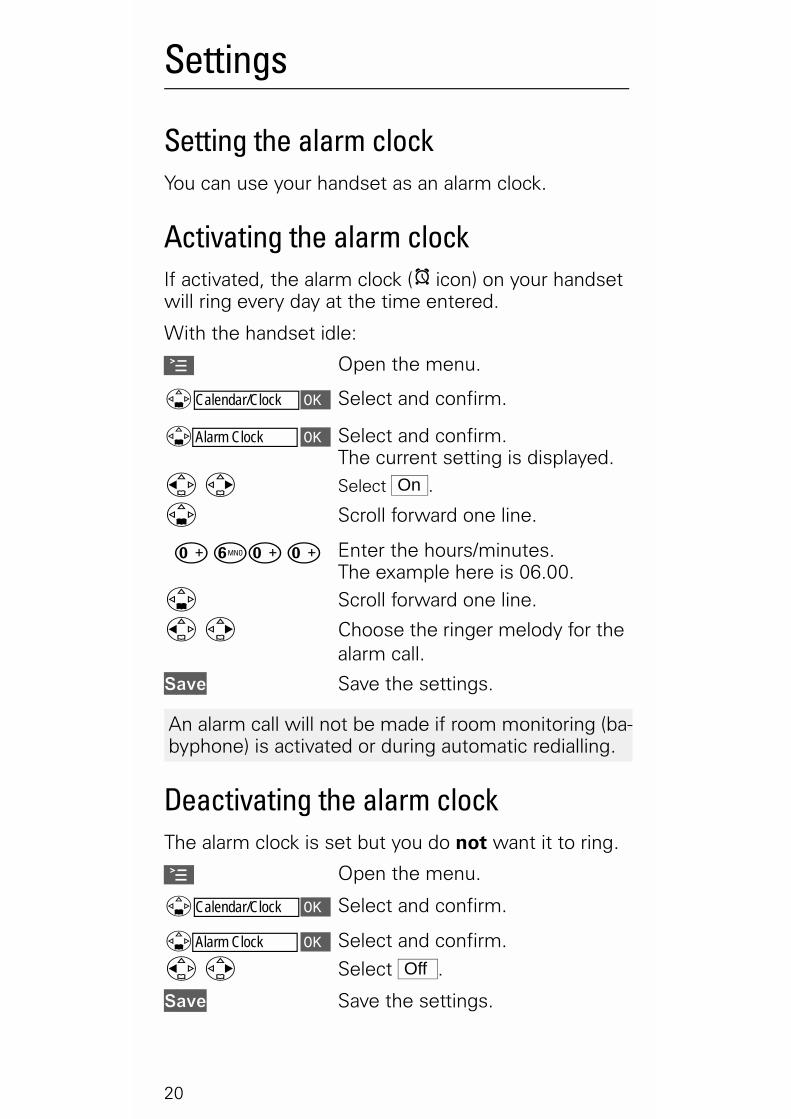
Setting the alarm clockYou can use your handset as an alarm clock.
Activating the alarm clockIf activated, the alarm clock ()�icon) on your handset will ring every day at the time entered.
With the handset idle:
� Open the menu.
�Calendar/Clock � Select and confirm.
�Alarm Clock � Select and confirm.The current setting is displayed.
� Select .
� Scroll forward one line.
��&��� Enter the hours/minutes. The example here is 06.00.
�� Scroll forward one line.
� Choose the ringer melody for the alarm call.
���� Save the settings.
Deactivating the alarm clockThe alarm clock is set but you do not want it to ring.
� Open the menu.
�Calendar/Clock � Select and confirm.
�Alarm Clock � Select and confirm.
�� Select .
���� Save the settings.
On
An alarm call will not be made if room monitoring (ba-byphone) is activated or during automatic redialling.
Off
21
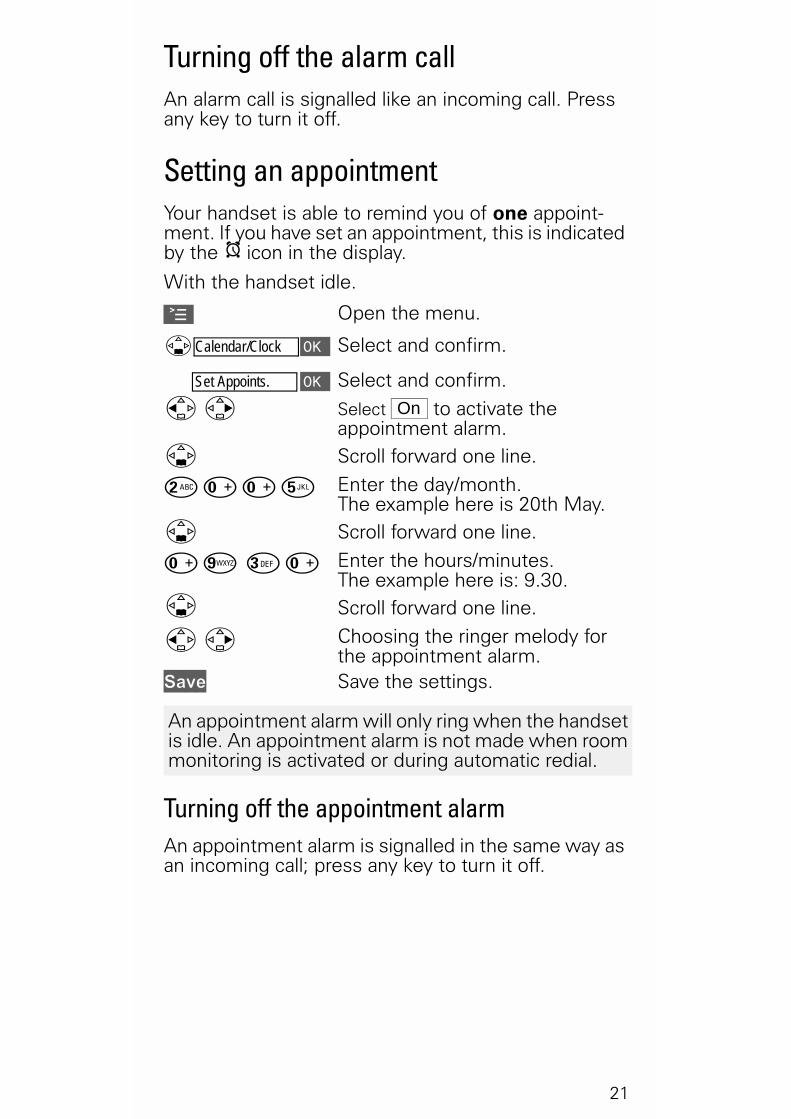
Turning off the alarm callAn alarm call is signalled like an incoming call. Press any key to turn it off.
Setting an appointmentYour handset is able to remind you of one appoint-ment. If you have set an appointment, this is indicated by the )�icon in the display.
With the handset idle.
� Open the menu.
�Calendar/Clock � Select and confirm.
Set Appoints. � Select and confirm.
�� Select to activate the appointment alarm.
� Scroll forward one line.
������� Enter the day/month. The example here is 20th May.
� Scroll forward one line.
�����#�� Enter the hours/minutes. The example here is: 9.30.
� Scroll forward one line.
� Choosing the ringer melody for the appointment alarm.
���� Save the settings.
Turning off the appointment alarmAn appointment alarm is signalled in the same way as an incoming call; press any key to turn it off.
On
An appointment alarm will only ring when the handset is idle. An appointment alarm is not made when room monitoring is activated or during automatic redial.
22
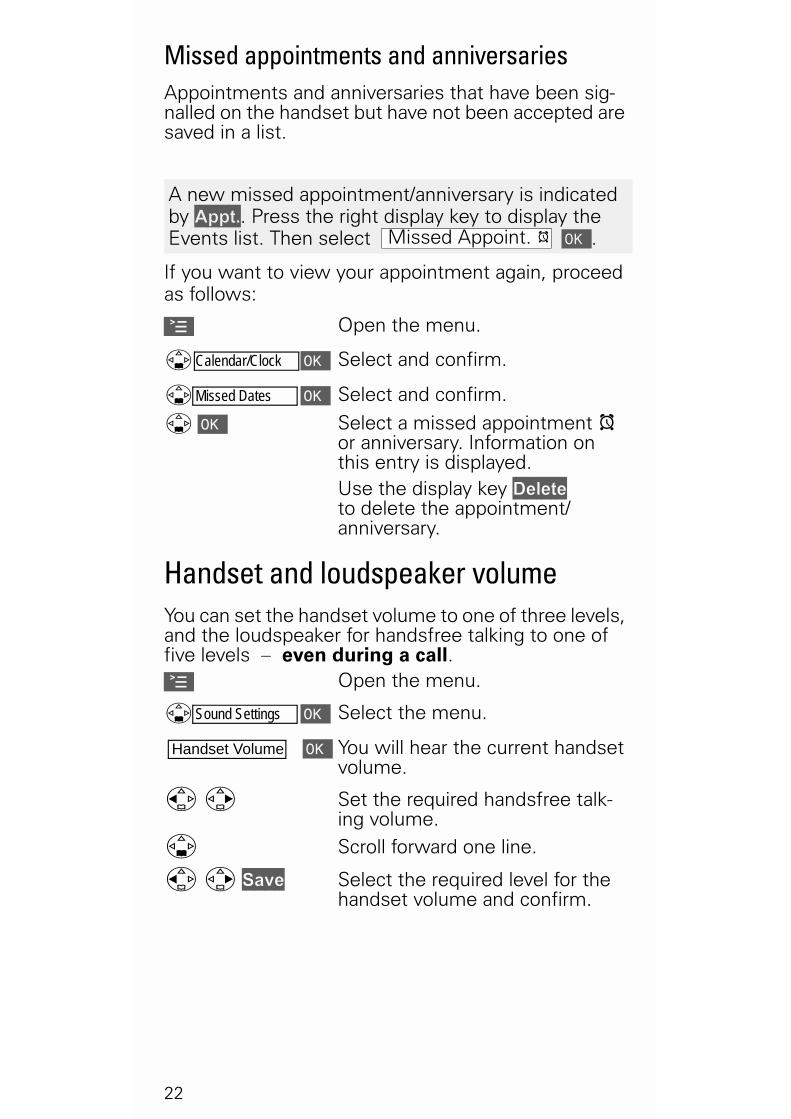
Missed appointments and anniversaries Appointments and anniversaries that have been sig-nalled on the handset but have not been accepted are saved in a list.
If you want to view your appointment again, proceed as follows:
� Open the menu.
�Calendar/Clock � Select and confirm.
�Missed Dates � Select and confirm.
��� Select a missed appointment )�or anniversary. Information on this entry is displayed. Use the display key ������ to delete the appointment/anniversary.
Handset and loudspeaker volumeYou can set the handset volume to one of three levels, and the loudspeaker for handsfree talking to one of five levels – even during a call.� Open the menu.
�Sound Settings � Select the menu.
Handset Volume � You will hear the current handset volume.
�� Set the required handsfree talk-ing volume.
� Scroll forward one line.
������� Select the required level for the handset volume and confirm.
A new missed appointment/anniversary is indicated by �����. Press the right display key to display the Events list. Then select �.Missed Appoint. )

23
Setting the ringer volume/melodyYou can choose from five ringer volumes, "crescen-do" ring (increasing volume), ringer off and any of ten ringer melodies:
� Open the menu.
�Sound Settings � Select and confirm.
�Ringer Settings � You will hear the current ringer volume and its level will be displayed.
�� Select the ringer volume.
�� Scroll forward one line.
������� Select the required ringer mel-ody (1–10) and confirm.
Time control for ringer volumeYou can set a different ringer volume for a particular time of day.
� Open the menu.
�Sound Settings � Select and confirm.
�Ringer Settings � You will hear the current ringer volume and its level will be dis-played.
������ Press.� Activate/deactivate time control.
�� Enter the period for the different ringer
e. g. �������� from 11:00 to 15:00.
�� Scroll forward one line and select the ringer volume
�������� Save the settings.���� or� Press.
24
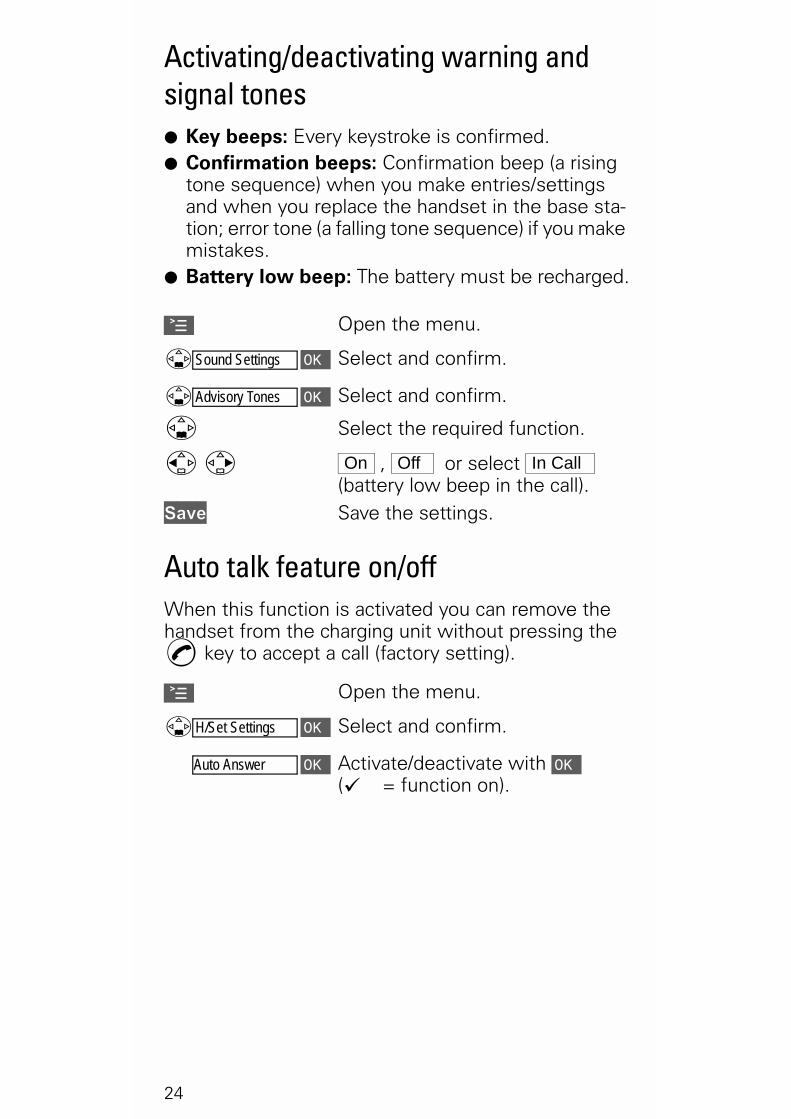
Activating/deactivating warning and signal tones● Key beeps: Every keystroke is confirmed.● Confirmation beeps: Confirmation beep (a rising
tone sequence) when you make entries/settings and when you replace the handset in the base sta-tion; error tone (a falling tone sequence) if you make mistakes.
● Battery low beep: The battery must be recharged.
� Open the menu.
�Sound Settings � Select and confirm.
�Advisory Tones � Select and confirm.
�� Select the required function.
�� , or select (battery low beep in the call).
���� Save the settings.
Auto talk feature on/offWhen this function is activated you can remove the handset from the charging unit without pressing the � key to accept a call (factory setting).
� Open the menu.
�H/Set Settings � Select and confirm.
*Auto Answer � Activate/deactivate with �+(� = function on).
On Off In Call

25
Resetting to the factory defaultsThe directory and the caller list are not deleted when you reset the handset. Registration at the base station is not affected.
� Open the menu.
�H/Set Settings � Select and confirm.
�Reset Handset � Select and confirm.
��� Confirm.
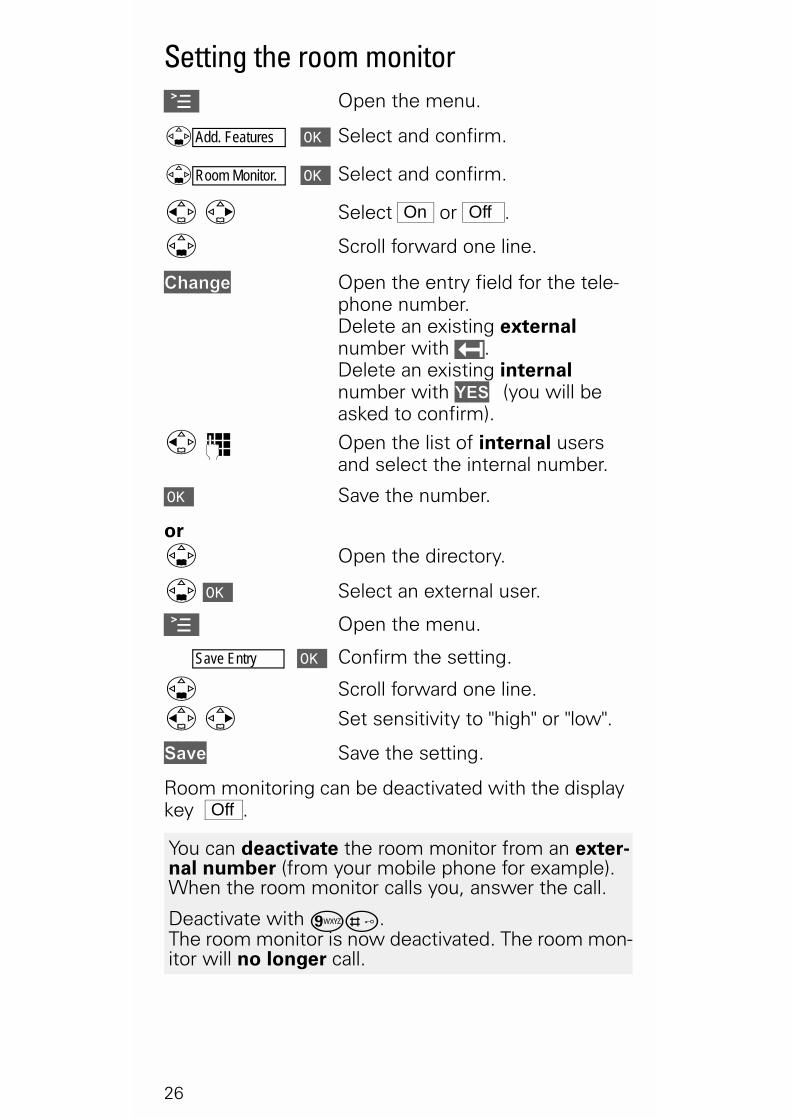
Room monitoring (babyphone)
You can use your handset as a baby monitor. The handset should be placed at least 1 to 2 meters away from your baby. If a certain noise level is reached (for example if your baby is crying) the handset will auto-matically dial the number you stored (internal or external). When the room monitor is active, incoming calls are merely displayed.
Function Factory settingHandset volume 1Ringer volume ("ring tone",) 5Ringer melody 1Auto talk OnBattery low beep OnHandsfree volume 3Room monitor level highTime control offDisplay language localRedialling list deleted
Only possible with base stations that support this feature.
26
Setting the room monitor� Open the menu.
�Add. Features � Select and confirm.
�Room Monitor. � Select and confirm.
�� Select or .
� Scroll forward one line.
������� Open the entry field for the tele-phone number. Delete an existing external number with �. Delete an existing internal number with ��� (you will be asked to confirm).
�� Open the list of internal users and select the internal number.
� Save the number.
or� Open the directory.
��� Select an external user.
� Open the menu.
Save Entry � Confirm the setting.
� Scroll forward one line.
� Set sensitivity to "high" or "low".
���� Save the setting.
Room monitoring can be deactivated with the display key .
On Off
You can deactivate the room monitor from an exter-nal number (from your mobile phone for example). When the room monitor calls you, answer the call.
Deactivate with ��.The room monitor is now deactivated. The room mon-itor will no longer call.
Off
27
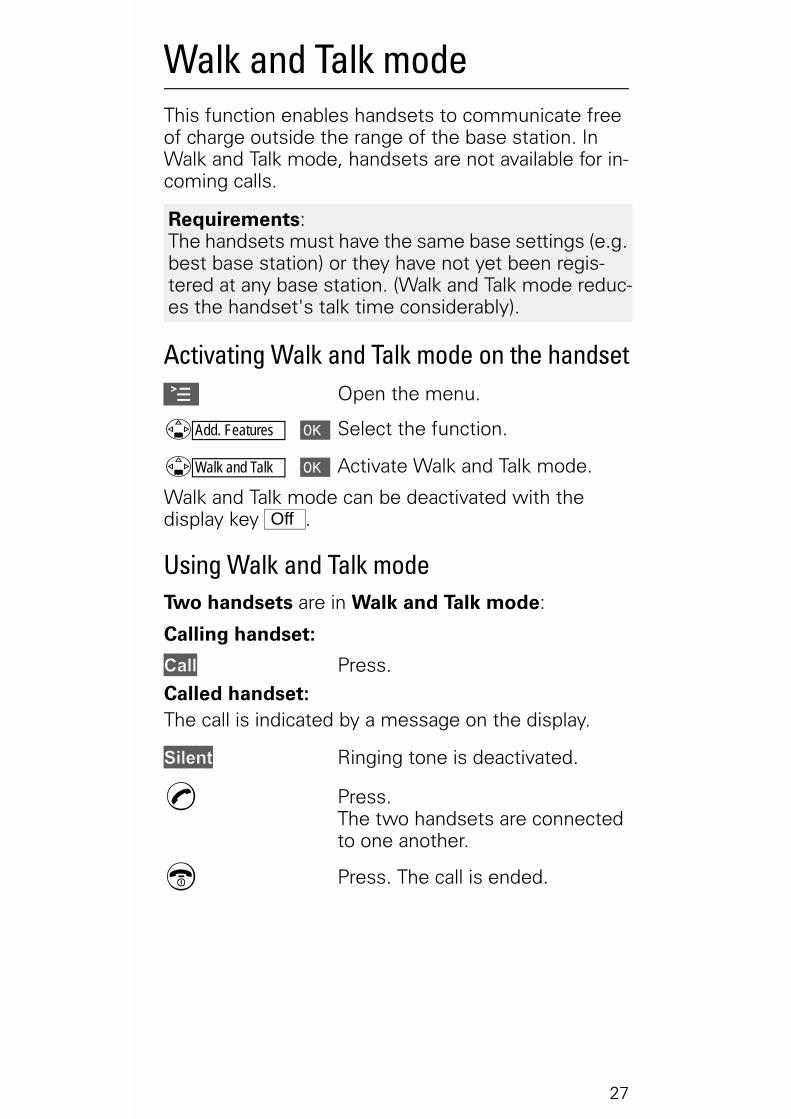
Walk and Talk modeThis function enables handsets to communicate free of charge outside the range of the base station. In Walk and Talk mode, handsets are not available for in-coming calls.
Activating Walk and Talk mode on the handset� Open the menu.
�Add. Features � Select the function.
�Walk and Talk � Activate Walk and Talk mode.
Walk and Talk mode can be deactivated with the display key .
Using Walk and Talk modeTwo handsets are in Walk and Talk mode:
Calling handset:
���� Press.
Called handset:The call is indicated by a message on the display.
������� Ringing tone is deactivated.
� Press.The two handsets are connected to one another.
� Press. The call is ended.
Requirements: The handsets must have the same base settings (e.g. best base station) or they have not yet been regis-tered at any base station. (Walk and Talk mode reduc-es the handset's talk time considerably).
Off

28
Appendix
Operating on base stations
Pronto 210, Top E401, Classic E104, Top E304, Top E414ISDN and Top E514ISDNThe following functions on your Comfort handset are not supported by these base stations.
● Setting the time (the time is not transferred after the handset has been switched off)
● Changing the display language● Room monitoring (cannot be switched off
externally)
Classic S117, Top S317The following functions on your Comfort handset are not supported by the above-mentioned base stations:
● Changing the display language● Setting authorisation stages
29
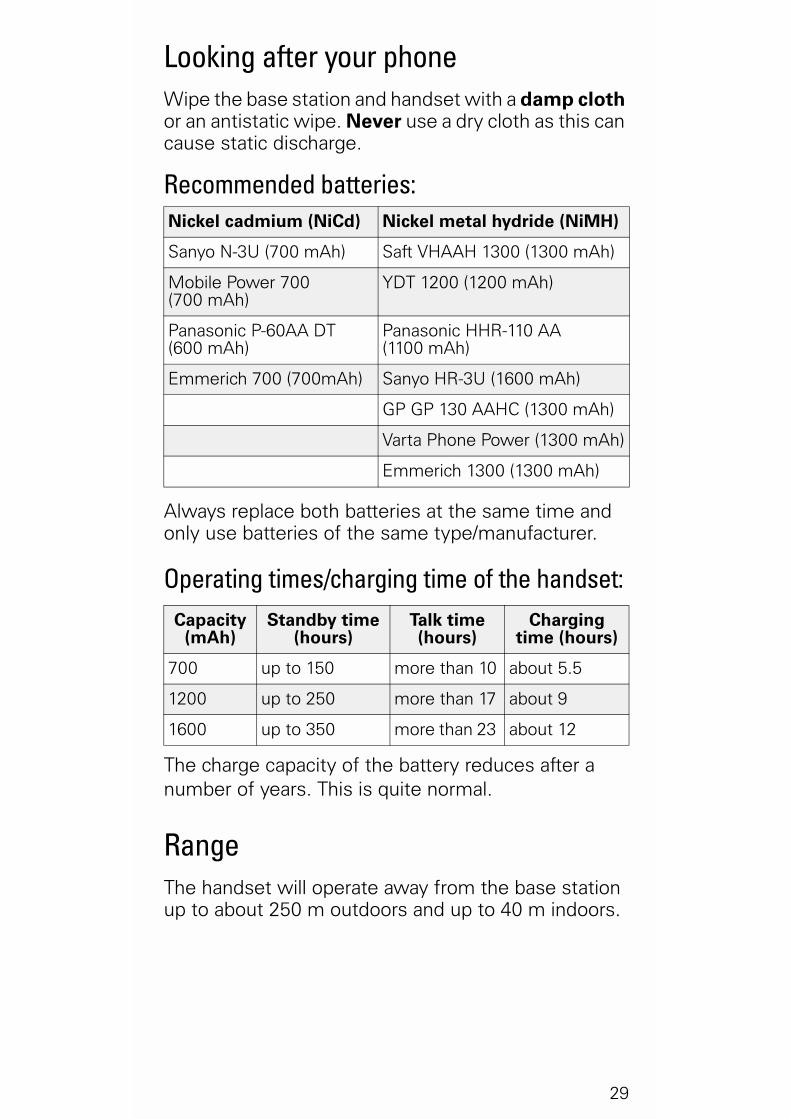
Looking after your phoneWipe the base station and handset with a damp cloth or an antistatic wipe. Never use a dry cloth as this can cause static discharge.
Recommended batteries:
Always replace both batteries at the same time and only use batteries of the same type/manufacturer.
Operating times/charging time of the handset:
The charge capacity of the battery reduces after a number of years. This is quite normal.
RangeThe handset will operate away from the base station up to about 250 m outdoors and up to 40 m indoors.
Nickel cadmium (NiCd) Nickel metal hydride (NiMH)
Sanyo N-3U (700 mAh) Saft VHAAH 1300 (1300 mAh)
Mobile Power 700 (700 mAh)
YDT 1200 (1200 mAh)
Panasonic P-60AA DT(600 mAh)
Panasonic HHR-110 AA (1100 mAh)
Emmerich 700 (700mAh) Sanyo HR-3U (1600 mAh)
GP GP 130 AAHC (1300 mAh)
Varta Phone Power (1300 mAh)
Emmerich 1300 (1300 mAh)
Capacity(mAh)
Standby time(hours)
Talk time(hours)
Charging time (hours)
700 up to 150 more than 10 about 5.5
1200 up to 250 more than 17 about 9
1600 up to 350 more than 23 about 12

30
GuaranteeThe guarantee period is two years from the date of pur-chase.
For repairs to be carried out under the guarantee, the defec-tive item must be accompanied by a completed guarantee card that has been stamped by the dealer at the time and place of purchase.
The guarantee does not cover any defects or damage caused by improper use or wear and tear or third-party inter-vention. The guarantee does not cover consumables or defects which only have a minor effect on the value or oper-ability of the phone.
If a defect occurs please contact your dealer.
Repair/maintenance Leased phones
If your phone is not functioning correctly please contact the Repair Service Team (Tel. 175).
The actual repair* and repair process are free of charge.
Purchased phones
Within the guarantee period, repairs to the phone will be carried out free of charge in accordance with the provisions of the guarantee*. The defective phone must be returned to the original place of purchase for repair.
Where the Repair Service Team is called out (including dur-ing the guarantee period), the repair process will be chargea-ble (travel costs and time spent). Beyond the guarantee period the repair costs incurred will also be chargeable.
Battery
A battery is a consumable good and is therefore not covered by the guarantee. There will be a charge for replacing defec-tive batteries. This applies to both leased and purchased phones.
* excluding damage to spare parts such as batteries and belt clipsand damage through improper use caused by dropping the phoneor ingress of moisture.

31
Assistance
If you have any general enquiries about our products or serv-ices please contact the Swisscom information helpline (Freephone 0800 800 135).
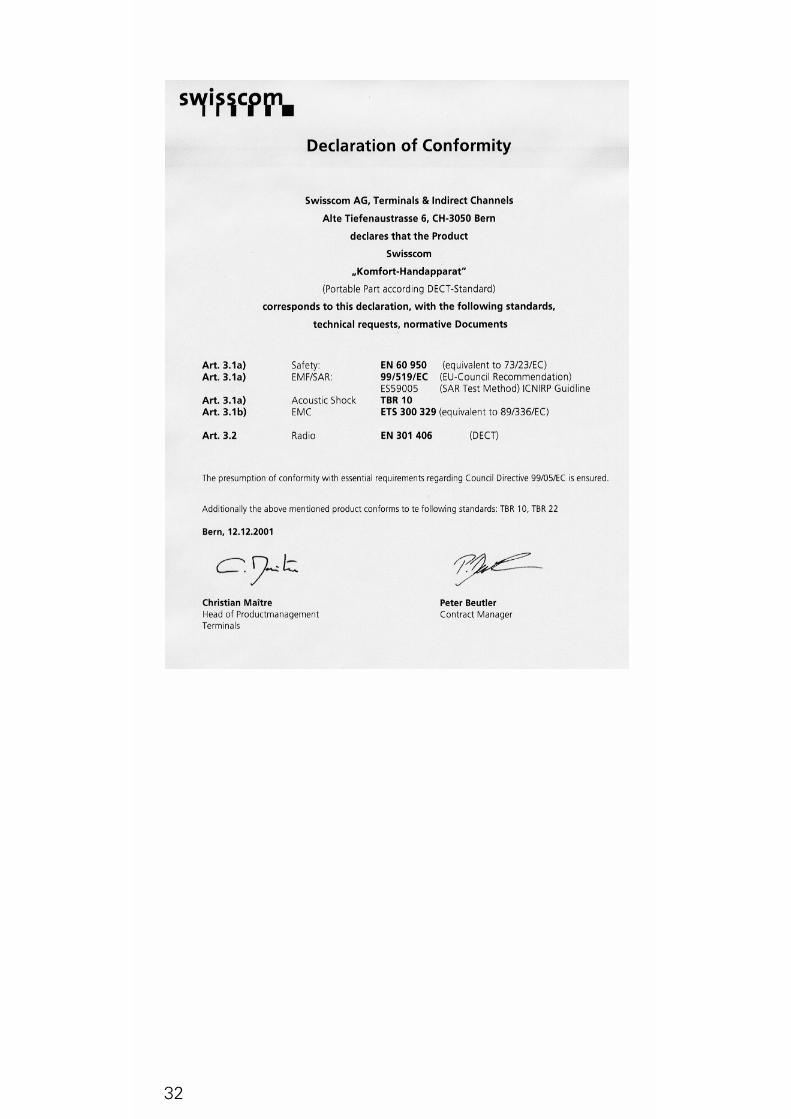
Approval conformity This handset can be used throughout the EU and in Switzer-land.
Country-specific requirements have been taken into consideration. Should you have any queries relating to differences between the public telephone networks please contact your service provider or specialist dealer. The CE symbol indicates that the telephone complies with the essential requirements of the R&TTE directive.
The manufacturer declares, that the above mentioned product is manufacturedaccording to the Full Quality Assurance System with the registration number"Q810820M" in compliance with ANNEX V of the R&TTE-Directive99/05/EC. The presumption of conformity with the essential requirementsregarding Council Directive 99/05/EC is ensured.
The original declaration has been issued.
32