commissioning guide for sun2000 8-28ktl · commissioning guide for sun2000 8- 28ktl public...
TRANSCRIPT
Commissioning guide for SUN2000 8-28KTL Public
2019-01-29 [email protected]
Page1, Total14
Commissioning guide for SUN2000 8-28KTL
Huawei Technologies Co. Ltd.
Version Created by Date Remarks
01 Huawei e84081311 24.01.2019 SUN2000 8-28KTL The information in this document may contain predictive statements including, without limitation, statements regarding the future financial and operating results, future product portfolio, new technology, etc. There are a number of factors that could cause actual results and developments to differ materially from those expressed or implied in the predictive statements. Therefore, such information is provided for reference purpose only and constitutes neither an offer nor an acceptance. Huawei may change the information at any time without notice.

Commissioning guide for SUN2000 8-28KTL Public
2019-01-29 [email protected]
Page2, Total14
This document describe how to commissioning the SUN2000 8-28KTL inverter connected to a Smartlogger1000 through RS485 communication using LCD screen of the inverter and Smartlogger1000.
1. Connect the RS485 communication cable Communication mode for a single SUN2000:
Communication mode for multiple SUN2000s:
A 24 AWG outdoor shielded network cable with the following specifications is recommended for use as an RS485 communications cable: - With an internal resistance less than or equal to 1.5 ohms/10 m - With an outer diameter of 4.5-7.5 mm (8 core wires, each with a diameter of 1.00-1.07 mm) A waterproof RJ45 connector has five parts: shielded plug, plastic housing, coupling nut, seal ring, and sealing nut. Connect the last inverter from the chain in COM1 of the Smartlogger1000 like below. If you have only one inverter connect the RS485 output to the COM1 of the Smartlogger1000.

Commissioning guide for SUN2000 8-28KTL Public
2019-01-29 [email protected]
Page3, Total14
The RJ45 connector have the connection sequence:
2. Set the inverter After you connect the DC inputs, AC output and RS485 communication cable, power on the inverter and follow the below steps to commissioning the inverter. Button description:
Enter-help you to access the menu
Arrow-help you to navigate in the menu
Escape-help you to exit from the menu
Commissioning guide for SUN2000 8-28KTL Public
2019-01-29 [email protected]
Page4, Total14
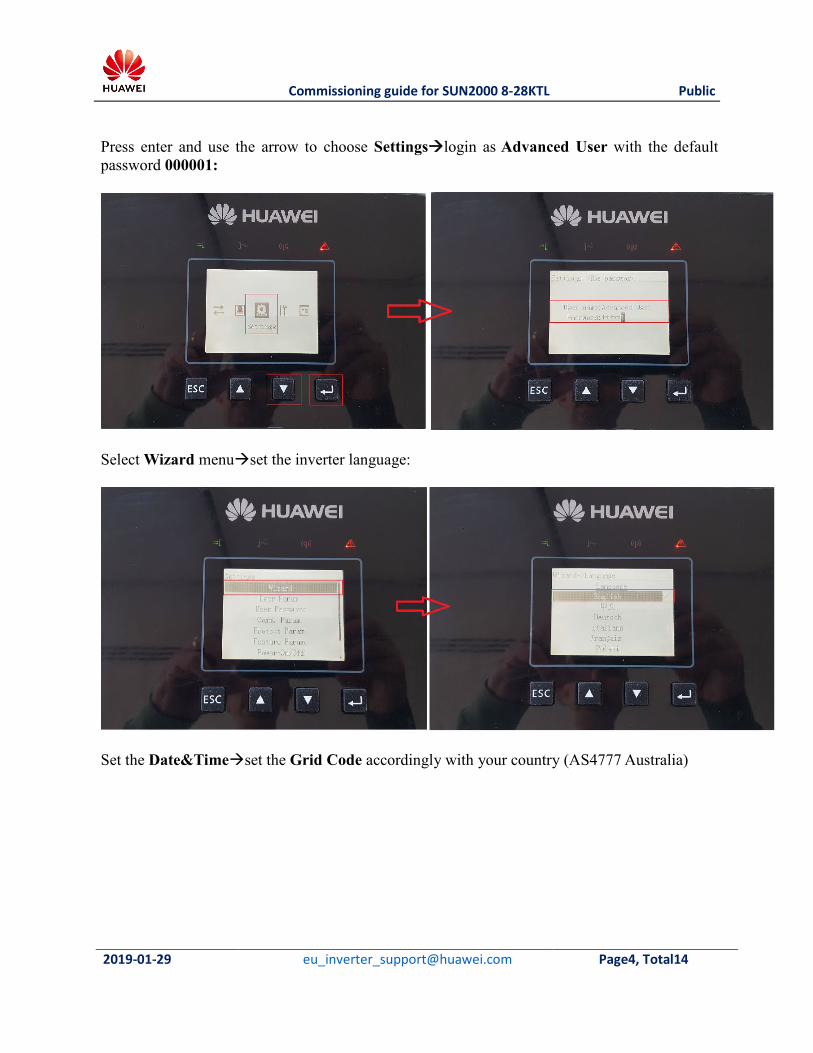
Press enter and use the arrow to choose Settingslogin as Advanced User with the default password 000001:
Select Wizard menuset the inverter language:
Set the Date&Timeset the Grid Code accordingly with your country (AS4777 Australia)

Commissioning guide for SUN2000 8-28KTL Public
2019-01-29 [email protected]
Page5, Total14
Confirm with Enter:
3. Enable the match resistance on inverter When you use the RS485 communication it is necessary to enable the match resistance on the last inverter from the chain (the farthest away from the Smartlogger1000). If you install only one inverter you need also to enable the match resistance like below. Press enter and use the arrow to choose Settingslogin as Advanced User with the default password 000001:

Commissioning guide for SUN2000 8-28KTL Public
2019-01-29 [email protected]
Page6, Total14
Select Comm. Param. select RS485:
Select match resistance: Connect Set the address start with 1 different for each inverter.

Commissioning guide for SUN2000 8-28KTL Public
2019-01-29 [email protected]
Page7, Total14
After you perform all the above steps check the inverter status on the main menu. The inverter status should be on-grid and start to produce.
4. Add the inverter in Smartlogger1000 Power on the Smartlogger1000 and before start to add the inverter you need to set the Smartlogger1000 user parameters. Press Enter and use the arrow to select Settings menu select User Param.

Commissioning guide for SUN2000 8-28KTL Public
2019-01-29 [email protected]
Page8, Total14
Set the next parameters: language, date&time, date format, currency and electricity price
Press ESC and from the main menu choose Maintenancelogin as Advanced User

Commissioning guide for SUN2000 8-28KTL Public
2019-01-29 [email protected]
Page9, Total14
Select Device Mgmt. select Addr. Allocate (if you already set on each inverter the RS485 address you can select Auto Search and Smartlogger1000 will add automatically the inverter)
Set the Start address to 1 confirm with Enter

Commissioning guide for SUN2000 8-28KTL Public
2019-01-29 [email protected]
Page10, Total14
Smartlogger1000 start to allocate the device address confirm with Enter to adjust the address
Before adjust the address Smartlogger1000 will show how many inverters are connected, confirm with Enter Smartlogger1000 will start to adjust the address for each inverter connected
Commissioning guide for SUN2000 8-28KTL Public
2019-01-29 [email protected]
Page11, Total14
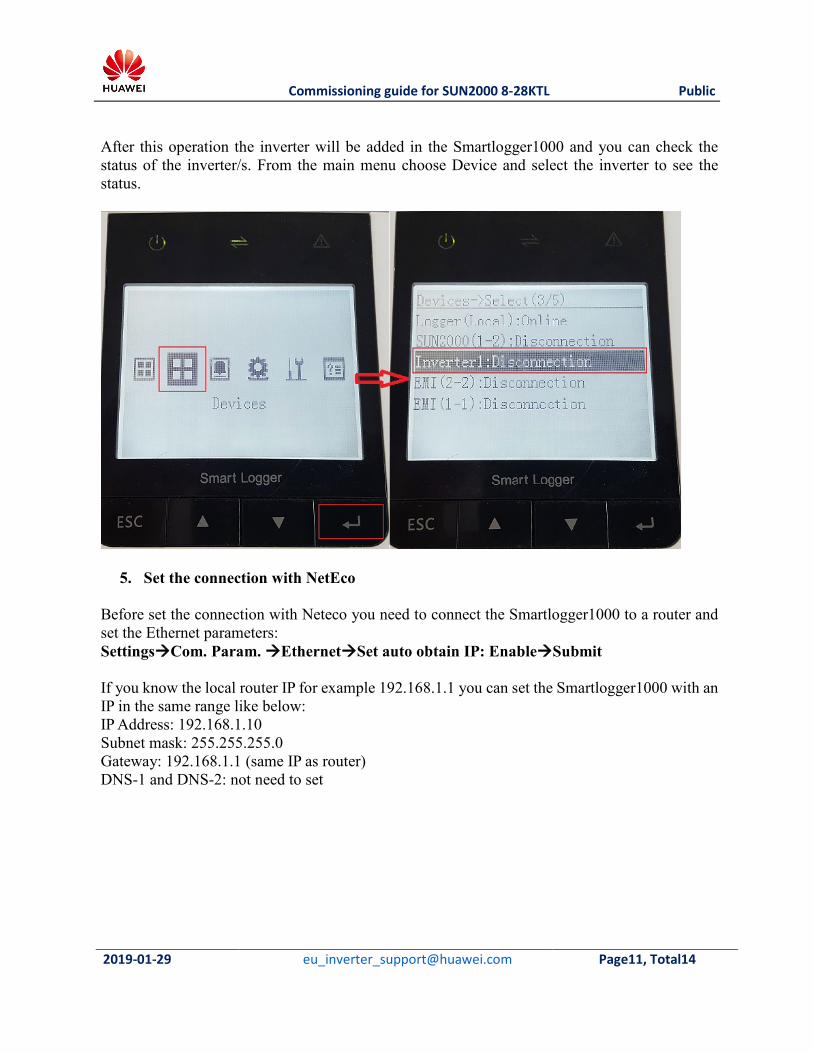
After this operation the inverter will be added in the Smartlogger1000 and you can check the status of the inverter/s. From the main menu choose Device and select the inverter to see the status.
5. Set the connection with NetEco Before set the connection with Neteco you need to connect the Smartlogger1000 to a router and set the Ethernet parameters: SettingsCom. Param. EthernetSet auto obtain IP: EnableSubmit If you know the local router IP for example 192.168.1.1 you can set the Smartlogger1000 with an IP in the same range like below: IP Address: 192.168.1.10 Subnet mask: 255.255.255.0 Gateway: 192.168.1.1 (same IP as router) DNS-1 and DNS-2: not need to set


Commissioning guide for SUN2000 8-28KTL Public
2019-01-29 [email protected]
Page13, Total14
Set the NetEco IP like below: SettingsCom.Param. Management System set the server IP: 52.65.198.34you can perform a network test if it’s available
Send to service support at [email protected] the next details to create an installer/customer account for you: -PV plant address -PV plant name -User name (installer and the customer) -Smartlogger SN Use the next link https://au.fusionsolar.huawei.com to connect on Neteco in a browser. Once you have an installer account you can monitories all the installed PV plants, create the plants and user for your customer by yourself. With the same account you can connect on Neteco APP that you can install from Google Play or IOS Store to monitories your PV plant. The domain name is : au.fusionsolar.huawei.com
