communicating with others - the college of …cs5789/2009/slides/serial-io.pdfcommunicating with...
TRANSCRIPT
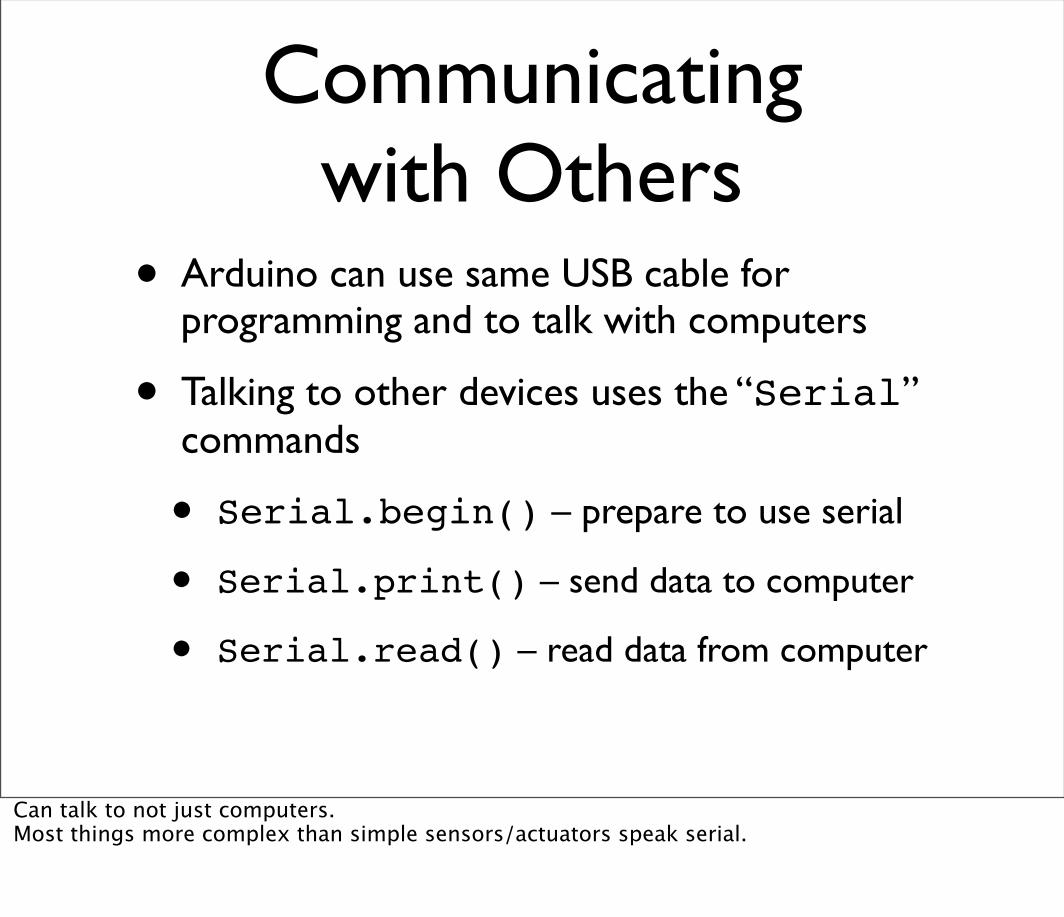
Communicatingwith Others
• Arduino can use same USB cable for programming and to talk with computers
• Talking to other devices uses the “Serial” commands
• Serial.begin() – prepare to use serial
• Serial.print() – send data to computer
• Serial.read() – read data from computer
Can talk to not just computers. Most things more complex than simple sensors/actuators speak serial.
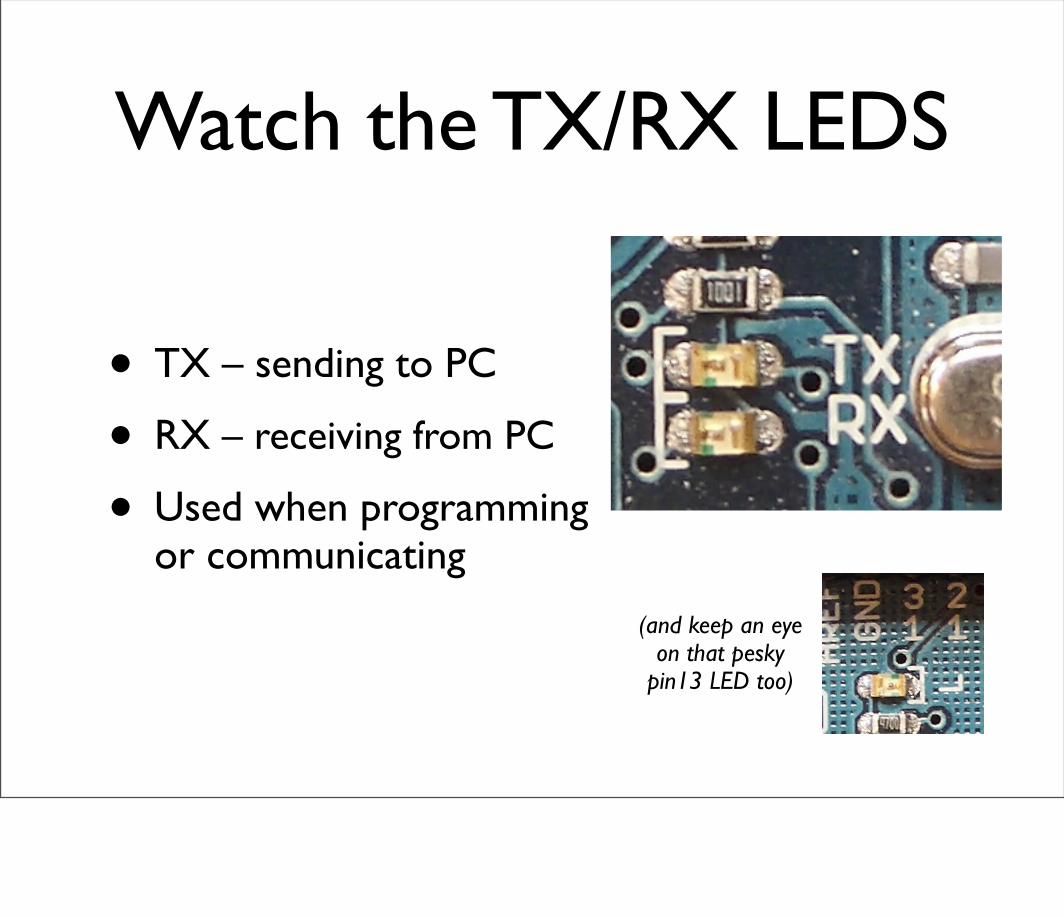
Watch the TX/RX LEDS
• TX – sending to PC
• RX – receiving from PC
• Used when programming or communicating
(and keep an eye on that pesky
pin13 LED too)
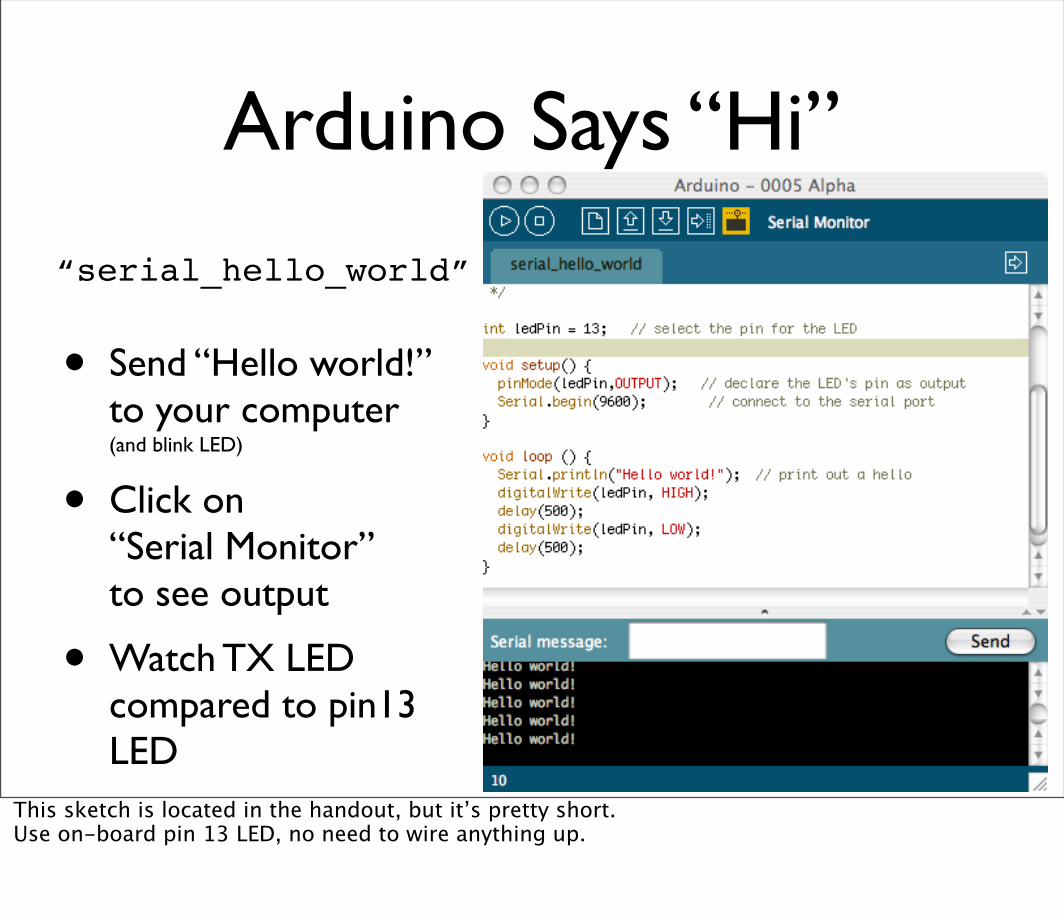
Arduino Says “Hi”
• Send “Hello world!” to your computer(and blink LED)
• Click on“Serial Monitor”to see output
• Watch TX LED compared to pin13 LED
“serial_hello_world”
This sketch is located in the handout, but it’s pretty short.Use on-board pin 13 LED, no need to wire anything up.
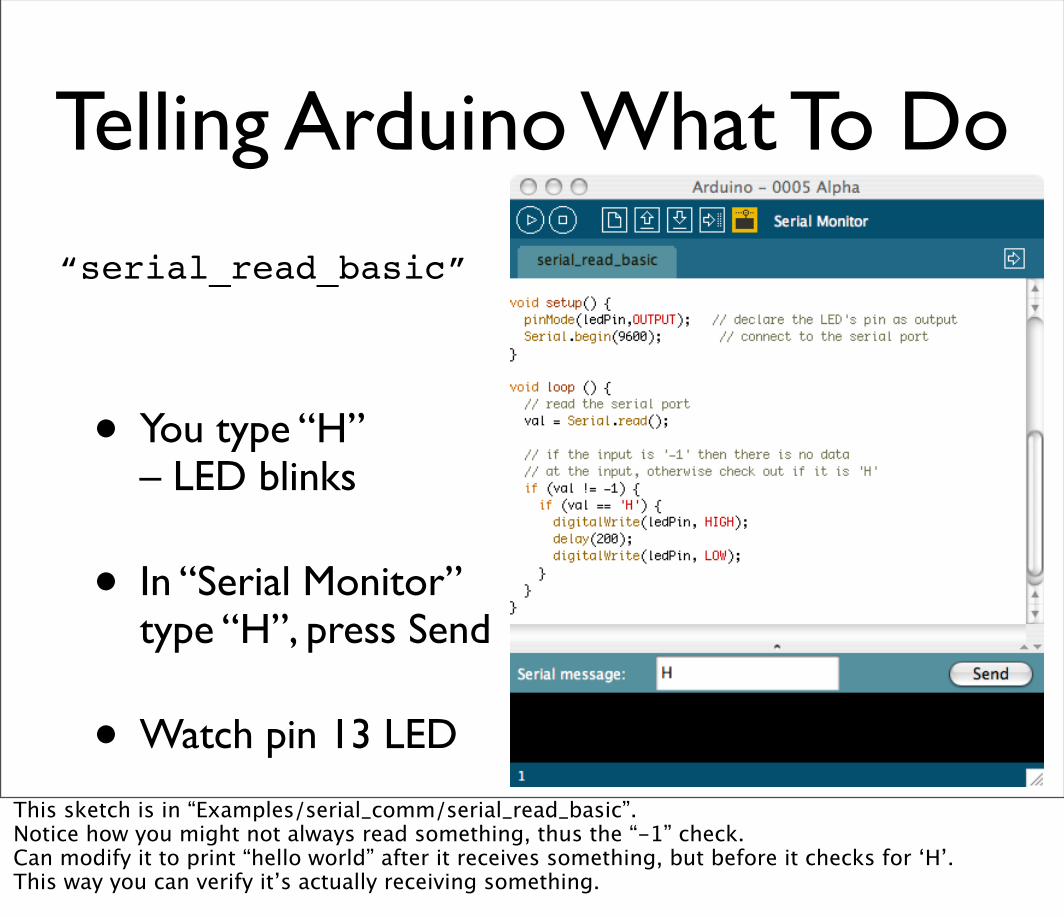
Telling Arduino What To Do
• You type “H”– LED blinks
• In “Serial Monitor”type “H”, press Send
• Watch pin 13 LED
“serial_read_basic”
This sketch is in “Examples/serial_comm/serial_read_basic”.Notice how you might not always read something, thus the “-1” check.Can modify it to print “hello world” after it receives something, but before it checks for ‘H’.This way you can verify it’s actually receiving something.

Arduino Communications
• Psst, Arduino doesn’t really do USB
• It really is “serial”, like old RS-232 serial
• All microcontrollers can do serial
• Not many can do USB
• Serial is easy, USB is hard
serial terminal from the olde days
is just serial communications
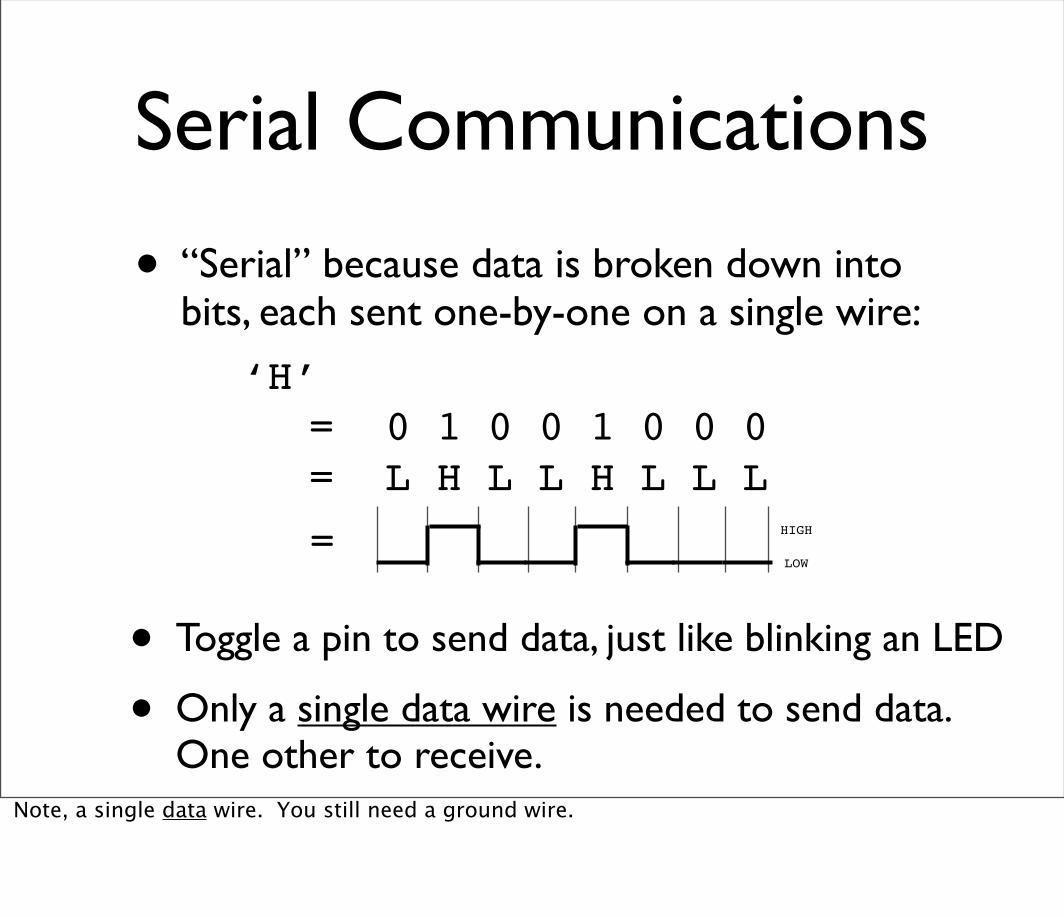
Serial Communications
• “Serial” because data is broken down into bits, each sent one-by-one on a single wire:
‘H’ = 0 1 0 0 1 0 0 0= L H L L H L L L
=LOW
HIGH
• Toggle a pin to send data, just like blinking an LED
• Only a single data wire is needed to send data. One other to receive.
Note, a single data wire. You still need a ground wire.
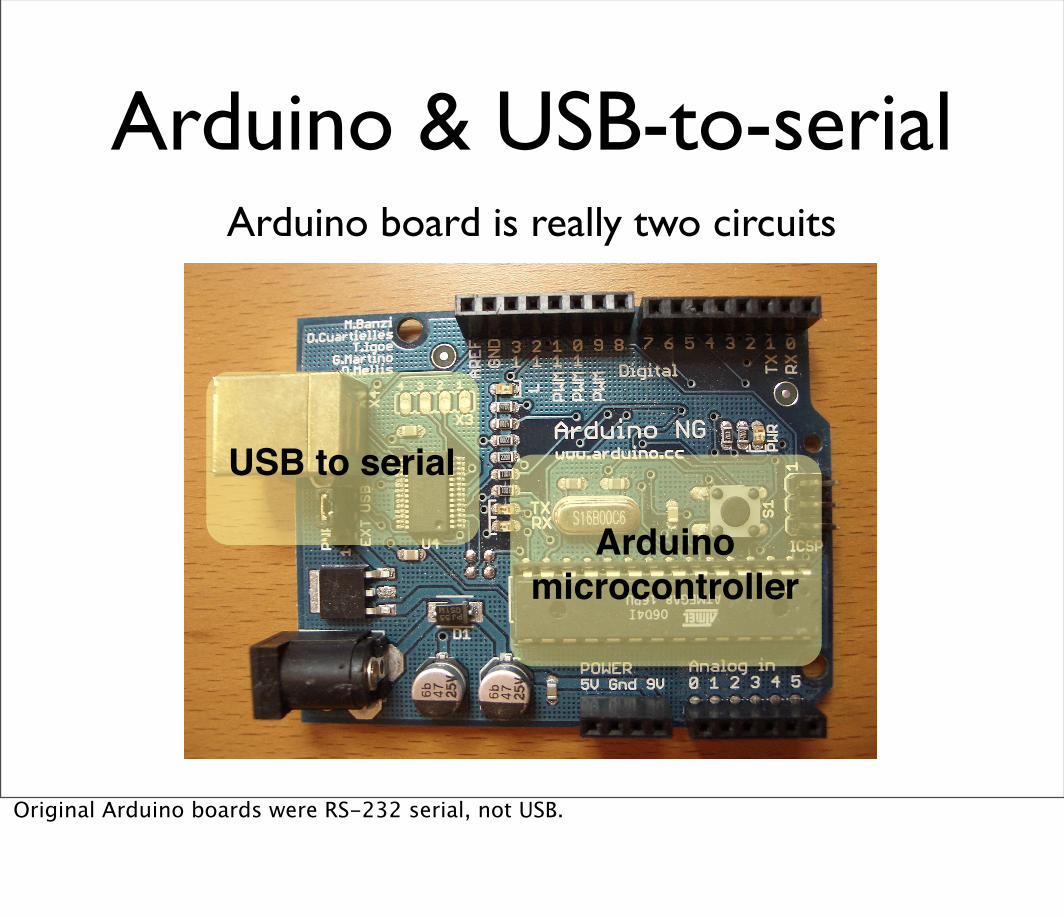
Arduino & USB-to-serial
USB to serial
Arduino
microcontroller
Arduino board is really two circuits
Original Arduino boards were RS-232 serial, not USB.

New Arduino MiniArduino Mini separates the two circuits
Arduino Mini Arduino Mini USB adapter
aka. “Arduino Stamp”If you don’t talk with a computer, the USB-to-serial functionality is superfluous.
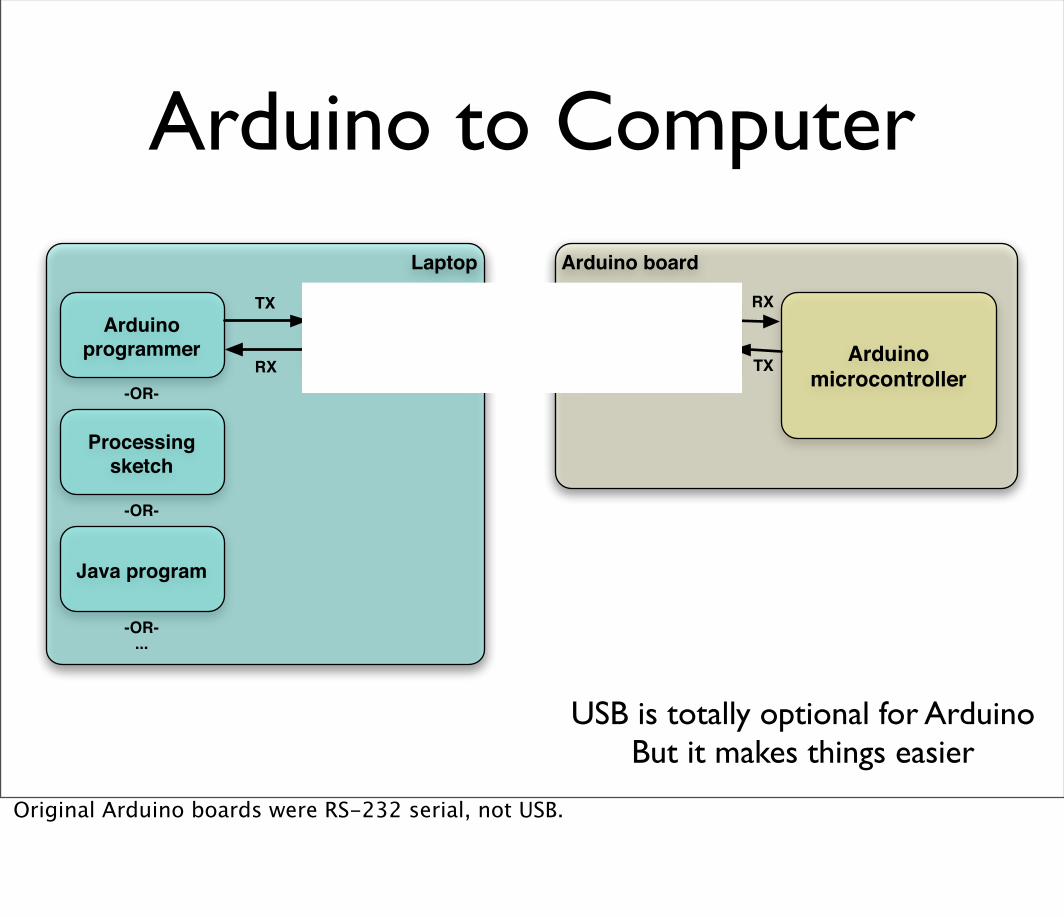
Arduino to ComputerArduino boardLaptop
USB to serialArduino
microcontroller
USB to serialdriver
Arduinoprogrammer
Processing sketch
Java program
RX
TX
-OR-
-OR-
-OR-...
USBTX
RX chip
USB is totally optional for ArduinoBut it makes things easier
Original Arduino boards were RS-232 serial, not USB.

Arduino & USB
• Because Arduino is all about serial,
• And not USB,
• Interfacing to things like USB flash drives, USB hard disks, USB webcams, etc. is not possible
Also, USB is a host/peripheral protocol. Being a USB “host” means needing a lot of processing power and software, not something for a tiny 8kB microcontroller.It can be a peripheral. In fact, there is an open project called “AVR-USB” that allows AVR chips like used in Arduino to be proper USB peripherals. See: http://www.obdev.at/products/avrusb/

Controlling the Computer
• Can send sensor data from Arduino to computer with Serial.print()
• There are many different variations to suite your needs:
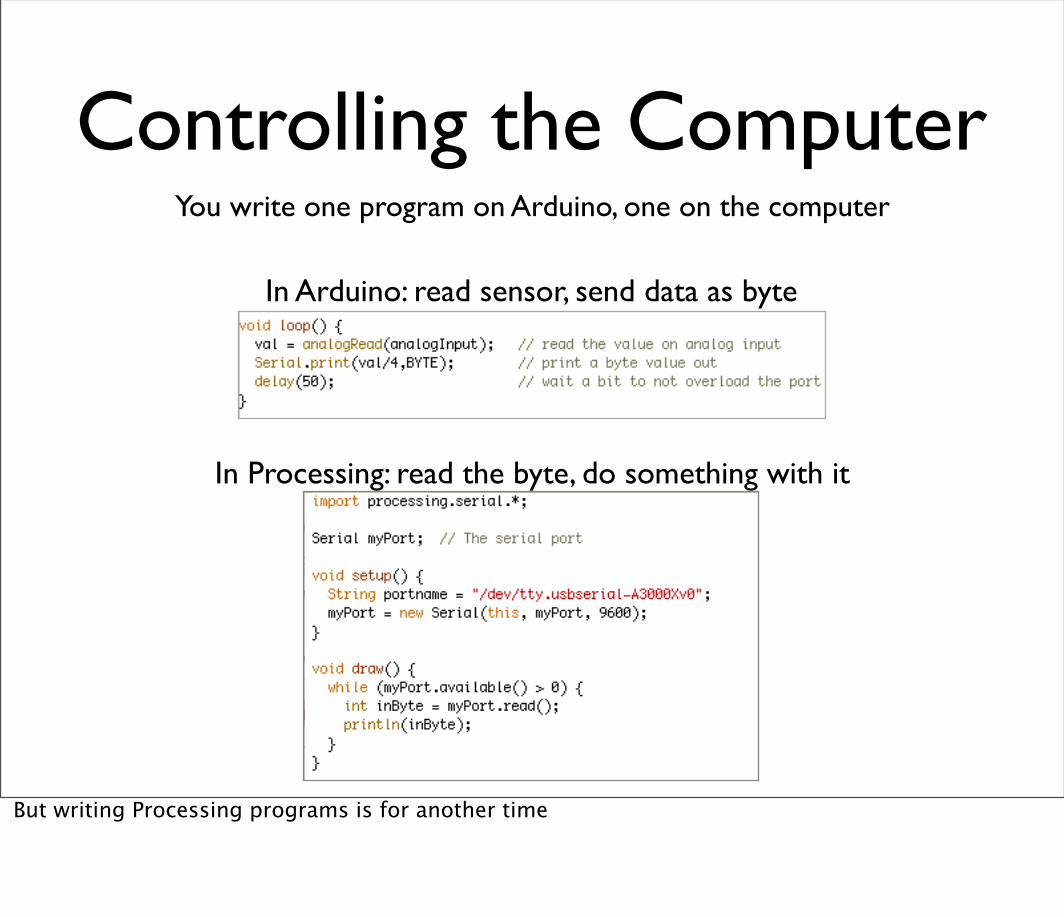
Controlling the Computer
In Arduino: read sensor, send data as byte
In Processing: read the byte, do something with it
You write one program on Arduino, one on the computer
But writing Processing programs is for another time
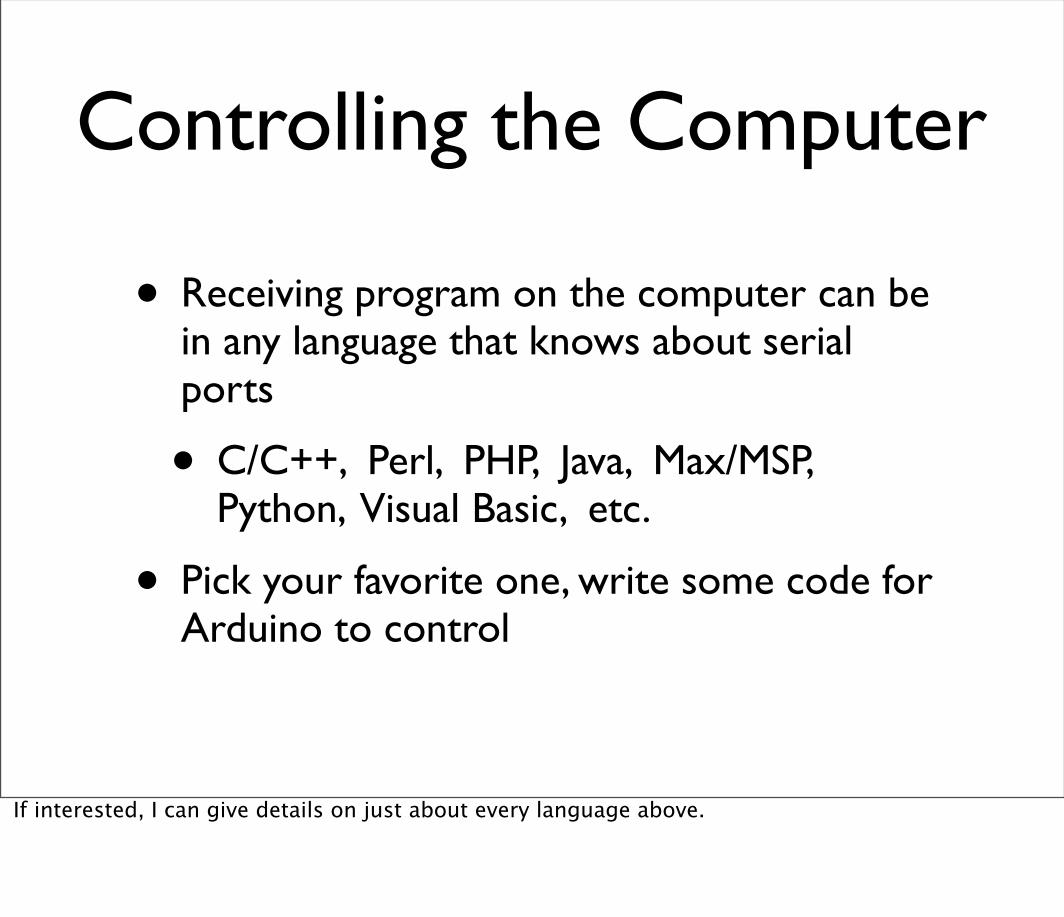
• Receiving program on the computer can be in any language that knows about serial ports
• C/C++, Perl, PHP, Java, Max/MSP, Python, Visual Basic, etc.
• Pick your favorite one, write some code for Arduino to control
Controlling the Computer
If interested, I can give details on just about every language above.
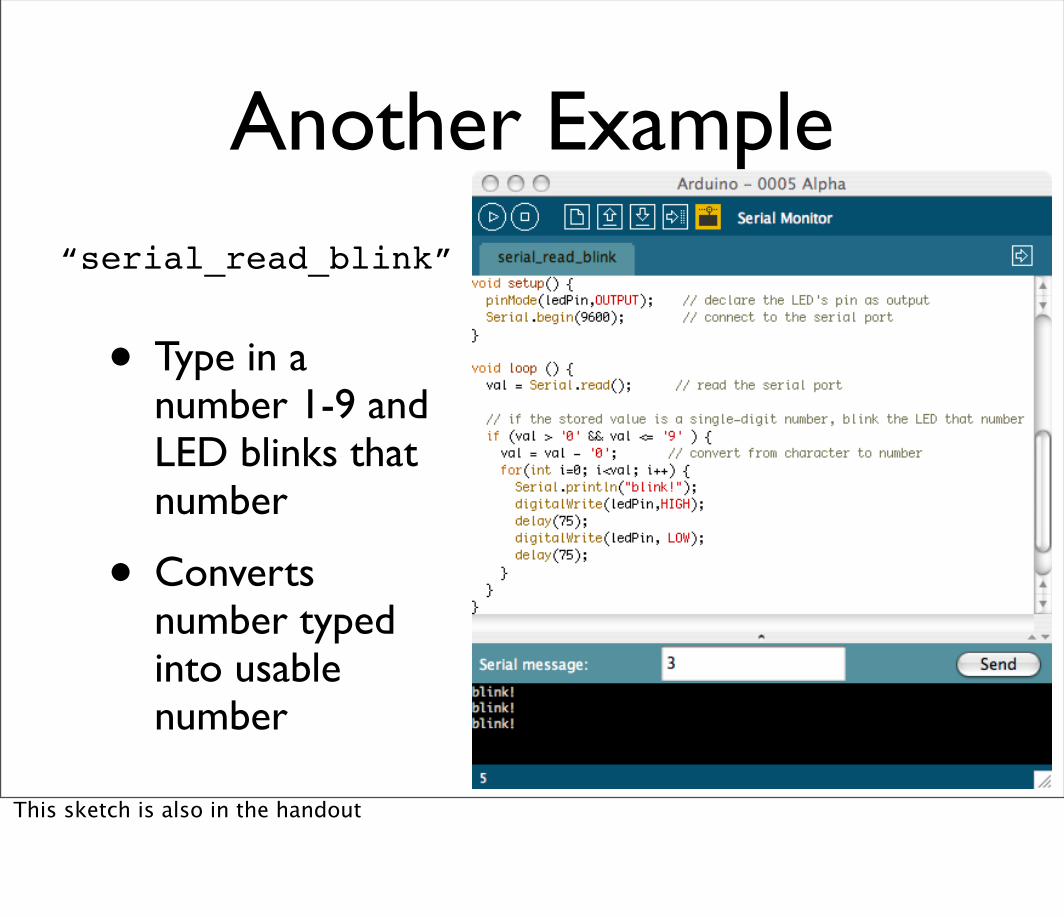
Another Example
• Type in a number 1-9 and LED blinks that number
• Converts number typed into usable number
“serial_read_blink”
This sketch is also in the handout
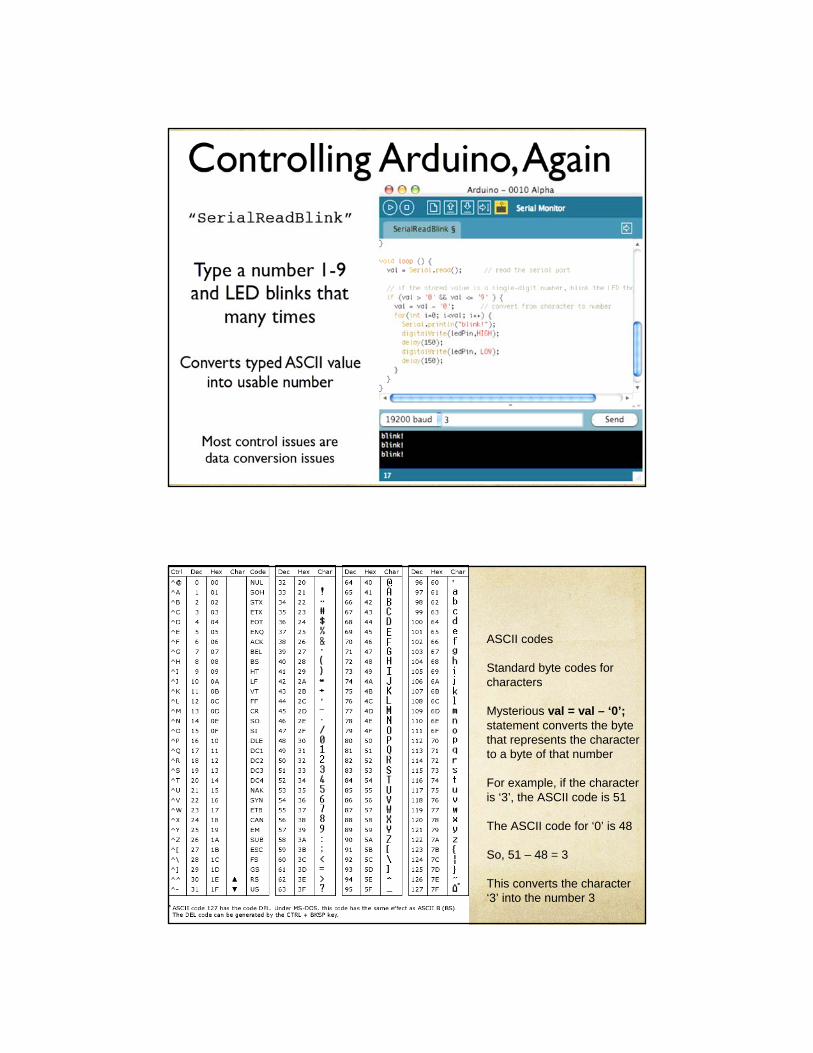
ASCII codes
Standard byte codes for characters
Mysterious val = val – ‘0’;statement converts the byte that represents the characterto a byte of that number
For example, if the characteris ‘3’, the ASCII code is 51
The ASCII code for ‘0’ is 48
So, 51 – 48 = 3
This converts the character ‘3’ into the number 3
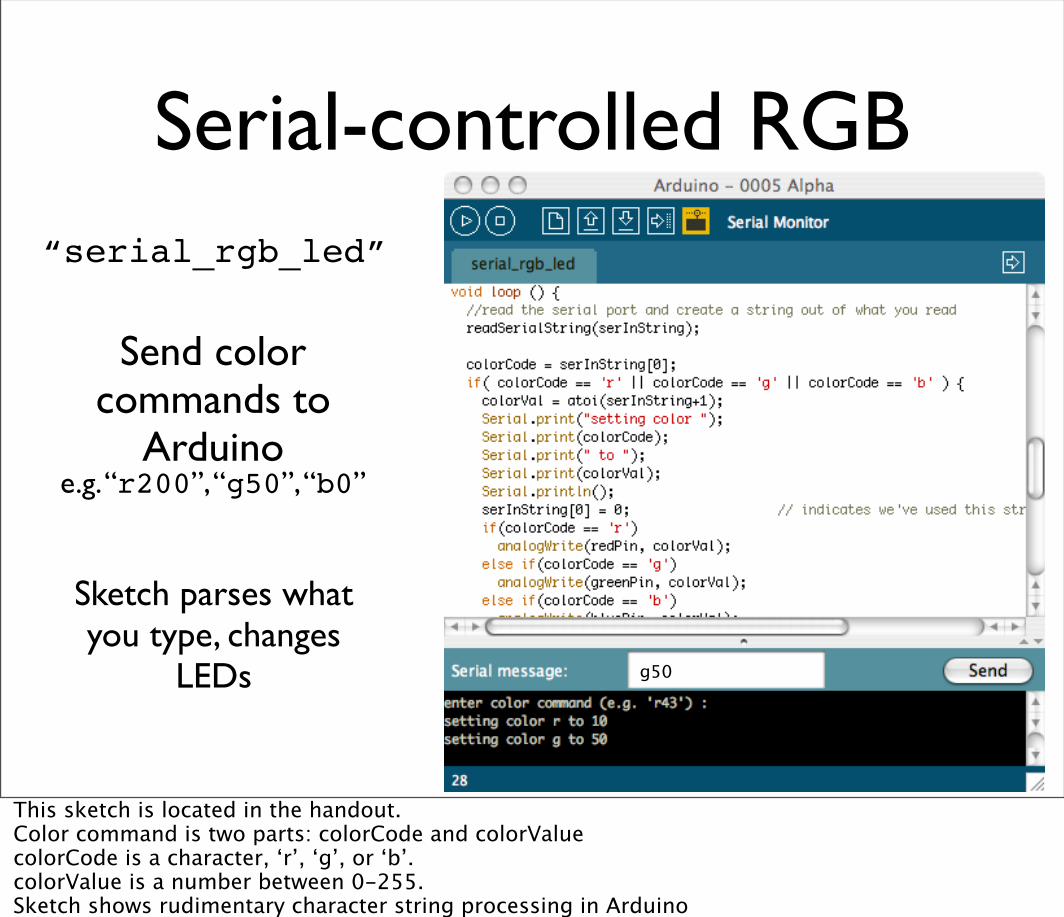
Serial-controlled RGB“serial_rgb_led”
Send color commands to
Arduinoe.g. “r200”, “g50”, “b0”
g50
Sketch parses what you type, changes
LEDs
This sketch is located in the handout.Color command is two parts: colorCode and colorValuecolorCode is a character, ‘r’, ‘g’, or ‘b’.colorValue is a number between 0-255.Sketch shows rudimentary character string processing in Arduino

Reading Serial Strings• New Serial function in
last sketch: “Serial.available()”
• Can use it to read all available serial data from computer
• Great for reading strings of characters
• The “readSerialString()” function at right takes a character string and sticks available serial data into it
Pay no attention to the pointer symbol (“*”)Must be careful about calling readSerialString() too often or you’ll read partial strings