computer basics last updated: 2007. 2 lesson plan lesson 1: computer parts storage devices keyboard...
TRANSCRIPT
Computer Basics
Last Updated: 2007
2
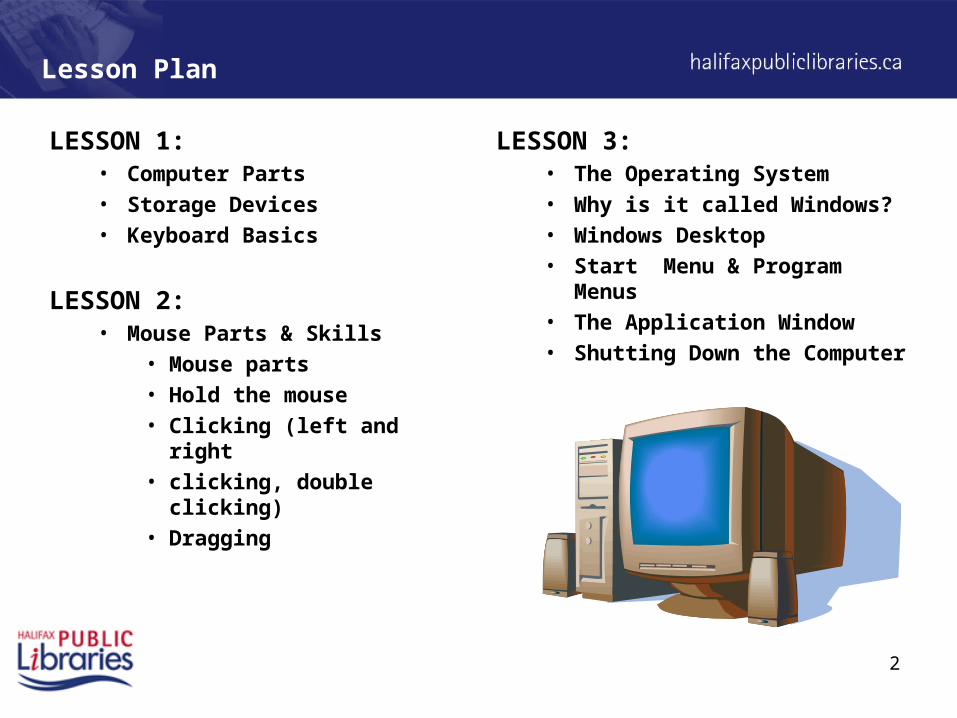
Lesson Plan
LESSON 1:• Computer Parts• Storage Devices• Keyboard Basics
LESSON 2:• Mouse Parts & Skills
• Mouse parts• Hold the mouse• Clicking (left and right• clicking, double clicking)• Dragging
LESSON 3:• The Operating System• Why is it called Windows? • Windows Desktop• Start Menu & Program Menus• The Application Window• Shutting Down the Computer
3
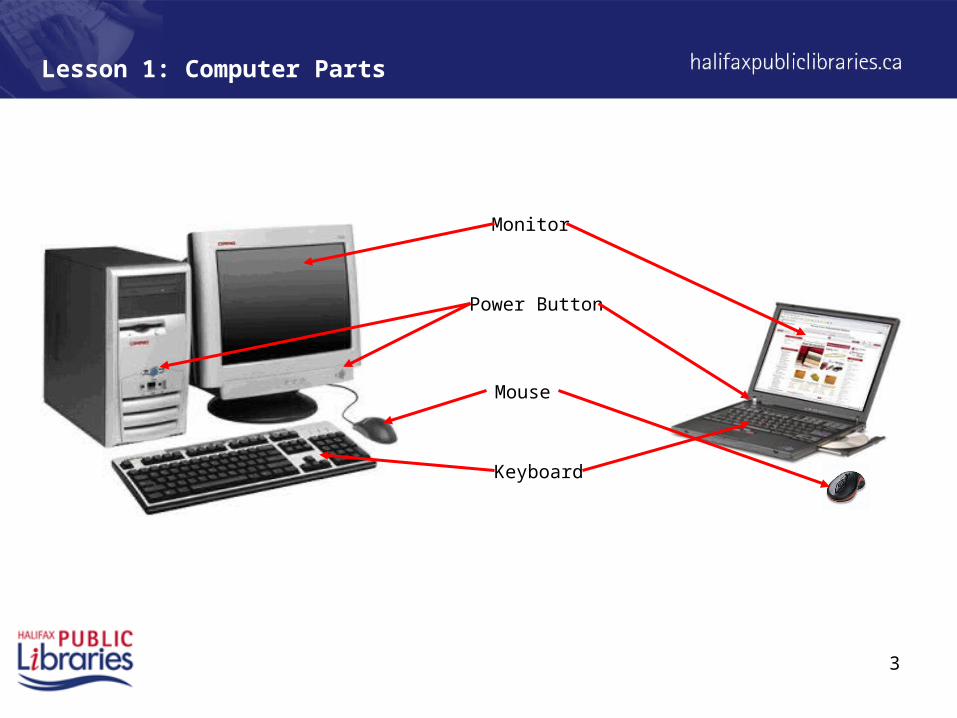
Lesson 1: Computer Parts
Monitor
Keyboard
Power Button
Mouse

4
Lesson 1: Storage Devices
A. Hard Drive
B. Floppy Disks
C. CD / DVD
D. Flash (USB) Drive
A
DC
B
5
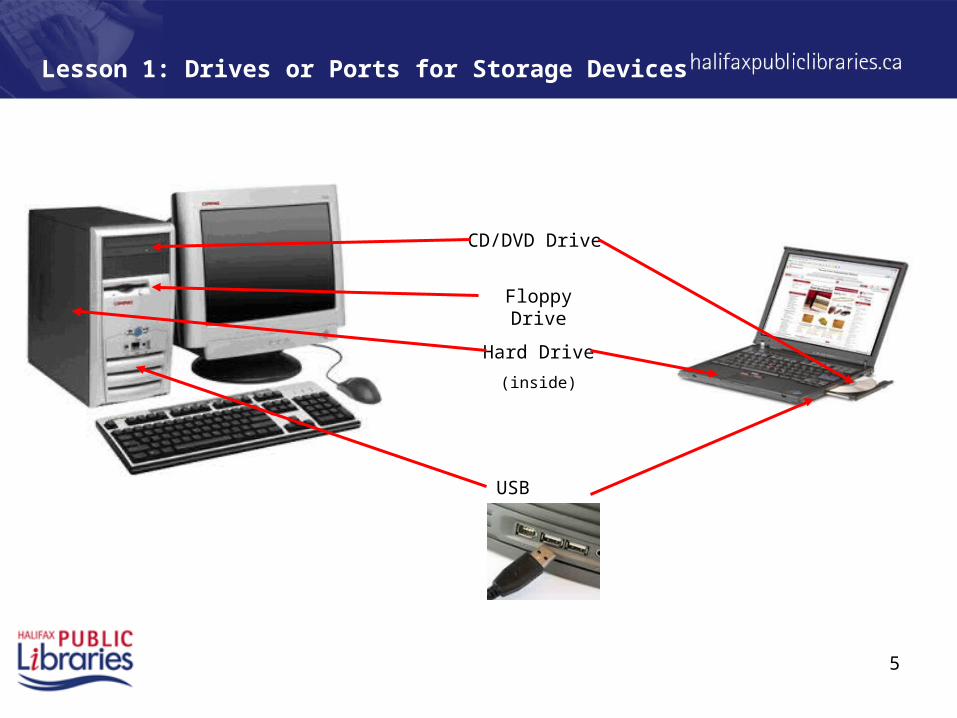
Lesson 1: Drives or Ports for Storage Devices
CD/DVD Drive
Floppy Drive
USB Ports
Hard Drive
(inside)

6
Tab
Shift Space Bar Arrow KeysEnter / Return
Caps Lock Backspace
Lesson 3: Keyboard Basics
7
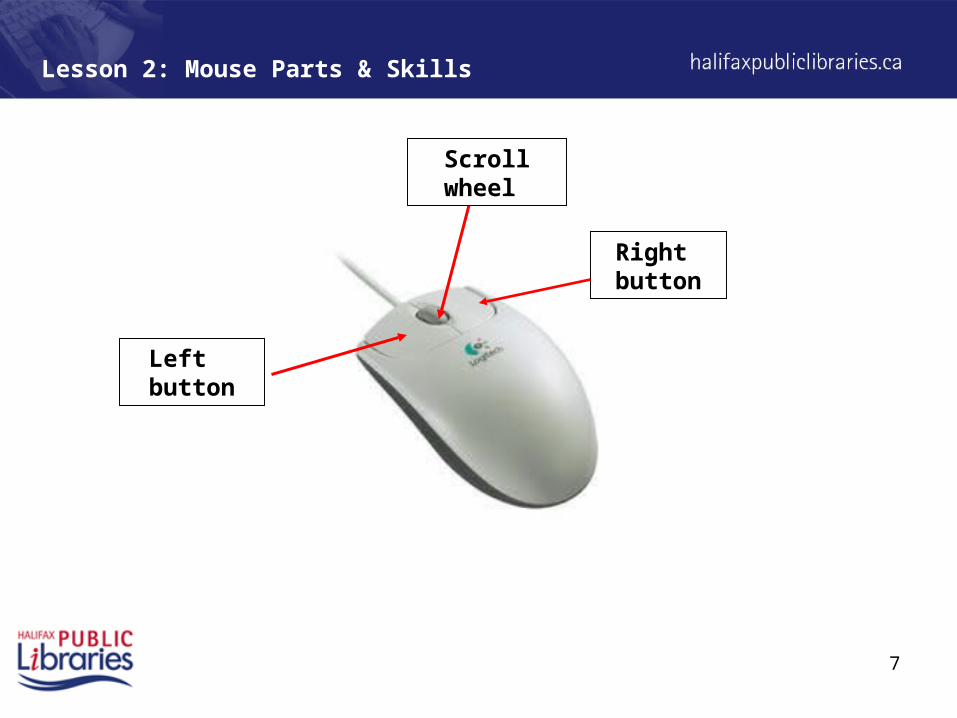
Lesson 2: Mouse Parts & Skills
Right button
Left button
Scroll wheel
8
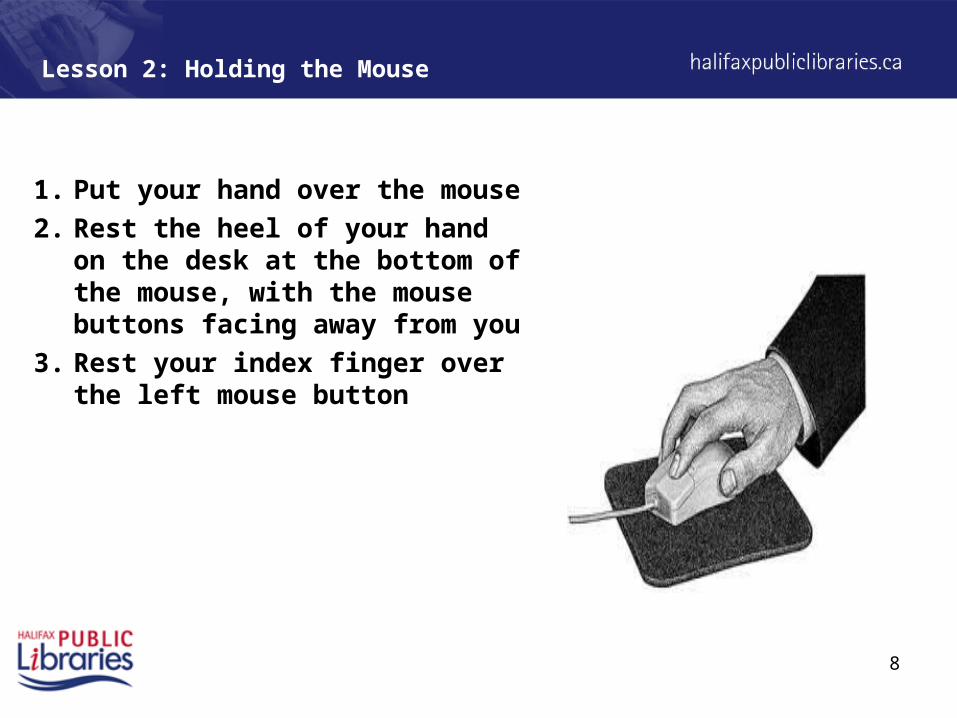
Lesson 2: Holding the Mouse
1. Put your hand over the mouse
2. Rest the heel of your hand on the desk at the bottom of the mouse, with the mouse buttons facing away from you
3. Rest your index finger over the left mouse button

9
What is the Desktop?•The first screen you see after the operating system starts•Includes:• Shortcuts (Icons)• Taskbar • Buttons• System tray• Background (Wallpaper)
How do you work around the desktop?• Use the mouse and keyboard to work with programs and icons
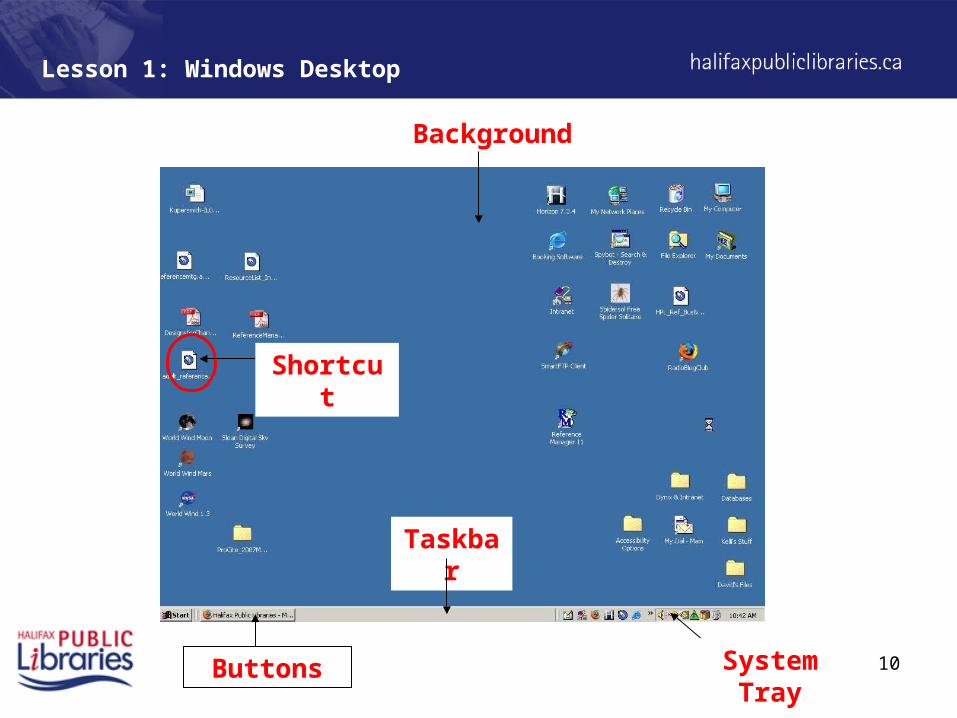
Lesson 1: Windows Desktop
10
Lesson 1: Windows Desktop
Background
Taskbar
Buttons
Shortcut
System Tray

11
Lesson 2: Left Clicking
Left button•Single click: to select an image or icon OR to open a web page
•Double click: to open a file or a program.
Exercise:
Using the left mouse button, double click “My Computer” icon on the Desktop.
12
Lesson 2: Dragging and Dropping
To drag an item:1. Move the mouse pointer over the item
2. Click the left mouse button once and hold it down
3. Drag the item to its destination
4. Release the left mouse button
Exercise:
Drag an application window to a new location on the Desktop

13
Lesson 2: Right Clicking
Right button
• Brings up a shortcut menu, a menu of commonly used functions (tasks)– Options in menu vary depending upon where you are when you
right click (aka “context sensitivity”)
The shortcut menu for the Internet Explorer icon
14
Lesson 2: Right Clicking
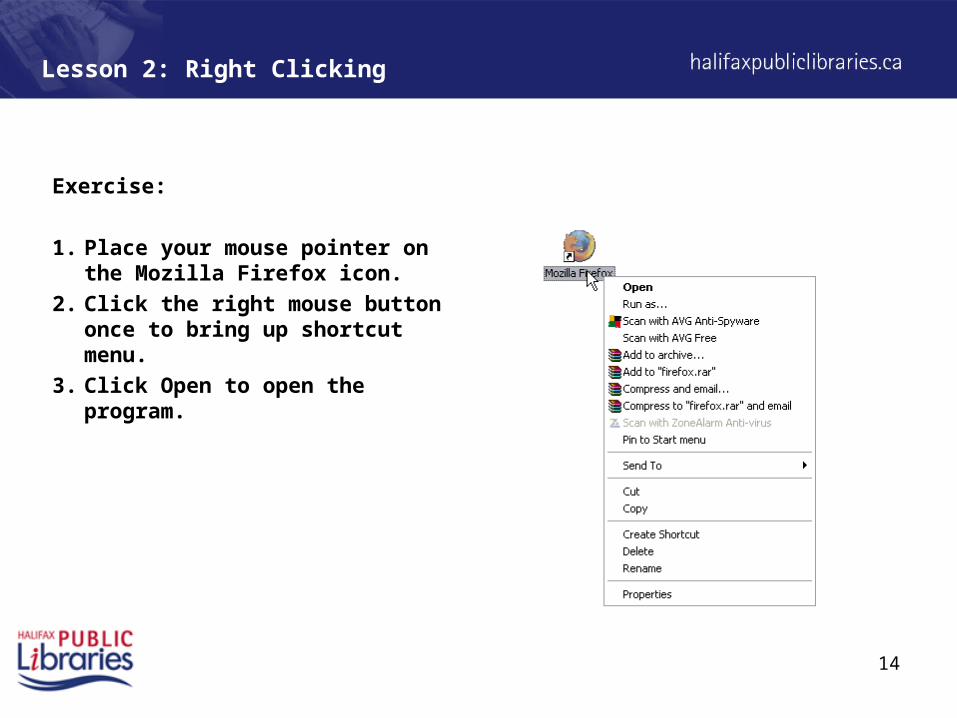
Exercise:
1. Place your mouse pointer on the Mozilla Firefox icon.
2. Click the right mouse button once to bring up shortcut menu.
3. Click Open to open the program.
15
Lesson 3: The Operating System
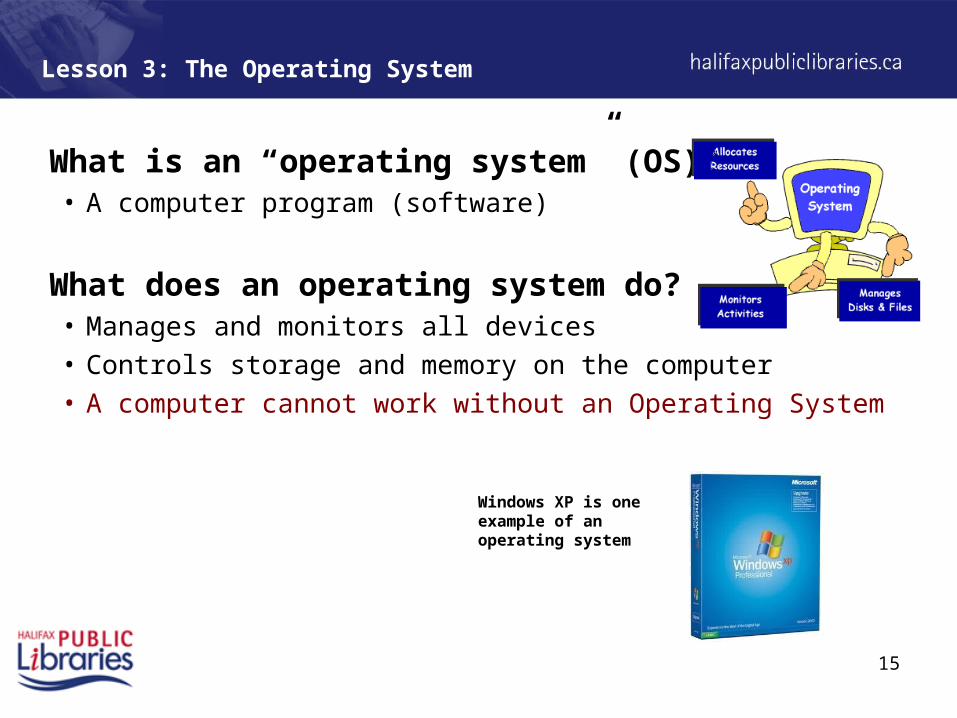
What is an “operating system” (OS)?• A computer program (software)
What does an operating system do?• Manages and monitors all devices• Controls storage and memory on the computer• A computer cannot work without an Operating System
Windows XP is one example of an operating system

16
Lesson 3: Windows Operating System
Why is it called “Microsoft Windows”?
• Because software (or programs) work in an area that looks like a window.
• The windows can be side by side, on top of each other or full screen.
• The window can be resized.
• Let’s you use many different programs at the same time.

17
Lesson 3: Start Menu & Program Menus
What is the Start Menu?• A menu that contains a list of very important shortcuts including:
• Programs• Documents• Settings• Search• Help
What is the Program Menu?• A menu that contains shortcuts to programs installed on the computer, such
as:• Word, Excel, Internet Explorer, Accessories…..etc.

18
Lesson 3: Start Menu & Program Menus
Start Menu
Program Menu
Submenu

19
Lesson 3: Program Window
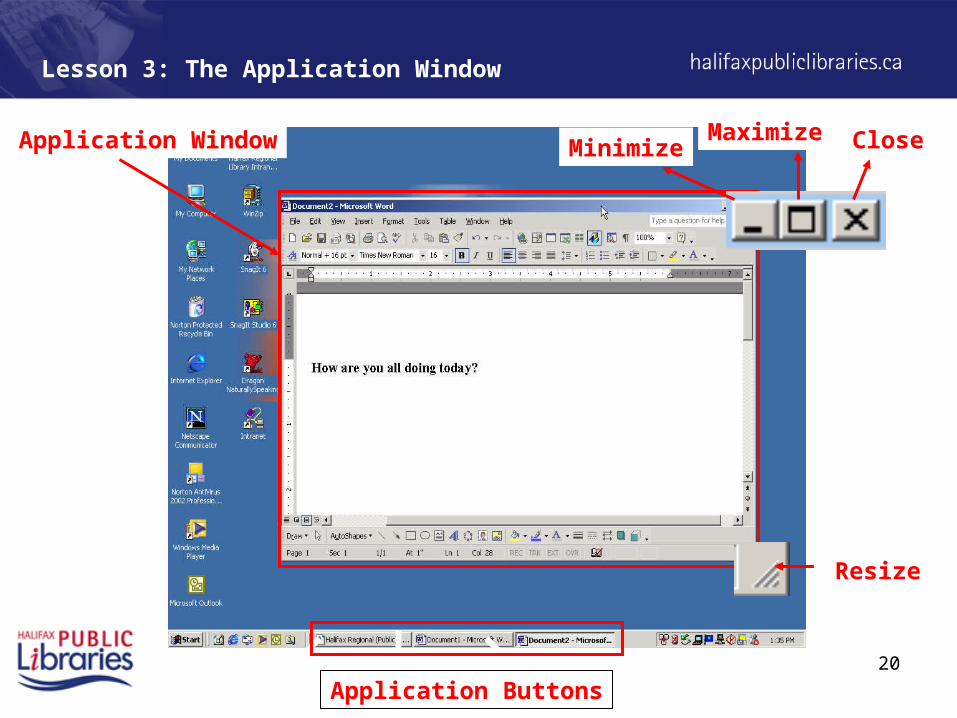
What is the Application Window?• a framed, square shaped window where information is
displayed;• it can be resized, moved around, and includes:
•Minimize Button
•Maximize/Restore Button
•Close Button
•Resizing Frame
•Menus and toolbars
–“Help” menu
–keyboard shortcuts
20
MinimizeMaximize CloseApplication Window
Lesson 3: The Application Window
Application Buttons
Resize
21
Lesson 3: Shutting down the computer
Can’t I just turn off the computer?• NO!!
Why not?• You must shut down the computer properly• You could lose information, or cause a computer
error.
How do I shut down properly?1. Close all open programs (don’t forget to save
your work!)2. Click the Start button, then choose “Shut down”
from the menu

22
Lesson 3: Shutting down the computer
1. Click the Start button, then
2. Click Shut Down

23
Lesson 3: Shutting down the computer

24
Recap
• Handouts
• Upcoming training programs
• Library resources
• Program evaluation forms
Any questions?