configuring the cisco nam 2220 appliance installation and configuration guide for the cisco nam 2220...
TRANSCRIPT

Installation and ConOL-16692-01
C H A P T E R 5
Configuring the Cisco NAM 2220 ApplianceThis section describes how to configure the Cisco NAM 2220 appliance to establish network connectivity, configure IP parameters, and how to perform other required administrative tasks using the NAM command line interface (CLI). This chapter also provides information about how to get started with the NAM graphical user interface (GUI) and how to perform various system management tasks.
This chapter contains the following sections:
• Logging In For the First Time, page 5-1
• Establishing Network Connectivity, page 5-3
• Enabling the NAM Traffic Analyzer Web Server, page 5-6
• Additional Configuration Using the NAM GUI, page 5-9
• Managing the Cisco NAM 2220 Appliance, page 5-13
Note For more advanced NAM configuration information, use the NAM Traffic Analyzer web GUI or see the Network Analysis Module Command Reference at the following URL: http://www.cisco.com/en/US/docs/net_mgmt/network_analysis_module_software/4.0/command/reference/guide/cmdref.html
Logging In For the First TimeAfter you turn power on and boot the Cisco NAM 2220 appliance for the first time, the login prompt displays on the attached console. When shipped from the factory, the root user is pre configured on the Cisco NAM 2220 appliance. The default password for the root user is root.
Note We require you to change the user root password during the first login session.
The root user has access to the root (read/write) level of NAM and can enter NAM command-line interface (CLI) commands.
To log in to the Cisco NAM 2220 appliance for the first time, open a console session or a serial session with the NAM appliance:
Note After your initial login, you can enable telnet and ssh connections to the NAM appliance.
5-1figuration Guide for the Cisco NAM 2220 Appliance
Chapter 5 Configuring the Cisco NAM 2220 ApplianceLogging In For the First Time
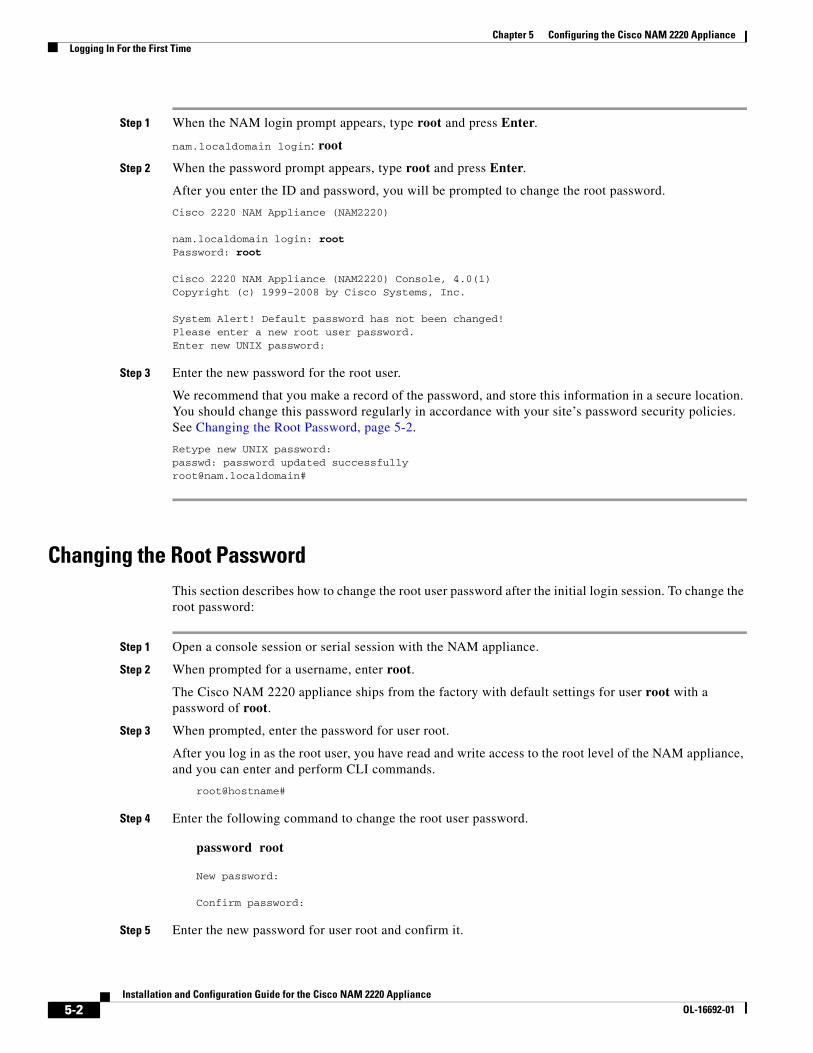
Step 1 When the NAM login prompt appears, type root and press Enter.
nam.localdomain login: root
Step 2 When the password prompt appears, type root and press Enter.
After you enter the ID and password, you will be prompted to change the root password.
Cisco 2220 NAM Appliance (NAM2220)
nam.localdomain login: rootPassword: root
Cisco 2220 NAM Appliance (NAM2220) Console, 4.0(1)Copyright (c) 1999-2008 by Cisco Systems, Inc. System Alert! Default password has not been changed!Please enter a new root user password.Enter new UNIX password:
Step 3 Enter the new password for the root user.
We recommend that you make a record of the password, and store this information in a secure location. You should change this password regularly in accordance with your site’s password security policies. See Changing the Root Password, page 5-2.
Retype new UNIX password:passwd: password updated [email protected]#
Changing the Root PasswordThis section describes how to change the root user password after the initial login session. To change the root password:
Step 1 Open a console session or serial session with the NAM appliance.
Step 2 When prompted for a username, enter root.
The Cisco NAM 2220 appliance ships from the factory with default settings for user root with a password of root.
Step 3 When prompted, enter the password for user root.
After you log in as the root user, you have read and write access to the root level of the NAM appliance, and you can enter and perform CLI commands.
root@hostname#
Step 4 Enter the following command to change the root user password.
password root
New password:
Confirm password:
Step 5 Enter the new password for user root and confirm it.
5-2Installation and Configuration Guide for the Cisco NAM 2220 Appliance
OL-16692-01
Chapter 5 Configuring the Cisco NAM 2220 ApplianceEstablishing Network Connectivity
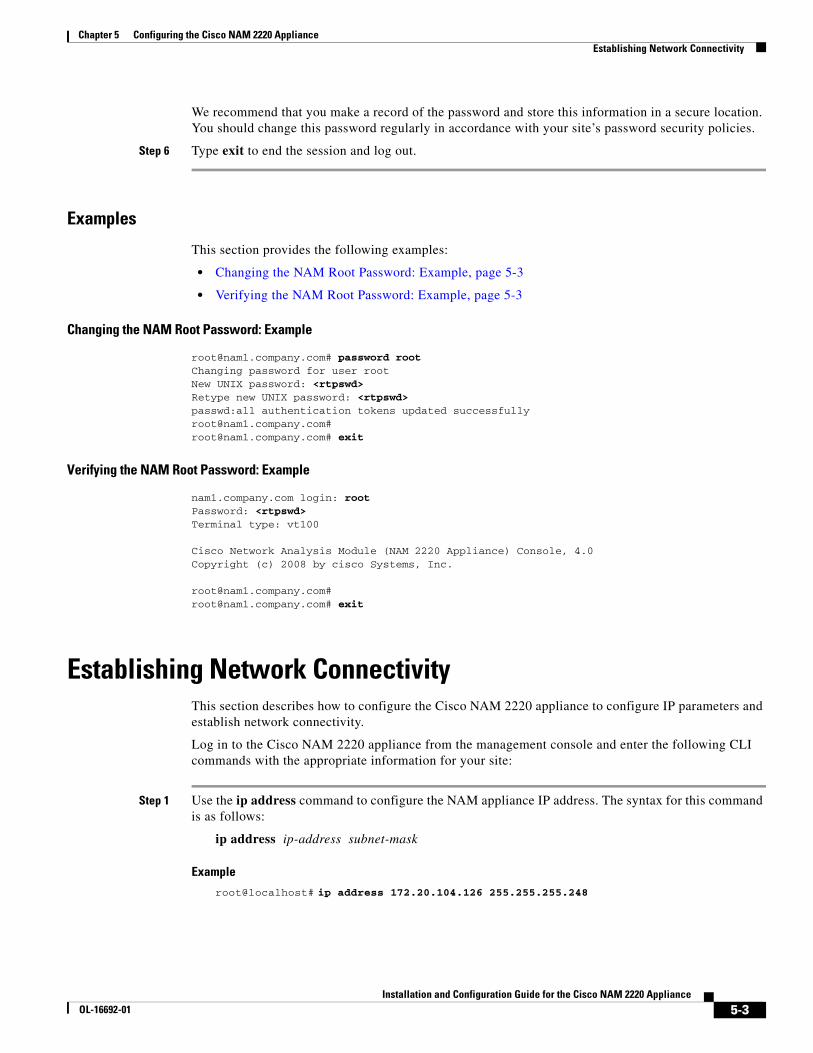
We recommend that you make a record of the password and store this information in a secure location. You should change this password regularly in accordance with your site’s password security policies.
Step 6 Type exit to end the session and log out.
Examples
This section provides the following examples:
• Changing the NAM Root Password: Example, page 5-3
• Verifying the NAM Root Password: Example, page 5-3
Changing the NAM Root Password: Example
[email protected]# password root Changing password for user root New UNIX password: <rtpswd> Retype new UNIX password: <rtpswd> passwd:all authentication tokens updated successfully [email protected]# [email protected]# exit
Verifying the NAM Root Password: Example
nam1.company.com login: root Password: <rtpswd> Terminal type: vt100
Cisco Network Analysis Module (NAM 2220 Appliance) Console, 4.0Copyright (c) 2008 by cisco Systems, Inc.
[email protected]#[email protected]# exit
Establishing Network ConnectivityThis section describes how to configure the Cisco NAM 2220 appliance to configure IP parameters and establish network connectivity.
Log in to the Cisco NAM 2220 appliance from the management console and enter the following CLI commands with the appropriate information for your site:
Step 1 Use the ip address command to configure the NAM appliance IP address. The syntax for this command is as follows:
ip address ip-address subnet-mask
Example
root@localhost# ip address 172.20.104.126 255.255.255.248
5-3Installation and Configuration Guide for the Cisco NAM 2220 Appliance
OL-16692-01
Chapter 5 Configuring the Cisco NAM 2220 ApplianceEstablishing Network Connectivity
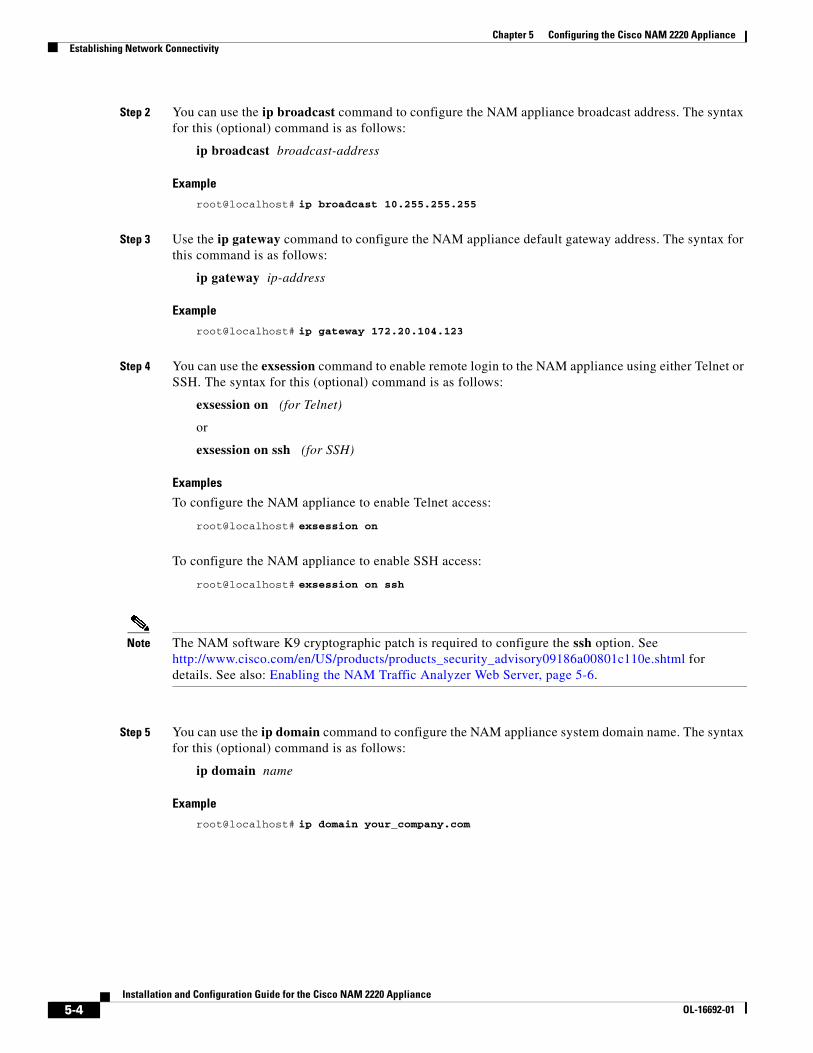
Step 2 You can use the ip broadcast command to configure the NAM appliance broadcast address. The syntax for this (optional) command is as follows:
ip broadcast broadcast-address
Example
root@localhost# ip broadcast 10.255.255.255
Step 3 Use the ip gateway command to configure the NAM appliance default gateway address. The syntax for this command is as follows:
ip gateway ip-address
Example
root@localhost# ip gateway 172.20.104.123
Step 4 You can use the exsession command to enable remote login to the NAM appliance using either Telnet or SSH. The syntax for this (optional) command is as follows:
exsession on (for Telnet)
or
exsession on ssh (for SSH)
Examples
To configure the NAM appliance to enable Telnet access:
root@localhost# exsession on
To configure the NAM appliance to enable SSH access:
root@localhost# exsession on ssh
Note The NAM software K9 cryptographic patch is required to configure the ssh option. See http://www.cisco.com/en/US/products/products_security_advisory09186a00801c110e.shtml for details. See also: Enabling the NAM Traffic Analyzer Web Server, page 5-6.
Step 5 You can use the ip domain command to configure the NAM appliance system domain name. The syntax for this (optional) command is as follows:
ip domain name
Example
root@localhost# ip domain your_company.com
5-4Installation and Configuration Guide for the Cisco NAM 2220 Appliance
OL-16692-01
Chapter 5 Configuring the Cisco NAM 2220 ApplianceEstablishing Network Connectivity
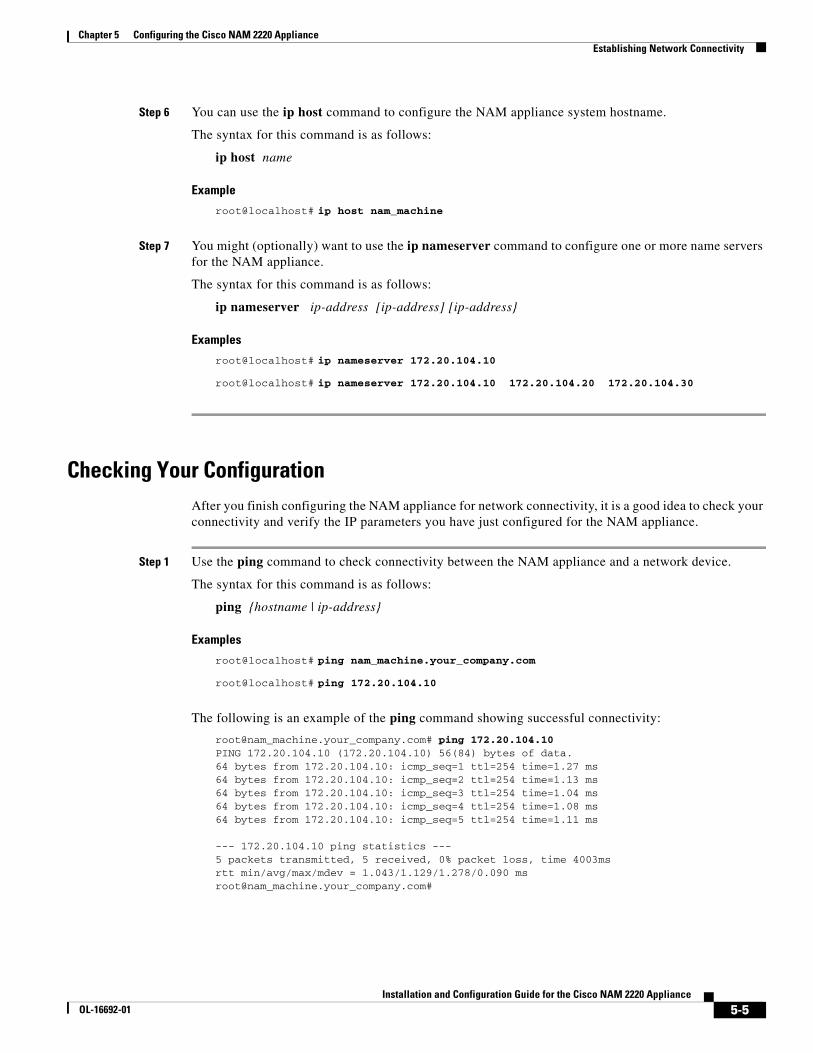
Step 6 You can use the ip host command to configure the NAM appliance system hostname.
The syntax for this command is as follows:
ip host name
Example
root@localhost# ip host nam_machine
Step 7 You might (optionally) want to use the ip nameserver command to configure one or more name servers for the NAM appliance.
The syntax for this command is as follows:
ip nameserver ip-address [ip-address] [ip-address}
Examples
root@localhost# ip nameserver 172.20.104.10
root@localhost# ip nameserver 172.20.104.10 172.20.104.20 172.20.104.30
Checking Your ConfigurationAfter you finish configuring the NAM appliance for network connectivity, it is a good idea to check your connectivity and verify the IP parameters you have just configured for the NAM appliance.
Step 1 Use the ping command to check connectivity between the NAM appliance and a network device.
The syntax for this command is as follows:
ping {hostname | ip-address}
Examples
root@localhost# ping nam_machine.your_company.com
root@localhost# ping 172.20.104.10
The following is an example of the ping command showing successful connectivity:
root@nam_machine.your_company.com# ping 172.20.104.10PING 172.20.104.10 (172.20.104.10) 56(84) bytes of data.64 bytes from 172.20.104.10: icmp_seq=1 ttl=254 time=1.27 ms64 bytes from 172.20.104.10: icmp_seq=2 ttl=254 time=1.13 ms64 bytes from 172.20.104.10: icmp_seq=3 ttl=254 time=1.04 ms64 bytes from 172.20.104.10: icmp_seq=4 ttl=254 time=1.08 ms64 bytes from 172.20.104.10: icmp_seq=5 ttl=254 time=1.11 ms
--- 172.20.104.10 ping statistics ---5 packets transmitted, 5 received, 0% packet loss, time 4003msrtt min/avg/max/mdev = 1.043/1.129/1.278/0.090 msroot@nam_machine.your_company.com#
5-5Installation and Configuration Guide for the Cisco NAM 2220 Appliance
OL-16692-01
Chapter 5 Configuring the Cisco NAM 2220 ApplianceEnabling the NAM Traffic Analyzer Web Server
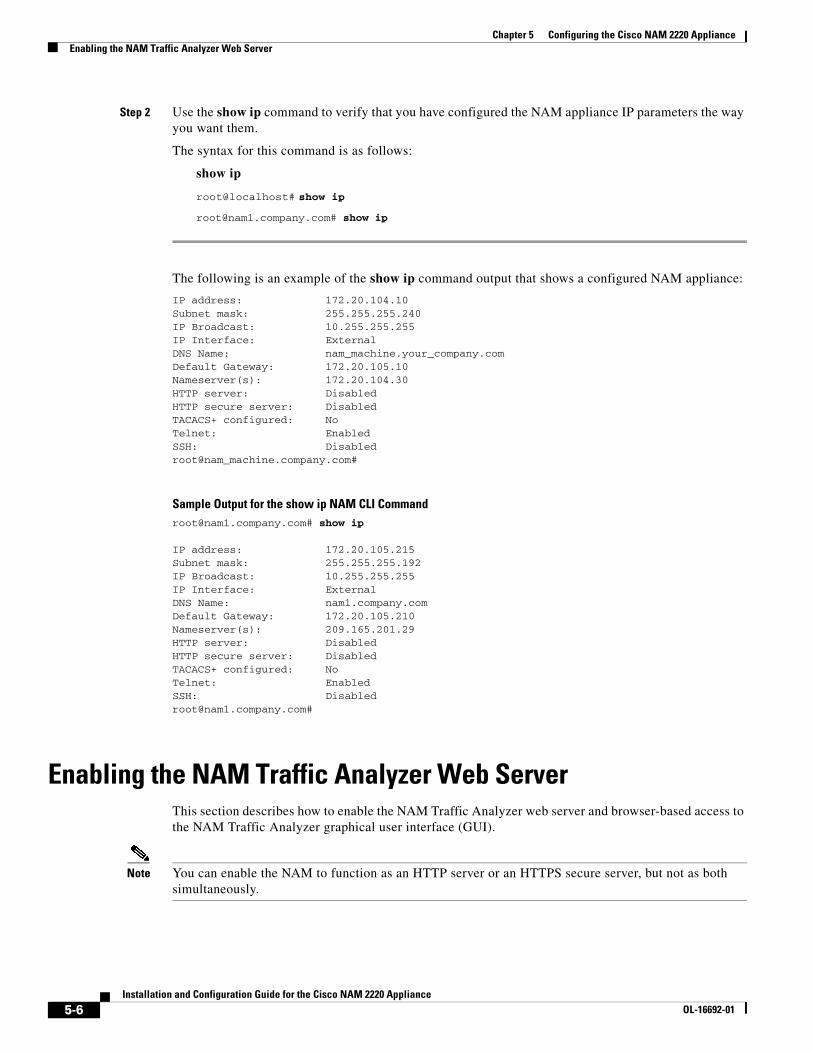
Step 2 Use the show ip command to verify that you have configured the NAM appliance IP parameters the way you want them.
The syntax for this command is as follows:
show ip
root@localhost# show ip
[email protected]# show ip
The following is an example of the show ip command output that shows a configured NAM appliance:
IP address: 172.20.104.10Subnet mask: 255.255.255.240IP Broadcast: 10.255.255.255IP Interface: ExternalDNS Name: nam_machine.your_company.comDefault Gateway: 172.20.105.10Nameserver(s): 172.20.104.30HTTP server: DisabledHTTP secure server: DisabledTACACS+ configured: NoTelnet: EnabledSSH: Disabledroot@nam_machine.company.com#
Sample Output for the show ip NAM CLI Command [email protected]# show ip
IP address: 172.20.105.215Subnet mask: 255.255.255.192IP Broadcast: 10.255.255.255IP Interface: ExternalDNS Name: nam1.company.comDefault Gateway: 172.20.105.210Nameserver(s): 209.165.201.29HTTP server: DisabledHTTP secure server: DisabledTACACS+ configured: NoTelnet: EnabledSSH: [email protected]#
Enabling the NAM Traffic Analyzer Web ServerThis section describes how to enable the NAM Traffic Analyzer web server and browser-based access to the NAM Traffic Analyzer graphical user interface (GUI).
Note You can enable the NAM to function as an HTTP server or an HTTPS secure server, but not as both simultaneously.
5-6Installation and Configuration Guide for the Cisco NAM 2220 Appliance
OL-16692-01
Chapter 5 Configuring the Cisco NAM 2220 ApplianceEnabling the NAM Traffic Analyzer Web Server
To enable the NAM web server and provide browser-based access, the following prerequisites must be met:
• If you plan to use the HTTP secure server (HTTPs), you must first download and install the NAM software K9 cryptographic patch. For detailed information, see the following URL:
http://www.cisco.com/en/US/products/products_security_advisory09186a00801c110e.shtml
The ip http secure commands remain disabled until you install the patch. You can download the NAM software K9 cryptographic patch from Cisco.com.
• Ensure that your web browser supports your NAM software release. For a list of supported browsers, see the NAM software release notes at the following URL:
http://www.cisco.com/en/US/docs/net_mgmt/network_analysis_module_software/4.0/release/notes/nam40note.html#wp71802
To enable the NAM web server:
Step 1 Open a Telnet or SSH session to the NAM appliance and at the password prompt, enter your password.
telnet {ip-address | hostname}
or
ssh {ip-address | hostname}
Step 2 Enter one of the following commands to enable either an HTTP server or an HTTPS secure server:
To enable the NAM HTTP web server:
ip http server enable
To enable the NAM HTTPS secure web server:
ip http secure server enable
The NAM requests a web administrator user name.
Enabling HTTP server...
No web users are configured.Please enter a web administrator user name [admin]: <CR>
The NAM web server requires at least one properly-configured web administrator. If the NAM does not prompt you for a web username and password, then at least one web administrator was previously configured.
Step 3 Enter the username of the web administrator. Otherwise, press Enter to use the default web administrator username admin.
The NAM requests a password for the web administrator, then requests the password to be entered again to ensure accuracy.
New password: <adminpswd>
Confirm password: <adminpswd>
Step 4 Enter the password for the web administrator and confirm it. Otherwise, press Enter to use the default web administrator password adminpswd.
5-7Installation and Configuration Guide for the Cisco NAM 2220 Appliance
OL-16692-01

Chapter 5 Configuring the Cisco NAM 2220 ApplianceEnabling the NAM Traffic Analyzer Web Server
Note Because this document is available to the public by way of Cisco.com, it is a good idea to change this and all default passwords as soon as possible.
Enabling the Web Server SummaryThe following summarizes the steps or interaction when you enable the NAM web server and access to it.
root@nam1# ip http server enable Enabling HTTP server...
No web users are configured.Please enter a web administrator user name [admin]: <CR> New password: admin_password Confirm password: admin_password
User admin added.starting httpdstarting polldstarting swpolldSuccessfully enabled HTTP server.root@nam1#
Checking the NAM Traffic Analyzer Web ServerAfter you have configured the NAM Traffic Analyzer web server and enabled access to it, you should check that the web server is working by launching a browser and trying to log in to the NAM.
To check the NAM Traffic Analyzer web server functionality, launch an approved internet browser and enter the IP address or host and domain name in the browser address field.
Note For a list of supported browsers, see the NAM software release notes at: http://www.cisco.com/en/US/docs/net_mgmt/network_analysis_module_software/4.0/release/notes/nam40note.html#wp71802
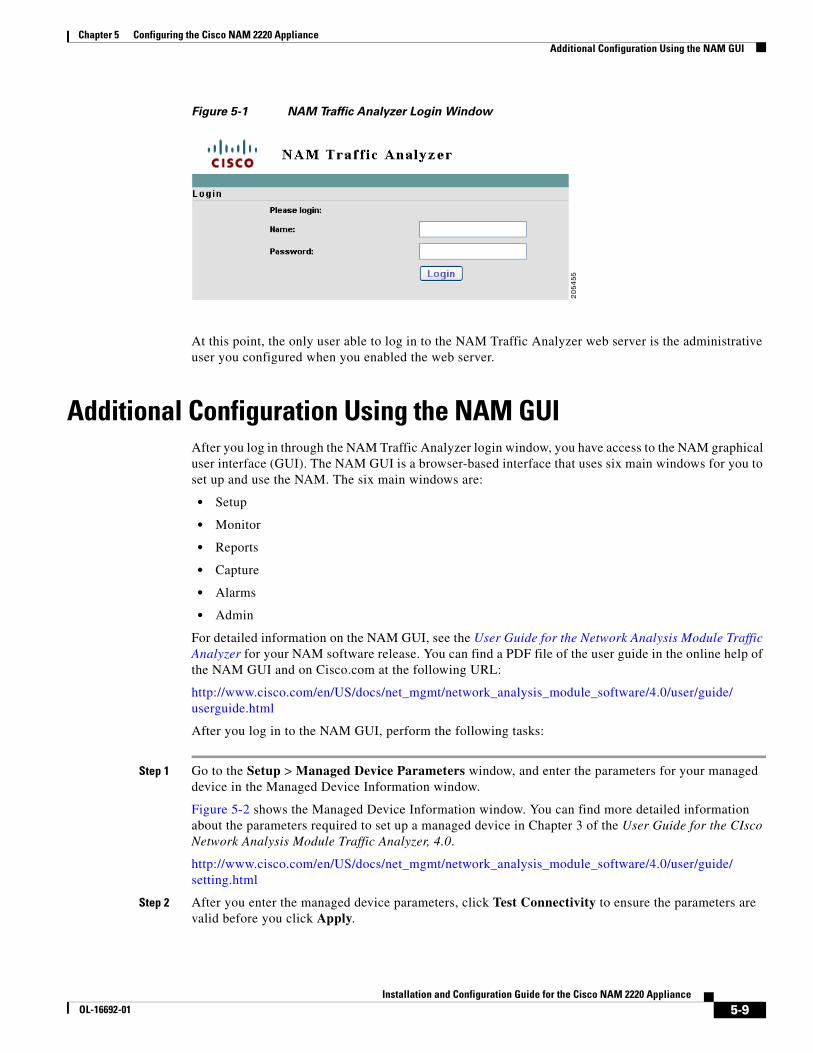
If the Cisco NAM 2220 Appliance web server is properly configured, you should access the NAM Traffic Analyzer login window as shown in Figure 5-1.
5-8Installation and Configuration Guide for the Cisco NAM 2220 Appliance
OL-16692-01
Chapter 5 Configuring the Cisco NAM 2220 ApplianceAdditional Configuration Using the NAM GUI
Figure 5-1 NAM Traffic Analyzer Login Window
At this point, the only user able to log in to the NAM Traffic Analyzer web server is the administrative user you configured when you enabled the web server.
Additional Configuration Using the NAM GUIAfter you log in through the NAM Traffic Analyzer login window, you have access to the NAM graphical user interface (GUI). The NAM GUI is a browser-based interface that uses six main windows for you to set up and use the NAM. The six main windows are:
• Setup
• Monitor
• Reports
• Capture
• Alarms
• Admin
For detailed information on the NAM GUI, see the User Guide for the Network Analysis Module Traffic Analyzer for your NAM software release. You can find a PDF file of the user guide in the online help of the NAM GUI and on Cisco.com at the following URL:
http://www.cisco.com/en/US/docs/net_mgmt/network_analysis_module_software/4.0/user/guide/userguide.html
After you log in to the NAM GUI, perform the following tasks:
Step 1 Go to the Setup > Managed Device Parameters window, and enter the parameters for your managed device in the Managed Device Information window.
Figure 5-2 shows the Managed Device Information window. You can find more detailed information about the parameters required to set up a managed device in Chapter 3 of the User Guide for the CIsco Network Analysis Module Traffic Analyzer, 4.0.
http://www.cisco.com/en/US/docs/net_mgmt/network_analysis_module_software/4.0/user/guide/setting.html
Step 2 After you enter the managed device parameters, click Test Connectivity to ensure the parameters are valid before you click Apply.
5-9Installation and Configuration Guide for the Cisco NAM 2220 Appliance
OL-16692-01

Chapter 5 Configuring the Cisco NAM 2220 ApplianceAdditional Configuration Using the NAM GUI
Figure 5-2 Managed Device Information Window
Step 3 Go to the Admin > System window, and click Network Parameters in the content menu.
Figure 5-3 shows an example of the Network Parameters window. Use this window to enter additional network connectivity parameters such as your site’s name servers.
Figure 5-3 Network Parameters Window
5-10Installation and Configuration Guide for the Cisco NAM 2220 Appliance
OL-16692-01
Chapter 5 Configuring the Cisco NAM 2220 ApplianceAdditional Configuration Using the NAM GUI
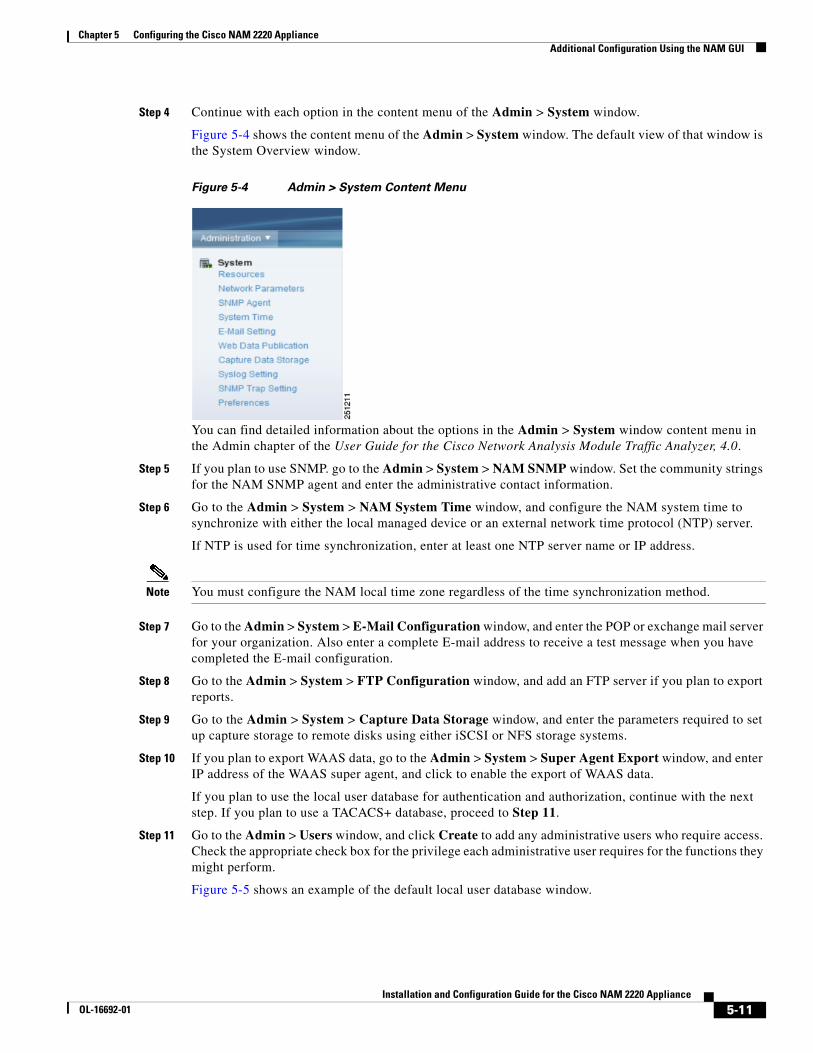
Step 4 Continue with each option in the content menu of the Admin > System window.
Figure 5-4 shows the content menu of the Admin > System window. The default view of that window is the System Overview window.
Figure 5-4 Admin > System Content Menu
You can find detailed information about the options in the Admin > System window content menu in the Admin chapter of the User Guide for the Cisco Network Analysis Module Traffic Analyzer, 4.0.
Step 5 If you plan to use SNMP. go to the Admin > System > NAM SNMP window. Set the community strings for the NAM SNMP agent and enter the administrative contact information.
Step 6 Go to the Admin > System > NAM System Time window, and configure the NAM system time to synchronize with either the local managed device or an external network time protocol (NTP) server.
If NTP is used for time synchronization, enter at least one NTP server name or IP address.
Note You must configure the NAM local time zone regardless of the time synchronization method.
Step 7 Go to the Admin > System > E-Mail Configuration window, and enter the POP or exchange mail server for your organization. Also enter a complete E-mail address to receive a test message when you have completed the E-mail configuration.
Step 8 Go to the Admin > System > FTP Configuration window, and add an FTP server if you plan to export reports.
Step 9 Go to the Admin > System > Capture Data Storage window, and enter the parameters required to set up capture storage to remote disks using either iSCSI or NFS storage systems.
Step 10 If you plan to export WAAS data, go to the Admin > System > Super Agent Export window, and enter IP address of the WAAS super agent, and click to enable the export of WAAS data.
If you plan to use the local user database for authentication and authorization, continue with the next step. If you plan to use a TACACS+ database, proceed to Step 11.
Step 11 Go to the Admin > Users window, and click Create to add any administrative users who require access. Check the appropriate check box for the privilege each administrative user requires for the functions they might perform.
Figure 5-5 shows an example of the default local user database window.
5-11Installation and Configuration Guide for the Cisco NAM 2220 Appliance
OL-16692-01

Chapter 5 Configuring the Cisco NAM 2220 ApplianceAdditional Configuration Using the NAM GUI
Figure 5-5 Admin > Users > Local User Database Window
Step 12 If you plan to use a TACACS+ server for authentication and authorization (AA), go to the Admin > Users > TACACS+ window, and enter the parameters required to access the TACACS+ server for authentication and authorization.
Enter the IP address of the TACACS+ server and the secret key to communicate with the server. The secret key must be the same as the one configured in the TACACS+ server. Figure 5-6 shows an example of the Admin > Users > TACACS+ window.
Figure 5-6 Admin > Users > TACACS+ Window
Step 13 If you plan to create an MPLS data source, go to the Setup > Managed Device > Managed Device Login window, and provide the user name and password required to log in to the switch. Click Test Login to validate the credentials.
Regarding MPLS monitoring:
• Only regular mode access is required.
• Enable password is not required.
• Telnet or SSH login method is supported.
5-12Installation and Configuration Guide for the Cisco NAM 2220 Appliance
OL-16692-01
Chapter 5 Configuring the Cisco NAM 2220 ApplianceManaging the Cisco NAM 2220 Appliance
Note To use SSH, you must apply the NAM K9 crypto patch. See Enabling the NAM Traffic Analyzer Web Server, page 5-6, for more details.
Managing the Cisco NAM 2220 ApplianceThis section contains the following information:
• Shutting Down and Starting Up NAM 2220 Appliance, page 5-13
• Verifying System Status, page 5-13
• Configuring Logging Options and Generating Diagnostics, page 5-15
• Resetting the NAM Root Password to the Default Value, page 5-15
• Opening and Closing a Telnet or SSH Session to the NAM, page 5-17
Note • The tables in these sections show only common managed device and network module commands.
– To view a complete list of available commands, type ? at the prompt(Example: user@nam_host.domain# ?).
– To view a complete list of command keyword options, type ? at the end of the command(Example: nam_host.domain# ip ?).
• The tables group commands by the configuration mode in which they are available. If the same command is available in more than one mode, it might act differently in each mode.
Shutting Down and Starting Up NAM 2220 ApplianceTo shut down the Cisco NAM 2220 appliance, issue the NAM CLI shutdown command.
The Cisco NAM 2220 appliance reboots after you press the Power button.
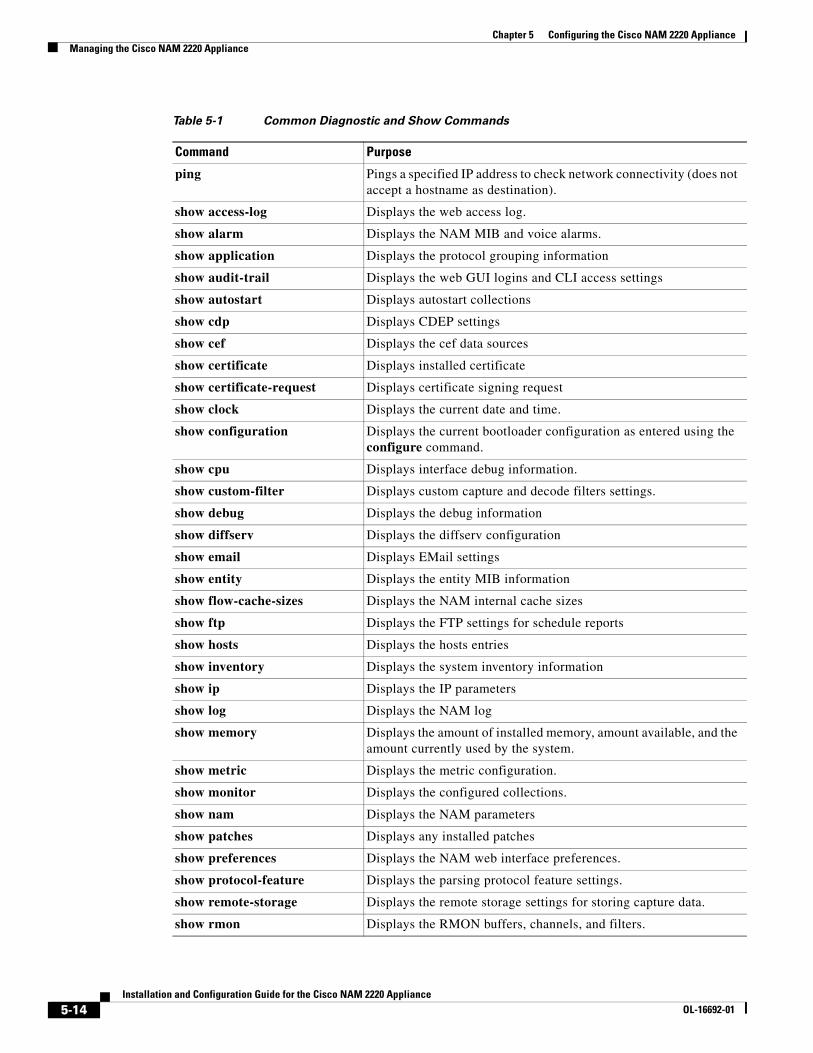
Verifying System StatusTo verify the status of an installation, upgrade, or downgrade or to troubleshoot problems, use commands from those listed in Table 5-1, Common Diagnostic and Show Commands.
Note Among keyword options for many show commands is provision to display diagnostic output on your screen or to pipe it to a file or a URL.
5-13Installation and Configuration Guide for the Cisco NAM 2220 Appliance
OL-16692-01
Chapter 5 Configuring the Cisco NAM 2220 ApplianceManaging the Cisco NAM 2220 Appliance
Table 5-1 Common Diagnostic and Show Commands
Command Purpose
ping Pings a specified IP address to check network connectivity (does not accept a hostname as destination).
show access-log Displays the web access log.
show alarm Displays the NAM MIB and voice alarms.
show application Displays the protocol grouping information
show audit-trail Displays the web GUI logins and CLI access settings
show autostart Displays autostart collections
show cdp Displays CDEP settings
show cef Displays the cef data sources
show certificate Displays installed certificate
show certificate-request Displays certificate signing request
show clock Displays the current date and time.
show configuration Displays the current bootloader configuration as entered using the configure command.
show cpu Displays interface debug information.
show custom-filter Displays custom capture and decode filters settings.
show debug Displays the debug information
show diffserv Displays the diffserv configuration
show email Displays EMail settings
show entity Displays the entity MIB information
show flow-cache-sizes Displays the NAM internal cache sizes
show ftp Displays the FTP settings for schedule reports
show hosts Displays the hosts entries
show inventory Displays the system inventory information
show ip Displays the IP parameters
show log Displays the NAM log
show memory Displays the amount of installed memory, amount available, and the amount currently used by the system.
show metric Displays the metric configuration.
show monitor Displays the configured collections.
show nam Displays the NAM parameters
show patches Displays any installed patches
show preferences Displays the NAM web interface preferences.
show protocol-feature Displays the parsing protocol feature settings.
show remote-storage Displays the remote storage settings for storing capture data.
show rmon Displays the RMON buffers, channels, and filters.
5-14Installation and Configuration Guide for the Cisco NAM 2220 Appliance
OL-16692-01
Chapter 5 Configuring the Cisco NAM 2220 ApplianceManaging the Cisco NAM 2220 Appliance
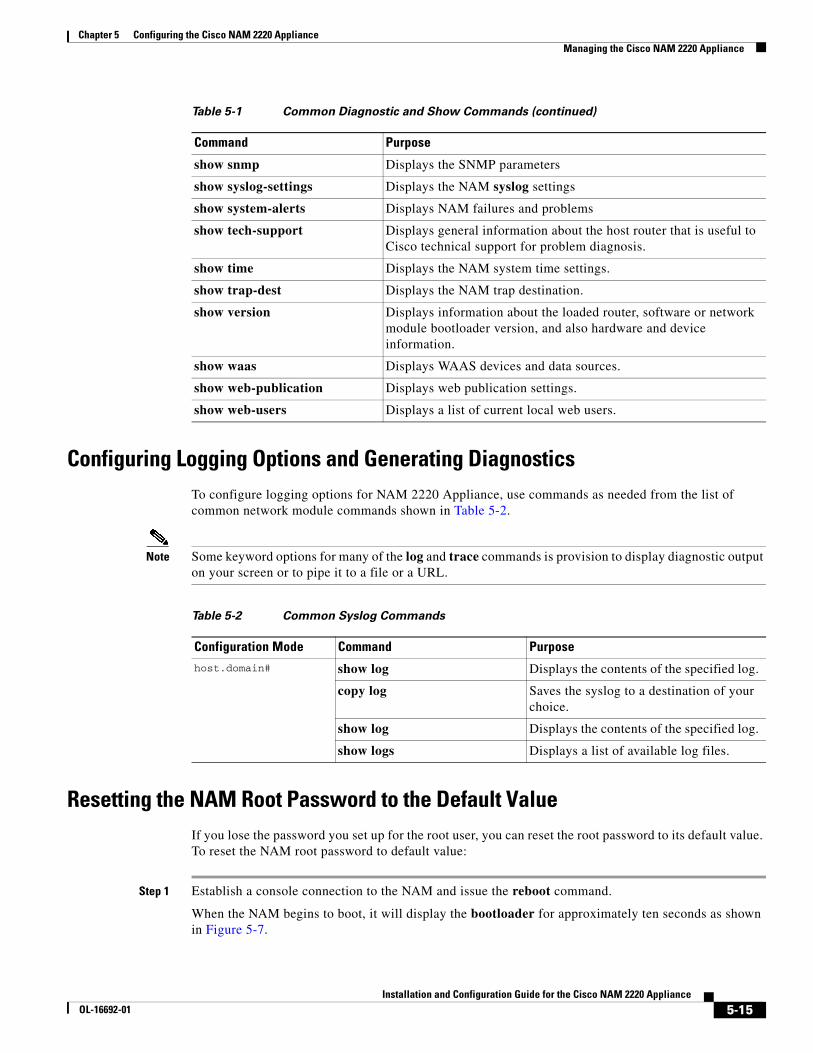
Configuring Logging Options and Generating DiagnosticsTo configure logging options for NAM 2220 Appliance, use commands as needed from the list of common network module commands shown in Table 5-2.
Note Some keyword options for many of the log and trace commands is provision to display diagnostic output on your screen or to pipe it to a file or a URL.
Resetting the NAM Root Password to the Default ValueIf you lose the password you set up for the root user, you can reset the root password to its default value. To reset the NAM root password to default value:
Step 1 Establish a console connection to the NAM and issue the reboot command.
When the NAM begins to boot, it will display the bootloader for approximately ten seconds as shown in Figure 5-7.
show snmp Displays the SNMP parameters
show syslog-settings Displays the NAM syslog settings
show system-alerts Displays NAM failures and problems
show tech-support Displays general information about the host router that is useful to Cisco technical support for problem diagnosis.
show time Displays the NAM system time settings.
show trap-dest Displays the NAM trap destination.
show version Displays information about the loaded router, software or network module bootloader version, and also hardware and device information.
show waas Displays WAAS devices and data sources.
show web-publication Displays web publication settings.
show web-users Displays a list of current local web users.
Table 5-1 Common Diagnostic and Show Commands (continued)
Command Purpose
Table 5-2 Common Syslog Commands
Configuration Mode Command Purpose
host.domain# show log Displays the contents of the specified log.
copy log Saves the syslog to a destination of your choice.
show log Displays the contents of the specified log.
show logs Displays a list of available log files.
5-15Installation and Configuration Guide for the Cisco NAM 2220 Appliance
OL-16692-01
Chapter 5 Configuring the Cisco NAM 2220 ApplianceManaging the Cisco NAM 2220 Appliance
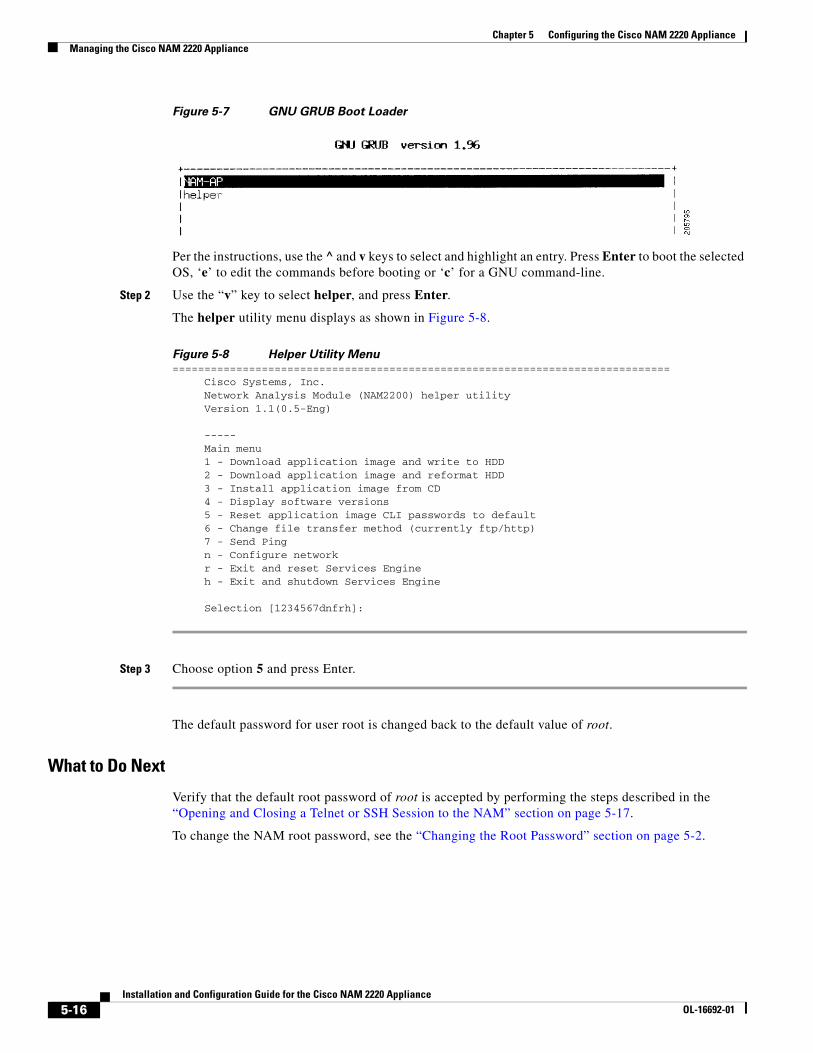
Figure 5-7 GNU GRUB Boot Loader
Per the instructions, use the ̂ and v keys to select and highlight an entry. Press Enter to boot the selected OS, ‘e’ to edit the commands before booting or ‘c’ for a GNU command-line.
Step 2 Use the “v” key to select helper, and press Enter.
The helper utility menu displays as shown in Figure 5-8.
Figure 5-8 Helper Utility Menu
============================================================================== Cisco Systems, Inc. Network Analysis Module (NAM2200) helper utility Version 1.1(0.5-Eng)
----- Main menu 1 - Download application image and write to HDD 2 - Download application image and reformat HDD 3 - Install application image from CD 4 - Display software versions 5 - Reset application image CLI passwords to default 6 - Change file transfer method (currently ftp/http) 7 - Send Ping n - Configure network r - Exit and reset Services Engine h - Exit and shutdown Services Engine
Selection [1234567dnfrh]:
Step 3 Choose option 5 and press Enter.
The default password for user root is changed back to the default value of root.
What to Do Next
Verify that the default root password of root is accepted by performing the steps described in the “Opening and Closing a Telnet or SSH Session to the NAM” section on page 5-17.
To change the NAM root password, see the “Changing the Root Password” section on page 5-2.
5-16Installation and Configuration Guide for the Cisco NAM 2220 Appliance
OL-16692-01

Chapter 5 Configuring the Cisco NAM 2220 ApplianceManaging the Cisco NAM 2220 Appliance
Opening and Closing a Telnet or SSH Session to the NAM This procedure opens and closes a Telnet or SSH session to the NAM. This procedure is not commonly performed, because you would typically use the NAM Traffic Analyzer (web GUI) to monitor and maintain the NAM. If, however, you cannot access the NAM Traffic Analyzer, then you might want to use Telnet or SSH to troubleshoot from the NAM CLI.
If your Cisco NAM 2220 appliance is not properly configured for Telnet or SSH access (see the following Prerequisites, page 5-17 section), then you can open a Telnet session to the managed device to which the Cisco NAM 2220 appliance is connected, then open a NAM console session from the managed device.
Prerequisites
• Configure the NAM system IP address. Optionally, set the NAM system hostname.
• Verify NAM network connectivity by performing one of the following ping tests:
– From a host beyond the gateway, ping the NAM system IP address.
– From the NAM CLI, ping the NAM system default gateway.
Telnet Prerequisites
• Enter the exsession on NAM CLI command.
SSH Prerequisites
• Install the NAM software K9 cryptographic patch, which you can download from Cisco.com.
• Enter the exsession on ssh NAM CLI command.
SUMMARY STEPS
1. telnet {ip-address | hostname} orssh {ip-address | hostname}
2. At the login prompt, enter root.
3. At the password prompt, enter your password.orIf you have not changed the password from the factory-set default, enter root as the root password.
4. Perform the tasks that you need to perform in the NAM CLI. When you want to end the Telnet or SSH session to the NAM and return to the Cisco IOS CLI, complete Step 5 and Step 6.
5. exit
6. logout
5-17Installation and Configuration Guide for the Cisco NAM 2220 Appliance
OL-16692-01
Chapter 5 Configuring the Cisco NAM 2220 ApplianceManaging the Cisco NAM 2220 Appliance
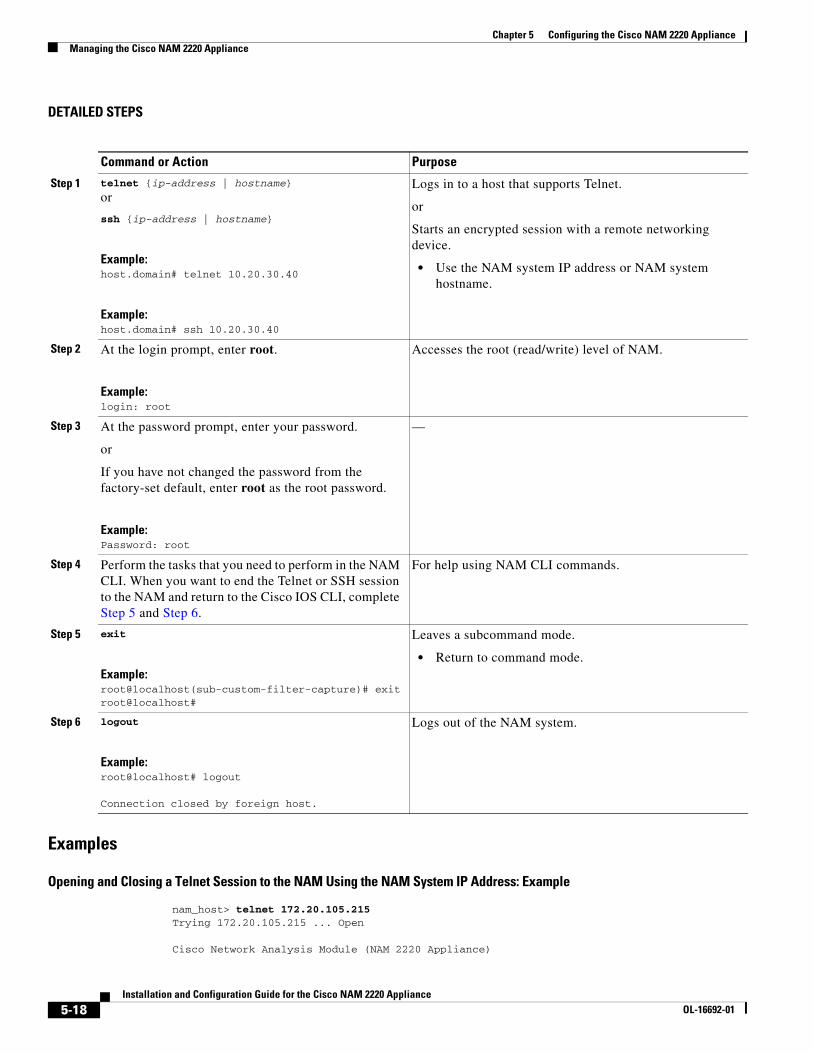
DETAILED STEPS
Examples
Opening and Closing a Telnet Session to the NAM Using the NAM System IP Address: Example
nam_host> telnet 172.20.105.215 Trying 172.20.105.215 ... Open
Cisco Network Analysis Module (NAM 2220 Appliance)
Command or Action Purpose
Step 1 telnet {ip-address | hostname}
or
ssh {ip-address | hostname}
Example:host.domain# telnet 10.20.30.40
Example:host.domain# ssh 10.20.30.40
Logs in to a host that supports Telnet.
or
Starts an encrypted session with a remote networking device.
• Use the NAM system IP address or NAM system hostname.
Step 2 At the login prompt, enter root.
Example:login: root
Accesses the root (read/write) level of NAM.
Step 3 At the password prompt, enter your password.
or
If you have not changed the password from the factory-set default, enter root as the root password.
Example:Password: root
—
Step 4 Perform the tasks that you need to perform in the NAM CLI. When you want to end the Telnet or SSH session to the NAM and return to the Cisco IOS CLI, complete Step 5 and Step 6.
For help using NAM CLI commands.
Step 5 exit
Example:root@localhost(sub-custom-filter-capture)# exitroot@localhost#
Leaves a subcommand mode.
• Return to command mode.
Step 6 logout
Example:root@localhost# logout
Connection closed by foreign host.
Logs out of the NAM system.
5-18Installation and Configuration Guide for the Cisco NAM 2220 Appliance
OL-16692-01
Chapter 5 Configuring the Cisco NAM 2220 ApplianceConfiguring the Monitored Device
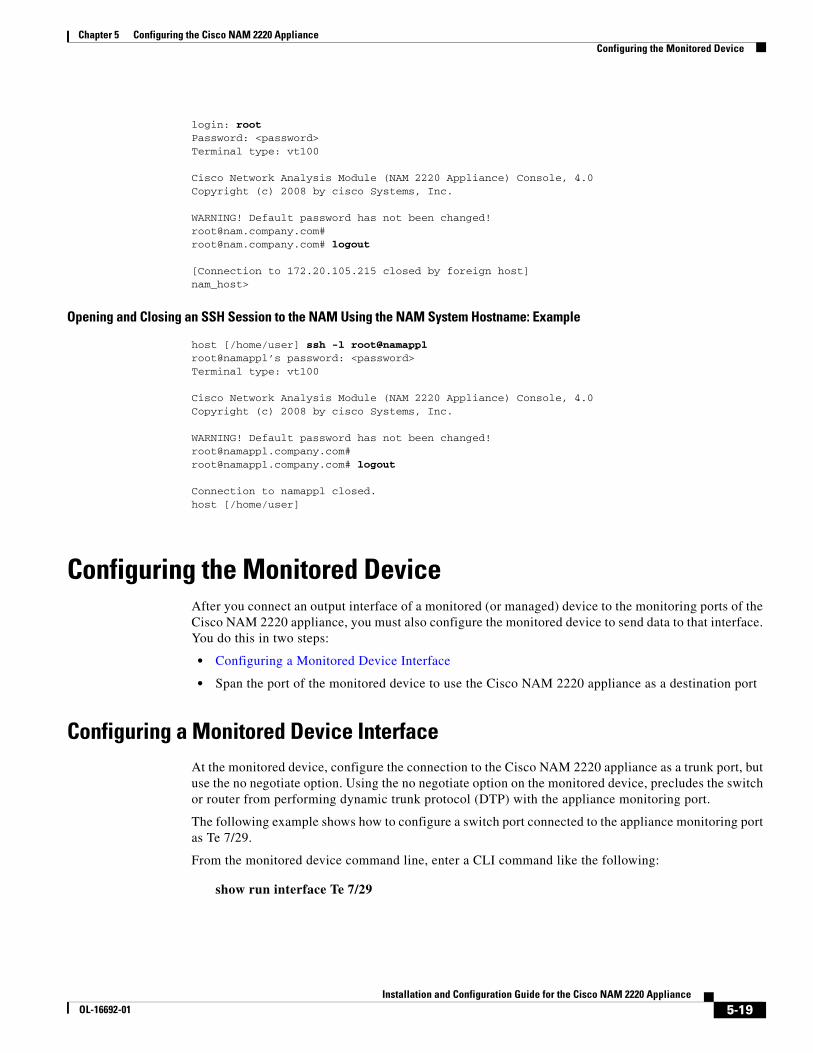
login: root Password: <password> Terminal type: vt100
Cisco Network Analysis Module (NAM 2220 Appliance) Console, 4.0Copyright (c) 2008 by cisco Systems, Inc.
WARNING! Default password has not been [email protected]#[email protected]# logout
[Connection to 172.20.105.215 closed by foreign host]nam_host>
Opening and Closing an SSH Session to the NAM Using the NAM System Hostname: Example
host [/home/user] ssh -l root@namappl root@namappl’s password: <password> Terminal type: vt100
Cisco Network Analysis Module (NAM 2220 Appliance) Console, 4.0Copyright (c) 2008 by cisco Systems, Inc.
WARNING! Default password has not been [email protected]# [email protected]# logout
Connection to namappl closed.host [/home/user]
Configuring the Monitored DeviceAfter you connect an output interface of a monitored (or managed) device to the monitoring ports of the Cisco NAM 2220 appliance, you must also configure the monitored device to send data to that interface. You do this in two steps:
• Configuring a Monitored Device Interface
• Span the port of the monitored device to use the Cisco NAM 2220 appliance as a destination port
Configuring a Monitored Device InterfaceAt the monitored device, configure the connection to the Cisco NAM 2220 appliance as a trunk port, but use the no negotiate option. Using the no negotiate option on the monitored device, precludes the switch or router from performing dynamic trunk protocol (DTP) with the appliance monitoring port.
The following example shows how to configure a switch port connected to the appliance monitoring port as Te 7/29.
From the monitored device command line, enter a CLI command like the following:
show run interface Te 7/29
5-19Installation and Configuration Guide for the Cisco NAM 2220 Appliance
OL-16692-01
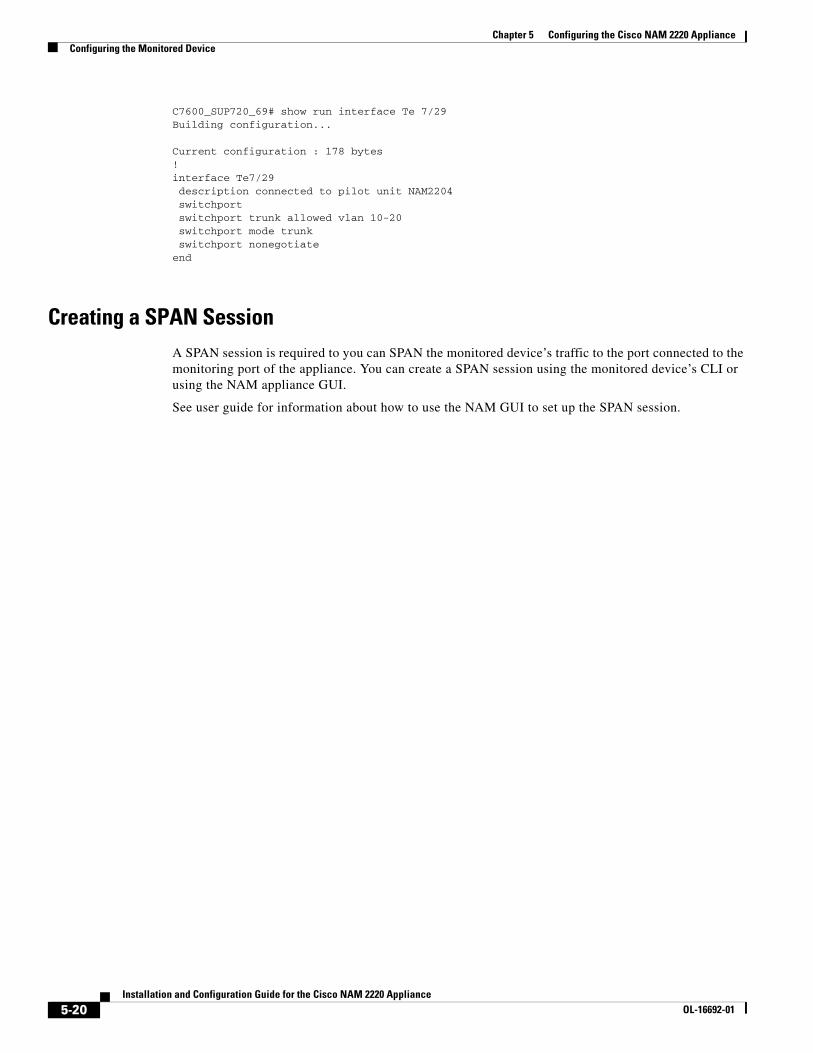
Chapter 5 Configuring the Cisco NAM 2220 ApplianceConfiguring the Monitored Device
C7600_SUP720_69# show run interface Te 7/29Building configuration... Current configuration : 178 bytes!interface Te7/29 description connected to pilot unit NAM2204 switchport switchport trunk allowed vlan 10-20 switchport mode trunk switchport nonegotiateend
Creating a SPAN SessionA SPAN session is required to you can SPAN the monitored device’s traffic to the port connected to the monitoring port of the appliance. You can create a SPAN session using the monitored device’s CLI or using the NAM appliance GUI.
See user guide for information about how to use the NAM GUI to set up the SPAN session.
5-20Installation and Configuration Guide for the Cisco NAM 2220 Appliance
OL-16692-01