configuring the j2ee engine - way2sapbasis.com the j2ee engine .pdfeach java instance consists of...
TRANSCRIPT

SAP NetWeaver '04 Configuration Guide
Configuring the J2EE Engine
Document Version 1.00 – January 2006

SAP AG Neurottstraße 16 69190 Walldorf Germany T +49/18 05/34 34 24 F +49/18 05/34 34 20 www.sap.com
© Copyright 2005 SAP AG. All rights reserved. No part of this publication may be reproduced or transmitted in any form or for any purpose without the express permission of SAP AG. The information contained herein may be changed without prior notice. Some software products marketed by SAP AG and its distributors contain proprietary software components of other software vendors. Microsoft, Windows, Outlook, and PowerPoint are registered trademarks of Microsoft Corporation. IBM, DB2, DB2 Universal Database, OS/2, Parallel Sysplex, MVS/ESA, AIX, S/390, AS/400, OS/390, OS/400, iSeries, pSeries, xSeries, zSeries, z/OS, AFP, Intelligent Miner, WebSphere, Netfinity, Tivoli, and Informix are trademarks or registered trademarks of IBM Corporation in the United States and/or other countries. Oracle is a registered trademark of Oracle Corporation. UNIX, X/Open, OSF/1, and Motif are registered trademarks of the Open Group. Citrix, ICA, Program Neighborhood, MetaFrame, WinFrame, VideoFrame, and MultiWin are trademarks or registered trademarks of Citrix Systems, Inc. HTML, XML, XHTML and W3C are trademarks or registered trademarks of W3C®, World Wide Web Consortium, Massachusetts Institute of Technology. Java is a registered trademark of Sun Microsystems, Inc. JavaScript is a registered trademark of Sun Microsystems, Inc., used under license for technology invented and implemented by Netscape. MaxDB is a trademark of MySQL AB, Sweden.
SAP, R/3, mySAP, mySAP.com, xApps, xApp, SAP NetWeaver, and other SAP products and services mentioned herein as well as their respective logos are trademarks or registered trademarks of SAP AG in Germany and in several other countries all over the world. All other product and service names mentioned are the trademarks of their respective companies. Data contained in this document serves informational purposes only. National product specifications may vary. These materials are subject to change without notice. These materials are provided by SAP AG and its affiliated companies ("SAP Group") for informational purposes only, without representation or warranty of any kind, and SAP Group shall not be liable for errors or omissions with respect to the materials. The only warranties for SAP Group products and services are those that are set forth in the express warranty statements accompanying such products and services, if any. Nothing herein should be construed as constituting an additional warranty. Disclaimer Some components of this product are based on Java™. Any code change in these components may cause unpredictable and severe malfunctions and is therefore expressively prohibited, as is any decompilation of these components. Any Java™ Source Code delivered with this product is only to be used by SAP’s Support Services and may not be modified or altered in any way. Documentation on SAP Service Marketplace You can find this documentation at service.sap.com/instguidesNW04

T yp o g r a p h i c C o n v e n t i o n s
Type Style Represents
Example Text Words or characters quoted from the screen. These include field names, screen titles, pushbuttons labels, menu names, menu paths, and menu options.
Cross-references to other documentation.
Example text Emphasized words or phrases in body text, graphic titles, and table titles.
EXAMPLE TEXT Technical names of system objects. These include report names, program names, transaction codes, table names, and key concepts of a programming language when they are surrounded by body text, for example, SELECT and INCLUDE.
Example text Output on the screen. This includes file and directory names and their paths, messages, names of variables and parameters, source text, and names of installation, upgrade and database tools.
Example text Exact user entry. These are words or characters that you enter in the system exactly as they appear in the documentation.
<Example text> Variable user entry. Angle brackets indicate that you replace these words and characters with appropriate entries to make entries in the system.
EXAMPLE TEXT Keys on the keyboard, for example, F2 or ENTER.
I c o n s
Icon Meaning
Caution
Example
Note
Recommendation
Syntax

Contents
1 CONFIGURING THE J2EE ENGINE................................................................................. 1 2 CLUSTERING THE J2EE ENGINE................................................................................... 2
2.1 Setting Up the J2EE Engine Cluster ......................................................................... 3 2.1.1 Template Configuration Tool .......................................................................... 4 2.1.2 Adding Java Instances ................................................................................. 14 2.1.3 Adding Server Processes............................................................................. 15
3 CONFIGURING THE J2EE ENGINE CLUSTER............................................................. 16 3.1 Configuring Cluster Elements ................................................................................. 17 3.2 Connections Manipulation....................................................................................... 18
3.2.1 Activities ....................................................................................................... 18 3.3 Setting Service Load Timeout ................................................................................. 21 3.4 Managing Cluster Elements Startup and Shutdown ............................................... 22 3.5 Configuring the Message Server Communication .................................................. 24 3.6 Configuring the Session Communication................................................................ 25 3.7 Configuring the Lazy Communication ..................................................................... 26 3.8 Setting Service Stop Timeout.................................................................................. 27 3.9 Setting Event Timeout............................................................................................. 28
4 CONFIGURING ADDITIONAL PARAMETERS OF THE J2EE ENGINE ....................... 29 4.1 Tuning Web Container ............................................................................................ 30 4.2 Tuning EJB Request Processing ............................................................................ 32 4.3 Tuning Remote Communication.............................................................................. 32 4.4 Tuning Database Connectivity ................................................................................ 33 4.5 Tuning JMS Provider............................................................................................... 34
5 REFERENCES AND RECOMMENDED FURTHER READINGS ................................... 35

Configuring the J2EE Engine January 2006
1 Configuring the J2EE Engine Purpose The J2EE Engine installation procedure provides a system that is ready to be run and used. However, you may need to configure the J2EE Engine additionally to adapt the system to the needs and requirements of a particular business scenario.
This guide assumes that you have already installed successfully Web Application Server Java.
Features This guide provides general guidelines about:
● Clustering the J2EE Engine [Page 2]
● Configuring the J2EE Engine Cluster [Page 16]
● Configuring Some Additional Parameters of the J2EE Engine [Page 29]
● References and Recommended Further Readings [Page 35]
Configuring the J2EE Engine 1

Clustering the J2EE Engine January 2006
2 Clustering the J2EE Engine This section is an introduction to the J2EE Engine cluster. It provides information about:
● The J2EE Engine cluster architecture
● Procedures how to scale the J2EE Engine cluster
● The initial configuration steps to run your J2EE Engine cluster
● Links to more advanced configuration topics
What is a Cluster? The cluster is a set of processes that work together to build a scalable and reliable system. The cluster structure is transparent to the clients and appears to them as a single server unit.
The J2EE Engine cluster consists of one or more Java dispatchers, several server processes, the Central Services (Message Service and Enqueue Service), and the database.
Why Clustering? Clustering provides the following advantages:
● Scalability of the system – In case of high system load, you can easily enlarge the current system.
● High availability of the system – The set of mechanisms that the system provides guarantees normal system operation with its ability to transparently recover in case of failures within the cluster.
To make use of the clustering features, you need to set up and configure the J2EE Engine according to the deployed applications and the expected workload. For more information, see Setting Up the J2EE Engine Cluster [Page 3] and Configuring the J2EE Engine Cluster [Page 16].
Configuring the J2EE Engine 2

Clustering the J2EE Engine January 2006
2.1 Setting Up the J2EE Engine Cluster
Purpose The appropriate cluster setup is one of the main prerequisites for the good performance of your system.
A J2EE Engine cluster consists of the following components:
● Central Services – Message Service and Enqueue Service
● One or more Java instances
Each Java instance consists of one dispatcher and one or several server processes.
● One or more databases.
When installing the J2EE Engine, you can choose to install the above components on a single host or on different hosts. In addition, you can choose the number of server processes in each Java instance.
These components form the initial configuration of your system. It is typically based on the expected system load defined by such factors as the anticipated throughput and number of users, as well as on the available hardware resources.
If the system load is greater than expected and the cluster that you have initially set up does not scale well, you can resize it by installing new Java instances or by adding server processes to existing Java instances.
Prerequisites You have installed the Central Services instance, at least one Java instance, and one database.
Process Flow To optimally configure your system, follow the recommendations below:
1. Run the Template Configuration Tool [Page 4] on the already installed Java instances.
2. If needed, install additional Java instances [Page 14] and run the Template Configuration Tool on each newly installed Java instance.
3. If needed, add server processes [Page 15] to the existing Java instances.
Result You have a fully scaled J2EE Engine Cluster. The Template Configuration Tool has configured some basic parameters of the Java instances. To optimize your J2EE Engine according to your scenario and applications, follow the recommendations in:
● Configuring the J2EE Engine Cluster [Page 16]
● Configuring Some Additional Parameters of the J2EE Engine [Page 29]
Configuring the J2EE Engine 3

Clustering the J2EE Engine January 2006
2.1.1 Template Configuration Tool
Purpose This component is a tool for configuring the J2EE Engine and the SAP NetWeaver components running on top of it. To configure the system properly, the Template Configuration Tool uses specially designed templates for each component.
You can find the latest information about the Template Configuration Tool and the related configuration templates in SAP Note 739788.
Implementation Considerations The installation procedure of the J2EE Engine and the SAP NetWeaver components provides the system with a default configuration. You can run the system using the initial configuration; however, this does not guarantee that the available resources are utilized optimally or that the system will function properly. Using the Template Configuration Tool and the templates provided by each component, you can easily adjust the infrastructure to the particular needs of the scenario that you are running. Therefore, we recommend that you run the Template Configuration Tool after installing the J2EE Engine.
The Template Configuration Tool is run only once for each server instance. If you expand the cluster vertically later on by adding new instances to it, you should run the tool on each new instance, so that all instances in the cluster are configured in the same way.
Integration While the Template Configuration Tool provides the framework for processing the templates, each SAP NetWeaver component provides its specific template.
Features The Template Configuration Tool is the framework that enables other SAP NetWeaver components to create their own configuration templates. You can use the tool to apply and restore a particular system configuration.
You can choose to apply the appropriate configuration templates depending on your particular scenario. For example, you may choose to apply a template for an Enterprise Portal scenario where you have a portal running on top of the J2EE Engine. Note that this may influence not just the configuration of the component itself, but also the settings of the J2EE Engine.
The tool is instance-based – that is, it configures the J2EE Engine based on the available hardware resources on a particular host, as well as some additional settings such as allocated memory. This means that you must run the tool separately for each Java instance that you have installed.
The Template Configuration Tool is designed to automatically detect most of the parameters that are used to define the configuration of the system. The tool provides wizards that guide you through the process of choosing which function you want to use, selecting the appropriate templates, and filling in the required parameters.
Configuring the J2EE Engine 4

Clustering the J2EE Engine January 2006
See also:
When To Use Template Configuration Tool? [Page 6]
Selecting the Appropriate Template [Page 7]
Starting the Template Configuration Tool [Page 9]
Applying a Configuration [Page 10]
Restoring a Configuration [Page 13]
Configuring the J2EE Engine 5

Clustering the J2EE Engine January 2006
2.1.1.1 When To Use Template Configuration Tool?
Use You can use the Template Configuration Tool to configure your system if the following conditions are met:
● It is a new installation of SAP Web AS (Java) with J2EE Engine SP7 or above, which corresponds to SAP NetWeaver 04 SP Stack 4.
You must not apply the tool on an existing SAP Web AS configuration after upgrading it to SP7 or above. This will delete the custom configurations that you have made in the system. In addition, the system may not start after you apply a configuration template to it.
● If your system should contain other SAP NetWeaver components in addition to SAP Web AS, such as Enterprise Portal, Exchange Infrastructure and so on, first install all required components, and then run the tool afterwards.
If you have installed the J2EE Engine as a part of a developer workplace, it is not necessary to apply a configuration template using the Template Configuration Tool.
See also:
Starting the Template Configuration Tool [Page 9]
Applying a Configuration [Page 10]
Selecting the Appropriate Template [Page 7]
Configuring the J2EE Engine 6

Clustering the J2EE Engine January 2006
2.1.1.2 Selecting the Appropriate Template
Use The installation of the Template Configuration Tool also includes a set of templates. When you run the tool, you can choose to apply a single template, so it is important that you select the most appropriate one for each scenario.
If you need to configure a combination of SAP NetWeaver components for which a specific template is not provided, choose a template that best corresponds to your scenario, and then manually configure the components that are not automatically configured by the tool.
Integration The selection of a template is done at step 3 of the procedure for applying a configuration template. For more information, see Applying a Configuration [Page 10].
Features The templates included in the installation of the Template Configuration Tool cover the scenarios described in the following table.
Scenario System Description Configuration Template
J2EE Applications A system in which only J2EE applications will be deployed and run
J2EE-Engine-only.zip
System Landscape Directory (SLD)
A system where SLD is installed
J2EE-Engine-only.zip
A central development infrastructure system comprising all components – that is, Design Time Repository (DTR), Change Management Service (CMS), and Central Build Server (CBS) installed
JDI-DTR-and-CBS.zipSAP NetWeaver Java Development Infrastructure (JDI)
DTR and CBS may be also installed on separate systems.
JDI-DTR-only.zip – for the system where DTR is installed
JDI-DTR-and-CBS.zip – for the system where CBS is installed
A system for EP productive use on a multiprocessor machine
Portal.zip
Also used for any portal application, if none of the more specific templates applies.
SAP Enterprise Portal (EP)
A system for EP productive use on a single processor machine.
Portal-1CPU.zip
To apply this template, make sure that you have at least 2GB memory allocated to the Java instance, on which the EP is running.
Configuring the J2EE Engine 7

Clustering the J2EE Engine January 2006
SAP Business Information Warehouse (BW)
A productive system for BW front-end applications MMR and UDI
BW.zip
BI Information Broadcasting
A productive system Portal.zip
SAP Mobile Infrastructure
A productive system J2EE-Engine-only.zip
SAP Knowledge Warehouse
A productive system J2EE-Engine-only.zip
Configuring the J2EE Engine 8

Clustering the J2EE Engine January 2006
2.1.1.3 Starting the Template Configuration Tool
Use The Template Configuration Tool is available with a GUI interface. It is started using a script file located in the installation directory of the tool.
Procedure
The Template Configuration Tool is installed in the global SAP directory shared as <sapmnt> on the global host of the SAP system. For more information about this directory, see the relevant installation guide for SAP Web Application Server on the Service Marketplace at http://service.sap.com/instguidesnw04.
You can find the script files for starting the Template Configuration Tool at the following location: \usr\sap\<SAPSID>\SYS\global\TemplateConfig.
To start the tool, run the cfgtemplategui script file in the installation directory.
Configuring the J2EE Engine 9
Clustering the J2EE Engine January 2006
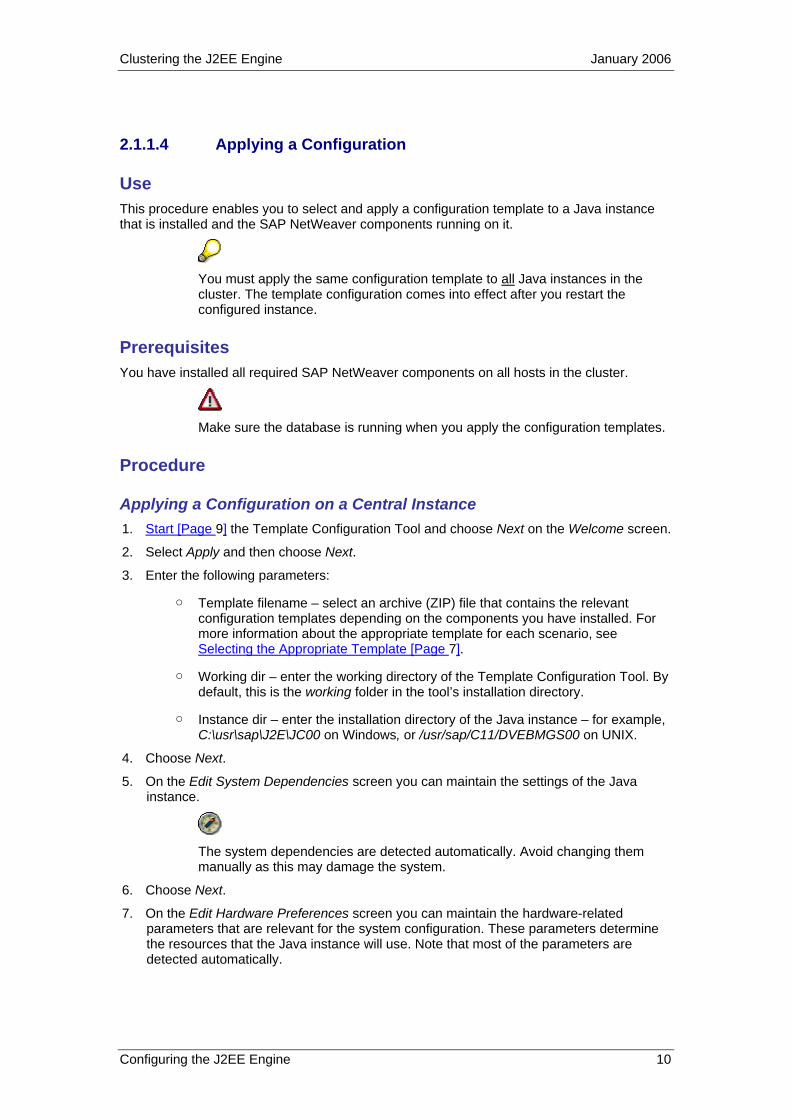
2.1.1.4 Applying a Configuration
Use This procedure enables you to select and apply a configuration template to a Java instance that is installed and the SAP NetWeaver components running on it.
You must apply the same configuration template to all Java instances in the cluster. The template configuration comes into effect after you restart the configured instance.
Prerequisites You have installed all required SAP NetWeaver components on all hosts in the cluster.
Make sure the database is running when you apply the configuration templates.
Procedure
Applying a Configuration on a Central Instance 1. Start [Page 9] the Template Configuration Tool and choose Next on the Welcome screen.
2. Select Apply and then choose Next.
3. Enter the following parameters:
○ Template filename – select an archive (ZIP) file that contains the relevant configuration templates depending on the components you have installed. For more information about the appropriate template for each scenario, see Selecting the Appropriate Template [Page 7].
○ Working dir – enter the working directory of the Template Configuration Tool. By default, this is the working folder in the tool’s installation directory.
○ Instance dir – enter the installation directory of the Java instance – for example, C:\usr\sap\J2E\JC00 on Windows, or /usr/sap/C11/DVEBMGS00 on UNIX.
4. Choose Next.
5. On the Edit System Dependencies screen you can maintain the settings of the Java instance.
The system dependencies are detected automatically. Avoid changing them manually as this may damage the system.
6. Choose Next.
7. On the Edit Hardware Preferences screen you can maintain the hardware-related parameters that are relevant for the system configuration. These parameters determine the resources that the Java instance will use. Note that most of the parameters are detected automatically.
Configuring the J2EE Engine 10

Clustering the J2EE Engine January 2006
a. To specify the amount of memory (in MB) that will be allocated to the Java instance you are configuring, use the AMOUNT_MEMORY option. This parameter will determine the number of server processes that will be created for this instance and the heap size that will be allocated to each of them.
b. To specify the number of CPUs that the Java instance will use, use the CPU_COUNT parameter. This will affect some internal parameters, such as the number of concurrent users that the Java instance will be able to process.
Make sure that you take into account the memory and CPU consumption by the other components or processes (for example, database systems, other ABAP or Java instances) running on the same physical host. That is, if you have a Java instance and a database system running on the same host, you should consider the amount of memory used by the database system, and then choose an appropriate AMOUNT_MEMORY value for the Java instance.
Do not configure the usage factor (USAGE_FACTOR). The system does not take its value into account.
8. Choose Next.
9. On the Advanced options screen, you can choose to create a backup for the current system configuration. The backup is created in a subfolder of the working directory, called backup.
We recommend that you use the backup option, so that you can restore [Page 13] the configuration if necessary.
Leave the option Instance Local Configuration Only deselected.
In the J2EE Engine you can apply two configuration categories – global or local configuration. The global configuration includes modifications that are applied to the entire cluster, such as starting and stopping services, changes to the service startup mode, and so on. The local configuration is applied to the current Java instance only and includes actions such as setting service and manager local properties. If you leave the Instance Local Configuration Only option unchecked, both the global and the local configurations are applied.
On this screen, you can set logging preferences using Logging options….
10. Choose Next.
11. On the Preview component screen, you can select the components that you are configuring. By choosing Preview… you see the changes that the Template Configuration Tool will apply to the existing system marked in red. Optionally, by choosing Export to XML… you can save in an XML file the list of parameters with their old and new values.
12. Choose Next.
13. Review the selected options and confirm them by choosing Finish.
14. Wait for the process to finish and close the console by choosing OK.
You can select the output in the console and copy it for logging purposes.
15. Restart the instance.
Configuring the J2EE Engine 11

Clustering the J2EE Engine January 2006
Applying a Configuration on a Dialog Instance ...
1. Mount the global SAP directory on the central instance host as a local drive for the relevant dialog instance host.
2. On the dialog instance host, start the Template Configuration Tool from the script file located in the global SAP directory. Choose Next on the Welcome screen.
3. Select Apply and choose Next.
4. Select an appropriate template.
Make sure you select the same template that you already applied to the central instance of the cluster.
For Instance dir, select the path on the local physical host to the of the installation directory of the dialog – for example, C:\usr\sap\J2E\JC00 on Windows, or /usr/sap/C11/DVEBMGS00 on UNIX. Choose Next.
5. Repeat steps 5 through 9 from the above procedure.
6. On the Advanced Options screen, enable the Instance Local Configuration Only option.
7. Complete the procedure as described in steps 11 through 15 above.
Configuring the J2EE Engine 12

Clustering the J2EE Engine January 2006
2.1.1.5 Restoring a Configuration
Use Use this procedure to restore a configuration that you previously backed up.
Prerequisites You have created a backup of the configuration that you want to re-apply.
You can create a backup of a configuration, while applying a new one. For more information, see Applying a Configuration [Page 10].
Procedure 1. Start [Page 9] the Template Configuration Tool and choose Next.
2. On the Choose Action screen, select Restore Previous Backup. Choose Next.
3. Specify the working directory for the Template Configuration Tool. By default, this is the working folder in the tool’s installation directory. The backup data is stored in the backup subfolder in the working directory. Choose Next.
4. Specify the installation directory of the Java instance – for example, C:\usr\sap\J2E.
5. On the Edit System Dependencies screen you can maintain the settings of the instance. Choose Next.
6. Review the selected options and confirm them by choosing Finish.
7. Wait for the process to finish and close the console by choosing OK.
Result The Template Configuration Tool restores the configuration for which a backup exists in its working directory.
Configuring the J2EE Engine 13
Clustering the J2EE Engine January 2006
2.1.2 Adding Java Instances
Use When the number of customer requests to the J2EE Engine is large, you may need to resize your cluster by installing new Java instances.
You install new Java instances on different physical machines, thus adding more hardware resources to your system and improving the failover capabilities of your system.
Prerequisites You have installed the basic components of the cluster.
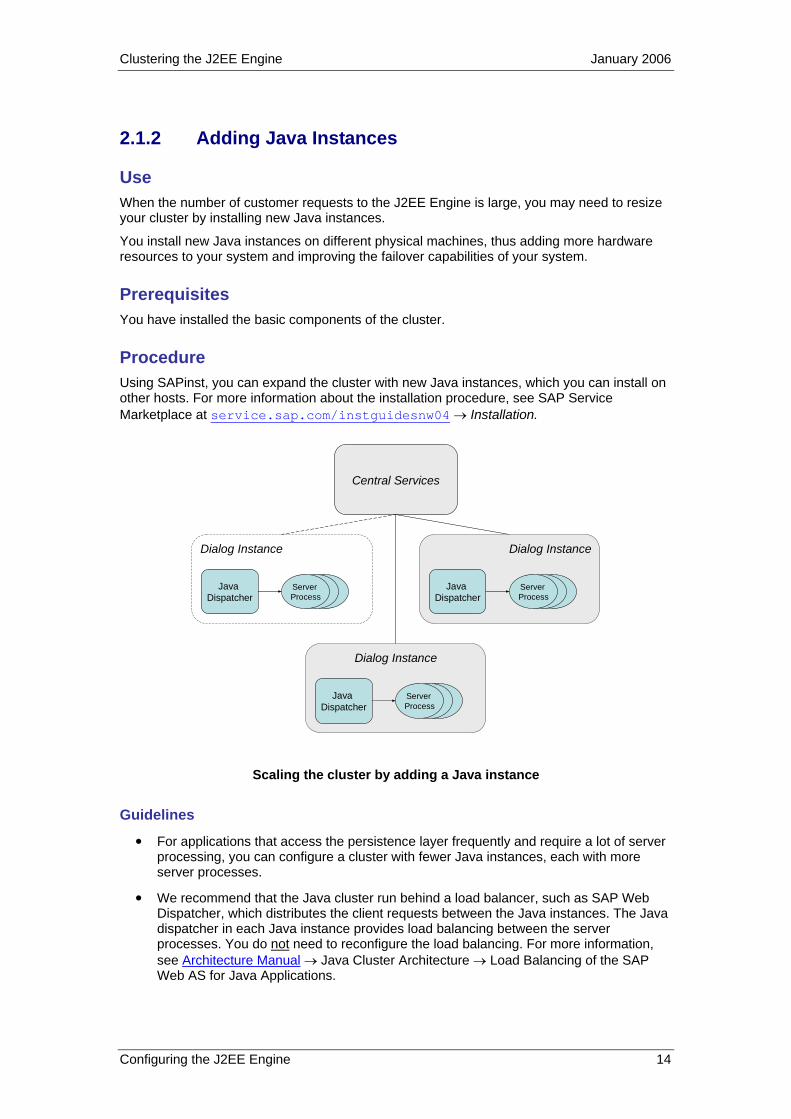
Procedure Using SAPinst, you can expand the cluster with new Java instances, which you can install on other hosts. For more information about the installation procedure, see SAP Service Marketplace at service.sap.com/instguidesnw04 → Installation.
Central Services
Dialog Instance
Java Dispatcher
Server Process
Dialog Instance
Java Dispatcher
Server Process
Dialog Instance
Java Dispatcher
Server Process
Scaling the cluster by adding a Java instance
Guidelines
● For applications that access the persistence layer frequently and require a lot of server processing, you can configure a cluster with fewer Java instances, each with more server processes.
● We recommend that the Java cluster run behind a load balancer, such as SAP Web Dispatcher, which distributes the client requests between the Java instances. The Java dispatcher in each Java instance provides load balancing between the server processes. You do not need to reconfigure the load balancing. For more information, see Architecture Manual → Java Cluster Architecture → Load Balancing of the SAP Web AS for Java Applications.
Configuring the J2EE Engine 14

Clustering the J2EE Engine January 2006
2.1.3 Adding Server Processes
Use You can also scale a Java cluster by adding server processes to already existing Java instances. This enables optimal utilization of the available hardware resources and of the capacity of the Java dispatcher to handle multiple server processes.
Dialog Instance
Central Services
JavaDispatcher
Server Process
Server Process
Server Process
Scaling the cluster by adding a server process
Prerequisites You have installed the basic components of the cluster.
Procedure When you run the Template Configuration Tool [Page 4] on your Java instance, it automatically configures the number of server processes based on the hardware resources that are available.
If you need to add more server processes to an existing Java instance, you can do that manually using the J2EE Engine Config Tool: ...
1. Make sure that the J2EE Engine system is stopped. For more information, see Administration Manual → Server Administration → Starting and Stopping the J2EE Engine.
2. Start the Config Tool by running the configtool script file located in the \usr\sap\<SAPSID>\j2ee\<instance name>\configtool directory.
3. Select the instance to which you want to add the server process.
4. Choose Server → Add Server.
We recommend that you use the Template Configuration Tool for automatic Java instance setup.
Configuring the J2EE Engine 15

Configuring the J2EE Engine Cluster January 2006
3 Configuring the J2EE Engine Cluster Purpose Typically, after installing the necessary cluster configuration and after applying the appropriate template for that configuration (using the Template Configuration Tool), you should configure the J2EE Engine cluster optimally for your scenario, hardware resources, and workload.
The additional cluster configuration that you can perform can be divided into two types of configuration:
● Required cluster configuration – this includes the configuration of some additional parameters depending on the size of the J2EE Engine cluster, the expected workload, and so on. Although referred to as “required configuration”, we recommend that you maintain these settings only after careful consideration and testing.
● Optional cluster configuration – perform the procedures described in this section only in case there are some problems within the cluster operation. Otherwise, we recommend that you do not reconfigure the default settings.
Process Flow
Required Cluster Configuration ● Configuring Cluster Elements [Page 17] – follow this procedure to configure the name
of the cluster elements and the join port of the server processes.
● Connections Manipulation [Page 18] – follow these procedures to configure the maximum number of user connections that the dispatcher can handle simultaneously and a timeout for establishing these connections.
● Setting Service Load Timeout [Page 21] – follow this procedure to configure the maximum time for which the services on a cluster node have to be started.
Optional Cluster Configuration ● Thread system configuration – to optimize the reallocation of system resources, we
recommend that you closely monitor and if necessary, reconfigure the J2EE Engine thread system.
● Managing the Cluster Elements Startup and Shutdown [Page 22] – use this procedure to configure manner in which the cluster elements will be started up and shut down.
● Configuring the cluster communication mechanisms:
○ Configuring the Message Server Communication [Page 24]
○ Configuring the Session Communication [Page 25]
○ Configuring the Lazy Communication [Page 26]
● Configuring the services stop and event timeouts:
○ Setting Service Stop Timeout [Page 27]
○ Setting Event Timeout [Page 28]
Configuring the J2EE Engine 16

Configuring the J2EE Engine Cluster January 2006
3.1 Configuring Cluster Elements
Use This procedure enables you to modify the default name of a cluster element that was assigned to it during the cluster element creation. If necessary, you can also change the assigned join port of a server process, on which the server process listens for connections (for example, when the port assigned to the cluster element is already in use by another program).
Do not modify the cluster element ID (element.clusterId), group ID (element.groupId), or type (element.type) properties. Modifying any of these properties leads to problems within the cluster communication and operation.
Procedure 1. Start the J2EE Engine Visual Administrator.
2. Choose Server/Dispatcher → Kernel → Cluster Manager → Properties tab.
3. Modify the required property values depending on the tasks you want to perform:
a. Use element.name to specify the name of the cluster element.
There are no restrictions about the name.
b. Use element.joinPort to specify the port on which the server process listens for connections.
The port value must not be: greater than 65535, less than 1024, or a “well known” port.
This property is available only on server processes.
4. Choose Save Properties to save your changes and restart the cluster node.
Configuring the J2EE Engine 17

Configuring the J2EE Engine Cluster January 2006
3.2 Connections Manipulation
Use The management of client connections in the cluster is represented in J2EE Engine by the Connections Manipulator Manager. This manager has an indirect connection with all services running on the dispatcher that receive or send data outside the cluster using a socket. It provides threads in which the processing of the received requests, their transfer from the dispatcher to the server, and the return of the response back to the user is accomplished.
Use this procedure to configure the maximum number of user connections that a dispatcher will be able to process at a certain moment, a timeout for these connections, and the connections checks.
3.2.1 Activities
3.2.1.1 Configuring the Maximum Number of User Connections The maximum number of user connections that the dispatcher can handle at a given moment is calculated by the system according to the memory (heap size) allocated to the dispatcher. By default, the Max heap size allocated to a dispatcher node is 170 MB. Thus, after making some allowances for connections reserved for internal communication and assuming that each connection consumes 10 KB memory, by default the maximum number of parallel user connections that a dispatcher (with 170 MB Max heap size) can handle is 12,403. If you change the Max heap size of a dispatcher node, the system will dynamically determine the maximum number of allowed user connections. When this number is exceeded, the users are rejected.
To view or change the Max heap size of a dispatcher node, use the Config Tool.
To check the maximum number of allowed user connections, use Telnet and execute the following commands:
add debug
debugmanager ConnectionsManipulator
The number calculated by the system is displayed as a value of the maxPossibleParallelUsers property.
However, you can limit the maximum number of user connections below the number that the system has calculated. To do so, proceed as follows:
1. Start the J2EE Engine Visual Administrator.
2. Choose Dispatcher → Kernel → Connections Manipulator → Properties tab.
3. Modify the value of the MaxParallelUsers property.
By default the value of this property is 0, which means that the system does not take this property into account and the maximum number of allowed user connections at a given moment is calculated by the system as described above.
Configuring the J2EE Engine 18

Configuring the J2EE Engine Cluster January 2006
When you modify the value of this property, the behavior of the system is as follows:
○ If your value is bigger than the maximum value the dispatcher can afford, the system will set its maximum value instead of your one.
○ If your value is less than the maximum value the dispatcher can afford, the system will accept your value.
Note also that when you increase the Max heap size of a dispatcher node and thus the maximum number of allowed user connections, you must also monitor the thread system and the log files and, if necessary, reconfigure the thread system as well (for example, the request/response times are higher that usual or the number of free threads is very small). For more information, see the Thread System description in the Administration Manual.
3.2.1.2 Configuring the Connections Timeout When the connections need more time to establish the communication between the dispatcher and the client side (for example, new connections in WAN), you need to increase the default connections timeout as it may not be enough and the connections may fail.
We recommend that you estimate carefully the new value that you will assign to the connections timeout property, because setting a too high value might lead to blocking additional resources in the thread system.
To modify the default connections timeout, proceed as follows: ...
1. Start the J2EE Engine Visual Administrator.
2. Choose Dispatcher → Kernel → Connections Manipulator → Properties tab.
3. Modify the value of the GetStreamsSoTimeout property.
For SSL connections, the value of this property is overwritten by the HANDSHAKE_SO_TIMEOUT and the RUNTIME_SO_TIMEOUT properties of the SSL Provider Service on the dispatcher nodes..
3.2.1.3 Configuring the Connections Checks The system performs two types of connection checks: an availability check (a check if some data is available to read in the connection) and a close-wait check (a check whether the connection is open or closed on the client side). By configuring these checks, you can change the balance between the CPU load and the overall system performance. You achieve this by modifying the value of the CloseWaitCheckPeriod property.
This property determines the number of availability checks for a connection, after which the system performs a check whether the connection is in close-wait status, that is, if the connection is closed on the client side but is still open on the server side. If the result of this check is positive, the system closes that connection on the server side, too. The default value is 100, that is, after each 100 checks for availability, the system checks whether the connection is in close-wait status.
Configuring the J2EE Engine 19
Configuring the J2EE Engine Cluster January 2006
● To improve the system performance, increase the value of the CloseWaitCheckPeriod property.
However, if you increase the CloseWaitCheckPeriod value and there are a lot of client connections in close-wait status, then the total number of connections in the connections queue increases. This in turn increases the CPU time needed to process this queue and the system needs more time to detect that a connection is in close-wait status and has to be closed on the server side.
● To decrease the CPU consumption, decrease the value of the CloseWaitCheckPeriod property.
If you decrease the CloseWaitCheckPeriod value, you increase the frequency in which the system checks if there are connections in close-wait status. This affects negatively the overall performance of all connections but also closes faster the connections in close-wait status and thus decreases the CPU consumption.
The close-wait check is time consuming. Therefore, be careful when decreasing the CloseWaitCheckPeriod value, because although this check does not block the CPU, it blocks the thread that serves the corresponding connection. Thus, if there are a lot of connections and you decrease the property value, this may result in blocking too many threads and, respectively, in a system bottleneck.
Configuring the J2EE Engine 20

Configuring the J2EE Engine Cluster January 2006
3.3 Setting Service Load Timeout
Use Use this procedure to change the maximum time for which all services on a cluster node have to be started.
If there are still services that have not started after this timeout elapses, the Service Manager assumes that all services are started and the system continues with the other startup processes. The timed-out services will continue their startup process in the background. A notification for each timed-out service is logged in the log files.
If there are large clusters (containing more than five server processes), check the log files for services that have timed out during startup. If there are such cases, we recommend that you increase the default timeout from 5 to up to 20 minutes.
Procedure ...
1. Start the J2EE Engine Visual Administrator.
2. Choose Server/Dispatcher → Kernel → Service Manager → Properties tab.
3. From the list of properties, select LoadTimeout.
4. In the Value field, set the required timeout in minutes.
5. Choose Save Properties to save the changes.
Configuring the J2EE Engine 21

Configuring the J2EE Engine Cluster January 2006
3.4 Managing Cluster Elements Startup and Shutdown
Use Use this procedure to configure the cluster to work in the manner of a full parallelism, or to set its startup/shutdown to be serialized. For your configuration purposes, use the properties provided by the J2EE Engine Cluster Manager.
By default, the cluster elements start up and shut down in full parallelism mode, that is, simultaneously, without waiting for each other.
We recommend that you do not modify the default cluster elements startup and shutdown configuration unless there are synchronization problems within the cluster and you are officially advised by SAP support to maintain these settings.
Procedure 1. Start the J2EE Engine Visual Administrator.
2. Choose Server/Dispatcher → Kernel → Cluster Manager → Properties tab.
3. Modify the required property values depending on the tasks you want to perform:
a. Use barrier.startup to determine the kind of the element's startup serialization.
There are three possible values: "none" – no serialization; "box" – serialization in the boundaries of the box, that is, the elements in one box will be started one by one; "cluster" – serialization in the boundaries of the whole cluster.
b. Use barrier.shutdown to determine the kind of the element's shutdown serialization – the use of this property is similar to the barrier.startup.
c. Use barrier.dependent to determine whether the startup and shutdown barriers are dependent.
This property has a Boolean value. If it is set to true, there can only be one starting or stopping element in the box/cluster at the moment. Otherwise, there can only be one starting and one stopping element.
d. Use barrier.timeout to specify the timeout, within which the element is forced to recheck its permissions to pass the barrier.
This property is used for optimization purposes. It is advisable not to change its value.
4. Choose Save Properties to save your changes.
Example ...
1. Example of a serialized startup/shutdown configuration:
barrier.startup=cluster
barrier.shutdown=cluster
Configuring the J2EE Engine 22

Configuring the J2EE Engine Cluster January 2006
barrier.dependent=true
barrier.timeout=10000
2. Example of a full parallelism configuration:
barrier.startup=none
barrier.shutdown=none
barrier.dependent=false
barrier.timeout=10000
Configuring the J2EE Engine 23

Configuring the J2EE Engine Cluster January 2006
3.5 Configuring the Message Server Communication
Use Message server communication is established through the message server that is used as a dispatcher when sending messages. The advantage of this way of communication is that it provides a failover function that avoids the loss of information.
Use this procedure to configure the default settings of the message server communication.
We recommend that you do not modify the default message server communication settings unless you are officially advised to do so by SAP support.
Procedure ...
1. Start the J2EE Engine Visual Administrator.
2. Choose Dispatcher/Server → Kernel → Cluster Manager → Properties tab.
3. Modify the values of the following properties:
a. Use ms.host to specify the host (IP address,) where the message server is running.
b. Use ms.port to specify the port, on which the message server listens for connections.
c. Use ms.message.pool.size to define the size of the message library pool.
The size of this pool can be changed for optimization purposes.
d. Use ms.confirmation.timeout to specify the timeout period that a joining cluster node waits for the confirmation replies from the cluster participants.
Modify the value of this property if you receive an error message during cluster startup indicating that there are errors when getting a confirmation message due to non-responding cluster elements and the node will be rebooted.
e. If necessary, you can increase the time the system waits before triggering a liveliness check (ping/pong protocol) event if there has been no communication between a cluster node and the message server. To do so, modify the value of the ms.keepalive property.
f. Use ms.reconnect.timeout to increase the time period during which you can reconnect to the message server. After this time elapses, you are no longer able to reconnect to the message server.
4. Choose Save Properties to save your changes and restart the cluster node.
Configuring the J2EE Engine 24

Configuring the J2EE Engine Cluster January 2006
3.6 Configuring the Session Communication
Use Session communication is used to exchange information between the dispatcher and a server in one cluster group. You can use this procedure to modify the default settings of the session communication.
We recommend that you do not modify the default session communication settings unless you are officially advised to do so by SAP support.
Procedure ...
1. Start the J2EE Engine Visual Administrator.
2. Choose Dispatcher/Server → Kernel → Cluster Manager → Properties tab.
3. Modify the value of the session.message.queue.size property.
This property defines the size of the session layer queue. It can be changed for optimization purposes.
4. Choose Save Properties to save your changes.
Configuring the J2EE Engine 25

Configuring the J2EE Engine Cluster January 2006
3.7 Configuring the Lazy Communication
Use The lazy communication mechanism is used automatically by the Cluster Manager to quickly exchange large amounts of information between two server processes without using the message server as an intermediary.
By default, lazy communication is enabled only for a predefined list of services (the list is stored in the lazy.exclusive.list property) and is disabled for the remaining services.
You can enable a mechanism by which lazy communication is activated when a previously defined amount of objects is transferred between two parties for a defined time interval.
We recommend that you do not modify the default lazy communication settings unless you are officially advised to do so by SAP support.
Procedure ...
1. Start the J2EE Engine Visual Administrator.
2. Choose Server → Kernel → Cluster Manager → Properties tab.
You can configure the lazy communication on servers only.
3. To add or remove a service from the list of services for which lazy communication is always enabled, select the lazy.exclusive.list property and modify its value.
4. To enable the mechanism by which lazy communication is enabled according to the amount of information exchanged for a definite period of time, modify the following:
a. Specify true as the value of the lazy.transparent.switch property.
b. Use lazy.time.piece to specify the time interval in milliseconds for which the quantity of messages defined by the lazy.threshold property has to be exchanged between two parties in order to open a lazy connection.
If two parties open a connection, and if they succeed in exchanging more messages than the size defined by the lazy.threshold property for the time defined, then a lazy connection will be opened.
c. Use lazy.threshold to specify the size of the messages that must be sent during a time interval equal to the value set in the lazy.time.piece property.
d. Use lazy.autoclose.timeout to specify the time for which the lazy connection will be open after the last large message is transported. After this timeout, the Cluster Manager closes the connection.
If you specify zero (0) as a value, the lazy connection will be permanently open (infinite timeout.)
e. Use lazy.message.pool.size to specify the size of the pool where the currently unused message objects are stored.
5. Choose Save Properties to save your changes.
Configuring the J2EE Engine 26

Configuring the J2EE Engine Cluster January 2006
3.8 Setting Service Stop Timeout
Use Use this procedure to change the maximum time which the Service Manager waits for each service to stop when the cluster node is shutting down.
If this timeout has elapsed and the service has not managed to stop, the Service Manager continues with the cluster node shutdown. A notification for each timed-out service is logged in the log files.
The default service stop timeout is 20 seconds. In case of problems during cluster node shutdown, check the log files for timed-out services during shutdown. In such cases, we recommend that you analyze the problematic services and, if necessary, increase the service stop timeout.
Procedure 1. Start the J2EE Engine Visual Administrator.
2. Choose Server/Dispatcher → Kernel → Service Manager → Properties tab.
3. From the list of properties, select StopServiceTimeout.
4. In the Value field, set the required timeout in seconds.
5. Choose Save Properties to save the changes.
Configuring the J2EE Engine 27
Configuring the J2EE Engine Cluster January 2006
3.9 Setting Event Timeout
Use Use this procedure to specify the time that the Service Manager waits for the event to be processed before undertaking another action.
If you want to stop a service, a beforeServiceStopped event is thrown first. Then it waits for all components to process the event. That is, the components are notified that the service will be stopped and they should undertake the appropriate actions, such as unregistration, and so on. After the specified timeout, the service is stopped.
The default value of the event timeout is 20 seconds. If after 20 seconds there are still components that have not processed the event, the system will not wait for them and the service will be stopped.
We recommend modifying this value only if you have problems stopping the service. Otherwise, we recommend that you do not reconfigure the default timeout.
Procedure ...
1. Start the J2EE Engine Visual Administrator.
2. Choose Server/Dispatcher → Kernel → Service Manager → Properties tab.
3. From the list of properties, select the EventTimeout.
4. In the Value field, set the required timeout in seconds.
5. Choose Save Properties to save the changes
Configuring the J2EE Engine 28

Configuring Additional Parameters of the J2EE Engine January 2006
4 Configuring Additional Parameters of the J2EE Engine
Purpose When running a particular J2EE application on the J2EE Engine, you can tune it to better fit the particular needs or your business scenario.
To configure the system for a specific application, you must be aware of which server components the application uses and which components are used by the other deployed applications. The configuration settings suggested here must be thoroughly tested before applying them on productive systems.
Prerequisites ● The cluster is configured properly. See Configuring the J2EE Engine Cluster [Page 16].
Process Flow The architecture of the J2EE Engine is component-based – that is, it comprises multiple services, libraries, and interfaces, which build up the middleware features of the server on top of the core system modules. This component-based approach enables you to choose those components that your application utilizes, and save resources by switching off some of the services that the application does not need.
This does not apply to the Java Enterprise Runtime and the core services in the J2EE Engine. The core services provide basic functions such as security, administration, logging, cluster communication, naming services, and so on. For core services the Core Service indicator in the Additional Info tab of the service in the Visual Administrator is enabled.
In addition, you can configure the components that your application needs to optimize the available resources. This section provides recommendations for tuning the following J2EE Engine components:
● Web Container [Page 30]
● EJB Container [Page 32]
● Remote communication with RMI-IIOP and RMI-P4 [Page 32]
● Database connectivity [Page 33]
● JMS Provider [Page 34]
The proper functioning of the applications on the J2EE Engine depends extensively on its proper design. Therefore, some of the sections that follow contain references to design- and development-time issues.
Result After you tune the J2EE Engine according to your scenario, we recommend that you consult the SAP NetWeaver Security Guide for the necessary security configuration.
Configuring the J2EE Engine 29

Configuring Additional Parameters of the J2EE Engine January 2006
4.1 Tuning Web Container
Use The Web-based applications that you deploy and run on the J2EE Engine rely on HTTP for their communication with the clients. In this section you can find guidelines for tuning the mechanisms for connection management and request processing.
Activities You can improve the HTTP communication by tuning:
● Connection establishment and maintenance
The system stores the indications for incoming HTTP requests in a queue. When the queue fills up, HTTP Provider Service refuses further connections. To increase the number of accepted HTTP requests, you can set a bigger size of the queue. However, this leads to increased memory consumption. Therefore, you need enough memory resources to use this feature. For more information, see Setting up HTTP Provider Service to Accept Incoming Requests (in the J2EE Engine Administration Manual).
HTTP Provider Service enables the establishment of persistent connections. Using the KeepAliveTimeout property of the service on dispatchers, you can set the timeout for the persistent connections (see the J2EE Engine Administration Manual). You can consider increasing the timeout in the following cases:
○ You have sufficient memory resources to keep the persistent connections open longer
○ The client-server communication is slow – that is, the interval between two successive client requests through the connection is more than 15 seconds, which is the default value of the property)
○ Your application relies on persistent connections and uses them properly as described in the HTTP 1.1 specification
○ Your proxy server provides a sufficient level of security
You can decrease the KeepAliveTimeout if your application does not rely on persistent connections, or you have insufficient memory resources.
If the number of client connections to the dispatcher increases drastically, you can tune the connections manipulation [Page 18] mechanism in the appropriate mode.
● Request processing:
You can speed up request processing and minimize the response times using the following functions:
...
○ HTTP response compression
○ HTTP cache
○ Long Data Transfer Mechanism
○ JSP compilation at startup
Configuring the J2EE Engine 30

Configuring Additional Parameters of the J2EE Engine January 2006
In addition, performance can be also influenced by:
○ Increasing the value of the ReadBufferSize property of HTTP Provider Service on the Java dispatcher – this option is useful when the bodies of the HTTP requests are large
○ Setting up the size of the InputStream read buffer
○ Configuring the size of the file buffer
The property SocketTcpNoDelay, which by default is set to true, improves performance when small-sized requests are exchanged. Therefore, we recommend you do not change the value of this property.
For more information how to configure these options, see the Administration Manual.
Configuring the J2EE Engine 31

Configuring Additional Parameters of the J2EE Engine January 2006
4.2 Tuning EJB Request Processing
Use The good performance of the applications that contain enterprise beans mainly depends on the proper design of the application. Therefore, it is important to consider carefully the development aspects of enterprise beans. For more information about enterprise beans use in applications, see Development Manual → Developing Business Logic → Developing Enterprise Beans.
You can find guidelines for achieving good performance by creating read-only entity beans, choosing the right locking strategy, optimizing the finder methods, and configuring enterprise bean instance pools in Optimizations and Performance Tuning. You can also consider using session timeouts for stateless and stateful session beans. For more information, see Stateful Session Beans' Timeouts.
4.3 Tuning Remote Communication
Use The J2EE Engine supports two protocols for remote communication:
● IIOP – a standard protocol used for interoperability between CORBA and Java objects.
● P4 – an SAP-specific protocol for communication between Java remote objects.
The following recommendations may improve the performance of the system when the application uses these protocols.
Activities Since a single connection is established from a P4 client that runs in a separate JVM to the J2EE Engine, to achieve good performance you can:
● Configure the connections manipulation [Page 18] mechanism in a mode that is suitable for fewer client connections.
● Set bigger socket buffer sizes by maintaining the properties SO_RCVBUF and SO_SNDBUF of the Ports Manager on the J2EE dispatcher.
The same recommendations apply to the use of RMI-IIOP.
Configuring the J2EE Engine 32
Configuring Additional Parameters of the J2EE Engine January 2006
4.4 Tuning Database Connectivity
Use Access to the persistence layer typically slows down client request processing, since it involves the establishment of a database connection, and database operations are time-consuming. With J2EE Engine, you can configure database connection pools.
Activities JDBC Connector Service enables you to configure a database connection pool for each DataSource you use. You can set the initial and the maximum number of connections in the pool, as well as their lifetime.
Guidelines
● Since each client request on the J2EE Engine server processes runs in a separate application thread, you should configure the number of database connections in the pool considering the maximum number of application threads set on the server processes. The application thread number is also the maximum number of client requests that are processed concurrently on the server. A single client may use several database connections, and you can define the application thread number and the number of pooled database connections considering the average connections-per-user number. The application thread number is configured in the properties of Application Thread Manager.
However, when you define the maximum number of pooled connections, you should also take into account the number of server processes that you have in your cluster. If the overall number of connections is too big, this may deteriorate the database performance.
● To limit the time during which an application thread remains locked while waiting for a database connection, you can decrease the value of the Maximum Time to Wait for Connection property for the DataSource.
Note that the good performance of the application also depends on its implementation. With regard to database connectivity, for example, it is very important that you close your connections after using them.
Configuring the J2EE Engine 33

Configuring Additional Parameters of the J2EE Engine January 2006
4.5 Tuning JMS Provider
Use Typically, the JMS features that J2EE Engine provides are used for application-level communication by the application components deployed on the server, such as enterprise beans, servlets or JSPs.
This procedure gives some guidelines about tuning JMS Provider Service.
Activities To improve the performance of the JMS system, you can consider the following aspects:
● Consumer buffers
For each message consumer the system stores messages that have not been consumed yet in a buffer. You can set the size of the buffer and the overall amount of memory allocated for consumer buffers using the JMS Provider Service properties clientConsumerBuffer and clientMemorySize respectively.
● Destination agents number
You can set the number of destination agent threads that run simultaneously on a server process using the agentThreadCount property of JMS Provider Service. The destination agents deliver the messages from the relevant destination to its consumers. Note that the agent threads are a subset of the application threads configured for the server process; therefore, you should set a number that leaves enough free application threads for processing other requests.
Since JMS Provider Service uses the underlying database layer to ensure the persistency of the messages, the overall performance of the JMS system is also related to the configuration of the database connection pool [Page 33].
● Destination queues
The destination agents buffer messages in a message queue. You can configure the size of this queue by the countLimitInMasterQueue and sizeLimitInMasterQueue properties of the JMS Provider Service. If the size of the message exceeds the size limit, only its header is stored in the queue. You can use the maxFetchSizeInMasterQueue property to configure the size of the data that is initially loaded when a destination is started.
● Message lifetime
The expired and acknowledged messages are deleted from the database at certain intervals, which you can define by setting the cleanUpServiceSleepInterval property of JMS Provider Service. When the message exchange is intensive, you can decrease the value of this property to prevent the creation of a database file that is too large. To define the period for keeping the messages in the database after their expiration, you can set a messageExpirationDelta interval. Thus you can ensure that you do not delete messages that are still in memory.
● Location of JMS transaction files
Each transacted session uses a unique file to store its incoming and outgoing messages and acknowledge requests. The property transactionStorePath is the location where the JMS transaction files will be stored. By default it is set to point to the home directory of the J2EE Engine installation. You must ensure that there is enough free space in that directory.
Configuring the J2EE Engine 34
References and Recommended Further Readings January 2006
5 References and Recommended Further Readings
We recommend that you also have a look at the following documentation and guides:
● Architecture Manual
This manual describes in detail the J2EE Engine architecture.
The manual can be found at: help.sap.com → Documentation → SAP NetWeaver → SAP NetWeaver ‘04 → English → SAP Library → SAP NetWeaver → Application Platform → Java Technology in SAP Web Application Server → Architecture Manual.
● Administration Manual
You will find there detailed information about the J2EE Engine modules, the administration tools, and the administration procedures.
This manual can be found at: help.sap.com → Documentation → SAP NetWeaver → SAP NetWeaver ‘04 → English → SAP Library → SAP NetWeaver → Application Platform → Java Technology in SAP Web Application Server → Administration Manual.
● How to… Fine Tune the J2EE Engine Performance
This guide contains some tuning recommendations that in certain scenarios will improve the J2EE Engine performance.
This how-to guide can be found at: sdn.sap.com
● SAP NetWeaver Security Guide
Contains recommendations how to configure the security settings.
You can find the guide for the J2EE Engine at: help.sap.com → Documentation → SAP NetWeaver → SAP NetWeaver ‘04 → English → SAP Library → SAP NetWeaver → Security → SAP NetWeaver Security Guide → Security Guides for the SAP NetWeaver Products → SAP Web Application Server Security Guide → SAP Web AS Security Guide for Java Technology.
Configuring the J2EE Engine 35