configuring windows 7 to do automatic 802 · pdf file · 2017-07-27configuring...
TRANSCRIPT

ConfiguringWindows7todoautomatic802.1x
IntroductionThisdocumentcovershowtoconfigureWindows7PC’stoconnectautomaticallytotheLoughboroughUniversity802.1xwirednetworkatSportPark.
Benefitsofthisconfigurationinclude
• thePCcanconnecttothe802.1xnetworkbeforetheuserlogsontoWindows,sothecomputercantalktodomaincontrollersbeforeauserlogsin.
• TheuserdoesnotneedtoenteraUniversityusername/passwordthemselveseachtimetheylogontothePC.
Drawbacksofthisconfigurationinclude
• thepasswordmustbestoredonthecomputeritself,whichmaynotbedesirablefromasecuritypointofview.
• TheUniversitycredentialsstoredbyWindowswillalwaysbeusedregardlessofwhoisusingthePC.WheremorethanonepersonusesaPC,thismaynotbedesirablesincetheUniversitywouldrecordallinternetactivityagainsttheUniversitycredentialsused.

Instructionsforconfiguringautomatic802.1xlogin
EnsuretheWiredAutoConfigServiceisenabled
• OpenServices(ControlPanel>SystemandSecurity>AdministrativeTools>Services)
• RightclickontheWiredAutoConfigserviceandchooseProperties
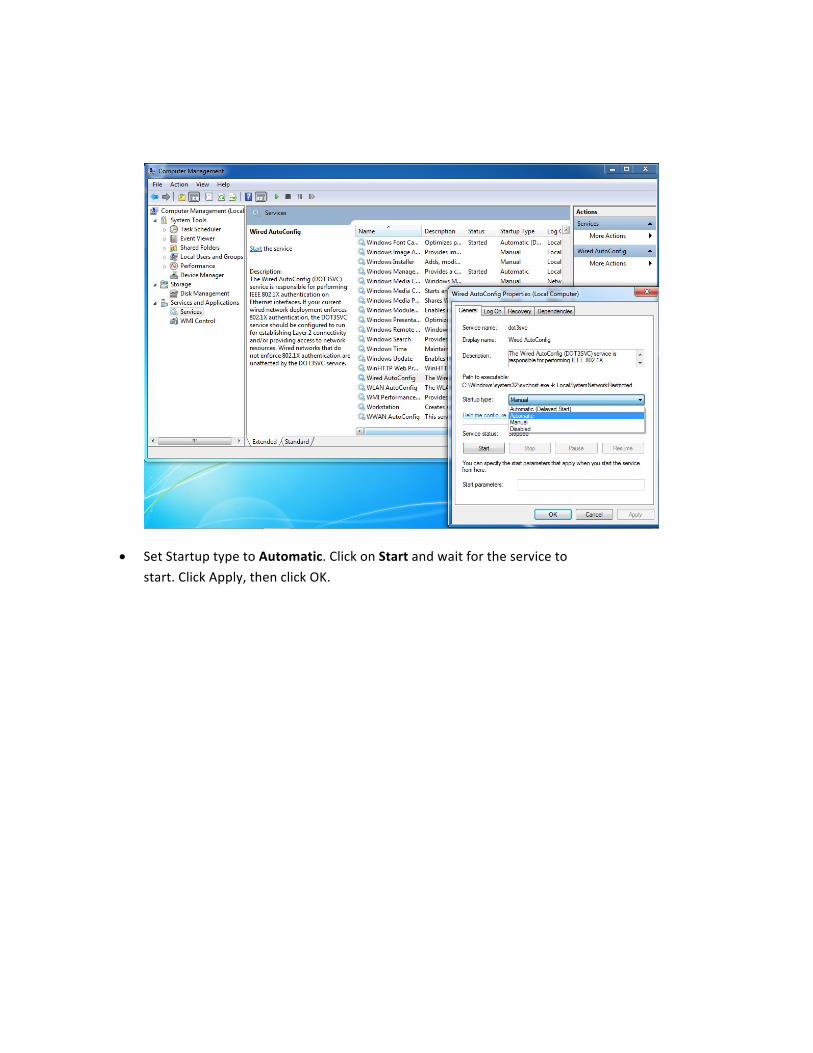
• SetStartuptypetoAutomatic.ClickonStartandwaitfortheservicetostart.ClickApply,thenclickOK.
InstalltheLoughboroughUniversitynetworkcertificate• Downloadthecertificatefromhttps://sportpark-portal.lboro.ac.uk/sportparkportal-files/lboro-
ca.derandsaveittoaconvenientlocation,suchasthedesktop.
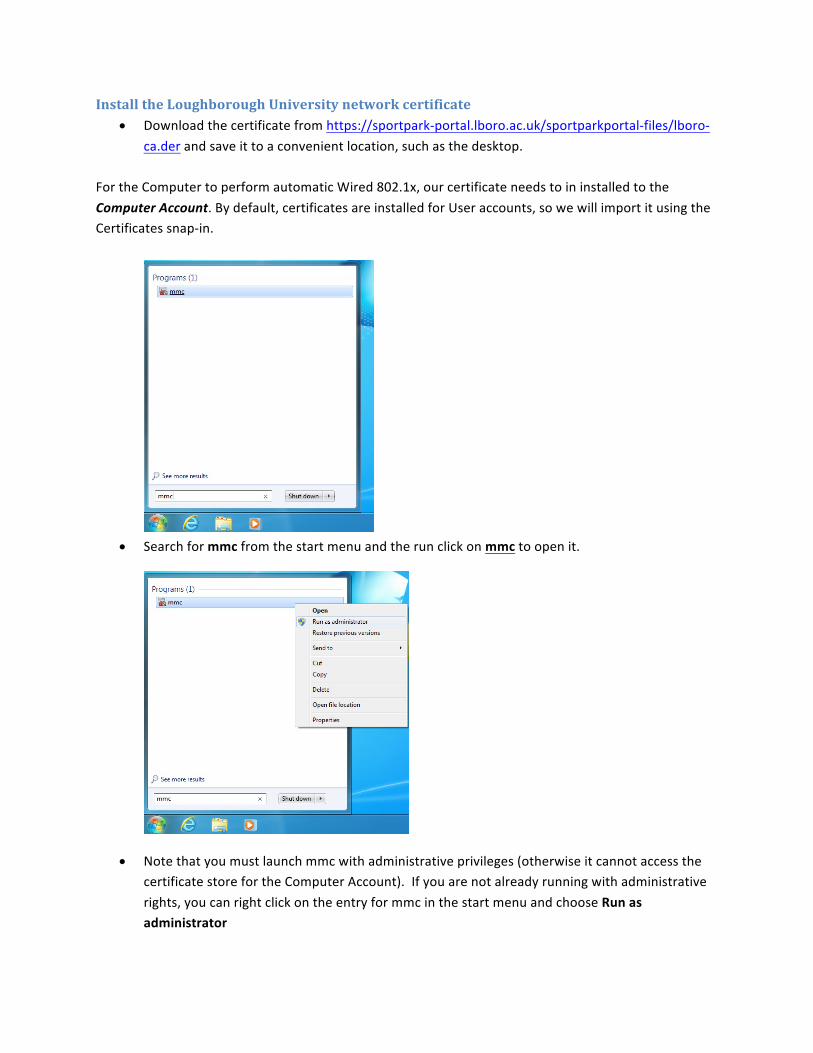
FortheComputertoperformautomaticWired802.1x,ourcertificateneedstoininstalledtotheComputerAccount.Bydefault,certificatesareinstalledforUseraccounts,sowewillimportitusingtheCertificatessnap-in.
• Searchformmcfromthestartmenuandtherunclickonmmctoopenit.
• Notethatyoumustlaunchmmcwithadministrativeprivileges(otherwiseitcannotaccessthecertificatestorefortheComputerAccount).Ifyouarenotalreadyrunningwithadministrativerights,youcanrightclickontheentryformmcinthestartmenuandchooseRunasadministrator
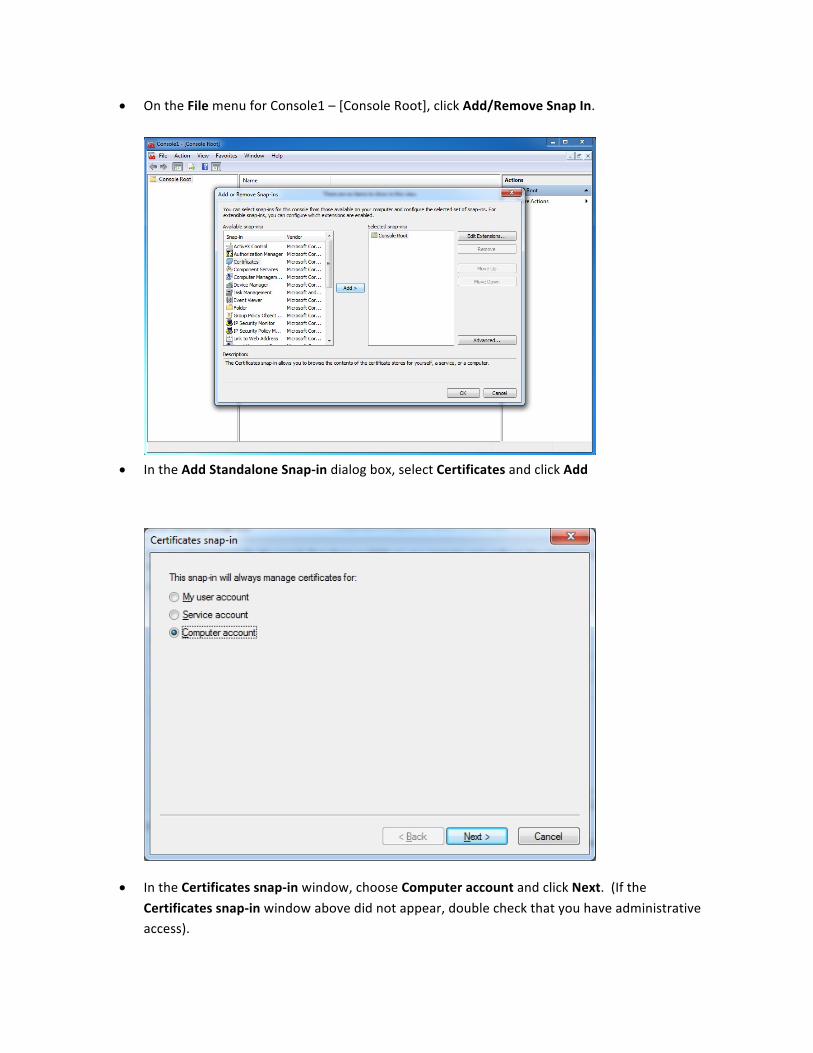
• OntheFilemenuforConsole1–[ConsoleRoot],clickAdd/RemoveSnapIn.
• IntheAddStandaloneSnap-indialogbox,selectCertificatesandclickAdd
• IntheCertificatessnap-inwindow,chooseComputeraccountandclickNext.(IftheCertificatessnap-inwindowabovedidnotappear,doublecheckthatyouhaveadministrativeaccess).
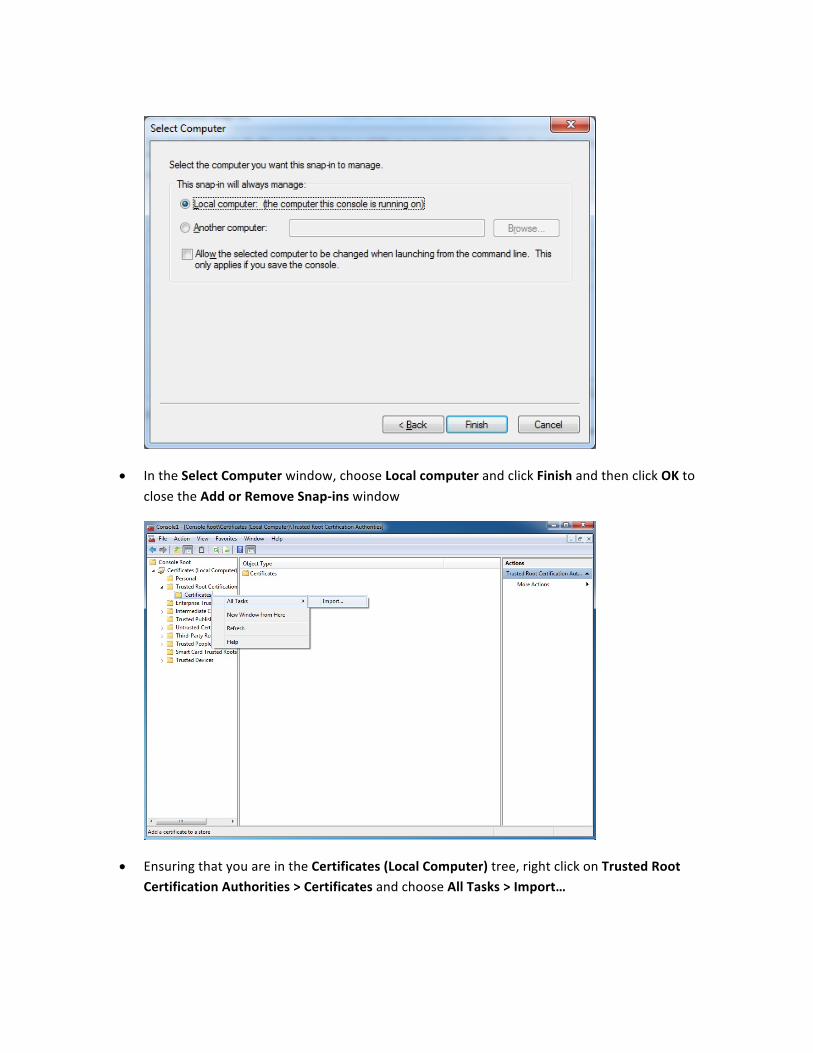
• IntheSelectComputerwindow,chooseLocalcomputerandclickFinishandthenclickOKtoclosetheAddorRemoveSnap-inswindow
• EnsuringthatyouareintheCertificates(LocalComputer)tree,rightclickonTrustedRootCertificationAuthorities>CertificatesandchooseAllTasks>Import…

• IntheCertificateImportWizard,clickNext
• Providethelocationofthelboro-ca.cercertificatefileyousavedearlier,thenclickNext.

• IntheCertificateImportWizard,choosePlaceallcertificatesinthefollowingstoreandthenclickBrowse
• Fromthelist,chooseTrustedRootCertificationAuthoritiesandclickOK.

• BackattheCertificateImportWizard,clickNextandthenFinish
• Ifpromptedwiththeabovesecuritywarning,chooseYes
• ClickOK.(Youcannowclosethemmcconsole)

ConfiguretheNetworkAdaptorforWired802.1x
• OpentheControlPanel\NetworkandInternet\NetworkConnections,thenrightclicktheLocalAreaConnectionandchooseProperties
• IntheLocalAreaConnectionPropertieswindow,choosetheAuthenticationtab.Thenensure
thatEnableIEEE802.1Xauthenticationisticked.Forthenetworkauthenticationmethod,chooseMicrosoft:ProtectedEAP(PEAP).NowclicktheSettingsbutton.

• IntheProtectedEAPPropertieswindow:o EnsurethatValidateservercertificateandEnableFastReconnectareticked.o FromthelistofTrustedRootCertificationAuthoritiesticktheboxnextto
LoughboroughUniversityNetworkServicesCertificateAuthorityo SettheAuthenticationMethodtoSecuredPassword(EAP-MSCHAPv2).
Afteryouhaveconfirmedthesesettings,clicktheConfigurebutton
• IntheEAPMSCHAPv2Propertiesdialog,ensurethatAutomaticallyusemyWindowslogonnameandpassword(anddomainifany)isNOTtickedandclickOK.
• ThenclickOKtoclosetheProtectedEAPPropertieswindow.

• BackattheLocalAreaConnectionPropertieswindow,clicktheAdditionalSettingsbutton
• IntheAdvancedsettingswindow:
o TicktheboxnexttoSpecifyauthenticationmodeandchooseUserauthentication.o ClicktheSavecredentialsbutton

o IntheWindowsSecuritydialogthatappears,entertheLoughboroughUniversity
networkcredentialsfortheuserwhowillusethePCandclickOK
o BackattheAdvancedsettingswindow,ensurethatEnablesinglesignonforthisnetworkisNOTtickedandthenclickOK
o Finally,backattheLocalAreaConnectionPropertieswindow,clickOK.
OncetheLocalAreaConnectionPropertieswindowisclosed,Windowsshouldauthenticateusingthecredentialsprovidedandshouldbeconnectedtothecorrectnetwork.