courierpost sato cg412dt printer driver setup
TRANSCRIPT
SATO CG412 Page 1
CourierPost SATO CG412DT printer driver setup
Local printer install:
Allow Windows to automatically install the printer USB drivers when plugged in. Renaming the printer to ‘Ticket-It’ or ‘Connect-It’ (depending on which application you are using) is a good convention. Do not test print. After installation, right click the printer’s icon and select ‘Printing Preferences…’.
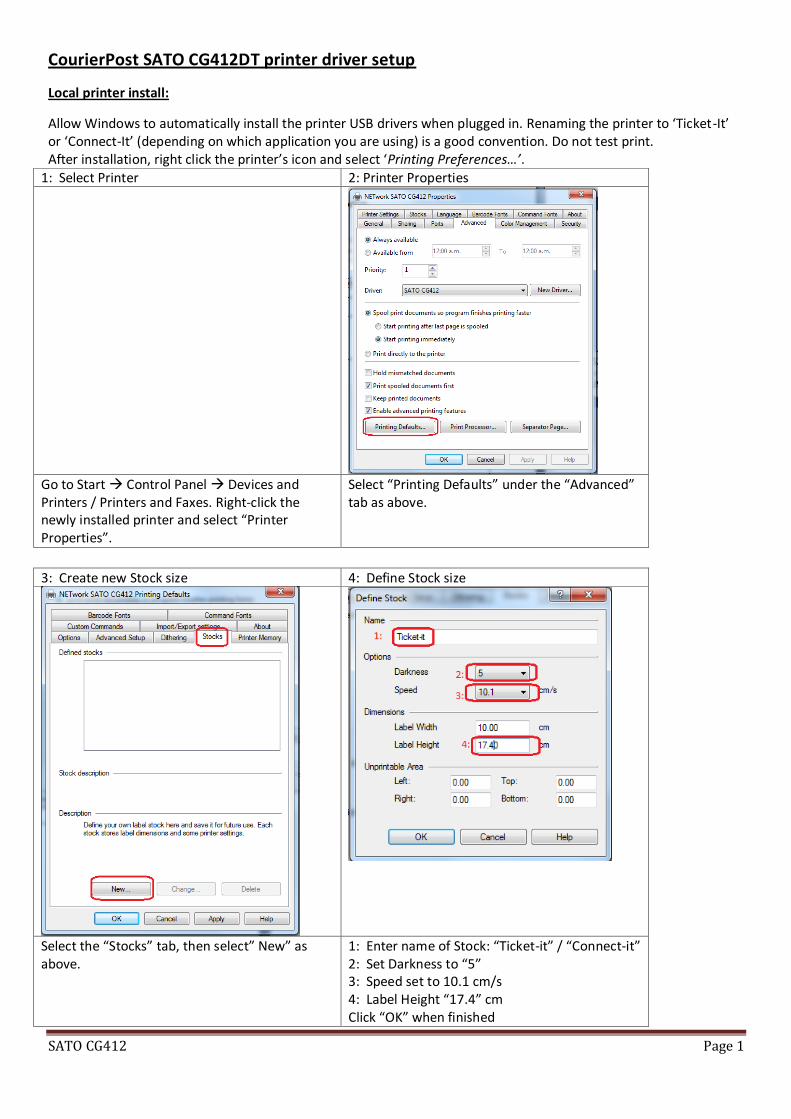
1: Select Printer 2: Printer Properties
Go to Start Control Panel Devices and Printers / Printers and Faxes. Right-click the newly installed printer and select “Printer Properties”.
Select “Printing Defaults” under the “Advanced” tab as above.
3: Create new Stock size 4: Define Stock size
Select the “Stocks” tab, then select” New” as above.
1: Enter name of Stock: “Ticket-it” / “Connect-it” 2: Set Darkness to “5” 3: Speed set to 10.1 cm/s 4: Label Height “17.4” cm Click “OK” when finished
SATO CG412 Page 2
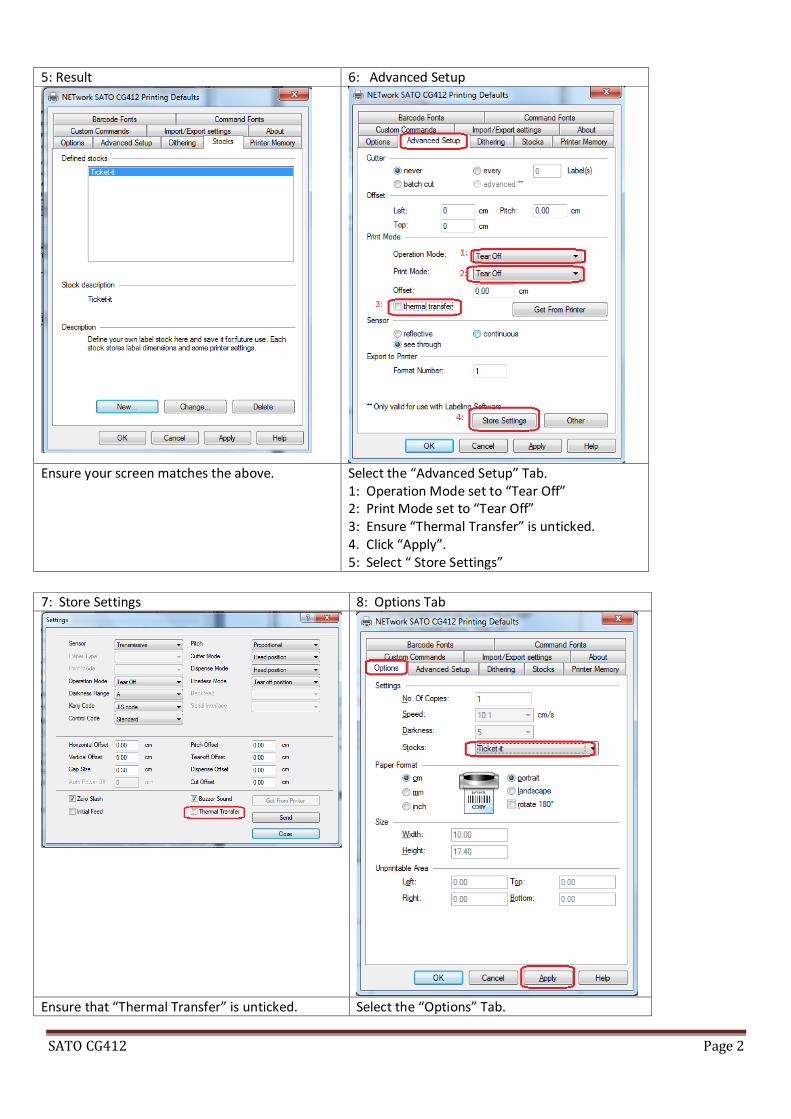
5: Result 6: Advanced Setup
Ensure your screen matches the above. Select the “Advanced Setup” Tab. 1: Operation Mode set to “Tear Off” 2: Print Mode set to “Tear Off” 3: Ensure “Thermal Transfer” is unticked. 4. Click “Apply”. 5: Select “ Store Settings”
7: Store Settings 8: Options Tab
Ensure that “Thermal Transfer” is unticked. Select the “Options” Tab.

SATO CG412 Page 3
Then click on “send” Then click “close”
Select from Stocks “Ticket-it” / “Connect-it”. Then Select “Apply”. Then “OK”.
9: Printer Properties – Printer Settings 10: Print test
Go to the “Printer Settings“ tab in Properties. Under “Override Application Default Settings”, tick “Always use driver settings”. Then Click “OK”.
Go to the “General” tab. Click “Print Test Page”. The printer should now produce a test page. Under the correct settings, the printed information should fill one label.
SATO CG412 Page 4
Network printer install:
Download and install the SATO All-In-One Tool. It can be downloaded from http://www.satoamerica.com/resource-
library/all-in-one-printer-utility/all-in-one-software-download.aspx .
Note that out-of-the box, the printer interface is configured as “AUTO” (auto-detect the interface port upon
power-up). Plug in the printer USB cable and turn it on to begin LAN configuration.
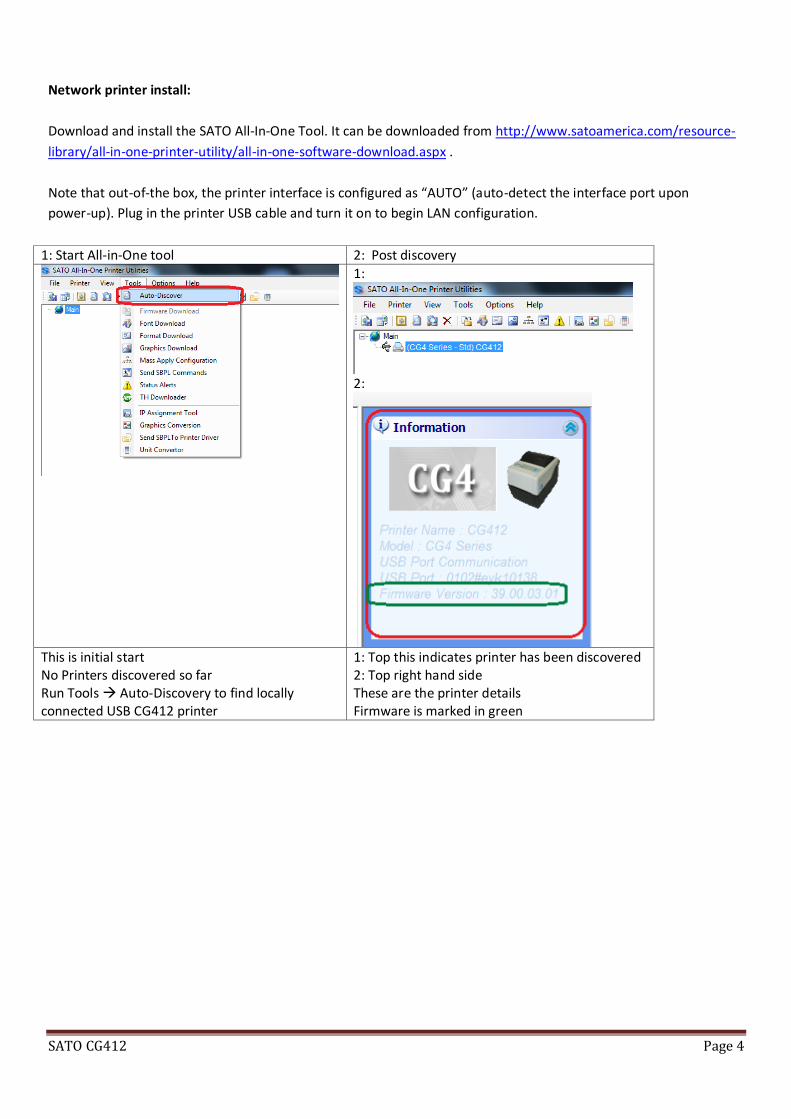
1: Start All-in-One tool 2: Post discovery
1:
2:
This is initial start No Printers discovered so far Run Tools Auto-Discovery to find locally connected USB CG412 printer
1: Top this indicates printer has been discovered 2: Top right hand side These are the printer details Firmware is marked in green
SATO CG412 Page 5
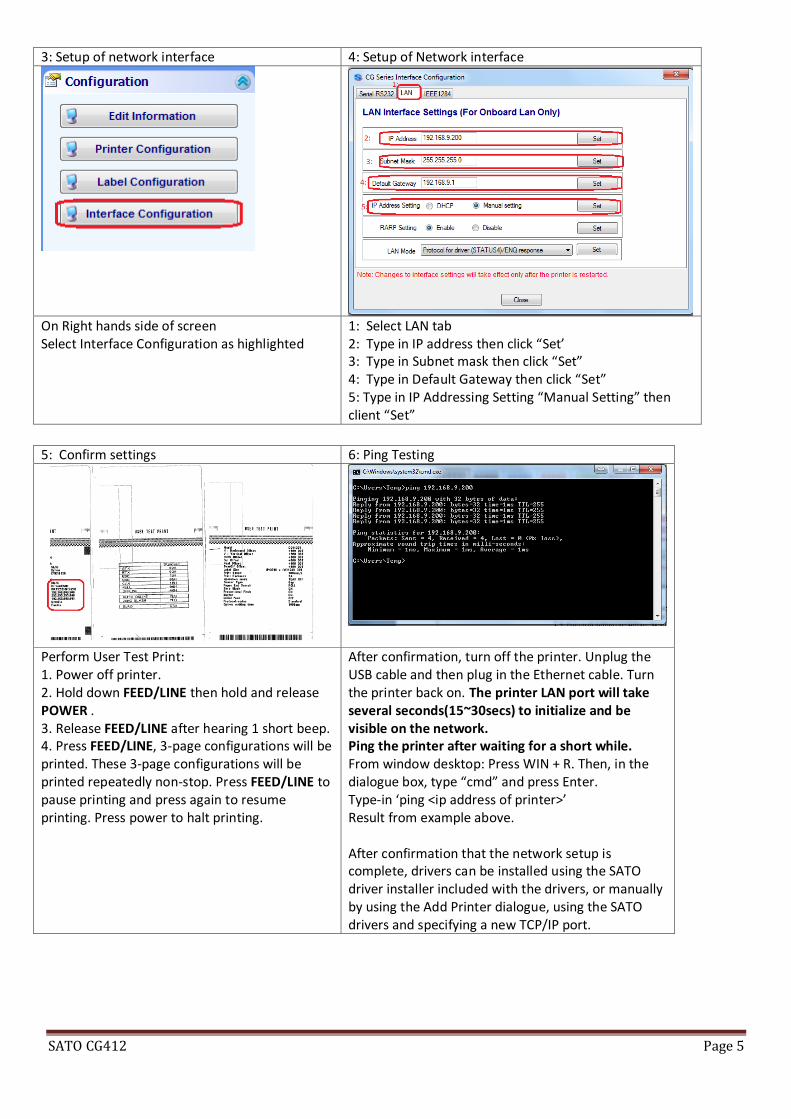
3: Setup of network interface 4: Setup of Network interface
On Right hands side of screen Select Interface Configuration as highlighted
1: Select LAN tab 2: Type in IP address then click “Set’ 3: Type in Subnet mask then click “Set” 4: Type in Default Gateway then click “Set” 5: Type in IP Addressing Setting “Manual Setting” then client “Set”
5: Confirm settings 6: Ping Testing
Perform User Test Print: 1. Power off printer. 2. Hold down FEED/LINE then hold and release POWER . 3. Release FEED/LINE after hearing 1 short beep. 4. Press FEED/LINE, 3-page configurations will be printed. These 3-page configurations will be printed repeatedly non-stop. Press FEED/LINE to pause printing and press again to resume printing. Press power to halt printing.
After confirmation, turn off the printer. Unplug the USB cable and then plug in the Ethernet cable. Turn the printer back on. The printer LAN port will take several seconds(15~30secs) to initialize and be visible on the network. Ping the printer after waiting for a short while. From window desktop: Press WIN + R. Then, in the dialogue box, type “cmd” and press Enter. Type-in ‘ping <ip address of printer>’ Result from example above. After confirmation that the network setup is complete, drivers can be installed using the SATO driver installer included with the drivers, or manually by using the Add Printer dialogue, using the SATO drivers and specifying a new TCP/IP port.
SATO CG412 Page 6
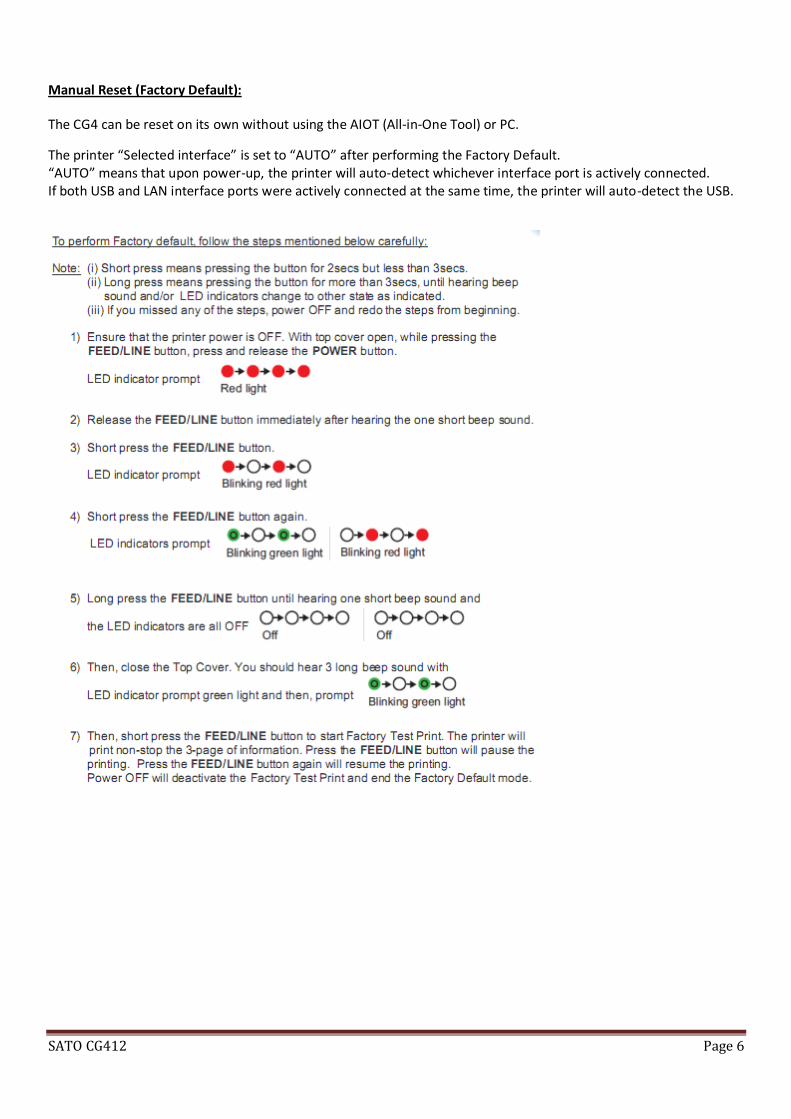
Manual Reset (Factory Default):
The CG4 can be reset on its own without using the AIOT (All-in-One Tool) or PC.
The printer “Selected interface” is set to “AUTO” after performing the Factory Default. “AUTO” means that upon power-up, the printer will auto-detect whichever interface port is actively connected. If both USB and LAN interface ports were actively connected at the same time, the printer will auto-detect the USB.

SATO CG412 Page 7
To assign the printer as the default in Ticket-It:
1. Login to Ticket-It and click Administration. Note: if this is the first time you’ve used Ticket-It on this particular
computer, you will need to go to Administration first and install the “Meadco’s Script” when prompted.
2. Scroll down to User Defaults.
3. Set the “Default Label Printer” drop-down box to “Ticket-It” – or the name you selected for your Ticket-It
printer.
4. Set “Default Printer Page Size” to “Ticket-It” – or the name you selected for the Ticket-It label stock size.
5. Click the green “Save” button beneath this section.
Notes:
Make sure the printer name assigned to the printer is always the same on every PC. Otherwise Ticket-It’s
saved Default Printer will appear to be missing when logging in on different computers, and printing may fail.