courtyard standard definition log set
TRANSCRIPT
1 OutdoorLifestylesbyHearth&HomeTechnologies•CourtyardStandardDefinitionLogSetSDLOGS-ODCOUG•4608-909C•3/19
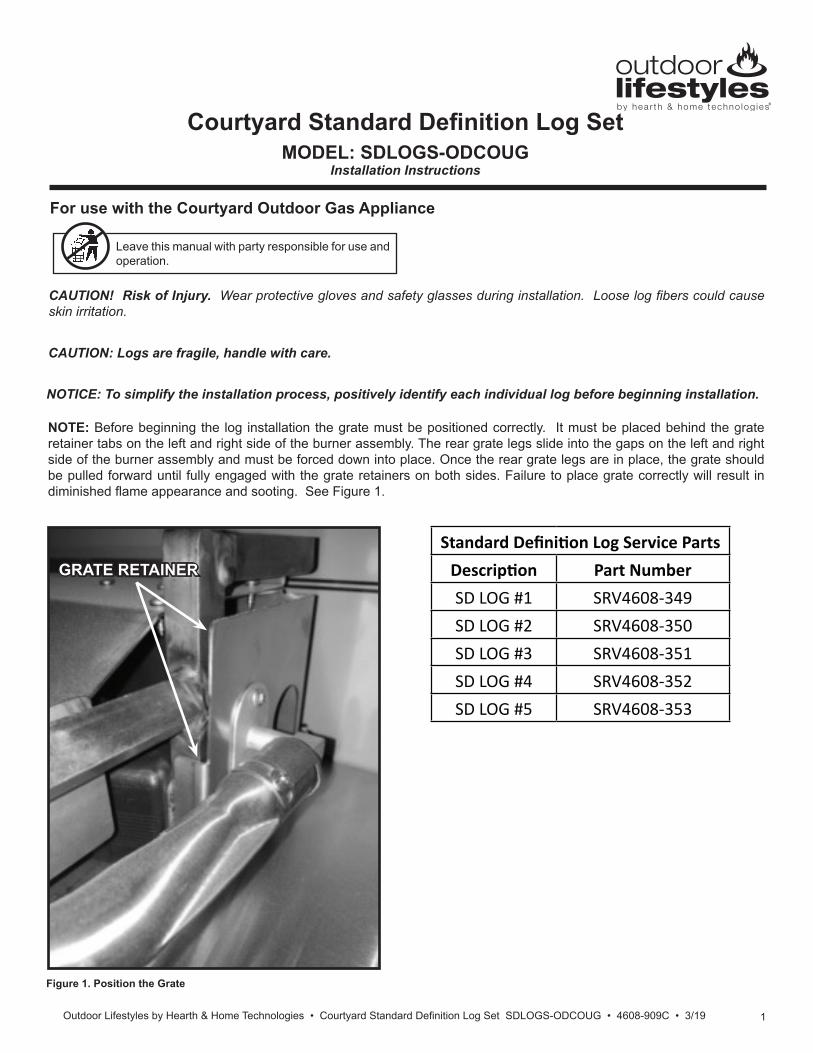
Figure 1. Position the Grate
CAUTION: Logs are fragile, handle with care.
NOTICE: To simplify the installation process, positively identify each individual log before beginning installation.
Courtyard Standard Definition Log SetMODEL: SDLOGS-ODCOUG
Installation Instructions
CAUTION! Risk of Injury. Wear protective gloves and safety glasses during installation. Loose log fibers could cause skin irritation.
Leave this manual with party responsible for use and operation.
NOTE: Before beginning the log installation the grate must be positioned correctly. It must be placed behind the grate retainer tabs on the left and right side of the burner assembly. The rear grate legs slide into the gaps on the left and right side of the burner assembly and must be forced down into place. Once the rear grate legs are in place, the grate should be pulled forward until fully engaged with the grate retainers on both sides. Failure to place grate correctly will result in diminished flame appearance and sooting. See Figure 1.
GRATE RETAINER
For use with the Courtyard Outdoor Gas Appliance
Standard Definition Log Service PartsDescription Part NumberSD LOG #1 SRV4608-349SD LOG #2 SRV4608-350SD LOG #3 SRV4608-351SD LOG #4 SRV4608-352SD LOG #5 SRV4608-353
2 OutdoorLifestylesbyHearth&HomeTechnologies•CourtyardStandardDefinitionLogSetSDLOGS-ODCOUG•4608-909C•3/19
2
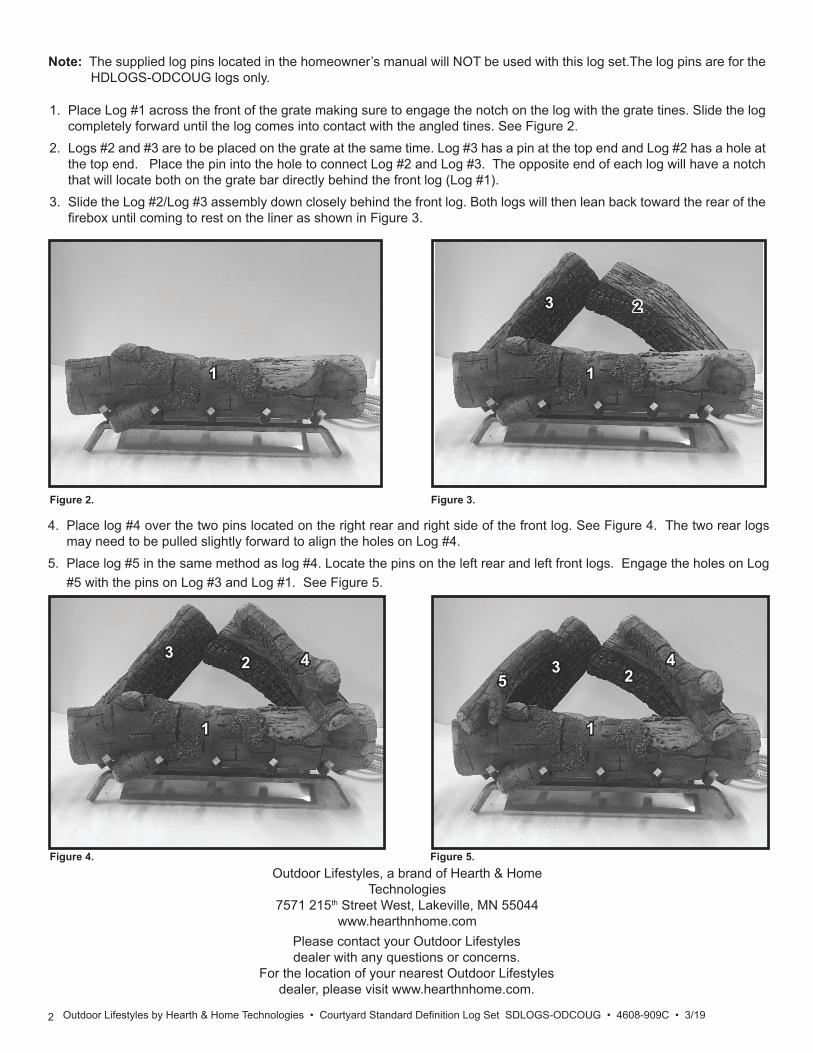
Figure 2.
1. Place Log #1 across the front of the grate making sure to engage the notch on the log with the grate tines. Slide the log completely forward until the log comes into contact with the angled tines. See Figure 2.
2. Logs #2 and #3 are to be placed on the grate at the same time. Log #3 has a pin at the top end and Log #2 has a hole at the top end. Place the pin into the hole to connect Log #2 and Log #3. The opposite end of each log will have a notch that will locate both on the grate bar directly behind the front log (Log #1).
3. Slide the Log #2/Log #3 assembly down closely behind the front log. Both logs will then lean back toward the rear of the firebox until coming to rest on the liner as shown in Figure 3.
Figure 3.
Figure 4. Figure 5.
23
3
1 1
11
234 45
Note: The supplied log pins located in the homeowner’s manual will NOT be used with this log set.The log pins are for the HDLOGS-ODCOUG logs only.
4. Place log #4 over the two pins located on the right rear and right side of the front log. See Figure 4. The two rear logs may need to be pulled slightly forward to align the holes on Log #4.
5. Place log #5 in the same method as log #4. Locate the pins on the left rear and left front logs. Engage the holes on Log #5 with the pins on Log #3 and Log #1. See Figure 5.
Outdoor Lifestyles, a brand of Hearth & Home Technologies
7571 215th Street West, Lakeville, MN 55044www.hearthnhome.com
Please contact your Outdoor Lifestyles dealer with any questions or concerns.
For the location of your nearest Outdoor Lifestyles dealer, please visit www.hearthnhome.com.