cpanel - packt of fantastico deluxe (a popular script auto-installer for cpanel). ... every cpanel...
TRANSCRIPT

cPanel User Guide and Tutorial
Aric Pederson
Chapter 4. "Working with Mail"

For More Information: http://www.packtpub.com/cPanel/book
In this package, you will find: A Biography of the author of the book
A preview chapter from the book, Chapter 4. "Working with Mail"
A synopsis of the book’s content
Information on where to buy this book
About the Author Aric Pedersen has been using cPanel on a daily basis for over six years both as an end user for his own websites and as a systems administrator. He currently works as a systems administrator for several hosting companies and also for Netenberg.com, the creators of Fantastico Deluxe (a popular script auto-installer for cPanel). Aric has been providing companies and end users with web hosting and related documentation for several years.

For More Information: http://www.packtpub.com/cPanel/book
4 Working with Mail
You may have initially purchased your web hosting account just to get your site onto the Internet, but depending on the hosting plan you purchased you may also have the ability to create/manage e-mail accounts for your domain. In fact, some web hosts offer inexpensive e-mail-only cPanel accounts that don't include web hosting.
Why Manage your Own E-mail Accounts? If you already have e-mail accounts from other sources (perhaps through your ISP or from a free service like Hotmail or Gmail) you might be wondering why you should bother with more e-mail accounts. Here are a few of the many reasons:
• Give your communication a more polished appearance: This is especially important if you are running your own business. If you sell products online and then ask people to contact you at an AOL or Hotmail e-mail account, they may wonder if your company is real. With e-mail coming from your domain, you can give the impression that you are a large business even if you're just running it out of your basement.
• Complete control over your e-mail: You can forward e-mail to one or more people automatically, create or remove extra e-mail addresses whenever you want, forward all mail sent to your domain to another domain altogether. The choice is yours. You are only limited by the disk space and features permitted in your hosting plan.
• Improved anti-spam features: You have complete control over the advanced spam fighting technologies cPanel offers. Several of these features are of the sort you find in expensive commercial products, but you get them all for no additional charge (depending on your web host).
• Wide range of choices concerning how to access your e-mail: Access your e-mail from any web browser securely, download it to your local computer or manage mail both locally and on the web at the same time.

For More Information: http://www.packtpub.com/cPanel/book
Working with Mail
38
Although the freedom managing your own e-mail gives you is a wonderful thing, this doesn't mean you should completely abandon all other e-mail addresses. You should keep at least one other e-mail address that isn't part of your hosted domain (even the free e-mail services will do). The reason for this is unless you have a dedicated server, there will be times (exceedingly rare times, it is hoped) when your hosted domain may go down or perhaps you run out of disk space or bandwidth. You do need to have an alternative e-mail address where your web host and other people can get in touch with you if your domain isn't working.
Though at first, you maybe overwhelmed by the profusion of features, managing your own e-mail accounts with cPanel isn't very difficult. Once you've had a chance to experiment with the various options a bit, you'll be managing your e-mail like a pro!
Common E-mail Terms When discussing e-mail you will be exposed to a number of different terms that you may not be familiar with. Here are the most common:
Bounced E-mail: E-mail messages that get returned to the sender because there was some sort of problem and the e-mail could not be delivered.
E-mail Address: This is what people type in to send e-mail to you—[email protected]. E-mail addresses always include the @ (at sign).
E-mail Body: The main section of the e-mail with whatever text you have written.
E-mail Headers: Several lines of information that appear prior to the body of an e-mail message. The headers contain a lot of information about where mail has come from and which mail server received it. Most e-mail programs don't show full headers by default since there can be so many of them. If you are having problems with spam or bounced e-mail messages, the full headers of the message contain information that can help track down the problem.
IMAP: This is a protocol for fetching e-mail from a remote web server. IMAP is designed to manage all mail on the remote mail server. IMAP is a good protocol to use if you travel a lot and want to be able to access all of your mail from anywhere. However, if your mail server is having problems you likely won't be able to access any mail (even old mail) until the server comes back online.
Mailbox: The location where mail is stored for an e-mail address.
MX Record: An MX (Mail eXchange) record tells the server where e-mail for a particular domain should be sent.
Password Authentication: This is one method you can use to prove that the e-mail account is yours. You enter your account username and password.
POP3: This is a protocol for fetching e-mail from a mail server. This method was designed to retrieve mail from a remote mail server and store the e-mail locally. Mail fetched via POP3 typically gets removed from a server once your e-mail client has fetched the mail (though you can

For More Information: http://www.packtpub.com/cPanel/book
Chapter 4
39
change this behavior). Since mail is removed from the server, you typically can only read old mail in the e-mail program used to download the messages. If your mail server goes down, you will still be able to access old mail locally without an Internet connection.
POP-Before-SMTP Authentication: An alternative SMTP (send mail) authentication method. To use this method, you must log in to your e-mail account via POP3 and check your e-mail. If you do that successfully then you will be able to send e-mail from that account for 30 minutes via SMTP without having to enter the account username and password again. This is a somewhat less secure than password authentication and not all web hosts support it.
SMTP: Stands for Simple Mail Transfer Protocol. SMTP is the protocol used when you need to send someone e-mail from your account.
Web Mail (Client): A program that allows you to access your e-mail from a web browser.
Accessing cPanel's E-mail Features Any features that have anything to do with e-mail can be found by clicking the Mail icon on the main cPanel screen.
Managing POP3 and IMAP E-mail Accounts If you want to create new e-mail accounts or work with existing ones, you should click on Manage/Add/Remove Accounts. This is where you go if you want to set up a POP3/IMAP e-mail account.

For More Information: http://www.packtpub.com/cPanel/book
Working with Mail
40
Every cPanel account comes with one administrator e-mail address by default. This administrator e-mail account matches both your cPanel account username (so the e-mail address is [email protected]) and password. If you change your cPanel account password, the main e-mail account password will change also. You may choose to use this account or not, but this account cannot be deleted.
There is one advantage to the administrator e-mail account (at the time of writing this book); it has the ability to see mail left for other users. To do that, you need to log into the account via web mail and you should then be able to choose the various mailboxes set up for e-mail accounts in your domain. While you cannot send mail as these users, you can read, forward, respond to (as the administrator) and delete any e-mail in these mailboxes.
Creating an E-mail Account To create another e-mail account, just click the Add Account button at the bottom of the screen. This will take you to the new e-mail account setup screen. Here you set the username for the e-mail address ([email protected]), set the password, and choose the mail quota (more commonly referred to as mailbox size) for the account. If you leave the quota blank, then the mailbox can grow until your web hosting account runs out of disk space. If you do set a mailbox size, then that e-mail account will stop accepting mail once it hits the quota until the mailbox is cleaned out to make room for more messages. Once you create the account, it is immediately active.
Configuring your E-mail Client to Use your New Address Of course, if you go through the trouble of setting up a real e-mail account, then you will probably want to send/receive mail from that account in your favorite e-mail program (Outlook (Express), Eudora, etc.). If you use Outlook or Outlook Express you can just click the Mail Client Configuration link next to the e-mail address you want to set up. This will take you to a screen where you can click on a link to configure either Outlook or Outlook Express with that e-mail account using either the POP3 or IMAP protocols. Otherwise, you will need to set it up manually.

For More Information: http://www.packtpub.com/cPanel/book
Chapter 4
41
For any given domain name:
• Account/Username: [email protected] OR username+domain.com • Password: the password you set up for that account in cPanel. • Mail Server: mail.domain.com • SMTP Server: mail.domain.com • SMTP Authentication: YES or NO. If you set this to YES (preferred) use password
SMTP Authentication and use the same username and password as above). If you set this to NO then you must check your e-mail via POP3 before trying to send mail or it will fail with an error message telling you that you must check your e-mail first. Not all web hosts support this method of authentication (called POP-Before-SMTP) and it isn't as secure as requiring standard SMTP authentication before sending mail.
• Return Address: [email protected]
Depending on your web host, you may also be able to use SSL secure mail sending (SMTPS) and receiving. You can find out what protocols your web host supports by clicking on Configure Mail Client and looking at the last paragraph of text on that page. That text tells you how to manually configure your e-mail client and what protocols are supported.
Changing Advanced E-mail Options and Monitoring your E-mail Account You can edit the mail quota at any time for all e-mail accounts you have created. To do that, you should click on the Change Quota link next to the e-mail account you want to edit. Enter the new quota in MB and click on Change to make the new mail quota size active.

For More Information: http://www.packtpub.com/cPanel/book
Working with Mail
42
Depending on how your web host has the mail server set up, mail that comes in for an account that is over the set quota will either be stored in a temporary queue until enough space is cleared out to allow the message to be delivered (up to 3 days at most before deleting the message) or be deleted immediately without delivering it; so watch mail quotas carefully.
To see how much disk space each account is using (for stored mail), click Show Disk Space Used and the amount of disk space in use and the maximum quota will be displayed next to each e-mail account. Note that the main e-mail account will not show this information.
Clicking on Aging will allow you to set a POP3 aging (mail expiration) time. Usually, if you use POP3 to check your e-mail it gets downloaded to your local computer and then removed off the remote mail server. However it is possible with most e-mail clients to download a local copy of your mail while keeping a copy of that mail on the server. If you keep your mail on the server all the time there is a chance that the account might go over the mail quota and you won't receive more e-mail until you manually clear out some old e-mail. To avoid this, you can automate deletion of old mail that is over a certain number (that you specify) of days old. This is called aging and only works with the POP3 protocol, not web mail or IMAP. If you don't regularly check e-mail via POP3, then the old mail will not get deleted automatically. The default setting for aging is 0 days (which turns the aging feature off).
Another thing you can do from the Manage/Add/Remove Accounts screen is change the password for any account you have created. Click Change Pass next to the e-mail account you want to change it for and then enter the new password. The change will take effect immediately.
Web Mail It is nice to be able to check mail from your home computer, but what happens if you need to check e-mail from some other location? You can use web mail. Web mail clients allow you to do almost everything you can do with your preferred local e-mail client program, but you can access it from nearly any web browser from anywhere on the Internet.
Accessing Web Mail There are several ways to access web mail, just as there are several ways to access cPanel. You have your choice of the following:
• http://domain.com/webmail/ • http://domain.com:2095/ • https://domain.com:2096/ (secure SSL connection)

For More Information: http://www.packtpub.com/cPanel/book
Chapter 4
43
All of these connection methods take you to exactly the same web mail management page:
If you have problems accessing web mail using ports 2095 or 2096, you can use cPanel proxy to access web mail as well via the web standard port 80. If you followed my advice in Chapter 1, you already have web mail proxy access set up. If not, please check with your web host to make sure using this proxy is OK and then visit http://cpanelproxy.net/ and use the auto-installer to install it. Once completed, you can also access web mail this way using http://webmail.domain.com/.
Remember, the cPanel proxy doesn't work with secure (SSL) connections and it will slow down access to web mail to some extent.
From the cPanel web mail management screen, you have access to at most three different web mail clients, NeoMail, Horde, or SquirrelMail.
NeoMail is the simplest and fastest loading web mail client but it is short on features and will be dropped soon from cPanel because it won't work with the Courier IMAP server software that cPanel will eventually make standard. (cPanel currently uses uwimap, though your web host may have already switched to Courier. If so, NeoMail won't work.)
SquirrelMail offers a clean interface with the ability to add lots of plug-ins or change the look of the web mail client through use of themes. Please note that the default installation of SquirrelMail in cPanel doesn't include many plug-ins (like a spelling checker, language translation, spam reporting, HTML mail viewing, and so on) unless your web host has enabled them.
Horde is another good web mail client. It includes a calendar, to do list, and memo area as well as a robust e-mail service. The downside is that it is rather complex and some people don't like the interface. I recommend you try both SquirrelMail and Horde and see which you prefer.
You may prefer to set up a subdomain like webmail.domain.com that takes the user directly to your preferred web mail client to log in (see Chapter 6 for more on subdomains).

For More Information: http://www.packtpub.com/cPanel/book
Working with Mail
44
Direct links to web mail clients in cPanel:
• NeoMail: http://domain.com:2095/NeoMail/NeoMail.pl • Horde: http://domain.com:2095/horde/login.php • SquirrelMail: http://domain.com:2095/3rdparty/squirrelmail/webmail.php
In addition to allowing you to choose which web mail program you want to use, the cPanel web mail management screen allows you to edit a number of mail options for this e-mail address including:
• Your e-mail account password • E-mail forwarding options • Auto-response options • BoxTrapper anti-spam features • POP3 e-mail aging settings
Clicking the lock icon will switch from non-secure to secure (SSL) web mail access.
To check your mail using the main administrator account, you should enter your cPanel username and password. For all other e-mail accounts that you set up for your domain, you should enter the full e-mail address ([email protected]) and the e-mail password. You can also use + . % , or : in place of the @ sign if you prefer or if your web browser doesn't like @ signs in usernames.
You can also access web mail for each account by clicking the Webmail link next to the e-mail account name you want to check on the mail account maintenance screen. You will be asked for the e-mail account password and then taken to the standard cPanel web mail screen.
E-mail Forwarders (Aliases) Forwarders are not full e-mail accounts; they just redirect mail to another e-mail address or addresses. For this reason, e-mail forwarders are also sometimes known as e-mail aliases. Forwarders are very useful, particularly if you want to have a number of different e-mail addresses without the hassle of having to check several different accounts. Just create the forwarding e-mail address and point it to your real e-mail account of choice. In fact, you can even have e-mail sent to a forwarding address that is redirected to many other recipients. To do this, set up the same forwarding e-mail address with multiple recipients (you can add multiple addresses at one time by separating each with a comma or you can set up each one separately if you prefer). You can use this feature to create simple group e-mail addresses. For example, you can set a forwarding e-mail address that automatically redirects any mail sent to that address to your entire family. This is great for personal announcements or a small mailing list without the hassle of setting up a full-fledged mailing list.
You can send mail so that it looks like it came from an e-mail forwarding account by setting up a new personality or account in your e-mail program of choice and setting the name and return e-mail address to your e-mail forwarding address and then using the standard mail/SMTP (send mail) addresses for your preferred real e-mail account. For example, to send mail so it looks like it comes from [email protected] when it is really coming from [email protected]:

For More Information: http://www.packtpub.com/cPanel/book
Chapter 4
45
Display name for e-mail: Administrator2
Return Address: [email protected]
Incoming Mail Server: mail.domain.com
Outgoing Mail Server: mail.domain.com
Username for POP3 and SMTP Authorization: [email protected]
Password for POP3 and SMTP Authorization: password of your admin e-mail account
Some ISPs do not allow sending mail that isn't from your real ISP-provided e-mail address. Also, your web host may not allow clients to send mail via SMTP that isn't from a real e-mail address.
E-mail Domain Forwarding E-mail domain forwarding is a way to send all e-mail from one domain, subdomain, parked or add-on domain to the same address at a different domain. Select E-mail Domain Forwarding from the mail manager screen and then click Add Domain Forwarder, select the domain to forward and enter the domain name to forward mail to (without www.). You don't have to own or control the domain you want to forward mail to (though it must be able to receive mail), but the domain you want to forward mail from must be hosted in your account. Once set up, this feature will redirect mail that is supposed to go to [email protected] (your cPanel main, sub, add-on, or parked domain) to [email protected] (the domain you choose to forward to). So if you have [email protected] set up in your cPanel and you have e-mail domain forwarding to otherdomain.com on, the message will be sent to [email protected].
Mailing Lists Sometimes the basic one-to-many simplicity of forwarding e-mail isn't full-featured enough, especially since it requires a lot of manual entry of e-mail addresses. If you are going to send a newsletter or any regular e-mail to many people, you'll probably want to set up a mailing list. You create one by clicking the Add List button and then filling in the name of the list, the domain name it should come from, and the mailing list administrative password. Then click Create. You will be shown that several files and entries were created to handle this new mailing list. Click Go Back and then click on the Edit List button to finish setting up the mailing list.
Once you enter your mailing list administrative password, you have access to all the features of the Mailman mailing list software. Mailman is very full-featured, but it has so many features that it is beyond the scope of this book. Mailman does have built-in help, which should be enough to answer most of your questions. If you need additional assistance, please check out the documentation at http://list.org/.

For More Information: http://www.packtpub.com/cPanel/book
Working with Mail
46
Dealing with Unsolicited E-mail (SPAM) Unsolicited Commercial E-mail (usually referred to as spam or UCE) is a big problem these days and the problem is getting progressively worse as time goes on. If you run a business that relies on e-mail then spam can cost you a lot of money because buried under that avalanche of spam is legitimate e-mail that you have to try and locate. The time you spend dealing with spam is that much less time you have to focus on your customers or clients. How can you cut down on the amount of spam you receive while being careful not to accidentally delete real e-mail? Thankfully, cPanel includes a number of tools that can help you with this task.
SpamAssassin Spam Assassin can serve as the front-line defense in your anti-spam corpus. It blocks known spammers and rewrites the headers of other e-mail messages so you can filter them out from your e-mail program if you wish. Click the Enable SpamAssassin button to turn it on, then click Configure Spam Assassin to edit the rules that SpamAssassin will use and what exactly it will do to incoming mail.

For More Information: http://www.packtpub.com/cPanel/book
Chapter 4
47
For More Information: http://www.packtpub.com/cPanel/book
Working with Mail
48
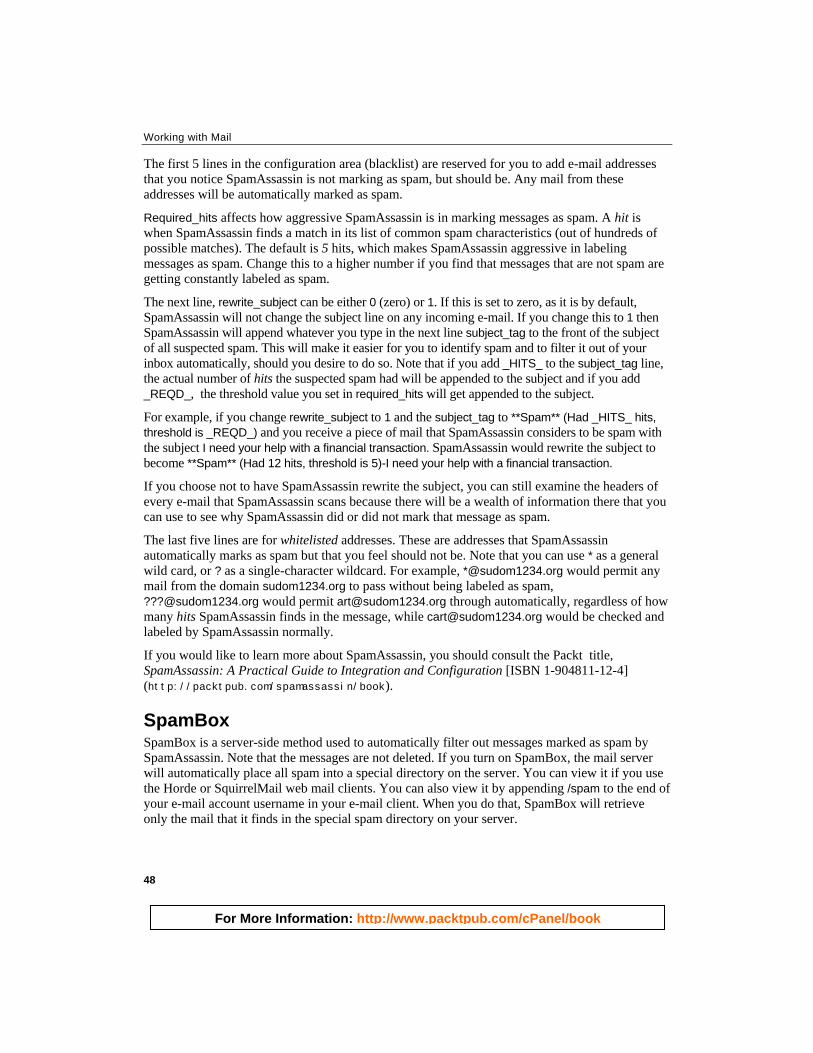
The first 5 lines in the configuration area (blacklist) are reserved for you to add e-mail addresses that you notice SpamAssassin is not marking as spam, but should be. Any mail from these addresses will be automatically marked as spam.
Required_hits affects how aggressive SpamAssassin is in marking messages as spam. A hit is when SpamAssassin finds a match in its list of common spam characteristics (out of hundreds of possible matches). The default is 5 hits, which makes SpamAssassin aggressive in labeling messages as spam. Change this to a higher number if you find that messages that are not spam are getting constantly labeled as spam.
The next line, rewrite_subject can be either 0 (zero) or 1. If this is set to zero, as it is by default, SpamAssassin will not change the subject line on any incoming e-mail. If you change this to 1 then SpamAssassin will append whatever you type in the next line subject_tag to the front of the subject of all suspected spam. This will make it easier for you to identify spam and to filter it out of your inbox automatically, should you desire to do so. Note that if you add _HITS_ to the subject_tag line, the actual number of hits the suspected spam had will be appended to the subject and if you add _REQD_, the threshold value you set in required_hits will get appended to the subject.
For example, if you change rewrite_subject to 1 and the subject_tag to **Spam** (Had _HITS_ hits, threshold is _REQD_) and you receive a piece of mail that SpamAssassin considers to be spam with the subject I need your help with a financial transaction. SpamAssassin would rewrite the subject to become **Spam** (Had 12 hits, threshold is 5)-I need your help with a financial transaction.
If you choose not to have SpamAssassin rewrite the subject, you can still examine the headers of every e-mail that SpamAssassin scans because there will be a wealth of information there that you can use to see why SpamAssassin did or did not mark that message as spam.
The last five lines are for whitelisted addresses. These are addresses that SpamAssassin automatically marks as spam but that you feel should not be. Note that you can use * as a general wild card, or ? as a single-character wildcard. For example, *@sudom1234.org would permit any mail from the domain sudom1234.org to pass without being labeled as spam, [email protected] would permit [email protected] through automatically, regardless of how many hits SpamAssassin finds in the message, while [email protected] would be checked and labeled by SpamAssassin normally.
If you would like to learn more about SpamAssassin, you should consult the Packt title, SpamAssassin: A Practical Guide to Integration and Configuration [ISBN 1-904811-12-4] (http://packtpub.com/spamassassin/book).
SpamBox SpamBox is a server-side method used to automatically filter out messages marked as spam by SpamAssassin. Note that the messages are not deleted. If you turn on SpamBox, the mail server will automatically place all spam into a special directory on the server. You can view it if you use the Horde or SquirrelMail web mail clients. You can also view it by appending /spam to the end of your e-mail account username in your e-mail client. When you do that, SpamBox will retrieve only the mail that it finds in the special spam directory on your server.

For More Information: http://www.packtpub.com/cPanel/book
Chapter 4
49
If you are going to use your e-mail client to check the SpamBox, you will probably want to set up another account (or at least a filter) in your e-mail client so that when the SpamBox gets checked, the messages don't get dumped into your inbox, but get placed into another folder so it is easy to tell the messages apart.
If SpamAssassin is incorrectly labeling files, return to your cPanel and edit the SpamAssassin settings.
E-mail Filtering Getting spam or other unwanted mail, and want to try to block some of it? Set up a filter to block e-mail based on your criteria. You can block based on the To: header, or the From: header, the subject line, a single word or words in the body of the e-mail, or any other header line.

For More Information: http://www.packtpub.com/cPanel/book
Working with Mail
50
Just select the criteria you want to block (one criterion per filter) and then click Activate. cPanel will even offer you the ability to test your new filters by running a test e-mail through your newly created filters to see if they work.
You can tell cPanel to delete any mail marked as spam by SpamAssassin by choosing the header as SpamAssassin Spam Header that Begins With and then typing Yes in the text box. Clicking the text Click Here just above the buttons to turn on, turn off, and configure SpamAssassin on the cPanel SpamAssassin screen, will accomplish the same thing.
BoxTrapper Enabling BoxTrapper for any real, cPanel-created e-mail address in your managed domain turns on an anti-spam challenge and response system for that address. Note that this doesn't work for e-mail forwarding addresses (aliases). A similar feature is offered by several third-party companies, and some cost as much as much as 200 USD a year.

For More Information: http://www.packtpub.com/cPanel/book
Chapter 4
51
If BoxTrapper is on, then any time an e-mail is received, it is placed into a special queue and BoxTrapper examines its whitelists for currently permitted e-mail senders. If the sender's e-mail address (or the e-mail subject line) is on the whitelist, the message is delivered immediately to your inbox. If the sender (or subject) is on the BoxTrapper blacklist, he or she gets an e-mail (which you can edit) notifying the sender that you are refusing mail from them.
If the sender (or subject) is on the BoxTrapper ignore list, then the e-mail is not delivered to your mailbox, and the sender is not sent a warning. If the sender and subject do not appear on any BoxTrapper list, they are automatically sent a please verify e-mail message which the user must respond to. Meanwhile, the message remains in the BoxTrapper queue awaiting a response. If one does not come, the e-mail is eventually deleted from the queue (in a user-specified number of days) and never delivered to your inbox. If the user responds, the user is placed on the BoxTrapper whitelist automatically and that message and all future e-mail from that sender will be immediately delivered to your mailbox. You can view the messages in the queue at any time and can set each message as good or bad or just delete them.
The operation is fairly straightforward. Enable BoxTrapper for any e-mail addresses you want to, then click Configure Settings to set how many different recipient e-mail addresses (perhaps through some forwarding or mailing list) get delivered to this address. If you have more than one e-mail recipient (perhaps [email protected] and [email protected] both come to [email protected], which is a real e-mail address, using e-mail forwarding for [email protected] and [email protected]) then list them ([email protected], [email protected], [email protected]) on the E-mail addresses going to this account line. Change the queue length if you want. If you get a lot of e-mail, you may wish to shorten the queue or you may run out of disk space. Next, edit the various confirmation e-mail addresses that BoxTrapper sends by clicking on Edit Confirmation Messages. Next, edit your blacklist/whitelist/ignorelist as you see fit. You can also review your current and past queues as well as see the log of what BoxTrapper received and what it did with those messages.
Virus Scanning using ClamAV This feature isn't primarily designed to stop spam, though it can filter out some special kinds of spam (called phishing e-mail) that attempt to collect personal information about you by pretending to be an e-mail from your bank, PayPal, eBay, and so on.

For More Information: http://www.packtpub.com/cPanel/book
Working with Mail
52
In addition, not all web hosts will offer this feature (or may offer something similar, but not exactly the same). If you host does offer it, you will find a link to Virus Scan on the main cPanel screen. Here you will be able to manually scan mail and the files in your account for viruses using a very good free virus-scanning engine called ClamAV. You can find out more information about ClamAV at its website, http://clamav.net/.
Default (Catch All) E-mail Address Selecting Default Address will allow you to set what action the mail server will take when mail is sent to an e-mail address you have not set up a real e-mail account or e-mail forwarding for.
By default, cPanel is usually set to forward all mail to the default e-mail address (though your web host can change this default). Alternatively, you can set e-mail to non-existent addresses to be instantly discarded with no warning (set the action to :blackhole:) or have the e-mail bounced back to the sender with a message noting that the e-mail was undeliverable (set the action to :fail: no such address here). As a general rule, it is a good idea to leave the default e-mail address set to :fail:.
You can put any words you like after :fail: and cPanel will use those words as the bounce error message. For example, :fail: Go away spammer! will send a bounce message telling the user to Go away spammer! Setting :fail: with no words after it will send a bounce message with no custom error message in the body.
E-mail Auto-Responders Choosing Auto-responders from the cPanel mail manager screen allows you to have cPanel automatically send an e-mail response to anyone who sends a message to a particular e-mail address.

For More Information: http://www.packtpub.com/cPanel/book
Chapter 4
53
This can be used for several different things. Perhaps the most common use is setting up an on vacation or out of the office message that automatically gets sent back to anyone who sends you e-mail. Be careful with this because if you subscribe to a mailing list, the mailing list could receive notification that you are away!
Another use might be to provide an e-mail FAQ covering commonly asked questions about a product or service you are selling, or about your company. So for example, you can create an auto-responder that automatically sends e-mail to a person who sends mail to [email protected] giving them answers to common problems and asking them to send mail to a different e-mail address if they still need help. If you specify a From address, then that auto-response message will only be sent to e-mail with that particular From address rather than to

For More Information: http://www.packtpub.com/cPanel/book
Working with Mail
54
all messages received at that account. In addition, you can select the type of character set you want to use (for the language the e-mail message is written in) and even send out HTML mail this way, just click the HTML checkbox and type or paste in some HTML code. cPanel makes an attempt to keep track of which e-mail addresses it has recently auto-responded to in an attempt to stop infinite I'm responding to your auto-response of my auto-response messages. However, this system isn't perfect and doesn't always work, so you should be careful when using it.
Advanced E-mail Tools These are a couple of features only used under special circumstances:
• Change Primary E-mail MX Record: You shouldn't change this unless you know what you are doing, as having it improperly set may cause all e-mail services to fail completely for your domain. This feature allows you to change the server that handles all incoming mail for this domain. Unfortunately, this cannot be used to add additional MX records (for backup mail service, for example). If you need extra MX records added to your domain, contact your web host.
• E-mail Trace Tool: This tool displays a map showing the mail server to which the e-mail is delivered. It will also help you to diagnose problems in sending mail to that address. It will map out any connections the address has and can provide information that may help tech support diagnose e-mail problems. It will be most useful for e-mail addresses not on the same server that you are on, since you will only see one entry for e-mail addresses on your server (as the mail doesn't get routed anywhere else).
Summary In this chapter, you have learned:
• Why you may want to manage your own e-mail accounts • How to setup and manage POP3 and IMAP e-mail accounts • How to create e-mail forwarders and forward all e-mails from one account to another • Ways to combat spam and viruses using features available in cPanel • How to work with web mail • How to manage mailing lists • The more advanced features cPanel provides for working with e-mail
Hopefully you now feel comfortable enough with cPanel's e-mail features to try your hand at managing your own e-mail accounts.
In the next chapter you will learn how to work with databases using the tools available in cPanel. If you plan to use web scripts on your website or if you need some place to store data that can be sorted and displayed dynamically, you won't want to miss it.
For More Information: http://www.packtpub.com/cPanel/book
cPanel: User Guide and Tutorial This book is designed to provide in-depth information for anyone who needs assistance with cPanel web hosting software. If you've never managed your own website before you will be able to confidently use the many features cPanel provides after reading this book. Even intermediate and advanced users of cPanel will likely learn many tips and tricks that will enable them to work both faster and smarter.
What This Book Covers Chapter 1: Introduction to cPanel Hosting
Before diving into the many features, you will learn:
• What cPanel is and what it is used for
• What tools you will need to get started working with cPanel and your website
• How to locate a web host that offers cPanel and what to look for in a good host
Chapter 2: Getting Started with cPanel
Start learning a few things about cPanel:
• Access cPanel in several different ways
• Familiarize yourself with the main cPanel interface
• Learn about some of the features of your cPanel account
Chapter 3: FTP and cPanel's File Manager
In this chapter you will discover most of the methods that cPanel provides to enable you to transfer files to and from your web hosting account:
• Discuss methods of uploading files to your hosting account
• Learn about the types of FTP clients available
• Learn how to work with FTP
• Accessing the main FTP account
• Creating FTP accounts and placing limits on those accounts
• Deleting FTP accounts
• Checking FTP quotas for accounts you create

For More Information: http://www.packtpub.com/cPanel/book
• Managing Anonymous FTP access
• Monitoring FTP access and killing FTP sessions
• SFTP (Secure FTP)
• FXP (File Exchange Protocol)
• Navigating your site with the cPanel file manager
• Uploading files and downloading files, editing and managing files with the file manager
• WYSIWYG HTML editing via WYSIWYG Pro in the file manager
Chapter 4: Working with Mail
Dive into the many features cPanel offers for working with e-mail:
• Why you may want to manage your own e-mail accounts
• How to setup and manage POP3 and IMAP e-mail accounts
• How to create e-mail forwarders and forward all e-mail from one account to another
• Ways to combat spam and viruses using features available in cPanel
• How to work with web mail
• How to manage mailing lists
• The more advanced features cPanel provides for working with e-mail (changing MX records, tracing mail, etc.)
Chapter 5: Working with Databases
In this chapter we will explore the wonderful world of databases:
• What databases are and what they are used for
• How to work with both MySQL and PostgreSQL databases in cPanel to handle administrative tasks
• Creating databases
• Creating database users
• Adding users to databases
• Common connection settings for databases
• Deleting databases and users
• Checking for damage, repairing, and optimizing databases
• Basics of working with databases using phpMyAdmin or phpPgAdmin
• Backing up databases with phpMyAdmin or phpPgAdmin
For More Information: http://www.packtpub.com/cPanel/book
Chapter 6: Controlling Access to and Organizing Your Data
In this chapter, you will learn how to manage access to and organize your site using numerous cPanel tools:
• Change your main cPanel password
• Create and manage subdomains
• What redirects are and why you might use them
• Enable hotlink protection and learn how to use it
• Manage leech protection
• Password-protect directories
• Stop problem users from visiting your site with the IP deny manager
• Create custom error messages
Chapter 7: Keeping an Eye on Account Activity
cPanel offers a number of features designed to allow you to keep track of what is happening in your account. In this chapter we will focus on:
• How to work with the various web statistics packages that cPanel offers
• How to disable and re-enable web statistics packages using the Stats Manager
• When and how to use your site's raw web logs
• How to keep track of the disk space your files are taking up
• How to use your cPanel error log to track down problems
Chapter 8: Backing up and Restoring Data
cPanel includes a number of tools that can help you get your site up and running again quickly in the event of data loss:
• What backups are and why they are so important
• How to use cPanel to back up the data in your account
• Automated backup methods
• How to use cPanel to restore the data that you've backed up
• What to do if you do not have a backup and need to restore the data in your account

For More Information: http://www.packtpub.com/cPanel/book
Chapter 9: Working with Scripts
Regardless of your level of expertise, there will probably come a time when you want to add content or features to your website without spending days or weeks coding something or paying someone to create the content for you. This is where pre-coded web scripts may come in handy. In this chapter we will cover:
• What scripts are and what you might want to use them for
• What scripts cPanel offers for installation and how to install them
• Some important advice concerning working with scripts.
Chapter 10: Advanced cPanel Features
You've mastered the basics and are still hungry for more, so in this chapter, we will explore:
• How to enable and disable FrontPage Extensions and learn why you may or may not need them
• Creating and managing Add-on and Parked Domains
• Creating Cron jobs and learning what they can be used for
• The basics of working with SSH/Telnet
• Editing MIME Types and learning what they are used for
• Adding Apache Handlers and learning their uses
• The cPanel interface for creating and storing OpenPGP Keys
• How to manage SSL certificates using cPanel
• The advanced network tools cPanel offers
• What cPanel Pro is and what new features it can provide
Chapter 11: Site and Account Security
You know how to use the features in your cPanel account and now it is time to learn how to protect yourself and your account data. Specifically, we will cover the following:
• What hacking is and why you may be at risk
• What you can do to protect yourself and your site from attack
• What to do if your site is hacked
Chapter 12: Third-Party Additions to cPanel
This chapter will cover most common cPanel additions, and you will discover:
• Many popular cPanel themes and learn about what makes them unique
• A number of popular third-party add-ons for cPanel and learn how they work

For More Information: http://www.packtpub.com/cPanel/book
Chapter 13: Useful Tools and Links and the Final Curtain Call
You've learned how to use the tools cPanel gives you. In this chapter you will find several great links for tools you can use for:
• FTP clients
• More cPanel information
• Basic webmaster and scripting assistance
• Domain, DNS, and Site Monitoring tools
• Password-storing programs
Where to buy this book You can buy cPanel: User Guide and Tutorial from the Packt Publishing website: http://www.packtpub.com/cPanel/book.
Free shipping to the US, UK, Europe, Australia, New Zealand, and India.
Alternatively, you can buy the book from Amazon, BN.com, Computer Manuals and most Internet book retailers.
www.PacktPub.com