creating a resume using word...
TRANSCRIPT
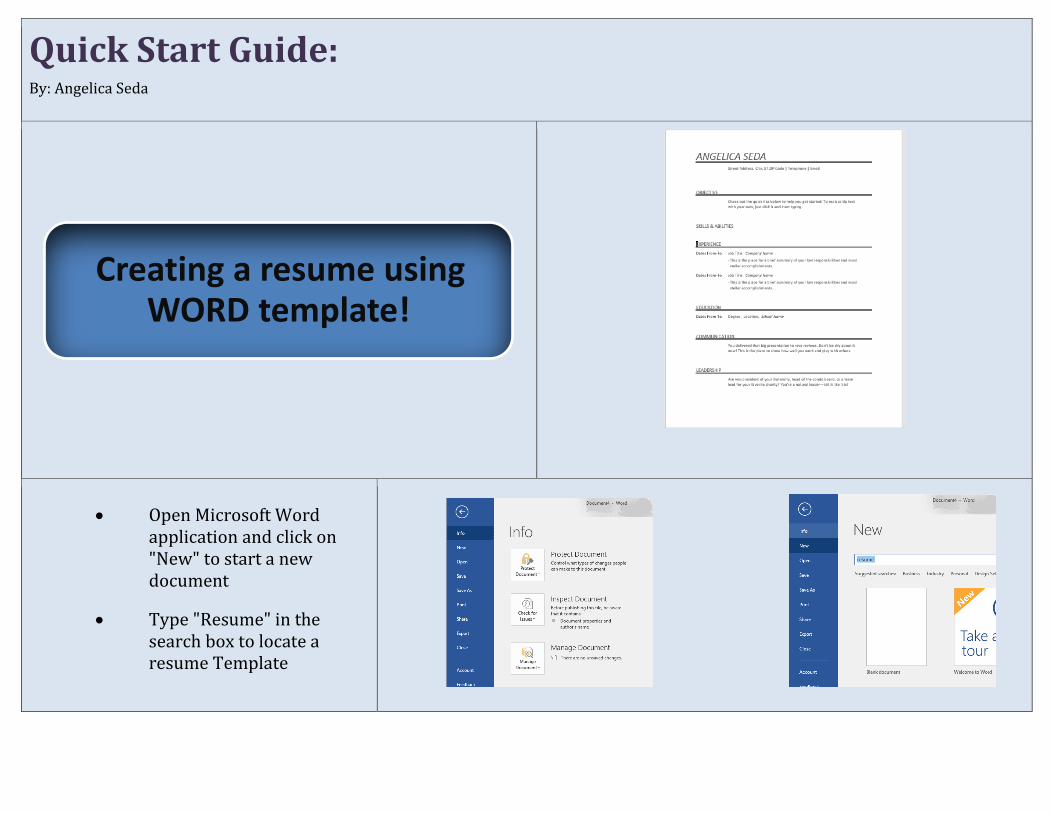
Quick Start Guide: By: Angelica Seda
• Open Microsoft Word application and click on "New" to start a new document
• Type "Resume" in the search box to locate a resume Template
Creating a resume using WORD template!

• Resume templates are available in many categories choose one that would best suite your need
• Scroll down to show more templates
• Choose a resume template

• This screen will pop up click “Create”
• The resume template you chose will populate in WORD
• Help option is to the right of your document (if you need assistance)
• Learn how to write a resume is below “Help”

• To close out “Help” box if not needed click on the “X” in the upper right corner
• Using the “Navigation pane” to the left of the document you can switch back and forth to the subject you want to work on just with a click
• In the ribbon above the ruler above the document you can change the fonts, style, size, and color.
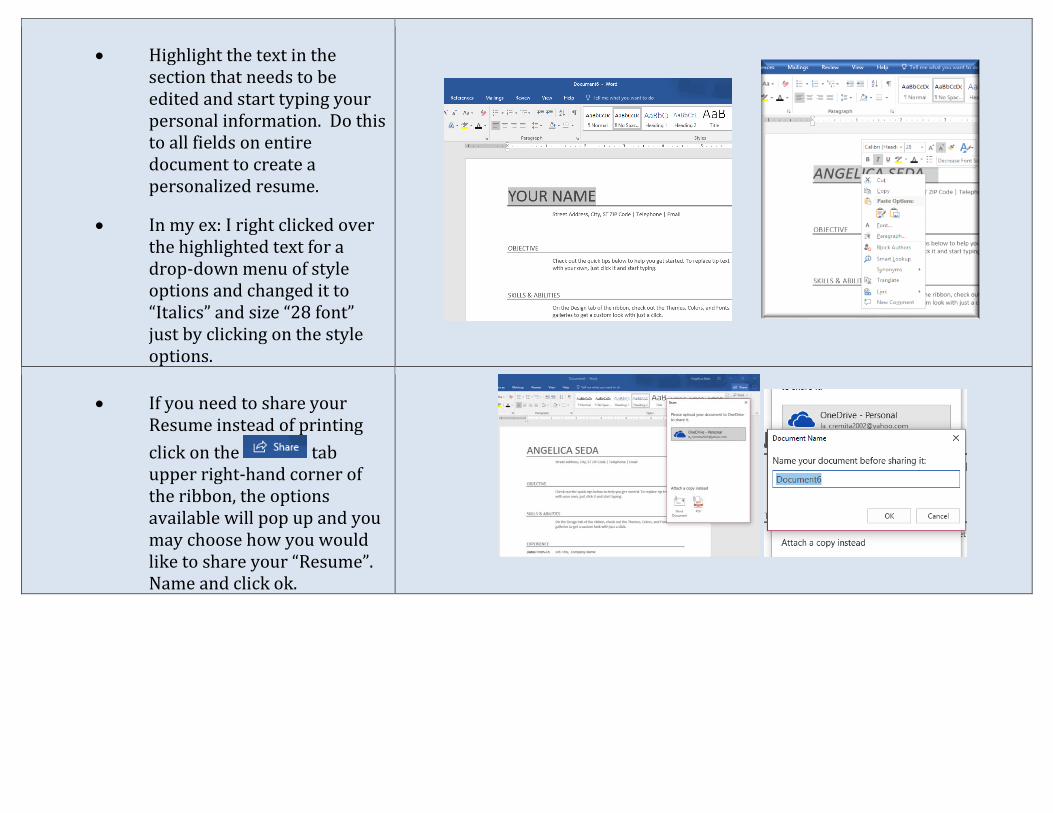
• Highlight the text in the section that needs to be edited and start typing your personal information. Do this to all fields on entire document to create a personalized resume.
• In my ex: I right clicked over the highlighted text for a drop-down menu of style options and changed it to “Italics” and size “28 font” just by clicking on the style options.
• If you need to share your Resume instead of printing
click on the tab upper right-hand corner of the ribbon, the options available will pop up and you may choose how you would like to share your “Resume”. Name and click ok.

• Sharing with others click on the book icon next to search box, here you can choose a contact in the address book ( populates after clicking on the book with whom you would like to share your “Resume” document)
• To save click the “File” tab and it will direct you to the background view.
• Click “save as” choose the location you want the document saved in, I chose “OneDrive”
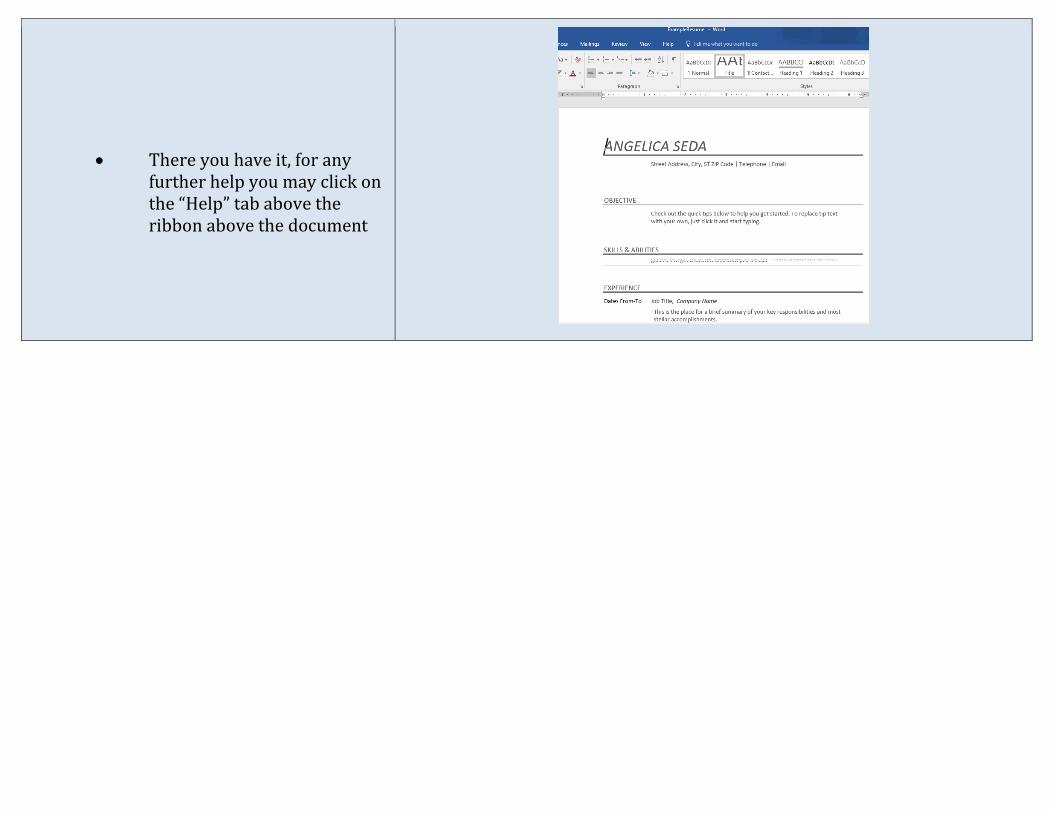
• There you have it, for any further help you may click on the “Help” tab above the ribbon above the document