creating a web site - wguwgu-darlingfacio.weebly.com/uploads/1/8/9/9/18992749/tdt...step 1 enter the...
TRANSCRIPT
Creating a Web Site
Pamela Darling-Facio, WGU
http://wgu-darlingfacio.weebly.com/index.html
In today’s world, web sites are requirement all businesses. Web sites are also useful in the field of
education. More and more teachers are now using web sites to facilitate learning. Many teachers reference
web sites in their lectures and coursework; others have created web sites for their students to access
homework and class files.
Years ago you had to know HTML (hypertext markup language) in order to create a web site. You also
had to pay for your domain name and pay monthly fees to maintain the site. Today there are a number of
web site programs that allow you to create and host your web site for free. Many of these sites will offer
an upgrade to the “Pro” version that provides additional features and custom URL’s (uniform resource
locator) or web site addresses.
One such site is www.weebly.com. Weebly provides users with a web editor that can be used to develop
and maintain a web site free of charge. They offer an upgrade to the Pro version but a small monthly fee.
In addition, you can host your web site on their server for free, using a Weebly subdomain, or you can
pay an annual fee to create a domain name that does not include the Weebly domain.
This process document will demonstrate the steps used to create a basic site, with multiple pages and
graphics using Weebly.
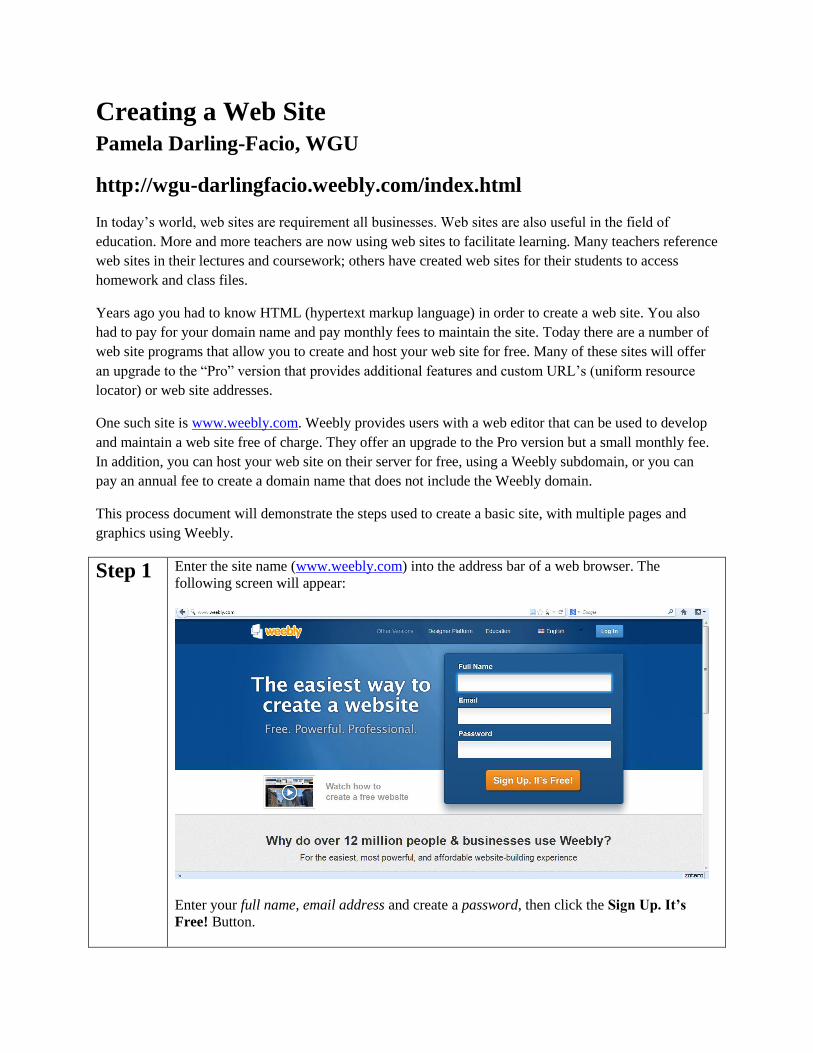
Step 1 Enter the site name (www.weebly.com) into the address bar of a web browser. The
following screen will appear:
Enter your full name, email address and create a password, then click the Sign Up. It’s
Free! Button.
Step 2 The next screen will ask you to verify you are human by having you type two words into the
window and click the Ok, Let’s Go button. Many sites such as this request verification to
avoid computer generated programs from creating web sites.
Step 3 Enter a web site name. The name should be descriptive but not too long. You can’t use
spaces or unusual characters. I used the following name: WGU-Darling-Facio. You will
also designate what type of site you creating, Education, Personal, Business, etc. Depending
on the type of site you designate, you may also have to choose a category. Click the
Continue button.
Step 4 You will then designate your domain name and site name. This will be the URL you provide
others so they can access your site. At this point you can use a Weebly subdomain, which is
free, you can designate a unique domain, which requires an annual fee, or if you own a
domain you can use that name as well. Once you have entered your domain name click the
Continue button.
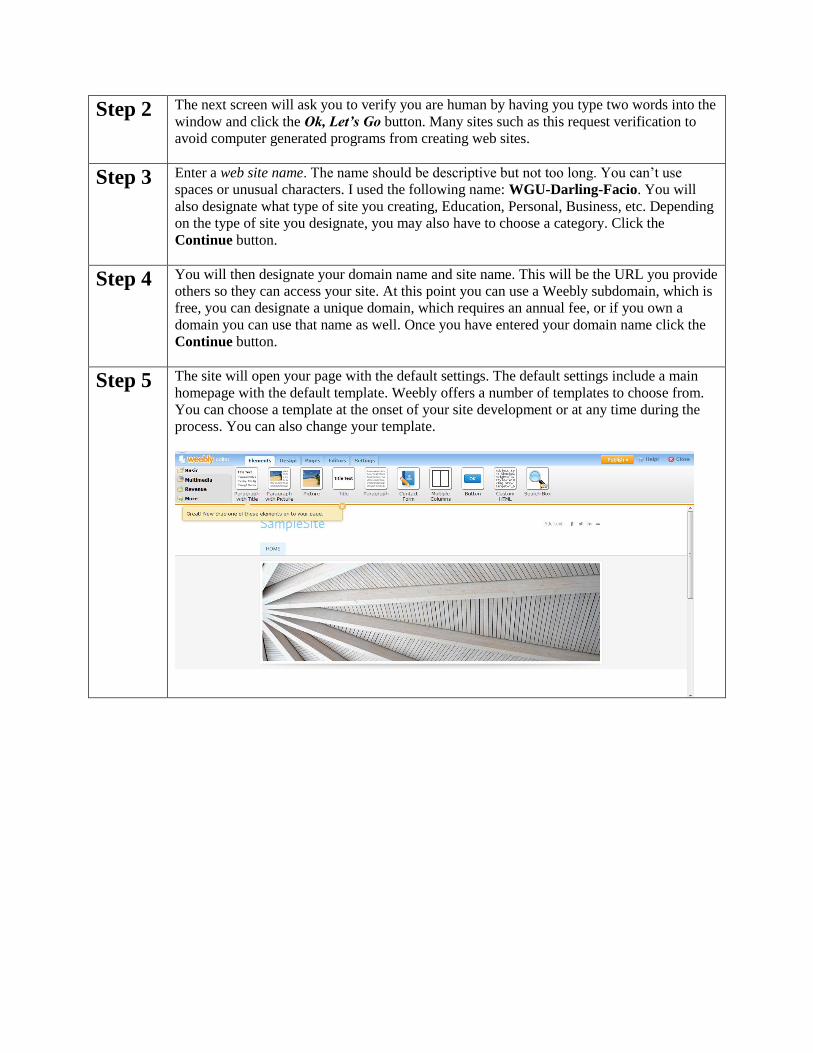
Step 5 The site will open your page with the default settings. The default settings include a main
homepage with the default template. Weebly offers a number of templates to choose from.
You can choose a template at the onset of your site development or at any time during the
process. You can also change your template.
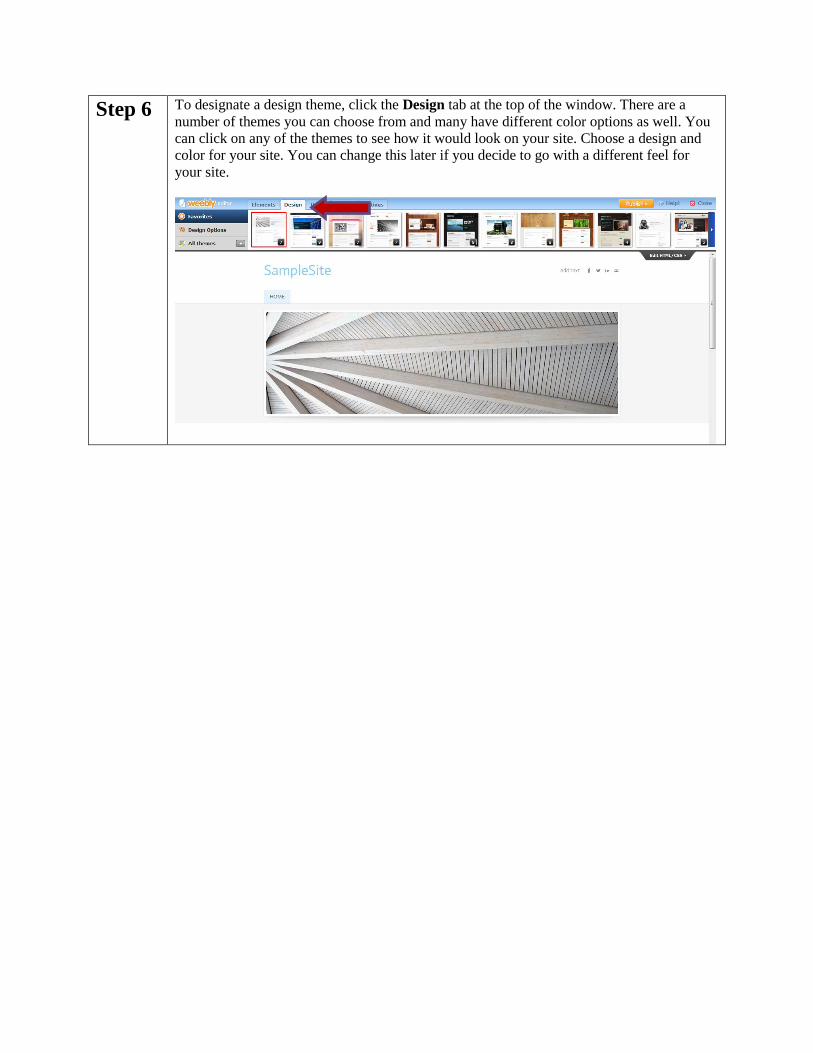
Step 6 To designate a design theme, click the Design tab at the top of the window. There are a
number of themes you can choose from and many have different color options as well. You
can click on any of the themes to see how it would look on your site. Choose a design and
color for your site. You can change this later if you decide to go with a different feel for
your site.

Step 7 You can now being to create the individual pages of your site. You will always have a
Home Page but can add additional pages. Click the Pages tab at the top of the screen (red
arrow).
Next you will click Add Page (blue arrow) and choose the type of page you would like to
add (Standard Page, Blog Page, and External Link). In most instances you will add a
Standard Page. The page will appear below the Home page.
You will also add a descriptive name to each of the pages you create. The name should be
descriptive but not too long. The name you type here (green arrow) will be used in the
navigation area.
You will also designate a Page Layout. For consistency purposes, you should use one
layout for the home page and a different layout for the remaining page.
After you have created the individual pages you can reorder the pages by clicking on a
page in the list and dragging it to a new location within the list. You can also create a
subpage by dragging a page to the right of the page you want it under (page 1.5 is a
subpage of page 1). The home page is always the page at the top regardless of the name.
The home page is designated with a house symbol in the blue header area.
You can also hide pages and add password protection. Hiding pages may be helpful if you
only allow students to see certain pages during specified time periods. You don’t have to
remove a page from your site but can hide it. Password protecting the pages is helpful as it
restricts access to the pages to only those you wish to grant access.
There are also advanced features you can add such as a title for the page (what a user
would see in the title bar of their web browser), page description, keywords, header and
footer code.
Weebly allows you to create as many pages and subpages as you would like for free.
Once you have created and named your pages hit the Save Settings button to save your
changes.
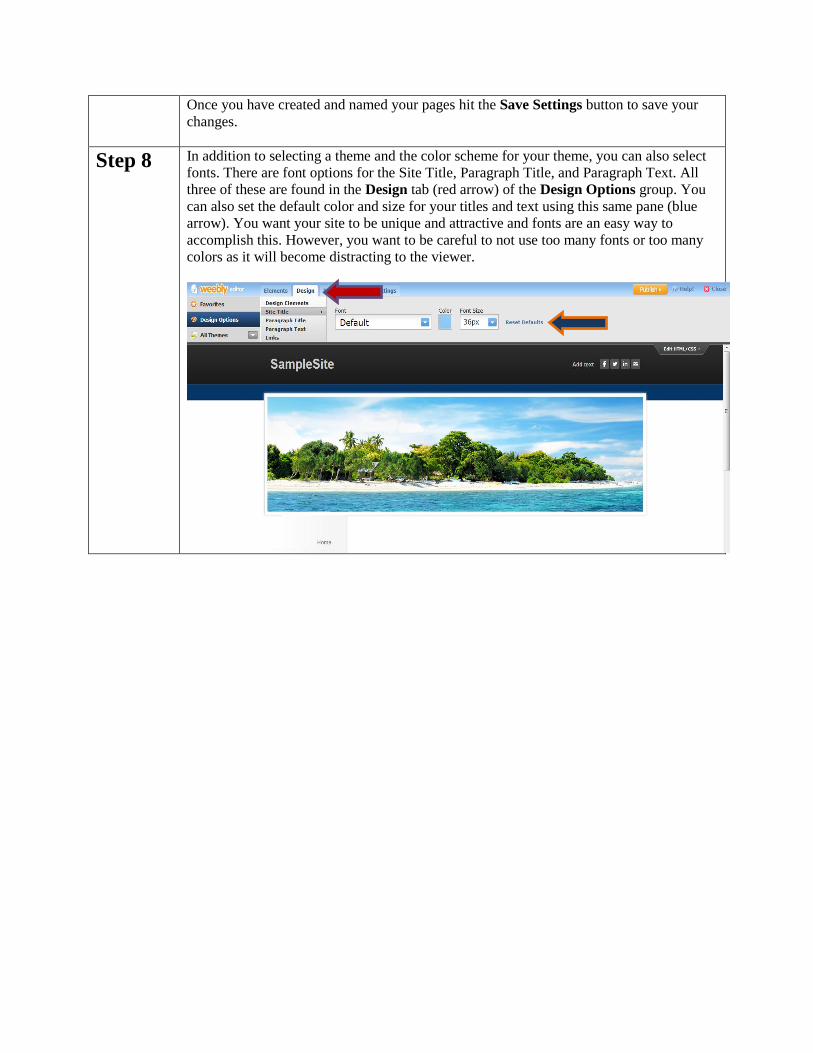
Step 8 In addition to selecting a theme and the color scheme for your theme, you can also select
fonts. There are font options for the Site Title, Paragraph Title, and Paragraph Text. All
three of these are found in the Design tab (red arrow) of the Design Options group. You
can also set the default color and size for your titles and text using this same pane (blue
arrow). You want your site to be unique and attractive and fonts are an easy way to
accomplish this. However, you want to be careful to not use too many fonts or too many
colors as it will become distracting to the viewer.
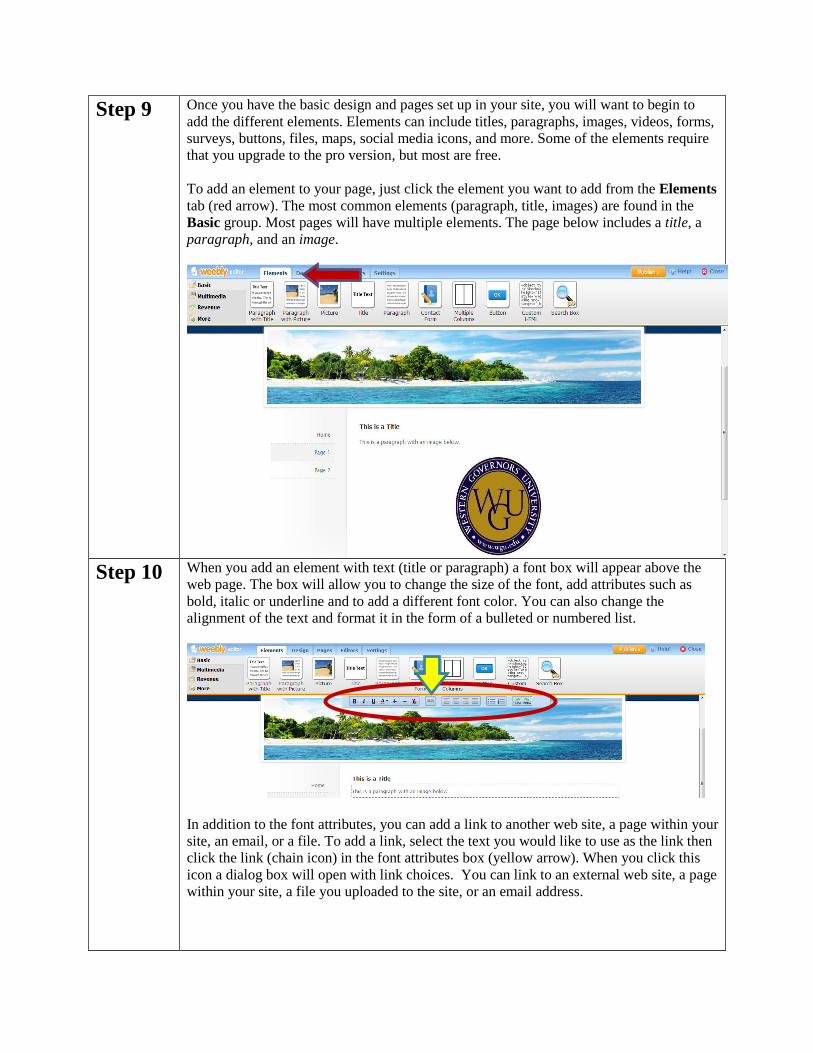
Step 9 Once you have the basic design and pages set up in your site, you will want to begin to
add the different elements. Elements can include titles, paragraphs, images, videos, forms,
surveys, buttons, files, maps, social media icons, and more. Some of the elements require
that you upgrade to the pro version, but most are free.
To add an element to your page, just click the element you want to add from the Elements
tab (red arrow). The most common elements (paragraph, title, images) are found in the
Basic group. Most pages will have multiple elements. The page below includes a title, a
paragraph, and an image.
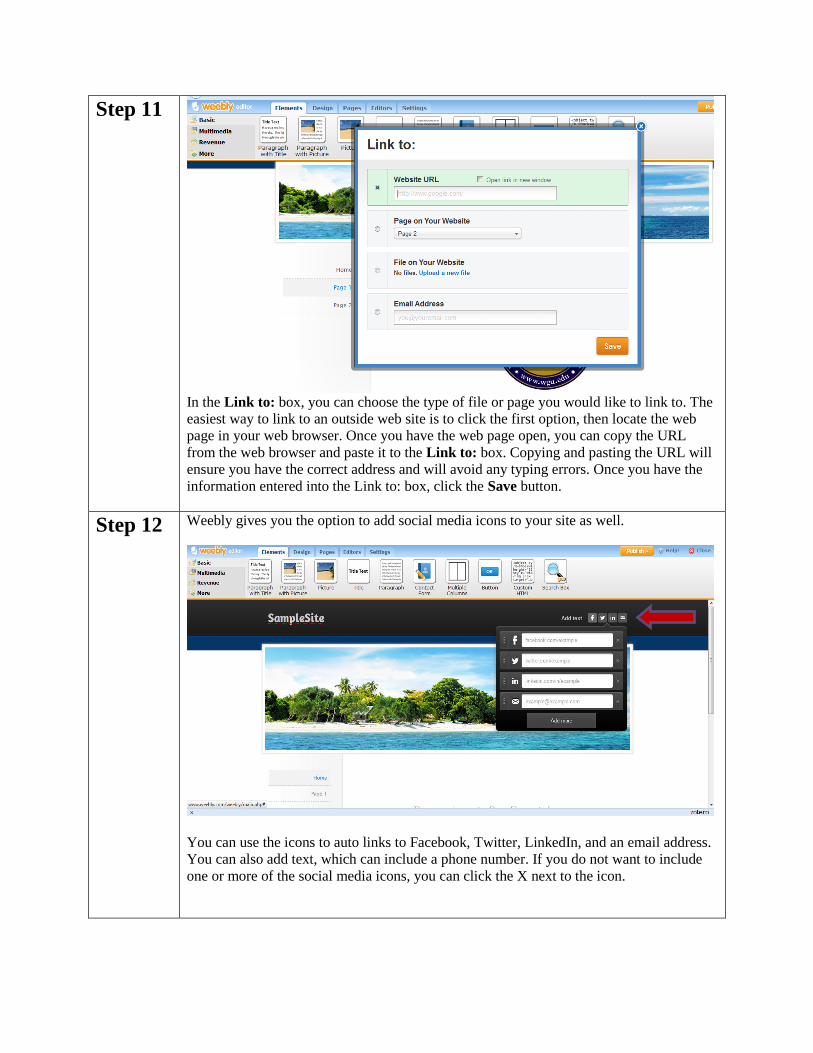
Step 10 When you add an element with text (title or paragraph) a font box will appear above the
web page. The box will allow you to change the size of the font, add attributes such as
bold, italic or underline and to add a different font color. You can also change the
alignment of the text and format it in the form of a bulleted or numbered list.
In addition to the font attributes, you can add a link to another web site, a page within your
site, an email, or a file. To add a link, select the text you would like to use as the link then
click the link (chain icon) in the font attributes box (yellow arrow). When you click this
icon a dialog box will open with link choices. You can link to an external web site, a page
within your site, a file you uploaded to the site, or an email address.
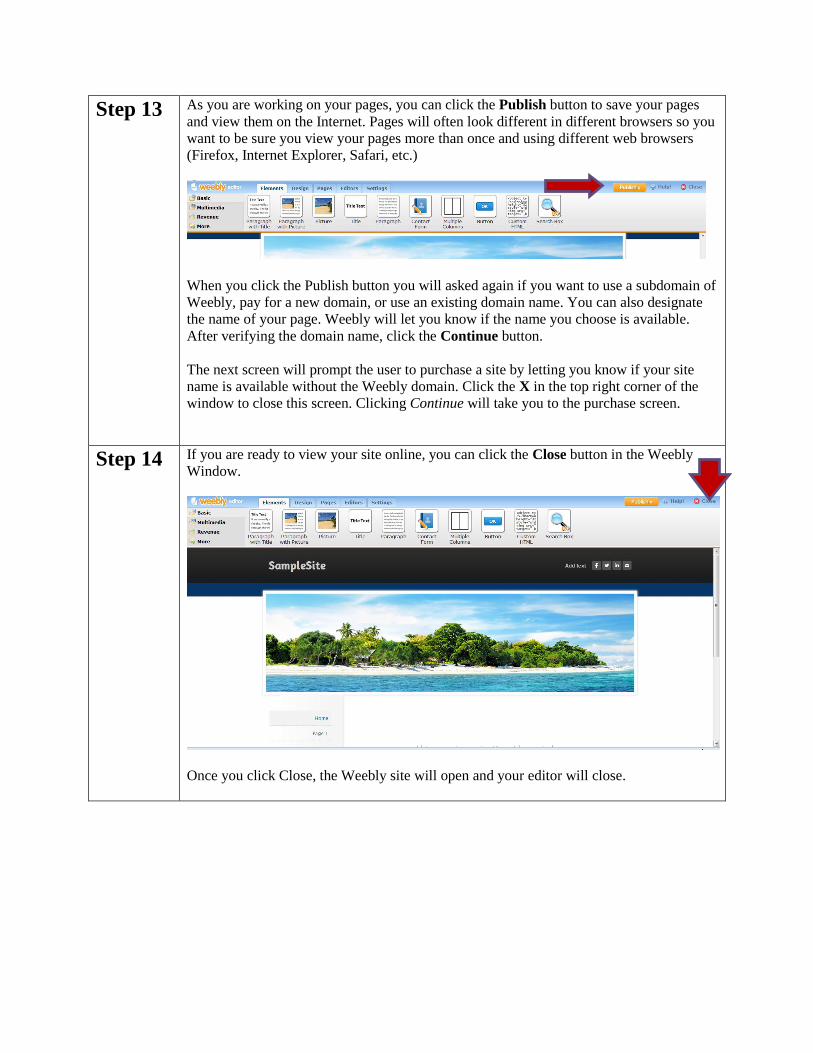
Step 11
In the Link to: box, you can choose the type of file or page you would like to link to. The
easiest way to link to an outside web site is to click the first option, then locate the web
page in your web browser. Once you have the web page open, you can copy the URL
from the web browser and paste it to the Link to: box. Copying and pasting the URL will
ensure you have the correct address and will avoid any typing errors. Once you have the
information entered into the Link to: box, click the Save button.
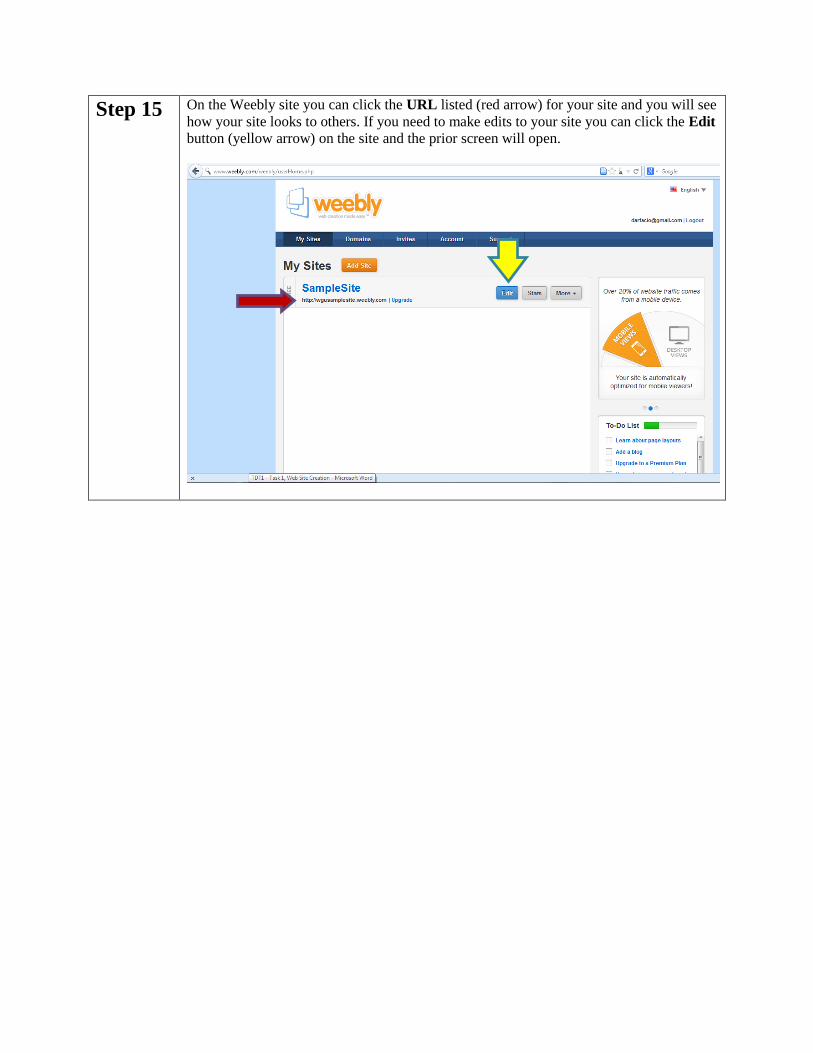
Step 12 Weebly gives you the option to add social media icons to your site as well.
You can use the icons to auto links to Facebook, Twitter, LinkedIn, and an email address.
You can also add text, which can include a phone number. If you do not want to include
one or more of the social media icons, you can click the X next to the icon.
Step 13 As you are working on your pages, you can click the Publish button to save your pages
and view them on the Internet. Pages will often look different in different browsers so you
want to be sure you view your pages more than once and using different web browsers
(Firefox, Internet Explorer, Safari, etc.)
When you click the Publish button you will asked again if you want to use a subdomain of
Weebly, pay for a new domain, or use an existing domain name. You can also designate
the name of your page. Weebly will let you know if the name you choose is available.
After verifying the domain name, click the Continue button.
The next screen will prompt the user to purchase a site by letting you know if your site
name is available without the Weebly domain. Click the X in the top right corner of the
window to close this screen. Clicking Continue will take you to the purchase screen.
Step 14 If you are ready to view your site online, you can click the Close button in the Weebly
Window.
Once you click Close, the Weebly site will open and your editor will close.
Step 15 On the Weebly site you can click the URL listed (red arrow) for your site and you will see
how your site looks to others. If you need to make edits to your site you can click the Edit
button (yellow arrow) on the site and the prior screen will open.