crocheted snow- flake ornaments · snowflake. step 2: saturate the snowflake with the glue mixture....
TRANSCRIPT
craftzine.comCrochet Pattern
CROCHETED SNOW-FLAKE ORNAMENTSBy Haley Pierson Cox
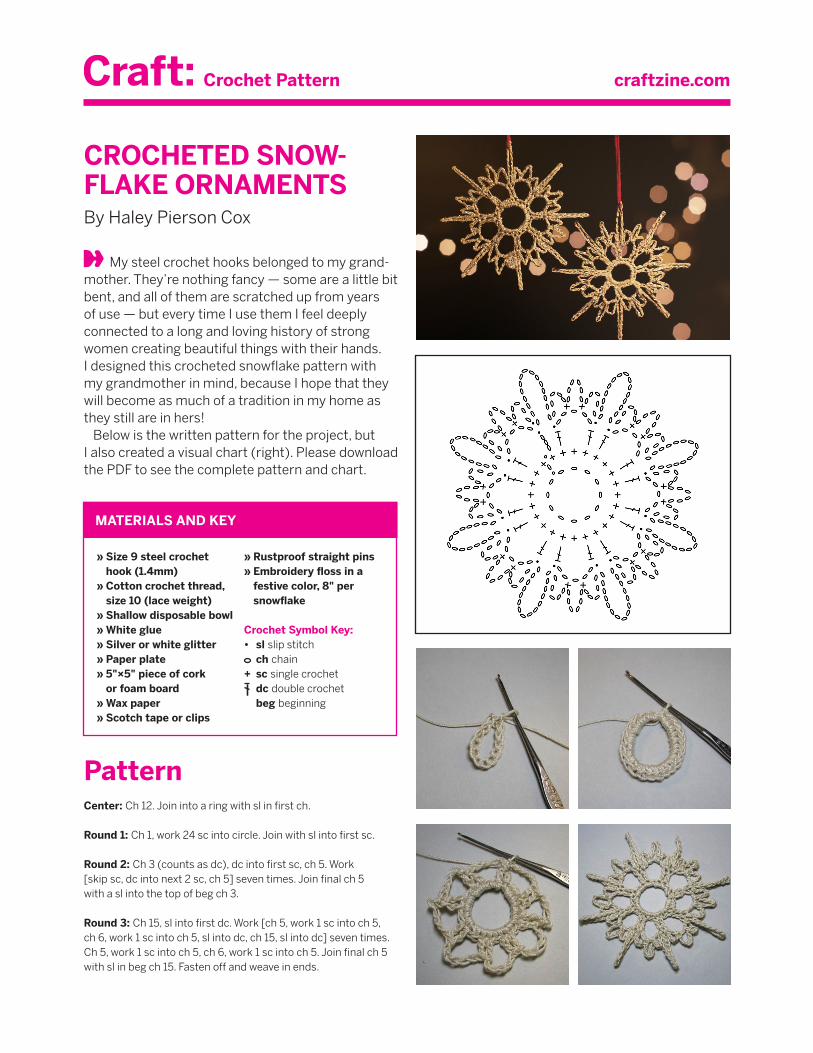
My steel crochet hooks belonged to my grand-mother. They’re nothing fancy — some are a little bit bent, and all of them are scratched up from years of use — but every time I use them I feel deeply connected to a long and loving history of strong women creating beautiful things with their hands. I designed this crocheted snowflake pattern with my grandmother in mind, because I hope that they will become as much of a tradition in my home as they still are in hers! Below is the written pattern for the project, but I also created a visual chart (right). Please download the PDF to see the complete pattern and chart.
» Size 9 steel crochet hook (1.4mm) » Cotton crochet thread, size 10 (lace weight) » Shallow disposable bowl » White glue » Silver or white glitter » Paper plate » 5"×5" piece of cork or foam board » Wax paper » Scotch tape or clips
» Rustproof straight pins » Embroidery floss in a festive color, 8" per snowflake
Crochet Symbol Key:• sl slip stitch ch chain+ sc single crochet dc double crochet beg beginning
MATERIALS AND KEY
PatternCenter: Ch 12. Join into a ring with sl in first ch.
Round 1: Ch 1, work 24 sc into circle. Join with sl into first sc.
Round 2: Ch 3 (counts as dc), dc into first sc, ch 5. Work [skip sc, dc into next 2 sc, ch 5] seven times. Join final ch 5 with a sl into the top of beg ch 3.
Round 3: Ch 15, sl into first dc. Work [ch 5, work 1 sc into ch 5, ch 6, work 1 sc into ch 5, sl into dc, ch 15, sl into dc] seven times. Ch 5, work 1 sc into ch 5, ch 6, work 1 sc into ch 5. Join final ch 5 with sl in beg ch 15. Fasten off and weave in ends.
craftzine.comCrochet Pattern
About the AuthorHaley Pierson-Cox is a Brooklyn-based craft writer who loves granny glasses and loathes extraneous apostrophes. She blogs about crafts, cats, domestic bliss, and DIY goodness at The Zen of Making.
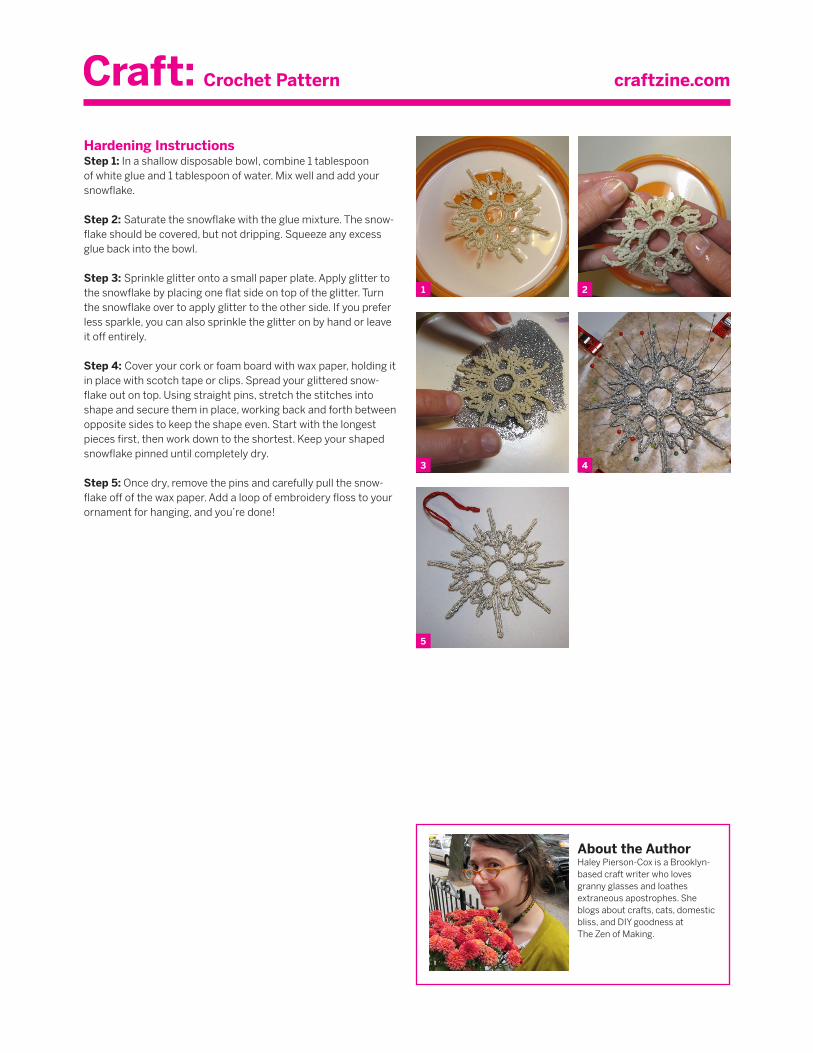
Hardening InstructionsStep 1: In a shallow disposable bowl, combine 1 tablespoon of white glue and 1 tablespoon of water. Mix well and add your snowflake.
Step 2: Saturate the snowflake with the glue mixture. The snow-flake should be covered, but not dripping. Squeeze any excess glue back into the bowl.
Step 3: Sprinkle glitter onto a small paper plate. Apply glitter to the snowflake by placing one flat side on top of the glitter. Turn the snowflake over to apply glitter to the other side. If you prefer less sparkle, you can also sprinkle the glitter on by hand or leave it off entirely.
Step 4: Cover your cork or foam board with wax paper, holding it in place with scotch tape or clips. Spread your glittered snow-flake out on top. Using straight pins, stretch the stitches into shape and secure them in place, working back and forth between opposite sides to keep the shape even. Start with the longest pieces first, then work down to the shortest. Keep your shaped snowflake pinned until completely dry.
Step 5: Once dry, remove the pins and carefully pull the snow-flake off of the wax paper. Add a loop of embroidery floss to your ornament for hanging, and you’re done!
1
3
5
2
4