cse 190 spring 2021
TRANSCRIPT
CSE 190 VR Technologies
Spring 2021
Guowei Yang
Discussion 5

ANNOUNCEMENTS
● Homework 3 Released
○ Due Sunday (5/16)
○ Explore levels of VR immersion
● Extra-Extra Credit Opportunity
○ Fill Survey by Friday (5/7)
○ 2pts Extra Credit towards HW 2
AGENDA
● Homework 3 Objectives
● Components
● Getting Started
● Debugging Tool
OBJECTIVES

Objectives
● Explore different level of immersion of VR
● Slowly taking away key components of VR environment
● Understand how FOV, tracking & rendering latency, stereo
images would affect overall VR experience
COMPONENTS
Main Components
● Mono/Stereo Skybox
● Shrinking FOV
● Stereo Modes
● Head Tracking
● Tracking Lag
● Rendering Lag
● Extra Credit

Mono/Stereo Skybox
● A Skybox is a 6-sided cube that is drawn behind all graphics in the game. ● Used as 360 degree background● Create new Material Asset -> Skybox
● By default, skybox is rendered monoscopic (both eyes sees same image)● Fine for far-away objects, but not ideal for near objects● A better skybox: render different images for different eyes● Stereo images are provided
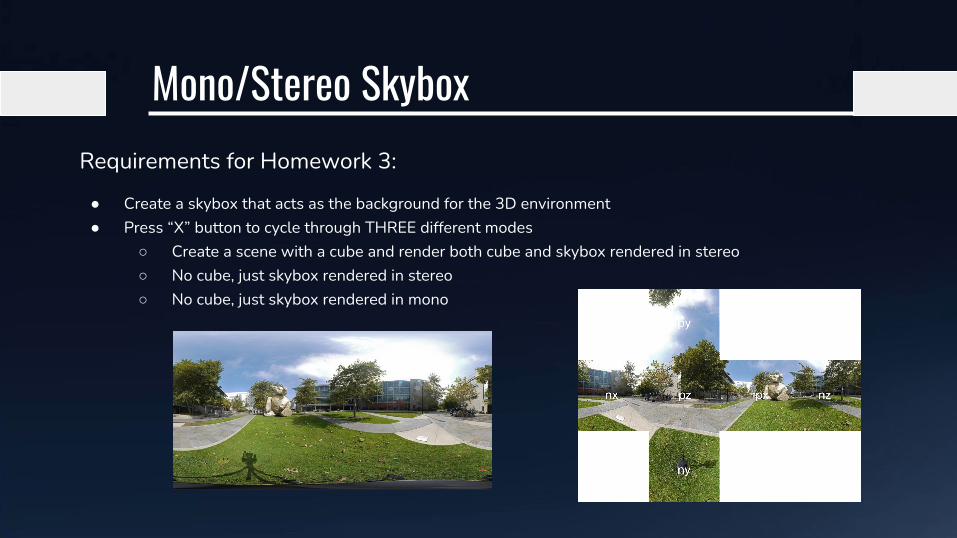
Mono/Stereo SkyboxRequirements for Homework 3:
● Create a skybox that acts as the background for the 3D environment● Press “X” button to cycle through THREE different modes
○ Create a scene with a cube and render both cube and skybox rendered in stereo○ No cube, just skybox rendered in stereo○ No cube, just skybox rendered in mono

Shrinking FOV
● Reduce the field of view of both eyes to half of the original size ● Rendering a black frame on top of your left and right eye views, with the center being
transparent

Stereo Modes
● Create a 3D Scene● Cycle among different modes with “A” button
○ 3D Stereo ○ Monoscopic○ Left Eye Only (Right eye black)○ Right Eye Only (Left eye black)○ Inverted Stereo (Left camera renders into right eye)
Requirements for Homework 3:
Head Tracking
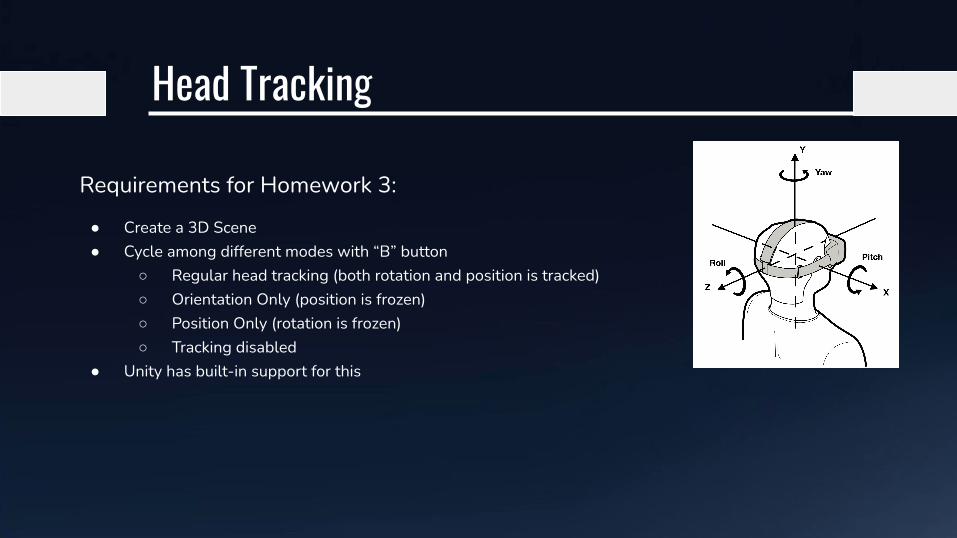
Requirements for Homework 3:
● Create a 3D Scene● Cycle among different modes with “B” button
○ Regular head tracking (both rotation and position is tracked)○ Orientation Only (position is frozen)○ Position Only (rotation is frozen)○ Tracking disabled
● Unity has built-in support for this
Tracking LagRequirements for Homework 3:
● Create a 3D Scene with a sphere following the dominant hand’s controller position● Obtain current camera matrix, and replace it with the camera matrix for the next scene● Save the camera matrices in a ring buffer with 30 entries● Press right index trigger button to add one frame of tracking lag● Press left index trigger to reduce one frame of tracking lag● Display the tracking lag in frame count # on screen.

Rendering LagRequirements for Homework 3:
● Explore what it would look like if rendering a frame took more than 1/90th of a second● Setup similar to tracking lag● Right middle finger trigger to add one frame as rendering lag (render the same, duplicate frame)● Left middle finger trigger to reduce one frame for rendering lag
Extra CreditDIY 3D Experiences!
● Stereo Image Viewer○ Use a camera or your smartphone to take two images of an identical scene○ Two camera positions should be ~65mm apart from each other○ Use the provided custom shader to render the images to each eyes
● Custom Skybox○ Create your own panorama images for both eyes by using some smartphone apps ○ Convert to cubemaps
● Super Rotation○ Magnify the rotation movement tracking of the head
● Smoother Controller Tracking○ Use moving average as the pose parameters for the controllers

GETTING STARTED

Creating Stereo Skybox● Creating a stereo skybox requires two cubemaps
○ One for left eye image and another for right eye image○ Assets -> Create -> Legacy -> Cubemap○ Set face size to be 2048, images are provided on the course website○ Create two of such cubemaps, one for left image, one for right image

Creating Stereo Skybox● Create a Skybox Material
○ Assets -> Create -> Material ○ Import the SkyboxStereo material downloaded
from the course website● Add the left and right cubemap you have created
from the last step● Drag this newly created skybox into the scene.

Change Head Tracking Mode● Select the OVRCameraRig from OVRPlayerController
○ In inspector view, under OVR Manager
○ Those booleans can either be set here, or dynamically in code■ Inside OVRManager.cs,find
● public bool usePositionTracking
● public bool useRotationTracking
■ Dynamically modify those values in your script
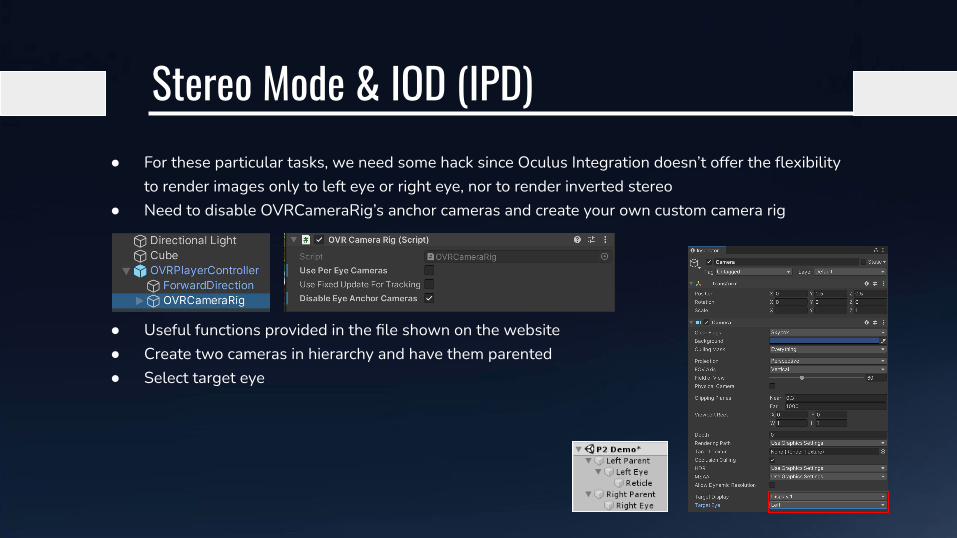
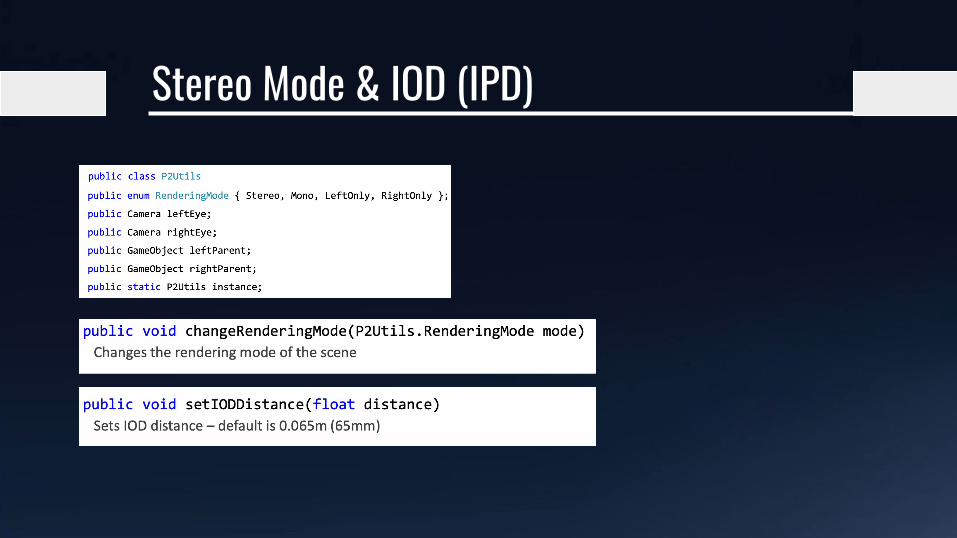
Stereo Mode & IOD (IPD)● For these particular tasks, we need some hack since Oculus Integration doesn’t offer the flexibility
to render images only to left eye or right eye, nor to render inverted stereo● Need to disable OVRCameraRig’s anchor cameras and create your own custom camera rig
● Useful functions provided in the file shown on the website● Create two cameras in hierarchy and have them parented● Select target eye
Stereo Mode & IOD (IPD)

DEBUGGING TOOL

Debugging Tool● Debugging is trickier since app is running on VR and there isn’t a terminal window on your VR● Cannot see debug logs inside your VR interface● Useful tool provided by Android Developer Support: ADB (Android Debug Bridge)
○ Obtain Android Debug Bridge on your machine: ■ https://www.xda-developers.com/install-adb-windows-macos-linux
○ In your terminal, navigate to the directory named “platform-tools” and use the command “./adb device”■ If everything is setup correctly, you should be able to see your Oculus Quest Serial #■ ■ ■ ■ ./adb help provides a list of available commands you can execute■ ./adb logcat outputs all the log output from your VR (make sure VR is always
tethered to your machine)● https://developer.oculus.com/documentation/unity/unity-enable-device

QUESTIONS?