cybermedia center education computer system user guide · cybermedia center education computer...
TRANSCRIPT

Cybermedia Center Education Computer System User Guide
for the Second Semester of 2014 Academic Year
Edited by Cybermedia Center, Osaka University
September 1, 2014

About this User Guide:
The Cybermedia Center runs the Education Computer System, which is intended to be used mostly for the education of students at Osaka University. This User Guide provides instructions and precautions concerning the use of the Education Computer System. Rules to be observed when using facilities provided by the Cybermedia Center: There are several rules to be observed when you use the Education Computer System. The rules listed below are all basic and essential. Please observe them so that you and all other users may enjoy carefree operation of the system. Violators will be reprimanded and may be prohibited from using computers. Full details of the rules are given in Appendices A, B, and C of this User Guide. Please read them without fail before using the system. Use the equipment carefully:
Computers, printers, and other devices at the university are public property. Please handle them with care.
Prohibition of unauthorized use and other illegal actions: Always use your own login name. The use of computers requires the entry of your login name, which is assigned to each of you (comparable to a bank account number), along with your password (secret code). Using a computer with someone else’s login name is regarded as unauthorized use of a computer. Other illegal actions include password cracking and stealing, and destruction or modification of data that belongs to others. Anyone found guilty of such criminal actions will be severely punished.
Refrain from wasteful use of printing papers: Papers and toners (inks) are precious resources. Note that the printing costs are not so cheap (5–10 yen per sheet). Refrain from producing too many hard copies. You are advised to rely on the display as much as possible and produce hard copies only at the end of your project. The number of hard copies produced by each user is counted at the printers in classrooms, and a limit is imposed on the maximum number of copies allowed.
No smoking: Smoking is prohibited in the Education and Research Center, the Educational Training Center and the Minoh General Research Building.
No drinking or eating: Drinking and eating are prohibited in the Education and Research Center, the Educational Training Center and the Minoh General Research Building.

i
Table of Contents CHAPTER 1: Introduction ................................................................................ 1
1.1 Cybermedia Center ................................................................................. 1
1.2 Information Education System .............................................................. 1
1.3 CALL System........................................................................................... 2
1.4 Minoh Education System ....................................................................... 2
1.5 About this User Guide ............................................................................ 2
1.6 Restrictions ............................................................................................. 3
CHAPTER 2: Education Computer System .................................................... 6
2.1 Users ........................................................................................................ 6
2.2 Login Name (Osaka University Personal ID) ........................................ 6
2.3 Passwords ............................................................................................... 6
2.4 Email Addresses ..................................................................................... 9
CHAPTER 3: Information Education System ............................................... 10
3.1 Sign-in and Sign-out ............................................................................. 10
3.1.1 Sign-in procedure ............................................................................. 10
3.1.2 Sign-out procedure ............................................................................11
3.1.3 Using a notebook PC you have brought in ....................................... 12
3.2 Desktop .................................................................................................. 16
3.2.1 Windows desktop ............................................................................. 16
3.2.2 Information Education System Application Menu ............................. 18
3.2.3 Using removable media .................................................................... 19
3.2.4 Setting the language ........................................................................ 21
3.3 World Wide Web (WWW) ...................................................................... 23
3.3.1 Starting up the web browser ............................................................. 23
3.3.2 Information Education System page ................................................. 24
3.3.3 Changing your password .................................................................. 25
3.4 Email ...................................................................................................... 26
3.4.1 Web mail (OU Mail) .......................................................................... 26
3.5 Preparing Your Homepage ................................................................... 31
3.6 Microsoft Office ..................................................................................... 35
3.7 Cygwin ................................................................................................... 36
3.7.1 Starting up Cygwin ........................................................................... 36
3.7.2 Accessing a file from Cygwin ............................................................ 36
3.7.3 Applications that run on Cygwin ....................................................... 36
ii
3.7.4 Using Xming ..................................................................................... 37
3.8 LaTeX ..................................................................................................... 38
3.8.1 Using LaTeX on the Information Education System ......................... 38
3.8.2 Compiling TeX files ........................................................................... 38
3.8.3 Browsing DVI files ............................................................................ 39
3.8.4 Preparing PDF files .......................................................................... 39
3.9 SAS ........................................................................................................ 40
3.9.1 Using SAS on Windows ................................................................... 40
3.9.2 Using SAS on VMware (Linux) ......................................................... 40
3.10 Other Applications .............................................................................. 42
3.11 VMware ................................................................................................ 44
3.11.1 Outline of VMware .......................................................................... 44
3.11.2 Starting up VMware ........................................................................ 44
3.11.3 Applications that run on CentOS ..................................................... 44
3.11.4 Preparing PDF files ........................................................................ 45
3.11.5 Exiting from VMware ...................................................................... 47
3.11.6 Precautions concerning the use of VMware ................................... 47
3.11.7 Initializing setups for the VMware (Linux) environment .................. 48
3.12 Printing ................................................................................................ 51
3.12.1 Preparing PDF files ........................................................................ 51
3.12.2 Using the paid printing service ....................................................... 53
3.13 Frequently Asked Questions (FAQ) ................................................... 55
3.13.1 FAQ (March 2013: excerpts) .......................................................... 55
CHAPTER 4: CALL System ............................................................................ 59
4.1 Logon and Logoff ................................................................................. 59
4.2 Instructions for First-time Users ......................................................... 61
4.3 Japanese Input ...................................................................................... 61
4.4 Switching Keyboard Languages ......................................................... 62
4.5 Internet Explorer (Web Browser) ......................................................... 62
4.6 Web Mail ................................................................................................ 62
4.7 Language Training Packages Available on the CALL System .......... 63
4.8 Other Software Packages ..................................................................... 68
4.9 Printing Restrictions ............................................................................. 68
4.10 Trouble Reporting ............................................................................... 68
CHAPTER 5: Minoh Education System ........................................................ 69
5.1 Instructions for First-time Users ......................................................... 69
iii
5.2 Logon and Logoff ................................................................................. 69
5.3 Types of Terminal in the Minoh Education System ............................ 71
5.4 Japanese Input ...................................................................................... 71
5.5 Switching between Input Languages .................................................. 72
5.6 Using the Printers ................................................................................. 72
5.7 Trouble Reporting ................................................................................. 72
CHAPTER 6: Osaka University CLE .............................................................. 75
6.1 Introduction ........................................................................................... 75
6.2 Login to Osaka University CLE ........................................................... 75
6.3 Course Home Pages ............................................................................. 76
6.4. Course Functions ................................................................................ 77
6.5 Resources for Instructors/Osaka University CLE Help Desk ............ 78
CHAPTER 7: KOAN ........................................................................................ 84
7.1 Introduction ........................................................................................... 84
7.2 Login to KOAN ...................................................................................... 86
7.3 Logout from KOAN ............................................................................... 87
Appendix A Education Computer System Usage Regulations .............. 88
Appendix B User Guidelines for Education Computer System and Student Email System .......................................................... 90
1 Introduction .............................................................................................. 90
2 The Education Computer System .......................................................... 90
3 The Student Email System ...................................................................... 91
4 Misconduct and Improper Activities ...................................................... 92
4.1 Improper Activities on Computers and Networks ................................. 92
4.2 Improper Actions Carried Out during Lectures or Seminars ................ 92
4.3 Unauthorized Accessing of Other Organizations’ Networks ................ 93
5 Respecting Intellectual Property ............................................................ 93
6 Prohibition of Theft .................................................................................. 94
7 Prohibition on Operational Disruption ................................................... 94
8 File Handling ............................................................................................ 94
9 Operational Control of the System ......................................................... 95
10 Penalties for Improper Use ................................................................... 95
11 Network Etiquette .................................................................................. 95
Appendix C ODINS User Guidelines ......................................................... 97
1 Introduction .............................................................................................. 97
2 ODINS and Networks Outside the University ........................................ 97
iv
3 Actions to be Avoided When Using ODINS ........................................... 98
3.1 Actions contravening laws and morals ................................................ 98
3.2 Actions contravening educational and research objectives ............... 100
3.3 Actions impeding the problem-free operation of ODINS .................... 100
4 Using the Network Appropriately ......................................................... 100
5 Postscript ............................................................................................... 102
Appendix D Locations and Opening Hours of Terminals ..................... 103
1 Locations ................................................................................................ 103
2 Education Computer System Opening Hours ..................................... 103
3 Scheduled Closures .............................................................................. 103
4 Notes regarding Branch Terminals ...................................................... 104
5 Information Education System ............................................................. 104
6 The CALL System .................................................................................. 106
7 Minoh Education System ...................................................................... 106
Appendix E Glossary ............................................................................... 107
1
CHAPTER 1: Introduction
1.1 Cybermedia Center
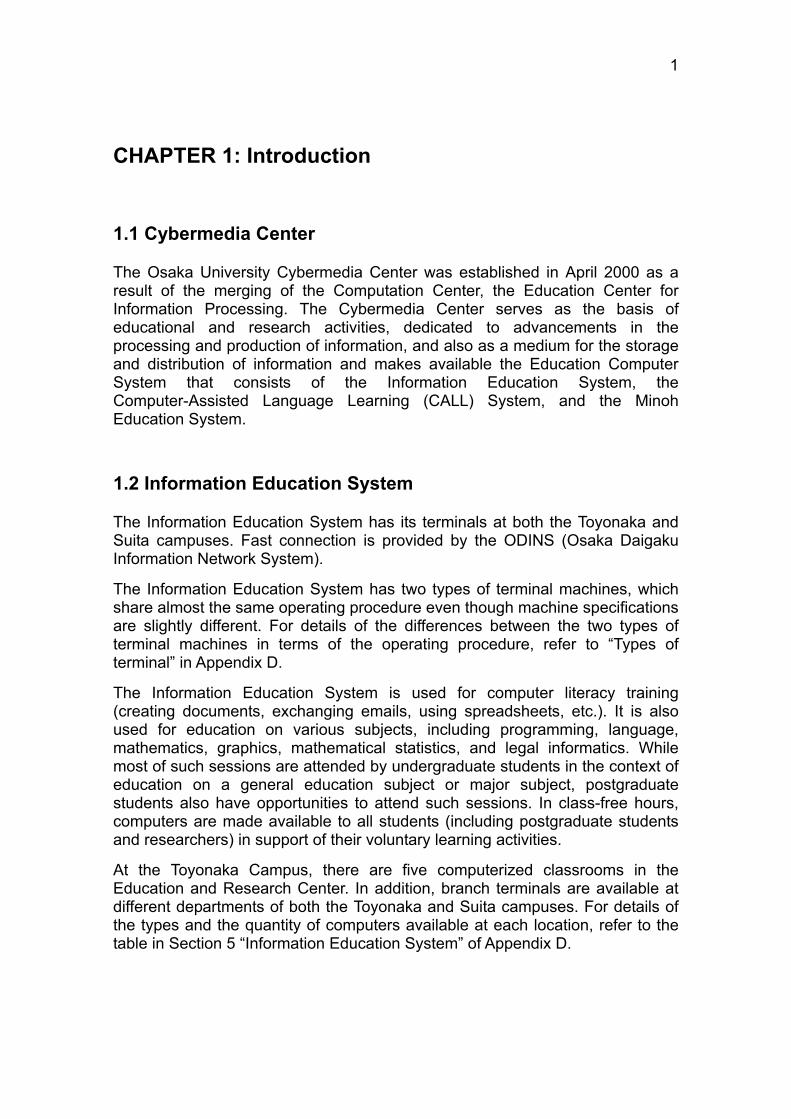
The Osaka University Cybermedia Center was established in April 2000 as a result of the merging of the Computation Center, the Education Center for Information Processing. The Cybermedia Center serves as the basis of educational and research activities, dedicated to advancements in the processing and production of information, and also as a medium for the storage and distribution of information and makes available the Education Computer System that consists of the Information Education System, the Computer-Assisted Language Learning (CALL) System, and the Minoh Education System.
1.2 Information Education System
The Information Education System has its terminals at both the Toyonaka and Suita campuses. Fast connection is provided by the ODINS (Osaka Daigaku Information Network System).
The Information Education System has two types of terminal machines, which share almost the same operating procedure even though machine specifications are slightly different. For details of the differences between the two types of terminal machines in terms of the operating procedure, refer to “Types of terminal” in Appendix D.
The Information Education System is used for computer literacy training (creating documents, exchanging emails, using spreadsheets, etc.). It is also used for education on various subjects, including programming, language, mathematics, graphics, mathematical statistics, and legal informatics. While most of such sessions are attended by undergraduate students in the context of education on a general education subject or major subject, postgraduate students also have opportunities to attend such sessions. In class-free hours, computers are made available to all students (including postgraduate students and researchers) in support of their voluntary learning activities.
At the Toyonaka Campus, there are five computerized classrooms in the Education and Research Center. In addition, branch terminals are available at different departments of both the Toyonaka and Suita campuses. For details of the types and the quantity of computers available at each location, refer to the table in Section 5 “Information Education System” of Appendix D.
2 CHAPTER 1: Introduction
1.3 CALL System
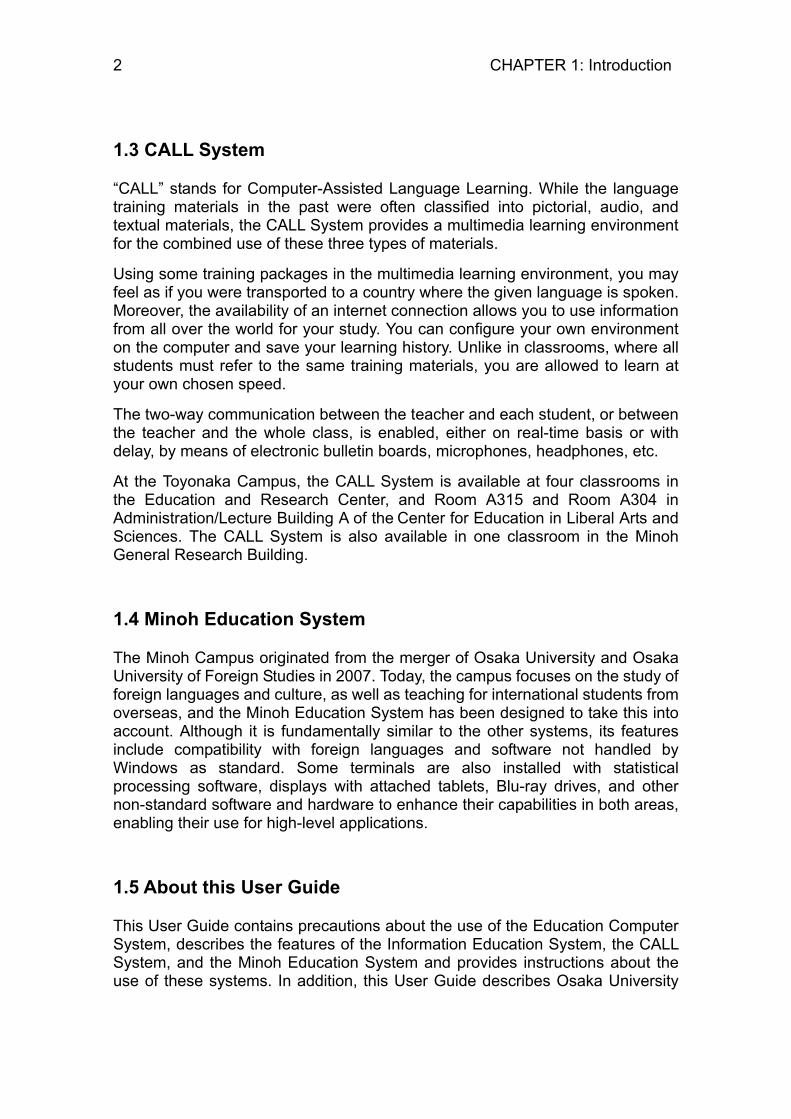
“CALL” stands for Computer-Assisted Language Learning. While the language training materials in the past were often classified into pictorial, audio, and textual materials, the CALL System provides a multimedia learning environment for the combined use of these three types of materials.
Using some training packages in the multimedia learning environment, you may feel as if you were transported to a country where the given language is spoken. Moreover, the availability of an internet connection allows you to use information from all over the world for your study. You can configure your own environment on the computer and save your learning history. Unlike in classrooms, where all students must refer to the same training materials, you are allowed to learn at your own chosen speed.
The two-way communication between the teacher and each student, or between the teacher and the whole class, is enabled, either on real-time basis or with delay, by means of electronic bulletin boards, microphones, headphones, etc.
At the Toyonaka Campus, the CALL System is available at four classrooms in the Education and Research Center, and Room A315 and Room A304 in Administration/Lecture Building A of the Center for Education in Liberal Arts and Sciences. The CALL System is also available in one classroom in the Minoh General Research Building.
1.4 Minoh Education System
The Minoh Campus originated from the merger of Osaka University and Osaka University of Foreign Studies in 2007. Today, the campus focuses on the study of foreign languages and culture, as well as teaching for international students from overseas, and the Minoh Education System has been designed to take this into account. Although it is fundamentally similar to the other systems, its features include compatibility with foreign languages and software not handled by Windows as standard. Some terminals are also installed with statistical processing software, displays with attached tablets, Blu-ray drives, and other non-standard software and hardware to enhance their capabilities in both areas, enabling their use for high-level applications.
1.5 About this User Guide
This User Guide contains precautions about the use of the Education Computer System, describes the features of the Information Education System, the CALL System, and the Minoh Education System and provides instructions about the use of these systems. In addition, this User Guide describes Osaka University
1.6 Restrictions 3
CLE, a classroom support system that works with the Education Computer System to support your learning, and KOAN, the Osaka University’s school affairs information system.
This User Guide concerns the use of the Education Computer System only. Users of any other system should read the user guide for that system.
Homepage addresses:
● Information Education System: https://www.ecs.cmc.osaka-u.ac.jp/e/
● CALL System: http://www.call.osaka-u.ac.jp/ (for access from within the CALL System) (Available only in Japanese) http://www.cmc.osaka-u.ac.jp/edu/call/ (for access from outside the CALL System) (Available only in Japanese)
● Minoh Education System http://www.cmc.osaka-u.ac.jp/edu/minoh/main.html (Available only in Japanese)
● Osaka University CLE
https://cle.koan.osaka-u.ac.jp/
● KOAN1: https://my.osaka-u.ac.jp/
1.6 Restrictions
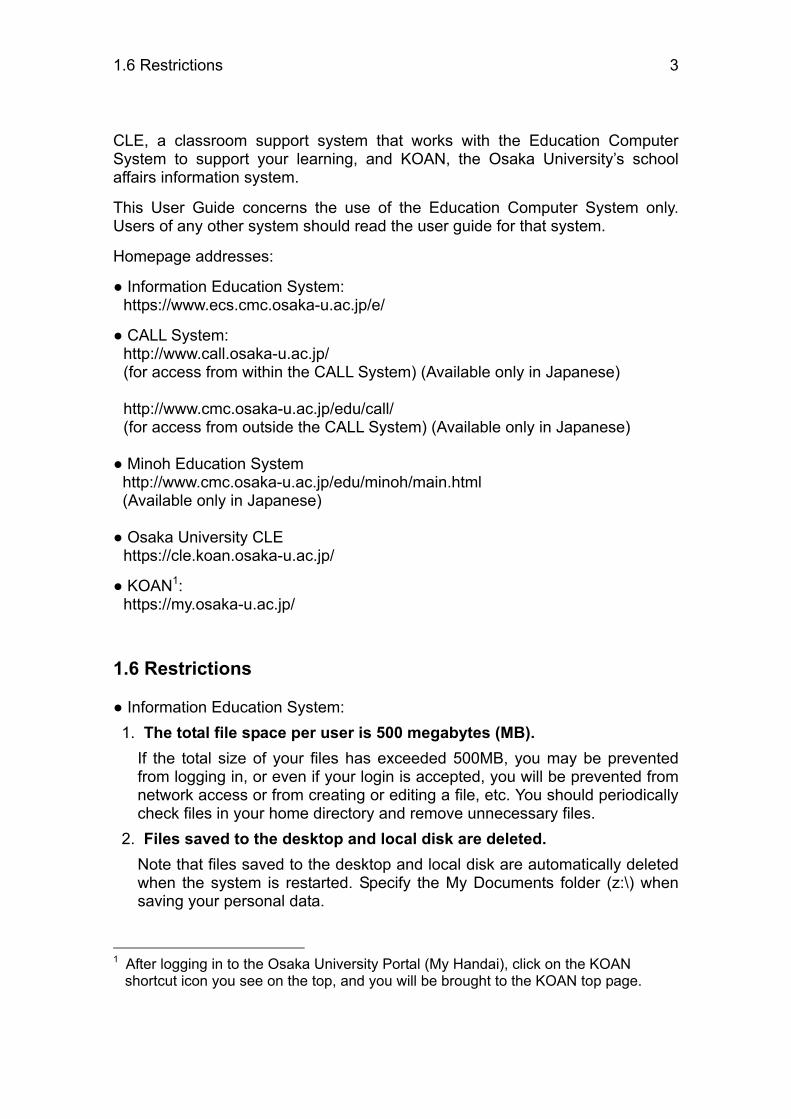
● Information Education System: 1. The total file space per user is 500 megabytes (MB).
If the total size of your files has exceeded 500MB, you may be prevented from logging in, or even if your login is accepted, you will be prevented from network access or from creating or editing a file, etc. You should periodically check files in your home directory and remove unnecessary files.
2. Files saved to the desktop and local disk are deleted. Note that files saved to the desktop and local disk are automatically deleted when the system is restarted. Specify the My Documents folder (z:\) when saving your personal data.
1 After logging in to the Osaka University Portal (My Handai), click on the KOAN
shortcut icon you see on the top, and you will be brought to the KOAN top page.

4 CHAPTER 1: Introduction
3. The maximum size of any email (total size including the text and attached files) is limited to 35MB.
Any email that exceeds this size cannot be sent or received. 4. The total space you may use for the saving of emails is 50GB.
If the total size of the emails you saved has reached 50GB, you will be unable to receive any further emails. You should be diligent about deleting unnecessary emails.
● CALL System: 1. The total file space per user is 500MB.
In principle, you are allowed to save a file in the “library” only. 2. As a security measure, the desktop and local disk (C:\) are
write-protected. Specify the “library” as the download destination for files.
3. The maximum size of any email (total size including the text and attached files) is limited to 35MB.
Any email that exceeds this size cannot be sent or received. 4. The total space you may use for the saving of emails is 50GB.
If the total size of the emails you saved has reached 50GB, you will be unable to receive any further emails. You should be diligent about deleting unnecessary emails.
5. You are allowed to use only A4 size paper for printing. The number of hard copies you may produce in each semester is limited to 150 pages.
Consult the Cybermedia Center if your study requires the production of a larger number of hard copies.
● Minoh Education System 1. The total file space per user is 90MB.
If your total file size has exceeded 90MB, you will no longer be able to create or edit files. You should periodically check files in your home directory and remove unnecessary files.
2. As a security measure, the desktop and local disk (C:\) are write-protected.
Specify the My Documents folder (z:\) when saving your personal data. 3. The maximum size of any email (total size including the text and
attached files) is limited to 35MB. Any email that exceeds this size cannot be sent or received.
1.6 Restrictions 5
4. The maximum space you may use for the saving of emails is 50GB. If the total size of the emails you saved has reached 50GB, you will be unable to receive any further emails. You should be diligent about deleting unnecessary emails.
5. You are allowed to use only A4 size paper for printing. The number of hard copies you may produce in each semester is limited to 300 pages.

6
CHAPTER 2: Education Computer System
This chapter describes topics that are common to the Information Education System, the CALL System and the Minoh Education System.
2.1 Users
All students at the Osaka University are allowed to use the Education Computer System. The Osaka University Personal ID that was assigned to you when you entered the university and the password that goes with it are the login name1 and password you should use when accessing the Education Computer System. In addition, you are assigned an email address. These can be used with the Information Education System, the CALL System and the Minoh Education System.
2.2 Login Name (Osaka University Personal ID)
The login name is referred to by the computer to identify the user. Each user is assigned a unique login name. That is to say, your login name is unique to you alone, and nobody else has the same login name. Never forget your login name because it is a name by which the computer identifies you. A login name is an alphanumeric string of eight characters. You will continue to use the same login name for the whole period of your study at the Osaka University.
2.3 Passwords
You must enter a password in combination with your login name to prove that you are the authentic holder of the login name.2 You will be prompted to enter your password every time you use a computer at the university. You are allowed to use the computer only when you have correctly entered your password.
If you reveal your password to others, the consequences can affect not only yourself, but other users as well, which can include serious trouble that can disturb the whole Education Computer System operation, in the worst case
1 Called a “logon name” in the case of Windows systems 2 The combination of a login name and a password is akin to the combination of a bank
account number and your secret code.

2.3 Passwords 7
scenario.3 Always ensure that your password is kept confidential.
New students will be given, at the class orientation meeting in April, an envelope containing a Letter of Notification for an Osaka University Personal ID. You will find your login name and default password in this document (Figure 2.1).
The password is common to the Information Education System, the CALL System and the Minoh Education System.
You need to use the default password upon the first access, but you should change the password without fail before ending this first session. If you change your password on the Information Education System, the CALL System, or the Minoh Education System, the new password is registered to the other systems as well. Note that it may take as long as 10 minutes before the new password is validated. Passwords are case sensitive. Do not forget the new password. Even the system administrator cannot retrieve your password. For detailed instructions concerning the changing of passwords, refer to Section 3.3.3.
3 The unauthorized use of someone else’s login name and password is a criminal act.
Anyone who is found guilty of such an act will be punished and prohibited from the use of the Education Computer System.
How to Choose Your Password Examples of poorly chosen passwords: ● Too difficult to remember (e.g., “kfddlkg”, “vkj3kn6jf”) ● Allows easy guessing (e.g., your name, initials,
birthday, an English word) ● Too short (e.g., “aa”, “32”)
Examples of appropriately chosen passwords: ● Insertion of a non-alphabetic character into an
English word (e.g., “Com7puter”) ● Combining different strings and/or cases, and
replacing some alphabetic characters with numbers (e.g., “y0ua11Ve”)
No password is absolutely safe. So, change your password from time to time. Do not just copy any of the passwords given above because they are already vulnerable to guessing by others.

8 CHAPTER 2: Education Computer System
Figure 2.1 Letter of Notification for an Osaka University Personal ID
2.4 Email Addresses 9
2.4 Email Addresses
Each user of the Education Computer System is given an email address in the following format: [email protected]. If your login name is u123456a, for example, your email address is [email protected]. Using your email address, you may send and receive email by accessing the web mail service either from the Information Education System, the CALL System or the Minoh Education System.

10
CHAPTER 3: Information Education System
3.1 Sign-in and Sign-out
The following subsections explain the sign-in and sign-out procedures to be followed when beginning and ending the use of a computer terminal. Sign-in is synonymous with login and logon; sign-out is synonymous with logout and logoff.
3.1.1 Sign-in procedure
The following explains how you can sign in to the computer of the Information Education System.
The screen displayed by Windows to accept your sign-in is called the “Sign-in screen” (Figure 3.1). Each computer accepts your sign-in when this screen is displayed. If you do not see this screen, it may be because the display is switched off. For reasons of power conservation, Information Education System terminal displays are switched off when they are not in use. Before using the terminal, lightly press the power switch at the lower right corner of the front panel to turn on the display. A green indicator will light up to tell that the power is on. Do you now see the Sign-in screen (Figure 3.1)? Note that the whole screen may appear dark even when the power switch is on. In that case, the screen will brighten up when you touch any key or move the mouse.
First, you must locate the mouse cursor, which should be somewhere on the Sign-in screen (Figure 3.1). If you have difficulty in finding the mouse cursor, move the mouse. Next, find a vertical bar in the user name field. This vertical line is called an “insertion point” or “text cursor.” If you do not find this, click on the user name field. Then, type your user name (Osaka University Personal ID). If you type an incorrect character, you can erase it using the Backspace key. A single press of the Backspace key erases one character at the left of the insertion point.
After completing the entry of your user name, enter your password into the password field following a similar procedure. Then, press Enter key. Note that any character or symbol you enter into the password field appears as a dot (●) on the screen. This is to protect your password from the eyes of others.
If you mistyped your user name (Osaka University Personal ID) and/or password, a message will appear to tell you that the user name or password is incorrect. Clicking “OK” in response to this message will bring you back to the initial display condition, as per Figure 3.1. You must repeat the procedure, starting with the entry of your user name (Osaka University Personal ID).
3.1 Sign-in and Sign-out 11
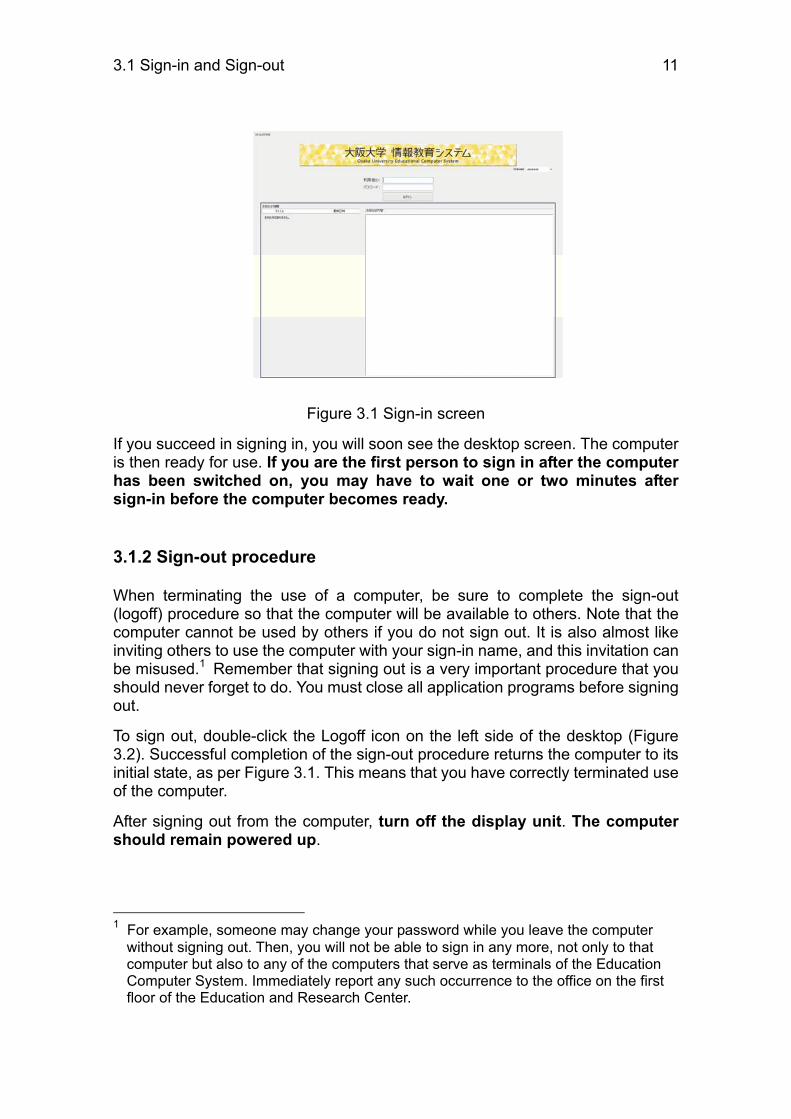
Figure 3.1 Sign-in screen
If you succeed in signing in, you will soon see the desktop screen. The computer is then ready for use. If you are the first person to sign in after the computer has been switched on, you may have to wait one or two minutes after sign-in before the computer becomes ready.
3.1.2 Sign-out procedure
When terminating the use of a computer, be sure to complete the sign-out (logoff) procedure so that the computer will be available to others. Note that the computer cannot be used by others if you do not sign out. It is also almost like inviting others to use the computer with your sign-in name, and this invitation can be misused.1 Remember that signing out is a very important procedure that you should never forget to do. You must close all application programs before signing out.
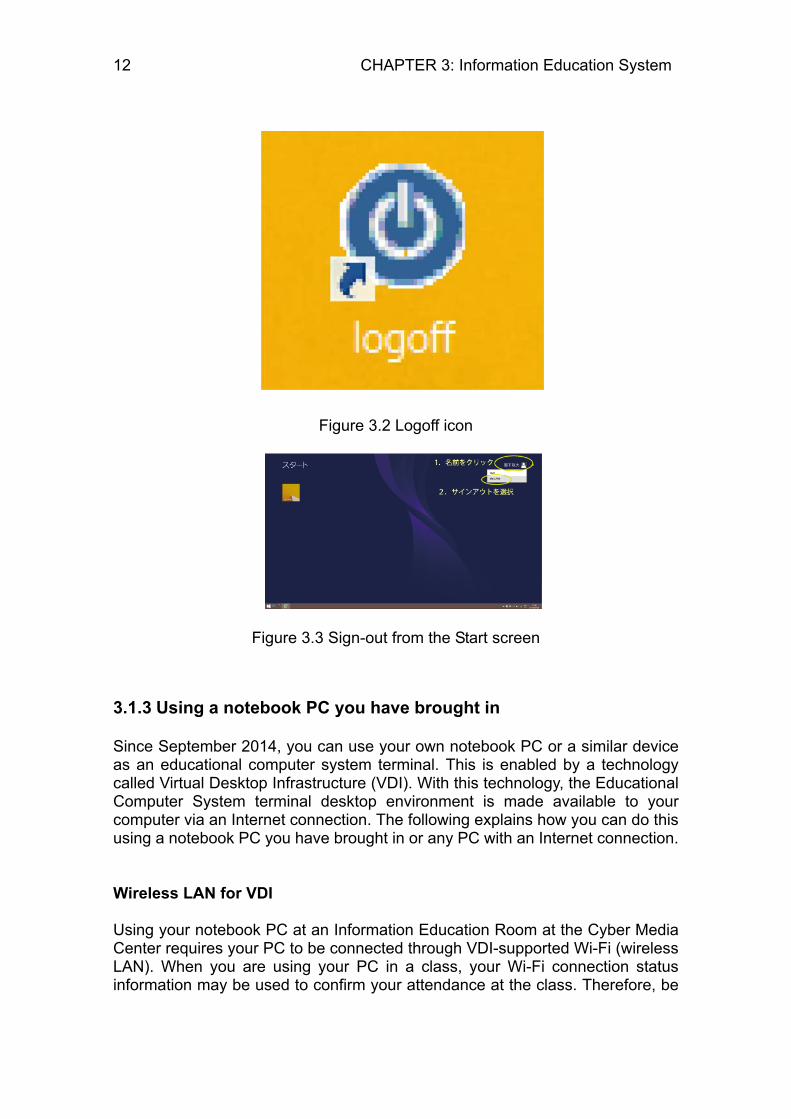
To sign out, double-click the Logoff icon on the left side of the desktop (Figure 3.2). Successful completion of the sign-out procedure returns the computer to its initial state, as per Figure 3.1. This means that you have correctly terminated use of the computer.
After signing out from the computer, turn off the display unit. The computer should remain powered up.
1 For example, someone may change your password while you leave the computer
without signing out. Then, you will not be able to sign in any more, not only to that computer but also to any of the computers that serve as terminals of the Education Computer System. Immediately report any such occurrence to the office on the first floor of the Education and Research Center.
12 CHAPTER 3: Information Education System
Figure 3.2 Logoff icon
Figure 3.3 Sign-out from the Start screen
3.1.3 Using a notebook PC you have brought in
Since September 2014, you can use your own notebook PC or a similar device as an educational computer system terminal. This is enabled by a technology called Virtual Desktop Infrastructure (VDI). With this technology, the Educational Computer System terminal desktop environment is made available to your computer via an Internet connection. The following explains how you can do this using a notebook PC you have brought in or any PC with an Internet connection. Wireless LAN for VDI Using your notebook PC at an Information Education Room at the Cyber Media Center requires your PC to be connected through VDI-supported Wi-Fi (wireless LAN). When you are using your PC in a class, your Wi-Fi connection status information may be used to confirm your attendance at the class. Therefore, be
3.1 Sign-in and Sign-out 13
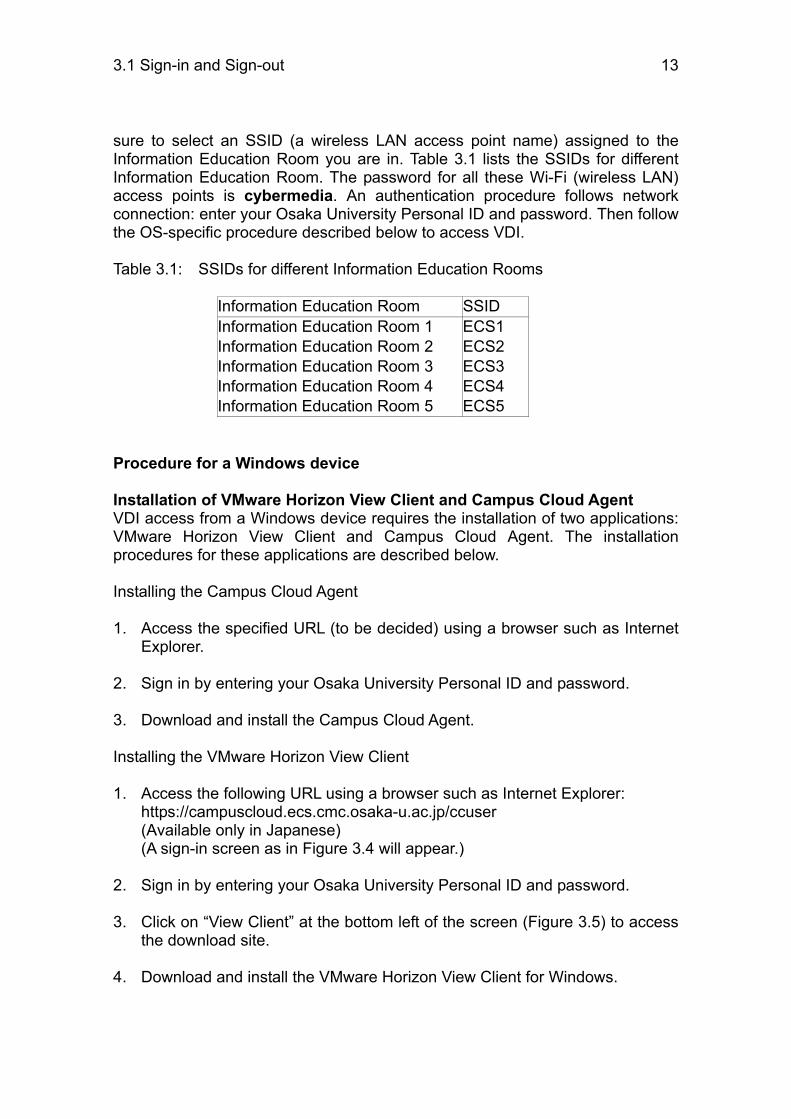
sure to select an SSID (a wireless LAN access point name) assigned to the Information Education Room you are in. Table 3.1 lists the SSIDs for different Information Education Room. The password for all these Wi-Fi (wireless LAN) access points is cybermedia. An authentication procedure follows network connection: enter your Osaka University Personal ID and password. Then follow the OS-specific procedure described below to access VDI. Table 3.1: SSIDs for different Information Education Rooms
Information Education Room SSID Information Education Room 1 ECS1 Information Education Room 2 ECS2 Information Education Room 3 ECS3 Information Education Room 4 ECS4 Information Education Room 5 ECS5
Procedure for a Windows device Installation of VMware Horizon View Client and Campus Cloud Agent VDI access from a Windows device requires the installation of two applications: VMware Horizon View Client and Campus Cloud Agent. The installation procedures for these applications are described below. Installing the Campus Cloud Agent 1. Access the specified URL (to be decided) using a browser such as Internet
Explorer. 2. Sign in by entering your Osaka University Personal ID and password. 3. Download and install the Campus Cloud Agent. Installing the VMware Horizon View Client 1. Access the following URL using a browser such as Internet Explorer:
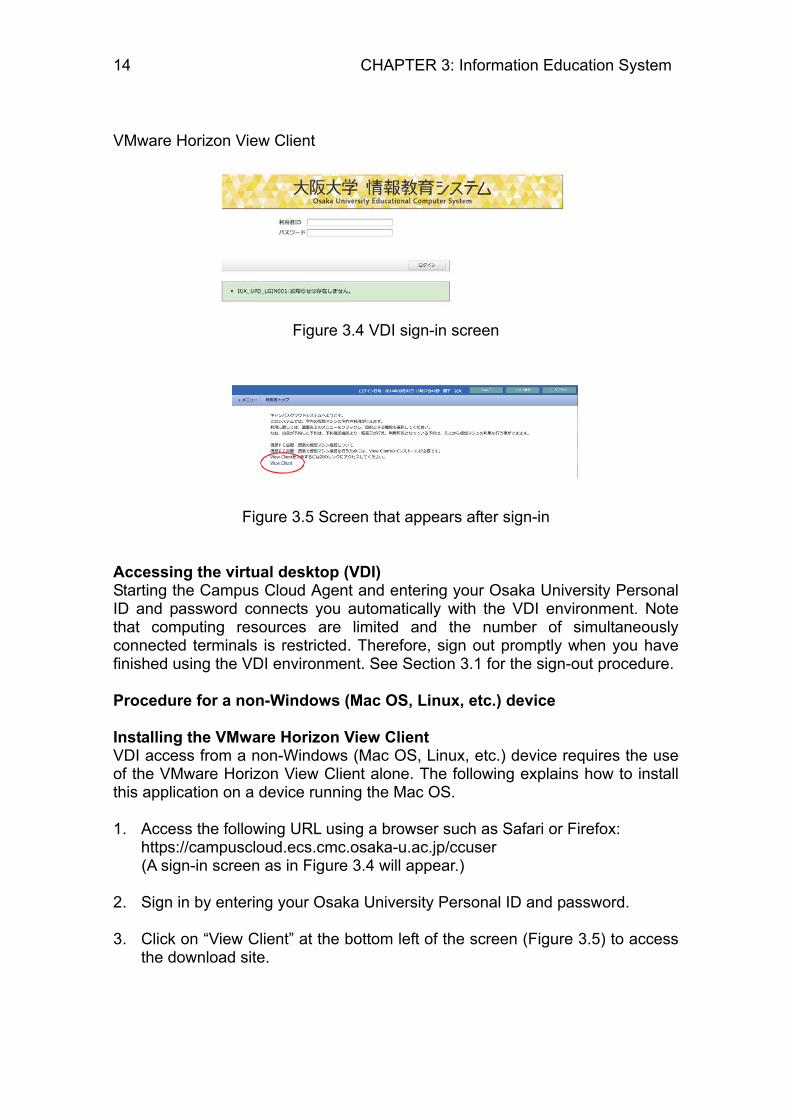
https://campuscloud.ecs.cmc.osaka-u.ac.jp/ccuser (Available only in Japanese) (A sign-in screen as in Figure 3.4 will appear.)
2. Sign in by entering your Osaka University Personal ID and password. 3. Click on “View Client” at the bottom left of the screen (Figure 3.5) to access
the download site. 4. Download and install the VMware Horizon View Client for Windows.
14 CHAPTER 3: Information Education System
VMware Horizon View Client
Figure 3.4 VDI sign-in screen
Figure 3.5 Screen that appears after sign-in Accessing the virtual desktop (VDI) Starting the Campus Cloud Agent and entering your Osaka University Personal ID and password connects you automatically with the VDI environment. Note that computing resources are limited and the number of simultaneously connected terminals is restricted. Therefore, sign out promptly when you have finished using the VDI environment. See Section 3.1 for the sign-out procedure. Procedure for a non-Windows (Mac OS, Linux, etc.) device Installing the VMware Horizon View Client VDI access from a non-Windows (Mac OS, Linux, etc.) device requires the use of the VMware Horizon View Client alone. The following explains how to install this application on a device running the Mac OS. 1. Access the following URL using a browser such as Safari or Firefox:
https://campuscloud.ecs.cmc.osaka-u.ac.jp/ccuser (A sign-in screen as in Figure 3.4 will appear.)
2. Sign in by entering your Osaka University Personal ID and password. 3. Click on “View Client” at the bottom left of the screen (Figure 3.5) to access
the download site.
3.1 Sign-in and Sign-out 15
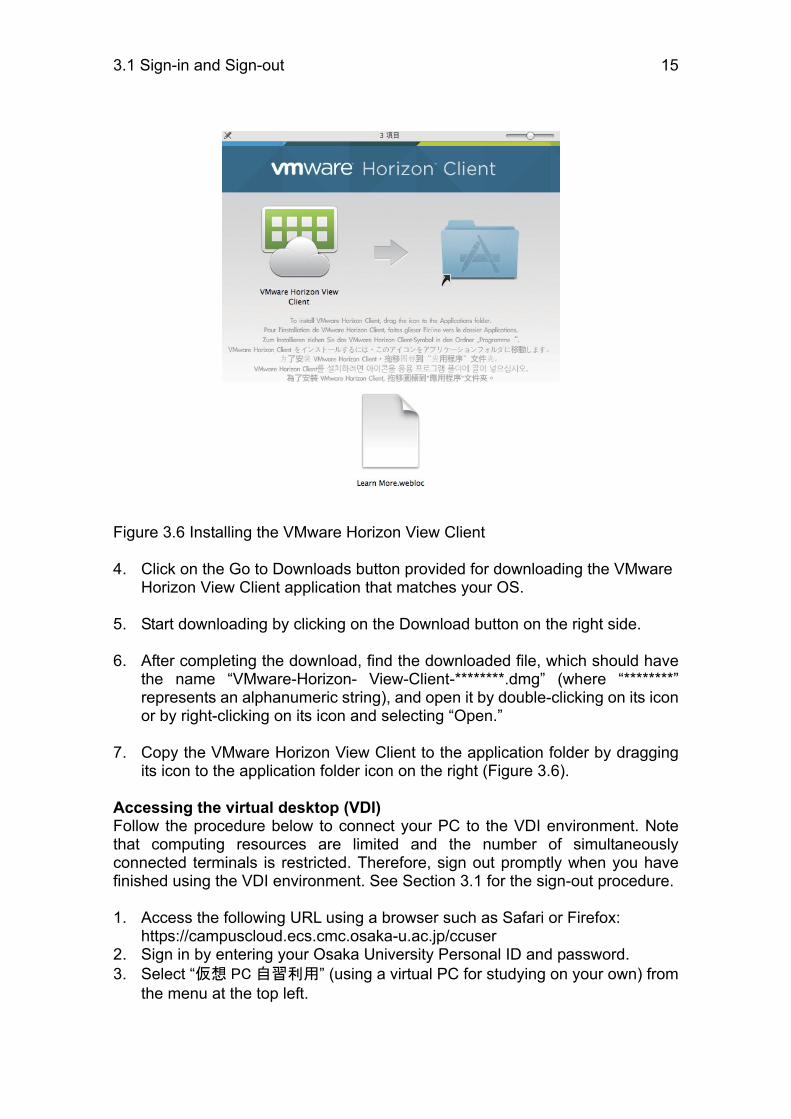
Figure 3.6 Installing the VMware Horizon View Client 4. Click on the Go to Downloads button provided for downloading the VMware
Horizon View Client application that matches your OS. 5. Start downloading by clicking on the Download button on the right side. 6. After completing the download, find the downloaded file, which should have
the name “VMware-Horizon- View-Client-********.dmg” (where “********” represents an alphanumeric string), and open it by double-clicking on its icon or by right-clicking on its icon and selecting “Open.”
7. Copy the VMware Horizon View Client to the application folder by dragging
its icon to the application folder icon on the right (Figure 3.6). Accessing the virtual desktop (VDI) Follow the procedure below to connect your PC to the VDI environment. Note that computing resources are limited and the number of simultaneously connected terminals is restricted. Therefore, sign out promptly when you have finished using the VDI environment. See Section 3.1 for the sign-out procedure. 1. Access the following URL using a browser such as Safari or Firefox:
https://campuscloud.ecs.cmc.osaka-u.ac.jp/ccuser 2. Sign in by entering your Osaka University Personal ID and password. 3. Select “仮想 PC 自習利用” (using a virtual PC for studying on your own) from
the menu at the top left.

16 CHAPTER 3: Information Education System
4. Select “Windows 8.1” as the “仮想マシンテンプレート” (virtual machine
template) and click on “入力内容を確認する” (verify entry). 5. Click on “この内容で登録する” (submit). 6. Wait for the “状態” (status) indication to turn blue on the booking confirmation
screen. 7. After confirming that the “状態” (status) indication has turned blue, click on
“接続” (connect). 8. Sign in by entering your Osaka University Personal ID and password.
3.2 Desktop
3.2.1 Windows desktop
The term “desktop” refers to the main display area that is made available by Windows after logon (Figure 3.7). As the name suggests, the desktop serves as a space in which you can perform various work. You may place files and folders or rearrange icons as you like on the desktop display area; however, files and folders you place on the desktop of a computer that serves as a terminal of the Information Education System are automatically deleted when you logon the next time. The desktop provides access to various features that you may use to facilitate the use of the computer. The following describes some of such features.2
Figure 3.7 Windows desktop
2 For more detailed or more basic instructions, refer to Microsoft online help at:
http://windows.microsoft.com/ja-JP/windows7/help (available only in Japanese)
Desktop icon
Application window
Taskbar
Quick Launch Bar

3.2 Desktop 17
Application window Each application program you start up displays its own window in the desktop display area. After your login to the computer, Internet Explorer starts up automatically to display a web page that allows your login to the Information Education System.
Taskbar This bar sits at the bottom of the screen. The taskbar displays the names of application programs and files that you started or opened, allowing you to switch from one window to another.
Start button and start menu Clicking on the Start button at the lower left corner of the screen accesses the Logout button, etc. In the ordinary Windows environment, other programs can also be started from here. However, for terminals of the Information Education System, programs are started via the Quick Launch Bar, which is described in the following section. Quick Launch Bar You can start various programs via the Quick Launch Bar. Click on “>>” in the right-hand side of the Quick Launch Bar to display an application menu (Information Education System Application Menu), which shows a categorized list of application programs. For details about the Information Education System Application Menu, refer to Section 3.2.2.
Desktop icons On the desktop of any computer that serves as a terminal of the Information Education System, you will find the following icons: “コンピュータ” (Computer), “マイドキュメント” (My Documents), Internet Explorer (web browser), Firefox (web browser), and Lhaplus (file compressor). These icons provide access to features and application programs that are often used. Beginners are advised to initially learn how to use these features and application programs.
● Computer Double-clicking on the Computer icon displays a list of folders and storage locations, allowing you access to removable media, etc. You may use this feature to access removable media, such as USB memory sticks and CD-ROMs. For detailed instructions concerning the use of removable media, refer to Section 3.2.3.
● Documents Clicking on the Documents icon enables access to the Documents folder in which you can save your personal files. The maximum space available in the Documents folder of each user is 500MB. Unlike in an ordinary Windows environment, users of the Information Education System are not allowed to save files to the desktop. Therefore, the files you download or create should be saved to your own removable media (e.g., a USB memory stick) or to the Documents folder (or any other folder that you created inside

18 CHAPTER 3: Information Education System
the Documents folder).3 The linuxhome folder, which you will find in the Documents folder, is for use in the Linux environment (described in Section 3.11) and should not be deleted. If you delete this folder, you may not be able to work in the Linux environment.
● Internet Explorer and Firefox Both Internet Explorer and Firefox are web browsers. You will need to use one of them to browse web pages. You will also use these web browsers when you change your password for accessing the Information Education System and when you use web mail and other services provided by the Information Education System.
● Lhaplus Lhaplus is file compression/decompression software. You can use it to compress a large file (i.e., to make the file smaller) and to decompress a compressed file. You may pack two or more files into a single compressed file. To compress a file or folder, drag and drop it on the Lhaplus icon. To compress two or more files or folders, drag and drop them together onto the Lhaplus icon. To decompress a compressed file, similarly drag and drop it onto the Lhaplus icon.
● Region and Language You can choose the language to be used for the Information Education System. For details, refer to Section 3.2.4 “Setting the region and language”.
MS-IME toolbar Japanese input is enabled using MS-IME. To change the input mode, use the “半角/全角” (one-byte/two-byte) changeover key, which you will find close to the top left corner of any Japanese keyboard. The current input mode is indicated on the MS-IME bar. You may also change the input mode using the MS-IME toolbar instead of using the one-byte/two-byte changeover key. 3.2.2 Information Education System Application Menu
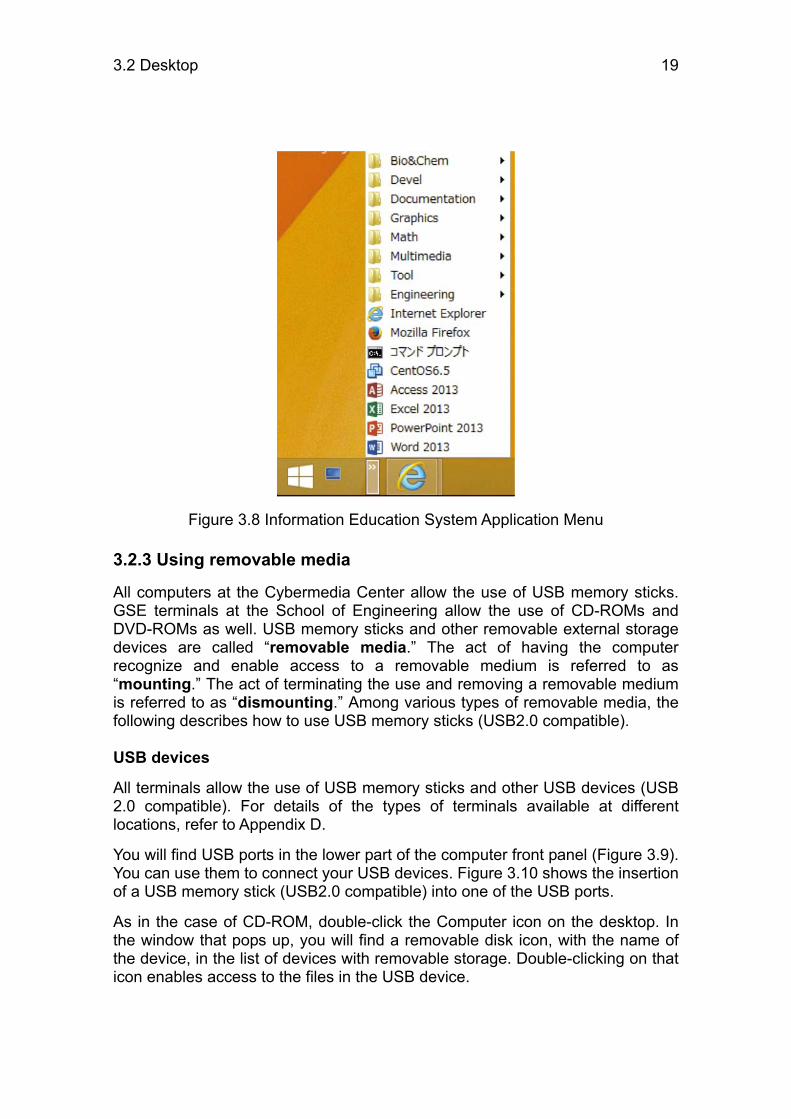
Because each of the Windows-based terminals of the Information Education System is installed with many application programs, an original menu – the Information Education System Application Menu - is provided to ensure easy access to the chosen application program (Figure 3.8). The Information Education System Application Menu is accessible via the Quick Launch Bar. Click on the “>>” in the right-hand side of the Quick Launch Bar on the right-hand side of the Start Menu, and the menu shown in Figure 3.8 appears. This menu shows a categorized list of application programs. Table 3.2 lists program categories as well as programs in each category.
3 The Documents folder of the Information Education System is mapped to the Z drive.
3.2 Desktop 19
Figure 3.8 Information Education System Application Menu 3.2.3 Using removable media
All computers at the Cybermedia Center allow the use of USB memory sticks. GSE terminals at the School of Engineering allow the use of CD-ROMs and DVD-ROMs as well. USB memory sticks and other removable external storage devices are called “removable media.” The act of having the computer recognize and enable access to a removable medium is referred to as “mounting.” The act of terminating the use and removing a removable medium is referred to as “dismounting.” Among various types of removable media, the following describes how to use USB memory sticks (USB2.0 compatible). USB devices
All terminals allow the use of USB memory sticks and other USB devices (USB 2.0 compatible). For details of the types of terminals available at different locations, refer to Appendix D.
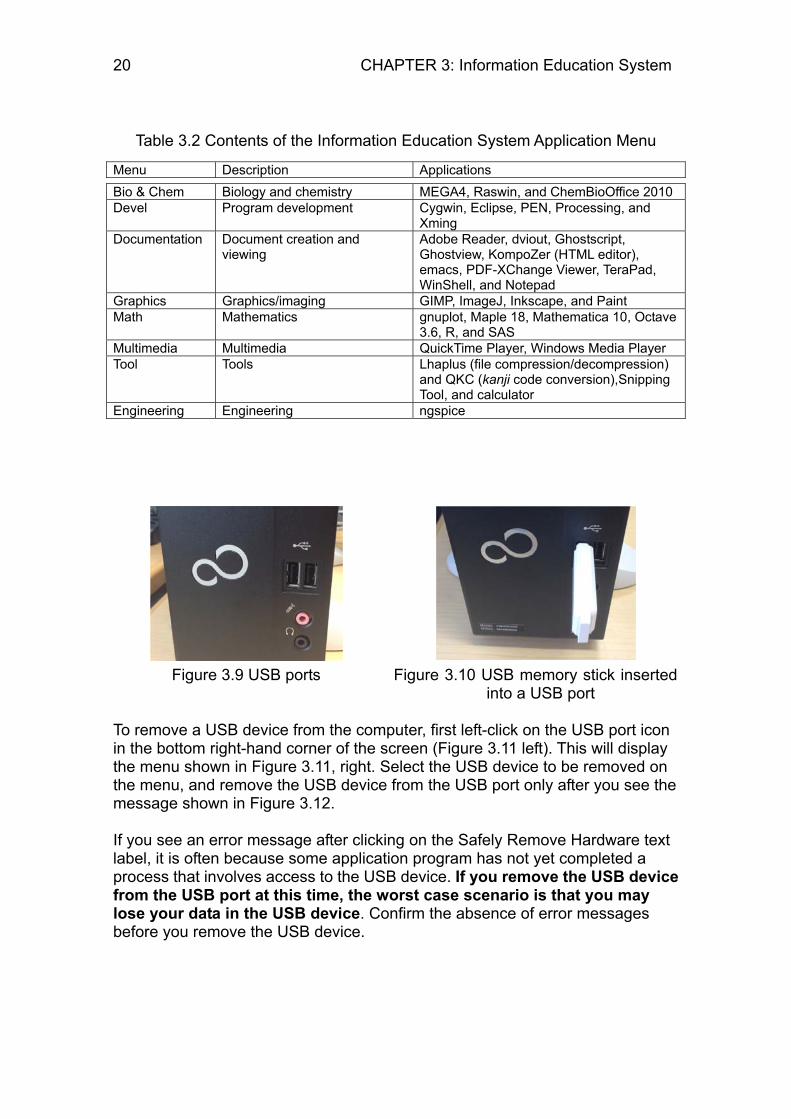
You will find USB ports in the lower part of the computer front panel (Figure 3.9). You can use them to connect your USB devices. Figure 3.10 shows the insertion of a USB memory stick (USB2.0 compatible) into one of the USB ports.
As in the case of CD-ROM, double-click the Computer icon on the desktop. In the window that pops up, you will find a removable disk icon, with the name of the device, in the list of devices with removable storage. Double-clicking on that icon enables access to the files in the USB device.
20 CHAPTER 3: Information Education System
Table 3.2 Contents of the Information Education System Application Menu
Menu Description Applications Bio & Chem Biology and chemistry MEGA4, Raswin, and ChemBioOffice 2010 Devel Program development Cygwin, Eclipse, PEN, Processing, and
Xming Documentation Document creation and
viewing Adobe Reader, dviout, Ghostscript, Ghostview, KompoZer (HTML editor), emacs, PDF-XChange Viewer, TeraPad, WinShell, and Notepad
Graphics Graphics/imaging GIMP, ImageJ, Inkscape, and Paint Math Mathematics gnuplot, Maple 18, Mathematica 10, Octave
3.6, R, and SAS Multimedia Multimedia QuickTime Player, Windows Media Player Tool Tools Lhaplus (file compression/decompression)
and QKC (kanji code conversion),Snipping Tool, and calculator
Engineering Engineering ngspice
Figure 3.9 USB ports Figure 3.10 USB memory stick inserted into a USB port
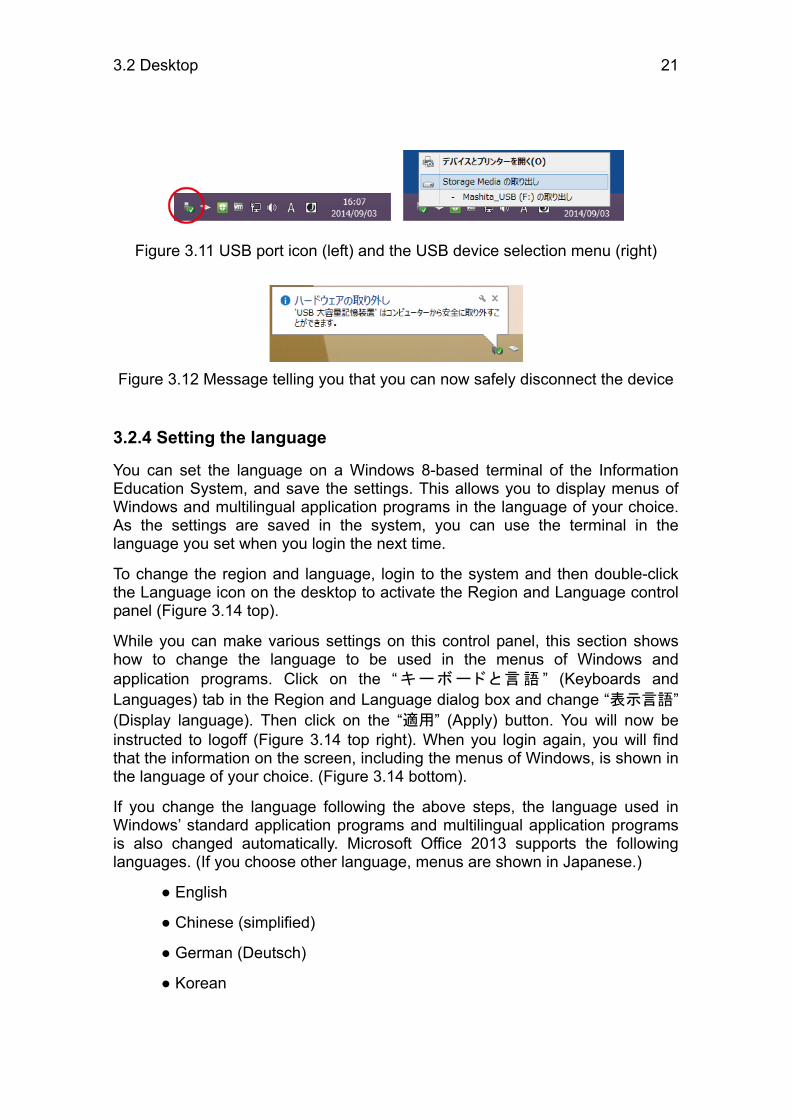
To remove a USB device from the computer, first left-click on the USB port icon in the bottom right-hand corner of the screen (Figure 3.11 left). This will display the menu shown in Figure 3.11, right. Select the USB device to be removed on the menu, and remove the USB device from the USB port only after you see the message shown in Figure 3.12. If you see an error message after clicking on the Safely Remove Hardware text label, it is often because some application program has not yet completed a process that involves access to the USB device. If you remove the USB device from the USB port at this time, the worst case scenario is that you may lose your data in the USB device. Confirm the absence of error messages before you remove the USB device.
3.2 Desktop 21
Figure 3.11 USB port icon (left) and the USB device selection menu (right)
Figure 3.12 Message telling you that you can now safely disconnect the device
3.2.4 Setting the language
You can set the language on a Windows 8-based terminal of the Information Education System, and save the settings. This allows you to display menus of Windows and multilingual application programs in the language of your choice. As the settings are saved in the system, you can use the terminal in the language you set when you login the next time.
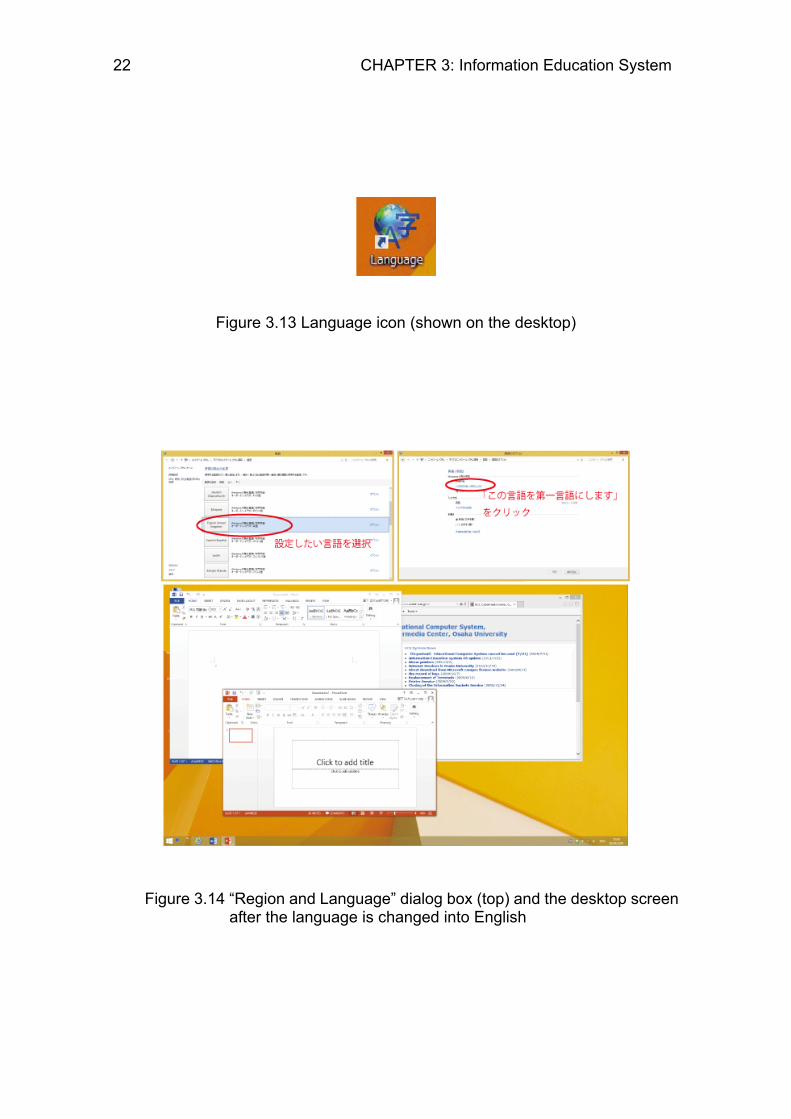
To change the region and language, login to the system and then double-click the Language icon on the desktop to activate the Region and Language control panel (Figure 3.14 top).
While you can make various settings on this control panel, this section shows how to change the language to be used in the menus of Windows and application programs. Click on the “ キ ー ボ ー ド と 言 語 ” (Keyboards and Languages) tab in the Region and Language dialog box and change “表示言語” (Display language). Then click on the “適用” (Apply) button. You will now be instructed to logoff (Figure 3.14 top right). When you login again, you will find that the information on the screen, including the menus of Windows, is shown in the language of your choice. (Figure 3.14 bottom).
If you change the language following the above steps, the language used in Windows’ standard application programs and multilingual application programs is also changed automatically. Microsoft Office 2013 supports the following languages. (If you choose other language, menus are shown in Japanese.)
● English
● Chinese (simplified)
● German (Deutsch)
● Korean
22 CHAPTER 3: Information Education System
Figure 3.13 Language icon (shown on the desktop)
Figure 3.14 “Region and Language” dialog box (top) and the desktop screen after the language is changed into English

3.3 World Wide Web (WWW) 23
3.3 World Wide Web (WWW)
The World Wide Web (also known as WWW or “the web”) is a huge internet-based network that allows the sharing and cross-referencing of various information resources from all over the world. Among such information resources available on the web, you will find academic articles that may help your study, weather forecasts, and news articles that may help you in your daily life, and articles you may like to read because of your hobbies and personal interests. With any computer that serves as a terminal of the Information Education System, you may use either one of the following two web browsers for accessing resources on the web: Internet Explorer (IE) as a standard web browser on Windows machines and Mozilla Firefox (or simply, Firefox). The following provides instructions about the use of IE. 3.3.1 Starting up the web browser
With any computer that serves as a terminal of the Information Education System, the web browser starts up automatically after you login to the computer. Figure 3.15 shows the first screen displayed by the web browser when it starts up. To login to the Information Education System, you may use either one of the two input areas (framed in the screenshot image) for entering your user name (login name) and password. After login, you will see the Information Education System page (Figure 3.16). This page contains information that you should know when you use facilities provided by the Cybermedia Center. Whenever you use one of our terminals, be sure to login to the Information Education System to see this page.4
Figure 3.15 Web browser display upon startup
4 This page is accessible from outside the Center as well.

24 CHAPTER 3: Information Education System
Figure 3.16 First display after login to the Information Education System 3.3.2 Information Education System page
The following explains the Information Education System page, which you will see after login. ユーザメニュー (User menu):
This menu provides links to often-used controls and services, such as those for KOAN, web mail services and Osaka University CLE.
教職員メニュー (Teachers’ menu):
This is for teachers only. Students will not be able to see this menu. リンク集 (Link):
This provides links to web sites that contain useful information, relevant articles on the Osaka University web site, etc.
Netiquette:
This provides links to web articles that describe manners and unspoken rules to be observed by network users. You are advised to read them.
情報教育システムニュース (Information Education System News):
Listed here are news articles from the Cybermedia Center. Check this list frequently because you may find important notices (e.g., temporary suspension of service).

3.3 World Wide Web (WWW) 25
利用者用サービス (Service): This provides users with various service-related information.
各種申請書類 (Application form):
This provides links to the password change application form, etc. 3.3.3 Changing your password
The password for accessing the Information Education System is linked to the Osaka University Personal ID password. Therefore, if your Osaka University Personal ID password is changed, your Information Education System password will be changed accordingly within about 10 minutes. For the procedure to change your Osaka University Personal ID password, refer to Information Education System News or the website of the Osaka University IT Authentication Service at http://repo.auth.osaka-u.ac.jp/en/.

26 CHAPTER 3: Information Education System
3.4 Email
Each user of the Education Computer System is given an email address in the following format: [email protected].
If your login name is u123456a, for example, your email address is [email protected].
Emails that are received at the Education Computer System of the Cybermedia Center are saved to user-assigned storage spaces in our mail server system. 3.4.1 Web mail (OU Mail)
The Information Education System allows you to send and receive emails using a web browser. This called the “web mail” service. You can access the web mail service even from computers that are external to the Cybermedia Center (e.g., from your home computer). Login to the web mail service
Figure 3.17 Web mail login page You can access the web mail service by selecting “Web Mail” from the User menu on the Information Education System page or, alternatively, by specifying the following URL on the web browser screen. http://mail.office365.com
3.4 Email 27
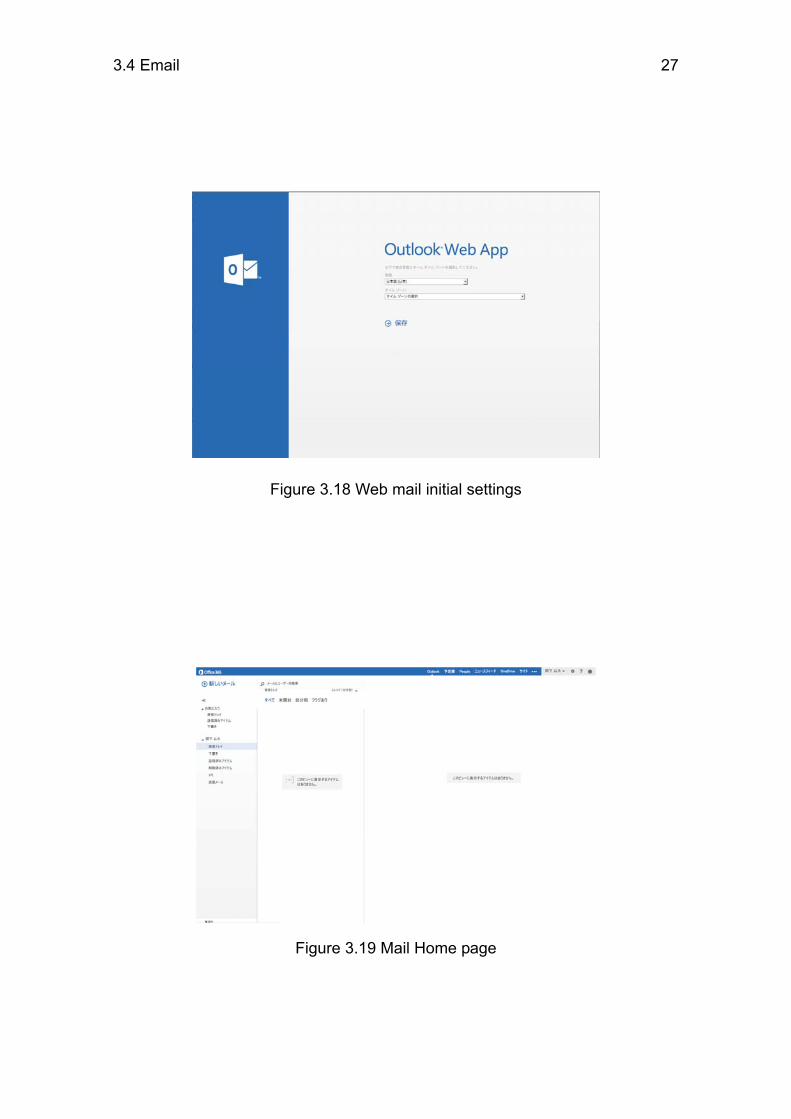
Figure 3.18 Web mail initial settings
Figure 3.19 Mail Home page

28 CHAPTER 3: Information Education System
Figure 3.17 shows the web mail login page. To log in, enter your email address and password and then left-click “サインイン” (sign-in). When you first sign-in (login), you will see an initial settings screen (Figure 3.18). After choosing the language and time zone, left-click on “保存” (Save). After successfully signing in, you will see your Mail Home page (Figure 3.19). On this page, you can find out the total number of mails and the number of unopened mails in the Inbox, Outbox and other folders, as well as the total disk space you are using. On any page displayed by the web mail service, you can return to this Mail Home page by left-clicking on the Outlook link displayed on the top left corner of the screen. Sending an email using the web mail service
Figure 3.20 Creating a new email message To create a new email message, left-click on the “new mail" link at the top left corner of the screen. The screen will display a new email message page (Figure 3.20). Enter the recipient’s email address after “To:” and a message title after “Subject:”, and then type your message into the message input area. You can attach a file to your email by dragging the icon of the file and dropping it into the message input area. The total size of the attached files should not exceed 35MB.
When you have finished preparing a message, left-click the Send icon in the top left corner of the screen. You can confirm your message has been successfully transmitted by left-clicking on the “Sent Items” icon in the left column. This will display a mail transmission confirmation screen as shown in Figure 3.21.

3.4 Email 29
Figure 3.21 Web mail transmission completion message
Receiving emails using the web mail service
Figure 3.22 Web mail Inbox display Left-clicking on “Inbox” in the folder list on the left side of the web mail screen allows you to look inside the Inbox (Figure 3.22). Left-click the mail you wish to read from the list of received mails. The screen will display the contents of the selected mail. At the top of the screen, you will find buttons such as “Reply” and “Forward”. Left-clicking on these buttons allows you to perform the corresponding action. To access other functions such as “Delete”, left-click on “...”.
30 CHAPTER 3: Information Education System
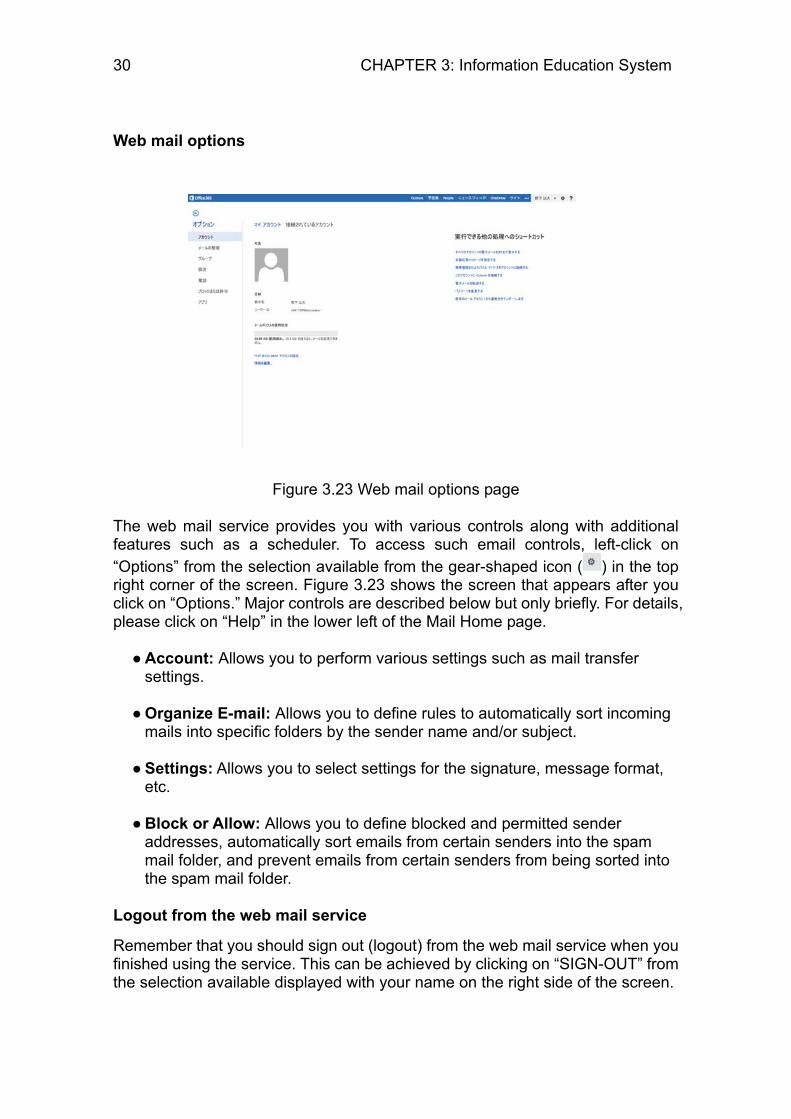
Web mail options
Figure 3.23 Web mail options page The web mail service provides you with various controls along with additional features such as a scheduler. To access such email controls, left-click on “Options” from the selection available from the gear-shaped icon ( ) in the top right corner of the screen. Figure 3.23 shows the screen that appears after you click on “Options.” Major controls are described below but only briefly. For details, please click on “Help” in the lower left of the Mail Home page.
● Account: Allows you to perform various settings such as mail transfer settings.
● Organize E-mail: Allows you to define rules to automatically sort incoming
mails into specific folders by the sender name and/or subject. ● Settings: Allows you to select settings for the signature, message format,
etc.
● Block or Allow: Allows you to define blocked and permitted sender addresses, automatically sort emails from certain senders into the spam mail folder, and prevent emails from certain senders from being sorted into the spam mail folder.
Logout from the web mail service
Remember that you should sign out (logout) from the web mail service when you finished using the service. This can be achieved by clicking on “SIGN-OUT” from the selection available displayed with your name on the right side of the screen.
3.5 Preparing Your Homepage 31
3.5 Preparing Your Homepage
The Information Education System allows each user to prepare his or her own homepage. The browsing of these homepages requires login to the Information Education System. Other users will be able to see your personal homepage on any web browser by accessing the following URL:5
http://webserver/~your-user-ID/
To prepare your homepage and make it accessible to other users, you must complete the following three steps: 1. Create a public folder (public_html). 2. Create HTML files and place them in the public folder. 3. Permit access to your homepage.
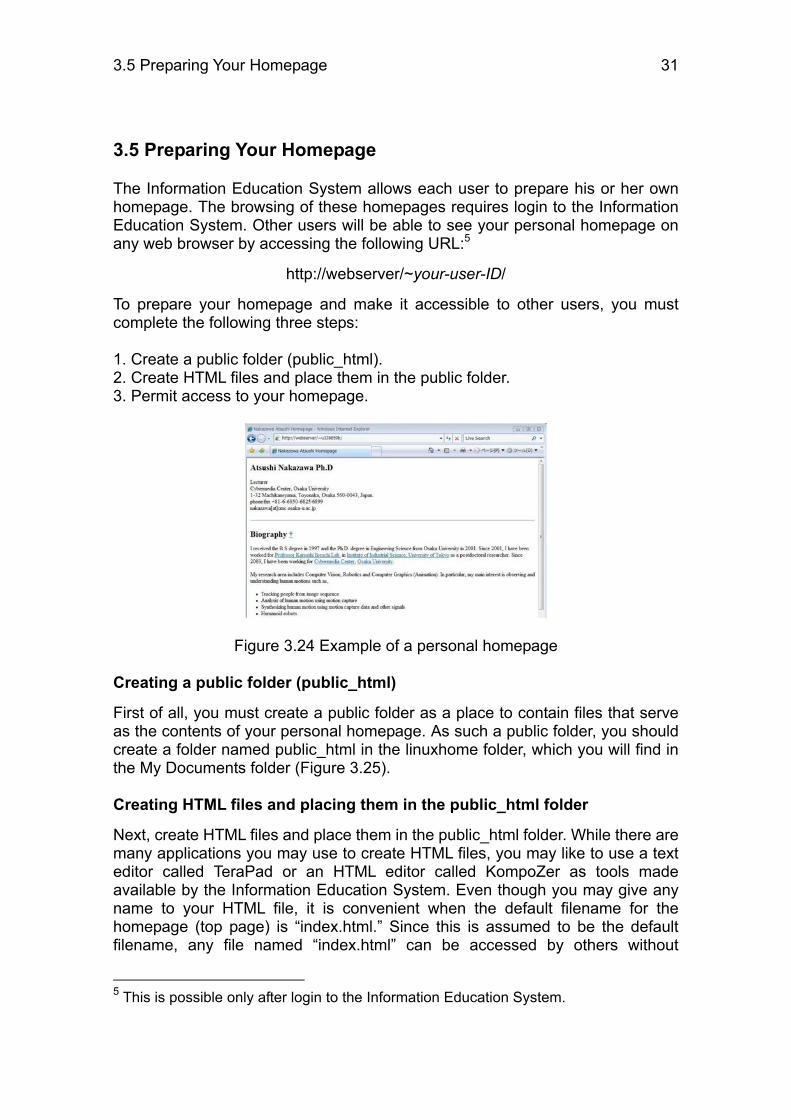
Figure 3.24 Example of a personal homepage Creating a public folder (public_html)
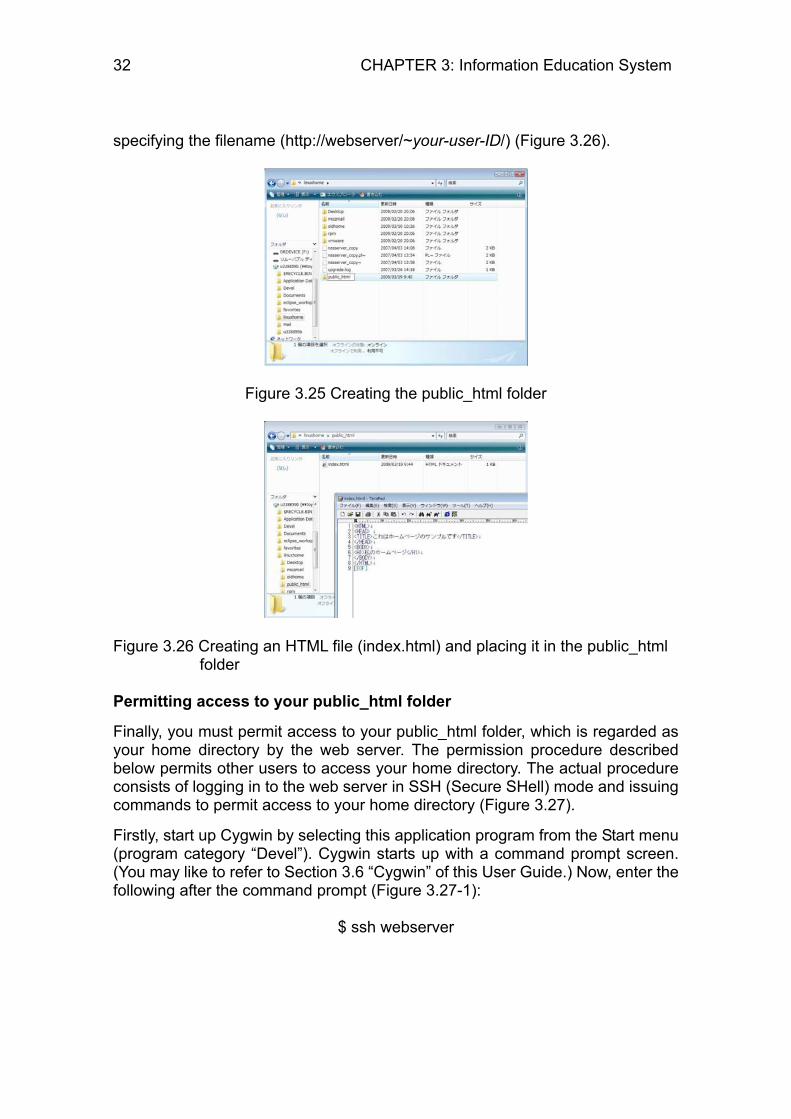
First of all, you must create a public folder as a place to contain files that serve as the contents of your personal homepage. As such a public folder, you should create a folder named public_html in the linuxhome folder, which you will find in the My Documents folder (Figure 3.25). Creating HTML files and placing them in the public_html folder
Next, create HTML files and place them in the public_html folder. While there are many applications you may use to create HTML files, you may like to use a text editor called TeraPad or an HTML editor called KompoZer as tools made available by the Information Education System. Even though you may give any name to your HTML file, it is convenient when the default filename for the homepage (top page) is “index.html.” Since this is assumed to be the default filename, any file named “index.html” can be accessed by others without
5 This is possible only after login to the Information Education System.
32 CHAPTER 3: Information Education System
specifying the filename (http://webserver/~your-user-ID/) (Figure 3.26).
Figure 3.25 Creating the public_html folder
Figure 3.26 Creating an HTML file (index.html) and placing it in the public_html folder
Permitting access to your public_html folder
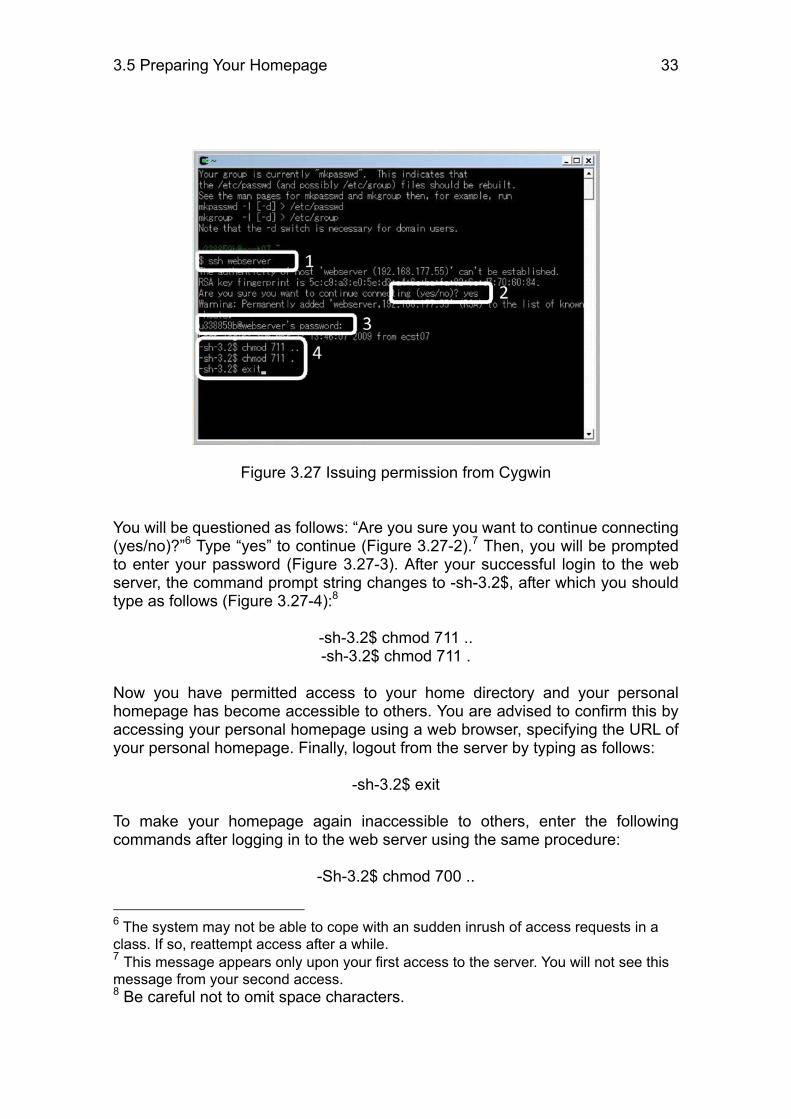
Finally, you must permit access to your public_html folder, which is regarded as your home directory by the web server. The permission procedure described below permits other users to access your home directory. The actual procedure consists of logging in to the web server in SSH (Secure SHell) mode and issuing commands to permit access to your home directory (Figure 3.27).
Firstly, start up Cygwin by selecting this application program from the Start menu (program category “Devel”). Cygwin starts up with a command prompt screen. (You may like to refer to Section 3.6 “Cygwin” of this User Guide.) Now, enter the following after the command prompt (Figure 3.27-1):
$ ssh webserver
3.5 Preparing Your Homepage 33
Figure 3.27 Issuing permission from Cygwin You will be questioned as follows: “Are you sure you want to continue connecting (yes/no)?”6 Type “yes” to continue (Figure 3.27-2).7 Then, you will be prompted to enter your password (Figure 3.27-3). After your successful login to the web server, the command prompt string changes to -sh-3.2$, after which you should type as follows (Figure 3.27-4):8
-sh-3.2$ chmod 711 .. -sh-3.2$ chmod 711 .
Now you have permitted access to your home directory and your personal homepage has become accessible to others. You are advised to confirm this by accessing your personal homepage using a web browser, specifying the URL of your personal homepage. Finally, logout from the server by typing as follows:
-sh-3.2$ exit To make your homepage again inaccessible to others, enter the following commands after logging in to the web server using the same procedure:
-Sh-3.2$ chmod 700 ..
6 The system may not be able to cope with an sudden inrush of access requests in a class. If so, reattempt access after a while. 7 This message appears only upon your first access to the server. You will not see this message from your second access. 8 Be careful not to omit space characters.

34 CHAPTER 3: Information Education System
-sh-3.2$ chmod 700 . Then, nobody will be able to access your homepage (Figure 3.28).
Figure 3.28 Access Forbidden message
3.6 Microsoft Office 35
3.6 Microsoft Office
The Office suite is a single package that combines a set of applications that are frequently used in business, including word processing, spreadsheet, and presentation software. The Word, Excel, and PowerPoint software from Microsoft Office 2010 are installed in the Information Education System. As there are numerous introductory manuals on the market explaining how to use Microsoft Office, and this subject is often also covered in high schools and other institutions, details are not included in this section, but if you wish to learn more about its use please see the links below. ● Microsoft Office 2012 Training Center (Microsoft website)
http://www.microsoft.com/ja-jp/office/2010/business/training/ (Available only in Japanese)
● Office 2010 Quick Guide http://www.microsoft.com/ja-jp/office/2010/ (Available only in Japanese)

36 CHAPTER 3: Information Education System
3.7 Cygwin
With any computer that serves as a terminal of the Information Education System, you may use Cygwin to emulate the UNIX environment on Windows. You can also use Xming as an X Window System compatible environment. Cygwin achieves this through migrating various UNIX commands, such as those supported by GNU development tools, to Windows. With Cygwin, you can compile and run programs written in various development languages including C, C++, Pascal, and Fortran. 3.7.1 Starting up Cygwin
To start Cygwin, select “Cygwin” from the program list in the “Devel” category, accessible from the Start menu. 3.7.2 Accessing a file from Cygwin
To access a file in the Windows file system (disk drive) from Cygwin, use the following style of directory designation:
/cygdrive/drive-name/
Note that the current (default) directory upon the startup of Cygwin is /cygdrive/z/. This is nothing but Drive Z (Z:) for Windows, a drive that accommodates the My Documents folders of Information Education System users. 3.7.3 Applications that run on Cygwin
Each computer that serves as a terminal of the Information Education System is installed with almost all Cygwin packages (command sets). Therefore, you can execute any typical UNIX command. The following development languages have been installed.
Command Description f77 Fortran77 g95 Fortran90 gcc GNU C compiler g++ GNU C++ compiler gpc GNU Pascal compiler gdb GNU GDB 6.8.0 (debugger) ruby Ruby 1.8.7 python Python 2.5.1 perl Perl 5.10.0

3.7 Cygwin 37
Additionally, note the following library configuration unique to the Information Education System:
Library name Installation directory (header file)
Installation directory (library file)
EGG-X /usr/local/include/ /usr/local/lib/ GLUT /usr/include/GL/ /usr/lib/ OpenCV 1.0 /usr/local/include/opencv/ /usr/local/lib/
3.7.4 Using Xming
With any computer that serves as a terminal of the Information Education System, you may use Xming to produce an X Window System compatible environment on Windows. To start up Xming, select Xming from the Start menu (program category “Devel”). While Xming is active, an Xming icon (see below) is shown in the taskbar (near the bottom right corner of the screen).
Figure 3.29 Xming icon on the taskbar
You may start up Cygwin and enter a command string after the prompt:
$ xterm
This allows you to start up various X Window System applications (Figure 3.30).
Figure 3.30 Using Xming

38 CHAPTER 3: Information Education System
3.8 LaTeX
With any computer that serves as a terminal of the Information Education System, you may use LaTeX (TeX Win32, pLaTex) for marking up documents to control typesetting (print format). 3.8.1 Using LaTeX on the Information Education System
With any computer that serves as a terminal of the Information Education System, you use the Windows Command Prompt window to compile LaTeX files. Select “Command Prompt” from the Start menu and then go to the folder that contains the TeX source file (.tex) you prepared. Alternatively, in the case of Windows 7, you may right-click on the target folder icon while pressing down the Shift key, and then select “Open Command Window Here” (Figure 3.31).
Figure 3.31 Opening a command prompt window (Windows 7) 3.8.2 Compiling TeX files
Use the command described below to compile the TeX file. Upon successful termination of the command, a DVI file (.dvi) will appear in the same folder.
platex filename
Specify the TeX filename without adding an extension (.tex).
3.8 LaTeX 39
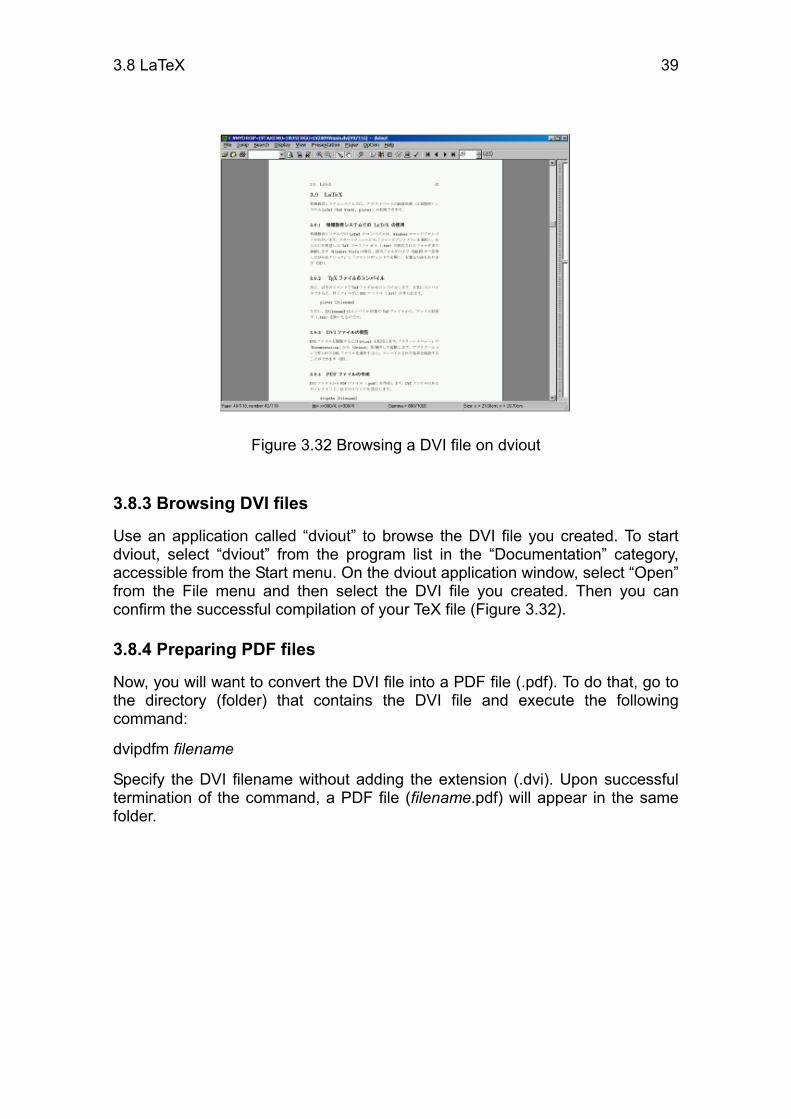
Figure 3.32 Browsing a DVI file on dviout
3.8.3 Browsing DVI files
Use an application called “dviout” to browse the DVI file you created. To start dviout, select “dviout” from the program list in the “Documentation” category, accessible from the Start menu. On the dviout application window, select “Open” from the File menu and then select the DVI file you created. Then you can confirm the successful compilation of your TeX file (Figure 3.32). 3.8.4 Preparing PDF files
Now, you will want to convert the DVI file into a PDF file (.pdf). To do that, go to the directory (folder) that contains the DVI file and execute the following command:
dvipdfm filename
Specify the DVI filename without adding the extension (.dvi). Upon successful termination of the command, a PDF file (filename.pdf) will appear in the same folder.
40 CHAPTER 3: Information Education System
3.9 SAS
With any computer that serves as a terminal of the Information Education System, you may use SAS for data analysis. On an Information Education System terminal, SAS runs in an X environment configured by Xming and Cygwin or by VMware (Vine Linux). 3.9.1 Using SAS on Windows
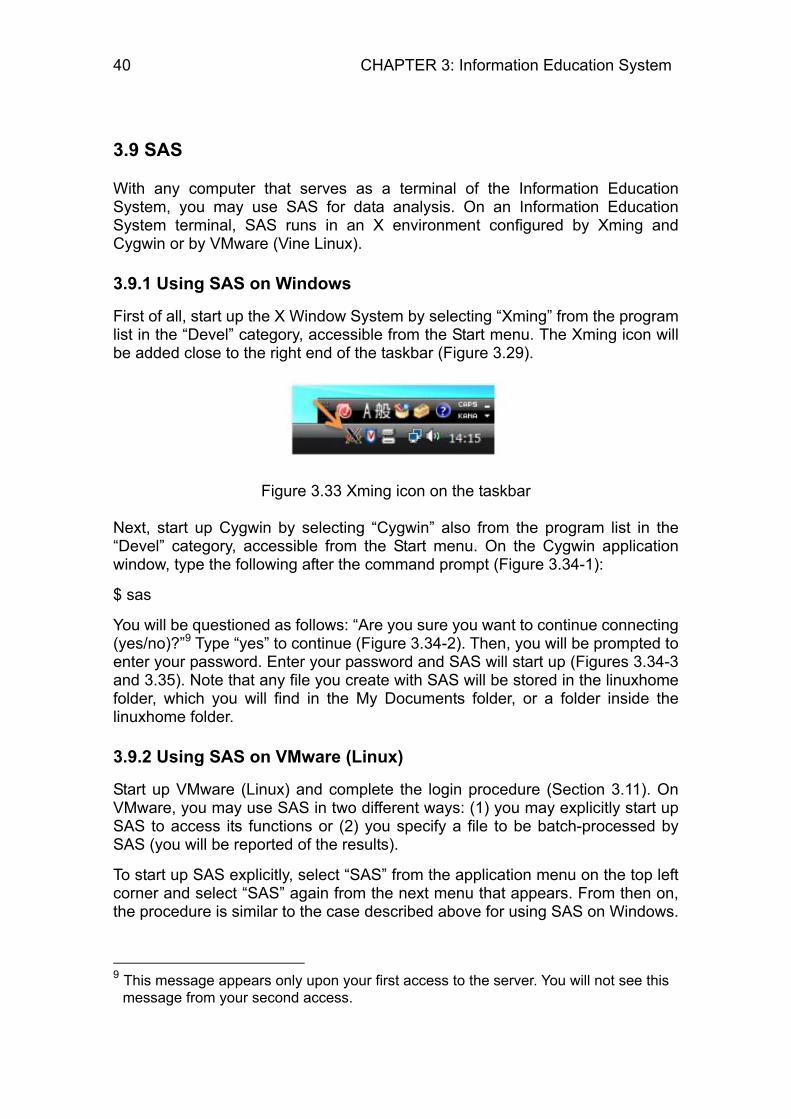
First of all, start up the X Window System by selecting “Xming” from the program list in the “Devel” category, accessible from the Start menu. The Xming icon will be added close to the right end of the taskbar (Figure 3.29).
Figure 3.33 Xming icon on the taskbar Next, start up Cygwin by selecting “Cygwin” also from the program list in the “Devel” category, accessible from the Start menu. On the Cygwin application window, type the following after the command prompt (Figure 3.34-1):
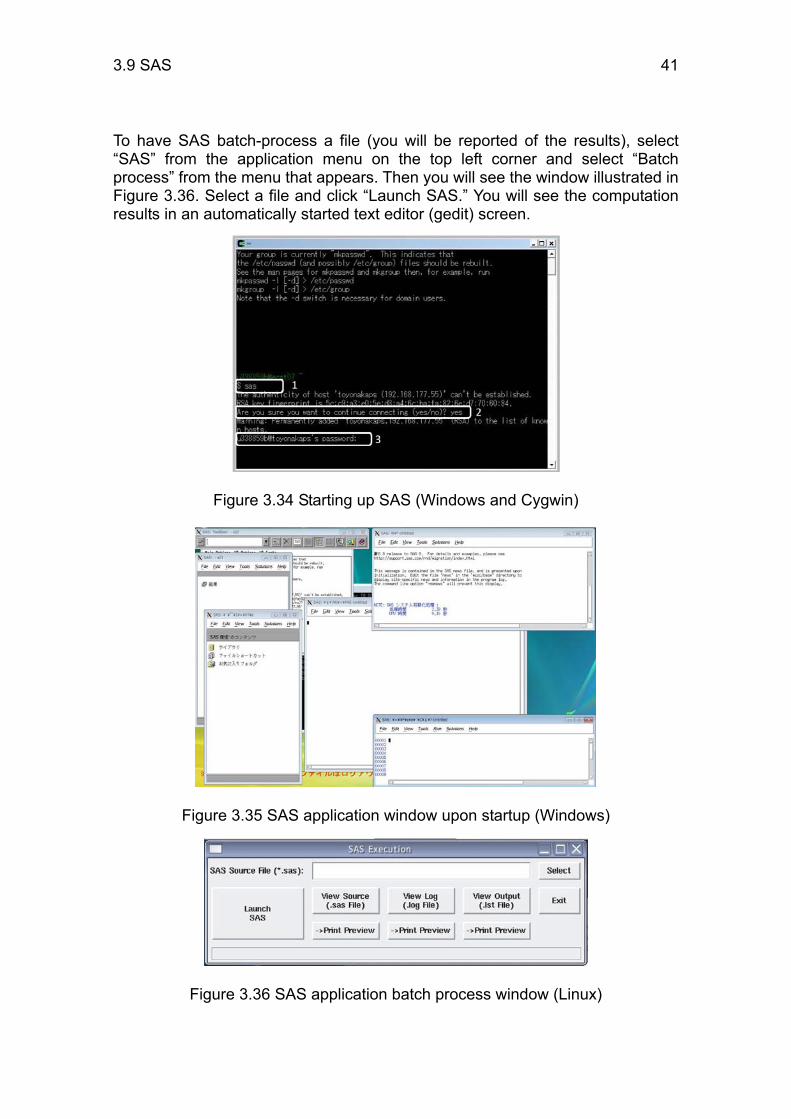
$ sas
You will be questioned as follows: “Are you sure you want to continue connecting (yes/no)?”9 Type “yes” to continue (Figure 3.34-2). Then, you will be prompted to enter your password. Enter your password and SAS will start up (Figures 3.34-3 and 3.35). Note that any file you create with SAS will be stored in the linuxhome folder, which you will find in the My Documents folder, or a folder inside the linuxhome folder. 3.9.2 Using SAS on VMware (Linux)
Start up VMware (Linux) and complete the login procedure (Section 3.11). On VMware, you may use SAS in two different ways: (1) you may explicitly start up SAS to access its functions or (2) you specify a file to be batch-processed by SAS (you will be reported of the results).
To start up SAS explicitly, select “SAS” from the application menu on the top left corner and select “SAS” again from the next menu that appears. From then on, the procedure is similar to the case described above for using SAS on Windows.
9 This message appears only upon your first access to the server. You will not see this
message from your second access.
3.9 SAS 41
To have SAS batch-process a file (you will be reported of the results), select “SAS” from the application menu on the top left corner and select “Batch process” from the menu that appears. Then you will see the window illustrated in Figure 3.36. Select a file and click “Launch SAS.” You will see the computation results in an automatically started text editor (gedit) screen.
Figure 3.34 Starting up SAS (Windows and Cygwin)
Figure 3.35 SAS application window upon startup (Windows)
Figure 3.36 SAS application batch process window (Linux)

42 CHAPTER 3: Information Education System
3.10 Other Applications
The following is a categorized list of other application programs installed to each computer that serves as a terminal of the Information Education System:
Bio & Chem: MEGA4 Supports molecular evolutionary genetics analysis of
DNA and protein sequence data WinRas (RasMol) Supports molecular graphical representation of
organic compounds and biopolymers ChemBioOffice Chemical desktop tool package
Devel: Cygwin See the section on Cygwin Eclipse Provides an integrated programming environment with
the support of Java, C++, etc. PEN Provides an environment that supports the learning of
programming techniques Processing Programming language environment for computer
graphic production Xming X Window System compatible environment on
Windows Documentation:
Adobe Reader PDF file viewer dviout DVI file viewer Ghostscript PostScript processor Ghostview EPS and PS file viewer KompoZer Graphics-oriented HTML file editor Emac Multi-functional text editor PDF-XChange Viewer
PDF file viewer and editor
TeraPad Simple text editor WinShell Integrated LaTeX editing environment Notepad Simple text editor
Graphics: GIMP Paint software Inkscape Drawing software ImageJ Image processing software Paint Paint software
Math: gnuplot Graph plotting software Maple Advanced mathematical computation software Mathematica Advanced mathematical computation software Octave GNU’s advanced mathematical computation software R Statistics processing software SAS Statistics processing software
3.10 Other Applications 43
Multimedia: QuickTime Player Multimedia player Windows Multimedia Player
Multimedia player
Tool: Lhaplus File compression and decompression QKC Kanji code conversion
44 CHAPTER 3: Information Education System
3.11 VMware
3.11.1 Outline of VMware
With VMware, a separate operating system environment can be emulated on the computer side by side with the native operating system environment. On each Windows machine that serves as a terminal of the Information Education System, VMware is used to make available the Linux environment side by side with the Windows environment. The Linux environment, configured with CentOS 6, allows the use of various Linux applications. You can use this environment to run programs produced for the earlier Linux-based machines of the Information Education System. 3.11.2 Starting up VMware
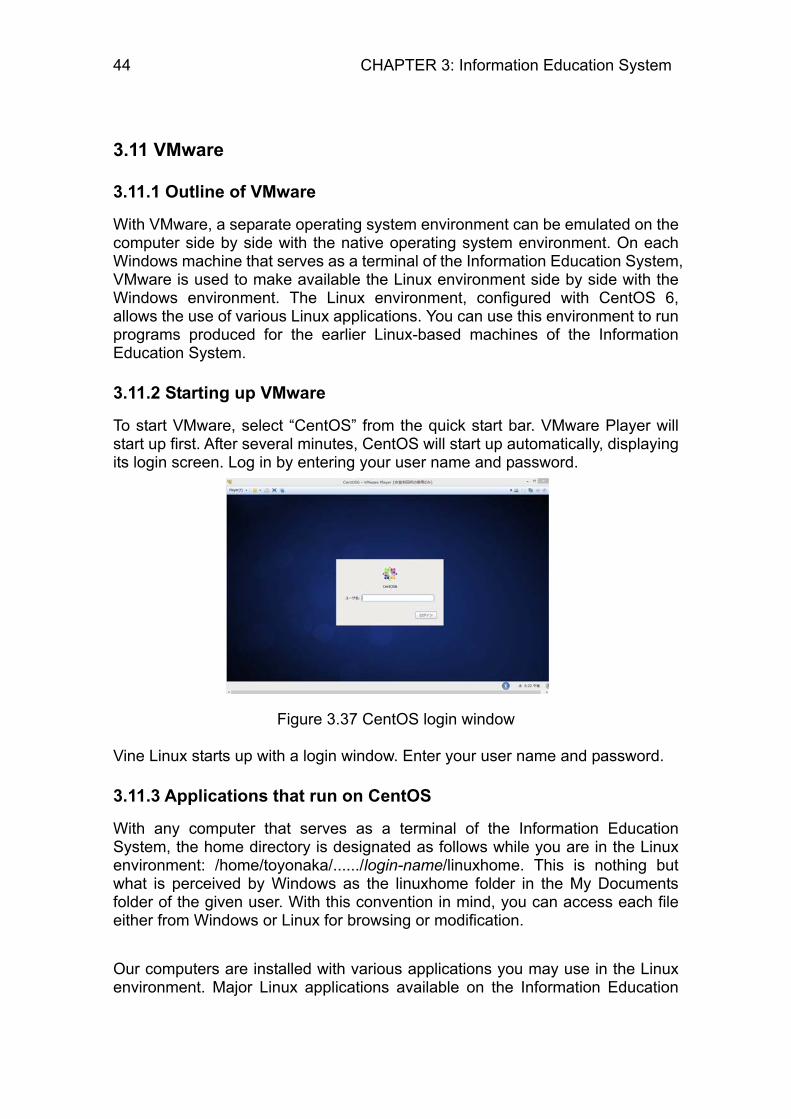
To start VMware, select “CentOS” from the quick start bar. VMware Player will start up first. After several minutes, CentOS will start up automatically, displaying its login screen. Log in by entering your user name and password.
Figure 3.37 CentOS login window Vine Linux starts up with a login window. Enter your user name and password. 3.11.3 Applications that run on CentOS
With any computer that serves as a terminal of the Information Education System, the home directory is designated as follows while you are in the Linux environment: /home/toyonaka/....../login-name/linuxhome. This is nothing but what is perceived by Windows as the linuxhome folder in the My Documents folder of the given user. With this convention in mind, you can access each file either from Windows or Linux for browsing or modification.
Our computers are installed with various applications you may use in the Linux environment. Major Linux applications available on the Information Education
3.11 VMware 45
System are listed below. As to the startup procedure, the list gives either the method that uses the applications list on the Start menu or the method that involves the use of the command shell (GNOME terminal). Application Description Startup GNOME terminal Terminal emulator [Accessories] > [GNOME
terminal] gedit Text editor [Accessories] > [GNOME text
editor] Emacs Text editor with advanced
features [Accessories] > [emacs text editor]
Acrobat Reader PDF file viewer [Office] > [Adobe Reader] Libre Office Office suite [Office] > [package-name] Firefox Web browser [Internet] > [Firefox 3] GIMP Paint software [Graphics] > [The GIMP] SAS Statistics processing
software [SAS] > [SAS]
SASGUI Statistics processing software
[SAS] > [Batch process]
R Statistics processing software
R
gnuplot Graph plotting software gnuplot pLaTeX Document formatting
software platex
GNU C/C++ C/C++ programming support
gcc
GNU debugger C/C++ debugger gdb Java JDK Java programming
support javac
Fortran77 Fortran programming support
f77
Fortran95 Fortran programming support
g95
Ruby Ruby programming support
ruby
EGGX Graphics library egg 3.11.4 Preparing PDF files
Before sending any file from CentOS to the paid printing service, you must first convert it into a PDF file. To create a PDF file, you can use either one of the two methods described below: Instructing PDF conversion from Windows Under the control of Windows, open the My Documents folder and then the linuxhome folder to find the target file. Open the target file using a file viewer that can run on Windows, and “print” a
46 CHAPTER 3: Information Education System
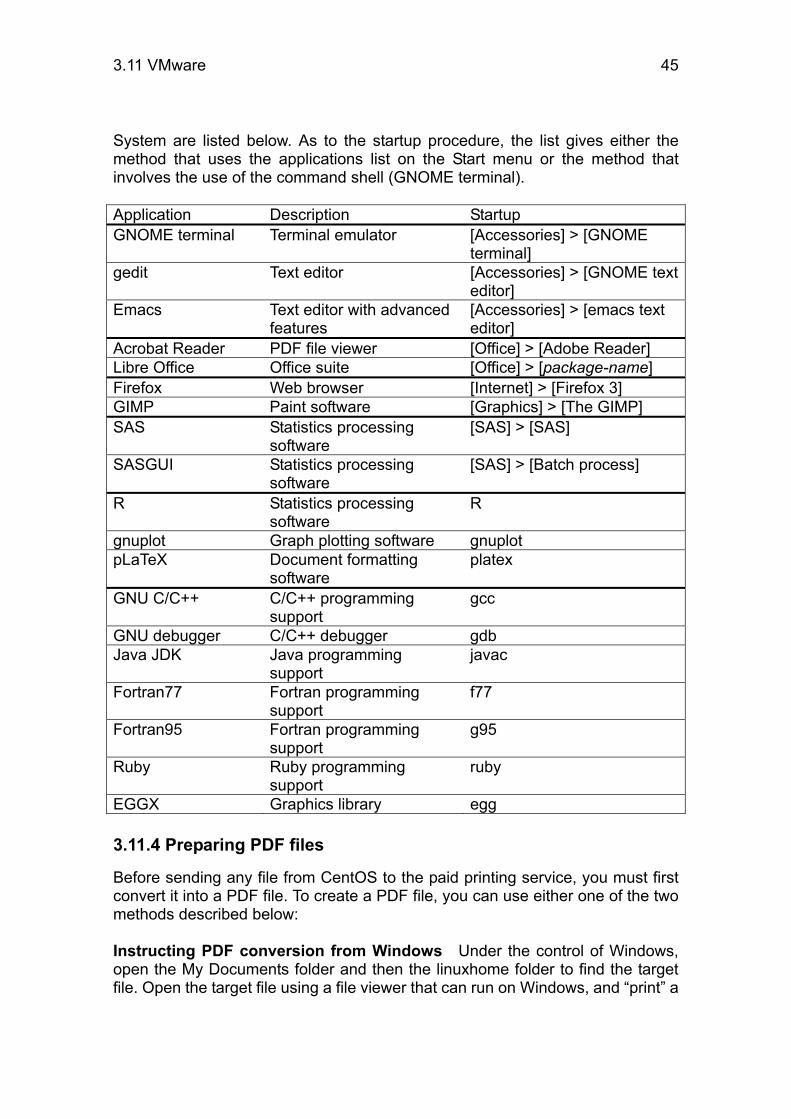
PDF file (i.e., set the print output as a PDF file) by following the procedure described in Section 3.12. Note, however, that a file viewer that runs on Windows may not be able to correctly display a file that has a format unique to Linux. Instructing PDF conversion from Linux You may view a file and convert it into a PDF file without leaving the Linux environment. However, note that you must open the file with an application that supports the output of a PDF file. The following explains how you can create a PDF file using an application that runs on Linux: gedit The text editor gedit supports the output of PDF files. To use this feature, select “Print” from the File menu. In the Print window that appears, select “Create a PDF Document” from the list of printers (Figure 3.38). With the default settings, the output is sent to a file named output.pdf in the linuxhome folder. You may change the output filename and/or destination by clicking on “Save as (A).”
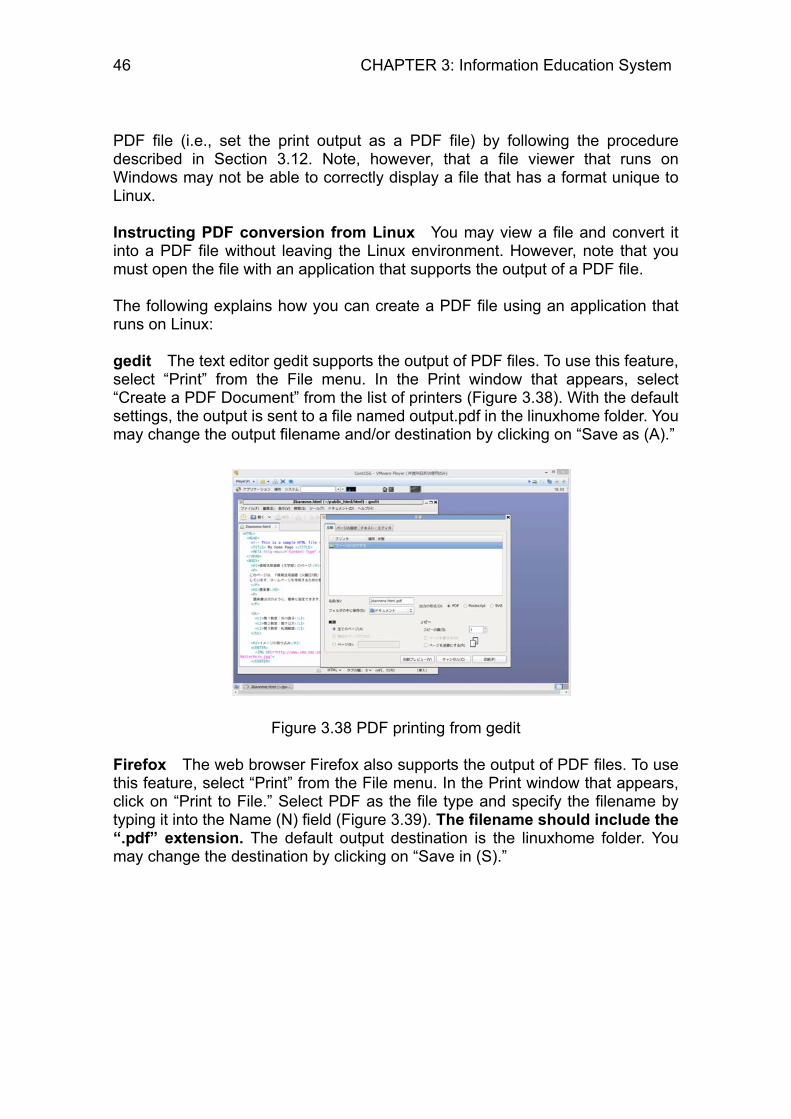
Figure 3.38 PDF printing from gedit Firefox The web browser Firefox also supports the output of PDF files. To use this feature, select “Print” from the File menu. In the Print window that appears, click on “Print to File.” Select PDF as the file type and specify the filename by typing it into the Name (N) field (Figure 3.39). The filename should include the “.pdf” extension. The default output destination is the linuxhome folder. You may change the destination by clicking on “Save in (S).”
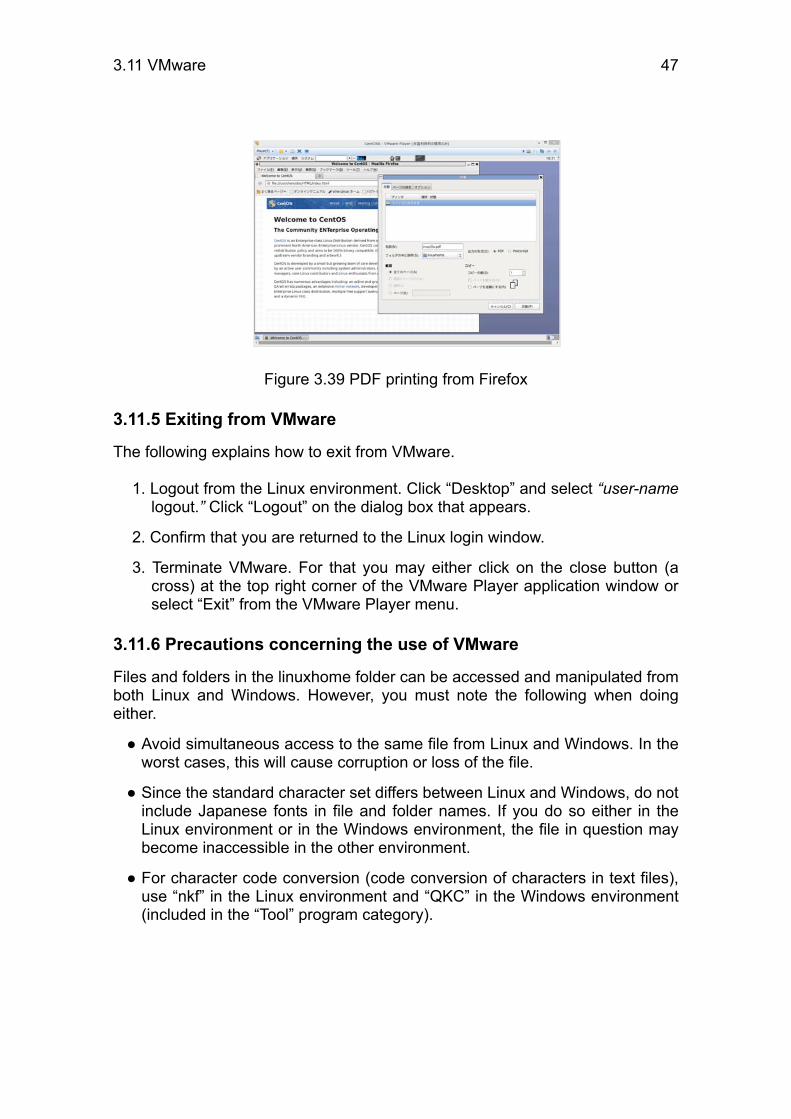
3.11 VMware 47
Figure 3.39 PDF printing from Firefox 3.11.5 Exiting from VMware
The following explains how to exit from VMware.
1. Logout from the Linux environment. Click “Desktop” and select “user-name logout.” Click “Logout” on the dialog box that appears.
2. Confirm that you are returned to the Linux login window.
3. Terminate VMware. For that you may either click on the close button (a cross) at the top right corner of the VMware Player application window or select “Exit” from the VMware Player menu.
3.11.6 Precautions concerning the use of VMware
Files and folders in the linuxhome folder can be accessed and manipulated from both Linux and Windows. However, you must note the following when doing either.
● Avoid simultaneous access to the same file from Linux and Windows. In the worst cases, this will cause corruption or loss of the file.
● Since the standard character set differs between Linux and Windows, do not include Japanese fonts in file and folder names. If you do so either in the Linux environment or in the Windows environment, the file in question may become inaccessible in the other environment.
● For character code conversion (code conversion of characters in text files), use “nkf” in the Linux environment and “QKC” in the Windows environment (included in the “Tool” program category).

48 CHAPTER 3: Information Education System
3.11.7 Initializing setups for the VMware (Linux) environment
Abnormal termination of a Linux application or VMware may corrupt the contents of configuration files (setups), preventing the normal startup of applications in subsequent sessions. In that case, it is often possible to solve the problem by initializing (or deleting) the corrupted configuration files. The following describes how you may initialize the setups of different applications.
Initializing the setups for Firefox Delete the linuxhome/.mozilla directory. Note, however, that this mozilla directory contains bookmark information and other setups that you may not wish to abandon. Move necessary information to elsewhere before deleting the directory. Also note that you must repeat the proxy setting after deleting the directory. See below for the deletion and setup procedure. Before starting the procedure, close all applications except the GNOME terminal.
1. Submit the following command from the GNOME terminal to delete the /.mozilla directory:
rm –rf ~/.mozilla
2. Click “Tools” on the menu and select “Options” from the pull-down list. You will see the Options panel.
3. Select “Advanced” from the row of buttons at the top and click on the “Network” tab. Click the Settings button to access the Connection Settings panel.
4. Select the “Manual proxy configuration” option. Type “toyonakans.ecs.cmc.osaka-u.ac.jp” into the “HTTP Proxy” box. Type “3128” into the Port box.
5. Enable the “Use this proxy server for all protocols” option.
6. Enter the following into the “No proxy for” box:
www.ecs.cmc.osaka-u.ac.jp, webct.ecs.cmc.osaka-u.ac.jp, webmail.ecs.cmc.osaka-u.ac.jp, webmail.ecs.osaka-u.ac.jp, localhost, 127.0.0.1
7. Click “OK” at the bottom to close the Connection Settings panel. Exit from the Options panel by clicking on “Close.”
8. Exit from Firefox.
Initializing the setups for Emacs Delete linuxhome/.emacs and other configuration files. Be careful not to remove .emacs and other settings. Before starting the procedure described

3.11 VMware 49
below, close all applications except the GNOME terminal.
1. Submit the following commands from the GNOME terminal to restore .emacs and other configuration files:
rm –rf ~/.emacs* cp /etc/skel/.emacs* ~/
Initializing the setups for CentOS Performing the following procedure on Windows allows you to access user-specific configuration files for CentOS running on VMware. Note that this procedure initializes all the user-specific setups for applications and CentOS, including the bookmarks used with Firefox on CentOS.
1. From the desktop, access My Document and open the linuxhome folder.
2. Press down the Alt key to display the menu. Select “フォルダオプション” (folder options) from the “ツール” (tools) menu.
Figure 3.40 Selecting “Folder Options”
3. Select the “表示” (View) tab. Under the heading of “ファイルとフォルダの表
示” (file and folder display), enable the “すべてのファイルとフォルダを表示す
る” (display all files and folders) option.
Figure 3.41 Selecting “Display of all files and folders”
50 CHAPTER 3: Information Education System
4. You will see a list of CentOS configuration file folder names starting with a dot (.). Delete the folder for the given application.
* Before deleting any configuration file folder, secure it by copying it to a different location or by renaming it.
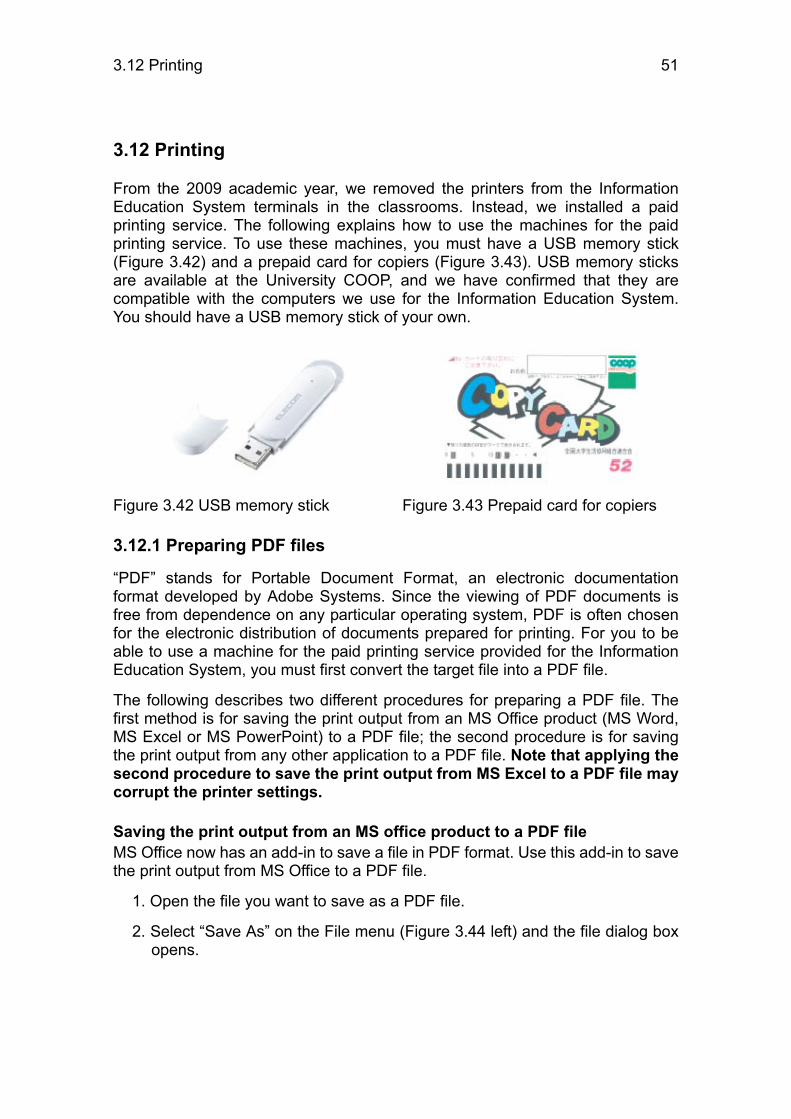
3.12 Printing 51
3.12 Printing
From the 2009 academic year, we removed the printers from the Information Education System terminals in the classrooms. Instead, we installed a paid printing service. The following explains how to use the machines for the paid printing service. To use these machines, you must have a USB memory stick (Figure 3.42) and a prepaid card for copiers (Figure 3.43). USB memory sticks are available at the University COOP, and we have confirmed that they are compatible with the computers we use for the Information Education System. You should have a USB memory stick of your own.
Figure 3.42 USB memory stick Figure 3.43 Prepaid card for copiers 3.12.1 Preparing PDF files
“PDF” stands for Portable Document Format, an electronic documentation format developed by Adobe Systems. Since the viewing of PDF documents is free from dependence on any particular operating system, PDF is often chosen for the electronic distribution of documents prepared for printing. For you to be able to use a machine for the paid printing service provided for the Information Education System, you must first convert the target file into a PDF file.
The following describes two different procedures for preparing a PDF file. The first method is for saving the print output from an MS Office product (MS Word, MS Excel or MS PowerPoint) to a PDF file; the second procedure is for saving the print output from any other application to a PDF file. Note that applying the second procedure to save the print output from MS Excel to a PDF file may corrupt the printer settings. Saving the print output from an MS office product to a PDF file MS Office now has an add-in to save a file in PDF format. Use this add-in to save the print output from MS Office to a PDF file.
1. Open the file you want to save as a PDF file.
2. Select “Save As” on the File menu (Figure 3.44 left) and the file dialog box opens.
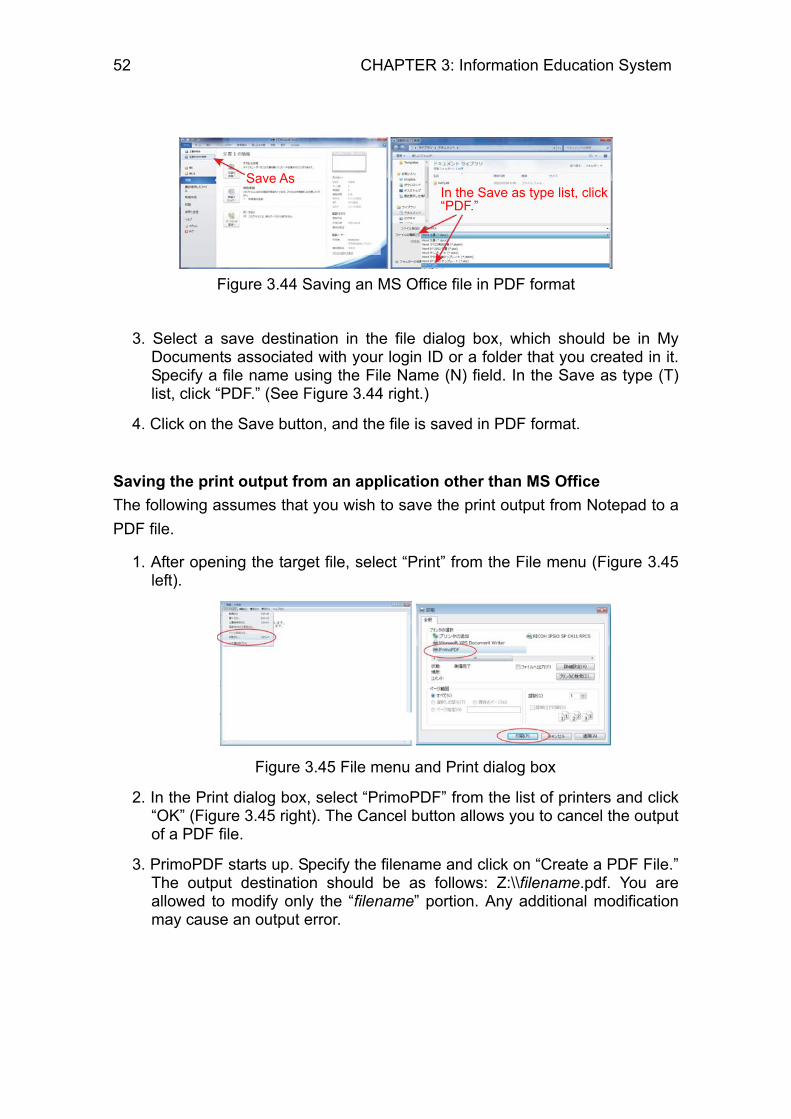
52 CHAPTER 3: Information Education System
Figure 3.44 Saving an MS Office file in PDF format
3. Select a save destination in the file dialog box, which should be in My
Documents associated with your login ID or a folder that you created in it. Specify a file name using the File Name (N) field. In the Save as type (T) list, click “PDF.” (See Figure 3.44 right.)
4. Click on the Save button, and the file is saved in PDF format.
Saving the print output from an application other than MS Office The following assumes that you wish to save the print output from Notepad to a PDF file.
1. After opening the target file, select “Print” from the File menu (Figure 3.45 left).
Figure 3.45 File menu and Print dialog box
2. In the Print dialog box, select “PrimoPDF” from the list of printers and click “OK” (Figure 3.45 right). The Cancel button allows you to cancel the output of a PDF file.
3. PrimoPDF starts up. Specify the filename and click on “Create a PDF File.” The output destination should be as follows: Z:\\filename.pdf. You are allowed to modify only the “filename” portion. Any additional modification may cause an output error.
Save As In the Save as type list, click “PDF.”
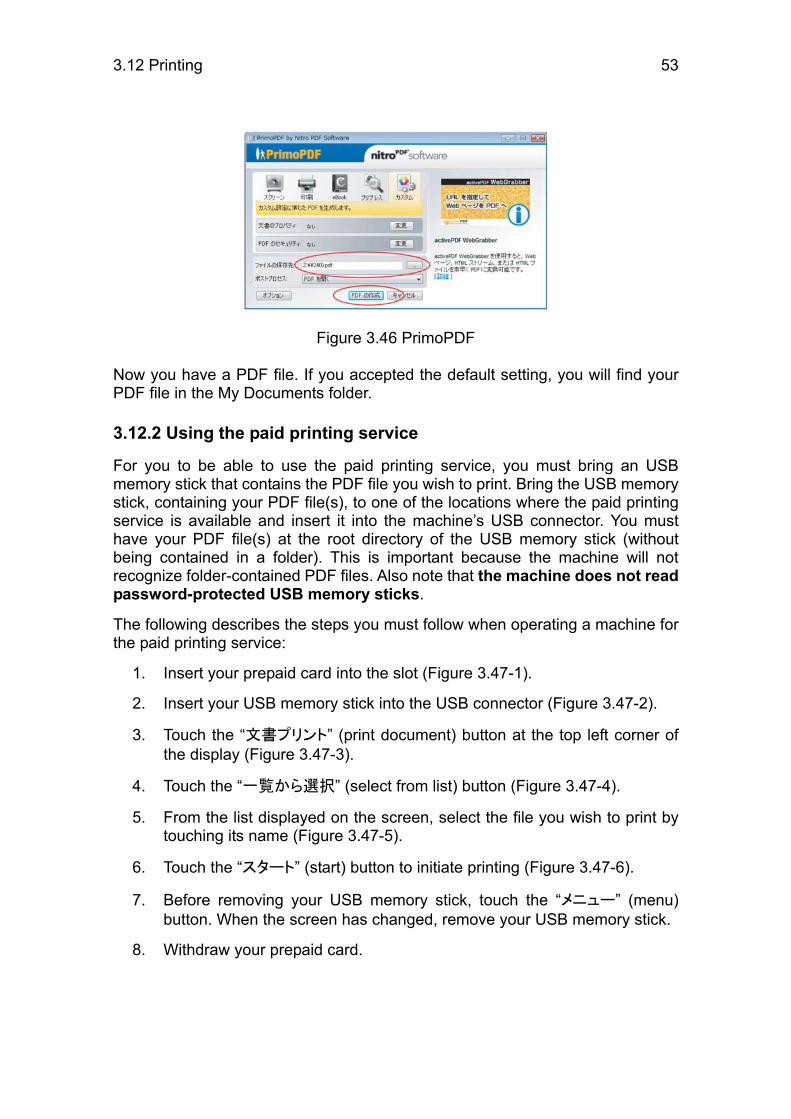
3.12 Printing 53
Figure 3.46 PrimoPDF Now you have a PDF file. If you accepted the default setting, you will find your PDF file in the My Documents folder. 3.12.2 Using the paid printing service
For you to be able to use the paid printing service, you must bring an USB memory stick that contains the PDF file you wish to print. Bring the USB memory stick, containing your PDF file(s), to one of the locations where the paid printing service is available and insert it into the machine’s USB connector. You must have your PDF file(s) at the root directory of the USB memory stick (without being contained in a folder). This is important because the machine will not recognize folder-contained PDF files. Also note that the machine does not read password-protected USB memory sticks.
The following describes the steps you must follow when operating a machine for the paid printing service:
1. Insert your prepaid card into the slot (Figure 3.47-1).
2. Insert your USB memory stick into the USB connector (Figure 3.47-2).
3. Touch the “文書プリント” (print document) button at the top left corner of the display (Figure 3.47-3).
4. Touch the “一覧から選択” (select from list) button (Figure 3.47-4).
5. From the list displayed on the screen, select the file you wish to print by touching its name (Figure 3.47-5).
6. Touch the “スタート” (start) button to initiate printing (Figure 3.47-6).
7. Before removing your USB memory stick, touch the “メニュー” (menu) button. When the screen has changed, remove your USB memory stick.
8. Withdraw your prepaid card.
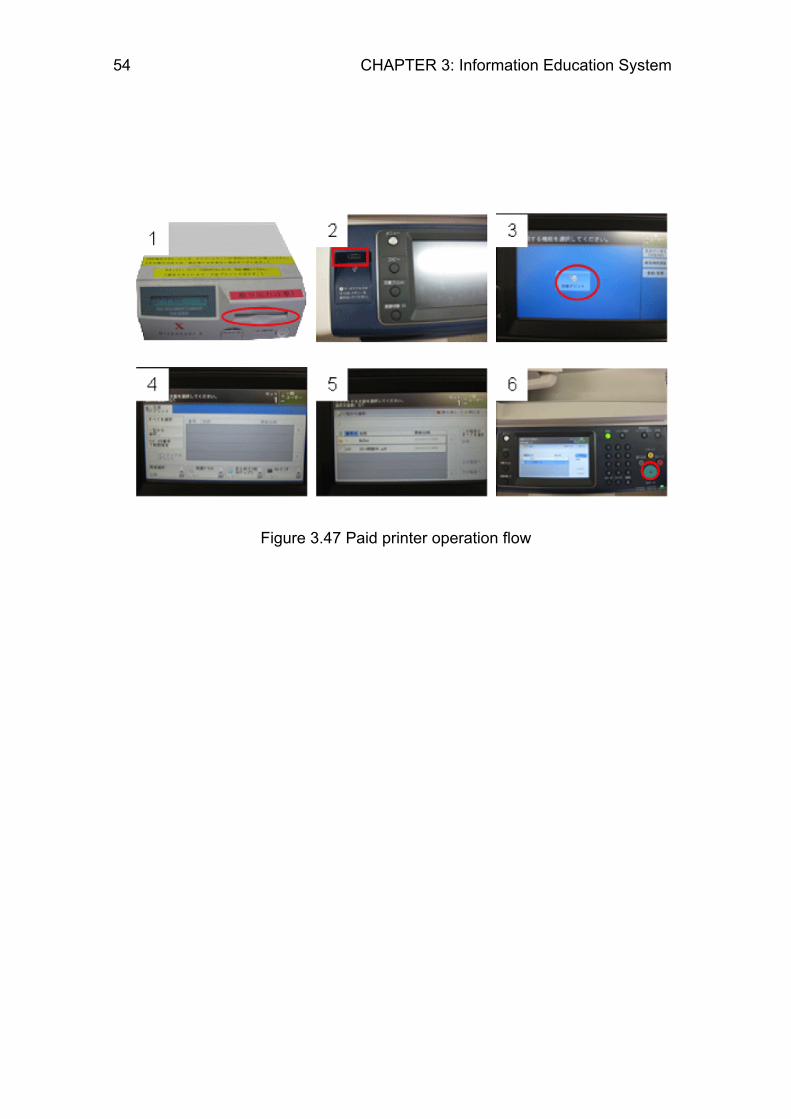
54 CHAPTER 3: Information Education System
Figure 3.47 Paid printer operation flow

3.13 Frequently Asked Questions (FAQ) 55
3.13 Frequently Asked Questions (FAQ)
Responses to the FAQ on the Information Education System are available for browsing on the “情報教育サポートページ ” (Information Education System support page). You are advised to browse through them before contacting staff for help because you may find responses to a question similar to your own. The FAQ articles on the “情報教育サポートページ” are regularly updated. Please refer to the latest articles.
情報教育サポートページ http://www.ecs.cmc.osaka-u.ac.jp/wiki/ (Available only in Japanese)
3.13.1 FAQ (March 2013: excerpts)
○ Login and logout
Why can’t I login? Re-check your account (user name) and password. If you have changed your password by accessing the Osaka University IT Authentication Service from elsewhere, note that it may take some time before the new password is applied to the Information Education System. If this could be the case, try to login with your earlier password.
○ File storage
What are the storage locations for files that we create on the Information Education System? Each user of the Information Education System can store their own files in the Z drive. The maximum file space per user is 500MB. When you use Vine Linux on VMware under the current system settings, the home directory is linuxhome in the Z drive.

56 CHAPTER 3: Information Education System
What happens to the files that I place on the desktop? Files on the desktop are cleared away when you logout. Files you wish to keep should be saved to My Document or to a USB memory stick.
○ Cygwin
Why can’t I terminate Emacs with ctrl-x or ctrl-c? If you are running Cygwin in the Bash environment, add an environment variable definition given below. Then you will be able to terminate Emacs with ctrl-x or ctrl-c.
$ export CYGWIN=tty $ emacs
How can I ensure that file names in Japanese characters are correctly displayed? In the default Cygwin environment, file names in Japanese characters are not displayed as they are, but appear converted into incomprehensible character strings. This can be prevented by adding a LANG environment variable definition and an ls command alias definition as follows:
$ export LANG=ja_JP.SJIS $ alias ls='ls --show-control-chars'
To make this setup carried over to subsequent sessions with Cygwin, add the following to the bash_profile file in the Cygwin home directory (in My Document):
export LANG=ja_JP.SJIS alias ls='ls --show-control-chars'
○ SAS
How can I use SAS? Please refer to the corresponding section of this User Guide.
Why do I see strange characters in the SAS title bar? Some of the characters in the title bar of the SAS application window may be displayed unusually in the VMware (Linux) environment. In that case, normalize the display by minimizing and then reopening the window. As
3.13 Frequently Asked Questions (FAQ) 57
far as we know, this problem does not affect the real functioning of SAS. Normalize the display by the above-mentioned procedure or simply ignore this problem.
○ VMware (Linux)
Why can’t I start up an application on VMware? If an application does not start up normally on VMware, you need to initialize the setups. Please refer to Section 3.11.7 (Initializing Setups for the VMware (Linux) Environment).
Why can’t I start up VMware? Some users reported that their attempt to start up VMware failed with the following error message: “The VMware Authorization Service is not running.” If this is the case, report the situation and terminal number to staff at the Cybermedia Center’s office (1F, Education and Research Center Building).
○ Paid printing service
Why don’t the PDF files I have saved to the USB memory stick appear in the PDF file list display? The machines for the paid printing service do not recognize folder-contained PDF files in a USB memory stick. You must save your PDF files to the root directory of the USB memory stick (without containing them in any folder). Also note that the machines do not read security-protected USB memory sticks. Ensure that your USB memory stick is not protected by a password.
Why can’t I print my PDF file? The machines for the paid printing service may not accept certain PDF files, depending on the application you used for creating them. Please create PDF files on the Information Education System following the recommended procedure.
○ Publication of web articles
Why can’t I access my own homepage at http://webserver/~[username]/? (e.g., error message reporting the unavailability of certification)

58 CHAPTER 3: Information Education System
Web articles at http://webserver/~[username]/ are accessible only from within the Information Education System. Verify your login to the Information Education System and try again.
Can’t you make our web articles at http://webserver/~[username]/ open to external access? Our policy is not to make them open to external access because of security concerns and also because of the difficulty in controlling their contents.
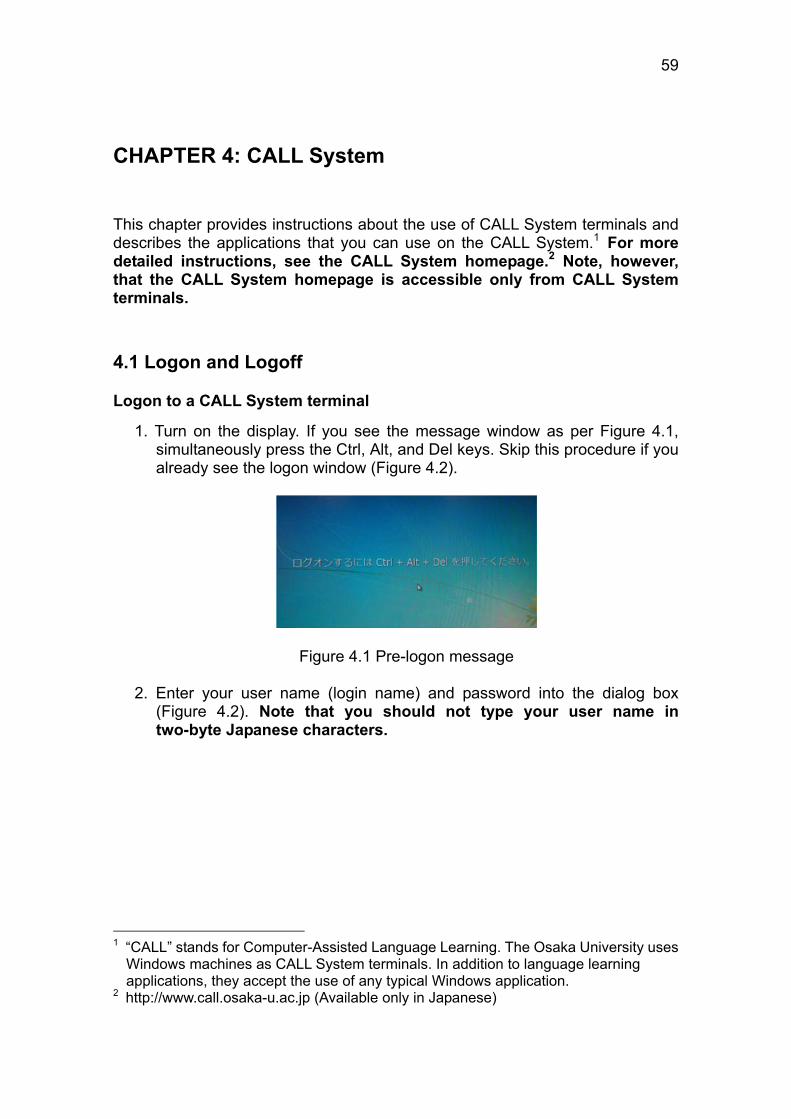
59
CHAPTER 4: CALL System
This chapter provides instructions about the use of CALL System terminals and describes the applications that you can use on the CALL System.1 For more detailed instructions, see the CALL System homepage.2 Note, however, that the CALL System homepage is accessible only from CALL System terminals.
4.1 Logon and Logoff
Logon to a CALL System terminal
1. Turn on the display. If you see the message window as per Figure 4.1, simultaneously press the Ctrl, Alt, and Del keys. Skip this procedure if you already see the logon window (Figure 4.2).
Figure 4.1 Pre-logon message
2. Enter your user name (login name) and password into the dialog box (Figure 4.2). Note that you should not type your user name in two-byte Japanese characters.
1 “CALL” stands for Computer-Assisted Language Learning. The Osaka University uses
Windows machines as CALL System terminals. In addition to language learning applications, they accept the use of any typical Windows application.
2 http://www.call.osaka-u.ac.jp (Available only in Japanese)
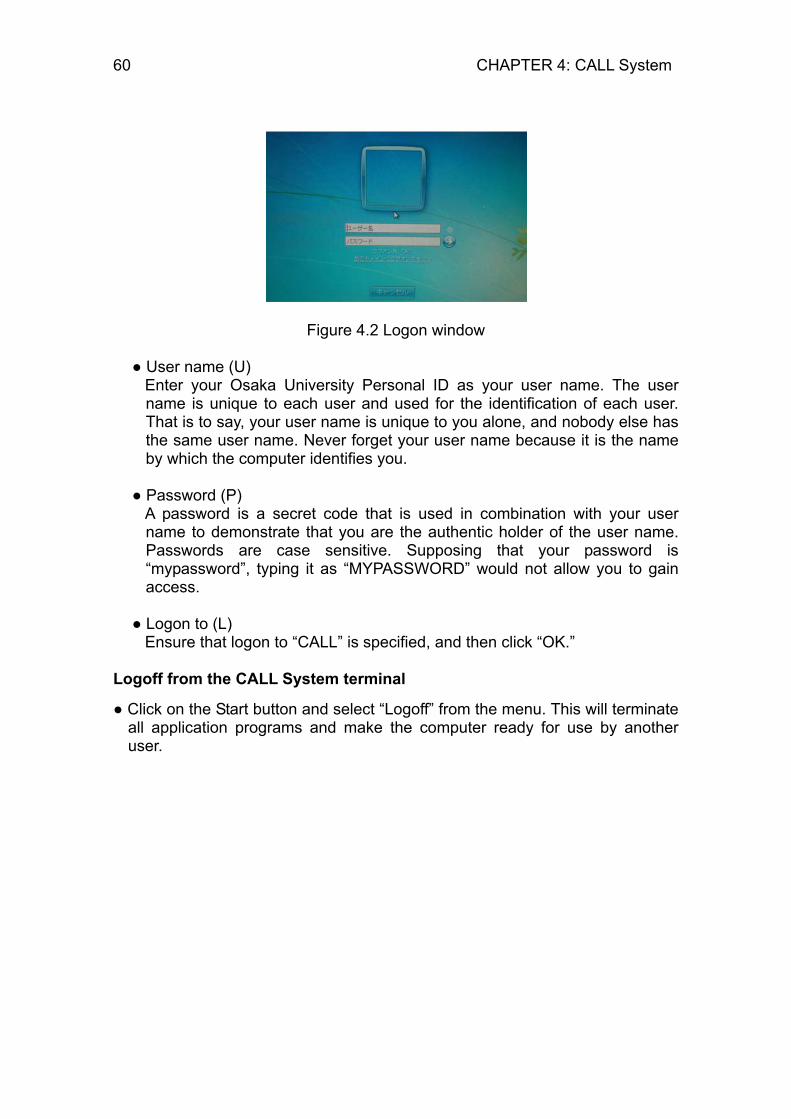
60 CHAPTER 4: CALL System
Figure 4.2 Logon window
● User name (U) Enter your Osaka University Personal ID as your user name. The user name is unique to each user and used for the identification of each user. That is to say, your user name is unique to you alone, and nobody else has the same user name. Never forget your user name because it is the name by which the computer identifies you.
● Password (P)
A password is a secret code that is used in combination with your user name to demonstrate that you are the authentic holder of the user name. Passwords are case sensitive. Supposing that your password is “mypassword”, typing it as “MYPASSWORD” would not allow you to gain access.
● Logon to (L)
Ensure that logon to “CALL” is specified, and then click “OK.” Logoff from the CALL System terminal
● Click on the Start button and select “Logoff” from the menu. This will terminate all application programs and make the computer ready for use by another user.
4.2 Instructions for First-time Users 61
Changing your password
● To change your password, access My Handai.3
4.2 Instructions for First-time Users
● The CALL System homepage is displayed automatically after logon. Please pay attention to the homepage because it may contain important notices concerning the use of the CALL System.
● You can save 500MB of data in the document in the “library”.
● As external storage media, you can use USB storage devices.
● You are allowed to use only A4-size paper for printing. The number of hard copies you may produce in each semester is limited to 150 pages.
● Note that the removal of any file to the Recycle Bin folder on the desktop results in immediate, complete, and irrevocable deletion of the file.
4.3 Japanese Input
Japanese input is enabled by MS-IME. You can change input mode through either of the following two methods:
● Click on the input mode button of the MS-IME toolbar and select input mode from the list.
● Use the “半角/全角” (one-byte/two-byte) changeover key, located close to the top left corner of any Japanese keyboard, to switch between direct (alphabetic) input and hiragana input.
* If the MS-IME toolbar is hidden, hit the one-byte/two-byte changeover key, which you will find close to the top left corner of any Japanese keyboard. It will then be displayed.
3 Osaka University Portal My Handai: https://my.osaka-u.ac.jp/ (Available only in Japanese)
62 CHAPTER 4: CALL System
4.4 Switching Keyboard Languages
You can change the keyboard language to allow direct input of German, English, French, Russian, Chinese, Korean, Vietnamese, or Hungarian, while you create a document using Microsoft Word, etc. You can change the keyboard language by the simultaneous pressing of the Alt and Shift keys. Repeat this until the desired language is chosen.
4.5 Internet Explorer (Web Browser)
● Double-click the Internet Explorer icon.
● Internet Explorer starts up with the display of a homepage (according to the homepage setting).
● To close Internet Explorer, click on the cross (X) in the top right corner of the browser window.
Figure 4.3 Internet Explorer icon
4.6 Web Mail
● Double-click the “情報システム Web メール” icon.
● For exchanging email, use the web mail service provided by the Information Education System. Descriptions concerning the web mail service in Section 3.4.1, etc., apply to CALL System terminals as well.
Figure 4.4 Information Education System Web Mail icon
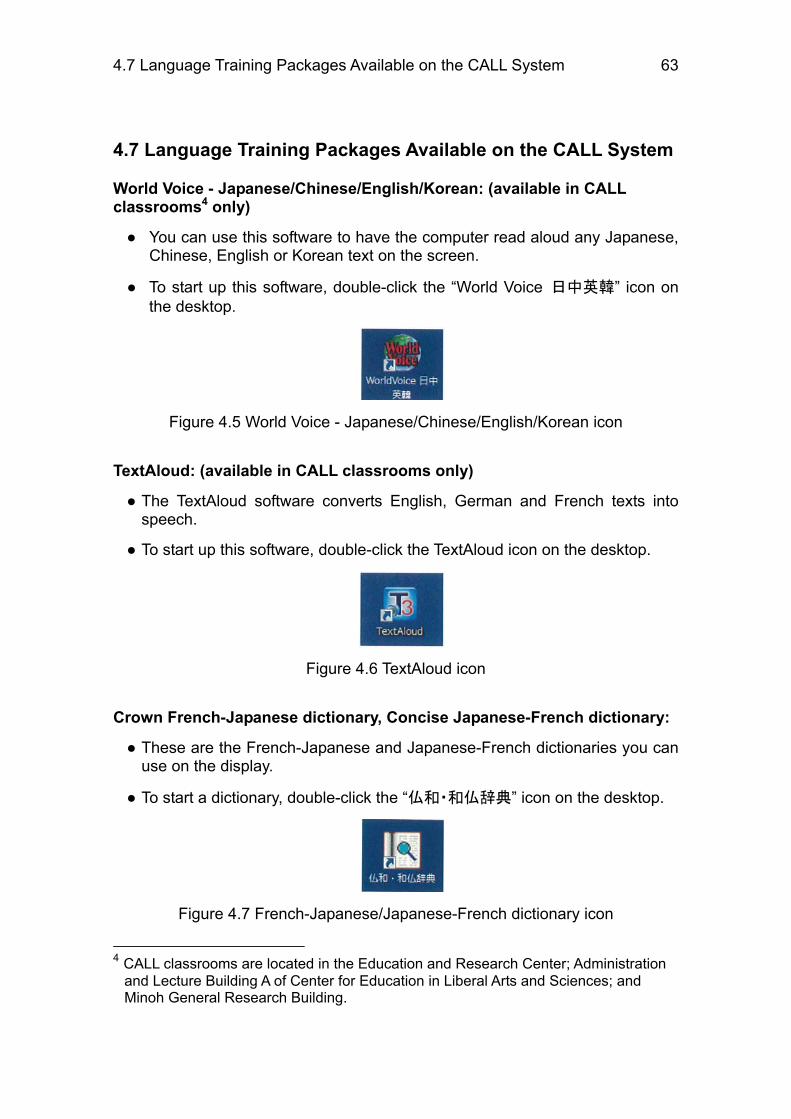
4.7 Language Training Packages Available on the CALL System 63
4.7 Language Training Packages Available on the CALL System
World Voice - Japanese/Chinese/English/Korean: (available in CALL classrooms4 only)
● You can use this software to have the computer read aloud any Japanese, Chinese, English or Korean text on the screen.
● To start up this software, double-click the “World Voice 日中英韓” icon on the desktop.
Figure 4.5 World Voice - Japanese/Chinese/English/Korean icon
TextAloud: (available in CALL classrooms only)
● The TextAloud software converts English, German and French texts into speech.
● To start up this software, double-click the TextAloud icon on the desktop.
Figure 4.6 TextAloud icon
Crown French-Japanese dictionary, Concise Japanese-French dictionary:
● These are the French-Japanese and Japanese-French dictionaries you can use on the display.
● To start a dictionary, double-click the “仏和・和仏辞典” icon on the desktop.
Figure 4.7 French-Japanese/Japanese-French dictionary icon
4 CALL classrooms are located in the Education and Research Center; Administration
and Lecture Building A of Center for Education in Liberal Arts and Sciences; and Minoh General Research Building.
64 CHAPTER 4: CALL System
クリック・ル・フランセ (Click Le Français): ● This software helps you acquire general skills in the French language as you
can do a multitude of exercises covering the basics, listening, and speaking.
● Double-clicking the “クリック・ル・フランセ” icon on the desktop starts this software on Internet Explorer.
Figure 4.8 Click Le Français icon
CALL Deutsch:
● This German learning software consists of a grammar courseware package, which combines grammatical explanations, exercises, and tests, and a collection of video-taped skits that help you learn conversation in various situations.
● Double-clicking the CALL Deutsch icon on the desktop starts this software on Internet Explorer.
Figure 4.9 CALL Deutsch icon

4.7 Language Training Packages Available on the CALL System 65
Listen to Me!” Series:
● This software trains you in English listening.
● The complete training consists of 10 courses. Open the “Listen to me!” folder on the desktop to find the icons for each individual course:5
Basic/intermediate: American Daily Life Basic/intermediate: Introduction to College Life Intermediate: College Life 1 Advanced: College Life 2 English for Science 1 English for Science 2
Readers English-Japanese dictionary:
● With this application enabled, you can display the meaning of a word simply by placing the mouse cursor over it. This serves as a convenient English-Japanese dictionary.
● To enable this dictionary, double-click the “リーダーズ英和辞典” icon on the desktop.
Figure 4.10 Readers English-Japanese dictionary icon
5 English for Science 1 and English for Science 2 are available only at the CALL room in the Education and Research Center.
66 CHAPTER 4: CALL System
NetAcademy2: ● This is a comprehensive multimedia CALL package that includes: TOEIC
training, a technical English course, a medical English course, a course on basic English writing, and a Japanese language course.
● To use this package, login to My Handai. To read instructions about the use of NetAcademy2 and responses to frequently asked questions (FAQs), go to the NetAcademy Campus License6 details page.
TOEIC Vocabulary:
● This software helps you learn 600 words that are often used in daily and business conversation.
● The software provides three courses on listening and three courses on reading. Open the TOEIC Vocabulary folder on the desktop to find icons for each individual course.
Figure 4.11 TOEIC Vocabulary folder icon
MovieTeleco:
● This software trains you in English pronunciation.
● To start up this software, double-click the MovieTeleco icon on the desktop.
Figure 4.12 MovieTeleco icon
6 http://www.cmc.osaka-u.ac.jp/j/license/netacademy/netacademy.html (Available only in Japanese)
4.7 Language Training Packages Available on the CALL System 67
Euro Talk:
● This software trains you in English, German, French, Chinese, Turkish, Korean, Tagalog, Spanish, Burmese, Vietnamese, Thai, Arabic, Russian, Indonesian, and Swedish, using high-quality video and sound.
● To start up this software, double-click the Euro Talk icon on the desktop.
Figure 4.13 Euro Talk icon
68 CHAPTER 4: CALL System
4.8 Other Software Packages
● Besides the language learning applications, you can use the following applications on the CALL system.
Microsoft Office Professional Hidemaru Editor WinShell Windows Media Player RealPlayer QuickTime Adobe Reader
4.9 Printing Restrictions
The maximum number of hard copies you can produce is limited to 150 pages per each semester. In consideration of this limit, avoid unnecessarily producing too many hard copies. The number of hard copies you have already produced can be checked on My Handai.
4.10 Trouble Reporting
● If you encounter any trouble during class, consult a teaching assistant or the instructor. If you encounter any trouble outside class hours, report it to the office on the first floor of the Education and Research Center Building.
● To read responses to FAQs and explanations about commonly experienced troubles (causes, corrective actions, precautions, etc.), go to the Osaka University CALL System home page http://www.call.osaka-u.ac.jp/7 (available only in Japanese).
7 Accessible only from CALL System terminals
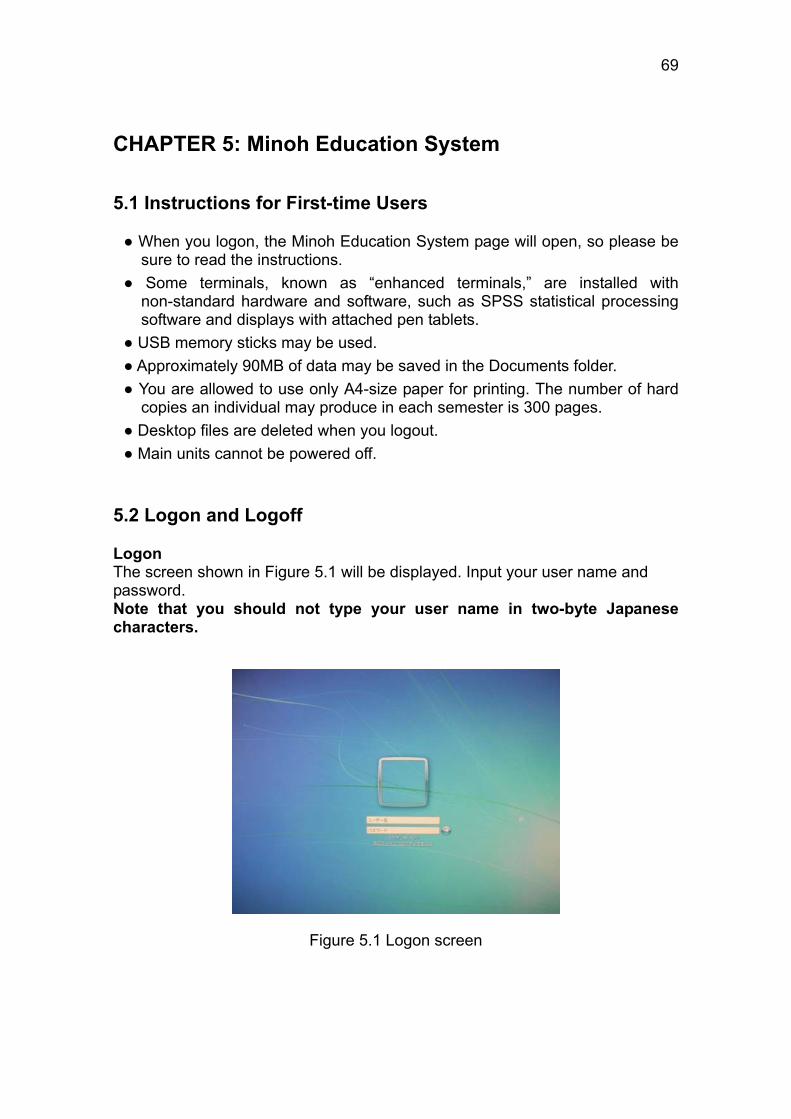
69
CHAPTER 5: Minoh Education System
5.1 Instructions for First-time Users
● When you logon, the Minoh Education System page will open, so please be sure to read the instructions.
● Some terminals, known as “enhanced terminals,” are installed with non-standard hardware and software, such as SPSS statistical processing software and displays with attached pen tablets.
● USB memory sticks may be used. ● Approximately 90MB of data may be saved in the Documents folder. ● You are allowed to use only A4-size paper for printing. The number of hard
copies an individual may produce in each semester is 300 pages. ● Desktop files are deleted when you logout. ● Main units cannot be powered off.
5.2 Logon and Logoff
Logon The screen shown in Figure 5.1 will be displayed. Input your user name and password. Note that you should not type your user name in two-byte Japanese characters.
Figure 5.1 Logon screen

70 CHAPTER 5: Minoh Education System
● User name (U) Enter your Osaka University Personal ID as your user name. ● Password (P) A password is a secret code that is used in combination with your user name to demonstrate that you are the authentic holder of the user name. ● Logon to (L) Ensure that logon to “EDU” is specified, and then click “OK.” Logoff ● Click on the Start button, and then click on Logoff. This will terminate all application programs and make the computer ready for use by another user. The main unit cannot be powered off. Changing your password To change your password, access My Handai.1
1 Osaka University Portal My Handai: https://my.osaka-u.ac.jp/ (Available only in Japanese)
5.3 Types of Terminal in the Minoh Education System 71
5.3 Types of Terminal in the Minoh Education System
The Minoh Education System includes three types of terminal: regular, enhanced, and faculty terminals, all with different hardware and software. Compared with regular terminals, enhanced terminals include extra software and hardware, and several of these terminals are installed in each classroom. Faculty terminals are for the use of instructors during class, and one is installed on the lecture podium. Enhanced terminals can easily be distinguished from regular terminals by the fact that they are equipped with displays with attached gray pen tablets and scanners. Table 5.1 shows the main software installed on each type of terminal. To launch a program, click on the Start button at the bottom left of the screen, then click on All Programs before clicking on the icon for the program you want to launch. Table 5.2 shows the main hardware installed on each type of terminal. 5.4 Japanese Input
Japanese can be input not only via the Microsoft IME, but also via ATOK, which is regarded as providing highly efficient character conversion. You can switch between these systems by using one of the two methods below. ● Click on the Microsoft IME icon (the name pops up when you move the cursor near it with the mouse), and click on ATOK on the menu displayed. ● Press the Ctrl and Shift keys.

72 CHAPTER 5: Minoh Education System
5.5 Switching between Input Languages
The characters and letters used in various different languages can be input directly from the keyboard. Use the following procedure as required to set the keyboard to enable input in the desired language. 1. Click on the Start button. 2. Click on Control Panel. 3. Click on Clock, Language and Region to display the Change keyboards or other input methods dialog box. 4. Click on the ‘Change keyboards (C)…’ button, and check the language(s) required. If the keyboard is set to permit input in two or more languages, you can switch between the input languages by one of the following two methods below. ● Click on JP to the right of the Taskbar, and click on the desired input language from the menu displayed. ● Press the Alt and Shift keys. 5.6 Using the Printers
You are allowed to use only A4-size paper for printing. The number of hard copies an individual may produce in each semester is 300 pages. The number of hard copies you have already produced can be checked on My Handai. Printouts will be output on the printer marked with the same sticker as the sticker attached to the terminal. 5.7 Trouble Reporting
● If you encounter any trouble during class, consult a teaching assistant or the instructor. If you encounter any trouble outside class hours, report it to the office on the fourth floor of the Minoh General Research Building.

5.7 Trouble Reporting 73
Table 5.1: Software installed on each type of terminal
Name Description Regular Enhanced Faculty Word 2010 Word processing software ○ ○ ○ Excel 2010 Spreadsheet software ○ ○ ○ PowerPoint 2010
Presentation software ○ ○ ○
Access 2010 Database software. Used to process very large amounts of data.
○ ○ ○
Ichitaro 2010 Word processing software ○ ○ ○ ATOK 2010 Switches between kana
and kanji characters ○ ○ ○
Visual Studio 2010
Software for software development using the C or C++ programming languages
○ ○ ○
Acrobat X Standard
Software for creating and manipulating PDF files
○ ○ ○
Dreamweaver CS5
Software for creating sophisticated websites
○ ○ ○
Photoshop Elements 9.0
Software for editing photographs and creating images. Can be used effectively by using the displays with attached pen tablets found on enhanced terminals.
○ ○ ○
Video playback software
Blu-ray videos cannot be played back on enhanced terminals
× ○ ○
SPSS Statistics Base
Sophisticated statistical processing software
× ○ ○
Windows Movie Maker
Simple video-editing software
○ ○ ○
EmEditor Text editor that supports a variety of languages
○ ○ ○
Firefox Web browser ○ ○ ○ FFFTP FTP client software ○ ○ ○

74 CHAPTER 5: Minoh Education System
Table 5.2: Hardware installed on each type of terminal
Name Description Regular Enhanced Faculty Blu-ray, DVD drives
Drives capable of reading and writing Blu-ray discs and DVDs. Blu-ray videos can only be played back on faculty terminals.
× ○ ○
Scanner Capable of handling paper up to A4
× ○ ○
Displays with attached pen tablets
The pen can be used to perform operations directly on the screen. Can be effectively used with image-handling software such as Photoshop Elements and PowerPoint.
× ○ ○
75
CHAPTER 6: Osaka University CLE
6.1 Introduction
Osaka University CLE (Collaboration and Learning Environment) is a web-based classroom support system (course management system) that consists of the Blackboard R9 (TM) courseware produced by US software maker Blackboard, customized for Osaka University. The Osaka University CLE has the following functions. ● Creation and uploading of classroom materials ● Online learning via the mini test function ● Report submission and scoring functions ● QA sessions on bulletin boards around topics connected with classroom
lessons ● Individual class schedule functions for faculty and students ● Gradebook function ● Group and email functions for interaction between course participants ● Journal function The system also includes a range of additional functions for use in classes. 6.2 Login to Osaka University CLE
The Osaka University CLE login page can be found at https://cle.koan.osaka-u.ac.jp/.
When using this page from the Information Education System, it can be accessed via the Osaka University CLE link in the left-hand menu on the Information Education System website. You can also access it from the button on the right-hand side of the My Handai website (Figure 6.1). At the top left of the login page (Figure 6.2) you will find a button for changing languages. You can use this to select English or Japanese as the language used on the CLE. The two buttons displayed on the top right can be used to change the font size and screen contrast. Notices about the CLE are displayed at the bottom of this screen.
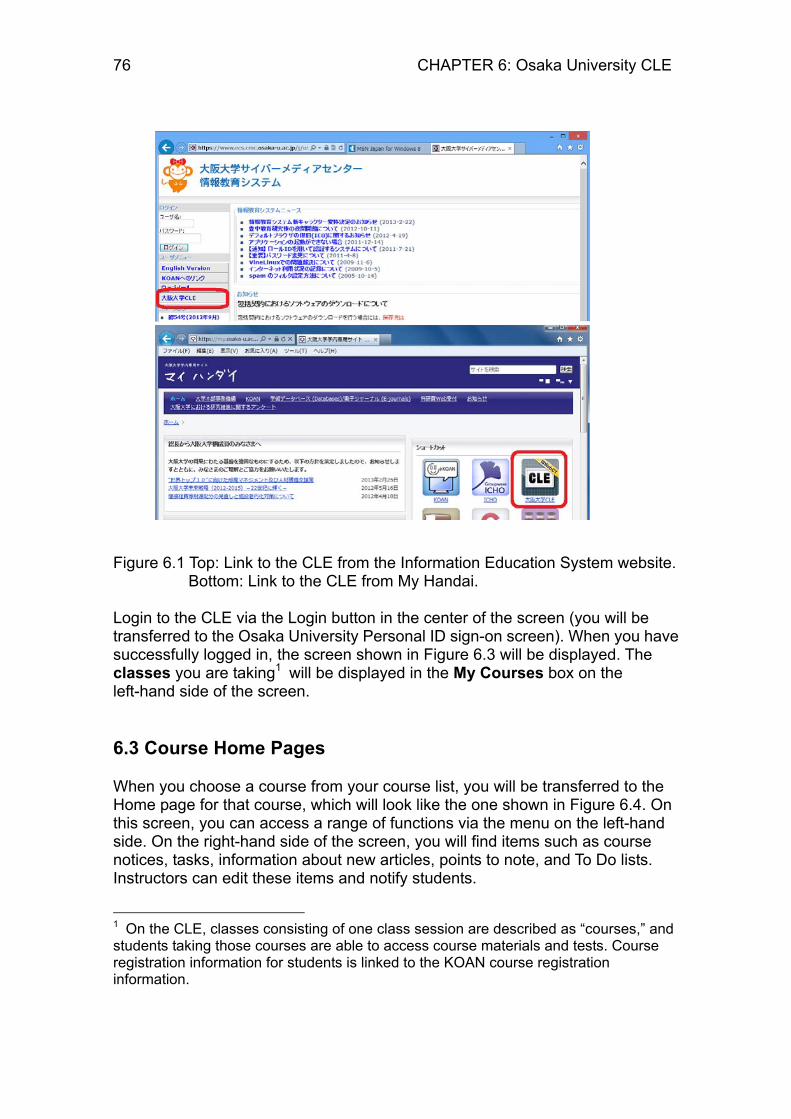
76 CHAPTER 6: Osaka University CLE
Figure 6.1 Top: Link to the CLE from the Information Education System website.
Bottom: Link to the CLE from My Handai. Login to the CLE via the Login button in the center of the screen (you will be transferred to the Osaka University Personal ID sign-on screen). When you have successfully logged in, the screen shown in Figure 6.3 will be displayed. The classes you are taking1 will be displayed in the My Courses box on the left-hand side of the screen. 6.3 Course Home Pages
When you choose a course from your course list, you will be transferred to the Home page for that course, which will look like the one shown in Figure 6.4. On this screen, you can access a range of functions via the menu on the left-hand side. On the right-hand side of the screen, you will find items such as course notices, tasks, information about new articles, points to note, and To Do lists. Instructors can edit these items and notify students.
1 On the CLE, classes consisting of one class session are described as “courses,” and students taking those courses are able to access course materials and tests. Course registration information for students is linked to the KOAN course registration information.
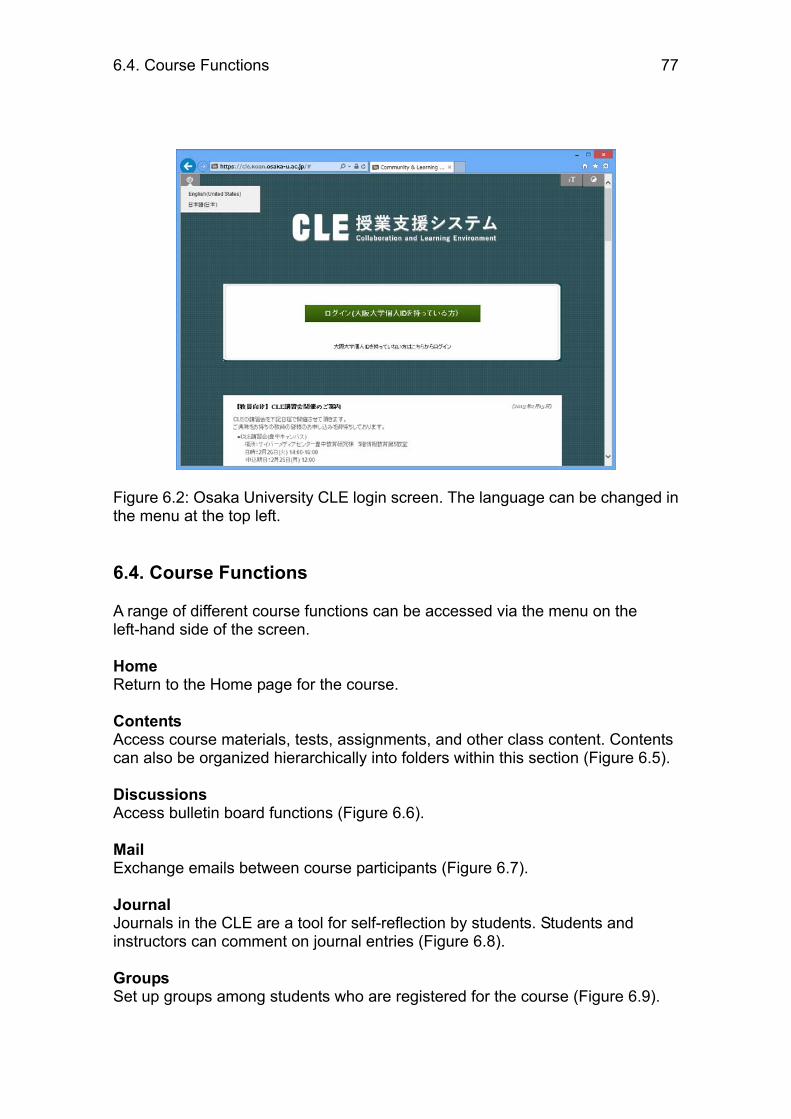
6.4. Course Functions 77
Figure 6.2: Osaka University CLE login screen. The language can be changed in the menu at the top left. 6.4. Course Functions
A range of different course functions can be accessed via the menu on the left-hand side of the screen. Home Return to the Home page for the course. Contents Access course materials, tests, assignments, and other class content. Contents can also be organized hierarchically into folders within this section (Figure 6.5). Discussions Access bulletin board functions (Figure 6.6). Mail Exchange emails between course participants (Figure 6.7). Journal Journals in the CLE are a tool for self-reflection by students. Students and instructors can comment on journal entries (Figure 6.8). Groups Set up groups among students who are registered for the course (Figure 6.9).
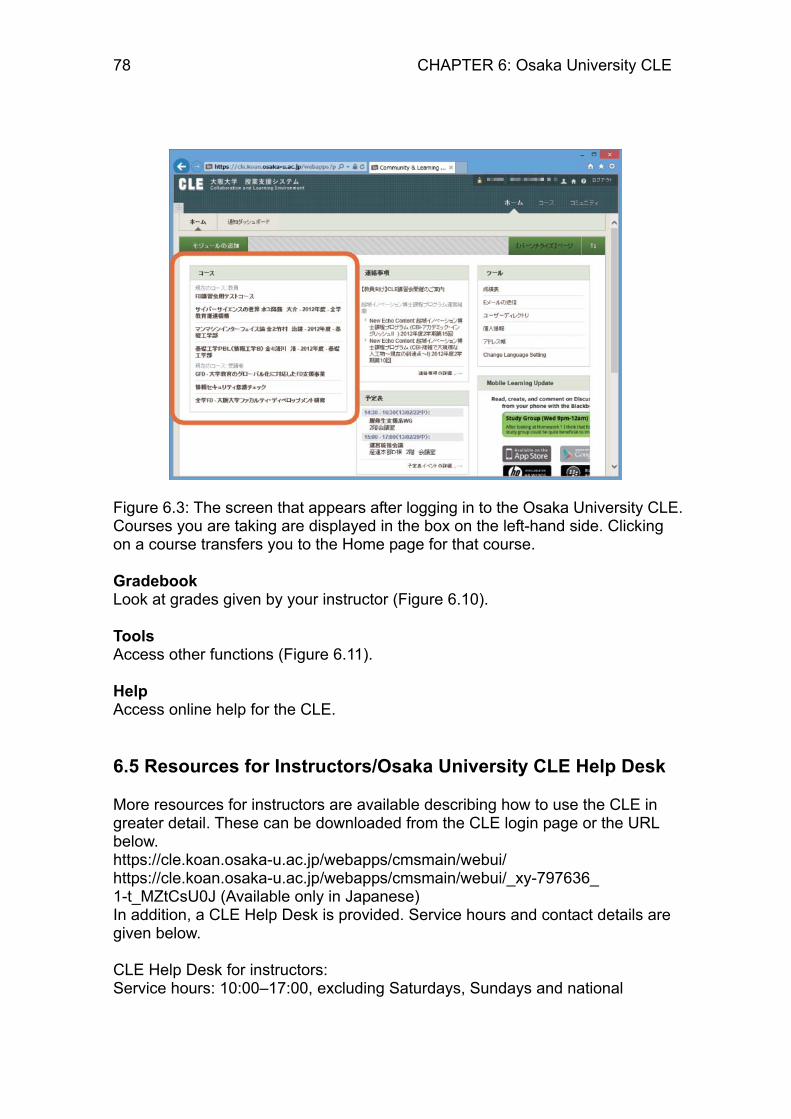
78 CHAPTER 6: Osaka University CLE
Figure 6.3: The screen that appears after logging in to the Osaka University CLE. Courses you are taking are displayed in the box on the left-hand side. Clicking on a course transfers you to the Home page for that course. Gradebook Look at grades given by your instructor (Figure 6.10). Tools Access other functions (Figure 6.11). Help Access online help for the CLE. 6.5 Resources for Instructors/Osaka University CLE Help Desk
More resources for instructors are available describing how to use the CLE in greater detail. These can be downloaded from the CLE login page or the URL below. https://cle.koan.osaka-u.ac.jp/webapps/cmsmain/webui/ https://cle.koan.osaka-u.ac.jp/webapps/cmsmain/webui/_xy-797636_ 1-t_MZtCsU0J (Available only in Japanese) In addition, a CLE Help Desk is provided. Service hours and contact details are given below. CLE Help Desk for instructors: Service hours: 10:00–17:00, excluding Saturdays, Sundays and national
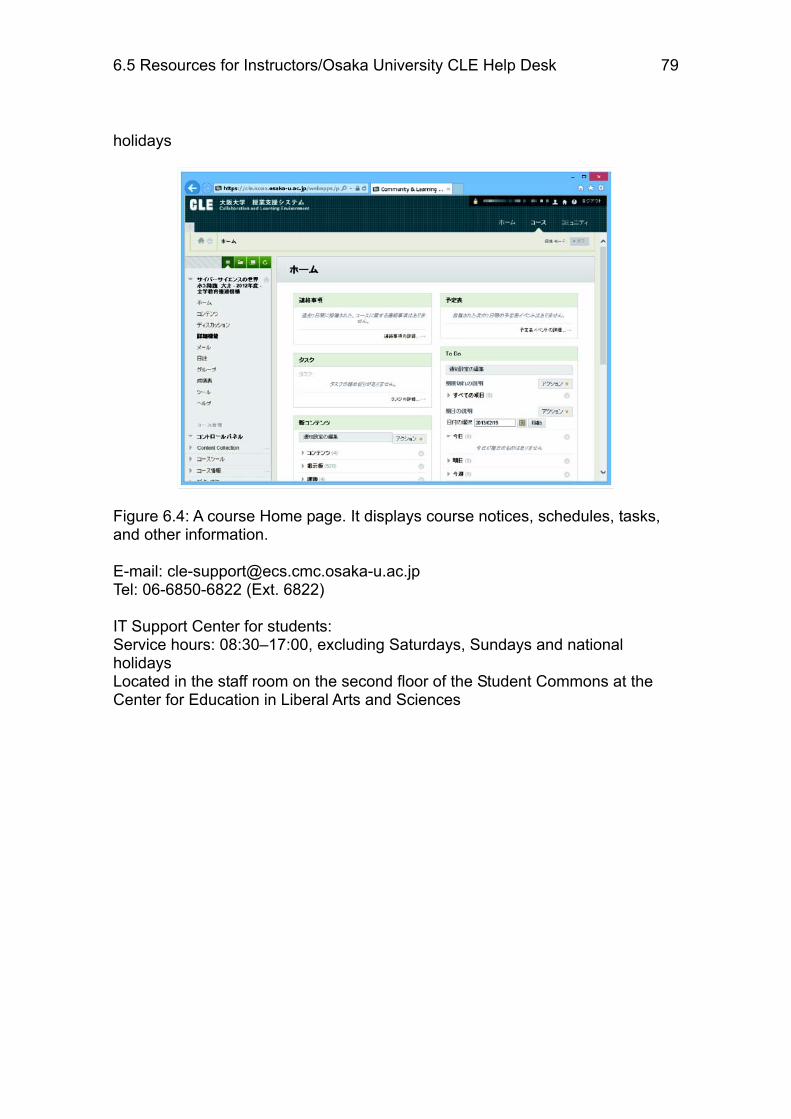
6.5 Resources for Instructors/Osaka University CLE Help Desk 79
holidays
Figure 6.4: A course Home page. It displays course notices, schedules, tasks, and other information. E-mail: [email protected] Tel: 06-6850-6822 (Ext. 6822) IT Support Center for students: Service hours: 08:30–17:00, excluding Saturdays, Sundays and national holidays Located in the staff room on the second floor of the Student Commons at the Center for Education in Liberal Arts and Sciences
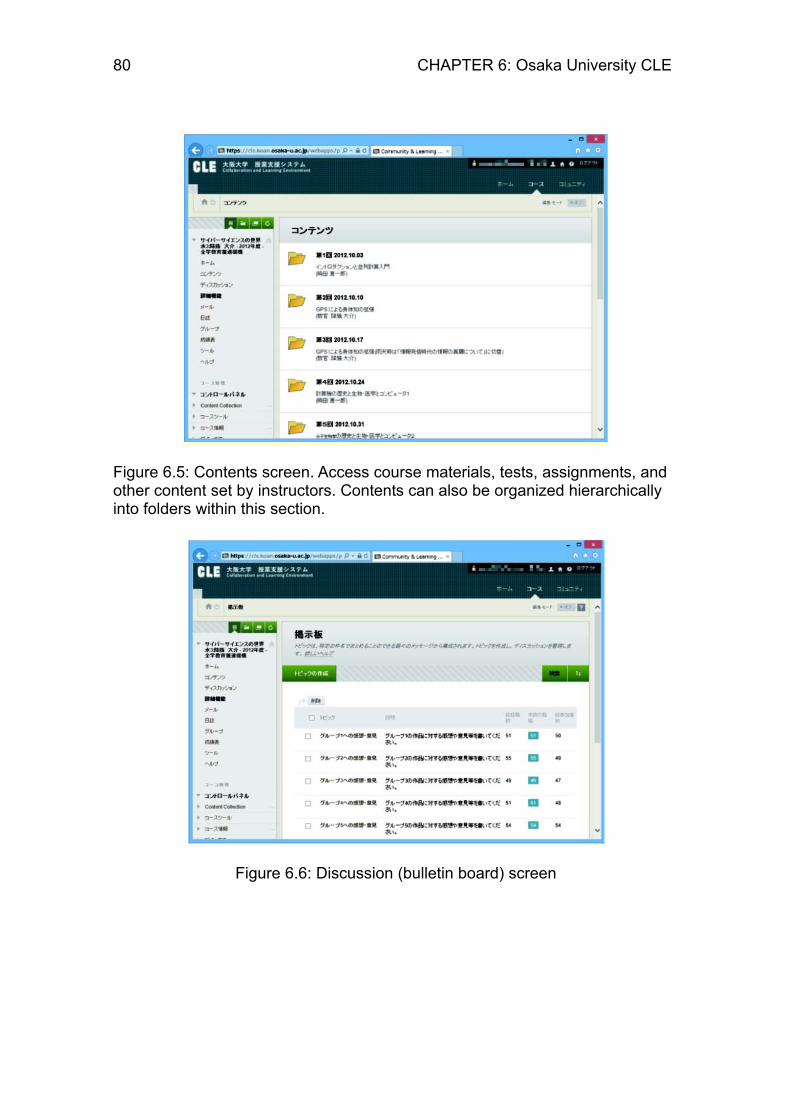
80 CHAPTER 6: Osaka University CLE
Figure 6.5: Contents screen. Access course materials, tests, assignments, and other content set by instructors. Contents can also be organized hierarchically into folders within this section.
Figure 6.6: Discussion (bulletin board) screen
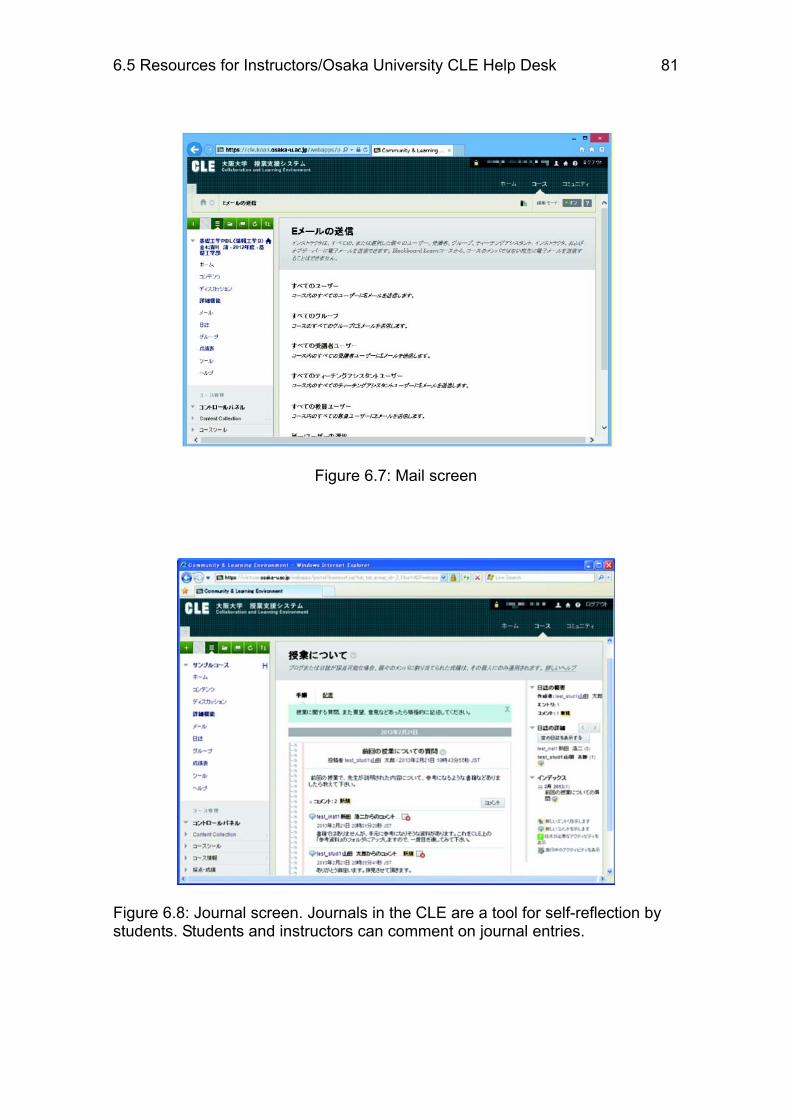
6.5 Resources for Instructors/Osaka University CLE Help Desk 81
Figure 6.7: Mail screen
Figure 6.8: Journal screen. Journals in the CLE are a tool for self-reflection by students. Students and instructors can comment on journal entries.
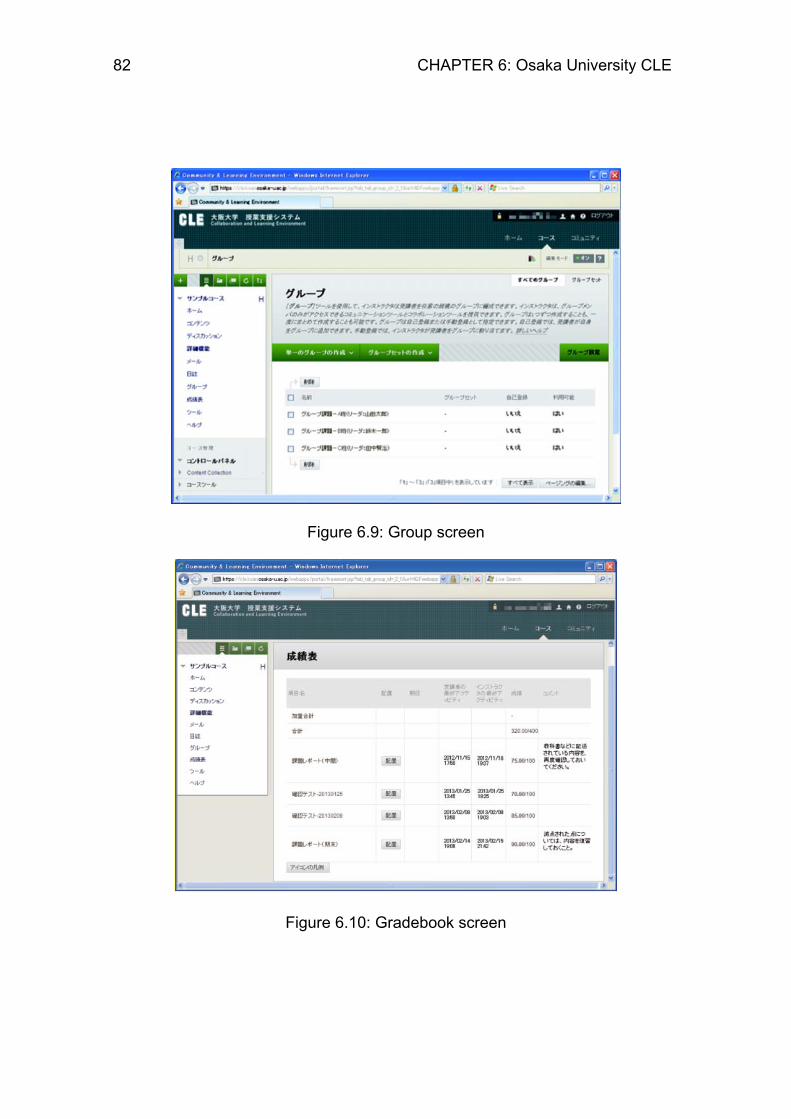
82 CHAPTER 6: Osaka University CLE
Figure 6.9: Group screen
Figure 6.10: Gradebook screen

6.5 Resources for Instructors/Osaka University CLE Help Desk 83
Figure 6.11: Tools screen
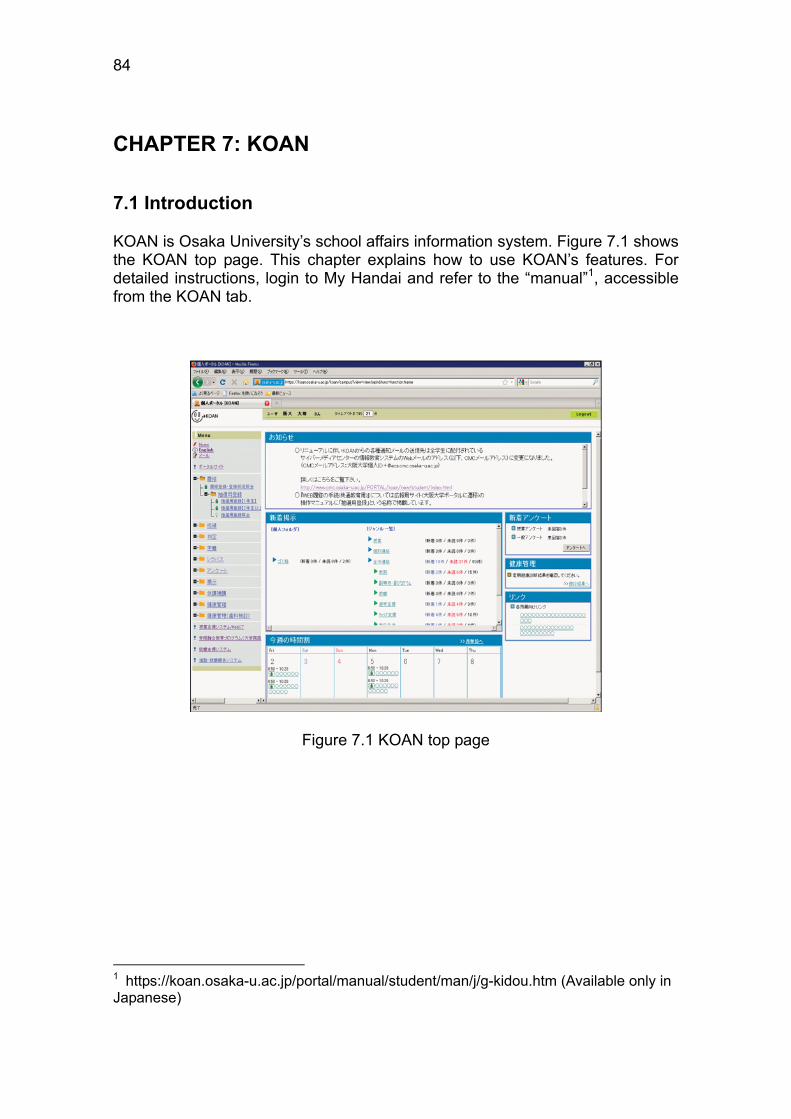
84
CHAPTER 7: KOAN
7.1 Introduction
KOAN is Osaka University’s school affairs information system. Figure 7.1 shows the KOAN top page. This chapter explains how to use KOAN’s features. For detailed instructions, login to My Handai and refer to the “manual”1, accessible from the KOAN tab.
Figure 7.1 KOAN top page
1 https://koan.osaka-u.ac.jp/portal/manual/student/man/j/g-kidou.htm (Available only in Japanese)

7.1 Introduction 85
Figure 7.2 Information Education System web page Students use KOAN mainly for the following purposes:
● Applying for courses ● Viewing grades ● Calculating the total number of credits you will earn at the end of the current
academic year ● Registering an address ● Viewing syllabuses ● Responding to a questionnaire survey ● Viewing the bulletin board ● Viewing information about the cancellation of lectures and announcements
on supplementary lectures ● Viewing the results of a health check-up ● Viewing the results of a dental check-up
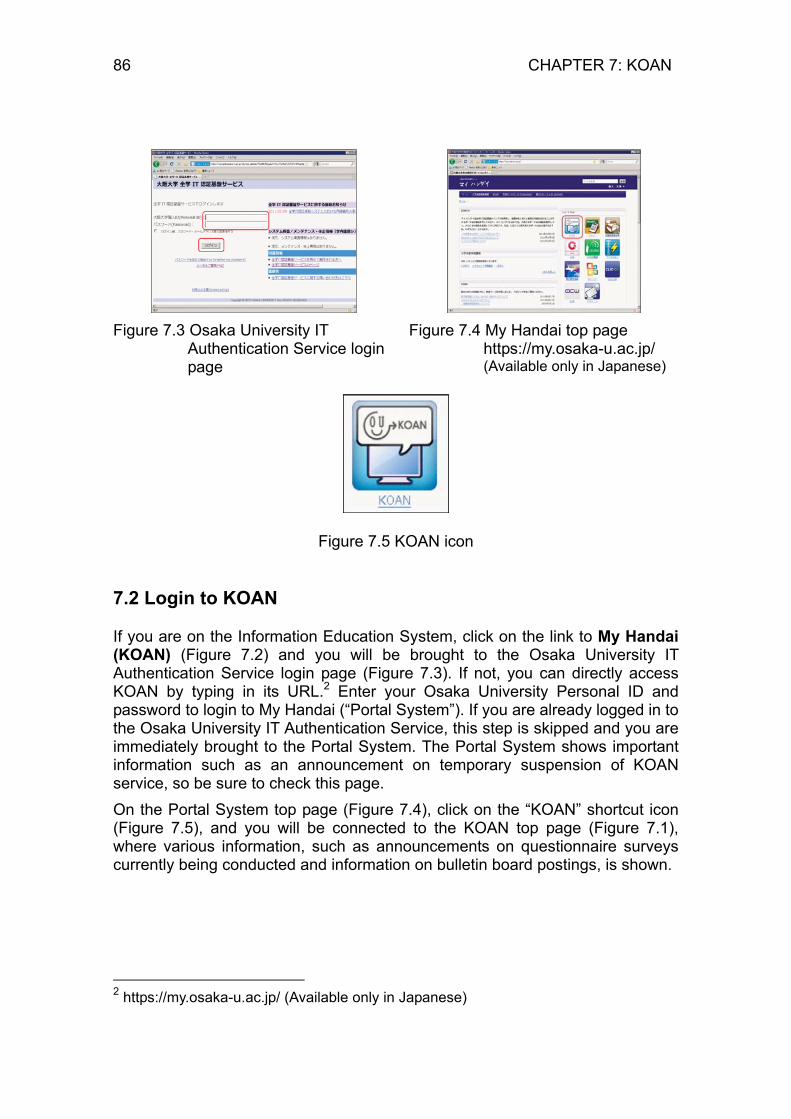
86 CHAPTER 7: KOAN
Figure 7.3 Osaka University IT
Authentication Service login page
Figure 7.4 My Handai top page https://my.osaka-u.ac.jp/ (Available only in Japanese)
Figure 7.5 KOAN icon 7.2 Login to KOAN
If you are on the Information Education System, click on the link to My Handai (KOAN) (Figure 7.2) and you will be brought to the Osaka University IT Authentication Service login page (Figure 7.3). If not, you can directly access KOAN by typing in its URL.2 Enter your Osaka University Personal ID and password to login to My Handai (“Portal System”). If you are already logged in to the Osaka University IT Authentication Service, this step is skipped and you are immediately brought to the Portal System. The Portal System shows important information such as an announcement on temporary suspension of KOAN service, so be sure to check this page. On the Portal System top page (Figure 7.4), click on the “KOAN” shortcut icon (Figure 7.5), and you will be connected to the KOAN top page (Figure 7.1), where various information, such as announcements on questionnaire surveys currently being conducted and information on bulletin board postings, is shown.
2 https://my.osaka-u.ac.jp/ (Available only in Japanese)
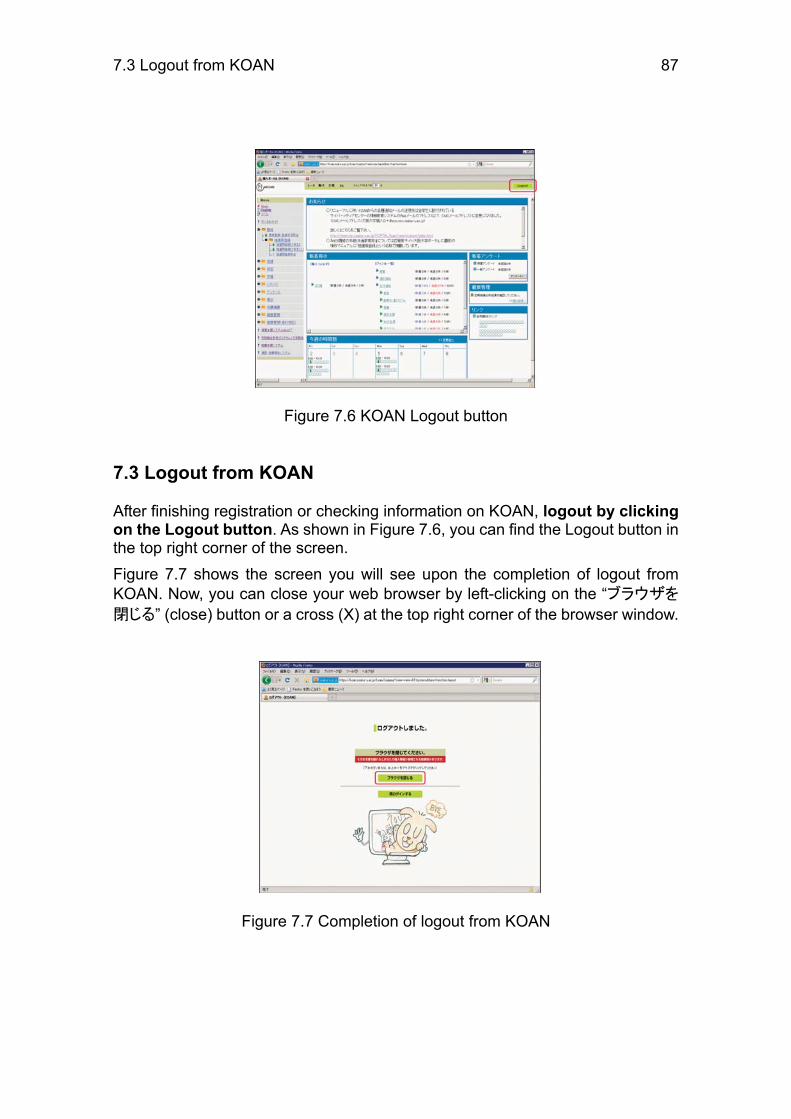
7.3 Logout from KOAN 87
Figure 7.6 KOAN Logout button 7.3 Logout from KOAN
After finishing registration or checking information on KOAN, logout by clicking on the Logout button. As shown in Figure 7.6, you can find the Logout button in the top right corner of the screen. Figure 7.7 shows the screen you will see upon the completion of logout from KOAN. Now, you can close your web browser by left-clicking on the “ブラウザを
閉じる” (close) button or a cross (X) at the top right corner of the browser window.
Figure 7.7 Completion of logout from KOAN

88
Appendix A Education Computer System Usage Regulations
Article 1 These Regulations relate to, and stipulate requirements for, the use of the Education Computer System managed and operated by the Osaka University Cybermedia Center (hereinafter “CMC”) (hereinafter “the Education Computer System”).
Article 2 The persons permitted to use the Education Computer System shall be as listed below. (1) Osaka University staff (2) Students of Osaka University (hereinafter “the University”) (3) Any other persons deemed appropriate by the Director of the
Cybermedia Center (hereinafter “the CMC Director”). 2 Persons who are to use the Education Computer System
(hereinafter “users”) shall, in advance, be given an Osaka University Personal ID for the purpose of using the Osaka University IT Authentication Service.
Article 3 If classes are to be conducted in subjects covered in the University-Wide General Education Regulations, or the regulations for the relevant school, faculty or graduate school, when the Education Computer System is to be used in the information education rooms or the CALL rooms of the CMC’s Toyonaka Education and Research Center (hereinafter “IT education classrooms”), the instructor responsible for that subject must submit the prescribed application form in advance to the director of the department in question (in cases where the system is to be used in a class in one of the university-wide general education subjects, this shall, as a rule, be deemed to be the Director of the Center for Education in Liberal Arts and Sciences) and receive his or her approval. 2 If, in cases other than those stipulated in the preceding
paragraph, a request to use the Education Computer System for the purposes of education and research in the IT education classrooms has been made by a person in a category listed in Article 2, Paragraph 1 (1) or (3) above, the CMC Director may permit such usage, as long as this poses no obstacle to the usages in the foregoing paragraph.
Article 4 Having approved a request of the type described in the preceding paragraph, the CMC Director shall notify the requesting party to that effect in writing.
Article 5 When using the Education Computer System, users must comply with guidelines set out separately.

89
Article 6 As and when necessary, the CMC Director may restrict the availability of the Education Computer System to users.
Article 7 As and when necessary, the CMC Director may request a user to report on the status and results of his or her use of the system.
Article 8 The department to which the user belongs (as a rule, if the system is to be used in a lesson in one of the university-wide general education subjects, this shall be deemed to be the Center for Education in Liberal Arts and Sciences) must bear part of the expenses pertaining to the user’s use of the system. 2 The abovementioned amount to be borne and the method
whereby it is to be borne shall be determined by the CMC Director upon discussion at the CMC Faculty Council.
3 Notwithstanding the provisions of the first paragraph, the obligation to bear expenses may be waived if this is deemed necessary by the CMC Director.
Article 9 If a user has infringed these Regulations, or if the operation of the CMC has suffered serious disruption through the fault of the user, the CMC Director may bar the user in question from using the system for a specified period.
Article 10 Any requirements, other than those stipulated in these Regulations, relating to the use of the Education Computer System, shall be determined by the CMC Director.
Supplementary Provisions 1 These Regulations shall come into effect on April 1, 2000. 2 The Osaka University Education Center for Information
Processing Usage Regulations (instituted on March 17, 1982) have been revoked.
3 Users who received usage approval in the 2000 academic year, under the Osaka University Education Center for Information Processing Usage Regulations, prior to the effectuation of these Regulations, shall be regarded as having been registered for usage under these Regulations.
Supplementary Provisions These amendments shall come into effect on April 1, 2004.
Supplementary Provisions These amendments shall come into effect on April 1, 2007.
Supplementary Provisions (abridged) Date of Effect
These amendments shall come into effect on April 1, 2012. Supplementary Provisions
These amendments shall come into effect on April 15, 2014.
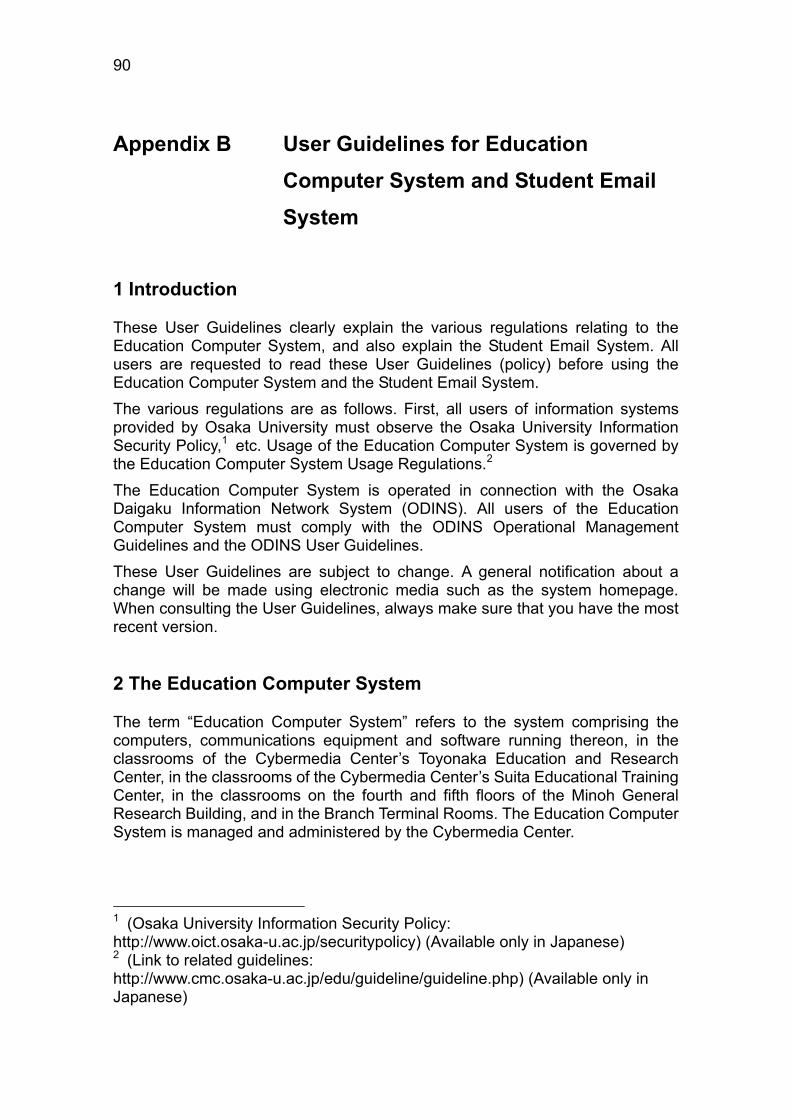
90
Appendix B User Guidelines for Education Computer System and Student Email System
1 Introduction
These User Guidelines clearly explain the various regulations relating to the Education Computer System, and also explain the Student Email System. All users are requested to read these User Guidelines (policy) before using the Education Computer System and the Student Email System. The various regulations are as follows. First, all users of information systems provided by Osaka University must observe the Osaka University Information Security Policy,1 etc. Usage of the Education Computer System is governed by the Education Computer System Usage Regulations.2 The Education Computer System is operated in connection with the Osaka Daigaku Information Network System (ODINS). All users of the Education Computer System must comply with the ODINS Operational Management Guidelines and the ODINS User Guidelines. These User Guidelines are subject to change. A general notification about a change will be made using electronic media such as the system homepage. When consulting the User Guidelines, always make sure that you have the most recent version. 2 The Education Computer System
The term “Education Computer System” refers to the system comprising the computers, communications equipment and software running thereon, in the classrooms of the Cybermedia Center’s Toyonaka Education and Research Center, in the classrooms of the Cybermedia Center’s Suita Educational Training Center, in the classrooms on the fourth and fifth floors of the Minoh General Research Building, and in the Branch Terminal Rooms. The Education Computer System is managed and administered by the Cybermedia Center.
1 (Osaka University Information Security Policy: http://www.oict.osaka-u.ac.jp/securitypolicy) (Available only in Japanese) 2 (Link to related guidelines: http://www.cmc.osaka-u.ac.jp/edu/guideline/guideline.php) (Available only in Japanese)
91
3 The Student Email System
The Student Email System provided by Osaka University aims to facilitate the provision of study-related information by supporting the distribution of information from Osaka University as well as the exchange of information. Therefore, you are requested to use the system safely by observing all rules and proper manners. Any violation of this principle may cause a problem for many other users and could even harm the reputation of Osaka University. Please observe the following points in order to reduce the risk of undesirable consequences, protect information assets and ensure safe usage of emails. Alumni are also assigned an email address to enable them to contact Osaka University after graduation. • Intended users
The Student Email System can be used by all students at Osaka University and all faculty members teaching in classrooms at the Cybermedia Center.
• Email account and password management Email accounts and passwords assigned by Osaka University should be properly managed by their owners. Never disclose your detailed email account information and/or password to others.
• Observation of the Information Security Policy, etc. All users of the Student Email System should observe the Osaka University Information Security Policy, etc.
• Users’ responsibility Each user is fully responsible/liable for all damages and losses that he/she may incur through the use of the Student Email System.
• Discontinuation of use After graduation, you may apply for the discontinuation of your account for the Student Email System.
• Student Email System Help Desk Please send any questions regarding the use of the Student Email System and inquiries on system administration/faults to: Education System Unit, Information and Communications Technology Services Infrastructure Division, Department of Information and Communications Technology Services TEL: 06-6850-6806 Mail: [email protected]
Inquiries on information distributed by email should be forwarded to the contact address provided in the subject email.
92
4 Misconduct and Improper Activities
4.1 Improper Activities on Computers and Networks The laws in Japan apply to computer and network activities the same as to any other activities. However, clauses prohibiting illegal actions are not included in the User Guidelines for the Education Computer System and the Student Email System. Note also that the fact that an action is not explicitly prohibited does not mean that the action in question is permissible. Principally from the viewpoint of education, actions contravening ethics, and actions grossly contravening system usage etiquette, committed on the Education Computer System or on the Student Email System, are termed “improper activities.”3 The Education Computer System is a University facility, so in cases where an action must not be carried out without permission using University facilities, the same applies to the Education Computer System. The Education Computer System must not be used for activities carried out for profit, such as paid programming work, or creating documents for use in part time employment as a private tutor or cram school tutor. Of those improper activities, including using the system for unintended purposes, using other people’s user accounts and allowing other people to use your own user accounts, and sabotaging system operations, are treated as particularly serious improprieties. Any user deemed to have carried out a serious impropriety will be subjected to suspension and curtailment of his or her entitlement to use the system. Such users may also be subjected to disciplinary measures in accordance with the provisions of Osaka University General Regulations and Osaka University Graduate Schools General Regulations. When using the Education Computer System, never attempt to find out the password used by another user or the passwords of the Operation Managers of the Education Computer. Such attempts will be regarded as actions intended for improper use of a computer. This type of action, which can only be regarded as a preparation for improper action, is termed “action preparatory to impropriety.” Actions preparatory to impropriety will be treated in the same way as improper actions. 4.2 Improper Actions Carried Out during Lectures or Seminars If an action contravening the Education Computer System Usage Regulations has been carried out during a lecture or seminar, the Education Computer System Usage Regulations will be applied, regardless of whether the action is improper in terms of the lecture or seminar. Any cheating, substitution of a proxy, plagiarism, and other offences in lectures or seminars in the classrooms listed in 3 Since February 13, 2000, when the Act on the Prohibition of Unauthorized Computer
Access was enacted, unauthorized computer access and contributory actions have been the subject of criminal punishments such as imprisonment and fines.
93
Chapter 2 will be treated in the same way as if the offence had taken place in a regular lecture room. In other words, the disallowing of attendance points or course credits as a sanction for improper actions, for instance, will be handled in accordance with the regulations of the relevant school/faculty, as if the offence had taken place in a regular lecture room. Suppose, for example, that student A has told his login ID and password to his friend student B, and had student B substitute for him as a proxy in a class held using the Education Computer System. A has allowed another person to use his account, and B has used another person’s account, so both A and B are treated as improper users of the Education Computer System. The sanctions imposed for the offence of substitution of a proxy are of no concern to the Education Computer System Operation Manager. At the discretion of the instructor responsible, the students in question could have attendance points deducted, or sanctions could be suspended, for instance. 4.3 Unauthorized Accessing of Other Organizations’ Networks Using network equipment known as a firewall, the network environment of the Education Computer System imposes restrictions preventing direct communications with other networks. This measure is designed to prevent unauthorized access to or from external networks. If an external network were subject to unauthorized access originating from Osaka University’s network, this could potentially lead to a situation where Osaka University had to disconnect its network from the internet. In some cases, it could even lead to an international incident. Even though Osaka University has implemented measures to prevent such an event that disturbs other organizations, note that any such attempt of unauthorized access will be punished. Any action causing operational disruption to another organization’s computer network, such as sending large volumes of emails, will be treated in the same way as unauthorized access. Note also that even if a computer has been left vulnerable by negligent administration, such as forgetting to set a password, this does not alter the fact that unauthorized access to that computer is prohibited. 5 Respecting Intellectual Property Please respect the copyright of documents and software. Copies of documents and software (other than freeware) installed on the Education Computer System must not be taken by users. If you wish to use freeware you have obtained from an external source, please do so at your own risk. Users must not take unauthorized copies of copyright material using the Education Computer System. The Copyright Act makes exceptions for personal use of copyright material. The Education Computer System is not the personal property of its users, nor is it within their homes, so the use of computers forming
94
part of the Education Computer System is unlikely to be legally regarded as private use. Articles on the internet such as bulletin board postings are the same as regular copyright material. It is extremely difficult to judge whether copyright has been infringed, but for example, quoting an excerpt from a piece of material under copyright (including songs, etc.) in an electronic bulletin board posting without explicitly citing the source, or quoting a piece of material under copyright in full, even if the source is explicitly cited, is likely to constitute copyright infringement. 6 Prohibition of Theft Even though not mentioned explicitly in the Education Computer System User Guidelines, the taking away of any computer comprising the Education Computer System, any components thereof, or unused printing paper provided for them, will be regarded as theft. 7 Prohibition on Operational Disruption Users must not switch off or reset computers or printers. An exception to this rule will be made if the Education Computer System Operation Manager instructs a user to switch off a device if it starts to emit smoke or in some other emergency. Should an act likely to disrupt the operation of the Education Computer System (such as deleting another user’s files, deliberate disruption of the network, and so forth) take place, severe penalties will be imposed. Even if the action in question does not result in economic damage, acts likely to disrupt the operation of the Education Computer System are prohibited. Besides physical actions such as unplugging power plugs and connectors, indirect actions such as transmitting viruses, as well as deliberate actions such as inserting a foreign object into a CD-ROM slot, are also illegal actions. 8 File Handling Each user of the Education Computer System is allocated a file area of a certain capacity within the Education Computer System. Note, however, that the file area always remains part of the property of Osaka University, and is not the personal property of the user in question. Each user of the Education Computer System is allowed to set the file protection mode such that his or her files can be read (i.e., copied) by other users. It is possible that, due to a user’s mistake in configuring his or her own file settings, his or her files might be read by another user without the first user being aware of the fact. Therefore, if you have any files you would not want other users to read, the safest policy is not to put them on the Education Computer System.

95
9 Operational Control of the System Should the Education Computer System and Student Email System Operation Manager discover misconduct or improper action, the Manager will lock the account. If the account used in the improper action was hijacked, the hijacked account will be locked, but after the situation has been assessed, the account will be unlocked. For any user who is suspected of misconduct or improper action, the user's name, year of University entrance, department, login ID and other details such as the frequency of accessing the system will not be treated as confidential information. The Education Computer System Operation Manager will respect the privacy of users’ file areas as far as possible. Nevertheless, the Manager performs periodic automatic probes to detect the presence of improper files, and may manually audit the content of files as and when necessary. Additionally, as a precaution against equipment failure, the Manager may back up users’ individual file areas onto hard disks, etc. Storing encrypted files on the Education Computer System does not constitute an improper action in itself. However, should it be suspected that files have been encrypted as a means toward some improper action, the user concerned may be requested to disclose the content of the files. Note also that restrictions apply to the capacity of the file area available, and the storage capacity for incoming emails. Files and emails cannot be stored beyond these capacity restrictions. 10 Penalties for Improper Use Theft of or damage to computers is treated in the same way as other cases of theft or damage to or inside the University facilities. Account suspension or other emergency measures to prevent the continuation of improper actions or misconduct, or to prevent their occurrence, will be implemented instantly at the discretion of the Education Computer System Operation Manager who has made the discovery. 11 Network Etiquette Several points must be considered to ensure appropriate use of the network in general. These points are collectively termed “network etiquette,” or “netiquette” for short. A basic rule for Internet users is that each user is responsible for his/her own actions and must take appropriate measures to protect against potential threats. The following are the minimum rules to be observed by Internet users:
• Strictly manage accounts and passwords. • Observe the rules of society. • Avoid making libelous or offensive remarks.
96
• Do not commit copyright infringement. • Avoid intruding on other persons’ privacy.
97
Appendix C ODINS User Guidelines 1 Introduction The computer network provided by Osaka Daigaku Information Network System (ODINS), the computers, communications equipment connected thereto, and the software running thereon, is equipment for the purpose of education and research, and is under the operational control of a Trustee responsible for information. Persons authorized to use the services provided by ODINS must observe these Guidelines and cooperate in maintaining the problem-free operation of ODINS, which is state-owned property. ODINS must be used in such a way as to allow it to make a contribution, through education and research, not only to the academic community, but also to the industrial community, civil society, and the local community. These Guidelines set out the points that must be borne in mind when using ODINS, in such a way that the academic staff members and students of this University, who are the users of ODINS, and all those bound by the Guidelines, are able fully to understand the aforementioned objectives of ODINS, and effectively to attain those objectives. Furthermore, individual departments have formulated their own user guidelines, regulations and the like with regard to the use of the network, so these too are to be followed by users. 2 ODINS and Networks Outside the University Communications with networks outside the University are carried out using connections between ODINS and a Wide Area Networks (WAN). The WANs is connected not only to academic networks but also to commercial and other networks varying in size and performance. To enable a user to view the website of an American university, for example, data is sent and received via various networks. Please bear in mind that networks outside the University may have a lower communications capacity than ODINS. That is to say, even when the same volume of data is sent or received, the burden placed on a network with a lower communications capacity will be greater than the burden placed on ODINS. Therefore, sending and receiving large volumes of unnecessary data should be avoided as far as possible. When you use ODINS, you will be able to access networks all over the world, but it should not be forgotten that other networks have their own usage regulations, and are kept running by large numbers of support personnel.

98
3 Actions to be Avoided When Using ODINS Although ODINS is physically connected to other computers, those computers are used by human beings. When using ODINS, please use your social common sense and consider other people. The actions listed below should be avoided.
● Actions contravening laws and morals ● Actions contravening the educational and research objectives of the
University ● Actions impeding the problem-free use of ODINS
Furthermore, in order to ensure secure and appropriate usage, ODINS keeps usage logs for its users, and if a user has carried out actions contravening the items listed above, measures may be taken, such as issuing a warning, restricting access, informing the user’s department, and publicizing the name of the user involved and the penalties imposed. 3.1 Actions contravening laws and morals ODINS does not constitute an extraterritorial jurisdiction. Within Japan, the law of Japan applies to actions carried out on this system. Laws having a particularly strong relevance include the Intellectual Property Law, the Act on the Prohibition of Unauthorized Computer Access, the Penal Code, the Civil Code and the Commercial Code. In the case of actions having ramifications in foreign countries, it must also be borne in mind that such actions may come under the provisions of the laws of those countries. The types of action listed below, for example, are prohibited. Even if you do not commit the action yourself, but instead cause or allow another person to commit the action, you may still be deemed to have contravened the law. There are also actions which, even if not covered by statutory prohibitions, are not acceptable to society in general. These are as follows.
(1) Violation of basic human rights Basic human rights must be respected both offline and online.
(2) Online publication of discriminatory expressions
Online publication of remarks that are discriminatory on grounds such as race, sex, and religious beliefs contravenes the spirit of respect for basic human rights stipulated in the Constitution of Japan.
(3) Slander or libel Online, as offline, committing slander or libel against another person is grounds for a defamation lawsuit.
(4) Violation of privacy
The personal information of ODINS users will be respected, and users
99
must also respect other users’ personal information. Personal information and private correspondence must not be published without permission.
(5) Unauthorized accessing of computers and communications equipment
On ODINS and elsewhere, users must not carry out unauthorized access to computers or communications equipment on the network. Should an external network be subject to unauthorized access originating from ODINS, this could potentially lead to a situation where Osaka University had to disconnect its network from the internet. In some cases, it could even lead to an international incident. Attempting unauthorized access to the networks of other organizations is also strictly forbidden. “Eavesdropping” by intercepting data on the network is also strictly forbidden, even if no unauthorized access is involved.
(6) Violation of intellectual property rights
Intellectual property rights confer protection on the rights of the creator with regard to human activity resulting in the creation of intellectual property. Please be careful to respect copyright material such as pictures, novels, software, etc., and designs. Copyright material must not be reproduced or adapted without permission. For example, text, illustrations, photographs, video, music and other material presented in a book or magazine, or on a website, must not be reproduced or adapted, or published on your own website, or posted to a newsgroup, without permission. Such actions may constitute not only violation of copyright, but also violation of the Commercial Code and the Trademark Act with regard to trademarks indicating a company logo or product, as well as violation of portrait rights with regard to photos or other images of celebrities. The copying of software and data regarding which the University has concluded license agreements is also prohibited.
(7) Publication of obscene material
Obscene images, audio or other material must not be published using ODINS. The provision of links to such material is also prohibited.
(8) Improper use of access privileges
Users must not allow other users to use their access privileges (i.e., their account), regardless of whether financial compensation is received. Each user has a responsibility to keep his or her password strictly private. This also means that you must not allow any other person to use a computer or network using your own login ID, or to use your own file storage area or any other network resources. Logging in under another user’s login ID, or sending emails or posting newsgroup or bulletin-board messages under another user’s login ID, is also prohibited.
(9) Online stalking and harassment
100
Online actions such as sending nuisance or malicious emails, or sending large volumes of unwanted data, are prohibited.
3.2 Actions contravening educational and research objectives ODINS is operated for the purpose of contributing to the problem-free pursuit of education and research. Actions such as those listed below, which depart from the purpose of supporting education and research for which ODINS was installed, may be the subject of penalties such as restriction of access privileges.
(1) Political and religious activities Because ODINS is Osaka University’s property, it must not be used for activities serving the convenience of specific political or religious groups.
(2) Profit-oriented activities
ODINS must not be used to send emails or create websites for profit-oriented activities such as advertising, publicity or sales. This also includes creating handouts for use when teaching classes at cram schools.
(3) Holding data for purposes other than the original intent
Users must not use their personal file area or web area to keep material inconsistent with educational and research purposes.
3.3 Actions impeding the problem-free operation of ODINS Actions disrupting the operation of ODINS are prohibited. Not only physical damage, but also excessive use likely to have a negative impact on the ODINS network, or to inconvenience other users, should be avoided. The following actions are also prohibited.
(1) Altering the wiring of ODINS communications equipment, or reconfiguring the connection of peripheral devices, or attempting to do so
(2) Reconfiguring network software, or attempting to do so (3) Installing or using software likely to impair the normal functioning of the
network, or attempting to do so (4) Sending or receiving unnecessarily large files, or carrying out other
communications likely to impair the normal functioning of the network 4 Using the Network Appropriately Aside from the issues of contravening laws or morals, and using ODINS in a manner consistent with research objectives, a number of other points need to be borne in mind. These are briefly touched on below.
(1) Maintaining the dignity of Osaka University
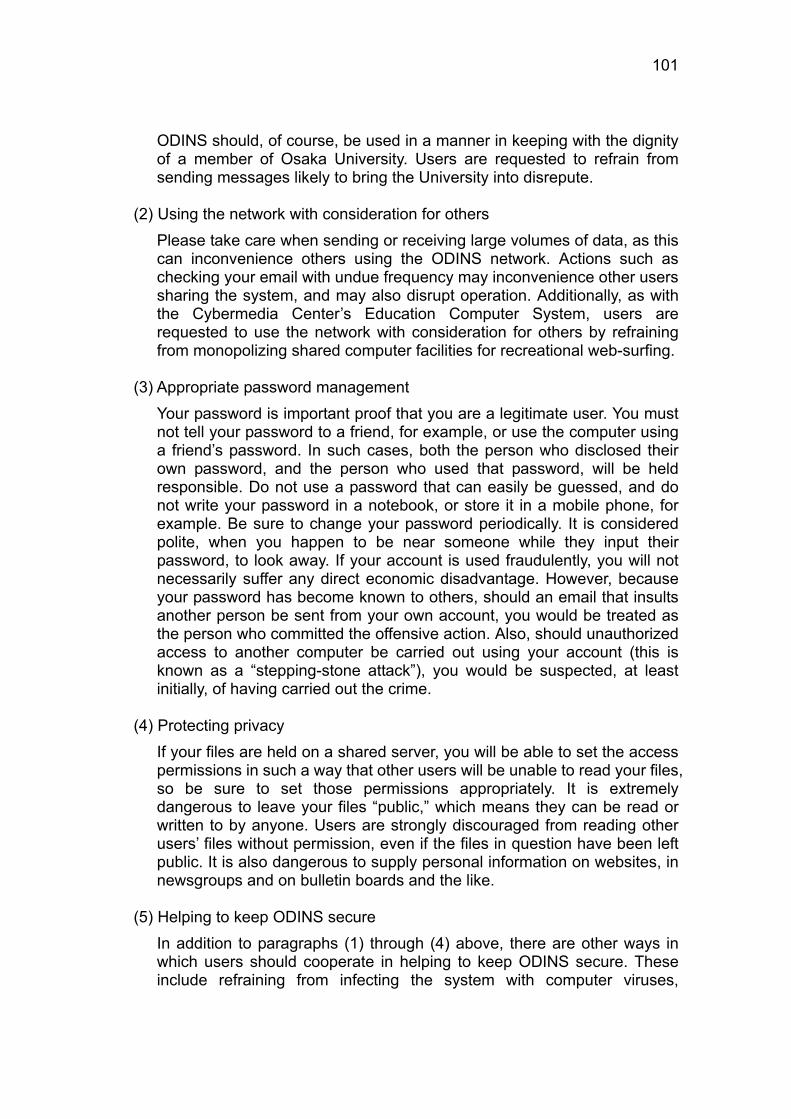
101
ODINS should, of course, be used in a manner in keeping with the dignity of a member of Osaka University. Users are requested to refrain from sending messages likely to bring the University into disrepute.
(2) Using the network with consideration for others
Please take care when sending or receiving large volumes of data, as this can inconvenience others using the ODINS network. Actions such as checking your email with undue frequency may inconvenience other users sharing the system, and may also disrupt operation. Additionally, as with the Cybermedia Center’s Education Computer System, users are requested to use the network with consideration for others by refraining from monopolizing shared computer facilities for recreational web-surfing.
(3) Appropriate password management
Your password is important proof that you are a legitimate user. You must not tell your password to a friend, for example, or use the computer using a friend’s password. In such cases, both the person who disclosed their own password, and the person who used that password, will be held responsible. Do not use a password that can easily be guessed, and do not write your password in a notebook, or store it in a mobile phone, for example. Be sure to change your password periodically. It is considered polite, when you happen to be near someone while they input their password, to look away. If your account is used fraudulently, you will not necessarily suffer any direct economic disadvantage. However, because your password has become known to others, should an email that insults another person be sent from your own account, you would be treated as the person who committed the offensive action. Also, should unauthorized access to another computer be carried out using your account (this is known as a “stepping-stone attack”), you would be suspected, at least initially, of having carried out the crime.
(4) Protecting privacy
If your files are held on a shared server, you will be able to set the access permissions in such a way that other users will be unable to read your files, so be sure to set those permissions appropriately. It is extremely dangerous to leave your files “public,” which means they can be read or written to by anyone. Users are strongly discouraged from reading other users’ files without permission, even if the files in question have been left public. It is also dangerous to supply personal information on websites, in newsgroups and on bulletin boards and the like.
(5) Helping to keep ODINS secure
In addition to paragraphs (1) through (4) above, there are other ways in which users should cooperate in helping to keep ODINS secure. These include refraining from infecting the system with computer viruses,

102
refraining from opening emails from suspicious senders, installing antivirus software on any computer for which they have personal responsibility, keeping virus signatures updated at all times, and notifying an administrator promptly on discovery of any breakdown or abnormality on ODINS.
(6) Obeying netiquette A number of points must be borne in mind for appropriate use of the network in general. These points are collectively termed “network etiquette,” or “netiquette” for short. For details, see netiquette websites such as http://www.cgh.ed.jp/netiquette/ (available only in Japanese).
5 Postscript The following documents were used for reference when compiling these Guidelines:
● Netiquette of Using ODINS (Akinori Saito, Osaka University Education Center for Information Processing), Osaka Daigaku Information Network System News, No.1
● User’s Handbook for Network Citizen: Hiroshima University User Guide for Computer and Computer Network (Edited by the Information Communication Media Committee, Hiroshima University)
● Computer Network Guideline for Security and Ethical Conduct (Tohoku University)

103
Appendix D Locations and Opening Hours of Terminals
1 Locations Cybermedia Center Toyonaka Education and Research Center
1-32 Machikaneyama, Toyonaka, Osaka 560-0043 Tel: 06-6850-6802 Fax: 06-6850-6819
4F, Minoh General Research Building
8-1-1 Aomatani-higashi, Minoh, Osaka 562-8558 2 Education Computer System Opening Hours The opening hours of the Toyonaka Education and Research Center and the fourth floor of the Minoh General Research Building are as follows.
Hours during semesters: 08:50 to 21:30 (Monday to Friday: Toyonaka Education and Research
Center) 09:40 to 20:40 (Monday to Friday: 4F, Minoh General Research Building)
Hours during vacations:
08:50 to 17:00 (Monday to Friday: Toyonaka Education and Research Center)
10:00 to 17:00 (Monday to Friday: 4F, Minoh General Research Building) 3 Scheduled Closures The Education and Research Center and the fourth floor of the Minoh General Research Building will be closed for the periods listed below. Unscheduled closures may take place for server maintenance or other reasons. For details, see the notice board at the center in question.
During the summer vacation: Mid-August through mid-September During the winter vacation: Late December through early January At the end/start of the academic year: Late March through early April

104
4 Notes regarding Branch Terminals Availability, opening hours and other information regarding branch terminals varies from department to department. For details, contact the Branch Terminal Room Operation Manager or Administrator in question. 5 Information Education System
Location of terminal(s) Terminal typeDepartment Terminal Room F SToyonaka Campus
Toyonaka Education and Research Center
Information Education Room 1, 1F 66 -Information Education Room 2, 2F 78 -Information Education Room 3, 2F 66 -Information Education Room 4, 2F 45 -Information Education Room 5, 3F 72 -Information Education Equipment Room 2 -
University Libraries Building B, 2F, Main Library 12 Building B, 3F, Main Library 38
School of Science Room B215, 2F, Main Building 34 -Center for International Education and Exchange Toyonaka Branch 3 -
Suita Campus
University Libraries 1F, Science and Engineering Library West 20 -2F, Life Sciences Library 5 -
School of Human Sciences Computer Room, 1F, Main Building 15 -
Medical School, Faculty of Medicine Student Computer Terminal Room, Floor L, Lecture Building 12 -
School of Allied Health Sciences, Faculty of Medicine 2F, Learning Resource Center 5 -
School of Dentistry Students’ individual study room in Building D 5 -
School of Pharmaceutical Sciences Room 217, 2F, Main Building 2 -
School of Engineering Computer Study Room, 2F, GSE Common West - 146
Center for International Education and Exchange
2F, Information Room for International Students 6 -
Total 486 146 Terminal locations and other details are subject to change. For the latest information, check on Information Education System website. Types of terminal Fujitsu ESPRIMO (designated as “F” in table)
This stands for the Fujitsu ESPRIMO (CPU: Intel Pentium G2020 / 2.9GHz) with a “super-multi” type DVD drive1, shown in Figure D.1. USB devices can also be connected.
1 Cannot write to DVDs or CDs.
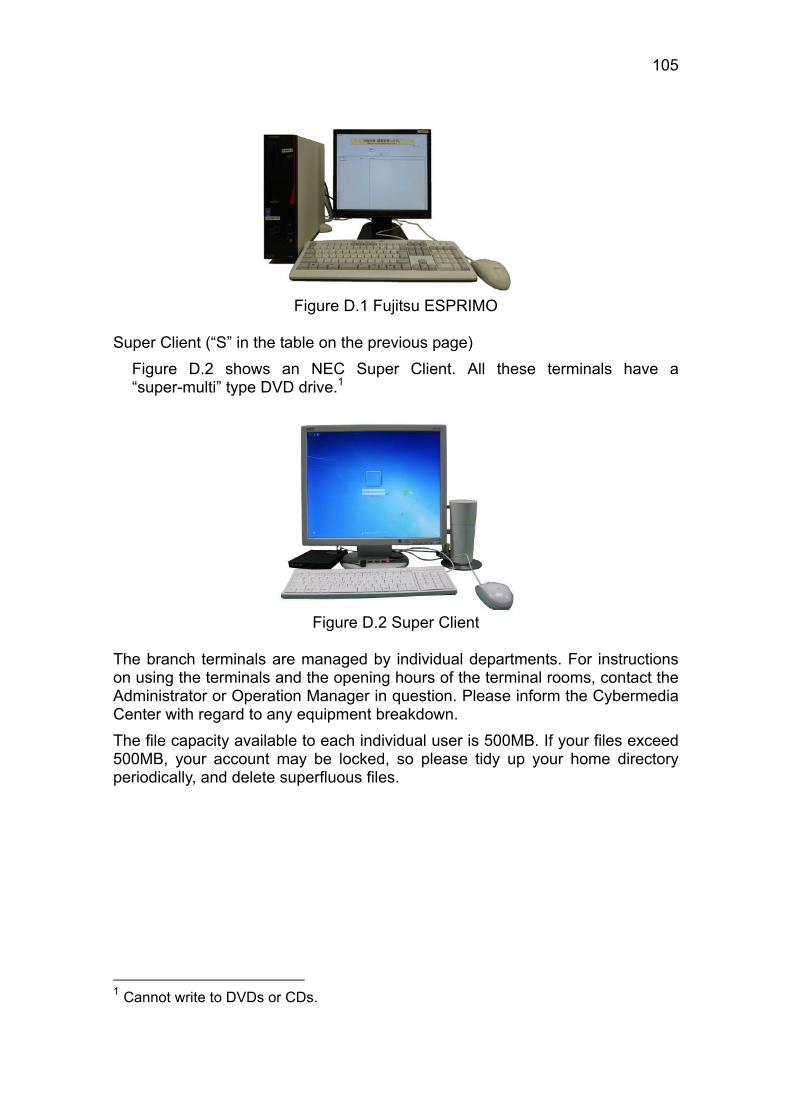
105
Figure D.1 Fujitsu ESPRIMO
Super Client (“S” in the table on the previous page) Figure D.2 shows an NEC Super Client. All these terminals have a “super-multi” type DVD drive.1
Figure D.2 Super Client
The branch terminals are managed by individual departments. For instructions on using the terminals and the opening hours of the terminal rooms, contact the Administrator or Operation Manager in question. Please inform the Cybermedia Center with regard to any equipment breakdown. The file capacity available to each individual user is 500MB. If your files exceed 500MB, your account may be locked, so please tidy up your home directory periodically, and delete superfluous files.
1 Cannot write to DVDs or CDs.
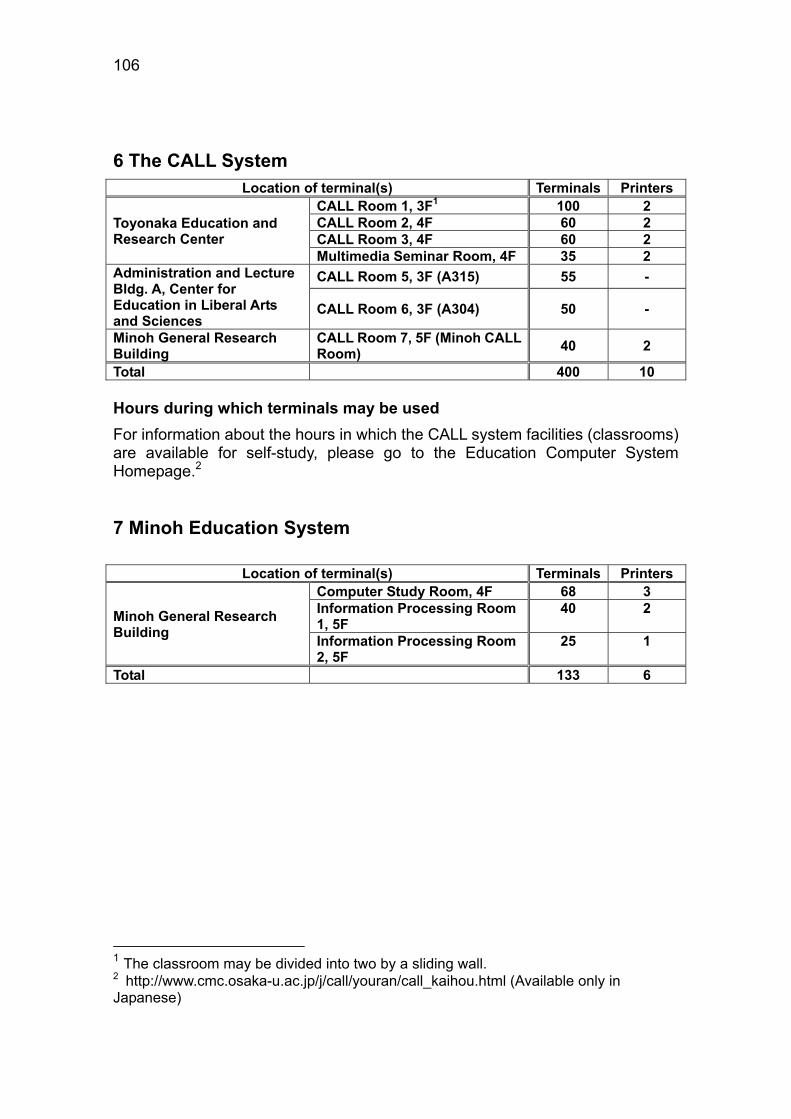
106
6 The CALL System
Location of terminal(s) Terminals Printers
Toyonaka Education and Research Center
CALL Room 1, 3F1 100 2 CALL Room 2, 4F 60 2 CALL Room 3, 4F 60 2 Multimedia Seminar Room, 4F 35 2
Administration and Lecture Bldg. A, Center for Education in Liberal Arts and Sciences
CALL Room 5, 3F (A315) 55 -
CALL Room 6, 3F (A304) 50 -
Minoh General Research Building
CALL Room 7, 5F (Minoh CALL Room) 40 2
Total 400 10 Hours during which terminals may be used For information about the hours in which the CALL system facilities (classrooms) are available for self-study, please go to the Education Computer System Homepage.2 7 Minoh Education System
Location of terminal(s) Terminals Printers
Minoh General Research Building
Computer Study Room, 4F 68 3 Information Processing Room 1, 5F
40 2
Information Processing Room 2, 5F
25 1
Total 133 6
1 The classroom may be divided into two by a sliding wall. 2 http://www.cmc.osaka-u.ac.jp/j/call/youran/call_kaihou.html (Available only in Japanese)

107
Appendix E Glossary
Active In a state in which input can be accepted. In general, the number of active windows is limited to one at any given time.
ALC Net Academy Multimedia English language learning software. Anchor The marked location of a link to another page,
displayed in a web browser. Left-clicking an anchor takes the browser to the link destination.
Applet A small program executed within an application. Application Short for “application software,” this is a generic
term for software for carrying out various tasks on a computer. Examples include word-processing software and spreadsheet software.
Arrow key The four keys on the keyboard that can be used to move the text cursor. Each key bears an arrow pointing up/down/left /right. Also known as “cursor keys.”
Authentication The process whereby a given system confirms that a person attempting to use the system is a legitimate user.
Bookmark A function whereby the URLs of frequently-visited websites are stored in a web browser. Also refers to individual websites thus stored.
Browser Software for viewing file directories or for viewing the web.
CALL Computer-Assisted Language Learning. CLE Abbreviation for Osaka University Collaboration and
Learning Environment. It consists of the Blackboard R9 courseware produced by US software maker Blackboard, customized for Osaka University.
Click To press a mouse button once, then release the pressure.
Client Indicates either the software that receives a service from a server, or the computer on which said software is running.
Close The action of closing a window, a file or some other unit of information.
108
Computer literacy The ability to use computers and other information technology (IT). The set of basic knowledge and skills needed to use computers to solve problems in daily life.
Copy To reproduce. Typically used to refer to the operation of reproducing files.
Current directory The directory in which the user is currently working. Also known as the “working directory.”
Cursor A graphic symbol indicating the input position on the computer screen. The arrow-shaped symbol used to indicate the position of the mouse is known as a “mouse cursor,” while the vertical bar indicating the text input position is known as a “text cursor,” and so on.
Cursor keys The arrow keys on a computer keyboard. Cut To remove a section of data when editing a
document or other file. Cybermedia Center One of the national joint-use facilities at Osaka
University. Underpins the information infrastructure within and outside Osaka University.
Cymon The official character of the Osaka University Cybermedia Center. Designed by the Osaka University Web Design Unit in 2012, his name was chosen from public submissions.
Desktop The basic operating screen displayed when the user logs in to a computer. The files are portrayed as documents resting on a screen representing the user’s desk.
Dialog box A window temporarily displayed on a computer screen in order to elicit a confirmation or a function selection from the user.
Directory Short for “file directory,” this term denotes one of the levels in the hierarchically-controlled arrangement of data on a disk. Also known as a “folder.”
Display A computer display device displaying text, graphics, etc. Also known as a “monitor.”
Double-click To click the mouse button twice in rapid succession. Download To save data from a network on to the computer
being used.

109
Drag To move the mouse while holding down the mouse button.
Drag & drop To move an icon or other item by dragging it, and then releasing the button at the intended destination.
Driver Software needed to render a specific device usable. Also known as a “device driver.”
Editor A generic term for any software used for editing pictures, text or other types of information. More specifically, the term “editor” is often used to mean “text editor.”
Electronic mail A system for exchanging messages, principally in the form of text, via a computer network. Also known as “email.”
Emacs A text editor with advanced features. Email address Information corresponding to a name and address,
used when sending and receiving email. Error An error of some sort, generated in the operation of
a computer. Extension A character string following a dot at the end of a
filename, indicating the type of file. File A block of data on a computer disk or other storage
device. There are various types of files, including word-processor documents, presentation documents, images, music, etc. Generally speaking, the content of a file can be overwritten using the filename.
File directory A hierarchically-controlled data structure on a disk. Also used to denote one of the levels within that data structure.
Firefox A web browser. Firewall A generic term for security systems designed to
prevent illicit access from outside the network. Folder A location on a hard disk or a floppy disk, inside
which multiple files can be placed in a group. Each folder is given a name, and the folder name is used to access the files contained in the folder. Also known as a “directory.”
110
Format When used as a verb, this term denotes the process of initializing a storage medium to make it available for use.
Forward To send to a different location. In an email context, it means to send a received message on to another, specified, email address. It is a good idea to configure your email account settings so that your Education Computer System emails are always forwarded to a pre-set alternative email address that you use frequently.
Free software Software that can be modified and distributed without restriction. Not to be confused with freeware.
Freeware Software which is available to the end user at no financial cost.
gedit A text editor provided by GNOME. GNOME A suite of software for Linux, providing the GNOME
desktop and other GUI elements. Also used to refer to the desktop environment created using said software suite.
GNOME terminal Terminal emulator supplied by GNOME. Graphical user interface A user interface through which the computer is
operated, using windows, icons, menus, pointers, etc. Also known as a “GUI.”
GUI Graphical user interface. Hard disk One of the typical computer storage devices. Hardware The equipment, devices and other physical entities
that constitute a computer. HDD Hard disk drive. Help A document providing software usage instructions
and other information. Home directory A disk area provided for each user, which can be
used by that user without restriction. Usually denotes the topmost hierarchical level of the disk area in question.
Home page A website, or the top page of a website. Icon A graphic symbol deployed on a computer screen to
denote a file, folder, program, device or other entity. ID Identifier.
111
Insertion point The input location in a document, indicated by the text cursor.
Interface Something that stands between two entities and mediates the exchange of data between them. More specifically, the term “interface” is often used as an abbreviation of “user interface.”
Internet browser Web browser. Internet Explorer Web browser supplied as standard with Windows. IT Verification Infrastructure Service
The verification service designed for ODINS. Its purpose is to create a single sign-on environment using Osaka University Personal IDs.
Key top The upper surface of an individual key on the keyboard.
Keybinding Allocating a function to a specific key on the keyboard.
Keyboard A board-shaped device featuring an array of buttons (keys) engraved with alphabetic characters, kana, numerals and other symbols. Used to input characters, and to execute specific commands, on a computer.
Left-click To press (click) the left mouse button once and then release it.
Link Information indicating the location of a given item of information.
Linux A free Unix-compatible operating system that runs on personal computers.
Listen to Me! Multimedia English language learning software. Load To read data or software into the computer. Local disk The hard disk directly connected to the computer
the user is using. Logoff Logout. Logon Login. Login The operation, carried by a user about to begin a
session on the computer. This operation verifies, by means of the user’s login name and password, that he or she is a legitimate user, and also configures the usage environment settings for the individual user in question.

112
Login name The unique name assigned to each user, which is used when logging in to the computer.
Logout The operation, carried out by a user when terminating his or her use of the computer, which leaves the computer ready for the next user to login.
Mailbox A disk area for saving emails. Maple An advanced mathematical computation software. Mathematica An advanced mathematical computation software. Media Information media. Denotes objects and devices
used to record, transfer and store information. Memory A storage device. Typically used to refer to the main
storage device of a computer. Menu A basic GUI element in the form of a list displaying
multiple selectable options. There are pulldown menus, popup menus and other variations.
Microsoft Office Office suite, manufactured by Microsoft Corporation. Mode State. Monitor A computer display device. Although liquid crystal
display (LCD) monitors have recently become mainstream, some cathode-ray tube (CRT) monitors are still in use.
Mount To cause the computer to recognize an external storage device, thus rendering the storage device available for use.
Mouse A device for operating the pointer on the screen by holding the device in one hand and manipulating it on the desk. A type of pointing device.
Mouse cursor A pointer. Often termed a “mouse cursor” because the pointer is often manipulated using a mouse. Also termed a “cursor” for short.
Mozilla A web browser. MS-IME A kana-kanji conversion program manufactured by
Microsoft Corporation. Multimedia An adjective indicating that multiple media, such as
text, audio and video, are handled in an integrated way.
Network A system whereby data communications are conducted by connecting computers together. Also known as a “computer network.”
113
Newline character The special character denoting a new line. In most software, the newline character itself is not visible.
ODINS Osaka Daigaku Information Network System. Office suite A software package containing programs widely
used in business, including word-processing and spreadsheet programs.
Online learning Learning carried out with the use of a computer network, typically the internet.
Open The operation of opening a data entity such as a window or a file.
OpenOffice.org A multifunctional software suite having excellent compatibility with Microsoft Office.
Operating system The software that manages the operation of the computer at the most basic level. Also known as an “OS.”
Option An application function or item that is not essential but can be added if so desired.
Osaka University IT Authentication Service The verification service designed for ODINS. Its purpose is to create a single sign-on environment using Osaka University Personal IDs.
Osaka University Personal ID The ID given to each student or academic staff member of Osaka University.
Panel A rectangular area on the computer screen. Unlike a normal window, it does not always have a frame, frame buttons, etc. “Login panel” and “notification panel” are two examples of the usage of this term.
Password A secret word known only to legitimate users, which is used to prove that a user is a legitimate user. The fact that the user has input the correct password is taken as proof that he or she is a legitimate user. The secret number for your ATM card is a type of password.
Path The location of a certain file or directory within the hierarchical structure of a file directory, indicated in the form of the directory “path” from the topmost level or from the current location.

114
Pointer One of the basic elements of a GUI. An arrow-shaped graphic displayed on a computer screen for the purpose of selecting an icon or a menu item on the screen.
Pointing device Generic term for devices used to operate screen cursors. Examples include the mouse, the trackball and the touchpad.
Popup A small window that appears suddenly (i.e., “pops up”) on top of the existing windows on the screen, displaying new information.
Portal A website featuring an accumulation of entrances to a range of services, targeted at a specific category of user. Osaka University’s portal system My Handai https://my.osaka-u.ac.jp (available only in Japanese), is run for the academic staff members and students of Osaka University.
Preview To view a document printout on screen before printing it out.
Programming The process of developing computer programs. Prompt A symbol eliciting input from the user. Used in
terminal emulators. Removable disk A portable storage device that can be removed from
the computer. Right-click To press (click) the right mouse button once and
then release. SAS A feature-rich statistical processing program. Security Safety, particularly in terms of using the computer. Server Indicates the software used to provide a service or
some sort, or the computer on which said software is running.
Shortcut icon An icon used for calling up a specific command or file (which was originally in another location).
Signature A character string attached to the end of an email, showing the sender’s name, professional affiliation, and other details.
Sign-in Synonymous with login. Sign-out Synonymous with logout.

115
Single sign-on A set-up in which a user logs on to a system, and, through that one authentication, is enabled to use multiple systems connected to the first system. This reduces the time needed to input passwords and so forth. Also known as “SSO”.
Software More or less synonymous with “computer program,” this term is used to denote an abstract entity, contrasted with the concrete entity that is hardware.
Source file The file containing the source code of a computer program.
Tab In text input, the “tab” is the function enabling the cursor to jump a specified number of characters. In a GUI, a “tab” is a header enabling the user to switch between multiple panels in the same window.
Template A formulaic pattern. Text cursor A graphic showing the text input position. Often
displayed as a vertical bar or a square, for example. Also known as a “caret” or “insertion point”.
Text editor Software used for editing text. Also known simply as an “editor.”
Title bar The area at the top of a window that shows the name of the window.
Touchpad A board-shaped pointing device enabling the user to operate a pointer by moving a fingertip on the device.
Trackball A device that moves the pointer (cursor) on the screen by rotating an inbuilt ball. A type of pointing device.
Unix In the broad sense, Unix is the generic term for an operating system (OS) having multitasking and multi-user functions, and derivative systems and compatible OSs. In the narrow sense, Unix is an OS complying with the definition held by the Open Group which holds the Unix trademark.
Unmount To terminate the use of a mounted storage device so that it can be safely disconnected from the computer.

116
URL Uniform Resource Locator. A string of characters indicating the location of information on the internet. It is composed of characters denoting the type of information, the name of the computer, the location of the information on the computer, etc. Also sometimes termed a “website address.”
User interface Software that mediates between the user and the computer.
User name In Osaka University’s Information Education System, a user’s login name is used as their user name.
VMware PC/AT emulator. Can make one OS run on another OS.
Web The World Wide Web (WWW). Web browser Generic term for software used for viewing
information on the World Wide Web (WWW). Examples include Internet Explorer, Netscape Navigator, Mozilla and Opera. Also known as a “WWW browser” or simply “browser.”
Web folder An online storage area provided using the WWW. Webmail An application for sending and receiving email using
a web browser. Website A set of information provided using the WWW, or the
location of that information on the internet. Wheel The disk-shaped part between the right and left
buttons on a mouse. It can be rotated forwards and backwards, and in some applications, it can be used to scroll vertically. If the wheel is pressed down, it functions as a central button. Not every mouse has a wheel.
Window A framed area on the screen, so named because its form resembles that of a window in a building. Application programs use windows as display areas. In other words, an application program displays the necessary data using a window. A window can be moved, enlarged, reduced, minimized as an icon, or subjected to various other manipulations, using a mouse or other pointer device.
Window manager A program that controls basic operations on the desktop or on individual windows.
117
WWW World Wide Web. The internet’s standard document system, in which text information is generally exchanged in HTML format. Also known as “the web.”