defining and installing in cics regions
TRANSCRIPT
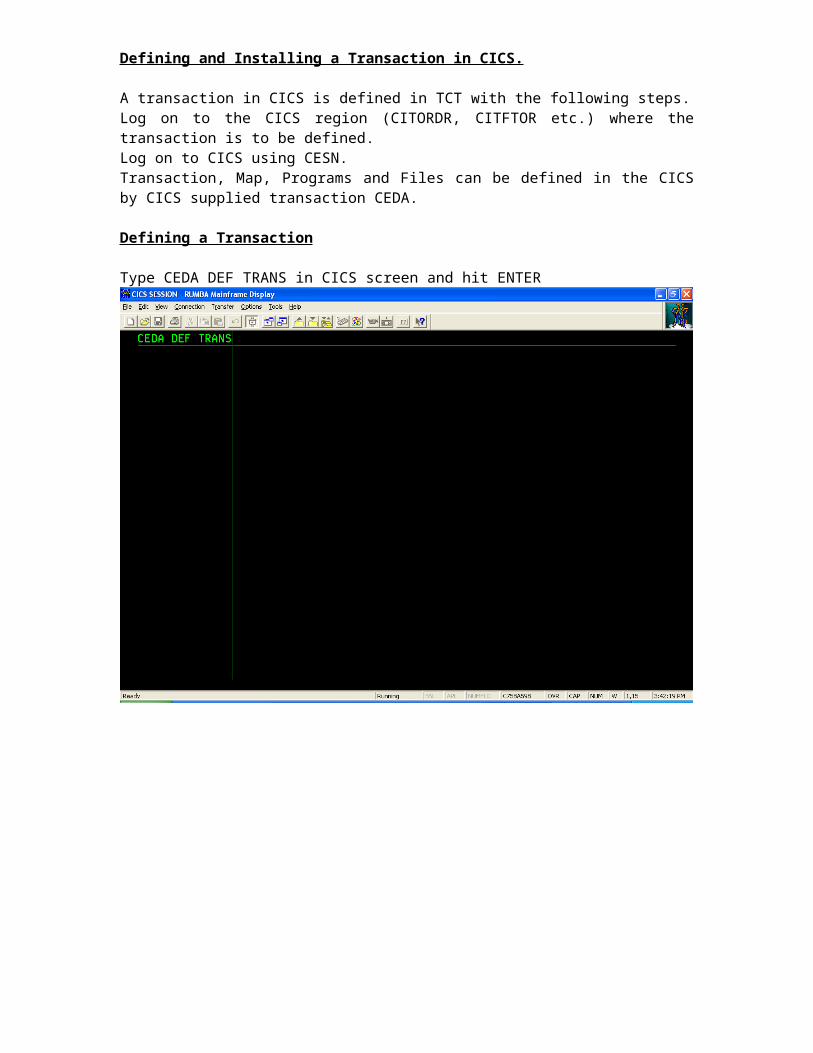
Defining and Installing a Transaction in CICS.
A transaction in CICS is defined in TCT with the following steps.Log on to the CICS region (CITORDR, CITFTOR etc.) where the transaction is to be defined.Log on to CICS using CESN.Transaction, Map, Programs and Files can be defined in the CICS by CICS supplied transaction CEDA.
Defining a Transaction
Type CEDA DEF TRANS in CICS screen and hit ENTER

The Following Screen will be displayed.
Enter the values forTRANSaction ==> EQCA (Can be any 4 character transaction ID)Group ==> @ORDRPPT (Can be any Group Name)PROGram == > FBC8200 (Can be the name of the first program that runs the TRANSaction)

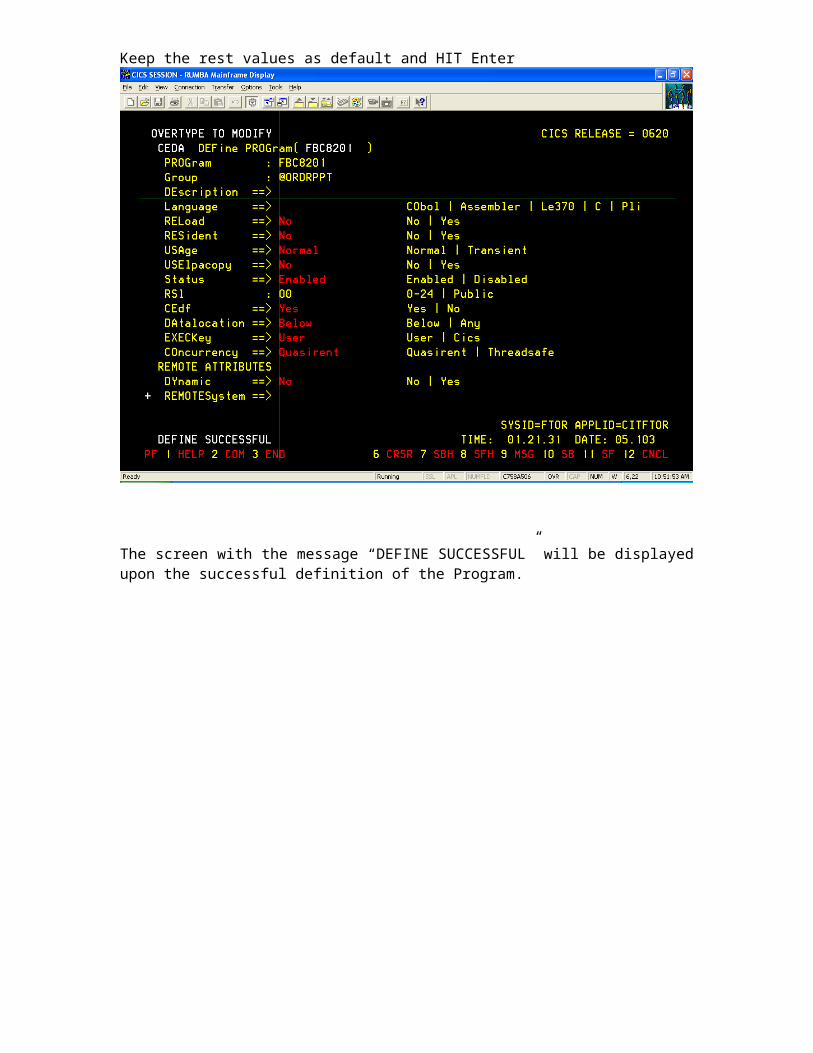
Keep rest of the parameters as Default and Hit Enter .
Screen with the message “DEFINE SUCCESSFUL” will be displayed upon the successful definition of the transaction.

Defining a Mapset
Type CEDA DEF MAP on the CICS Screen.

The Following Screen Will be displayed.
Enter the values for
Mapset : FBM8200Group : @ORDRPPT

Keep the rest values as default and HIT Enter.
Above Screen with the message “DEFINE SUCCESSFUL” will be displayed upon the successful definition of the Map.

Defining a Program
Type CEDA DEF PROG at the CICS Screen.

Following Screen will be displayed.
Enter the values for
PROGram : FBC8200Group : @ORDRPPTLanguage : Cobol
Keep the rest values as default and HIT Enter
The screen with the message “DEFINE SUCCESSFUL” will be displayed upon the successful definition of the Program.
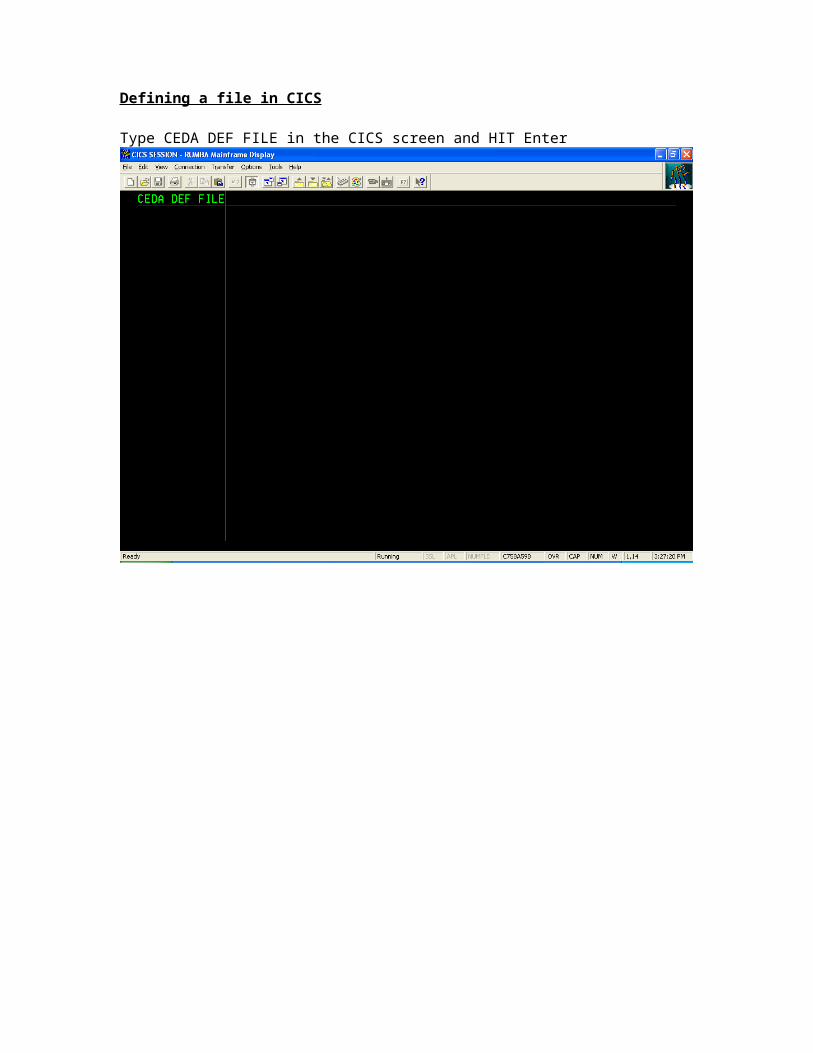
Defining a file in CICS
Type CEDA DEF FILE in the CICS screen and HIT Enter

The Following Screen will be displayed.
Enter the values for
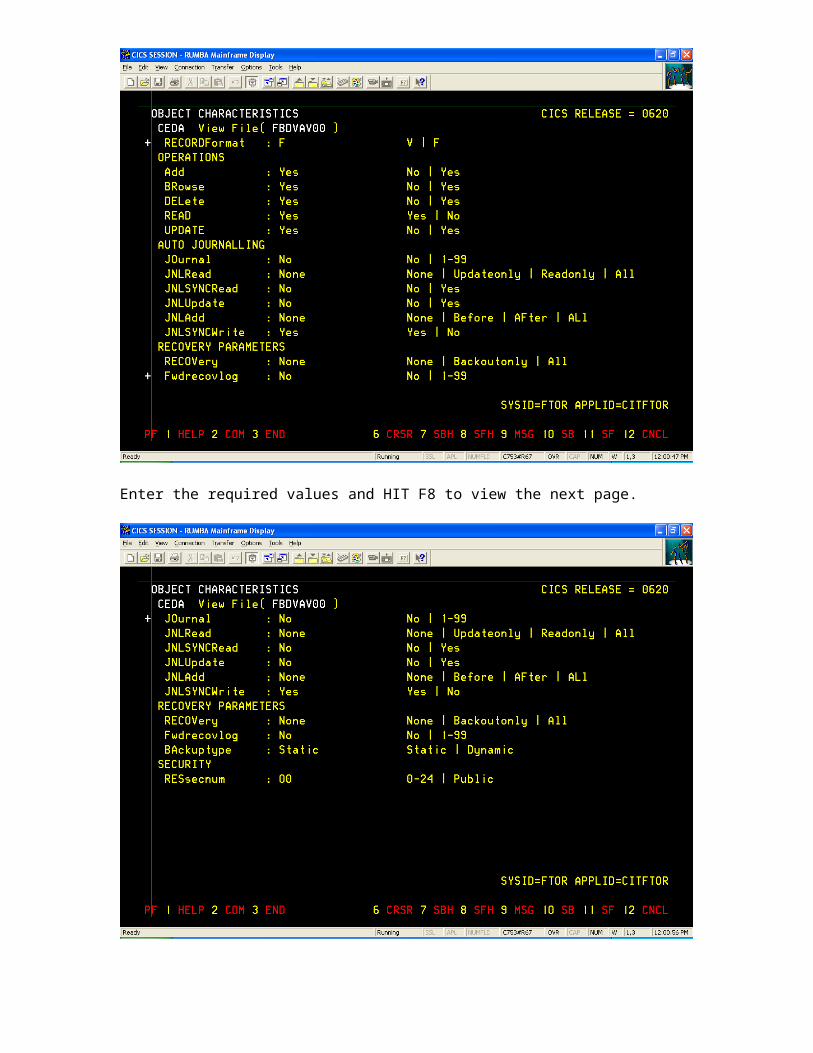
File == > FBDVAV00 (Logical file name that will be used to refer the actual file in the CICS Program).Group == > @ORDRPPTDSName == > <CAN BE THE VSAM DATASET NAME>STRING == > 005REMOTESystem == > ORDRRECORDSize == > 200
HIT F8 TO VIEW THE NEXT PAGE

Enter the required values and HIT F8 to view the NEXT page.
Enter the required values and HIT F8 to view the NEXT page.
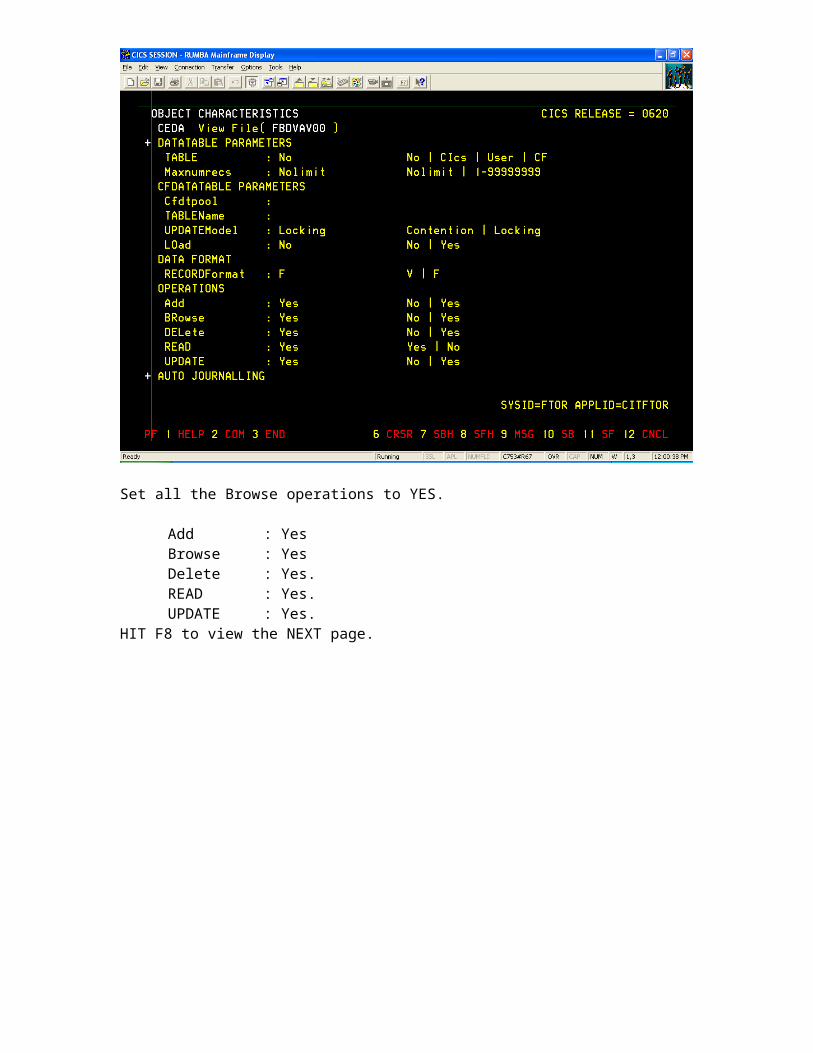
Set all the Browse operations to YES.
Add : YesBrowse : YesDelete : Yes.READ : Yes.UPDATE : Yes.
HIT F8 to view the NEXT page.
Enter the required values and HIT F8 to view the next page.
After all the values are entered HIT Enter to define the file. The Screen with the message “DEFINE SUCCESSFUL” is displayed upon the successful definition of the file.
Installing a Transaction, Program and Mapset
After Defining the Transaction, Program, Mapset and File, all these need to be installed before running the transaction.
Type CEDA I at the CICS Screen.
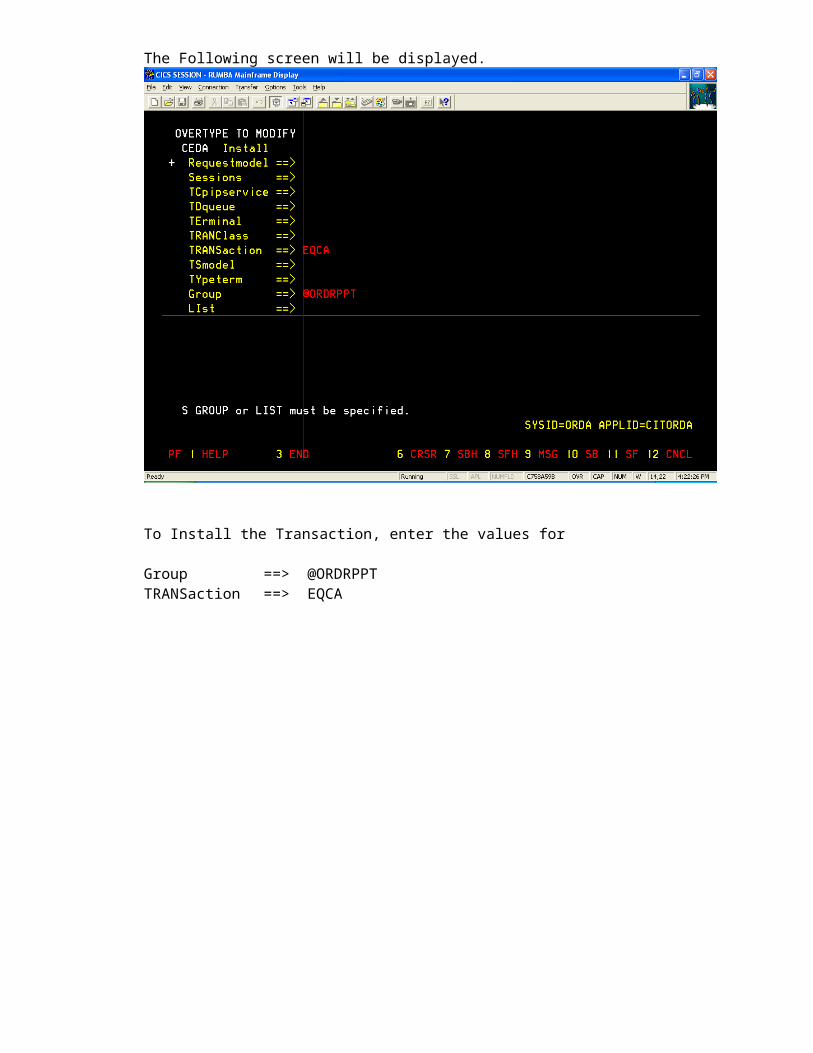
The Following screen will be displayed.
To Install the Transaction, enter the values for
Group ==> @ORDRPPTTRANSaction ==> EQCA

HIT Enter.
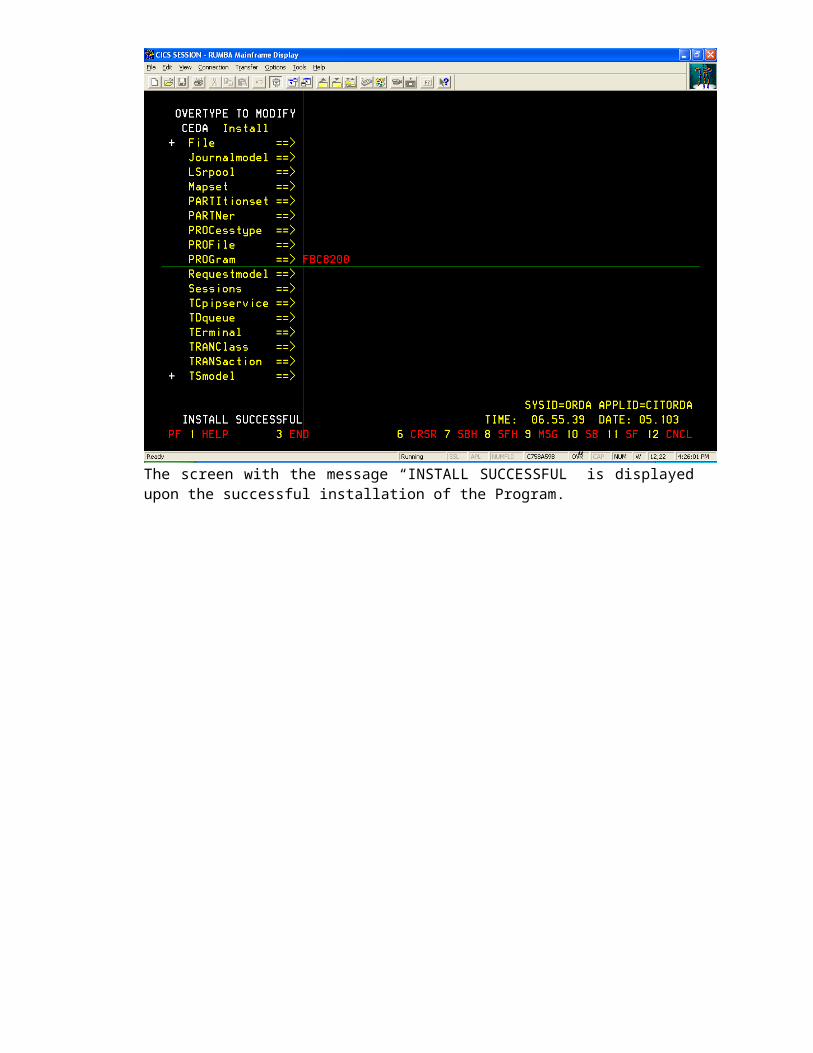
The screen with the message “INSTALL SUCCESSFUL” is displayed upon the successful installation of the Transaction.
To install the Program delete the TRANSaction and Enter the values for Program.

PROGram == > FBC8200
HIT Enter.
The screen with the message “INSTALL SUCCESSFUL” is displayed upon the successful installation of the Program.
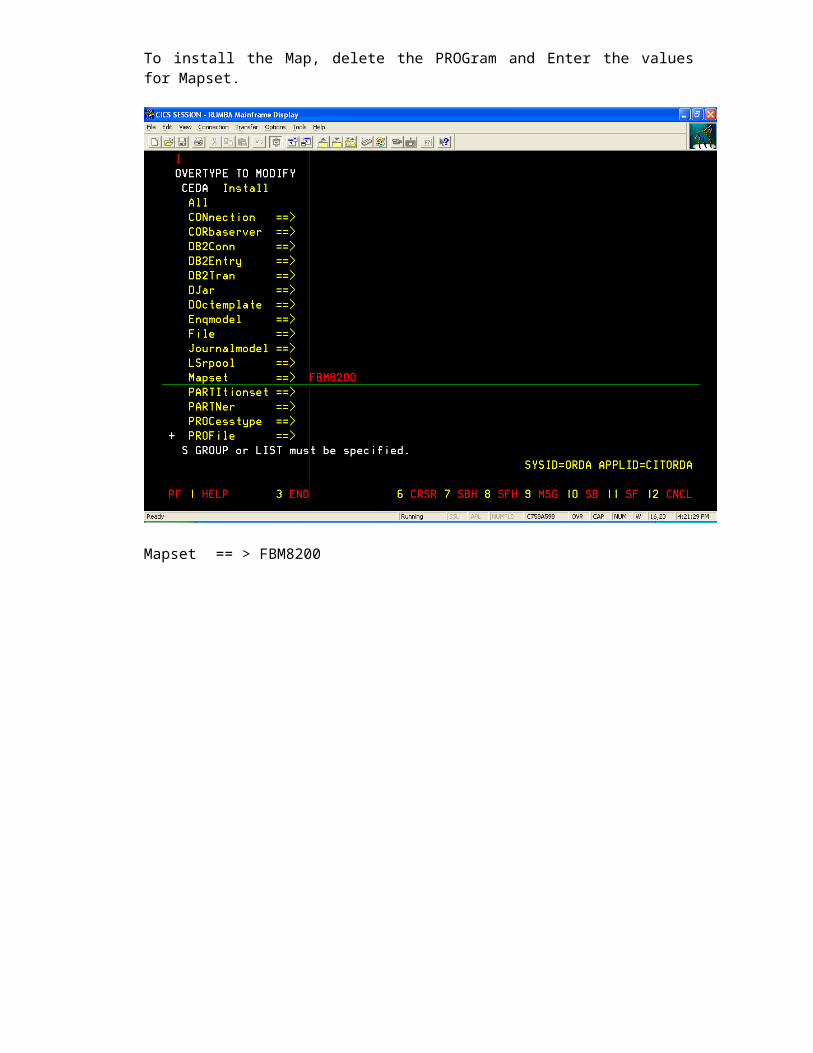
To install the Map, delete the PROGram and Enter the values for Mapset.
Mapset == > FBM8200
HIT Enter.
The screen with the message “INSTALL SUCCESSFUL” is displayed upon the successful installation of the Map.

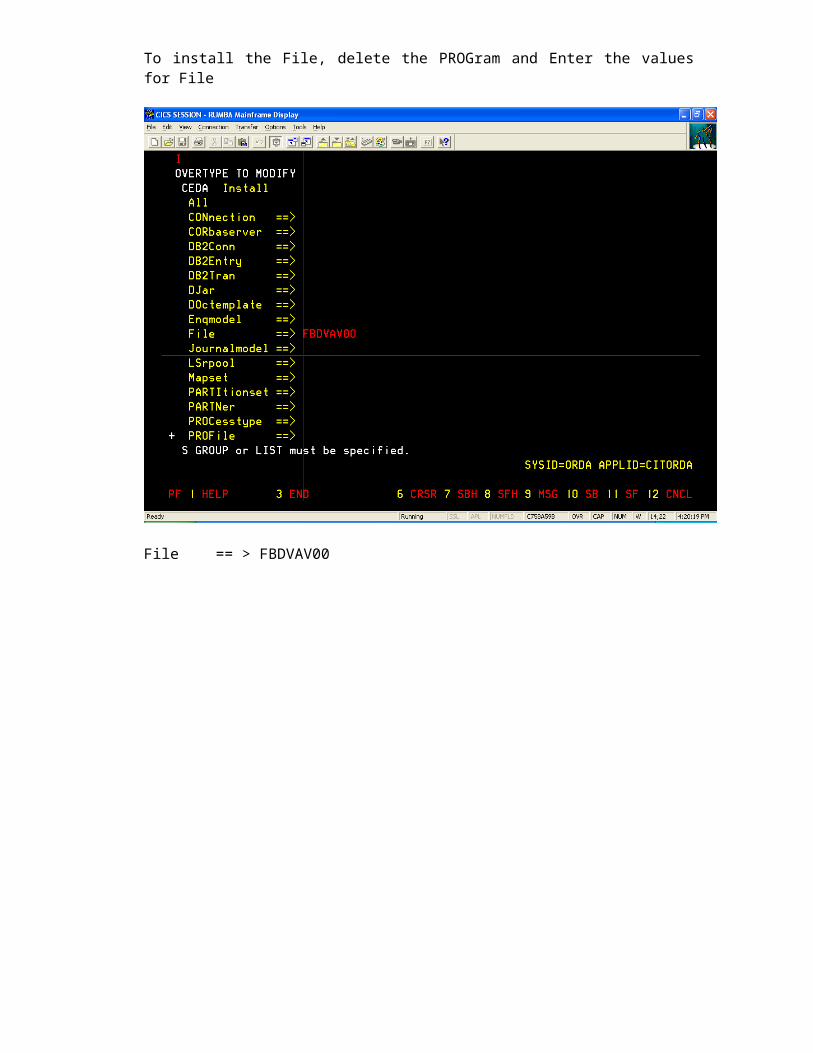
To install the File, delete the PROGram and Enter the values for File
File == > FBDVAV00
HIT Enter.
The message “INSTALL SUCCESSFUL” is displayed upon the successful installation of the file.