demo overview: identity and access...
TRANSCRIPT

Demo Guide Identity & Access Management
Identity & Access ManagementDemo Track
Updated: 3/17/2017
1
Demo Guide Identity & Access Management
ContentsDemo Overview: Identity and Access Management.......................................................................................4
Scenarios and Features..............................................................................................................................4Intended Audience..................................................................................................................................... 5Length........................................................................................................................................................ 5Demo Prerequisites.................................................................................................................................... 5
One-Time Demo Environment Setup.......................................................................................................5Access to the Azure Classic Portal..............................................................................................................5
Thousands of Apps, One Identity...................................................................................................................6Pre-Demo Steps......................................................................................................................................... 6Cloud Connect Seamlessly.........................................................................................................................6Single Sign-On............................................................................................................................................ 6Bring-Your-Own-Apps.................................................................................................................................9Secure Remote Access to On-Premises Apps...........................................................................................11Lift-and-Shift of On-Premises Apps to the Cloud.......................................................................................11Demo Reset Steps....................................................................................................................................11
Enable Business Without Borders................................................................................................................12Pre-Demo Steps.......................................................................................................................................12Ease of Use for End Users........................................................................................................................12Cross-Organization Collaboration.............................................................................................................14Any-Time, Any-Place Productivity with Win10..........................................................................................16Demo Reset Steps....................................................................................................................................16
Manage Access at Scale..............................................................................................................................16Pre-Demo Steps.......................................................................................................................................16Advanced User Lifecycle Management.....................................................................................................16Low IT Overhead...................................................................................................................................... 19Monitor Your Identity Bridge.....................................................................................................................19Demo Reset Steps....................................................................................................................................19
Cloud Powered Protection (Security)............................................................................................................19Pre-Demo Steps.......................................................................................................................................19Safeguard User Authentication with MFA.................................................................................................20Control Access to Resources with Conditional Access..............................................................................23Respond to Advanced Threats with Risk Based Policies and Monitoring...................................................24Mitigate Admin Risk with Privileged Identity Management.......................................................................24Demo Reset Steps....................................................................................................................................26
Appendix 1: One Time Demo Environment Setup........................................................................................27Review SaaS Applications and Access in Azure AD...................................................................................27Configure Salesforce Integration..............................................................................................................27
2
Demo Guide Identity & Access Management
Configure Twitter SSO Integration............................................................................................................32Configure BrowserStack SaaS Application................................................................................................33Install Access Panel Extension..................................................................................................................34Send Welcome Email to Isaiah Langer......................................................................................................35Initialize Azure AD Privileged Identity Management (PIM)........................................................................36
3

Demo Guide Identity & Access Management
Demo Overview: Identity and Access ManagementOrganizations in the mobile-first, cloud-first world need to empower their employees to access all their data and applications from every device and every location. Users need to collaborate with each other, their partners and connect with customers. And the tools they use don’t live in a protected and controlled environment any more. They can be found in any public cloud.This new world introduces challenges and advanced threats that cannot be mitigated with traditional tools. There is no point to protect just your network while the new boundary is the user. The key to be productive and protected in this environment is a strong identity solution.Azure Active Directory is a cloud identity and access management solution that can provide to organizations access to everything they need from everywhere, in a secure and productive way, in collaboration with existing investments on traditional tools.
Scenarios and FeaturesThis demo guide will cover the following technical scenarios listed below. Please note some scenarios are available as PowerPoint click through demos only as these require a lot of setup to perform live using your demo environment.
Scenario & Value Prop Technical Scenario Demo Resources/Links
1000s of Apps, 1 IdentityProviding one persona for the modern workforce for SSO to 1000s of cloud and on-premises applications
Cloud Connect Seamlessly (not available yet)
Single Sign-OnDeep Dive GuideClick-thru Guide
Bring Your Own AppsDeep Dive GuideClick-thru Guide
Secure Remote Access to On-Premises Apps Click-thru Guide
Support for Lift-and-Shift of On-Premises Apps to the Cloud Click-thru Guide
Enable Business Without BordersStaying productive everywhere with ease of access to every application and collaboration capabilities across location, application, and device borders
Ease of Use for End Users Deep Dive GuideCross-Organization Collaboration (B2B) Deep Dive GuideAnytime, Anyplace Productivity with Windows 10 (Azure AD Join) (not available yet)
Support for Consumer Facing Apps (B2C) (not available yet)
Manage Access at ScaleManage identities at scale in the cloud and on-premises
Advanced User Lifecycle Management Deep Dive GuideLow IT Overhead Deep Dive GuideMonitor Your Identity Bridge Click-thru Guide
Cloud Powered ProtectionEnsure accountability with better security and governance
Respond to Advanced Threats with Risk Based Policies and Monitoring (Azure AD Identity Protection)
Click-thru Guide
Mitigate Admin Risk (Privileged Identity) Deep Dive GuideGovernance of Identity (not available yet)
Intended Audience4

Demo Guide Identity & Access Management
IT Pros, Business Decision Makers
Length30 minutes
Demo Prerequisites A Microsoft Enterprise Mobility + Security (EMS) demo environment provisioned through
demos.microsoft.com portal. See the EMS Demos Getting Started Guide for detailed instructions on creating your own demo environment.
A Windows PC or Virtual Machine running Windows 8 or above with the following browsers:o Internet Explorero Chrome or Firefox
One-Time Demo Environment SetupYour demo tenant is pre-provisioned with a lot of content and settings that you can leverage as-is. However, some settings need to be manually configured by you. Please ensure the following activities are performed against your tenant prior to your first demo:1. If you plan to use custom demo personas for your demo, ensure the user accounts are
appropriately licensed for EMS and Office 365. You may use the Office Admin Portal (https://portal.office.com then click Admin tile) to review and modify the tenant subscription and user licensing status.
2. Configure SaaS applications in your demo tenant’s Azure AD as detailed in the Appendix.3. Review, and if necessary, execute the scenario-specific pre-demo setup steps specified at the
beginning section of each demo.
Access to the Azure Classic PortalAll the demo scenarios documented in this guide use the new Azure Portal, which is still in preview at the time of this guide update (3/17/2017). For some advanced management scenarios that are not yet available in the new Azure portal (and not documented in this guide), you may need to access the Azure Classic Portal (https://manage.windowsazure.com). However, accessing the classic portal requires an Azure Subscription connected to the tenant. Demo tenants provisioned after 3/2/2017 via demos.microsoft.com do not have connection to an Azure Subscription.If you need to access the Azure Classic Portal to manage your demo tenant, you will need to bring your own Azure Subscription and connect it to your tenant. Detailed steps are documented here.
5
Demo Guide Identity & Access Management
Thousands of Apps, One IdentityPre-Demo Steps
1. Ensure one-time demo environment setup steps have been performed against your demo tenant/device, as detailed in the Appendix.
2. Launch an InPrivate browser session for the Global Admin user:a. Browse to https://portal.azure.comb. Log in as admin@<tenant>.onmicrosoft.com and your tenant password (located within the
details section of your tenant on demos.microsoft.com).c. Locate Azure Active Directory in the left navigation and click to launch it.
3. Launch a separate browser session (Firefox or Chrome) for end user experience:a. Ensure this browser has the Access Panel Extension installed/enabled. See Appendix for
details.b. Browse to https://myapps.microsoft.com.c. Log in as end user hero persona (IsaiahL@<tenant.onmicrosoft.com and password).
4. [Optional] Download any click-thru guides locally to your demo PC. These click-thru guides can be used in lieu of live code demo to simulate some of the more difficult demos. Links to published click-thru guides are available in the Scenarios and Features section above.
Cloud Connect SeamlesslyNote: Detailed demo guidance is not yet available for this scenario. Azure AD Connect integrates on-premises directories with Azure Active Directory. This provides a common identity for users of Office 365, Azure, and SaaS applications integrated with Azure AD. Integrating your on-premises directories with Azure AD makes your users more productive by providing a common identity for accessing both cloud and on-premises resources.
Users can use a single identity to access on-premises applications and cloud services such as Office 365.
A Single tool provides an easy deployment experience for synchronization and sign-in. Azure AD Connect replaces older versions of identity integration tools such as DirSync and Azure
AD Sync. For more information, see Hybrid Identity directory integration tools comparison.
Single Sign-OnAzure AD integrates with many of today’s popular SaaS applications (e.g., Box, Twitter, and so on), supporting single sign-on (SSO) authentication and identity, and providing secure access management to applications. Azure AD supports federated SSO through Microsoft Azure AD Single Sign-on and password SSO to third party apps and internal custom apps.This demo is also available as a PowerPoint click-thru deck.Talk Track StepsSingle sign-on allows users to access all the applications and resources they need to do business, by signing in only once using a single user account. Once signed in, users can access all the applications they need without being required to authenticate (e.g. type a password) a
Note: This demo scenario assumes you have already configured Salesforce enterprise application for SSO.
1. Switch to the Global Admin user browser session.
6

Demo Guide Identity & Access Management
Talk Track Stepssecond time. Azure AD supports three types of single sign-on authentication:1. SAML-based Sign-on – This option uses
federated sign-on to allow users to automatically sign in to a SaaS app using the user account information from Azure AD.
2. Password Single Sign-On – This option enables users to be automatically signed in to the third-party application by Azure AD using a specific set of credentials.
3. Existing Single Sign-on – This option supports single sign-on to the app using Active Directory Federation Services (ADFS) or another third-party single sign-on provider.
Azure AD SSO (Federated) with SalesforceContoso is onboarding the Salesforce application for availability to all employees to provide on-demand services that help with global customer communications. The admin has added the Salesforce application to Azure AD from the Azure AD Application Gallery. To simplify access to the application, the admin configured Salesforce with federated SSO. Let’s review how it was configured.The Sign on URL points to the web-based sign-in page for this application. If the application is configured to perform service provider-initiated single sign on, then when a user navigates to this URL, the service provider will do the necessary redirections to authenticate and log the user in to the application.The admin had to do some configurations within the Salesforce application. This included uploading the certificate that was downloaded from here, and configuring the Salesforce authentication provider.Beyond single sign-on, Azure AD also supports account provisioning so when users from Azure AD are assigned access to Salesforce, they find their user account in Salesforce automatically.Assign Groups and Users to SalesforceThe last step to enabling SSO Integration is to assign users and groups who can access the app.The admin has assigned the Sales and Marketing security group access to Salesforce so any members of this group has access to this app.
2. Under MANAGE, click Enterprise applications.3. Click All applications, then Salesforce.4. Under MANAGE, click Single sign-on.5. Click on the Mode drop-down control and point to
the available authentication types.6. Point to Sign on URL field.
7. Point to the SAML Signing Certificate section and note the properties of the certificate.
8. Click Configure Salesforce link (at bottom of the blade).
9. Scroll down the Configure sign-on blade, then close the blade to return to Salesforce – Single sign-on blade.
10. Under MANAGE, click Provisioning.11. Review the settings.
12. Under MANAGE, click Users and groups.
13. Click sg-Sales and Marketing, then click Edit.
7

Demo Guide Identity & Access Management
Talk Track StepsAnyone who joins the Sales and Marketing group will automatically have access to the Salesforce application. The admin can add individual users also. Because automated user provisioning is enabled, the admin receives a prompt to define what type of Salesforce profile the user should have. Newly provisioned users will have access to Salesforce via the Application Panel as soon as they are granted access by the Administrator.
14. Click Select Role.15. Click the X to close the Select Role blade
(without making any changes).16. Click the X to close the Edit Assignment blade
(without making any changes).
Password SSO with TwitterContoso has also onboarding the Twitter application to promote social networking, internally and externally. The admin has added the Twitter application to Azure AD from the Azure AD Application Gallery. To simplify access to the application, the admin also configured the Single Sign-On (SSO) feature. The Twitter application supports Password Single Sign-on and ADFS (Linked Sign-On). With password-based single sign-on, Azure AD will automatically sign users in to the third-party Twitter application using the user account information from Twitter. When the admin enables this feature, Azure AD collects and securely stores the user account information and the related password.Azure AD can support password-based single sign on for any cloud-based app that has an HTML-based sign-in page. By using a custom browser plugin, AAD automates the user’s sign in process via securely retrieving application credentials such as the username and the password from the directory, and enters these credentials into the application’s sign in page on behalf of the user.Administrators can assign applications to end users or groups, and allow the end users to enter their own credentials directly upon accessing the application for the first time in their access panel. This creates a convenience for end users whereby they do not need to continually enter the app-specific passwords each time they access the application. Or, administrators can create and manage application credentials, and assign those credentials to users or groups who need access to the application. In this case, members of the Sales and Marketing security group will have access to the Twitter account, but do not need to
17. Return to the Enterprise applications page in Azure AD.
18. Click All applications, then Twitter.19. Under MANAGE, click Single sign-on.20. Note the SSO Mode option currently set
(Password-based Sign-on).
21. Under MANAGE, click Users and groups.22. Click on sg-Sales and Marketing to highlight,
then click Update Credentials.23. Note the User Name and Password field, then
Close the blade (do not make changes).
8

Demo Guide Identity & Access Management
Talk Track Stepsknow the credentials. End User ExperienceThe Applications Access Panel is a cross-device/cross-browser portal, supporting iOS, Android, Mac, and Windows. To reach the Access Panel, users authenticates against Azure AD once, they can view or access any of the applications listed in the MyApps portal. If the application was configured for SSO by the administrator, the users don’t need to re-authenticate to access the application: single sign-on will take care of the authentication automatically.Here, Isaiah Langer is logged into the Access Panel using his corporate credentials and can see all the applications available to him. He has seamless access to various line-of-business and custom applications, without having to remember multiple logins and passwords for each.
24. Switch to the browser session where you’re logged in as Isaiah Langer to the Apps page of Contoso Access Panel (https://myapps.microsoft.com).
25. Point to the various enterprise application icons on the page.
26. Click Salesforce.27. Salesforce will launch in a new browser tab:
a. Note the automated login to Salesforce.b. Click the user icon, in the top right corner
of the page, to see the name Isaiah Langer.28. Close Salesforce browser tab to return to Apps.
29. Click Twitter. 30. Note the automated login to Twitter account, with
the preconfigured username and password.31. Close the Twitter browser tab to return to Apps.
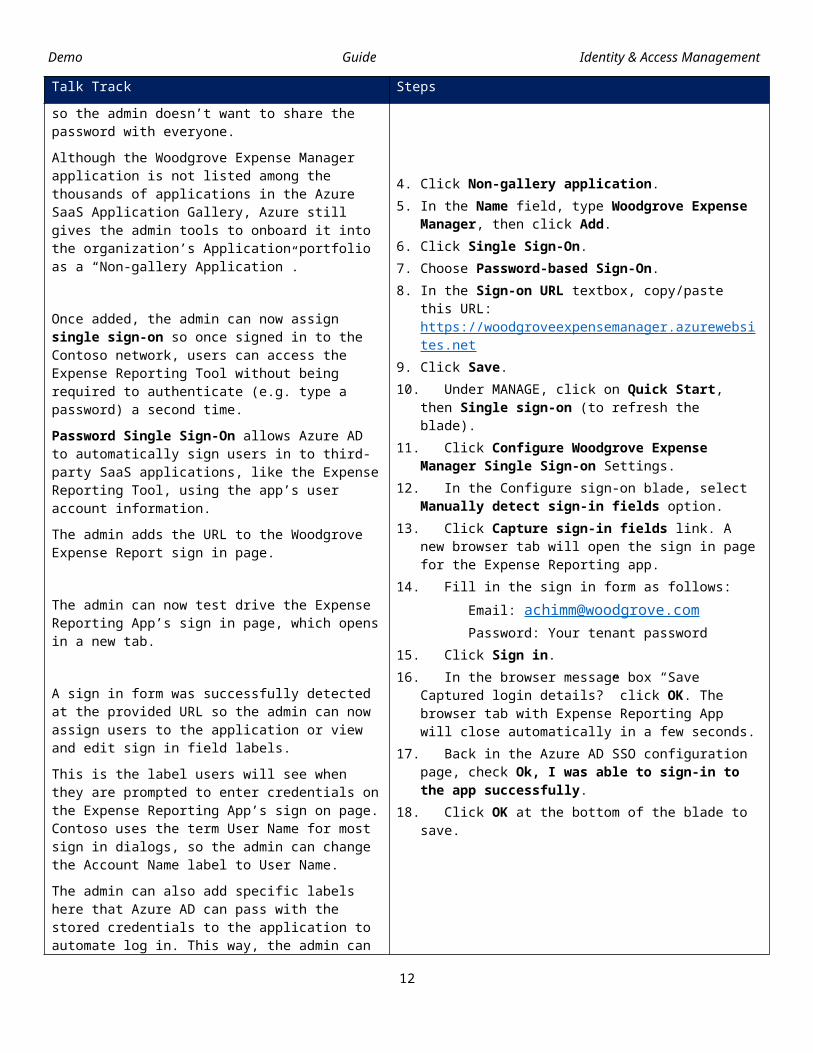
Bring-Your-Own-AppsAzure AD application gallery features thousands of applications that you can add to your organization, but if you cannot find a third-party application, you can add still add it as a custom app for your organization to use.This demo is also available as a PowerPoint click-thru deck.Talk Track StepsContoso uses a third-party expense management and reporting solution. The solution is provided as a SaaS application by a vendor called Woodgrove. The IT administrator would like everyone in the Sales and Marketing organization to have access to this service in such a way that they don’t need to log in to access the service. Furthermore, Contoso uses only one login for the entire group, so the admin doesn’t want to share the password with everyone.Although the Woodgrove Expense Manager application is not listed among the thousands of applications in the Azure SaaS Application Gallery, Azure still gives the admin tools to onboard it into the organization’s Application portfolio as a “Non-gallery Application”.
Once added, the admin can now assign single
1. Switch to the Global Admin user browser session.2. Navigate to Azure Active Directory >
Enterprise applications.3. Click + Add at the top of the page.
4. Click Non-gallery application.5. In the Name field, type Woodgrove Expense
Manager, then click Add.6. Click Single Sign-On.7. Choose Password-based Sign-On.8. In the Sign-on URL textbox, copy/paste this URL:
https://woodgroveexpensemanager.azurewebsites.
9

Demo Guide Identity & Access Management
Talk Track Stepssign-on so once signed in to the Contoso network, users can access the Expense Reporting Tool without being required to authenticate (e.g. type a password) a second time.Password Single Sign-On allows Azure AD to automatically sign users in to third-party SaaS applications, like the Expense Reporting Tool, using the app’s user account information.The admin adds the URL to the Woodgrove Expense Report sign in page.
The admin can now test drive the Expense Reporting App’s sign in page, which opens in a new tab.
A sign in form was successfully detected at the provided URL so the admin can now assign users to the application or view and edit sign in field labels.This is the label users will see when they are prompted to enter credentials on the Expense Reporting App’s sign on page. Contoso uses the term User Name for most sign in dialogs, so the admin can change the Account Name label to User Name. The admin can also add specific labels here that Azure AD can pass with the stored credentials to the application to automate log in. This way, the admin can onboard just about any web-based application that has a user name and password based authentication mechanism, whether listed in the Azure application gallery or not.
The admin assigns the Sales and Marketing security group access to the Woodgrove Expense Reporting app so all members of this group have access to the app. Also, anyone who joins the Sales and Marketing group will automatically have access to the app application.
net 9. Click Save.10. Under MANAGE, click on Quick Start, then Single
sign-on (to refresh the blade).11. Click Configure Woodgrove Expense Manager
Single Sign-on Settings.12. In the Configure sign-on blade, select Manually
detect sign-in fields option.13. Click Capture sign-in fields link. A new browser
tab will open the sign in page for the Expense Reporting app.
14. Fill in the sign in form as follows:Email: [email protected]: Your tenant password
15. Click Sign in.16. In the browser message box “Save Captured login
details?” click OK. The browser tab with Expense Reporting App will close automatically in a few seconds.
17. Back in the Azure AD SSO configuration page, check Ok, I was able to sign-in to the app successfully.
18. Click OK at the bottom of the blade to save.
19. Under MANAGE, click Users and groups.20. Click + Add.21. Click Users and groups.22. Type sg, then select sg-Sales and Marketing
security group.23. Click Select at the bottom of the blade.24. Click Assign Credentials.25. Set Assign credentials to be shared among all
group members to Yes.26. Fill in the credentials form as follows:
a. Account Name: [email protected]. Password: your tenant password
27. Click OK at the bottom of the blade.28. Click Assign at the bottom of the blade to save all
changes.
10

Demo Guide Identity & Access Management
Talk Track Steps
OPTIONAL: Azure AD allows custom apps to be configured with custom icons to make it easy for administrators to apply custom branding. It also allows for easy identification for end users.
29. OPTIONAL: Upload a logo for this application:a. Under MANAGE, click Properties.b. Under Logo, click Select a file.c. Paste this URL
http://emsassetspub.blob.core.windows.net/demoassets/WoodgroveBank.png, then click OK.
d. Click Save.End User ExperienceHere, Isaiah Langer is logged into the Access Panel using his corporate credentials and can see all the applications available to him. He has seamless access to various line-of-business and custom applications, without having to remember multiple logins and passwords for each.
30. Switch to the browser session where you’re logged in as Isaiah Langer to the Apps Access Panel (https://myapps.microsoft.com).
31. Refresh the browser until you see the Woodgrove Expense Manager tile in the panel.
32. Click on the Woodgrove Expense Manager tile. 33. The app will launch in a new browser tab. Note the
automated login to the app.
Secure Remote Access to On-Premises AppsAvailable as a PowerPoint Click-thru Deck.
Lift-and-Shift of On-Premises Apps to the CloudAvailable as a PowerPoint Click-thru Deck.
Demo Reset StepsPerform these steps after each demo presentation to ensure re-usability of this demo environment.
1. Remove the custom application, Woodgrove Expense Manager, from the list of Azure AD Enterprise applications.
2. Remove any applications from Azure AD, if you added them during the demo.3. Revert any application or Azure AD configuration changes made during the demo.
Enable Business Without BordersPre-Demo StepsPrior to each demo, follow these steps to ensure a smooth presentation:
1. Ensure the following one-time demo environment setup steps have been performed against your demo tenant/device. Detailed instructions are provided in the Appendix section: Configure Enterprise App SSO Integration with your demo tenant Send welcome email to Isaiah Langer
2. Launch an InPrivate browser session for the Global Admin user:a. Browse to https://portal.azure.comb. Log in as admin@<tenant>.onmicrosoft.com and password.c. Locate Azure Active Directory in the left navigation and click to launch it.
11
Demo Guide Identity & Access Management
3. Launch a separate browser session (IE, Firefox or Chrome) for end user experience:a. Ensure this browser has the Access Panel Extension installed/enabled. See Appendix for
details.b. Browse to https://outlook.office.com (Outlook on the Web).c. Log in as end user hero persona (IsaiahL@<tenant.onmicrosoft.com and password).
4. [Optional] Download any click-thru guides locally to your demo PC. These click-thru guides can be used in lieu of live code demo to simulate some of the more difficult demos. Links to published click-thru guides are available in the Scenarios and Features section above.
Ease of Use for End UsersThis scenario demonstrates the user centered Access Panel, a one-stop shop to share applications and other resources through Azure AD. The demo shows how Azure AD allows organization to use familiar applications well integrated to allow for productivity quickly.Talk Track StepsIsaiah has volunteered to join Contoso’s Testing Team. The QA manager has sent an email invitation to join the Contoso Bug Bashers security group.He clicks the link, which opens the Access Panel at http://myapps.microsoft.com. This is a web-based portal that Isaiah accesses as an end user with an organizational account in Azure Active Directory. The Azure AD administrator has granted Isaiah access to these cloud-based applications. Some are internal to Isaiah’s organization and some are external, such as Twitter and Salesforce. Some are SaaS apps, custom apps, and on-premises apps.
1. Start in the browser tab opened to Outlook on the Web, logged in as Isaiah Langer.
2. Point to the email from Patti Fernandez.3. Click the link embedded in the email.
4. In the Access Panel, point to the enterprise applications that Isaiah has access to:
a. Microsoft Office 365 appsb. Third party SaaS apps (Salesforce, Twitter,
etc.)5. Click Salesforce. Salesforce will open in a new
browser tab, and automatically sign in.6. Click on user icon on top-right corner of the page to
show currently signed-in user: Isaiah Langer.7. Close the browser tab to return to Access Panel.
Self-Service Group ManagementIsaiah can also utilize self-service group management capabilities through the Access Panel.
Patti, the QA manager, asked him to join the Bug Bashers security group, so he simply finds the group, then clicks to join it.
This group has been set up to automatically accept join requests. However, it can also be configured to accept requests manually, after the group owner has approved it.
8. Click on Isaiah (user menu on top-right corner) then click Groups.
9. Click + Create group.10. In the Create group pop-up window, click the Group
policy drop-down menu.11. See the available options, then click Cancel.12. Click + Join group.13. Scroll to the bottom of the page, then click ssg-
Contoso Bug Bashers group.14. Click Join group.15. In the Request to join pop-up, type a Business
justification text (e.g. “demo”), then click Request.16. Note the request is auto-approved.17. Click OK on the approval message.18. Click Groups.19. Scroll down the list of Groups I’m in. Note ssg-
Contoso Bug Bashers is in the list.Accessing Single Sign-On Applications 20. Click on Isaiah (user menu on top-right corner) then
12

Demo Guide Identity & Access Management
Talk Track StepsIn two easy steps, he joins the group and when he returns to the list of applications, he sees the new BrowserStack app. The admin has given the Contoso Bug Bashers security group access to this additional application, so just by joining the group Isaiah now has access to the applications his team is using. He doesn’t need to review a list and add them individually.
click Apps.21. Note a new application appears on the list of
applications, BrowserStack.
22. Click BrowserStack.
Multi-factor AuthenticationThe BrowserStack application has been configured for a Multi-Factor Authentication as an added security measure to verify the user.The first time Isaiah encounters MFA, he’s required to verify his alternate contact info. Once setup, his phone or authenticator app will alert him to respond to the MFA challenge.
Note: You will only be prompted to set up additional security verification the very first time for each user (steps 22-26 below). If this was setup previously, you’ll be prompted to respond to MFA on your phone directly (step 27).23. On the Azure AD sign-in page for Salesforce, click Set
it up now.24. Click Select your country or region and select
your country.25. Click in the text box and type in your (real) phone
number.26. Under Method, select an option (send code by text
or call), and then click Contact me.27. Obtain the verification code from the phone and type
it in the text box, then click Verify.
28. Respond to the MFA request.29. Note that Isaiah is automatically logged in to the
BrowserStack App using the shared account set up by the administrator.
30. Close the BrowserStack app browser tab to return to Access Panel.
Accessing App Panel through Office 365Contoso is using Office 365 applications and since Isaiah is licensed to use them, they display on his Access Panel.When he clicks a tile for an Office 365 application, he is redirected to that application and automatically signed in.The Office 365 and Azure Active Directory integration allows organization to place apps assigned to Isaiah on his My apps page in Office 365.
31. From the list of Apps, click SharePoint.32. Dismiss SharePoint guided tour pop-up, if prompted.33. Click App Launcher icon (also known as the “waffle”
icon) in the top-left corner of the page.34. Note the list of apps under HOME. The list is currently
populated with Microsoft Office 365 apps only.35. Click ALL, then scroll to the bottom of the list, to
Other apps.36. Hover over Salesforce, then click on the ellipsis …37. Click Pin to home.38. Click HOME. Note the Salesforce icon at the bottom
of the list.39. Click Salesforce icon to launch Salesforce app.
Cross-Organization CollaborationThis demo steps through adding external users to the Azure AD to provide access to Azure AD Groups and Applications.
13

Demo Guide Identity & Access Management
Pre-demo step:1. Determine an external user to use for this demo scenario. This may be your real-world work
account, or a demo Live ID account.2. Log in to your external user email mailbox (using browser, Outlook client, or mobile device).
Talk Track StepsAzure Active Directory B2B collaboration supports cross company relationships by enabling partners to selectively access corporate applications and data using self-managed identities.Azure AD supports adding four types of users:
New user in your organization User with an existing Microsoft
account User in another Microsoft Azure AD
directory Users in partner company.
The Contoso Bug Bashers group is Contoso’s internal security user group that’s dedicated for cross-platform testing and QA. Contoso has recently taken on a large project where the testing needs to be performed in collaboration with a Partner firm. How can Contoso users and the Partners work seamlessly on the same project and access the same assets online?The Azure AD B2B capabilities allow Contoso to invite Partner users to their directory, and allow them access to only the resources they need.
The Contoso Bug Bashers security group owner or a Global Administrator can add new members to the group. If the new members are not yet part of the Contoso directory, they can invite to join the directory via an automated email.
Here, the Partner receives an email to join the Contoso directory. The Partner need simply click on the link on the email and authenticate with their own existing credentials. Contoso need not manage their passwords.
1. Switch to the Global Admin user’s browser session (loaded with Azure AD management blade).
2. Click Users and groups, then All groups.
3. Scroll down the list, then click ssg-Contoso Bug Bashers.
4. Click Members.5. Click + Add Members.6. Click + Invite.7. Type your external user’s email address (e.g.
[email protected]) then click Invite.8. Switch to your external user’s email inbox (on a
separate browser, client app or mobile).9. Locate and open the new email from MOD
Administrator.
14

Demo Guide Identity & Access Management
Talk Track Steps
As soon as the Partner user accepts the invitation to join Contoso’s directory, and is added to the Bug Bashers security group, they have access to the same apps and resources that other Contoso members of the group have access to. In this case, they are all able to access BrowserStack SaaS application, and collaborate on their testing.
10. Click Get Started in the email body. The link will open in a new browser tab.
11. In the Welcome to Contoso screen, click Next.12. Authenticate with your external user’s login
credentials.
13. Switch to the Global Admin user browser session (Add Members blade).
14. In the Select textbox, type a few characters of your work email address.
15. Highlight your email address from the list, then click Select.
16. Switch to your external user browser session.17. Refresh the Access Panel Apps page. BrowserStack
app icon should appear on the page.18. Click BrowserStack app icon. Note the app launches
in a new browser tab, and logs in the external user automatically.
Any-Time, Any-Place Productivity with Win10<Demo guidance coming soon>
Demo Reset StepsPerform these steps after each demo presentation to ensure re-usability of this demo environment.
1. Log back into https://myapps.microsoft.com as IsaiahL and leave the security group ssg-Contoso Bug Bashers.
2. Unpin applications from the Office 365 app launcher HOME.3. Delete the External User account from Contoso’s Azure AD.
15

Demo Guide Identity & Access Management
Manage Access at ScalePre-Demo StepsPrior to each demo, follow these steps to ensure a smooth presentation:1. Ensure the following one-time demo environment setup steps have been performed against your demo
tenant/device. Detailed instructions are provided in the Appendix section: Install Access Panel Extension
2. Prepare a browser session for end user: Launch IE or Chrome or Firefox browser (in standard or incognito session) – the browser where
you installed the Access Panel Extension. Sign in to MyApps Portal (https://myapps.microsoft.com) as
IsaiahL@<Tenant>.onmicrosoft.com.3. Prepare a separate browser session for administrator experience:
Launch Internet Explorer or Edge browser in InPrivate mode. Log in to the Azure Portal (https://portal.azure.com) as the Global Admin. Open the Azure Active Directory blade.
Advanced User Lifecycle ManagementThis demo shows how Microsoft Azure AD allows admins to easily add and manage users and groups, including enabling dynamic group membership.Talk Track StepsContoso is creating a new team to manage development needs for the Finance department. Troy Sun was recently hired to lead the team. The Contoso admin will add Troy to Azure Active Directory, then create a dynamic group to allow only Finance team members to automatically join the group.Manage Users This is the directory of all users in the Contoso organization.The Source of authority column indicates how Azure created each user account. If the source is local Active Directory, Azure created the account by synchronizing with an on-premises Active Directory. (The admin must manage these users in the on-premises directory.) If the source is Azure Active Directory, Azure created the account in the cloud.The admin must create an account for every user who will access a Microsoft online service, such as Office 365. Azure AD supports adding four types of users:
New user in your organization User with an existing Microsoft
1. Start in the Azure Active Directory browser page.2. Under MANAGE, click Users and groups, then All
users.3. Click Columns (icon at top of the blade).4. Check Source of authority, then click Apply.
5. Click + Add.
6. Fill in the new User form as follows:Name: Troy SunUser name: troys@<tenant>.onmicrosoft.com
16

Demo Guide Identity & Access Management
Talk Track Stepsaccount
User in another Microsoft Azure AD directory
Users in partner company
The most basic role is User. There are other elevated roles that can be assigned here. Azure creates a temporary password for the user that must be changed at the user’s first login.
Administrator can easily grant product licenses based on subscriptions already purchased by the organization. Specifying each user’s location (by country) is required before a product license can be applied, since product service availability and experience may differ by country.
Administrators can track Troy’s activities, including his sign in attempts, application access, and device usage.
7. Click Directory role, then show the options available.
8. Click the Show Password checkbox.9. Click Create.
10. In the Search users textbox, type Troy, then click Troy Sun in the results list.
11. Under MANAGE, click Profile. Note the long list of properties available in Azure AD user profile.
12. Set the Usage location drop-down to a country of your choice (e.g. United States).
13. In the Job title property, type Marketing Analyst.14. Click Save.
15. Under MANAGE, click Licenses.16. Click + Assign.17. Click Products.18. Select Enterprise Mobility + Security then click
Select.19. Click Assignment options.20. Note the list of services included in the Enterprise
Mobility + Security license.21. Click Assign.
22. Click Devices.23. Click Sign-ins.24. Click Audit logs.
Manage GroupsWhen many users need to access the same application, organizations can use groups to assign the application multiple users. Organizations can also use groups to configure access management of other online services that control access to resources (e.g., SharePoint Online).
If the organization is using Office 365, the distribution groups and mail-enabled security groups created and managed within the Exchange Admin Center display here. The source for these groups is Office 365, and
25. In the Microsoft Azure breadcrumb (links across the top of the page), click Users and groups.
26. Click All groups.27. Scroll down the list of Groups and note the GROUP
TYPES:a. Distribution groupb. Office groupc. Security group
28. Click + Add.29. Fill in the new group properties as follows:
a. Name: Marketing Stars
17

Demo Guide Identity & Access Management
Talk Track Stepsthe admin must continue managing them in Office 365.Azure AD also allows dynamic group memberships. Dynamic groups run rules against user object attributes to automatically add and remove users from groups.
Any user that meets the membership requirements (as defined in the group membership query rule) will automatically become a member of the group and gain access to appropriate resources and privileges automatically.
b. Membership type: Dynamic Userc. Enable Office features: Yes
30. Click Add dynamic query under Dynamic user members.
31. Set the dynamic membership rule as follows:a. Select: Simple rule (default)b. Add users where: jobTitle (pick from drop-
down)c. Starts With: "marketing" (include double
quotes)32. Click Add query, then Create.33. Close the Group blade to return to All groups.34. In the Search groups text box, type marketing.35. Click Marketing Stars from the results list.36. Under MANAGE, click Members.37. Note the newly created group already has 3
members.Note: You may need to wait a few minutes to see members in the group due to latency in processing the dynamic group query.
Low IT OverheadAzure AD Premium offers self-service for password reset, group management, and app management capabilities to empower IT and users’ productivity in your organization. There’s no need for users to make a helpdesk phone call and provide a lot of information to get a temporary password that’s sent in e-mail or shared during the call in an unsecured way.Talk Track StepsSelf-Service Password ResetSelf-service password reset has numerous benefits: Reduce costs - support-assisted
password reset is typically 20% of organization's IT spend
Improve user experiences - users don't want to call helpdesk and spend an hour on the phone every time they forget their passwords
Lower helpdesk volumes - password management is the single largest helpdesk driver for most organizations
Enable mobility - users can reset their passwords from wherever they are
Isaiah can perform self-service on his Azure AD account, which really empowers him to get work done on the go, without having to depend on IT help desk or an Administrator.
1. Launch a new, InPrivate browser session, then navigate to https://portal.office.com.
2. In the user name, type IsaiahL@<tenant>.onmicrosoft.com
3. Do not type in a password (i.e. assume you forgot password), then click Can’t access your account? link.
4. Respond to captcha challenge, then Next.5. Under verification step 1, choose Text or Call
option (as desired), and type in the full phone number that was registered for Isaiah’s phone verification earlier.
6. Respond to the MFA (phone call or text, as appropriate).
7. Type in a new password, then click Finish.
18

Demo Guide Identity & Access Management
Talk Track StepsHe can also reset, and change his own password so if he ever goes on vacation and his password expires he can reset it himself. Self-service is a very effective cost cutting method that reduces help desk calls.
Monitor Your Identity BridgeAvailable as a PowerPoint Click-thru Deck.
Demo Reset StepsPerform these steps after each demo presentation to ensure re-usability of this demo environment:
1. Delete Troy Sun from Users.2. Delete Marketing Stars from Groups.3. Reset Isaiah Langer’s password, or note down the new password for next demo.
Cloud Powered Protection (Security)Pre-Demo Steps1. Ensure the following one-time demo environment setup steps have been performed against your demo
tenant/device. Detailed instructions are provided in the Appendix section: Install Access Panel Extension
2. Obtain the public IP address of the demo PC: Open a browser window and navigate to http://whatismyip.com/. Note down the IPv4 address shown, then close the browser.
3. Prepare a browser session for end user: Launch IE or Chrome or Firefox browser (in standard or incognito session) – the browser where
you installed the Access Panel Extension.4. Prepare a separate browser session for administrator experience:
Launch Internet Explorer or Edge browser in InPrivate mode. Log in to the Azure Portal (https://portal.azure.com) as the Global Admin. Launch the Azure Active Directory management blade.
Safeguard User Authentication with MFAThis demo shows how organizations can use Azure Active Directory Premium to safeguard user authentication by requiring additional factors of verification when a user logs in. Typically, this authentication happens through a mobile device, such as a text message with a verification code, a call to the device, or through the Multi-Factor Authentication (MFA) mobile app called Azure Authenticator.Talk Track StepsAdministration ExperienceAdmins use the Azure Active Directory blade to set up MFA.
If applications do not support MFA, the admin can
1. Switch to the Global Admin browser session.2. Click Users and groups, then All users.3. Click Multi-Factor Authentication button at the top
of the page.
19

Demo Guide Identity & Access Management
Talk Track Steps
allow users to create application specific passwords to bypass multi-factor authentication and continue working with the apps.
Trusted IP addresses allow administrators of a managed or federated tenant to bypass MFA for users signing in from the company’s local intranet.
The admin can select the methods of verification available to the users when using Azure MFA.
Admins can set up the MFA re-authentication settings for devices. In this case, users will not have to re-authenticate on devices for 7 days.
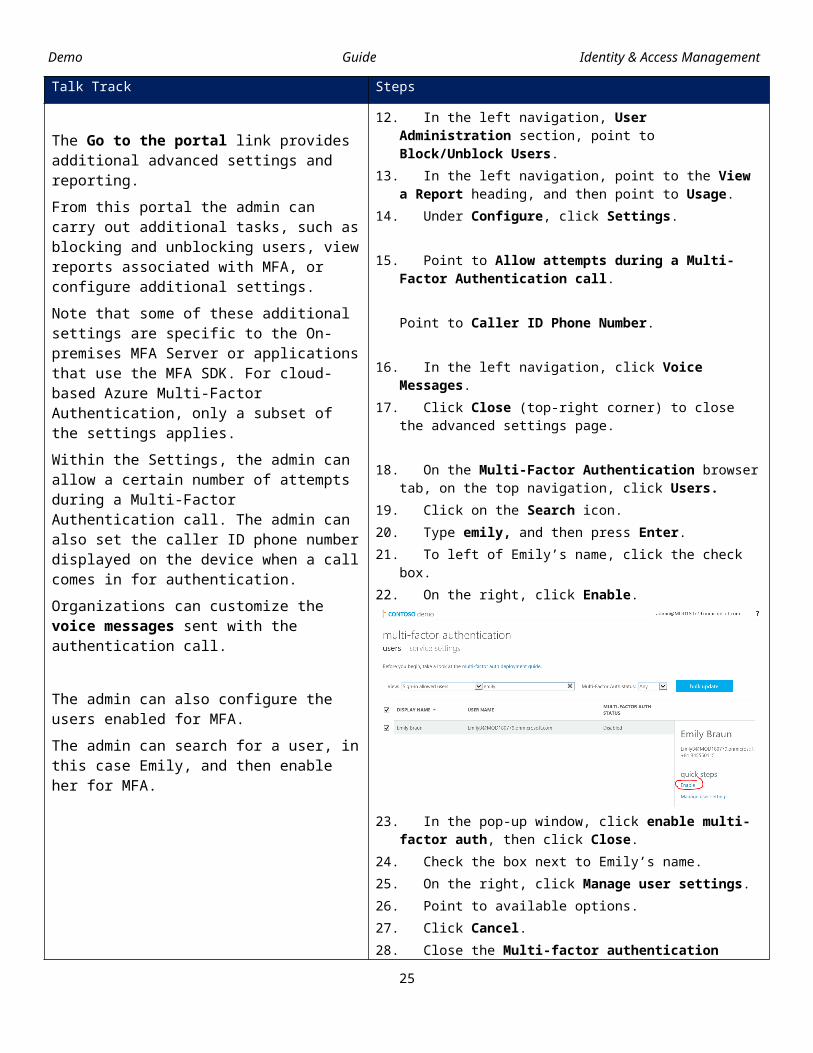
The Go to the portal link provides additional advanced settings and reporting.
From this portal the admin can carry out additional tasks, such as blocking and unblocking users, view reports associated with MFA, or configure additional settings.
Note that some of these additional settings are specific to the On-premises MFA Server or applications that use the MFA SDK. For cloud-based Azure Multi-Factor Authentication, only a subset of the settings applies.
Within the Settings, the admin can allow a certain number of attempts during a Multi-Factor Authentication call. The admin can also set the caller ID phone number displayed on the device when a call comes in for authentication.
Organizations can customize the voice messages sent with the authentication call.
The admin can also configure the users enabled for MFA.
The admin can search for a user, in this case Emily, and then enable her for MFA.
4. On the multi-factor authentication page top navigation, click service settings..
5. Point to the App Passwords settings.
6. Point to the Trusted IPs settings.
7. Point to Verification Options.8. Under remember multi-factor authentication, check
Allow users to remember multi-factor authentication on devices they trust.
9. In the Days before a device must re-authenticate (1-60):, type 7, and then click Save.
10. On the Updates successful dialog, click Close.11. At the bottom of the service settings page click the
Go to the portal link.
12. In the left navigation, User Administration section, point to Block/Unblock Users.
13. In the left navigation, point to the View a Report heading, and then point to Usage.
14. Under Configure, click Settings.
15. Point to Allow attempts during a Multi-Factor Authentication call.
Point to Caller ID Phone Number.
16. In the left navigation, click Voice Messages.17. Click Close (top-right corner) to close the advanced
settings page.
18. On the Multi-Factor Authentication browser tab, on the top navigation, click Users.
19. Click on the Search icon.20. Type emily, and then press Enter.21. To left of Emily’s name, click the check box.22. On the right, click Enable.
20

Demo Guide Identity & Access Management
Talk Track Steps
The admin can also manage all of Emily’s settings, such as prompting the user to provide their contact methods again, deleting any app passwords that have been generated and forgetting all trusted devices and prompting for MFA again from those devices.
23. In the pop-up window, click enable multi-factor auth, then click Close.
24. Check the box next to Emily’s name.25. On the right, click Manage user settings.26. Point to available options.27. Click Cancel.28. Close the Multi-factor authentication browser tab.
User ExperienceLogging in as Emily now will initiate the set up for Multi-Factor Authentication.
Emily is prompted for the authentication method to be used and the phone number.
For the voice call, Emily’s phone will ring and the message is acknowledged by pressing the # key.
Once the authentication occurs the web page automatically progresses to the next step.
As part of the initial MFA set-up, an initial application password is generated. This can be used in any applications that do not support MFA.Once logged in to the MyApps portal, there is tile for additional security verification. This enables Emily to reconfigure the contact methods chosen for MFA.
30. Open a new InPrivate browser window.31. Browse to https://myapps.microsoft.com. 32. Sign in as EmilyB@<tenantid>.onmicrosoft.com
and your tenant password 33. At the prompt for additional security verification, click
Set it up now.34. Select appropriate country or region.35. Enter your phone number.36. Click CONTACT ME.37. Answer call when phone rings.38. Press # on the phone when prompted.
39. Indicate the generated app password option.40. Click Done.
41. Click on the user icon (to access menu), then Profile.42. Under Manage Account, click Additional security
verification.43. Under how would you like to respond? note the
various options available.[Optional] Azure Authenticator AppThe Microsoft Authenticator app is the recommended app when you use Azure Multi-Factor Authentication. It is considered even more secure than phone call or text verification. The Microsoft Authenticator app is available for Windows Phone, Android, and
Note: This portion of the demo requires Azure Authenticator app on your mobile phone. Go to the app store of your phone and download it, if necessary.44. Check Azure Authenticator app checkbox.45. Click Configure. You’ll see a QR code similar to
below:
21

Demo Guide Identity & Access Management
Talk Track StepsiOS.
46. On your mobile device, launch the Authenticator app.
47. Click + to add new account.48. Choose Work or school account.49. If prompted, allow Authenticator app to use your
device’s camera.50. Point to the QR code on the screen.
The Authenticator app setup is complete!51. Click Done on the browser.
Control Access to Resources with Conditional AccessThis demo shows how Active Directory Premium enables administrators to enforce controls on access to applications based on group, location, and application sensitivity.Talk Track Steps
Access rules for content are enabled and configured for each published application.
By default, the policy is applied to all users that have access to the application. The admin can restrict access to members of certain Azure Active Directory groups.
Admins can use ‘Except’ to explicitly exclude users and security groups from the multi-factor authentication requirement, even if they are a member of a group subject to the access rule.
Admins can restrict access depending on from where the user is accessing the application. They can totally block users or prompt them for multifactor authentication when not at work. With this option, a user coming from a trusted IP address
1. Switch to the Global Admin user’s Azure Active Directory management browser session.
2. Navigate to Enterprise applications, then All applications.
3. In the list of applications, click Office 365 SharePoint Online.
4. Click Conditional access policies.5. Click + Add.6. Fill in the New policy as follows:
a. Name: Require MFA for remote SharePoint access
b. Users and groups > Include > All users > Done
c. Conditions > Locations > Configure: Yesi. Include > All locationsii. Exclude > Trusted IPs > Done.
22
Demo Guide Identity & Access Management
Talk Track Steps
is not required to perform multi-factor authentication. The trusted IP address ranges are configured on the multi-factor authentication settings page.
The network address range is not yet defined so all access results in the user being prompted for multi-factor authentication until the address range is configured.
When trying to access an application, Emily is prompted to use multi-factor authentication.
To define the work network, the admin needs to configure the public IP address ranges for the corporate network on the multifactor authentication service settings.
This can be a range of addresses in CIDR notation or an individual IP address like here.
Trying to access the application now from an address defined within the corporate network allows Emily to access the application without additional authentication.
d. Click Done again to save Conditions.e. Controls > Grant > Allow access > Require
multi-factor authentication > Selectf. Enable policy > On
7. Click Create to save policy settings.8. Navigate to Azure Active Directory > Users and
groups > All users.9. Click Multi-Factor Authentication link (top of the
blade).10. In the MFA administration page (new tab), click
service settings.11. Click in the trusted ips text box and type the IP
address noted in the pre-demo setup steps in the format X.X.X.X/32.Example: 50.34.84.106/32
12. Click Save.13. In the Updates successful dialog, click Close.
14. Switch to the Access Panel Applications browser.15. Click the SharePoint tile.
Respond to Advanced Threats with Risk Based Policies and MonitoringAzure AD Identity Protection is a new feature of Azure AD that allows administrators to detect and respond to a variety of threats using active monitoring and risk-based policy enforcement. Since this demo is heavily dependent on a rich history of user logins and other activities against the tenant over a span of time, it can take a while for your tenant to collect enough log data to have a meaningful demo. Hence, we recommend the following:
Use the PowerPoint-based click-thru guide as an alternate to a live-code demo, or to learn key capabilities and value propositions of this feature.
If you want to perform live code demo using your actual tenant, you need to perform some extra work. Your demo tenant directory is already activated for Azure AD Identity Protection. You can prep your tenant further and create a richer demo environment by configuring specific policies and simulating various types of end user behaviors. Please follow the online playbook documented by the Azure AD team for more details.
Mitigate Admin Risk with Privileged Identity ManagementWith Azure AD Privileged Identity Management, you can manage, control, and monitor access within your organization. This includes access to resources in Azure AD and other Microsoft online services like Office 365 or Microsoft Intune. This demo shows how a Global Administrator can grant a super user elevated access for a limited period.
23

Demo Guide Identity & Access Management
Talk Track StepsThe Azure AD Privileged Identity Manager dashboard provides important information such as:
Alerts that point out opportunities to improve security
The number of users who are assigned to each privileged role
The number of eligible and permanent admins Ongoing access reviews
Contoso has numerous permanent Global Admins. They have full access and control over the directory and the Office 365 tenant all the time. That leaves Contoso compromised and open to malicious attacks all the time.
With Privileged Identity Management Contoso can decide who should have permanent access and who should just have temporary access when required. Isaiah does not need permanent admin access so the admin sets him to eligible.
Eligible admins are users that need privileged access now and then, but not every day. The role is inactive until Isaiah needs access, then he completes an activation process and becomes an active admin for a predetermined amount of time.
The admin can also configure the nature of the admins access, how long it lasts and any notification or if additional authentication is needed. Note that for certain high privileged roles, MFA is always enabled.
When Isaiah needs higher privileges for a specific task, he can go in to the Privileged Identity Management in the Azure portal and request activation for the access role. Any type of admin can use Azure AD Privileged Identity Management to activate.
First, Isaiah is prompted to verify his identity using Multi-Factor Authentication.
1. Click the Azure Portal tab (https://portal.azure.com).2. In the Azure Management Portal left navigation, click
More Services, and then select Azure AD Privileged Identity Management (Preview).
3. Click Manage privileged roles.4. Point to Alerts and Role Summary.
5. Under Role summary, click the Global Administrator role.
6. In the Global Administrator blade, click Isaiah Langer.
7. On the right, click Make Eligible.
8. In the Global Administrator blade top navigation, click Settings.
9. Move the Maximum Activation duration slider to the left, to 0.5 hours.
10. Set email Notifications to Enable.11. Click Save.
12. In the upper right of the browser, click admin@<Tenant>, then click Sign out.
13. Browse to the following URL: https://outlook.office365.com/ to view Isaiah Langer’s email.
14. Sign in as IsaiahL@<Tenant>.onmicrosoft.com (with your tenant password).
15. Open the email from Microsoft Azure Alerts for Activating Global Administrator.
16. Click on the Azure Portal link in the email.17. In the Azure Portal, click More Services > then
Azure AD Privileged Identity Management.18. Click Activate my roles.19. Click Global Administrator.20. Click Verify your identity before proceeding.21. Click Verify my identity.Note: if Isaiah Langer has not yet been set up for MFA, you will be prompted to set up phone verification.
24
Demo Guide Identity & Access Management
Talk Track Steps
Isaiah can now activate the request. Role activation is customizable. In the PIM settings, Isaiah can determine the length of the activation and provide a business justification.
Isaiah is auto-approved for the requested access with an expiration time for that permission.
Using Azure AD Privileged Identity Management, the admin can track changes in privileged role assignments and role activation history. The admin can see Isaiah just requested access as a Global Administrator. This information can be critical for auditing and forensic investigations.
Complete the setup by following the instructions to register your phone for MFA.22. Respond to the phone verification.23. In the Azure Portal, return to the Global
Administrator Role Activation Details blade:a. In the left navigation, click More Services,
and then select Azure AD Privileged Identity Management (preview).
b. Click Activate my roles.c. Click Global Administrator.
24. In the top navigation, click Activate.25. In the Reason for role activation text box, type
Year end financials.26. Click OK.27. Click Activate my roles.28. On the Global Administrator tile, point to Access
valid till.29. Sign out of Azure portal.30. Sign in to the Azure portal as
Admin@<Tenant>.onmicrosoft.com.31. On the Dashboard, click the Azure AD Privileged
Identity Management tile.32. Click on Manage privileged roles.33. On the Activity dashboard, click Audit history.34. Indicate the business justification enter above, which
is displayed in the Reasoning column.
Demo Reset StepsPerform these steps after each demo presentation to ensure re-usability of this demo environment:
1. Disable MFA requirement for Emily Braun.2. Reset MFA service settings:
a. Under Trusted ips, remove the IP address from the text box.b. Under Remember multi-factor authentication set Days before a device must re-
authenticate to 14.c. Uncheck Allow users to remember multi-factor authentication on devices they
trust.d. Save changes.
3. Delete the Require MFA for remote SharePoint access rule.4. Set IsaiahL back to a permanent Global Administrator.
25

Demo Guide Identity & Access Management
Appendix 1: One Time Demo Environment SetupNote: These activities need to be performed only once per demo tenant.
Review SaaS Applications and Access in Azure ADTo give you a head start on pre-demo configuration steps that require SaaS applications, several SaaS applications were pre-provisioned to your demo tenant’s Azure AD. These are only a few of thousands of apps available in the application gallery.
1. Log in to the Azure Management Portal (https://portal.azure.com) as admin@<tenant>.onmicrosoft.com.
2. In the left navigation, click Azure Active Directory.3. Under MANAGE, click Enterprise applications.4. Click All applications.5. Review the list of SaaS applications and user/group assignments (as listed in the table below).
Application Name
Demos that Require this App
Groups that have Access to App
Additional Configurations Needed
Salesforce Federated SSO demoMulti-Factor Authentication demo
sg-Sales & Marketing Configure federated SSO between Azure AD and Salesforce
Twitter Password-based SSOPassword Rollover
sg-Sales & Marketing Configure password SSO between Azure AD and Twitter
BrowserStack Self-Service Group demo ssg-Contoso Bug Bashers Enable access rules in App Configuration to require MFA
Box (sample only) sg-Financesg-Sales & Marketing
LinkedIn (sample only) sg-Financesg-Sales & Marketing
Configure Salesforce IntegrationEstimated Setup Time: 20 minutesThe Salesforce application is added to your demo Azure AD, but not yet configured for SSO. Please follow the detailed guidance below to sign up for a Salesforce account for your demo tenant and configure SSO with your tenant’s Azure AD.Sign up for a Salesforce Developer Account
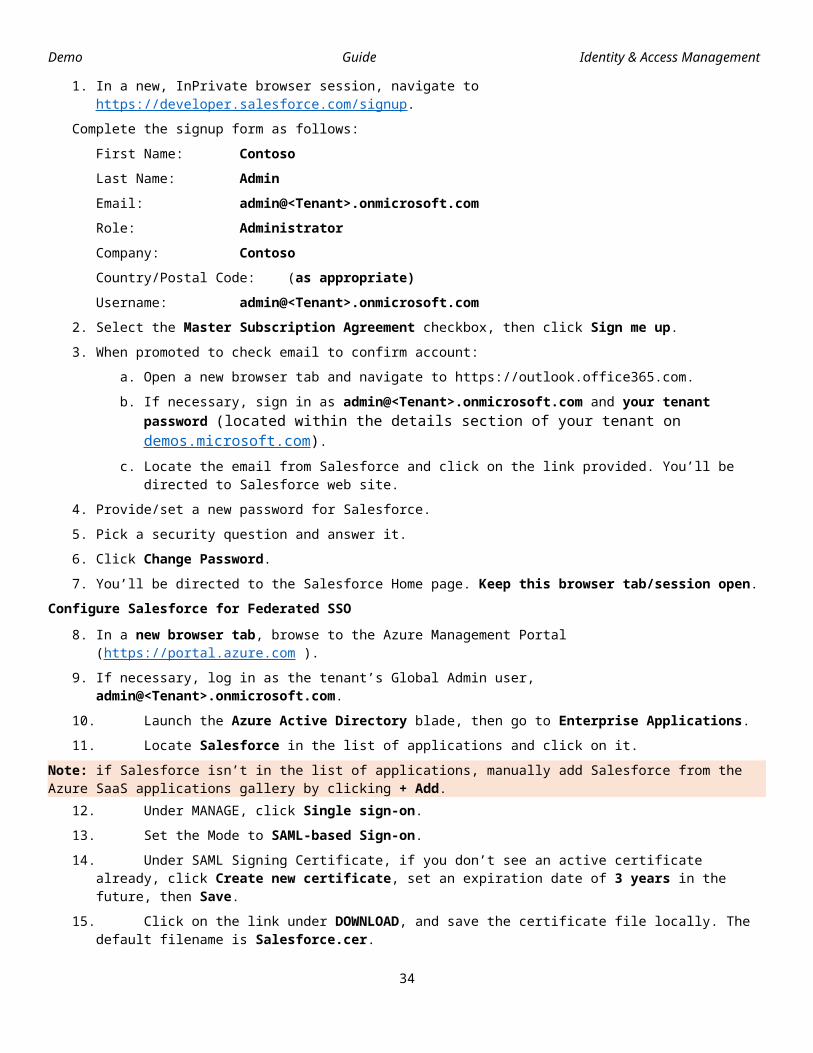
1. In a new, InPrivate browser session, navigate to https://developer.salesforce.com/signup. Complete the signup form as follows:
First Name: ContosoLast Name: AdminEmail: admin@<Tenant>.onmicrosoft.comRole: Administrator
26

Demo Guide Identity & Access Management
Company: ContosoCountry/Postal Code: (as appropriate)Username: admin@<Tenant>.onmicrosoft.com
2. Select the Master Subscription Agreement checkbox, then click Sign me up.3. When promoted to check email to confirm account:
a. Open a new browser tab and navigate to https://outlook.office365.com. b. If necessary, sign in as admin@<Tenant>.onmicrosoft.com and your tenant password
(located within the details section of your tenant on demos.microsoft.com).c. Locate the email from Salesforce and click on the link provided. You’ll be directed to
Salesforce web site.4. Provide/set a new password for Salesforce.5. Pick a security question and answer it. 6. Click Change Password.7. You’ll be directed to the Salesforce Home page. Keep this browser tab/session open.
Configure Salesforce for Federated SSO8. In a new browser tab, browse to the Azure Management Portal (https://portal.azure.com ).9. If necessary, log in as the tenant’s Global Admin user, admin@<Tenant>.onmicrosoft.com.10. Launch the Azure Active Directory blade, then go to Enterprise Applications.11. Locate Salesforce in the list of applications and click on it.
Note: if Salesforce isn’t in the list of applications, manually add Salesforce from the Azure SaaS applications gallery by clicking + Add.
12. Under MANAGE, click Single sign-on. 13. Set the Mode to SAML-based Sign-on.14. Under SAML Signing Certificate, if you don’t see an active certificate already, click Create new
certificate, set an expiration date of 3 years in the future, then Save.15. Click on the link under DOWNLOAD, and save the certificate file locally. The default filename is
Salesforce.cer.16. Click Configure Salesforce link at the bottom of the blade.
Note: This blade includes URLs and IDs unique to your demo tenant – keep this window open while you work through the next section of Salesforce SSO setup.
17. Switch to the Salesforce administration browser tab.18. In the left navigation pane, expand SETTINGS > Identity, then click Single Sign-On Settings.19. Under Single Sign-on Settings, click Edit. 20. Under Federated Single Sign-On Using SAML, check SAML Enabled, and then click Save. 21. In the SAML Single Sign-On Settings section, click New. 22. Fill in the SAML Single Sign-On Settings form as follows:
a. Name: AzureSSO (any friendly name will work)b. Issuer: (copy/paste from Azure window, e.g. https://sts.windows.net/e7aa4694-d862-46f7-
87bb-9421e6fda590/)c. Entity ID: https://<TENANT>-dev-ed.my.salesforce.com (replace <TENANT> with your
actual tenant name, e.g. MOD12345).d. Identity Provider Certificate: (Upload the Salesforce.cer file you downloaded in step #16.)
27

Demo Guide Identity & Access Management
e. Identity Provider Login URL: (copy/paste from Azure window, e.g. https://sts.windows.net/e7aa4694-d862-46f7-87bb-9421e6fda590/)
23. Click Save.24. In the left navigation, expand SETTINGS > Company Settings, then click My Domain.25. Under Choose Your Domain Name, type your tenant name in the textbox (e.g. MOD12345).
Note: this domain name URL (e.g. https://MOD12345-dev-ed.my.salesforce.com/ should match the Entity ID value you entered in step #23c.
26. Click Check Availability. If the domain name is unique, it will be available.27. Click Register Domain.NOTE: Please wait 2-3 minutes before proceeding to the next step. The custom domain name you just registered requires some time to take effect.28. In the left navigation, click My Domain again to refresh the page. If you don’t see Authentication
Configuration section, wait another minute and try again.29. Click Edit button next to Authentication Configuration.30. Under Header Logo, click Browse and in the File Name text box, paste the following URL:
http://emsassetspub.blob.core.windows.net/demoassets/Logo-250.png31. Click Open.32. Under Authentication Service, de-select Login Page, then select AzureSSO.
33. Click Save. 34. Click on the Log in button to test your new domain.35. If you’re prompted to register your mobile phone, click I Don’t Want to Register My Phone.
28

Demo Guide Identity & Access Management
36. If needed, login with your Salesforce administrator user ID (admin@<Tenant>.onmicrosoft.com) and password.The My Domain page will re-load. Note the URL for this page now begins with your custom domain name.
37. Under My Domain, click Deploy to Users. 38. Click OK on the dialog box to confirm domain deployment. 39. In the left navigation, expand Security Controls, then click Single Sign-On Settings, 40. Click Edit next to AzureSSO.41. Under Service Provider Initiated Request Binding, choose HTTP Redirect.
42. Click Save.43. Switch to the Azure administration browser tab with Salesforce single sign-on configuration
documentation blade.44. Close the documentation blade to return to SSO configuration.45. Change the Sign on URL to https://<TENANT>-dev-ed.my.salesforce.com. 46. If unchecked, check the box Make new certificate active.47. Click Save.48. Click OK at the Rollover certificate confirmation prompt.
Configure Account Provisioning49. Under MANAGE, click Provisioning.
29

Demo Guide Identity & Access Management
50. Set the Provisioning Mode to Automatic.51. Under Admin Credentials, type in the Admin Username and Password for accessing Salesforce.52. Obtain a Secret Token as follows:
a. Switch to the Salesforce browser tab.b. Access the user menu (top-right corner of the page), then click Settings.
c. In the left navigation, expand My Personal Information, then click Reset My Security Token.
d. Click Reset Security Token button. e. Go to the Global Administrator’s Office 365 inbox, then copy the security token.
53. In the Secret Token textbox, paste in the security token string.54. Click Test Connection.55. Set Notification Email to admin@<tenant>.onmicrosoft.com and check Send an email
notification when a failure occurs.56. Under Settings, set the Provisioning Status to On.57. Click Save.
Assign Group and User Accounts to Salesforce58. Under MANAGE, click Users and groups.59. Click sg-Sales and Marketing to highlight, then click Update Credentials.60. Click Edit.61. Click Select Role.62. Click Chatter Free User.63. Click Select.64. Click Assign.
Configure Twitter SSO IntegrationEstimated Setup Time: 8 minutesYou will be using the Twitter app to demonstrate password roll-over feature in Azure AD.Sign up for a Demo Twitter AccountYou will need to sign up for a new Twitter account, if you don’t have a demo Twitter account already.
1. In a new InPrivate browser session, navigate to https://twitter.com/signup.2. Complete the form with following information:
a. Full Name: Contoso Demob. Email address: admin@<Tenant>.onmicrosoft.com
30

Demo Guide Identity & Access Management
c. Password: <your choice>3. Click Sign up. 4. On the Enter your phone page, provide your mobile phone number [Optional], then click Next. 5. On the Choose a username page, type Demo<Tenant> (e.g. DemoMOD45654), and then click
Next. 6. Click Let’s go! 7. In the What are you interested in? page, click Continue.8. In the Want to find friends and see who they follow? page, click No thanks.9. In the Make your timeline yours page, uncheck Select All to deselect all items, then click
Continue.10. Click Add a photo, and then click Upload photo.11. In the File name field, paste the Contoso logo URL:
http://emsassetspub.blob.core.windows.net/spdoclib/contoso-200x200.png then click Open.12. Click Apply to apply the logo as display image for the new Twitter account.
Confirm email address for Twitter account13. In a new browser tab, navigate to https://outlook.office365.com and log in as
admin@<Tenant>.onmicrosoft.com.14. Locate the email from Twitter, then click Confirm now link on the email body.15. If prompted, log in as admin@<tenant>.onmicrosoft.com.
Configure Twitter for Password SSO16. In a new browser tab, browse to the Azure Management Portal (https://portal.azure.com ).17. If necessary, log in as the tenant’s Global Admin user, admin@<Tenant>.onmicrosoft.com.18. Launch the Azure Active Directory blade, then go to Enterprise applications.19. Click All applications.20. Locate Twitter in the list of applications and click on it.
Note: if Twitter isn’t in the list of applications, manually add Twitter from the Azure SaaS applications gallery by clicking + Add.
21. Under MANAGE, click Users and groups.22. Click sg-Sales and Marketing to highlight, then click Update Credentials.
Note: if no groups are displayed here, click + Add to add the sg-Sales and Marketing security group to Twitter.
23. Type in the User Name and Password you set for Twitter earlier.24. Click Save.
Configure BrowserStack SaaS Application Estimated Setup Time: 5 minutesYou will be using the BrowserStack app to demonstrate Self-Service Group Management in MyApps.Sign up for a Demo BrowserStack AccountYou will need to sign up for a new BrowserStack account, if you don’t have a demo BrowserStack account already.
1. In a new InPrivate browser session, navigate to https://browserStack.com/users/sign_up.2. Complete the form with following information:
Email: admin@<Tenant>.onmicrosoft.com31

Demo Guide Identity & Access Management
Password: <your choice> Full Name: Contoso Demo
3. Select I’m not a robot, respond to prompt, and then click Verify4. Click Sign me up. 5. In a new browser tab, browse to the Azure Management Portal (https://portal.azure.com ).6. If necessary, log in as the tenant’s Global Admin user, admin@<Tenant>.onmicrosoft.com.7. Launch the Azure Active Directory blade, then go to Enterprise applications.8. Click All applications.9. Locate BrowserStack in the list of applications and click on it.
Note: if BrowserStack isn’t in the list of applications, manually add BrowserStack from the Azure SaaS applications gallery by clicking + Add.
10. Under MANAGE, click Conditional access policies.11. Click + Add.12. Type a name for the new rule, e.g. Require two-factor authentication for BrowserStack.13. Fill in the remaining settings as follows:
a. Assignments > Users and groups > Include > All users [select radio button], then click Done.
b. Assignments > Cloud apps > BrowserStack (default setting)c. Assignments > Conditions > leave all as Not configured (default setting)d. Controls > Grant > Allow access > Require multi-factor authentication [check], then
click Select.e. Controls > Sessions > leave as 0 controls selected (default setting)f. Enable policy > On.
14. Click Create to save the policy settings.15. Under MANAGE, click Users and groups.16. Locate and click on ssg-Contoso Bug Bashers in the list of Groups.17. Click Update Credentials.18. Type in the BrowserStack account you configured earlier (email and password) in the text box, then
click Save.
Install Access Panel ExtensionSome demos require access to the Applications Access Panel (https://myapps.microsoft.com). This web site requires a browser extension, but not all modern browsers allow extensions. The following browsers are recommended for demos that require access to the Application Access Panel:
Chrome (standard or Incognito mode) Internet Explorer 8 or above (standard mode only, InPrivate mode is not supported) Firefox
To configure a browser for Access Panel Extension:1. Launch a compatible browser and navigate to https://myapps.microsoft.com. 2. Log in as Isaiah Langer (IsaiahL@<tenant>.onmicrosot.com and password).3. At the bottom of the page, click on the link Change to classic look.4. If you see a prompt at the top of the page to “install some software”, click Install Now.
32

Demo Guide Identity & Access Management
5. Complete the installation wizard to install Access Panel Extension to your browser (and device). You will be required to close your browser during the installation.
6. Re-launch IE browser and log in as Isaiah Langer.7. Test Salesforce SSO login by clicking on the Salesforce icon.8. Test Twitter SSO login by clicking on the Twitter icon.
Note: If you’re having issues configuring your IE browser to work with Access Panel Extension, please visit this troubleshooting page: https://account.activedirectory.windowsazure.com/Applications/Troubleshooting.html Tip: The extension may have been disabled by the browser. Visit the browser settings page and ensure appropriate configurations are set.
Send Welcome Email to Isaiah LangerYou will need to send an email to Isaiah Langer with a link to join the sg-Contoso Bug Bashers security group in Azure AD to enable access to the BrowserStack application when demonstrating the Ease of Use for End Users scenario.
1. Open a new InPrivate browser tab and log into Outlook on the Web (https://outlook.office365.com) as Patti Fernandez (PattiF@<tenant>.onmicrosoft.com).
2. Compose an email message similar to the following:To: Isaiah LangerSubject: Welcome to the Bug Bashers Team Message: Hello Isaiah,
33
Demo Guide Identity & Access Management
Welcome to the Contoso Bug Bashers team! Please join our sg-Contoso Bug Bashers security group so you can begin accessing all testing resources and applications.
Thank you,Patti
3. Ensure the text in the message body join our sg-Contoso Bug Bashers security group has a hyperlink to pointing to http://myapps.microsoft.com.
4. Click Send.
Initialize Azure AD Privileged Identity Management (PIM)1. Sign in to the Azure Management Portal (https://portal.azure.com) as
admin@<Tenant>.onmicrosoft.com.2. In the left navigation, click More Services >, then Azure AD Privileged Identity Management.3. Click on the link, Azure AD Privileged Identity Management at the bottom of the blade.4. In the list of Results, click Azure AD Privileged Identity Management.5. At the bottom of the Azure AD Privileged Identity Management blade, click Create.6. If prompted to verify identity with MFA, click Verify my identity.7. Follow the prompts to set up and verify using Multi-Factor Authentication (MFA) using phone
verification.8. After completing verification with MFA and being returned to the Azure Portal click Create.9. Wait a few moments while the PIM service initializes and discovers privileged identities in your
tenant. 10. On the Discover privileged roles blade click Next.11. On the CONVERT USERS TO ELIGBLE blade click NEXT.12. On the REVIEW CHANGES blade click OK.
34