dent 718 - advanced topics in removable prosthodontics, winter
TRANSCRIPT
University of Michigan
2008-01
DENT 718 - Advanced Topics in Removable
Prosthodontics, Winter 2008
Shotwell, Jeffrey Shotwell, J. (2008, April 23) Advanced Topics in Removable Prosthodontics. Retrieved from
Open.Michigan - Educational Resources web site: https://open.umich.edu/education/dent/dent718-
winter2008 <http://hdl.handle.net/2027.42/64947>http://hdl.handle.net/2027.42/64947
Deep Blue deepblue.lib.umich.edu

Unless otherwise noted, the content of this course material is
licensed under a Creative Commons Attribution 3.0 License.
Copyright 2008, Jeffrey Shotwell
The following information is intended to inform and educate and is not a tool for self-diagnosis or a replacement for
medical evaluation, advice, diagnosis or treatment by a healthcare professional. You should speak to your physician or
make an appointment to be seen if you have questions or concerns about this information or your medical condition.
You assume all responsibility for use and potential liability associated with any use of the material.
Material contains copyrighted content, used in accordance with U.S. law. Copyright holders of content included in this
material should contact [email protected] with any questions, corrections, or clarifications regarding the use
of content. The Regents of the University of Michigan do not license the use of third party content posted to this site
unless such a license is specifically granted in connection with particular content objects. Users of content are
responsible for their compliance with applicable law.
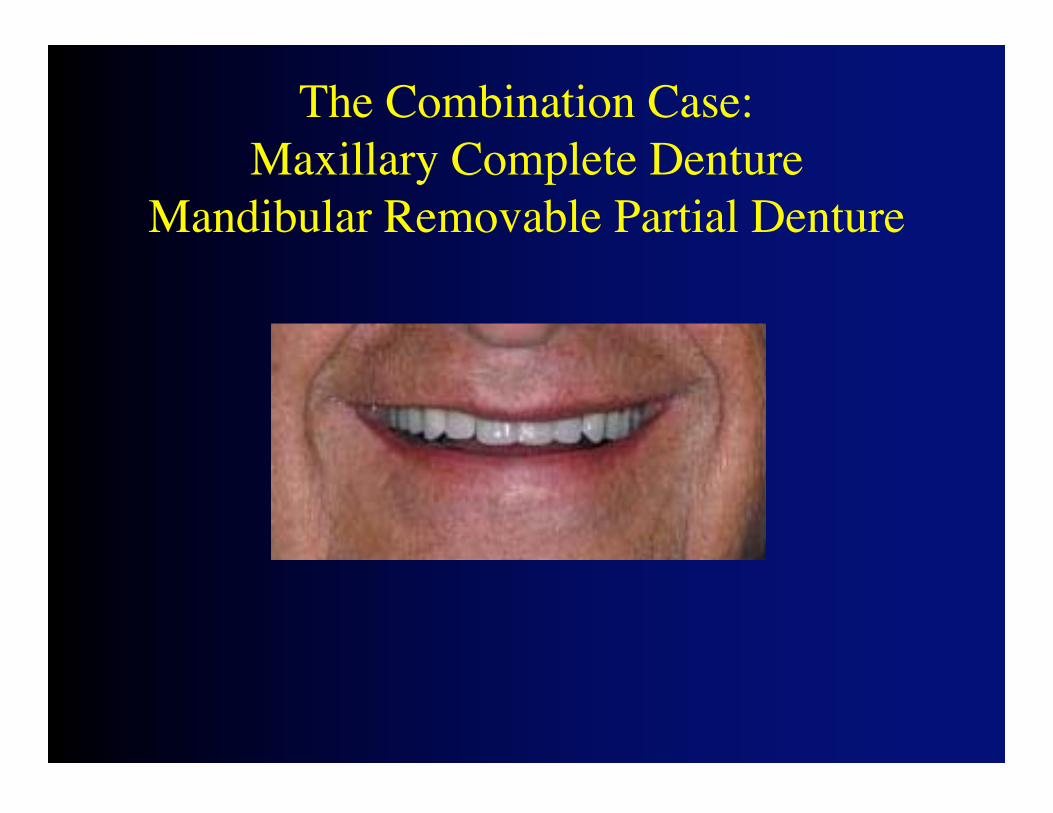
The Combination Case:Maxillary Complete Denture
Mandibular Removable Partial Denture
Disclaimer:
Mentions of specific products in theseslides represent the opinion of thespeaker only and do not representendorsement by the University ofMichigan.
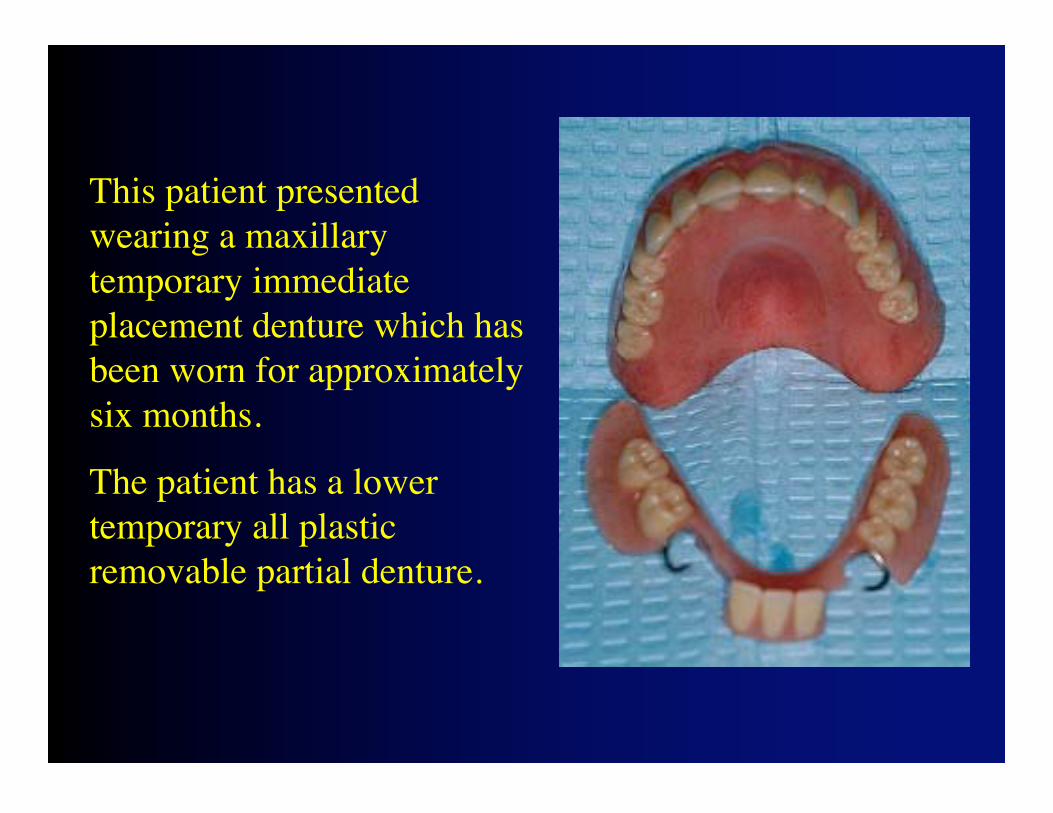
This patient presentedwearing a maxillarytemporary immediateplacement denture which hasbeen worn for approximatelysix months.
The patient has a lowertemporary all plasticremovable partial denture.
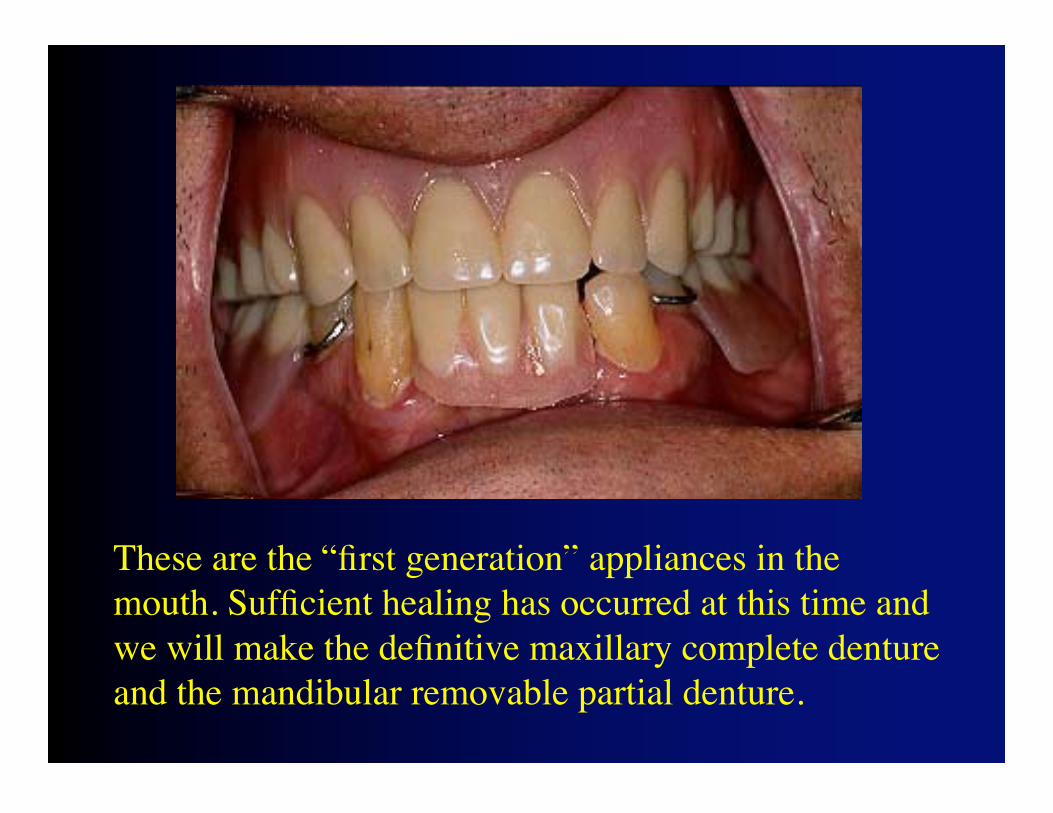
These are the “first generation” appliances in themouth. Sufficient healing has occurred at this time andwe will make the definitive maxillary complete dentureand the mandibular removable partial denture.
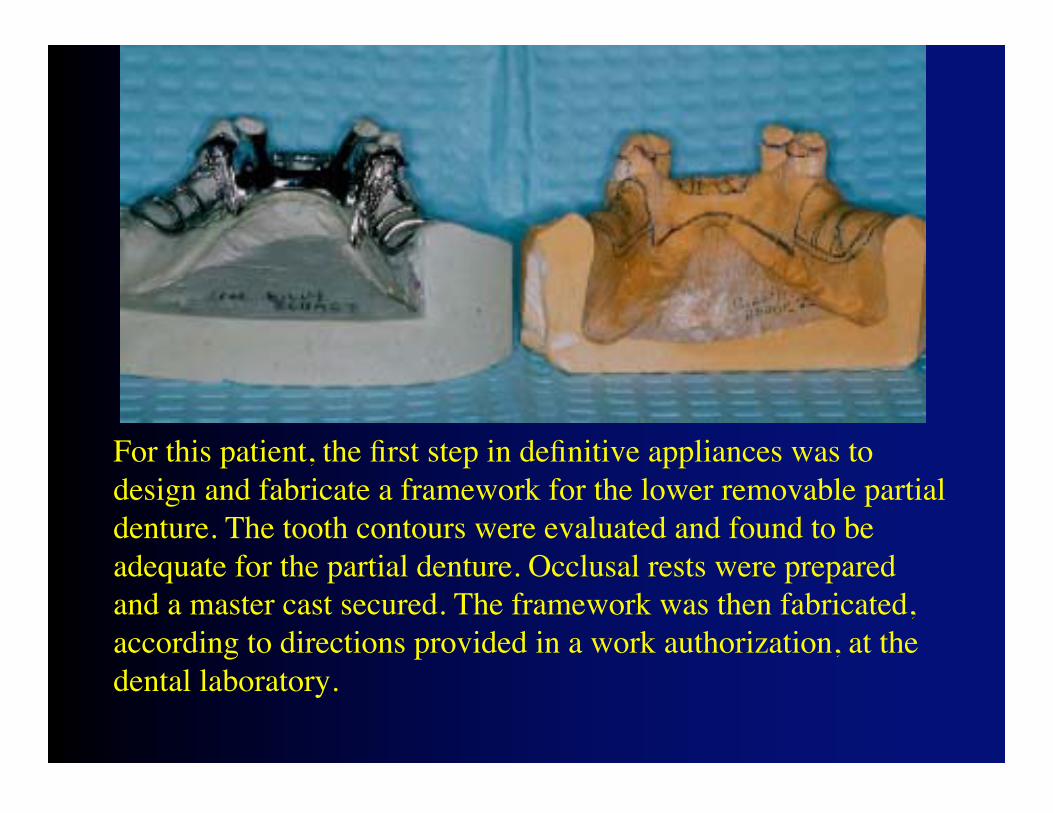
For this patient, the first step in definitive appliances was todesign and fabricate a framework for the lower removable partialdenture. The tooth contours were evaluated and found to beadequate for the partial denture. Occlusal rests were preparedand a master cast secured. The framework was then fabricated,according to directions provided in a work authorization, at thedental laboratory.
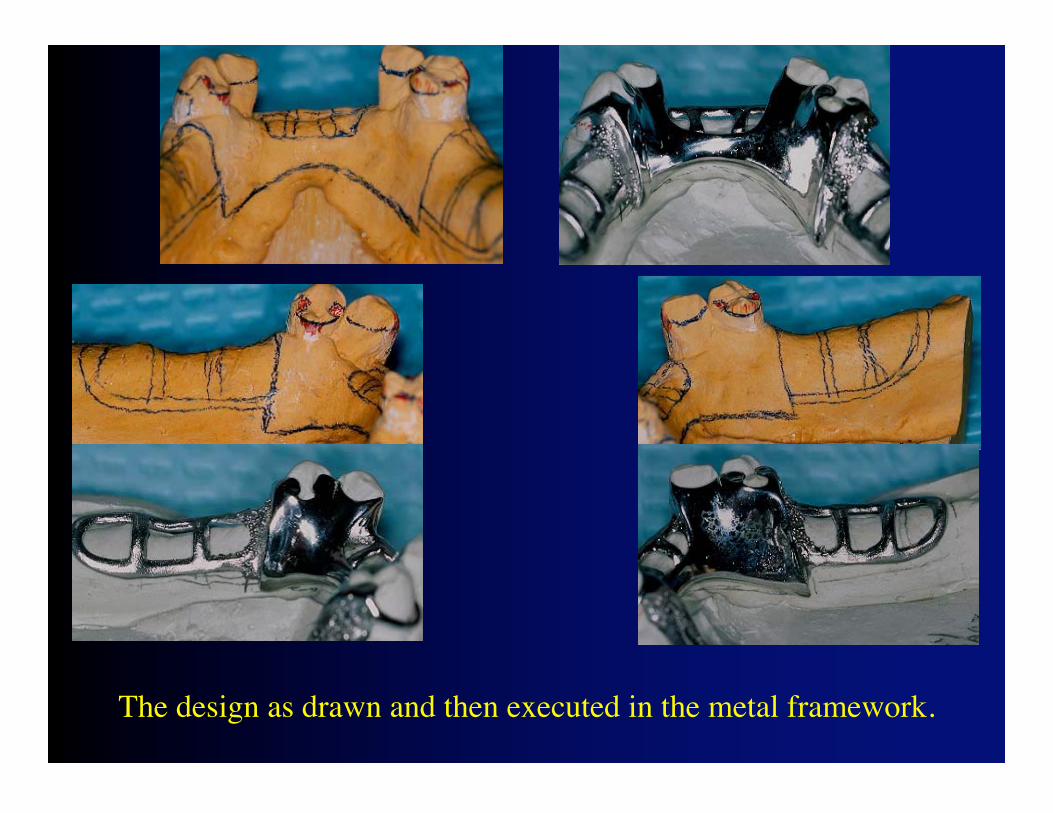
The design as drawn and then executed in the metal framework.

The metal framework tried in the mouth to verify the fit.Notice that the underside of the framework in the areaswhere teeth are to be placed is not in contact with thetissue.
No tissue contact
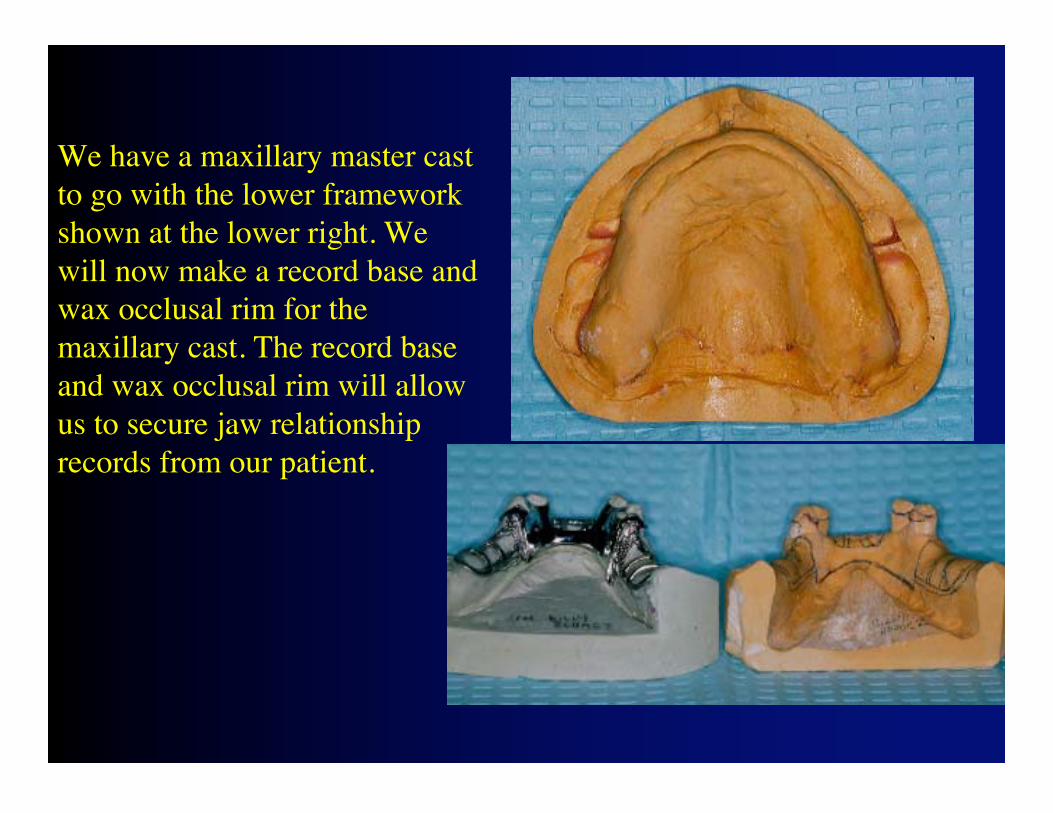
We have a maxillary master castto go with the lower frameworkshown at the lower right. Wewill now make a record base andwax occlusal rim for themaxillary cast. The record baseand wax occlusal rim will allowus to secure jaw relationshiprecords from our patient.
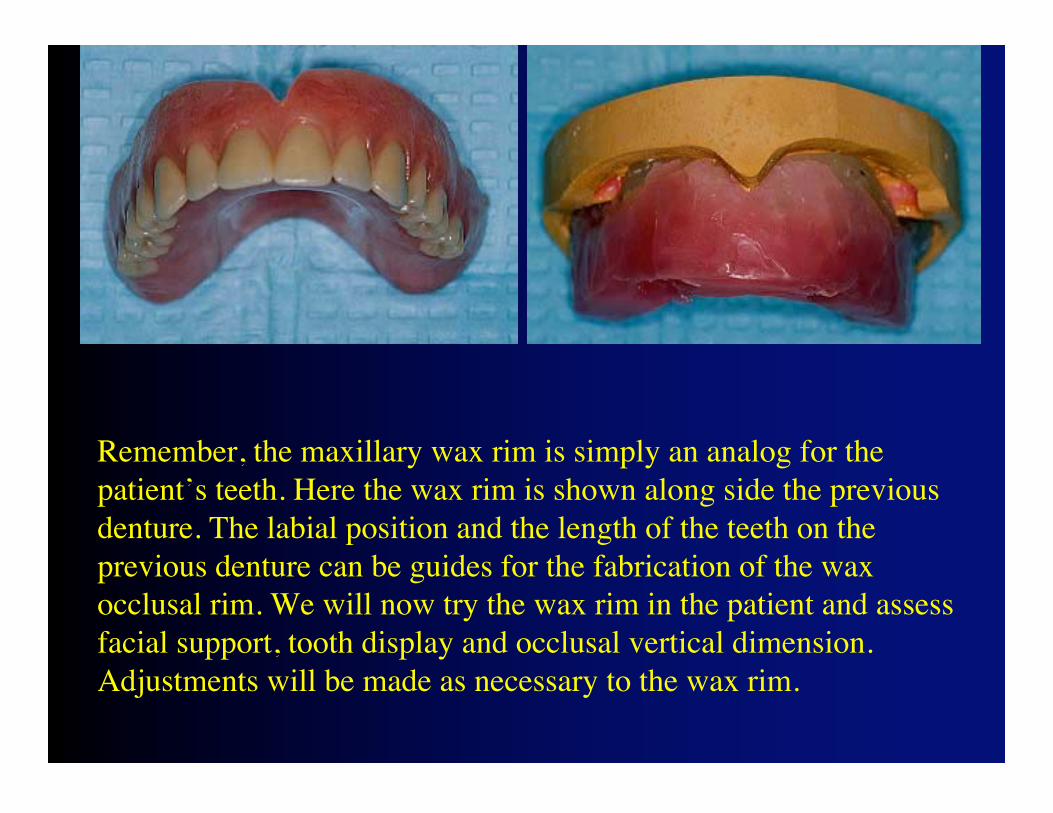
Remember, the maxillary wax rim is simply an analog for thepatient’s teeth. Here the wax rim is shown along side the previousdenture. The labial position and the length of the teeth on theprevious denture can be guides for the fabrication of the waxocclusal rim. We will now try the wax rim in the patient and assessfacial support, tooth display and occlusal vertical dimension.Adjustments will be made as necessary to the wax rim.
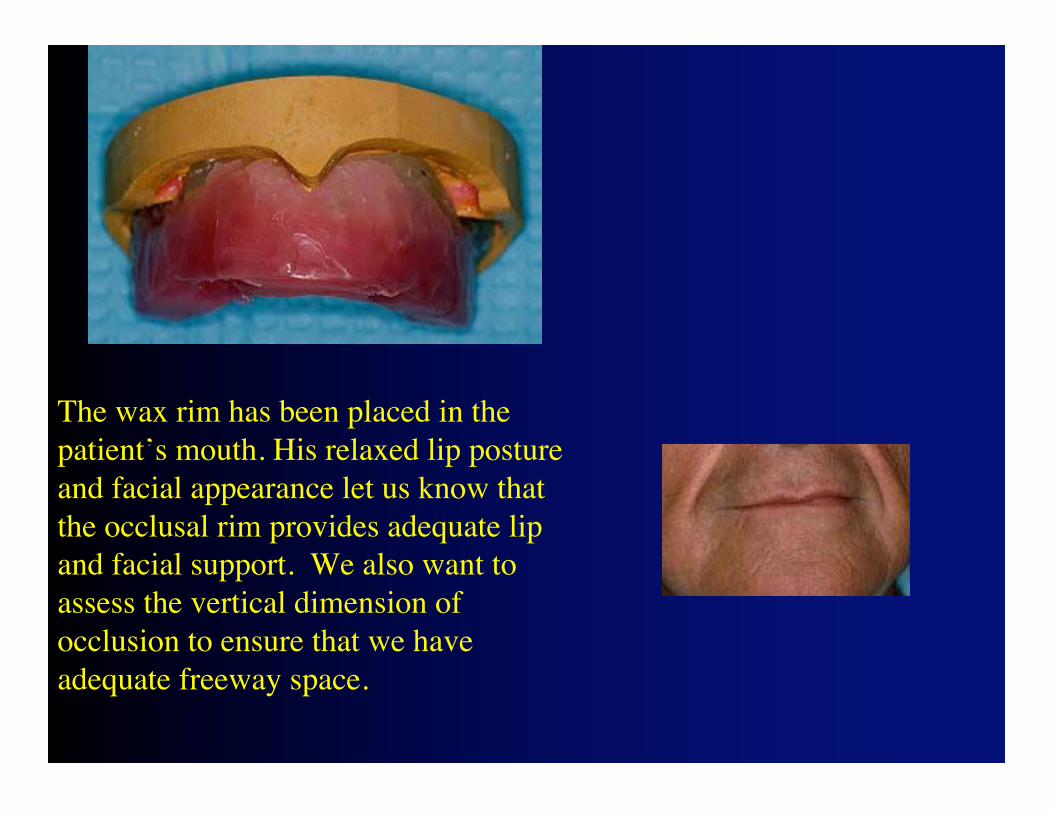
The wax rim has been placed in thepatient’s mouth. His relaxed lip postureand facial appearance let us know thatthe occlusal rim provides adequate lipand facial support. We also want toassess the vertical dimension ofocclusion to ensure that we haveadequate freeway space.

These views show the patient biting into the wax rim. The jaw isguided to a centered position for this registration. Note theguidelines on the wax rim.

We have the patient smile aswell. This gives us an ideaof how active the upper lipis. Some patients don’tshow that much upper toothdue the muscular activity ofthe upper lip.
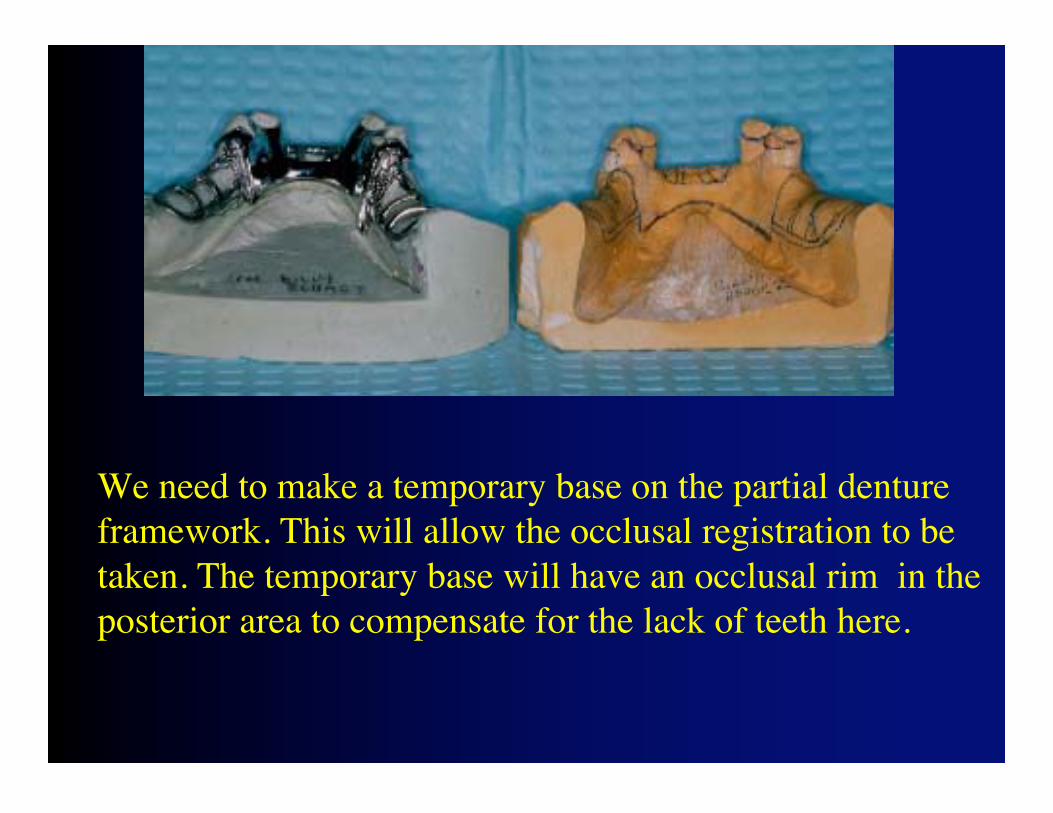
We need to make a temporary base on the partial dentureframework. This will allow the occlusal registration to betaken. The temporary base will have an occlusal rim in theposterior area to compensate for the lack of teeth here.

These images showthe stabilization ofthe partial dentureframework prior totaking the jawrelationship records.Here blue-bite is usedto create a temporarybase and an occlusalrim for taking the jawrelationship records.
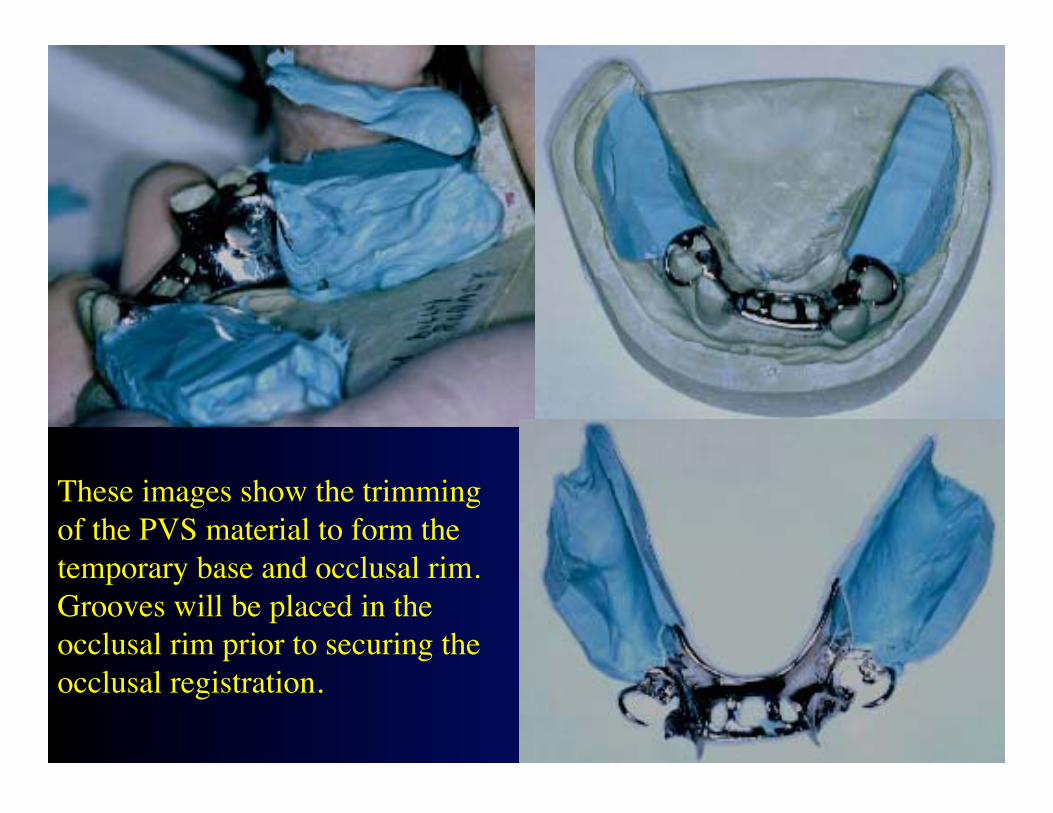
These images show the trimmingof the PVS material to form thetemporary base and occlusal rim.Grooves will be placed in theocclusal rim prior to securing theocclusal registration.
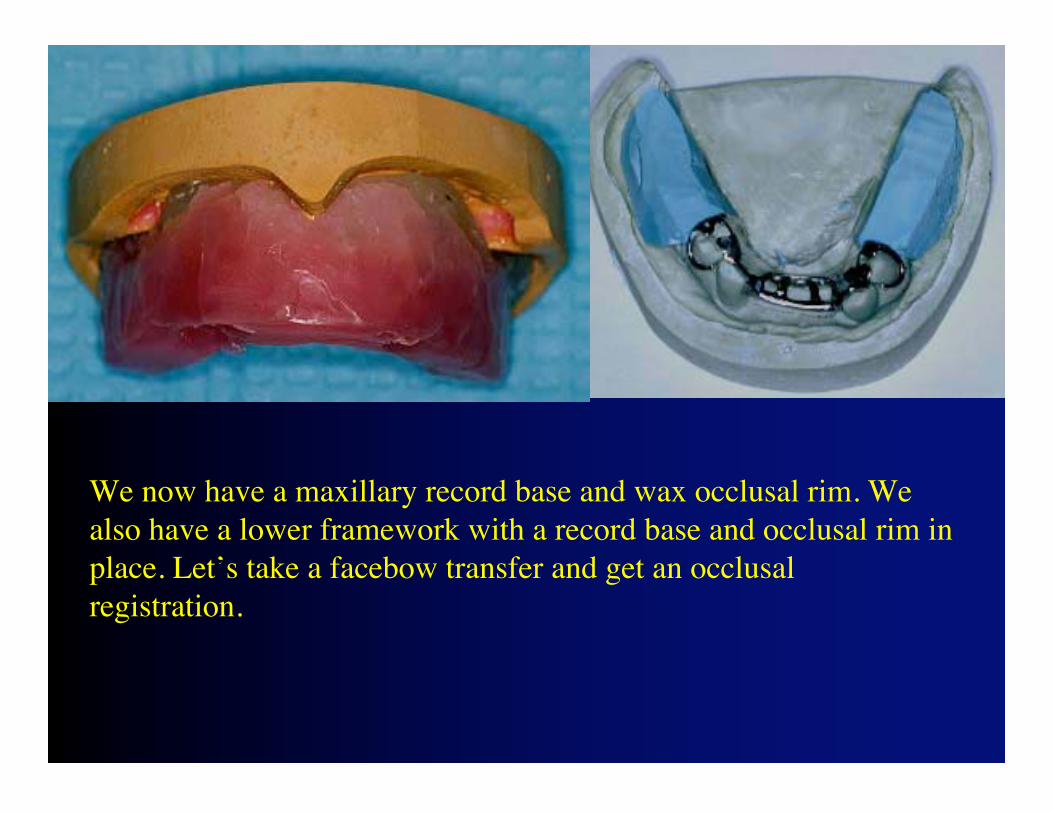
We now have a maxillary record base and wax occlusal rim. Wealso have a lower framework with a record base and occlusal rim inplace. Let’s take a facebow transfer and get an occlusalregistration.

Remember, here is the maxillaryrecord base and the lowerframework in place prior to addingthe temporary base. For taking thefacebow transfer, we will placegrooves on the maxillary occlusalrim and make a registration in waxor blu-bite on the bite fork. Thisindex on the bite fork will help usplace the maxillary record base in asecure and repeatable positionrelative on the bite fork. It need notbe sealed on the bite fork with wax.
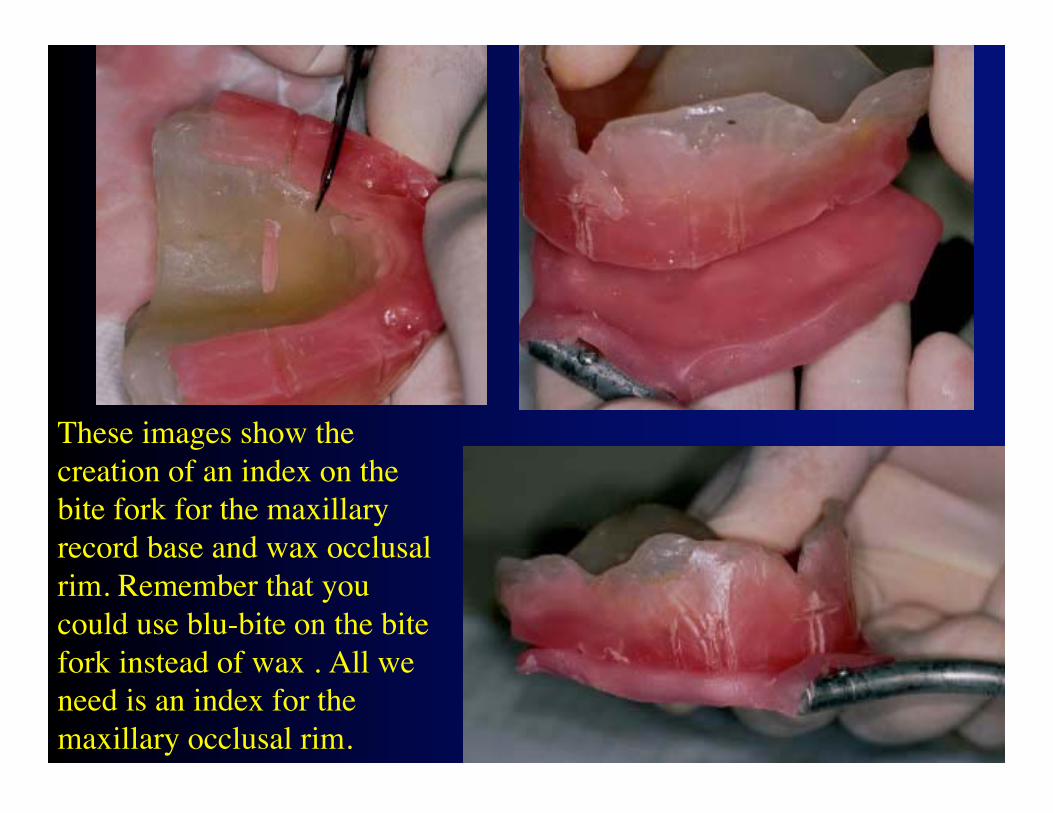
These images show thecreation of an index on thebite fork for the maxillaryrecord base and wax occlusalrim. Remember that youcould use blu-bite on the bitefork instead of wax . All weneed is an index for themaxillary occlusal rim.
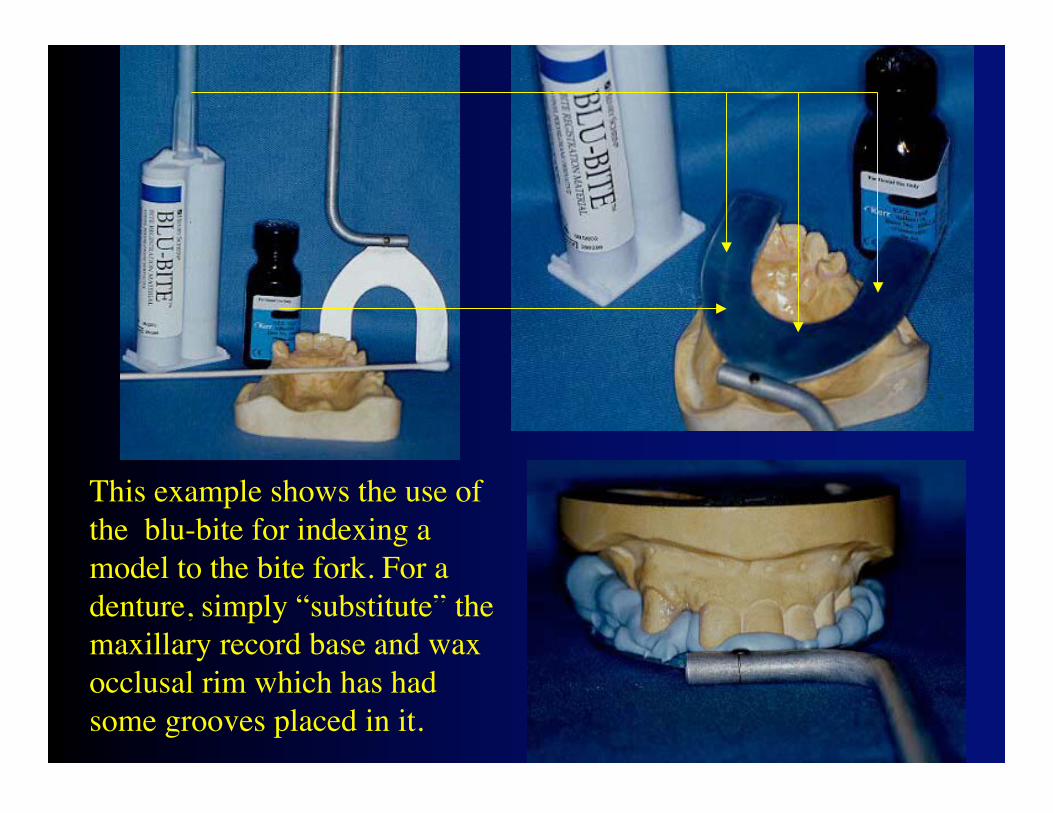
This example shows the use ofthe blu-bite for indexing amodel to the bite fork. For adenture, simply “substitute” themaxillary record base and waxocclusal rim which has hadsome grooves placed in it.

You can see here how theblu-bite could replace thewax on the bite fork forthis purpose. We now takethe face-bow assembly tothe patient.
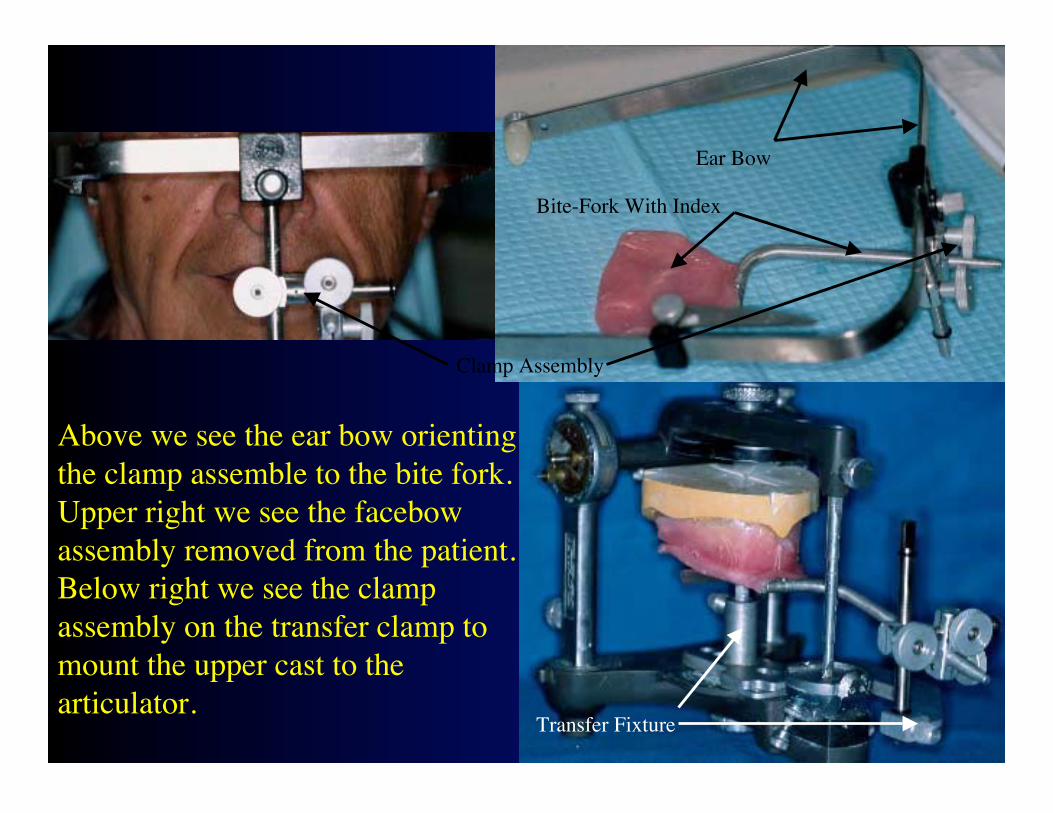
Above we see the ear bow orientingthe clamp assemble to the bite fork.Upper right we see the facebowassembly removed from the patient.Below right we see the clampassembly on the transfer clamp tomount the upper cast to thearticulator.
Ear Bow
Bite-Fork With Index
Clamp Assembly
Transfer Fixture
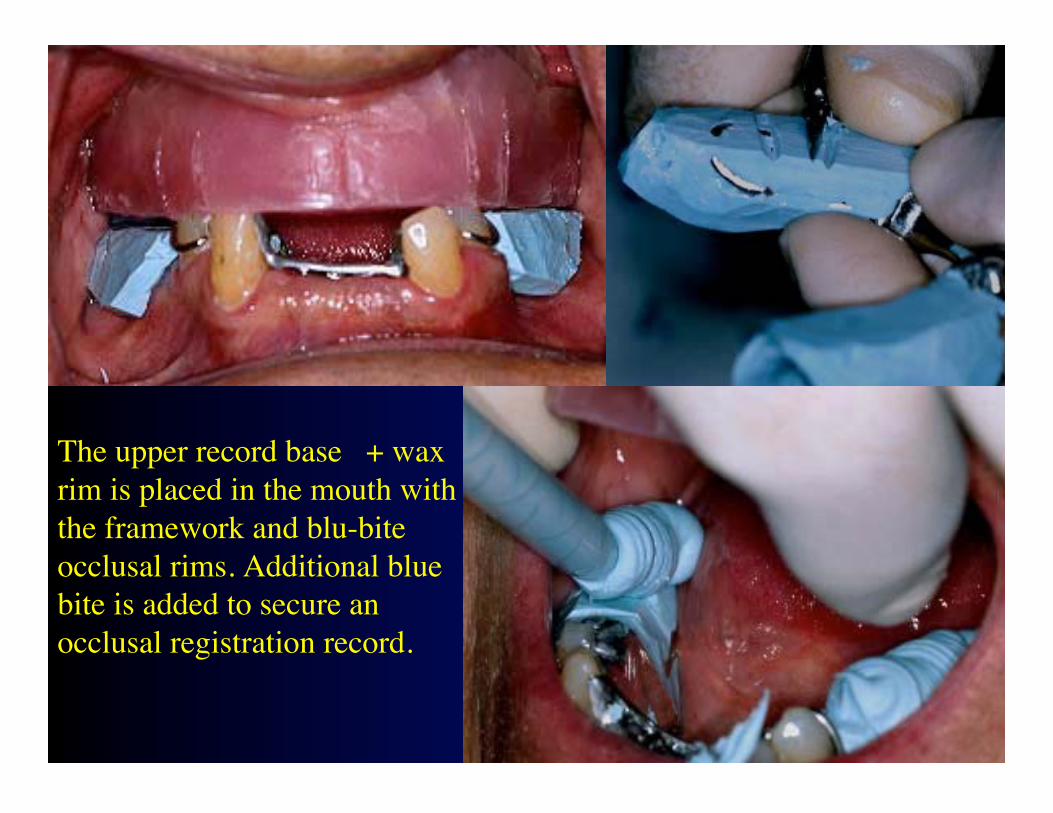
The upper record base + waxrim is placed in the mouth withthe framework and blu-biteocclusal rims. Additional bluebite is added to secure anocclusal registration record.
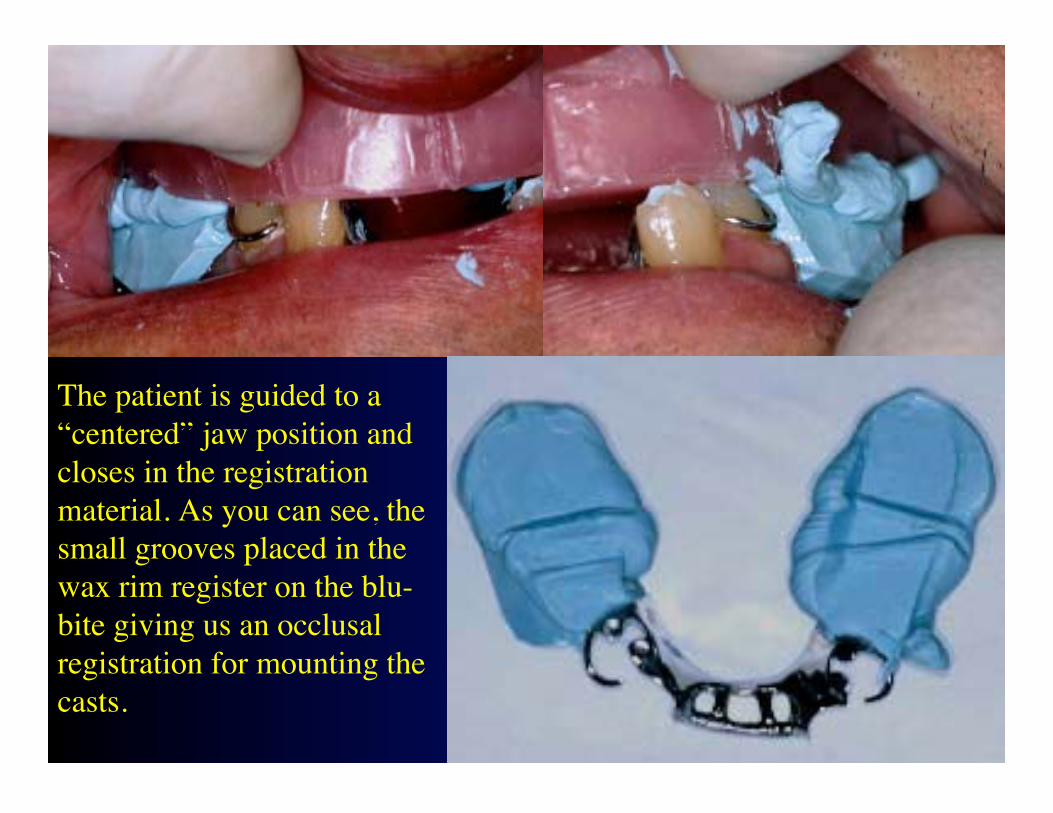
The patient is guided to a“centered” jaw position andcloses in the registrationmaterial. As you can see, thesmall grooves placed in thewax rim register on the blu-bite giving us an occlusalregistration for mounting thecasts.

We now have out occlusal registration and our facebow transfer.The clamp assemble may be removed from the spring bow andtransferred to the mounting jig. This will allow us to mount themaxillary cast to the articulator.
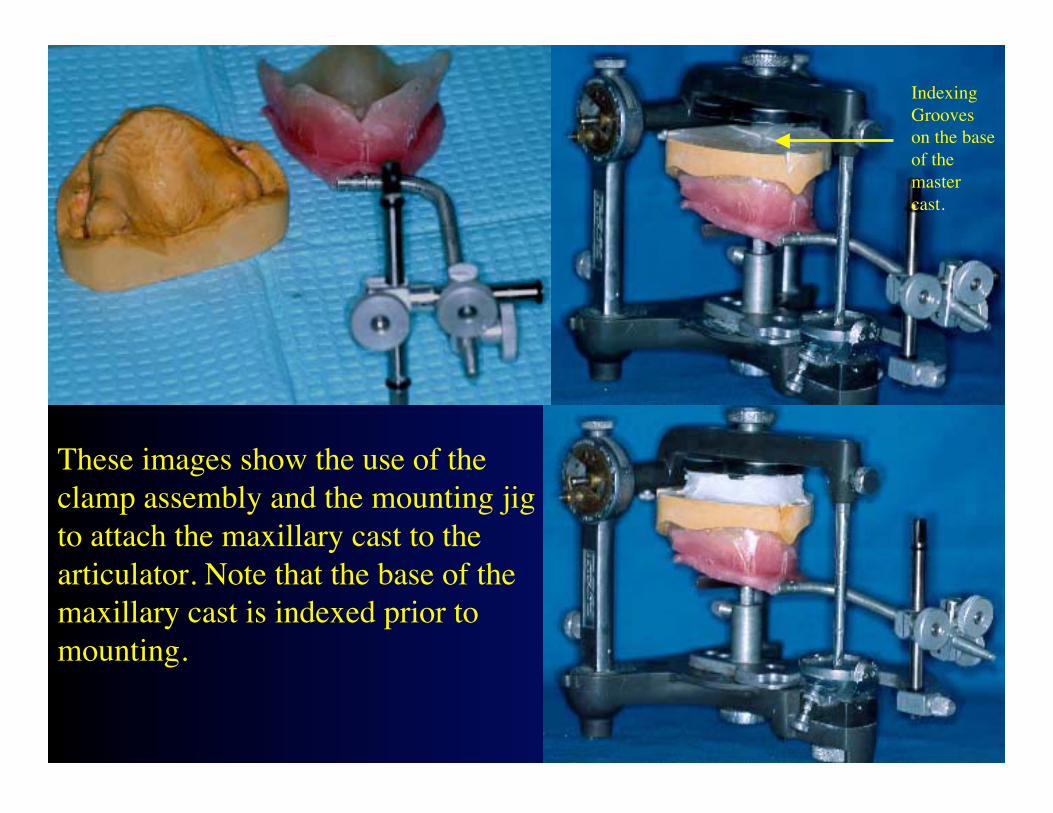
These images show the use of theclamp assembly and the mounting jigto attach the maxillary cast to thearticulator. Note that the base of themaxillary cast is indexed prior tomounting.
IndexingGrooveson the baseof themastercast.
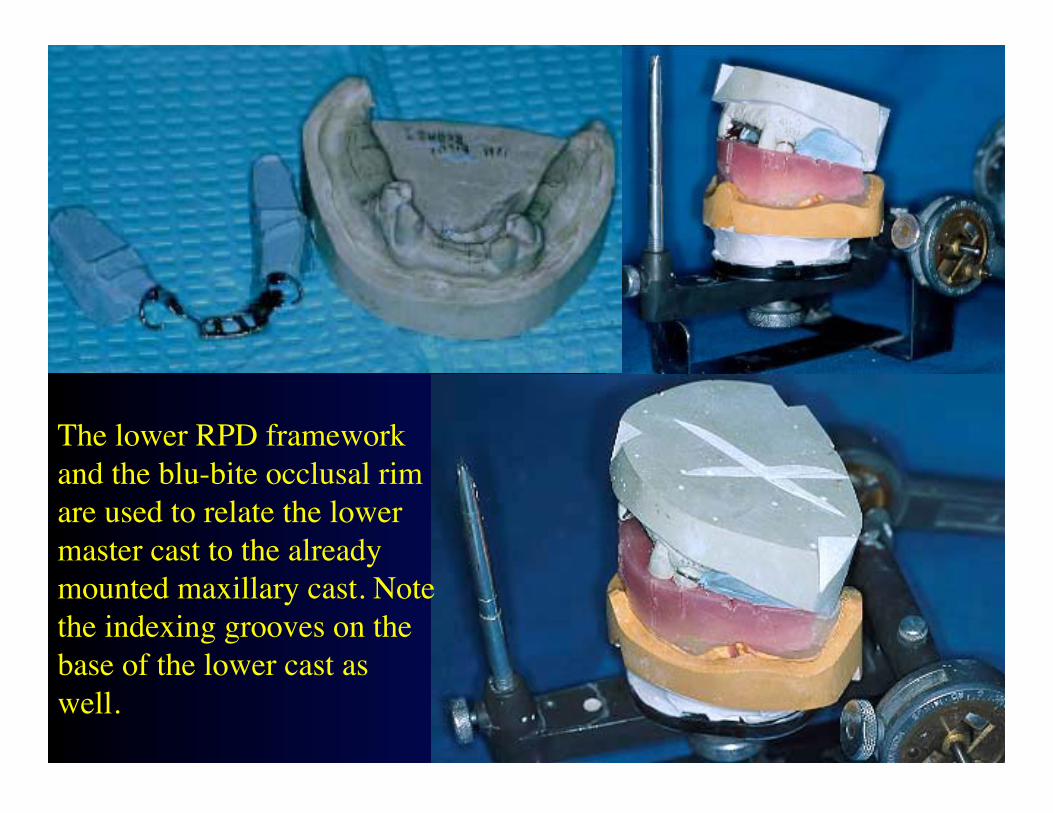
The lower RPD frameworkand the blu-bite occlusal rimare used to relate the lowermaster cast to the alreadymounted maxillary cast. Notethe indexing grooves on thebase of the lower cast aswell.
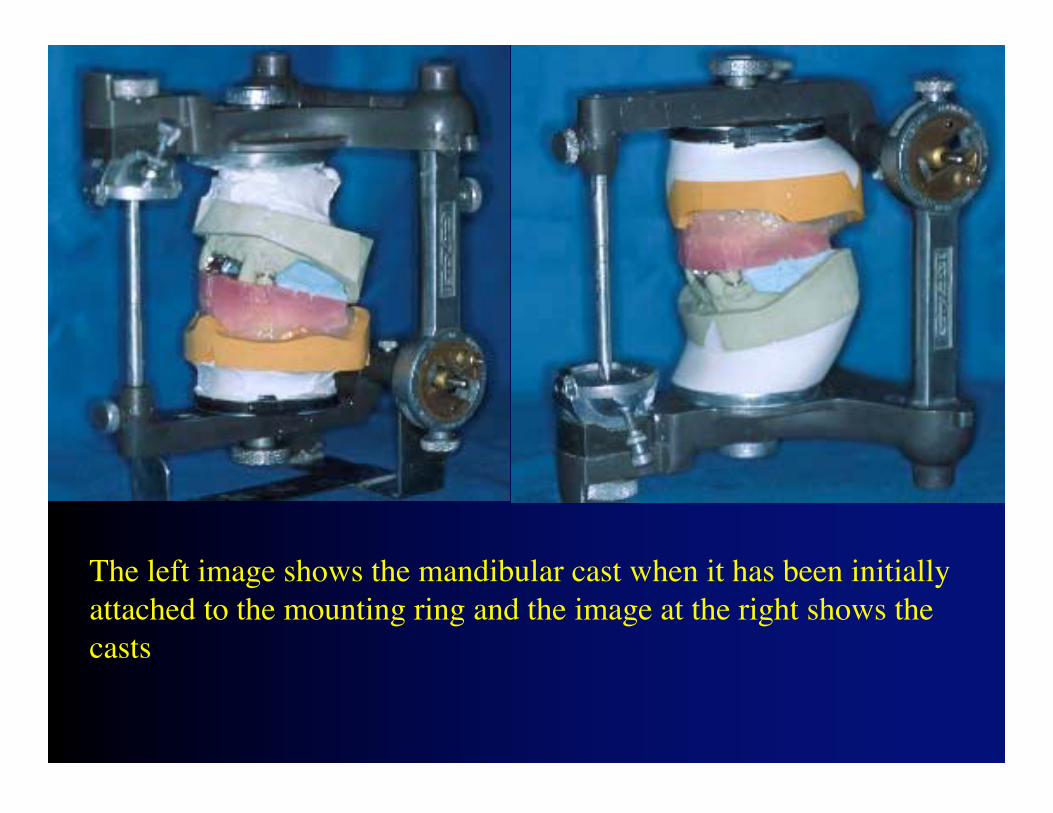
The left image shows the mandibular cast when it has been initiallyattached to the mounting ring and the image at the right shows thecasts

The patient’s models mounted and the teethwe will be setting for the maxillary andmandibular appliances.
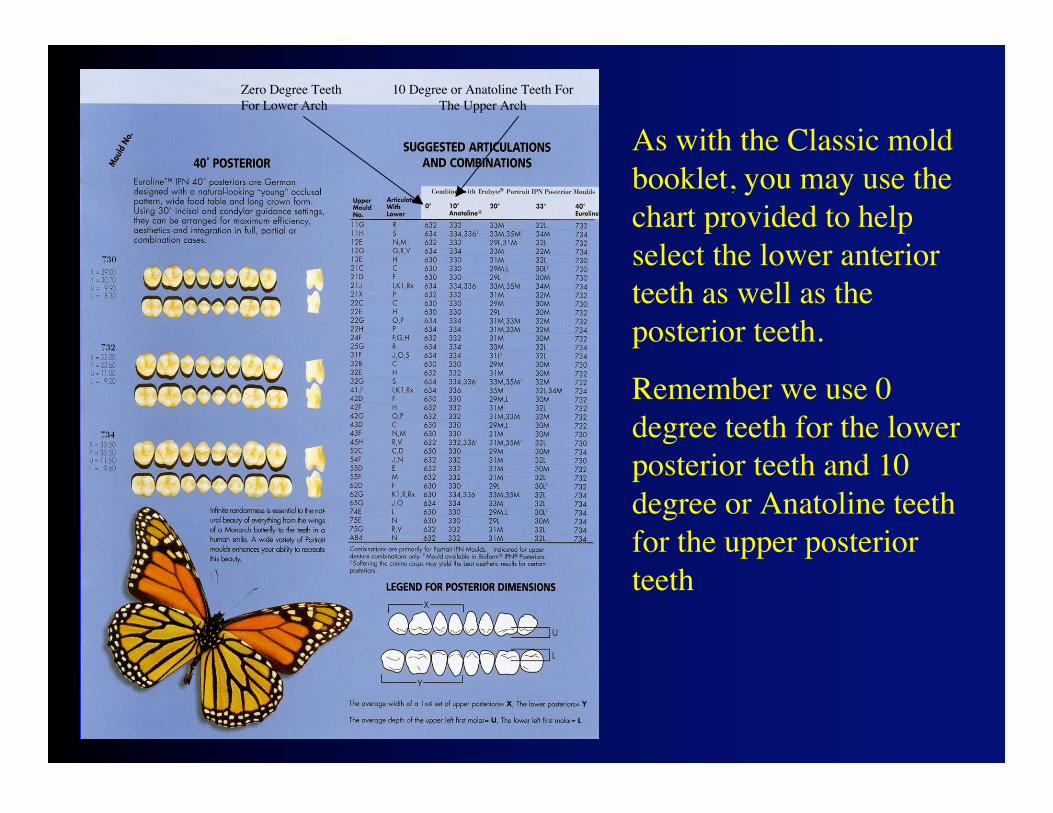
As with the Classic moldbooklet, you may use thechart provided to helpselect the lower anteriorteeth as well as theposterior teeth.
Remember we use 0degree teeth for the lowerposterior teeth and 10degree or Anatoline teethfor the upper posteriorteeth
Zero Degree TeethFor Lower Arch
10 Degree or Anatoline Teeth ForThe Upper Arch
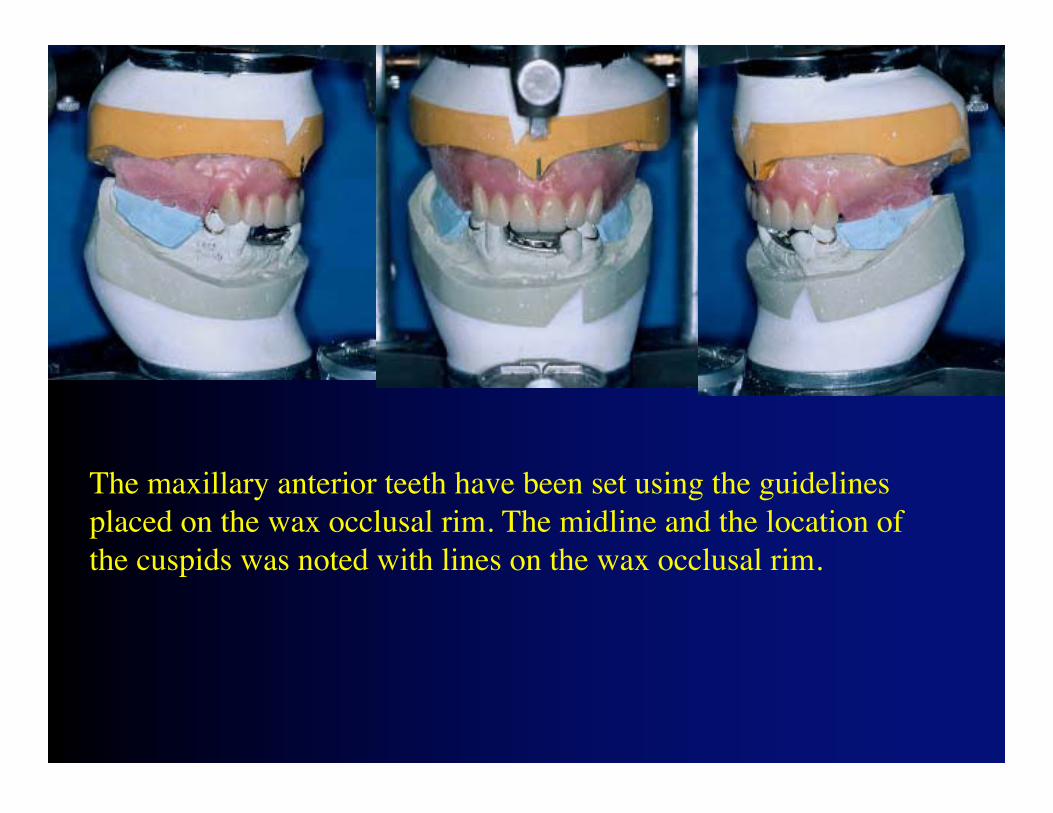
The maxillary anterior teeth have been set using the guidelinesplaced on the wax occlusal rim. The midline and the location ofthe cuspids was noted with lines on the wax occlusal rim.
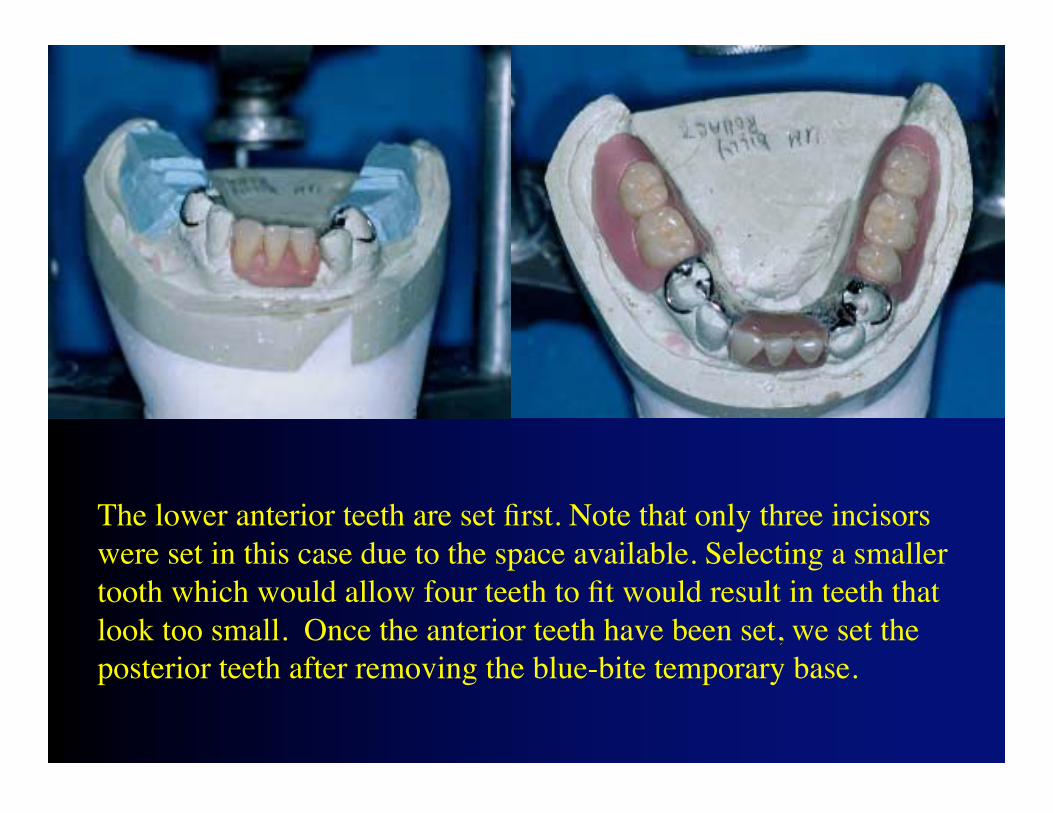
The lower anterior teeth are set first. Note that only three incisorswere set in this case due to the space available. Selecting a smallertooth which would allow four teeth to fit would result in teeth thatlook too small. Once the anterior teeth have been set, we set theposterior teeth after removing the blue-bite temporary base.
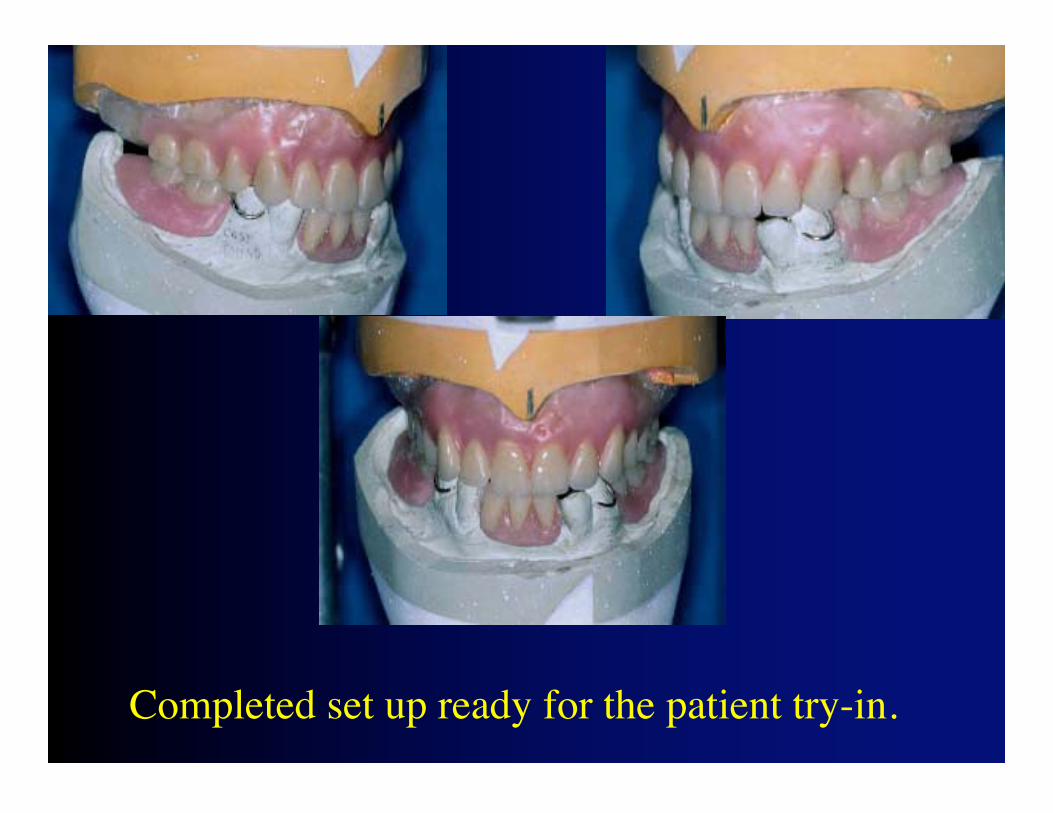
Completed set up ready for the patient try-in.
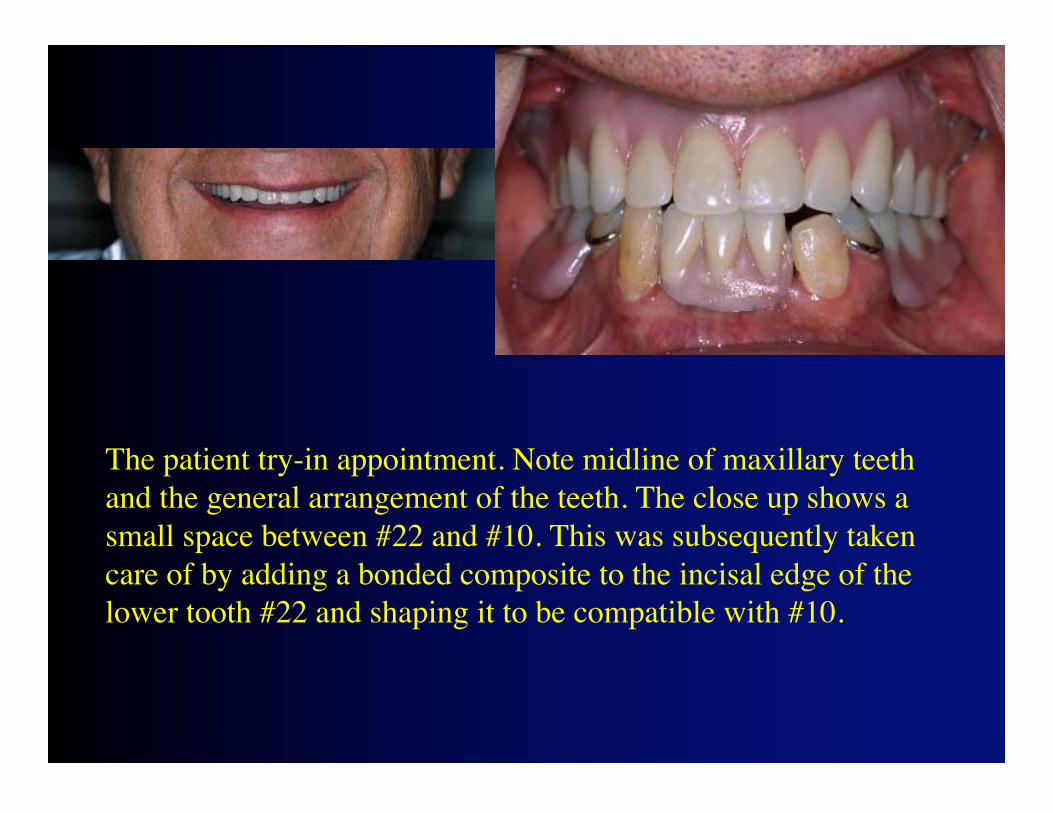
The patient try-in appointment. Note midline of maxillary teethand the general arrangement of the teeth. The close up shows asmall space between #22 and #10. This was subsequently takencare of by adding a bonded composite to the incisal edge of thelower tooth #22 and shaping it to be compatible with #10.