deploy to database - wordpress.com...configure database server firewall to allow the access from...
TRANSCRIPT

Deploy to Database
1. Add database connection string in web.config
2. Commit change to trigger automatic deployment
3. Access database

1. Add database connection string


Copy this connection string and paste it in web.config

Replace with the connection string of your databaseSee next slide for how to get your database connection string on Azure Portal

2. Deploy app to cloud


Write a commit message and then commit and then push

Make sure you have pushed the change to your project repository.

A deployment will be triggered automatically

The “Sync” button allows you to manually trigger a deployment

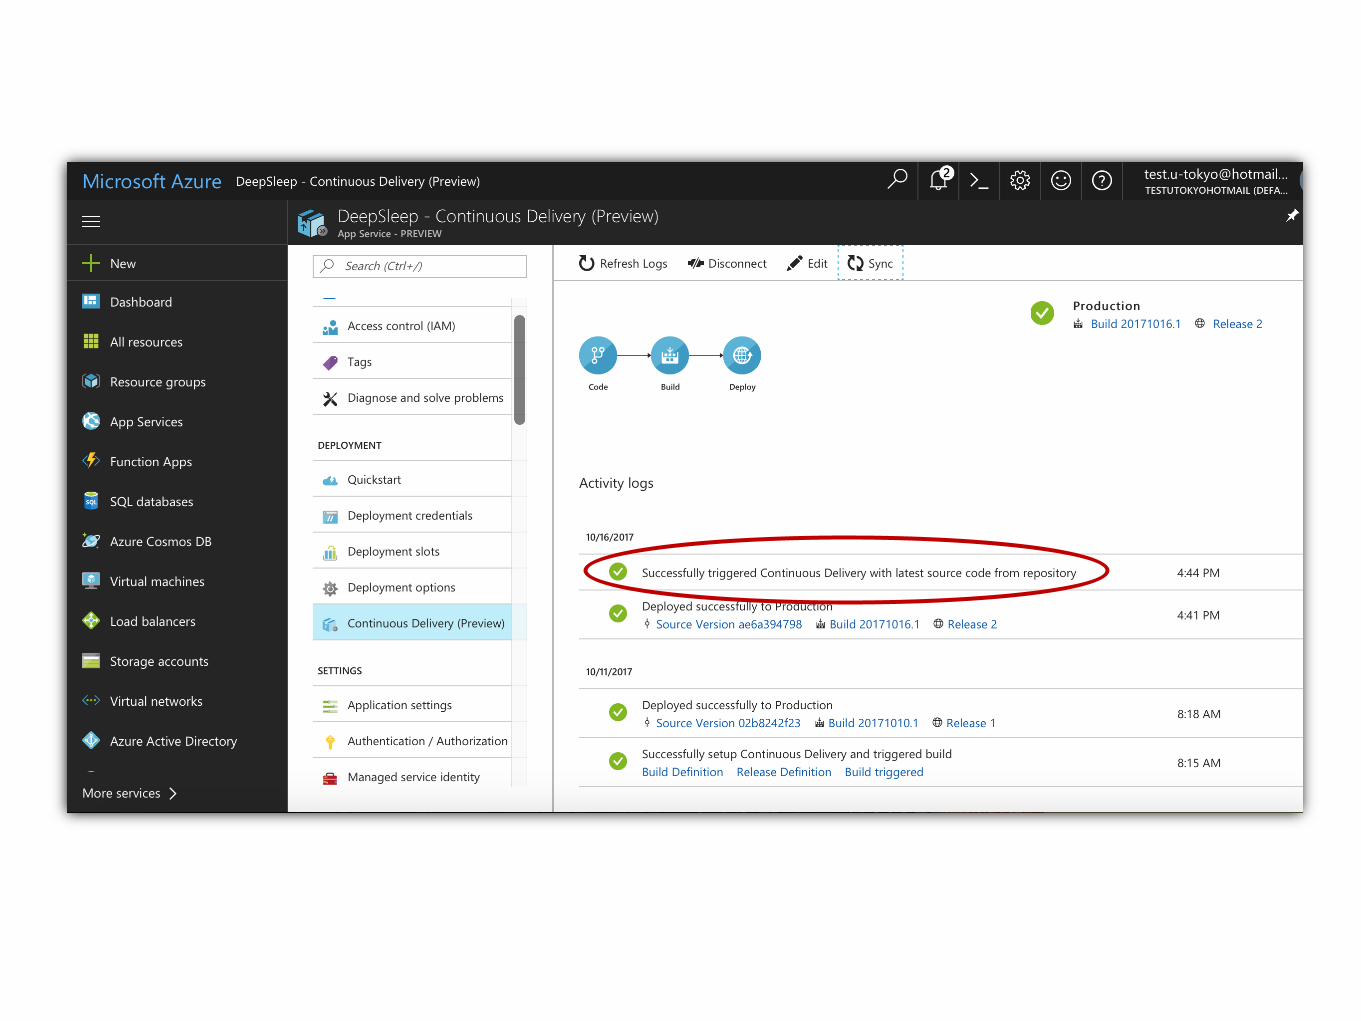

You can monitor the performance of your database on Azure Portal

Your app is up running in Azure cloud

3. Access database using 3-party tool

Configure database server firewall to allow the access from your IP address


There are several tools for Mac OS that allow you to workwith Microsoft SQL server on Azure cloud, e.g. SQLPro forMSSQL, Navicat, Valentina Studio, Visual Studio Code withmssql extension. Let’s try SQLPro for MSSQL first!

Input server, database name, user, password to connect toyour database on Azure.

There are the tables in your database

What’s next?
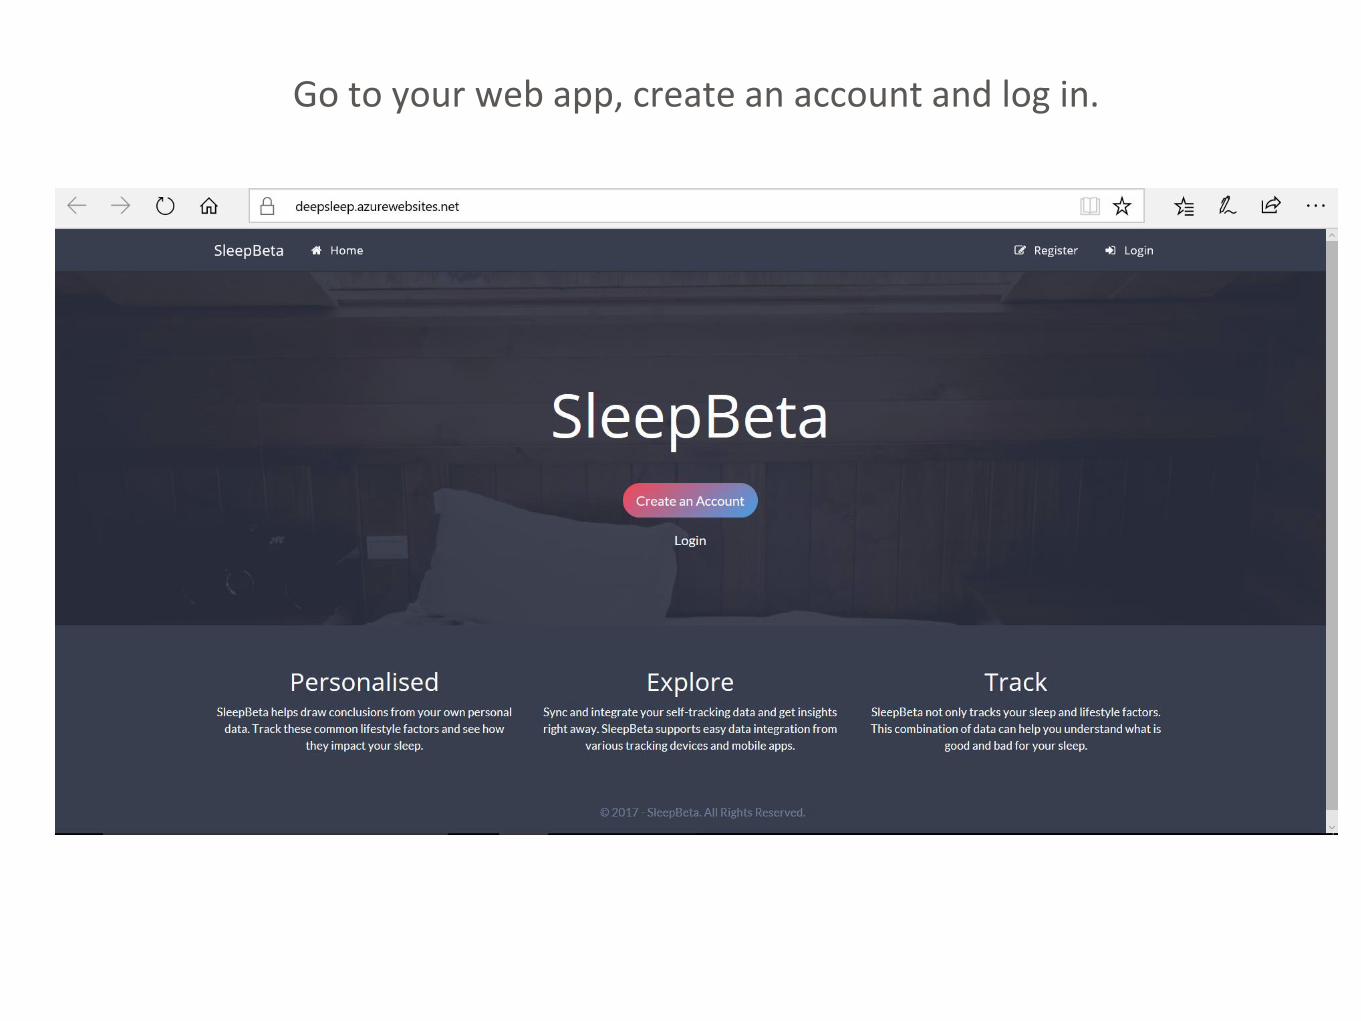
Go to your web app, create an account and log in.

Oops, got an error after log in?Because we haven’t completed deploying the database, e.g. the table “UserQuestions” is missing.(to do in next class)

These tables were implemented using LINQ-to-SQL rather then Entity Framework.We will need to re-implement this part in next class