design document for a guided experiential learning course1 · design document for a guided...
TRANSCRIPT
Design Document For A Guided Experiential Learning Course1
Richard E. Clark, Ed.D.
Rossier School of Education University of Southern California
August 11, 2004
1 This document is a work product developed by Dr. Richard Clark of the University of Southern California and submitted to satisfy contract DAAD 19-99-D-0046-0004 from TRADOC to the Institute for Creative Technology and the Rossier School of Education to provide “Workshops-TDAD” under account number 53-4400-8040. The opinions expressed in this document are those of the Principle Investigator and not those of TRADOC or the University of Southern California.
1
Introduction This document presents the design of an instructional module for TRADOC training designers on how to design a Guided Experiential Learning (GEL) course. Since a design document is intended to give instructions to developers who will produce the materials and media for a formative evaluation of the course, and its final production after a revision cycle, this document also specifies development activities. In this context a “design” is defined as a “blueprint” or a plan to that can be tested and revised so that it can serve as an adequate guide for the finished development and media production of course materials and media to support a TRADOC training effort. The research support for GEL training design and the proposal for this design document is presented in Appendix A. The result of a review of the proposal and revised plans for this document are presented in Appendix B. The most recent specifications for distance course development based on TRADOC developer guidelines are available in Appendix C. Definitions for Terms Used in this Design Document Since it is complex to think about a design for a course to train course designers – there is a need to standardize the terms being used to refer to different jobs, roles and processes. Term Definition Design A plan for a course – a blueprint for course development Designer A person who is skilled at designing training Design trainee A person who is learning to design GEL courses Developers Writers, media producers, artists who develop finished courses Development The production of media and materials based on a design blueprint Students The learners who will take the course designed by design trainees Design Objective The goal of this document is to provide guidance to TRADOC designers who will be producing a course to teach design trainees how to design guided experiential learning (GEL) courses for TRADOC2. Course Goal: The goal of the course to be developed is:
When given an assignment to design a training course for individuals, teams or units, trainees will learn when and how to apply guided experiential learning (GEL) procedures to design effective and efficient training.
2 See APPENDIX A at the end of this document for the background and evidence for GEL courses and a copy of the proposal for this design document. APPENDIX B presents a copy of the preliminary outline of the course that was submitted for review in April and revised after feedback was received.
2
Reason for the Course This course is intended to implement the latest research and best practice on how to design a course for individuals and teams based on guided experience-based practice in authentic situations. Recent reviews of hundreds of studies stretching back over the past four decades (e.g. Mayer, 2004)3 have concluded that “information is not training” and that providing trainees with a field-based problem or an immersive situation alone are not adequate to achieve individual or team learning. This course draws on evidence that providing strong early guidance for the learning of expert-based strategies works best. Guidance consists of clear procedures, accurate demonstrations of authentic field-based problem solving and practice on increasingly difficult problems where expert feedback helps correct faulty understanding. Guidance is gradually faded until the soldier or unit is able to continue to learn and perform at or above expectations (See Appendix A for a discussion of the research issues and for alternative points of view). Media Selection While media selection usually occurs at the end of the design process (Lesson 13), given the number of people who might be assigned to complete this course and their wide distribution geographically, it is recommended that the web and CD/DVD media be selected as the platform for most of this course. Much of the development requires video production, computer screen design and documents such as job aids that trainees will need to print from electronic files available on the web. Asynchronous “guidance” from live experts will be necessary in parts of the course to answer questions and review and give feedback on the results of a few of the practice exercises required of design trainees. In addition, design trainees must work with subject matter experts (SME’s) for part of the course. Prior Knowledge and Skill level of participants: This workshop module is intended for novice to intermediate military training designers. More advanced designers will find value in the job aid’s that will be developed to assist in the implementation of the GEL design strategy. Any design trainee who meets TRADOC requirements to work as a training designer should be able to successfully complete this training. A prior knowledge test to identify prospective trainees will be produced as part of the course ( see Lesson 14). Overview Model and Outline of GEL Course Structure The outline below presents the overall structure of a GEL course. In this course, design trainees will learn how to locate and capture the information necessary to design and sequence each of the elements below in any course they are assigned.
3 Mayer, R. (2004) Should there be a three-strikes rule against pure discovery learning?
The case for guided methods of instruction. American Psychologist, 59(1), 14-19.
3
GEL Course Structure
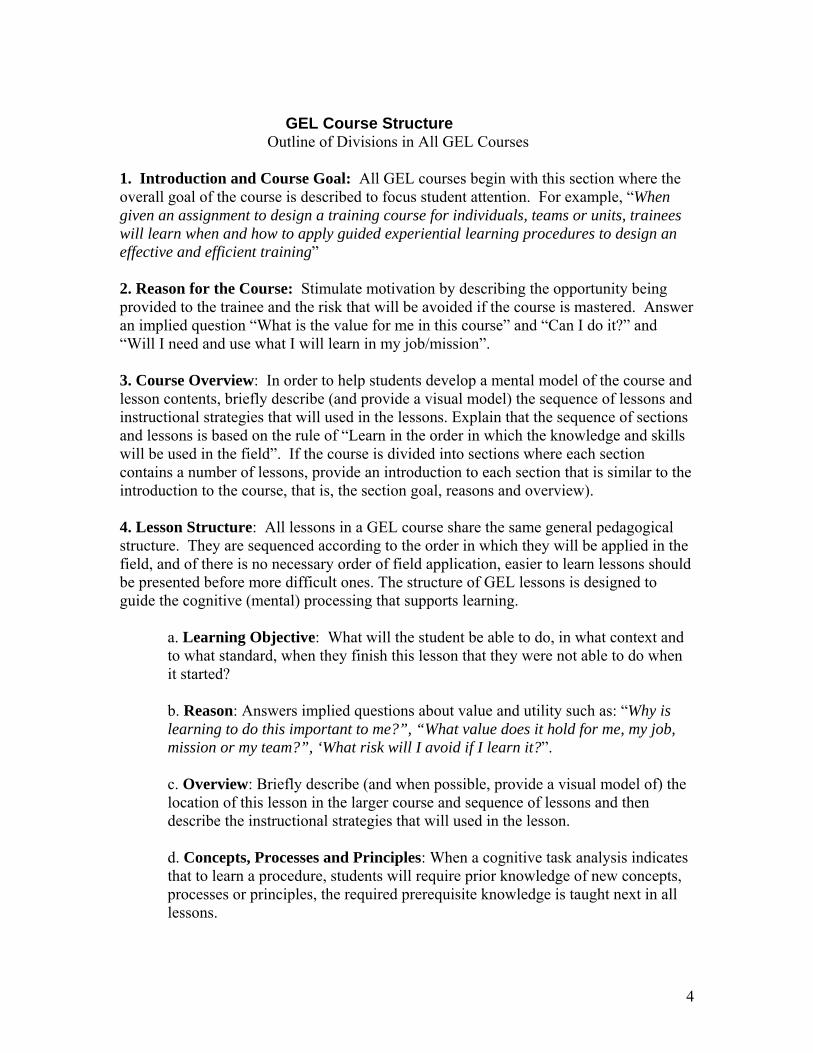
Outline of Divisions in All GEL Courses 1. Introduction and Course Goal: All GEL courses begin with this section where the overall goal of the course is described to focus student attention. For example, “When given an assignment to design a training course for individuals, teams or units, trainees will learn when and how to apply guided experiential learning procedures to design an effective and efficient training” 2. Reason for the Course: Stimulate motivation by describing the opportunity being provided to the trainee and the risk that will be avoided if the course is mastered. Answer an implied question “What is the value for me in this course” and “Can I do it?” and “Will I need and use what I will learn in my job/mission”. 3. Course Overview: In order to help students develop a mental model of the course and lesson contents, briefly describe (and provide a visual model) the sequence of lessons and instructional strategies that will used in the lessons. Explain that the sequence of sections and lessons is based on the rule of “Learn in the order in which the knowledge and skills will be used in the field”. If the course is divided into sections where each section contains a number of lessons, provide an introduction to each section that is similar to the introduction to the course, that is, the section goal, reasons and overview). 4. Lesson Structure: All lessons in a GEL course share the same general pedagogical structure. They are sequenced according to the order in which they will be applied in the field, and of there is no necessary order of field application, easier to learn lessons should be presented before more difficult ones. The structure of GEL lessons is designed to guide the cognitive (mental) processing that supports learning.
a. Learning Objective: What will the student be able to do, in what context and to what standard, when they finish this lesson that they were not able to do when it started? b. Reason: Answers implied questions about value and utility such as: “Why is learning to do this important to me?”, “What value does it hold for me, my job, mission or my team?”, ‘What risk will I avoid if I learn it?”. c. Overview: Briefly describe (and when possible, provide a visual model of) the location of this lesson in the larger course and sequence of lessons and then describe the instructional strategies that will used in the lesson. d. Concepts, Processes and Principles: When a cognitive task analysis indicates that to learn a procedure, students will require prior knowledge of new concepts, processes or principles, the required prerequisite knowledge is taught next in all lessons.
4
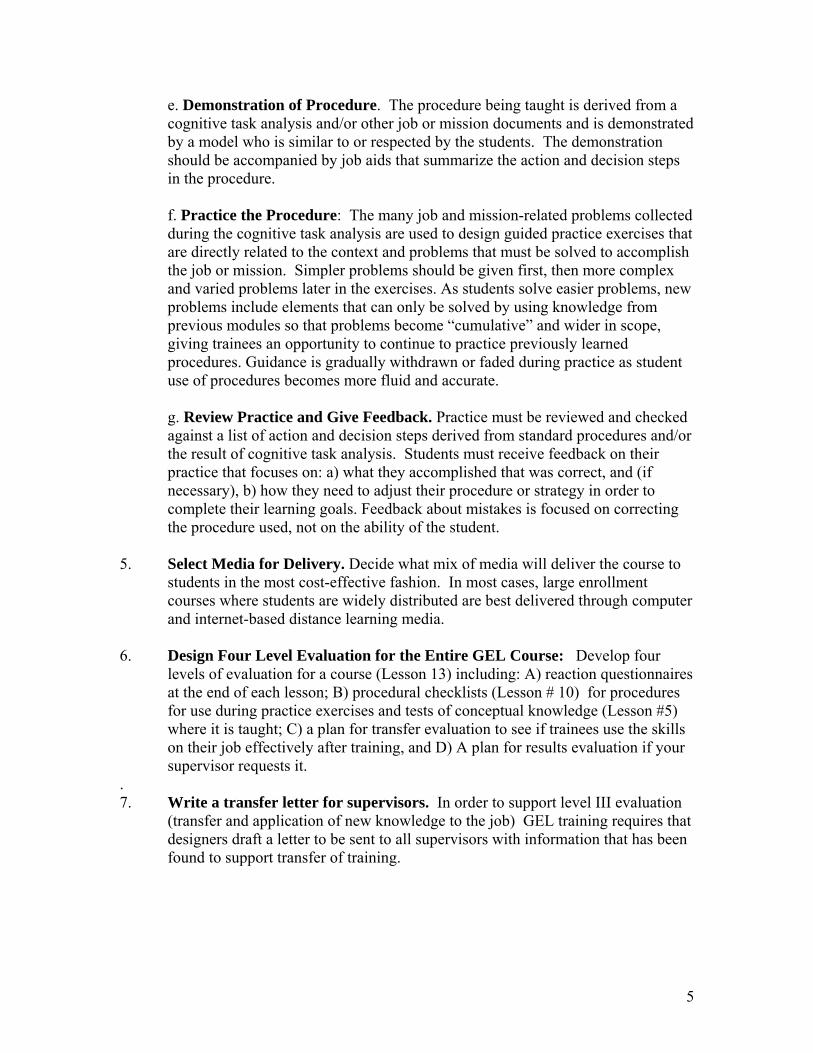
e. Demonstration of Procedure. The procedure being taught is derived from a cognitive task analysis and/or other job or mission documents and is demonstrated by a model who is similar to or respected by the students. The demonstration should be accompanied by job aids that summarize the action and decision steps in the procedure. f. Practice the Procedure: The many job and mission-related problems collected during the cognitive task analysis are used to design guided practice exercises that are directly related to the context and problems that must be solved to accomplish the job or mission. Simpler problems should be given first, then more complex and varied problems later in the exercises. As students solve easier problems, new problems include elements that can only be solved by using knowledge from previous modules so that problems become “cumulative” and wider in scope, giving trainees an opportunity to continue to practice previously learned procedures. Guidance is gradually withdrawn or faded during practice as student use of procedures becomes more fluid and accurate. g. Review Practice and Give Feedback. Practice must be reviewed and checked against a list of action and decision steps derived from standard procedures and/or the result of cognitive task analysis. Students must receive feedback on their practice that focuses on: a) what they accomplished that was correct, and (if necessary), b) how they need to adjust their procedure or strategy in order to complete their learning goals. Feedback about mistakes is focused on correcting the procedure used, not on the ability of the student.
5. Select Media for Delivery. Decide what mix of media will deliver the course to
students in the most cost-effective fashion. In most cases, large enrollment courses where students are widely distributed are best delivered through computer and internet-based distance learning media.
6. Design Four Level Evaluation for the Entire GEL Course: Develop four
levels of evaluation for a course (Lesson 13) including: A) reaction questionnaires at the end of each lesson; B) procedural checklists (Lesson # 10) for procedures for use during practice exercises and tests of conceptual knowledge (Lesson #5) where it is taught; C) a plan for transfer evaluation to see if trainees use the skills on their job effectively after training, and D) A plan for results evaluation if your supervisor requests it.
. 7. Write a transfer letter for supervisors. In order to support level III evaluation
(transfer and application of new knowledge to the job) GEL training requires that designers draft a letter to be sent to all supervisors with information that has been found to support transfer of training.
5
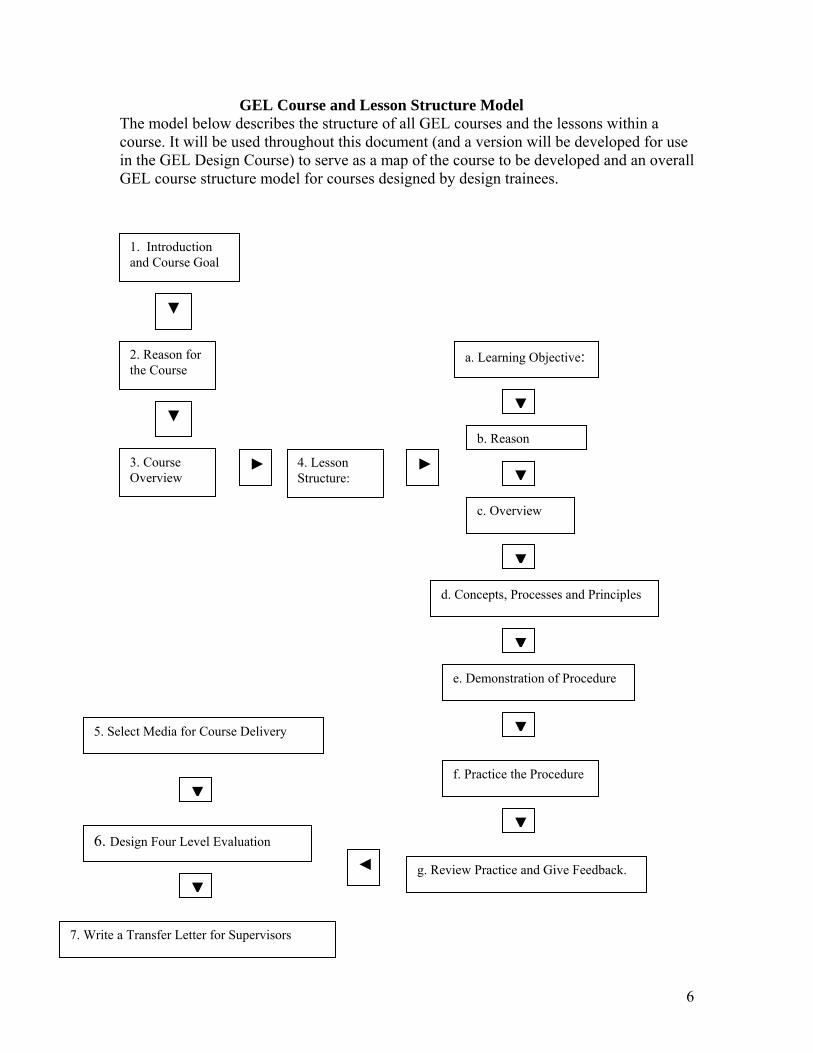
GEL Course and Lesson Structure Model The model below describes the structure of all GEL courses and the lessons within a course. It will be used throughout this document (and a version will be developed for use in the GEL Design Course) to serve as a map of the course to be developed and an overall GEL course structure model for courses designed by design trainees.
1. Introduction and Course Goal
▼
2. Reason for the Course
a. Learning Objective:
▼ n
c. Overview
3. Course Overview
► 4. Lesson Structure:
►
d. Co
e. D 5. Select Media for Course Delivery
f. P
6. Design Four Level Evaluation
◄ g. Review
7. Write a Transfer Letter for Supervisors
b. Reaso
c. Ov
ncepts,
emon
ractice
Practi
▼
▼
erview
▼
Processes and Principles
▼
stration of Procedure
▼
the Procedure
▼
ce and Give Feedback.
▼▼
6
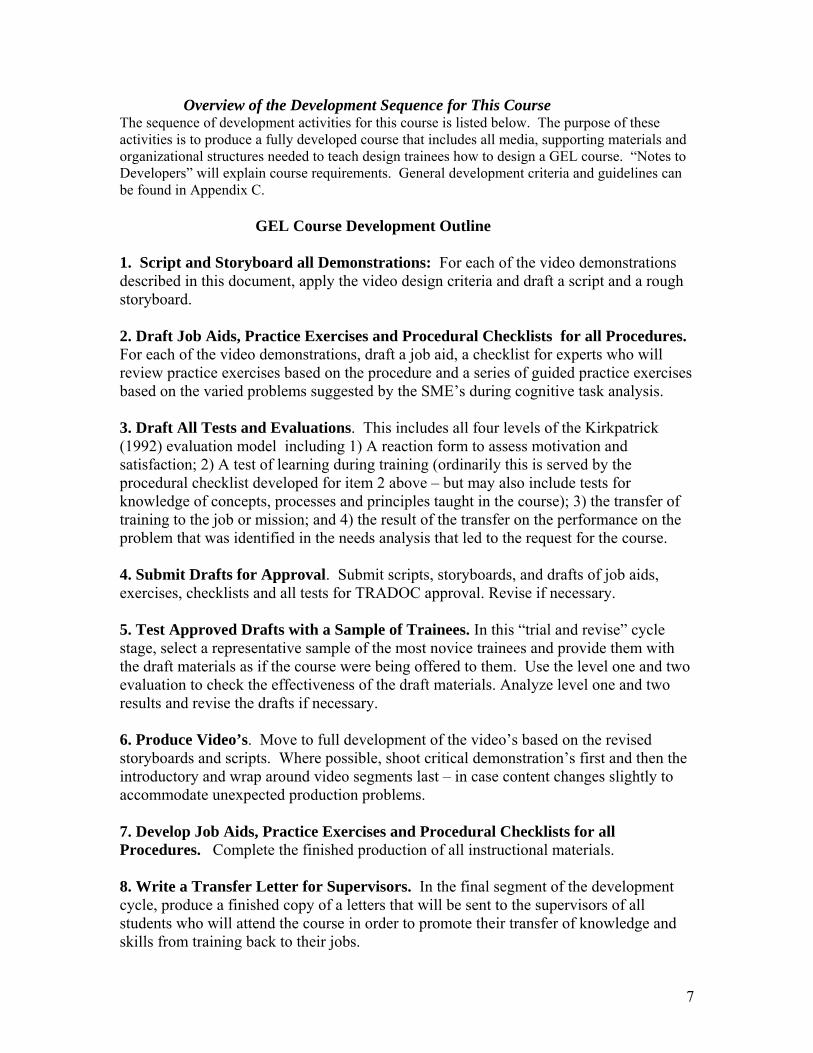
Overview of the Development Sequence for This Course The sequence of development activities for this course is listed below. The purpose of these activities is to produce a fully developed course that includes all media, supporting materials and organizational structures needed to teach design trainees how to design a GEL course. “Notes to Developers” will explain course requirements. General development criteria and guidelines can be found in Appendix C. GEL Course Development Outline 1. Script and Storyboard all Demonstrations: For each of the video demonstrations described in this document, apply the video design criteria and draft a script and a rough storyboard. 2. Draft Job Aids, Practice Exercises and Procedural Checklists for all Procedures. For each of the video demonstrations, draft a job aid, a checklist for experts who will review practice exercises based on the procedure and a series of guided practice exercises based on the varied problems suggested by the SME’s during cognitive task analysis. 3. Draft All Tests and Evaluations. This includes all four levels of the Kirkpatrick (1992) evaluation model including 1) A reaction form to assess motivation and satisfaction; 2) A test of learning during training (ordinarily this is served by the procedural checklist developed for item 2 above – but may also include tests for knowledge of concepts, processes and principles taught in the course); 3) the transfer of training to the job or mission; and 4) the result of the transfer on the performance on the problem that was identified in the needs analysis that led to the request for the course. 4. Submit Drafts for Approval. Submit scripts, storyboards, and drafts of job aids, exercises, checklists and all tests for TRADOC approval. Revise if necessary. 5. Test Approved Drafts with a Sample of Trainees. In this “trial and revise” cycle stage, select a representative sample of the most novice trainees and provide them with the draft materials as if the course were being offered to them. Use the level one and two evaluation to check the effectiveness of the draft materials. Analyze level one and two results and revise the drafts if necessary. 6. Produce Video’s. Move to full development of the video’s based on the revised storyboards and scripts. Where possible, shoot critical demonstration’s first and then the introductory and wrap around video segments last – in case content changes slightly to accommodate unexpected production problems. 7. Develop Job Aids, Practice Exercises and Procedural Checklists for all Procedures. Complete the finished production of all instructional materials. 8. Write a Transfer Letter for Supervisors. In the final segment of the development cycle, produce a finished copy of a letters that will be sent to the supervisors of all students who will attend the course in order to promote their transfer of knowledge and skills from training back to their jobs.
7
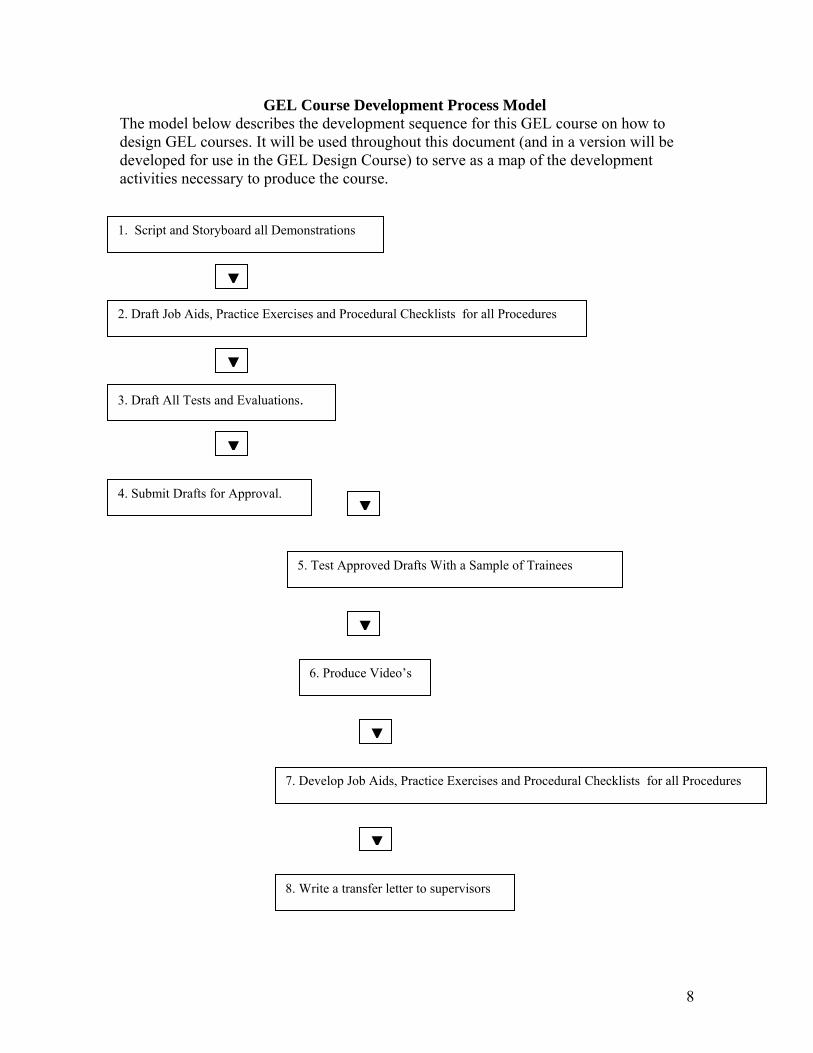
GEL Course Development Process Model The model below describes the development sequence for this GEL course on how to design GEL courses. It will be used throughout this document (and in a version will be developed for use in the GEL Design Course) to serve as a map of the development activities necessary to produce the course. 1. Script and Storyboard all Demonstrations
2. Draft Job Aids, P
3. Draft All Tests a
4. Submit Drafts fo
▼
ractice Exercises and Procedural Checklists for all Procedures
▼
nd Evaluations.
▼
r Approval.
5. Test Ap
6. Produ
7. Develop J
8. Write a tr
▼
proved Drafts With a Sample of Trainees
▼
ce Video’s
ob
an
▼
Aids, Practice Exercises and Procedural Checklists for all Procedures
▼
sfer letter to supervisors
8
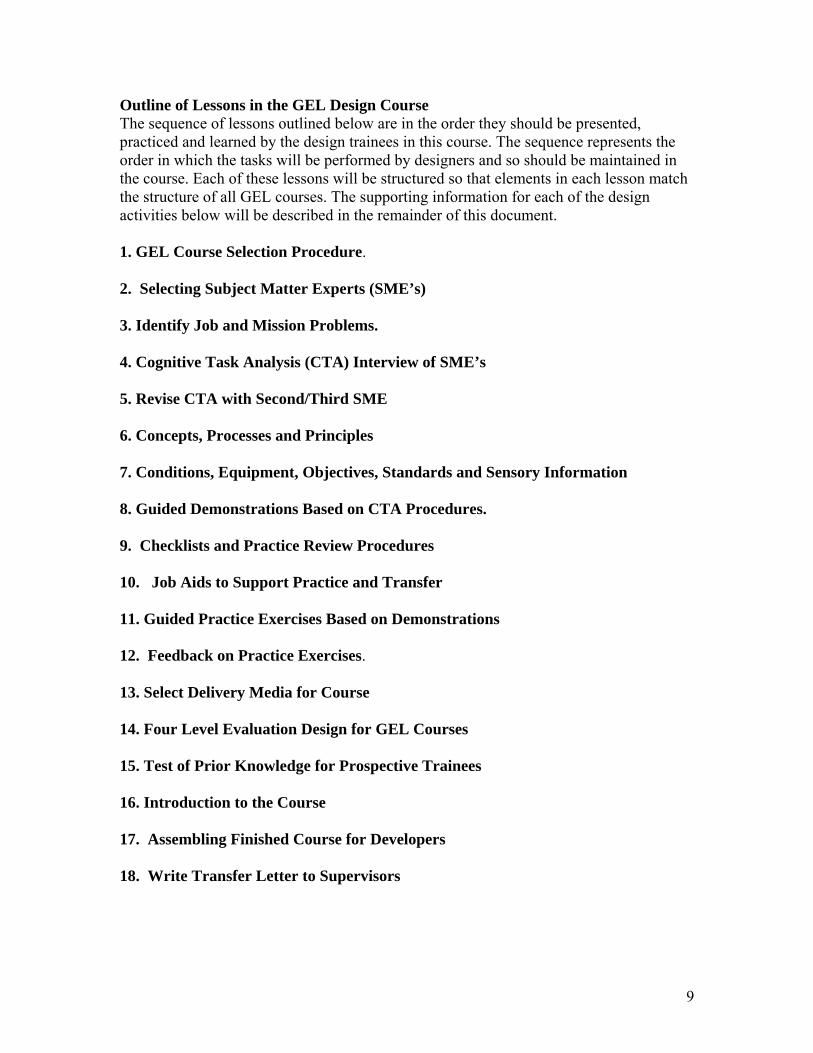
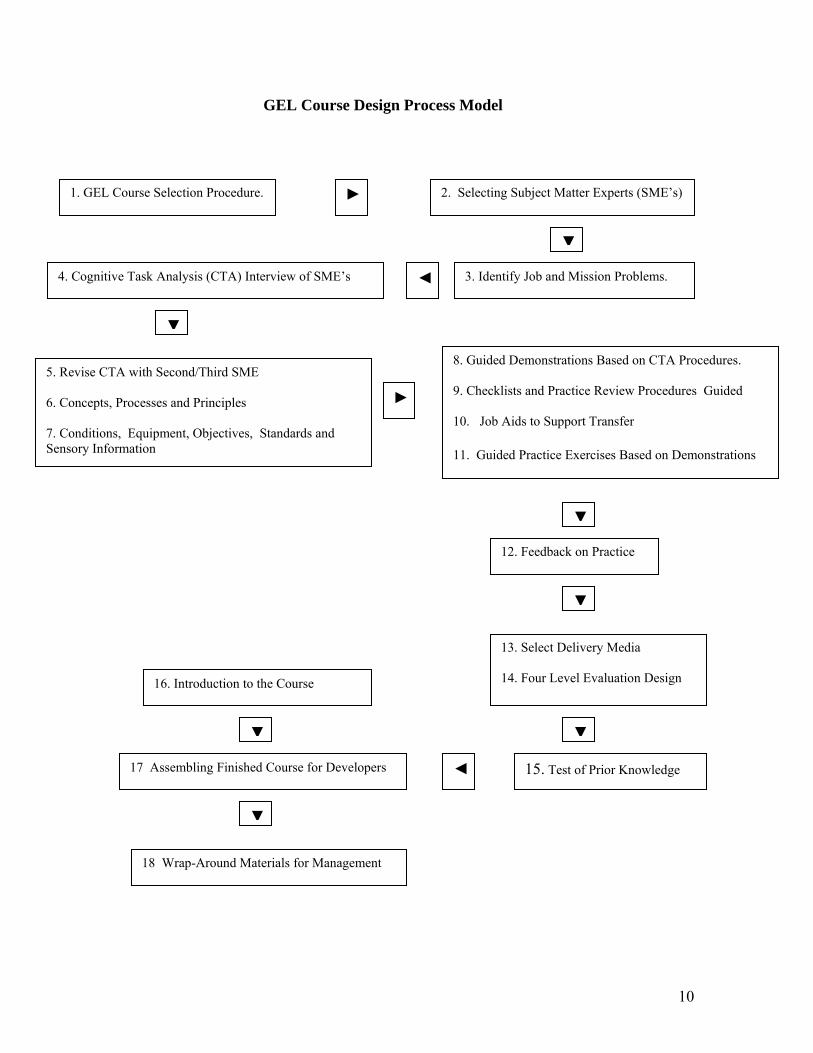
Outline of Lessons in the GEL Design Course The sequence of lessons outlined below are in the order they should be presented, practiced and learned by the design trainees in this course. The sequence represents the order in which the tasks will be performed by designers and so should be maintained in the course. Each of these lessons will be structured so that elements in each lesson match the structure of all GEL courses. The supporting information for each of the design activities below will be described in the remainder of this document. 1. GEL Course Selection Procedure. 2. Selecting Subject Matter Experts (SME’s) 3. Identify Job and Mission Problems. 4. Cognitive Task Analysis (CTA) Interview of SME’s 5. Revise CTA with Second/Third SME 6. Concepts, Processes and Principles 7. Conditions, Equipment, Objectives, Standards and Sensory Information 8. Guided Demonstrations Based on CTA Procedures. 9. Checklists and Practice Review Procedures 10. Job Aids to Support Practice and Transfer 11. Guided Practice Exercises Based on Demonstrations 12. Feedback on Practice Exercises. 13. Select Delivery Media for Course 14. Four Level Evaluation Design for GEL Courses 15. Test of Prior Knowledge for Prospective Trainees 16. Introduction to the Course 17. Assembling Finished Course for Developers 18. Write Transfer Letter to Supervisors
9
GEL Course Design Process Model
►
1. GEL Course Selection Procedure.◄
►
16. Introduction to the Course
17 Assembling Finished Course for Developers
2. Selecting Subject Matter Experts (SME’s)
◄
3. Identify Job and Mission Problems.
4. Cognitive Task Analysis (CTA) Interview of SME’s5. Revise CTA with Second/Third SME 6. Concepts, Processes and Principles 7. Conditions, Equipment, Objectives, Standards and Sensory Information
8. Guided Demonstrations Based on CTA Procedures. 9. Checklists and Practice Review Procedures Guided 10. Job Aids to Support Transfer 11. Guided Practice Exercises Based on Demonstrations
15. T
▼
▼
es
▼
12. Feedback on Practice13. Select Delivery Media 14. Four Level Evaluation Design
▼
▼
t of Prior Knowledge
▼
18 Wrap-Around Materials for Management
▼
10
GEL Design Course Development GEL Design Course Procedures Notes For Developers: What follows are a sequence of procedures that represent the 17 lessons in the GEL Design course. They are presented in the sequence in which they will be taught in the course you are developing. Each procedure is presented in the context of the seven elements of a GEL course (Learnng Objective, Reason, Overview, Concepts, Demonstration, Practice and Feedback). In general, each lesson in this course represents a separate video segment that includes the seven elements. You may decide to include more than one lesson in a video or break one or more of the longer lessons into more than one video segment. Your job at this early stage in the development is to create scripts and story boards for each of the lessons (focusing on the procedure to be taught) so that the course design can be formatively evaluated before final production. Before you start script and storyboard development, please refer to the develoopment guidelines described in Appendx C and attempt to implement the research-based suggestions it contains when you script video demonstrations and produce all materials for the course. In order to develop adequate demonstrations and practice exercises it will be necessary for you to select two courses to be used as examples in this training. One example should be relatively simple (for example, a motor pool team who are diagnosing problems with vehicles or it might be more interesting if the team were a pit crew servicing a racing team during a race) and the second task should be more complex and difficult such as a complex supply logistics problem or the interview of a suspected terrorist. The two “courses” selected should serve as examples throughout this course. Where possible, trainees can be given take away exercises to design their own course after they master the exercises based on the “canned” courses. It is strongly recommended that you develop a graphic version of the GEL Course Outline Model (above) and repeat it for every lesson in the course, highlighting the place in the model that represents the current lesson being presented. The model could also be used as a navagation tool allowing reviewers who are cleared to navagate freely between lessons to move from place to place in the course. The same model could remind students about the lessons they have completed successfully and those reamaining to be mastered.
11
Lesson 1: GEL Course Selection Procedure. Note for the Developer: This is the first lesson in the course and so it must grab the attention of the design trainees and establish a format for the lessons to come in this course. The video should show the trainees selecting the two courses that will be used as examples in subsiquent lessons. Since the developed course will require a couple of example courses that will be designed as exmples in the lessons to follow, they should be introduced in this first lesson. One course might be one or more jobs on racing pit crew. The second task should be different and non-technical while still procedural – such as a course in how interview suspected terrorists. Learning goal for this Lesson:
When presented with a list of courses to be designed and the results of needs analysis that have resulted in the design request for those courses and when asked to select courses from the list that are candidates for GEL design, trainees will apply the GEL selection procedure accurately and select courses that are appropriate for GEL design.
Reason for this lesson: Not all courses should be subjected to GEL design. Courses for advanced learners and/or experts do not require the amount of learning support embedded in a GEL course. Most advanced or intermediate experts only need accurate, succinct descriptions about how to achieve a new goal in their area of expertise and they will learn it without support if they see a need for the new skill. In addition, when the learning goals of a course are vague or the problems the course is teaching students to solve are unstructured, and when only conceptual knowledge is being taught (without “how to” instruction) GEL design is simply not useful. Therefore, a procedure for identifying courses that are appropriate for GEL design is necessary. Overview: Insert GEL Design Course Outline Model and highlight this lesson on the model. Briefly describe (with narration) the objective and reason for this lesson. Concepts, Processes and Principles: Trainees may not understand the term “technical skills”, “well-defined problem” . These concepts are defined as: Technical Skills – Ability to solve specific, practical, mechanical or scientific
problems Well Defined Problem – A problem with measurable elements that can be solved by
a known, step-by-step solution.
12
Equipment and Materials Required to Perform the Procedure: Trainees will require a large number of brief course proposals accompanied by equally brief summaries of the “needs analysis” results that led to the request for a new course. Since this is the first lesson in the course, it is appropriate to introduce two different courses to use as examples of the design process that will evolve through all of the remaining lessons. Those two courses should be introduced in this lesson. Procedure for selecting courses that are appropriate for GEL Design: Step Actions and Decisions 1 IF the course objectives require the learning and transfer of
A) Technical skills and/or B) Procedural “How to” knowledge, and/or C) Where problems are linked and cumulative (that is, where solving a more advanced problem requires that simpler, prerequisite problems be mastered), and D) Where experts are successful at solving problems and achieving goals than novices, OR E) Where the task involves the solving of well-defined problems of any kind, AND ,
2 IF the training design skills of the trainees is classified as novice to
intermediate, 3 THEN: It is appropriate to use the GEL Design system. Demonstration and Practice A brief segment should demonstrate the use of this procedure in a context where designers are selecting courses that are appropriate for GEL Design and separating them from courses that are not appropriate. Courses teaching more conceptual (university topics, philosophy than technical, more philosophical than procedural and/ or where students are asked to “generate new knowledge” or “solve unstructured problems” can serve as “non examples” of GEL Course objectives. Practice of the above procedure should include a list of brief descriptions of courses that have been identified by needs analysis as requiring design. Then a computer-based exercise should be developed where the trainee is asked to select from among a list of course descriptions and the system should give feedback similar to the approach described later in Lesson 12. Insert a Reaction Questionnaire similar to the one described in Lesson 14 at this point and store data collected in each trainees electronic course record.
13
Lesson 2: Selecting Subject Matter Experts (SME’s) Notes For Developers: The purpose of this video demonstration is to teach design trainees three different selection procedures at the early stages in the design process. First they will learn how to select the best experts for cognitive task analysis interviews focused on the example courses being designed. Then the lesson helps them determine whether the feedback their students will need when they practice can be provided by the computer or whether they will need to select experts to give feedback. And third, they will learn to select and train the experts who will be reviewing and giving feedback to students who complete practice exercises in the courses they design when computer assessment and feedback is not possible. This selection process is critical for GEL Design since the quality of the subject matter experts (SME’s) used in design will determine the quality of the information content of the courses that trainees design. Where feasible and cost effective, feedback on practice should be automated so that the computer can review a practice exercise and give feedback to students. You may decide to blend all three of these procedures into one integrated approach to selecting experts. If you integrate them, be cautious that you do not overload the trainees with too much information. Learning goals for this lesson:
Whenever a GEL course is to be designed, and when SME’s are required for cognitive task analysis, the design trainees will be able to select SME’s who will provide accurate procedural descriptions of the skills to be taught in the course.
When a practice exercise has been designed, the design trainee will be able to decide whether automated or live performance feedback is possible. When live feedback on a practice exercises is required, the design trainee will effectively implement the procedure for selecting and training SME’s who will give students feedback on their practice.
Reason for this Lesson When the documentation available to support training for a job or mission does not contain clear, complete and accurate “how to do it” procedures, you must collect that information from experts. In order to produce a GEL Design you need to be able to clearly describe all critical actions and decisions necessary for your students to accomplish key learning goals. When job or mission documentation does not contain clear procedures, you must get the necessary information from experts. In order to accomplish this goal, you will interview top experts who have been highly successful at the job to be taught using a technique called “cognitive task analysis”. Ordinary task analysis attempts to describe the visible actions necessary to accomplish a job. Cognitive task analysis goes farther and also describes the decisions that need to be made, the criteria for making the decisions and their impact. What complicates this process of
14
extracting knowledge from experts is that when someone becomes an expert, the knowledge they possess about their expertise is largely automated an unconscious. That means that while a top expert is very capable of solving nearly all of the complex problems they encounter in their area of expertise, they are not necessarily able to give a clear description to a novice about “how it is done”, even if they try. You might say that top experts “don’t know what they know” in a way that allows them to describe it without help. So cognitive task analysis will teach you a technique of helping experts describe the way they solve problems. Expertise is more than experience at a job or mission. Top experts will be able to reliably and constantly solve problems that even the most capable and intelligent novices cannot solve. Experts are also required to observe and give corrective feedback to your students when a computer cannot give feedback on the practice exercises you will design for them. Therefore, you have to learn to decide which practices need human experts for review and feedback, which practice exercises require an expert and then you must know how to select the best experts to review practice for your course. Overview: Insert GEL Design Course Outline Model and highlight this lesson on the model. Briefly describe (with narration) the objective and reason for this lesson. Concepts, Processes and Principles: No conceptual knowledge needs to be taught in this lesson. Equipment and Materials Required to Perform the Procedure: Presenting and practicing the procedures below require a large number of example courses that might have been selected for design (each example course should be accompanied by a title and some supporting information that would allow trainees to determine whether it meets the criteria for computer or live practice). In addition, a large number of brief dossier description of potential experts for CTA and for review of practice (and people who would not be appropriate for either task) must accompany the course descriptions. Procedure for deciding whether automated or live feedback will be provided for practice exercises: Step Actions and Decisions 1 IF an exercise requires students to practice the recall or identification
(classification) of examples of concepts, processes or principles, 2 IF an exercise requires a procedure where the application environment can
be adequately simulated on a computer and key procedural steps used by the student to practice can be recorded by the computer;
15
THEN design a practice exercises that can be assessed by the computer and feedback that can be provided by the computer using GEL product
3 IF neither step 1 or step 2 are possible, that is – if the students are
practicing a “how to” procedure with decisions and actions that cannot be adequately simulated on a computer,
THEN instruct trainees to practice so that essential parts and/or products
of the practice can be observed by an expert who will give corrective feedback using GEL products 3.3 and 3.4.
Procedure for selecting experts for Cognitive Task Analysis Interviews Step Actions and Decisions 1 IF the documentation for the job to be learned in a GEL course provides
complete and accurate “how to” information at the detail level required for novices about all actions and decisions required to successfully perform the job, use that information and do not apply the procedure that follows.
2 IF the documentation for the job to be learned in a GEL course DOES
NOT provide complete and accurate “how to” information at the detail level required for novices about all actions and decisions required to successfully perform the job, use the procedure that follows to select three experts who you will interview with cognitive task analysis (presented in Lesson 4).
3 Review the qualifications of all available subject matter experts and select
as candidates those with the following characteristics Select an expert who: a) Has an established track record of highly successful accomplishment
of the goal or mission being taught in the GEL course (as opposed to merely having established “job experience” over time).
b) Has consistently solved job-related problems and achieved goals that bright and capable novices have not been able to accomplish.
c) Has the reputation of broad knowledge (as opposed to very narrow experience and knowledge) of the job or mission (including related jobs and missions). The alternative is to select experts whose narrow and specialized knowledge is exceptional and select more than one expert to cover a broad job or mission.
d) Has the reputation of cooperativeness and/or is willing to tolerate the frustration of being asked to explain very familiar information at a very specific level of detail and to read and correct written descriptions of your interview.
16
e) If possible, find experts who are highly respected by people who have served with them.
4 Then request the assignment of selected experts to your course from their
superiors on the following basis: a) You will need three experts and you will interview each of them
separately, preferably face-to-face and at least twice with a time lag of one to two weeks between interviews.
b) You will require approximately 4 total hours of expert time in one to two hour segments, on different days, for every hour of training you design.
Procedure for deciding how to select and training experts who will give students feedback on their practice exercises: Step Actions and Decisions 1 IF a practice exercise must be observed by an expert who will give
corrective feedback (Lesson 11) 2 IF design trainees must select the expert who will review student practice
and give feedback THEN select experts to act as reviewer who have the following qualities:
a) Some basic (but not extensive) knowledge and skill in the job being practiced by the students, (additional experience as a trainer is a plus but not essential) and,
b) Agreement to evaluate student practice using only the procedural checklist specified in Lesson 10.
Demonstration of Procedures All three procedures should be demonstrated in the order in which they are presented above. The demonstration of the three procedures can be integrated into one video or divided between three separate but linked video segments. In each case, the students should see design trainees making choices between candidate experts, courses that do and don’t have adequate documentation and people who are and are not appropriate to review practice and give feedback. Practice and Feedback Practice selecting courses requring CTA, experts who should be selected for CTA interviews and those who will provide checklist based review and feedback should be provieded in this lesson. Insert a Reaction Questionnaire similar to the one described in Lesson 14 at this point and store data collected in each trainees electronic course record.
17
Lesson 3: Identify Job and Mission Problems to Outline Course Notes for Developers: The goal of this segment is to develop a video that demonstrates to trainees the first part of their cognitive task analysis interviews with experts. In this lesson they will learn how to get two kinds of information from experts about the sample courses being designed: First, they will ask the expert to list key tasks and describe the order in which each tasks is performed on the job. They will use this information to develop an outline of the course. They will be taught to sequence a course in the same way that the knowledge they are learning will be used on the job or mission. Second, trainees will learn how to get expert help in locating and describing a range of problems and novel task descriptions that their students should be able to solve/accomplish during and after they are trained. These problems and tasks, at increasing levels of difficulty, will become the practice exercises in the course they are designing and the subject matter for the tests their students will take to certify that they have learned what is being taught. It is recommended that you produce a video demonstrating an interview between one or more of the SME’s that were chosen in the Lesson 2 video and a GEL designer who is implementing this lesson procedure. Develop a “checklist” style job aid that can be printed by the trainee and used during the demonstration and after the training during expert interviews. Learning objective for this lesson:
When course design requires the capturing of existing expertise from experts and teaching it to novices, design trainees will be able to successfully interview SME’s and accurately record a list, describe and collect examples of increasingly complex job and mission related tasks and/or problems to be performed or solved by the trainees in the course they are designing.
Reason for this Lesson: Design trainees need a systematic way to outline the course they are teaching and to get examples of problems that their students will learn to solve and task students will learn to accomplish. The first stage of the cognitive task analysis you will conduct with SME’s is intended to give you the information needed to produce your first course outline and to get examples of the problems you will teach your students to solve with your design. This activity is one of the huge benefits of GEL Design. Your course will be much more effective if you conduct a very systematic analysis of the problems and tasks that your students will learn to handle and an effective sequence for teaching them. Keep in mind that the organization of the course may change as you learn more about it from the experts. The SME’s may also not give you all of the needed problems at all necessary difficulty levels in your first interview. This lesson is the first attempt to implement one of the most important principles of complex training exercises: “Learning is promoted when the instruction demonstrates what is to be learned with worked examples of authentic problems rather than merely telling information about what is to be learned.” You are capturing the list of authentic problems whose solutions will be demonstrated and taught to your students.
18
Overview: Insert GEL Design Course Outline Model and highlight this lesson on the model. Briefly describe (with narration) the objective and reason for this lesson. Concepts, Processes and Principles: No conceptual knowledge needs to be taught in this lesson. Procedure for Interviewing SME to capture descriptions of problems and tasks that trainees should be able to solve and perform successfully after training Equipment , materials and setting for this procedure: The resources needed to implement this procedure are- Access to approved documentation and/or at least two (preferably three) highly skilled subject matter experts. If no one expert can adequately represent the expertise required for the entire scope of content in the course being designed, the trainee and/or their supervisor must identify multiple SME’s for each area. Next, the trainee must be advised to review all documentation on the job so that they are as familiar as possible with its requirements before the interview. It is also useful to have a voice recorder and either a computer or pad of paper to write notes during the interview. If the tasks or problems being described require visual elements, a video record of the interview can be helpful. The interview meeting should be held in a relaxed setting and a minimum of two to three hours (with periodic breaks) should be scheduled. The trainee should prepare the expert by telling them about the course they are designing for trainees, thank them for spending time helping to design the course and describe the interview protocol so that the expert knows what to expect. Give the trainee a job aid that describes the steps in the procedure below so that they can refer to the aid when they are viewing the video demonstration and use it during their practice exercise. Step Actions and Decisions
1 Ask: “How would you describe the overall performance goal of this task? If there is more than one general goal, what are the others?” Ask clarifying questions at any point if necessary.
2 Say something like the following to the expert: “Please describe the sequence of
tasks trainees should be able to perform and the kinds of routine problems should they be able to solve if they have learned each of the main tasks or problem solving required for this job. Each task and problem may become a lesson in the training we are designing. If possible, start from the beginning. What is the first task they must handle? For example, what has to happen when the job or first task begins? Then describe the second task or problem and so on. If there is no necessary sequence, start with the simplest one and then move to the more complex.”. Explain that you will later ask how to accomplish each task and solve each problem they mention – but at this point you only want to get an outline of the job.
19
3 Make a handwritten or typed list of the sequence described by the expert. Ask
them to review it and modify it if necessary (experts almost always leave things out of their first list). Remind them that the list is for novices not other experts and ask them to make it “…as complete as possible for someone first learning this job”. When the expert has completed their description of the sequence of tasks and problems and has corrected your notes, ask for a break and schedule another interview for a later time and go on to step 4.
4 Hand the expert a copy of your revised list so that you both have a copy, read the
first task or problem on your list and ask “Is there anything that trainees must be able to do before they perform this task (or solve this problem)? For example, must they make a decision that leads them to this task. Or is there anything they need to do afterwards, before they tackle the next task on your list – anything else we need to note?”. Review the entire list with similar questions until the expert is convinced that the list of tasks and problems is as accurate as possible.
5 When the list is complete, thank the expert and tell them that you will get back to
them later to ask for typical examples of problems and tasks to use in the training you are designing.
6 Schedule an interview with a second expert, hand them the revised list of tasks
and problems you generated with the first expert and ask “This is a list of the tasks and problems we believe trainees should be able to handle in order to successfully handle the job. What changes would you make on the list to make it more accurate or more efficient? Each task or problem may become a lesson in the course we are designing so they must be accurate. Please only change the list if it is inaccurate or if you see tasks or problems that do not need to be handled” Note the changes they ask you to make.
7 Reconcile the differences between the two experts either by asking both of them
to meet and agree or submitting the lists to a validating group of experts. When you have a final list, schedule one more meeting with one or both of the experts.
8 In this meeting, you are going to ask the expert to “Take each task and problem
on the list and, one by one, describe a very simple example of a time when trainees will need to perform the task or solve the problem. Then, if possible, describe a more complex and difficult setting or incident when they will need to perform the same task or solve the same problem. Our goal here is to collect as many authentic examples as possible at different levels of difficulty so that we can include them in the training course as practice exercises. It might help if you remember something that happened in the past that made each problem or task much more critical or complex – and describe that event so that we could duplicate it in the training.”
20
9 Repeat step 8 with the second expert except that in this interview you ask for a revision or improvement in the list of examples. If experts have promised to get information for you outside of the interview, follow up and retrieve what was promised. Note all suggested changes.
10 Summarize the examples of all tasks and problems in a master file. If approval of
the list is required, implement the approval process and revise the list as directed. Demonstration of Procedures All three procedures should be demonstrated in the order in which they are presented above. The demonstration of the three procedures can be integrated into one video or divided between three separate but linked video segments. In each case, the students should see design trainees making choices between candidate experts, courses that do and don’t have adequate documentation and people who are and are not appropriate to review practice and give feedback. Practice and Feedback Practice selecting courses requring CTA, experts who should be selected for CTA interviews and those who will provide checklist based review and feedback should be provieded in this lesson. Insert a Reaction Questionnaire similar to the one described in Lesson 14 at this point and store data collected in each trainees electronic course record.
21
Lesson 4: Cognitive Task Analysis (CTA) Interview of SME’s Notes for Developers: The interview technique to be demonstrated in this lesson is very critical to GEL Design and it will be a challenge for design trainees to learn. The video that demonstrates the CTA interview must be clear and paced slowly enough so that trainees do not become overloaded or discouraged. The interview has been broken up into four lessons (4, 5, 6, and 7) to lower the mental load on trainees and increase the success of the training. In Lesson 4, trainees learn to capture detailed action and decision steps for each task or problem that they must teach in the example courses being designed. When you demonstrate the interview in this video, the expert being interviewed should often forget steps and that decisions have to be made in the task being described. The interviewer should ask leading and checking questions often so that the expert is able to “remember” what they forgot to say in their first attempt to describe steps. The procedure being described should start out simply and then become more complex, that is, it should involve more decisions that branch the procedure into more tracks depending on how decisions are made. During the CTA , the interviewer will be prompted to record a number of different types of information in this and the next three lessons: first, descriptions of action steps (things to do that a person can observe directly), and decision steps (decisions that have alternatives and criteria for choosing between the alternatives); second, new conceptual knowledge in the form of concepts, processes and principles. Some of this new knowledge will have to be taught separately in order for trainees to fully understand the reason for a procedure and why the actions and decisions are necessary to succeed at the job. This aspect of the procedure is handled in lesson 4. The trainee also needs to understand how to check the procedure captured from one SME with another SME to insure the accuracy, efficiency and completeness of the resulting procedure (covered in Lesson 5). CTA interviewers need to capture information on the conditions that start the procedure, the equipment and materials needed by the person performing the procedure, the objectives of the procedure, any standards (time limits, cost, quality indicators) that govern the performance of the procedure and any sensory information (smells, tastes, textures and so on) that trainees must experience in order to learn.. This information is covered in Lesson 7. In this video, demonstrate how an designer would capture and simply record and set aside all of the types of information described above and then explain that they will all be analyzed separately after the interview is concluded. To make the point that trainees need to be careful when they conduct CTA interviews, ask them to remember when they learned how to drive. Most often, the person teaching someone to drive leaves out a great number of steps and decisions that novice drivers need in order to succeed. Exerts often assume that novices can fluidly operate a number of mechanical and rule-based systems such as the accelerator, braking system, steering wheel, and mirrors for rear view on the one hand, and coordinate them along with “rules of the road” to drive effectively, on the other hand. Remind the trainees that novices have to master each of the separate functions in an automobile separately, now when and
22
how to use them and then gradually integrate their knowledge with practice. Remind them also that even cooperative experts tend to become irritable when you ask them to describe “how to” information at the level needed by a novice. Ask them if the person or people who taught them to drive were occasionally irritable when they were asking detailed questions or having problems applying the incomplete information they had been given about how to drive a car. Explain that they should expect irritation from the expert and even warn them ahead that they might feel irritation and that this is “normal” in the CTA interview. Learning Goals for this Lesson:
When designers need to develop a demonstration about how to accomplish job tasks or solve job-related problems, they will learn to determine whether existing job documentation provides an adequate level of detail and accuracy to support successful demonstrations for novices in training. When accurate and authentic procedures for solving problems and accomplishing job tasks are not available at a level of detail needed by learners, designers will learn how to conduct a cognitive task analysis (CTA) interview of an SME to capture the action and decision steps for each job task or problem.
When required to conduct a CTA, designers will also learn how to capture from SME’s and existing job documentation the three types of conceptual knowledge (concepts, processes, principles) and five related types of information about jobs (conditions, needed equipment and materials, objectives, standards and sensory information) that must be included in effective demonstrations.
Reason for this Lesson In the introduction, explain to the trainees that they will learn the latest strategy for capturing the “how to” knowledge of top experts so that trainees will eventually be able to “do it like the experts”. Emphasize in your explanation that with years of experience, experts become very automated and unconscious about their expertise. While they can perform tasks and solve the most complex problems in their area of expertise very successfully they are largely unaware of exactly how they do so. It is therefore difficult even for cooperative experts to provide a complete and accurate explanation meaningful to novices when asked to explain how they solve problems and make decisions. This section presents a new interview strategy called “Cognitive Task Analysis” that is designed to help them uncover the hidden knowledge that experts possess and translate it into a form that trainees can use. After you record a how to procedure for accomplishing each task and solving all problems you collected earlier, you’ll also develop a printed list of steps for each procedure as a “job aid” for trainees to use when applying the knowledge after training. Focus your reasons for this lesson on the “driving instruction” example described in the notes to developers above. Emphasize the value of CTA expertise for the design trainee
23

since it is a new technique and has created a considerable “buzz” in training circles. A recent book describing the use of various CTA methods in military and civilian contexts is available to trainees who want more information – Schraagen, J. M. , Chipman, S. and Shalin, V.L. (2000) Cognitive Task Analysis . Mahwah, N. J.: Lawrence Erlbaum Associates, Publishers. The following URL provides a number of CTA resources including discussions of how to adopt this procedure for use with teams: http://www.ctaresource.com/ Overview: Insert GEL Design Course Outline Model and highlight this lesson on the model. Briefly describe (with narration) the objective and reason for this lesson. Concepts, Processes and Principles to be reviewed and/or taught before the procedure: Concepts: Approved Job Documentation: Any written descriptions of the job and tasks to be trained that have been approved by the command structure, are accurate and contain all of the information required by this CTA procedure. Produce a narrated video that contains a demonstration of the following Cognitive Task Analysis procedure Equipment and Materials Required to Perform the Procedure: In order to practice this procedure, it is necessary to have the following equipment available: Audio and/or video recording device (a motion digital video camera is recommended with at least four hours of recording media available in one hour segments). A lined tablet and pens for the interviewer. If possible, the SME should be interviewed in the setting similar to the one where the job or mission typically occurs so that job related examples can be obtained or identified during the interview. Procedure for deciding whether a cognitive task analysis is necessary: Step Actions and Decisions 1 IF in the job and mission problem interview (described in Lesson 3) you
determined that adequate documentation existed about the procedure needed to accomplish the learning goals in the course you are designing, do NOT conduct CTA at this point. Instead, draw on existing job and mission documentation to answer all of the questions asked in the CTA procedure and jump review the remainder of the lesson as if you were consulting the documentation for the information required to design the course rather than an SME.
2 IF you suspect that the job documentation is not completely accurate or if
information needed for your training design is missing, request access to
24
the two (or three) SME’s who were interviewed for Lesson 3 and conduct the full CTA described below. If in doubt, assume that the information is not complete.
3 IF the task to be learned requires expertise that extends beyond the
background of any one SME, use the procedure described in Lesson 3 to identify additional SME’s who are recognized in each of the many areas where information needs to be captured for training.
A) IF you are conducting a team CTA where members are interdependent (where each member has different skills and must collaborate with others to get the job done), interview SME’s on each team job and produce a separate CTA for each team position.
B) In team CTA’s, be certain that you capture the process by which team members interact (who does what with whom , when and how) to get the job done.
A Procedure for Designing a Demonstration from Expert Interviews
Step Actions and Decisions 1.0 Schedule an interview with the most experienced expert on the least complex
task (if a number of different experts are to be interviewed for different tasks) and prepare them by describing what will happen in the interview . Explain that you will ask them questions about how they perform each task and/or solve each problem - and then ask them to check and correct the answers of other experts who answer the same questions. Start out with a general question: “How would you describe the overall performance goal for this job?”. And then ask “How would you break that general goal down into a number of sub goals? We may divide the training into sections based on your suggestion of sub goals.”. Record their answers for later review and make notes summarizing their answers to help you remember what they said.
2.0 Pick the simplest task or problem for the first part of the interview, describe
the goal of the task and ask the expert five questions about it and record their answers for later summarizing in a printed document:
(2.1)New Procedure: “Please describe how you accomplish this goal step by step. Try to give enough information in your description so that a novice trainee could perform the task (or solve the problem). Keep in mind that “how to” descriptions are usually mixes of actions and decisions. Please note when a decision must be made. Decisions help people decide between alternatives when they must make decisions to continue to implement any procedure) Ask the expert what alternatives should be considered and what criteria should be used to choose between the alternatives? Experts
25
seldom realize when they’ve made important decisions so be on the alert for them. If it helps you, think of a specific incident or example of when someone was performing and describe how they did it?” Record the expert’s description.
(2.2) As the expert describes each step in the procedure, stop and ask for more detail whenever they mention the following three types of knowledge:
(2.2.1) New concepts. When the expert mentions a novel word, name, quality, term or locations that would be unfamiliar to novices -- ask the expert a follow up question: “Can you please define that term so that a novice would understand it and suggest where we can find examples of it to use in training?” (2.2.2) New Processes. When the expert describes steps in a procedure that seem to require knowledge about how something works - not how individuals do “how to” things - but how teams and/or natural or mechanical systems work – ask the expert a follow up question: “Please describe the process that is being supported by those steps in more detail – enough detail so that a novice trainee would understand it? Is there a written description of the process we can access? Why is it important for trainees to know about this process in order to succeed at this procedure or modify it if conditions change in unexpected ways?” (2.2.3) New Principles: When the expert describes steps that support the making cause and effect predictions about the future state of something, ask them a follow up question: “Please describe the cause and effect principle that led you to suggest that series of steps in the procedure. Could you define the principle? What evidence exists for it? Can you point me to some reading so that I can understand it better? Can you give me an example of a way that it works in this job/mission setting so that we could use the example in the training?”
(2.3) Ask the expert “What are the conditions that must be present in order for someone to start this procedure? Are there any formal or informal orders, permissions or initiating events that must happen in order for the performers to start or continue any part of this procedure? Where does this procedure take place? What context? What happens just before it is implemented? For example, must they be given an order or a formal request in some form? Must something being done earlier be completed? Who decides? “
26
(2.4) What equipment and materials are necessary to start or to complete any phase of this procedure? Where are they located and how are they acquired?
(2.5) How would you state the performance goal of this part of the
procedure? How would we know, for example, that a trainee would be able to perform the procedure adequately? What is the objective?
(2.6) Are there any critical performance standards(for example, time,
efficiency, quality indicators) that the person performing this procedure must achieve that would guide us in evaluating the performance of those who are learning and using this procedure?
(2.7) Are there any specific sensory experiences that trainees must have
in order to perform the procedure? For example, must they identify a smell, or a texture, or taste something or be able to identify a specific sound or set of sounds? Or visually recognize something unusual?
3.0 Summarize the first experts procedure by writing it down in a form similar to
the way that this procedure is being printed. Then ask the expert to read what you have written and to “please correct any mistake we made and if you can think of anything you forgot or any way to perform any of the steps or sequences more efficiently, please let us know?”. Make the changes they recommend.
4.0 Repeat steps 2.0 to 3.0 for each of the remaining tasks that must be taught and
learned. Sequence the tasks subjected to CTA by first choosing the simplest task and then the next most complex or difficult task until all are successfully analyzed.
5.0 Summarize the first experts procedures and related information for all tasks by
writing it down in a form similar to the way that this procedure is being formatted. Then ask the expert to read what you have written and to “Please correct any mistake we made and if you can think of anything you forgot or any way to perform any of the steps or sequences more efficiently, please let us know?”. Make the changes they recommend.
Demonstration of Procedures The many steps in this procedure should be demonstrated in the order in which they are presented above with the two courses that are being used as examples. The demonstration of all of the steps can be integrated into one video or divided between two or three separate but linked video segments. In each case, the students should see design trainees interviewing experts and recording the results. Stress the fact that trainees must
27
separately record different kinds of information for later review and restructuring. The types are: The procedure- consisting of two types of steps: 1) Action steps (How an individual must act), and 2) Decision steps (What decision needs to be made? What are the primary alternatives that must be considered? What criteria determine which of the alternatives should be chosen). The Conditions (What must happen to start this procedure or this part of the procedure?); The equipment and materials needed to perform this job or task. Any conceptual knowledge needed – consisting of three types: 1) concepts, 2) processes and 3 cause and effect principles. Standards (How quickly, cheaply, with what “quality” indicators must I perform this task?), and Sensory Information (Does the trainee need to recognize a smell, taste, texture, sound or unusual visual event?) Each of these types of knowledge will be pulled into the lessons for the training being designed. Practice and Feedback Trainees could practice this lessson in one or all of three ways. First, they could watch a video of a CTA being performed and recorded – and be asked to make a typed record of the CTA in a file that can be electronically scanned with keyword and phraise recognition software for review and feedback. They would have to be able to control the speed of the interview and review comments made by the video model. A more effective practice exercise would require all trainees to conduct a cognitive task analysis with a live individual who is trained to simulate SME behavior and give similar information in all interviews. The third alternative is to ask trainees to conduct an authentic CTA with an authentic SME and report the results. Full practice of this key procedure might involve all three methods (in the order listed above). Insert a Reaction Questionnaire similar to the one described in Lesson 14 at this point and store data collected in each trainees electronic course record.
28
Lesson 5: Revise CTA with a Second and Third SME Notes for Developers: This lesson continues the cognitive task analysis process started in Lesson 4. In this lesson, the video demonstration continues and the designer checks the CTA developed in lesson 4 with one to two additional SME’s. This lesson is critical because most designers are tempted to stop this process after they receive information from one SME. The reason for continuing is that all SME’s have highly automated knowledge that keeps them from giving an accurate account of all of the strategies they use to accomplish tasks and solve problems – even if they are cooperative and want to help. A second and third SME will most often catch the omitted information and often have more efficient strategies to offer that are easier for trainees to implement. So this lesson is about how to check, correct and improve on the CTA collected from the first SME. In the video, make certain that the first SME omitted a number of key decisions (this is typical in CTA) and suggested some procedural steps that are overly long and complex (and so can be edited and simplified for novices by SME #2 and #3. Learning goals for this lesson
After collecting CTA’s from the first SME, trainees will learn how to correct, improve and validate the initial CTA information by interviewing two additional SME’s.
Reason for this Lesson This lesson is critical because most designers are tempted to stop this process after they receive information from one SME. If you persist, the course you develop will increase dramatically in effectiveness. The reason for continuing and checking the initial CTA with two new SME’s is that all SME’s have highly automated knowledge that keeps them from giving an accurate account of all of the strategies they use to accomplish tasks and solve problems – even if they are cooperative and want to help. A second and third SME will most often catch the omitted information and often have more efficient strategies to offer that are easier for trainees to implement. So this lesson is about how to check, correct and improve on the CTA collected from the first SME. Overview: Insert GEL Design Course Outline Model and highlight this lesson on the model. Briefly describe (with narration) the objective and reason for this lesson. Concepts, Processes and Principles: No new conceptual knowledge needed to support this procedure. Equipment and Materials Required to Perform the Procedure: The same equipment and materials available in Lesson 4 must be provided for this procedure and in addition, designers must have electronic and paper copies of the CTA developed with the first SME.
29
Procedure for checking, editing, improving and validating the CTA with two additional SME’s (the step number sequence is continued from the previous lesson)
6.0 Arrange a meeting with the second expert and hand them the procedure you edited in step 5.0 (above) and ask them to “Please review this procedure and point out errors (steps or information that is wrong). We understand that you might perform this procedure differently, but at first simply point out steps that are not accurate because they are out of place or would not succeed if performed in the way described. Please also let us know if any of the steps or sequence of steps could be performed more efficiently - with fewer steps or less effort - with the same or similar result?”.
7.0 Edit the CTA draft in the way the second SME recommends but keep a copy
of the first CTA. Note the reason the changes were recommended by Expert #2.
8.0 Repeat step 6.0 and 7.0 with a third expert. 9.0 Note all areas of disagreement that you cannot reconcile yourself in the three
versions of the procedure and related information. Some SME’s make obvious errors that are caught by other SME’s. If for example, SME #2 and #3 both validate an error in the first CTA it is not necessary to discuss and resolve them in the final meeting. Meet with the experts (and anyone else who must approve the final document) as a group to reconcile their differences and get agreement on one accurate and efficient (fewest steps possible) procedure to be taught in the course you are designing. Explain to the SME’s in the group meeting that the goal is not to duplicate any of their procedures but to generate a procedure that is best for beginning novices who are being trained for the first time.
10.0 If necessary, submit the final draft of the procedure agreed to in the group
meeting for formal approval. Revise as directed. Demonstration of Procedures Continue the demonstration from Lesson 4 with the content of the procedure described in this lesson. Practice and Feedback Practice and feedback for this lesson is similar to lesson 4 except that the CTA documents in Lesson 4 are now being revised and corrected. Insert a Reaction Questionnaire similar to the one described in Lesson 14 at this point and store data collected in each trainees electronic course record.
30
Lesson 6: Concepts, Processes and Principles Notes for Developers: In the next two lessons, trainees will be focused on how to extract the information they collected from the SME’s during CTA and restructure it for later inclusion in the lessons they design. This lesson deals with the description of the three types of conceptual knowledge (also called “declarative knowledge in the research studies on learning) about the job or mission mentioned by SME’s – concepts, processes and principles. The need to teach concepts and processes occur often in training because new terms are introduced and trainees must understand the wider processes that are occurring within and around the job they are learning. Principles are seldom taught or needed outside of “education” the way it is provided in high schools or colleges. The difference between “education” and “training” is, in large measure, the difference between teaching primarily conceptual knowledge (in education where we can’t be certain how and where knowledge will be needed and applied) and teaching primarily procedural knowledge (in training where we know a great deal about when and where knowledge will be applied). Contrary to popular opinion and practice, in most training, it is not necessary to teach conceptual knowledge since clear, accurate and complete procedures are all that is necessary to perform most jobs. However, when the conditions under which a job will be performed change constantly or when novel and/or unexpected situations arise, and when those situations pose a danger to people or equipment, procedures may have to be significantly modified to solve an unexpected problem. Modifying the procedural knowledge someone has learned and practiced requires adequate conceptual knowledge. This lesson requires that you demonstrate both how to make the decision about including conceptual knowledge, and if it must be included, how to design it into GEL Lessons. Learning goals for this lesson
After completing and validating the CTA’s , design trainees will learn how to determine whether the conceptual knowledge (concepts, processes and principles) mentioned by the SME needs to be included in the training they are designing. When design trainees determine that any conceptual knowledge needs to be included in their training design, they will learn where the three different types of knowledge belong in a demonstration as well as how to select examples to demonstrate concepts, how to sketch graphic depictions of processes and decisions, and how to describe the cause and effect relationships that characterize principles.
Reason for this Lesson Learning how to do something often requires foundation knowledge. Some of this foundation is simply being able to recognize new terms or names or to know where something is located or how to identify a new piece of equipment (these are called concepts). Some of it is to know how something works (called a process) or what causes something to happen in a certain way (a principle). Most of us can’t learn a procedure
31
unless we also learn all of the new terms used in the procedure. And in some cases, we are more willing to learn a procedure if we understand the larger process that the procedure is designed to support or the principle that has led to the procedure . These types of knowledge are often called “conceptual” or “declarative” in the research literature on learning and instruction. They allow the students who learn procedures to change the procedures they learn when they encounter unexpected events in the field. Military history is full of examples of soldiers who encountered novel and/or unexpected field situations not covered during training. During some of these unusual events, soldiers have to invent new solutions in order to succeed. New ideas do not spring into our minds without any foundation. Modifying what we know in order to do something new requires background knowledge. What this lesson asks you to do is to decide whether your students will need any conceptual background knowledge in order to either learn the procedures you must design for them or to later modify the procedure when something unexpected happens. Overview: Insert GEL Design Course Outline Model and highlight this lesson on the model. Briefly describe (with narration) the objective and reason for this lesson. Concepts, Processes and Principles that need to be taught in this lesson: Concept Process Principle Conceptual Knowledge Equipment and Materials Required to Perform the Procedure: The trainee will need the printed and/or audio-visual record of the CTA interview with an SME conducted for Lesson’s 3, 4 and 5. The CTA interview records must contain information about the three types of conceptual knowledge and examples of each. Procedure for deciding whether conceptual knowledge must be included in the design and for how to design for concepts, processes and principles Step Actions and Decisions 1 IF the SME or someone familiar with the prior knowledge of your students
advises that some of the concepts being used in the procedure you must teach are unfamiliar to students who will take the training, select those concepts to be taught in advance of instruction on the procedure AND/OR
2 IF the SME or command staff have advised that the procedures being
trained has a high probability of requiring significant modification in the field due to unanticipatable events, teach the concept, process and principle knowledge required to modify the procedure, AND/OR
32
3 If the process and principle knowledge mentioned by the SME during CTA will help to motivate trainees by serving as reasons to perform the procedure exactly as it will be taught, describe the processed or principles as “reasons” for learning and using the procedure.
Procedure for designing instruction on concepts, processes and principles 1 Whenever you decide that students in your course must learn new concepts in
order to learn a procedure or modify it later, design instruction in the concept that follows the outline in the lesson and occurs before the procedure where the new concept occurs. Teach the concept by stating its name, defining it with clear criteria suggested by the SME during the CTA. And provide at least one job-relevant example of the concept. If more than two concepts must be taught in one lesson, provide a separate practice exercise where you give many examples of all of the concepts in a matching format and ask trainees to match the name of each concept to all of its examples.
2 Whenever you decide that students in your course must learn new processes (how
something works) in order to learn a procedure or modify it later, design instruction in the process that follows the outline in the lesson and occurs before the procedure where the new process is relevant. Or, if the process is being described to motivate students, place it in the “reasons:” section of the lesson. Teach a process by drawing on the description you collected during the CTA from the SME to label and create a visual model of the stages in the process and its outcome. Describe the events that occur at each stage in the process in job-relevant terms and where the stage descriptions are fully integrated into the visual depiction of the process. Also describe how the events and products of each stage relate to other stages of the process and the final outcome of the process. If you need to practice and evaluation knowledge of a process, provide a separate practice exercise where you ask students to fill in the blanks on a visual process chart, explain what happens at some of the stages and how different values for events at one stage might influence the outcome of the process.
3 Whenever you decide that students in your course must learn new cause and
effect principles (how one or more causal events change – for example by increasing or decreasing one or more effect events) in order to learn a procedure or modify it later, design instruction in the principle that follows the outline in the lesson and occurs before the procedure where the new principle is relevant. Draw on sections of your CTA document where your SME described steps that support the making cause and effect predictions about the future state of something. Look at how they answered you when you asked “Please describe the cause and effect principle that led you to suggest that series of steps in the procedure. Could you define the principle? What evidence exists for it? Can you point me to some reading so that I can understand it better? Can you give me an example of a way that it works in this job/mission setting so that we could use the example in the training?” Teach a principle by defining it clearly and then show what kinds of
33
problems it solves. Provide practice of a principle by listing a number of types of problems and ask trainees to match the principle with the problems it will solve. Also ask trainees to restate the cause and effect principle and describe the evidence for it.
Demonstration of Procedures Provide a video where a trainee is deciding whether information from the task analysis collected in the two courses will require separate instruction in conceptual knowledge. Set up the demonstration so that only the more complex course will require conceptual knowledge instructioin. Then show an example where the designer finds information in the CTA document about concepts, a process and a principle and designs training on each type of conceptual knowledge. Practice and Feedback Create a key for the practice lessons and design an automated practice and feedback exercise for the conceptual knowledge that is computer based. Insert a Reaction Questionnaire similar to the one described in Lesson 14 at this point and store data collected in each trainees electronic course record.
34
Lesson 7: Conditions, Equipment, Objectives, Standards and Sensory Information Notes For Developers: In this lesson, design trainees are continuing to extract information from the CTA for use in their design. In this lesson they are capturing the enabling conditions for the procedures being taught (what starts the procedure, also called “conditional knowledge” by some experienced training designers), a list of the equipment and materials needed to learn and perform the procedure, the learning objective of the lesson, standards of performance (if required)and sensory information that must be experienced in order to succeed at the procedure. Learning goals for this lesson
Trainees will learn how to locate and describe four types of information (conditions, equipment and materials, objectives, standards and sensory mode information) from a CTA and direct each type of knowledge to the appropriate section of the course they are designing.
Reason for this Lesson Trainees should be told that this lesson gives them most of the remaining information details they need for of the lessons they are designing. Overview: Insert GEL Design Course Outline Model and highlight this lesson on the model. Briefly describe (with narration) the objective and reason for this lesson. Concepts, Processes and Principles: Novel conceptual knowledge is not needed to support this procedure Equipment and Materials Required to Perform the Procedure: Trainees will need access to the full CTA for the example courses they are designing and the capability to cut and paste information from one electronic file to another. Procedure for identifying and inserting information on conditions, equipment, objectives, standards and sensory mode information in a GEL Lesson Step Actions and Decisions 1 For each procedure described by the SME’s in the CTA document locate
the answer to the following questions “Are there any formal or informal orders, permissions or initiating events that must happen in order for the performers to start or continue any part of this procedure? Where does this procedure take place? What context? What happens just before it is implemented? For example, must they be given an order or a formal request in some form? Must something being done earlier be completed?
35
Who decides?” Summarize their answer and translate it into the first step in each procedure to be trained in your course.
2 In the CTA document, locate the answer to the question “What equipment
and materials are necessary to start or to complete any phase of this procedure? Where are they located and how are they acquired?” and place the answer in the Guided Demonstrations section of your course under a heading such as “Equipment and Materials Required to Learn and Use the Procedure”.
3 In the CTA document, locate the SME’s answers to the questions: “Are
there any critical performance standards(for example, time, efficiency, quality indicators) that the person performing this procedure must achieve that would guide us in evaluating the performance of those who are learning and using this procedure?” and place it in a “standards” file.
4 In the CTA document, locate the SME’s answers to the questions “How
would you state the performance goal of this part of the procedure? How would we know, for example, that a trainee would be able to perform the procedure adequately? What is the objective” And place the result in the early part of your GEL Lessons under “Learning Objective”.
5 Check the CTA document to see if the SME indicated that trainees would
have to be able to identify a smell, taste, texture or sound in order to correctly perform the procedure or learn conceptual knowledge. Place all unusual (taste, smell and texture) requirements in a “sensory information” file.
Demonstration of Procedures This demonstration continues the story of the designer(s) who use the CTA to fill in the various sections of the lessons for their course. It is helpful for trainees to see at least two examples of each type of knowledge being located in the CTA and positioned in their lesson. Practice and Feedback Practice locating the four types of information and correctly placing it in a lesson design is required. This practice and the necessary corrective feedback can be automated. Insert a Reaction Questionnaire similar to the one described in Lesson 14 at this point and store data collected in each trainees electronic course record.
36
Lesson 8: Guided Demonstrations Based on CTA Procedures Notes for Developers: This is the lesson where the design trainees must begin to learn how to communicate effectively with developers. The ultimate purpose of all of the procedures and related information collected from SME’s in the CTA is to aid in the design of very accurate and authentic demonstrations of the knowledge to be learned. Designers must “plan” demonstrations but not develop them. Development is your job and designers must give you a plan to flesh out but not tell you how to do your job any more than an architect directly supervises a building contractor. A design is a blueprint and where possible, it should provide developers with clear specifications for the most critical structural level elements needed in the finished course. The important structural elements in a demonstration is that the essential components of the procedure and the organization and presentation of all related information (conditions, equipment, objectives, standards and sensory mode information) must be described clearly enough to support the development of an interesting scenario for a demonstration. Learning goals for this lesson
When provided with a corrected and validated cognitive task analysis document and/or an approved procedure and necessary related information, the design trainee will be able to design an effective demonstration of the procedure for the developer.
Reason for this Lesson From before the beginning of recorded history, human beings learned how to do important things by watching others. The person who was being watched could be said to be “demonstrating”. Demonstrations are the heart of all training courses. When most people think back to the instruction that they have found most useful in their lives, most of us remember teachers or mentors who were very effective at demonstrating ways to accomplish goals (and many who were inadequate). Your job in this lesson is to think of yourself like an architect who is designing specifications (taken from experts in CTA) for a contractor who will build a building. You will not tell the contractor how to do the job, you will however provide a blueprint that contains all necessary components and standards for the building that must be built. The developer will decide how to implement your specifications. They may decide to provide a “live” actor to demonstrate or give verbal (narrated) descriptions of how to do something and/or arrange to have the procedure acted out by a person who is filmed doing the job as they are describing how they do it. The decisions about how to format your specifications belong to the developer. The purpose of GEL Design is to capture the most accurate and effective strategies of top experts and embed them in the most powerful demonstrations that capture and retain the interest of your students. A demonstration is simply an attempt to give an authentic example of a person who is doing what a student will learn how to do in the training course being designed.
37
Overview: Insert GEL Design Course Outline Model and highlight this lesson on the model. Briefly describe (with narration) the objective and reason for this lesson. Concepts, Processes and Principles: There is no novel conceptual knowledge needed to support this procedure Equipment and Materials Required to Perform the Procedure: The design trainee will need the final copy of one or more CTA documents in order to design a demonstration. Procedure for designing demonstrations based on procedures Step Actions and Decisions 1 Read the validated and approved CTA carefully, arrange the procedures in
sequence according to the order you established for your course in Lesson 3.
2 Take the first task in your sequence (the first one to be performed or the
easiest task to learn if none must be performed first) and consult the CTA to extract and arrange the following types of information in it in the following sequence to structure a demonstration for a GEL Course Design:
C) Learning Objective D) Reasons for the task E) Overview (the place of each task in the sequence of the
procedures to be taught) F) The equipment and materials required for the procedure
including the location where it typically takes place G) The action and decision steps in the procedure H) Practice problems (ordered from easy to difficult) I) Performance standards (if any) for each procedure
3 The seven elements above constitute the minimum requirements of a
demonstration of each procedure and so need to be described for the developers in a systematic way.
4 In addition to the seven elements, if the media for course delivery has been
prematurely chosen (note that media should not be determined until later in the design process – see Lesson 13), provide any cautions necessary to the developer about how to facilitate learning by the use of specific production values associated with the delivery media.
38
Demonstration of the Procedure The demonstration should illustrate the design of two demonstrations, one for each of the courses being used as examples. Practice and Feedback Trainees should be given example CTA’s and the requirement to design increasingly difficult demonstrations. Insert a Reaction Questionnaire similar to the one described in Lesson 14 at this point and store data collected in each trainees electronic course record.
39
Lesson 9: Checklists and Practice Review Procedures Notes for Developers: In guided experiential learning all practice exercises are also opportunities for evaluation of learning and a context in which corrective, supportive feedback is offered to the learner. Thus, in this lesson, the design trainees will produce checklists of the steps in each procedure identified in the CTA. These checklists will be used for the computer-based review of automated exercises and by experts who will review students live practice exercises. It may not require a video or you may decide not to offer it as a separate lesson and instead embed it into Lesson 10 on Job Aids (since checklists are the structural basis for Job Aids). Learning goals for this lesson
Given a CTA and the requirements to develop practice exercises for all demonstrations, trainees will be able to produce an accurate procedural checklist for use by experts who will review practice exercises and give feedback to students.
Reason for this Lesson Have you ever been frustrated that most tests simply tell you what you were not correct, but don’t tell you how you could have solved the problem or exactly what was faulty about the strategy you were using on a test or exercise? In guided experiential learning all practice exercises are also opportunities for evaluation of learning and a context in which corrective, supportive feedback is offered to the learner. The checklist you will learn to design in this course is a paper or computer-based copy of a list of the steps students are using to tackle practice exercises. It will enable coaches or tutors to observe student practice and be able to tell them exactly how they need to modify the procedure they have learned in order to succeed. In other words to give them helpful feedback that insures their success instead of only telling them that they were wrong or that they failed. Overview: Insert GEL Design Course Outline Model and highlight this lesson on the model. Briefly describe (with narration) the objective and reason for this lesson. Concepts, Processes and Principles: No novel conceptual knowledge is needed to support this procedure Equipment and Materials Required to Perform the Procedure: Design trainees need a copy of the procedure that students will learn and a way to convert the procedure to a succinct list of action and decision steps with row margins where an observer or coach can check when the step is performed incorrectly and a place for notes by the observer for later feedback to the student. Procedure for developing a procedural checklist to evaluate practice exercises:
40

Step Actions and Decisions 1 For each demonstration, create a paper and/or computer-based step-by- step checklist so that an evaluator who is observing trainees performing the procedure could note whether each step was performed correctly. 2 To create the checklist, restate each critical step in the procedure by summarizing them in three to four words and sequence them in the order in which they are performed. 3 Create a title for the checklist that carries a description of the task or problem-solving being practiced. 4 At the top of the checklist, list the learning goals being evaluated with the checklist. 5 Below the learning goals describe the instructions that students will receive before they practice the procedure being evaluated. 6 At the right hand margin of the list of steps, create two columns and at the top of one column, type “Not Done or Incorrect” and at the top of the other “Correct”. Demonstration of Procedures Provide a demonstration of the development of at least two checklists based on some of the procedures in the CTA’s being used as examples in the course. Practice and Feedback Ask students to format at least two checklists (one relativley simple, one more difficult) from CTA’s they are given during practice. Insert a Reaction Questionnaire similar to the one described in Lesson 14 at this point and store data collected in each trainees electronic course record.
41
Lesson 10: Job Aids to Support Practice and Transfer Notes for Developers: This lesson could be combined with lesson 9 since it also makes use of the procedure to develop a list of steps. In this case, the list is designed to support student’s application of the procedure while it is being transferred and applied on the job. Job aid’s are memory aids. They are designed to be consulted briefly by students who are either getting ready to perform a procedure they are learning or who have momentarily forgotten some of the steps they are implementing. In the past, this kind of support was considered “cheating” and carried negative names such as “crib sheet” or “cheat sheets”. Some trainers believed that job aids actually harmed learning by serving as a crippling “crutch” that prevented students from working independently. While solid research evidence indicates that job aids actually speed learning and enhance performance, it is still difficult to convince some traditionalists. The issue seems to revolve around the difference between education and training. In education, the goal is most often to help students memorize information so that they can recall it when it is needed. Remembering is vital to education and so memory aids can prevent some students from learning to remember on their own. In training, the goal is to help trainees learn to apply procedures appropriately and accurately. When procedures are learned, they become gradually automated so that we do not have to think about them or “remember” them, we only have to be able to “do” them when called on. Job aids help novices with the constant practice that causes their performance to gradually automate. The fact that most experts cannot remember or tell us accurately how they make decisions (and therefore we need cognitive task analysis) is an indicator of the limited role of memory in the learning of even the most complex types of expertise. Learning goals for this lesson
After completing the design of checklists, the trainee will learn how to design effective job aids to support students while they are practicing each procedure during training and on the job after training.
Reason for this Lesson A job aid is a brief, static, flow-chart like summary of the sequence of steps in a procedure (or series of linked procedures) required to succeed at a task or mission. Job aid’s are produced during the development process. They are often either paper based and/or available “just in time” as a visual graphic available on portable DVD, CD or other visual media. The purpose of a job aid is to be carried around by those who are learning a job in order to remind them about the sequence of procedures and/or the sequence of main decision and action steps in any one procedure. The reminder must be available to them “on or near the job” so that they can review correct procedures as they are applying them “in the field”. There is evidence that job aid’s speed the learning of complex procedures. This evidence is counter intuitive for some educators who worry that job aids may retard learning by acting as a “crutch” that prevents learning for trainees who will rely on the aid and not on themselves. The evidence from a number of studies suggests that job aids not only make the transfer of learning to the field more
42
effective, they also speed the process by which learners become more automated and fluid in their use of new skills. Students will use job aids when they are learning but will give them up quickly when new skills are established. Thus, as part of the development process, all procedures taught in this course should be accompanied by job aids based on all of the procedures developed during cognitive task analysis and all other instructional modules in this course. Designers who want more information about job aid development might wish to consult an excellent book: Rossett, A. & Gauthier-Downes, J. (1991) A Handbook of Job Aids. San Francisco: Jossey Bass Publishers Overview: Insert GEL Design Course Outline Model and highlight this lesson on the model. Briefly describe (with narration) the objective and reason for this lesson. Concepts, Processes and Principles: No novel conceptual knowledge is needed to support this procedure Equipment and Materials Required to Perform the Procedure: Job aids, like checklists, are based on the steps in a procedure and so the designer only has to summarize the key words for each major step to support the development of each job aid. Therefore the requirements for checklist and job aid design are the same. Procedure for the design of job aids Step Actions and Decisions 1 For each procedure, create a paper and/or computer-based job aid with abbreviated step-by step key word descriptions of how to perform each step in the procedure. 2 To create the job aid, restate each critical step in the procedure by summarizing them in three to four key words and sequence in the order in which they are performed. 3 Create a title for the job aid that carries a description of the task or problem-solving being practiced. 4 At the top of the job aid, list the performance goal, the conditions for starting the task, equipment and materials required, any standards that must be achieved and any special sensory information they must identify.
43
Demonstration of Procedures Show design trainees translating procedures and checklists to support the development of job aids. The designer responsibility is to choose the key words for the steps and summarize related information (for example the conditions, standards and sensory mode information). It is the developers job to translate the outline into an appealing document. Practice and Feedback Trainees should practice translating a procedure and a checklist into the design for a job aid. Insert a Reaction Questionnaire similar to the one described in Lesson 14 at this point and store data collected in each trainees electronic course record.
44
Lesson 11: Guided Practice Exercises Based on Demonstrations Notes for Developers: Another key feature of GEL design is the amount of guidance provided during practice. Transfer from training and application of new skills in work settings is promoted when learners are required to use their new knowledge or skill to solve increasingly difficult and varied problems in varied contexts where corrective feedback is given and gradually faded as learning and transfer occurs. To accomplish learning and promote transfer to the job, after students see a demonstration of the procedure they are learning, they must immediately be faced with the opportunity to apply what they witnessed. The practice problems they are given and the context of their application should mirror the essential conditions in the setting where they will use the skills eventually. To support practice, design trainees were instructed in Lesson 3 to identify a number of authentic job-related problems of increasing difficulty for each of the learning tasks taught in GEL courses. Those problems will now be used as vehicles for practice. If the CTA procedure is accurate, when students apply it they should accomplish the task successfully. If they fail, either the procedure is wrong or incomplete or the student has not learned. In order to determine whether the students use the procedure, evaluators will use the checklists designed in Lesson 9 to determine whether they implemented all necessary steps in the correct sequence in order to achieve the goal of each task. Students will also be using job aids (lesson 10) to support their practice. Where possible, automate the review and use of checklists for practice and feedback to make it more cost-beneficial. Learning goal for this lesson
When the design for a demonstration is drafted, the design trainee will learn to accurately implement the procedure for designing an effective practice exercise based on the increasingly difficult authentic problems developed in Lesson 3.
Reason for this Lesson Most of us have the experience of sitting in classrooms where teachers demanded we learn abstract knowledge that seemed useless and isolated from real life. The practice exercises in GEL design attempt to overcome this problem by providing students with authentic job-related problems they’ll be asked to use the knowledge they’ve gained in the demonstrations to solve increasingly difficult but totally authentic problems similar to those they will encounter on the job. Solid evidence exists in many research studies to support the claim that the learning of new skills and their transfer from training to application work settings is promoted when learners are required to practice what they are learning. The most powerful learning occurs when practice involves the solving of increasingly difficult and varied problems while being given corrective feedback that is gradually faded as learning and transfer occurs. In this lesson, you will learn how to provide this kind of practice.
45
Overview: Insert GEL Design Course Outline Model and highlight this lesson on the model. Briefly describe (with narration) the objective and reason for this lesson. Concepts, Processes and Principles: There is no novel conceptual knowledge needed to support this procedure Equipment and Materials Required to Perform the Procedure: Design trainees need the list of problems developed for Lesson 3 and the plan for a demonstration of a number of tasks or problems to solve and access to drafts of checklists and job aids for the demonstrated procedures for which they will design practice. Procedure for designing practice exercises: Steps Actions and Decisions 1 Begin by going back to Lesson three and selecting the simplest
problem or task you collected from the experts related to one of the demonstrations you have designed. Describe for the developers a way to present the first practice problem and/or task to trainees by embedding it in a context or setting that is as authentic as possible and describe how developers should ask students to solve the problem or perform the task using the same procedure they viewed during the demonstration.
2 Simpler problems should be given first in a practice exercise, then
more complex and varied problems later in the exercises wherever possible. As problems develop in a course, new problems should include elements that can only be solved by using knowledge from previous lessons so that problems become “cumulative” and wider in scope, giving trainees an opportunity to continue to practice previously learned procedures.
3 In longer training exercises, it is very important to occasionally
insert very large exercises that draw on many previous lessons and ask trainees to assemble everything they have learned to that point and practice a series of procedures together. These “cumulative exercises” do not have to be preceded by a demonstration and can “stand alone” in a training course. An informal rule is that every four to five lessons should be followed by a cumulative exercise and that one should occur at the end of every course.
4 In your development plan for each practice exercise, require that
the trainees have access to a job aid in the early stage of their practice to help them apply the procedure and require that the
46
result of their practice be evaluated by direct observation of their performance using the checklist you designed in Lesson 9.
5 As you design each practice exercise, suggest ways that the
developer can provide the most authentic, job and mission-based context for the practice so that it seems “realistic” to the students and helps them immerse themselves in the practice and contextualize what they are learning to promote transfer to the job.
6 Apply the feedback strategy described in Lesson 12 (next) and
when trainees have successfully completed the first practice exercise on the simpler task or problem, repeat steps 1, 2, 4 and 5 with the next most complex problem or task until all problems have been practiced. Then design the next exercise until practice for all procedures have been completed.
Demonstration of Procedures Continue the demonstration based on the two courses being designed. In this segment the trainees should design at least two demonstrations with practice exercises for each, drawing on problems from lesson 3, checklists from lesson 9 and job aids from lesson 10. The discussion should also highlight ways to draw on the CTA to design the most “authentic” immersive environment for the demonstration and practice exercise. Practice and Feedback This practice is critical. Along with demonstrations, the design of authentic, guided practice exercises (and feedback) is the most important component of GEL design. Since much of the immersive training movement and the gaming technology have focused on authentic practice, this lesson will add an effective support structure to immersion and games that are used in training. Trainees should be required to develop a number of designs for practice ranging from relativley simple to more complex. This lesson is a very appropriate place to require a “cumulative” practice exercises described in step three in the procedure above. Insert a Reaction Questionnaire similar to the one described in Lesson 14 at this point and store data collected in each trainees electronic course record.
47
Lesson 12: Feedback on Practice Exercises. Notes for Developers: The information we give students about the accuracy and quality of their practice during training has a much larger impact than most of us realize. In a recent, comprehensive survey of all feedback research in many countries and cultures, Kluger and DiNisi (1998)4 found that a third of all studies reported that people learned less with a very popular kind of feedback. Another third of the studies they examined used feedback methods that made no difference at all, and only a third of the published studies demonstrated positive impact. This lesson implements the type of feedback that Kluger and DiNisi found that worked and asks designers and developers to avoid the type of feedback that made things worse in training. The challenge in this lesson is to overcome the beliefs of many traditional trainers who have been taught that the most effective feedback during practice is to immediately and loudly point out mistakes and criticize or threaten the person who made them. In your development of this lesson, it may as important to make the case about what NOT to do (and why) as it is to demonstrate the most effective method for giving feedback. Where possible, feedback should be automated and provided by the computer. In situations where practice must be observed by live experts using checklists, those experts must be trained to give effective feedback. Learning goals for this lesson
When a demonstration and practice with accompanying job aids and checklists have been designed, the design trainee will learn to provide developers with an effective plan for providing guided learning feedback to trainees who are practicing.
Reason for this Lesson Think back to the times in your own educational experience when you either did not receive any feedback on your progress when you needed it, or got feedback that was insulting or discouraging? Some teachers (and some parents) use negative feedback in the form of “You made a mistake” or “You screwed up” or the more abusive “You are stupid” to get our attention and control our behavior. Anger is often the first reaction to a kid or an adult who has not done what was expected or intended. Yet anger-based feedback during training most often has an effect that is the reverse of what is expected. It causes most (but not all) people to react with anger, resentment and resistance. People have to make mistakes in order to learn. Mistakes tell us a lot about how someone is learning and about the effectiveness of our instruction (if everyone is making the same mistake, we should look at our instruction and not their understanding as the cause of the mistakes). No one learns without mistakes. So your job as a designer is to arrange for feedback that clearly acknowledges the “naturalness” of mistakes and that helps students correct their mistakes without anger or resistance. The feedback strategy you are asked 4 Error! Main Document Only.Kluger, A. and DiNisi, A., June,1998. Feedback Interventions: Toward the Understanding of a Double-Edged Sword. Current Directions in Psychological Science . Vol. 7. No. 3. pp. 67-72.)
48
to use in this lesson has been tested in research conducted with people from many cultures and seems to work best for most. It is based on the survey of all feedback research conducted by Kluger and DiNisi (1998) who reported that a third of all studies reported that people learned less with mistake-based or abusive feedback. Another third of the studies they examined used feedback methods that made no difference at all, and only a third of the published studies demonstrated positive impact. This lesson implements the type of feedback that Kluger and DiNisi found that worked and asks designers and developers to avoid the type of feedback that made things worse in training. Procedure for training experts or programming a computer to give students feedback on their practice exercises and monitoring their performance to insure accurate learning and transfer: Step Actions and Decisions 1 Create a plan to develop a scenario for training developers that
illustrates the use of a procedural checklist as coaches and computers observe the performance of students who are practicing. The observer checks all accurately performed steps and notes any steps that are incorrectly performed.
2 When trainees perform steps correctly, give feedback that focuses
on the strategy or approach they are using such as “The strategy you are using works” or “The steps you used were accurate … and they solved the problem”.
3 When trainees are correct, do NOT give feedback that focuses on
the person or team such as “You are correct”. Similarly, when trainees make mistakes, do NOT give feedback that attributes blame to them such as “You are wrong.” or “You made a mistake.”.
4 When trainees make mistakes on steps:
4.1 First give feedback that points out the correct segments of the procedure (“The approach used in the first half – or on steps xx - was correct”) unless the trainees approach was entirely wrong.
4.2 Next, after you have acknowledged what they did correctly, ask them
to modify the approach on the steps where mistakes were made (“The approach to the second part of the procedure needs to be revised because ...”).
49
4.3 If possible, give trainees the option to review that part of the demonstration where they made mistakes before they are given another practice problem by suggesting “Next you’ll be asked to solve a similar problem (perform a similar task). If you’d like to review the procedure again before tackling another problem (task) click on the xxx icon. Revise the approach that did not work on the last attempt before you tackle another exercise.”
5 Provide a new problem or task that is similar to the one where trainees
experienced problems and ask them to “Try again with a revised approach” and Repeat steps 1 to 4 once more.
5.1 If the trainee is successful, ask them to “Move on to the next
demonstration and practice”. 5.2 If however, trainees do not modify their approach and make the same
mistakes, ask them to study the job aid and watch the demonstration of the procedure and then return to repeat the practice exercise after a time delay.
5.3 If trainees continue to make old or new mistakes after the review in
step 5.2, give them instructions on how to contact an advisor who will help explain the part(s) of the procedure that are causing them difficulty. It is possible that trainees who cannot (or will not) correct their mistakes should not have been placed in the training.
5.4 Set a criterion for how many practice exercises students must complete
without mistakes (one or more) before they can exit a lesson and proceed to a different practice or a different lesson.
Demonstration of Procedures Continue the demonstration based on the two courses being designed. In this segment the trainees should design feedback for at least the two practice exercises they used in the previous lesson. Practice and Feedback As in Lesson 11, this practice is also critical. Along with demonstrations, the design of authentic, guided practice exercises and feedback are the most important components of GEL design. Since much of the immersive training movement and the gaming technology have focused on authentic practice, this lesson will add an effective support structure to the feedback provided in immersion and games that are used in training. Trainees should be required to develop a number of designs for feedback ranging from relativley simple to more complex.
50

Insert a Reaction Questionnaire similar to the one described in Lesson 14 at this point and store data collected in each trainees electronic course record.
51
Lesson 13: Selecting Media for Course Delivery Notes For Developers: GEL design swims upstream against the practice of selecting media before design begins. In the view of a number of instructional design specialists, this premature decision causes some of the most important problems we’ve experienced in the past. If more than one medium will have the same learning and performance impact in a course, the choice of media is an economic issue – one mix of media will usually be less expensive (and more easily available to learners) than another mix. The best evidence is that nearly all learning goals can be achieved from instruction that is presented by more than one media.5 The choice emphasized in the procedure to be taught in this lesson is between “face to face” instruction – primarily for small groups of trainees, or for larger groups where extremely complex procedures must be practiced in the field where live experts can observe them and give feedback or where unusual sensory information must be constantly available (for example many different smells and textures). Learning goals for this lesson When assigned to design a GEL course, design trainees will be able to
effectively implement a cost-beneficial selection of either face to face or distance learning delivery platforms for GEL Training Courses.
Reason for this Lesson GEL design attempts to separate two activities that, when combined, have caused many problems for the training profession in the past. Often the media for a course are selected first and development starts immediately. This is similar to starting to build a building without a plan and with only available materials. A more systematic approach gives better results in the building trades and in training. Since cost is a big issue in training, the most economically sane way to plan a course is to make certain that the media chosen for delivery will permit your design and all of the developers art to be provided to the student. It will also insure that the scarce resources available for training are invested in the courses that truly require them, not in courses that could have had maximum impact without spending large amounts on delivery media. The procedure you’ll be using in this lesson is state of the art and science for media selection during the design process. Overview: Insert GEL Design Course Outline Model and highlight this lesson on the model. Briefly describe (with narration) the objective and reason for this lesson.
5 Evidence for this claim can be found in: Clark, R. E. (2001). Learning from Media: Arguments, Analysis and Evidence. Greenwich, Conn: Information Age Publishers. ISBN 1-930608-77-2. A review of all published media selection strategies is available in: Sugrue, B. and Clark, R. E . (2000), Media Selection for Training. In, Tobias, S. and Fletcher, D. (Eds.), Training Handbook, New York: Macmillan
52
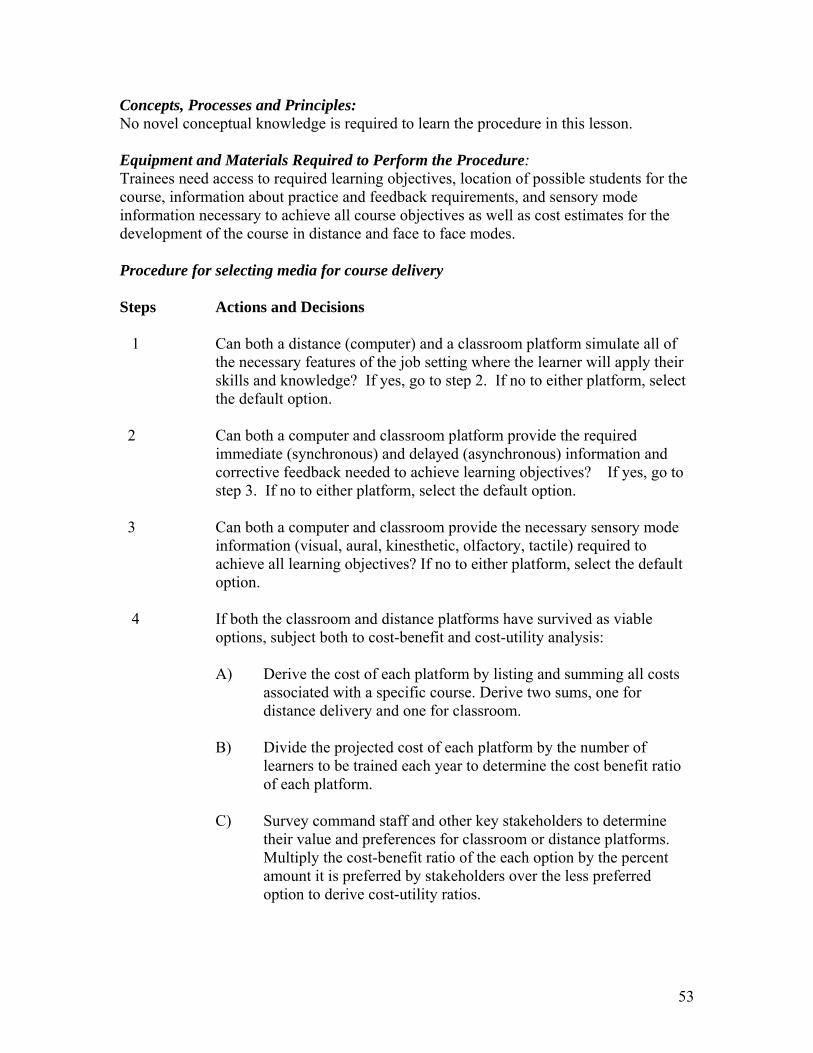
Concepts, Processes and Principles: No novel conceptual knowledge is required to learn the procedure in this lesson. Equipment and Materials Required to Perform the Procedure: Trainees need access to required learning objectives, location of possible students for the course, information about practice and feedback requirements, and sensory mode information necessary to achieve all course objectives as well as cost estimates for the development of the course in distance and face to face modes. Procedure for selecting media for course delivery Steps Actions and Decisions 1 Can both a distance (computer) and a classroom platform simulate all of
the necessary features of the job setting where the learner will apply their skills and knowledge? If yes, go to step 2. If no to either platform, select the default option.
2 Can both a computer and classroom platform provide the required
immediate (synchronous) and delayed (asynchronous) information and corrective feedback needed to achieve learning objectives? If yes, go to step 3. If no to either platform, select the default option.
3 Can both a computer and classroom provide the necessary sensory mode
information (visual, aural, kinesthetic, olfactory, tactile) required to achieve all learning objectives? If no to either platform, select the default option.
4 If both the classroom and distance platforms have survived as viable
options, subject both to cost-benefit and cost-utility analysis:
A) Derive the cost of each platform by listing and summing all costs associated with a specific course. Derive two sums, one for distance delivery and one for classroom.
B) Divide the projected cost of each platform by the number of
learners to be trained each year to determine the cost benefit ratio of each platform.
C) Survey command staff and other key stakeholders to determine
their value and preferences for classroom or distance platforms. Multiply the cost-benefit ratio of the each option by the percent amount it is preferred by stakeholders over the less preferred option to derive cost-utility ratios.
53
5 Select the delivery platform option that survived steps 1 to 3 and is most cost effective and cost beneficial.
Demonstration of Procedures Continue the demonstration and practice based on the two courses being designed in the demonstrations and practice. In this segment the trainees should see a scenario where the design trainees select the delivery media for each of the classes. Practice and Feedback A number of media selection problems will have to be developed for this demonstration. Insert a Reaction Questionnaire similar to the one described in Lesson 14 at this point and store data collected in each trainees electronic course record.
54

Lesson 14: Four Level Evaluation Design for GEL Courses Notes for Developers: Evaluation is an activity that gives us information about what works as intended and what needs to be improved. Evaluation is where the rubber hits the road in training. Everyone wants evidence that a design will work when an investment is made in its full production, and that it continues to be effective over time. GEL design utilizes a well-established, four level evaluation model developed by Kirkpatrick (2001)6 and employed most often in business settings. The model permits us to insert evaluation into training in an unobtrusive and natural manner and to use the results to tune the design and developed product to maximize its success. In the development process you will be asked to first produce a draft of all lessons and to subject that draft to formative evaluation on two of the Kirkpatrick levels. First, Level I, Reactions – answers the question “Do the trainee value the lesson? Are they confident that they can learn it and use it effectively later in their jobs? What advice do they have for us about improving the lesson?”. The second level, Learning during training, answers the questions “Did they learn what was taught? Are they able to perform the procedures to the established standard?”. After your scripts, storyboards and related draft materials are formatively tested at these first two levels, they will be revised. Later tests will be focused on the remaining levels – Level III where we ask about the transfer of training to the job (this issue is covered in this lesson and in the final lesson of the course) and Level IV “Results” evaluation is where we check to see if the new knowledge and skills the students have learned and transferred to their jobs or mission have solved the problems that led to the request for the course you developed. Your job is not only to include all four levels in your developed course but also to find a way to record and analyze the data that results from the formative test of drafts an to help your clients assemble and analyze data from this course across its lifespan. Learning goals for this lesson
When designing a GEL Course, design trainees will learn to draw on procedural checklists and other course elements to provide clear and accurate specifications for the development of four levels of evaluation for every course including level I (Reactions) using questionnaires and Level II (Learning) using procedural checklist based data after each practice exercise; Level III (transfer) using questionnaires for supervisors and command staff and Level IV (results) where analysis plans will check the impact of the course on the problem identified during the needs analysis that led to the initial request for the course.
6 Kirkpatrick, D. (2001) Chapter 12: The four-level evaluation process. In Ukens, L. L. (Ed.), What Smart Trainers Know: the Secrets of Success from the Worlds Foremost Experts, San Francisco: Jossey-Bass Pfeiffer. 122-132.
55
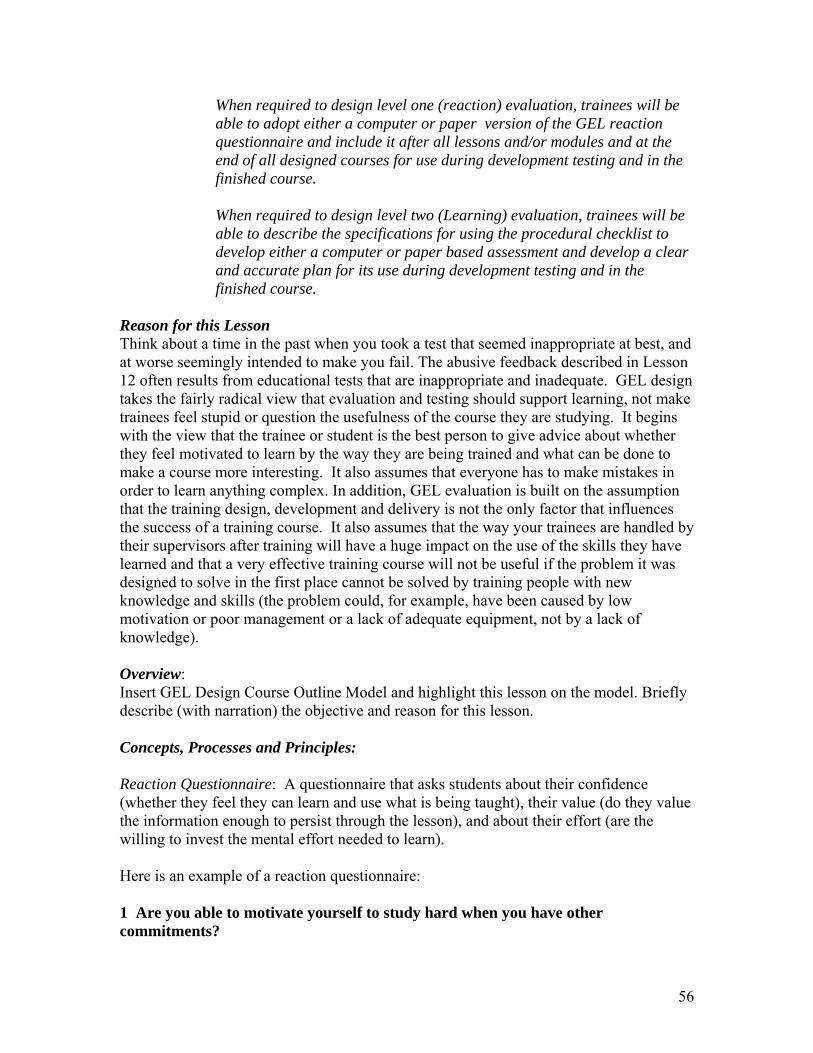
When required to design level one (reaction) evaluation, trainees will be able to adopt either a computer or paper version of the GEL reaction questionnaire and include it after all lessons and/or modules and at the end of all designed courses for use during development testing and in the finished course. When required to design level two (Learning) evaluation, trainees will be able to describe the specifications for using the procedural checklist to develop either a computer or paper based assessment and develop a clear and accurate plan for its use during development testing and in the finished course.
Reason for this Lesson Think about a time in the past when you took a test that seemed inappropriate at best, and at worse seemingly intended to make you fail. The abusive feedback described in Lesson 12 often results from educational tests that are inappropriate and inadequate. GEL design takes the fairly radical view that evaluation and testing should support learning, not make trainees feel stupid or question the usefulness of the course they are studying. It begins with the view that the trainee or student is the best person to give advice about whether they feel motivated to learn by the way they are being trained and what can be done to make a course more interesting. It also assumes that everyone has to make mistakes in order to learn anything complex. In addition, GEL evaluation is built on the assumption that the training design, development and delivery is not the only factor that influences the success of a training course. It also assumes that the way your trainees are handled by their supervisors after training will have a huge impact on the use of the skills they have learned and that a very effective training course will not be useful if the problem it was designed to solve in the first place cannot be solved by training people with new knowledge and skills (the problem could, for example, have been caused by low motivation or poor management or a lack of adequate equipment, not by a lack of knowledge). Overview: Insert GEL Design Course Outline Model and highlight this lesson on the model. Briefly describe (with narration) the objective and reason for this lesson. Concepts, Processes and Principles: Reaction Questionnaire: A questionnaire that asks students about their confidence (whether they feel they can learn and use what is being taught), their value (do they value the information enough to persist through the lesson), and about their effort (are the willing to invest the mental effort needed to learn). Here is an example of a reaction questionnaire: 1 Are you able to motivate yourself to study hard when you have other commitments?
56

1 2 3 4 5 6 7 Not at all Not much Fairly well Very well 2 How much do you value the skills you are learning in this course (section)? 1 2 3 4 5 6 7 Not at all Not much Somewhat Very much 3 Did (Are) you enjoy (ing) the (this section of the) course? 1 2 3 4 5 6 7 Not at all Not much Somewhat Very much 4 How much mental effort was required to learn from the course up to this point? 1 2 3 4 5 6 7 None, it’s easy Not much Quite a bit Too much, its very difficult 5. How confident are you that you’ll be able to learn and apply the content of this part of the course? 1 2 3 4 5 6 7 None at all Not much Some of it Most all of it The second part should provide a field where the trainee can answer two open questions:
6. How would you change this lesson (section of the) course so that it was more useful and interesting to you? Be as specific as possible.
7. What part of this lesson (section of the) course did you enjoy the most and
why?
Other questions can be added as needed by designers. Equipment and Materials Required to Perform the Procedure: Design trainees will need access to the practice exercises, feedback and checklists they have designed and the capacity to create electronic text files where they can describe the specifications for developers who will produce materials and media for four levels of evaluation. Procedure for designing level I (Reaction) evaluation Steps Actions and Decisions 1 When you have completed the practice and feedback plan for your lessons,
create a paper or electronic draft of a reaction evaluation questionnaire that includes the following elements:
57
a) One open-ended questions where you ask students to tell you specifically how they would improve the lesson (or any part of a lesson)to make it more effective or motivating for them , and, b) One open ended question where you ask students to tell you what they liked or appreciated about the lesson (or any part of a lesson) and why, and, c) At least four closed “Likert” style questions (see example) where you ask them to rank, on a scale of one to five or seven (always an odd number of choices to prevent the selection of a middle point) to rank 1) how confident they are that they will be able to learn and apply the knowledge in the lesson; 2) how much they value what they are learning; 3) how much effort is required to learn; and 4) whether they are able to stick at the lesson and persist in the face of distractions.
2. Create a plan to capture interesting elements of the students answers to the
open ended questions by listing the features they like and those they would change (and how they would change them). Send a summary of these responses to the managers of the course periodically.
3 Capture student responses to the numbered items with a computer program
that stores them and permits them to be analyzed along with student performance data from Level II and III evaluations.
Procedure for designing Level Two (Learning) evaluations for GEL Courses and lessons: Steps Actions and Decisions 1 Level two evaluation can be designed even if level one evaluation is
negative. Students sometimes learn a great deal from training courses that they dislike. So regardless of the outcome of level one evaluation, level two should be designed and implemented.
2 In the rare event that a task analysis indicates a need to teach conceptual
knowledge in a lesson and it is determined that they must be learned and remembered, design the specifications for a learning test by describing either a matching test (matching mixed, job related examples with concept names) or by describing a set of job or mission-related problems that can be solved by using the process or principle knowledge. 3 Whenever the task analysis indicates a need to teach a procedure, instruct
developers work with experts to set a minimum performance criteria on the procedural checklist to use the results of the procedural checklist data on each practice exercise to determine whether trainees achieved the
58

criteria for learning and how many trials (rounds of feedback and revision) was required.
4 When course certification is indicated and an “end of course” learning
assessment is required, design specifications for an end of course test that provides items from both step one and step two above. Write specifications for a cut score that would represent the level of skill development required to achieve the job or mission.
Procedure for designing Level Three (Transfer) evaluations for GEL Courses and lessons: Steps Actions and Decisions 1 Level three evaluation is never implemented if level 2 evaluation indicates
that people did not learn enough to achieve the minimum criterion set for a course. If not enough learning occurred, no transfer is possible. So if level two is successful, proceed to the next step.
2 Wherever level two evaluation is designed, level three must also be
included. Level three evaluation requires the letters to supervisors described in Lesson 18 and the involvement of those who will supervise the students after they complete the course being designed.
3 Draw on the procedural checklists and end of course level two
assessments described in steps two and three in the level two procedure. Develop a summary, master version of the procedural checklists for the supervisors of students who complete the course successfully and go back to their units. The master checklist should be a list of procedures (not a list of steps). The master checklists should highlight the most important skills learned so that supervisors can indicate whether each individual and unit can and do perform the procedures in the field.
4 Direct the managers of the course to send the letter developed in Lesson
18 to supervisors to accompany the checklists and request a return of the checklist with data on the transfer performance of each student within two to three months after they complete training and return to their unit.
5 Place all transfer data in a master file for the course and use it to identify
any dysfunctional aspects of the lessons that need to be changed when the course is revised.
59
Procedure for designing Level Four (Results) evaluations for GEL Courses and lessons: Steps Actions and Decisions 1 Designers and developers are seldom required to produce level four
designs, however wherever you receive a specific request for level four evaluation you must first request access to the “needs analysis” data that began the process of identifying the problems to be solved by the course you have designed. Level four evaluation is a check on the needs analysis process in that it is intended to provide evidence for whether the performance needs or problems that were identified initially as a reason to design the course have been satisfied or solved by the knowledge that was transferred to the field from the course.
. 2 Level four evaluation is never implemented if level two evaluation
indicates that people did not learn enough to achieve the minimum criterion set for a course. It is seldom implemented if level three evaluation indicates that they did not transfer it to the field. The exception to this rule is when mangers want to check the current status of a needs analysis. So if level three was successful or your supervisors want to check on the current status of needs analysis, proceed to the next step.
3 Level four evaluation requires that you simply repeat the needs analysis
that resulted in the course requirement. If the need is no longer present, it may be that the knowledge acquired in the course and transferred to the field eliminated the need by producing the desired result. Where possible, compare “before” (pre test) and “after” (post test) data to determine the level of impact. Where possible, estimate the cost of the problem and the benefit of the result. If you require a specific level four design, read the following article and implement the design it describes: Clark, R. E. & Snow, R. E. (Fall, 1975) Alternative designs for instructional technology research, AV Communication Review. 23(4).
Demonstration of Procedures Continue the demonstration based on the two courses being designed. In this segment the trainees should design evaluation at level one and two for at least the two practice exercises they used in the previous lesson. Evaluation offers the opportunity for creative development technology. For example, the level I questionnaire could be presented by a narrator and student replies captured with voice recognition software. Student information about what mot ivates them could be captured and translated into individually tailored reasons for investing effort in future lessons.
60

Practice and Feedback Trainees should be required to develop a number of level I and II designs for the courses being developed and perhaps also to submit plans for level III designs. However, Level IV designs go beyond the scope of most evaluation plans for designers. Insert a Reaction Questionnaire similar to the one described in this lesson (at the end of this lesson) and store data collected in each trainees electronic course record.
61
Lesson 15: Test of Prior Knowledge for Prospective Trainees Notes for Developers: This test is designed for prospective trainees – to see if they have the prerequisite knowledge to benefit from the course or if they do not need it because they already know how to conduct GEL Design. If possible, the test should be automated. One alternative would be to use this test to focus prospective students on some lessons more than others (many design trainees will, for example, be familiar with the Kirkpatrick four level evaluation system). Learning goals for this lesson When assigned to design a GEL course, design trainees will learn when and how to design a test of prior knowledge for their course. Reason for this Lesson One of the wiser old trainers said that “People are often assigned to training as a reward - a vacation from work - or as a punishment -to get rid of a problem person for a while”. While nothing much can be done to prevent managers from assigning people to training for the wrong reason, we can prevent people from wasting their time in a training course. Have you ever been assigned to take a course where you already knew most everything that was being presented? Or have you had the uncomfortable experience of having been assigned to a course where you were over your head? This test to be designed in this lesson is an attempt to prevent a waste of time and resources by selecting people for training who can benefit from it. Overview: Insert GEL Design Course Outline Model and highlight this lesson on the model. Briefly describe (with narration) the objective and reason for this lesson. Concepts, Processes and Principles: No novel conceptual knowledge is required to learn the procedure in this lesson. Equipment and Materials Required to Perform the Procedure: Trainees need access to example files of procedures, checklists and conceptual knowledge included in the course and the capability to create new text files on the computer. Procedure for designing a test of prior knowledge for prospective students Steps Actions and Decisions 1 Make a separate file of all concepts, processes and cause and effect
principles to be taught in the course along with their definitions and examples.
62
2 Randomly select a sample of approximately 25 of the key concepts and the related examples of each concept collected during the CTA (or 5 percent of the total concepts, whichever is greater) and three or four of the major processes and principles from the file created in step 1 to serve as part of the test of prior knowledge.
3 Select three or four of the outline form (captured in the validated CTA) of
the key procedures to be taught in the training and place them in the file along with the concepts, processes and principle definitions and examples.
4 Create a computer-based test where course definitions for selected key
concepts will be presented in a matching format (ask prospective trainees to match the concept names with the appropriate examples).
5 Test processes by showing a partial process chart and ask prospective
trainees (in a multiple choice format) to indicate the next stage in the process.
6 Test the principles by asking (in a multiple choice format) what type of
problem each principle solves. 7 Test the procedures by displaying a few steps from each procedure and
asking trainees to finish the procedure by typing in the remaining steps (check the typed answers with word recognition software – or use a multiple choice format for the remaining steps).
8 Validate the test by giving it to a number of experienced designers and
novices and test to see whether the test reliably identifies the two groups. Revise items that are poor predictors.
Demonstration of Procedures Show GEL design trainees designing two tests of prior knowledge for the two courses that have been used throughout as examples. Practice and Feedback Ask the trainees to design a test for prior knowledge and submit it for review Insert a Reaction Questionnaire similar to the one described in Lesson 14 at this point and store data collected in each trainees electronic course record.
63
Lesson 16: Introduction to the Course Notes for Developers: At this point in the design process most of the content of the course to be developed has been designed and the design trainees need to be thinking of how to introduce it. The primary goal of an introduction to a course is to motivate students and give them an impression of what they will encounter in the course and why. The more that the introduction engages people and entices them to interact and want to see more of the course, the more effective it will be. Learning goals for this lesson
In this lesson, design trainees will learn how to describe the goals and specifications for the introduction to a GEL course for developers.
The goal of the introduction for the students who will eventually receive the developed version could be stated as: At the conclusion of the introduction and when asked, trainees will be able to verbally describe the reason for GEL design and the course, outline of the sequence of lessons to be presented and describe the first task they will be asked to perform
Reason for this Lesson Like the beginning of a movie, the introduction to a course, if it is well designed and developed, can be a very powerful motivator for students who may enroll in it. The goal in this lesson is to give an accurate overview of the course you have designed. Equally important is to help the developers of the course to produce an exciting and enticing preface to what will follow. Overview: Insert GEL Design Course Outline Model and highlight this lesson on the model. Briefly describe (with narration) the objective and reason for this lesson. Concepts, Processes and Principles: No novel conceptual knowledge needs to be learned in this lesson Equipment and Materials Required to Perform the Procedure: All of the files generated for the course must be available to the design trainee so that they can draw on them to outline the introduction to the course. Specifications for the introductory video- Produce a narrated, introduction video that contains the following elements:
A brief description of guided experiential learning and reasons for learning how to us it in instructional design.
64
Describe an overview of the course and explain to the trainees that they will be designing different sections of their course out of sequence and then assembling them in the correct order at the end.
In an early segment of the course they will learn how to interview subject matter experts in order to select many different representative tasks and problems at different difficulty levels that their trainees will learn to perform and solve.
Later in the course they will learn why and how to interview SME’s with a new technique called “cognitive task analysis”. This approach will allow them to capture “how to” information from the SME’s in the form of “worked examples” describing a way to solve problems and perform tasks. This information will become the backbone of their training design so that with practice, their trainees will eventually be able to “do it like the experts”
Emphasize in your explanation that with experience, experts become very automated and unconscious about their expertise and so it is difficult for them to provide a completely accurate explanation to trainees when asked to explain how they solve problems and make decisions. Cognitive task analysis overcomes this problem.
After capturing “how to” knowledge and validating it with other experts, the trainees will translate it for students into effective, learning-goal-focused demonstrations called “worked examples”.
Explain that evidence from research and best practice is that trainees who experience these worked examples learn much more quickly, efficiently and effectively. The worked example serves as a “mental model” or example of the problem solving or task performance procedure for trainees to draw on and transfer to the field.
65
Lesson 17: Assembling Finished Course for Review Notes for Developers: This lesson departs a bit from the usual set of fixed headings used in the rest of the course. While this developed lesson should look similar to the others, much of the content of the lesson has been developed in previous lessons and only need to be assembled into lesson size chunks organized according to the common sequence for all GEL lessons. In addition, design trainees must learn how to give instructions that direct developers to produce a coherent draft of all of the lessons in the course so that it can be tested and revised. The model for lesson assembly process is presented next and following the lesson model, is an outline plan of the development process. Learning goals for this lesson
In this lesson, design trainees will learn how to assemble their course according to the GEL Lesson outline, to describe the specifications for developers who will be producing a draft that can be tested and to provide a plan for the test and revision of the course before the final production of training materials.
Reason for this Lesson Design seldom takes a straight path from beginning to end. GEL Design is no exception. It requires that we build a course in parts and then assemble them at the end into a coherent GEL pattern. This is the place were all of the pieces you’ve designed get put together using the GEL Course and Lesson Structure Model as a template.. Start at the beginning and use the process model (at the end of this procedure) to assemble the various components in each lesson for your course. Once you’ve finished assembling all of the lessons, you will then produce a plan for the developers who will create a draft of all of the instructional materials and test them with trainees. Your plan will describe the sequence to be followed and the way they should analyze and revise the draft they test. Procedure for assembling the components of a GEL Course Steps Actions and Decisions 1. Introduction and Course Goal: All GEL courses begin with this section where the
overall goal of the course is described and an overview is presented. Take the information for the course introduction from Lessons 14, 15 and 16.
2. Reason for the Course: Describe the opportunity being provided to the trainee and the
risk that will be avoided if the course is mastered. Answer an implied question “What is the value for me in this course” and “Can I do it?” and “Will I need and use what I will learn in my job/mission”. Where possible, the final version of the reasons for the course should be inserted by the developers who will test a draft of the course with trainees. They will use a reaction questionnaire and can take reasons from the feedback they receive from design trainees.
3. Course Overview: Briefly describe (and when possible provide a visual model) the
sequence of lessons and instructional strategies that will used in the lessons. Explain that the sequence of sections and lessons is based on the rule of “Learn in the order in which the knowledge and skills will be used in the field”. If the course is divided into sections
66
where each section contains a number of lessons, provide an introduction to each of the sections that is similar to the introduction to the course, that is, the section goal, reasons and overview). The organization of the course is decided by the sequence the SME’s give to you in Lesson # 3 and the way that you organize the demonstrations in Lesson #8.
4. Lesson Structure: All lessons in a GEL course share the same general structure. They
are sequenced according to the order depicted in the outline below. The order is determined by research studies that strongly suggest the following – start with a learning objective (to give the student a destination), then tell them why (to motivate learning) and then what will happen in the lesson (an overview) to create a mental model of what will be learned, then teach the conceptual knowledge they need to learn a procedure (if any), demonstrate the procedure and provide practice and feedback. Each of these parts of a lesson are described below in more detail along with the location of the information you have already designed that needs to be cut and pasted into the lesson at each point:
a. Learning Objective: What will the student be able to do, in what context and to what standard, when they finish this lesson that they were not able to do when it started? Learning objectives can be designed from information contained in lesson # 5 and #6. b. Reason: Answers implied questions about value and utility such as: “Why is learning to do this important to me?”, “What value does it hold for me, my mission or my team?”, ‘What risk will I avoid if I learn it?”. Reasons are available from feedback on reaction forms during the formative test and should be inserted by developers. c. Overview: Briefly describe (and when possible, provide a visual model of) the location of this lesson in the larger course and sequence of lessons and then describe the instructional strategies that will used in the lesson (for example, “In this lesson you will see a demonstration of procedure X, have the opportunity to practice it and get feedback”). The overview of the content in a lesson is available in lesson # 8. d. Concepts, Processes and Principles: When the cognitive task analysis indicates that to learn a procedure, students will require prior knowledge of new concepts, processes or principles, the required prerequisite knowledge is taught next in all lessons. The instructional method used to teach this foundational knowledge is: Define all concepts, give multiple job-related examples of each, and provide practice recalling or using (applying). Processes (how things work) should be described and illustrated visually. Practice includes explaining a job or mission-related event using the process. Principles should be stated and a number of job or mission related problems they solve should be described. A lesson containing many concepts and/or processes/principles might end here without presenting a procedure so as not to overload trainees. The necessary conceptual knowledge is suggested by the prior knowledge test (Lesson #14) and the design of this knowledge is described in Lesson #5. e. Demonstration of Procedure. The procedure being taught is derived from the cognitive task analysis and other job or mission documents and is demonstrated by a model who is similar and/or attractive to the students. The demonstration should be accompanied by job aids that summarize the action and decision steps in the procedure. After watching the procedure once, the students should be able to control repeat viewings of the demonstration and ask questions about it until they are ready to practice it themselves. Take the content of your demonstrations from the information you developed
67
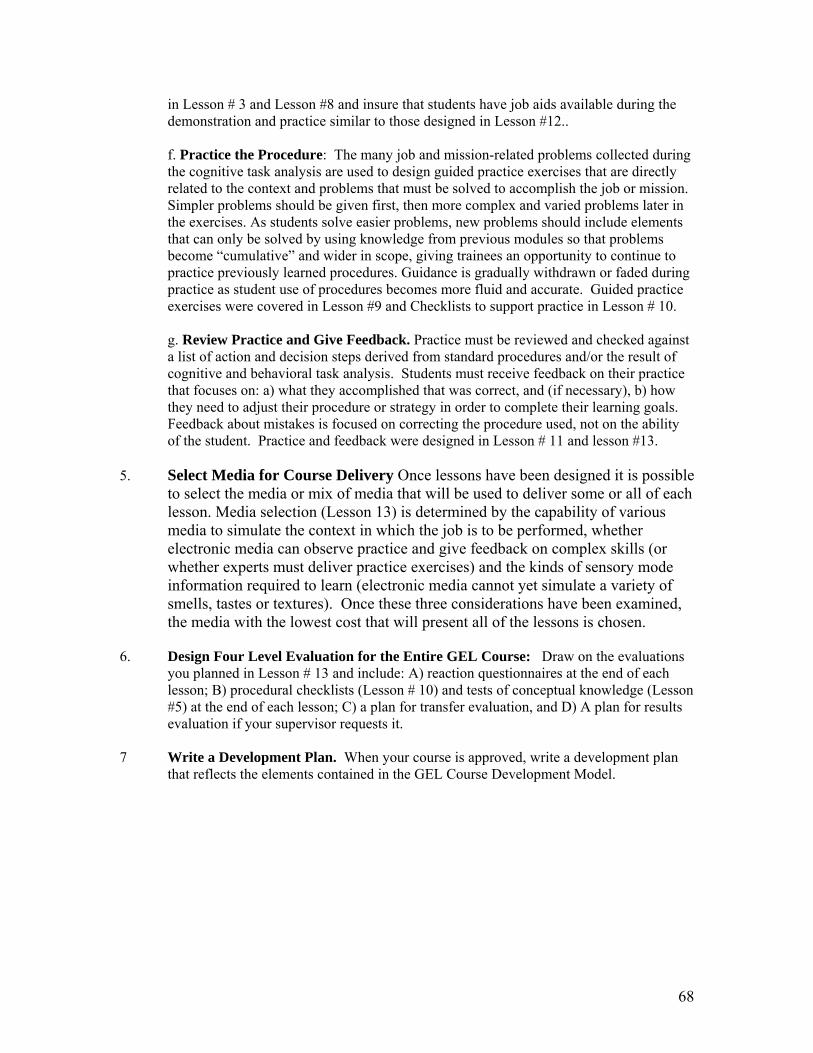
in Lesson # 3 and Lesson #8 and insure that students have job aids available during the demonstration and practice similar to those designed in Lesson #12.. f. Practice the Procedure: The many job and mission-related problems collected during the cognitive task analysis are used to design guided practice exercises that are directly related to the context and problems that must be solved to accomplish the job or mission. Simpler problems should be given first, then more complex and varied problems later in the exercises. As students solve easier problems, new problems should include elements that can only be solved by using knowledge from previous modules so that problems become “cumulative” and wider in scope, giving trainees an opportunity to continue to practice previously learned procedures. Guidance is gradually withdrawn or faded during practice as student use of procedures becomes more fluid and accurate. Guided practice exercises were covered in Lesson #9 and Checklists to support practice in Lesson # 10. g. Review Practice and Give Feedback. Practice must be reviewed and checked against a list of action and decision steps derived from standard procedures and/or the result of cognitive and behavioral task analysis. Students must receive feedback on their practice that focuses on: a) what they accomplished that was correct, and (if necessary), b) how they need to adjust their procedure or strategy in order to complete their learning goals. Feedback about mistakes is focused on correcting the procedure used, not on the ability of the student. Practice and feedback were designed in Lesson # 11 and lesson #13.
5. Select Media for Course Delivery Once lessons have been designed it is possible
to select the media or mix of media that will be used to deliver some or all of each lesson. Media selection (Lesson 13) is determined by the capability of various media to simulate the context in which the job is to be performed, whether electronic media can observe practice and give feedback on complex skills (or whether experts must deliver practice exercises) and the kinds of sensory mode information required to learn (electronic media cannot yet simulate a variety of smells, tastes or textures). Once these three considerations have been examined, the media with the lowest cost that will present all of the lessons is chosen.
6. Design Four Level Evaluation for the Entire GEL Course: Draw on the evaluations
you planned in Lesson # 13 and include: A) reaction questionnaires at the end of each lesson; B) procedural checklists (Lesson # 10) and tests of conceptual knowledge (Lesson #5) at the end of each lesson; C) a plan for transfer evaluation, and D) A plan for results evaluation if your supervisor requests it.
7 Write a Development Plan. When your course is approved, write a development plan
that reflects the elements contained in the GEL Course Development Model.
68
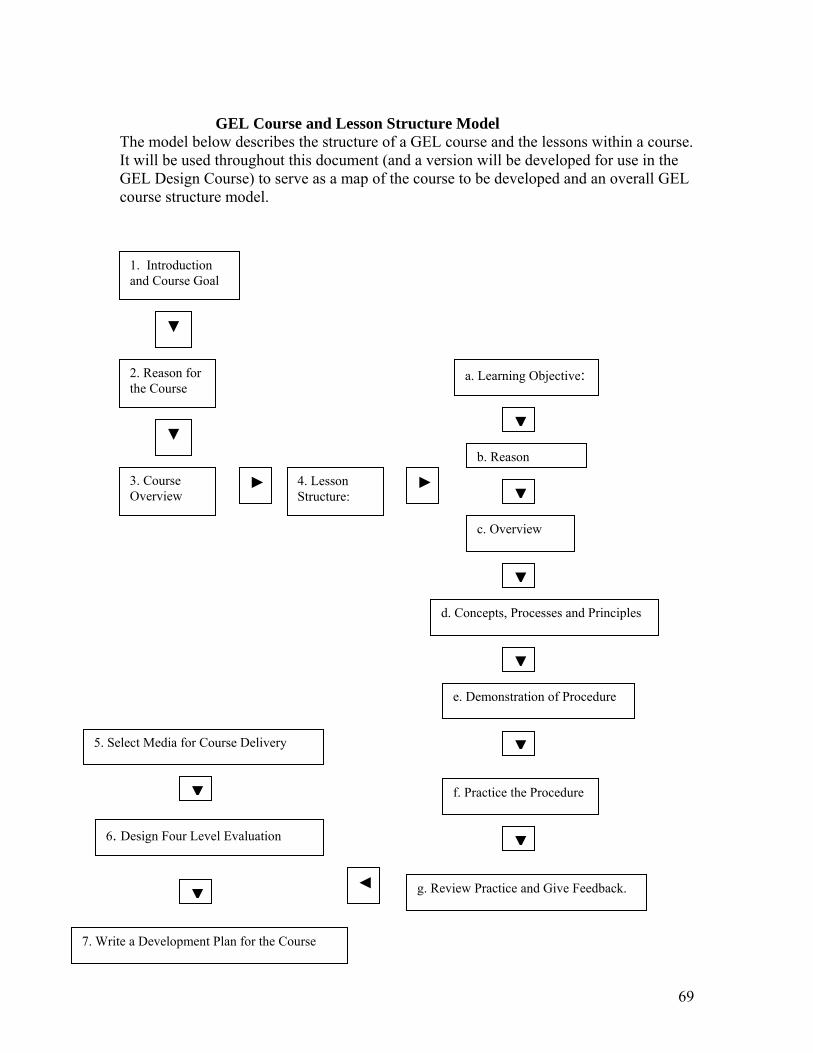
GEL Course and Lesson Structure Model The model below describes the structure of a GEL course and the lessons within a course. It will be used throughout this document (and a version will be developed for use in the GEL Design Course) to serve as a map of the course to be developed and an overall GEL course structure model.
1. Introduction and Course Goal
▼
2. Reason for the Course
a. Learning Objective:
▼ n
c. Overview
3. Course Overview
► 4. Lesson Structure:
►
d. Co
e. D 5. Select Media for Course Delivery
f. P
6. Design Four Level Evaluation
◄ g. Review
7. Write a Development Plan for the Course
b. Reaso
c. Ov
ncepts,
emon
ractice
Practi
▼
▼
erview
▼
Processes and Principles
▼
stration of Procedure
▼
the Procedure
▼
ce and Give Feedback.
▼▼
69
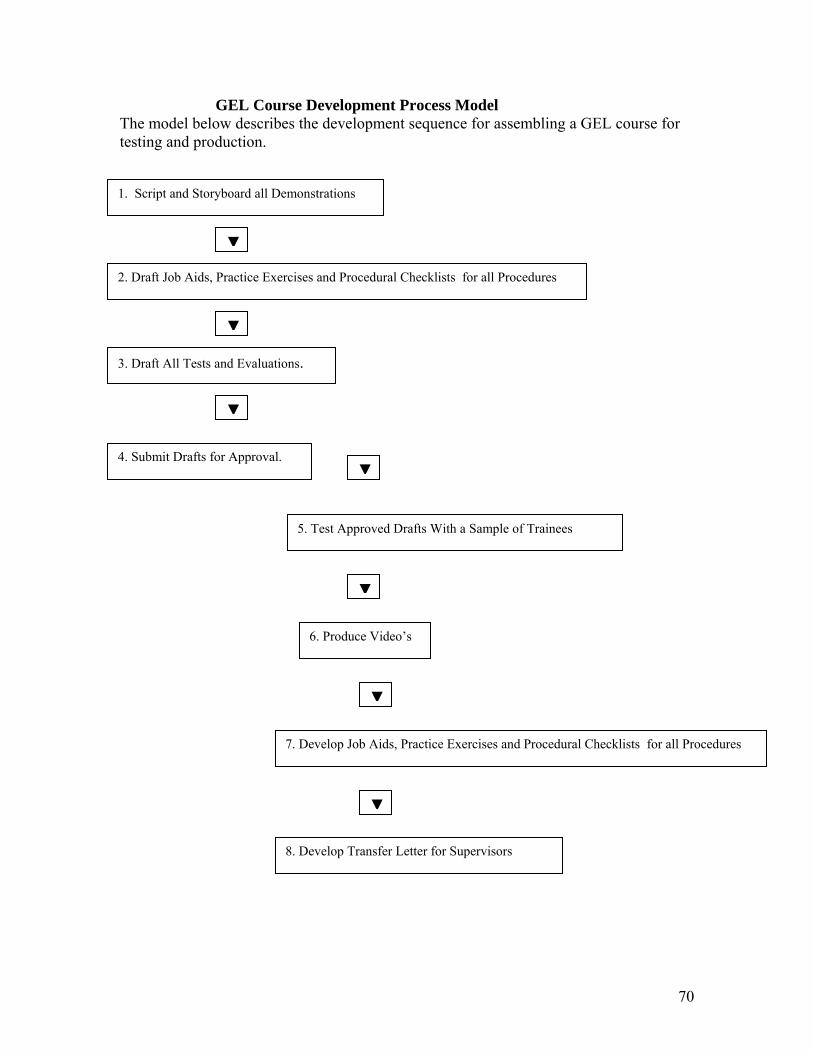
GEL Course Development Process Model The model below describes the development sequence for assembling a GEL course for testing and production. 1. Script and Storyboard all Demonstrations
2. Draft Job Aids, P
3. Draft All Tests a
4. Submit Drafts fo
▼
ractice Exercises and Procedural Checklists for all Procedures
▼
nd Evaluations.
▼
r Approval.
5. Test Ap
6. Produ
7. Develop J
8. Develop T
▼
proved Drafts With a Sample of Trainees
▼
ce Video’s
ob
ra
▼
Aids, Practice Exercises and Procedural Checklists for all Procedures
▼
nsfer Letter for Supervisors
70
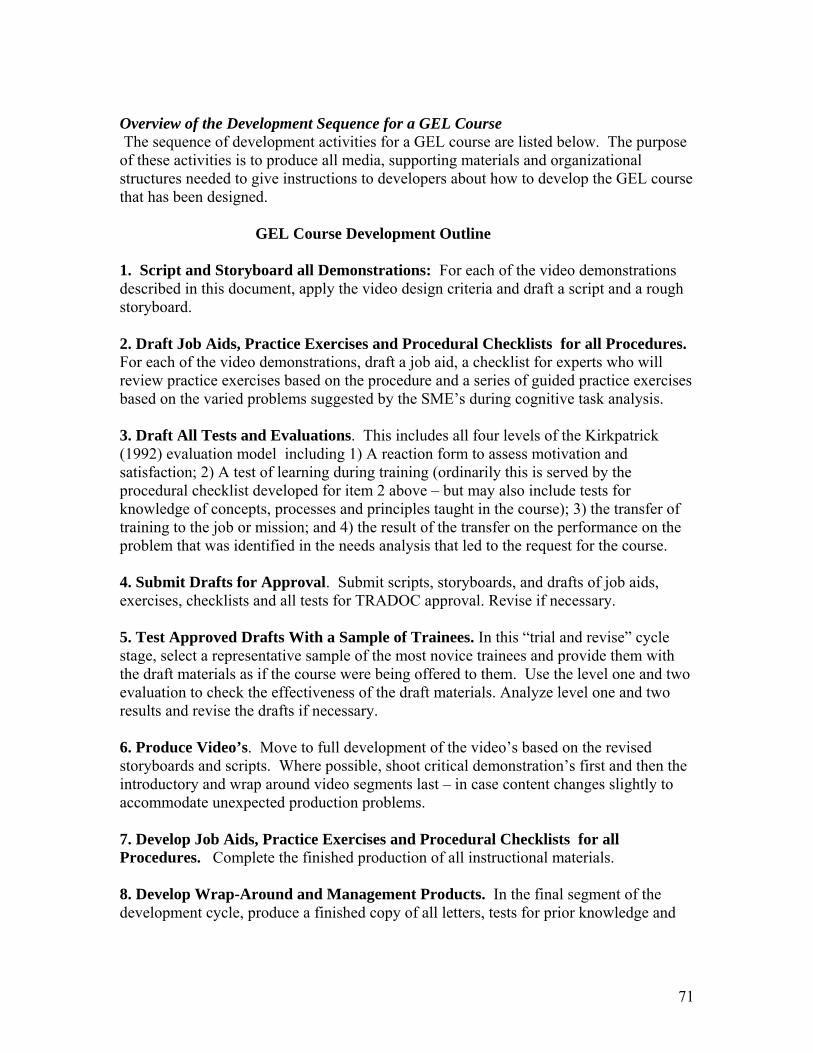
Overview of the Development Sequence for a GEL Course The sequence of development activities for a GEL course are listed below. The purpose of these activities is to produce all media, supporting materials and organizational structures needed to give instructions to developers about how to develop the GEL course that has been designed. GEL Course Development Outline 1. Script and Storyboard all Demonstrations: For each of the video demonstrations described in this document, apply the video design criteria and draft a script and a rough storyboard. 2. Draft Job Aids, Practice Exercises and Procedural Checklists for all Procedures. For each of the video demonstrations, draft a job aid, a checklist for experts who will review practice exercises based on the procedure and a series of guided practice exercises based on the varied problems suggested by the SME’s during cognitive task analysis. 3. Draft All Tests and Evaluations. This includes all four levels of the Kirkpatrick (1992) evaluation model including 1) A reaction form to assess motivation and satisfaction; 2) A test of learning during training (ordinarily this is served by the procedural checklist developed for item 2 above – but may also include tests for knowledge of concepts, processes and principles taught in the course); 3) the transfer of training to the job or mission; and 4) the result of the transfer on the performance on the problem that was identified in the needs analysis that led to the request for the course. 4. Submit Drafts for Approval. Submit scripts, storyboards, and drafts of job aids, exercises, checklists and all tests for TRADOC approval. Revise if necessary. 5. Test Approved Drafts With a Sample of Trainees. In this “trial and revise” cycle stage, select a representative sample of the most novice trainees and provide them with the draft materials as if the course were being offered to them. Use the level one and two evaluation to check the effectiveness of the draft materials. Analyze level one and two results and revise the drafts if necessary. 6. Produce Video’s. Move to full development of the video’s based on the revised storyboards and scripts. Where possible, shoot critical demonstration’s first and then the introductory and wrap around video segments last – in case content changes slightly to accommodate unexpected production problems. 7. Develop Job Aids, Practice Exercises and Procedural Checklists for all Procedures. Complete the finished production of all instructional materials. 8. Develop Wrap-Around and Management Products. In the final segment of the development cycle, produce a finished copy of all letters, tests for prior knowledge and
71
certification, statements about production values for different products and plans for administering the course. Demonstration of Procedures Design trainees need to see the two example courses being assembled according to the GEL Course Outline. They also need to see the course design being turned into a development document based on the process outlined above. Practice and Feedback Designers should be asked to create a course design for one of the courses that they have been practicing with during this course. Insert a Reaction Questionnaire similar to the one described in Lesson 14 at this point and store data collected in each trainees electronic course record.
72
Lesson 18: Transfer Letter for Supervisors Notes for Developers: This lesson is a placeholder for a number of management issues that typically accompany the design of a new course. In this and all GEL Courses, it is necessary to develop a letter to be sent to the supervisors of trainees who will be attending a GEL Training Design course. The purpose of the letter is to alert the supervisor to their role in insuring the transfer of training from the design course back to the job. Learning goals for this lesson When required to write a transfer letter for a GEL Course, the design trainees will use the template in this lesson to design an effective letter. Reason for this Lesson How many times have you attended a training course only to find when it is finished that no one asks you to use what you learned? Since the role of the person or team who supervises the trainees who take your course is a very important source of support and encouragement after they finish training, this letter will help supervisors know what kind of support the students will need. Overview: Insert GEL Design Course Outline Model and highlight this lesson on the model. Briefly describe (with narration) the objective and reason for this lesson. Concepts, Processes and Principles: Novel conceptual knowledge is not needed to succeed at this lesson Equipment and Materials Required to Perform the Procedure: Text editing is required along with access to the letter template below. Procedure for writing a transfer letter to design supervisors 1. A letter explaining the scope and importance of the GEL Design course and its
learning goals should be sent to those who supervise students for this course along with a request that each supervisors meet or communicate directly with their trainees before the training to emphasize the importance of the course and the goal of “brining it back to apply”.
2. Include in the letter a request that their prospective GEL Design trainees take a
test of prior knowledge that will be web based. The results of the test will indicate whether the design candidates they recommend have the knowledge base that is necessary for the course
3. Also include the request that the supervisors assign the design trainees to a design
project as soon as they return from the course to insure the transfer of their skills.
73
4. Explain to the supervisor that GEL design requires that in addition to a course assignment following training, individual designers or design teams must be able to interview two or three subject matter experts (SME’s) who have extensive experience in the area of the course they will be assigned after training. These interviews will require about three hours of the SME’s time for every hour of instruction in the finished course and can be scheduled in advance of the start of the course. SME’s are welcome as designers but cannot serve in both roles during the design course
5. Send the supervisor the procedure for deciding what courses should be selected
for GEL training (see Lesson #2) and provide the supervisors with web access to a brief module on how to select GEL Design courses and SME’s.
6. Provide the supervisors with information on when and how their staff will be
scheduled to access the web and/or CD/DVD delivery modes for the GEL design course.
Demonstration of Procedures Show the design trainee two letters, one for each of the two courses that were designed during the training. Practice and Feedback Require that the trainees write two draft letters for two additional courses. Insert a Reaction Questionnaire similar to the one described in Lesson 14 at this point and store data collected in each trainees electronic course record.
74
APPENDIX A:
The Background and Reasons for Experiential Learning - A Review7
Richard E. Clark
Rossier School of Education University of Southern California
Submitted 12/13/2003
This document is a brief review of “experiential learning” from its inception in the 1930’s to its current status. At the conclusion of the review, I propose to base the TRADOC “experiential learning” training design on Merrill’s “First Principles of Instruction”. Given the large body of research on the training of adults for complex work, Merrill’s system seems the best option to embody the effective elements of experiential learning in an approach that is consistent with Army training needs and the evidence from solid research on the learning and transfer benefits of different training methods.
History of Experiential Learning:
This brief history of experiential learning will only feature four main approaches: John Dewey’s original 1938 book that started the movement, the work of David Kolb on experience and learning styles which is very widely read in Adult learning and organizational design, the early 1990’s work of John Seeley Brown and Paul Duguid at Xerox Corporation and finally the work of M. David Merrill at Utah State University.
John Dewey and Experiential Learning
In the 1920's / 1930's, John Dewey became famous for pointing out that the authoritarian, strict, pre-ordained knowledge approach of modern traditional education was too concerned with delivering knowledge, and not enough with understanding students' actual experiences. His best expression of these ideas were published as: Dewey, J. (1938/1997). Experience and education. Macmillan.
Dewey became the champion, or philosophical father of experiential education, or as it was then referred to, progressive education. But he was critical of completely "free, student-driven" education because students often don't know how to structure their learning experiences for maximum benefit.
Thus, Dewey proposed that education be designed on the basis of a theory of experience. We must understand the nature of how humans have the experiences they do, in order to design effective education. Dewey's theory is that experience arises from
7 Originally submitted to Dr. Millie Abel, TRADOC, as the first draft of a plan to complete a training design document that could be developed into a course to teach Army training designers to implement “experience based learning”.
75
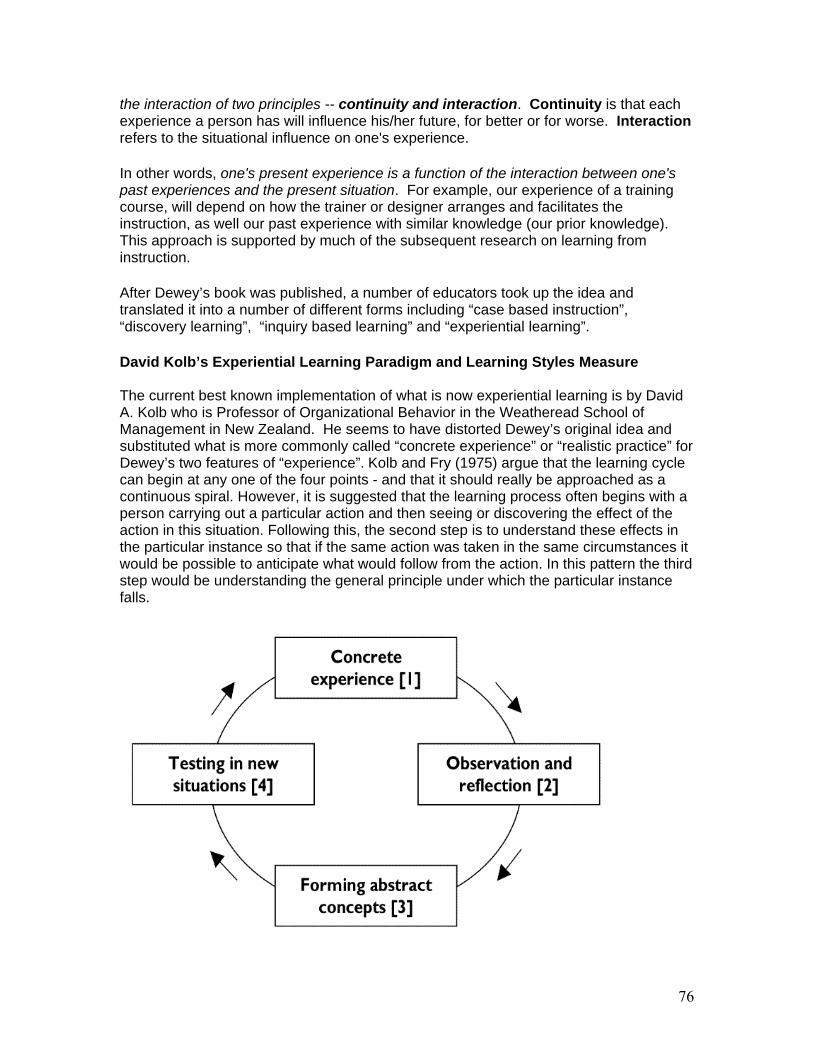
the interaction of two principles -- continuity and interaction. Continuity is that each experience a person has will influence his/her future, for better or for worse. Interaction refers to the situational influence on one's experience.
In other words, one's present experience is a function of the interaction between one's past experiences and the present situation. For example, our experience of a training course, will depend on how the trainer or designer arranges and facilitates the instruction, as well our past experience with similar knowledge (our prior knowledge). This approach is supported by much of the subsequent research on learning from instruction.
After Dewey’s book was published, a number of educators took up the idea and translated it into a number of different forms including “case based instruction”, “discovery learning”, “inquiry based learning” and “experiential learning”.
David Kolb’s Experiential Learning Paradigm and Learning Styles Measure The current best known implementation of what is now experiential learning is by David A. Kolb who is Professor of Organizational Behavior in the Weatheread School of Management in New Zealand. He seems to have distorted Dewey’s original idea and substituted what is more commonly called “concrete experience” or “realistic practice” for Dewey’s two features of “experience”. Kolb and Fry (1975) argue that the learning cycle can begin at any one of the four points - and that it should really be approached as a continuous spiral. However, it is suggested that the learning process often begins with a person carrying out a particular action and then seeing or discovering the effect of the action in this situation. Following this, the second step is to understand these effects in the particular instance so that if the same action was taken in the same circumstances it would be possible to anticipate what would follow from the action. In this pattern the third step would be understanding the general principle under which the particular instance falls.
76
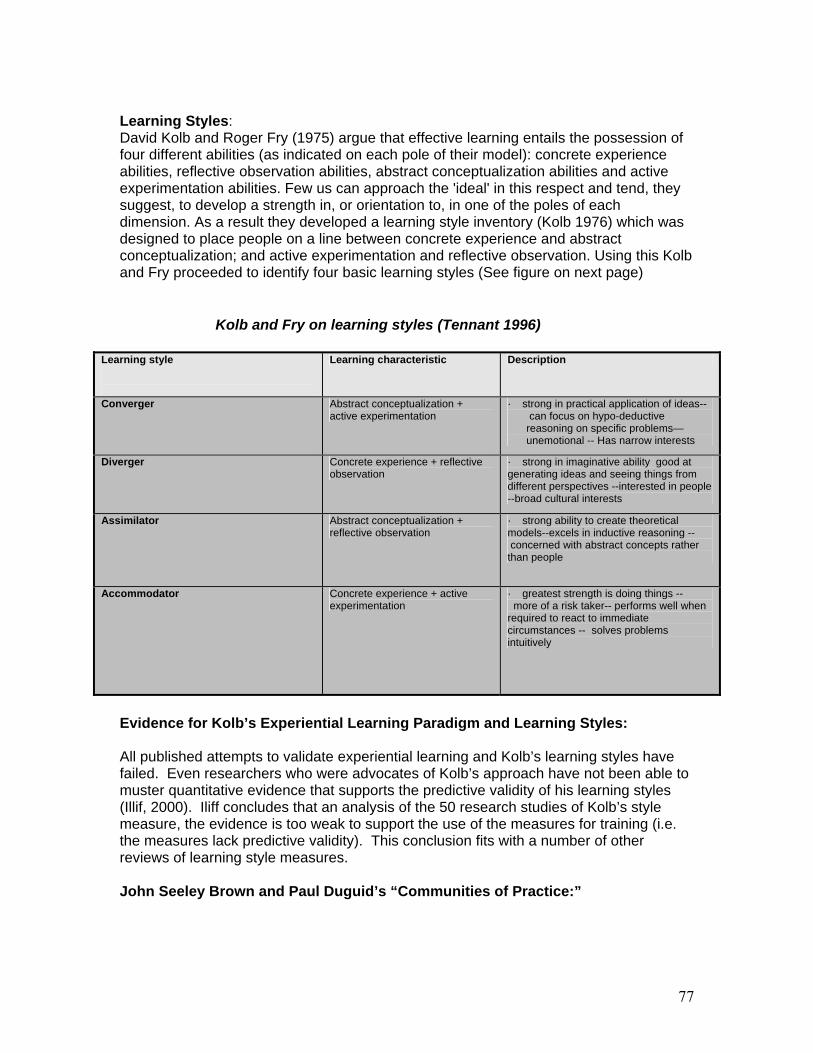
Learning Styles: David Kolb and Roger Fry (1975) argue that effective learning entails the possession of four different abilities (as indicated on each pole of their model): concrete experience abilities, reflective observation abilities, abstract conceptualization abilities and active experimentation abilities. Few us can approach the 'ideal' in this respect and tend, they suggest, to develop a strength in, or orientation to, in one of the poles of each dimension. As a result they developed a learning style inventory (Kolb 1976) which was designed to place people on a line between concrete experience and abstract conceptualization; and active experimentation and reflective observation. Using this Kolb and Fry proceeded to identify four basic learning styles (See figure on next page)
Kolb and Fry on learning styles (Tennant 1996)
Learning style
Learning characteristic Description
Converger Abstract conceptualization + active experimentation
· strong in practical application of ideas-- can focus on hypo-deductive reasoning on specific problems—unemotional -- Has narrow interests
Diverger Concrete experience + reflective observation
· strong in imaginative ability good at generating ideas and seeing things from different perspectives --interested in people --broad cultural interests
Assimilator Abstract conceptualization + reflective observation
· strong ability to create theoretical models--excels in inductive reasoning -- concerned with abstract concepts rather than people
Accommodator Concrete experience + active experimentation
· greatest strength is doing things -- more of a risk taker-- performs well when required to react to immediate circumstances -- solves problems intuitively
Evidence for Kolb’s Experiential Learning Paradigm and Learning Styles: All published attempts to validate experiential learning and Kolb’s learning styles have failed. Even researchers who were advocates of Kolb’s approach have not been able to muster quantitative evidence that supports the predictive validity of his learning styles (Illif, 2000). Iliff concludes that an analysis of the 50 research studies of Kolb’s style measure, the evidence is too weak to support the use of the measures for training (i.e. the measures lack predictive validity). This conclusion fits with a number of other reviews of learning style measures. John Seeley Brown and Paul Duguid’s “Communities of Practice:”
77
In the early 1990’s, John Seeley Brown and Paul Duguid of Xerox Park described an approach to adult, “on the job” learning they called “communities of practice” (see http://www2.parc.com/ops/members/brown/papers/orglearning.htmlFor a draft of their paper). They described how learning is negotiated in a large organization where teams function to achieve organizational goals. Their system includes three elements:
Narratives, used for diagnosing problems and as repositories of existing knowledge.
Collaboration, due to members engaging in, and sharing a common practice.
Social constructivism, members develop a common understanding of their practice and a common understanding of how to solve problems.
These elements are the ones that must be supported by an organization if effective, practice-based learning is to occur. Brown and Duguid explain that most learning is “bound to context” and “implicit” therefore difficult to generalize. Like most of the constructivist theories, this one is descriptive in nature and was not intended to support training. Problems with Experiential Learning as a Training Strategy: The Research Research supporting experience-based learning would need to consist of a number of replicated studies demonstrating the conditions under which experience-based learning was more effective than direct, instructional guidance, the conditions under which it was not effective, what forms experience-based learning should take, on what variables it has positive or negative effects. Despite almost a half century of advocacy associated with enquiry-based learning, there is no such body of research supporting the technique. In so far as there is any evidence from controlled experimental studies, it almost uniformly supports direct instructional guidance with appropriate practice rather than experience-based learning (e.g. see Moreno, in press; Tuovinen & Sweller, 1999). There is a good empirical case against the use of experience or discovery-based learning. Hardiman, Pollatsek, and Weil (1986) and Brown and Campione (1994) noted that when adults learn with pure-discovery methods and minimal feedback, they often become lost, frustrated, and their confusion can lead to misconceptions. Others (e.g., Carlson, Lundy, & Schneider, 1992; Schauble, 1990) found that since false starts are common in such learning situations, the unguided discovery that characterizes experience-based learning is often inefficient. From a cognitive load point of view, there is also evidence to the contrary. Sweller and others (Sweller, 1999; Paas, Renkl, & Sweller, 2003) note that despite the alleged advantages to experience-based environments to help learners to make meaning from learning materials, cognitive load theory suggests that the free exploration of a highly complex environment may generate a heavy cognitive load that is detrimental to learning. This suggestion is particularly important in the case of novice adult learners, who lack adequate prior knowledge (in the Dewey sense of continuity) to integrate the new information with their prior knowledge. Tuovinen and Sweller, (1999) have shown that exploration practice (an experience-based discovery technique) caused a much
78
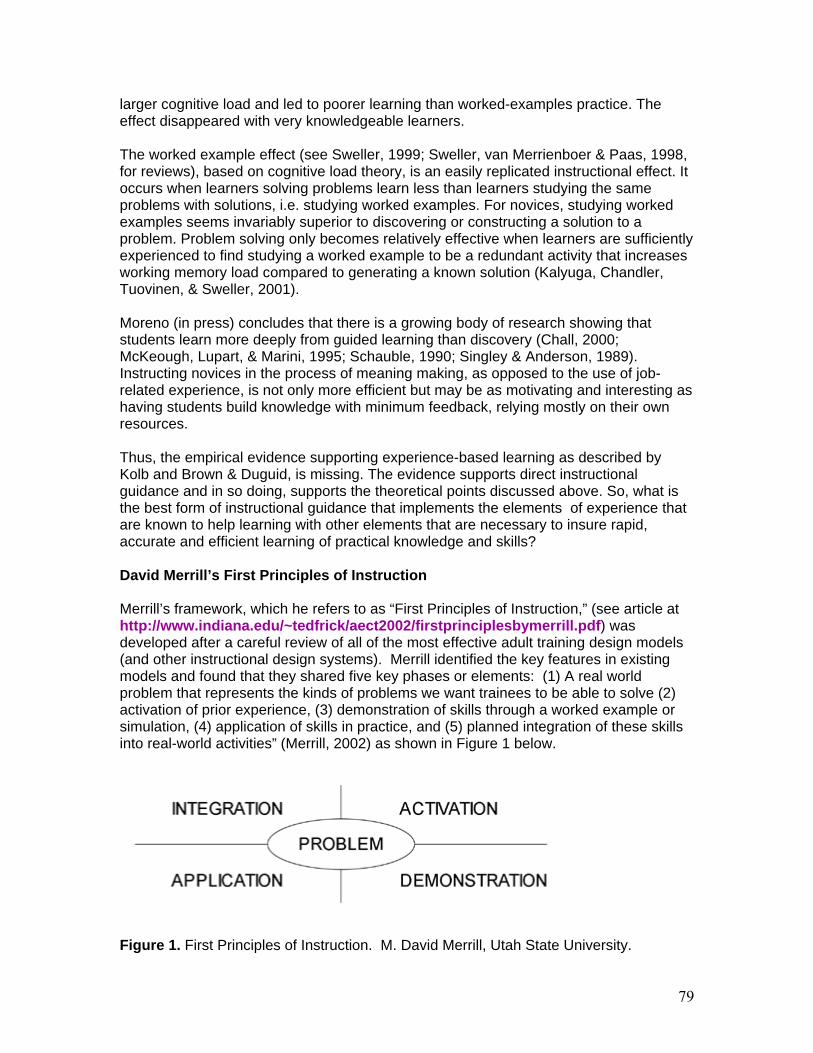
larger cognitive load and led to poorer learning than worked-examples practice. The effect disappeared with very knowledgeable learners. The worked example effect (see Sweller, 1999; Sweller, van Merrienboer & Paas, 1998, for reviews), based on cognitive load theory, is an easily replicated instructional effect. It occurs when learners solving problems learn less than learners studying the same problems with solutions, i.e. studying worked examples. For novices, studying worked examples seems invariably superior to discovering or constructing a solution to a problem. Problem solving only becomes relatively effective when learners are sufficiently experienced to find studying a worked example to be a redundant activity that increases working memory load compared to generating a known solution (Kalyuga, Chandler, Tuovinen, & Sweller, 2001). Moreno (in press) concludes that there is a growing body of research showing that students learn more deeply from guided learning than discovery (Chall, 2000; McKeough, Lupart, & Marini, 1995; Schauble, 1990; Singley & Anderson, 1989). Instructing novices in the process of meaning making, as opposed to the use of job-related experience, is not only more efficient but may be as motivating and interesting as having students build knowledge with minimum feedback, relying mostly on their own resources. Thus, the empirical evidence supporting experience-based learning as described by Kolb and Brown & Duguid, is missing. The evidence supports direct instructional guidance and in so doing, supports the theoretical points discussed above. So, what is the best form of instructional guidance that implements the elements of experience that are known to help learning with other elements that are necessary to insure rapid, accurate and efficient learning of practical knowledge and skills? David Merrill’s First Principles of Instruction Merrill’s framework, which he refers to as “First Principles of Instruction,” (see article at http://www.indiana.edu/~tedfrick/aect2002/firstprinciplesbymerrill.pdf) was developed after a careful review of all of the most effective adult training design models (and other instructional design systems). Merrill identified the key features in existing models and found that they shared five key phases or elements: (1) A real world problem that represents the kinds of problems we want trainees to be able to solve (2) activation of prior experience, (3) demonstration of skills through a worked example or simulation, (4) application of skills in practice, and (5) planned integration of these skills into real-world activities” (Merrill, 2002) as shown in Figure 1 below.
Figure 1. First Principles of Instruction. M. David Merrill, Utah State University.
79
Each of these five elements has supporting generalizations, which provide the prescriptions for effective instruction8:
Problem-centered. Learning is promoted when learners are engaged in solving real-world problems. Some corollaries:
• Show task: Learners are shown the tasks they will be able to do. • Task level: Learners are engaged at the problem or task level, not just at the
operation or action level. • Problem progression: Learners solve a progression of problems that are
increasingly difficult and that are explicitly compared to one another.
Activation Phase. Learning is promoted when relevant previous experience is activated. Some corollaries:
• Previous experience: Learners are directed to recall, relate, describe, or apply knowledge from relevant past experience that can be used as a foundation for the new knowledge.
• New experience: Learners are provided relevant experience in the form of worked examples that can be used as a foundation for the new knowledge.
• Structure: Learners are provided or encouraged to recall a structure that can be used to organize the new knowledge.
Demonstration Phase. Learning is promoted when the instruction demonstrates what is to be learned rather than merely telling information about what is to be learned. Some corollaries:
• Demonstration consistency: The demonstration is consistent with the learning goal (i.e., examples for concepts, demonstrations for procedures, visualizations for processes, and modeling for behavior).
• Learner guidance: Learners are provided appropriate learner guidance including some of the following: they are directed to relevant information, multiple representations are used for the demonstrations, or multiple demonstrations are explicitly compared.
• Relevant media: Media play a relevant instructional role and multiple forms of media do not compete for the attention of the learner.
Application Phase. Learning is promoted when learners are required to use their new knowledge or skill to solve problems. Some corollaries:
• Practice consistency: The practice and posttest are consistent with the stated or implied objectives.
• Diminishing coaching: Learners are guided in their problem solving by appropriate feedback and coaching, including error detection and correction, and when coaching is gradually withdrawn as learning is established.
8 The discussion of the elements in Merrill’s system draws heavily on a summary provided in Molenda (2002) “A new framework for teaching in the cognitive domain” ERIC EDO-IR-2002-09. Used with permission.
80
• Varied problems: Learners are required to solve a sequence of increasingly varied examples of the same set of problems from different contexts to promote transfer.
Integration Phase. Learning is promoted when learners are encouraged to integrate (transfer) the new knowledge or skill into their everyday life. Some corollaries:
• Watch me: Learners are given the opportunity to publicly demonstrate their new knowledge or skill.
• Reflection: Learners can reflect-on, discuss, and defend their new knowledge or skill.
• Creation: Learners can create, invent, and explore new and personal ways to use their new knowledge (Merrill, 2002, pp. 45-50).
Proposal: First Principles of Experiential Learning
I propose to create a design for a training presentation on the use of the ‘first principles” for TRADOC designers. The design will provide a blueprint for a lesson that would teach designers to use the first principles in the design of any lesson or course. The design will follow the first principles and the lesson will be an example of implementing the principles as well as a blueprint for training. The design will contain the following elements:
1) Goal of the lesson (learning objectives, problems to be solved, what learners will be able to do at the end of the lesson)
2) Reasons and Activation (Rationale and overview for the goal and objectives -- why this is important to designers and their students. What problems have designers encountered in the past that will be solved if this lesson is incorporated into professional design practice? ).
3) Demonstration of First Principles of Experiential Instruction ( A modeling of strategies for selecting, designing and presenting a demonstration during instruction that is delivered by a live instructor or presented in a distance, multi-media format.
4) Application (How to support practice, feedback and correction of mistakes in a variety of presentation formats. How to provide varied examples to promote generalizable learning)
5) Integration (How to design for integration of skills learned during training with application and practice after an initial training experience. How to support learner reflection on what they have learned and how they are applying the knowledge in the field). 6) Assessment ( What are the qualities of effective formative and summative assessment at the Kirkpatrick four levels?) Proposed Schedule for Design:
81
January 10, 2004 Completion and approval of design plan April 15, 2004 Progress report and draft of lesson May 15, 2004 Approved design outline, final design begins June 30, 2004 Design Blueprint completed and submitted References Brown, A., and Campione, J. (1994). Guided discovery in a community of learners. In K. McGilly
(Ed.), Classroom lessons: Integrating cognitive theory and classroom practice (pp. 229-270). Cambridge, MA: MIT Press.
Bruner, J. S. (1961). The art of discovery. Harvard Educational Review 31, 21-32. Carlson, R. A., Lundy, D. H. and Schneider, W. (1992). Strategy guidance and memory aiding in
learning a problem-solving skill. Human Factors, 34, 129-145. Chall, J. S. (2000). The academic achievement challenge. New York: Guilford Press. Dewey, J. (1938/1997). Experience and education. Macmillan. Hardiman, P., Pollatsek, A., and Weil, A. (1986). Learning to understand the balance beam.
Cognition and Instruction, 3, 1-30. see Iliff, C.H. 1994, Kolbs Learning Style Inventory: A Meta-Analysis. Unpublished Doctoral
Dissertation, Boston University. Cited and described in Kolb, D. A. & Boyatzis, R.E. Experiential Leaning Theory: Previous Research and New Directions and published as a chapter in Sternberg, R. and Zhang, L.F. (2000) Perspectives on Cognitive, Learning and Thinking Styles. NJ: Lawrence Erlbaum Associates
McKeough, A., Lupart, J., and Marini, A. (Eds.). (1995). Teaching for transfer: Fostering generalization in learning. Mahwah, NJ: Erlbaum.
Merrill, M. D. (2002). First principles of instruction. Educational Technology Research and Development, 50 (3), 43-59.
Paas, F., Renkl, A., and Sweller, J. (2003). Cognitive load theory and instructional design: Recent developments. Educational Psychologist, 38, 1-4.
Schauble, L. (1990). Belief revision in children: The role of prior knowledge and strategies for generating evidence. Journal of Experimental Child Psychology, 49, 31-57.
Singley, M. K. and Anderson, J. R. (1989). The transfer of cognitive skill. Cambridge, MA: Harvard University Press.
Sweller, J. (1988). Cognitive load during problem solving: Effects on learning. Cognitive Science, 12, 257-285.
Sweller, J. (1999). Instructional design in technical areas. Camberwell, Australia: ACER Press. Sweller, J. (2003). Evolution of human cognitive architecture. In B. Ross (Ed.), The Psychology of
Learning and Motivation (Vol. 43, pp. 215-266). San Diego: Academic Press. Sweller, J. & Cooper, G. A. (1985).The use of worked examples as a substitute for problem
solving in learning algebra. Cognition and Instruction, 2, 59-89. Sweller, J., van Merriënboer, J. J. G. and Paas, F. G. W. C. (1998). Cognitive architecture and
instructional design. Educational Psychology Review, 10, 251-296. Tuovinen, J. E., and Sweller, J. (1999). A comparison of cognitive load associated with discovery
learning and worked examples. Journal of Educational Psychology, 91, 334-341.
82
APPENDIX B Outline for Guided Experiential Learning Design Module9
Richard E. Clark Rossier School of Education University of Southern California Submitted April 15, 2004 Overview: This document presents an outline of an instructional module for military training
designers. The goal of the module is that participants will learn how to apply guided experiential learning principles when they design instruction for any learning goals. The module itself will be designed using the principles it teaches.
Experience level of participants: This workshop module is intended for novice to intermediate military training
designers. More advanced designers will find value in the job aid’s that will be developed to assist in the implementation of the experiential learning design strategy.
Prior to the workshop: Before the workshop begins and where possible, the workshop organizers should
complete two tasks: 1) People who will be invited to each workshop should be contacted as far in
advance as possible and provided with a description of the workshop goals. In addition, each person or design team should be given the opportunity to bring a current design assignment to the workshop.
2) In general, participants who work on actual (authentic) design assignments during the workshop will learn more and transfer more of the knowledge and skills they learn back to their jobs.
To insure that all participants learn and transfer as much of the workshop as
possible, those who directly supervise the designers should be contacted ahead of the workshop and asked to:
A) Meet with their designer(s) prior to the workshop and clearly indicate the
importance of learning what is taught and “bringing it back to apply”; B) Provide them with a design task that they can use for practice during the
workshop; and, C) Inform their designer(s) that at the conclusion of the training, they will face a
design project and will be expected to use the guided experiential design strategy.
9 This document is an progress report outline promised by 4/15/04 as part of the TDAD proposal Award to ICT at the University of Southern California to develop an experiential learning design module for TRADOC – Award Number - DAAD-19-99-0046
83
Advance organizer: The module will be organized so that it will begin with a brief introduction that
explains the approach and sets the stage by introducing the learning objectives for the course. The introduction is followed immediately by an “example module” – an example of a finished module based on a brief, informal and engaging topic that demonstrates the guided experiential learning approach. All participants will be asked to complete the example module once as trainees so that as they learn to design, they can draw on their own experience as a learner in a guided experiential module.
Example Modules: After finishing the example module and answering some brief
questions about their experience (questions designed to assess their self efficacy in design), trainees will experience a sequence of interactive lessons on how to produce a module using guided experiential design. During the lessons, they will be prompted to apply what they have learned to the design of the module topic they brought with them to the training.
If participants were not assigned or allowed to bring a topic to the training, they
will be provided with a menu of two to three examples that they can select for practice experience during the training. The examples should range from basic skills (for example, mechanical troubleshooting of a familiar piece of equipment) to an advanced and more complex topic (such as selected team leadership strategies).
Overview: After completing (or reviewing) the example module, an overview of the
training will be provided in the form of “This module is organized so that you will experience the following sequence of activities ... Note that each activity is followed by an estimate of the time required to complete it”.
Section 1: Selecting Learning Tasks and Problems: Principle being Implemented: Problem-centered. Learning is promoted when learners are engaged in solving
authentic, real-world problems. In this section, trainees will see a demonstration about why and how to select the
most motivating, authentic, real-world problems and tasks that will form the basis of the guided experiential learning modules they are designing.
Learners who bring a design problem to the module will be guided through the
development of problems for their own modules. Those who select one of the training examples offered in the module will develop problems and tasks for the practice exercises.
In addition participants will learn how to create a progression of increasingly
84

difficult forms of the problems and tasks they select for training and to develop clear and measurable learning objectives for each problem and task set. Problems and tasks must be selected and described first because the training module and assessments will be built around them.
Section 2: Design Demonstrations of Problem-solving and/or Task Completion: Principle being Implemented: Demonstrate: Learning is promoted when the instruction demonstrates what is to be
learned with worked examples of authentic problems rather than merely telling information about what is to be learned.
In this section, participants will learn why and how to design an effective,
learning-goal-focused demonstration so that the learners who experience their training course will be able to effectively and efficiently solve authentic, work-based problems and complete work tasks. The approach to demonstrations taught in this module will draw heavily on cognitive and behavioral task analysis.
Participants will learn how to develop “worked examples” that demonstrate how
to solve the problems and complete the tasks selected in Section 1 of this module. Participants will learn how to distinguish the four types of knowledge that must
be included in effective demonstrations and where the four different types of knowledge belong in a demonstration. Thus they will learn how to select examples to demonstrate concepts, how to sketch graphic depictions of processes and principles, how to describe the step-by-step actions and decisions that characterize procedures and select models who will demonstrate procedures.
In addition, participants will learn how to provide increasingly complex problems
and fade or gradually withdraw demonstration support from learners as their problem solving and task handling skills increase - and how and when to provide help during learning.
Finally, in this section, participants will learn how to identify media demands for
all aspects of the demonstrations they design. Section 3: Design to Connect New Knowledge With Prior Experience Principle being Implemented: Activate and Personalize: Learning is promoted when relevant previous experience is
activated and new knowledge is personalized. Participants will learn how to help learners recall, describe and apply knowledge
from their past experience that is relevant and can serve as a foundation for the new knowledge they will encounter in the demonstrations. Where learner prior experience does not exist, participants will learn how to develop and present worked examples that will serve as concrete examples of problem solving and
85
task completion. In addition, participants will learn how to “personalize” the demonstrations by
using the learner’s name wherever possible and asking the learner to remember their past experience with problems and/or tasks similar to those being learned.
The result of this section will be integrated with the products of Section 2. Section 4: Design for Application and Transfer Principle being Implemented: Apply New Knowledge: Transfer and application in work settings is promoted when
learners are required to use their new knowledge or skill to solve increasingly difficult and varied problems in varied contexts where corrective feedback is given and gradually faded as learning and transfer occurs.
After learning to design demonstrations, connect elements of the demonstrations to prior experience and personalize instruction, participants will learn how to design application (practice) exercises. In guided experiential learning all practice exercises are also opportunities for evaluation of learning and the context in which corrective feedback is offered to the learner. Thus, in this section, participants will learn what information needs to be captured from problem solving practice, and how to provide effective feedback so that problems, demonstrations, application exercises, feedback and learning objectives are aligned.
Participants will learn when and how to gradually vary and increase the difficulty
of practice exercises and gradually to fade both practice and feedback as learning is achieved.
Section 5: Design Overall Layout of Module for Media Production In this section, participants will learn how to organize all of the information they
have generated during the design process into a blueprint that is useful for media production and course material developers.
Certification Assessment: Certification of participants is recommended. If certification is required, all those
who successfully complete the module will be required to design a guided experiential learning module and submit their design for review and certification. A checklist for certification will be developed.
86
APPENDIX C: Distance Learning XXI Contract Guidelines
The trainer’s challenge is to design instruction in such a way that Soldiers are most likely to learn from instruction delivered via distance learning (DL) technologies. The following guidelines, based on findings from research in learning and instruction, were mainly taken from What Works in Distance Learning, a document developed for the Navy by the University of Southern California. The guidelines are divided into two parts. Part I lists what the contractor shall do in designing and developing The Army Distributed Learning Program (TADLP) instruction, while Part II lists what actions that TRADOC strongly recommends the contractor will do, as appropriate, in designing TADLP courseware. Taken together, the two parts should be used as a springboard for discussion between the contractor and TRADOC proponent schools with regard to how proponents will evaluate contractor-developed TADLP courseware. The guidelines below are not all-inclusive, and the final product is subject to courseware requirements stipulated by the TRADOC proponent school with which the contractor works. The contractor shall: 1) Involve the learner in real-world scenarios/problems/situations that grab and hold attention.
o Grab attention and stimulate curiosity within the first minute of instruction.
o Involve learners throughout instruction by incorporating learner-learner, learner-
content, and learner-instructor interactions, as relevant.
o Within the context of the learning experience, clearly communicate why the learner needs to know the task to be trained as well as the consequences of not achieving the learning objectives.
2) Ensure internal consistency between learning objectives, information content, examples, practice exercises, and test items. 3) Minimize cognitive load in instructional presentations.
o Use graphics, pictures, animation or video when concrete examples are needed, rather than relying solely on printed text, audio, or a talking head.
o If creating a multimedia message consisting of graphics and printed words,
integrate the printed words and graphic by placing the words next to the place they describe rather than apart from the portion of the graphic they describe.
o Use animation or diagrams to demonstrate processes that are difficult to visualize from verbal descriptions, or that are costly or impractical to videotape (e.g. cutaways of mechanisms in operation, physical/
chemical/biological laws). o If creating a verbal explanation or description of a procedure, present
corresponding graphics (e.g. animation, video, illustrations, pictures) that unfold so that the narration and visual information is fully integrated (so that the narrator is talking about what trainees are seeing at the moment).
87
o If verbal written information is presented on the screen, use short, concise
statements along with audio narration that paraphrases rather than reads the screen literally.
4) When teaching a concept, provide a definition of the concept, examples from the work environment, and exercises requiring learners to classify novel and varied examples of a concept. 5) When teaching a process (how something works), provide a visual model with a narrated description stating the sequence of events in the process and explaining how each action leads to the next stage.
o Include practical exercises that develop a full grasp of the concepts involved in the process. o When providing audio narration, use a human voice with a standard accent.
6) When teaching a procedure (“how to” knowledge), use direct instruction rather than experiential learning. Within the instruction:
o Provide a clear, step-by-step how to description of all actions and decisions
needed to achieve the performance.
o Demonstrate the procedure and explain why the procedure works.
o Provide opportunities to practice the procedure on problems in settings that mirror the work environment.
o Use an informal, conversational style when creating a short verbal explanation or
verbal description of a procedure.
o When providing audio narration, use a human voice with a standard accent. o When an instructor is available either synchronously or asynchronously, have
learners show how a solution was achieved when they practice procedures.
7) When providing direct instruction in cause-and-effect principles:
o State cause(s) and resulting effect(s) in the principle.
o Provide an example from the work setting.
o Require practice that begins with simple examples and moves to more complex examples in which learners are asked first to describe and label each phase of the cause-and-effect chain.
o Require students, when given one phase, to predict the next phase or the
previous phase, and then to use the cause-effect principle to solve novel problems.
8) Provide effective instruction on all learning objectives.
Learning Objectives
88

o Provide concrete and challenging but achievable learning objectives that are clearly understood by the target population.
Sequencing instruction
o Follow “part” practice of a procedure with “whole task” practice.
Examples and Exercises
o Present performance and provide practice exercises within the context of the job (mission) upon which the objectives build.
o Provide exercises supporting enabling objectives that build required
skills needed to support full performance, steadily building on one another, using conditions and standards increasing toward those required in the terminal learning objective and the test, and including adequate iterations of practice to master each skill.
Feedback
o Build in periods of review.
o Describe the gap between the student’s learning objectives and his
performance, and suggest how to close the gap.
o Focus student attention on the learning objective and not on his failure to achieve the objective.
Evaluation
o Construct the test to cover terminal learning objective(s) as a scenario simulating
actual job performance conditions and standards as closely as media will permit. The test and terminal objective should mirror each other, differing only in scenario details.
The contractor will, as appropriate:
1. Use video scenarios to stimulate critical thinking and discussion.
2. If creating a multimedia message without learner control, present verbal explanations in speech rather than writing. Provide a link to written explanations for the hearing-impaired.
3. Limit learner control over sequencing and learning strategies. Permit only minimal learner
control over pacing.
4. Relate the lesson to the learner’s prior knowledge and call upon the learner to begin relating prior knowledge to the current task.
89
5. If creating a multimedia explanation with narration of how something works or how to carry out a procedure, organize the narration to include a preview summary outlining the main steps, section headings corresponding to the main steps, and pointer words such as first, second, third, or as a result. Use these words to position the student within the lesson.
6. Chunk elaborate procedures into segments of four to five new (to the learner) steps
during instruction and model worked examples and explanations of their underlying principles, processes, and concepts.
7. Provide demonstrations of the performance required in terminal learning and enabling
objectives, tests and exercises prior to the student beginning the exercise.
8. Include enough feedback so errors do not accumulate. Focus corrective feedback on the strategy being used by the learner and not the learner or his mistake.
9. Follow instruction with reflection in two areas –
(1) what was learned, and (2) how it was learned (what worked well and not so well during instruction).
10. Use whole-part-whole sequencing. 11. Use easy-to-difficult sequencing.
12. Point out the unusual/new elements of what students are learning.
14. Provide distributed exercises separated by time to enhance long-term
90