designing a simple but modern website in this easy photoshop tutorial by joel jurado
TRANSCRIPT

Designing a Simple but Modern Website in this easy Photoshop tutorial By Joel Jurado

1. New Document/Canvas
Alright, let’s start off by creating a new document in which we can design our template. For this tutorial use the following settings press OK.
Leave the document as is and do to step 2.

2. I opened a picture of a student. Created a new layer by clicking at the bottom right next to the trash can and drew on layer 1.
Use the following pen settings.
I used the pen tool to trace around the picture by click and drag, creating a silhouette. .

3. After the silhouette is complete, click and hold down layer 1 to drag into the project window that was created in the beginning.
If necessary press ctrl+T to scale image then press enter to accept command.
I repeated this process.
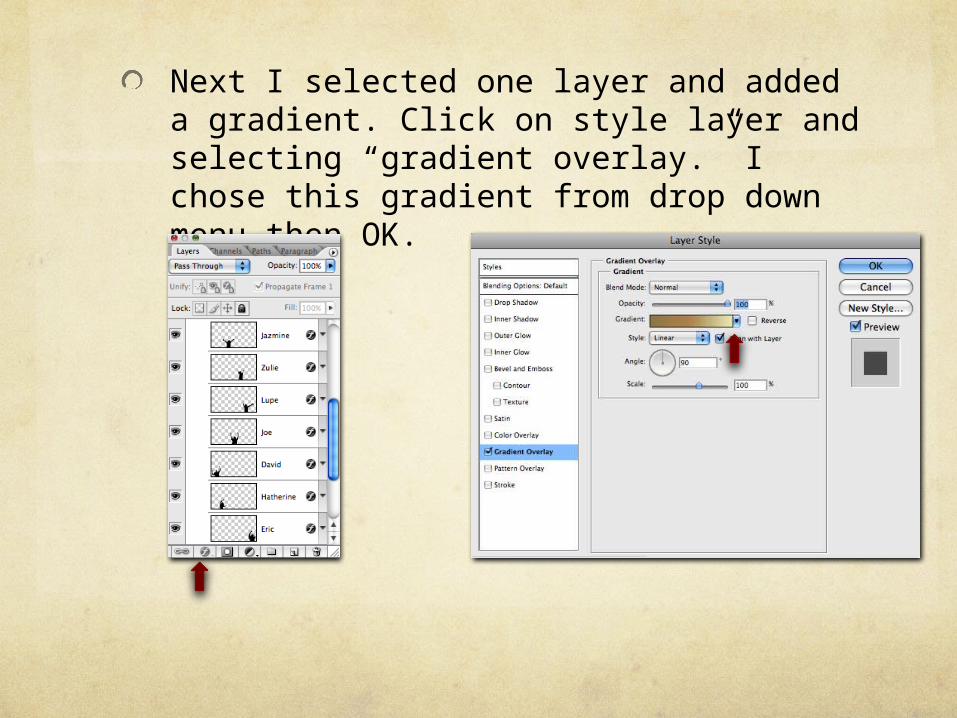
Next I selected one layer and added a gradient. Click on style layer and selecting “gradient overlay.” I chose this gradient from drop down menu then OK.
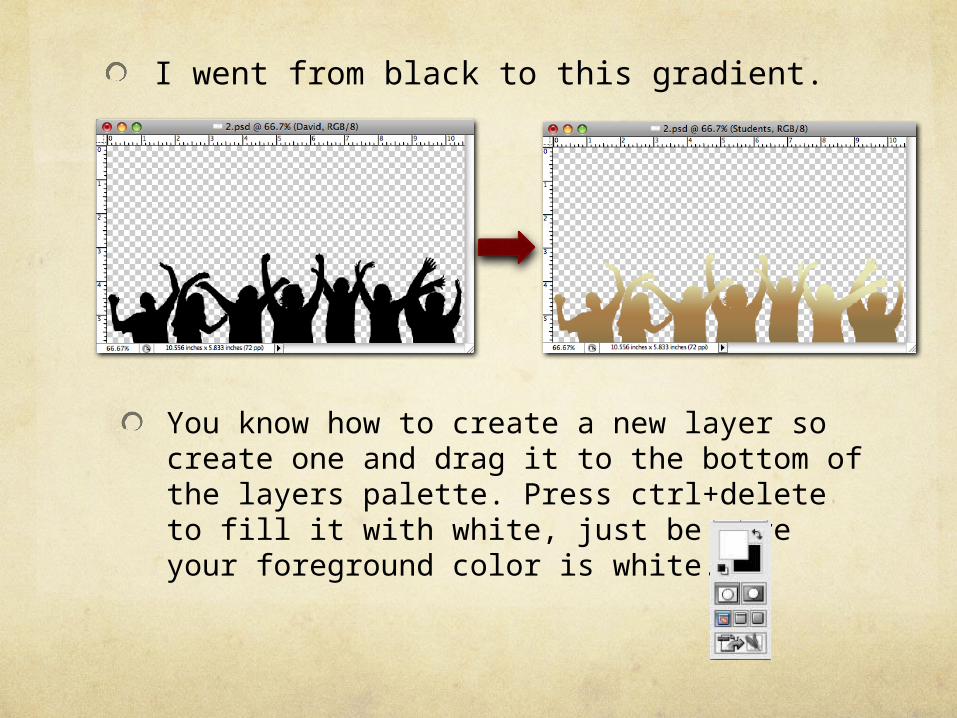
I went from black to this gradient.
You know how to create a new layer so create one and drag it to the bottom of the layers palette. Press ctrl+delete to fill it with white, just be sure your foreground color is white.

After creating a white background I open a Illustrator document that I created earlier and dragged it in to the project window. “I wont got into details on how I created this Document but you can bring in a picture or drawing.
After creating this I clicked on the Text tool and clickedon the document and typed S.A.Y Yes!. I used Marker feltas my Font but you can use any font that you like.

After adding some more text on a different layer and using some of my personal brushes I created this art work. Then created a new layer to add 2 images to be as links to photo galleries. Well I finished the process of designing the page.
Before I post it on the web site I needed go through the following process.
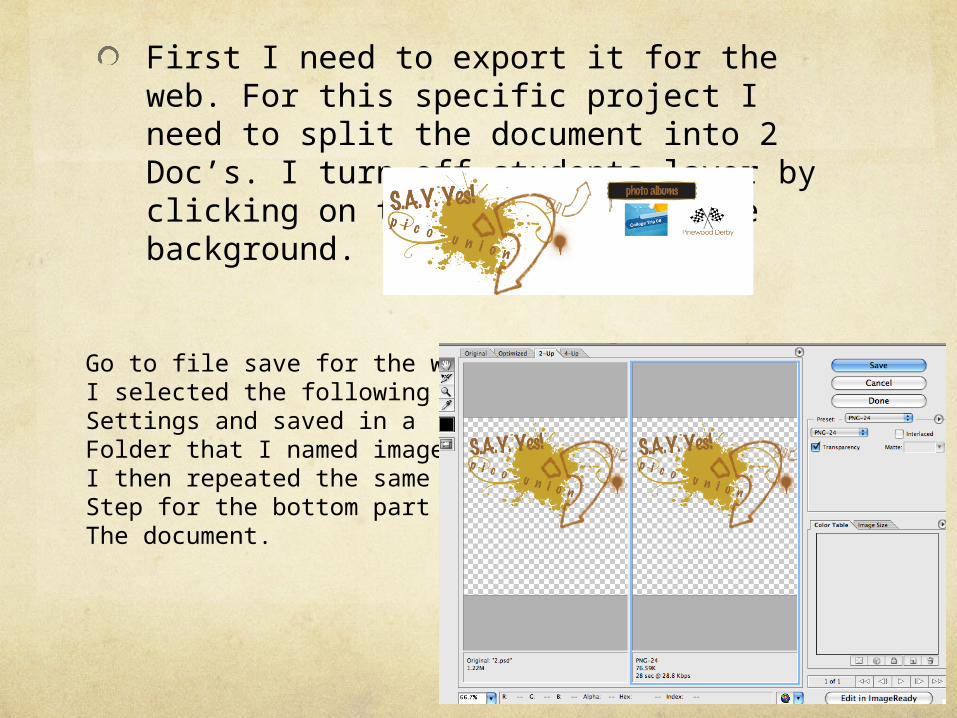
First I need to export it for the web. For this specific project I need to split the document into 2 Doc’s. I turn off students layer by clicking on the eye and also the background.
Go to file save for the web.I selected the following Settings and saved in a Folder that I named images.I then repeated the sameStep for the bottom part of The document.

From this point I opened Dreamweaver and I went to create a new document. Created a a table and with 1 column and 1 row. Since I am the web master for my church I have access to the web server. I’m not going to show the process to getting my page on line, because different hosting company have different processes to access them. Also depending on the software you use there is different process.
In Dreamweaver I created the links to the photo album. In this case I useMy email capabilities to create a photo gallery and created albums. I wanted to use Google's Picasa web album but wasn’t able to because theDownload is not Mac compatible.