distant guns: the russo-japanese war at sea, … · distant guns: the russo-japanese war at sea...
TRANSCRIPT
Distant Guns i
Player’s Guide
Copyright Albireo Studios LLC, 2001-2008. Storm Eagle, Storm Eagle Studios, and
Distant Guns are Trademarks of Albireo Studios LLC. All Rights Reserved.
Last edited: March 21, 2011
Distant Guns ii
DISTANT GUNS: THE RUSSO-JAPANESE WAR AT SEA ................................ 1
Introduction and Author’s Notes ................................................................................................................ 1
System Requirements ................................................................................................................................... 3
Launching the Game .................................................................................................................................... 4 Registration and Trial Limits ..................................................................................................................... 5
STARTING A GAME ............................................................................................ 7
Loading a Game ............................................................................................................................................ 8
Assigning Players .......................................................................................................................................... 9
Multiplayer Games ......................................................................................................................................10 Setting Up a New Multiplayer Game........................................................................................................11
Multiplayer Session Setup (Host) Dialog ............................................................................................11 Joining an Existing Multiplayer Game .....................................................................................................12
Multiplayer Session Setup (Join) Dialog .............................................................................................12 Select Session Dialog ...........................................................................................................................12
Multiplayer Player Assignments Dialog ...................................................................................................13 Differences between Multiplayer and Single Player Games .....................................................................13 Multiplayer Assignment Inheritance.........................................................................................................13 Multiplayer Information Dialog ................................................................................................................14
BATTLE GAMES ................................................................................................ 14
The Battle Screen .........................................................................................................................................15 The Point of View .....................................................................................................................................15
Point of View Controls ........................................................................................................................15 Main Control Flyout Panel .......................................................................................................................17 Time, Date, and Event Reports .................................................................................................................18 Information and Prompts ..........................................................................................................................18 The Microview Map .................................................................................................................................19 Battle Space Controls ...............................................................................................................................19
Selected Ships ......................................................................................................................................19 Mouse Selections with No Ships Selected ...........................................................................................19 Mouse Selections with One or More Ships Selected ...........................................................................20
The Battle Game Orders Flyout Panel ......................................................................................................21 Ship Information Group Buttons ..........................................................................................................21 Maneuver Group Buttons .....................................................................................................................22 Targeting Group Buttons .....................................................................................................................24 Selection Group Buttons ......................................................................................................................25 Sticky vs. Non-Sticky Flyouts (Advanced) ..........................................................................................26
Miscellaneous Controls ............................................................................................................................27 Window Controls ......................................................................................................................................27 Shell-cam ..................................................................................................................................................28 Ship Information .......................................................................................................................................28
Ship Status Indicator ............................................................................................................................28 Ship Information Popup .......................................................................................................................28 Ship Information Screen ......................................................................................................................29
Situation Information ................................................................................................................................29 The Weather Report .............................................................................................................................29

Distant Guns iii
The Situation Report ............................................................................................................................30 The Mission Objectives Report ............................................................................................................30 The Operational Map ...........................................................................................................................31
Playing the Battle Game .............................................................................................................................31 What‟s Going on Under the Hood – The Short Version ...........................................................................31 Command..................................................................................................................................................32
Leaders .................................................................................................................................................32 General Quarters ..................................................................................................................................33
Maneuver ..................................................................................................................................................33 Maneuver Orders .................................................................................................................................33 Collisions .............................................................................................................................................35 Entering Naval Bases ...........................................................................................................................36
Weapons ...................................................................................................................................................36 Firing ....................................................................................................................................................37 Ammunition .........................................................................................................................................37 Targeting Orders ..................................................................................................................................37 Locally Directed Weapons Fire ...........................................................................................................37 Guns .....................................................................................................................................................38 Torpedoes.............................................................................................................................................38 Mines ...................................................................................................................................................39 Shore Batteries .....................................................................................................................................39
Weapon Effects .........................................................................................................................................40 Damage and Damage Control ...................................................................................................................40 Sinking ......................................................................................................................................................40 Environment and Fog of War ...................................................................................................................41
Weather and Lighting ..........................................................................................................................41 Visibility and Weapons ........................................................................................................................41 Sea State Effects ..................................................................................................................................42 The Edge of the World .........................................................................................................................42
A Short Tutorial – Opening moves at Ulsan .............................................................................................43 Ulsan Introduction ....................................................................................................................................43 Starting Up ................................................................................................................................................44 Finding Our Way Around .........................................................................................................................47 Making Things Happen ............................................................................................................................51
CAMPAIGN GAMES .......................................................................................... 59
The Full War Campaign - One Hundred Victories ..................................................................................59
The Campaign Screen .................................................................................................................................59 The Campaign Map ..................................................................................................................................59
Campaign Map Overlays .....................................................................................................................60 Campaign Map Controls ...........................................................................................................................60 Main Campaign Control Flyout Panel ......................................................................................................60 Time, Date, and Event Reports .................................................................................................................61 Information and Prompts ..........................................................................................................................61 Campaign Space Controls .........................................................................................................................61
Selected Task Forces ............................................................................................................................61 Mouse Selections With No Task Force Selected .................................................................................61 Mouse Selections With a Task Force Selected ....................................................................................61
The Campaign Orders Flyout Panel ..........................................................................................................61 Control Group Buttons .........................................................................................................................62 Mission Group Buttons ........................................................................................................................62
Distant Guns iv
Organization Group Buttons ................................................................................................................62 Task Force Information ............................................................................................................................62
Task Force Status .................................................................................................................................62 Task Force Information Popup ............................................................................................................63
The Weather Report ..................................................................................................................................63
Playing the Campaign Game ......................................................................................................................63 Task Forces ...............................................................................................................................................63
Task Force Organization ......................................................................................................................63 The Task Force Organization Screen ...................................................................................................63 Task Force Missions ............................................................................................................................64 Coal and Sailing Range ........................................................................................................................65 Maintenance and Supply ......................................................................................................................65 Sailing ..................................................................................................................................................66 Basing ..................................................................................................................................................66 Patrols ..................................................................................................................................................66 Area Patrols ..........................................................................................................................................66
The War ....................................................................................................................................................67 Time .....................................................................................................................................................67 Weather ................................................................................................................................................67 Fog of War ...........................................................................................................................................67 News ....................................................................................................................................................67 Mine Warfare .......................................................................................................................................67 Reinforcements ....................................................................................................................................68 The Russian 2
nd Pacific Squadron ........................................................................................................68
Port Arthur ...........................................................................................................................................68 Battles .......................................................................................................................................................69
Beginning a Battle................................................................................................................................69 Initial Battle .........................................................................................................................................69 Special Disengagement ........................................................................................................................69 Ending a Battle .....................................................................................................................................69 After Action .........................................................................................................................................70 Victory in Battle ...................................................................................................................................70 Cargo Shipping ....................................................................................................................................70 Campaign Victory ................................................................................................................................70
APPENDICES..................................................................................................... 71
Appendix – Guns at Sea: the Inspiration for Distant Guns’ title. ..........................................................71
Appendix – License Transfer Utilities .......................................................................................................72 Introduction ..............................................................................................................................................72 On-Line License Transfers .......................................................................................................................72
On-line License Transfers - Detailed Instructions ...............................................................................72 Off-Line License Transfers .......................................................................................................................72 Orphan Policy ...........................................................................................................................................72
Appendix – Mouse Controls ......................................................................................................................73
Appendix – Battle Game Hotkeys .............................................................................................................73
Appendix – Campaign Game Hotkeys ......................................................................................................74
Appendix – Display Options ......................................................................................................................75
Distant Guns v
Appendix – Sound Options ........................................................................................................................77
Appendix – Weapons of the Russo-Japanese War ..................................................................................77
Appendix – Ships of the Russo-Japanese War ..........................................................................................78 Imperial Japanese Navy (Nihon Teikoku Kaigun) ...................................................................................79
Battleship Mikasa.................................................................................................................................79 Battleship Asahi ...................................................................................................................................80 Battleship Shikishima ..........................................................................................................................80 Battleship Hatsuse ................................................................................................................................81 Battleship Fuji ......................................................................................................................................82 Battleship Yashima ..............................................................................................................................82 Armored Cruiser Asama ......................................................................................................................83 Armored Cruiser Idzumo .....................................................................................................................84 Armored Cruiser Yakumo ....................................................................................................................84 Armored Cruiser Adzuma ....................................................................................................................85 Armored Cruiser Nisshin .....................................................................................................................86 Armored Cruiser Kasuga .....................................................................................................................86 Battleship Chin Yen .............................................................................................................................87 Protected Cruiser Chitose.....................................................................................................................88 Protected Cruiser Takasago .................................................................................................................88 Protected Cruiser Tsushima .................................................................................................................89 Protected Cruiser Naniwa ....................................................................................................................90 Protected Cruiser Yoshino ...................................................................................................................90 Protected Cruiser Akitsushima .............................................................................................................91 Protected Cruiser Matsushima .............................................................................................................92 Protected Cruiser Itsukushima .............................................................................................................92 Cruiser Fuso .........................................................................................................................................93 Protected Cruiser Otowa ......................................................................................................................94 Armored Cruiser Chiyoda ....................................................................................................................94 Protected Cruiser Suma ........................................................................................................................95 Armored Cruiser Hei Yen ....................................................................................................................96 Protected Cruiser Idzumi .....................................................................................................................96 Cruiser Takao .......................................................................................................................................97 Protected Cruiser Sai Yen ....................................................................................................................98 Armored Corvette Hiei ........................................................................................................................98 Corvette Tsukuba .................................................................................................................................99 Cruiser Chihaya ...................................................................................................................................99 Cruiser Tatsuta ...................................................................................................................................100 Cruiser Yaeyama ................................................................................................................................100 Cruiser Miyako ..................................................................................................................................101 Corvette Kaimon ................................................................................................................................102 Corvette Tenryu .................................................................................................................................102 Destroyer Shirakumo .........................................................................................................................103 Destroyer Akatsuki ............................................................................................................................103 Destroyer Harusame ...........................................................................................................................104 Destroyer Murakumo .........................................................................................................................104 Destroyer Ikazuchi .............................................................................................................................105 Torpedo Boat Hayabusa .....................................................................................................................105 Gunboat Maya ....................................................................................................................................106 Auxiliary Cruiser Kasuga Maru .........................................................................................................107 Torpedo Boat Shirataka .....................................................................................................................107 Torpedo Boat 67 ................................................................................................................................108 Torpedo Boat 31 ................................................................................................................................108 Torpedo Boat 39 ................................................................................................................................109 Torpedo Boat Fukurio ........................................................................................................................109
Distant Guns vi
Torpedo Boat 50 ................................................................................................................................110 Russian Imperial Fleet (Rossiskogo Impyeratorskogo Flota) .................................................................110
Battleship Tsesarevitch ......................................................................................................................111 Armored Cruiser Gromoboi ...............................................................................................................111 Battleship Petropavlovsk ...................................................................................................................112 Battleship Borodino ...........................................................................................................................113 Battleship Retvizan ............................................................................................................................113 Battleship Peresvyet ...........................................................................................................................114 Battleship Sisoi Vyeliki .....................................................................................................................115 Battleship Navarin .............................................................................................................................115 Armored Cruiser Rossiya ...................................................................................................................116 Battleship Imperator Nikolai I ...........................................................................................................117 Armored Cruiser Ryurik ....................................................................................................................117 Armored Cruiser Admiral Nakhimov ................................................................................................118 Armored Cruiser Bayan .....................................................................................................................119 Coastal Battleship Admiral Ushakov .................................................................................................120 Coastal Battleship Gen. Admiral Apraksin ........................................................................................120 Armored Cruiser Dmitri Donskoi ......................................................................................................121 Protected Cruiser Pallada ...................................................................................................................122 Protected Cruiser Varyag ...................................................................................................................122 Protected Cruiser Bogatyr ..................................................................................................................123 Armored Cruiser Vladimir Monomakh ..............................................................................................124 Protected Cruiser Askold ...................................................................................................................124 Protected Cruiser Svyetlana ...............................................................................................................125 Protected Cruiser Boyarin ..................................................................................................................126 Protected Cruiser Izumrud .................................................................................................................126 Auxiliary Cruiser Ural .......................................................................................................................127 Protected Cruiser Novik .....................................................................................................................127 Auxiliary Cruiser Lyena ....................................................................................................................128 Armored Gunboat Gryemyashchi ......................................................................................................129 Gunboat Bobr .....................................................................................................................................129 Gunboat Koreyets ..............................................................................................................................130 Clipper Zabiyaka ................................................................................................................................131 Minelayer Amur .................................................................................................................................131 Auxiliary Cruiser Almaz ....................................................................................................................132 Gunboat Gilyak ..................................................................................................................................132 Repair Ship Kamchatka .....................................................................................................................133 Destroyer Bdityelni ............................................................................................................................133 Destroyer Boiki ..................................................................................................................................134 Destroyer Boyevoi .............................................................................................................................134 Destroyer Vnimatelni .........................................................................................................................135 Torpedo Gunboat Gaidamak ..............................................................................................................136 Destroyer Lyetyenant Burakov ..........................................................................................................136 Destroyer Ryeshitelni .........................................................................................................................137 Torpedo Boat 203 Sungari .................................................................................................................137 Torpedo Boat 208 ..............................................................................................................................138 Torpedo Boat 205 Sveaborg ..............................................................................................................138 Torpedo Boat 201 Yanchukhye .........................................................................................................139
Appendix – Damage and Damage Control ..............................................................................................139 Ship systems ...........................................................................................................................................139 Temporary and Permanent Damage........................................................................................................140 Fire ..........................................................................................................................................................141 Damage Control ......................................................................................................................................141
Appendix – Concepts .................................................................................................................................141
Distant Guns vii
Appendix – Copyright and Credits ..........................................................................................................142
Appendix – Battleset 1 Scenarios .............................................................................................................144 Port Arthur - 12:20 A.M., February 9th, 1904 ........................................................................................144 Chemulpo - 12:00 P.M., February 9th, 1904 ..........................................................................................148 Liau-ti-shan - 4:00 A.M., March 10th, 1904 ...........................................................................................151 Bubnov's Surprise - 10:30 P.M., April 12th, 1904 ..................................................................................153 Makarov's Sortie - 8:00 A.M., April 13th, 1904 .....................................................................................155 Yellow Sea - 10:20 A.M., August 10th, 1904.........................................................................................162 Ullung 3:15 P.M., August 13th, 1904 .....................................................................................................168 Ulsan - 5:00 A.M., August 14th, 1904 ....................................................................................................172 Ulsan (Alternate) - 9:00 A.M., August 14th, 1904 .................................................................................175 The Hunt for Novik - 4:15 P.M., August 20th, 1904 ..............................................................................177 Tsushima, Tsushima (Engaged) 11:15 A.M. (1:39 P.M.,), May 27th, 1905 ...........................................179
Distant Guns 1
Distant Guns: The Russo-Japanese War at Sea
Introduction and Author’s Notes
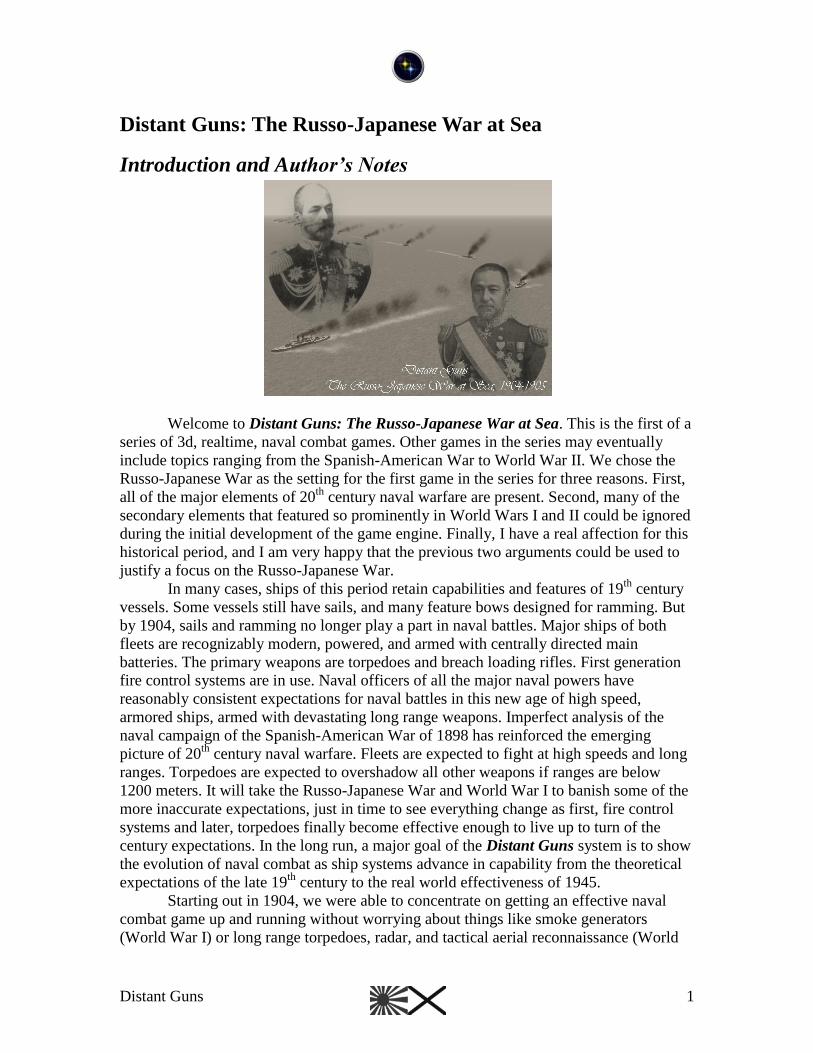
Welcome to Distant Guns: The Russo-Japanese War at Sea. This is the first of a
series of 3d, realtime, naval combat games. Other games in the series may eventually
include topics ranging from the Spanish-American War to World War II. We chose the
Russo-Japanese War as the setting for the first game in the series for three reasons. First,
all of the major elements of 20th
century naval warfare are present. Second, many of the
secondary elements that featured so prominently in World Wars I and II could be ignored
during the initial development of the game engine. Finally, I have a real affection for this
historical period, and I am very happy that the previous two arguments could be used to
justify a focus on the Russo-Japanese War.
In many cases, ships of this period retain capabilities and features of 19th
century
vessels. Some vessels still have sails, and many feature bows designed for ramming. But
by 1904, sails and ramming no longer play a part in naval battles. Major ships of both
fleets are recognizably modern, powered, and armed with centrally directed main
batteries. The primary weapons are torpedoes and breach loading rifles. First generation
fire control systems are in use. Naval officers of all the major naval powers have
reasonably consistent expectations for naval battles in this new age of high speed,
armored ships, armed with devastating long range weapons. Imperfect analysis of the
naval campaign of the Spanish-American War of 1898 has reinforced the emerging
picture of 20th
century naval warfare. Fleets are expected to fight at high speeds and long
ranges. Torpedoes are expected to overshadow all other weapons if ranges are below
1200 meters. It will take the Russo-Japanese War and World War I to banish some of the
more inaccurate expectations, just in time to see everything change as first, fire control
systems and later, torpedoes finally become effective enough to live up to turn of the
century expectations. In the long run, a major goal of the Distant Guns system is to show
the evolution of naval combat as ship systems advance in capability from the theoretical
expectations of the late 19th
century to the real world effectiveness of 1945.
Starting out in 1904, we were able to concentrate on getting an effective naval
combat game up and running without worrying about things like smoke generators
(World War I) or long range torpedoes, radar, and tactical aerial reconnaissance (World
Distant Guns 2
War II). By deferring treatment of these issues, we could take the time concentrate on
other details – things that might have slipped through the cracks if we had tried to tackle
everything at once. Some effects are so small you will probably never notice them: things
like impairing the ability of weapons to fire if seas are high enough to reach their actual
locations about ship. Then there is the issue of scale. Although some of the battles of this
period are fairly large, smoky affairs, we could defer the problem of maintaining
reasonable 3d frame rates at Jutland until computers have another year or so to speed up.
I am particularly pleased that we managed to focus on the 1904-1905 period. All
too frequently, game designers are forced by market pressures to concentrate on topics
outside their area of interest. I do have a serious interest in World Wars I and II, and I
look forward to tackling the rich entertainment opportunities of these periods. But it gives
me a warm, fuzzy feeling to have an excuse to slip obscure Russian gunboats into the art
budget. The next few years promise to be a lot of fun as we add the campaign game, deal
with other campaigns, and extend the game engine. Your suggestions for improvements
and extensions will help with this. As with my previous title, The Operational Art of
War, I have designed the game on this topic that I want to play. For my part, I believe I
have succeeded. I find the game tremendously fun to play, and I hope you do as well.
This manual and help file is organized in two sections. The main section is a
description of game play with an emphasis on what players need to know to actually play
the game. It is deliberately a bit light on technical details. Those of you who are
interested will find considerable additional detail in the appendices.
Norm Koger 2.0
May 24, 2006
Distant Guns 3
System Requirements
Minimum PC Requirements
Windows XP
Internet Connection with a valid email account
1.5 GHz Intel or AMD PC Compatible
512 MB of RAM
3D Video Card capable of running Direct X 9
275 MB of Hard Drive Space
You may, of course, try the trial version of Distant Guns on any computer of your choice.
These requirements outline the lower limits of computers and operating systems that are
supported by Storm Eagle Studios. The game may work on other systems, but we do not
offer troubleshooting or other support for systems not meeting our minimum
requirements.
Distant Guns 4
Launching the Game
With StormPowered, all of your games are accessible from one location. Launch
StormPowered and go to the My Games tab, then launch the game by double clicking on
its entry in the My Games list, or highlight it by clicking it once and press the „Launch‟
Button.
Distant Guns 5
Registration and Trial Limits
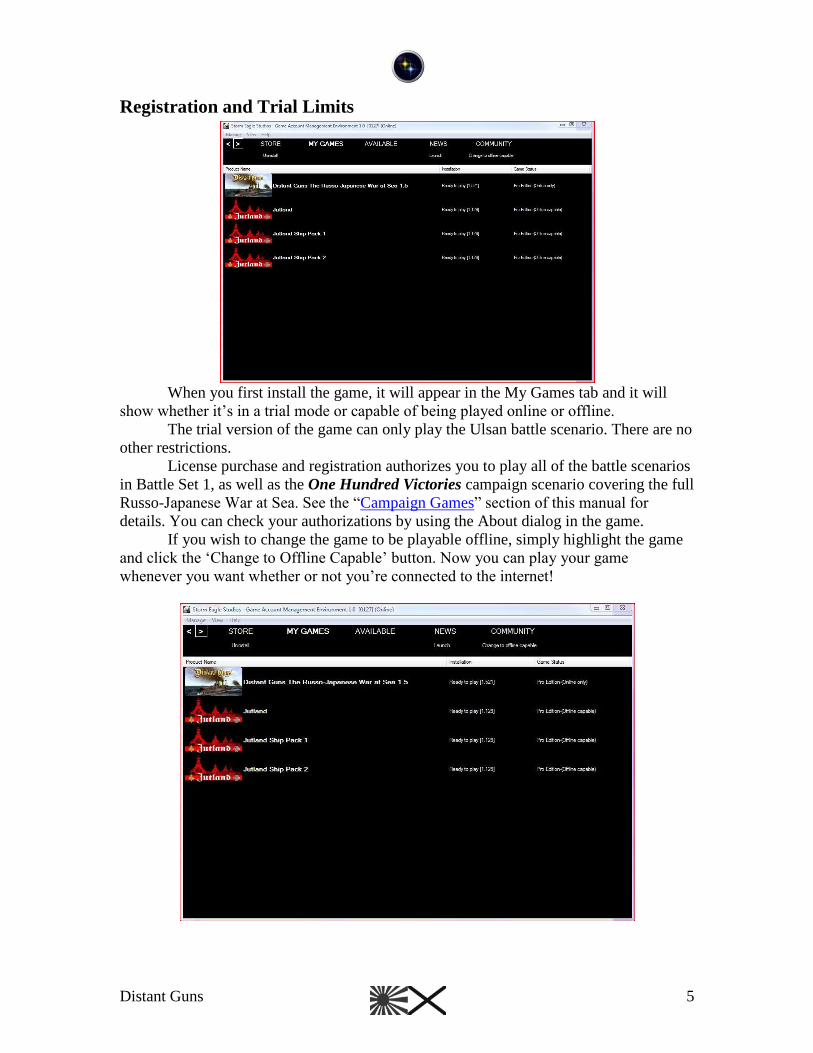
When you first install the game, it will appear in the My Games tab and it will
show whether it‟s in a trial mode or capable of being played online or offline.
The trial version of the game can only play the Ulsan battle scenario. There are no
other restrictions.
License purchase and registration authorizes you to play all of the battle scenarios
in Battle Set 1, as well as the One Hundred Victories campaign scenario covering the full
Russo-Japanese War at Sea. See the “Campaign Games” section of this manual for
details. You can check your authorizations by using the About dialog in the game.
If you wish to change the game to be playable offline, simply highlight the game
and click the „Change to Offline Capable‟ button. Now you can play your game
whenever you want whether or not you‟re connected to the internet!
Distant Guns 6
Main Options Screen
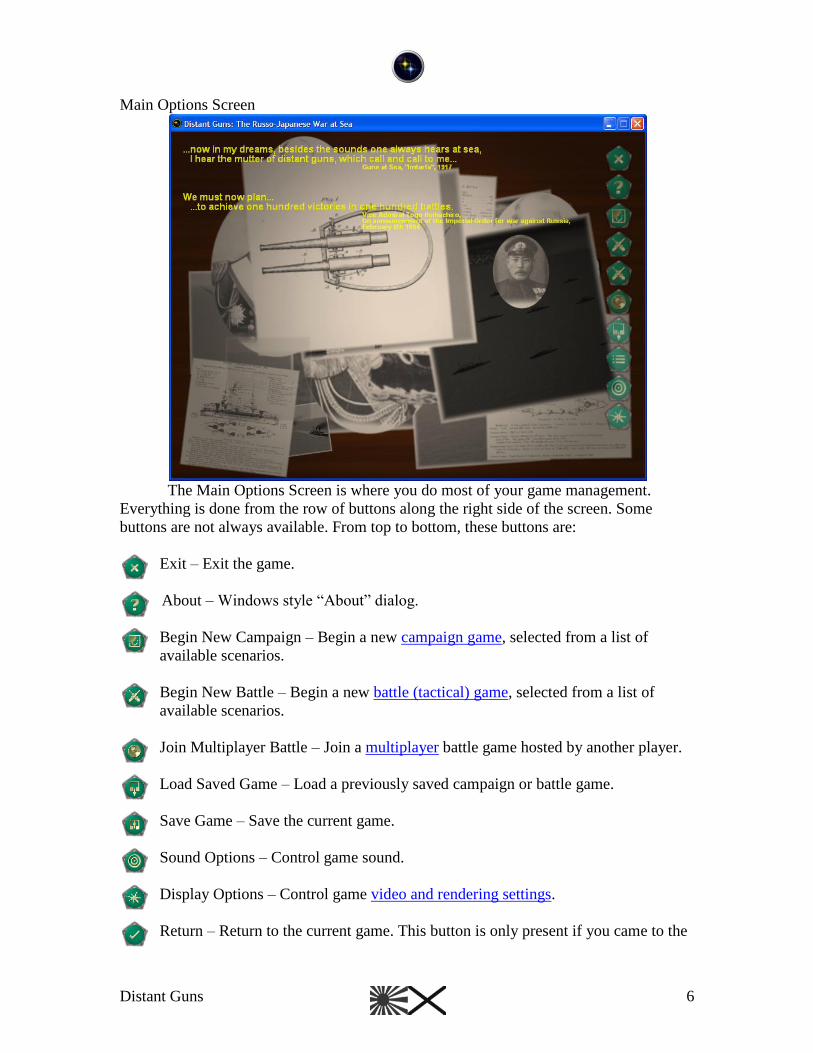
The Main Options Screen is where you do most of your game management.
Everything is done from the row of buttons along the right side of the screen. Some
buttons are not always available. From top to bottom, these buttons are:
Exit – Exit the game.
About – Windows style “About” dialog.
Begin New Campaign – Begin a new campaign game, selected from a list of
available scenarios.
Begin New Battle – Begin a new battle (tactical) game, selected from a list of
available scenarios.
Join Multiplayer Battle – Join a multiplayer battle game hosted by another player.
Load Saved Game – Load a previously saved campaign or battle game.
Save Game – Save the current game.
Sound Options – Control game sound.
Display Options – Control game video and rendering settings.
Return – Return to the current game. This button is only present if you came to the
Distant Guns 7
Main Options Screen from within a battle or campaign game.
Starting a Game
If you want to begin playing immediately, select the fourth button down from the
top left on the Main Options Screen: Begin New Battle. Select your game using the Load
Game Dialog, and pick which side to play using the Select Players Dialog. You can use
the tutorial based on the Ulsan scenario to help you learn how to play the game.
In trial mode, the game limits you to playing on the Ulsan scenario. Once the
game is registered, additional battles may be selected for play.
Distant Guns 8
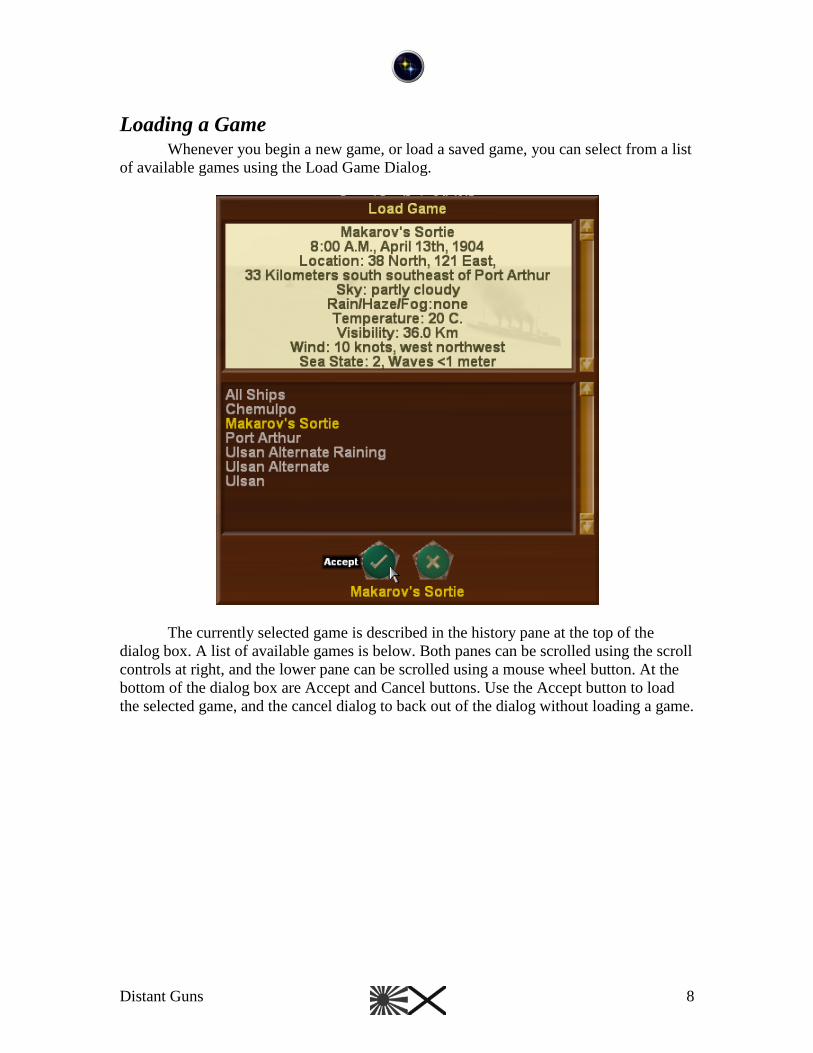
Loading a Game Whenever you begin a new game, or load a saved game, you can select from a list
of available games using the Load Game Dialog.
The currently selected game is described in the history pane at the top of the
dialog box. A list of available games is below. Both panes can be scrolled using the scroll
controls at right, and the lower pane can be scrolled using a mouse wheel button. At the
bottom of the dialog box are Accept and Cancel buttons. Use the Accept button to load
the selected game, and the cancel dialog to back out of the dialog without loading a game.
Distant Guns 9
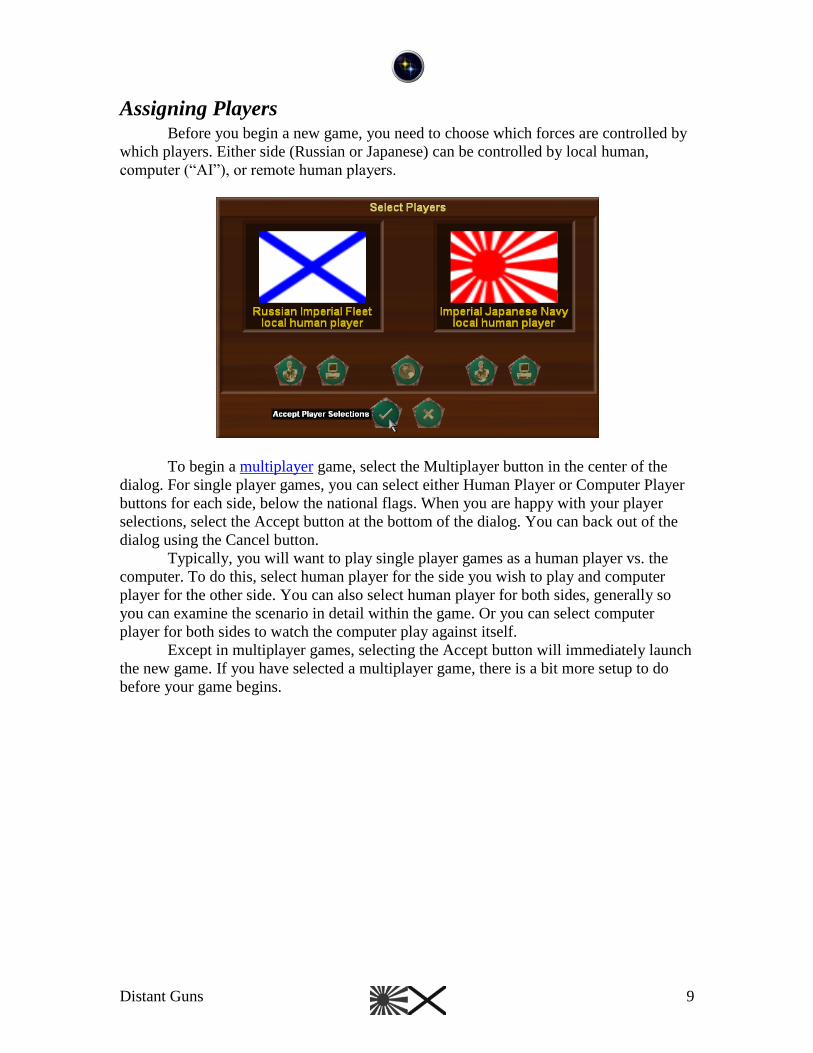
Assigning Players Before you begin a new game, you need to choose which forces are controlled by
which players. Either side (Russian or Japanese) can be controlled by local human,
computer (“AI”), or remote human players.
To begin a multiplayer game, select the Multiplayer button in the center of the
dialog. For single player games, you can select either Human Player or Computer Player
buttons for each side, below the national flags. When you are happy with your player
selections, select the Accept button at the bottom of the dialog. You can back out of the
dialog using the Cancel button.
Typically, you will want to play single player games as a human player vs. the
computer. To do this, select human player for the side you wish to play and computer
player for the other side. You can also select human player for both sides, generally so
you can examine the scenario in detail within the game. Or you can select computer
player for both sides to watch the computer play against itself.
Except in multiplayer games, selecting the Accept button will immediately launch
the new game. If you have selected a multiplayer game, there is a bit more setup to do
before your game begins.
Distant Guns 10
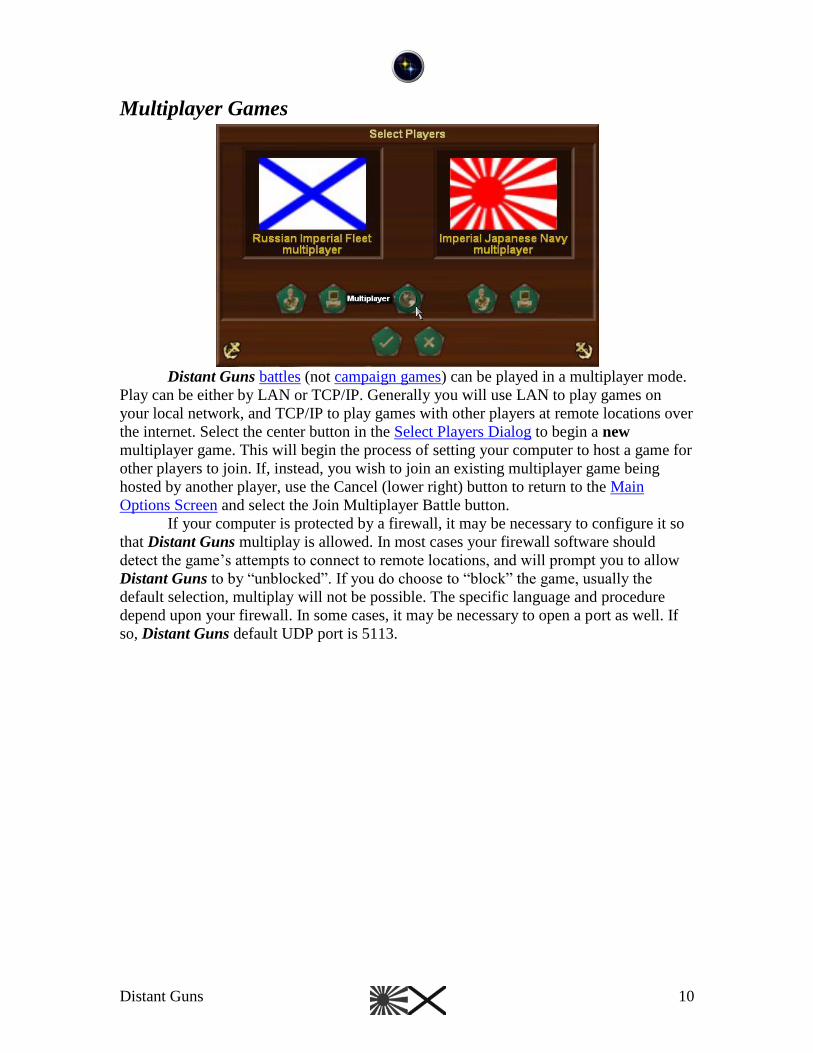
Multiplayer Games
Distant Guns battles (not campaign games) can be played in a multiplayer mode.
Play can be either by LAN or TCP/IP. Generally you will use LAN to play games on
your local network, and TCP/IP to play games with other players at remote locations over
the internet. Select the center button in the Select Players Dialog to begin a new
multiplayer game. This will begin the process of setting your computer to host a game for
other players to join. If, instead, you wish to join an existing multiplayer game being
hosted by another player, use the Cancel (lower right) button to return to the Main
Options Screen and select the Join Multiplayer Battle button.
If your computer is protected by a firewall, it may be necessary to configure it so
that Distant Guns multiplay is allowed. In most cases your firewall software should
detect the game‟s attempts to connect to remote locations, and will prompt you to allow
Distant Guns to by “unblocked”. If you do choose to “block” the game, usually the
default selection, multiplay will not be possible. The specific language and procedure
depend upon your firewall. In some cases, it may be necessary to open a port as well. If
so, Distant Guns default UDP port is 5113.
Distant Guns 11
Setting Up a New Multiplayer Game
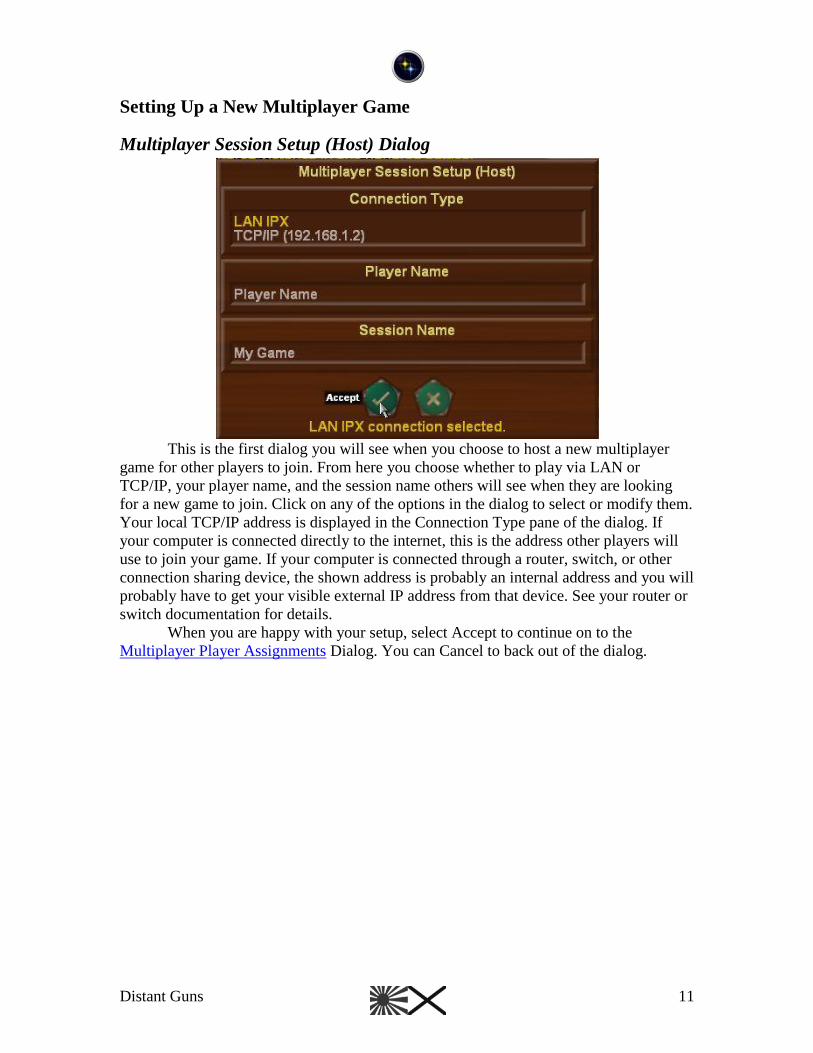
Multiplayer Session Setup (Host) Dialog
This is the first dialog you will see when you choose to host a new multiplayer
game for other players to join. From here you choose whether to play via LAN or
TCP/IP, your player name, and the session name others will see when they are looking
for a new game to join. Click on any of the options in the dialog to select or modify them.
Your local TCP/IP address is displayed in the Connection Type pane of the dialog. If
your computer is connected directly to the internet, this is the address other players will
use to join your game. If your computer is connected through a router, switch, or other
connection sharing device, the shown address is probably an internal address and you will
probably have to get your visible external IP address from that device. See your router or
switch documentation for details.
When you are happy with your setup, select Accept to continue on to the
Multiplayer Player Assignments Dialog. You can Cancel to back out of the dialog.
Distant Guns 12
Joining an Existing Multiplayer Game
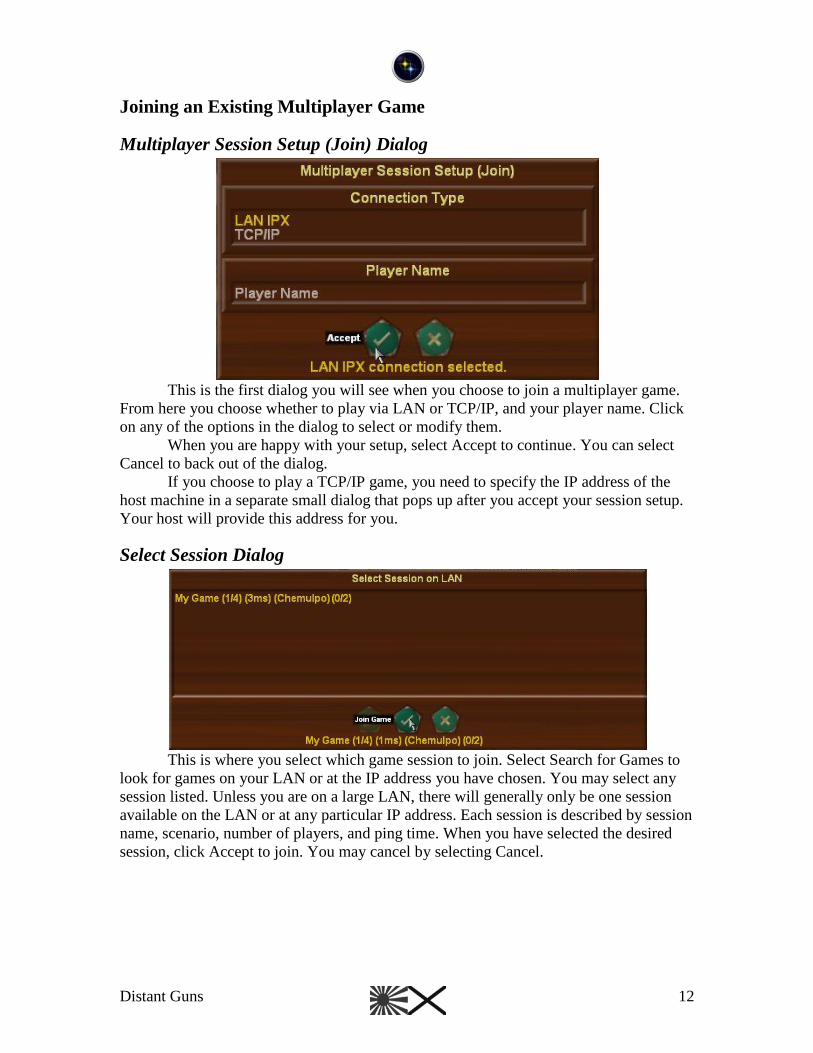
Multiplayer Session Setup (Join) Dialog
This is the first dialog you will see when you choose to join a multiplayer game.
From here you choose whether to play via LAN or TCP/IP, and your player name. Click
on any of the options in the dialog to select or modify them.
When you are happy with your setup, select Accept to continue. You can select
Cancel to back out of the dialog.
If you choose to play a TCP/IP game, you need to specify the IP address of the
host machine in a separate small dialog that pops up after you accept your session setup.
Your host will provide this address for you.
Select Session Dialog
This is where you select which game session to join. Select Search for Games to
look for games on your LAN or at the IP address you have chosen. You may select any
session listed. Unless you are on a large LAN, there will generally only be one session
available on the LAN or at any particular IP address. Each session is described by session
name, scenario, number of players, and ping time. When you have selected the desired
session, click Accept to join. You may cancel by selecting Cancel.
Distant Guns 13
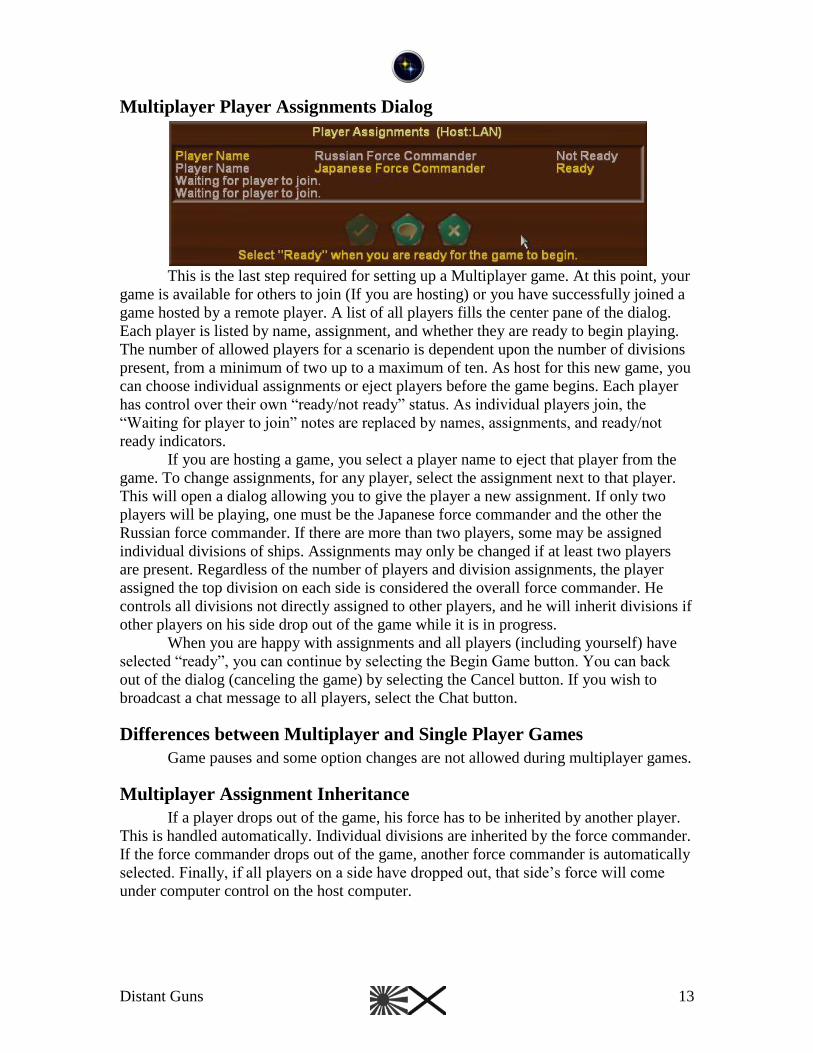
Multiplayer Player Assignments Dialog
This is the last step required for setting up a Multiplayer game. At this point, your
game is available for others to join (If you are hosting) or you have successfully joined a
game hosted by a remote player. A list of all players fills the center pane of the dialog.
Each player is listed by name, assignment, and whether they are ready to begin playing.
The number of allowed players for a scenario is dependent upon the number of divisions
present, from a minimum of two up to a maximum of ten. As host for this new game, you
can choose individual assignments or eject players before the game begins. Each player
has control over their own “ready/not ready” status. As individual players join, the
“Waiting for player to join” notes are replaced by names, assignments, and ready/not
ready indicators.
If you are hosting a game, you select a player name to eject that player from the
game. To change assignments, for any player, select the assignment next to that player.
This will open a dialog allowing you to give the player a new assignment. If only two
players will be playing, one must be the Japanese force commander and the other the
Russian force commander. If there are more than two players, some may be assigned
individual divisions of ships. Assignments may only be changed if at least two players
are present. Regardless of the number of players and division assignments, the player
assigned the top division on each side is considered the overall force commander. He
controls all divisions not directly assigned to other players, and he will inherit divisions if
other players on his side drop out of the game while it is in progress.
When you are happy with assignments and all players (including yourself) have
selected “ready”, you can continue by selecting the Begin Game button. You can back
out of the dialog (canceling the game) by selecting the Cancel button. If you wish to
broadcast a chat message to all players, select the Chat button.
Differences between Multiplayer and Single Player Games
Game pauses and some option changes are not allowed during multiplayer games.
Multiplayer Assignment Inheritance
If a player drops out of the game, his force has to be inherited by another player.
This is handled automatically. Individual divisions are inherited by the force commander.
If the force commander drops out of the game, another force commander is automatically
selected. Finally, if all players on a side have dropped out, that side‟s force will come
under computer control on the host computer.
Distant Guns 14
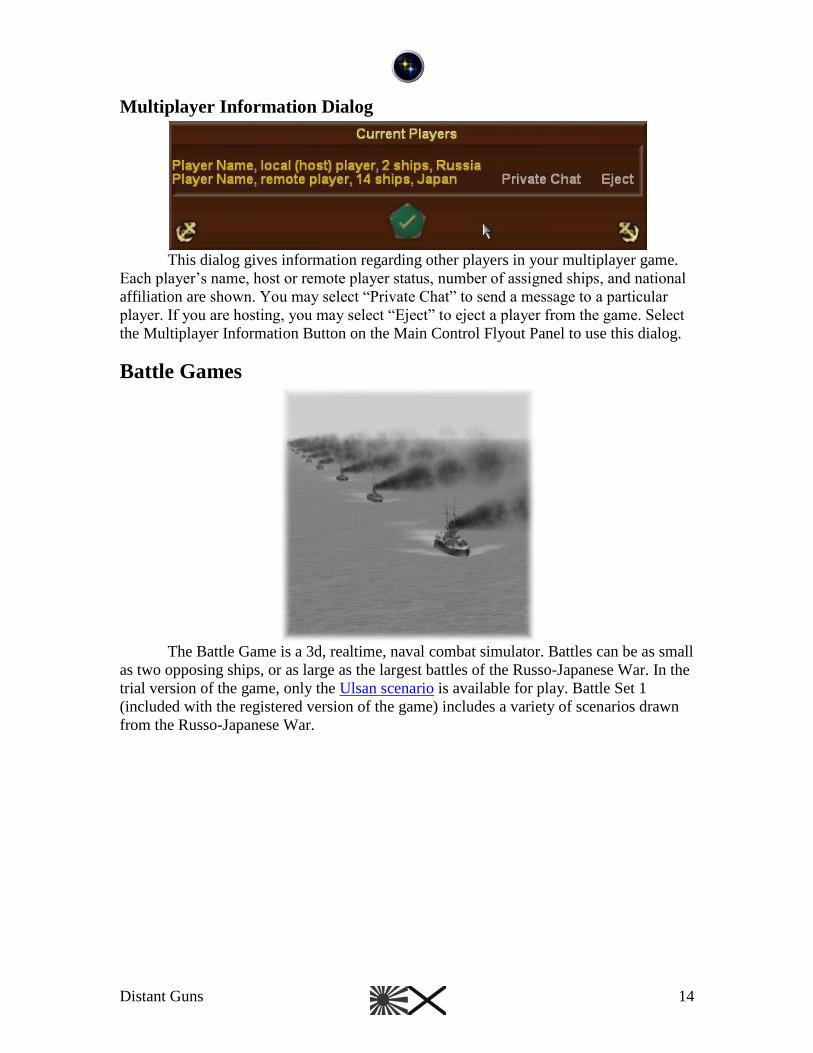
Multiplayer Information Dialog
This dialog gives information regarding other players in your multiplayer game.
Each player‟s name, host or remote player status, number of assigned ships, and national
affiliation are shown. You may select “Private Chat” to send a message to a particular
player. If you are hosting, you may select “Eject” to eject a player from the game. Select
the Multiplayer Information Button on the Main Control Flyout Panel to use this dialog.
Battle Games
The Battle Game is a 3d, realtime, naval combat simulator. Battles can be as small
as two opposing ships, or as large as the largest battles of the Russo-Japanese War. In the
trial version of the game, only the Ulsan scenario is available for play. Battle Set 1
(included with the registered version of the game) includes a variety of scenarios drawn
from the Russo-Japanese War.
Distant Guns 15
The Battle Screen
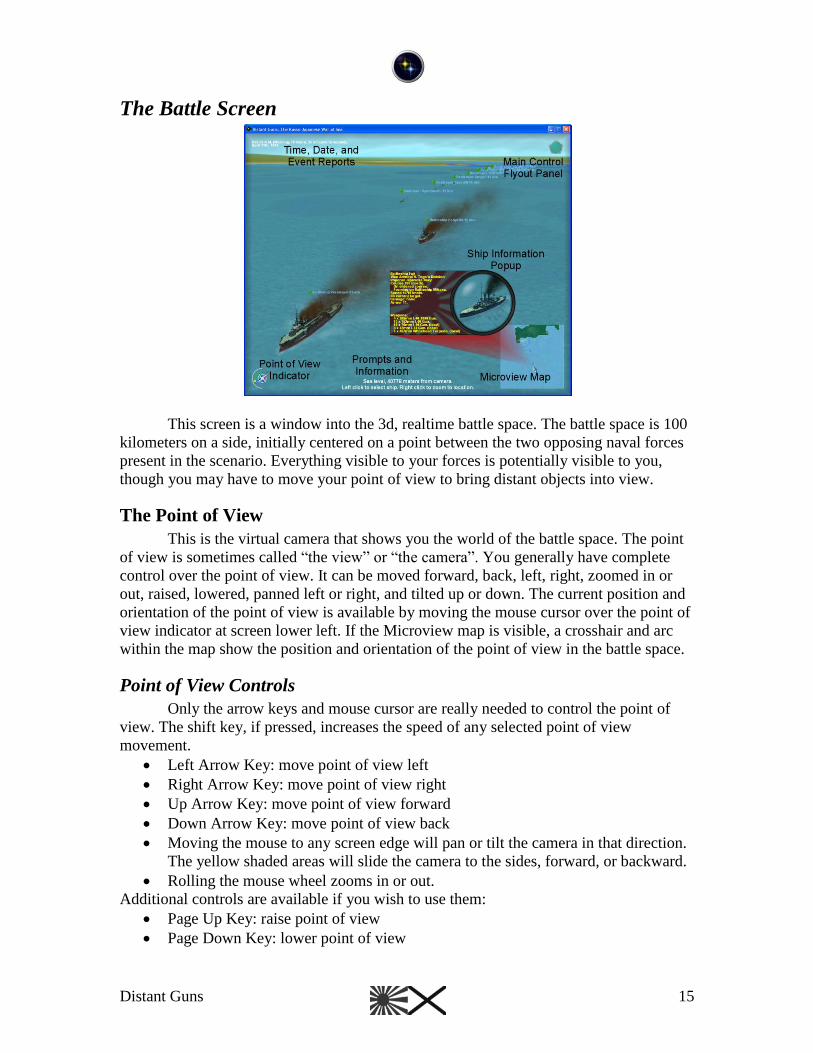
This screen is a window into the 3d, realtime battle space. The battle space is 100
kilometers on a side, initially centered on a point between the two opposing naval forces
present in the scenario. Everything visible to your forces is potentially visible to you,
though you may have to move your point of view to bring distant objects into view.
The Point of View
This is the virtual camera that shows you the world of the battle space. The point
of view is sometimes called “the view” or “the camera”. You generally have complete
control over the point of view. It can be moved forward, back, left, right, zoomed in or
out, raised, lowered, panned left or right, and tilted up or down. The current position and
orientation of the point of view is available by moving the mouse cursor over the point of
view indicator at screen lower left. If the Microview map is visible, a crosshair and arc
within the map show the position and orientation of the point of view in the battle space.
Point of View Controls
Only the arrow keys and mouse cursor are really needed to control the point of
view. The shift key, if pressed, increases the speed of any selected point of view
movement.
Left Arrow Key: move point of view left
Right Arrow Key: move point of view right
Up Arrow Key: move point of view forward
Down Arrow Key: move point of view back
Moving the mouse to any screen edge will pan or tilt the camera in that direction.
The yellow shaded areas will slide the camera to the sides, forward, or backward.
Rolling the mouse wheel zooms in or out.
Additional controls are available if you wish to use them:
Page Up Key: raise point of view
Page Down Key: lower point of view
Distant Guns 16
Number Pad 1 or 7 Key: pan point of view left
Number Pad 8 Key: tilt point of view down
Number Pad 3 or 9 Key: pan point of view right
Number Pad 6 Key: move point of view right
Number Pad 2 Key: tilt point of view up
Number Pad 5 Key: move point of view forward
Number Pad 0 Key: move point of view back
Number Pad – Key: zoom point of view out
Number Pad + Key: zoom point of view in
Number Pad * Key: raise point of view
Number Pad / Key: lower point of view
Mouse Wheel Forward: Zoom in
Mouse Wheel Back: Zoom out
Distant Guns 17
Main Control Flyout Panel
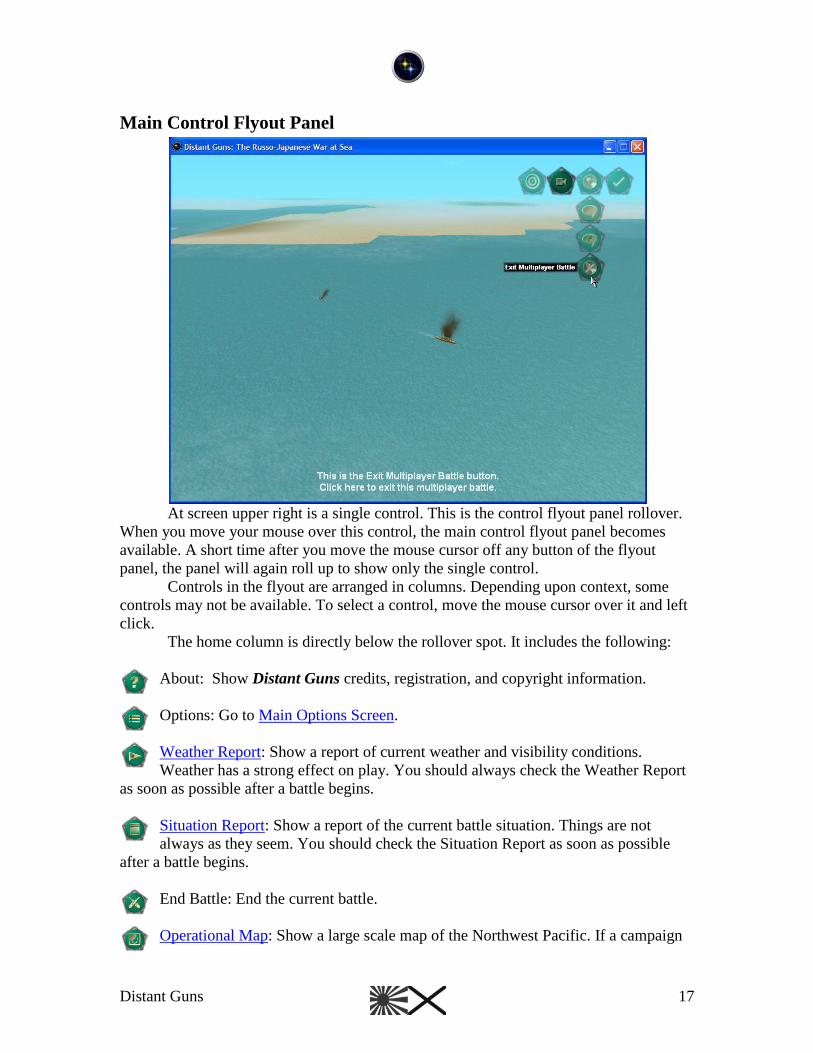
At screen upper right is a single control. This is the control flyout panel rollover.
When you move your mouse over this control, the main control flyout panel becomes
available. A short time after you move the mouse cursor off any button of the flyout
panel, the panel will again roll up to show only the single control.
Controls in the flyout are arranged in columns. Depending upon context, some
controls may not be available. To select a control, move the mouse cursor over it and left
click.
The home column is directly below the rollover spot. It includes the following:
About: Show Distant Guns credits, registration, and copyright information.
Options: Go to Main Options Screen.
Weather Report: Show a report of current weather and visibility conditions.
Weather has a strong effect on play. You should always check the Weather Report
as soon as possible after a battle begins.
Situation Report: Show a report of the current battle situation. Things are not
always as they seem. You should check the Situation Report as soon as possible
after a battle begins.
End Battle: End the current battle.
Operational Map: Show a large scale map of the Northwest Pacific. If a campaign
Distant Guns 18
game is in progress, movements of forces not directly involved in the battle can be
monitored here.
Exit: Exit the game.
To the left of the home column is the view lock column. These controls are used to free
or impose certain constraints on the movement of the point of view.
Free View: Set the point of view as free to move. (Default)
Follow View: Set the point of view to keep pace with a ship ship, moving to keep it
at a constant distance.
To the left of the view lock column is the display and sound option column. These
controls are used to bring up dialogs allowing you to change display and sound options.
Sound Options: Show the sound options dialog.
Display Options: Show the display options dialog.
In multiplayer games, there is also a multiplayer game option column. These controls are
used to manage various multiplayer game options.
Multiplayer Player Information: Show the Player Information dialog.
Multiplayer Chat: Send a chat message visible to all players.
Multiplayer Fleet Chat: Send a chat message visible to all players in your fleet.
Multiplayer Exit: Exit this multiplayer game.
Time, Date, and Event Reports
At screen upper left is a layer of text showing the current time and date, lighting
information, view mode, and (potentially) several lines of notifications of recent
significant battle events. By default, up to 16 lines of notifications can be visible under
the time / date / view lines. The size of the text can be increased, at the cost of fewer
visible lines, or turned off altogether.
N Key: toggles between standard, large, or no time and event display.
Information and Prompts
At the bottom center of the screen are two lines of context sensitive prompt and
information text.
Distant Guns 19
The Microview Map
At screen lower right is a small map showing all or a portion of the battle space.
All friendly and known enemy ships and shore batteries are shown as blue (Russian) or
red (Japanese) icons overlaid on the map. The location and orientation of the point of
view within the battle space are shown as a crosshair and arc. More than a simple map,
the microview is also a game control. As the mouse cursor is moved over the map, the
location under the cursor is shown in a “spyglass” view. If you left click within the map,
the point of view will rotate to face the location you clicked upon. Any friendly ship there
will be selected as the selected ship. Right clicking within the map will move the point of
view to the selected location.
You can change the appearance of the microview using the keyboard. Number
keys refer to the keys across the top of your keyboard, not the num pad keys. If the map
magnification is set higher than 1x, the map will be centered on the point of view.
1 Key: Set microview map magnification to 1x, showing the entire battle space.
(Default)
2 Key: Set microview map magnification to 2x.
3 Key: Set microview map magnification to 3x.
4 Key: Set microview map magnification to 4x.
5 Key: Set microview map magnification to 5x.
M Key: Toggle between standard display at lower right, full screen display at
center, or microview map display off.
Battle Space Controls
The battle space controls are the heart of the battle game. All orders to your forces
are issued by left or right clicking within the battle space.
The 3d world shown in the battle screen is “hot”. As the mouse cursor is moved
over the screen, distance and elevation data are shown for the spot under the cursor. If a
friendly or enemy ship is under the cursor, the cursor will change to a cross and
information on the ship is displayed.
Any visible location can be selected by left or right click. The effects of mouse
clicks depend upon whether any ships are currently selected.
Selected Ships
Any orders you issue will only affect the ships you have selected. Ships are
selected by using the left mouse button. See Mouse Selections with No Ships Selected.
Once selected, ships are highlighted by either a red (Japanese) or blue (Russian) halo on
screen. You can deselect your ships by using the escape key or right clicking anywhere
on the screen selecting the Close Flyout / Deselect button in Orders Flyout Panel.
Mouse Selections with No Ships Selected
If no ship is selected, a left or right mouse button click will move the point of
view toward the selected location, and any selectable friendly ship at the location will be
selected. You can select more than one ship by left clicking, holding, and dragging a
selection rectangle. When you release the button, any selectable ships within are selected.
Under certain conditions, some friendly ships may not be selectable.
Distant Guns 20
Mouse Selections with One or More Ships Selected
If one or more ships are selected, a left mouse click on a selected ship selects
ships belonging to the next command level of the force. Clicking on a lone selected ship
selects that ship‟s parent division. Clicking again selects the friendly entire fleet. Clicking
again on the ship selects back down to just that ship, so repeated clicking on selected
ships results in a circular rotation through all levels of command.
A left click in the water starts movement plotting. Yellow arcs and lines are
drawn from the selected ships and any ships in their parent divisions. These lines are
potential ship movements that you can order. As you move the mouse cursor, the lines
will change in an attempt to plot moves toward the world location under the mouse
cursor. You will probably find that it is helpful to be at least 1000 meters from the
selected ship when plotting moves, as most ships require large areas to complete turns.
Point of view controls remain active during plotting, and you will frequently find yourself
moving the point of view while setting up movement orders. It can also be helpful to set
the magnification of the microview to 2x or higher, particularly if the selected ships are
close to enemy forces. Projected plot lines extending from division leaders are slightly
brighter or bolder than other lines. Note that the plot lines are constantly changing. If you
are not playing a multiplayer game, you may wish to pause the game while plotting
movement. To turn movement path calculation off, left click again in the water. The
yellow lines will disappear.
When the projected plot lines are where you want them to be, or if you wish to
issue non-movement related orders, right click. This brings up the Orders Flyout Panel.
Distant Guns 21
The Battle Game Orders Flyout Panel
All orders to ships can be given using the orders flyout panel. The buttons that
appear, and their appearance, are dependent upon how many ships are selected, their
state, and whether any movement plots are on screen. Each button is fully described using
on-screen prompts. As with the Main Control Flyout Panel, the buttons are divided into
columns, and unless the mouse cursor is within the column only the top button of each
column is displayed. Selecting the Close Flyout button will close the flyout, leaving any
selected ships still selected. You can select the Close Flyout / Deselect button to close the
flyout while releasing selected ships.
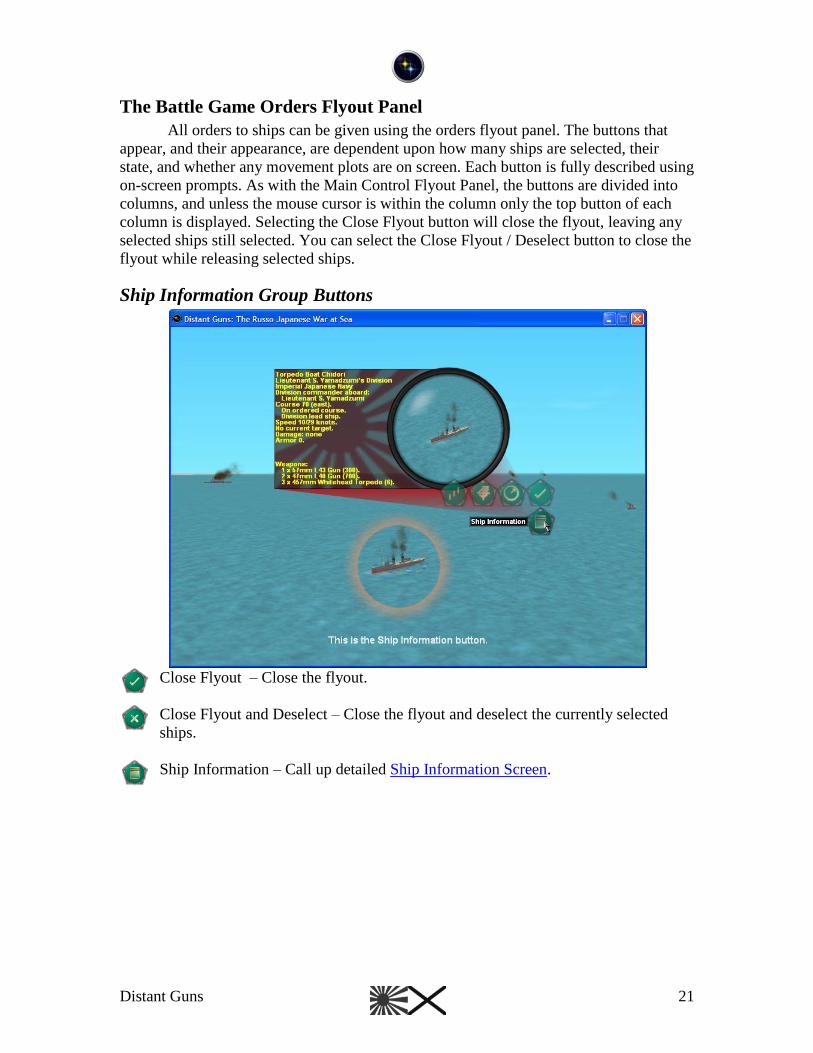
Ship Information Group Buttons
Close Flyout – Close the flyout.
Close Flyout and Deselect – Close the flyout and deselect the currently selected
ships.
Ship Information – Call up detailed Ship Information Screen.
Distant Guns 22
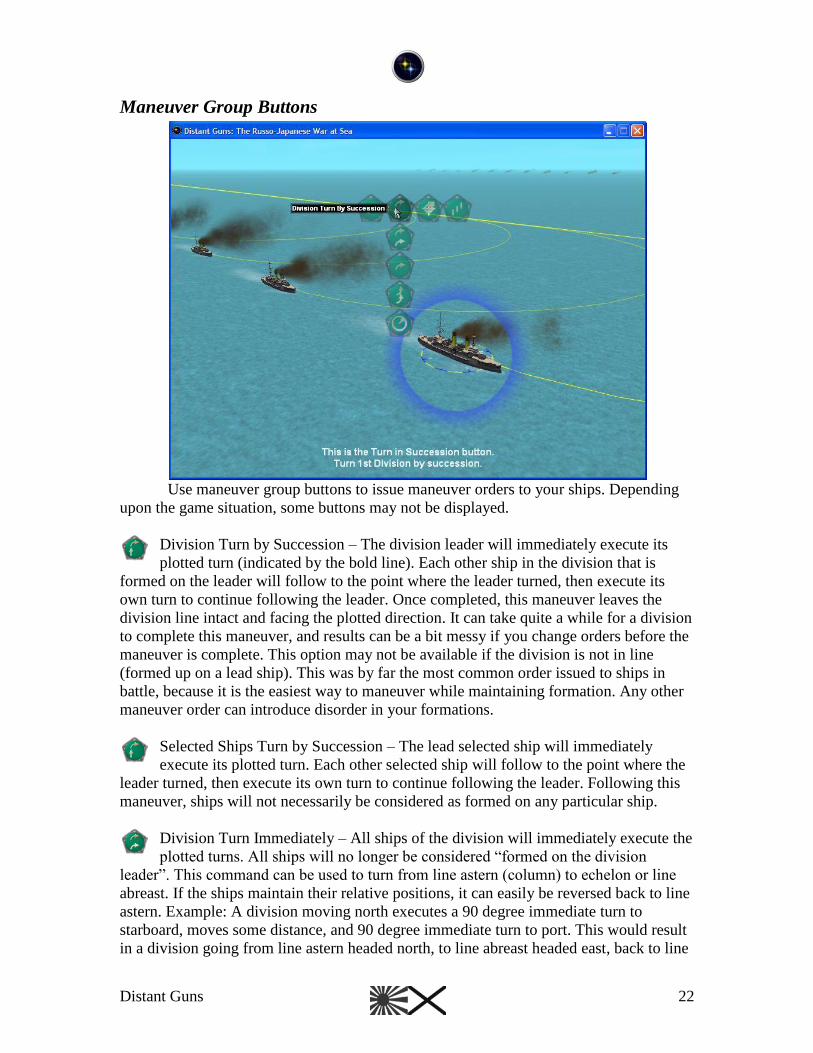
Maneuver Group Buttons
Use maneuver group buttons to issue maneuver orders to your ships. Depending
upon the game situation, some buttons may not be displayed.
Division Turn by Succession – The division leader will immediately execute its
plotted turn (indicated by the bold line). Each other ship in the division that is
formed on the leader will follow to the point where the leader turned, then execute its
own turn to continue following the leader. Once completed, this maneuver leaves the
division line intact and facing the plotted direction. It can take quite a while for a division
to complete this maneuver, and results can be a bit messy if you change orders before the
maneuver is complete. This option may not be available if the division is not in line
(formed up on a lead ship). This was by far the most common order issued to ships in
battle, because it is the easiest way to maneuver while maintaining formation. Any other
maneuver order can introduce disorder in your formations.
Selected Ships Turn by Succession – The lead selected ship will immediately
execute its plotted turn. Each other selected ship will follow to the point where the
leader turned, then execute its own turn to continue following the leader. Following this
maneuver, ships will not necessarily be considered as formed on any particular ship.
Division Turn Immediately – All ships of the division will immediately execute the
plotted turns. All ships will no longer be considered “formed on the division
leader”. This command can be used to turn from line astern (column) to echelon or line
abreast. If the ships maintain their relative positions, it can easily be reversed back to line
astern. Example: A division moving north executes a 90 degree immediate turn to
starboard, moves some distance, and 90 degree immediate turn to port. This would result
in a division going from line astern headed north, to line abreast headed east, back to line
Distant Guns 23
astern headed north. Each ship would execute an “s” shaped course. If perfectly executed,
all ships of the division will once again be considered formed on the division leader.
Frequently, particularly in combat, this will not be the case.
Ship Turn Independently – This is very similar to Immediate Turn, except that only
the selected ships will execute the maneuver. Non-selected ships of the division
will continue their original movement, and will maintain their “formed on division
leader” status.
Division Reform Line on Best Lead Ship – This is your best bet for restoring order
to a scattered formation. Ships will attempt to return to their position astern of a
division leader, at the same interval as at the beginning of the scenario. The leader chosen
will depend upon the arrangement of the ships. It will not necessarily be the original
division leader. The prompts will inform you of the selected “best leader” for a quick
reformation. If the division is scattered, this can take some time. It can also result in
unpredictable maneuvers by individual ships. In many cases you can speed things up by
tidying the ship positions manually (making sure they are already in something like line
formation, in their original order, facing more or less in the same direction, and not in
imminent danger of collision), prior to giving this order. It can be helpful to set the speed
of the lead ship a couple of knots below the speed of the slowest ship in the division, so
ships attempting to take trailing positions can accelerate to catch up with the leader.
Division Reform Line on Selected Ship – All selected ships will attempt to return
to their position astern of the selected ship as division leader, at the same interval
as at the beginning of the scenario. If the division is scattered, this can take some time. It
can also result in unpredictable maneuvers by individual ships. In many cases you can
speed things up by tidying the ship positions manually (making sure they are already in
something like line formation, in their original order, facing more or less in the same
direction, and not in imminent danger of collision), prior to giving this order. Your
division will reform most easily if you pick a leader that appears to be in front of most of
the other ships in the division. Be careful with this command. If you choose a ship toward
the apparent rear of the division, individual ships can spend considerable time looping
around trying to line up. It can be helpful to set the speed of the selected lead ship a
couple of knots below the speed of the slowest ship in the division, so ships attempting to
take trailing positions can accelerate to catch up with the leader.
Division Turn Immediately and Reform – All selected ships will immediately
execute the plotted turns as in a normal immediate turn. When the turns are
completed, the division will reform on whichever ship is nearest the head of the
formation at that time. This order is frequently given to order simultaneous 180 degree
turns, with the originally trailing ship becoming the new lead ship for the formation. If all
goes well, you can usually predict which ship will be at the head of the reformed division.
Turns of less than 90 degrees will tend to retain the original leader, and turns of more
than 90 degrees tend to reverse the order of the division line. This is usually a fairly safe
order unless the enemy is near enough to disrupt it, or the paths of the ships (as indicated
Distant Guns 24
by the yellow lines) are such that it isn‟t easy to determine who will be in the lead after
the turn.
Guide on Other Division – The selected division will follow the division of the ship
under the mouse cursor. This button will only appear if a division leader is the
currently selected ship, and the mouse cursor is over a ship belonging to another division
when you right click to bring up the flyout.
Guide Independently – The selected division will no longer follow the division it is
currently following. This button will only appear if the selected division is
currently following another division.
Set Speed – Set the ordered speed for the selected ships. Note that ships “formed
on” other ships will set their speed automatically to maintain proper interval within
their formation regardless of individual speed orders, so this setting only has a direct
effect if issued to division lead ships or ships that are not formed.
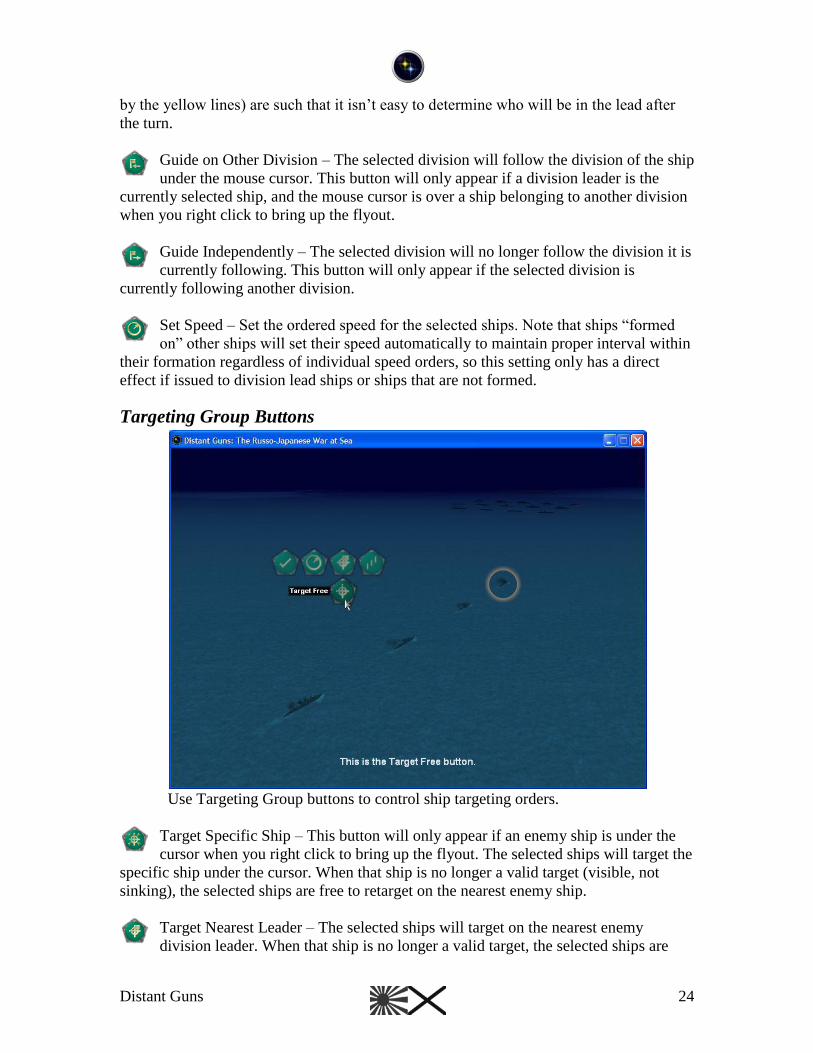
Targeting Group Buttons
Use Targeting Group buttons to control ship targeting orders.
Target Specific Ship – This button will only appear if an enemy ship is under the
cursor when you right click to bring up the flyout. The selected ships will target the
specific ship under the cursor. When that ship is no longer a valid target (visible, not
sinking), the selected ships are free to retarget on the nearest enemy ship.
Target Nearest Leader – The selected ships will target on the nearest enemy
division leader. When that ship is no longer a valid target, the selected ships are
Distant Guns 25
free to retarget on the nearest enemy ship.
Target Free – The selected ships may pick their own target, generally the nearest
enemy ship.
Cease Fire – The selected ships will cease fire.
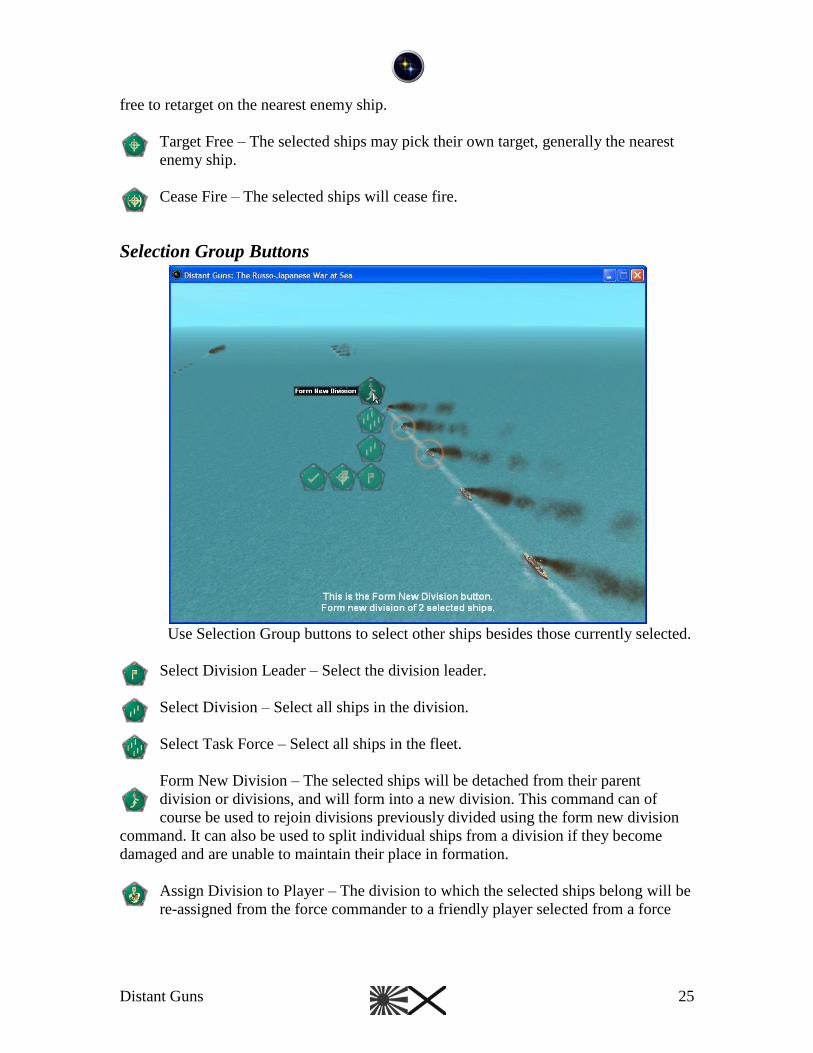
Selection Group Buttons
Use Selection Group buttons to select other ships besides those currently selected.
Select Division Leader – Select the division leader.
Select Division – Select all ships in the division.
Select Task Force – Select all ships in the fleet.
Form New Division – The selected ships will be detached from their parent
division or divisions, and will form into a new division. This command can of
course be used to rejoin divisions previously divided using the form new division
command. It can also be used to split individual ships from a division if they become
damaged and are unable to maintain their place in formation.
Assign Division to Player – The division to which the selected ships belong will be
re-assigned from the force commander to a friendly player selected from a force
Distant Guns 26
assignment dialog box. This button will only appear in multiplayer games, and is only
available to force commanders. The option can be used to fine tune assignments in
multiplayer games, or to assign new forces to players who have lost their starting force.
Sticky vs. Non-Sticky Flyouts (Advanced)
By default, orders flyouts are “sticky”. That is, they remain on the screen until
you select one of the close options to close them.
Non-sticky flyouts offer experienced players a faster, more streamlined way to
issue orders. Unlike sticky flyouts, non-sticky flyouts remain on the screen only as long
as the right mouse button is depressed. If you want to issue an order to your selected
ships, press and hold the right mouse button. The flyout appears. While holding the right
mouse button, move the cursor over the flyout until you reach the option you want to
select, then release the right mouse button. Non-sticky flyouts allow you to issue any
flyout order with a single click, rather than the three usually required using the standard,
sticky flyouts.
Press the “x” key to toggle between sticky and non-sticky flyouts.
Distant Guns 27
Miscellaneous Controls
These controls perform miscellaneous game functions.
C Key: Send chat message to all players (multiplay).
C <shift> Key: Send chat message to all friendly players (multiplay).
K Key: View next enemy ship.
L Key: View previous enemy ship.
. Key: View next friendly ship.
. <shift> Key: Select next friendly ship.
, Key: View previous friendly ship.
, <shift> Key: Select previous friendly ship.
B Key: View last selected ship.
L Key: Multiplay player management and direct message dialog.
P Key: Pause the game (not in multiplay).
S Key: Toggle ship status display on/off.
T Key: Toggle spyglass views on/off.
Q Key: Selected ships target specific ship. If this key is pressed while your mouse
cursor is on an enemy ship, your selected ships will be given orders to target that
enemy.
A Key: Selected ships target nearest leader.
Z Key: Selected ships target free.
Space Key: Selected ships cease fire.
R Key: Set Free View.
F Key: Set Follow View
V Key: Set Fixed View.
X Key: Turn “sticky” orders flyouts on/off
Z Key: Change Shell-cam option (off/selected ships/all ships).
F1 Key: Toggle hotkey list on/off.
F2 Key: Set the standard ship view to the current distance and orientation, relative
to the selected ship.
F3 Key: Set the standard battle space view to the current elevation and
orientation.
F4 Key: Toggle frame rate display on/off.
F5 Key: Binocular View
F6 Key: Quick Save Game
F7 Key: Increase time rate (not in multiplay).
F8 Key: Decrease time rate (not in multiplay).
F9 Key: Set time rate to 1x.
F12 Key: Reset all game defaults. Some changes may not be visible until the next
time you start the game.
Window Controls
If you are playing in windowed mode, the game screen may be moved or resized
using standard Windows ™ conventions. A standard Windows ™ Help file will also be
available via the F1 Key.
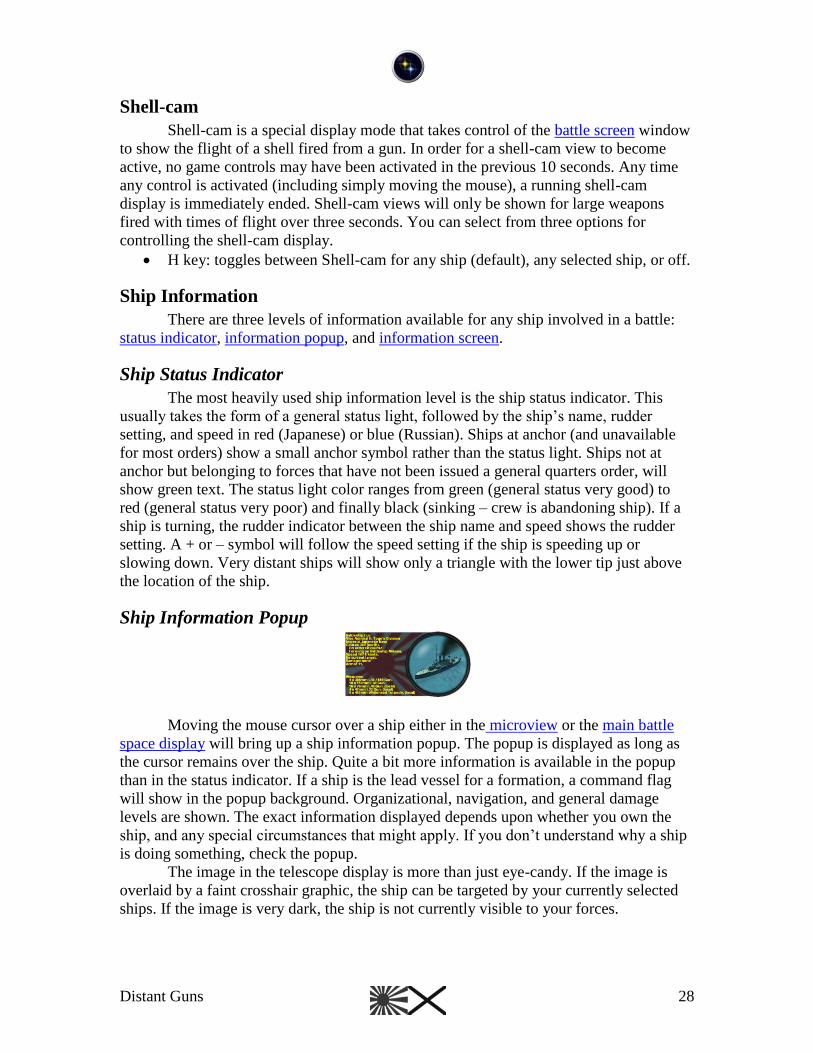
Distant Guns 28
Shell-cam
Shell-cam is a special display mode that takes control of the battle screen window
to show the flight of a shell fired from a gun. In order for a shell-cam view to become
active, no game controls may have been activated in the previous 10 seconds. Any time
any control is activated (including simply moving the mouse), a running shell-cam
display is immediately ended. Shell-cam views will only be shown for large weapons
fired with times of flight over three seconds. You can select from three options for
controlling the shell-cam display.
H key: toggles between Shell-cam for any ship (default), any selected ship, or off.
Ship Information
There are three levels of information available for any ship involved in a battle:
status indicator, information popup, and information screen.
Ship Status Indicator
The most heavily used ship information level is the ship status indicator. This
usually takes the form of a general status light, followed by the ship‟s name, rudder
setting, and speed in red (Japanese) or blue (Russian). Ships at anchor (and unavailable
for most orders) show a small anchor symbol rather than the status light. Ships not at
anchor but belonging to forces that have not been issued a general quarters order, will
show green text. The status light color ranges from green (general status very good) to
red (general status very poor) and finally black (sinking – crew is abandoning ship). If a
ship is turning, the rudder indicator between the ship name and speed shows the rudder
setting. A + or – symbol will follow the speed setting if the ship is speeding up or
slowing down. Very distant ships will show only a triangle with the lower tip just above
the location of the ship.
Ship Information Popup
Moving the mouse cursor over a ship either in the microview or the main battle
space display will bring up a ship information popup. The popup is displayed as long as
the cursor remains over the ship. Quite a bit more information is available in the popup
than in the status indicator. If a ship is the lead vessel for a formation, a command flag
will show in the popup background. Organizational, navigation, and general damage
levels are shown. The exact information displayed depends upon whether you own the
ship, and any special circumstances that might apply. If you don‟t understand why a ship
is doing something, check the popup.
The image in the telescope display is more than just eye-candy. If the image is
overlaid by a faint crosshair graphic, the ship can be targeted by your currently selected
ships. If the image is very dark, the ship is not currently visible to your forces.
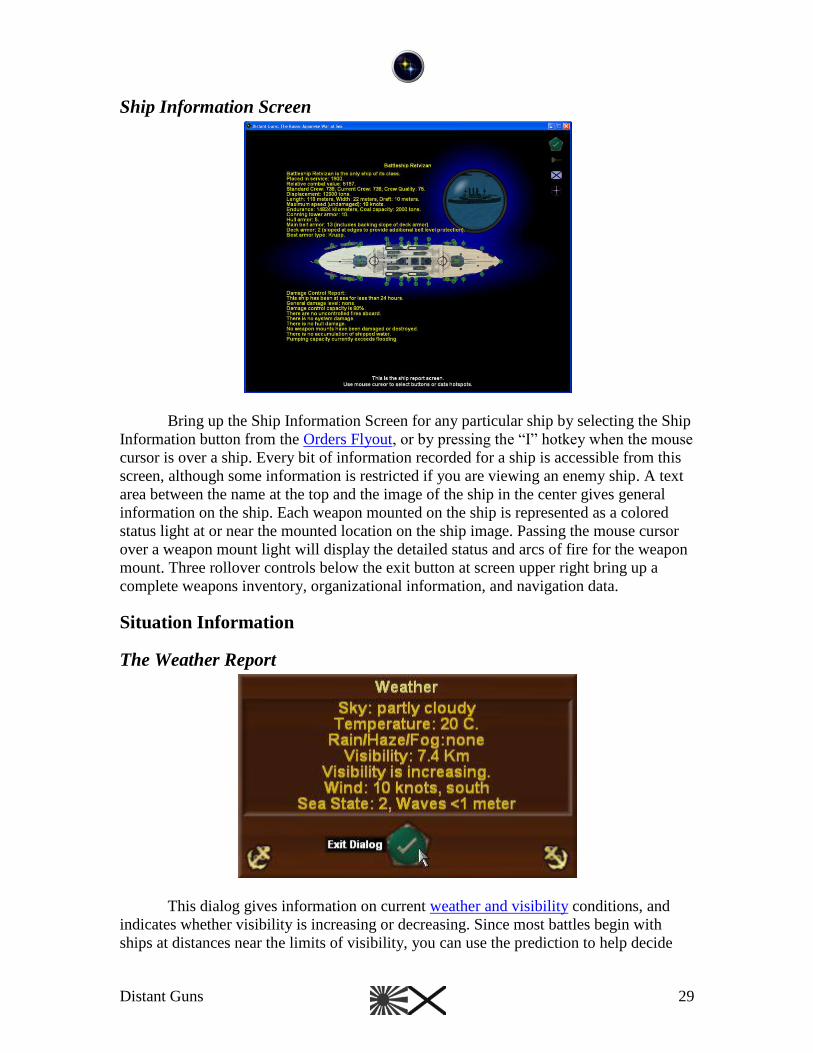
Distant Guns 29
Ship Information Screen
Bring up the Ship Information Screen for any particular ship by selecting the Ship
Information button from the Orders Flyout, or by pressing the “I” hotkey when the mouse
cursor is over a ship. Every bit of information recorded for a ship is accessible from this
screen, although some information is restricted if you are viewing an enemy ship. A text
area between the name at the top and the image of the ship in the center gives general
information on the ship. Each weapon mounted on the ship is represented as a colored
status light at or near the mounted location on the ship image. Passing the mouse cursor
over a weapon mount light will display the detailed status and arcs of fire for the weapon
mount. Three rollover controls below the exit button at screen upper right bring up a
complete weapons inventory, organizational information, and navigation data.
Situation Information
The Weather Report
This dialog gives information on current weather and visibility conditions, and
indicates whether visibility is increasing or decreasing. Since most battles begin with
ships at distances near the limits of visibility, you can use the prediction to help decide
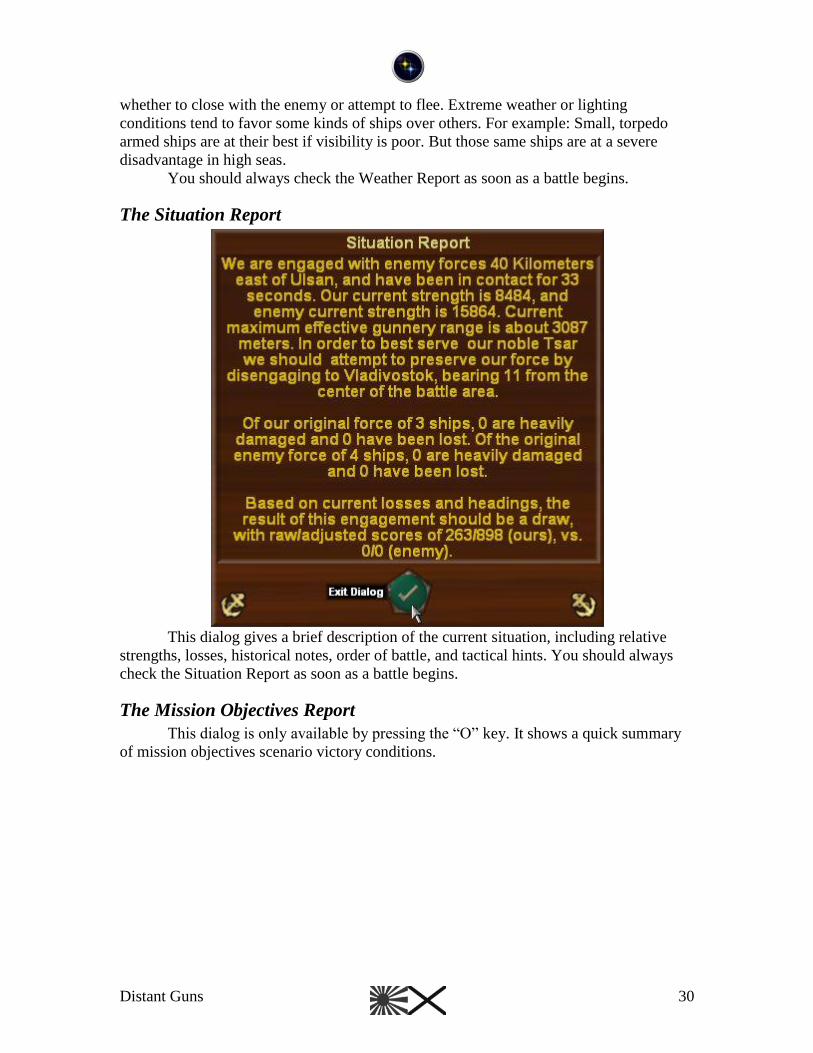
Distant Guns 30
whether to close with the enemy or attempt to flee. Extreme weather or lighting
conditions tend to favor some kinds of ships over others. For example: Small, torpedo
armed ships are at their best if visibility is poor. But those same ships are at a severe
disadvantage in high seas.
You should always check the Weather Report as soon as a battle begins.
The Situation Report
This dialog gives a brief description of the current situation, including relative
strengths, losses, historical notes, order of battle, and tactical hints. You should always
check the Situation Report as soon as a battle begins.
The Mission Objectives Report
This dialog is only available by pressing the “O” key. It shows a quick summary
of mission objectives scenario victory conditions.
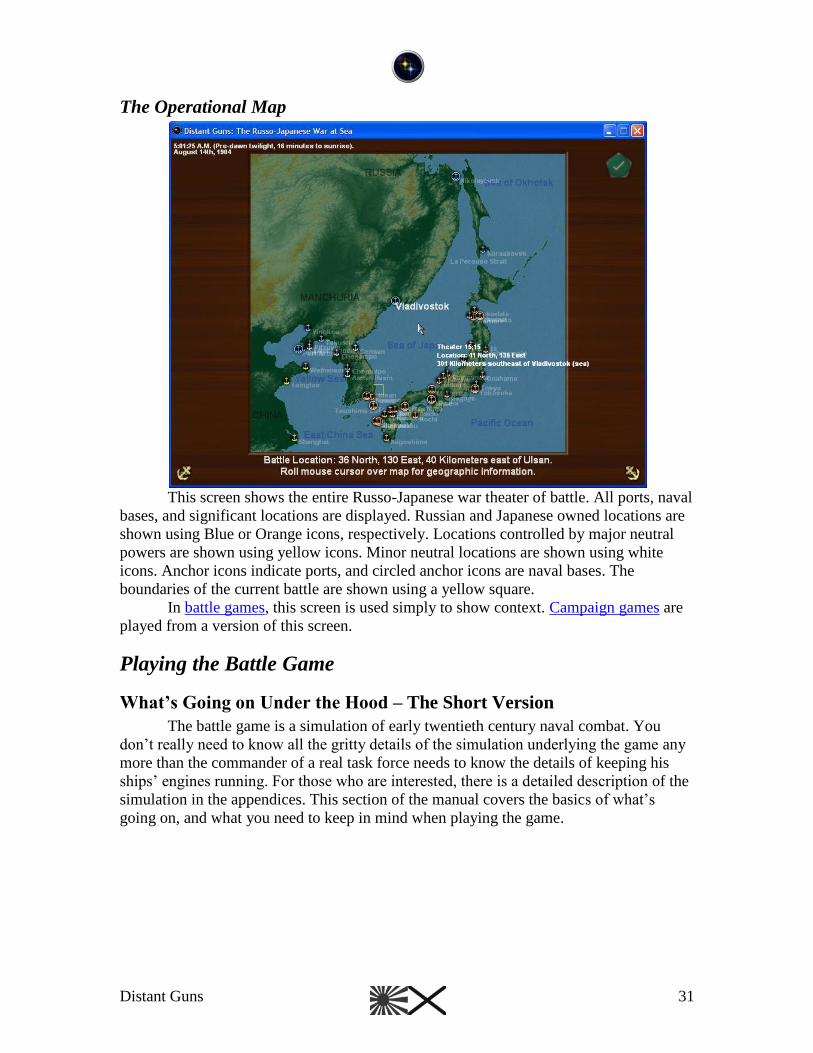
Distant Guns 31
The Operational Map
This screen shows the entire Russo-Japanese war theater of battle. All ports, naval
bases, and significant locations are displayed. Russian and Japanese owned locations are
shown using Blue or Orange icons, respectively. Locations controlled by major neutral
powers are shown using yellow icons. Minor neutral locations are shown using white
icons. Anchor icons indicate ports, and circled anchor icons are naval bases. The
boundaries of the current battle are shown using a yellow square.
In battle games, this screen is used simply to show context. Campaign games are
played from a version of this screen.
Playing the Battle Game
What’s Going on Under the Hood – The Short Version
The battle game is a simulation of early twentieth century naval combat. You
don‟t really need to know all the gritty details of the simulation underlying the game any
more than the commander of a real task force needs to know the details of keeping his
ships‟ engines running. For those who are interested, there is a detailed description of the
simulation in the appendices. This section of the manual covers the basics of what‟s
going on, and what you need to keep in mind when playing the game.
Distant Guns 32
Command
Your task is to keep your force intact, organized, moving in the right direction,
and firing at the enemy. All action takes place in real time, and in as realistic a 3d
environment as we could create. This means things can be pretty difficult to manage in
large fleet actions. Please, do yourself a favor and start with smaller battle scenarios.
Large battles are very complex. Commanders with years of experience lost effective
control of their forces in several cases during the actual war. The classic case of this
occurred at the Battle of Tsushima, where the Russian Admiral Rozhyestvyenski made a
small error that confusion compounded into a large error just as the two battle lines came
into range. Fortunately; unlike real world commanders, you have the option to pause the
action (except in multiplayer games). Feel free to pause the game frequently as you learn
to play.
Leaders
Divisions begin a battle with at least one leader on board one of the ships in the
division. If a division is split up into groups of two or more ships, a ship commander will
be “promoted” to leader status so that all portions of a division have leaders. Ships sailing
independently as single ship divisions generally do not have leaders on board. Any ship
sailing beyond visual range of at least one friendly leader may become unavailable for
orders.
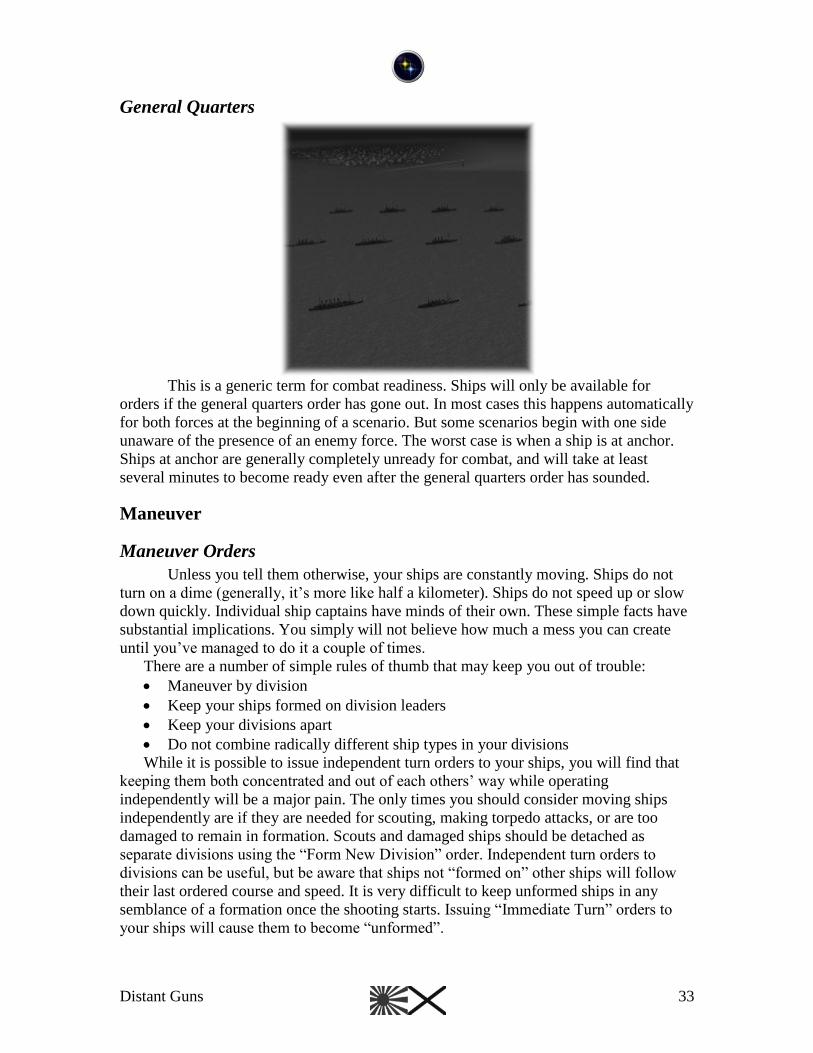
Distant Guns 33
General Quarters
This is a generic term for combat readiness. Ships will only be available for
orders if the general quarters order has gone out. In most cases this happens automatically
for both forces at the beginning of a scenario. But some scenarios begin with one side
unaware of the presence of an enemy force. The worst case is when a ship is at anchor.
Ships at anchor are generally completely unready for combat, and will take at least
several minutes to become ready even after the general quarters order has sounded.
Maneuver
Maneuver Orders
Unless you tell them otherwise, your ships are constantly moving. Ships do not
turn on a dime (generally, it‟s more like half a kilometer). Ships do not speed up or slow
down quickly. Individual ship captains have minds of their own. These simple facts have
substantial implications. You simply will not believe how much a mess you can create
until you‟ve managed to do it a couple of times.
There are a number of simple rules of thumb that may keep you out of trouble:
Maneuver by division
Keep your ships formed on division leaders
Keep your divisions apart
Do not combine radically different ship types in your divisions
While it is possible to issue independent turn orders to your ships, you will find that
keeping them both concentrated and out of each others‟ way while operating
independently will be a major pain. The only times you should consider moving ships
independently are if they are needed for scouting, making torpedo attacks, or are too
damaged to remain in formation. Scouts and damaged ships should be detached as
separate divisions using the “Form New Division” order. Independent turn orders to
divisions can be useful, but be aware that ships not “formed on” other ships will follow
their last ordered course and speed. It is very difficult to keep unformed ships in any
semblance of a formation once the shooting starts. Issuing “Immediate Turn” orders to
your ships will cause them to become “unformed”.
Distant Guns 34
Ships that are “formed on” other ships will follow the ships they are formed on,
adjusting speed and heading as necessary, and will seek to find their way back to their
spot in formation if temporarily forced to maneuver to avoid collisions, torpedoes, or
whatever. Issuing “Turn by Succession” orders will keep your ships formed on their
division leaders. In turns by succession, the division leader turns first. Each following
ship moves to where the division leader made her turn, then turns to follow the division
leader.
There are times when you want a division to remain formed, but you don‟t want to
wait for a turn by succession. The “Turn Immediately and Reform” order can be useful
here. In “Turn Immediately and Reform” orders, all ships will perform immediate turns
exactly as if you had ordered a standard “immediate turn”. After all ships have completed
their turns, the commanders will reform the division into line after the ship furthest
forward in the new direction of travel. Be aware that this can be unpredictable if your
formation is scattered, or if the positions of the ships after their turns makes selection of a
new leader difficult. This command is most effective for relatively shallow (less than 45
degrees) or relatively deep (more than 120 degrees) turns, where the position of the
leader after the turn has been completed is easy to determine. In particular, this command
is very useful for reversing the direction of travel of a division while keeping the ships in
formation.
If a division becomes scattered, you can order selected ships to “reform line”. When
you do this, you are effectively ordering the individual ship captains to use their best
judgment to reform. The selected ships will determine the furthest forward ship and form
line behind it. In truly chaotic situations, you may want to do a bit of manual tidying up
before issuing a “reform line” order. Fairly ugly things can happen if you order a
randomly scattered cloud of ships to reform line. They will eventually succeed, but it can
take a while.
Advanced: If you have a large fleet (several divisions), there may be times when you
want several individual divisions act as a single, large formation. You do this by selecting
a division leader, then right clicking on any ship of the formation you want the selected
division to follow, and selecting the “Guide on division” order. You can form a chain of
divisions by doing this with successive division leaders on ships of preceding formations.
If you order a division to guide on a division that another division is already guiding on,
the new division will insert itself into place in line between the original two divisions.
You can break any division free by selecting its division leader and issuing a “Guide
Independently” order.
Try to make sure that divisions have enough room to maneuver without interacting.
Any two divisions should usually be kept as far apart as the length of the longer division.
You can form ships into new divisions, or split up original divisions during play using
the “form new division” order. If you do this, avoid placing ships of very different
capabilities in the same division. Divisions in formation tend to operate at the level of the
poorest performer in the division.
You can select more than one ship by using a selection rectangle. Left click and drag.
A box will appear. Any ships within the box when the mouse button is released will be
selected. This is the only way to concurrently select ships of different divisions.
Your captains will attempt to avoid collisions with other ships, land, minefields, and
torpedoes. Don‟t be surprised to see a ship move briefly out of its location in line in order
Distant Guns 35
to avoid a collision. If the ship is “formed” it will maneuver back to its position in the
formation when the danger is past.
Collisions
Your captains will do their best to avoid collisions, but they will sometimes occur.
They are particularly common at night, during torpedo attacks, and in situations where
many ships are in proximity. Ships can collide with other ships or with land. The damage
caused by a collision is based on the speed and displacement of the ships involved, and
the angle of impact. Damage can be severe. Avoid giving your ships orders that may lead
to collisions – crossing formations, entering restricted bodies of water, etc.
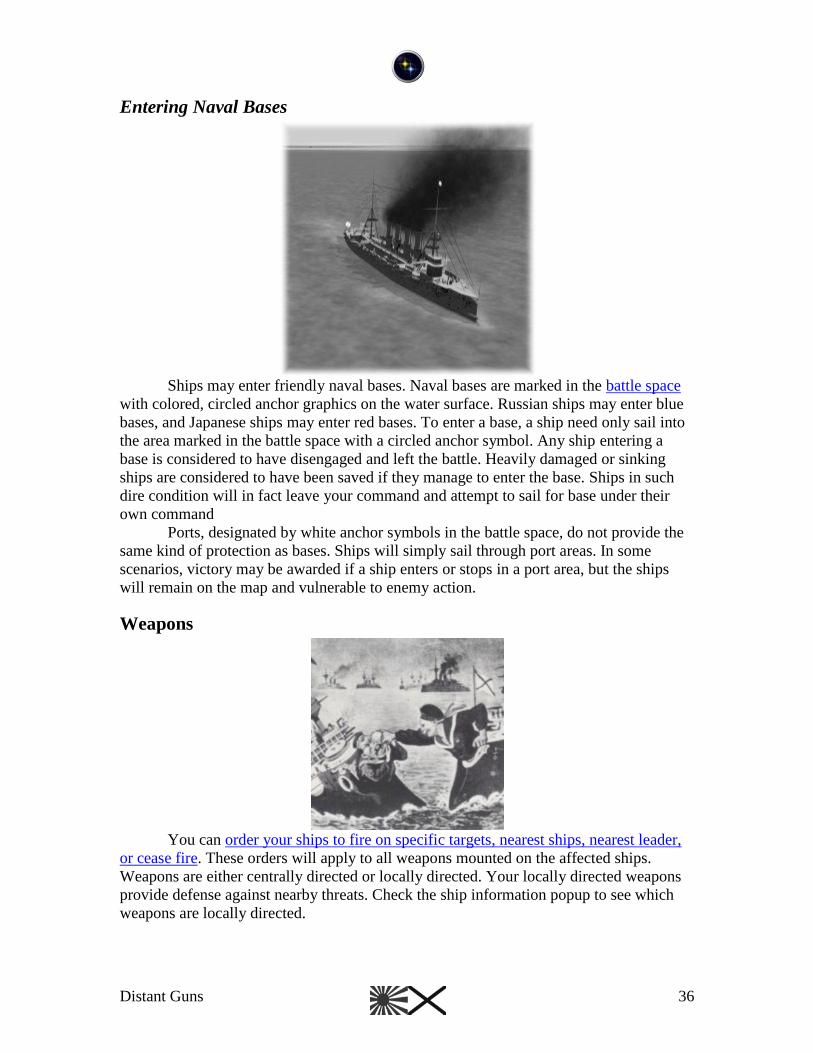
Distant Guns 36
Entering Naval Bases
Ships may enter friendly naval bases. Naval bases are marked in the battle space
with colored, circled anchor graphics on the water surface. Russian ships may enter blue
bases, and Japanese ships may enter red bases. To enter a base, a ship need only sail into
the area marked in the battle space with a circled anchor symbol. Any ship entering a
base is considered to have disengaged and left the battle. Heavily damaged or sinking
ships are considered to have been saved if they manage to enter the base. Ships in such
dire condition will in fact leave your command and attempt to sail for base under their
own command
Ports, designated by white anchor symbols in the battle space, do not provide the
same kind of protection as bases. Ships will simply sail through port areas. In some
scenarios, victory may be awarded if a ship enters or stops in a port area, but the ships
will remain on the map and vulnerable to enemy action.
Weapons
You can order your ships to fire on specific targets, nearest ships, nearest leader,
or cease fire. These orders will apply to all weapons mounted on the affected ships.
Weapons are either centrally directed or locally directed. Your locally directed weapons
provide defense against nearby threats. Check the ship information popup to see which
weapons are locally directed.
Distant Guns 37
Firing
Weapons will fire if loaded, their view of the target is unobstructed, and the target
is within range. Once fired, weapons need to reload. This requires time and ammunition.
Some weapons have very long reload times.
Ammunition
All weapons require ammunition (ammo) in order to fire. Ships can easily run out
of ammo. Shore batteries have unlimited ammo. Ammunition can not be replenished
during battles. Ammo is maintained on a per mount basis, so it is possible to run out of
ammo at one mount while having plenty for another. If this happens, ammo will be
transferred from mounts with excess to mounts without. Ammo transfer may happen
slowly, particularly if crews are heavily engaged in damage control.
Targeting Orders
Centrally directed weapons will always fire only on a ship‟s ordered target. Ships
may be ordered to cease fire, target freely, target nearest enemy leader, or target a
specific ship.
Cease Fire orders prevent a ship from firing its centrally directed weapons. This
order is generally given to conserve ammo.
Target Free orders allow a ship to independently select a target. This will
generally be the nearest appropriate target. Ships selecting targets under Target Free
orders will select targets based on both range and combat value. An armored cruiser, for
example, will generally ignore a nearby destroyer to target on a more distant cruiser or
battleship.
Target Nearest Leader orders restrict a ship‟s independent targeting to leaders of
enemy formations, if any. If no leader of an enemy division is visible, this order works
identically to a target free order.
Target Specific Ship orders order a ship to target a specific enemy ship. If
effective fire on the target is no longer possible, or if the target begins sinking, this order
reverts to a target free order. You can only issue a target specific ship order if you right
click on the intended target to open the orders flyout.
All selected ships are affected whenever a targeting order is issued.
Once a target is selected, a ship will continue to fire on that target as long as
effective fire is possible, or until the target begins to sink. When that happens, ships
without cease fire orders will select another target. Targeting will not skip around from
target to target as relative positions change.
Locally Directed Weapons Fire
Locally directed weapons are generally used for close defense against small ships,
or for quick torpedo shots at nearby major vessels other than the ordered target. Locally
directed weapons will usually fire on a ship‟s ordered target, but if another target is
within ½ of the maximum range of a locally directed weapon, the weapon will instead
fire on the nearest target. A ship‟s locally directed weapons may independently fire on
several targets. This means you don‟t have to manually retarget your battleship on those
destroyers the other fellow is trying to swarm you with. While your centrally controlled
Distant Guns 38
weapons will continue to fire on some more appropriate target, the locally directed
weapons will automatically target approaching smaller ships.
Guns
Most of the weapons mounted on your ships are guns. Generally speaking, bigger
guns are longer ranged and more powerful than smaller guns. Unfortunately, power isn‟t
everything. Accuracy is a major factor. Beyond a few thousand meters, the targeting
capabilities of the period were simply not up to the task of accurately aiming big guns at
moving targets. But limits of effective ranges to a few thousand meters mean that smaller
guns with high rates of fire are relatively more effective than they might seem. Add to
this the problem of armor. The big guns of the period didn‟t quite have the necessary
penetration and fusing to deal with the armor on other ships mounting similar big guns.
Where armor penetrations occurred, the shells tended to pass through their targets, doing
relatively little damage. Most damage was done by destruction of lightly armored or
unarmored areas on target ships. This further reduced the relative effectiveness of big
guns vs. quick firing guns. In practical terms, assuming equal levels of accuracy, this
means guns of 150mm or larger are almost interchangeable. They do operate very
differently in the game, but their end effects are similar. So when gauging the combat
power of a ship, it pays more to count guns than to compare gun sizes. In very rough
terms, under ideal conditions you can expect about the following effective ranges for
your ships:
Dominant Armament (mm) Effective Range (meters)
150mm+ 6000
120mm+ 5000
75mm+ 4000
<75mm 3000
You can, of course, order fire at ranges beyond those in the table. In fact, there are
frequently good reasons to do so. But don‟t expect much damage beyond the effective
ranges of your weapons. And don‟t shoot up all of your ammo at long range, or you may
find that you have handed your enemy a significant advantage.
Gun accuracy is heavily dependent upon muzzle velocity, and can be affected by
visibility, wind, sea state, whether the firing ship is under heavy fire, and firing and
targeted ship speeds. Accuracy improves somewhat after the first few rounds fired at any
particular target.
Torpedoes
Much was expected of the torpedo when the war began. Peacetime tests had
suggested that the torpedo could be a devastating weapon. As a result, almost all warships
had torpedo launchers. Even battleships tended to carry a dozen or more torpedoes. But
the torpedo was limited to ranges of 1300 meters or less unless fired at such low speeds
that they were effectively useless. Launcher reloading times were very long. As poor as
the gun targeting systems of the time were, they were quite accurate at short ranges. The
result is that torpedo attacks by small ships against undamaged large ships are difficult to
carry out. If you check the number of locally directed weapons mounted on any cruiser or
Distant Guns 39
battleship, you will quickly see that the area within 1000 meters of such a ship can be a
very unhealthy place for an enemy destroyer or torpedo boat. Torpedoes are at their best
in three cases: surprise attacks at night, attacks on damaged ships, and firing back toward
a pursuing enemy as you retreat.
Torpedo accuracy can be affected by visibility, sea state, and firing ship speed.
Torpedoes are also subject to several different types of malfunctions that can decrease
range and / or speed, running depth, and chance of detonation on contact.
Torpedoes are usually locally directed on large ships, meaning they will fire at
nearby targets of opportunity. They are usually centrally directed on smaller ships, and
will launch at those ships‟ specific targets.
Mines
Very few ships can deploy mines during combat. There was an experimental
Japanese system called “linked mines” that allowed destroyers to deploy floating
minefields. But while they did play a minor part in one incident late in the war, these
systems were very difficult to use effectively. The Japanese were quite taken with
floating minefields, and feared that the Russians had a similar capability. To reflect this,
in some scenarios some destroyers may randomly have their torpedoes replaced by the
ability to deploy floating minefields during a battle. You will receive a notification if this
is the case for any of your ships. Of course, you will receive no such notification if the
enemy has this capability.
Most of the time, mines are deployed in large fields maintained by specialized
ships. For practical reasons that go beyond the scope of battle scenarios, these minefields
are generally located near ports and naval bases. Most of the time you will know exactly
where all minefields are, but if the scenario takes place within a few kilometers of a port
or naval base there is always the possibility that additional random minefields may be
placed. If this is the case, one player will be notified and the other will not. Known
minefields are indicated on the sea surface by a faint mine graphic. There is no such thing
as a friendly minefield. Any ship entering a minefield is subject to attack.
Naval base defenses are similar to minefields, except that they are friendly to the
owner of the base. They are indicated by graphics similar to minefields. This is
appropriate in that the defensive areas consist, primarily of carefully maintained contact
and electrically controlled minefields. Only the owner of the base may freely enter base
defensive areas. Outer defensive areas are functionally similarly to relatively light
minefields, while inner defensive areas are similar to very dense minefields. Except for
special “brander” or “block” ships, your ships will refuse to enter known minefields, and
enemy base defensive areas. Base defensive areas are always known to both players, and
generally extend several kilometers out from the main base anchorage.
What do you really need to know about minefields and enemy base defense areas?
Stay away from them.
Shore Batteries
Shore batteries operate independently. Neither player controls them. If enemy
ships come within range, shore batteries will automatically open fire. Shore batteries tend
to be a bit more accurate than floating guns. They also tend to have unlimited
ammunition supplies, so expect that they will be more effective at longer ranges. The
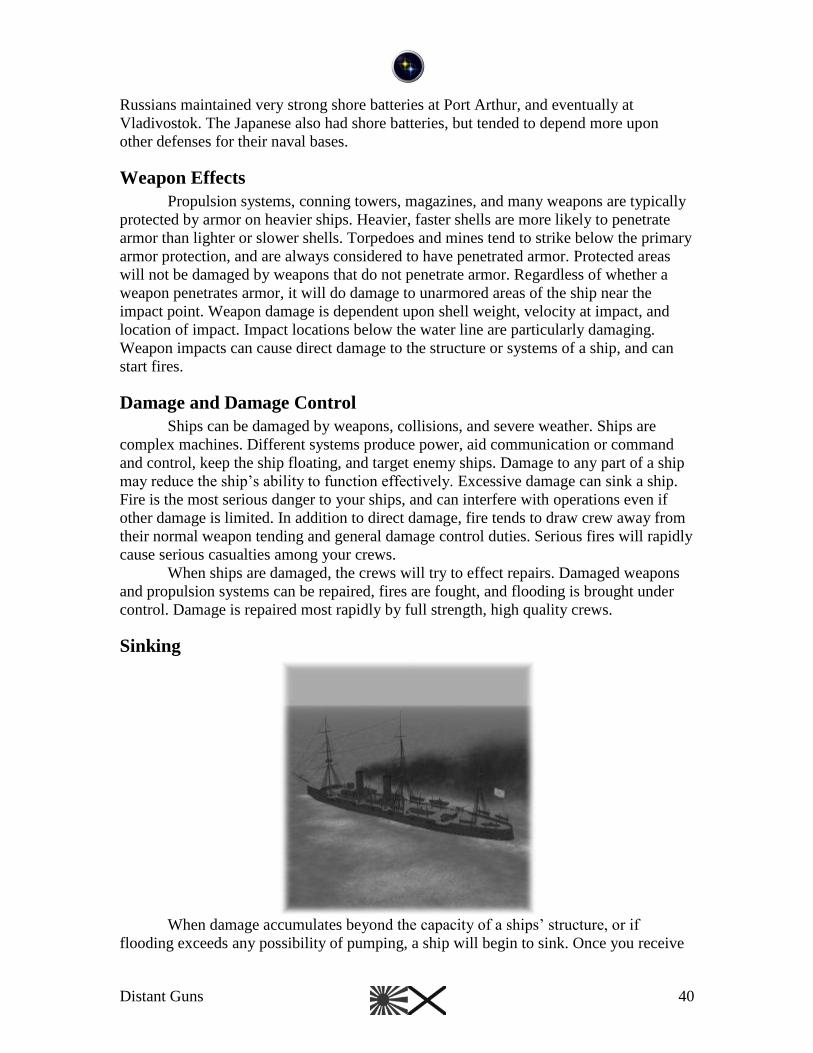
Distant Guns 40
Russians maintained very strong shore batteries at Port Arthur, and eventually at
Vladivostok. The Japanese also had shore batteries, but tended to depend more upon
other defenses for their naval bases.
Weapon Effects
Propulsion systems, conning towers, magazines, and many weapons are typically
protected by armor on heavier ships. Heavier, faster shells are more likely to penetrate
armor than lighter or slower shells. Torpedoes and mines tend to strike below the primary
armor protection, and are always considered to have penetrated armor. Protected areas
will not be damaged by weapons that do not penetrate armor. Regardless of whether a
weapon penetrates armor, it will do damage to unarmored areas of the ship near the
impact point. Weapon damage is dependent upon shell weight, velocity at impact, and
location of impact. Impact locations below the water line are particularly damaging.
Weapon impacts can cause direct damage to the structure or systems of a ship, and can
start fires.
Damage and Damage Control
Ships can be damaged by weapons, collisions, and severe weather. Ships are
complex machines. Different systems produce power, aid communication or command
and control, keep the ship floating, and target enemy ships. Damage to any part of a ship
may reduce the ship‟s ability to function effectively. Excessive damage can sink a ship.
Fire is the most serious danger to your ships, and can interfere with operations even if
other damage is limited. In addition to direct damage, fire tends to draw crew away from
their normal weapon tending and general damage control duties. Serious fires will rapidly
cause serious casualties among your crews.
When ships are damaged, the crews will try to effect repairs. Damaged weapons
and propulsion systems can be repaired, fires are fought, and flooding is brought under
control. Damage is repaired most rapidly by full strength, high quality crews.
Sinking
When damage accumulates beyond the capacity of a ships‟ structure, or if
flooding exceeds any possibility of pumping, a ship will begin to sink. Once you receive
Distant Guns 41
word that a ship is sinking, the process is irreversible. Sinking ships can remain floating
as a hazard to navigation for quite some time.
Sinking ships will automatically attempt to beach (run aground) or head for a
nearby port or naval base if there is any chance of reaching shallow water before sinking.
Beached ships, or those reaching port, will disengage as soon as they reach their
destination.
Ships may sink suddenly if struck by very large weapons, or if a weapon
penetrates to the ship‟s magazine.
Environment and Fog of War
Weather and Lighting
Most of the time, the primary impact of weather will be on visibility. You will
only be able to see what your ships could see given current visibility conditions. The
distance your ships can see is determined by lighting and fog or rain: the higher the sun
or moon, the brighter the light. Maximum clear weather visibility is 36000 meters when
the sun is at least a few degrees above the horizon. Even if lighting is at maximum,
clouds and rain or fog can cut visibility to zero. Visibility affects both fog of war
calculations and the appearance of the 3d battle space display. For playability purposes,
display visibility is always restricted to the range of 3600 to 20000 meters, even if actual
visibility is more or less. Weather can change more or less randomly, though it tends to
remain constant. Fog generally burns off as a day progresses, but may close in as the sun
is going down.
You will see any known enemy ships within visibility range of one of your ships
or shore batteries. At the beginning of a battle, some ships may not be visible until
spotted. This generally happens only at night. The chance of spotting a ship depends upon
the size of the unspotted ship and the height or elevation of the spotting ship or battery.
Each ship or battery has a chance of spotting an enemy, so ships will tend to be spotted at
greater distances by larger forces. Once one enemy ship is spotted, all others will quickly
follow. Only known enemy forces are shown on the Microview map.
It is possible for enemy ships to become so distant from your ships that none of
your ships can see them. If that happens, the enemy ships will remain visible on the
microview and in the battle space for a short time before disappearing altogether from
your perception.
Friendly ships operating beyond visual range of a division leader may at times
become unavailable for orders. This includes ships operating independently as single ship
divisions.
A battle ends if no ship or shore battery can see any enemy ship or shore battery.
A player who wishes to escape combat may be able to do so by simply fleeing until
visibility decreases.
Visibility and Weapons
Weapons are less accurate in low visibility conditions. Poor visibility due to low
light can be increased somewhat by use of searchlights. Many ships have at least some
searchlight capability. You do not have to order the use of searchlights. Ships with
Distant Guns 42
undamaged searchlights will use them as necessary to improve the accuracy of weapons
fire if lighting is poor.
Sea State Effects
Except for internal torpedo launchers, weapons mounted near a ship‟s water line
may be impaired by rough seas. If waves are higher than the height of a weapon above
the water line, the weapon will not be able to fire. Rough seas can also decrease the
accuracy of torpedoes. Most of the time, waves will not interfere with your weapons.
Rough seas can decrease a ship‟s maximum speed. The effect becomes noticeable
for any particular ship when wave heights are comparable the ship‟s height. In extreme
cases (you may never see this) rough seas can actually damage smaller ships.
The Edge of the World
Battles are not limited to the original boundaries of the battle space. If a battle
wanders too far toward the edge of the visible world, the battle space will re-center to
keep as many ships as possible within the battle. Should the battle spread so that some
ships are more than 100km from others, some ships will be forced to leave the battle.
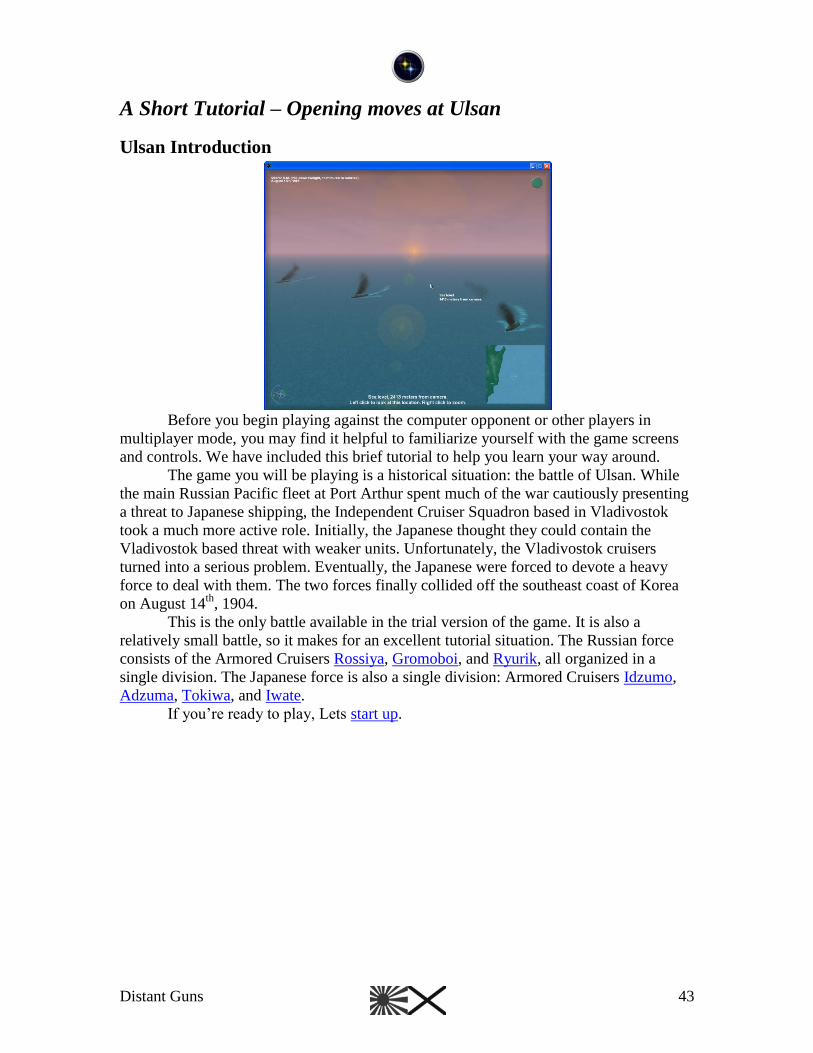
Distant Guns 43
A Short Tutorial – Opening moves at Ulsan
Ulsan Introduction
Before you begin playing against the computer opponent or other players in
multiplayer mode, you may find it helpful to familiarize yourself with the game screens
and controls. We have included this brief tutorial to help you learn your way around.
The game you will be playing is a historical situation: the battle of Ulsan. While
the main Russian Pacific fleet at Port Arthur spent much of the war cautiously presenting
a threat to Japanese shipping, the Independent Cruiser Squadron based in Vladivostok
took a much more active role. Initially, the Japanese thought they could contain the
Vladivostok based threat with weaker units. Unfortunately, the Vladivostok cruisers
turned into a serious problem. Eventually, the Japanese were forced to devote a heavy
force to deal with them. The two forces finally collided off the southeast coast of Korea
on August 14th
, 1904.
This is the only battle available in the trial version of the game. It is also a
relatively small battle, so it makes for an excellent tutorial situation. The Russian force
consists of the Armored Cruisers Rossiya, Gromoboi, and Ryurik, all organized in a
single division. The Japanese force is also a single division: Armored Cruisers Idzumo,
Adzuma, Tokiwa, and Iwate.
If you‟re ready to play, Lets start up.
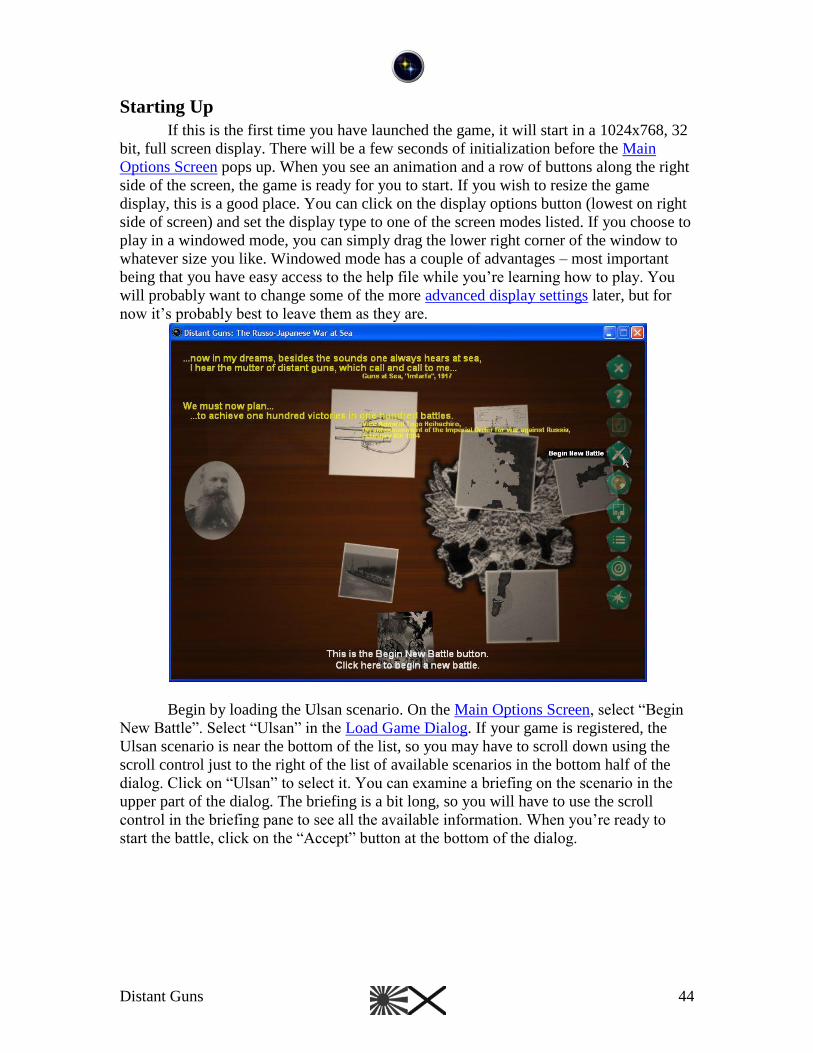
Distant Guns 44
Starting Up
If this is the first time you have launched the game, it will start in a 1024x768, 32
bit, full screen display. There will be a few seconds of initialization before the Main
Options Screen pops up. When you see an animation and a row of buttons along the right
side of the screen, the game is ready for you to start. If you wish to resize the game
display, this is a good place. You can click on the display options button (lowest on right
side of screen) and set the display type to one of the screen modes listed. If you choose to
play in a windowed mode, you can simply drag the lower right corner of the window to
whatever size you like. Windowed mode has a couple of advantages – most important
being that you have easy access to the help file while you‟re learning how to play. You
will probably want to change some of the more advanced display settings later, but for
now it‟s probably best to leave them as they are.
Begin by loading the Ulsan scenario. On the Main Options Screen, select “Begin
New Battle”. Select “Ulsan” in the Load Game Dialog. If your game is registered, the
Ulsan scenario is near the bottom of the list, so you may have to scroll down using the
scroll control just to the right of the list of available scenarios in the bottom half of the
dialog. Click on “Ulsan” to select it. You can examine a briefing on the scenario in the
upper part of the dialog. The briefing is a bit long, so you will have to use the scroll
control in the briefing pane to see all the available information. When you‟re ready to
start the battle, click on the “Accept” button at the bottom of the dialog.

Distant Guns 45
The “Select Players” dialog will come up after the Load Game dialog closes.
Normally, you would choose either a multiplayer game or set one side to be played by
computer. In this case, leave both players set to the default “local human player” setting.
This will start the battle in a special solitaire mode where you control both sides. Click
the Accept button.
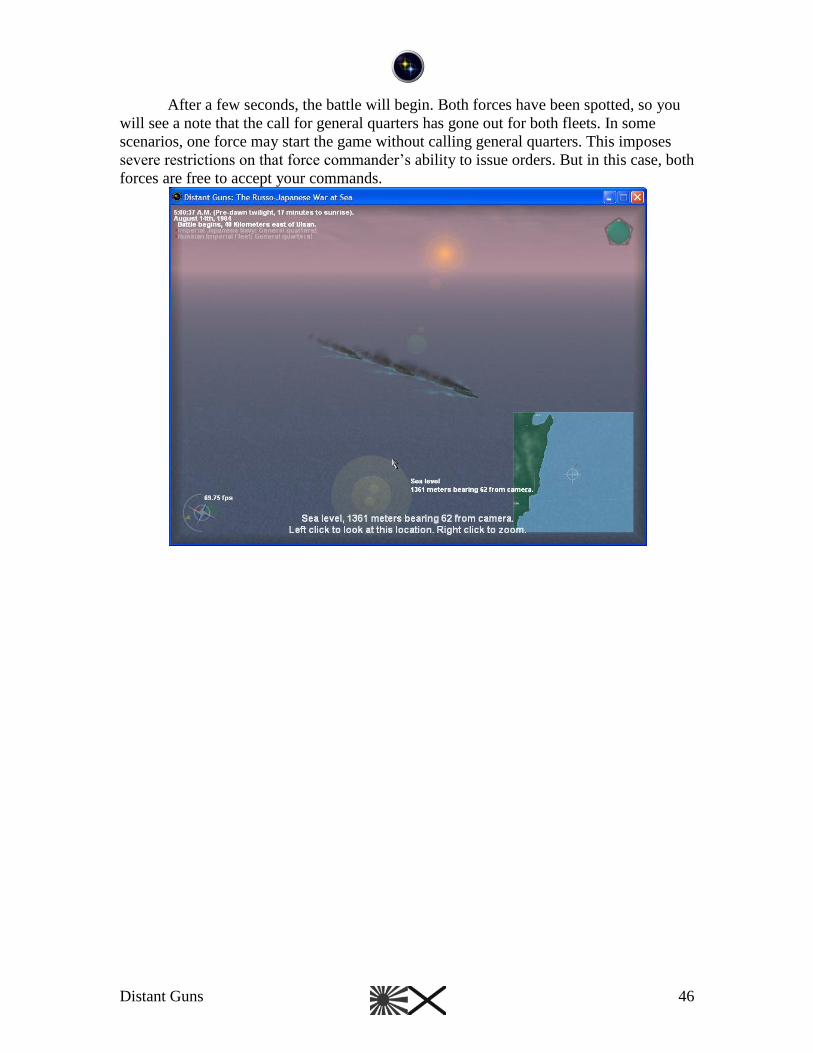
Distant Guns 46
After a few seconds, the battle will begin. Both forces have been spotted, so you
will see a note that the call for general quarters has gone out for both fleets. In some
scenarios, one force may start the game without calling general quarters. This imposes
severe restrictions on that force commander‟s ability to issue orders. But in this case, both
forces are free to accept your commands.
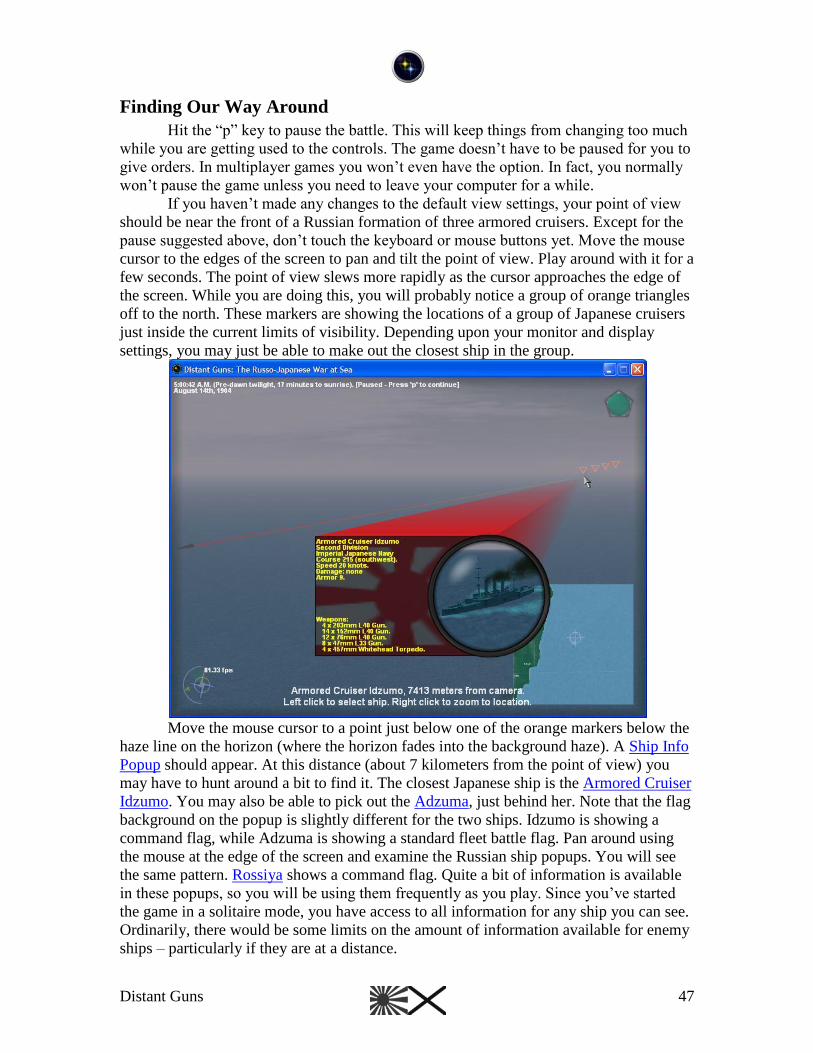
Distant Guns 47
Finding Our Way Around
Hit the “p” key to pause the battle. This will keep things from changing too much
while you are getting used to the controls. The game doesn‟t have to be paused for you to
give orders. In multiplayer games you won‟t even have the option. In fact, you normally
won‟t pause the game unless you need to leave your computer for a while.
If you haven‟t made any changes to the default view settings, your point of view
should be near the front of a Russian formation of three armored cruisers. Except for the
pause suggested above, don‟t touch the keyboard or mouse buttons yet. Move the mouse
cursor to the edges of the screen to pan and tilt the point of view. Play around with it for a
few seconds. The point of view slews more rapidly as the cursor approaches the edge of
the screen. While you are doing this, you will probably notice a group of orange triangles
off to the north. These markers are showing the locations of a group of Japanese cruisers
just inside the current limits of visibility. Depending upon your monitor and display
settings, you may just be able to make out the closest ship in the group.
Move the mouse cursor to a point just below one of the orange markers below the
haze line on the horizon (where the horizon fades into the background haze). A Ship Info
Popup should appear. At this distance (about 7 kilometers from the point of view) you
may have to hunt around a bit to find it. The closest Japanese ship is the Armored Cruiser
Idzumo. You may also be able to pick out the Adzuma, just behind her. Note that the flag
background on the popup is slightly different for the two ships. Idzumo is showing a
command flag, while Adzuma is showing a standard fleet battle flag. Pan around using
the mouse at the edge of the screen and examine the Russian ship popups. You will see
the same pattern. Rossiya shows a command flag. Quite a bit of information is available
in these popups, so you will be using them frequently as you play. Since you‟ve started
the game in a solitaire mode, you have access to all information for any ship you can see.
Ordinarily, there would be some limits on the amount of information available for enemy
ships – particularly if they are at a distance.
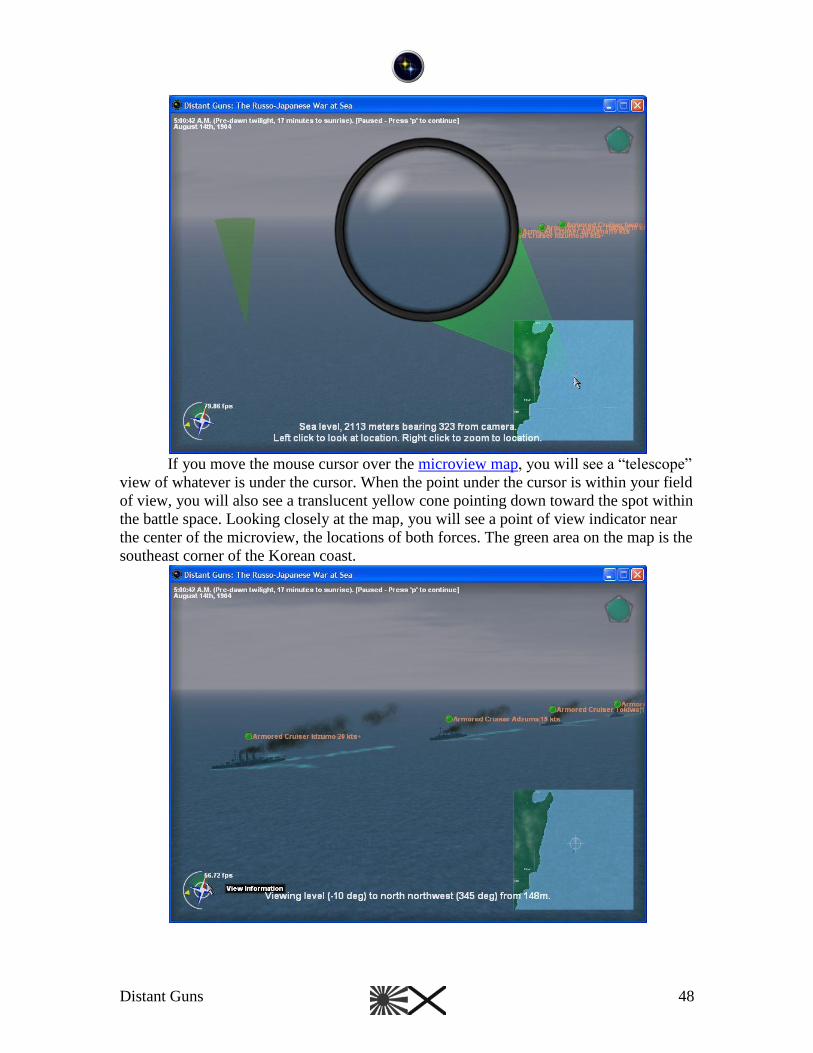
Distant Guns 48
If you move the mouse cursor over the microview map, you will see a “telescope”
view of whatever is under the cursor. When the point under the cursor is within your field
of view, you will also see a translucent yellow cone pointing down toward the spot within
the battle space. Looking closely at the map, you will see a point of view indicator near
the center of the microview, the locations of both forces. The green area on the map is the
southeast corner of the Korean coast.
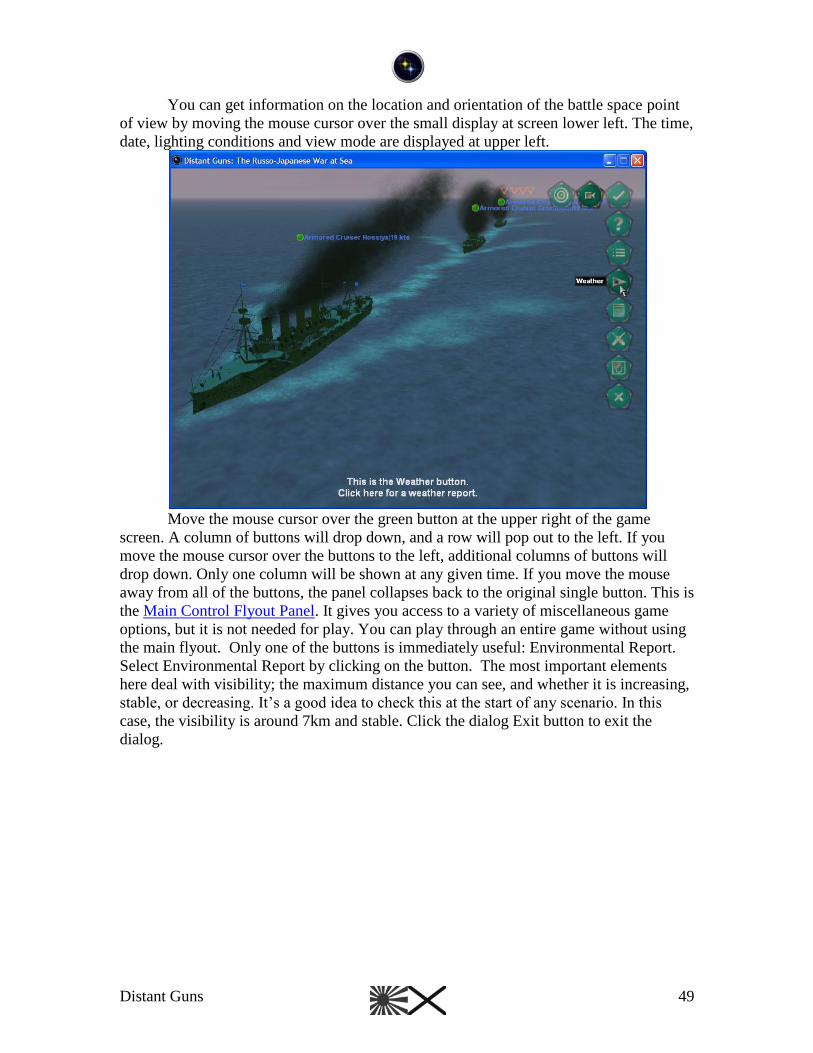
Distant Guns 49
You can get information on the location and orientation of the battle space point
of view by moving the mouse cursor over the small display at screen lower left. The time,
date, lighting conditions and view mode are displayed at upper left.
Move the mouse cursor over the green button at the upper right of the game
screen. A column of buttons will drop down, and a row will pop out to the left. If you
move the mouse cursor over the buttons to the left, additional columns of buttons will
drop down. Only one column will be shown at any given time. If you move the mouse
away from all of the buttons, the panel collapses back to the original single button. This is
the Main Control Flyout Panel. It gives you access to a variety of miscellaneous game
options, but it is not needed for play. You can play through an entire game without using
the main flyout. Only one of the buttons is immediately useful: Environmental Report.
Select Environmental Report by clicking on the button. The most important elements
here deal with visibility; the maximum distance you can see, and whether it is increasing,
stable, or decreasing. It‟s a good idea to check this at the start of any scenario. In this
case, the visibility is around 7km and stable. Click the dialog Exit button to exit the
dialog.
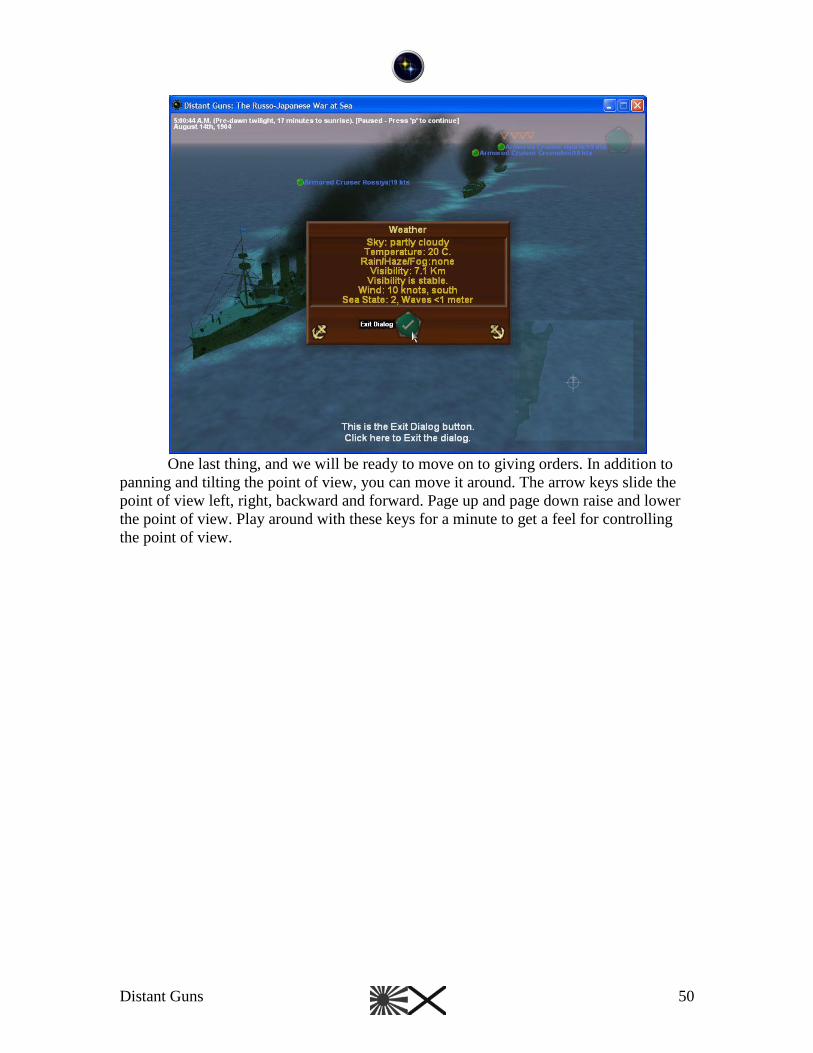
Distant Guns 50
One last thing, and we will be ready to move on to giving orders. In addition to
panning and tilting the point of view, you can move it around. The arrow keys slide the
point of view left, right, backward and forward. Page up and page down raise and lower
the point of view. Play around with these keys for a minute to get a feel for controlling
the point of view.
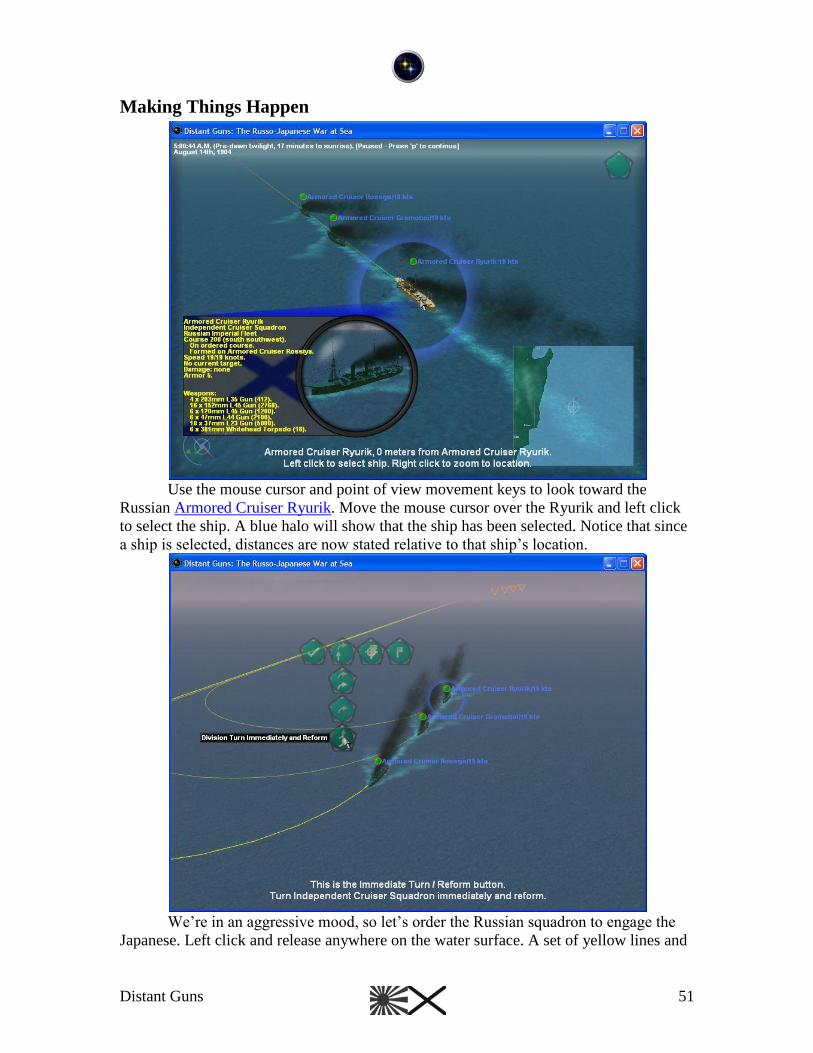
Distant Guns 51
Making Things Happen
Use the mouse cursor and point of view movement keys to look toward the
Russian Armored Cruiser Ryurik. Move the mouse cursor over the Ryurik and left click
to select the ship. A blue halo will show that the ship has been selected. Notice that since
a ship is selected, distances are now stated relative to that ship‟s location.
We‟re in an aggressive mood, so let‟s order the Russian squadron to engage the
Japanese. Left click and release anywhere on the water surface. A set of yellow lines and
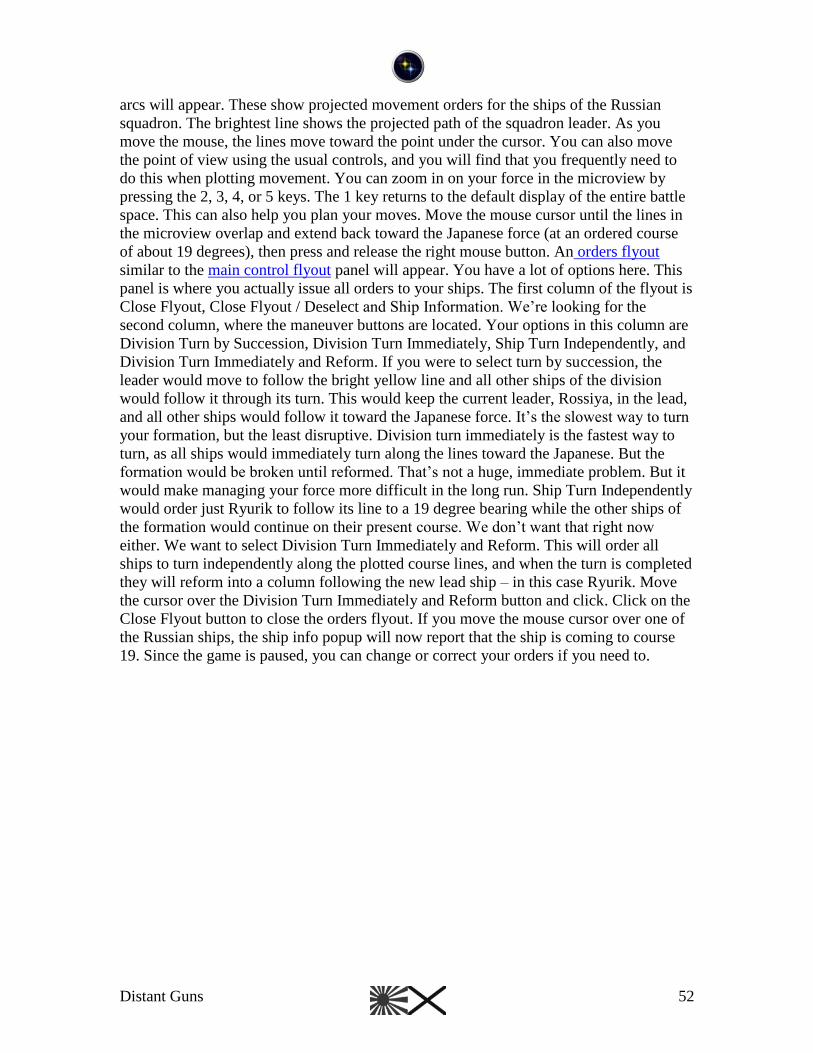
Distant Guns 52
arcs will appear. These show projected movement orders for the ships of the Russian
squadron. The brightest line shows the projected path of the squadron leader. As you
move the mouse, the lines move toward the point under the cursor. You can also move
the point of view using the usual controls, and you will find that you frequently need to
do this when plotting movement. You can zoom in on your force in the microview by
pressing the 2, 3, 4, or 5 keys. The 1 key returns to the default display of the entire battle
space. This can also help you plan your moves. Move the mouse cursor until the lines in
the microview overlap and extend back toward the Japanese force (at an ordered course
of about 19 degrees), then press and release the right mouse button. An orders flyout
similar to the main control flyout panel will appear. You have a lot of options here. This
panel is where you actually issue all orders to your ships. The first column of the flyout is
Close Flyout, Close Flyout / Deselect and Ship Information. We‟re looking for the
second column, where the maneuver buttons are located. Your options in this column are
Division Turn by Succession, Division Turn Immediately, Ship Turn Independently, and
Division Turn Immediately and Reform. If you were to select turn by succession, the
leader would move to follow the bright yellow line and all other ships of the division
would follow it through its turn. This would keep the current leader, Rossiya, in the lead,
and all other ships would follow it toward the Japanese force. It‟s the slowest way to turn
your formation, but the least disruptive. Division turn immediately is the fastest way to
turn, as all ships would immediately turn along the lines toward the Japanese. But the
formation would be broken until reformed. That‟s not a huge, immediate problem. But it
would make managing your force more difficult in the long run. Ship Turn Independently
would order just Ryurik to follow its line to a 19 degree bearing while the other ships of
the formation would continue on their present course. We don‟t want that right now
either. We want to select Division Turn Immediately and Reform. This will order all
ships to turn independently along the plotted course lines, and when the turn is completed
they will reform into a column following the new lead ship – in this case Ryurik. Move
the cursor over the Division Turn Immediately and Reform button and click. Click on the
Close Flyout button to close the orders flyout. If you move the mouse cursor over one of
the Russian ships, the ship info popup will now report that the ship is coming to course
19. Since the game is paused, you can change or correct your orders if you need to.
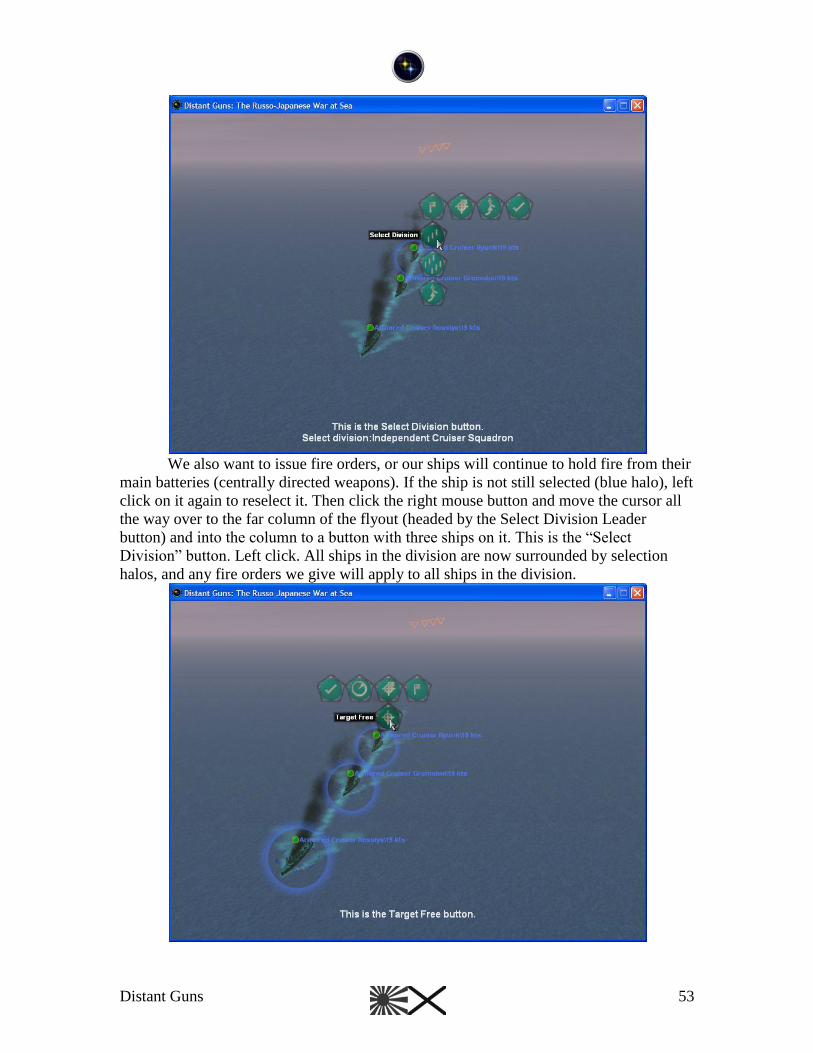
Distant Guns 53
We also want to issue fire orders, or our ships will continue to hold fire from their
main batteries (centrally directed weapons). If the ship is not still selected (blue halo), left
click on it again to reselect it. Then click the right mouse button and move the cursor all
the way over to the far column of the flyout (headed by the Select Division Leader
button) and into the column to a button with three ships on it. This is the “Select
Division” button. Left click. All ships in the division are now surrounded by selection
halos, and any fire orders we give will apply to all ships in the division.
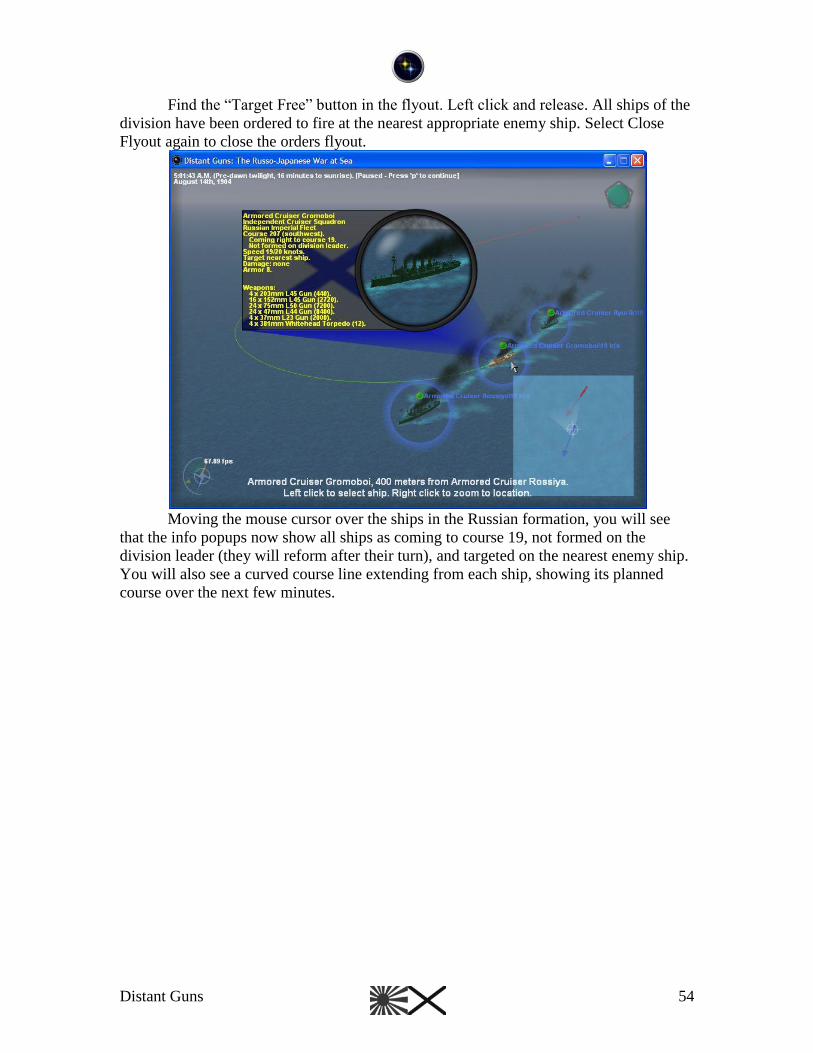
Distant Guns 54
Find the “Target Free” button in the flyout. Left click and release. All ships of the
division have been ordered to fire at the nearest appropriate enemy ship. Select Close
Flyout again to close the orders flyout.
Moving the mouse cursor over the ships in the Russian formation, you will see
that the info popups now show all ships as coming to course 19, not formed on the
division leader (they will reform after their turn), and targeted on the nearest enemy ship.
You will also see a curved course line extending from each ship, showing its planned
course over the next few minutes.
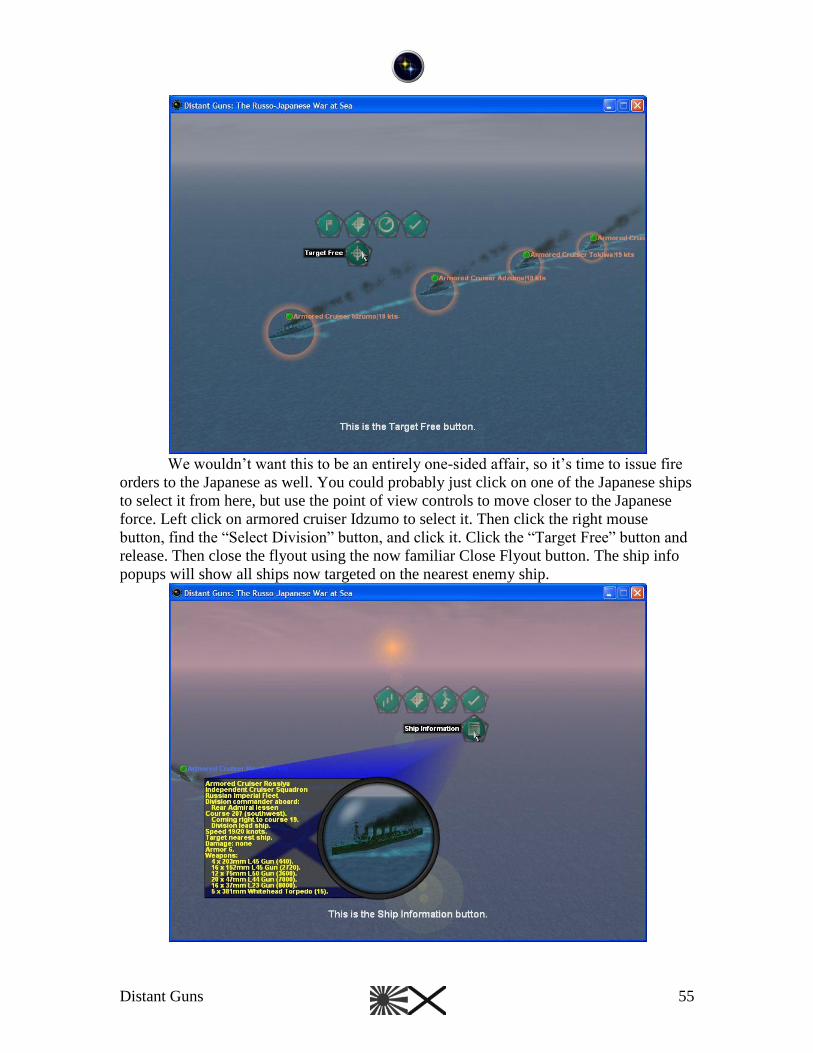
Distant Guns 55
We wouldn‟t want this to be an entirely one-sided affair, so it‟s time to issue fire
orders to the Japanese as well. You could probably just click on one of the Japanese ships
to select it from here, but use the point of view controls to move closer to the Japanese
force. Left click on armored cruiser Idzumo to select it. Then click the right mouse
button, find the “Select Division” button, and click it. Click the “Target Free” button and
release. Then close the flyout using the now familiar Close Flyout button. The ship info
popups will show all ships now targeted on the nearest enemy ship.
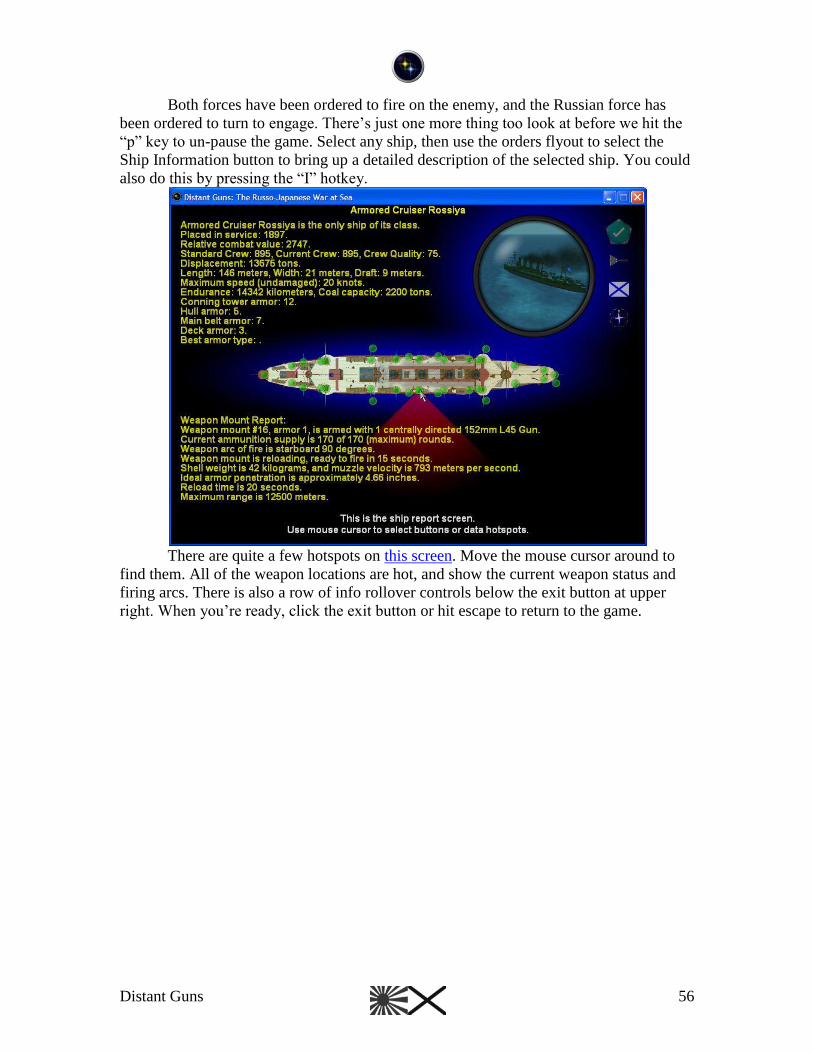
Distant Guns 56
Both forces have been ordered to fire on the enemy, and the Russian force has
been ordered to turn to engage. There‟s just one more thing too look at before we hit the
“p” key to un-pause the game. Select any ship, then use the orders flyout to select the
Ship Information button to bring up a detailed description of the selected ship. You could
also do this by pressing the “I” hotkey.
There are quite a few hotspots on this screen. Move the mouse cursor around to
find them. All of the weapon locations are hot, and show the current weapon status and
firing arcs. There is also a row of info rollover controls below the exit button at upper
right. When you‟re ready, click the exit button or hit escape to return to the game.
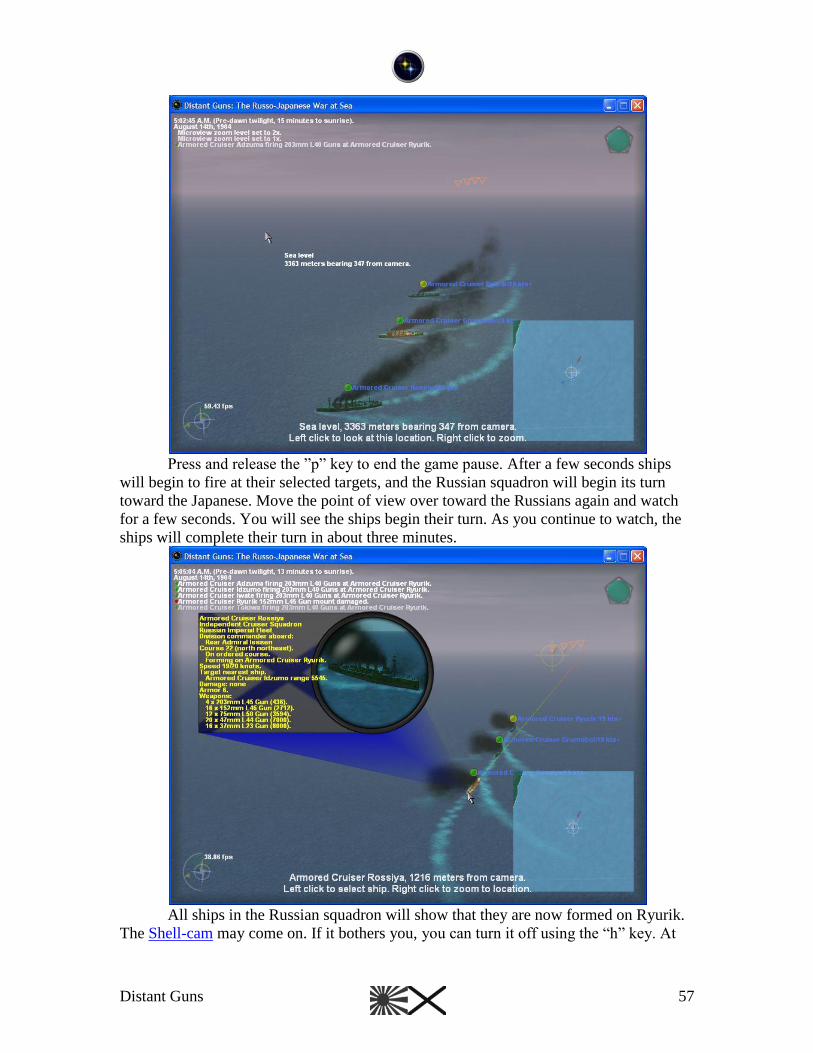
Distant Guns 57
Press and release the ”p” key to end the game pause. After a few seconds ships
will begin to fire at their selected targets, and the Russian squadron will begin its turn
toward the Japanese. Move the point of view over toward the Russians again and watch
for a few seconds. You will see the ships begin their turn. As you continue to watch, the
ships will complete their turn in about three minutes.
All ships in the Russian squadron will show that they are now formed on Ryurik.
The Shell-cam may come on. If it bothers you, you can turn it off using the “h” key. At
Distant Guns 58
some point along the way one or more ships will be hit by enemy fire, and the status
lights above them may change from their original green color. Significant hits and
damage are also reported at the upper left corner of the screen. As the formations close to
within 2000 meters, torpedoes may be fired. If this happens, some ships may temporarily
maneuver out of formation to avoid being hit.
Experiment with selecting ships and giving a few orders of your own. Since you
don‟t have to worry about an opponent, the solitaire mode is a useful way to learn how to
issue orders to your ships.
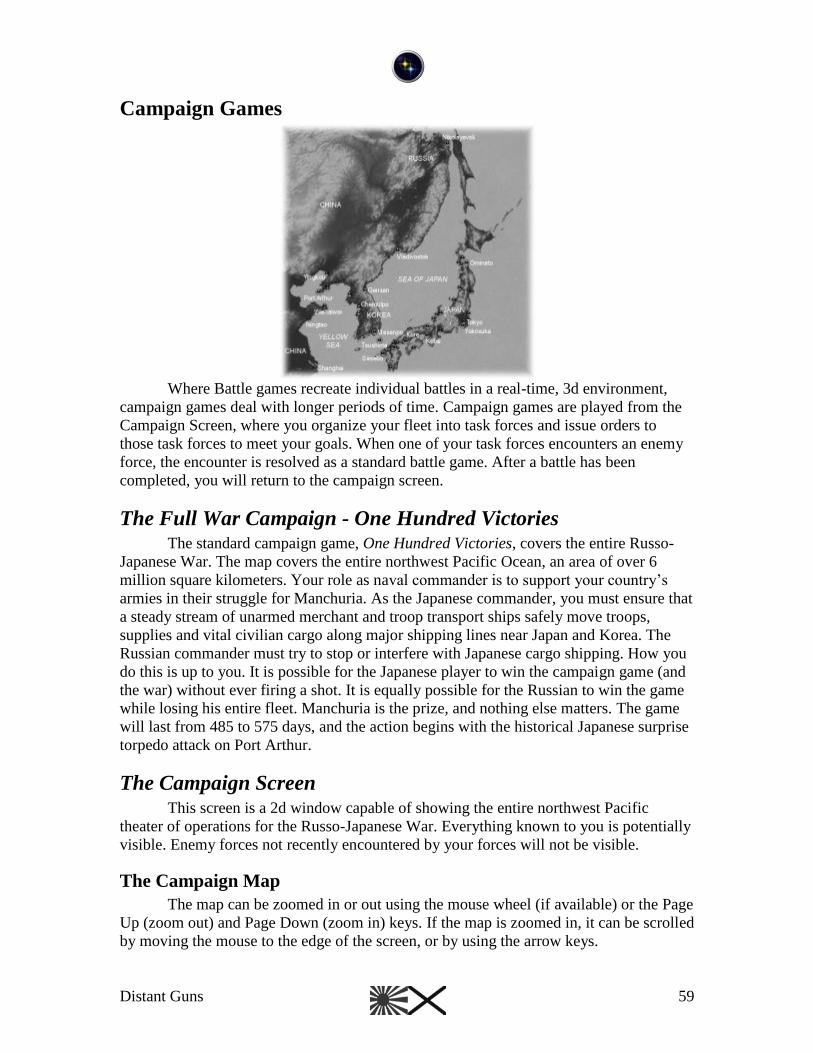
Distant Guns 59
Campaign Games
Where Battle games recreate individual battles in a real-time, 3d environment,
campaign games deal with longer periods of time. Campaign games are played from the
Campaign Screen, where you organize your fleet into task forces and issue orders to
those task forces to meet your goals. When one of your task forces encounters an enemy
force, the encounter is resolved as a standard battle game. After a battle has been
completed, you will return to the campaign screen.
The Full War Campaign - One Hundred Victories The standard campaign game, One Hundred Victories, covers the entire Russo-
Japanese War. The map covers the entire northwest Pacific Ocean, an area of over 6
million square kilometers. Your role as naval commander is to support your country‟s
armies in their struggle for Manchuria. As the Japanese commander, you must ensure that
a steady stream of unarmed merchant and troop transport ships safely move troops,
supplies and vital civilian cargo along major shipping lines near Japan and Korea. The
Russian commander must try to stop or interfere with Japanese cargo shipping. How you
do this is up to you. It is possible for the Japanese player to win the campaign game (and
the war) without ever firing a shot. It is equally possible for the Russian to win the game
while losing his entire fleet. Manchuria is the prize, and nothing else matters. The game
will last from 485 to 575 days, and the action begins with the historical Japanese surprise
torpedo attack on Port Arthur.
The Campaign Screen This screen is a 2d window capable of showing the entire northwest Pacific
theater of operations for the Russo-Japanese War. Everything known to you is potentially
visible. Enemy forces not recently encountered by your forces will not be visible.
The Campaign Map
The map can be zoomed in or out using the mouse wheel (if available) or the Page
Up (zoom out) and Page Down (zoom in) keys. If the map is zoomed in, it can be scrolled
by moving the mouse to the edge of the screen, or by using the arrow keys.
Distant Guns 60
Campaign Map Overlays
You can use the F3 key to toggle through information overlays on the campaign map.
Overlays may be off, or they may show shipping lanes or territorial ownership.
Shipping Lane Overlay – Japanese shipping lanes are shown on the map. The
density of shipping through each location is indicated by the brightness of a dot
shown over the location. Brighter dots indicate heavier traffic. These shipping
lanes are recalculated from time to time, and reflect actual routes recently used by
Japanese shipping. The Japanese player will also see the location and nationality
of all cargo ships, as well as the current locations of individual ships performing
area patrols.
Territorial Ownership Overlay – Territorial ownership is shown on the map. This
shows which side controls what territory at any given time, and gives a good
general indication of the progress of the land war in Manchuria.
Campaign Map Controls
Left Arrow Key – Scroll map left
Right Arrow Key – Scroll the map right
Up Arrow Key – Scroll the map up
Down Arrow Key – Scroll the map down
Page Up – Zoom out
Page Down – Zoom in
Mouse Wheel Forward – Zoom in
Mouse Wheel Back – Zoom out
F3 – Change map overlay
Main Campaign Control Flyout Panel
At screen upper right is a single control. This is the main control flyout panel
rollover. When you move your mouse over this control, the main control flyout panel
becomes available. A short time after you move the mouse cursor off any button of the
flyout panel, the panel will again roll up to show only the single control.
Controls in the flyout are arranged in columns. Depending upon context, some
controls may not be available. To select a control, move the mouse cursor over it and left
click.
The home column is directly below the rollover spot. It includes the following:
About: Show Distant Guns credits, registration, and copyright information.
Options: Go to Main Options Screen.
Weather Report: Show a report of current weather and visibility conditions.
Exit: Exit the game.
To the left of the view lock column is the display and sound option column. These
controls are used to bring up dialogs allowing you to change display and sound options.
Sound Options: Show the sound options dialog.
Display Options: Show the display options dialog.
Distant Guns 61
Time, Date, and Event Reports
At screen upper left is a layer of text showing the current time and date, lighting
information, a running victory projection, and (potentially) several lines of notifications
of recent significant battle events. By default, up to 16 lines of notifications can be visible
under the time / date / view lines. The size of the text can be increased, at the cost of
fewer visible lines, or turned off altogether.
N Key: toggles between standard, large, or no time and event display.
Information and Prompts
At the bottom center of the screen are two lines of context sensitive prompt and
information text.
Campaign Space Controls
The campaign space controls are the heart of the campaign game. All orders to
your forces are issued by left or right clicking within the campaign map. The campaign
map is “hot”. As the mouse cursor is moved over the map, location data and context
specific information related to the spot under the cursor are shown. If a task force is
under the cursor, information on the task force is displayed. If more than one task force is
under the cursor, a selection box drops down to allow you to examine all forces in the
location. The effects of mouse clicks depend upon whether or not a task force is currently
selected.
Selected Task Forces
Any orders you issue will only affect the task force you have selected. Task forces
are selected by using the left mouse button. See Mouse Selections with No Task Force
Selected. A selected task force is detailed on the right side of the screen, and highlighted
with a blinking status light on the map. You can deselect a task force using the Campaign
Orders Flyout Panel.
Mouse Selections With No Task Force Selected
If no task force is selected, a left click on a map location will select any friendly
task force under the cursor. If no force is under the cursor, the previously selected task
force will be re-selected.
Mouse Selections With a Task Force Selected
If a task force is selected and that task force has no sailing orders, left clicks on
the map will place mission waypoints. Clicking on an existing waypoint before sailing
orders have been issued removes the waypoint from the map. You define the path for
sailing orders by placing waypoints, then right clicking to bring up the Campaign Orders
Flyout Panel.
The Campaign Orders Flyout Panel
The Campaign Orders Flyout Panel is used to issue orders or reorganize your
forces.
Distant Guns 62
Control Group Buttons
Close Flyout – Close the flyout
Close Flyout – Deselect – Deselect the selected task force and close the flyout.
Zoom In – Zoom into the campaign map.
Zoom Out – Zoom out of the campaign map.
Center – Center the campaign map on this point.
Zoom Full Out – Zoom the campaign map all the way out.
Mission Group Buttons
Sail – Order the task force to sail the path you have selected on the map. The task
force will automatically return to base after sailing through the last point you
specified.
New Sailing Orders – Cancel any existing sailing orders and prepare to issue new
sailing orders.
Mine – This has the same effect as sail, except that the task force will deploy
mines (as many as it can carry, to a maximum of 600) in the last selected location.
This will only appear if the selected location includes a port or base.
Make Ready – Order the task force from Rest to Ready status. A ready force can
sail on two hours notice.
Rest – Order the task force to rest. A resting task force can perform maintenance
and repairs, but may require to 48 hours to sail if you issue sailing orders.
Patrol – Stop in the selected location and wait. A time dialog will appear. You can
choose how long you want the task force to remain on station in the location.
Once the time on station has expired, the task force will continue on through the
rest of its mission path before returning to its home base/
Assign Base – Select the base under the cursor as the new base for the task force.
Area Patrol – Order the task force to perform area patrols from home base.
Organization Group Buttons
Task Force Organization – Use this to bring up the Task Force Organization
Screen.
Task Force Information
There are two levels on information available for any visible task force: the status
indicator and the information popup.
Task Force Status
The most heavily used task force information level is the status indicator. This
usually takes the form of a general status light and a national naval flag. If both players
have forces in the location, a mixed naval flag appears. The status light color ranges from
green (general status very good) to red (general status very poor). More information is
available as you zoom in on the location. When space allows, a silhouette of the force
flagship appears above the light and flag, and a strength bar appears below. Stronger task
forces have longer strength bars. If more than one force is in the location, the number of
Distant Guns 63
forces may appear to the left of the status light, and any information presented reflects the
strongest task force present. Finally, the name of the strongest task force in the location
may appear above the strength bar.
In some cases, more than one task force may be present in a location. If you move
your mouse cursor over a location with more than one force, a drop down selection box
will appear. You can use this to examine individual task forces in the location.
Task Force Information Popup
This is similar to the Ship Information Popup in the Battle Game. The popup is
displayed as long as the mouse cursor remains over the task force. Quite a bit of context
sensitive information is available, although your information regarding enemy task forces
will be limited.
The Weather Report
This is similar to the Battle Game Weather Report. It reflects general, theater
wide conditions. Actual conditions, particularly regarding lighting, will vary at individual
locations.
Playing the Campaign Game
Task Forces
Your entire fleet is organized into task forces. A task force can comprise a single
ship, your entire fleet, or anything in between. Your role as naval commander is to
organize your forces and order them to perform missions with the goal of meeting your
campaign objectives. It can be quite difficult to closely coordinate the actions of two or
more task forces. If you want a portion of your fleet to act in close coordination with
another, all of the ships and divisions involved should be combined into a single task
force.
Task Force Organization
Up twelve divisions may be assigned to a task force. A division is a group of up to
10 ships. So, in theory, a task force could have as many as 120 ships assigned. In the
campaign game, individual ships always sail in line within their divisions. Individual
divisions have assigned locations within the task force formation.
The Task Force Organization Screen
Task Forces are created and organized using the Task Force Organization Screen.
The Task Force Organization Screen is organized into three panels: Task Force
Selection Panel, Task Force Formation Panel, and the Division Panel. You organize your
forces using drag and drop operations. To drag a ship icon you simply left click and hold
the mouse button, then move the mouse to where you want to drop the icon and release
the left mouse button. Depending upon where the icon originated, it can represent a ship,
division, or task force. Ship icons can be dragged from place to place within panes, or
from pane to pane to organize your forces.
Distant Guns 64
To screen left we have the Task Force Selection Panel. This lists all friendly task
forces in the same campaign map location as the task force you had selected before
launching the Task Force Organization Screen. The status light of the currently selected
task force blinks. To select another task force, you only have to roll the mouse over
another force in the Task Force Selection Panel. No mouse click is necessary. Dropping
an icon into this panel will create a new task force.
The largest panel, in the center of the screen, is the Task Force Formation Panel.
Ship icons in this panel represent divisions, and their position in the panel indicates their
position in the task force formation. Each space in the panel represents 1000 meters,
although divisions in line will frequently take more space than this. Divisions represented
by icons lined up in a column will be lined up directly behind one another if the task
force becomes engaged in combat. Any open space in a column will show up as a 1000
meter gap in the formation. If there is any confusion, actual spacing is shown in the
information area at the bottom of the screen. Divisions dragged from one spot to another
in this panel are assigned new positions within the task force formation. Divisions
dragged into the Selection Panel to the left will become new task forces. Ships dragged
from the Division Panel into this panel will be assigned as single ship divisions within the
task force. Left click and release to select a division to appear in the Division Panel.
At screen right is the Division Panel. This shows the order of ships within the
division selected on the Task Force Formation Panel. This is the actual order in which
ships assigned to the division will line up if the task force becomes engaged in combat.
You can drag ship icons within this panel to change the order of the division. If you drag
a ship icon out of this panel into the Formation Panel, the ship will be assigned as a new
division. Dragging a ship all the way over to the Selection Panel on the left side of the
screen will create a new task force with just the one ship.
You can rename divisions and task forces by right clicking on their icons in this
screen.
Task Force Missions
The entire task force will perform any assigned mission as a unit. Unless the task
force is performing an area patrol mission, all ships and divisions will be present in the
same location. Available missions are rest, ready, sail, mine, and area patrol.
Rest – The task force is resting. Individual ships are undergoing maintenance. The
force is not ready to sail, and may take up to 48 hours to leave base if you issue a
sailing order. Individual ship “at sea” days are reduced on a daily basis. Major
repairs (including repairs to “permanent” damage and “destroyed” weapons
mounts) are accomplished.
Ready – The task force is ready to sail. Only limited maintenance is being
performed. The “at sea” days for individual ships remain unchanged, although
ammunition and coal supplies are restocked and replacement crew will be
boarded. Except for repairs normally possible in Battle Games, no repairs are
performed. “Permanent” damage and “destroyed” weapons mounts are not
repaired.
Sail – The task force is at sea, sailing along a path that may include a patrol point.
If a patrol point is specified, the task force will delay in the specified patrol
location for the number of hours you order. Sailing orders always end in the task
Distant Guns 65
force home base. You will not be allowed to order missions that exceed the range
of the force.
Mine – This is identical to standard sailing orders, except that the task force will
deploy mines at the specified location.
Area Patrol – The task force will disperse and patrol a given area. See Area
Patrols.
Coal and Sailing Range
Each ship in the game has a specific coal carrying capacity and rate of coal
consumption. This is used to calculate the ranges shown in the ship appendices. The
range of a task force is a fairly complicated calculation. The game, of course, performs it
for you. You don‟t need to worry about the details, but it can be helpful to understand a
few points.
Small ships, particularly destroyers and torpedo boats, tend to have very short
ranges. A force composed entirely of these ships may have a very short range. Coal is
shared as necessary when a task force sails. This means that the inclusion of even a single
large ship can greatly extend the range of a task force. It also means that if you want to
plan a very long range mission, you may not wish to include any small ships in your task
force.
Ships burn coal at very high rates when in combat. At the end of any battle, the
coal supply of the task force is checked. Regardless of orders, if the task force fuel state
is critical, the task force will immediately sail directly to base.
The game limits ranges and may sometimes override your orders to return a task
force with low fuel directly to base, but you do not have to worry that your ships will find
themselves lost at sea for lack of coal.
Maintenance and Supply
Ships on missions other than Rest and Ready burn coal and accumulate “sea
days” (one per day) as they sail. They expend ammunition and accumulate combat
damage when they fight. Without maintenance and re-supply, their capabilities will be
reduced.
Any “resting” or “ready” task force will automatically load ammunition and coal.
This process is fairly fast, generally taking less than six game hours to fully restock a
fully depleted task force.
A “ready” task force is effectively frozen at its current state of repair. The task
force will not perform repairs to destroyed weapons or “permanent” damage. Sea days
will not be added or reduced.
A “resting” task force will perform repairs to “destroyed” weapons and
“permanent” damage. Permanent damage is repaired at a rate of 1% per day. The chance
of repair for a destroyed weapon mount is dependent upon the size of the weapon. Some
destroyed weapons may remain destroyed for days, weeks, or months of rest time. Each
day of rest will reduce the sea days of every ship in the task force by 6 days, so a force
with the maximum accumulation of 120 sea days will be reduced to zero in 20 days of
rest.
Accumulated sea days affect crew quality (and all the checks dependent upon it,
such as damage control and weapon accuracy) and ship maximum speed. The first 30
Distant Guns 66
days have no effect. Accumulations of from 30 to 120 days will have progressively
greater effects on ship performance.
Sailing
Once sailing orders have been issued to a task force, the force will begin moving
toward the selected destination along the path you specify. After the last selected point on
the path is reached, the force will automatically return to base. If your force is not already
sailing, there may be a delay between the time the orders are issued and the time when
movement begins. Any delays will be detailed in the task force information popup.
The speed at which a task force sails is dependent upon the speed of the slowest
ship in the force. If the slowest speed is greater than 10 knots, the force moves at a speed
halfway between the slowest ship‟s best speed and 10 knots. If the slowest speed is less
than 10 knots, the task force will move at the speed of the slowest ship unless towing is
possible (and it generally is, unless the slowest ship is much larger than anything else in
the force). Towing, if necessary, is preformed automatically.
Although task force locations are plotted on the map in 100 kilometer cells,
movement and task force locations are actually tracked very precisely. At any given
time, the game knows the location of every ship to a precision well under one meter. Two
task forces passing through a displayed map location may actually be up to 100
kilometers distant. Contact between opposing forces will only occur if at least one ship in
each force is within visible range of one ship on a potentially opposing force.
Basing
Every task force has an assigned base. The assigned base must be a friendly naval
base (not just a port). You may reassign task force bases by right clicking on a friendly
base within one way range, and selecting the “Assign Base” button. Once a new base is
assigned, a task force will sail to that base as soon as possible.
Patrols
When a task force sails (with normal sailing orders, or a mine mission), you may
specify a single point along the path as a patrol point. You can do this at any time by right
clicking on any point of the selected task force mission path. Upon reaching this point,
the task force will delay for the number of hours you specify. You can use this to
maintain forces on station at critical locations: near enemy bases you wish to monitor,
critical shipping lanes, etc.
Area Patrols
A task force with Area Patrol orders effectively becomes a small, independent
navy – managing its own missions and maintenance. Individual ships are assigned sailing
missions designed to maximize the chance of locating enemy forces sailing within 1000
kilometers from base. The task force will manage all individual ship maintenance and
sailing orders. This order is generally given to special purpose task forces composed of
“auxiliary cruisers” – ships not generally useful for much besides reconnaissance.
Distant Guns 67
The War
Time
The standard campaign game will last a minimum of 485 and a maximum of 575
days. Your warning that the war is drawing to a close is a news item stating: “Russia and
Japan enter into American mediated negotiations to end the war.” The war will end
approximately one month after this news report.
The rate at which time passes in the campaign game is player selectable. Allowed
rates of time are 1x (real time), 10x, 100x, 1000x, 10,000x, and 100,000x. You change
the rate of time by use of the keys. If any known task force is currently sailing (one of
yours, or a recently spotted enemy force), the maximum rate of time will drop back to
1000x for a minimum of 30 real world seconds. This way you can use higher rates of
time without worrying that you will miss something critical as forces move.
Weather
Weather is tracked on a theater wide basis, but details will vary somewhat in
individual locations. Most of the time, the variations are not visible. They do come into
play when battles occur.
Battles
When any ship of one of your task forces comes within visible range of any ship
of an enemy task force, a battle will begin. Campaign game battles are resolved as
standard Battle Game battles. Initial force deployments depend upon where the involved
task forces where at the time of contact, and the formations you have created using the
Task Force Organization Screen.
Fog of War
You will only be able to see your own task forces on the map. Enemy forces will
not be visible unless they have been spotted by a friendly force with the last six hours.
The Japanese player can also see the locations of all cargo vessels, including neutrals, if
the shipping overlay is active on the campaign map. These ships are ordinarily not visible
to the Russian player.
News
Some news events have a direct influence on the naval campaign. The status of
Port Arthur is perhaps the most critical element. You can view all of the news stories that
have appeared so far by use of the News dialog (F2 key).
Mine Warfare
Mine warfare was a major feature of the Russo-Japanese War. Both sides
deployed large numbers of mines, and both sides experienced painful losses to enemy
mines.
Defended naval bases are always heavily mined. These minefields are permanent,
and only affect enemy shipping.
Mines outside of naval base defensive areas are deployed in two ways. You may
assign a mine mission to a task force. A task force with a mine order will sail normally,
Distant Guns 68
but will lay mines in the selected location as it passes through. Any task force resting in a
base will deploy mines in the base campaign map location at a rate of once every seven
days. Mines deployed by your forces will not affect your ships when they are sailing on
the campaign map. Only mines deployed by enemy forces will affect your ships.
The number of mines a force can carry is shown in the task force information
popup, and is dependent upon the ships in the force. Some ships (particularly, the two
Russian minelayers) can carry very large numbers of mines.
The maximum number of mines in a given campaign map location is 600. Any
enemy ship operating in a mine field of this density will have up to a 5% chance per day
of striking a mine. The chance is dependent upon the size of the ship. A large ship has a
much greater chance of striking a mine than a smaller ship.
Mines do not last forever. They fail over time, are broken from moorings during
storms, and may be swept by enemy forces. 50% of mines located in the same cell as an
enemy naval base will be destroyed per week. The attrition rate is lower at other
locations. 50% of mines located in cells without enemy naval bases will be destroyed per
month. In other words, mines have a half life of one week near enemy naval bases, and
one month elsewhere.
If mines are present in a campaign map location, mine fields will be located in the
Battle Space should a battle occur there. During a battle, mine fields are dangerous to
ships of both sides. Your only advantage regarding minefields deployed by your forces is
that you will know where the fields are at the start of the battle. Your enemy will have to
find out the hard way.
Reinforcements
From time to time, new naval vessels will enter the game. The Japanese will
receive several ships purchased just before the war began, or near completion in Japanese
shipyards at the start of the war. The appearance of these ships will be mentioned in news
reports. The only reinforcement expected by the Russians is the 2nd
Pacific Squadron.
The Russian 2nd
Pacific Squadron
One of the most memorable elements of the Russo-Japanese war is the story of
the Russian 2nd
Pacific Squadron. The main elements of the force sailed from the Baltic
in October of 1904, and arrived in the war zone in May of 1905.
While this task force is no match for the Japanese fleet at its full pre-war strength,
its core of five of Russia‟s best battleships may prove a serious challenge to the Japanese
player with an injured fleet. This is particularly true if substantial elements of the original
Russian Pacific fleet are still operational. Both players should keep an eye on the news
for reports of the progress of the 2nd
Pacific Squadron. The force will most likely appear
about six weeks after reports of its passage by Singapore.
Port Arthur
The Russian naval base at Port Arthur is the most critical piece of real estate in
the entire game. From here, the Russians are in a position to seriously threaten all
Japanese shipping to the Asian mainland. Unfortunately for the Russians, Port Arthur is
one of the major objectives of the Japanese Army in their land campaign. Unless the
Russians manage to stop a very large number of Japanese and neutral cargo ships early in
Distant Guns 69
the game, Port Arthur will at some point fall to the Japanese Army. Shortly before this
happens, the Japanese Army will be in a position to effectively shell the naval base. This
will happen with very little warning. Several days before the Japanese succeed in moving
into the hills around Port Arthur there will be a news warning that “Port Arthur is no
longer a safe naval base.” If the Russian player still has naval units based at Port Arthur,
he should immediately send them to Vladivostok. The Japanese, of course, should expect
a Russian attempt to break out.
Battles
Beginning a Battle
Any time two ships from opposing forces spot one another, and at least one is
armed, a battle will take place. These battles are played exactly like the historical battle
scenarios included with the game. Battles will only occur if ships from opposing forces
can see each other. It is entirely possible for opposing forces to sail through a campaign
map location without spotting each other, particularly at night and in bad weather. You
can maximize the chance that your task force will spot an enemy force by deploying
individual ships or divisions far out on the flanks of your force. You can minimize the
chance of being spotted by packing your task force into a single column. Keep this in
mind when deciding your task force formations.
Initial Battle
Campaign games may begin with a pre-set initial battle. The standard historical
campaign begins with the surprise Japanese torpedo attack on the Russian fleet at anchor
off Port Arthur. After the initial battle is complete, you will be returned to the campaign
game and any campaign briefing.
Special Disengagement
In the campaign game, there are a number of special cases of ship disengagement
from a battle. They are most likely to take place in battles occurring near Port Arthur.
Normally, if a ship runs aground, it is destroyed. In campaign game battles, ships running
aground within 5000 meters of a friendly base are instead considered to have disengaged.
Ships entering a friendly base are also considered to have disengaged. This applies even
if the ship involved was sinking at the time. As long as a ship makes it into base or
manages to run aground near base, it will be saved and can eventually be repaired. Ships
entering major neutral ports (this will happen very rarely) are considered interned –
effectively lost for the duration of the war.
Ending a Battle
When playing the campaign game, all battles must be fully resolved before you
return to the campaign screen. If for any reason you wish to skip a particular battle, you
have the option of selecting the “End Battle” button on the battle screen. This will cause
the battle to be fought in a computer vs. computer mode at 120x real time. In most cases,
the computer will try to fight a battle pretty much the way you would probably fight –
fleeing superior forces unless an ambush is possible, or attempting to overtake and
Distant Guns 70
destroy weaker forces. For small battles, the result will be almost immediate. For larger
battles, a full resolution could take several minutes. Important events during the quick
resolution are displayed as event reports. Remember that the battle is being resolved very
quickly, and that when the action is heavy the event reports will scroll by very quickly.
After Action
After a battle has ended, you will be presented with a brief after action report
summarizing the results of the engagement. When you exit this report, you can examine
the situation just as after a standard battle game. Select the battle game Main Control
Flyout Panel “Return to Campaign” button to return to the campaign screen. It is a good
idea to pause the action on return to the campaign screen to examine the state of the
forces that just engaged in a battle. In many cases you will want to reorganize the forces
or issue new orders in light of battle results.
Victory in Battle
In the campaign game, you determine whether you have won or lost any particular
battle. There is no arbitrary calculation of victory. Your goal is to win the campaign.
Cargo Shipping
The entire campaign game is about cargo shipping. Your success in protecting
(Japanese) or attacking (Russian) the Japanese shipping lanes is your only influence on
victory in the standard campaign game. Even fleet losses do not matter. Everything
depends upon the flow of cargo over the course of the war.
There are two types of cargo shipping moving along Japanese shipping lanes:
neutral merchants, and Japanese cargo steamers.
The day to day commerce necessary for the maintenance of the Japanese wartime
economy is, for the most part, carried by neutral merchants. These ships, primarily
British, German, and American, operate in Japanese coastal waters. If an armed Russian
ship with a crew of more than 100 comes within 10000 meters of an unarmed neutral
merchant, and no Japanese armed ship is within view, the neutral will surrender and be
taken prize by the Russians. Russian naval vessels may not fire upon neutral ships.
Critical cargo headed for the mainland is generally carried by Japanese cargo
steamers. These ships are lightly armed, and will fight rather than surrender. Russian
ships may freely fire upon Japanese cargo vessels.
Any ship sunk or taken by the Russians will have a negative effect on the
Japanese Army. The effect is based upon the size of the cargo vessel (displacement), and
whether it is Japanese (worth twice the usual value by tonnage) or neutral.
In order to win the campaign, the Russians should stop the equivalent of 375,000
tons of neutral shipping. Historically, they only managed about 17% of this total.
Campaign Victory
The Russo-Japanese War was fought over the issue of control of Manchuria,
particularly the area near the vital naval base at Port Arthur. As naval commander, you
have no direct influence over the course of the land campaign. Armies will advance or
retreat, battles will be fought, and sieges will play out – all beyond the scope of your
Distant Guns 71
control. News of the land campaign will appear from time to time, and all news stories
can be viewed using the News dialog.
Although you have no direct influence on the land war, you do have a decisive
indirect effect. Every soldier, weapon, and round of ammunition used by the Japanese
Army in Manchuria has to be shipped from Japan to the Asian mainland. All of this cargo
is transported by unarmed neutral or lightly armed Japanese steamers. As the Russian,
you want to stop at least 375,000 tons of shipping (roughly 100 ships). The Japanese
want to prevent this. The exact, critical tonnage of ships is unknown to you, and will vary
from game to game.
How do you know how you are doing? There is a running victory projection at the
upper left corner of the screen. This is your most direct gauge.
Appendices
Appendix – Guns at Sea: the Inspiration for Distant Guns’ title. Guns at Sea
Imtarfa, 1917
Let me get back to the guns again, I hear them calling me,
And all I ask is my own ship, and the surge of the open sea,
In the long, dark nights, when the stars are out, and the clean salt breezes blow,
And the land's foul ways are half forgot, like nightmare, and I know
That the world is good, and life worth while, and man's real work to do,
In the final test, in Nature's school, to see which of us rings true.
On shore, in peace, men cheat and lie - but you can't do that at sea,
For the sea is strong; if your work is weak, vain is the weakling's plea
Of a "first offence" or "I'm only young," or "It shall not happen again,"
For the sea finds out your weakness, and writes its lesson plain.
"The liar, the slave, the slum-bred cur - let them stay ashore, say I,
"For, mark it well, if they come to me, I break them and they die.
The land is kind to a soul unsound; I find and probe the flaw,
For I am the tears of eternity that rock to eternal law."
I love the touch of the clean salt spray on my hands and hair and face,
I love to feel the long ship leap, when she feels the sea's embrace,
While down below is the straining hull, o'erhead the gulls and clouds,
And the clean wind comes 'cross the vast sea space, and sings its song in the shrouds.
But now in my dreams, besides the sounds one always hears at sea,
I hear the mutter of distant guns, which call and call to me,
Singing: "Come! The day is here for which you have waited long."
And women's tears, and craven fears, are drowned in that monstrous song.
So whatever the future hold in store, I feel that I must go,
To where, thro' the shattering roar, I hear a voice that whispers low:
"The craven, the weak, the man with nerves, from me they must keep away,
Or a dreadful price in shattered nerves, and broken health they pay.
But send me the man who is calm and strong, in the face of my roaring blast,
Distant Guns 72
He shall tested be in my mighty fires, and if he shall live at the last,
He can go to his home, his friends, his kin, to his life e'er war began,
With a new-found soul, and a new-found strength, knowing himself a man."
Appendix – License Transfer Utilities
Introduction
You can only play Distant Guns on one computer at a time, but there is no limit
on the number of times you can transfer the right to play from one computer to another.
In order to transfer a license, you must have a licensed (“activated”) version of the
game on one computer. The computer that has this existing licensed installation of the
game is the source computer. The game must also be installed on the computer to which
you wish to transfer the license. This new computer is called the target computer.
On-Line License Transfers
This is the preferred method for transferring licenses. On-line license transfers
require that both computers involved have an open internet connection, but only one
computer needs to be on-line at any given time.
On-line License Transfers - Detailed Instructions
To transfer the license from a source computer to a target computer:
Step 1: Install the game on the target computer.
Step 2: Launch the game on the source computer. At any point after the opening
cinematic has played, press <shift> f12. This will bring up the License Release
dialog. Press the “Yes” button on the dialog to store your license in your account
on the Storm Eagle Studios server. After the license release, the game will
automatically shut down on the source computer. At this point, your license is
stored in your account on the Storm Eagle Studios server, and available to activate
any computer with an open internet connection.
Step 3: Launch the game on the target computer. When the trial dialog appears,
select Activate This Software Online and use your password and license ID to
activate the game. This is exactly the same process you used originally when you
first activated your game. That‟s it. The game is now fully activated on the target
computer.
Off-Line License Transfers
Off-Line License Transfers are no longer supported.
Orphan Policy
In the event that Storm Eagle Studios server becomes unavailable for transfers,
we will release a global code allowing off-line activation using your password and
license ID.
Distant Guns 73
Appendix – Mouse Controls
Left or Right Click: General selections.
Cursor at Screen Edge: Pan or tilt point of view.
Wheel Forward: Zoom in
Wheel Back: Zoom out
Appendix – Battle Game Hotkeys
Left Arrow Key: move view left
Right Arrow Key: move view right
Up Arrow Key: move view forward
Down Arrow Key: move view back
Page Up Key: raise view
Page Down Key: lower view
Number Pad 1 or 7 Key: pan left
Number Pad 8 Key: tilt down
Number Pad 3 or 9 Key: pan right
Number Pad 6 Key: move right
Number Pad 2 Key: tilt up
Number Pad 5 Key: move forward
Number Pad 0 Key: move back
Number Pad - Key: zoom out
Number Pad + Key: zoom in
Number Pad * Key: raise view
Number Pad / Key: lower view
R Key: Set free view
F Key: Set follow view
V Key: Set fixed view
F2 Key: Set ship standard view
F3 Key: Set battle space standard view
1 Key: microview map 1x
2 Key: microview map 2x
3 Key: microview map 3x
4 Key: microview map 4x
5 Key: microview map 5x
M Key: microview display (lower right/center large/off)
C Key: Message to all players
C<shift> Key: Message to friendly players
G Key: Multiplay management dialog
B Key: Show last selected ship
B<shift> Key: Reselect last selected ship
K Key: Show next enemy ship
L Key: Show previous enemy ship
. Key: Show next friendly ship
Distant Guns 74
, Key: ,Show previous friendly ship
.<shift> Key: Select next friendly ship
,<shift> Key: Select previous friendly ship
Q Key: Issue target specific ship orders
A Key: Issue target nearest leader orders
Z Key: Issue target free orders
Space Key: Issue cease fire orders
I Key: Show Ship Information Screen
O Key: Show battle objectives
P Key: Pause the game
D Key: Show situation report
S Key: Toggle ship status on or off
T Key: Set Spyglass on, on with 1.5 second delay, or off
X Key: Set sticky orders flyouts on or off
H Key: Change Shell-cam (off, selected, all ships)
F4 Key: Toggle frame rate display on or off
F5 Key: Binocular View
F6 Key: Quick Save Game
F7 Key: Increase game time rate
F8 Key: Decrease game time rate
F9 Key: Set game time rate to 1x
F1 Key: Hotkey help toggle (show this list)
F12 Key: Reset all game defaults. Some changes may not be visible until the next
time you start the game.
Appendix – Campaign Game Hotkeys
Left Arrow Key: scroll map left
Right Arrow Key: scroll map right
Up Arrow Key: scroll map up
Down Arrow Key: scroll map down
Page Up Key: zoom out
Page Down Key: zoom in
P Key: Pause the game
F1 Key: Hotkey help toggle (show this list)
F2 Key: Show news reports
F3 Key: Change map information overlay
F4 Key: Toggle frame rate display on or off
F6 Key: Quick Save Game
F7 Key: Increase game time rate
F8 Key: Decrease game time rate
F9 Key: Set game time rate to 1x
F11 Key: Show last briefing
F12 Key: Reset all game defaults. Some changes may not be visible until the next
time you start the game.

Distant Guns 75
Appendix – Display Options As with most 3d games, Distant Guns includes a number of options for fine
tuning display quality. The default settings for display quality represent a reasonable
compromise between display quality and frame rate. If the game display seems jerky or
slow, try setting some quality settings lower. If you think you may have the necessary
head room, feel free to experiment with higher quality settings. We feel that the choice to
experiment with the full range of settings should be yours, rather than restricted to a
“safe” set, and have placed no restrictions on any of these features. If DirectX reports to
our code that your system is capable of a feature, we allow you to select it; but not all
computer systems are actually capable of running at high frame rates and high resolutions
and high detail, etc.
Some settings are marked with an asterisk (*). Changing these settings will cause
a reset of the 3d display, which may take a few seconds.
Anti-aliasing (*): This value is hardware dependent. Setting any value higher than
1x will force the game to render in anti-aliasing mode. Typical allowed values
range from 2x to 4x in windowed mode and higher in full screen modes. Higher
values give better displays, but require more memory and may have a substantial
impact on frame rates. Turn “off” for highest frame rate.
Anisotropic Filtering (*): This value is hardware dependent. Setting any value
other than “off” will force the game to render using anisotropic texture filtering.
Higher is generally better, but the most noticeable effect comes at the 2x level.
Depending upon your 3d hardware, anisotropic filtering may have a substantial
effect on frame rates. Turn “off” for highest frame rate.
3d Detail Geometry: This controls display of 3d ship detail sets. The best looking
display value is “full”, but the extra geometry may cause slower 3d cards to bog
down. Set to “basic” for highest frame rate.
Smoke and Wake Quality: This controls the number and duration of smoke and
wake related 3d objects. Best looking display value is “full”, and highest frame
rate value is minimal. Default value is “medium”.
High Resolution Effects: This controls display of blast shock waves, searchlights
(at night), shell objects, shoreline related effects, explosion lighting effects, and
shadows. Best looking display value is “on”, and highest frame rate value is “off”.
Default value is off.
Visibility Limiting: This imposes a mid distance fog and battle space view cutoff
in high visibility settings that affects only the display without affecting game play.
There is no effect on the distance at which ships spot each other, etc., but display
rendering is done as if the visibility were lower. Best looking display value is
“off”, and highest frame rate value is “on”. Default value is “on”.
Texture Quality (*): This sets allowances for texture loading resolutions. At the
“full” quality setting, textures up to 1024x1024 are loaded. At “basic” quality,
textures are limited to 256x256 pixels and smaller textures are halved in size. Best
looking display value is “full”, and highest frame rate value is “basic”. This
setting will only have a significant effect on your frame rates if your 3d hardware
has less than 64MB of available memory. Default value is “full”.
Distant Guns 76
Display Type (*): The game can be played in windowed or one of a range of set
full screen resolutions and color depths. The allowed values are hardware
dependent, as detected by DirectX. Some 3d hardware will run much slower in
windowed mode than in full screen mode. Windowed mode allows easier access
to other applications that may be running. Default is value full screen, 1024x768,
32 bit color depth.
Adaptive Default View: If “on”, the point of view will “remember” its orientation
whenever you tilt, pan, raise, or lower the camera. If off, the set values for
elevation, and tilt, and pan are used. There is no performance difference between
settings.
Animated Ocean Surface (*): If “off”, the ocean surface is textured using a fixed
texture and fixed wave geometry. At “medium” the ocean is displayed using a set
of animated meshes and textures. “Full” is similar to medium, but with a slightly
smoother animation (more frames, changing more frequently). Turn “off” for
highest frame rate.
Lens Flare: If “on”, a lens flare effect will be displayed when the sun is visible
within the battlespace view. If “off”, no flare is displayed. Depending upon your
3d hardware, there may be no performance difference between settings.
Trilinear Texture Filtering: If “on”, distant objects may appear a bit clearer. The
exact effect depends upon your graphic adapter and drivers. Turn “off” for highest
frame rate.
Water Surface Geometry: This controls the distance to which wave geometry is
displayed before fading out to a distant, flat, ocean surface. Turn “off” for highest
frame rate. Set “high” for best display.
V Synch (*): If “on”, screen refreshes occur only during vertical scan interrupts.
The visual effect depends heavily upon your monitor, graphic adapter, and
hardware drivers. Most users will want to leave V Synch on for highest quality
display. This can lower your frame rate if your video refresh rate is lower than or
near your current frame rate, but the effect is usually very small. With v synch
“off” you may notice occasional, single frame (appearing briefly, then
disappearing) glitches in the game display.
Visible Damage Effects: Display ship damage skins. If “on”, ship damage will be
visible. This is memory intensive, and can lower your frame rates. Turn “off” for
highest frame rate.
Frame Rate Adaptive Detail: If “on”, the game program will monitor your frame
rate. If the frame rate falls below certain thresholds, some quality settings will be
temporarily reduced in an attempt to keep the frame rate up. When the frame rate
increases, your selected quality settings are restored. Turn “on” for highest frame
rate.
Our development machines (3 GHz Pentium IV/ nVidia GeForce 6800) typically
played at 30+ frames per second even under high-load conditions (Late in the Tsushima
scenario) with the following settings: Anti-aliasing: 4x, Anisotropic Filtering: 2x, 3D
Detail Geometry: Full, Smoke and Wake Quality: Full, High Resolution Effects: On,
Visibility Limiting: Off, Texture Quality: Full, Display Type: Windowed (generally at
1600x1200x32 bit), Adaptive Default View: On, Animated Ocean Surface: Medium,

Distant Guns 77
Lens Flare: On, Trilinear Texture Filtering: On, Water Surface Geometry: Medium, V
Synch: Off, Visible Damage Effects: On, Frame Rate Adaptive Detail: On.
Most players will probably prefer frame rates of 20fps or higher. Some of our testers
surprised us by opting for very high resolutions and detail settings at the expense of
frame rates on modest test systems. The choice is yours. You can check your frame rate
by enabling the frame rate display. Press the F4 Key to toggle the frame rate display
on/off.
Appendix – Sound Options
Music: Turn music on or off.
Appendix – Weapons of the Russo-Japanese War Weapon data are drawn primarily from Russian sources. Ranges are theoretical
maxima, and in many cases greatly exceed effective ranges. Fire control systems of the
time were primitive. Fire solutions generally assumed constant ranges. Range estimates,
particularly under poor lighting conditions, were very poor. Even under the best of
conditions, any hit at ranges over 6000 meters was more likely an act of God than the
result of precision gunnery.
Name Country Muzzle
Velocity
(m/s)
Shell
Weight
(kg)
Rate of Fire
- rpm
Range
(meters)
37mm L23 Gun RUSSIA 442 1 15 3700
47mm L44 Gun RUSSIA 710 2 16 6600
75mm L50 Gun RUSSIA 823 5 7 9200
107mm L20 Gun RUSSIA 450 15 6 10000
120mm L45 Gun RUSSIA 823 20 4 11400
152mm L28 Gun RUSSIA 500 41 2 7000
152mm L35 Gun RUSSIA 645 41 2 9400
152mm L45 Gun RUSSIA 793 42 3 12500
203mm L35 Gun RUSSIA 664 88 0.67 10800
203mm L45 Gun RUSSIA 891 88 1.5 14000
210mm L30 Gun RUSSIA 569 176 0.33 12100
229mm L35 Gun RUSSIA 653 126 0.75 11000
239mm L40 Gun RUSSIA 875 144 1.5 20000
254mm L45LP Gun RUSSIA 693 225 0.67 14300
254mm L45 Gun RUSSIA 732 225 0.67 20200
280mm L10 Gun RUSSIA 314 217 1 7800
305mm L30 Gun RUSSIA 570 332 0.2 11200
305mm L35 Gun RUSSIA 637 332 0.25 11600
305mm L40 Gun RUSSIA 792 332 0.5 15800
381mm Whitehead Torpedo RUSSIA 14 64 0.025 900
37mm L23 Gun JAPAN 430 1 22 3300
47mm L33 Gun JAPAN 560 1 20 3700
47mm L40 Gun JAPAN 562 2 22 4400
57mm L43 Gun JAPAN 553 3 18 6600
Distant Guns 78
75mm L30 Gun JAPAN 500 5 7 6000
76mm L40 Gun JAPAN 647 6 8 8800
120mm L25 Gun JAPAN 500 20 6 7000
120mm L40 Gun JAPAN 655 20 6 9700
150mm L22 Gun JAPAN 450 40 3 6000
150mm L35 Gun JAPAN 550 40 3 8300
152mm L40 Gun JAPAN 677 45 5 14100
152mm L45 Gun JAPAN 762 45 6 16000
170mm L35 Gun JAPAN 600 63 2 9000
203mm L40 Gun JAPAN 786 113 2 13200
203mm L45 Gun JAPAN 867 108 2 19100
210mm L30 Gun JAPAN 569 176 0.33 12100
254mm L45 Gun JAPAN 826 226 1 22000
260mm L22 Gun JAPAN 450 230 0.5 7000
280mm L10 Gun JAPAN 314 217 1 7800
305mm L22 Gun JAPAN 527 328 0.25 9700
305mm L40-1890 Gun JAPAN 732 386 0.25 16900
305mm L40-1891 Gun JAPAN 762 386 0.75 18000
320mm L38 Gun JAPAN 703 449 0.2 13200
356mm Whitehead Torpedo JAPAN 14 41 0.025 600
381mm Whitehead Torpedo JAPAN 14 64 0.025 900
457mm Whitehead Torpedo JAPAN 16 197 0.025 1300
Notes:
Reload time is (1/rate of fire) minutes. Torpedo rate of fire is given for the case of
open mounts on small ships, and translates into 40 minutes reload time. Reload times for
interior mounts on larger ships tend to be much shorter, on the order of 8 minutes.
LP: Low pressure.
Except for torpedoes, accuracy is heavily dependent upon muzzle velocity. At any
given range, it is much easier to hit a target with a shell traveling at 700 meters per
second than with a shell traveling at 500 meters per second. Damage is primarily
dependent upon shell weight, although hits underwater due to mines and torpedoes are
wildly variable. There were destroyers that survived mine strikes, and battleships that
sank immediately upon hitting the same kind of mine.
Appendix – Ships of the Russo-Japanese War This is a list of ships that participated in the Russo-Japanese War. It does not
include ships that, while they may have been on naval lists, were not available in the
Northwest Pacific Theater of Operations. Ships are listed in order of general combat
value. In some cases the order may raise eyebrows. This was a period of rapid evolution
in warship design. Keep in mind that the armored cruisers of the early 20th
century
evolved into battlecruisers, and are more properly thought of as capital ships than as
comparable to later generation cruisers. Combat value differences less than 20% should
be considered insignificant. Armor values are stated in effective inches, corrected for
armor type, and rounded.
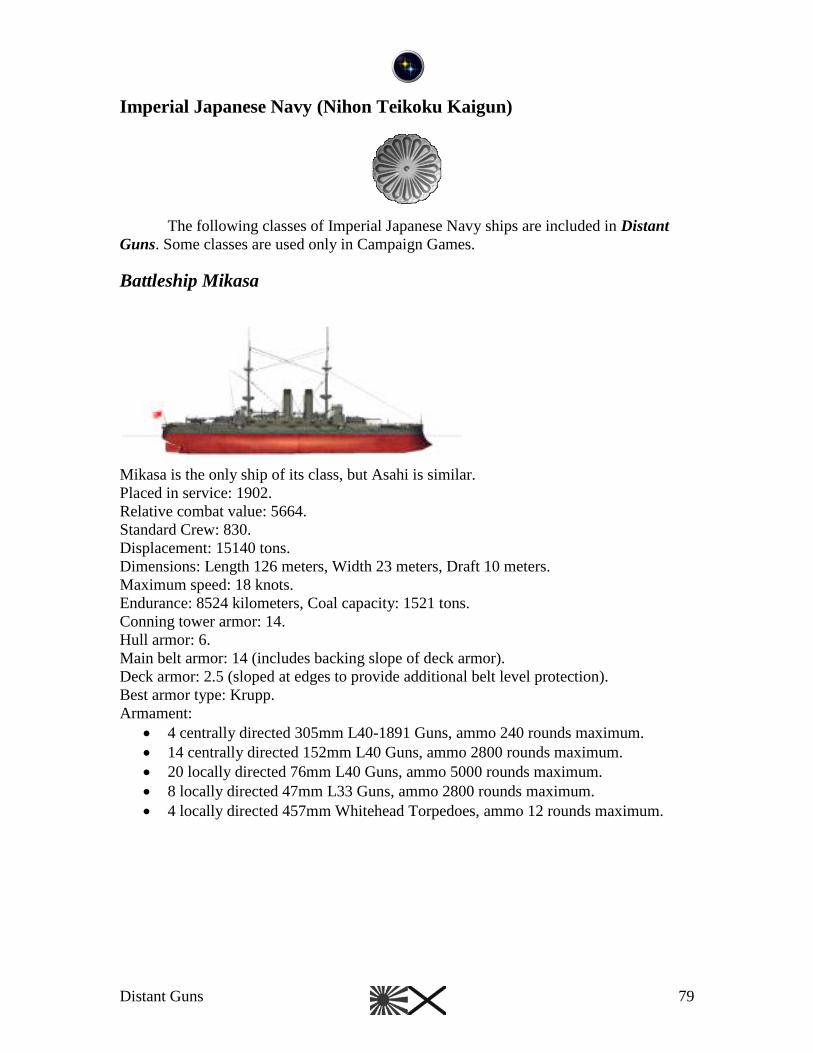
Distant Guns 79
Imperial Japanese Navy (Nihon Teikoku Kaigun)
The following classes of Imperial Japanese Navy ships are included in Distant
Guns. Some classes are used only in Campaign Games.
Battleship Mikasa
Mikasa is the only ship of its class, but Asahi is similar.
Placed in service: 1902.
Relative combat value: 5664.
Standard Crew: 830.
Displacement: 15140 tons.
Dimensions: Length 126 meters, Width 23 meters, Draft 10 meters.
Maximum speed: 18 knots.
Endurance: 8524 kilometers, Coal capacity: 1521 tons.
Conning tower armor: 14.
Hull armor: 6.
Main belt armor: 14 (includes backing slope of deck armor).
Deck armor: 2.5 (sloped at edges to provide additional belt level protection).
Best armor type: Krupp.
Armament:
4 centrally directed 305mm L40-1891 Guns, ammo 240 rounds maximum.
14 centrally directed 152mm L40 Guns, ammo 2800 rounds maximum.
20 locally directed 76mm L40 Guns, ammo 5000 rounds maximum.
8 locally directed 47mm L33 Guns, ammo 2800 rounds maximum.
4 locally directed 457mm Whitehead Torpedoes, ammo 12 rounds maximum.
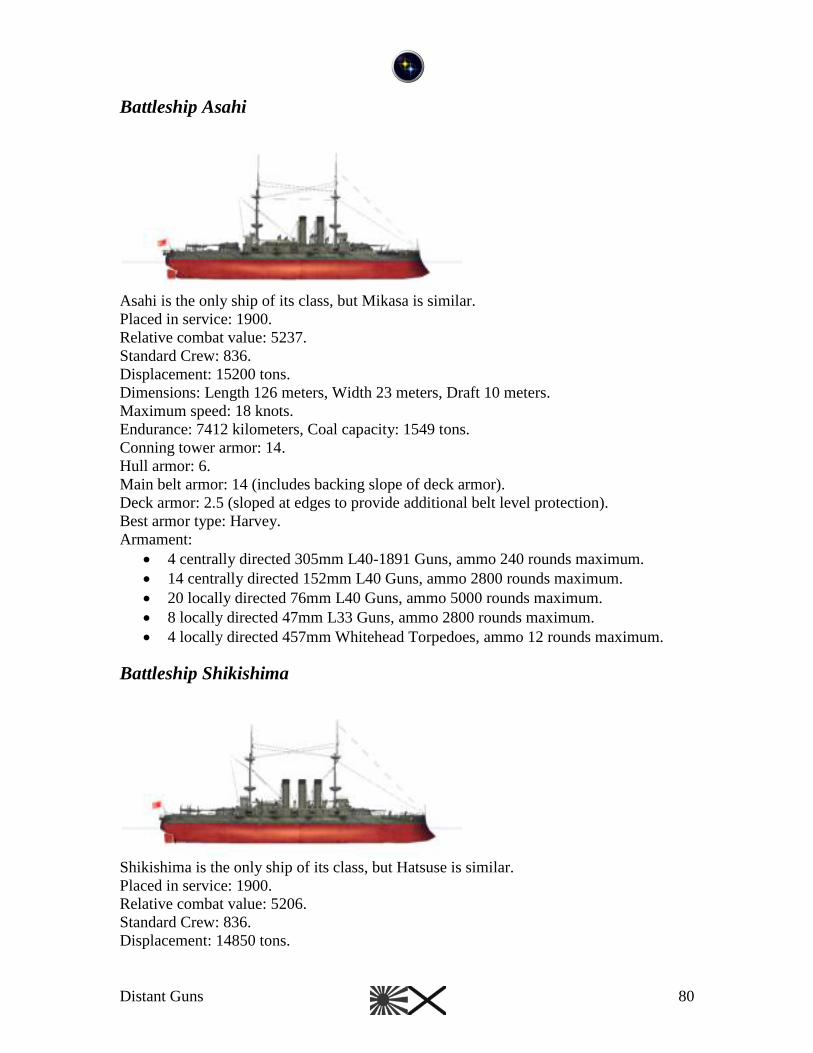
Distant Guns 80
Battleship Asahi
Asahi is the only ship of its class, but Mikasa is similar.
Placed in service: 1900.
Relative combat value: 5237.
Standard Crew: 836.
Displacement: 15200 tons.
Dimensions: Length 126 meters, Width 23 meters, Draft 10 meters.
Maximum speed: 18 knots.
Endurance: 7412 kilometers, Coal capacity: 1549 tons.
Conning tower armor: 14.
Hull armor: 6.
Main belt armor: 14 (includes backing slope of deck armor).
Deck armor: 2.5 (sloped at edges to provide additional belt level protection).
Best armor type: Harvey.
Armament:
4 centrally directed 305mm L40-1891 Guns, ammo 240 rounds maximum.
14 centrally directed 152mm L40 Guns, ammo 2800 rounds maximum.
20 locally directed 76mm L40 Guns, ammo 5000 rounds maximum.
8 locally directed 47mm L33 Guns, ammo 2800 rounds maximum.
4 locally directed 457mm Whitehead Torpedoes, ammo 12 rounds maximum.
Battleship Shikishima
Shikishima is the only ship of its class, but Hatsuse is similar.
Placed in service: 1900.
Relative combat value: 5206.
Standard Crew: 836.
Displacement: 14850 tons.
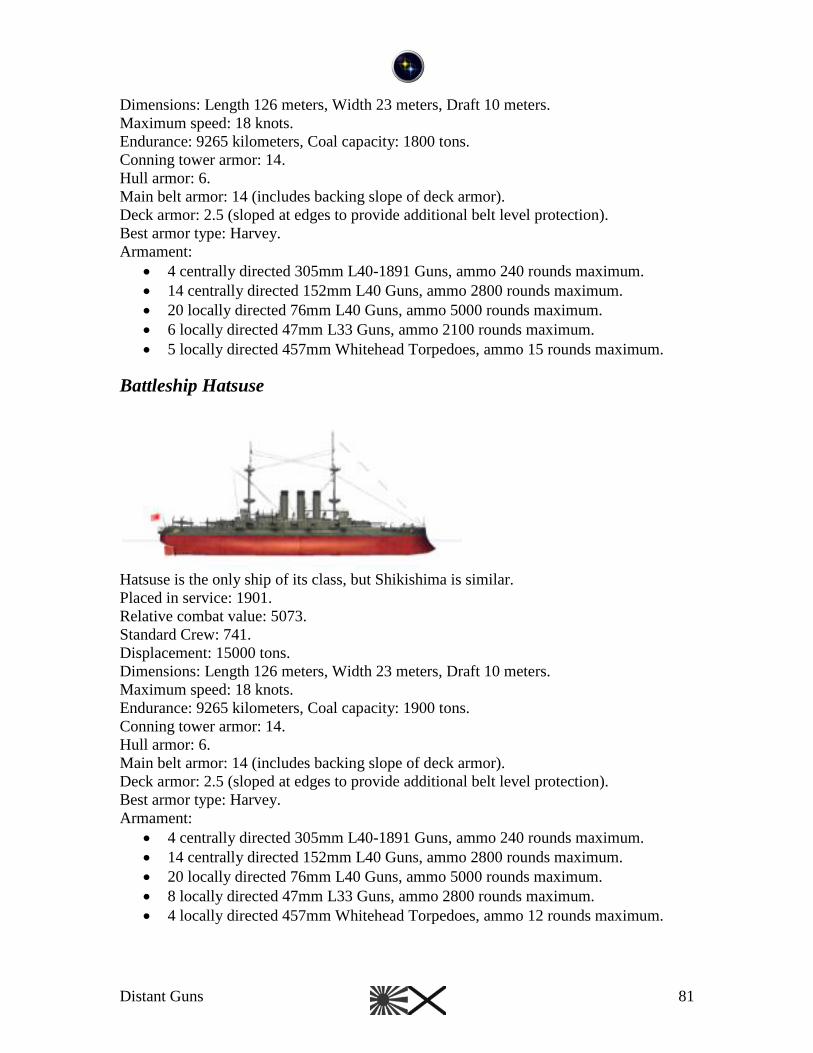
Distant Guns 81
Dimensions: Length 126 meters, Width 23 meters, Draft 10 meters.
Maximum speed: 18 knots.
Endurance: 9265 kilometers, Coal capacity: 1800 tons.
Conning tower armor: 14.
Hull armor: 6.
Main belt armor: 14 (includes backing slope of deck armor).
Deck armor: 2.5 (sloped at edges to provide additional belt level protection).
Best armor type: Harvey.
Armament:
4 centrally directed 305mm L40-1891 Guns, ammo 240 rounds maximum.
14 centrally directed 152mm L40 Guns, ammo 2800 rounds maximum.
20 locally directed 76mm L40 Guns, ammo 5000 rounds maximum.
6 locally directed 47mm L33 Guns, ammo 2100 rounds maximum.
5 locally directed 457mm Whitehead Torpedoes, ammo 15 rounds maximum.
Battleship Hatsuse
Hatsuse is the only ship of its class, but Shikishima is similar.
Placed in service: 1901.
Relative combat value: 5073.
Standard Crew: 741.
Displacement: 15000 tons.
Dimensions: Length 126 meters, Width 23 meters, Draft 10 meters.
Maximum speed: 18 knots.
Endurance: 9265 kilometers, Coal capacity: 1900 tons.
Conning tower armor: 14.
Hull armor: 6.
Main belt armor: 14 (includes backing slope of deck armor).
Deck armor: 2.5 (sloped at edges to provide additional belt level protection).
Best armor type: Harvey.
Armament:
4 centrally directed 305mm L40-1891 Guns, ammo 240 rounds maximum.
14 centrally directed 152mm L40 Guns, ammo 2800 rounds maximum.
20 locally directed 76mm L40 Guns, ammo 5000 rounds maximum.
8 locally directed 47mm L33 Guns, ammo 2800 rounds maximum.
4 locally directed 457mm Whitehead Torpedoes, ammo 12 rounds maximum.
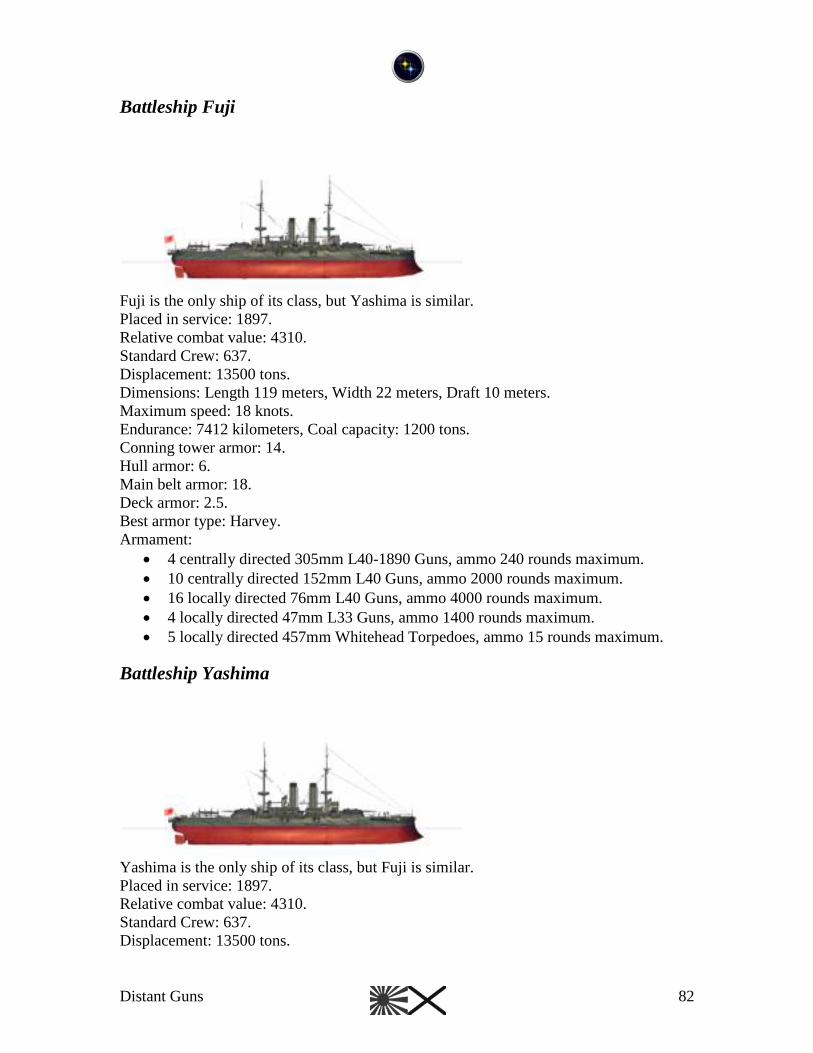
Distant Guns 82
Battleship Fuji
Fuji is the only ship of its class, but Yashima is similar.
Placed in service: 1897.
Relative combat value: 4310.
Standard Crew: 637.
Displacement: 13500 tons.
Dimensions: Length 119 meters, Width 22 meters, Draft 10 meters.
Maximum speed: 18 knots.
Endurance: 7412 kilometers, Coal capacity: 1200 tons.
Conning tower armor: 14.
Hull armor: 6.
Main belt armor: 18.
Deck armor: 2.5.
Best armor type: Harvey.
Armament:
4 centrally directed 305mm L40-1890 Guns, ammo 240 rounds maximum.
10 centrally directed 152mm L40 Guns, ammo 2000 rounds maximum.
16 locally directed 76mm L40 Guns, ammo 4000 rounds maximum.
4 locally directed 47mm L33 Guns, ammo 1400 rounds maximum.
5 locally directed 457mm Whitehead Torpedoes, ammo 15 rounds maximum.
Battleship Yashima
Yashima is the only ship of its class, but Fuji is similar.
Placed in service: 1897.
Relative combat value: 4310.
Standard Crew: 637.
Displacement: 13500 tons.
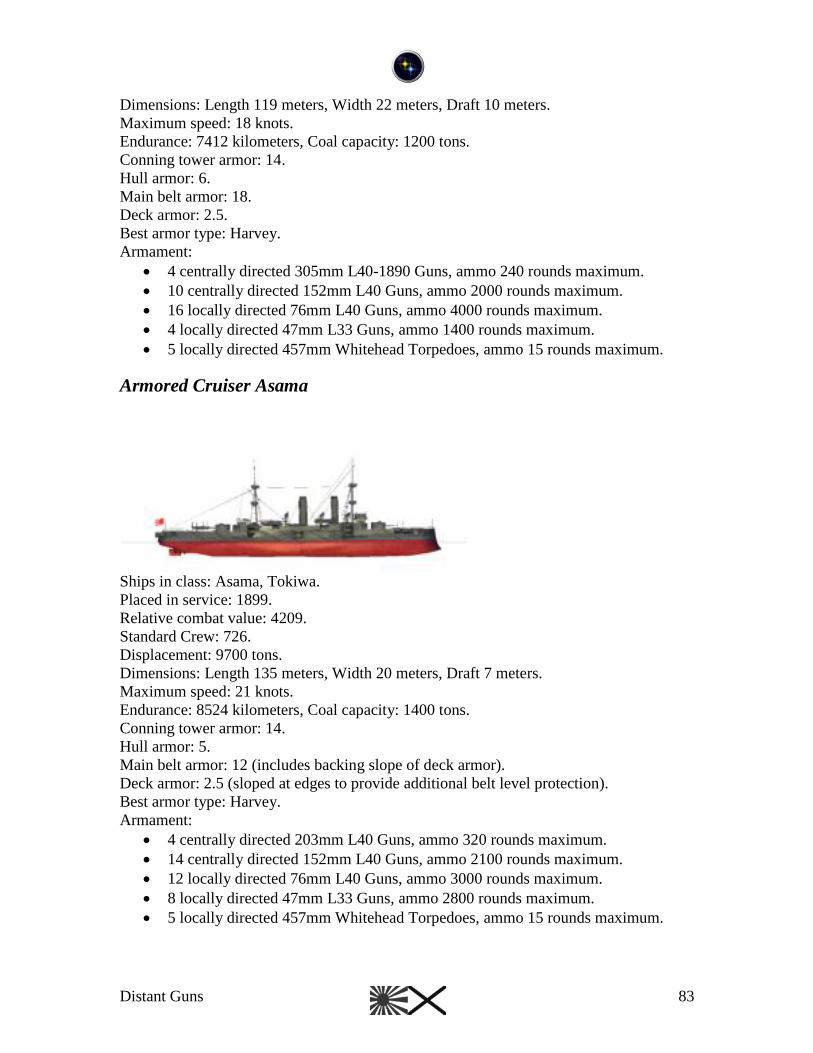
Distant Guns 83
Dimensions: Length 119 meters, Width 22 meters, Draft 10 meters.
Maximum speed: 18 knots.
Endurance: 7412 kilometers, Coal capacity: 1200 tons.
Conning tower armor: 14.
Hull armor: 6.
Main belt armor: 18.
Deck armor: 2.5.
Best armor type: Harvey.
Armament:
4 centrally directed 305mm L40-1890 Guns, ammo 240 rounds maximum.
10 centrally directed 152mm L40 Guns, ammo 2000 rounds maximum.
16 locally directed 76mm L40 Guns, ammo 4000 rounds maximum.
4 locally directed 47mm L33 Guns, ammo 1400 rounds maximum.
5 locally directed 457mm Whitehead Torpedoes, ammo 15 rounds maximum.
Armored Cruiser Asama
Ships in class: Asama, Tokiwa.
Placed in service: 1899.
Relative combat value: 4209.
Standard Crew: 726.
Displacement: 9700 tons.
Dimensions: Length 135 meters, Width 20 meters, Draft 7 meters.
Maximum speed: 21 knots.
Endurance: 8524 kilometers, Coal capacity: 1400 tons.
Conning tower armor: 14.
Hull armor: 5.
Main belt armor: 12 (includes backing slope of deck armor).
Deck armor: 2.5 (sloped at edges to provide additional belt level protection).
Best armor type: Harvey.
Armament:
4 centrally directed 203mm L40 Guns, ammo 320 rounds maximum.
14 centrally directed 152mm L40 Guns, ammo 2100 rounds maximum.
12 locally directed 76mm L40 Guns, ammo 3000 rounds maximum.
8 locally directed 47mm L33 Guns, ammo 2800 rounds maximum.
5 locally directed 457mm Whitehead Torpedoes, ammo 15 rounds maximum.
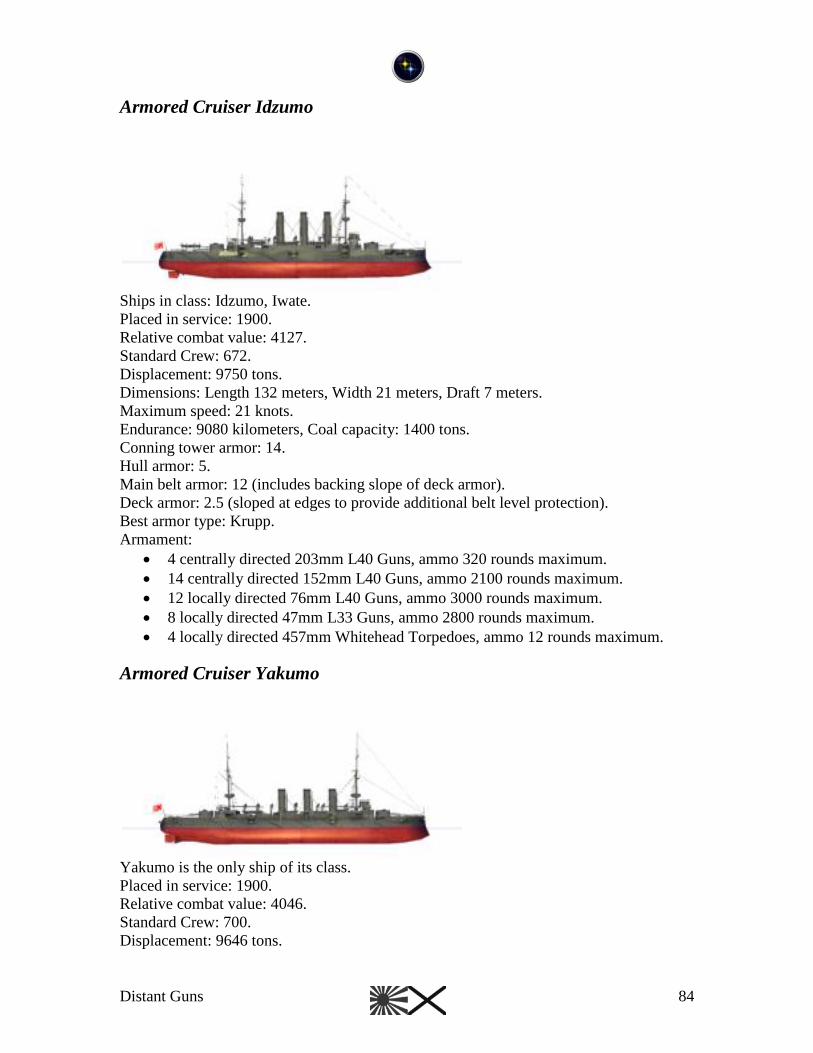
Distant Guns 84
Armored Cruiser Idzumo
Ships in class: Idzumo, Iwate.
Placed in service: 1900.
Relative combat value: 4127.
Standard Crew: 672.
Displacement: 9750 tons.
Dimensions: Length 132 meters, Width 21 meters, Draft 7 meters.
Maximum speed: 21 knots.
Endurance: 9080 kilometers, Coal capacity: 1400 tons.
Conning tower armor: 14.
Hull armor: 5.
Main belt armor: 12 (includes backing slope of deck armor).
Deck armor: 2.5 (sloped at edges to provide additional belt level protection).
Best armor type: Krupp.
Armament:
4 centrally directed 203mm L40 Guns, ammo 320 rounds maximum.
14 centrally directed 152mm L40 Guns, ammo 2100 rounds maximum.
12 locally directed 76mm L40 Guns, ammo 3000 rounds maximum.
8 locally directed 47mm L33 Guns, ammo 2800 rounds maximum.
4 locally directed 457mm Whitehead Torpedoes, ammo 12 rounds maximum.
Armored Cruiser Yakumo
Yakumo is the only ship of its class.
Placed in service: 1900.
Relative combat value: 4046.
Standard Crew: 700.
Displacement: 9646 tons.

Distant Guns 85
Dimensions: Length 132 meters, Width 20 meters, Draft 7 meters.
Maximum speed: 20 knots.
Endurance: 9265 kilometers, Coal capacity: 1242 tons.
Conning tower armor: 14.
Hull armor: 5.
Main belt armor: 12 (includes backing slope of deck armor).
Deck armor: 2.5 (sloped at edges to provide additional belt level protection).
Best armor type: Krupp.
Armament:
4 centrally directed 203mm L40 Guns, ammo 320 rounds maximum.
12 centrally directed 152mm L40 Guns, ammo 1800 rounds maximum.
12 locally directed 76mm L40 Guns, ammo 3000 rounds maximum.
8 locally directed 47mm L33 Guns, ammo 2800 rounds maximum.
5 locally directed 457mm Whitehead Torpedoes, ammo 15 rounds maximum.
Armored Cruiser Adzuma
Adzuma is the only ship of its class.
Placed in service: 1900.
Relative combat value: 3664.
Standard Crew: 650.
Displacement: 9307 tons.
Dimensions: Length 138 meters, Width 21 meters, Draft 6 meters.
Maximum speed: 20 knots.
Endurance: 7227 kilometers, Coal capacity: 1275 tons.
Conning tower armor: 14.
Hull armor: 5.
Main belt armor: 12 (includes backing slope of deck armor).
Deck armor: 2.5 (sloped at edges to provide additional belt level protection).
Best armor type: Harvey.
Armament:
4 centrally directed 203mm L40 Guns, ammo 480 rounds maximum.
12 centrally directed 152mm L40 Guns, ammo 1680 rounds maximum.
12 locally directed 76mm L40 Guns, ammo 3000 rounds maximum.
8 locally directed 47mm L33 Guns, ammo 2800 rounds maximum.
5 locally directed 457mm Whitehead Torpedoes, ammo 15 rounds maximum.
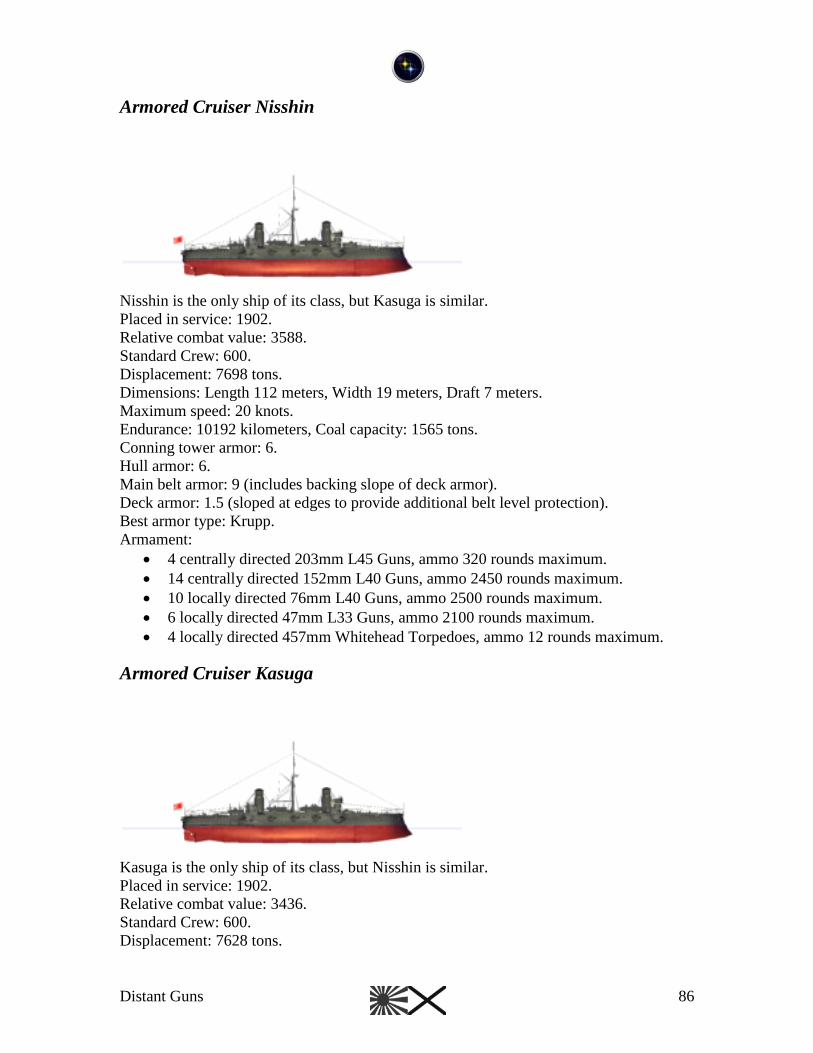
Distant Guns 86
Armored Cruiser Nisshin
Nisshin is the only ship of its class, but Kasuga is similar.
Placed in service: 1902.
Relative combat value: 3588.
Standard Crew: 600.
Displacement: 7698 tons.
Dimensions: Length 112 meters, Width 19 meters, Draft 7 meters.
Maximum speed: 20 knots.
Endurance: 10192 kilometers, Coal capacity: 1565 tons.
Conning tower armor: 6.
Hull armor: 6.
Main belt armor: 9 (includes backing slope of deck armor).
Deck armor: 1.5 (sloped at edges to provide additional belt level protection).
Best armor type: Krupp.
Armament:
4 centrally directed 203mm L45 Guns, ammo 320 rounds maximum.
14 centrally directed 152mm L40 Guns, ammo 2450 rounds maximum.
10 locally directed 76mm L40 Guns, ammo 2500 rounds maximum.
6 locally directed 47mm L33 Guns, ammo 2100 rounds maximum.
4 locally directed 457mm Whitehead Torpedoes, ammo 12 rounds maximum.
Armored Cruiser Kasuga
Kasuga is the only ship of its class, but Nisshin is similar.
Placed in service: 1902.
Relative combat value: 3436.
Standard Crew: 600.
Displacement: 7628 tons.
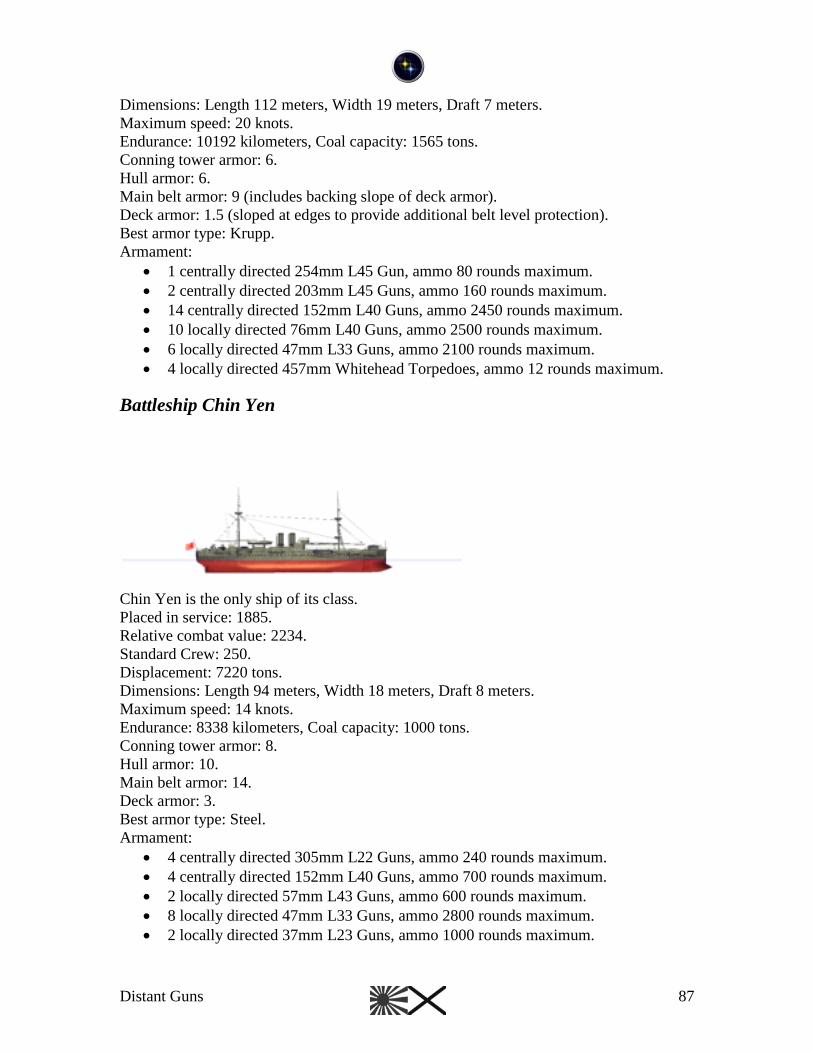
Distant Guns 87
Dimensions: Length 112 meters, Width 19 meters, Draft 7 meters.
Maximum speed: 20 knots.
Endurance: 10192 kilometers, Coal capacity: 1565 tons.
Conning tower armor: 6.
Hull armor: 6.
Main belt armor: 9 (includes backing slope of deck armor).
Deck armor: 1.5 (sloped at edges to provide additional belt level protection).
Best armor type: Krupp.
Armament:
1 centrally directed 254mm L45 Gun, ammo 80 rounds maximum.
2 centrally directed 203mm L45 Guns, ammo 160 rounds maximum.
14 centrally directed 152mm L40 Guns, ammo 2450 rounds maximum.
10 locally directed 76mm L40 Guns, ammo 2500 rounds maximum.
6 locally directed 47mm L33 Guns, ammo 2100 rounds maximum.
4 locally directed 457mm Whitehead Torpedoes, ammo 12 rounds maximum.
Battleship Chin Yen
Chin Yen is the only ship of its class.
Placed in service: 1885.
Relative combat value: 2234.
Standard Crew: 250.
Displacement: 7220 tons.
Dimensions: Length 94 meters, Width 18 meters, Draft 8 meters.
Maximum speed: 14 knots.
Endurance: 8338 kilometers, Coal capacity: 1000 tons.
Conning tower armor: 8.
Hull armor: 10.
Main belt armor: 14.
Deck armor: 3.
Best armor type: Steel.
Armament:
4 centrally directed 305mm L22 Guns, ammo 240 rounds maximum.
4 centrally directed 152mm L40 Guns, ammo 700 rounds maximum.
2 locally directed 57mm L43 Guns, ammo 600 rounds maximum.
8 locally directed 47mm L33 Guns, ammo 2800 rounds maximum.
2 locally directed 37mm L23 Guns, ammo 1000 rounds maximum.
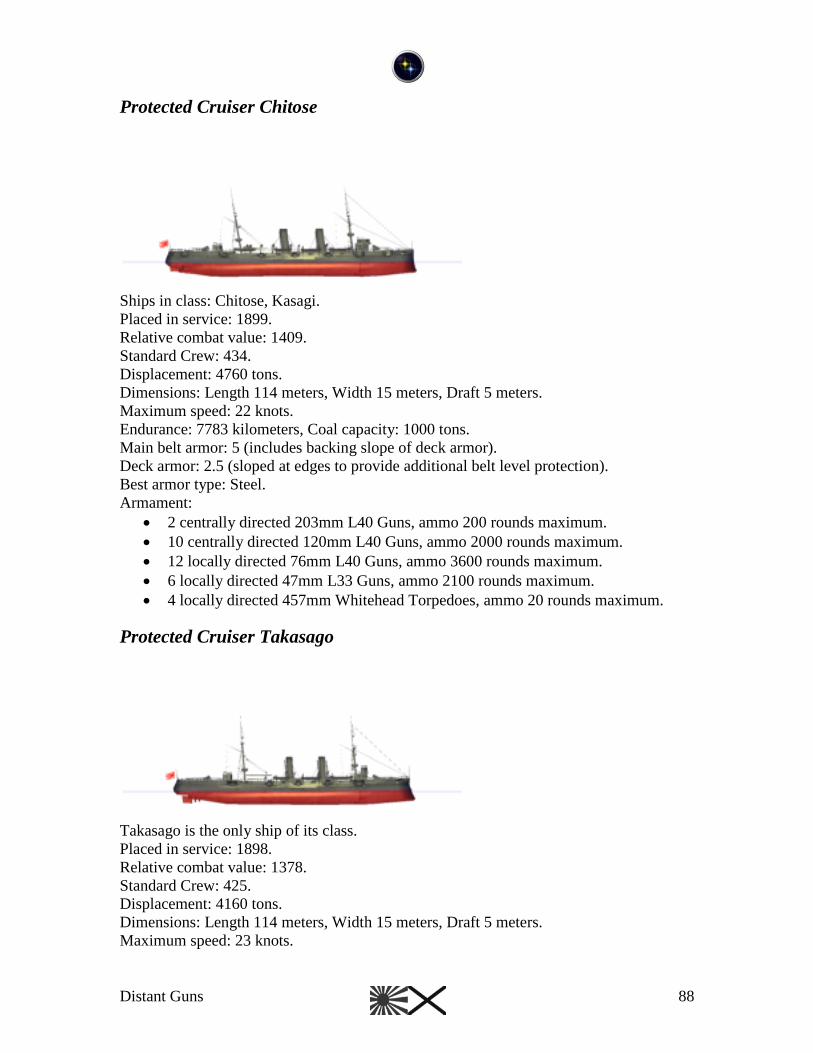
Distant Guns 88
Protected Cruiser Chitose
Ships in class: Chitose, Kasagi.
Placed in service: 1899.
Relative combat value: 1409.
Standard Crew: 434.
Displacement: 4760 tons.
Dimensions: Length 114 meters, Width 15 meters, Draft 5 meters.
Maximum speed: 22 knots.
Endurance: 7783 kilometers, Coal capacity: 1000 tons.
Main belt armor: 5 (includes backing slope of deck armor).
Deck armor: 2.5 (sloped at edges to provide additional belt level protection).
Best armor type: Steel.
Armament:
2 centrally directed 203mm L40 Guns, ammo 200 rounds maximum.
10 centrally directed 120mm L40 Guns, ammo 2000 rounds maximum.
12 locally directed 76mm L40 Guns, ammo 3600 rounds maximum.
6 locally directed 47mm L33 Guns, ammo 2100 rounds maximum.
4 locally directed 457mm Whitehead Torpedoes, ammo 20 rounds maximum.
Protected Cruiser Takasago
Takasago is the only ship of its class.
Placed in service: 1898.
Relative combat value: 1378.
Standard Crew: 425.
Displacement: 4160 tons.
Dimensions: Length 114 meters, Width 15 meters, Draft 5 meters.
Maximum speed: 23 knots.

Distant Guns 89
Endurance: 7783 kilometers, Coal capacity: 1000 tons.
Main belt armor: 5 (includes backing slope of deck armor).
Deck armor: 2.5 (sloped at edges to provide additional belt level protection).
Best armor type: Steel.
Armament:
2 centrally directed 203mm L40 Guns, ammo 200 rounds maximum.
10 centrally directed 120mm L40 Guns, ammo 2000 rounds maximum.
12 locally directed 76mm L40 Guns, ammo 3600 rounds maximum.
6 locally directed 47mm L33 Guns, ammo 2100 rounds maximum.
4 locally directed 457mm Whitehead Torpedoes, ammo 20 rounds maximum.
Protected Cruiser Tsushima
Ships in class: Tsushima, Niitaka.
Placed in service: 1904.
Relative combat value: 1318.
Standard Crew: 320.
Displacement: 3366 tons.
Dimensions: Length 102 meters, Width 13 meters, Draft 5 meters.
Maximum speed: 20 knots.
Endurance: 7412 kilometers, Coal capacity: 600 tons.
Conning tower armor: 4.
Main belt armor: 5 (includes backing slope of deck armor).
Deck armor: 2.5 (sloped at edges to provide additional belt level protection).
Best armor type: Steel.
Armament:
6 centrally directed 152mm L45 Guns, ammo 1050 rounds maximum.
10 centrally directed 76mm L40 Guns, ammo 2500 rounds maximum.
4 locally directed 47mm L40 Guns, ammo 1400 rounds maximum.
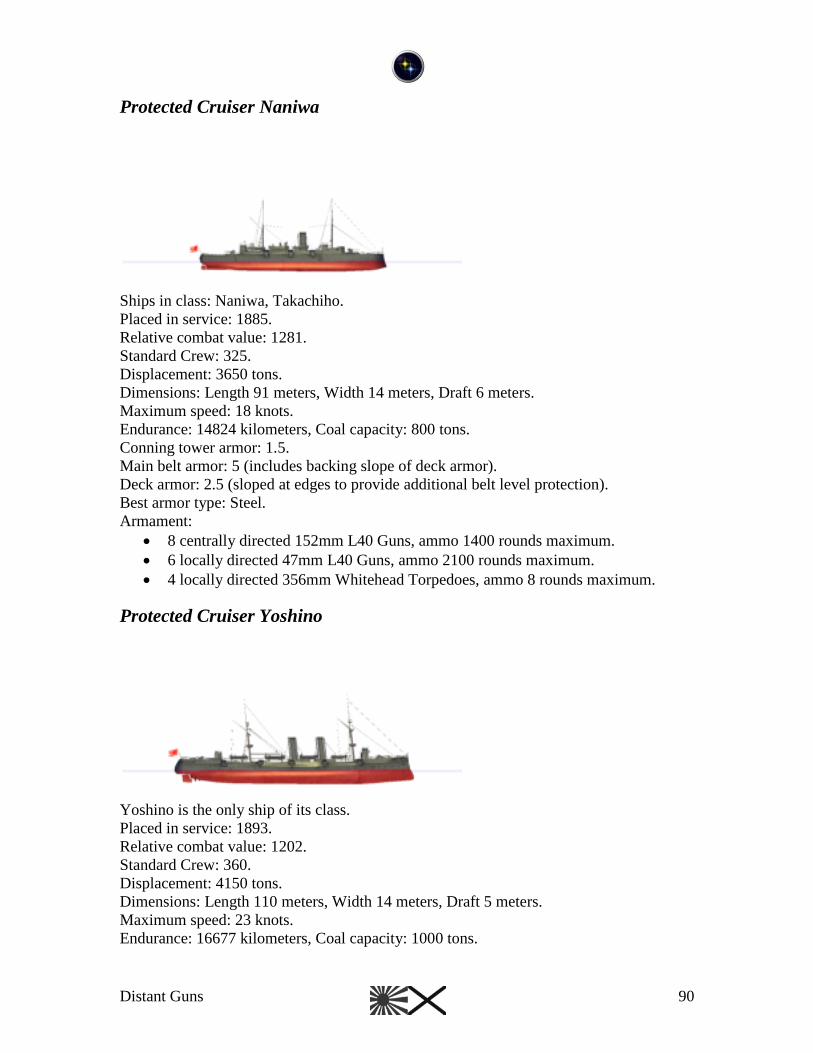
Distant Guns 90
Protected Cruiser Naniwa
Ships in class: Naniwa, Takachiho.
Placed in service: 1885.
Relative combat value: 1281.
Standard Crew: 325.
Displacement: 3650 tons.
Dimensions: Length 91 meters, Width 14 meters, Draft 6 meters.
Maximum speed: 18 knots.
Endurance: 14824 kilometers, Coal capacity: 800 tons.
Conning tower armor: 1.5.
Main belt armor: 5 (includes backing slope of deck armor).
Deck armor: 2.5 (sloped at edges to provide additional belt level protection).
Best armor type: Steel.
Armament:
8 centrally directed 152mm L40 Guns, ammo 1400 rounds maximum.
6 locally directed 47mm L40 Guns, ammo 2100 rounds maximum.
4 locally directed 356mm Whitehead Torpedoes, ammo 8 rounds maximum.
Protected Cruiser Yoshino
Yoshino is the only ship of its class.
Placed in service: 1893.
Relative combat value: 1202.
Standard Crew: 360.
Displacement: 4150 tons.
Dimensions: Length 110 meters, Width 14 meters, Draft 5 meters.
Maximum speed: 23 knots.
Endurance: 16677 kilometers, Coal capacity: 1000 tons.
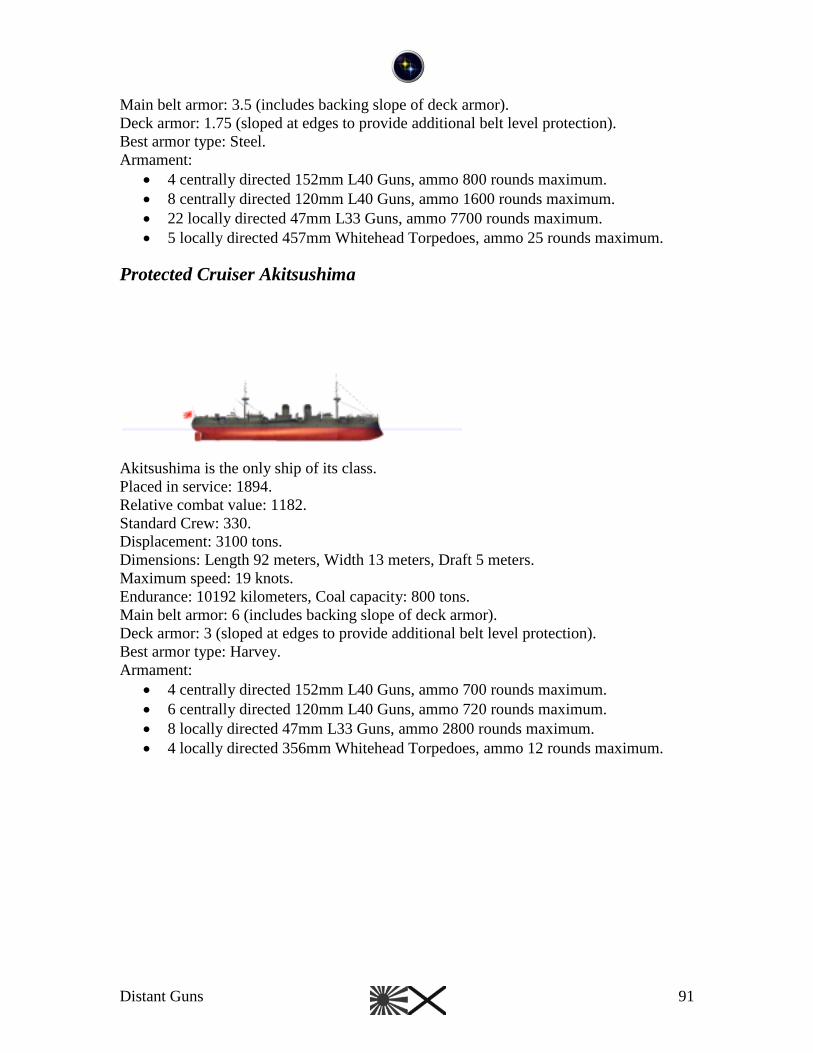
Distant Guns 91
Main belt armor: 3.5 (includes backing slope of deck armor).
Deck armor: 1.75 (sloped at edges to provide additional belt level protection).
Best armor type: Steel.
Armament:
4 centrally directed 152mm L40 Guns, ammo 800 rounds maximum.
8 centrally directed 120mm L40 Guns, ammo 1600 rounds maximum.
22 locally directed 47mm L33 Guns, ammo 7700 rounds maximum.
5 locally directed 457mm Whitehead Torpedoes, ammo 25 rounds maximum.
Protected Cruiser Akitsushima
Akitsushima is the only ship of its class.
Placed in service: 1894.
Relative combat value: 1182.
Standard Crew: 330.
Displacement: 3100 tons.
Dimensions: Length 92 meters, Width 13 meters, Draft 5 meters.
Maximum speed: 19 knots.
Endurance: 10192 kilometers, Coal capacity: 800 tons.
Main belt armor: 6 (includes backing slope of deck armor).
Deck armor: 3 (sloped at edges to provide additional belt level protection).
Best armor type: Harvey.
Armament:
4 centrally directed 152mm L40 Guns, ammo 700 rounds maximum.
6 centrally directed 120mm L40 Guns, ammo 720 rounds maximum.
8 locally directed 47mm L33 Guns, ammo 2800 rounds maximum.
4 locally directed 356mm Whitehead Torpedoes, ammo 12 rounds maximum.
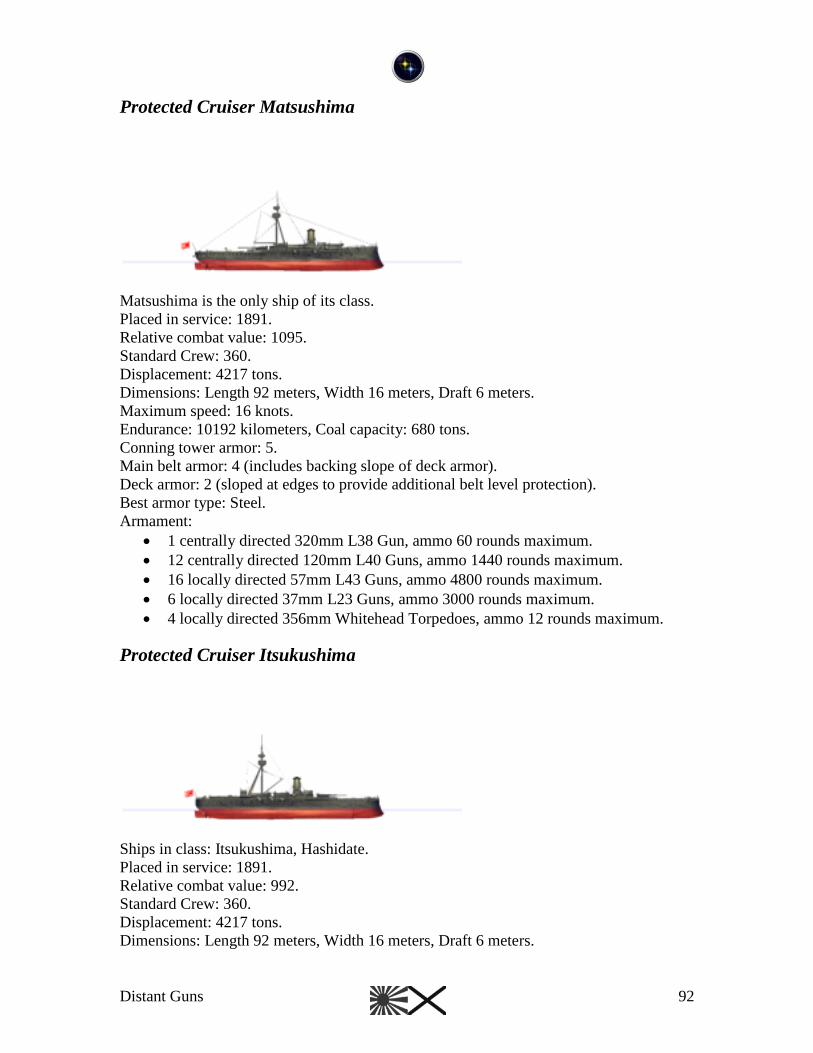
Distant Guns 92
Protected Cruiser Matsushima
Matsushima is the only ship of its class.
Placed in service: 1891.
Relative combat value: 1095.
Standard Crew: 360.
Displacement: 4217 tons.
Dimensions: Length 92 meters, Width 16 meters, Draft 6 meters.
Maximum speed: 16 knots.
Endurance: 10192 kilometers, Coal capacity: 680 tons.
Conning tower armor: 5.
Main belt armor: 4 (includes backing slope of deck armor).
Deck armor: 2 (sloped at edges to provide additional belt level protection).
Best armor type: Steel.
Armament:
1 centrally directed 320mm L38 Gun, ammo 60 rounds maximum.
12 centrally directed 120mm L40 Guns, ammo 1440 rounds maximum.
16 locally directed 57mm L43 Guns, ammo 4800 rounds maximum.
6 locally directed 37mm L23 Guns, ammo 3000 rounds maximum.
4 locally directed 356mm Whitehead Torpedoes, ammo 12 rounds maximum.
Protected Cruiser Itsukushima
Ships in class: Itsukushima, Hashidate.
Placed in service: 1891.
Relative combat value: 992.
Standard Crew: 360.
Displacement: 4217 tons.
Dimensions: Length 92 meters, Width 16 meters, Draft 6 meters.
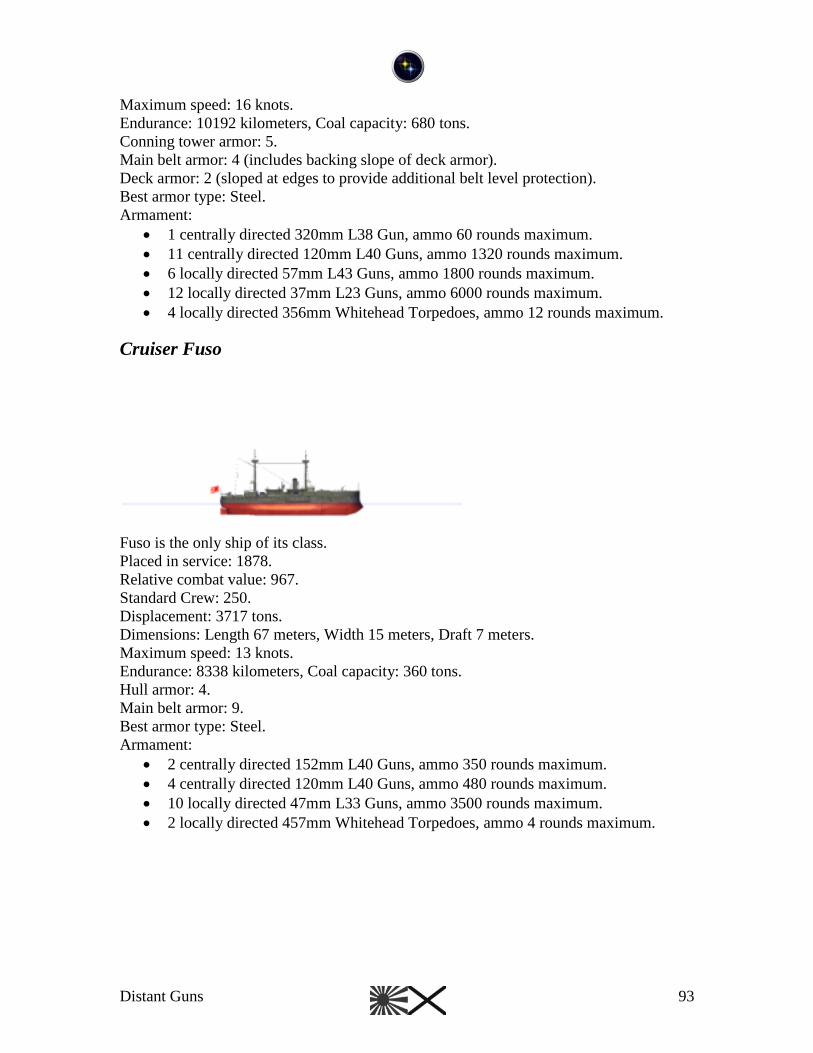
Distant Guns 93
Maximum speed: 16 knots.
Endurance: 10192 kilometers, Coal capacity: 680 tons.
Conning tower armor: 5.
Main belt armor: 4 (includes backing slope of deck armor).
Deck armor: 2 (sloped at edges to provide additional belt level protection).
Best armor type: Steel.
Armament:
1 centrally directed 320mm L38 Gun, ammo 60 rounds maximum.
11 centrally directed 120mm L40 Guns, ammo 1320 rounds maximum.
6 locally directed 57mm L43 Guns, ammo 1800 rounds maximum.
12 locally directed 37mm L23 Guns, ammo 6000 rounds maximum.
4 locally directed 356mm Whitehead Torpedoes, ammo 12 rounds maximum.
Cruiser Fuso
Fuso is the only ship of its class.
Placed in service: 1878.
Relative combat value: 967.
Standard Crew: 250.
Displacement: 3717 tons.
Dimensions: Length 67 meters, Width 15 meters, Draft 7 meters.
Maximum speed: 13 knots.
Endurance: 8338 kilometers, Coal capacity: 360 tons.
Hull armor: 4.
Main belt armor: 9.
Best armor type: Steel.
Armament:
2 centrally directed 152mm L40 Guns, ammo 350 rounds maximum.
4 centrally directed 120mm L40 Guns, ammo 480 rounds maximum.
10 locally directed 47mm L33 Guns, ammo 3500 rounds maximum.
2 locally directed 457mm Whitehead Torpedoes, ammo 4 rounds maximum.
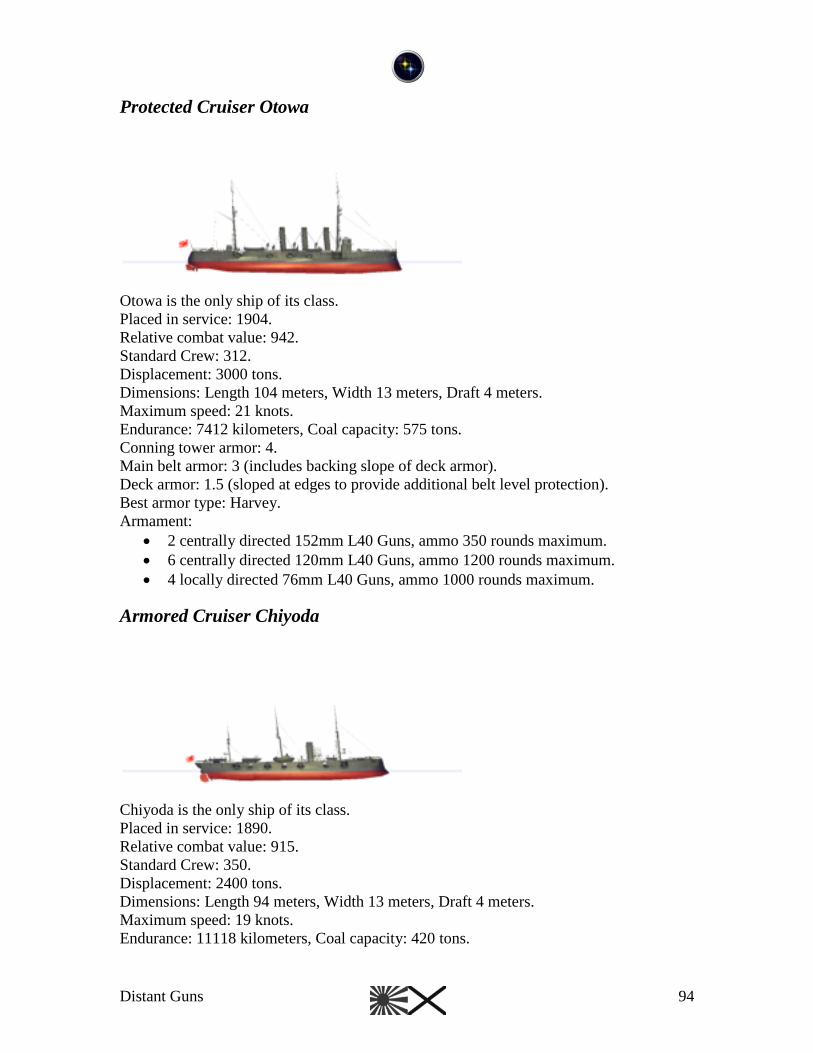
Distant Guns 94
Protected Cruiser Otowa
Otowa is the only ship of its class.
Placed in service: 1904.
Relative combat value: 942.
Standard Crew: 312.
Displacement: 3000 tons.
Dimensions: Length 104 meters, Width 13 meters, Draft 4 meters.
Maximum speed: 21 knots.
Endurance: 7412 kilometers, Coal capacity: 575 tons.
Conning tower armor: 4.
Main belt armor: 3 (includes backing slope of deck armor).
Deck armor: 1.5 (sloped at edges to provide additional belt level protection).
Best armor type: Harvey.
Armament:
2 centrally directed 152mm L40 Guns, ammo 350 rounds maximum.
6 centrally directed 120mm L40 Guns, ammo 1200 rounds maximum.
4 locally directed 76mm L40 Guns, ammo 1000 rounds maximum.
Armored Cruiser Chiyoda
Chiyoda is the only ship of its class.
Placed in service: 1890.
Relative combat value: 915.
Standard Crew: 350.
Displacement: 2400 tons.
Dimensions: Length 94 meters, Width 13 meters, Draft 4 meters.
Maximum speed: 19 knots.
Endurance: 11118 kilometers, Coal capacity: 420 tons.
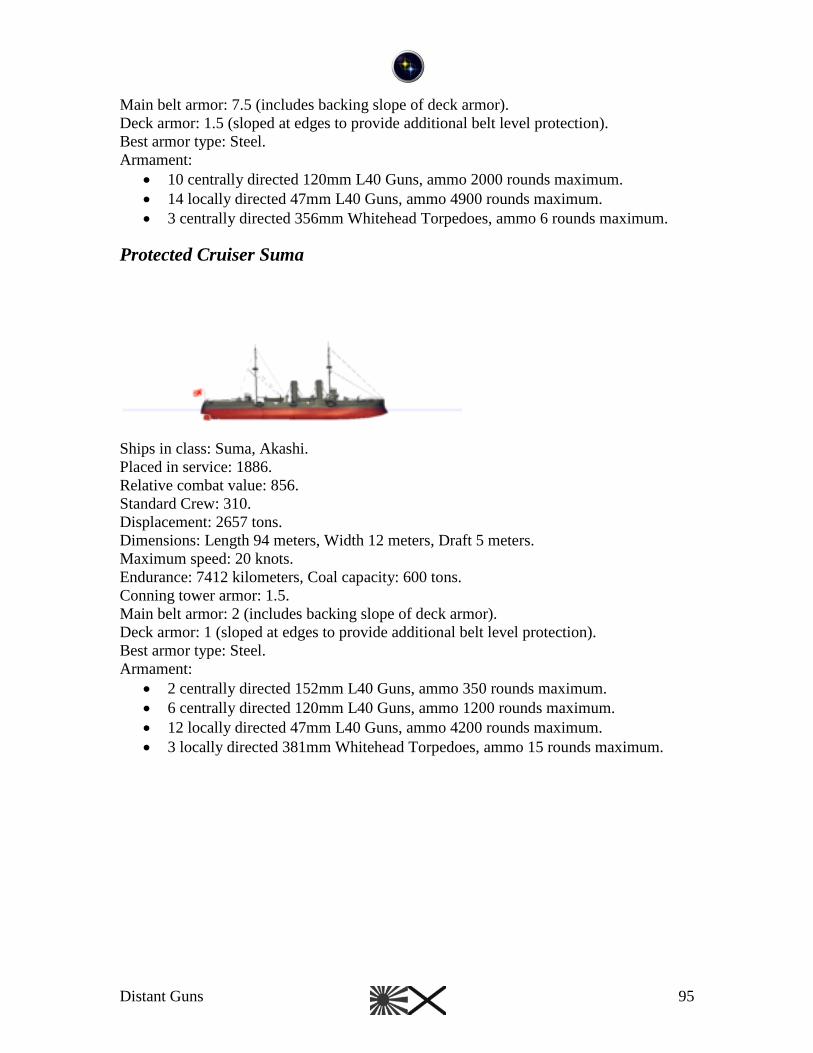
Distant Guns 95
Main belt armor: 7.5 (includes backing slope of deck armor).
Deck armor: 1.5 (sloped at edges to provide additional belt level protection).
Best armor type: Steel.
Armament:
10 centrally directed 120mm L40 Guns, ammo 2000 rounds maximum.
14 locally directed 47mm L40 Guns, ammo 4900 rounds maximum.
3 centrally directed 356mm Whitehead Torpedoes, ammo 6 rounds maximum.
Protected Cruiser Suma
Ships in class: Suma, Akashi.
Placed in service: 1886.
Relative combat value: 856.
Standard Crew: 310.
Displacement: 2657 tons.
Dimensions: Length 94 meters, Width 12 meters, Draft 5 meters.
Maximum speed: 20 knots.
Endurance: 7412 kilometers, Coal capacity: 600 tons.
Conning tower armor: 1.5.
Main belt armor: 2 (includes backing slope of deck armor).
Deck armor: 1 (sloped at edges to provide additional belt level protection).
Best armor type: Steel.
Armament:
2 centrally directed 152mm L40 Guns, ammo 350 rounds maximum.
6 centrally directed 120mm L40 Guns, ammo 1200 rounds maximum.
12 locally directed 47mm L40 Guns, ammo 4200 rounds maximum.
3 locally directed 381mm Whitehead Torpedoes, ammo 15 rounds maximum.
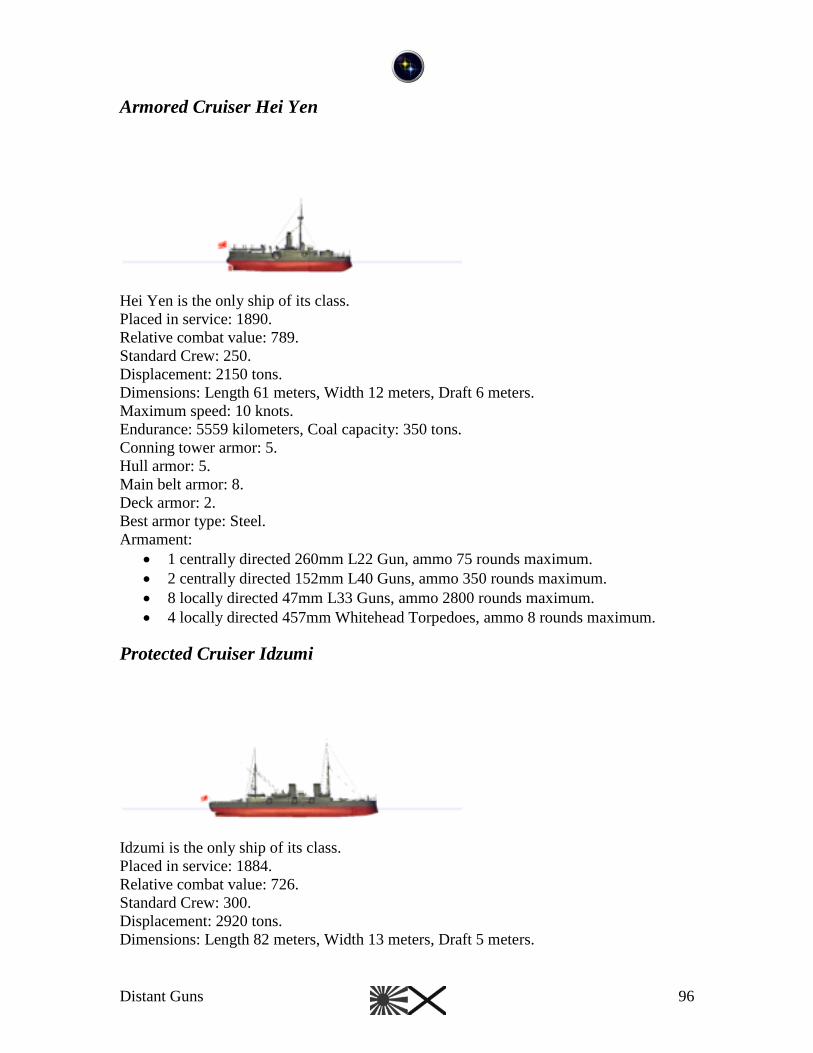
Distant Guns 96
Armored Cruiser Hei Yen
Hei Yen is the only ship of its class.
Placed in service: 1890.
Relative combat value: 789.
Standard Crew: 250.
Displacement: 2150 tons.
Dimensions: Length 61 meters, Width 12 meters, Draft 6 meters.
Maximum speed: 10 knots.
Endurance: 5559 kilometers, Coal capacity: 350 tons.
Conning tower armor: 5.
Hull armor: 5.
Main belt armor: 8.
Deck armor: 2.
Best armor type: Steel.
Armament:
1 centrally directed 260mm L22 Gun, ammo 75 rounds maximum.
2 centrally directed 152mm L40 Guns, ammo 350 rounds maximum.
8 locally directed 47mm L33 Guns, ammo 2800 rounds maximum.
4 locally directed 457mm Whitehead Torpedoes, ammo 8 rounds maximum.
Protected Cruiser Idzumi
Idzumi is the only ship of its class.
Placed in service: 1884.
Relative combat value: 726.
Standard Crew: 300.
Displacement: 2920 tons.
Dimensions: Length 82 meters, Width 13 meters, Draft 5 meters.
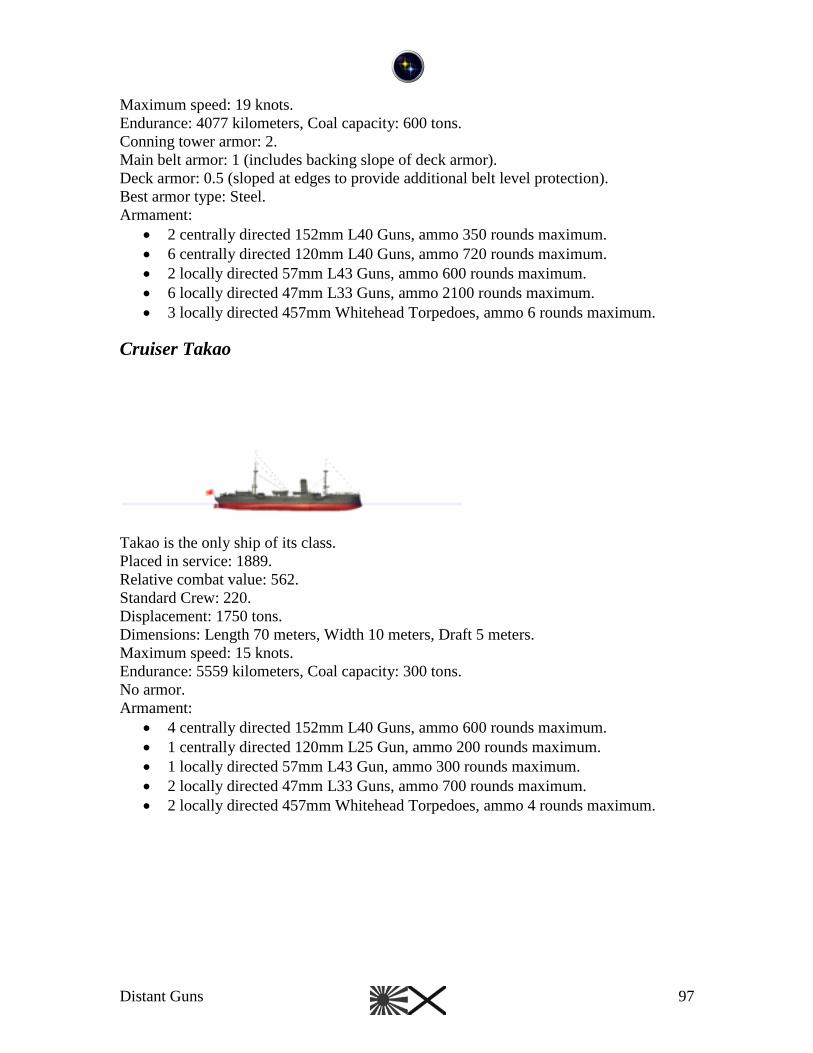
Distant Guns 97
Maximum speed: 19 knots.
Endurance: 4077 kilometers, Coal capacity: 600 tons.
Conning tower armor: 2.
Main belt armor: 1 (includes backing slope of deck armor).
Deck armor: 0.5 (sloped at edges to provide additional belt level protection).
Best armor type: Steel.
Armament:
2 centrally directed 152mm L40 Guns, ammo 350 rounds maximum.
6 centrally directed 120mm L40 Guns, ammo 720 rounds maximum.
2 locally directed 57mm L43 Guns, ammo 600 rounds maximum.
6 locally directed 47mm L33 Guns, ammo 2100 rounds maximum.
3 locally directed 457mm Whitehead Torpedoes, ammo 6 rounds maximum.
Cruiser Takao
Takao is the only ship of its class.
Placed in service: 1889.
Relative combat value: 562.
Standard Crew: 220.
Displacement: 1750 tons.
Dimensions: Length 70 meters, Width 10 meters, Draft 5 meters.
Maximum speed: 15 knots.
Endurance: 5559 kilometers, Coal capacity: 300 tons.
No armor.
Armament:
4 centrally directed 152mm L40 Guns, ammo 600 rounds maximum.
1 centrally directed 120mm L25 Gun, ammo 200 rounds maximum.
1 locally directed 57mm L43 Gun, ammo 300 rounds maximum.
2 locally directed 47mm L33 Guns, ammo 700 rounds maximum.
2 locally directed 457mm Whitehead Torpedoes, ammo 4 rounds maximum.
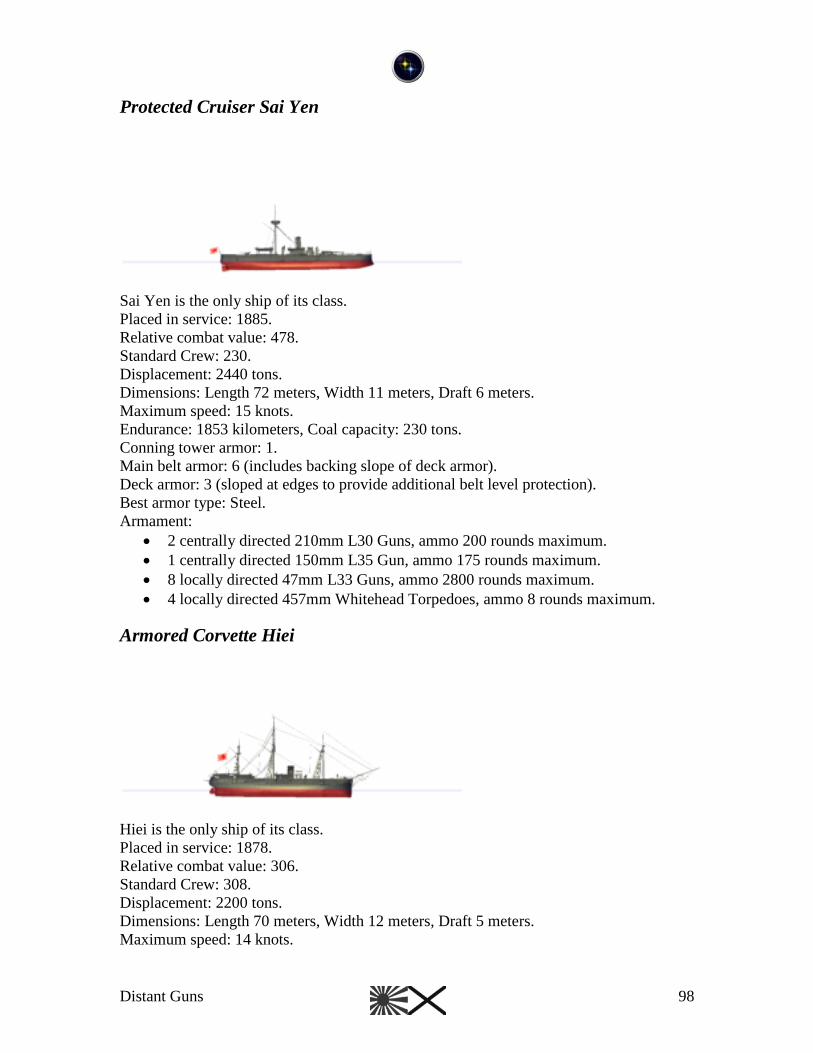
Distant Guns 98
Protected Cruiser Sai Yen
Sai Yen is the only ship of its class.
Placed in service: 1885.
Relative combat value: 478.
Standard Crew: 230.
Displacement: 2440 tons.
Dimensions: Length 72 meters, Width 11 meters, Draft 6 meters.
Maximum speed: 15 knots.
Endurance: 1853 kilometers, Coal capacity: 230 tons.
Conning tower armor: 1.
Main belt armor: 6 (includes backing slope of deck armor).
Deck armor: 3 (sloped at edges to provide additional belt level protection).
Best armor type: Steel.
Armament:
2 centrally directed 210mm L30 Guns, ammo 200 rounds maximum.
1 centrally directed 150mm L35 Gun, ammo 175 rounds maximum.
8 locally directed 47mm L33 Guns, ammo 2800 rounds maximum.
4 locally directed 457mm Whitehead Torpedoes, ammo 8 rounds maximum.
Armored Corvette Hiei
Hiei is the only ship of its class.
Placed in service: 1878.
Relative combat value: 306.
Standard Crew: 308.
Displacement: 2200 tons.
Dimensions: Length 70 meters, Width 12 meters, Draft 5 meters.
Maximum speed: 14 knots.
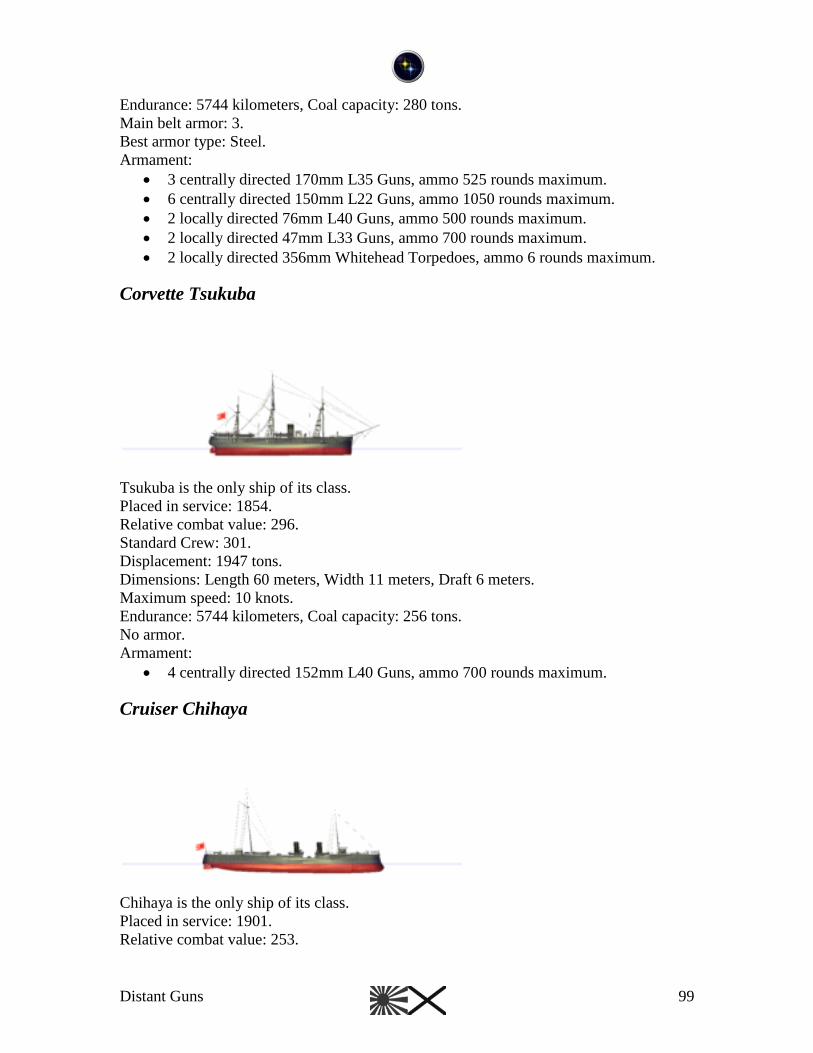
Distant Guns 99
Endurance: 5744 kilometers, Coal capacity: 280 tons.
Main belt armor: 3.
Best armor type: Steel.
Armament:
3 centrally directed 170mm L35 Guns, ammo 525 rounds maximum.
6 centrally directed 150mm L22 Guns, ammo 1050 rounds maximum.
2 locally directed 76mm L40 Guns, ammo 500 rounds maximum.
2 locally directed 47mm L33 Guns, ammo 700 rounds maximum.
2 locally directed 356mm Whitehead Torpedoes, ammo 6 rounds maximum.
Corvette Tsukuba
Tsukuba is the only ship of its class.
Placed in service: 1854.
Relative combat value: 296.
Standard Crew: 301.
Displacement: 1947 tons.
Dimensions: Length 60 meters, Width 11 meters, Draft 6 meters.
Maximum speed: 10 knots.
Endurance: 5744 kilometers, Coal capacity: 256 tons.
No armor.
Armament:
4 centrally directed 152mm L40 Guns, ammo 700 rounds maximum.
Cruiser Chihaya
Chihaya is the only ship of its class.
Placed in service: 1901.
Relative combat value: 253.
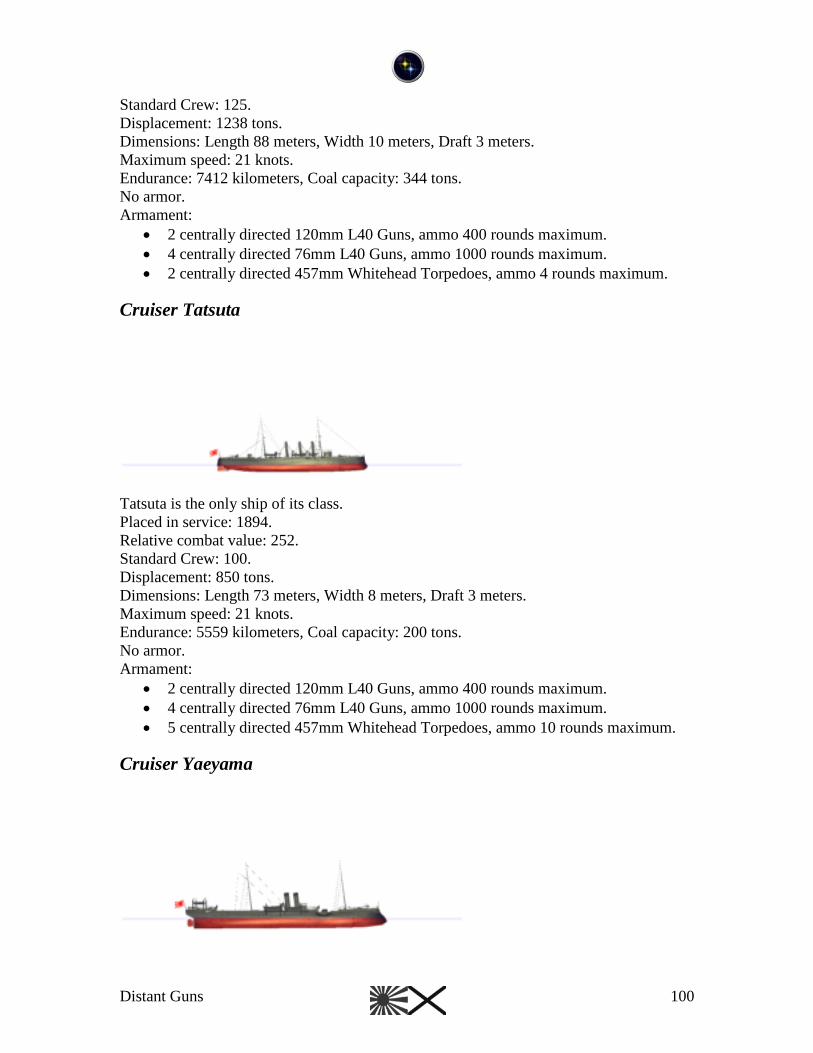
Distant Guns 100
Standard Crew: 125.
Displacement: 1238 tons.
Dimensions: Length 88 meters, Width 10 meters, Draft 3 meters.
Maximum speed: 21 knots.
Endurance: 7412 kilometers, Coal capacity: 344 tons.
No armor.
Armament:
2 centrally directed 120mm L40 Guns, ammo 400 rounds maximum.
4 centrally directed 76mm L40 Guns, ammo 1000 rounds maximum.
2 centrally directed 457mm Whitehead Torpedoes, ammo 4 rounds maximum.
Cruiser Tatsuta
Tatsuta is the only ship of its class.
Placed in service: 1894.
Relative combat value: 252.
Standard Crew: 100.
Displacement: 850 tons.
Dimensions: Length 73 meters, Width 8 meters, Draft 3 meters.
Maximum speed: 21 knots.
Endurance: 5559 kilometers, Coal capacity: 200 tons.
No armor.
Armament:
2 centrally directed 120mm L40 Guns, ammo 400 rounds maximum.
4 centrally directed 76mm L40 Guns, ammo 1000 rounds maximum.
5 centrally directed 457mm Whitehead Torpedoes, ammo 10 rounds maximum.
Cruiser Yaeyama
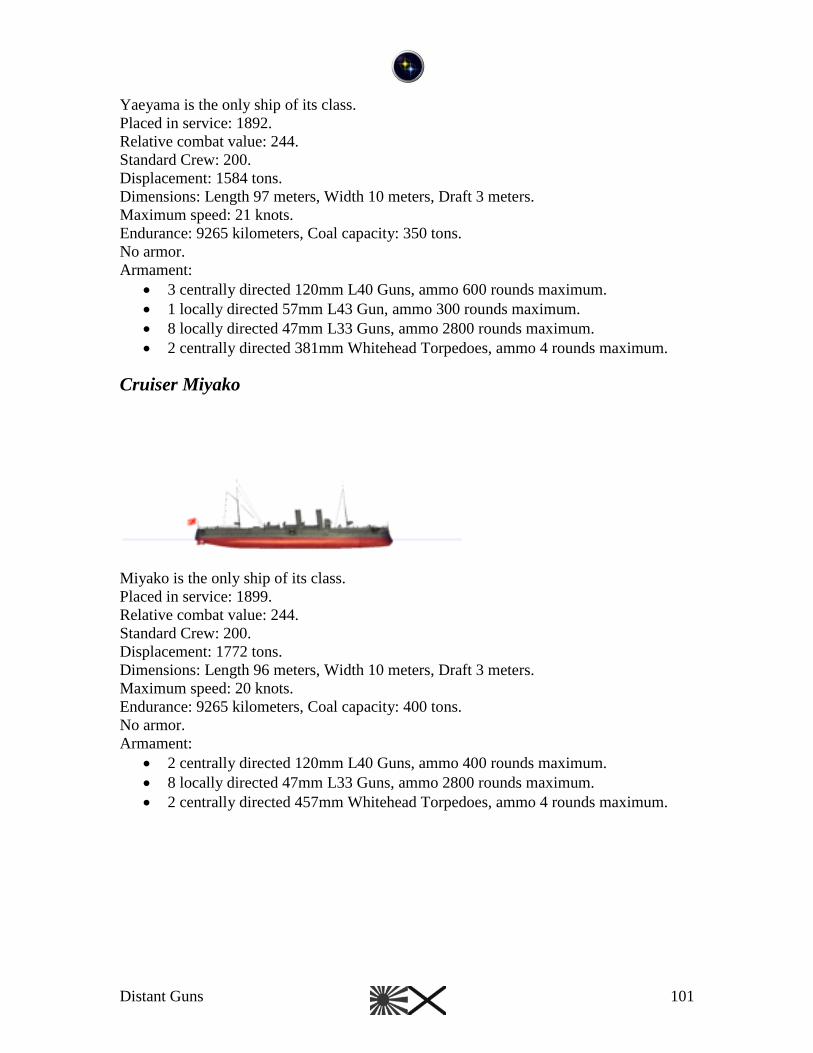
Distant Guns 101
Yaeyama is the only ship of its class.
Placed in service: 1892.
Relative combat value: 244.
Standard Crew: 200.
Displacement: 1584 tons.
Dimensions: Length 97 meters, Width 10 meters, Draft 3 meters.
Maximum speed: 21 knots.
Endurance: 9265 kilometers, Coal capacity: 350 tons.
No armor.
Armament:
3 centrally directed 120mm L40 Guns, ammo 600 rounds maximum.
1 locally directed 57mm L43 Gun, ammo 300 rounds maximum.
8 locally directed 47mm L33 Guns, ammo 2800 rounds maximum.
2 centrally directed 381mm Whitehead Torpedoes, ammo 4 rounds maximum.
Cruiser Miyako
Miyako is the only ship of its class.
Placed in service: 1899.
Relative combat value: 244.
Standard Crew: 200.
Displacement: 1772 tons.
Dimensions: Length 96 meters, Width 10 meters, Draft 3 meters.
Maximum speed: 20 knots.
Endurance: 9265 kilometers, Coal capacity: 400 tons.
No armor.
Armament:
2 centrally directed 120mm L40 Guns, ammo 400 rounds maximum.
8 locally directed 47mm L33 Guns, ammo 2800 rounds maximum.
2 centrally directed 457mm Whitehead Torpedoes, ammo 4 rounds maximum.
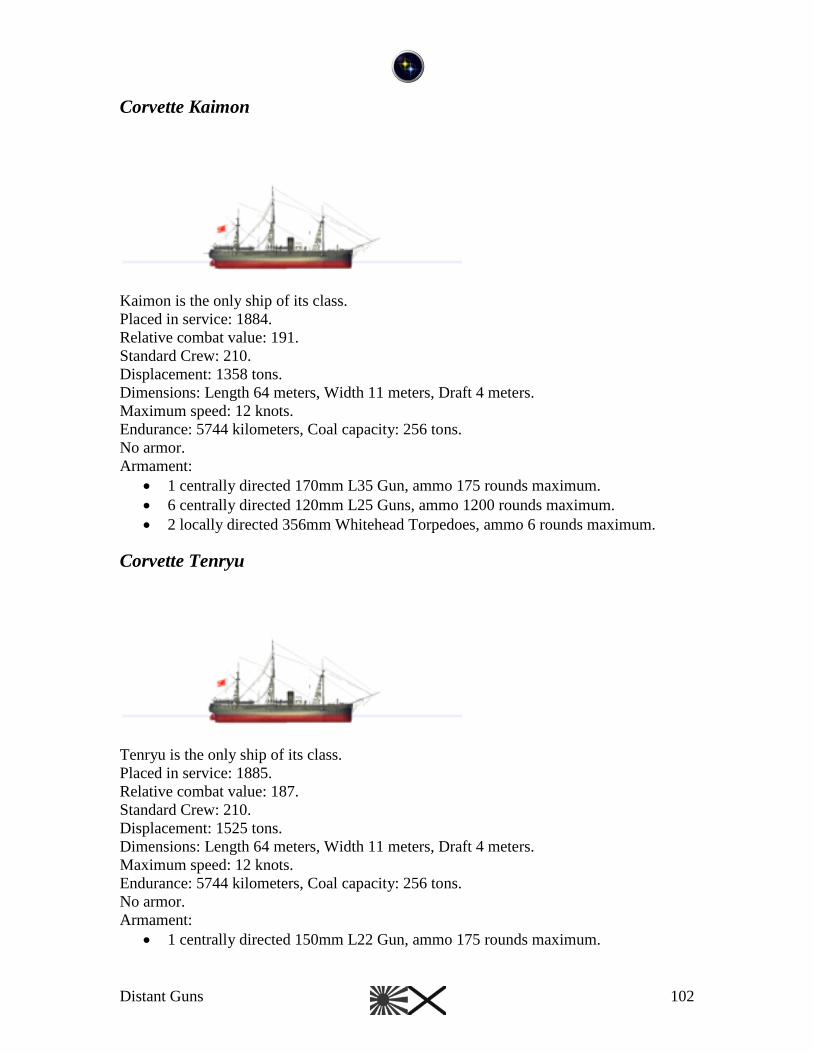
Distant Guns 102
Corvette Kaimon
Kaimon is the only ship of its class.
Placed in service: 1884.
Relative combat value: 191.
Standard Crew: 210.
Displacement: 1358 tons.
Dimensions: Length 64 meters, Width 11 meters, Draft 4 meters.
Maximum speed: 12 knots.
Endurance: 5744 kilometers, Coal capacity: 256 tons.
No armor.
Armament:
1 centrally directed 170mm L35 Gun, ammo 175 rounds maximum.
6 centrally directed 120mm L25 Guns, ammo 1200 rounds maximum.
2 locally directed 356mm Whitehead Torpedoes, ammo 6 rounds maximum.
Corvette Tenryu
Tenryu is the only ship of its class.
Placed in service: 1885.
Relative combat value: 187.
Standard Crew: 210.
Displacement: 1525 tons.
Dimensions: Length 64 meters, Width 11 meters, Draft 4 meters.
Maximum speed: 12 knots.
Endurance: 5744 kilometers, Coal capacity: 256 tons.
No armor.
Armament:
1 centrally directed 150mm L22 Gun, ammo 175 rounds maximum.
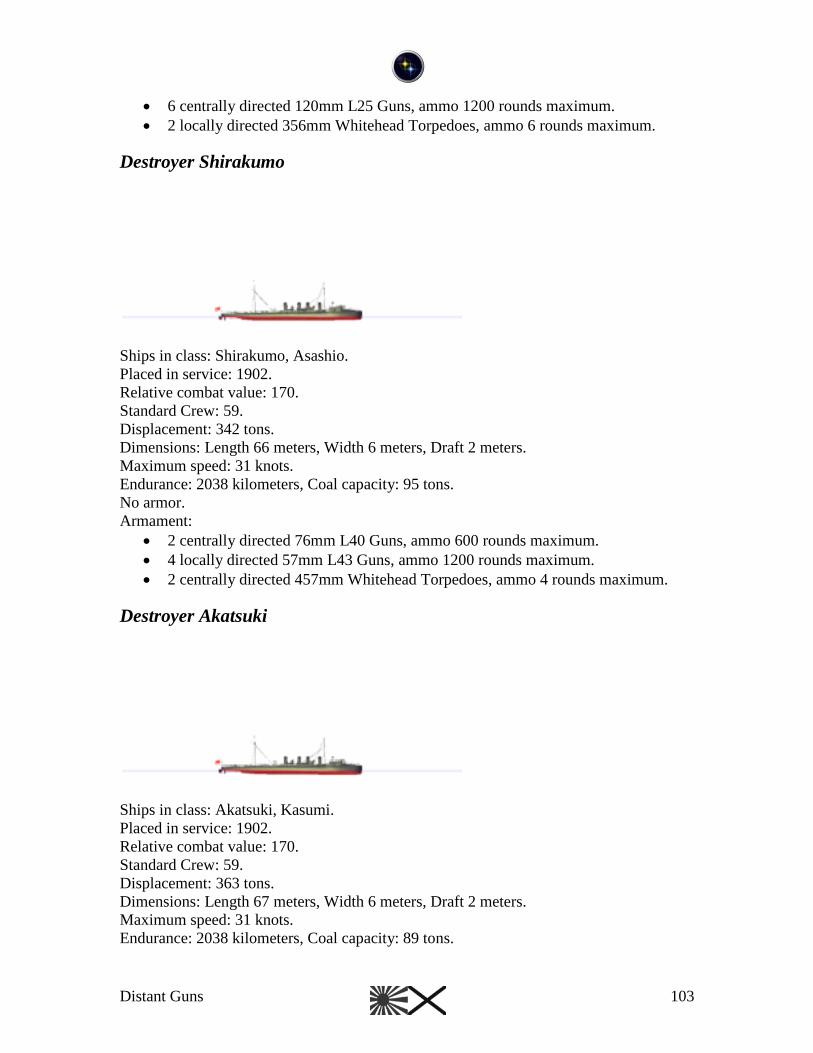
Distant Guns 103
6 centrally directed 120mm L25 Guns, ammo 1200 rounds maximum.
2 locally directed 356mm Whitehead Torpedoes, ammo 6 rounds maximum.
Destroyer Shirakumo
Ships in class: Shirakumo, Asashio.
Placed in service: 1902.
Relative combat value: 170.
Standard Crew: 59.
Displacement: 342 tons.
Dimensions: Length 66 meters, Width 6 meters, Draft 2 meters.
Maximum speed: 31 knots.
Endurance: 2038 kilometers, Coal capacity: 95 tons.
No armor.
Armament:
2 centrally directed 76mm L40 Guns, ammo 600 rounds maximum.
4 locally directed 57mm L43 Guns, ammo 1200 rounds maximum.
2 centrally directed 457mm Whitehead Torpedoes, ammo 4 rounds maximum.
Destroyer Akatsuki
Ships in class: Akatsuki, Kasumi.
Placed in service: 1902.
Relative combat value: 170.
Standard Crew: 59.
Displacement: 363 tons.
Dimensions: Length 67 meters, Width 6 meters, Draft 2 meters.
Maximum speed: 31 knots.
Endurance: 2038 kilometers, Coal capacity: 89 tons.
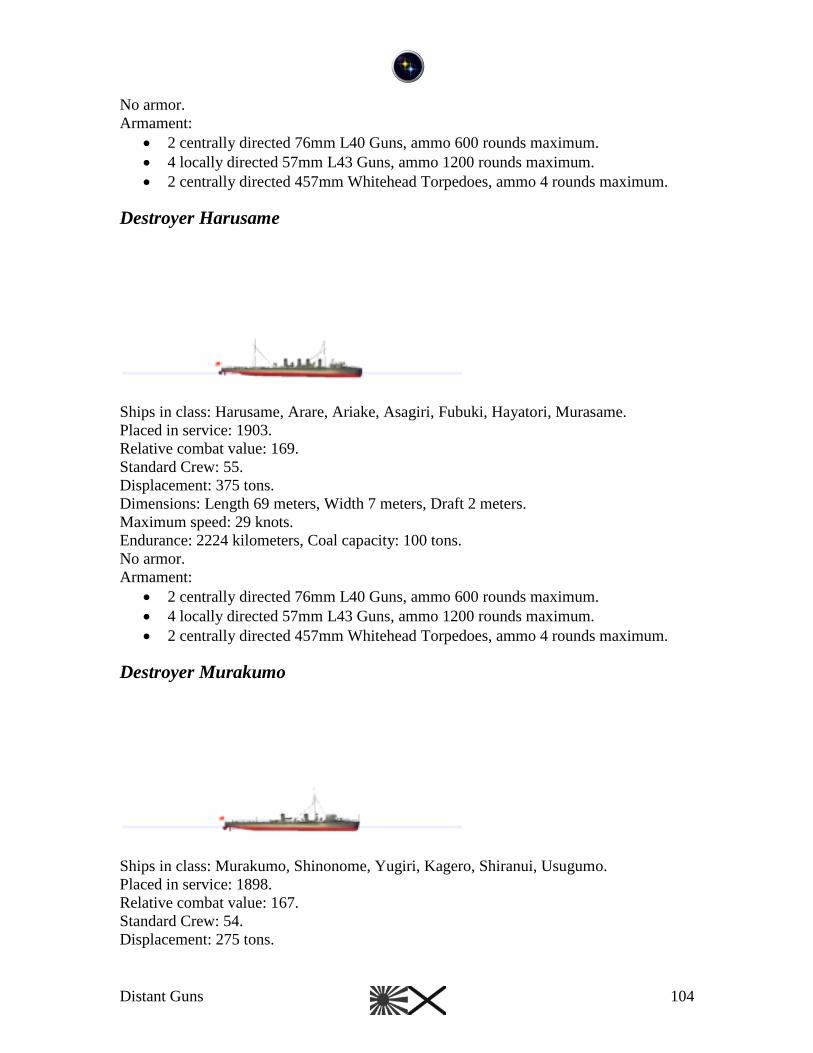
Distant Guns 104
No armor.
Armament:
2 centrally directed 76mm L40 Guns, ammo 600 rounds maximum.
4 locally directed 57mm L43 Guns, ammo 1200 rounds maximum.
2 centrally directed 457mm Whitehead Torpedoes, ammo 4 rounds maximum.
Destroyer Harusame
Ships in class: Harusame, Arare, Ariake, Asagiri, Fubuki, Hayatori, Murasame.
Placed in service: 1903.
Relative combat value: 169.
Standard Crew: 55.
Displacement: 375 tons.
Dimensions: Length 69 meters, Width 7 meters, Draft 2 meters.
Maximum speed: 29 knots.
Endurance: 2224 kilometers, Coal capacity: 100 tons.
No armor.
Armament:
2 centrally directed 76mm L40 Guns, ammo 600 rounds maximum.
4 locally directed 57mm L43 Guns, ammo 1200 rounds maximum.
2 centrally directed 457mm Whitehead Torpedoes, ammo 4 rounds maximum.
Destroyer Murakumo
Ships in class: Murakumo, Shinonome, Yugiri, Kagero, Shiranui, Usugumo.
Placed in service: 1898.
Relative combat value: 167.
Standard Crew: 54.
Displacement: 275 tons.
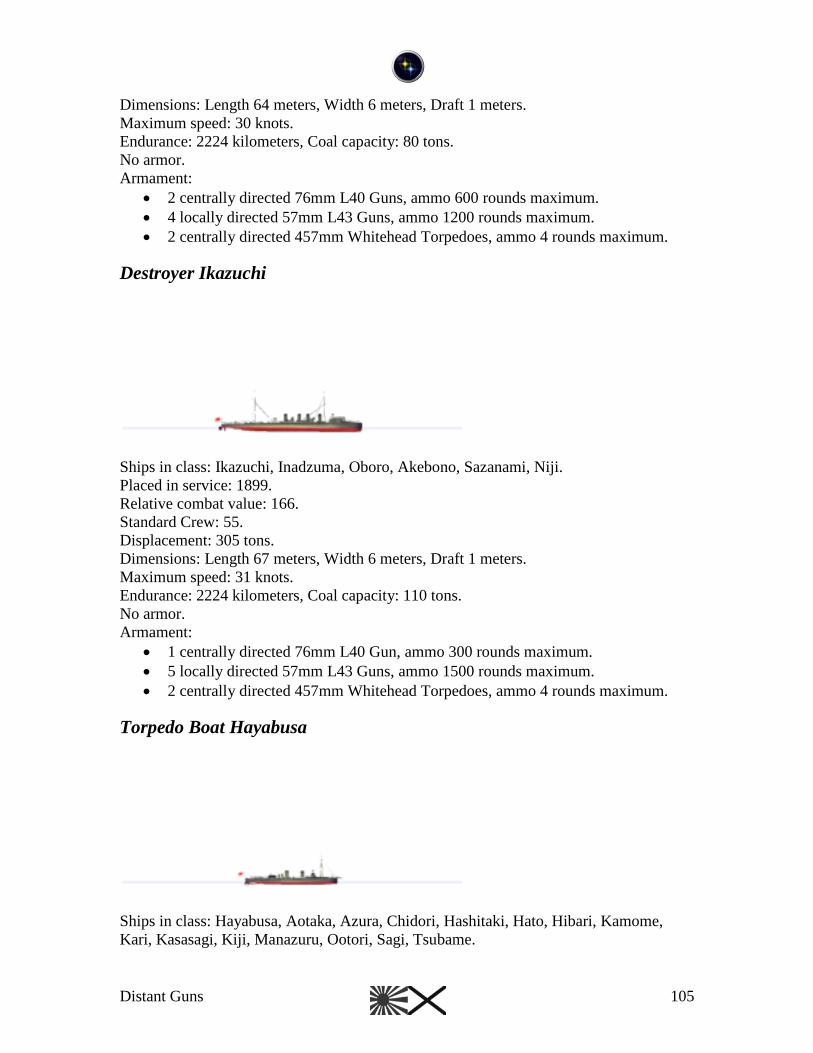
Distant Guns 105
Dimensions: Length 64 meters, Width 6 meters, Draft 1 meters.
Maximum speed: 30 knots.
Endurance: 2224 kilometers, Coal capacity: 80 tons.
No armor.
Armament:
2 centrally directed 76mm L40 Guns, ammo 600 rounds maximum.
4 locally directed 57mm L43 Guns, ammo 1200 rounds maximum.
2 centrally directed 457mm Whitehead Torpedoes, ammo 4 rounds maximum.
Destroyer Ikazuchi
Ships in class: Ikazuchi, Inadzuma, Oboro, Akebono, Sazanami, Niji.
Placed in service: 1899.
Relative combat value: 166.
Standard Crew: 55.
Displacement: 305 tons.
Dimensions: Length 67 meters, Width 6 meters, Draft 1 meters.
Maximum speed: 31 knots.
Endurance: 2224 kilometers, Coal capacity: 110 tons.
No armor.
Armament:
1 centrally directed 76mm L40 Gun, ammo 300 rounds maximum.
5 locally directed 57mm L43 Guns, ammo 1500 rounds maximum.
2 centrally directed 457mm Whitehead Torpedoes, ammo 4 rounds maximum.
Torpedo Boat Hayabusa
Ships in class: Hayabusa, Aotaka, Azura, Chidori, Hashitaki, Hato, Hibari, Kamome,
Kari, Kasasagi, Kiji, Manazuru, Ootori, Sagi, Tsubame.
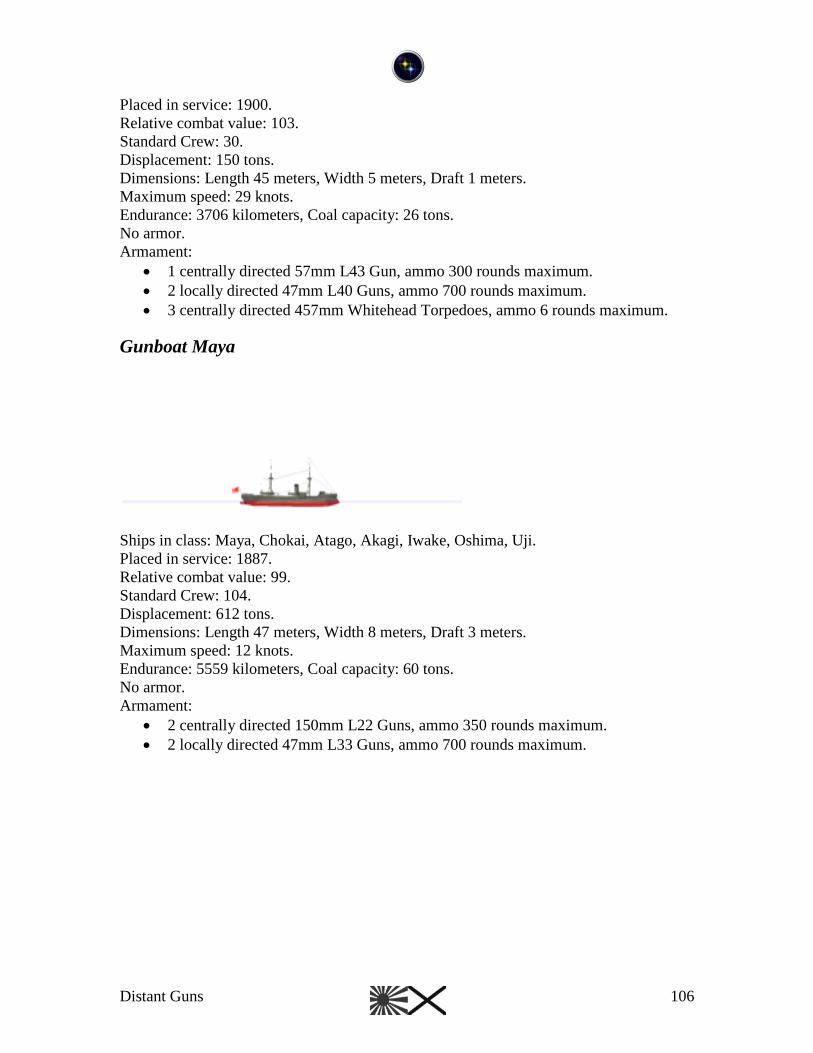
Distant Guns 106
Placed in service: 1900.
Relative combat value: 103.
Standard Crew: 30.
Displacement: 150 tons.
Dimensions: Length 45 meters, Width 5 meters, Draft 1 meters.
Maximum speed: 29 knots.
Endurance: 3706 kilometers, Coal capacity: 26 tons.
No armor.
Armament:
1 centrally directed 57mm L43 Gun, ammo 300 rounds maximum.
2 locally directed 47mm L40 Guns, ammo 700 rounds maximum.
3 centrally directed 457mm Whitehead Torpedoes, ammo 6 rounds maximum.
Gunboat Maya
Ships in class: Maya, Chokai, Atago, Akagi, Iwake, Oshima, Uji.
Placed in service: 1887.
Relative combat value: 99.
Standard Crew: 104.
Displacement: 612 tons.
Dimensions: Length 47 meters, Width 8 meters, Draft 3 meters.
Maximum speed: 12 knots.
Endurance: 5559 kilometers, Coal capacity: 60 tons.
No armor.
Armament:
2 centrally directed 150mm L22 Guns, ammo 350 rounds maximum.
2 locally directed 47mm L33 Guns, ammo 700 rounds maximum.
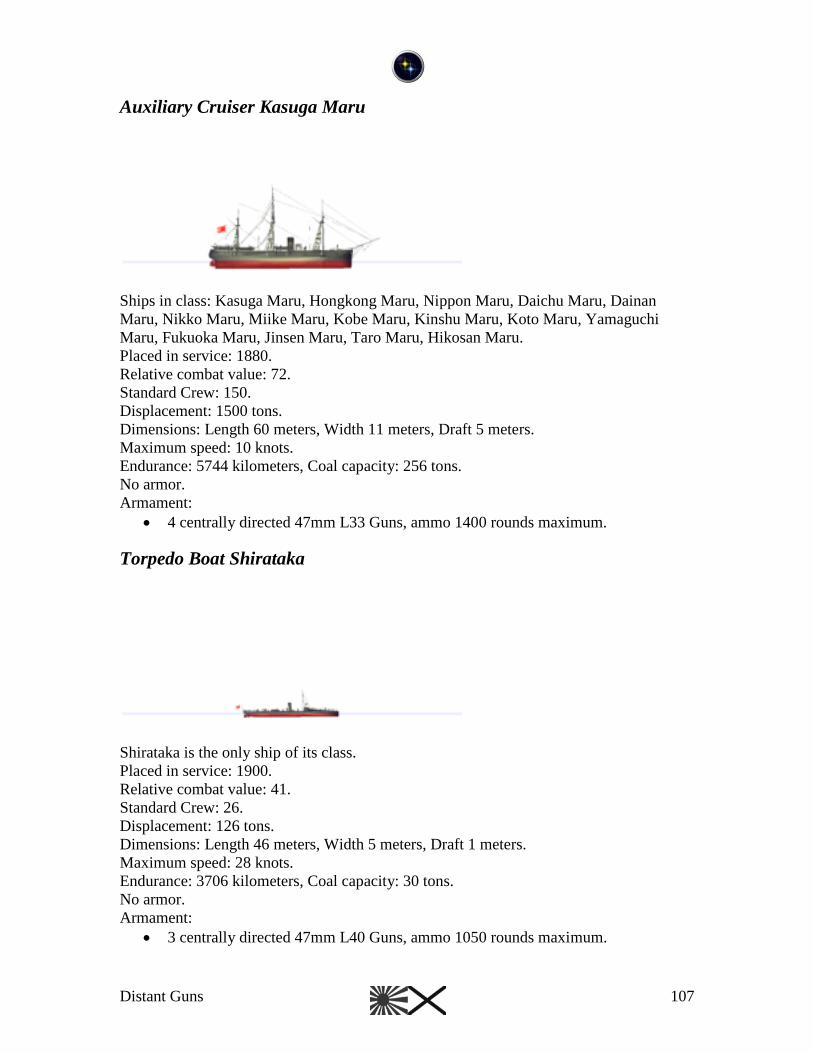
Distant Guns 107
Auxiliary Cruiser Kasuga Maru
Ships in class: Kasuga Maru, Hongkong Maru, Nippon Maru, Daichu Maru, Dainan
Maru, Nikko Maru, Miike Maru, Kobe Maru, Kinshu Maru, Koto Maru, Yamaguchi
Maru, Fukuoka Maru, Jinsen Maru, Taro Maru, Hikosan Maru.
Placed in service: 1880.
Relative combat value: 72.
Standard Crew: 150.
Displacement: 1500 tons.
Dimensions: Length 60 meters, Width 11 meters, Draft 5 meters.
Maximum speed: 10 knots.
Endurance: 5744 kilometers, Coal capacity: 256 tons.
No armor.
Armament:
4 centrally directed 47mm L33 Guns, ammo 1400 rounds maximum.
Torpedo Boat Shirataka
Shirataka is the only ship of its class.
Placed in service: 1900.
Relative combat value: 41.
Standard Crew: 26.
Displacement: 126 tons.
Dimensions: Length 46 meters, Width 5 meters, Draft 1 meters.
Maximum speed: 28 knots.
Endurance: 3706 kilometers, Coal capacity: 30 tons.
No armor.
Armament:
3 centrally directed 47mm L40 Guns, ammo 1050 rounds maximum.
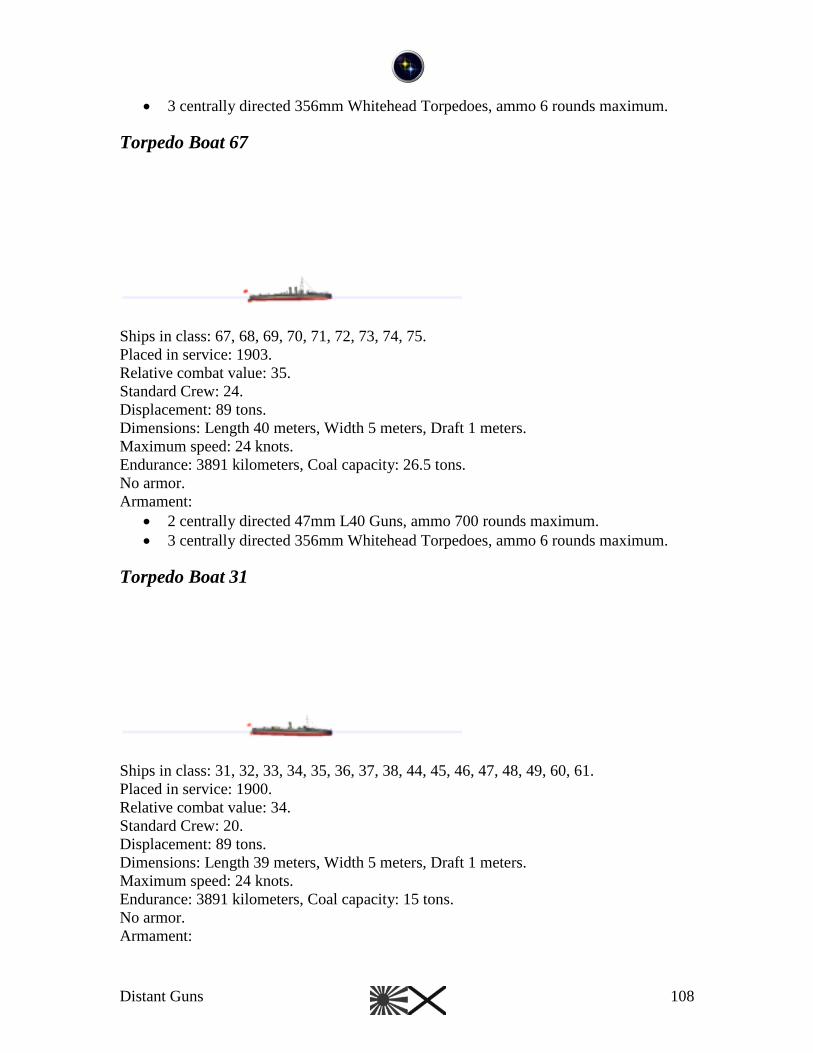
Distant Guns 108
3 centrally directed 356mm Whitehead Torpedoes, ammo 6 rounds maximum.
Torpedo Boat 67
Ships in class: 67, 68, 69, 70, 71, 72, 73, 74, 75.
Placed in service: 1903.
Relative combat value: 35.
Standard Crew: 24.
Displacement: 89 tons.
Dimensions: Length 40 meters, Width 5 meters, Draft 1 meters.
Maximum speed: 24 knots.
Endurance: 3891 kilometers, Coal capacity: 26.5 tons.
No armor.
Armament:
2 centrally directed 47mm L40 Guns, ammo 700 rounds maximum.
3 centrally directed 356mm Whitehead Torpedoes, ammo 6 rounds maximum.
Torpedo Boat 31
Ships in class: 31, 32, 33, 34, 35, 36, 37, 38, 44, 45, 46, 47, 48, 49, 60, 61.
Placed in service: 1900.
Relative combat value: 34.
Standard Crew: 20.
Displacement: 89 tons.
Dimensions: Length 39 meters, Width 5 meters, Draft 1 meters.
Maximum speed: 24 knots.
Endurance: 3891 kilometers, Coal capacity: 15 tons.
No armor.
Armament:
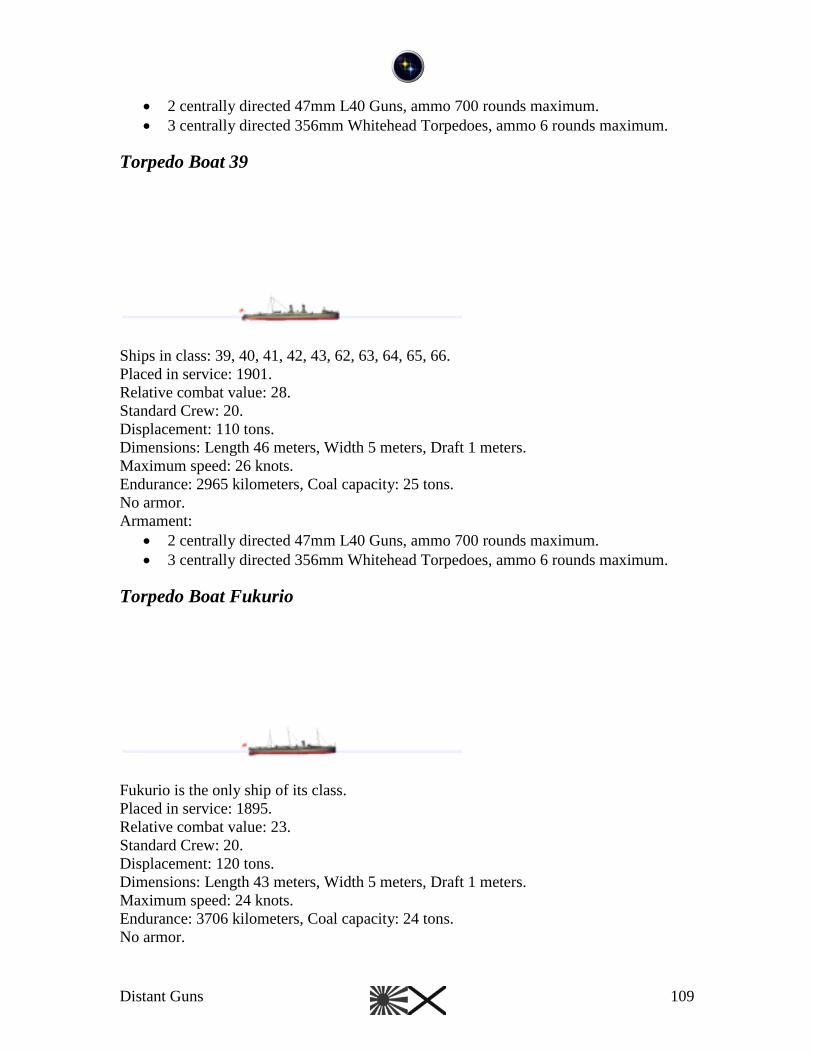
Distant Guns 109
2 centrally directed 47mm L40 Guns, ammo 700 rounds maximum.
3 centrally directed 356mm Whitehead Torpedoes, ammo 6 rounds maximum.
Torpedo Boat 39
Ships in class: 39, 40, 41, 42, 43, 62, 63, 64, 65, 66.
Placed in service: 1901.
Relative combat value: 28.
Standard Crew: 20.
Displacement: 110 tons.
Dimensions: Length 46 meters, Width 5 meters, Draft 1 meters.
Maximum speed: 26 knots.
Endurance: 2965 kilometers, Coal capacity: 25 tons.
No armor.
Armament:
2 centrally directed 47mm L40 Guns, ammo 700 rounds maximum.
3 centrally directed 356mm Whitehead Torpedoes, ammo 6 rounds maximum.
Torpedo Boat Fukurio
Fukurio is the only ship of its class.
Placed in service: 1895.
Relative combat value: 23.
Standard Crew: 20.
Displacement: 120 tons.
Dimensions: Length 43 meters, Width 5 meters, Draft 1 meters.
Maximum speed: 24 knots.
Endurance: 3706 kilometers, Coal capacity: 24 tons.
No armor.
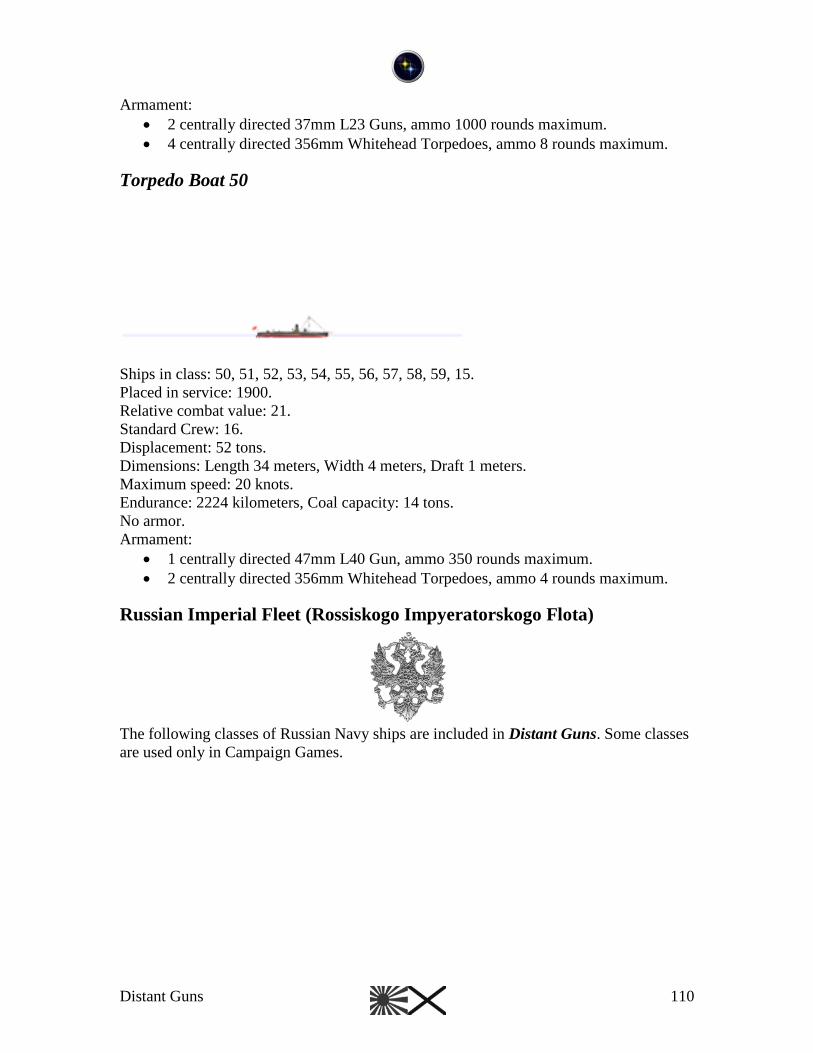
Distant Guns 110
Armament:
2 centrally directed 37mm L23 Guns, ammo 1000 rounds maximum.
4 centrally directed 356mm Whitehead Torpedoes, ammo 8 rounds maximum.
Torpedo Boat 50
Ships in class: 50, 51, 52, 53, 54, 55, 56, 57, 58, 59, 15.
Placed in service: 1900.
Relative combat value: 21.
Standard Crew: 16.
Displacement: 52 tons.
Dimensions: Length 34 meters, Width 4 meters, Draft 1 meters.
Maximum speed: 20 knots.
Endurance: 2224 kilometers, Coal capacity: 14 tons.
No armor.
Armament:
1 centrally directed 47mm L40 Gun, ammo 350 rounds maximum.
2 centrally directed 356mm Whitehead Torpedoes, ammo 4 rounds maximum.
Russian Imperial Fleet (Rossiskogo Impyeratorskogo Flota)
The following classes of Russian Navy ships are included in Distant Guns. Some classes
are used only in Campaign Games.
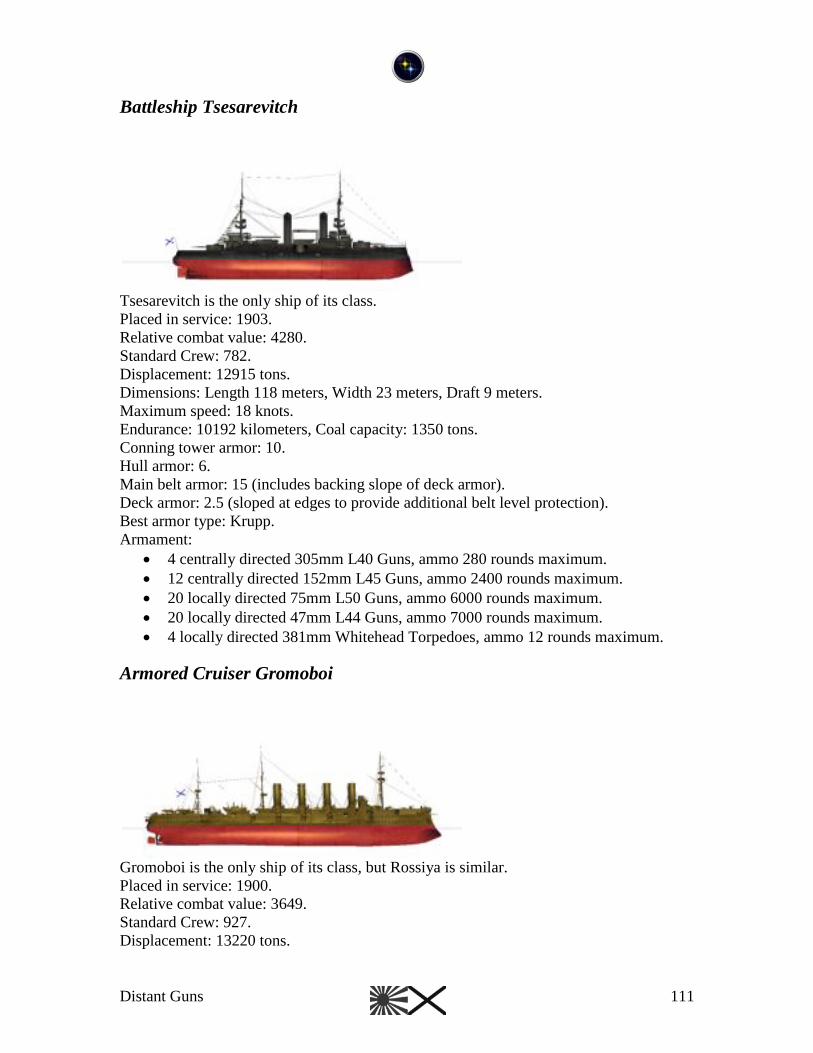
Distant Guns 111
Battleship Tsesarevitch
Tsesarevitch is the only ship of its class.
Placed in service: 1903.
Relative combat value: 4280.
Standard Crew: 782.
Displacement: 12915 tons.
Dimensions: Length 118 meters, Width 23 meters, Draft 9 meters.
Maximum speed: 18 knots.
Endurance: 10192 kilometers, Coal capacity: 1350 tons.
Conning tower armor: 10.
Hull armor: 6.
Main belt armor: 15 (includes backing slope of deck armor).
Deck armor: 2.5 (sloped at edges to provide additional belt level protection).
Best armor type: Krupp.
Armament:
4 centrally directed 305mm L40 Guns, ammo 280 rounds maximum.
12 centrally directed 152mm L45 Guns, ammo 2400 rounds maximum.
20 locally directed 75mm L50 Guns, ammo 6000 rounds maximum.
20 locally directed 47mm L44 Guns, ammo 7000 rounds maximum.
4 locally directed 381mm Whitehead Torpedoes, ammo 12 rounds maximum.
Armored Cruiser Gromoboi
Gromoboi is the only ship of its class, but Rossiya is similar.
Placed in service: 1900.
Relative combat value: 3649.
Standard Crew: 927.
Displacement: 13220 tons.
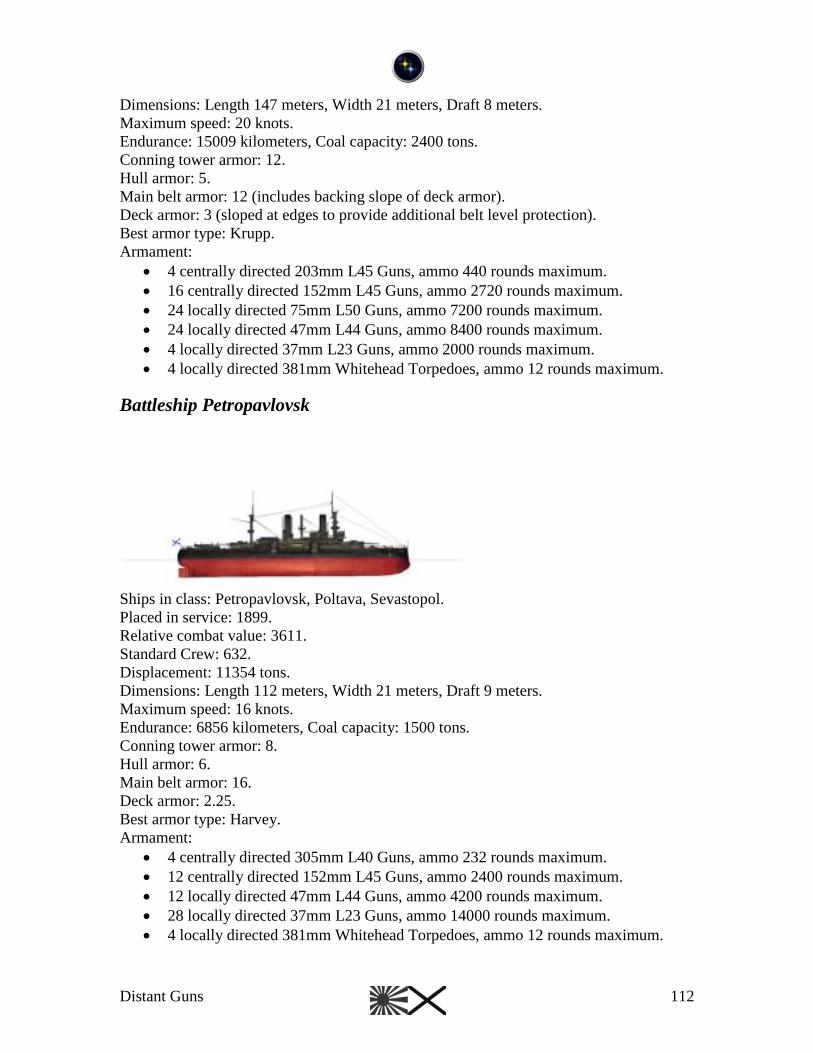
Distant Guns 112
Dimensions: Length 147 meters, Width 21 meters, Draft 8 meters.
Maximum speed: 20 knots.
Endurance: 15009 kilometers, Coal capacity: 2400 tons.
Conning tower armor: 12.
Hull armor: 5.
Main belt armor: 12 (includes backing slope of deck armor).
Deck armor: 3 (sloped at edges to provide additional belt level protection).
Best armor type: Krupp.
Armament:
4 centrally directed 203mm L45 Guns, ammo 440 rounds maximum.
16 centrally directed 152mm L45 Guns, ammo 2720 rounds maximum.
24 locally directed 75mm L50 Guns, ammo 7200 rounds maximum.
24 locally directed 47mm L44 Guns, ammo 8400 rounds maximum.
4 locally directed 37mm L23 Guns, ammo 2000 rounds maximum.
4 locally directed 381mm Whitehead Torpedoes, ammo 12 rounds maximum.
Battleship Petropavlovsk
Ships in class: Petropavlovsk, Poltava, Sevastopol.
Placed in service: 1899.
Relative combat value: 3611.
Standard Crew: 632.
Displacement: 11354 tons.
Dimensions: Length 112 meters, Width 21 meters, Draft 9 meters.
Maximum speed: 16 knots.
Endurance: 6856 kilometers, Coal capacity: 1500 tons.
Conning tower armor: 8.
Hull armor: 6.
Main belt armor: 16.
Deck armor: 2.25.
Best armor type: Harvey.
Armament:
4 centrally directed 305mm L40 Guns, ammo 232 rounds maximum.
12 centrally directed 152mm L45 Guns, ammo 2400 rounds maximum.
12 locally directed 47mm L44 Guns, ammo 4200 rounds maximum.
28 locally directed 37mm L23 Guns, ammo 14000 rounds maximum.
4 locally directed 381mm Whitehead Torpedoes, ammo 12 rounds maximum.

Distant Guns 113
Battleship Borodino
Ships in class: Borodino, Imperator Aleksander III, Knyaz Suvorov, Oryel.
Placed in service: 1904.
Relative combat value: 3569.
Standard Crew: 835.
Displacement: 13516 tons.
Dimensions: Length 121 meters, Width 23 meters, Draft 9 meters.
Maximum speed: 18 knots.
Endurance: 11489 kilometers, Coal capacity: 1520 tons.
Conning tower armor: 8.
Hull armor: 5.
Main belt armor: 10 (includes backing slope of deck armor).
Deck armor: 2 (sloped at edges to provide additional belt level protection).
Best armor type: Krupp.
Armament:
4 centrally directed 305mm L40 Guns, ammo 280 rounds maximum.
12 centrally directed 152mm L45 Guns, ammo 2400 rounds maximum.
20 locally directed 75mm L50 Guns, ammo 6000 rounds maximum.
20 locally directed 47mm L44 Guns, ammo 7000 rounds maximum.
4 locally directed 381mm Whitehead Torpedoes, ammo 12 rounds maximum.
Battleship Retvizan
Retvizan is the only ship of its class.
Placed in service: 1900.
Relative combat value: 3474.
Standard Crew: 738.
Displacement: 12900 tons.
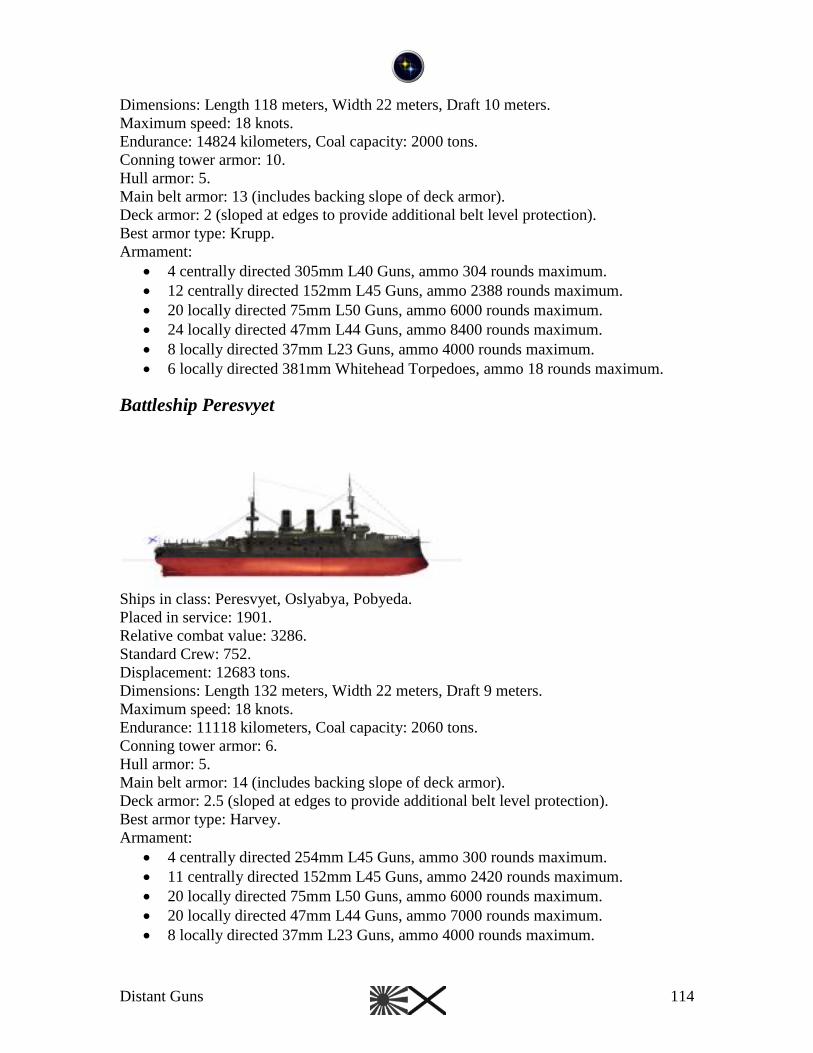
Distant Guns 114
Dimensions: Length 118 meters, Width 22 meters, Draft 10 meters.
Maximum speed: 18 knots.
Endurance: 14824 kilometers, Coal capacity: 2000 tons.
Conning tower armor: 10.
Hull armor: 5.
Main belt armor: 13 (includes backing slope of deck armor).
Deck armor: 2 (sloped at edges to provide additional belt level protection).
Best armor type: Krupp.
Armament:
4 centrally directed 305mm L40 Guns, ammo 304 rounds maximum.
12 centrally directed 152mm L45 Guns, ammo 2388 rounds maximum.
20 locally directed 75mm L50 Guns, ammo 6000 rounds maximum.
24 locally directed 47mm L44 Guns, ammo 8400 rounds maximum.
8 locally directed 37mm L23 Guns, ammo 4000 rounds maximum.
6 locally directed 381mm Whitehead Torpedoes, ammo 18 rounds maximum.
Battleship Peresvyet
Ships in class: Peresvyet, Oslyabya, Pobyeda.
Placed in service: 1901.
Relative combat value: 3286.
Standard Crew: 752.
Displacement: 12683 tons.
Dimensions: Length 132 meters, Width 22 meters, Draft 9 meters.
Maximum speed: 18 knots.
Endurance: 11118 kilometers, Coal capacity: 2060 tons.
Conning tower armor: 6.
Hull armor: 5.
Main belt armor: 14 (includes backing slope of deck armor).
Deck armor: 2.5 (sloped at edges to provide additional belt level protection).
Best armor type: Harvey.
Armament:
4 centrally directed 254mm L45 Guns, ammo 300 rounds maximum.
11 centrally directed 152mm L45 Guns, ammo 2420 rounds maximum.
20 locally directed 75mm L50 Guns, ammo 6000 rounds maximum.
20 locally directed 47mm L44 Guns, ammo 7000 rounds maximum.
8 locally directed 37mm L23 Guns, ammo 4000 rounds maximum.
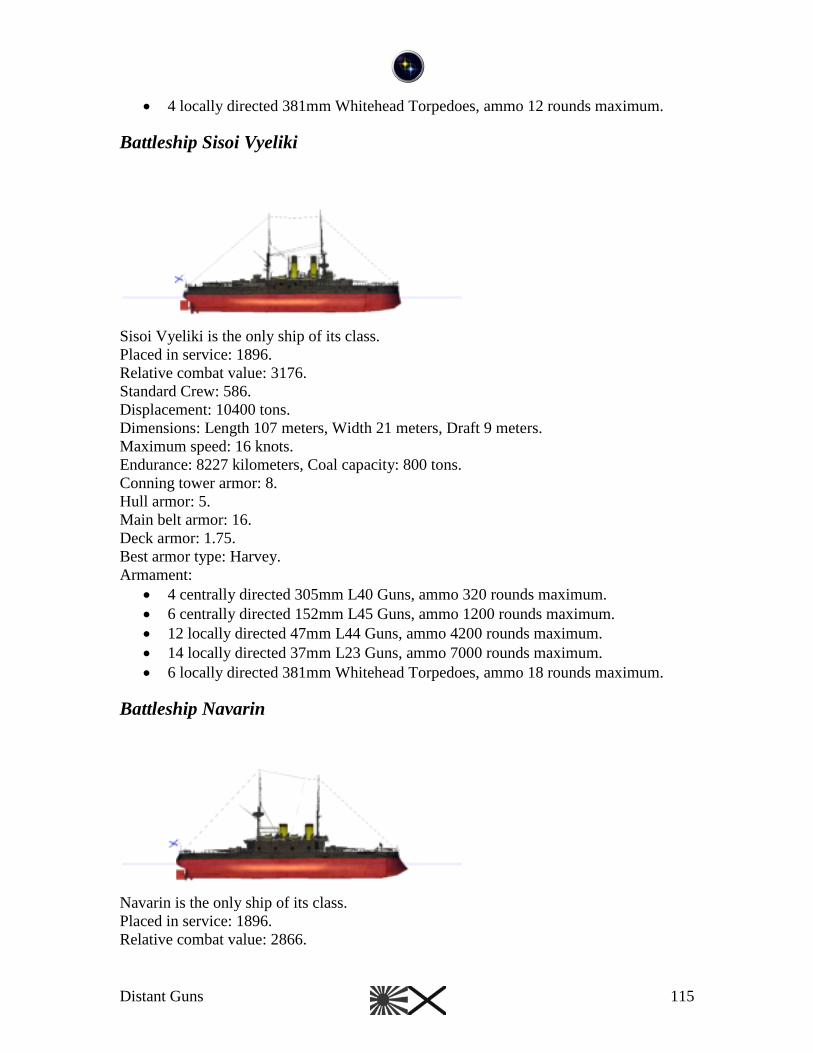
Distant Guns 115
4 locally directed 381mm Whitehead Torpedoes, ammo 12 rounds maximum.
Battleship Sisoi Vyeliki
Sisoi Vyeliki is the only ship of its class.
Placed in service: 1896.
Relative combat value: 3176.
Standard Crew: 586.
Displacement: 10400 tons.
Dimensions: Length 107 meters, Width 21 meters, Draft 9 meters.
Maximum speed: 16 knots.
Endurance: 8227 kilometers, Coal capacity: 800 tons.
Conning tower armor: 8.
Hull armor: 5.
Main belt armor: 16.
Deck armor: 1.75.
Best armor type: Harvey.
Armament:
4 centrally directed 305mm L40 Guns, ammo 320 rounds maximum.
6 centrally directed 152mm L45 Guns, ammo 1200 rounds maximum.
12 locally directed 47mm L44 Guns, ammo 4200 rounds maximum.
14 locally directed 37mm L23 Guns, ammo 7000 rounds maximum.
6 locally directed 381mm Whitehead Torpedoes, ammo 18 rounds maximum.
Battleship Navarin
Navarin is the only ship of its class.
Placed in service: 1896.
Relative combat value: 2866.

Distant Guns 116
Standard Crew: 622.
Displacement: 10206 tons.
Dimensions: Length 109 meters, Width 20 meters, Draft 9 meters.
Maximum speed: 16 knots.
Endurance: 5652 kilometers, Coal capacity: 700 tons.
Conning tower armor: 10.
Hull armor: 8.
Main belt armor: 16.
Deck armor: 2.5.
Best armor type: Harvey.
Armament:
4 centrally directed 305mm L35 Guns, ammo 320 rounds maximum.
8 centrally directed 152mm L35 Guns, ammo 1600 rounds maximum.
18 locally directed 47mm L44 Guns, ammo 6300 rounds maximum.
12 locally directed 37mm L23 Guns, ammo 6000 rounds maximum.
6 locally directed 381mm Whitehead Torpedoes, ammo 18 rounds maximum.
Armored Cruiser Rossiya
Rossiya is the only ship of its class, but Gromoboi is similar.
Placed in service: 1897.
Relative combat value: 2747.
Standard Crew: 895.
Displacement: 13675 tons.
Dimensions: Length 146 meters, Width 21 meters, Draft 9 meters.
Maximum speed: 20 knots.
Endurance: 14342 kilometers, Coal capacity: 2200 tons.
Conning tower armor: 12.
Hull armor: 5.
Main belt armor: 7.
Deck armor: 3.
Best armor type: Harvey.
Armament:
4 centrally directed 203mm L45 Guns, ammo 440 rounds maximum.
16 centrally directed 152mm L45 Guns, ammo 2720 rounds maximum.
12 locally directed 75mm L50 Guns, ammo 3600 rounds maximum.
20 locally directed 47mm L44 Guns, ammo 7000 rounds maximum.
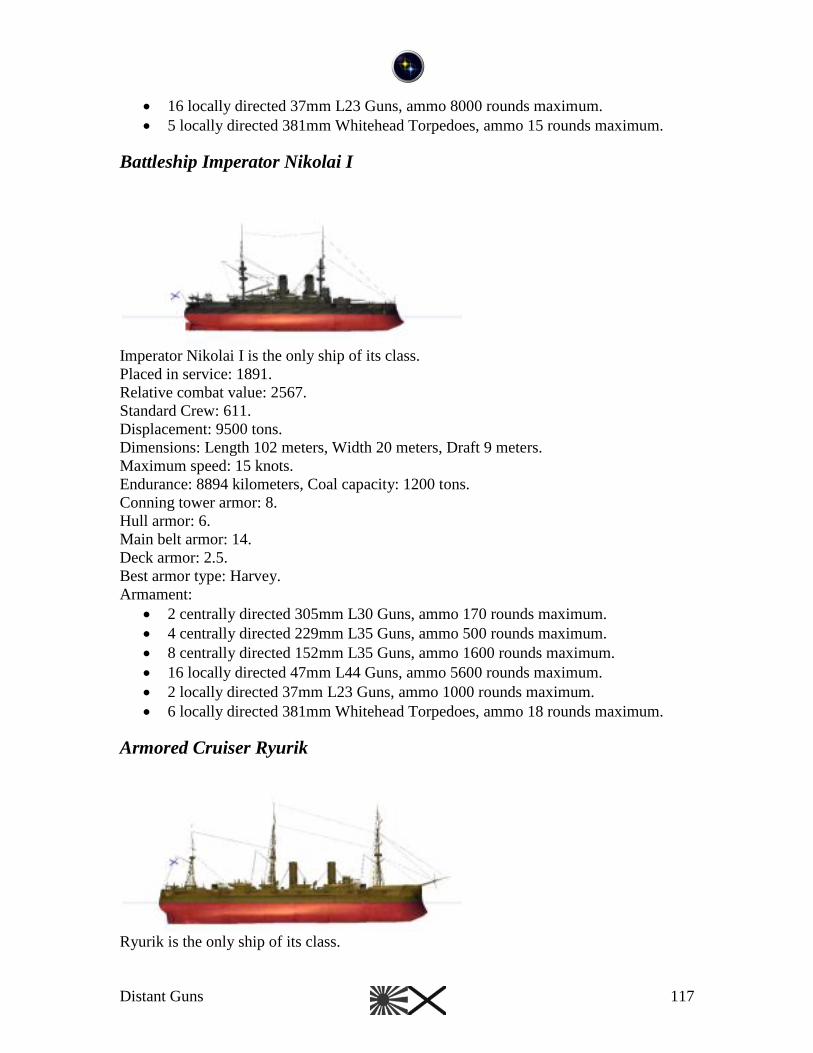
Distant Guns 117
16 locally directed 37mm L23 Guns, ammo 8000 rounds maximum.
5 locally directed 381mm Whitehead Torpedoes, ammo 15 rounds maximum.
Battleship Imperator Nikolai I
Imperator Nikolai I is the only ship of its class.
Placed in service: 1891.
Relative combat value: 2567.
Standard Crew: 611.
Displacement: 9500 tons.
Dimensions: Length 102 meters, Width 20 meters, Draft 9 meters.
Maximum speed: 15 knots.
Endurance: 8894 kilometers, Coal capacity: 1200 tons.
Conning tower armor: 8.
Hull armor: 6.
Main belt armor: 14.
Deck armor: 2.5.
Best armor type: Harvey.
Armament:
2 centrally directed 305mm L30 Guns, ammo 170 rounds maximum.
4 centrally directed 229mm L35 Guns, ammo 500 rounds maximum.
8 centrally directed 152mm L35 Guns, ammo 1600 rounds maximum.
16 locally directed 47mm L44 Guns, ammo 5600 rounds maximum.
2 locally directed 37mm L23 Guns, ammo 1000 rounds maximum.
6 locally directed 381mm Whitehead Torpedoes, ammo 18 rounds maximum.
Armored Cruiser Ryurik
Ryurik is the only ship of its class.
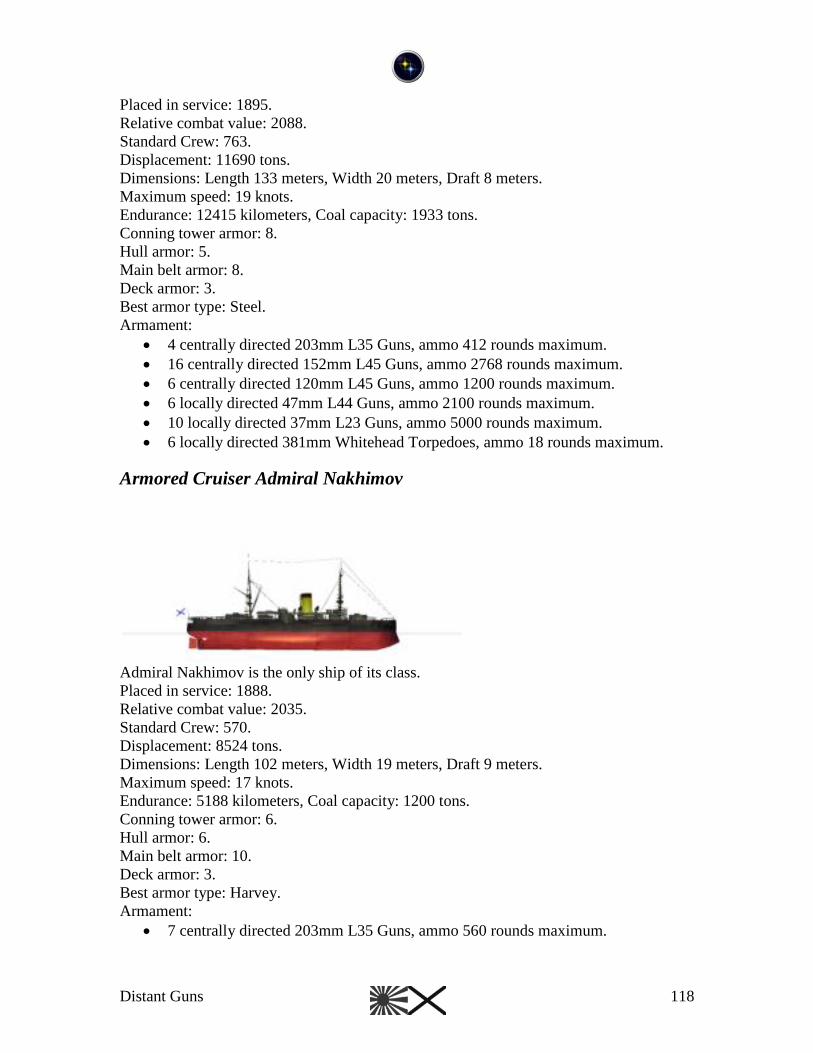
Distant Guns 118
Placed in service: 1895.
Relative combat value: 2088.
Standard Crew: 763.
Displacement: 11690 tons.
Dimensions: Length 133 meters, Width 20 meters, Draft 8 meters.
Maximum speed: 19 knots.
Endurance: 12415 kilometers, Coal capacity: 1933 tons.
Conning tower armor: 8.
Hull armor: 5.
Main belt armor: 8.
Deck armor: 3.
Best armor type: Steel.
Armament:
4 centrally directed 203mm L35 Guns, ammo 412 rounds maximum.
16 centrally directed 152mm L45 Guns, ammo 2768 rounds maximum.
6 centrally directed 120mm L45 Guns, ammo 1200 rounds maximum.
6 locally directed 47mm L44 Guns, ammo 2100 rounds maximum.
10 locally directed 37mm L23 Guns, ammo 5000 rounds maximum.
6 locally directed 381mm Whitehead Torpedoes, ammo 18 rounds maximum.
Armored Cruiser Admiral Nakhimov
Admiral Nakhimov is the only ship of its class.
Placed in service: 1888.
Relative combat value: 2035.
Standard Crew: 570.
Displacement: 8524 tons.
Dimensions: Length 102 meters, Width 19 meters, Draft 9 meters.
Maximum speed: 17 knots.
Endurance: 5188 kilometers, Coal capacity: 1200 tons.
Conning tower armor: 6.
Hull armor: 6.
Main belt armor: 10.
Deck armor: 3.
Best armor type: Harvey.
Armament:
7 centrally directed 203mm L35 Guns, ammo 560 rounds maximum.

Distant Guns 119
10 centrally directed 152mm L35 Guns, ammo 2000 rounds maximum.
12 locally directed 47mm L44 Guns, ammo 4200 rounds maximum.
6 locally directed 37mm L23 Guns, ammo 3000 rounds maximum.
3 locally directed 381mm Whitehead Torpedoes, ammo 9 rounds maximum.
Armored Cruiser Bayan
Bayan is the only ship of its class.
Placed in service: 1903.
Relative combat value: 1813.
Standard Crew: 593.
Displacement: 7725 tons.
Dimensions: Length 137 meters, Width 18 meters, Draft 6 meters.
Maximum speed: 21 knots.
Endurance: 3891 kilometers, Coal capacity: 1200 tons.
Conning tower armor: 6.75.
Hull armor: 2.5.
Main belt armor: 8.
Deck armor: 2.
Best armor type: Harvey.
Armament:
2 centrally directed 203mm L45 Guns, ammo 200 rounds maximum.
8 centrally directed 152mm L45 Guns, ammo 1200 rounds maximum.
20 locally directed 75mm L50 Guns, ammo 6000 rounds maximum.
8 locally directed 47mm L44 Guns, ammo 2800 rounds maximum.
2 locally directed 37mm L23 Guns, ammo 1000 rounds maximum.
2 locally directed 381mm Whitehead Torpedoes, ammo 6 rounds maximum.
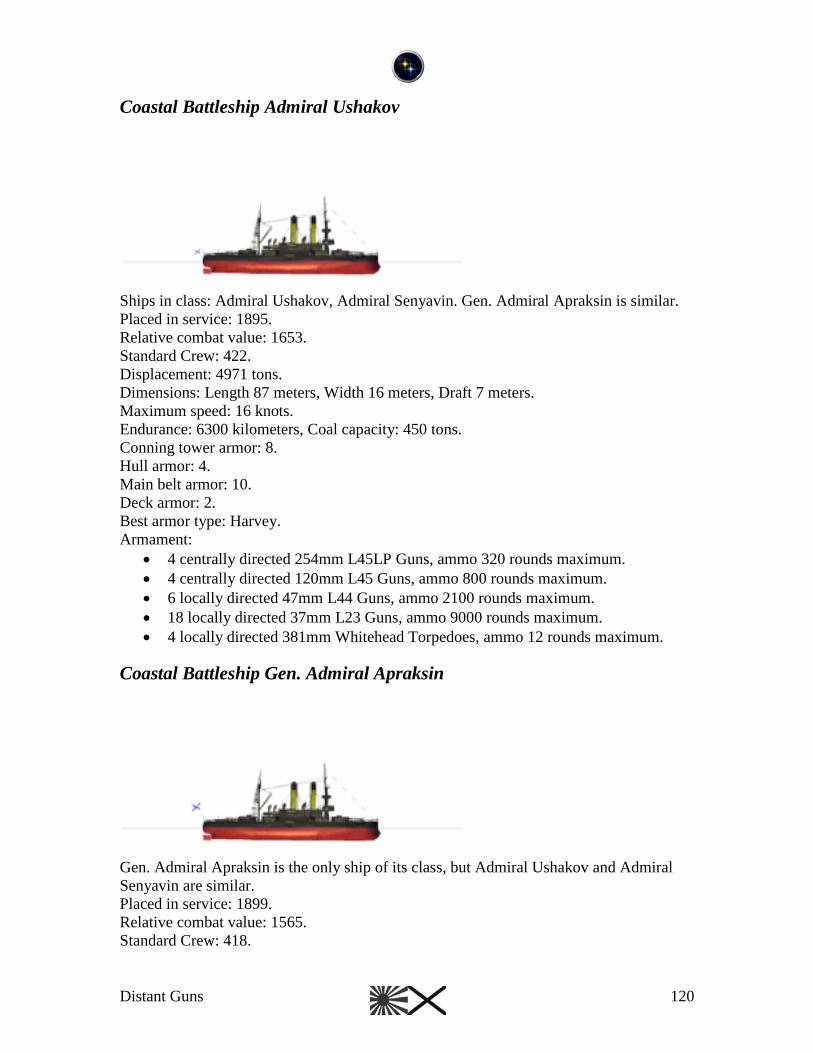
Distant Guns 120
Coastal Battleship Admiral Ushakov
Ships in class: Admiral Ushakov, Admiral Senyavin. Gen. Admiral Apraksin is similar.
Placed in service: 1895.
Relative combat value: 1653.
Standard Crew: 422.
Displacement: 4971 tons.
Dimensions: Length 87 meters, Width 16 meters, Draft 7 meters.
Maximum speed: 16 knots.
Endurance: 6300 kilometers, Coal capacity: 450 tons.
Conning tower armor: 8.
Hull armor: 4.
Main belt armor: 10.
Deck armor: 2.
Best armor type: Harvey.
Armament:
4 centrally directed 254mm L45LP Guns, ammo 320 rounds maximum.
4 centrally directed 120mm L45 Guns, ammo 800 rounds maximum.
6 locally directed 47mm L44 Guns, ammo 2100 rounds maximum.
18 locally directed 37mm L23 Guns, ammo 9000 rounds maximum.
4 locally directed 381mm Whitehead Torpedoes, ammo 12 rounds maximum.
Coastal Battleship Gen. Admiral Apraksin
Gen. Admiral Apraksin is the only ship of its class, but Admiral Ushakov and Admiral
Senyavin are similar.
Placed in service: 1899.
Relative combat value: 1565.
Standard Crew: 418.
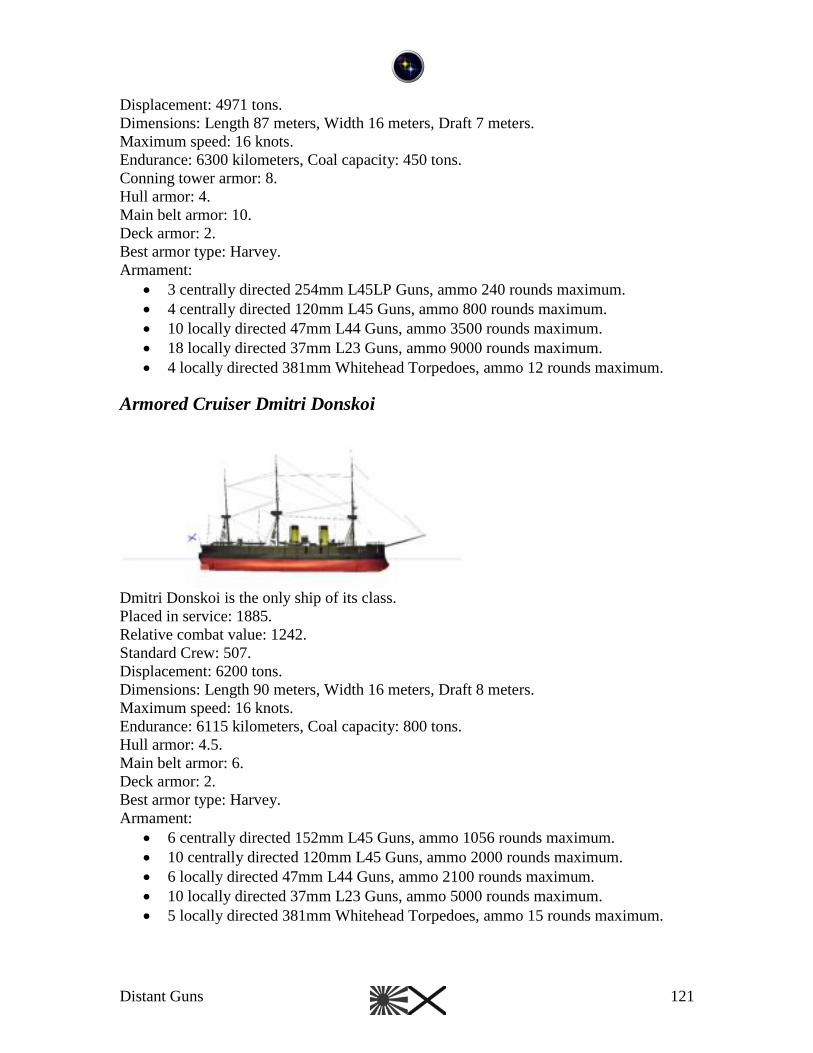
Distant Guns 121
Displacement: 4971 tons.
Dimensions: Length 87 meters, Width 16 meters, Draft 7 meters.
Maximum speed: 16 knots.
Endurance: 6300 kilometers, Coal capacity: 450 tons.
Conning tower armor: 8.
Hull armor: 4.
Main belt armor: 10.
Deck armor: 2.
Best armor type: Harvey.
Armament:
3 centrally directed 254mm L45LP Guns, ammo 240 rounds maximum.
4 centrally directed 120mm L45 Guns, ammo 800 rounds maximum.
10 locally directed 47mm L44 Guns, ammo 3500 rounds maximum.
18 locally directed 37mm L23 Guns, ammo 9000 rounds maximum.
4 locally directed 381mm Whitehead Torpedoes, ammo 12 rounds maximum.
Armored Cruiser Dmitri Donskoi
Dmitri Donskoi is the only ship of its class.
Placed in service: 1885.
Relative combat value: 1242.
Standard Crew: 507.
Displacement: 6200 tons.
Dimensions: Length 90 meters, Width 16 meters, Draft 8 meters.
Maximum speed: 16 knots.
Endurance: 6115 kilometers, Coal capacity: 800 tons.
Hull armor: 4.5.
Main belt armor: 6.
Deck armor: 2.
Best armor type: Harvey.
Armament:
6 centrally directed 152mm L45 Guns, ammo 1056 rounds maximum.
10 centrally directed 120mm L45 Guns, ammo 2000 rounds maximum.
6 locally directed 47mm L44 Guns, ammo 2100 rounds maximum.
10 locally directed 37mm L23 Guns, ammo 5000 rounds maximum.
5 locally directed 381mm Whitehead Torpedoes, ammo 15 rounds maximum.
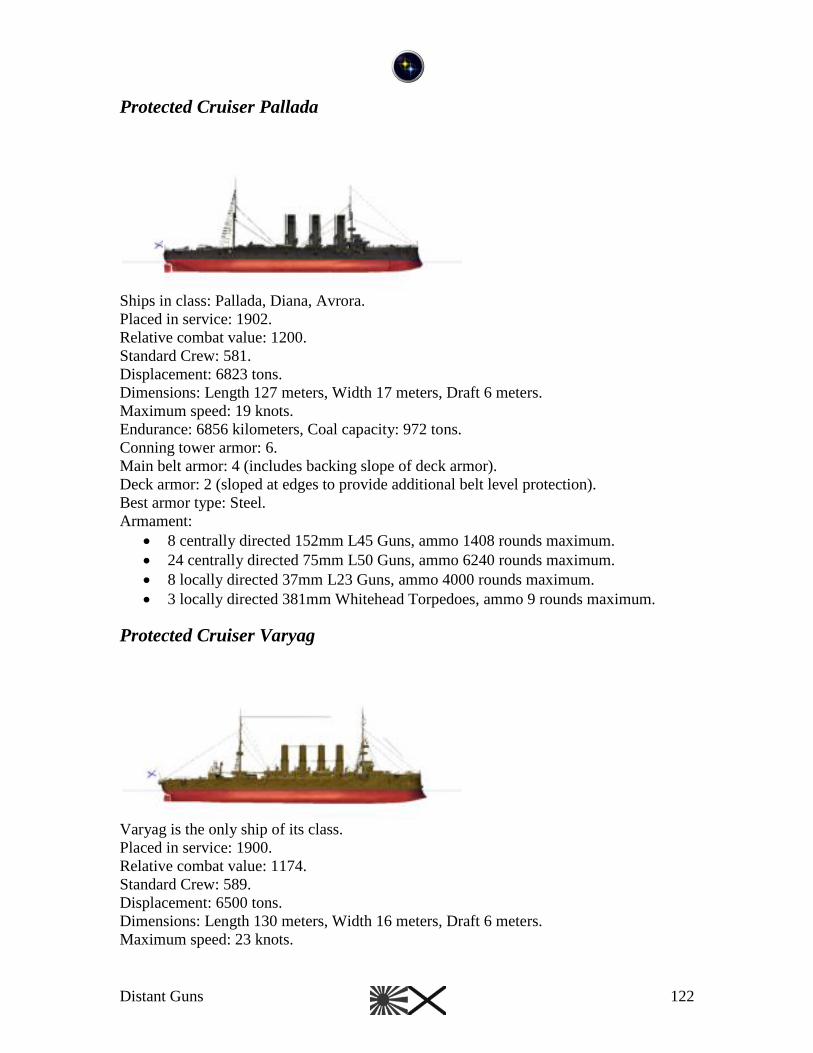
Distant Guns 122
Protected Cruiser Pallada
Ships in class: Pallada, Diana, Avrora.
Placed in service: 1902.
Relative combat value: 1200.
Standard Crew: 581.
Displacement: 6823 tons.
Dimensions: Length 127 meters, Width 17 meters, Draft 6 meters.
Maximum speed: 19 knots.
Endurance: 6856 kilometers, Coal capacity: 972 tons.
Conning tower armor: 6.
Main belt armor: 4 (includes backing slope of deck armor).
Deck armor: 2 (sloped at edges to provide additional belt level protection).
Best armor type: Steel.
Armament:
8 centrally directed 152mm L45 Guns, ammo 1408 rounds maximum.
24 centrally directed 75mm L50 Guns, ammo 6240 rounds maximum.
8 locally directed 37mm L23 Guns, ammo 4000 rounds maximum.
3 locally directed 381mm Whitehead Torpedoes, ammo 9 rounds maximum.
Protected Cruiser Varyag
Varyag is the only ship of its class.
Placed in service: 1900.
Relative combat value: 1174.
Standard Crew: 589.
Displacement: 6500 tons.
Dimensions: Length 130 meters, Width 16 meters, Draft 6 meters.
Maximum speed: 23 knots.

Distant Guns 123
Endurance: 7968 kilometers, Coal capacity: 1300 tons.
Conning tower armor: 6.
Main belt armor: 3 (includes backing slope of deck armor).
Deck armor: 1.5 (sloped at edges to provide additional belt level protection).
Best armor type: Steel.
Armament:
12 centrally directed 152mm L45 Guns, ammo 2376 rounds maximum.
12 centrally directed 75mm L50 Guns, ammo 3000 rounds maximum.
8 locally directed 47mm L44 Guns, ammo 2800 rounds maximum.
2 locally directed 37mm L23 Guns, ammo 1000 rounds maximum.
6 locally directed 381mm Whitehead Torpedoes, ammo 12 rounds maximum.
Protected Cruiser Bogatyr
Ships in class: Bogatyr, Oleg.
Placed in service: 1901.
Relative combat value: 1166.
Standard Crew: 580.
Displacement: 6645 tons.
Dimensions: Length 134 meters, Width 17 meters, Draft 6 meters.
Maximum speed: 23 knots.
Endurance: 9080 kilometers, Coal capacity: 1220 tons.
Conning tower armor: 5.5.
Main belt armor: 3 (includes backing slope of deck armor).
Deck armor: 1.5 (sloped at edges to provide additional belt level protection).
Best armor type: Krupp.
Armament:
12 centrally directed 152mm L45 Guns, ammo 2160 rounds maximum.
12 centrally directed 75mm L50 Guns, ammo 3000 rounds maximum.
8 locally directed 47mm L44 Guns, ammo 2800 rounds maximum.
2 locally directed 37mm L23 Guns, ammo 1000 rounds maximum.
6 locally directed 381mm Whitehead Torpedoes, ammo 12 rounds maximum.
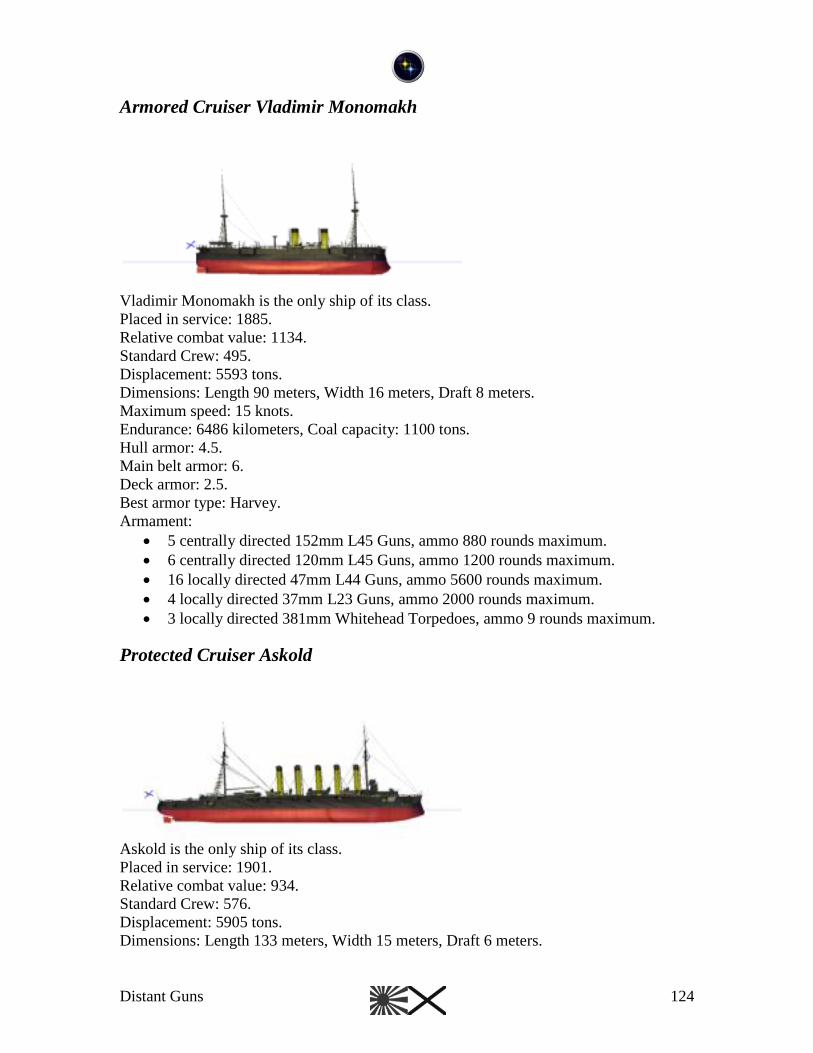
Distant Guns 124
Armored Cruiser Vladimir Monomakh
Vladimir Monomakh is the only ship of its class.
Placed in service: 1885.
Relative combat value: 1134.
Standard Crew: 495.
Displacement: 5593 tons.
Dimensions: Length 90 meters, Width 16 meters, Draft 8 meters.
Maximum speed: 15 knots.
Endurance: 6486 kilometers, Coal capacity: 1100 tons.
Hull armor: 4.5.
Main belt armor: 6.
Deck armor: 2.5.
Best armor type: Harvey.
Armament:
5 centrally directed 152mm L45 Guns, ammo 880 rounds maximum.
6 centrally directed 120mm L45 Guns, ammo 1200 rounds maximum.
16 locally directed 47mm L44 Guns, ammo 5600 rounds maximum.
4 locally directed 37mm L23 Guns, ammo 2000 rounds maximum.
3 locally directed 381mm Whitehead Torpedoes, ammo 9 rounds maximum.
Protected Cruiser Askold
Askold is the only ship of its class.
Placed in service: 1901.
Relative combat value: 934.
Standard Crew: 576.
Displacement: 5905 tons.
Dimensions: Length 133 meters, Width 15 meters, Draft 6 meters.
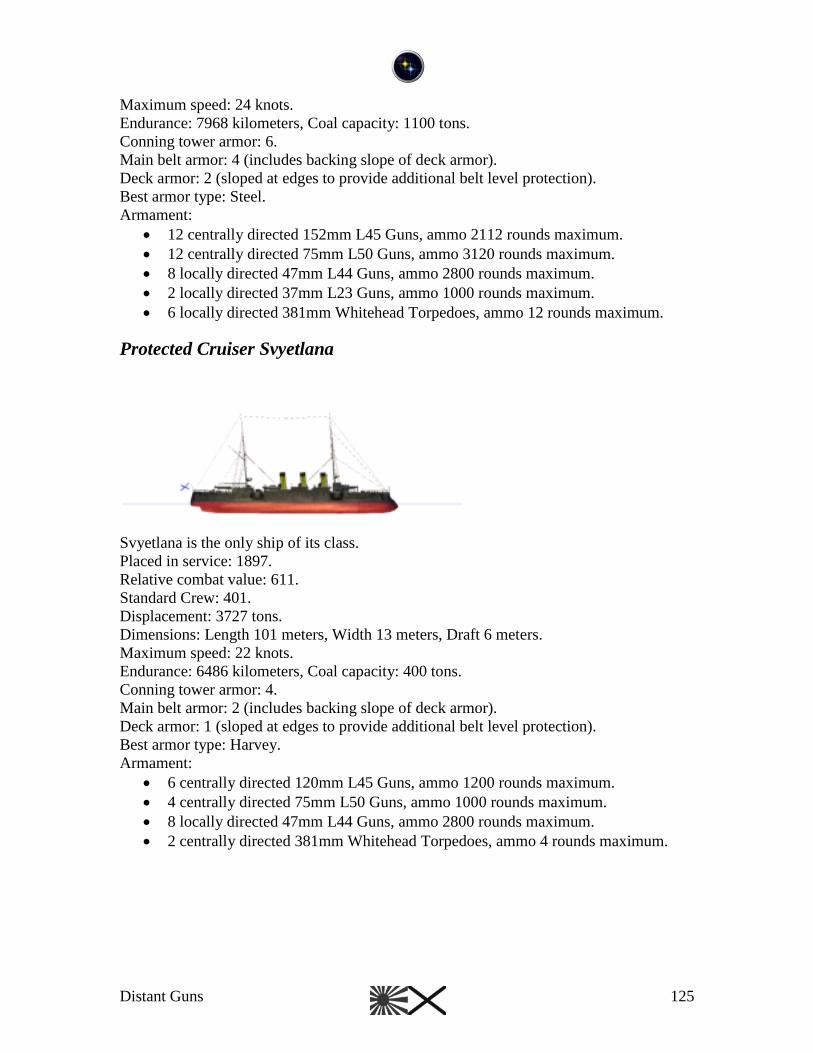
Distant Guns 125
Maximum speed: 24 knots.
Endurance: 7968 kilometers, Coal capacity: 1100 tons.
Conning tower armor: 6.
Main belt armor: 4 (includes backing slope of deck armor).
Deck armor: 2 (sloped at edges to provide additional belt level protection).
Best armor type: Steel.
Armament:
12 centrally directed 152mm L45 Guns, ammo 2112 rounds maximum.
12 centrally directed 75mm L50 Guns, ammo 3120 rounds maximum.
8 locally directed 47mm L44 Guns, ammo 2800 rounds maximum.
2 locally directed 37mm L23 Guns, ammo 1000 rounds maximum.
6 locally directed 381mm Whitehead Torpedoes, ammo 12 rounds maximum.
Protected Cruiser Svyetlana
Svyetlana is the only ship of its class.
Placed in service: 1897.
Relative combat value: 611.
Standard Crew: 401.
Displacement: 3727 tons.
Dimensions: Length 101 meters, Width 13 meters, Draft 6 meters.
Maximum speed: 22 knots.
Endurance: 6486 kilometers, Coal capacity: 400 tons.
Conning tower armor: 4.
Main belt armor: 2 (includes backing slope of deck armor).
Deck armor: 1 (sloped at edges to provide additional belt level protection).
Best armor type: Harvey.
Armament:
6 centrally directed 120mm L45 Guns, ammo 1200 rounds maximum.
4 centrally directed 75mm L50 Guns, ammo 1000 rounds maximum.
8 locally directed 47mm L44 Guns, ammo 2800 rounds maximum.
2 centrally directed 381mm Whitehead Torpedoes, ammo 4 rounds maximum.
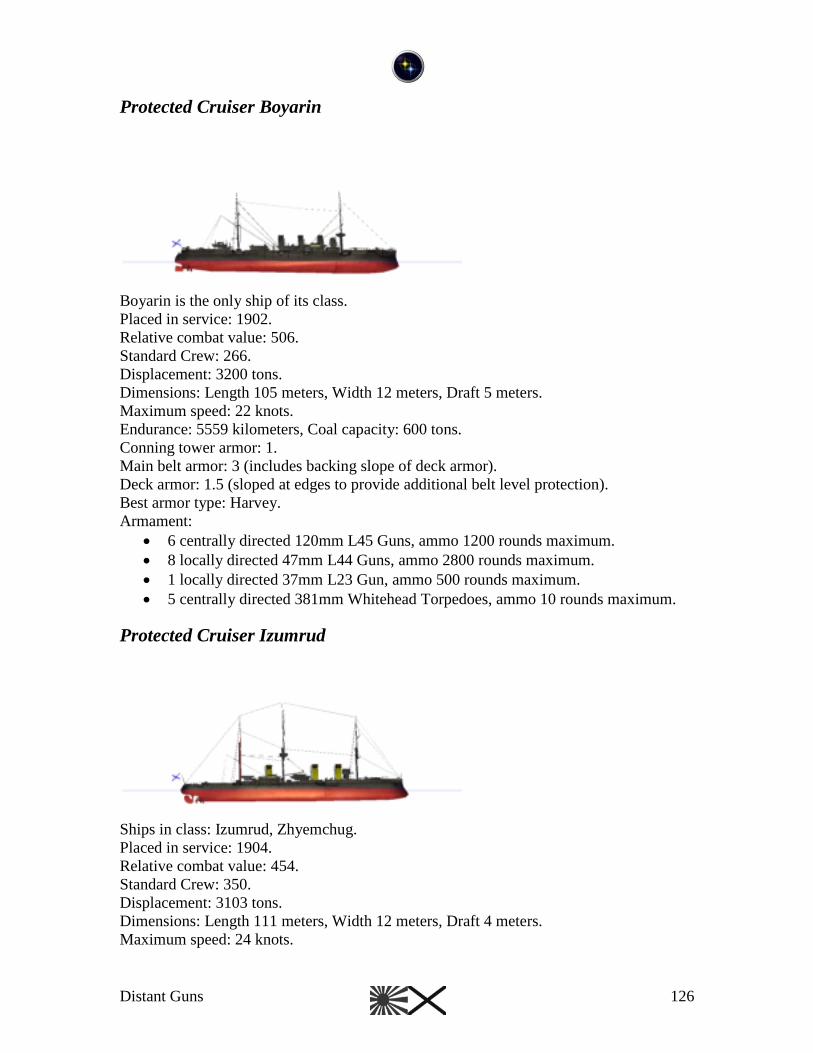
Distant Guns 126
Protected Cruiser Boyarin
Boyarin is the only ship of its class.
Placed in service: 1902.
Relative combat value: 506.
Standard Crew: 266.
Displacement: 3200 tons.
Dimensions: Length 105 meters, Width 12 meters, Draft 5 meters.
Maximum speed: 22 knots.
Endurance: 5559 kilometers, Coal capacity: 600 tons.
Conning tower armor: 1.
Main belt armor: 3 (includes backing slope of deck armor).
Deck armor: 1.5 (sloped at edges to provide additional belt level protection).
Best armor type: Harvey.
Armament:
6 centrally directed 120mm L45 Guns, ammo 1200 rounds maximum.
8 locally directed 47mm L44 Guns, ammo 2800 rounds maximum.
1 locally directed 37mm L23 Gun, ammo 500 rounds maximum.
5 centrally directed 381mm Whitehead Torpedoes, ammo 10 rounds maximum.
Protected Cruiser Izumrud
Ships in class: Izumrud, Zhyemchug.
Placed in service: 1904.
Relative combat value: 454.
Standard Crew: 350.
Displacement: 3103 tons.
Dimensions: Length 111 meters, Width 12 meters, Draft 4 meters.
Maximum speed: 24 knots.
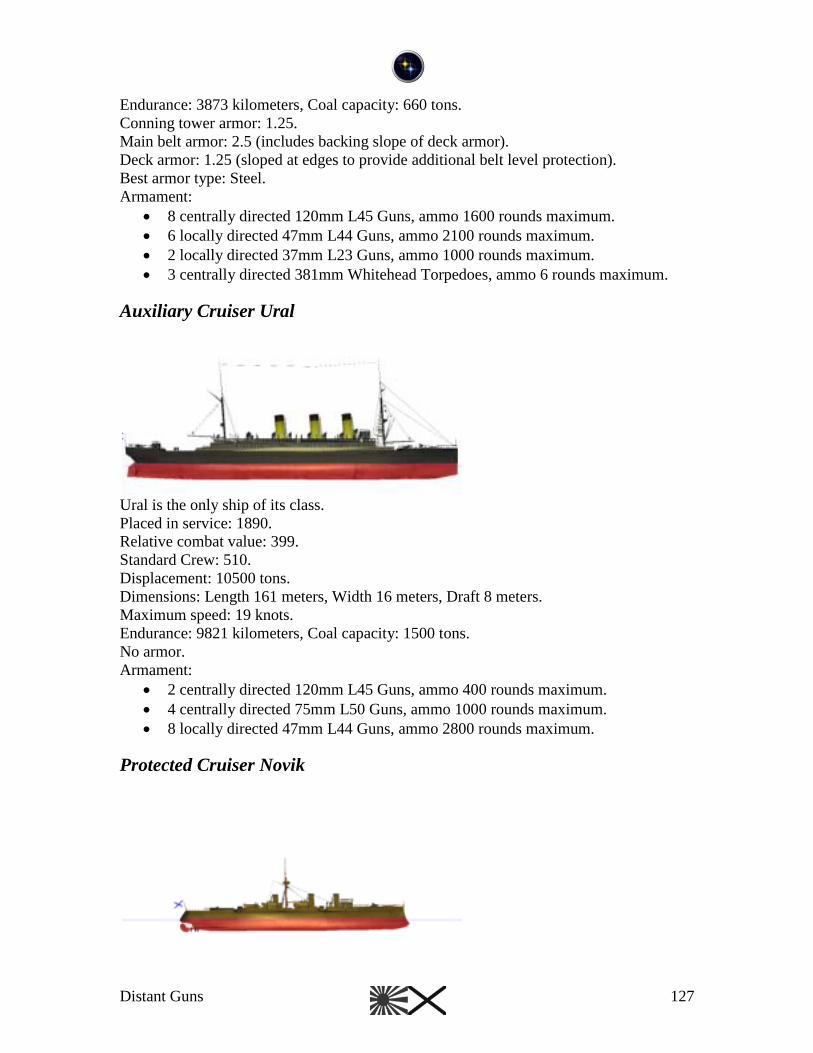
Distant Guns 127
Endurance: 3873 kilometers, Coal capacity: 660 tons.
Conning tower armor: 1.25.
Main belt armor: 2.5 (includes backing slope of deck armor).
Deck armor: 1.25 (sloped at edges to provide additional belt level protection).
Best armor type: Steel.
Armament:
8 centrally directed 120mm L45 Guns, ammo 1600 rounds maximum.
6 locally directed 47mm L44 Guns, ammo 2100 rounds maximum.
2 locally directed 37mm L23 Guns, ammo 1000 rounds maximum.
3 centrally directed 381mm Whitehead Torpedoes, ammo 6 rounds maximum.
Auxiliary Cruiser Ural
Ural is the only ship of its class.
Placed in service: 1890.
Relative combat value: 399.
Standard Crew: 510.
Displacement: 10500 tons.
Dimensions: Length 161 meters, Width 16 meters, Draft 8 meters.
Maximum speed: 19 knots.
Endurance: 9821 kilometers, Coal capacity: 1500 tons.
No armor.
Armament:
2 centrally directed 120mm L45 Guns, ammo 400 rounds maximum.
4 centrally directed 75mm L50 Guns, ammo 1000 rounds maximum.
8 locally directed 47mm L44 Guns, ammo 2800 rounds maximum.
Protected Cruiser Novik
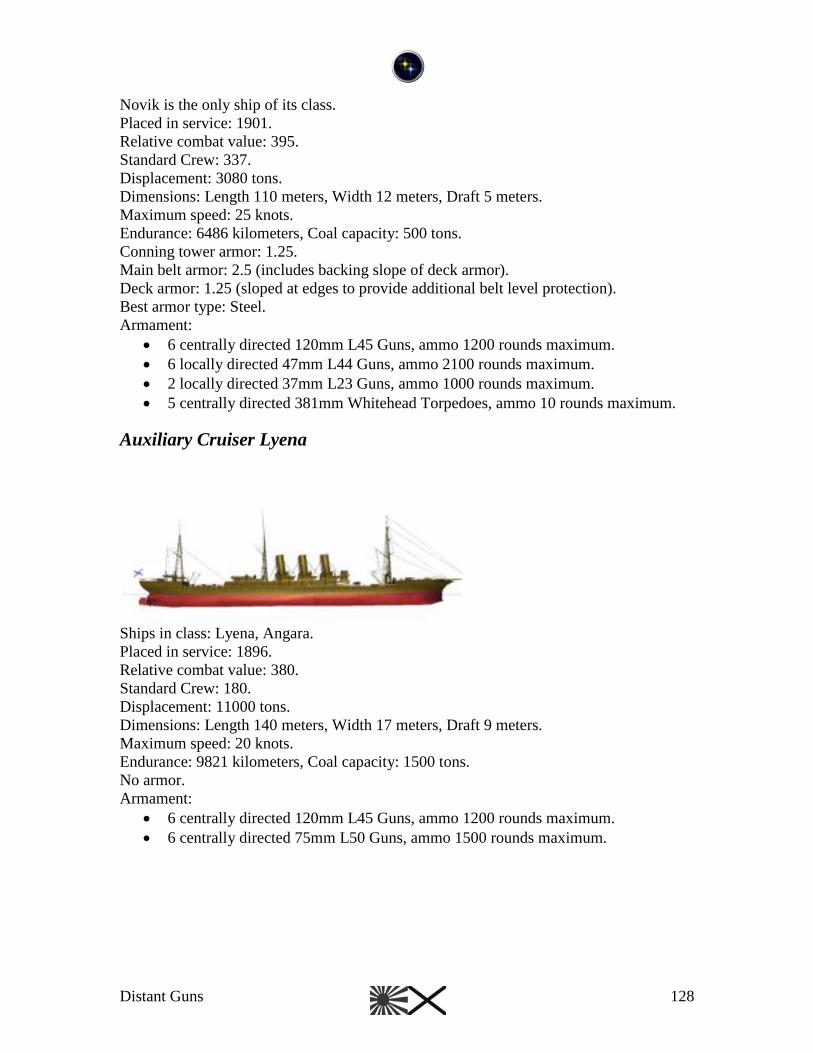
Distant Guns 128
Novik is the only ship of its class.
Placed in service: 1901.
Relative combat value: 395.
Standard Crew: 337.
Displacement: 3080 tons.
Dimensions: Length 110 meters, Width 12 meters, Draft 5 meters.
Maximum speed: 25 knots.
Endurance: 6486 kilometers, Coal capacity: 500 tons.
Conning tower armor: 1.25.
Main belt armor: 2.5 (includes backing slope of deck armor).
Deck armor: 1.25 (sloped at edges to provide additional belt level protection).
Best armor type: Steel.
Armament:
6 centrally directed 120mm L45 Guns, ammo 1200 rounds maximum.
6 locally directed 47mm L44 Guns, ammo 2100 rounds maximum.
2 locally directed 37mm L23 Guns, ammo 1000 rounds maximum.
5 centrally directed 381mm Whitehead Torpedoes, ammo 10 rounds maximum.
Auxiliary Cruiser Lyena
Ships in class: Lyena, Angara.
Placed in service: 1896.
Relative combat value: 380.
Standard Crew: 180.
Displacement: 11000 tons.
Dimensions: Length 140 meters, Width 17 meters, Draft 9 meters.
Maximum speed: 20 knots.
Endurance: 9821 kilometers, Coal capacity: 1500 tons.
No armor.
Armament:
6 centrally directed 120mm L45 Guns, ammo 1200 rounds maximum.
6 centrally directed 75mm L50 Guns, ammo 1500 rounds maximum.
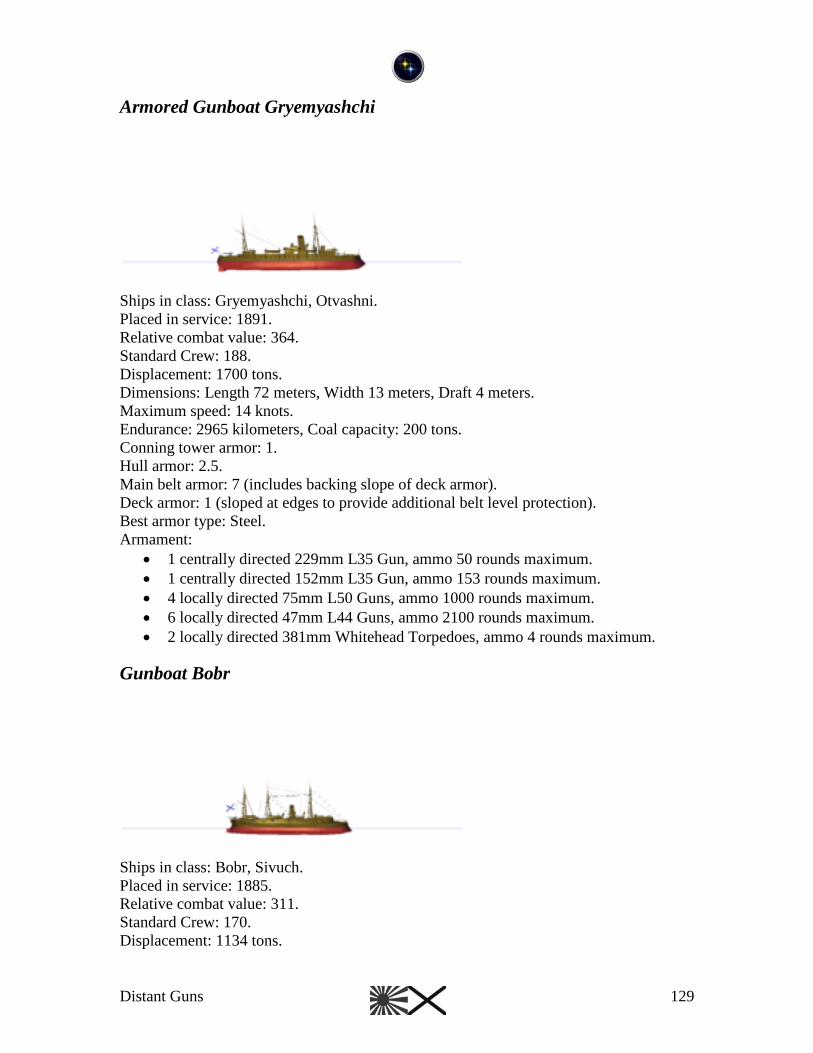
Distant Guns 129
Armored Gunboat Gryemyashchi
Ships in class: Gryemyashchi, Otvashni.
Placed in service: 1891.
Relative combat value: 364.
Standard Crew: 188.
Displacement: 1700 tons.
Dimensions: Length 72 meters, Width 13 meters, Draft 4 meters.
Maximum speed: 14 knots.
Endurance: 2965 kilometers, Coal capacity: 200 tons.
Conning tower armor: 1.
Hull armor: 2.5.
Main belt armor: 7 (includes backing slope of deck armor).
Deck armor: 1 (sloped at edges to provide additional belt level protection).
Best armor type: Steel.
Armament:
1 centrally directed 229mm L35 Gun, ammo 50 rounds maximum.
1 centrally directed 152mm L35 Gun, ammo 153 rounds maximum.
4 locally directed 75mm L50 Guns, ammo 1000 rounds maximum.
6 locally directed 47mm L44 Guns, ammo 2100 rounds maximum.
2 locally directed 381mm Whitehead Torpedoes, ammo 4 rounds maximum.
Gunboat Bobr
Ships in class: Bobr, Sivuch.
Placed in service: 1885.
Relative combat value: 311.
Standard Crew: 170.
Displacement: 1134 tons.
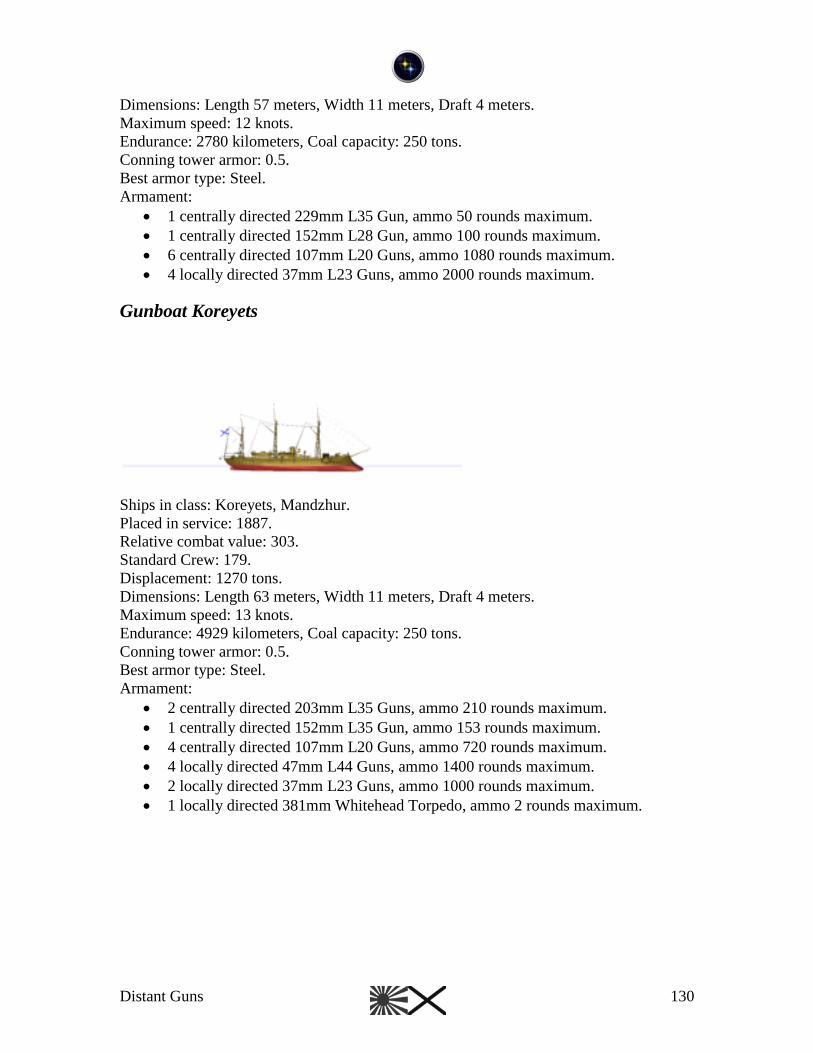
Distant Guns 130
Dimensions: Length 57 meters, Width 11 meters, Draft 4 meters.
Maximum speed: 12 knots.
Endurance: 2780 kilometers, Coal capacity: 250 tons.
Conning tower armor: 0.5.
Best armor type: Steel.
Armament:
1 centrally directed 229mm L35 Gun, ammo 50 rounds maximum.
1 centrally directed 152mm L28 Gun, ammo 100 rounds maximum.
6 centrally directed 107mm L20 Guns, ammo 1080 rounds maximum.
4 locally directed 37mm L23 Guns, ammo 2000 rounds maximum.
Gunboat Koreyets
Ships in class: Koreyets, Mandzhur.
Placed in service: 1887.
Relative combat value: 303.
Standard Crew: 179.
Displacement: 1270 tons.
Dimensions: Length 63 meters, Width 11 meters, Draft 4 meters.
Maximum speed: 13 knots.
Endurance: 4929 kilometers, Coal capacity: 250 tons.
Conning tower armor: 0.5.
Best armor type: Steel.
Armament:
2 centrally directed 203mm L35 Guns, ammo 210 rounds maximum.
1 centrally directed 152mm L35 Gun, ammo 153 rounds maximum.
4 centrally directed 107mm L20 Guns, ammo 720 rounds maximum.
4 locally directed 47mm L44 Guns, ammo 1400 rounds maximum.
2 locally directed 37mm L23 Guns, ammo 1000 rounds maximum.
1 locally directed 381mm Whitehead Torpedo, ammo 2 rounds maximum.
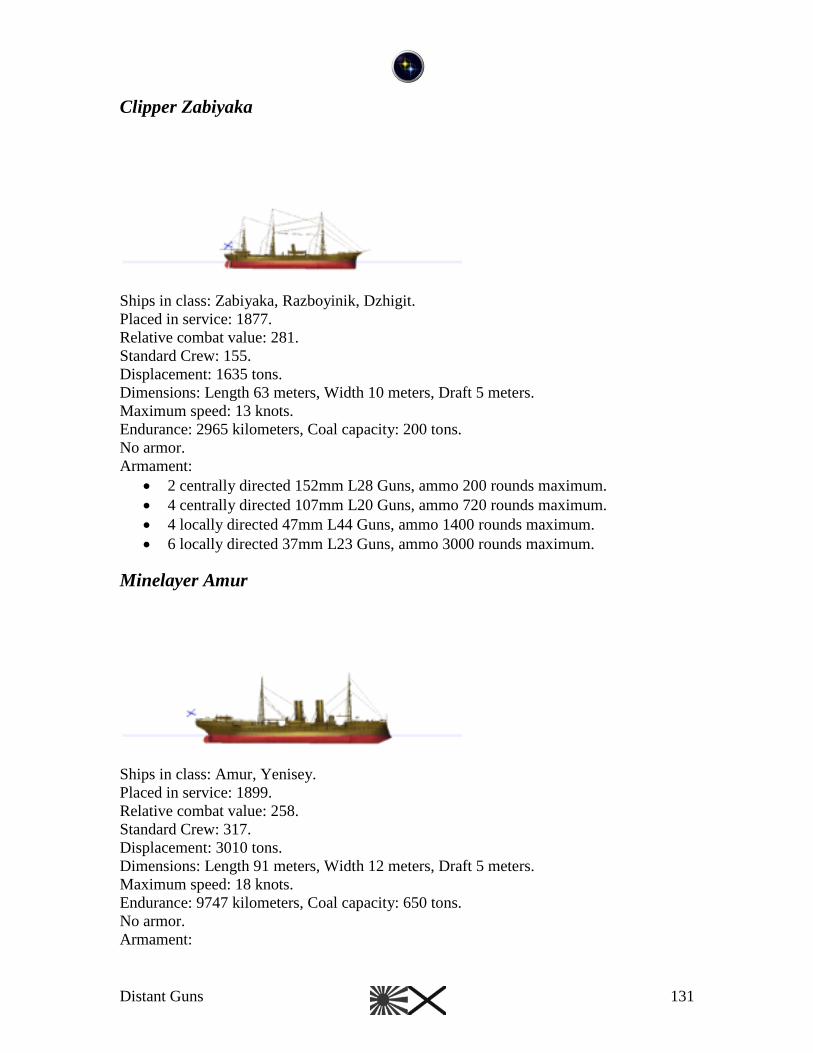
Distant Guns 131
Clipper Zabiyaka
Ships in class: Zabiyaka, Razboyinik, Dzhigit.
Placed in service: 1877.
Relative combat value: 281.
Standard Crew: 155.
Displacement: 1635 tons.
Dimensions: Length 63 meters, Width 10 meters, Draft 5 meters.
Maximum speed: 13 knots.
Endurance: 2965 kilometers, Coal capacity: 200 tons.
No armor.
Armament:
2 centrally directed 152mm L28 Guns, ammo 200 rounds maximum.
4 centrally directed 107mm L20 Guns, ammo 720 rounds maximum.
4 locally directed 47mm L44 Guns, ammo 1400 rounds maximum.
6 locally directed 37mm L23 Guns, ammo 3000 rounds maximum.
Minelayer Amur
Ships in class: Amur, Yenisey.
Placed in service: 1899.
Relative combat value: 258.
Standard Crew: 317.
Displacement: 3010 tons.
Dimensions: Length 91 meters, Width 12 meters, Draft 5 meters.
Maximum speed: 18 knots.
Endurance: 9747 kilometers, Coal capacity: 650 tons.
No armor.
Armament:
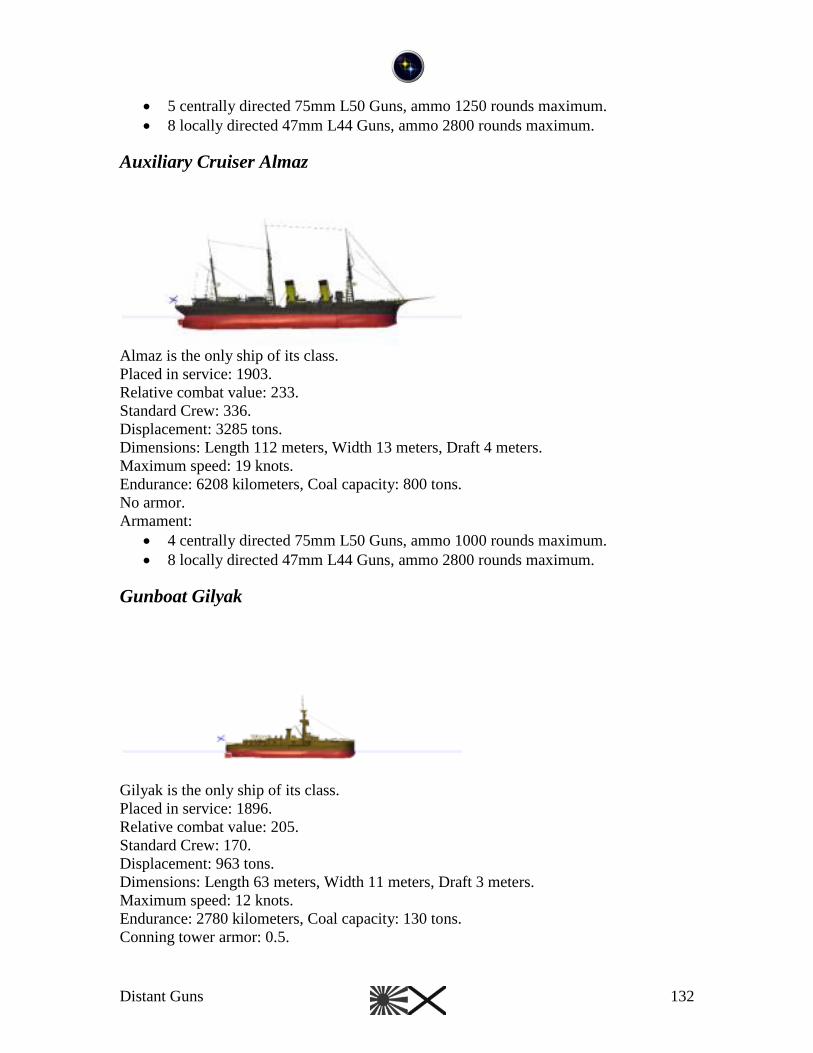
Distant Guns 132
5 centrally directed 75mm L50 Guns, ammo 1250 rounds maximum.
8 locally directed 47mm L44 Guns, ammo 2800 rounds maximum.
Auxiliary Cruiser Almaz
Almaz is the only ship of its class.
Placed in service: 1903.
Relative combat value: 233.
Standard Crew: 336.
Displacement: 3285 tons.
Dimensions: Length 112 meters, Width 13 meters, Draft 4 meters.
Maximum speed: 19 knots.
Endurance: 6208 kilometers, Coal capacity: 800 tons.
No armor.
Armament:
4 centrally directed 75mm L50 Guns, ammo 1000 rounds maximum.
8 locally directed 47mm L44 Guns, ammo 2800 rounds maximum.
Gunboat Gilyak
Gilyak is the only ship of its class.
Placed in service: 1896.
Relative combat value: 205.
Standard Crew: 170.
Displacement: 963 tons.
Dimensions: Length 63 meters, Width 11 meters, Draft 3 meters.
Maximum speed: 12 knots.
Endurance: 2780 kilometers, Coal capacity: 130 tons.
Conning tower armor: 0.5.
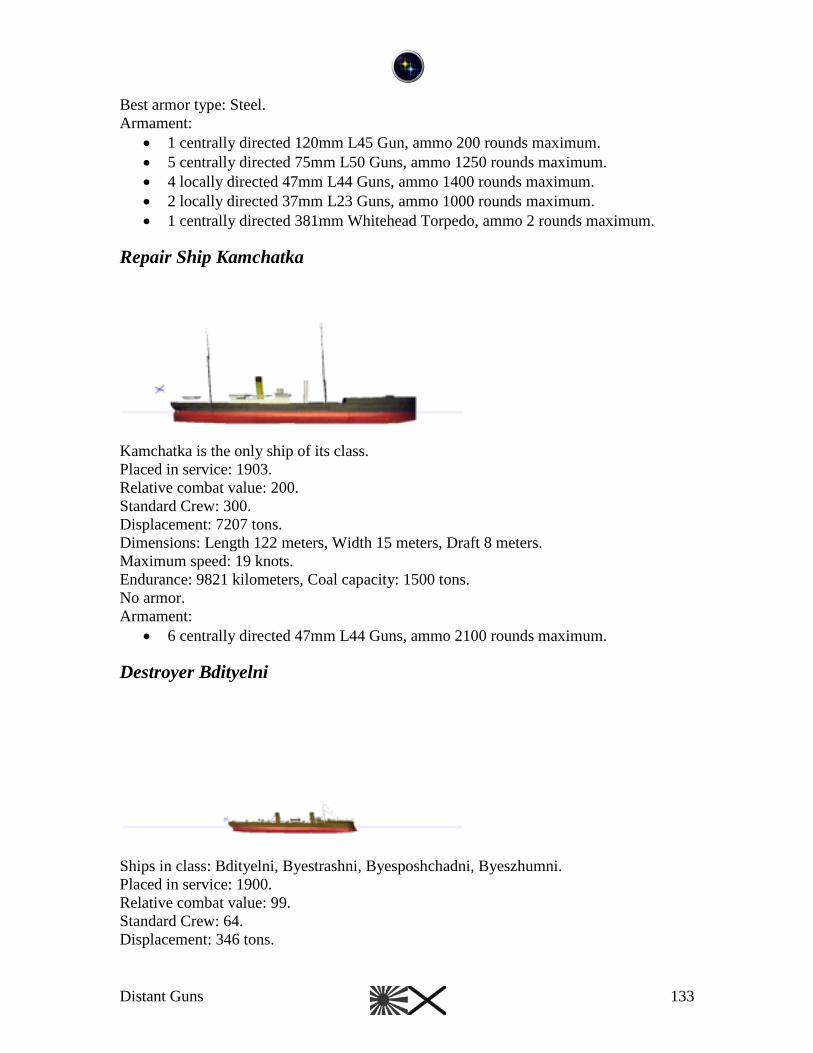
Distant Guns 133
Best armor type: Steel.
Armament:
1 centrally directed 120mm L45 Gun, ammo 200 rounds maximum.
5 centrally directed 75mm L50 Guns, ammo 1250 rounds maximum.
4 locally directed 47mm L44 Guns, ammo 1400 rounds maximum.
2 locally directed 37mm L23 Guns, ammo 1000 rounds maximum.
1 centrally directed 381mm Whitehead Torpedo, ammo 2 rounds maximum.
Repair Ship Kamchatka
Kamchatka is the only ship of its class.
Placed in service: 1903.
Relative combat value: 200.
Standard Crew: 300.
Displacement: 7207 tons.
Dimensions: Length 122 meters, Width 15 meters, Draft 8 meters.
Maximum speed: 19 knots.
Endurance: 9821 kilometers, Coal capacity: 1500 tons.
No armor.
Armament:
6 centrally directed 47mm L44 Guns, ammo 2100 rounds maximum.
Destroyer Bdityelni
Ships in class: Bdityelni, Byestrashni, Byesposhchadni, Byeszhumni.
Placed in service: 1900.
Relative combat value: 99.
Standard Crew: 64.
Displacement: 346 tons.
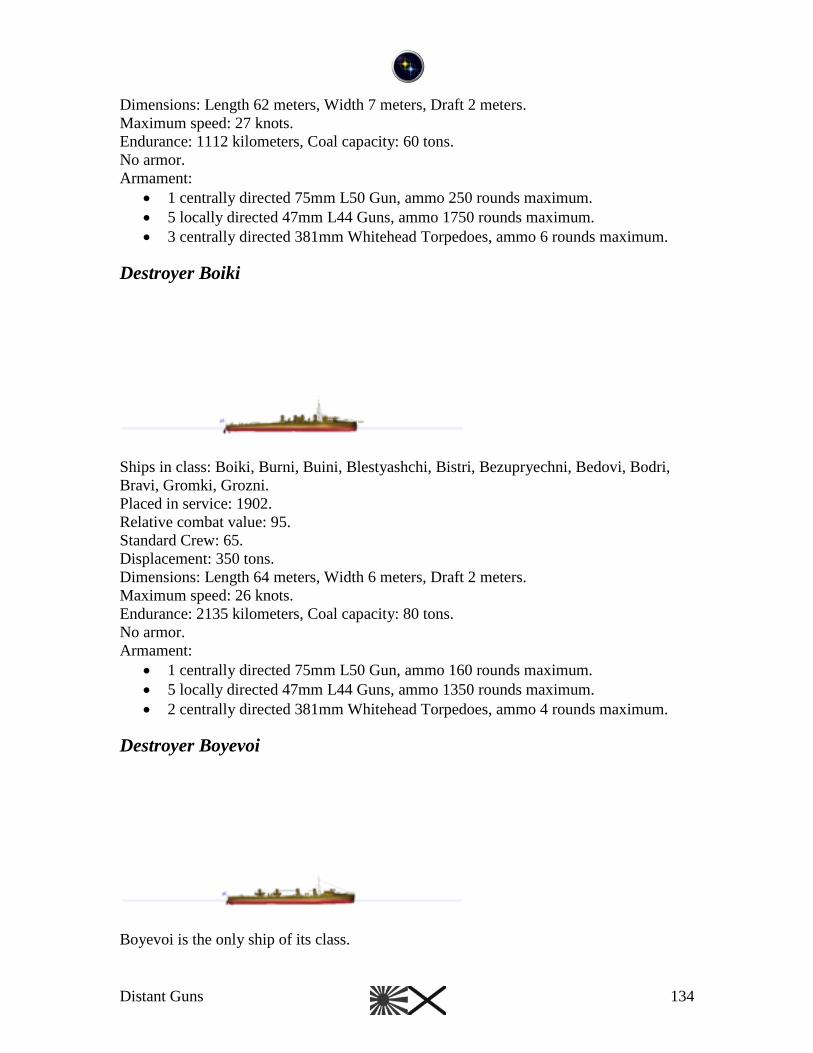
Distant Guns 134
Dimensions: Length 62 meters, Width 7 meters, Draft 2 meters.
Maximum speed: 27 knots.
Endurance: 1112 kilometers, Coal capacity: 60 tons.
No armor.
Armament:
1 centrally directed 75mm L50 Gun, ammo 250 rounds maximum.
5 locally directed 47mm L44 Guns, ammo 1750 rounds maximum.
3 centrally directed 381mm Whitehead Torpedoes, ammo 6 rounds maximum.
Destroyer Boiki
Ships in class: Boiki, Burni, Buini, Blestyashchi, Bistri, Bezupryechni, Bedovi, Bodri,
Bravi, Gromki, Grozni.
Placed in service: 1902.
Relative combat value: 95.
Standard Crew: 65.
Displacement: 350 tons.
Dimensions: Length 64 meters, Width 6 meters, Draft 2 meters.
Maximum speed: 26 knots.
Endurance: 2135 kilometers, Coal capacity: 80 tons.
No armor.
Armament:
1 centrally directed 75mm L50 Gun, ammo 160 rounds maximum.
5 locally directed 47mm L44 Guns, ammo 1350 rounds maximum.
2 centrally directed 381mm Whitehead Torpedoes, ammo 4 rounds maximum.
Destroyer Boyevoi
Boyevoi is the only ship of its class.
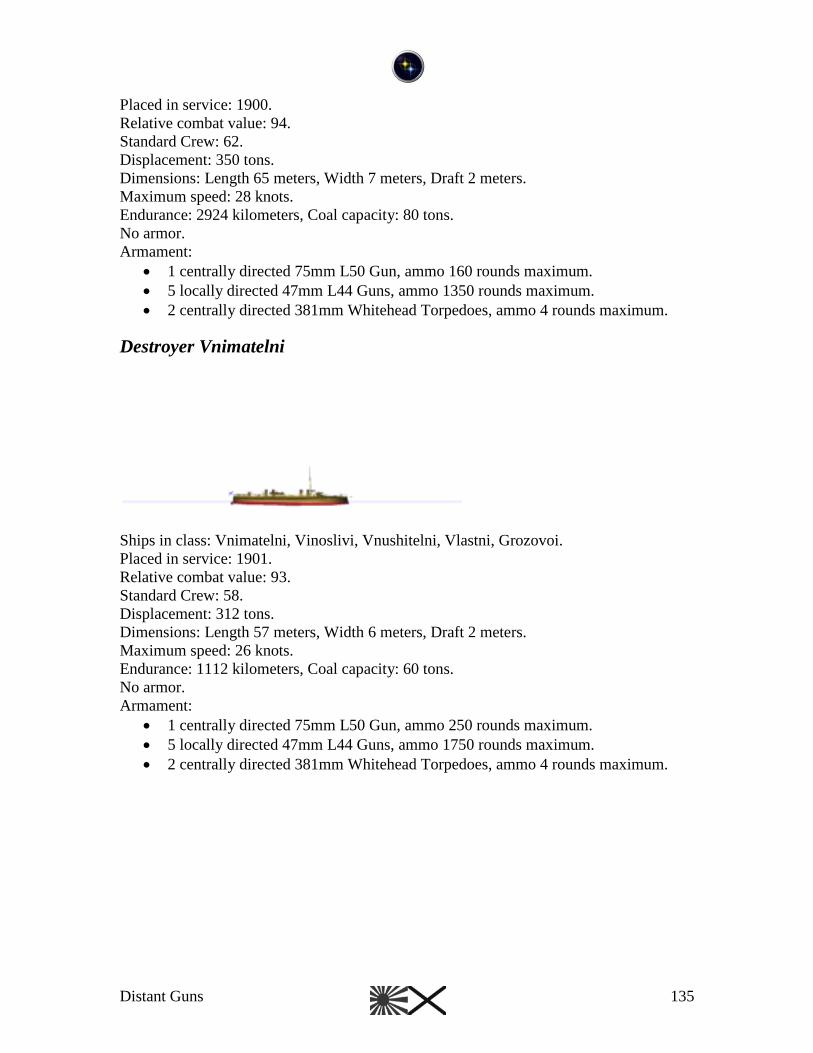
Distant Guns 135
Placed in service: 1900.
Relative combat value: 94.
Standard Crew: 62.
Displacement: 350 tons.
Dimensions: Length 65 meters, Width 7 meters, Draft 2 meters.
Maximum speed: 28 knots.
Endurance: 2924 kilometers, Coal capacity: 80 tons.
No armor.
Armament:
1 centrally directed 75mm L50 Gun, ammo 160 rounds maximum.
5 locally directed 47mm L44 Guns, ammo 1350 rounds maximum.
2 centrally directed 381mm Whitehead Torpedoes, ammo 4 rounds maximum.
Destroyer Vnimatelni
Ships in class: Vnimatelni, Vinoslivi, Vnushitelni, Vlastni, Grozovoi.
Placed in service: 1901.
Relative combat value: 93.
Standard Crew: 58.
Displacement: 312 tons.
Dimensions: Length 57 meters, Width 6 meters, Draft 2 meters.
Maximum speed: 26 knots.
Endurance: 1112 kilometers, Coal capacity: 60 tons.
No armor.
Armament:
1 centrally directed 75mm L50 Gun, ammo 250 rounds maximum.
5 locally directed 47mm L44 Guns, ammo 1750 rounds maximum.
2 centrally directed 381mm Whitehead Torpedoes, ammo 4 rounds maximum.
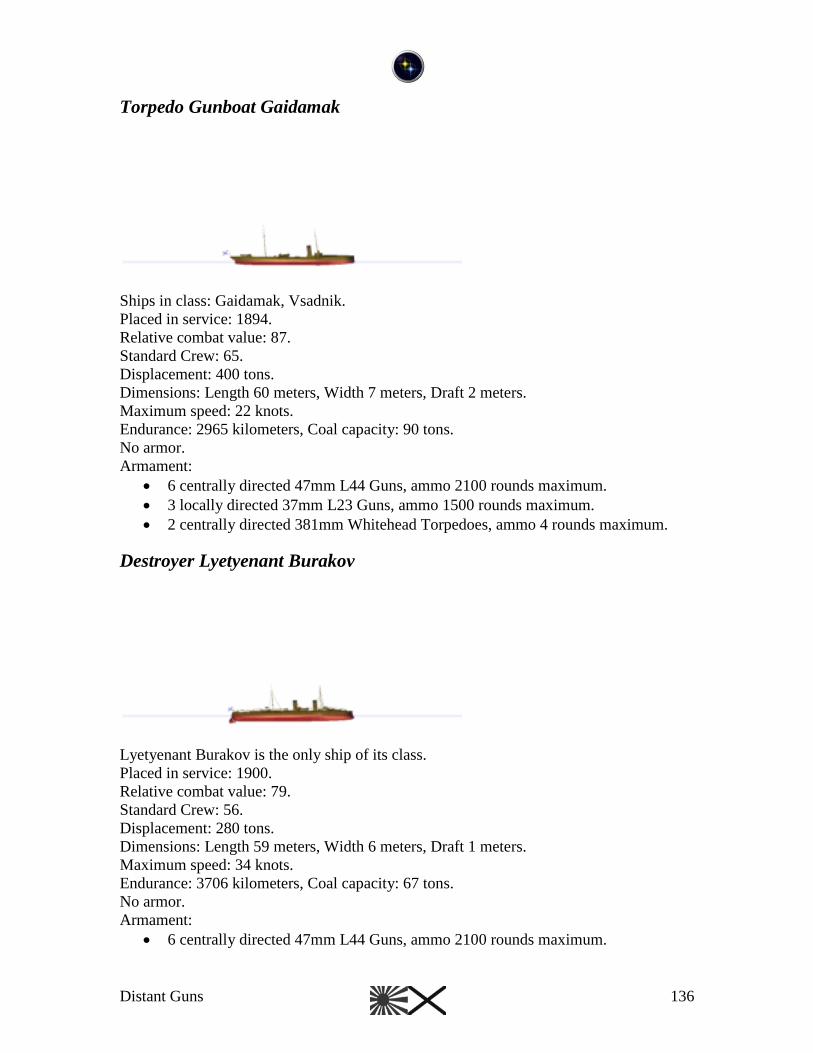
Distant Guns 136
Torpedo Gunboat Gaidamak
Ships in class: Gaidamak, Vsadnik.
Placed in service: 1894.
Relative combat value: 87.
Standard Crew: 65.
Displacement: 400 tons.
Dimensions: Length 60 meters, Width 7 meters, Draft 2 meters.
Maximum speed: 22 knots.
Endurance: 2965 kilometers, Coal capacity: 90 tons.
No armor.
Armament:
6 centrally directed 47mm L44 Guns, ammo 2100 rounds maximum.
3 locally directed 37mm L23 Guns, ammo 1500 rounds maximum.
2 centrally directed 381mm Whitehead Torpedoes, ammo 4 rounds maximum.
Destroyer Lyetyenant Burakov
Lyetyenant Burakov is the only ship of its class.
Placed in service: 1900.
Relative combat value: 79.
Standard Crew: 56.
Displacement: 280 tons.
Dimensions: Length 59 meters, Width 6 meters, Draft 1 meters.
Maximum speed: 34 knots.
Endurance: 3706 kilometers, Coal capacity: 67 tons.
No armor.
Armament:
6 centrally directed 47mm L44 Guns, ammo 2100 rounds maximum.
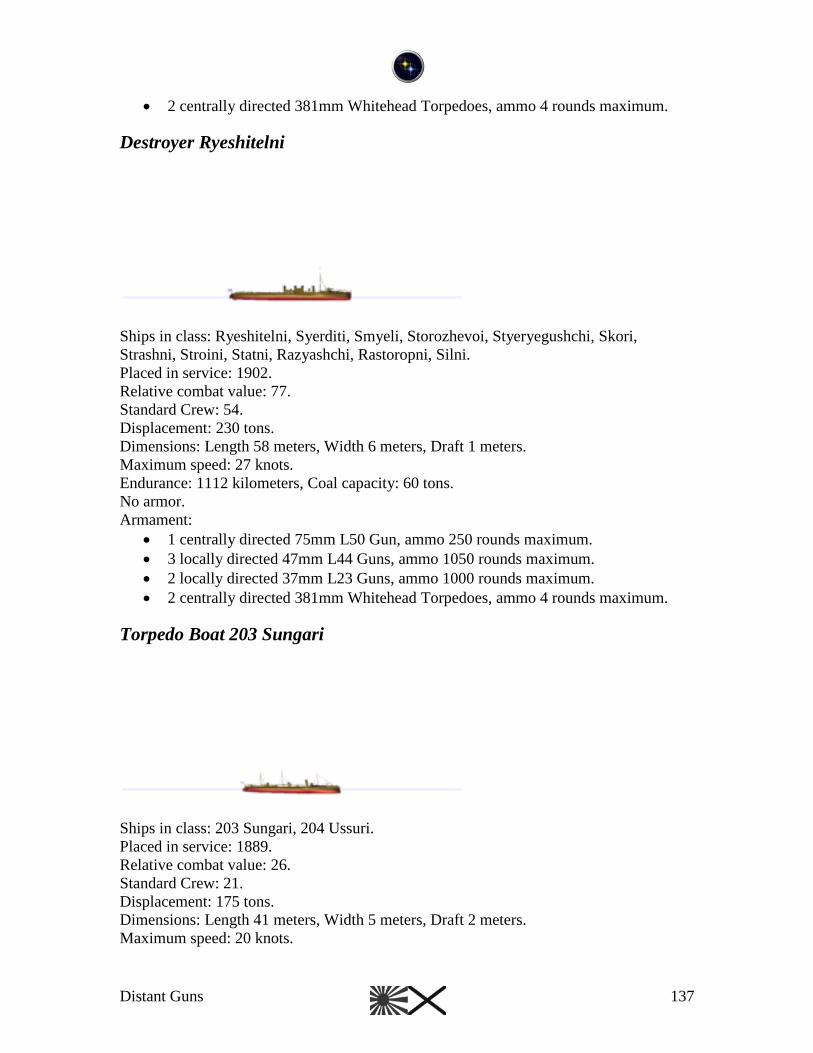
Distant Guns 137
2 centrally directed 381mm Whitehead Torpedoes, ammo 4 rounds maximum.
Destroyer Ryeshitelni
Ships in class: Ryeshitelni, Syerditi, Smyeli, Storozhevoi, Styeryegushchi, Skori,
Strashni, Stroini, Statni, Razyashchi, Rastoropni, Silni.
Placed in service: 1902.
Relative combat value: 77.
Standard Crew: 54.
Displacement: 230 tons.
Dimensions: Length 58 meters, Width 6 meters, Draft 1 meters.
Maximum speed: 27 knots.
Endurance: 1112 kilometers, Coal capacity: 60 tons.
No armor.
Armament:
1 centrally directed 75mm L50 Gun, ammo 250 rounds maximum.
3 locally directed 47mm L44 Guns, ammo 1050 rounds maximum.
2 locally directed 37mm L23 Guns, ammo 1000 rounds maximum.
2 centrally directed 381mm Whitehead Torpedoes, ammo 4 rounds maximum.
Torpedo Boat 203 Sungari
Ships in class: 203 Sungari, 204 Ussuri.
Placed in service: 1889.
Relative combat value: 26.
Standard Crew: 21.
Displacement: 175 tons.
Dimensions: Length 41 meters, Width 5 meters, Draft 2 meters.
Maximum speed: 20 knots.
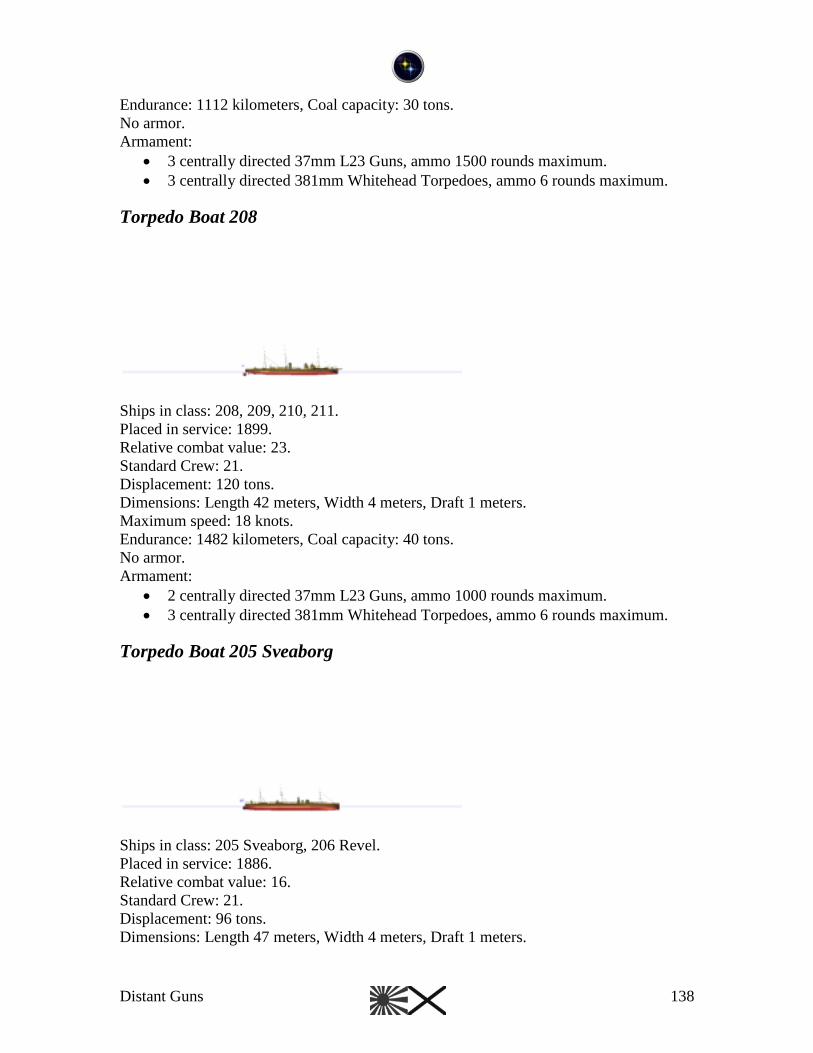
Distant Guns 138
Endurance: 1112 kilometers, Coal capacity: 30 tons.
No armor.
Armament:
3 centrally directed 37mm L23 Guns, ammo 1500 rounds maximum.
3 centrally directed 381mm Whitehead Torpedoes, ammo 6 rounds maximum.
Torpedo Boat 208
Ships in class: 208, 209, 210, 211.
Placed in service: 1899.
Relative combat value: 23.
Standard Crew: 21.
Displacement: 120 tons.
Dimensions: Length 42 meters, Width 4 meters, Draft 1 meters.
Maximum speed: 18 knots.
Endurance: 1482 kilometers, Coal capacity: 40 tons.
No armor.
Armament:
2 centrally directed 37mm L23 Guns, ammo 1000 rounds maximum.
3 centrally directed 381mm Whitehead Torpedoes, ammo 6 rounds maximum.
Torpedo Boat 205 Sveaborg
Ships in class: 205 Sveaborg, 206 Revel.
Placed in service: 1886.
Relative combat value: 16.
Standard Crew: 21.
Displacement: 96 tons.
Dimensions: Length 47 meters, Width 4 meters, Draft 1 meters.
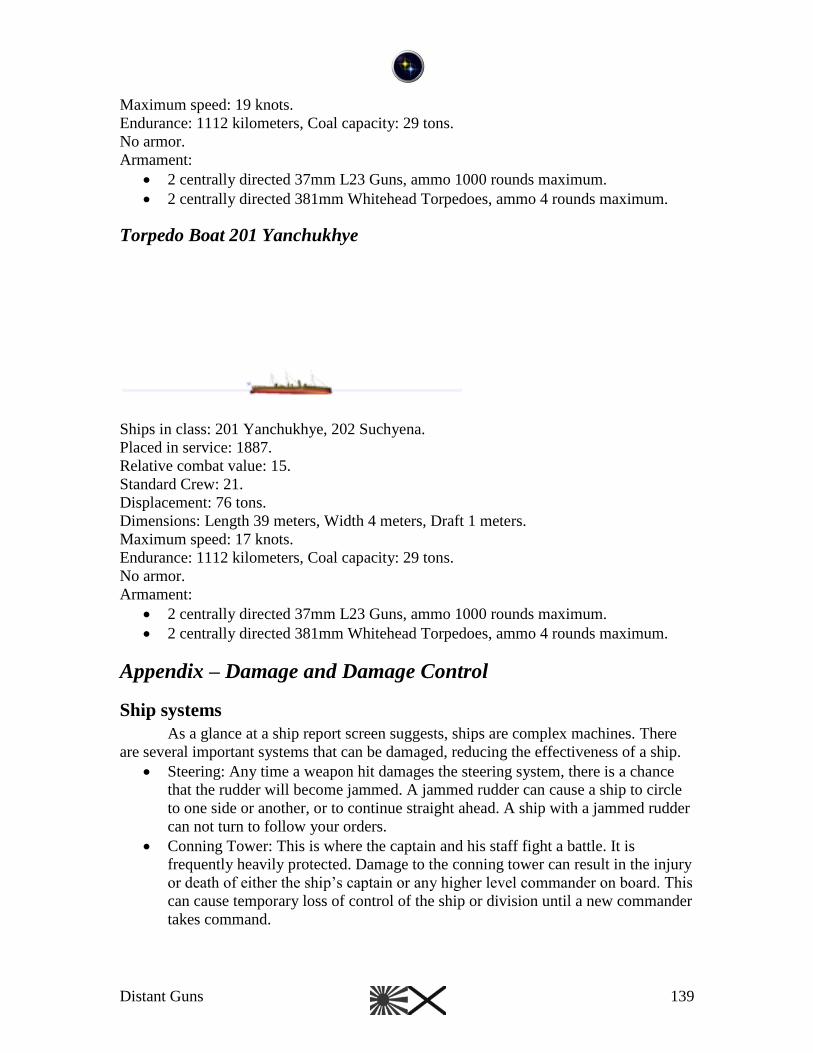
Distant Guns 139
Maximum speed: 19 knots.
Endurance: 1112 kilometers, Coal capacity: 29 tons.
No armor.
Armament:
2 centrally directed 37mm L23 Guns, ammo 1000 rounds maximum.
2 centrally directed 381mm Whitehead Torpedoes, ammo 4 rounds maximum.
Torpedo Boat 201 Yanchukhye
Ships in class: 201 Yanchukhye, 202 Suchyena.
Placed in service: 1887.
Relative combat value: 15.
Standard Crew: 21.
Displacement: 76 tons.
Dimensions: Length 39 meters, Width 4 meters, Draft 1 meters.
Maximum speed: 17 knots.
Endurance: 1112 kilometers, Coal capacity: 29 tons.
No armor.
Armament:
2 centrally directed 37mm L23 Guns, ammo 1000 rounds maximum.
2 centrally directed 381mm Whitehead Torpedoes, ammo 4 rounds maximum.
Appendix – Damage and Damage Control
Ship systems
As a glance at a ship report screen suggests, ships are complex machines. There
are several important systems that can be damaged, reducing the effectiveness of a ship.
Steering: Any time a weapon hit damages the steering system, there is a chance
that the rudder will become jammed. A jammed rudder can cause a ship to circle
to one side or another, or to continue straight ahead. A ship with a jammed rudder
can not turn to follow your orders.
Conning Tower: This is where the captain and his staff fight a battle. It is
frequently heavily protected. Damage to the conning tower can result in the injury
or death of either the ship‟s captain or any higher level commander on board. This
can cause temporary loss of control of the ship or division until a new commander
takes command.

Distant Guns 140
Propulsion: Hits on the propulsion system will decrease the maximum speed of
the ship as well as its ability to pump water. Propulsion damage has both
temporary and permanent components.
Flotation: Hits on the ship‟s hull cause holes, allowing flooding to occur.
Flooding damage has both temporary and permanent components. Flooding itself
will not sink a ship. If the propulsion system is intact, water accumulation due to
flooding can usually be controlled. But if a ship‟s pumping capacity is reduced
below the rate of flooding, water will accumulate until the ship sinks. Flooding
damage is divided to port and starboard components. Excessive accumulation of
water on one side of a ship can introduce a list, or lean, to the ship. Counter-
flooding to control the list is automatic, but has its limits. A list can impact
weapon accuracy, and in severe cases can cause a ship to capsize. Heavily flooded
ships will have their maximum speed reduced even if the propulsion system is
undamaged.
Searchlights: Searchlights aid in targeting at night. Damaged or destroyed
searchlights will not perform this function.
Magazines: Ammo is stored in the ship‟s magazines. Any hit penetrating to the
magazines has a chance of causing a catastrophic explosion.
Masts: Normally, you can control any ship within visible range of a ship with a
commander on board. If the commander‟s ship‟s masts are destroyed, the control
range drops to ½ the visibility radius.
Weapons: Damaged or destroyed weapons will not fire. Damaged weapons may
be repaired during a battle. Destroyed weapons may only be repaired at a naval
base during a campaign game.
Armor: Armor protects many vital ship systems. In order to damage a system, any
armor protecting it must be penetrated. Some weapons are protected by armor.
Conning towers are frequently heavily protected. Belt armor protects a ship‟s
internal systems from hits impacting the center half of a ship below 1/3 the ship‟s
height. Hull armor protects a ship from hits above the belt to 2/3 the ship‟s
height, as well as hits to 1/3 the ship‟s height extending most of the way from
bow to stern. Deck armor protects a ship‟s internal systems from shells impacting
in a downward direction. In some cases, the deck armor is angled down toward
the water line at the edges so that it forms a second, sloped layer of protection
behind the main belt area. Where this is the case, the angled thickness of the slope
is added to the ship‟s belt armor protection.
Crew: The crew operates the ship. Reductions in crew result in declining rates of
fire for weapons and reduced damage control capacity. Crew can be killed by
direct weapon effects or by fire.
Temporary and Permanent Damage
The damage reported on the ship report screen is temporary damage. Temporary
damage can be repaired during a battle, but only down to ½ the highest previous level of
temporary damage. This repair limit is a permanent damage level. Any time a ship
receives flooding or propulsion damage, permanent damage levels are raised if necessary
to equal ½ the temporary damage. Permanent damage can only be repaired at a naval
Distant Guns 141
base during a campaign game. This means that if a ship‟s propulsion system receives
40% damage during combat, repairs can only reduce the damage level to 20%.
Fire
Any weapon hit has the potential to cause or spread fires on a ship. Larger
weapons are more likely to start larger fires. Weapons and propulsion systems can be
directly damaged, and crewmen can be killed by fires. Fires are self perpetuating. Once
begun, even a small fire can flare out of control. Fires are a serious threat to a ship, so a
portion of the crew will drop whatever they are doing to fight fires. Firefighting will
continue until all fires are extinguished. Crew commitments to firefighting can have a
serious impact on other damage control efforts and weapon rates of fire.
Damage Control
When ships are damaged, the crews will try to effect repairs. Damaged weapons
and propulsion systems can be repaired, fires are fought, and flooding is brought under
control. Damage is repaired most rapidly by full strength, high quality crews. Fires,
particularly if they are out of control, and crew losses interfere with repairs.
Appendix – Concepts Selected Ship – If a ship is selected (by left click or area selection) it is highlighted with
a colored halo. More than one ship can be selected. Only the selected ships, or other ships
in their divisions, are affected by orders given using the flyout control panel.
Formed on division leader – In this period, ships usually maneuvered by division. There
are a number of reasons for this. One reason will immediately become apparent if you
scatter your formations. It is difficult to coordinate the actions of scattered ships. You
will also only be allowed to issue orders to ships that can see their division leader or are
currently formed on the division leader. Once outside the control radius from the division
leader, ships not formed on their division leaders will act independently. In most cases,
they will attempt to sail toward the division leader for orders. The control radius is
usually equal to the scenario visibility distance, but can be reduced by smoke or if the
division leader suffers mast damage. All ships in line astern behind their division leaders
at the beginning of a tactical scenario are considered formed on their division leader.
They will remain formed on their division leader unless battle damage forces them out of
line, a maneuver order other than “Turn by Succession” is issued to them, or they fail a
quality check if a turn by succession order is interrupted before it is complete. (The latter
is what happened to the Russians at Tsushima).
Maintaining formation – You can easily maintain your division formations as long as
you are careful and your ships are not damaged. Use “Turn by Succession” whenever
possible. Do not interrupt maneuvers in progress. Try to use “Immediate Turn” only
outside of effective engagement range from the enemy and return to line astern by use of
“Return to Line” before you get too close. If you start noticing significant damage
accumulations, you are probably too close to safely use immediate turns. Do not use
“Independent Turn” unless you really don‟t care about maintaining formation. Avoid
closing to within 2000 meters from other formations, whether friendly or enemy. Your
Distant Guns 142
ships will usually maneuver to avoid imminent collisions, and this will disrupt your
formation. Keep an eye on your ships‟ maximum speeds. If battle damage reduces a
ship‟s speed below that of the division leader, it will not be able to maintain its position
in the division formation. It will remain “formed on the division leader”, and it will
continue to try to reach its position. Note that ships heavily dependent upon torpedo
armament will have to come close enough to the enemy that their formations will almost
certainly be disrupted. Also note that an armored cruiser will not bother to avoid a
collision with a destroyer.
Appendix – Copyright and Credits Copyright Notice
Storm Eagle Studios
END USER LICENSE AGREEMENT
July 1, 2006
This agreement covers all software licenses purchased from Storm Eagle Studios,
including all titles listed herein.
Distant Guns - The Russo-Japanese War at Sea, copyright Albireo Studios L.L.C., 2001-
2006, licensed by Storm Eagle Studios, All Rights Reserved. Distant Guns, Storm Eagle
and Storm Eagle Studios are trademarks of Albireo Studios, L.L.C.
Distant Guns: The Russo-Japanese War at Sea (the "Product") is intended solely for your
personal non-commercial home entertainment use. Albireo Studios L.L.C. and its
licensors or assigns retain all right, title and interest in the Product, including all
intellectual property rights embodied therein and derivatives thereof. The Product,
including, without limitation, all code, data structures, characters, images, sounds, text,
screens, game play, derivative works and all other elements of the Product may not be
copied, resold, rented, leased, distributed (electronically or otherwise), used on a pay-per-
play, coin-op or other for-charge basis, or for any commercial purpose. Any permission
granted herein is provided on a temporary basis and can be withdrawn by Albireo Studios
L.L.C. at any time. All rights not expressly granted are reserved.
Any and all scenarios created by Storm Eagle Studios software products, including, but
not limited to, Random Battle Generators and Scenario Editors, are the sole property of
Storm Eagle Studios. Scenarios and any add-ons created in this manner can be distributed
by the end user, providing that no monetary gain be received for said distribution. Storm
Eagle Studios or its assigns, reserves all rights to distribute any and all scenarios and add-
ons created in this manner for Storm Eagle Studios games, unless otherwise specified.
The product is trial ware. You may evaluate it for period of 30 days or 30 plays, which
ever occurs first. After this period you may not use the product unless you have
purchased a license by registering.
Distant Guns 143
You may share the unregistered product with other people only if the product is
distributed in its original setup package.
You may use only one copy of the registered product on one single computer, provided
that the product is in use on only one computer at any time. Because the product is trial
ware and that means it is freely available, you may create unlimited number of copies for
Archive or backup. You may not reverse engineer, decompile or disassemble the product
and modify the computer program or merge all or any part of it in another program.
Liability: The product is provided on an "as is" basis, without any other warranties, or
conditions, express or implied, including but not limited to warranties of merchantable
quality, merchantability or fitness for a particular purpose, or those arising by law,
statute, usage of trade or course of trading.
The entire risk as to the results and performance of the product is assumed by you.
Albireo Studios L.L.C, it's subsidiaries, and partners shall not have any liability to you or
any other person or entity for any indirect, incidental, special or consequential damages
whatsoever, including but not limited to loss of revenue of profit, lost or damaged data or
other commercial or economic loss, even if we have been advised of the possibility of
such damages or they are foreseeable; or for claims by a third party. Our maximum
aggregate liability to you shall not exceed the amount paid by you for the registration of
the product.
Unless otherwise specified in the product description, all software licenses purchased are
entitled to a 90 Day tech support warranty and (1) One year of software updates, should
these become available during this period. The need for updates will be determined solely
by Storm Eagle Studios, or its' assigns, and made publicly available to end users.
Unless specifically specified, these updates do not include scenario add-ons, game
expansions, campaign games, or anything of this nature. Storm Eagle Studios reserves the
right to add any updates or additions to its products without notification to end users.
Tech support must be obtained by the end user using the Storm Eagle Studios Tech
Support Ticket System available on its website, or by emailing
[email protected] detailing the issues.
Using the product indicates your acknowledgment that you have read this end user
license agreement and agree to its terms.
Credits
Game Design – Norm Koger, Jim Rose
Programming, 2d and 3d Art – Norm Koger
3d Ship Models, Building Textures – Steve Estes
Historical Research, Battle Scenarios – Norm Koger, Bill Madison
Playtest – Norm Koger, Jim Rose, Bill Madison, Ian Thompson, David Manley
Distant Guns 144
Appendix – Battleset 1 Scenarios The following scenarios are included with Battleset 1, and are all available for
play to registered users of the game. We have arranged them here in chronological order.
Only the Ulsan scenario is available when the game is in demo / trial mode.
Some scenarios are available in standard and “engaged” variations. The engaged
variants begin a bit later than the standard scenarios, at about the point where typical
historical accounts usually pick up. Standard variants are generally longer scenarios,
beginning at about the point where forces first make contact.
Bubnov‟s Surprise, Ulsan (Alternate), and Ullung are hypothetical. The other
scenarios are historical battles.
Careful readers will note occasional differences in spelling of Russian or Japanese
names in scenario briefings. This is typical of records of the war, where both sides used
alphabets that do not map exactly to ours. People who study the period tend to have
settled on favorite spellings, based upon their favorite references. Rather than forcing
everyone to obey an arbitrary standard that nobody would agree upon, we have left
original authors‟ spellings intact.
Port Arthur - 12:20 A.M., February 9th, 1904
Location: 39 North, 121 East
5 Kilometers southeast of Port Arthur
Sky: fair
Rain/Haze/Fog:moderate
Temperature: -5 C.
Visibility: 2.5 Km
Wind: 2 knots, west northwest
Sea State: 1, Waves <1 meter
- History -
During the evening of 8 February Admiral Togo summoned his destroyer captains
to his flagship. The group crowded around the large table in Togo's cabin. Spread out
before the Admiral, were two charts, one of the Yellow Sea and a large scale one of the
Port Arthur approaches. Copies of the Port Arthur chart were distributed among the
officers of the First Flotilla, whose attention was directed to the marks indicating the
reputed anchorage of each Russian warship outside of the entrance.
Togo stated that the Flotillas were to attack the Russians that very night at Port
Arthur. He reminded them of the absolute necessity of self-concealment and to screen
their faint stern lights, prevent telltale funnel sparks and to attain maximum speed only at
the moment of attack. Details of the execution of the attack were expressly left to the
division commanders.
Rarely have two adversaries presented a bigger contrast at the beginning of a war.
While the Japanese were fully prepared, the Russians, confident in their strength, had
scarcely moved a ship or a company of troops to a war footing. Doubtless the Tsar's most
recent instruction, that if war came it would be for the Japanese, not the Russians to fire
the first shot, weighed heavily upon his commanders.
Distant Guns 145
Owing to the false information Togo had received regarding the sortie of Russian
battleships from Port Arthur he decided to hold back his battle fleet and to split his
destroyers into two attack flotillas. The First Flotilla consisting of the 1st, 2nd, and 3rd
divisions, for Port Arthur, and the Second consisting of the 4th and 5th divisions for
Dalny. It was an unlucky arrangement by which nearly half the weight of the attack was
lost, and ill luck pursued it from the first.
At about 2230 hours the First Flotilla sighted the lights of the patrolling Russian
destroyers. The Japanese succeeded in evading them, but during the maneuver two of the
Japanese destroyers collided and the divisions lost contact with each other. The First
Division continued on its course and soon sighted the flashes of the Liau-ti-shan
lighthouse, by which it was able to fix its position. Then seeing the Russian searchlights
sweeping the water, the First Division reduced speed and approached quietly. It was now
about 0020 hours, the moon had not yet risen and the sea reflected only the rays of the
searchlights.
Still unobserved, the Japanese could make out the indistinct forms of several large
ships. It was at that point that the commander of the First Division gave the order to
attack. The lead destroyer moved in and at 0028 hours launched a torpedo against a three-
funneled Russian ship and then another against a two-funneled vessel. As the destroyer
sped away at full speed the crew heard the sound of explosions. The second destroyer,
following in the wake of the first, fired a torpedo at the Retvizan and then made off at full
speed.
The two other Japanese divisions, several of whose ships had lost contact with
each other after the earlier collision, were less successful. They arrived too late to benefit
from the surprise factor, and made their attacks individually rather than by division. The
Russians were fully awake now, and their searchlights and gunfire made accurate and
close range torpedo firing impossible. Oboro made the last attack, around 0200 hours.
This ship had been damaged in the collision and had reached Port Arthur an hour after
her consorts; long after the firing had ceased. Oboro was soon spotted, and her attack
produced no results.
Despite ideal conditions for a torpedo attack, the results were relatively poor.
Evidently the torpedo was not quite the devastating weapon that had been anticipated. Of
the sixteen torpedoes fired that night, all but three either missed or failed to explode. But
luck was against the Russians in so far as two of those three torpedoes hit their best
battleships. Retvizan and Tsarevich were put out of action for weeks, as was the cruiser
Pallada.
- Missions -
The Japanese Player should engage the Russian force and damage or destroy as
much of it as possible. The Russian Player should attempt to limit damage to his force,
sending damaged ships into Port Arthur to prevent their loss.
ORDER OF BATTLE
Russian Imperial Fleet
Distant Guns 146
[Inner Roadstead]
(Vice Admiral O. Stark)
Battleship Petropavlovsk
Battleship Poltava
Battleship Peresvyet
Battleship Pobyeda
Battleship Sevastopol
[Center Roadstead ]
Battleship Tsesarevitch
Battleship Retvizan
[Outer Roadstead]
Protected Cruiser Pallada
Protected Cruiser Novik
Protected Cruiser Boyarin
Protected Cruiser Askold
[Center Roadstead Scouts]
Protected Cruiser Diana
Armored Cruiser Bayan
[Independent Command]
Auxiliary Cruiser Angara
[Duty Force]
Destroyer Rastoropni
Destroyer Byestrashni
Force Strength:31283.
Imperial Japanese Navy
[1st Destroyer Division]
(Captain S. Asai)
Destroyer Shirakumo
Destroyer Asashio
Destroyer Kasumi
Destroyer Akatsuki
[2nd Destroyer Division(-)]
(Commander E. Ishida)
Destroyer Ikazuchi
Destroyer Inadzuma
Destroyer Usugumo
Distant Guns 147
[3rd Destroyer Division(-)]
Destroyer Shinonome
Destroyer Sazanami
[Destroyer Oboro]
Destroyer Oboro
Force Strength:1678.
Distant Guns 148
Chemulpo - 12:00 P.M., February 9th, 1904
Location: 37 North, 126 East
21 Kilometers southwest of Chemulpo
Sky: mostly clear
Rain/Haze/Fog:none
Temperature: 0 C.
Visibility: 36.0 Km
Wind: 10 knots, north northwest
Sea State: 2, Waves <1 meter
- History -
Despite all the attention it has received from historians, the attack on Port Arthur
was just a covering operation for the real target of Japan's opening move of the war, the
invasion of Korea at Chemulpo. This critical operation was given to Rear Admiral Uriu
Sotokichi.
The approach to the port lies between two islands, Richy to the north and Yung-
hung-do to the south. Off the south coast of Richy lies the small Philip Island, and north
of Yung-hung-do are reefs ending in the Pender Rock. Between this rock and Philip
Island is a fairway nearly four miles wide. About three miles inside this line lays the
Island of Yodolmi, and here begins the real entrance to the port, a channel nearly ten
miles long running roughly northeast up to the place where Rear Admiral Uriu intended
to land his troops.
About seven miles up the channel from Yodolmi the Russian cruiser Varyag and
gunboat Korietz were anchored. Just to make matters more interesting four neutral
vessels were also present in the anchorage, Talbot (Great Britain), Pascal (France), Elba
(Italy) and Vicksburg (United States). Uriu reasoned that if the Russians remained where
they were, in the midst of the neutral ships, they could not possibly attack his transports
and if they came out to do battle he had ample force to destroy them.
Uriu ordered the Chiyoda, Takachiho, Asama and the torpedo-boats to proceed up
the channel with the troop-ships to commence the debarkation at once while the Naniwa,
Niitaka and Akashi lay to the westward of Yodolmi Island.
The Japanese advance detachment entered Chemulpo and moored near the
Russians, while the soldiers streamed ashore in disembarkation operations that continued
through that night in which Togo's assault was being delivered at Port Arthur. To the
amazement of the tense Japanese, the crews of Varyag and Korietz seemed as phlegmatic
and casual as usual, airing out bunting and leaving out booms as though all were well in
the affairs of nations. By the next morning the transports had discharged their passengers
and withdrawn from the harbor, along with all of the Japanese men-of-war except
Chiyoda. The latter delivered to Captain Rudneff of Varyag an ultimatum from Admiral
Uriu to vacate the harbor by noon and to the commanding officers of the neutral warships
a request that they shift their berths to a safe corner. Talbot's skipper was the future
Admiral Sir Lewis Bayly and, despite the Anglo-Japanese Alliance and its unwritten
implications, he protested as senior officer present against any violation of Korean
neutrality, a measure in which the American captain refused to join. Rudneff spared Uriu
Distant Guns 149
the necessity of making a decision with respect to a harbor attack. Declining to be trapped
like a bird in a cage, he resolved to make a hopeless break for the open sea.
True to the general conditions prevailing in the Russian Navy, Varyag was able to
attain a scant two-thirds of her maximum speed. Korietz was even slower and of no
combat value anyway but bravely insisted upon tagging along. In formidable array stood
the Japanese cruisers. Asama alone was capable of disposing of the weaker Russians but
Togo, like Fisher in dispatching Invincible and Inflexible to sink Von Spee's inferior
squadron, purposely had sent a force that he was sure would be overwhelming.
Shortly before noon, Korietz started down the channel directly past the Japanese
line and soon was overtaken by Varyag. The Japanese had nothing to worry about. They
let Asama's 8" rifles do the heavy damage of which they were capable at a range
reasonably safe from Varyag's wildly inaccurate return fire. The other Japanese cruisers,
particularly the flagship Naniwa, contributed superfluous support and attacked Korietz
without effect. The latter kept partly behind the shelter of one of the islands in the
vicinity and in mid-afternoon she followed the battered Varyag back to the harbor, where
both took refuge near the neutral warships. Their crews then scuttled the ships.
- Missions -
The Japanese Player should intercept the Russian force and damage or destroy as
much of it as possible. The Russian Player should attempt to slip past the Japanese force
and move toward Port Arthur.
ORDER OF BATTLE
Russian Imperial Fleet
[Independent Cruiser Squadron]
(Captain V.Rudnyev)
Protected Cruiser Varyag
Gunboat Koreyets
Force Strength:1477.
Imperial Japanese Navy
[Second Division]
(Rear Admiral Uryu S.)
Armored Cruiser Asama
Armored Cruiser Chiyoda
Protected Cruiser Naniwa
Protected Cruiser Niitaka
Protected Cruiser Takachiho
Protected Cruiser Akashi
[9th Torpedo Boat Division]
Distant Guns 150
Torpedo Boat Aotaka
Torpedo Boat Hato
Torpedo Boat Kari
Torpedo Boat Tsubame
[14th Torpedo Boat Division]
Torpedo Boat Chidori
Torpedo Boat Hayabusa
Torpedo Boat Manazuru
Torpedo Boat Kasasagi
Force Strength:10686.

Distant Guns 151
Liau-ti-shan - 4:00 A.M., March 10th, 1904
Location: 39 North, 121 East
8 Kilometers southwest of Port Arthur
Sky: fair
Rain/Haze/Fog:none
Temperature: 15 C.
Visibility: 3.6 Km
Wind: 3 knots, southwest
Sea State: 1, Waves <1 meter
- History -
At midnight, March 10th, 1904, a force of Japanese torpedo boats was spotted and
fired upon by shore batteries protecting Port Arthur. Newly arrived Russian Admiral
Makarov decided to send two divisions of destroyers on separate missions to attack and
disperse Japanese light forces that might be preparing yet another of their frequent night
torpedo attacks. One division, under Captain N.A. Matusyevich, sailed from Port Arthur
at 2:40 A.M. with orders to patrol west toward the Liau-ti-shan lighthouse. There, at 4:00
A.M., they encountered the Japanese First Destroyer Division (Captain S. Asai),
supported by the cruiser Tatsuta, which was operating under orders to destroy any
Russian forces operating outside of Port Arthur to guard against torpedo attacks. The
short, sharp action which followed inflicted considerable damage on both forces, though
no ships were lost.
At the beginning of this scenario, the Japanese force has not yet spotted the
Russian force and is not yet at general quarters. Depending upon how long it takes for the
Japanese to spot the Russian force, this may give the Russian player an early advantage.
- Missions -
The Japanese Player should attack any Russian forces encountered and damage or
destroy as much of them as possible. The Russian Player should attack any Japanese
forces encountered and damage or destroy as much of them as possible.
ORDER OF BATTLE
Russian Imperial Fleet
[3rd Division]
(Captain N.A. Matusyevich)
Destroyer Vnimatelni
Destroyer Vinoslivi
Destroyer Vlastni
Destroyer Byestrashni
Distant Guns 152
[Port Arthur Electric Cliff Battery]
[Port Arthur Battery #17]
[Port Arthur Battery #22]
[Port Arthur Battery #8]
[Port Arthur Battery #6]
[Lao Li Chu Battery]
[Port Arthur Battery #7]
[Port Arthur Battery #5]
[Port Arthur Battery #23]
Force Strength:378 (+9551).
Imperial Japanese Navy
[1st Destroyer Division]
(Captain S. Asai)
Destroyer Shirakumo
Destroyer Asashio
Destroyer Kasumi
Destroyer Akatsuki
[Cruiser Tatsuta]
Cruiser Tatsuta
Force Strength:932.
Distant Guns 153
Bubnov's Surprise - 10:30 P.M., April 12th, 1904
Location: 39 North, 121 East
15 Kilometers southeast of Dalny
Sky: overcast
Rain/Haze/Fog:very heavy
Temperature: 15 C.
Visibility: 0.7 Km
Wind: 1 knots, west
Sea State: 1, Waves <1 meter
- History -
For much of the Russo-Japanese War, the primary mission of the Imperial
Japanese Navy was to keep the Russian 1st Pacific Squadron bottled up in Port Arthur
and away from the Imperial Army's vulnerable naval supply line. This was a difficult and
dangerous task. It required that sufficient heavy forces remain nearby to engage the
Russians should they sortie, but far enough out to avoid attacks by destroyers that slipped
out of port under cover of darkness. Nighttime blockade, such as it was, was maintained
by destroyers and torpedo boats.
At 6:30 P.M., April 12th, 1904, two divisions of Russian destroyers sailed from
Port Arthur with orders to attack any enemy forces encountered. They were to sail east,
toward the Japanese anchorage in the Elliott Islands, then reverse around midnight to
return to the safety of Port Arthur the next morning. Intermittent rain and mist meant
visibility was poor. Forces might pass quite close without spotting each other, and any
encounters would be at very close quarters.
Japanese naval forces were also on the move near Port Arthur on the night of
April 12th. Dewa's protected cruisers sailed south before returning to the vicinity of Port
Arthur by morning. The Armored cruisers under Kamimura moved to rendezvous with
Togo near round Island, east of Port Arthur. A force of minelayers, destroyers, and
torpedo boats took advantage of the poor visibility to lay mines near the entrance of Port
Arthur.
Historically, the visibility became so poor that destroyer divisions on both sides
dispersed, unable to maintain formation. Finding other ships in the rain and darkness,
one Japanese and two Russian destroyers actually took station in enemy formations until
dawn. It was an attempt to rescue one of these destroyers, the Strashni, that lead to
Admiral Makarov's fateful sortie the next morning.
At about the same time that Strashni and Smyeli became separated from their
division, the Russian destroyers were near two of Kamimura's armored cruisers. Only a
few meters difference, or a brief lifting of the rain, and Captain Bubnoff's destroyers
would probably have spotted the Japanese armored cruisers under almost ideal conditions
for a torpedo attack.
Distant Guns 154
At the beginning of this scenario, the Japanese force has not yet spotted the
Russian force and is not yet at general quarters.
- Missions -
The Japanese Player should attempt to disengage from Russian light forces. The
Russian Player should attack any Japanese force it encounters and return to Port Arthur.
Damaging Japanese heavy units is more important than preserving your force.
ORDER OF BATTLE
Russian Imperial Fleet
[2nd Division]
(Commander E.P. Eliseyev)
Destroyer Storozhevoi
Destroyer Silni
Destroyer Smyeli
Destroyer Strashni
[1st Division]
(Captain M.V. Bubnov)
Destroyer Razyashchi
Destroyer Rastoropni
Destroyer Ryeshitelni
Destroyer Syerditi
Force Strength:616.
Imperial Japanese Navy
[2nd Division]
(Vice Admiral H. Kamimura)
Armored Cruiser Asama
Armored Cruiser Tokiwa
Force Strength:8418.
Distant Guns 155
Makarov's Sortie - 8:00 A.M., April 13th, 1904
Location: 38 North, 121 East
33 Kilometers south southeast of Port Arthur
Sky: partly cloudy
Rain/Haze/Fog:none
Temperature: 15 C.
Visibility: 36.0 Km
Wind: 10 knots, west northwest
Sea State: 2, Waves <1 meter
- History -
With no accurate means available to the Japanese to adjust their fall of shot during
indirect bombardments of Port Arthur, Togo came to the conclusion that these
bombardments were wholly ineffective. It was equally obvious that nothing could induce
the Russians to leave the shelter of their batteries and risk an engagement at sea. There
remained the mine. Since the Russians were not entirely inactive and did venture to sea
when the Japanese were not off the port, there was the chance of laying a minefield
secretly in the waters they were accustomed to traverse, and if the main Japanese Fleet
was kept out of sight and a weak squadron was exposed as a decoy the Russians might be
enticed into the mined area.
On the evening of 12 April, the Japanese mining detachment departed Thornton
Haven from which the operation was to begin. The other Japanese squadrons proceeded
to carry out the established movements of their nightly blockade of Port Arthur. Admiral
Dewa, with his decoy division, first moved to the southward toward Shantung
Promontory and then back again toward Port Arthur, while the battleships headed
westward for a position south of Round Island, where they were to be joined by the
armored cruisers.
In the early hours of the 13th April the Japanese mining party had carried out their work
without interruption, and according to their detailed instructions they had received, two
fields, disposed at either limit of the outer roadstead, where the Russians had always been
observed to move in the shelter of their batteries. One field was laid just south of Lutin
Rock to catch them if they moved to the eastward, the other just east of White Wolf Hill
to serve if they made round Liau-ti-shan. By midnight it was all done and the mining
party made off to Admiral Togo's rendezvous south of Round Island.
The following account is by Commander Vladimir Semenoff, taken from his book
"RASPLATA" ("The Reckoning"):
"Apart from the short apparition of the "Greyhounds" on April 6 (note: the
'Greyhounds' were Admiral Dewa's Third Division), and even that was not fully
authenticated, two weeks had now passed, during which the enemy had given no sign of
life. That was certainly suspicious, and therefore all destroyers ready for sea were sent
out in a body during the night of April 12-13. The boats were this time to go a long way.
They were given the task of searching the Elliot Islands. These islands are about 60 to 70
miles from Port Arthur, and it seemed very probable that the Japanese occasionally used
them as a base. Theoretically, the dark period of one night sufficed completely for the
Distant Guns 156
purpose. The destroyers were promised, however, that at daybreak the Askold would in
any case go out to meet them. The cruiser was to cover the boats if they had been
delayed, and were obliged to return by day. The Askold had been chosen so as to obviate
any possible mistake. She was the only vessel in the Far East with five funnels, and could
therefore be recognized without any signals, even in the dark. The weather now turned
wet. It varied between drizzle and light rain. The Admiral went through our battery. The
men were at their action stations, and he said a few simple words to them, which means
so much in war. Hardly had he completed his tour, when something was sighted. It was
difficult to say what it was. Still, we saw in the searchlight beam from Cross Hill what
were undoubtedly the outlines of vessels. They bore S. 60 E. Taking into account that
our searchlights could not quite reach them, and estimating our distance from Cross Hill,
as well as the angle at which its searchlights were trained, we made their distance to be
about 2 miles.
The drizzling rain was brightly lit up by the searchlight beams, and rendered the
field of view opaque. It seemed as if these shadows sometimes lay motionless, sometimes
moved backwards and forwards on the same spot. It was now 10.30 p.m.
"Shall I open fire?" the captain asked. "Oh, who can tell what it is," the Admiral
replied rather crossly. "They are probably our own destroyers. They know nothing of
night work. Some of them probably got separated from the rest and are now pottering
about in front of Port Arthur. They can't find the others, and dare not return into harbor
from fear of being taken for Japanese. Bad luck to it!" Makaroff mastered his ill-humor at
once, and added in a calm voice: "Note the bearing and distance very carefully. If these
turn out not to be our boats, we must certainly search the place very carefully tomorrow.
Possibly something unpleasant for us has been dropped there."
The remainder of the night passed peacefully. We saw nothing; in fact, we could
really see nothing on account of the rain.
Just as it was getting light next morning, at 4.15, the Admiral and staff returned to
the Petropavlovsk. Precisely at that moment several columns of smoke showed up on the
eastern horizon. These were our destroyers returning from their expedition, which had
been carried out successfully, but without result. They had not found anything in the bays
of the Elliot Islands. Unhappily, the boats did not all return. The Admiral's fears had been
only too fully justified. Some of the boats had lost touch with the main body, and had not
regained it. Suddenly we saw the flashes of guns in the dawn to the southeast-a direction
in which we had not looked for anything. (It was 5.25.) The firing could be heard
distinctly. Who were fighting there, we were unable to make out, owing to the great
distance. It was clear, however, that small vessels, probably destroyers, were fighting
together. We (Diana) could have got away quickest, but the Admiral apparently did not
want to employ the Diana, which could have been mistaken for the Iwate, as he had
promised the boats a cruiser, unlike any Japanese ship. For some reason or other the
Askold was not ready. Consequently, the Bayan (four funnels), which also did not
resemble any Japanese ship, was ordered out. What with orders and counter-orders a
good deal of time was lost. When the Bayan steamed out, we thought we had been quite
forgotten. We therefore set off without orders and followed her. Of course we were soon
left behind. When we reached the open, the Bayan was already a long way ahead. It
turned out that the destroyer Strashny had parted company during the night. On looking
for her consorts she came across a Japanese destroyer flotilla, which she joined. The
Distant Guns 157
Japanese also did not notice that the Strashny was an enemy, so they cruised about
together before Port Arthur till daybreak. As soon as it was light enough a mutual
recognition took place, and at once a desperate fight commenced, of one against six, at
quite close quarters.
The Bayan hurried as fast as she could to the assistance of her small comrade. All
she could do was to scatter the hostile boats, which were steaming round the place where
the Strashny had sunk. The Japanese destroyers fled to the southward. The remnants of
the Strashny's heroic crew were swimming about in life belts, or clinging to pieces of
wreckage. They greeted their cruiser with joy; but already the "Greyhounds" were
approaching from the south at top speed, in the place of the destroyers, which had fled.
Skeptics will, of course, say that they were only four protected cruisers opposed to our
armored cruiser. Still, it was four to one. The Bayan, or her captain-ship and captain are
one-did not hesitate a moment. She covered those in the water with her high sides,
lowered boats to pick them up, and faced the attack lying still with her engines stopped.
At the moment we were still under Golden Hill and could not make out what was going
on. Our hearts stood still at the thought that her engines might be disabled. Could we
arrive in time to assist her? Great Heavens, how we cursed the St. Petersburg works
where the Diana had been built! Instead of the 20 knots of the contract, we were hardly
going 17. The oldest engineer had now to listen to some very bitter truths from the mouth
of the youngest sub-lieutenant. The Novik came out and ran past us, as if we were at
anchor. The Novik was followed by the Askold.
"Just look at that! It is easy to see that they were built abroad. That is something
different from our 'Goddess.'"
The Bayan was already returning. The "Greyhounds" did not follow her.
Apparently they had no desire to come within reach of our coast batteries. It was 7.15
A.M. The destroyers back from the Elliot Islands had already got in safely. At 7.15 the
Petropavlovsk came out. The Poltava followed. The Bayan reported by semaphore and
wireless what she had seen. She was not sure whether in the heat of action she had saved
everybody: possibly there might still be some men on the wreckage. The Admiral at once
signaled: "Single line ahead on the Bayan. Bayan to lead the squadron back to the scene
of the disaster. Every one to keep a good look-out for wreckage."
The line was formed. As we lay there, with engines stopped, to let the other ships
pass and then form up astern, the Petropavlovsk passed quite close along our starboard
side.
A suppressed "Ah!" passed through the ship's company. The Admiral came over
to the port side of the bridge-that is, the side nearest to the Diana. He wore an overcoat
with a fur collar. The wind was blowing about his big, fair beard. "Your health, my lads!"
came in his mighty voice. Every word was clear and distinct.
"We wish your Excellency good health!" sounded back in specially hearty, cheery
voices.
"God grant a happy issue!"
"Respectful thanks your-"; but the regulation reply did not get beyond this.
Instead, there burst out a frantic "Hurrah!"
The Admiral had already left the bridge and gone into the chart-house. He now
came out again, went right out to the end of the bridge and took off his cap, waving it at
us with a smile.
Distant Guns 158
"Hurrah!" sounded again and again from the crew. The men clambered on to each
other's shoulders to see "Little Grandfather." "Hurrah!" now shouted the officers,
forgetting all restraint, and waved their caps amongst the men.
We saw our Admiral for the last time.
In my diary is written as follows: "8 A.M.-We are in single line ahead, in the
following order: Bayan, Petropavlovsk, Poltava, Askold, Diana, Novik."
The "Greyhounds" reappeared out of the morning mist. We steamed towards
them. This time they were led by two armored cruisers. The enemy advanced boldly
towards us, though he saw we were stronger. A long range action commenced. At 8.10
the Japanese turned away suddenly and steamed off to the southward. The shortest
distance had been 50 cables (10,000 yards). We had no losses. For a little while longer
we cruised about over the spot where the Strashny had gone down, and looked about for
any one to save, but without any result. We were then about 15 miles from Port Arthur.
Any one with good eyes could see that the rest of our squadron was coming out. At 8.40
A.M. the Japanese battleships appeared out of the mist. They joined the armored cruisers
and "Greyhounds," and altogether headed straight for us. Now the Japanese were again
the stronger, nearly twice as strong, in fact.
We followed our Admiral, who was turning towards Port Arthur and retiring. The
Japanese followed us, with the evident intention of attacking. The Novik and the
destroyers made good use of their speed. They steamed ahead and a little to port. The
Diana became rear ship. I confess quite candidly that our position was causing me some
anxiety. We were steaming as fast as we could, but the distance steadily decreased. By
nine o'clock we were only 38 cables (7,500 yards) from the hostile leader (apparently
Mikasa). Our stern 6-inch guns had already adjusted their sights. We were waiting for the
flagship to order us to open fire; but no signal came. The Japanese also did not fire, just
as if there had been an agreement to that effect. At 9.15 we reached the fire zone of our
fortress guns (6 to 7 miles). At 9.30 the enemy gave up the chase, without having fired a
gun, and shaped course to the westward. The distance between us began to increase.
"Why did they not fire?" we asked ourselves. The Diana and Askold had been the rear
ships at a distance of 38 cables, surely that was tempting enough to send some
"portmanteaus" whizzing across.
Towards 9.30 we joined up with the remainder of the squadron. It was complete
except for the damaged ships. The Japanese slowly moved behind Liau-ti-shan, as if they
intended to commence their usual bombardment. Admiral Makaroff apparently intended
to stand backwards and forwards as usual between White Wolf Hill and Cross Hill. The
sinking of the Strashny, the hurried exit of single ships which this had caused, the
sighting of the hostile fleet, and the forming up of the squadron-all this had somewhat
blunted the impressions of last night, which, moreover, appeared quite unimportant.
Neither the Admiral nor those about him gave any further thought to the suspicious
shadows which we had seen so indistinctly when the searchlights were illuminating the
rain so brightly. These shadows, however, had been seen precisely on the "figure of
eight" we were making, namely South of Cross Hill and East of White Wolf Hill. Every
one had forgotten that we were to search out this place to see whether they had dropped
"something unpleasant for us."
"The gunlayers to remain at their guns; the remainder fall out, but not to
separate," I ordered.
Distant Guns 159
The gunnery lieutenant came up to me. "Now for the old story," he said; "now
they will chuck 'portmanteaus' from a distance. Let us go and have a smoke."
"By all means," I replied. "Nothing of any importance is likely to happen now.
For to-day we have got everything behind us. We'll start washing decks. They haven't
been touched since the hands were called."
We both came down from the upper bridge. The gunnery lieutenant went to the
smoking place, where the slow match was kept burning. I went on the forecastle, where I
stood at the starboard bow 6-inch gun, and was just giving the boatswain the usual orders,
when an explosion, with a dull, rolling sound shook the whole ship, as if a 12-inch gun
had gone off quite close. I looked round vaguely. A second explosion, even more violent!
What was happening? Suddenly cries of horror arose: "The Petropavlovsk! The
Petropavlovsk!" Dreading the worst, I rushed to the side. I saw a huge cloud of brown
smoke. "That is pyroxiline, therefore a torpedo," passed through my mind. In this cloud I
saw the ship's foremast. It was slanting, helpless, not as if it was falling, but as if it were
suspended in the air. To the left of this cloud I saw the battleships stern. It looked as
always, as if the awful happenings in the fore-part were none of its concern. A third
explosion! White steam now began to mix with the brown cloud. The boilers had burst!
Suddenly the stern of the battleship rose straight in the air. This happened so rapidly that
it did not look as if the bow had gone down, but as if the ship had broken in half
amidships. For a moment I saw the screws whirling round in the air. Was there a further
explosion? I don't know. It appeared to me as if the after-part of the Petropavlovsk (all
that was visible of her) suddenly opened out and belched forth fire and flames, like a
volcano. It seemed even as if flames came out of the sea, long after it had closed over the
wreck.
Never, even at times when the most important orders were being given, had such
silence reigned on board our ship, as at this gruesome spectacle. Habit, however,
becomes one's second nature. As an old navigator I was in the habit of noticing
everything. When I saw the explosion, I mechanically looked at my watch, and then
wrote in my note-book: "9.43.-Explosion on board Petropavlovsk"; and then: "9.44.-All
over."
- Missions -
The Japanese Player should intercept the Russian force and damage or destroy as
much of it as possible. The Russian Player should attempt to return to Port Arthur.
ORDER OF BATTLE
Russian Imperial Fleet
[1st Division]
(Vice Admiral S.O. Makarov)
Armored Cruiser Bayan
Battleship Petropavlovsk
Battleship Poltava
Protected Cruiser Askold
Distant Guns 160
Protected Cruiser Diana
Protected Cruiser Novik
[2nd Division]
(Rear Admiral P.P. Ukhtomski)
Battleship Peresvyet
Battleship Pobyeda
[3rd Division]
Destroyer Boiki
Destroyer Burni
Destroyer Vinoslivi
Destroyer Vlastni
Destroyer Grozovoi
Destroyer Byestrashni
Destroyer Byeszhumni
Destroyer Byesposhchadni
[Port Arthur Electric Cliff Battery]
[Port Arthur Battery #17]
[Port Arthur Battery #22]
[Lao Li Chu Battery]
[Port Arthur Battery #8]
[Port Arthur Battery #6]
[Port Arthur Battery #7]
[Port Arthur Battery #5]
[Port Arthur Battery #23]
Force Strength:18662 (+9551).
Imperial Japanese Navy
[1st Division]
(Vice Admiral H. Togo)
Battleship Mikasa
Battleship Asahi
Battleship Fuji
Battleship Yashima

Distant Guns 161
Battleship Shikishima
Battleship Hatsuse
Armored Cruiser Nisshin
Armored Cruiser Kasuga
[2nd Division]
(Vice Admiral H. Kamimura)
Armored Cruiser Asama
Armored Cruiser Tokiwa
[3rd Division]
(Vice Admiral S. Dewa)
Protected Cruiser Chitose
Protected Cruiser Takasago
Protected Cruiser Kasagi
Protected Cruiser Yoshino
[2nd Destroyer Division]
(Commander E. Ishida)
Destroyer Ikazuchi
Destroyer Oboro
Destroyer Inadzuma
Destroyer Akebono
Force Strength:51293.
Distant Guns 162
Yellow Sea - 10:20 A.M., August 10th, 1904
Location: 38 North, 121 East
40 Kilometers south southwest of Dalny
Sky: fair
Rain/Haze/Fog:heavy
Temperature: 25 C.
Visibility: 18.0 Km
Wind: 5 knots, southeast
Sea State: 1, Waves <1 meter
- History -
Throughout late July and early August, as Japanese troops had closed in on Port
Arthur and as shells had started falling in the town, the correspondence between Viceroy
Alexieff (commander of Port Arthur) and Admiral Vitgeft (Makaroff's replacement) had
become more and more acrimonious. What was to become of the fleet? Alexieff favored
a sortie so that the Port Arthur ships could link up with the Vladivostok Squadron, and
create a force powerful enough to challenge the Japanese.
Admiral Vitgeft felt that just staying at anchor and contributing some of his
armament to the land battle was the safest course to follow, and that's exactly what he
proposed backed up by his flag officers and captains. In their view the risks of a sortie
were too great to be hazarded.
Alexieff faced with what amounted to almost direct disobedience to his orders,
appealed to St. Petersburg and the authority of the Tsar. Nicholas replied to the Viceroy
as follows, 'I fully share your opinion concerning the importance of the squadron making
a speedy sortie from Port Arthur, and breaking through to Vladivostok.'
Alexieff, reinforced by the Imperial will, would have no more of Vitgeft's
attempts to avoid battle and telegraphed on 7th August as follows:
"I again reiterate my inflexible determination that you are to take the squadron
out of Port Arthur. I must recall to you and all serious officers the exploit of the Varyag.
The failure of the squadron to proceed to sea regardless of the Imperial will, and of my
command, and it's extinction in the harbor in the event of the fall of the fortress will, in
addition to the heavy legal responsibility, leave an indelible spot on the flag of St.
Andrew and on the honor of the fleet. You are to make known this telegram to all
admirals and commanding officers and are to report its receipt."
Faced with an order couched in these terms even Vitgeft could not hesitate any
longer.
With the Japanese Army tightening it's grip on Port Arthur Admiral Togo
expected an attempted breakout by the Russian squadron and positioned his divisions
accordingly. He wanted no mere transfer of the situation to Vladivostok, with a fleet-in-
being up there and thus another stronghold to besiege. The Siberian port was less
protected than Port Arthur and had no coal for the ships, but from the existent military
aspect a new campaign in that area would have overtaxed the resources of Field Marshal
Oyama. Togo wanted to grab Vitgeft by the nape of the neck and drown him in the
Yellow Sea.
Distant Guns 163
The long awaited sortie took place on 10 August 1904, when the tide permitted
the exodus to commence at dawn. Togo had to let the enemy squadron emerge well into
the clear and then grip it tight. He would have available only whatever daylight, if any,
happened to remain after Vitgeft was completely outside of his defensive minefields.
The Battle of the Yellow Sea was the closest and, except for Tsushima, the most
decisive naval engagement of the war. Encountering Vitgeft's squadron in the early
afternoon, Togo's first moves were designed to put himself between it and Port Arthur, so
as to prevent its return and force a major fleet action. However when it had become clear
that the Russians had no intention of going back but were making for Vladivostok, Togo
was so far behind the Russian fleet that he had to waste hours in getting around Vitgeft's
weaker vessels so as to catch up with the battleships at the head of the Russian line. It
was 1743 hours when he opened fire on the leading Russian ships. From then until dusk
Togo's First Division and the six Russian battleships, banged away at each other on
almost even terms, with Mikasa and Tsarevich sharing the brunt of the punishment.
What finally decided the issue, just as it was beginning to look as though the
Russians would be able to hold their course until darkness enabled them to escape, was a
double hit by two Japanese shells that at almost the same instant struck Tsarevich's
bridge. The result was not merely the death of Vitgeft, of whom all that was later found
was a part of one leg, but the death or incapacitation of every one else on the bridge or in
the conning tower beneath it. These included the helmsman, whose loss proved to be of
even more immediate significance than that of the admiral commanding.
In addition to killing the helmsman, the explosion wedged the ships wheel into the
position of a port turn. An instant later the turn began, so sharply that Tsarevich heeled
over 12 degrees; and Retvizan, which had detected nothing about the latest hit on the
flagship to distinguish it from earlier ones, followed in her wake. By the time Pobyeda
arrived at the turning point, Tsarevich had swung around more than 180 degrees and was
heading back into her own line, making it apparent at last that something was seriously
wrong. Nonetheless, in the absence of any signal to indicate what had happened there was
no way for the other ships to deduce that in fact Tsarevich was not only out of control and
without admiral but actually without any one at all in command.
By the time an officer had been found to take charge and signal Rear Admiral
Prince Ukhtomsky, Vitgeft's second in command aboard Peresvyet, that responsibility for
the fleet now rested with him, most of the cruisers stationed to port of the battleships had
copied the 180 degree turn of the leading Tsarevich and Retvizan, with the result that the
entire squadron was in total disarray. There was little left for Ukhtomsky to do but give
up the attempt to reach Vladivostok, and order the squadron to follow him back to Port
Arthur. Even this, since Peresvyet was too damaged to hoist intelligible signals, was not
clearly understood, and many of the cruisers wandered off on their own, to eventual
internment, capture, or destruction.
What Togo had to decide at this critical point was whether to leave it to his
torpedo boats and destroyers to try to prevent the Russians from regaining Port Arthur or
to risk trying to finish it off himself in a night fleet action at short range. The latter, if
successful, would end the threat of the Russian Pacific Squadron once and for all, but it
had serious drawbacks. Mikasa had already suffered more than twenty hits in the course
of the battle, and his other three battleships were damaged to a comparable degree. To
risk losing one or more of these irreplaceable ships without the chance of at least a
Distant Guns 164
proportionate gain seemed unjustifiable to Togo, and it also seemed to him doubtful that
the present circumstances provided any such chance.
The Russians had been turned back from their objective and the torpedo boats and
destroyers might well be able to damage them further during the night. Even if the
Russians did regain Port Arthur, the ships would remain subject to Japanese artillery fire;
and any that survived would become Japanese prizes when Port Arthur finally fell. Togo
choose the prudent course, with the result that five of the six Russian battleships, on
which the Japanese torpedo boats proved unable to score any hits, found their way home
by dawn the next day, never too fight again. Tsarevich, unable to keep up with the others,
eventually put in at the German port of Tsing-Tau.
- Missions -
The Japanese Player should intercept the Russian force and damage or destroy as
much of it as possible. The Russian Player should attempt to slip past the Japanese force
and move toward Vladivostok.
ORDER OF BATTLE
Russian Imperial Fleet
[Vitgeft's Division]
(Rear Admiral V. Vitgeft)
Battleship Tsesarevitch
Battleship Retvizan
Battleship Pobyeda
Battleship Peresvyet
Battleship Poltava
Battleship Sevastopol
[Scout Division]
(Rear Admiral N. Reytsyenshteyn)
Protected Cruiser Askold
Protected Cruiser Pallada
Protected Cruiser Diana
[Destroyer Division]
Destroyer Boiki
Destroyer Burni
Destroyer Vinoslivi
Destroyer Vlastni
Destroyer Grozovoi
Destroyer Byestrashni
Destroyer Byeszhumni
Destroyer Byesposhchadni
Distant Guns 165
[Protected Cruiser Novik]
Protected Cruiser Novik
[Port Arthur Electric Cliff Battery]
[Port Arthur Battery #17]
[Lao Li Chu Battery]
[Port Arthur Battery #22]
[Port Arthur Battery #8]
[Port Arthur Battery #6]
[Port Arthur Battery #7]
[Port Arthur Battery #5]
[Port Arthur Battery #23]
Force Strength:25563 (+9551).
Imperial Japanese Navy
[First Division]
(Vice Admiral H. Togo)
Battleship Mikasa
Battleship Asahi
Battleship Fuji
Battleship Shikishima
Armored Cruiser Nisshin
Armored Cruiser Kasuga
[3rd Division]
(Vice Admiral S. Dewa)
Armored Cruiser Yakumo
Protected Cruiser Kasagi
Protected Cruiser Chitose
Protected Cruiser Takasago
[5th Division]
(Vice Admiral H. Yamada)
Protected Cruiser Itsukushima
Protected Cruiser Matsushima
Protected Cruiser Hashidate
Distant Guns 166
Battleship Chin Yen
[6th Division]
(Vice Admiral M. Togo)
Protected Cruiser Akashi
Protected Cruiser Suma
Protected Cruiser Akitsushima
[4th Destroyer Division]
(Commander G. Nagai)
Destroyer Hayatori
Destroyer Harusame
Destroyer Asagiri
Destroyer Murasame
[5th Destroyer Division]
(Commander G. Mano)
Destroyer Kagero
Destroyer Murakumo
Destroyer Yugiri
Destroyer Shiranui
[2nd Destroyer Division]
(Commander E. Ishida)
Destroyer Ikazuchi
Destroyer Inadzuma
Destroyer Oboro
Destroyer Akebono
[1st Destroyer Division]
(Captain S. Asai)
Destroyer Asashio
Destroyer Shirakumo
Destroyer Kasumi
[3rd Destroyer Division]
(Commander M. Tsushia)
Destroyer Usugumo
Destroyer Shinonome
Destroyer Sazanami
[14th Torpedo Boat Division]
(Commander E. Sakurai)
Torpedo Boat Chidori
Torpedo Boat Hayabusa
Torpedo Boat Manazuru
Distant Guns 167
Torpedo Boat Kasasagi
[Cruiser Yaeyama]
Cruiser Yaeyama
[21st Torpedo Boat Division]
Torpedo Boat 44
Torpedo Boat 47
Torpedo Boat 48
Torpedo Boat 49
[2nd Torpedo Boat Division]
Torpedo Boat 45
Torpedo Boat 46
Torpedo Boat 37
Torpedo Boat 38
[10th Torpedo Boat Division]
(Commander M. Otaki)
Torpedo Boat 43
Torpedo Boat 40
Torpedo Boat 41
Torpedo Boat 42
Force Strength:47939.
Distant Guns 168
Ullung 3:15 P.M., August 13th, 1904
Location: 38 North, 131 East
29 Kilometers north northwest of Ullung
Sky: partly cloudy
Rain/Haze/Fog:none
Temperature: 22 C.
Visibility: 36.0 Km
Wind: 15 knots, southeast
Sea State: 3, Waves 1 meter
- History -
Throughout late July and early August, as Japanese troops had closed in on Port
Arthur and as shells had started falling in the town, the correspondence between Viceroy
Alexieff (commander of Port Arthur) and Admiral Vitgeft (Makaroff's replacement) had
become more and more acrimonious. What was to become of the fleet? Alexieff favored
a sortie so that the Port Arthur ships could link up with the Vladivostok Squadron, and
create a force powerful enough to challenge the Japanese.
Admiral Vitgeft felt that just staying at anchor and contributing some of his
armament to the land battle was the safest course to follow, and that's exactly what he
proposed backed up by his flag officers and captains. In their view the risks of a sortie
were too great to be hazarded.
Alexieff faced with what amounted to almost direct disobedience to his orders,
appealed to St. Petersburg and the authority of the Tsar. Nicholas replied to the Viceroy
as follows, 'I fully share your opinion concerning the importance of the squadron making
a speedy sortie from Port Arthur, and breaking through to Vladivostok.'
Alexieff, reinforced by the Imperial will, would have no more of Vitgeft's
attempts to avoid battle and telegraphed on 7th August as follows:
"I again reiterate my inflexible determination that you are to take the squadron
out of Port Arthur. I must recall to you and all serious officers the exploit of the Varyag.
The failure of the squadron to proceed to sea regardless of the Imperial will, and of my
command, and it's extinction in the harbor in the event of the fall of the fortress will, in
addition to the heavy legal responsibility, leave an indelible spot on the flag of St.
Andrew and on the honor of the fleet. You are to make known this telegram to all
admirals and commanding officers and are to report its receipt."
Faced with an order couched in these terms even Vitgeft could not hesitate any
longer.
With the Japanese Army tightening it's grip on Port Arthur Admiral Togo
expected an attempted breakout by the Russian squadron and positioned his divisions
accordingly. He wanted no mere transfer of the situation to Vladivostok, with a fleet-in-
being up there and thus another stronghold to besiege. The Siberian port was less
protected than Port Arthur and had no coal for the ships, but from the existent military
aspect a new campaign in that area would have overtaxed the resources of Field Marshal
Oyama. Togo wanted to grab Vitgeft by the nape of the neck and drown him in the
Yellow Sea.
Distant Guns 169
The long awaited sortie took place on 10 August 1904, when the tide permitted
the exodus to commence at dawn. Togo had to let the enemy squadron emerge well into
the clear and then grip it tight. He would have available only whatever daylight, if any,
happened to remain after Vitgeft was completely outside of his defensive minefields.
Historically, Togo came to grips with Vitgeft a few miles south of Port Arthur. In
the resulting Battle of the Yellow Sea, Vitgeft was killed and the Russian force returned
to Port Arthur. But through bad weather or bad luck, Togo might have let Vitgeft slip
through his fingers. Had that happened, the result would most likely have been a long
chase along the route from Port Arthur to Vladivostok.
In order to support Vitgeft, the Russian Independent Cruiser Squadron (Armored
Cruisers Rossiya, Gromoboi, and Ryurik) moved south from Vladivostok August 12th. A
rendezvous was expected somewhere in the Sea of Japan August 13th. Historically, this
resulted in the Battle of Ulsan. But had Vitgeft slipped past Togo, Kamimura's 2nd
Division (Armored Cruisers Idzumo, Adzuma, Tokiwa and Iwate) would probably have
been diverted to intercept Vitgeft. The Battle of Ulsan would never have happened, and
the tracks of all four forces might have converged somewhere near the Island of Ullung,
in the Sea of Japan, about 140 Kilometers from the Korean coast.
- Missions -
The Japanese Player should intercept the Russian force and damage or destroy as
much of it as possible. The Russian Player should attempt to slip past the Japanese force
and move toward Vladivostok.
ORDER OF BATTLE
Russian Imperial Fleet
[Vitgeft's Division]
(Rear Admiral V. Vitgeft)
Battleship Tsesarevitch
Battleship Retvizan
Battleship Pobyeda
Battleship Peresvyet
Battleship Poltava
Battleship Sevastopol
[Independent Cruiser Squadron]
(Rear Admiral Iessen)
Armored Cruiser Rossiya
Armored Cruiser Gromoboi
Armored Cruiser Ryurik
[Scout Division]
(Rear Admiral N. Reytsyenshteyn)
Protected Cruiser Askold
Distant Guns 170
Protected Cruiser Pallada
Protected Cruiser Diana
[Destroyer Division]
Destroyer Boiki
Destroyer Burni
Destroyer Vinoslivi
Destroyer Vlastni
Destroyer Grozovoi
Destroyer Byestrashni
Destroyer Byeszhumni
Destroyer Byesposhchadni
[Protected Cruiser Novik]
Protected Cruiser Novik
Force Strength:34047.
Imperial Japanese Navy
[First Division]
(Vice Admiral H. Togo)
Battleship Mikasa
Battleship Asahi
Battleship Fuji
Battleship Shikishima
Armored Cruiser Nisshin
Armored Cruiser Kasuga
[Second Division]
(Vice Admiral H. Kamimura)
Armored Cruiser Idzumo
Armored Cruiser Adzuma
Armored Cruiser Tokiwa
Armored Cruiser Iwate
[3rd Division]
(Vice Admiral S. Dewa)
Armored Cruiser Yakumo
Protected Cruiser Kasagi
Protected Cruiser Chitose
Protected Cruiser Takasago
[4th Destroyer Division]
(Commander G. Nagai)
Destroyer Hayatori
Distant Guns 171
Destroyer Harusame
Destroyer Asagiri
Destroyer Murasame
[5th Destroyer Division]
(Commander G. Mano)
Destroyer Kagero
Destroyer Murakumo
Destroyer Yugiri
Destroyer Shiranui
[2nd Destroyer Division]
(Commander E. Ishida)
Destroyer Ikazuchi
Destroyer Inadzuma
Destroyer Oboro
Destroyer Akebono
[1st Destroyer Division]
(Captain S. Asai)
Destroyer Asashio
Destroyer Shirakumo
Destroyer Kasumi
[3rd Destroyer Division]
(Commander M. Tsushia)
Destroyer Usugumo
Destroyer Shinonome
Destroyer Sazanami
[Cruiser Yaeyama]
Cruiser Yaeyama
Force Strength:55061.
Distant Guns 172
Ulsan - 5:00 A.M., August 14th, 1904
Location: 36 North, 130 East
40 Kilometers east of Ulsan
Sky: partly cloudy
Rain/Haze/Fog:none
Temperature: 25 C.
Visibility: 7.1 Km
Wind: 10 knots, south
Sea State: 2, Waves <1 meter
- History -
The news that the Port Arthur Squadron had sailed reached Vladivostok in the
afternoon of 11 August. But the Vladivostok cruisers were not ready for action. It had
been understood that they would receive ample warning when the Port Arthur Squadron
was ready to sortie. No such warning had been given, and there was every reason to
believe that Admiral Vitgeft was immovable. The last word received from him was in a
telegram received on 5 August, in which he announced that "after prayer and full
consideration" his final decision was to perish with the fortress. Consequently, the
Vladivostok Squadron was leisurely coaling when the news of the sortie arrived.
Owing to the delay in sailing there was little hope of being able to assist Admiral
Vitgeft's squadron at the critical passage of the Tsushima Straits. It was calculated that if
Vitgeft was successful, and the Port Arthur Squadron was able to break through, it would
already be coming up the Sea of Japan. Admiral Iessen, therefore, formed his ships in line
abreast at intervals of four nautical miles and headed southward at 14 knots, in hourly
expectation of sighting the Port Arthur Squadron.
That night the Vladivostok Squadron closed up into line ahead and continued on
to the southward at a reduced speed throughout the next day. It was a serious
disappointment that nothing had been seen of the Port Arthur Squadron and the hope that
it might yet be met within the straits was still clung to. Admiral Iessen informed his
captains that at dawn they would be approaching Tsushima, and that it was his intention
not to enter the straits but to cruise all day on the parallel of Fusan. Before dark they
sighted the Korean coast, and closed with Fusan.
At this time Admiral Kamimura was to the eastward of them heading for a
position 30 nautical miles northeast of Ulsan where he was to patrol in the hope of
intercepting the Russians. The two squadrons had passed very close to one another in the
dark on opposite courses but neither was aware of the other. At dawn, Admiral Iessen
succeeded in reaching Fusan unobserved and with the straits wide open. Had it been his
intention to pass them he could have run through the Western Channel without anything
but torpedo-boats in his way. But this was not his plan, so at 0500 hours, in accordance
with his decision to await the coming of the Port Arthur Squadron in the northern
approaches to the straits, he began to turn west towards the Korean coast.
Ever since 0130 hours, Admiral Kamimura had been heading back from his night
patrol area on a course that took him directly to where the Russians were. No sooner had
Admiral Iessen put his helm over than he sighted the four Japanese armored cruisers.
Distant Guns 173
Kamimura's long months of hunting were finally over. The weather was ideal and
Kamimura had the entire summer day ahead of him. The enemy was as far from
Vladivostok as it was possible to be in the Sea of Japan, and Kamimura found himself
between the Russians and their distant base.
The lightening day clarified the two columns of warships, whose converging
tracks gradually closed the range. At 0520 hours the range was down to 8,500 yards, and
both Admirals ordered opening salvos. Soon the 8-inch batteries were firing steadily and,
as the range shrank further, the 6-inch rifles joined in.
For some reason, Kamimura, in assigning targets, gave his extra ship to Rurik, the
last and weakest in the Russian column, so that she was subjected to twice the
bombardment administered to her stronger comrades. Rurik lost most of her officers in a
short time, and many of her men were being hammered on the Japanese anvil. It looked
as though she would be destroyed within a very few minutes and yet she remained afloat
for hours, the diminishing number of survivors continuing to fire the few remaining guns
until the very last, in a gallant display of classic heroism that won the admiration of the
Japanese.
Rurik dropped behind. The other two Russian cruisers, themselves heavily attacked,
swerved away from the enemy and then reversed course to enable Rurik to regain her
station as they passed.
On the easterly run Kamimura took some punishment himself but nothing
comparable to what he inflicted. It would be assumed that when the Russians sheered
away from the Japanese muzzles, Kamimura would have pressed in closer. This did not
happen. Kamimura oddly held his course during Iessen's sixteen-point turn and then,
when a few minutes later Kamimura came about himself, it was by an exterior swing to
port onto a new track that lengthened rather than shortened the range.
Rurik, under further shelling, was unable to proceed in column, and a shell in her
steering-engine-room caused her to circle out of control. Obviously she was a lost ship
and the gallant efforts of Admiral Iessen to save her by maneuvering in the vicinity
should have caused his ruin. Kamimura followed Iessen's weaving in and out, the two
squadrons banging away at each other and scoring numerous hits with shells that
expended most of their fury outside the armored walls.
Iessen realized at last that Rurik was a wreck and that he would be unable to
rescue the survivors, so at 0830 hours he turned and made for Vladivostok. The
remarkable thing is that he got there. The Japanese and Russian cruisers now steaming
northward were firing vigorously at each other. The hitting continued, particularly by the
Japanese, and Iessen's vessels gave forth clouds of smoke, sheets of flame and other
indications of serious damage. But they pushed ahead and occasionally landed a
staggering blow on one of the enemy.
All was not entirely well in Kamimura's squadron. Iwate at the rear of the line had
been roughly treated in the early stage of the action prior to the Russian dash for home
and Admiral Misu's flagship started to show the effects. The French built Adzuma began
to fall back as the stiff chase strained her engines. The terrific demands on the ships
personnel began to cause physical and mental exhaustion. Their salvos came at increased
intervals. The Russians, however, were in far worse condition than the Japanese. The
Distant Guns 174
decks of Rossiya and Gromoboi were covered with dead and wounded, and the upper
portions of the vessels showed the havoc wreaked by the shells that had burst there.
The battle had come after months of the most arduous overwork. Perhaps
Kamimura was exhausted himself. It is impossible to imagine a persuasive reason for his
abandoning the pursuit after only three hours, while still on the high seas, and with long
daylight hours ahead and many steaming hours between Iessen and Vladivostok. But
Kamimura did just that, turning around at 1115 hours and heading back to the position of
Rurik's grave.
- Missions -
The Japanese Player should intercept the Russian force and damage or destroy as
much of it as possible. The Russian Player should attempt to slip past the Japanese force
and move toward Vladivostok.
ORDER OF BATTLE
Russian Imperial Fleet
[Independent Cruiser Squadron]
(Rear Admiral Iessen)
Armored Cruiser Rossiya
Armored Cruiser Gromoboi
Armored Cruiser Ryurik
Force Strength:8484.
Imperial Japanese Navy
[Second Division]
(Vice Admiral H. Kamimura)
Armored Cruiser Idzumo
Armored Cruiser Adzuma
Armored Cruiser Tokiwa
Armored Cruiser Iwate
Force Strength:16127.
Distant Guns 175
Ulsan (Alternate) - 9:00 A.M., August 14th, 1904
Location: 36 North, 130 East
40 Kilometers east of Ulsan
Sky: overcast
Rain/Haze/Fog:very heavy
Temperature: 20 C.
Visibility: 7.1 Km
Wind: 10 knots, south
Sea State: 2, Waves <1 meter
- History -
This is a hypothetical variant of the standard Ulsan scenario. Historically, the
Russian cruiser Bogatyr was damaged in an accident in May, 1904. This variant puts the
shoe on the other foot, assuming the Japanese cruiser Iwate was instead unavailable.
Although they are still a bit outmatched, the Russians have more of a fighting chance
than they did historically at Ulsan.
- Missions -
The Japanese Player should intercept the Russian force and damage or destroy as
much of it as possible. The Russian Player should attempt to slip past the Japanese force
and move toward Vladivostok.
ORDER OF BATTLE
Russian Imperial Fleet
[Independent Cruiser Squadron]
(Rear Admiral Iessen)
Armored Cruiser Rossiya
Armored Cruiser Gromoboi
Armored Cruiser Ryurik
Protected Cruiser Bogatyr
Force Strength:9650.
Imperial Japanese Navy
[Second Division]
(Vice Admiral H. Kamimura)
Armored Cruiser Idzumo
Armored Cruiser Adzuma
Armored Cruiser Tokiwa

Distant Guns 176
Force Strength:12000.
Distant Guns 177
The Hunt for Novik - 4:15 P.M., August 20th, 1904
Location: 46 North, 145 East
53 Kilometers southwest of Korsakovsk
Sky: mostly clear
Rain/Haze/Fog:none
Temperature: 20 C.
Visibility: 36.0 Km
Wind: 3 knots, east northeast
Sea State: 1, Waves <1 meter
- History -
After surviving The Battle of the Yellow Sea, the captain of Novik believed that
his crew and vessel could better serve the Tsar and Mother Russia by joining the
Vladivostok squadron, rather than sitting out the war interned in some neutral port.
Believing that the Japanese would have the Tsushima Straits closely guarded, he decided
to take the long route around Japan in his attempt to reach Vladivostok.
As Novik rounded Yakushima, south of the Van Diemen Strait on 19 August, she
was spotted by a Japanese merchant vessel. Admiral Togo received this information after
some delay, allowing Novik to escape well to the north before he was able to get Chitose
and Tsushima to join the hunt.
Next morning Chitose and Tsushima were together in La Perouse Strait. Chitose
had been searching the strait for two hours by the time Tsushima arrived and as Novik
had not been seen, Tsushima was ordered to look into Korsakovsk, a Russian port on
Sakhalin Island, just north of the strait. By 1600 hours she was in sight of the place and
could see smoke rising from the anchorage. As the Japanese had expected, Novik was
there. In spite of using economical speed, her wide detour around Japan had forced her to
put in for coal and water, and at sunrise she had begun to take in the necessary supplies.
Novik‟s crew had picked up the Japanese wireless transmissions as they searched for her,
and funnel smoke from Tsushima could be seen as she approached. Her captain, who had
intended to run La Perouse Strait at night, decided to put to sea at once for fear of being
trapped in harbor.
As Tsushima closed on Korsakovsk her captain spotted Novik steaming south for
La Perouse Strait. Signaling her sighting to Chitose, she put on full speed and headed to
cut off the enemy. At 1630 hours Tsushima opened fire, Novik replied with spirit, and a
sharp action ensued. The battle was, however, unequal. Tsushima was larger and better
protected, and against Novik‟s six 4.7in. guns she carried an armament of six 6in. and ten
12-pounders. She was, moreover, fresh and undamaged, and the advantage told quickly.
In a little over half an hour Novik was forced to turn back and head for Korsakovsk.
Tsushima‟s shooting was good; she had knocked out half of Novik‟s boilers as well as
inflicting five hits on the waterline that flooded Novik‟s steering compartment. As Novik
turned away Tsushima gave chase, but not for long. Novik was not yet defeated. She
returned fire, and at 1740 hours struck Tsushima with two hits on the waterline that
flooded two compartments and caused such a list that Tsushima was forced to give up the
chase and stop for emergency repairs.
Distant Guns 178
While Tsushima was stopped, Chitose joined her, and together they watched the
port throughout the night. At dawn the next day Chitose closed the port in order to
complete the job at hand, only to find Novik beached on a sandbank with boats and
launches busy removing her gear and crew. During the night Novik‟s captain had come to
the conclusion that it was impossible to save her. Novik‟s steering gear was smashed
beyond repair and the searchlights outside the harbor told him that another cruiser had
joined his adversary. Escape being impossible, he decided to sink his ship in shallow
water. With the destruction of Novik the Japanese put paid to the Russian First Pacific
Squadron.
- Missions -
The Japanese Player should intercept the Novik and damage or destroy as much
of it as possible. The Russian Player should attempt to slip past the Japanese force and
move toward Vladivostok.
ORDER OF BATTLE
Russian Imperial Fleet
[Protected Cruiser Novik]
(Captain Schulz)
Protected Cruiser Novik
Force Strength:395.
Imperial Japanese Navy
[Protected Cruiser Tsushima]
(Captain Sento)
Protected Cruiser Tsushima
Force Strength:1318.
Distant Guns 179
Tsushima, Tsushima (Engaged) 11:15 A.M. (1:39 P.M.,), May 27th,
1905
Location: 34 North, 130 East
34 Kilometers east southeast of Takeshiki
Sky: mostly clear
Rain/Haze/Fog:heavy
Temperature: 18 C.
Visibility: 18.0 Km
Wind: 22 knots, southwest
Sea State: 4, Waves 2 meters
- History -
In October 1904, Russia's Baltic Fleet, now renamed the Second Pacific
Squadron, was preparing to set out on its long and difficult journey to reinforce the
embattled Russian naval forces at Port Arthur.
The difficulties facing Rear Admiral Zinovi Petrovitch Rozhdestvenski were
unprecedented. Coal-fired warships were not designed for 18,000-mile journeys without
the benefit of extensive dockyard facilities along the way. Their reciprocating engines
pounded themselves to pieces over long periods of time, unless run at their slowest
speeds, and were prone to breakdowns. Their steam boilers needed frequent cleaning that
made the heat of the tropics, especially for the Russian crewman, an unbearable hell.
Raw crews, many of whom had never sailed before and who felt that the war was
already lost, manned the ships. Others were plotting revolution. There was a shortage of
engineers forcing the commandeering of many from private shipping firms. Most of the
Baltic Fleet was made up of men whose love of home was stronger than their sense of
duty. Gunnery and ship handling were things of mystery. Nothing went right during two
weeks of practice. Ships collided with each other, and the gunners seemed hopeless.
Rozhdestvenski's optimism was fading.
Coaling for the long voyage would be another problem. Coal had been declared
contraband, something the Japanese government had foreseen and prepared for before the
war. For years the Japanese had been purchasing large quantities of the practically
smokeless Cardiff Coal. The Russians had not.
Japan's ally, Britain, would not sell Russia even a pound of her fine Welsh coal.
Anxious to keep Russia in the war for as long as possible, Kaiser Wilhelm II eventually
agreed to help. With German bases few and far between on the route to the Far East, he
arranged for a fleet of sixty colliers of the Hamburg-Amerika Line to supply coal
between Libau in the Baltic and Port Arthur. Where there were no friendly or neutral
ports, the coal would be loaded at sea directly from the colliers.
On 15 October 1904, the Second Pacific Squadron finally set sail from the Baltic
and headed toward their comrades at Port Arthur, it would be May 1905 before they
finally arrived.
After nearly superhuman effort and an unprecedented voyage of 18,000 miles
around the world from the Baltic, now Vice Admiral Zinovi Petrovitch Rozhdestvenski
by May 1905 was steaming through the South China Sea. The Third Pacific Squadron,
Distant Guns 180
under the command of Rear Admiral Nikolai Nebogatov, had joined Rozhdestvenski's
fleet that month. The reinforcement sent by St. Petersburg was actually more of a
hindrance than help. Nebogatov's ships were old, built in the 1880s, and only one of them
could be classed a battleship. The rest were coastal defense ships that would slow the
progress of the fleet.
With Port Arthur now in Japanese hands the only remaining Russian port in the
region was Vladivostok. There were three possible routes that Rozhdestvenski could take,
all through relatively narrow straits. The first two, La Perouse and Tsugaru, were at the
northern end of the Japanese home islands. A voyage through them meant steaming up
the east coast of Japan and would require another coaling at sea, all the while vulnerable
to attack. The third alternative, the Tsushima Strait, would lead his fleet through the heart
of the Japanese controlled seas. With the condition of his fleet and the need to make
Vladivostok before his coal was gone, Rozhdestvenski made the only choice he could.
Tsushima Strait would have to be his chosen route.
Through the night of 26-27 May, the Russian fleet, steaming at 9 knots finally
began to penetrate the Tsushima Straits. Admiral Rozhdestvenski's fleet, steaming with
lights dimmed, pushed deeply into the straits and passed through the Japanese outer
patrol line. Unfortunately for the Russians the hospital ship Orel, stationed several miles
to the rear of the fleet, was lit up like a Christmas tree in observance of international law.
Shinano Maru, one of the Japanese auxiliary cruisers that had been out on the outer patrol
line was returning to her day station when she sighted Orel. Captain Morikawa,
commander of Shinano Maru, correctly identified the Russian vessel and after radioing
his report, "Enemy's smoke in sight", at 0445 hours dashed off to the north in pursuit of
the now visible Russian fleet.
Shortly after 0630 hours Mikasa joined the fleet in Douglas Inlet having left
Sylvia Basin upon receipt of the sighting report. A few minutes later a report came in
from Idzumi, which had been shadowing the Russians since dawn. The Russians were
heading for the Eastern Channel. Togo led his ships to sea, heading round to the north of
Tsushima Island and then southeast toward Okinoshima, the place where nearly a year
ago the Russians had sunk the Japanese military transports. Togo wanted to intercept the
Russians at this spot where the spirits of the unburied Japanese dead would inspire his
men to fire with a vengeance.
At around 0950 hours Admiral Kataoka leading the Fifth Division, who had been
steaming in search of the Russian fleet, could dimly make out in the mist what seemed to
be over a dozen ships in two lines ahead. Gradually closing to five miles he kept a
parallel course on their port bow, followed by Rear Admiral Togo leading the Sixth
Division. By 1015 hours Admiral Kataoka realizing that he was in the presence of the
Russian main body, hoisted his battle flags and proceeded to lead the enemy toward
Admiral Togo's battle line.
When Admiral Dewa leading the Third Division arrived at around 1114 hours, he
closed the range to the Russians to such an extent that Rozhdestvenski, who had earlier
formed his fleet into a single line of battle, split his First Division off in a failed attempt
to ward off what he assumed was an attack. Rozhdestvenski had attempted to take his
First Division to starboard of the main line and form line abreast in order to confront
head-on the Japanese cruisers coming in from his port bow. Poor ship handling or missed
signals threw his division into disarray and stymied his plan, now forcing his division to
Distant Guns 181
race to get back into position ahead of the rest. While this was happening other Russian
ships opened fire on Dewa's cruisers. Dewa turned to port and pulled ahead of the
Russians, disappearing into the mist.
At 1247 hours Admiral Togo was about 10 miles to the northwest of Okinoshima.
Having never been informed that Rozhdestvenski had at one point formed his fleet into
single line ahead, Togo was acting under the false presumption that if he now turned west
and then south he would be able to engage the Russian fleet's weaker port column. It was
purely owing to the Russians poor seamanship that when the two fleets engaged they
were still in two columns, as Togo believed. Togo also believed that the Russians were
further to the east and that they should appear before him off his port bow. Then at 1339
hours with the mist clearing the enemy fleet came into sight, only they were to the
southwest off his starboard bow.
Admiral Togo may have been surprised by the Russian's position, but he quickly
reacted. Togo ordered his ships to starboard and crossed the Russian's path as if to attack
the port column, which his scouts had reported to be the weaker of the two, on an
opposite course.
Then to the amazement of the Russian commanders and sailors alike, Togo led his
fleet in a great U-turn, coming up on a parallel course with the Russians on their port
side.
Within the hour, the battle was decided. Four Russian battleships were put out of
commission by the concentrated fire of Admirals Togo and Kamimura's divisions. The
Russian ships scattered, and the battle quickly degenerated into a melee. The shelling
continued till 1920 hours, when Admiral Togo ordered his flotillas to finish off the rest.
- Missions -
The Japanese Player should intercept the Russian force and damage or destroy as
much of it as possible. The Russian Player should attempt to slip past the Japanese force
and move toward Vladivostok.
ORDER OF BATTLE
Russian Imperial Fleet
[1st Division]
(Vice Admiral Z. Rozhyestvyenski)
Battleship Knyaz Suvorov
Battleship Imperator Aleksander III
Battleship Borodino
Battleship Oryel
[2nd Division]
(Rear Admiral D. Fyelkyerzam)
Battleship Oslyabya
Battleship Sisoi Vyeliki
Battleship Navarin
Distant Guns 182
Armored Cruiser Admiral Nakhimov
[3rd Division]
(Rear Admiral N. Nyebogatov)
Battleship Imperator Nikolai I
Coastal Battleship Gen. Admiral Apraksin
Coastal Battleship Admiral Senyavin
Coastal Battleship Admiral Ushakov
[Cruiser Division]
(Rear Admiral O. Enkvist)
Protected Cruiser Oleg
Protected Cruiser Avrora
Armored Cruiser Dmitri Donskoi
[Scouts]
Protected Cruiser Svyetlana
Auxiliary Cruiser Almaz
Auxiliary Cruiser Ural
[Independent Command]
Armored Cruiser Vladimir Monomakh
[Support Division]
Transport Anadyr
Transport Irtysh
Repair Ship Kamchatka
Transport Koreya
Auxiliary Ship Rus
Auxiliary Ship Svir
[Escort Division (1)]
Protected Cruiser Zhyemchug
Destroyer Bedovi
Destroyer Bistri
[Escort Division (2)]
Protected Cruiser Izumrud
Destroyer Buini
Destroyer Bravi
[2nd Destroyer Division]
Destroyer Blestyashchi
Destroyer Bezupryechni
Destroyer Bodri
Destroyer Gromki
Distant Guns 183
Destroyer Grozni
[Support Division]
Hospital Ship Oryel
Transport Kostroma
Force Strength:41526.
Imperial Japanese Navy
[1st Division]
(Admiral H. Togo)
Battleship Mikasa
Battleship Shikishima
Battleship Fuji
Battleship Asahi
Armored Cruiser Kasuga
Armored Cruiser Nisshin
[2nd Division]
(Vice Admiral H. Kamimura)
Armored Cruiser Idzumo
Armored Cruiser Adzuma
Armored Cruiser Tokiwa
Armored Cruiser Yakumo
Armored Cruiser Iwate
Armored Cruiser Asama
[5th Division]
(Vice Admiral S. Kataoka)
Protected Cruiser Itsukushima
Battleship Chin Yen
Protected Cruiser Matsushima
Protected Cruiser Hashidate
Cruiser Yaeyama
[3rd Division]
(Vice Admiral S. Dewa)
Protected Cruiser Kasagi
Protected Cruiser Chitose
Protected Cruiser Otowa
Protected Cruiser Niitaka
[Fourth Division]
(Rear Admiral Uriu)
Protected Cruiser Naniwa
Distant Guns 184
Protected Cruiser Takachiho
Protected Cruiser Akashi
Protected Cruiser Tsushima
[6th Division]
(Rear Admiral M. Togo)
Protected Cruiser Suma
Armored Cruiser Chiyoda
Protected Cruiser Akitsushima
[Protected Cruiser Idzumi]
Protected Cruiser Idzumi
[4th Destroyer Division]
(Commander Suzuki)
Destroyer Asagiri
Destroyer Murasame
Destroyer Shirakumo
Destroyer Asashio
[1st Destroyer Division]
(Captain G. Fujimoto)
Destroyer Harusame
Destroyer Arare
Destroyer Ariake
Destroyer Fubuki
[3rd Destroyer Division]
(Commander Yoshijima)
Destroyer Shinonome
Destroyer Usugumo
Destroyer Kasumi
Destroyer Sazanami
[5th Destroyer Division]
(Commander Hirose)
Destroyer Shiranui
Destroyer Murakumo
Destroyer Yugiri
Destroyer Kagero
[2nd Destroyer Division]
(Commander E. Ishida)
Destroyer Ikazuchi
Destroyer Inadzuma
Destroyer Oboro
Distant Guns 185
Destroyer Akebono
[Cruiser Chihaya]
Cruiser Chihaya
[Cruiser Tatsuta]
Cruiser Tatsuta
Force Strength:74725.