dog training classes - animal sheltering · pdf filekenny lamberti you might want to consider...
TRANSCRIPT
XII Dog Training Classes
“ What we have to learn to do, we learn by doing.” —Aristotle
Kenny Lamberti
You might want to consider providing free dog
training classes to your community of focus.
Dog training is considered a luxury item that most
people want and need, but cannot afford. Providing
this service offers a unique opportunity to elevate the
human-animal bond. Classes help build trust with dog
owners by making their interactions with their dogs
fun. The interactions you can have with community
members at a fun and effective training class provide
an excellent way to connect and develop more in-
depth relationships with clients.
Objectives of free dog training classes are:
• To elevate the human-animal bond.
• To keep dogs in their homes and decrease shelter
intake and euthanasia.
• To provide pet owners with positive and fun
activities to share with their dogs.
• To provide dogs a mentally and physically
stimulating lifestyle.
• To raise people’s understanding of basic dog
behavior and overall pet care.
• To expose people to fun and positive activities with
their dog, such as dog sports and therapy work.
• To create a forum to share information about broader
animal welfare issues, such as spay/neuter, shelter
overpopulation, general pet wellness, and ways to
get involved in animal welfare.
• To extend dog training services to pet owners in
under-served communities where the luxury of
training has been limited or nonexistent.
• To mentor students identified as leaders who may
be interested in becoming trainers.
• To create opportunities for students to become
animal advocates in their own community
and beyond.
• To provide a new, fresh training approach for animal
professionals as an alternative to the traditional
industry standards.
XII Dog Training Classes
You’ll achieve the most overall success with the classes by opening them to all breeds, ages, and levels of training, and by always focusing on and teaching positive reinforcement.
148
PFL Training Philosophy
PFL uses a relationship-based approach to enhance
and elevate the bond between dogs and their
human companions. The PFL approach focuses on
understanding why dogs exhibit specific behaviors
and how strengthening the relationship and improving
communication between human and dog can create
a healthy, happy, and lifelong partnership. PFL dog
training is inclusive, not exclusive, and employs
techniques that do not use fear, pain, or intimidation
as motivation.
Although the relationship-based approach of PFL dog
training is different from the four quadrants above,
it does fit into the Positive Reinforcement quadrant.
Positive reinforcement-based dog training builds
confidence in dogs and trust in the human handler,
which elevates the bond between dog and owner.
This is one of the fundamental principles of PFL dog
training. The PFL approach teaches dogs what they
should do instead of focusing on what they should
not do. On the other hand, positive punishment
approaches teach dogs what not to do without
providing an alternative behavior. PFL dog training
does not practice this type of training because of the
obvious physical pain, discomfort, and emotional
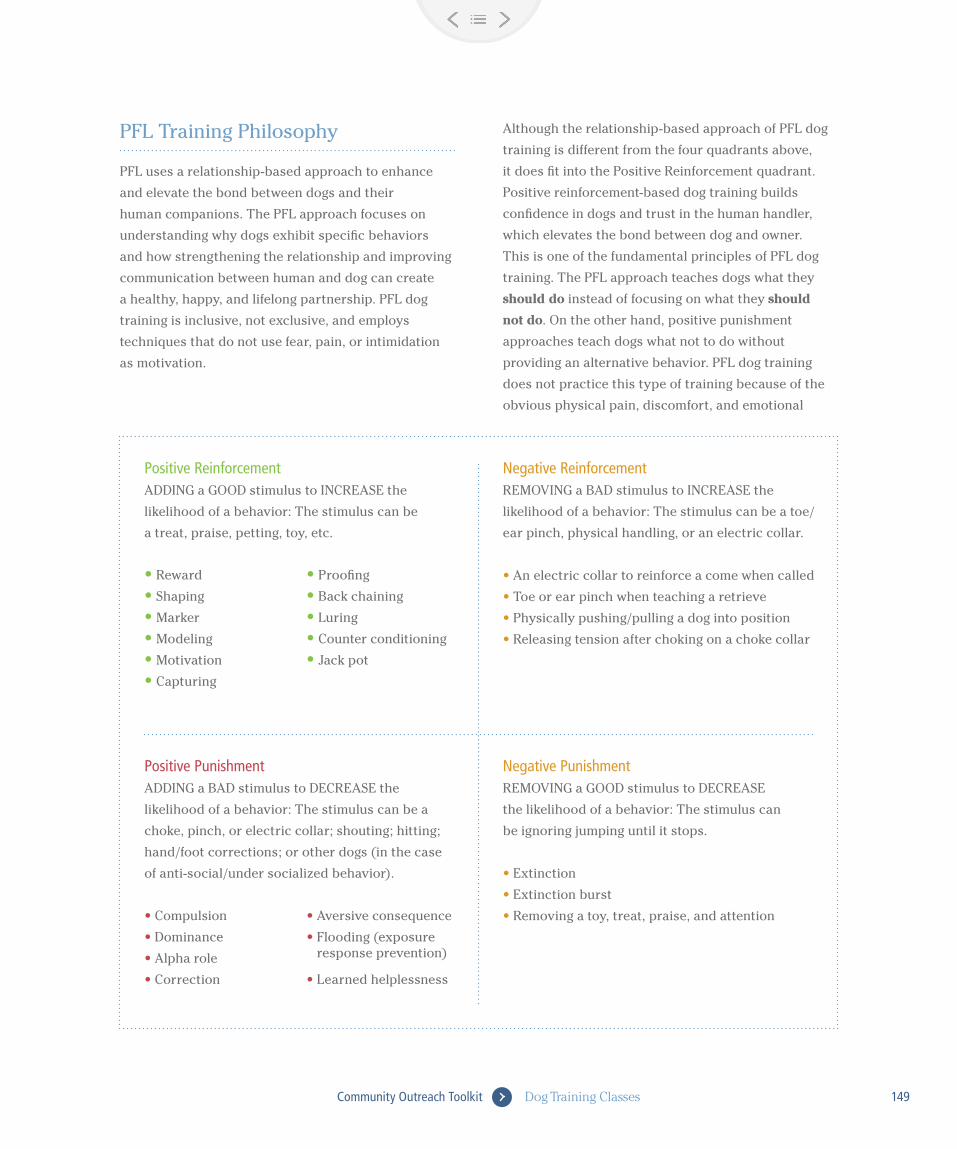
Positive ReinforcementADDING a GOOD stimulus to INCREASE the
likelihood of a behavior: The stimulus can be
a treat, praise, petting, toy, etc.
Negative ReinforcementREMOVING a BAD stimulus to INCREASE the
likelihood of a behavior: The stimulus can be a toe/
ear pinch, physical handling, or an electric collar.
• An electric collar to reinforce a come when called
• Toe or ear pinch when teaching a retrieve
• Physically pushing/pulling a dog into position
• Releasing tension after choking on a choke collar
• Reward
• Shaping
• Marker
• Modeling
• Motivation
• Capturing
• Proofing
• Back chaining
• Luring
• Counter conditioning
• Jack pot
Positive PunishmentADDING a BAD stimulus to DECREASE the
likelihood of a behavior: The stimulus can be a
choke, pinch, or electric collar; shouting; hitting;
hand/foot corrections; or other dogs (in the case
of anti-social/under socialized behavior).
Negative PunishmentREMOVING a GOOD stimulus to DECREASE
the likelihood of a behavior: The stimulus can
be ignoring jumping until it stops.
• Extinction
• Extinction burst
• Removing a toy, treat, praise, and attention• Compulsion
• Dominance
• Alpha role
• Correction
• Aversive consequence
• Flooding (exposure response prevention)
• Learned helplessness
149Community Outreach Toolkit Dog Training Classes
trauma for the dog, and because undesired behaviors
often return when the punishment stops. These
approaches damage the trust between the dog and the
owner, breaking their bond. With PFL’s goal of keeping
dogs in their homes for life and providing sustainable
training tools, PFL dog training considers the long-
term connection between human and dog.
PFL’s relationship-based training teaches the dog
to focus on his handler and not on his environment.
The PFL method teaches dogs non-reaction in the
face of distractions through the Focus on Handler
approach and does not push socialization with others.
Not every dog enjoys or desires social interaction
with other dogs and people, and not every dog
has the appropriate social skills to engage in these
interactions. Forced socialization creates stress and
breaks down trust between the handler and dog,
while the Focus on Handler approach enhances
communication, understanding, and confidence and
avoids stress for the dog. For dogs who enjoy social
interaction with people and other dogs, PFL training
teaches and facilitates appropriate greetings and social
conduct to give both dogs and handlers the best skills
for real-life experiences.
PFL works to keep dogs in their homes and with their
families for life, and works to provide tools to ensure
the highest quality of life. The PFL dog training
approach shares information with dog owners about
common behavior concerns, such as house breaking,
chewing, transitioning dogs indoors, leash walking,
dog-to-dog interactions, and many more. Through
dog training, PFL identifies new ambassadors and
advocates, creates a platform for issues, such as
spay/neuter, and creates a new audience that
historically has not viewed rescue or adoption
as an option. Furthermore, it fosters positive
relationships with the community.
With a unique approach to dog training, PFL uses a
testing system called Certified Pet Partner. It is designed
to showcase the relationship and understanding
between the handler and dog. This test is used as a
measurement for the program but also provides a
way to solidify the human-animal bond and a sense of
accomplishment for the owner. The test and additional
information is provided at the end of this chapter.
Outreach
Ideally, training classes should be located within your
neighborhood of focus. Depending on the region and
season, you can hold them in a facility, parking lot, or
park. You’ll achieve the most success by opening them
to all breeds, ages, and levels of training.
After establishing a location, market your classes
using the same PFL methodology used for community
outreach. Training classes should be open to all
interested dog owners and promotions should be
strategically targeted in your area of focus.
• Create a simple flyer with pertinent information
(when, where, what). Only post flyers in your area
of focus.
Sample Dog Training Flyer
• Go door-to-door to promote just as you do with
general community outreach, as discussed in
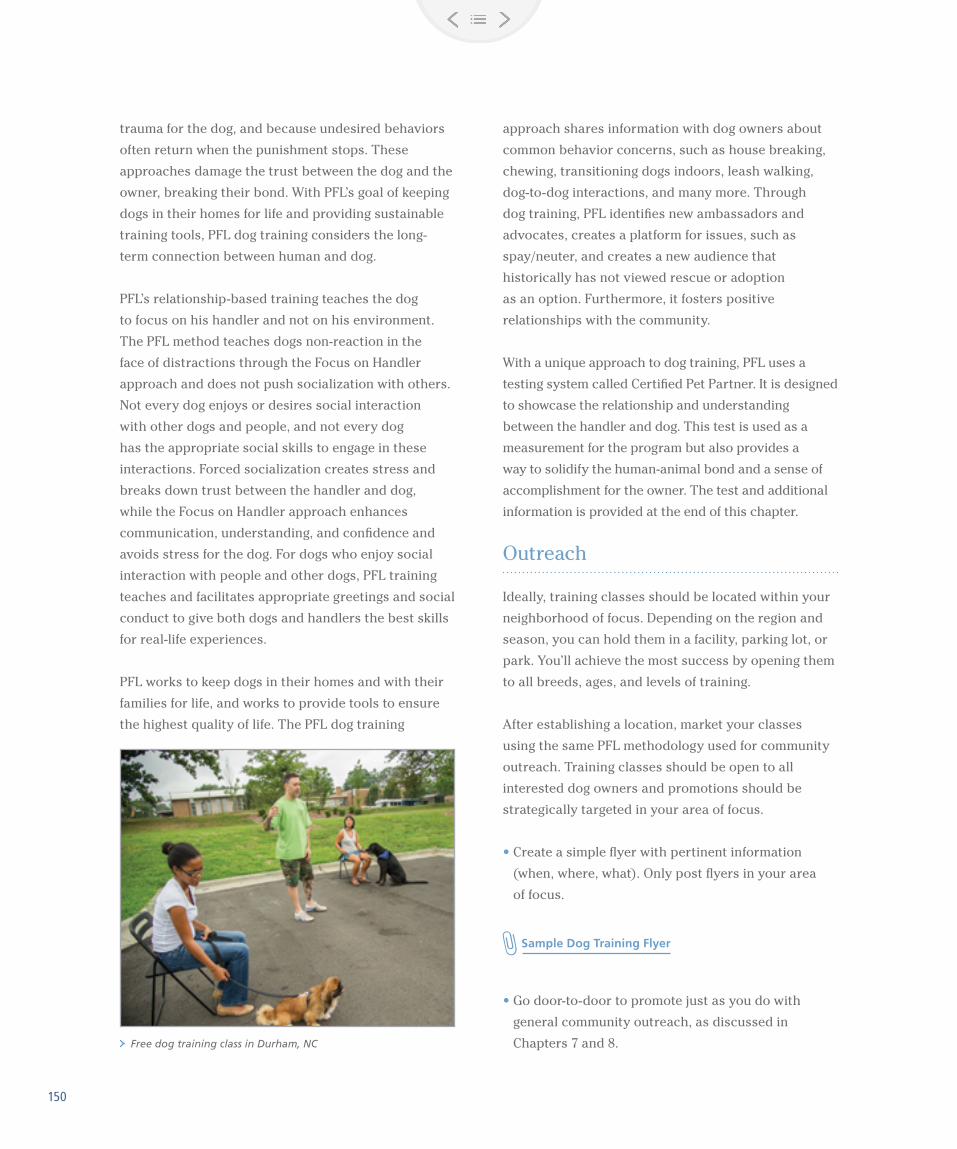
Chapters 7 and 8. Free dog training class in Durham, NC
150
• Do not use traditional marketing such as Facebook,
TV, radio, etc., as this will ultimately draw clients
from outside your focus area.
• Ask people to share details with others they know
who have dogs—word of mouth works.
Classes should be open enrollment, meaning that
clients do not have to pre-register to attend. Make
sure this is clear on marketing materials. Because
changing circumstances often make it difficult for
clients to plan ahead for a training class, you do not
want to discourage attendance; the goal is to bring out
people who haven’t had access to training in the past.
Depending on the demand, more than one class per
week should be scheduled. If that’s not possible, assess
overflow students and put them on a waiting list for the
next class or help them with any pressing issues (and
possibly schedule them for home training sessions).
Clients should be welcome to attend as many or as few
sessions as possible, and should never be made to feel
bad for missing a class. Your level of follow-up with the
students each week between classes will have a major
impact on consistent attendance. To ensure consistent
attendance and truly address any issues students
are facing with their dogs, all clients should get at
least one phone call or home visit each week between
classes. This call serves as good customer service to
thank people for attending, as well as, a reminder for
the next class. Keeping students engaged is the way to
ensure that they get the most out of the classes and to
build the strongest bond possible with their dogs.
Clients who struggle in class should get a call to make
them feel comfortable, let them know that what they
are experiencing is normal and okay, and encourage
them to return. You want to ensure that every student
has a positive experience and doesn’t think their dog is
failing in any way. If possible, struggling students should
receive a home visit to provide additional guidance.
The more engaged the students are, the more
consistent their attendance will be and the stronger
relationship they will build with their dogs.
Who Makes a Good PFL-Style Dog Trainer?
Every dog trainer has his or her own personality and
style; this is what makes classes fun, engaging, and
holds the attention of the class. The right trainer for
PFL-style dog training has a full understanding of
all dog training philosophies, is dynamic, and has a
strong presence. Most of all, the trainer has quality
people skills and likes people as much as they like
dogs. The trainer should genuinely care for the clients,
which creates deeper relationships between trainer
and clients, and in turn, the dogs.
To be successful at PFL-style dog training, the trainer
must be open and accepting—it is important to meet
the clients where they are. This means setting aside
all judgment of clients’ “training techniques” and their
interactions with their dog. Until the trainer develops a
relationship with the clients, no credibility exists. The
trainer must demonstrate by example a better way for
clients to interact and communicate with their dogs.
This is why it is vital to understand all methods of dog
training, whether positive or negative, in order to show
and share knowledge when questioned or challenged.
A trainer should also have the ability to improvise and
react to an ever-changing group class environment.
Because the class is open admission, varying numbers
of students and dogs will arrive at class each week.
Some dogs will be under-socialized and reactive, so
the trainer must remain calm and in control of the
class, regardless of the situation. To maintain a safe
and enjoyable environment, the trainer will also need
competent volunteers to assist in managing check-in,
the clients, and the dogs. The trainer should train the
volunteers in the skills required to provide effective,
safe, and fun classes.
151Community Outreach Toolkit Dog Training Classes

Volunteers
Volunteers are essential to the success of the training
classes. Volunteers should receive training from the
head trainer and understand the PFL philosophy.
Holding a volunteer orientation, specifically for
training class volunteers is most effective. At this
orientation, the head trainer can communicate the
appropriate code of conduct in class, the language to
use and not use, skills to know (e.g. effective defensive
leash handling, class set-up, and maintaining class
flow), and all other details necessary to hold safe and
fun training classes.
Training class tasks for volunteers are:
• Set up registration table
• Prepare and refill treat bags
• Prepare and refill water bowls and set
in place around the training area
• Set up “place” spots
• Greet and welcome students
• Hold leashes while students register for class
• Escort students to assigned “place” as determined
by the head trainer
• Hold leashes during class as needed
• Assist in fitting collars and harnesses as needed
• Break down of “place” spots
• Break down of registration table
Volunteers are not to instruct students or give training
advice unless specifically requested by the trainer.
However, volunteers will often assist students with
exercises and instructions given by the trainer.
Class Details
Class size is determined by the comfort level of
the trainer and the training space’s size. Because
the classes are open enrollment, be sure to have
a plan in case more students show up than can be
accommodated. Designate a specified person to greet
any overflow students and collect their information.
If a second trainer or trainer’s assistant is available,
he or she could take extras on a dog walk, do minimal
training in a separate area, or simply chat with them to
reschedule and share basic information. The key is
to make everyone feel welcome and to ensure them
you’ll be in touch for additional training opportunities.
Most trainers and locations will be comfortable
with a class size between 10–25 students. The level
of experience with group classes and the quality
of volunteers and training assistants available will
determine where in this range your classes should
fall. Usually an outdoor space will accommodate
more students and have greater options for spacing.
However, an indoor space is not affected by weather
and is often a more controlled environment.
Defensive Leash Handling
• Hold the leash approximately two feet from
the collar. At this length, if the dog turns on
the handler, the leash is shorter than the
handlers arm length and the handler can
react in one motion to keep safe.
• Maintain light tension on the leash at all
times so that the handler is aware of where
the dog is without having to look.
• The handler should loop the leash over the
thumb and through the palm of the hand for
additional support and strength.
152
Regardless of the venue, there should be a clear and
organized set-up for the class as follows:
• Registration table clearly marked—all students
should enter at this location before reaching the
training area. This allows for the easy interception
and assessment of dogs before they reach the space
to greet each other
• Data collection table
• Tents/canopies set up over registration
and data collection table (if outside)
• Chairs for spectators
• Water bowls for dogs
• Cones to delineate the training area
• “Place” spots in the training area—these should be
spaced a minimum of six feet apart. If space permits,
a 12 ft. minimum is preferred.
As the clients arrive, the process should be:
[1] Students are welcomed and greeted by volunteers.
[2] Students register and fill out necessary paperwork.
[3] All dogs are checked for a well-fitting collar—well
fitted is determined by whether the dog can get
free from the collar. Any too-loose or too-tight
collars or harnesses are replaced, as are chains,
ropes, wires, etc. At this point, loop leashes, choke,
and pinch collars are all accepted. You will have
time to individually and thoroughly engage people
about the types of equipment to use, but not
during registration.
[4] Each student is handed a treat pouch filled
with treats.
[5] All students are advised to keep their dogs close to
them and not to allow their dog to interact with any
other dog.
[6] The trainer is at the registration table to greet
clients, quickly assess the dogs, and assign them
a “place” spot. Assignments are made based on
size and reactive tendencies. Size related training
techniques are relevant because teaching a 12 lb.
dog to lay down can be different from teaching a
60 lb. dog to lay down. If small dogs are grouped
together, the trainer can instruct them together,
which is most effective and efficient. Dogs that
appear to be reactive will be grouped away from
the other dogs. However, small reactive dogs
should be grouped with other small dogs rather
than large reactive dogs.
[7] Training assistants escort students to their
assigned “place.”
[8] Students are advised to keep their dog on/in the
assigned “place.”
[9] Volunteers are stationed close by for assistance
if required by a student.
[10] Volunteers remind students of no dog interaction
and other safety precautions.
Supplies needed for classes:
• “Place” spots—cones, boxes, tape on the floor, etc.
• Treat bags (Home Depot fabric tool aprons are cheap
and practical)
• Voice projection device, if needed
• Tables and chairs
• Tents/canopies, if outdoors
153Community Outreach Toolkit Dog Training Classes
• Registration paperwork—data collection forms,
sign-in sheet, liability waivers
• Training handouts
• Traffic cones
• Martingale collars
• Buckle collars
• 6-foot leashes
• Head halters
• Easy walk harnesses
• Temporary leads
• Dog waste bags
• Water bowls
For the class itself, Basic and Advanced curriculum are
provided at the end of this chapter.
As discussed earlier, every trainer has his or her own
style and preference for how to run group classes, but
the flow for each class generally follows this schedule:
[1] Greeting/welcome
[2] Explanation of what will happen during the class
[3] Class rules
[4] Curriculum for class
[5] Games and prizes
[6] End of session
Sample Class Rules:
• One handler per dog permitted in the training area
• No children under 14 permitted to handle a dog
• Dogs are not allowed to play with or greet other dogs
unless directed by the trainer
• Dogs must stay on leash unless directed by trainer
• Focus on your training; don’t excite or play with
other people’s dogs
• Always ask the handler’s permission before offering
treats to a dog that is not your own
• Try to keep conversation quiet and to a minimum; it
can be distracting to people and their dogs
• No human food allowed in the training space
• Keep cell phones off and put away
• If you need to leave the space for any reason, make
sure to let the trainer know so you don’t disrupt class
• Absolutely no hitting or yelling at any dog in class
• Most importantly, HAVE FUN!
In-Home Training Sessions
As a supplement to or instead of group training
classes, in-home dog training sessions can be very
beneficial to your clients. They can help elevate the
bond clients have with their dogs to keep dogs in their
homes for life.
154
In-home training sessions are ideal for:
• Clients struggling in group classes (with the goal
of returning to class)
• Clients unable to travel or make it to group classes
• Clients with highly reactive dogs (with the goal
of eventually attending group classes if possible)
• Elderly clients who are safer working with their
dog at home
• Clients with two or more dogs (and who are unable
to handle multiple dogs at once in class)
The key to success for in-home training sessions is
structure and consistency. First, create a schedule that
works for both the client and trainer. If sessions every
other week are all that is possible, that’s okay, but
be consistent. It’s better to have more time between
sessions than to miss scheduled sessions. Next, have
a detailed conversation with the client to identify what
behaviors are the most important to address. Really
listen to what the client is struggling with and what
will improve the quality of life for both the human and
the dog in the home. Create a timeline for expected
improvement. As much as possible, include all family
members in the discussion, including children. The
more consistent the dog’s experience is, the more
successful the dog will be.
For the sessions, make sure to take your own treats
for use in the training and bring equipment that will
be best used in the session in case the owner does
not have safe, secure equipment. Always provide
the owner with written instructions (homework) of
what you want them to work on with the dog between
training sessions. Don’t limit the sessions to inside the
home only. Taking a walk on the street where the client
lives is great real-life practice for the client and their
dog, as well as, a great opportunity to meet other
pet owners.
In-home training sessions not only benefit the client
and the dog but provide you with the opportunity to
build a trusting, positive relationship with the client.
You might also engage clients on spay/neuter and
other general wellness topics. When a client sees
improvement in their dog’s behaviors or sees issues
disappear that have been stressful or overwhelming,
not only are you increasing the odds that the dog will
remain in that home, but you are setting yourself up
to be a trusted resource for any questions or issues
that client may have.
Community Dog Walks
In addition to or instead of group classes and in-home
training sessions, your training program can include
community dog walks. If you are unable to secure
a building or space to hold group training classes,
community dog walks can teach skills and improve
the bond between clients and their dogs. Community
dog walks are designed to encompass all of the basic
skills that a client and their dog need to enjoy taking
walks and to address practical and realistic challenges
that can happen every day on walks. Dog walks
provide many benefits to your clients, their dogs, your
outreach program, and the community overall:
• Real-life experience for clients and dogs
• Opportunity to practice skills with distractions
• Fun, positive activity for clients and the community
• Opportunity to meet new pet owners in the
community
• Visibility in your area of focus
• Marketing and promotion for your program
155Community Outreach Toolkit Dog Training Classes
For community dog walks, having conversations with
the participants beforehand is very important and lets
you be somewhat selective in who participates. These
walks are not ideal for reactive dogs or dogs that are
easily stressed out. You can always work with certain
clients and dogs on skills needed to participate in
these walks, but the walks must be enjoyable and safe
for all involved.
For the walks, pick an open area to meet where
instructions and details can be given to the group.
The meeting spot should be where the walk begins,
and the walking route should be a residential “hot
spot” in the community of focus. The walks should
take place at a time when people are out and about—
maybe a Saturday morning or Sunday afternoon. Avoid
business streets, major thoroughfares with high traffic,
and large organized groups of people, such as events
at city parks, sporting events, music festivals, etc.
Each trainer can tweak the details of the walks. Just
make sure they are fun, informative, effective, and
safe. To ensure safety:
• All dogs need secure equipment. When first meeting,
the trainer and volunteers should inspect every
dog to make sure their equipment is secure and
fits properly. If not, proper equipment should be
provided before the walk begins.
• There should be one trained staff person or
volunteer for every four dogs. They should be
positioned throughout the group at all times and
constantly surveying the dogs and providing
guidance to the clients.
• Always have extra leashes and collars on hand
during the walk in case a loose dog approaches the
group or equipment breaks.
On the walks, staff or volunteers should also have
on hand:
• Flyers, business cards, or program information
• Treats
• Dog waste bags
• Deterrent spray, such as citronella spray
or Direct Stop
• Bottles of water and a dog bowl
156
Nine Week Program
Weeks 1–6: Six Weeks of Basic Obedience Training
Week 7: PFL Test Week
Week 8: Graduation Ceremony
Week 9: Workshop
Week 1: Introduce the training philosophy behind
positive reinforcement; the rules of the class;
information on how dogs learn; equipment students
will need; the layout of the room; and the overall
structure of the training classes. Begin with basic
commands/tasks, such as, getting the dog’s attention,
teaching the dog to sit and stay, teaching the dog to
walk on a leash. Assign and explain the first homework
assignment: Teaching a dog his name and nothing in
life is free. (For details on these assignments, see the
attachments provided.)
Nothing is Free
Teach Your Dog His/Her Name
Week 2: Start with review of the basics from previous
week; add duration and distance to keeping the dog’s
attention with sit and stay. Add distractions to the stay
and greeting exercises. Play a game to see who can get
the “fastest sit” and start teaching “down.” Introduce
“pushups” (dogs going from sit to down repeatedly)
and explain and assign homework:
Sit and Stay
Week 3: Start with review of the previous week, add
duration and distance to all basic obedience learned
so far. Introduce down and down/stay challenges like
asking dogs to stay while the handler walks away (only
if safe and confident dogs/handlers are ready).
Teach new items, like shaking hands, greeting other
dogs, knocking on wall, etc. Offer prizes for good
work. Start loose leash walking, pressure and release
techniques and proper leash handling. Explain and
assign homework:
Down and Stay
Week 4: Start with review of the previous week.
Get right into distracted sit and stays with duration
and distance (those who are ready should be in down
stays and dropping leash—important: only those who
are ready). Play the “Fastest Down in Town” game with
prizes and incorporate loose leash work. Start basics
of recall and explain and assign homework:
Off
Week 5: Start with review of previous week and then
go right into loose leash walking around the room with
the trainer prompting people with random commands
like sit, down, stay, etc. Recall training should be
a significant part of this session. Use games such
as relay races, puppy ping-pong, etc. Start leave it
exercises and explain and assign homework:
Leave and Take It
Basic Curriculum
157Community Outreach Toolkit Dog Training Classes
Week 6: Review all of the basics that have been taught.
Ask the class if there is anything they are stuck on
or having trouble with—let the students pick what
things to work on. Talk about the Certified Pet Partner
(CPP) test the following week, who may be ready, what
specific people/dogs need to work on, etc. Talk about
the remaining three weeks—CPP test, graduation class
and celebration, and workshop. Hand out Learning
Theory sheet and let people know the contents are
good to review and understand before moving forward
in the next session or Advanced Training.
How Dogs Learn
Week 7: CPP TESTING WEEK. This can also be an
extra work week for those not testing to try and get
them ready. This week is open to anyone—current
students, previous students who may have failed,
new people who have done some of their own training,
etc. Disseminate information on Graduation Day
and Workshop.
Between Week 7 and Week 8, there can be testing
occurring during the week to see if anyone can pass
before Graduation Day.
Week 8: GRADUATION DAY. Give out session
completion certificates for those who did not test or
did not pass the test and certificates for those who
passed CPP (actual certificates will arrive in the mail
at a later date). Most important, be sure to thank
everyone and encourage them to attend the following
week’s workshop and offer ways they can stay involved
with the program.
Week 9: WORKSHOP. This can be determined for each
session based on need, availability of speakers, etc.
General topics to be covered are spay/neuter, basic
behavior problems, and understanding aggression.
Speakers include veterinarians, local trainers, animal
shelter/animal control personnel and suggested
presentations include therapy/working dogs, trick
performances, and so on. This week should be focused
on providing information, raising awareness of all the
possibilities for trained dogs, providing ideas on jobs
in the animal welfare field, etc.
158
Trainer must approve participation in the advanced class.
Nine Week Program
Weeks 1–6: Six Weeks of Advanced Training Classes
Week 7: Certified Pet Partner (CPP) Testing Week
Week 8: Graduation Ceremony
Week 9: Workshop
Week 1: Start off with a review of all basic obedience:
sit, down, stay, and recall. Add distraction and
duration to all commands and begin off-leash down/
stay. Homework: master an off-leash down/stay.
Week 2: Start class with all dogs in a stay and have
each handler drop the leash and shake hands with the
trainer when directed. Have the dogs remain in stay
while the handler leaves to greet another dog. Other
stay challenges to utilize are having the handler leave
the room, get objects from a closet, bounce a ball,
etc. Start teaching heel on leash and students who are
ready should start working off leash. Introduce weave
poles with heel. Homework: master heel.
Week 3: Start class with all dogs in a down/stay,
have each handler walk to the center of the room and
turn their back to the dogs. Set up weave poles and
hurdles; work obstacles off leash and work on recall
with multiple dogs passing each other. Note that agility
equipment is used to challenge dogs, not for speed
or proficiency. Add in distractions, such as balls, toys,
and other dogs. Homework: master a reliable recall.
Week 4: Start class by playing musical chairs on-leash
and work towards off-leash. Reward the winners with
prizes. Set up multiple obstacle agility courses; as
needed, split into two groups so dogs are not sitting
around idle when others are active. The goal is for
all dogs to be working off leash as much as possible.
Homework: teach dog a trick.
Week 5: OFF-LEASH WEEK. Go through all commands
from previous weeks without a leash. Introduce simple
detection work; put treats in a can or peanut butter
container and teach dogs to seek them on command.
Set up agility equipment as obstacles for dogs to
navigate while performing commands. Homework:
teach dog to seek or find.
Week 6: HANDLER’S CHOICE. The trainer should ask
the class what they want to work on. Any dog that has
not passed the Certified Pet Partner (CPP) test should
work on what is needed to pass and be prepared
to take the test the following week. Incorporate
competitive games, such as musical chairs, agility
course competitions, longest downs and stays, etc.
Week 7: CPP TESTING WEEK. Students who have
passed the CPP test should be encouraged to attend
class and assist.
Week 8: Give out session completion certificates for
those who did not pass the test and certificates for
those who passed CPP (actual certificates will arrive
in the mail at a later date). Most important, be sure
to thank everyone and encourage them to attend the
following week’s workshop, and offer ways they can
stay involved with the program.
Advanced Curriculum
159Community Outreach Toolkit Dog Training Classes

Week 9: WORKSHOP. This can be determined each
session based on need, availability of speakers, etc.
General topics to be covered are spay/neuter, basic
behavior problems, and understanding aggression.
Speakers include veterinarians, local trainers, animal
shelter/animal control personnel, and suggested
presentations include therapy/working dogs, trick
performances, etc. This week should be focused on
providing information, raising awareness of all the
possibilities for trained dogs, providing ideas on jobs
in the animal welfare field, etc.
Dog learning “sit” at training in a local park
160
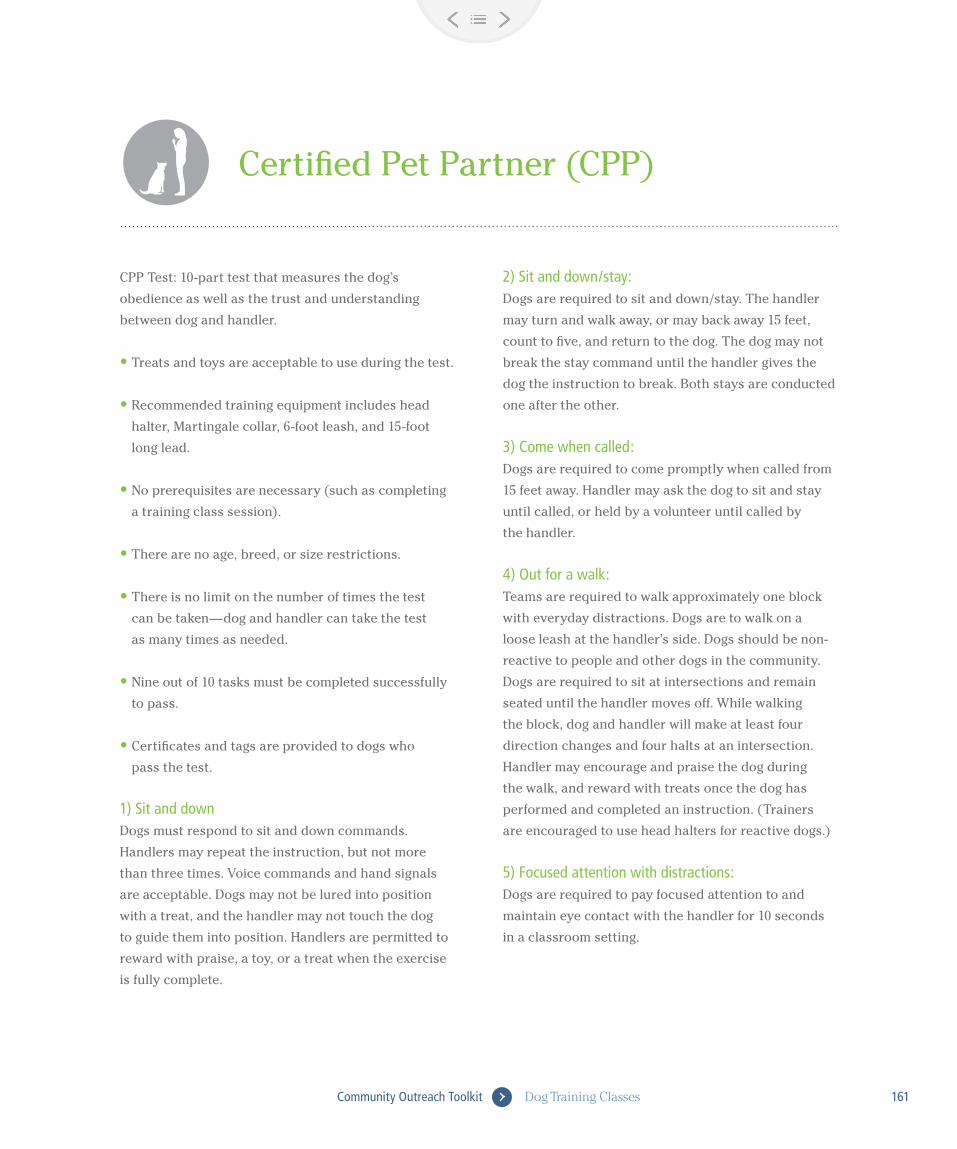
Certified Pet Partner (CPP)
CPP Test: 10-part test that measures the dog’s
obedience as well as the trust and understanding
between dog and handler.
• Treats and toys are acceptable to use during the test.
• Recommended training equipment includes head
halter, Martingale collar, 6-foot leash, and 15-foot
long lead.
• No prerequisites are necessary (such as completing
a training class session).
• There are no age, breed, or size restrictions.
• There is no limit on the number of times the test
can be taken—dog and handler can take the test
as many times as needed.
• Nine out of 10 tasks must be completed successfully
to pass.
• Certificates and tags are provided to dogs who
pass the test.
1) Sit and downDogs must respond to sit and down commands.
Handlers may repeat the instruction, but not more
than three times. Voice commands and hand signals
are acceptable. Dogs may not be lured into position
with a treat, and the handler may not touch the dog
to guide them into position. Handlers are permitted to
reward with praise, a toy, or a treat when the exercise
is fully complete.
2) Sit and down/stay:Dogs are required to sit and down/stay. The handler
may turn and walk away, or may back away 15 feet,
count to five, and return to the dog. The dog may not
break the stay command until the handler gives the
dog the instruction to break. Both stays are conducted
one after the other.
3) Come when called:Dogs are required to come promptly when called from
15 feet away. Handler may ask the dog to sit and stay
until called, or held by a volunteer until called by
the handler.
4) Out for a walk:Teams are required to walk approximately one block
with everyday distractions. Dogs are to walk on a
loose leash at the handler’s side. Dogs should be non-
reactive to people and other dogs in the community.
Dogs are required to sit at intersections and remain
seated until the handler moves off. While walking
the block, dog and handler will make at least four
direction changes and four halts at an intersection.
Handler may encourage and praise the dog during
the walk, and reward with treats once the dog has
performed and completed an instruction. (Trainers
are encouraged to use head halters for reactive dogs.)
5) Focused attention with distractions:Dogs are required to pay focused attention to and
maintain eye contact with the handler for 10 seconds
in a classroom setting.
161Community Outreach Toolkit Dog Training Classes
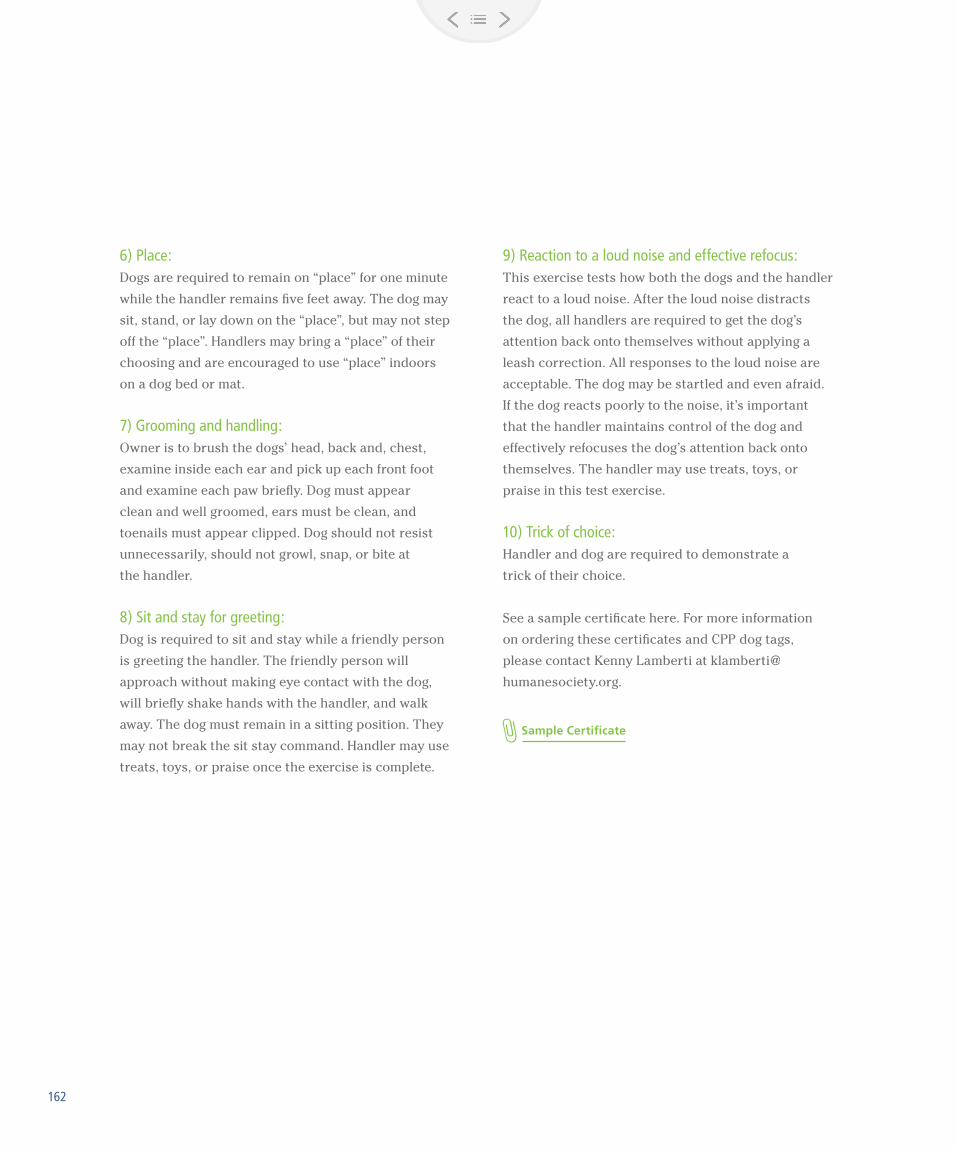
6) Place:Dogs are required to remain on “place” for one minute
while the handler remains five feet away. The dog may
sit, stand, or lay down on the “place”, but may not step
off the “place”. Handlers may bring a “place” of their
choosing and are encouraged to use “place” indoors
on a dog bed or mat.
7) Grooming and handling:Owner is to brush the dogs’ head, back and, chest,
examine inside each ear and pick up each front foot
and examine each paw briefly. Dog must appear
clean and well groomed, ears must be clean, and
toenails must appear clipped. Dog should not resist
unnecessarily, should not growl, snap, or bite at
the handler.
8) Sit and stay for greeting:Dog is required to sit and stay while a friendly person
is greeting the handler. The friendly person will
approach without making eye contact with the dog,
will briefly shake hands with the handler, and walk
away. The dog must remain in a sitting position. They
may not break the sit stay command. Handler may use
treats, toys, or praise once the exercise is complete.
9) Reaction to a loud noise and effective refocus:This exercise tests how both the dogs and the handler
react to a loud noise. After the loud noise distracts
the dog, all handlers are required to get the dog’s
attention back onto themselves without applying a
leash correction. All responses to the loud noise are
acceptable. The dog may be startled and even afraid.
If the dog reacts poorly to the noise, it’s important
that the handler maintains control of the dog and
effectively refocuses the dog’s attention back onto
themselves. The handler may use treats, toys, or
praise in this test exercise.
10) Trick of choice:Handler and dog are required to demonstrate a
trick of their choice.
See a sample certificate here. For more information
on ordering these certificates and CPP dog tags,
please contact Kenny Lamberti at klamberti@
humanesociety.org.
Sample Certificate
162
Notes XII Dog Training Classes

THE HUMANE SOCIETY OF THE UNITED STATES [ Pets for Life ]
Certified Pet Partner
this confirms that
in partnership with
successfully passed the test on
Director, [ Pets for Life ]
CER
TIFIE
D PET PARTNER
[ Pe ts fo r L ife ]
SAMPLE

Dogs commit a great deal of time and effort to figuring out how to get what they want. It is your job to show your dog that certain behaviors give him/her certain results. The best place to start is to make it very clear to your dog that NOTHING IN LIFE IS FREE.
If you leave it up to your dog he/she will jump up to gain your affection, surf the countertops to obtain food, bark and whine to go outside and the list goes on and on. You can teach your dog the appropriate way to gain all of these exciting things. For example, every time you feed your dog you can simply ask him/her to sit and when the dog sits the food bowl appears. The lesson the dog learns is that “Sitting gets me food.” When you go to the front door, you ask the dog to sit and wait and the door opens to the fabulous outside world. The lesson learned is that “Sitting and being patient gets me outside.”
Simply put, everything the dog wants, he/she must earn by performing a simple command that you give. If you give the command consistently, as you will learn in class, your dog will learn to act appropriately with your guidance!
Week 1Nothing in Life is Free

Free Dog Training Classes
9 weekly sessions of free professional dog training classes • HAVE YOUR DOG BECOME A CPP (CERTIFIED PET PARTNER) -‐ AN OFFICIAL HSUS TITLED PAPER! • OBEDIENCE • AGILITY • TRICKS/GAMES (WIN PRIZES) • DOG SPORTS • HAVE THE BEST DOG IN THE NEIGHBORHOOD!
Please call 877-993-2111 for more information Location: Training Room, 350 E. Erie Ave., Philadelphia PA 19134

One of the first things you want to teach your dog is his/her name. It is surprising how many dogs do not recognize their name! To teach your dog his/her name, you just need to follow a few simple steps and repeat them over and over again often and reward your dog for learning.
First, show your dog a treat. Then, toss the treat a short distance. Your dog will run to get it. Say his/her name right after he/she grabs it and when he/she turns to look at you, praise him/her and toss another treat in a different direction. When your dog runs in that direction and grabs the treat, say his/her name again. Repeat this a few times. This game will eventually teach your dog his/her name and allow you to get your dog’s attention when you call his/her name.
To further the game, at anytime if you catch your dog offering his/her attention to you without being asked, give him/her a reward and praise for doing so.
Week 1Teach Your Dog His/HerName - The Cookie Toss Game

Association: Like all dogs, your dog can quickly make connections. He associates what he receives (good or bad) with whatever he was doing in that exact moment. Consequences: Just like people, your dog learns through consequences. Consequences can be positive (which will increase the likelihood of a certain behavior happening again) or negative (which will decrease the likelihood of a certain behavior happening again).
Positive Reinforcer: When a desired behavior is positively reinforced immediately following said behavior, the behavior will increase in frequency. A positive reinforcer is anything pleasing to your dog and can vary per dog. Some dogs love treats, some a certain toy or activity and some just simply want attention and praise. You should determine what positive reinforcer works best for your dog.
Once you have determined the best positive reinforcer for your dog, this can be used to strengthen your dog’s positive behaviors in many situations. Basically, positive reinforcement works when your dog does something in a given situation that you like and you immediately follow that behavior with the positive reinforcer. When you do this, your dog is more likely to do the same thing again the next time he is in that situation.
Example: You ask your dog to sit. He sits. You give him a treat. He is more likely to sit the next time you ask.
Example: You leave a piece of steak on the counter and your dog jumps up and steals it. The dog is going to be more likely to jump on the counter the next time he has the opportunity. In this situation your dog positively reinforced himself!
Set your dog up for success by controlling the positive reinforcements he or she receives.
Week 6Learning Theory

Secondary reinforcer: In our training classes you will use a marker word such as “Yes” or a clicker as a secondary reinforcer. Your dog learns best when you are very clear with the message. The sound of a secondary reinforcer establishes a very clear message of approval.
Immediacy: For maximum effectiveness, a reinforcer should be given immediately after the desired response. If your timing is not immediate, your dog could have performed three other behaviors by the time you reinforce him or her! The reinforcer strengthens the behavior that it immediately follows. Since immediate reinforcement is not always possible, you can use a secondary reinforcer to bridge the time between the behavior and the delivery of the reward.
Continuous and Intermittent Schedules of Reinforcement: Continuous reinforcement is a schedule where EVERY time your dog performs a certain behavior, he gets a positive reinforcer. You will use this schedule until your dog understands what you are asking and knows the verbal command and the hand signal in many different locations with various types of distractions. Once your dog is consistently performing the behavior, you will go to a varied or intermittent schedule.
Intermittent reinforcement is a schedule where your dog is rewarded only occasionally – such as every other time or every third time a behavior is performed and eventually when the behavior is performed a couple times or multiple times in a row.
Intermittent reinforcement helps a behavior stick. When your dog has continuous reinforcement every time he performs a behavior, he will quickly notice if the reinforcement stops. He may try the behavior a few times to illicit the positive reinforcer. Just be aware that if you don’t produce the reinforcer, the behavior can become extinct.
If your dog never knows when a reinforcer is coming, he will continue to work, hoping the next time he will receive the pay off. Ultimately, fewer treats makes him want the treats more. Intermittently reinforced behaviors take longer to extinguish, because your dog gets used to sometimes working for no immediate reward. This is why if you allow your dog to jump on you and you give attention every so often, but in between the attention you say, “No,” your dog will keep jumping. If you ignore him every time he jumps and he doesn’t receive a reinforcement, he will stop jumping.
Natural Reinforcers: Once your dog understands a desired behavior and performs it consistently, you will wean him off the constant positive reinforcement and you will use an intermittent schedule instead. Eventually your dog will perform the behavior for natural reinforcers as well as the ones you provide.
Example: Your dog learns he has to sit and wait by the door before you will allow him to go out of the door for a walk. Eventually your dog sits and waits automatically by the door. The natural reinforcer is that he will be rewarded for sitting by going outside where he will enjoy a walk or play time.
There are two techniques you can use to positively reinforce your dog’s behavior: Luring: Luring is using food or an object to get your dog focused and following that food or object in order to get a particular position or behavior from your dog.

Example: When you teach your dog to sit, you put a treat to your dog’s nose, lift the treat over his head and your dog’s bottom hits the ground.
Shaping: Shaping is very useful in learning more complicated behaviors. You shape behaviors by breaking the behavior down into small, easy to learn pieces and marking and rewarding each behavior when it happens, building up to the main behavior.
Example: You want your dog to pick up your keys and bring them to you. You start by marking and rewarding your dog for sniffing the keys. Once your dog is consistently sniffing the keys, wait for him to mouth at them and reward that behavior. Once your dog is mouthing the keys consistently only reward him when he picks them up and so on.
When you use positive reinforcement to shape your dog’s behavior, not only does your dog learn what behaviors you want from him but you also get to have fun with your dog through creating a strong and loving bond.

Everyone has their own method of getting a dog to “off.” Have you heard, “Knee him in the chest,” “Step on his back paws,” “Squeeze his front paws,” etc.? The truth is, methods such as these will only teach your dog to fear you. When your dog jumps up, he or she is actually trying to show you affection and share his or her excitement with you. Your dog is giving you a supreme compliment and has no way of knowing that this might be irritating you. The more agitated you get, the more your dog will want to be deferential and loving to you and the jumping up will not stop.
Rather than punish or trying to stop your dog from greeting and loving you, you should teach your dog to greet you in an appropriate manner. When your dog jumps on you, do not react! Instead, turn to the side with your hands behind your back, allowing your body motion to gently displace your dog. As you do this, firmly, yet quietly say, “Off.” As soon as your dog’s feet are on the ground, tell your dog, “Sit.” If your dog sits, kneel down by him or her and give praise. This teaches your dog that he or she will get attention and praise when in a sit. If your dog does not sit when you tell him or her to, you need to focus attention back on mastering the sit.
As you get better at using your body turn and motion to teach your dog off, you will be able to start anticipating before your dog jumps up and actually be able to step to the side to avoid the jump up all together. This motion alone should cause your dog to pause. If you believe your dog is about to jump, anticipate and ask for a sit instead. Always give praise when your dog does the desired action!
Week 4Off

“Leave it” is a fun and important behavior to teach your dog. To start, show your dog a treat. Put the treat in the palm of your hand and close your hand around it. Put your closed fist in front of your dog’s nose and let him or her sniff your hand. Your dog will begin to nose, lick, paw, or mouth at your hand. In a quiet voice say, “Leave it.” The moment your dog looks away from your hand, mark the behavior and give your dog a treat (one from the hand you have not shown your dog) while saying, “Take it,” in a cheery voice. Repeat this several times. Your dog will quickly figure out the game. As you say, “Leave it,” your dog will begin to turn his or her head away and not even look at your hand.
The next step is to have the treat in your palm open handed. Follow the same steps as above. If your dog tries to take it, close your palm into a fist and say, “Leave it,” and follow the first process above.
Once your dog has mastered leave it with an open hand, try putting the treat on the floor. Cover the treat with your foot. Put your weight on your heel and swivel your foot to the side to reveal the treat. If your dog attempts to take it, swing your foot back over the treat. Don’t bend down and try to grab the treat from your dog. Your dog is faster than you and by trying to grab the treat you will create a game of keep away that is fun to your dog. Work on this until you can step away from the treat with a leave it command and then release your dog with a take it command.
For extra fun once you have mastered the leave it, try putting the treats on both of your dog’s front paws while he or she is in a down and get him or her to leave it. You can also work up to putting the treat on your dog’s nose or forehead and have him or her leave it until you release. Extra points if your dog can flip the treat into his or her mouth!
Week 5Leave It

This homework is designed to teach your dog to love to sit and stay, and to allow you to keep control over your dog in everyday circumstances, not only when he or she is on a leash. So practice with a leash to begin with and graduate to without a leash when you and your dog are ready.
Begin with your dog in a sit. Put a handful of food/treats in your left hand. Do not dangle the food in front of your dog, keep it hidden. Give the stay signal as you learned in training class and say, “Stay.” After the task is completed say, “Yes” and immediately give your dog the food reward. Repeat often.
Amount of Time in “Stay” Completed Number of times performed
Count one _____ __________Count two _____ __________Count three _____ __________Count five _____ __________Count seven _____ __________Count ten _____ __________Count fifteen _____ __________Count twenty _____ __________
Now you are ready to do some dancing!!
One step to the left and return _____ __________One step to the right and return _____ __________One step back and return _____ __________One step left and return _____ __________Two steps left and return _____ __________Two steps right and return _____ __________Two steps back and return _____ __________Three steps left and return _____ __________Three steps right and return _____ __________Three steps back and return _____ __________Count ten _____ __________Two steps to right, count ten _____ __________Two steps to left, count ten _____ __________Two steps back, count ten _____ __________Five steps right and return _____ __________Five steps left and return _____ __________
Week 2Sit & Stay

Five steps back and return _____ __________One step back, about face, return _____ __________Two steps back, about face, return _____ __________Three steps back, about face, return _____ __________Count twenty _____ __________Ten steps to left and return _____ __________Ten steps back and return _____ __________Count ten _____ __________

“Down” means to lie down. Down is a good command to use when you want your dog to stay for any period of time. Many dogs will “down” easiest after they have mastered sit and stay. To work on down, put your dog in a sit and stay. Have a large treat in your right hand, kneel on your dog’s right side and gently put your left hand on your dog’s back. While you say “Down” pass the treat in an “L” motion down to the floor from your dog’s nose and then pull it out in front of him. Do not push down on your dog’s back, just gently deter him or her from getting up. When your dog lies down, mark the behavior with a “Yes” and give the treat.
Once your dog learns down, then start working on down and stay. Ideally your dog should learn the “relaxed down” before the stay. A relaxed down is one where the dog shifts onto one hip to be more comfortable. Once the dog does that he or she will be more likely to stay. To get your dog to do a relaxed down, don’t give the treat right away after he or she goes down, take the treat and pass it from your dog’s nose in a semi-circle to your dog’s hip, as you say, “Relax.” When he or she shifts onto the hip, say, “Yes” and give the treat.
Now you are ready to add the stay. While your dog is in the relaxed down position simply stand up and say, “Stay.” It will help to use a hand signal (straighten out your arm and with your hand, make a stop signal) at the same time as you say, “Stay.” Now step away from your dog. If you have a dog that is antsy, only stand up half way and make the stay a very short one. It is important for your dog to be successful as much as possible so keep the stay short at first and then gradually add time and distance as your dog improves.
Week 3Down & Down-Stay