doll
DESCRIPTION
amigurumiTRANSCRIPT
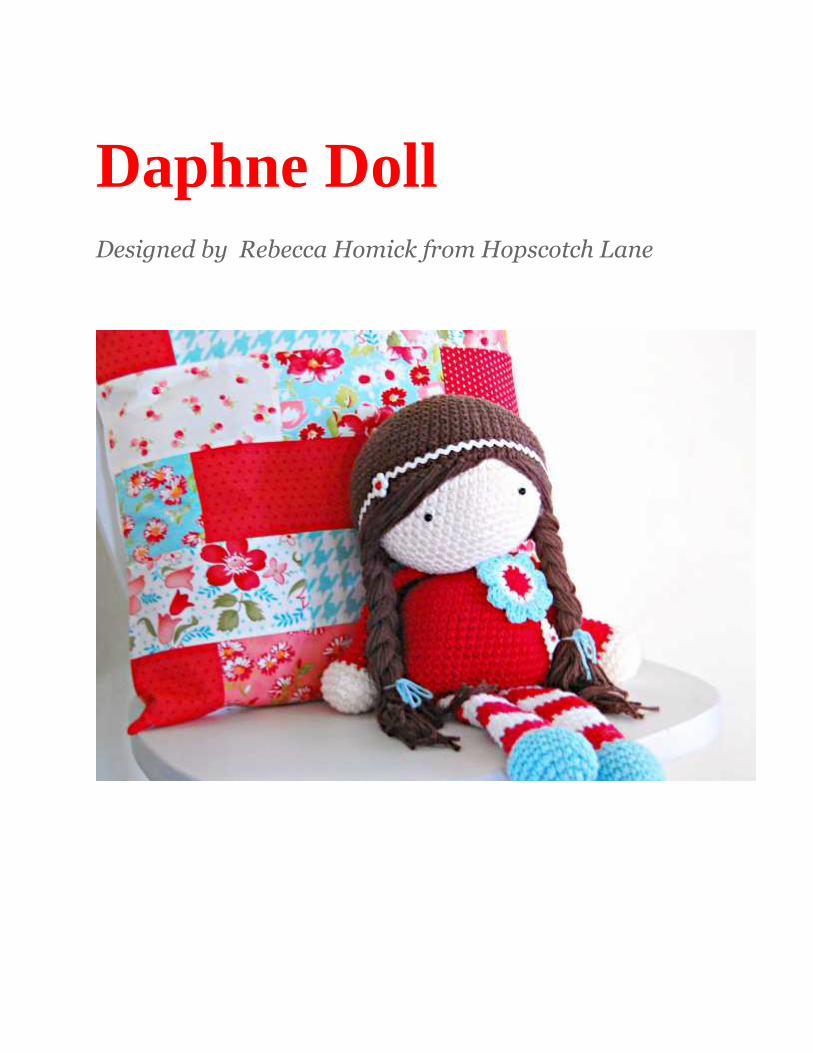
Daphne DollDesigned by Rebecca Homick from Hopscotch Lane
Materials:- Any worsted weight cotton yarn can be used for this project.I used Lily Sugar n Cream solid cotton in 2.5oz ball which is 120 yards per ball.
● Color A - light ecru - 1 ball● Color B - red - 1 ball● Color C - robin’s egg blue- 1 ball● Color D - white- 1 ball● Color E - brown - 2 balls
- Size F/5 (3.75mm) hook- Two 6mm plastic safety eyes- Poly-Fil or stuffing of your choice- yarn needle for finishing- flower button (optional)- thin ric rac for the headband (optional)- stitch marker or a small piece of yarn
Abbreviations:● ch chain● st/sts stitches● sl st slip stitch● sc single crochet● hdc half double crochet● dc double crochet● inc increase (2sc in the next stitch)● dec decrease (join the next 2 sts into 1)● R1 round 1
Gauge:Gauge is not extremely important. If consistent tension is kept throughout the pattern your dollwill remain proportional. Just remember to use a hook size that is smaller than what your yarncalls for. This will create a nice dense fabric so that the stuffing will not show through.
Size of Finished Doll:
Approximately 19 inches tall. The size of your doll may be slightly larger or smaller depending on your tension, yarn, and hook size.

Notes About This Pattern:● Pieces are crocheted separately, then sewn together at the end.● All body parts are crocheted in a spiral, so do not join at the end of each round. Use
something to mark the first stitch of the round and move it up as you work. You can usea stitch marker, but I prefer to use a small piece of contrasting yarn. It is easier to laybetween the stitches rather than attaching and detaching a stitch marker every round.
● The “Magic Loop” is used to start each piece. If you are unfamiliar with this technique agreat tutorial can be found online here: http://www.crochetme.com/forums/t/28917.aspx
● The entire pattern is written in US crochet terminology
Head:Using Color AR1: 6 sc in magic loopR2: inc x6 = 12 stsR3: (1 inc, sc in next st) x6 = 18 stsR4: (1 inc, sc in next 2 sts) x6 = 24 stsR5: (1 inc, sc in next 3 sts) x6 = 30 stsR6: (1 inc, sc in next 4 sts) x6 = 36 stsR7: (1 inc, sc in next 5 sts) x6 = 42 stsR8: (1 inc, sc in next 6 sts) x6 = 48 stsR9: (1 inc, sc in next 7 sts) x6 = 54 stsR10: (1 inc, sc in next 8 sts) x6 = 60 stsR11: (1 inc, sc in next 9 sts) x6 = 66 stsR12: (1 inc, sc in next 10 sts) x6 = 72 stsR13-R15: sc in each st = 72stsR16: sc in next 4 sts, place waste yarn to mark placement of first eye, sc in next 10 sts, placeanother piece of waste yarn to mark placement of second eye, sc in each st to end of round =72sts.
R17-R22: sc in each st= 72stsR23: (1 dec, sc in next 10 sts) x6 = 66 stsR24: (1 dec, sc in next 9 sts) x6 = 60 stsR25: (1 dec, sc in next 8 sts) x6 = 54 sts

Insert and and secure safety eyes where previously marked. Begin stuffing the head with poly filand continue stuffing as you go ( I alway stuff more than i think is necessary. You do do notwant your doll to be floppy and saggy).
Body:
Fasten off and leave a 12” tail for sewing. Stuff the body. Flatten the bottom in half and sew theopening closed. Hide the rest of the tail in the body. Using the tail from the head, sew the bodyto the head. There is really no trick to this, try to match up the stitches of the head and body andsew them together. Just be patient and take it one stitch at a time. I sew around the head andbody a few times for extra durability and stability.
Fasten off and leave a long tail about 16” long. Use this tail to sew the head shut (this is thebottom of the head). You will use the rest of the tail later on to sew the head to the body.
R26: (1 dec, sc in next 7 sts) x6 =48 stsR27: (1 dec, sc in next 6 sts) x6 = 42 stsR28: (1 dec, sc in next 5 sts) x6 = 36 stsR29: (1 dec, sc in next 4 sts) x 6 = 30 sts
R30: (1 dec, sc in next 3 sts) x6 = 24 stsR31: (1 dec, sc in next 2 sts) x6 = 18 stsR32: (1 dec, sc in next st) x6 = 12 stsR33: dec x6 = 6 sts
Using Color BR1: 6 sc in magic loopR2: inc x6 = 12 stsR3: (1 inc, sc in next st) x6 = 18 stsR4: (1 inc, sc in next 2 sts) x6 = 24 stsR5: (1 inc, sc in next 3 sts) x6 = 30 stsR6: (1 inc, sc in next 4 sts) x6 = 36 stsR7: (1 inc, sc in next 5 sts) x6 = 42 stsR8- R21 : sc in each st = 48 stsR22: (1 dec, sc in next 5 sts) = 42 stsR23: (1 dec, sc in next 4 sts) = 36 stsR24: sc in each st = 36 sts

Arms(make 2):Using Color A
Fasten off and leave a 12” tail for sewing. Flatten the opening of the arm and sew it shut. Sewboth arms to each side of the body.
R1: 5 sc in the magic loopR2: inc x5 = 10 stsR3: (1 inc, sc in next st) x5 = 15 stsR4: (1 inc, sc in next 2 sts) x5 = 20 stsR5: sc in each st = 20 stsR6: (1 dec, sc in next 2 sts) x5 = 15 stsR7: (1 dec, sc in next st) x 5 = 10 stsStuff the doll’s hands with fiber fil. The rest of the arms do not need to be stuffed.Switch to Color B
R8-R26 : sc in each st - 10 sts

Legs (make 2):Using Color C
R1: 5 sc in the magic loopR2: inc x5 = 10 stsR3: (1 inc, sc in next st) x5 = 15 stsR4: (1 inc, sc in next 2 sts) x5 = 20 stsR5-R7: sc in each st = 20 stsR8: (1 dec, sc in next 2 sts) x5 = 15 stsR9: (1 dec, sc in next st) x 5 = 10 stsStuff the doll’s feet with fiber fil. The rest of the legs do not need to be stuffed.Switch to Color BR10-R13 : sc in each st - 10 stsSwitch to Color DR14-R17: sc in each st - 10stsSwitch to Color BR18-R21: sc in each st - 10stsSwitch to Color D

Fasten off and leave a 12” tail for sewing. Flatten the opening of the leg and sew it shut. Sewboth legs to the bottom of the body, leaving only one stitch between both legs.
R22- R25: sc in each st - 10stsSwitch to Color BR26-R29: sc in each st - 10 stsSwitch to Color DR30-R33: sc in each st- 10 sts
The hair may seem like the most tricky part of the doll, but it is actually really simple. You areessentially just making a cap for the doll with strands of yarn running all around the outsidestitches.
So first we have to make the cap, which is just the top of the head pattern that you have alreadydone.
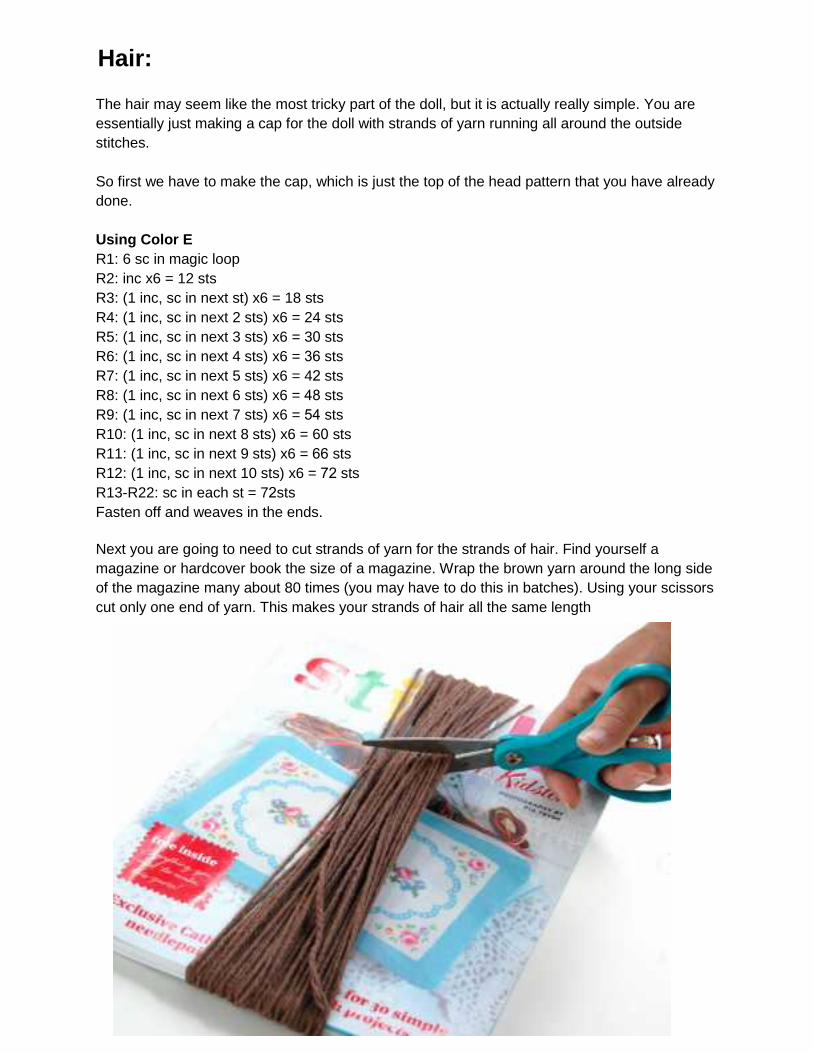
Next you are going to need to cut strands of yarn for the strands of hair. Find yourself amagazine or hardcover book the size of a magazine. Wrap the brown yarn around the long sideof the magazine many about 80 times (you may have to do this in batches). Using your scissorscut only one end of yarn. This makes your strands of hair all the same length
Hair:
Using Color ER1: 6 sc in magic loopR2: inc x6 = 12 stsR3: (1 inc, sc in next st) x6 = 18 stsR4: (1 inc, sc in next 2 sts) x6 = 24 stsR5: (1 inc, sc in next 3 sts) x6 = 30 stsR6: (1 inc, sc in next 4 sts) x6 = 36 stsR7: (1 inc, sc in next 5 sts) x6 = 42 stsR8: (1 inc, sc in next 6 sts) x6 = 48 stsR9: (1 inc, sc in next 7 sts) x6 = 54 stsR10: (1 inc, sc in next 8 sts) x6 = 60 stsR11: (1 inc, sc in next 9 sts) x6 = 66 stsR12: (1 inc, sc in next 10 sts) x6 = 72 stsR13-R22: sc in each st = 72stsFasten off and weaves in the ends.

pull through the stitch. Loop both strands around your hook and pull through loop on the hookone more time. Pull both strands of yarn all the way through loop. Pull strands tightly to securethe hair. You should now have made two strands of hair in one stitch.Repeat this same step inevery stitch around the cap. That’s it you have just made a wig!
Now takeyour doll cap and insertyour hook through one stitch on theouteredge. Fold onestrand of hair in half and


Next just simply stitch the wig onto the doll head between the the second to last row and lastrow of the cap.
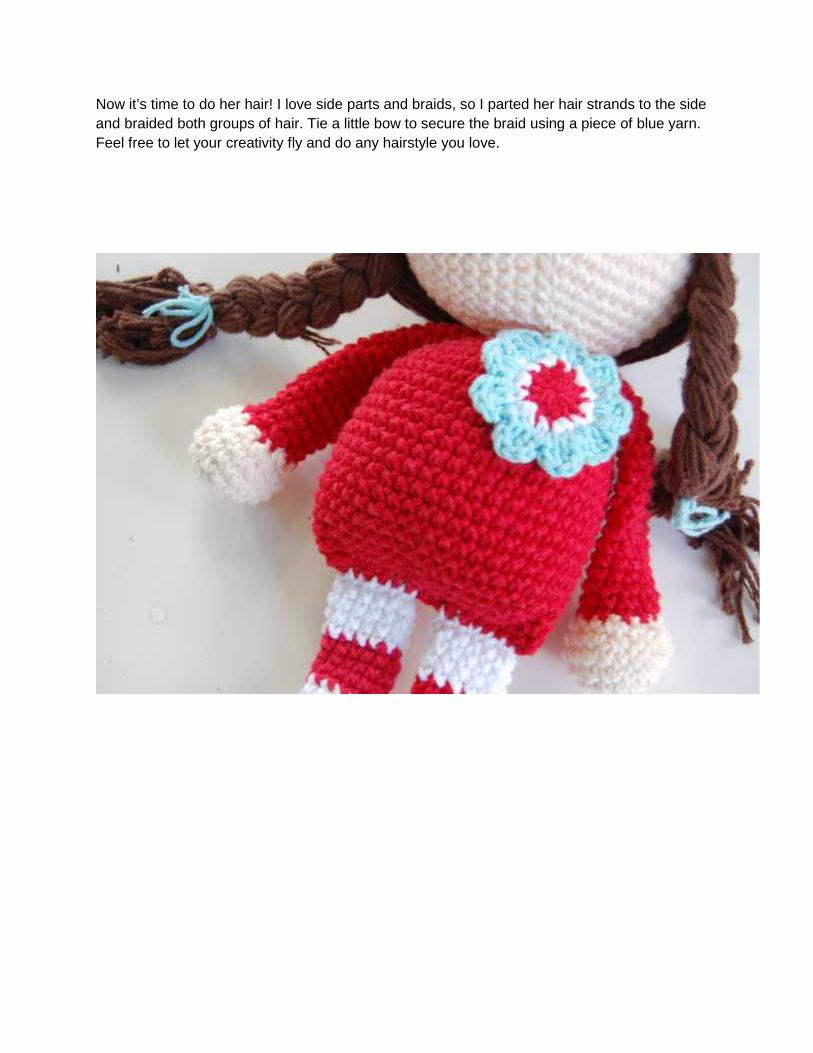
Now it’s time to do her hair! I love side parts and braids, so I parted her hair strands to the sideand braided both groups of hair. Tie a little bow to secure the braid using a piece of blue yarn.Feel free to let your creativity fly and do any hairstyle you love.
Accessories
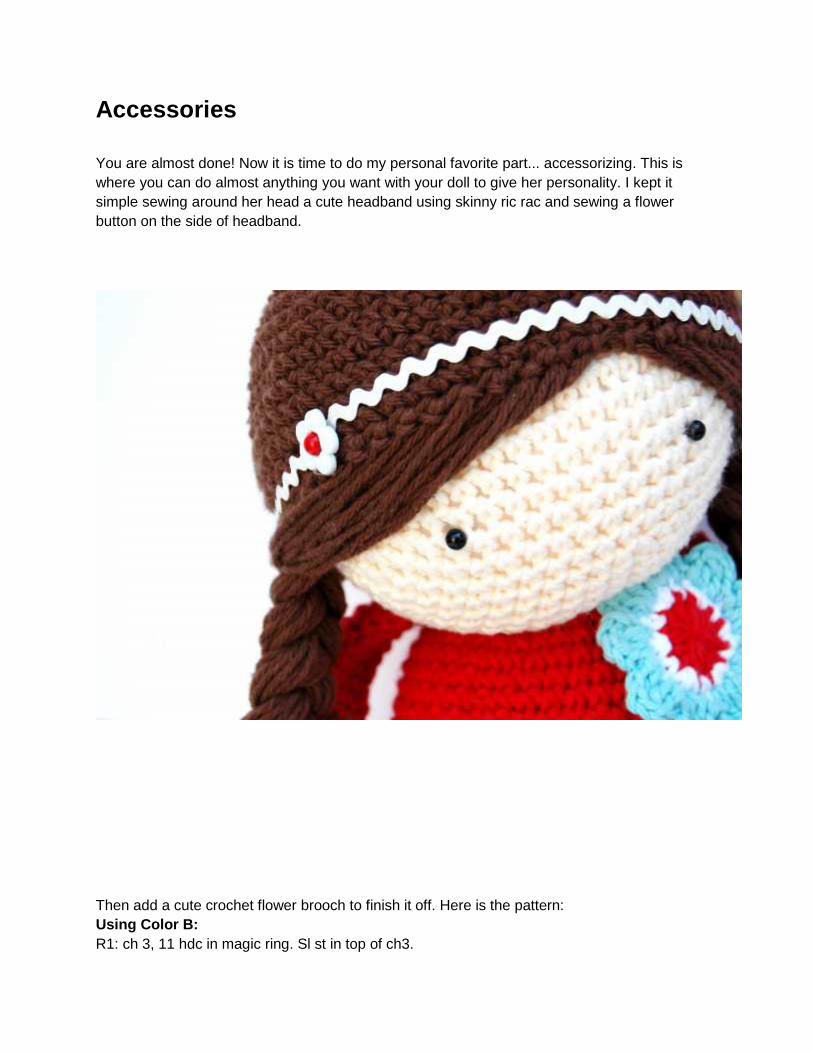
You are almost done! Now it is time to do my personal favorite part... accessorizing. This iswhere you can do almost anything you want with your doll to give her personality. I kept itsimple sewing around her head a cute headband using skinny ric rac and sewing a flowerbutton on the side of headband.
Then add a cute crochet flower brooch to finish it off. Here is the pattern:Using Color B:R1: ch 3, 11 hdc in magic ring. Sl st in top of ch3.

Change to Color D;R2: ch 3, 1 sc in same st, inc in next st, (1 sc, 1 inc) x5. Sl st in top of ch 3Change to Color C:R3: Ch 2, 1 dc in same stitch, dc in next st. ch2 , sl st in same stitch. (sl st in next st, ch2, dc insame st, dc in next st, ch 2, sl st in same stitch) x8. Slip st in bottom first sc of the last round.Fasten off and weave in ends. Sew flower onto doll’s chest.
Congratulations you have finished your very own doll!

Contact info:
If you have any questions, feel free to email me at:[email protected]
or message me through etsy at:www.hopscotchlane.etsy.com
You can also find me blogging at:www.hopscotchlane.blogspot.com
Copyright Information:©2012 Rebeca Homick(Hopscotch Lane). You are welcome to sell your finished doll creations.However, I respectfully request that you do not attempt to claim my patterns as your owndesigns; please clearly credit all designs to Hopscotch Lane, and provide a link to my Etsy shop(www.hopscotchlane.etsy.com). Permissions for commercial use DO NOT include massproduction or factory manufacturing of any kind. Also, please do not reproduce any part of mypatterns anywhere. I work very hard to design and write these patterns, so encounteringplagiarism and/or reproduction of my patterns would be extremely discouraging and hurtful.Thank you so much for your understanding, and happy crocheting!
Warning:Your finished doll may have small parts, so please be extremely cautious if you plan to give yourfinished doll to a child. The safety eyes and other small pieces, if somehow detach whileplaying, can be a serious choking hazard. If you decide to sell your finished doll, pleaseremember to include plenty of warnings to people purchasing your product.

Daphne Doll(Simplified version without photos)
Designed by Rebecca Homick from Hopscotch Lane
Materials:- Any worsted weight cotton yarn can be used for this project.I used Lily Sugar n Cream solid cotton in 2.5oz ball which 120 yards per ball.
● Color A - light ecru - 1 ball● Color B - red - 1 ball● Color C - robin’s egg blue- 1 ball● Color D - white- 1 ball● Color E - brown - 2 balls
- Size F/5 (3.75mm) hook- Two 6mm plastic safety eyes- Poly-Fil or stuffing of your choice- yarn needle for finishing- flower button (optional)- thin ric rac for the headband (optional)- stitch marker or a small piece of yarn
Abbreviations:● ch chain● st/sts stitches

● sl st slip stitch● sc single crochet● hdc half double crochet● dc double crochet● inc increase (2sc in the next stitch)● dec decrease (join the next 2 sts into 1)● R1 round 1
Gauge:Gauge is not extremely important. If consistent tension is kept throughout the pattern your dollwill remain proportional. Just remember to use a hook size that is smaller than what your yarncalls for. This will create a nice dense fabric so that the stuffing will not show through.
Size of Finished Doll:Approximately 19 inches tall. The size of your doll may be slightly larger or smaller depending inyour tension, yarn, and hook size.
Notes About This Pattern:● Pieces are crocheted separately, then sewn together at the end.● All body parts are crocheted in a spiral, so do not join at the end of each round. Use
something to mark the first stitch of the round and move it up as you work. You can usea stitch marker, but I prefer to use a small piece of contrasting yarn. It is easier to just laybetween the stitches rather than attaching and detaching a stitch marker every round.
● The “Magic Loop” is used to start each piece. If you are unfamiliar with this technique agreat tutorial can be found online here: http://www.crochetme.com/forums/t/28917.aspx
● The entire pattern is written in US crochet terminology
Head:Using Color AR1: 6 sc in magic loopR2: inc x6 = 12 stsR3: (1 inc, sc in next st) x6 = 18 sts

Insert and and secure safety eyes where previously marked. Begin stuffing the head with poly filand continue stuffing as you go ( I alway stuff more than i think is necessary. You do do notwant your doll to be floppy and saggy).
Fasten off and leave a long tail about 16” long. Use this tail to sew the head shut (this is thebottom of the head). You will use the rest of the tail later on to sew the head to the body.
Body:
R4: (1 inc, sc in next 2 sts) x6 = 24 stsR5: (1 inc, sc in next 3 sts) x6 = 30 stsR6: (1 inc, sc in next 4 sts) x6 = 36 stsR7: (1 inc, sc in next 5 sts) x6 = 42 stsR8: (1 inc, sc in next 6 sts) x6 = 48 stsR9: (1 inc, sc in next 7 sts) x6 = 54 stsR10: (1 inc, sc in next 8 sts) x6 = 60 stsR11: (1 inc, sc in next 9 sts) x6 = 66 stsR12: (1 inc, sc in next 10 sts) x6 = 72 stsR13-R15: sc in each st = 72stsR16: sc in next 4 sts, place waste yarn to mark placement of first eye, sc in next 9 sts, placeanother piece of waste yarn to mark placement of second eye, sc in each st to end of round =78 sts.R17-R22: sc in each st= 72stsR23: (1 dec, sc in next 10 sts) x6 = 66 stsR24: (1 dec, sc in next 9 sts) x6 = 60 stsR25: (1 dec, sc in next 8 sts) x6 = 54stsR26: (1 dec, sc in next 7 sts) x6 = 48 stsR27: (1 dec, sc in next 6 sts) x6 = 42 stsR28: (1 dec, sc in next 5 sts) x6 = 36 stsR29: (1 dec, sc in next 4 sts) x 6 = 30 sts
Using Color BR1: 6 sc in magic loopR2: inc x6 = 12 stsR3: (1 inc, sc in next st) x6 = 18 stsR4: (1 inc, sc in next 2 sts) x6 = 24 stsR5: (1 inc, sc in next 3 sts) x6 = 30 stsR6: (1 inc, sc in next 4 sts) x6 = 36 sts
R20: (1 dec, sc in next 3 sts) x6 = 24 stsR31: (1 dec, sc in next 2 sts) x6 = 18 stsR32: (1 dec, sc in next st) x6 = 12 stsR33: dec x6 = 6 sts

Fasten off and leave a 12” tail for sewing. Stuff the body. Flatten the bottom in half and sew theopening closed. Hide the rest of the tail in the body. Using the tail from the head, sew the bodyto the head. There is really no trick to this, try to match up the stitches of the head and body andsew them together. Just be patient and take it one stitch at a time. I sew around the head andbody a few times for extra durability and stability.
Arms(make 2):Using Color A
Fasten off and leave a 12” tail for sewing. Flatten the opening of the arm and sew it shut. Sewboth arms to each side of the body.
Legs (make 2):Using Color C
R7: (1 inc, sc in next 5 sts) x6 = 42 stsR8- R21 : sc in each st = 42 stsR22: (1 dec, sc in next 5 sts) = 36 stsR23: (1 dec, sc in next 4 sts) = 30 stsR24: sc in each st = 30 sts
R1: 5 sc in the magic loopR2: inc x5 = 10 stsR3: (1 inc, sc in next st) x5 = 15 stsR4: (1 inc, sc in next 2 sts) x5 = 20 stsR5: sc in each st = 20 stsR6: (1 dec, sc in next 2 sts) x5 = 15 stsR7: (1 dec, sc in next st) x 5 = 10 stsStuff the doll’s hands with fiber fil. The rest of the arms do not need to be stuffed.Switch to Color BR8-R26 : sc in each st - 10 sts
R1: 5 sc in the magic loopR2: inc x5 = 10 stsR3: (1 inc, sc in next st) x5 = 15 stsR4: (1 inc, sc in next 2 sts) x5 = 20 stsR5-R7: sc in each st = 20 stsR8: (1 dec, sc in next 2 sts) x5 = 15 stsR9: (1 dec, sc in next st) x 5 = 10 sts
Fasten off and leave a 12” tail for sewing. Flatten the opening of the leg and sew it shut. Sewboth legs to the bottom of the body, leaving only one stitch between both legs.
Hair:The hair may seem like the most tricky part of the doll, but it is actually really simple. You areessentially just making a cap for the doll with strands of yarn running all around the outsidestitches.
So first we have to make the cap, which is just the top of the head pattern that you have alreadydone.
Fasten off and weaves in the ends.
Using Color ER1: 6 sc in magic loopR2: inc x6 = 12 stsR3: (1 inc, sc in next st) x6 = 18 stsR4: (1 inc, sc in next 2 sts) x6 = 24 stsR5: (1 inc, sc in next 3 sts) x6 = 30 stsR6: (1 inc, sc in next 4 sts) x6 = 36 stsR7: (1 inc, sc in next 5 sts) x6 = 42 stsR8: (1 inc, sc in next 6 sts) x6 = 48 stsR9: (1 inc, sc in next 7 sts) x6 = 54 stsR10: (1 inc, sc in next 8 sts) x6 = 60 stsR11: (1 inc, sc in next 9 sts) x6 = 66 stsR12: (1 inc, sc in next 10 sts) x6 = 72 stsR13-R22: sc in each st = 72sts
Stuff the doll’s feet with fiber fil. The rest of the legs do not need to be stuffed.Switch to Color BR10-R13 : sc in each st - 10 stsSwitch to Color DR14-R17: sc in each st - 10stsSwitch to Color BR18-R21: sc in each st - 10stsSwitch to Color DR22- R25: sc in each st - 10stsSwitch to Color BR26-R29: sc in each st - 10 stsSwitch to Color DR30-R33: sc in each st- 10 sts

Next you are going to need to cut strands of yarn for the strands of hair. Find yourself amagazine or hardcover book the size of a magazine. Wrap the brown hair around the long sideof the magazine many about 80 times (you may have to do this in batches). Using your scissorscut only one end of yarn. This makes your strands of hair all the same length.
Now take your doll cap and insert your hook through one stitch on the outer edge. Fold onestrand of hair in half and pull through the stitch. Loop both strands around your hook and pullthrough loop on the hook one more time. Pull both strands of yarn all the way through loop. Pullstrands tightly to secure the hair. You should now have made to strands of hair in one stitch.Repeat this same step in every stitch around the cap. That’s it you have just made a wig!
Next just simply stitch the wig onto the doll head between the the second to last row and lastrow of the cap.
Now it’s time to do her hair. I love side parts and braids, so I parted her hair strands to the sideand braided both groups of hair. Tie a little bow to secure the braid using a piece of blue yarn.Feel free to let your creativity fly and do any hairstyle you love.
Accessories:
You are almost done! Now it is time to do my personal favorite part... accessorizing. This iswhere you can do almost anything you want with your doll to give her personality. I kept itsimple sewing around her head a cute headband using skinny ric rac and sewing a flowerbutton on the side of headband.
Then a cute crochet flower brooch to finish it off. Here is the pattern:Using Color B:R1: ch 3, 11 hdc in magic ring. Sl st in top of ch3.Change to Color D:R2: ch 3, 1 sc in same st, inc in next st, (1 sc, 1 inc) x5. Sl st in top of ch 3Change to Color C:R3: Ch 2, 1 dc in same stich, dc in next st. ch2 , sl st in same stitch. (sl st in next st, ch2, dc insame st, dc in next st, ch 2, sl st in same stitch) x8. Slip st in bottom first sc of the last round.Fasten off and weave in ends. Sew flower onto doll’s chest.
Congratulations you have finished your very own doll!
Contact info:

If you have any questions, feel free to email me at:[email protected]
or message me through etsy at:www.hopscotchlane.etsy.com
You can also find me blogging at:www.hopscotchlane.blogspot.com
Copyright Information:©2012 Rebeca Homick(Hopscotch Lane). You are welcome to sell your finished doll creations.However, I respectfully request that you do not attempt to claim my patterns as your owndesigns; please clearly credit all designs to Hopscotch Lane, and provide a link to my Etsy shop(www.hopscotchlane.etsy.com). Permissions for commercial use DO NOT include massproduction or factory manufacturing of any kind. Also, please do not reproduce any part of mypatterns anywhere. I work very hard to design and write these patterns, so encounteringplagiarism and/or reproduction of my patterns would be extremely discouraging and hurtful.Thank you so much for your understanding, and happy crocheting!
Warning:Your finished doll may have small parts, so please be extremely cautious if you plan to give yourfinished doll to a child. The safety eyes and other small pieces, if somehow detach whileplaying, can be a serious choking hazard. If you decide to sell your finished doll, pleaseremember to include plenty of warnings to people purchasing your product.