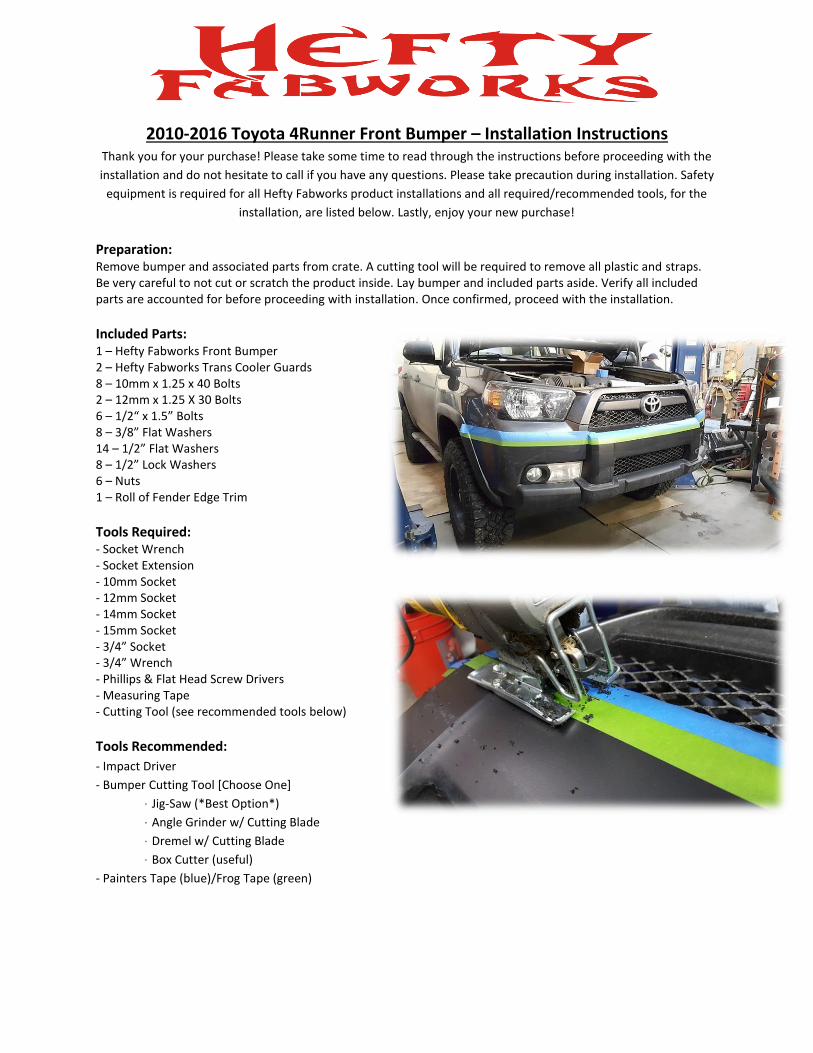
2010-2016 Toyota 4Runner Front Bumper – Installation Instructions Thank you for your purchase! Please take some time to read through the instructions before proceeding with the
installation and do not hesitate to call if you have any questions. Please take precaution during installation. Safety
equipment is required for all Hefty Fabworks product installations and all required/recommended tools, for the
installation, are listed below. Lastly, enjoy your new purchase!
Preparation: Remove bumper and associated parts from crate. A cutting tool will be required to remove all plastic and straps. Be very careful to not cut or scratch the product inside. Lay bumper and included parts aside. Verify all included parts are accounted for before proceeding with installation. Once confirmed, proceed with the installation.
Included Parts: 1 – Hefty Fabworks Front Bumper 2 – Hefty Fabworks Trans Cooler Guards 8 – 10mm x 1.25 x 40 Bolts 2 – 12mm x 1.25 X 30 Bolts 6 – 1/2“ x 1.5” Bolts 8 – 3/8” Flat Washers 14 – 1/2” Flat Washers 8 – 1/2” Lock Washers 6 – Nuts 1 – Roll of Fender Edge Trim
Tools Required: - Socket Wrench - Socket Extension - 10mm Socket - 12mm Socket - 14mm Socket - 15mm Socket - 3/4” Socket - 3/4” Wrench - Phillips & Flat Head Screw Drivers - Measuring Tape - Cutting Tool (see recommended tools below)
Tools Recommended:
- Impact Driver
- Bumper Cutting Tool [Choose One]
· Jig-Saw (*Best Option*)
· Angle Grinder w/ Cutting Blade
· Dremel w/ Cutting Blade
· Box Cutter (useful)
- Painters Tape (blue)/Frog Tape (green)
Installation:
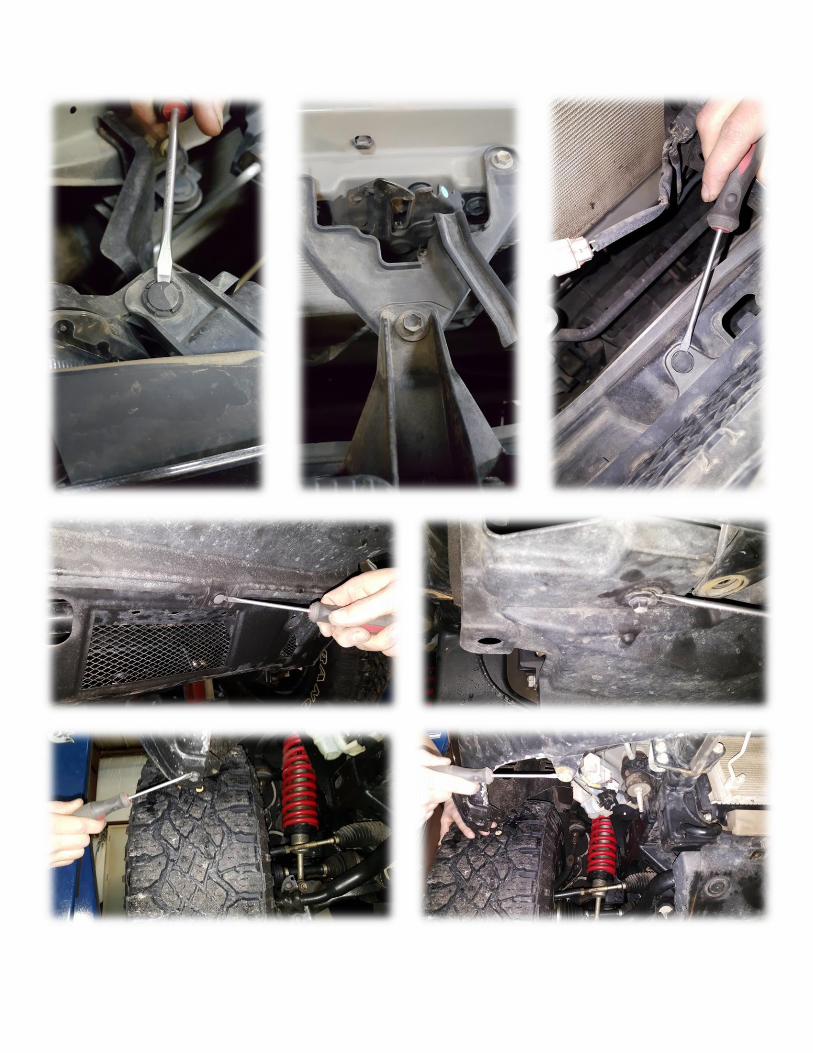
1) Remove upper engine bay plastic splash guard.
2) Remove grill.
3) Remove lower plastic splash guard.
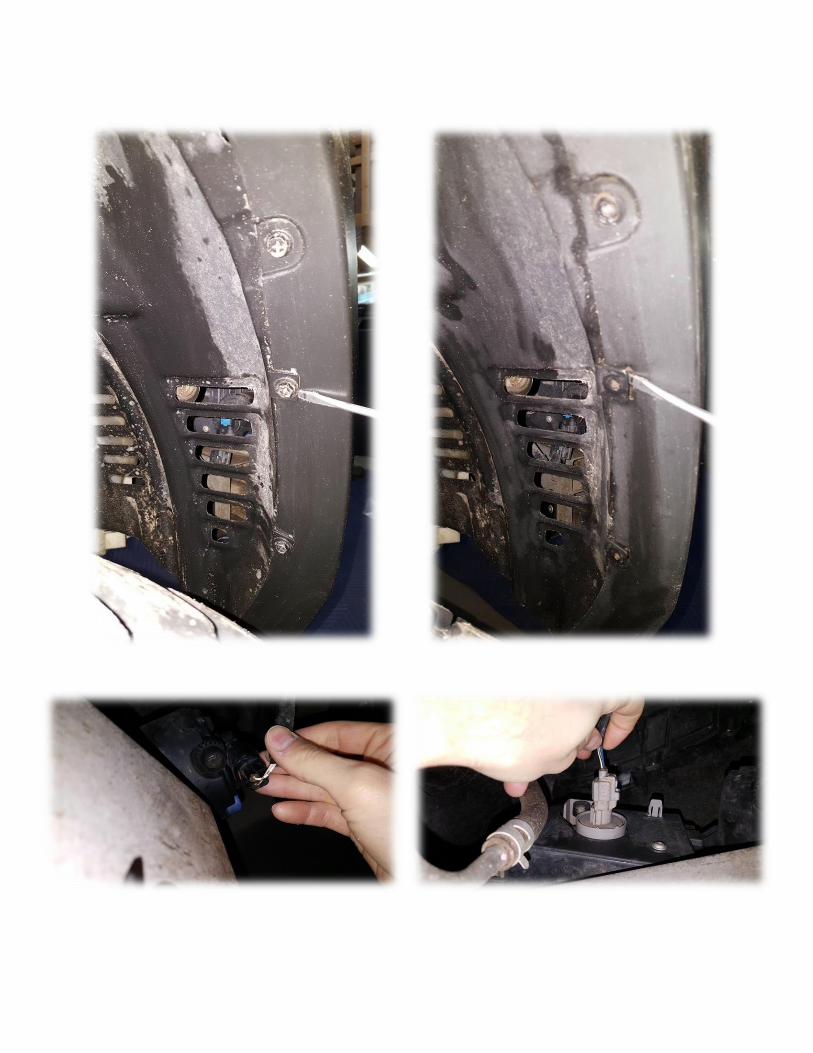
4) Unplug fog light harness on each side.
5) Unplug indicator light harness on each side.
6) Remove inner fender splash guard from plastic bumper.
7) Remove lower fender bolts and bracket mounts.
8) Remove lower bumper bracket bolts.
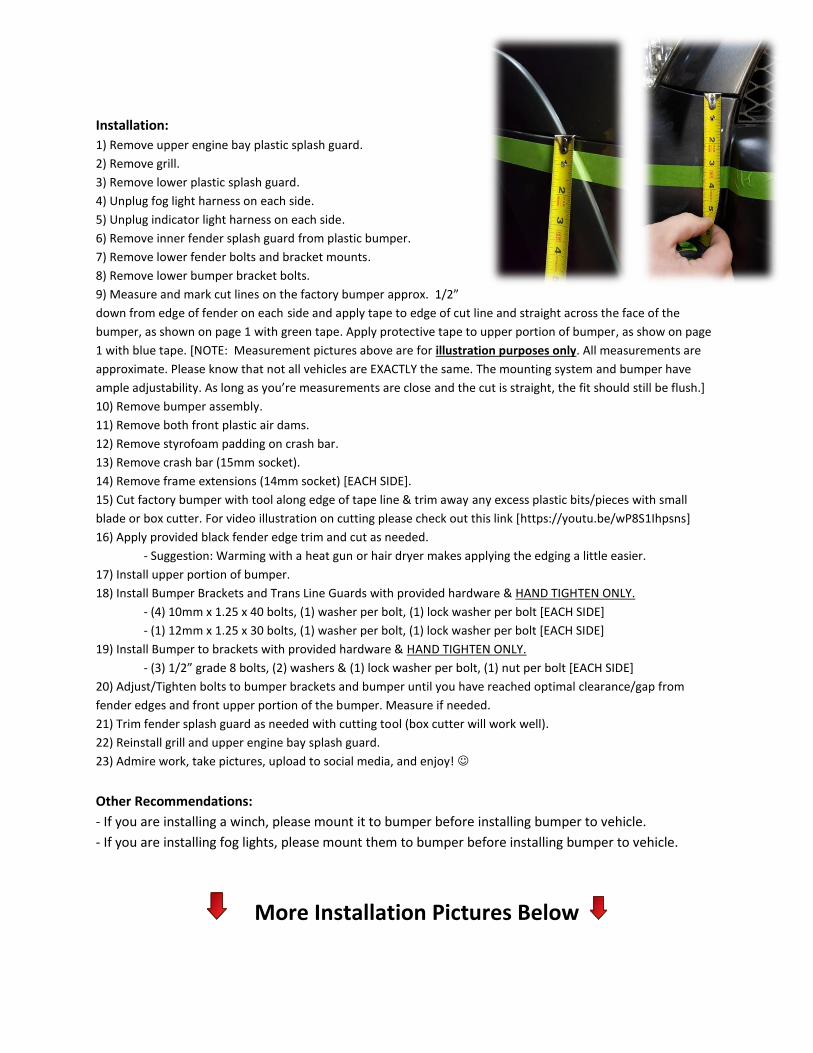
9) Measure and mark cut lines on the factory bumper approx. 1/2”
down from edge of fender on each side and apply tape to edge of cut line and straight across the face of the
bumper, as shown on page 1 with green tape. Apply protective tape to upper portion of bumper, as show on page
1 with blue tape. [NOTE: Measurement pictures above are for illustration purposes only. All measurements are
approximate. Please know that not all vehicles are EXACTLY the same. The mounting system and bumper have
ample adjustability. As long as you’re measurements are close and the cut is straight, the fit should still be flush.]
10) Remove bumper assembly.
11) Remove both front plastic air dams.
12) Remove styrofoam padding on crash bar.
13) Remove crash bar (15mm socket).
14) Remove frame extensions (14mm socket) [EACH SIDE].
15) Cut factory bumper with tool along edge of tape line & trim away any excess plastic bits/pieces with small
blade or box cutter. For video illustration on cutting please check out this link [https://youtu.be/wP8S1Ihpsns]
16) Apply provided black fender edge trim and cut as needed.
- Suggestion: Warming with a heat gun or hair dryer makes applying the edging a little easier.
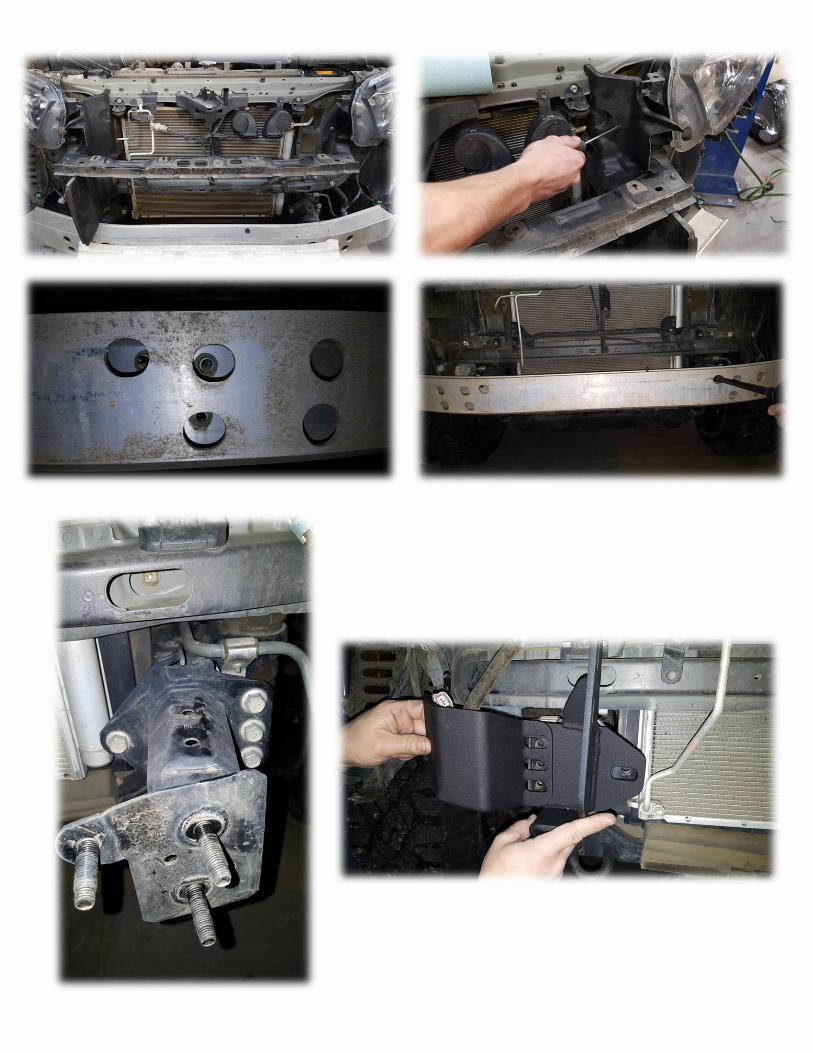
17) Install upper portion of bumper.
18) Install Bumper Brackets and Trans Line Guards with provided hardware & HAND TIGHTEN ONLY.
- (4) 10mm x 1.25 x 40 bolts, (1) washer per bolt, (1) lock washer per bolt [EACH SIDE]
- (1) 12mm x 1.25 x 30 bolts, (1) washer per bolt, (1) lock washer per bolt [EACH SIDE]
19) Install Bumper to brackets with provided hardware & HAND TIGHTEN ONLY.
- (3) 1/2” grade 8 bolts, (2) washers & (1) lock washer per bolt, (1) nut per bolt [EACH SIDE]
20) Adjust/Tighten bolts to bumper brackets and bumper until you have reached optimal clearance/gap from
fender edges and front upper portion of the bumper. Measure if needed.
21) Trim fender splash guard as needed with cutting tool (box cutter will work well).
22) Reinstall grill and upper engine bay splash guard.
23) Admire work, take pictures, upload to social media, and enjoy!
Other Recommendations:
- If you are installing a winch, please mount it to bumper before installing bumper to vehicle.
- If you are installing fog lights, please mount them to bumper before installing bumper to vehicle.
More Installation Pictures Below