
Chelsio Unified Wire for VMware ESXi 6.5 Installation and User’s Guide

Chelsio Unified Wire for VMware ESXi 6.5 ii
This document and related products are distributed under licenses restricting their use, copying, distribution,
and reverse-engineering.
No part of this document may be reproduced in any form or by any means without prior written permission
by Chelsio Communications.
All third-party trademarks are copyright of their respective owners.
THIS DOCUMENTATION IS PROVIDED “AS IS” AND WITHOUT ANY EXPRESS OR IMPLIED
WARRANTIES, INCLUDING, WITHOUT LIMITATION, THE IMPLIED WARRANTIES OF
MERCHANTABILITY AND FITNESS FOR A PARTICULAR PURPOSE.
THE USE OF THE SOFTWARE AND ANY ASSOCIATED MATERIALS (COLLECTIVELY THE
“SOFTWARE”) IS SUBJECT TO THE SOFTWARE LICENSE TERMS OF CHELSIO COMMUNICATIONS,
INC.
Sales
For all sales inquiries please send email to [email protected]
Support
For all support related questions please send email to [email protected]
Copyright © 2017.Chelsio Communications. All Rights Reserved.
Chelsio ® is a registered trademark of Chelsio Communications.
All other marks and names mentioned herein may be trademarks of their respective companies.
Chelsio Communications (Headquarters)
209 North Fair Oaks Avenue,
Sunnyvale, CA 94085
U.S.A
www.chelsio.com
Tel:408.962.3600
Fax: 408.962.3661
Chelsio (India) Private Limited
Subramanya Arcade, Floor 3, Tower B
No. 12, Bannerghatta Road,
Bangalore-560029
Karnataka,
India
Tel: +91-80-4039-6800
Chelsio KK (Japan)
Yamato Building 8F,
5-27-3 Sendagaya,
Shibuya-ku,
Tokyo 151-0051,
Japan

Chelsio Unified Wire for VMware ESXi 6.5 iii
Version History
Version Revision Date
1.0.0 12/27/2017

Chelsio Unified Wire for VMware ESXi 6.5 iv
This document and related products are distributed under licenses restricting their use, copying, distribution,
and reverse-engineering.
No part of this document may be reproduced in any form or by any means without prior written permission
by Chelsio Communications.
All third-party trademarks are copyright of their respective owners.
THIS DOCUMENTATION IS PROVIDED “AS IS” AND WITHOUT ANY EXPRESS OR IMPLIED
WARRANTIES, INCLUDING, WITHOUT LIMITATION, THE IMPLIED WARRANTIES OF
MERCHANTABILITY AND FITNESS FOR A PARTICULAR PURPOSE.
THE USE OF THE SOFTWARE AND ANY ASSOCIATED MATERIALS (COLLECTIVELY THE
“SOFTWARE”) IS SUBJECT TO THE SOFTWARE LICENSE TERMS OF CHELSIO COMMUNICATIONS,
INC.
Sales
For all sales inquiries please send email to [email protected]
Support
For all support related questions please send email to [email protected]
Copyright © 2017. Chelsio Communications. All Rights Reserved.
Chelsio ® is a registered trademark of Chelsio Communications.
All other marks and names mentioned herein may be trademarks of their respective companies.
Chelsio Communications (Headquarters)
209 North Fair Oaks Avenue,
Sunnyvale, CA 94085
U.S.A
www.chelsio.com
Tel: 408.962.3600
Fax: 408.962.3661
Chelsio (India) Private Limited
Subramanya Arcade, Floor 3, Tower B
No. 12, Bannerghatta Road,
Bangalore-560029
Karnataka,
India
Tel: +91-80-4039-6800
Chelsio KK (Japan)
Yamato Building 8F,
5-27-3 Sendagaya,
Shibuya-ku,
Tokyo 151-0051,
Japan
Chelsio Unified Wire for VMware ESXi 6.5 v
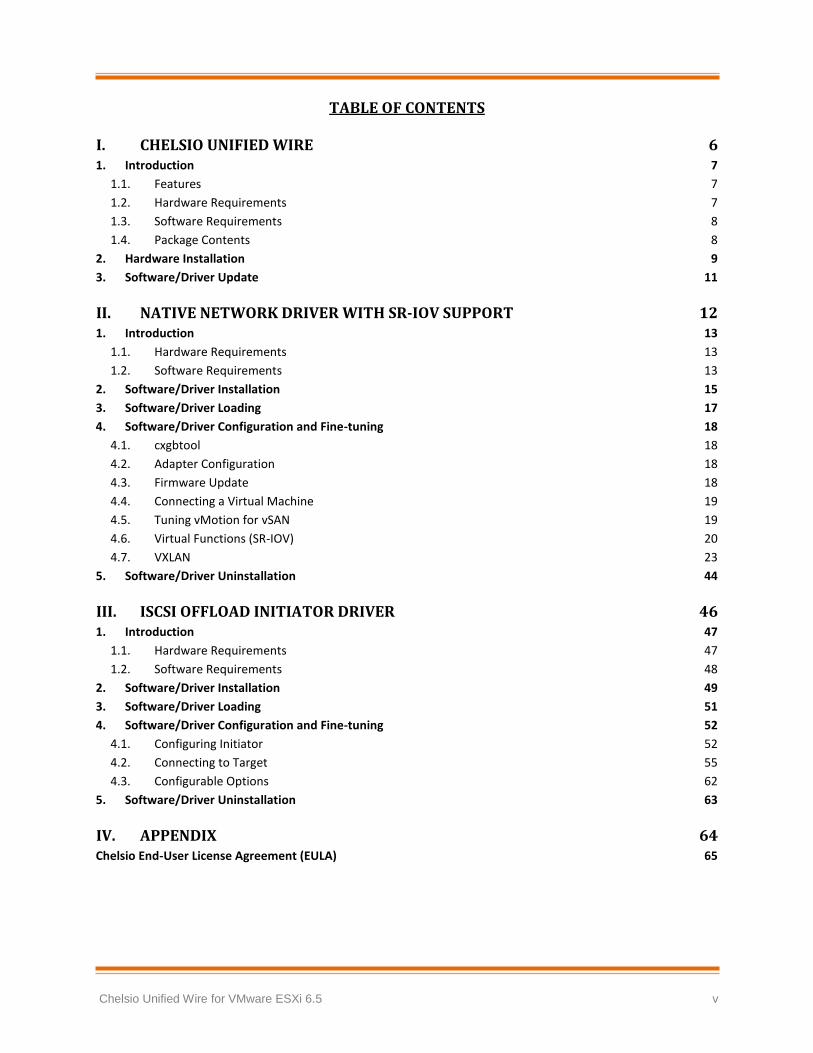
TABLE OF CONTENTS
I. CHELSIO UNIFIED WIRE 6
1. Introduction 7
1.1. Features 7
1.2. Hardware Requirements 7
1.3. Software Requirements 8
1.4. Package Contents 8
2. Hardware Installation 9
3. Software/Driver Update 11
II. NATIVE NETWORK DRIVER WITH SR-IOV SUPPORT 12
1. Introduction 13
1.1. Hardware Requirements 13
1.2. Software Requirements 13
2. Software/Driver Installation 15
3. Software/Driver Loading 17
4. Software/Driver Configuration and Fine-tuning 18
4.1. cxgbtool 18
4.2. Adapter Configuration 18
4.3. Firmware Update 18
4.4. Connecting a Virtual Machine 19
4.5. Tuning vMotion for vSAN 19
4.6. Virtual Functions (SR-IOV) 20
4.7. VXLAN 23
5. Software/Driver Uninstallation 44
III. ISCSI OFFLOAD INITIATOR DRIVER 46
1. Introduction 47
1.1. Hardware Requirements 47
1.2. Software Requirements 48
2. Software/Driver Installation 49
3. Software/Driver Loading 51
4. Software/Driver Configuration and Fine-tuning 52
4.1. Configuring Initiator 52
4.2. Connecting to Target 55
4.3. Configurable Options 62
5. Software/Driver Uninstallation 63
IV. APPENDIX 64
Chelsio End-User License Agreement (EULA) 65

Chapter I. Chelsio Unified Wire
Chelsio Unified Wire for VMware ESXi 6.5 6
I. Chelsio Unified Wire

Chapter I. Chelsio Unified Wire
Chelsio Unified Wire for VMware ESXi 6.5 7
1. Introduction
Thank you for choosing Chelsio Unified Wire adapters. These high speed, single chip, single
firmware cards provide enterprises and datacenters with high performance solutions for various
Network and Storage related requirements.
The Terminator series of adapters is Chelsio’s next generation of highly integrated, hyper-
virtualized 1/10/25/40/50/100GbE controllers. The adapters are built around a programmable
protocol-processing engine, with full offload of a complete Unified Wire solution comprising NIC,
TOE, iWARP RDMA, iSCSI, FCoE and NAT support. It scales to true 100Gb line-rate operation
from a single TCP connection to thousands of connections, and allows simultaneous low latency
and high bandwidth operation thanks to multiple physical channels through the ASIC.
Ideal for all data, storage and high-performance clustering applications, Chelsio adapters
enable a unified fabric over a single wire by simultaneously running all unmodified IP sockets,
Fibre Channel and InfiniBand applications over Ethernet at line rate.
Designed for deployment in virtualized datacenters, cloud service installations and high-
performance computing environments, Chelsio adapters bring a new level of performance metrics
and functional capabilities to the computer networking industry.
This document describes the installation, use and maintenance of Unified Wire software for
VMware ESXi and its various components.
1.1. Features
The Chelsio Unified Wire package installs various drivers and utilities and consists of the
following software:
Native Network driver with SR-IOV support
iSCSI Offload Initiator Driver
For detailed instructions on loading, unloading and configuring the drivers/tools please refer to
their respective sections.
1.2. Hardware Requirements
The Chelsio Unified Wire software supports Chelsio Terminator series of Unified Wire adapters.
To know more about the list of adapters supported by each driver, please refer to their respective
sections.
The drivers are not VMware certified. Note

Chapter I. Chelsio Unified Wire
Chelsio Unified Wire for VMware ESXi 6.5 8
1.3. Software Requirements
The Chelsio Unified Wire software has been developed to run on 64-bit ESXi based platforms
and therefore it is a base requirement for running the driver. To know more about the complete
list of operating systems supported by each driver, please refer to their respective sections.
1.4. Package Contents
The Chelsio Unified Wire driver package consists of the following files/directories:
cxl-*.vib: Native Network driver VIB file.
cheiscsi-*.vib: iSCSI Offload Initiator driver VIB file.
chelsio-esx-libcheiscsi_ima.so: IMA driver file.
docs: This directory contains support documents - README, Release Notes and User’s
Guide (this document) for the software.
EULA: Chelsio’s End User License Agreement.

Chapter I. Chelsio Unified Wire
Chelsio Unified Wire for VMware ESXi 6.5 9
2. Hardware Installation
Follow these steps to install Chelsio adapter in your system:
i. Shutdown/power off your system.
ii. Power off all remaining peripherals attached to your system.
iii. Unpack the Chelsio adapter and place it on an anti-static surface.
iv. Remove the system case cover according to the system manufacturer’s instructions.
v. Remove the PCI filler plate from the slot where you will install the Ethernet adapter.
vi. For maximum performance, it is highly recommended to install the adapter into a PCIe
x8/x16 slot.
vii. Holding the Chelsio adapter by the edges, align the edge connector with the PCI connector on
the motherboard. Apply even pressure on both edges until the card is firmly seated. It may be
necessary to remove the transceiver modules prior to inserting the adapter.
viii. Secure the Chelsio adapter with a screw, or other securing mechanism, as described by the
system manufacturer’s instructions. Replace the case cover.
ix. After securing the card, ensure that the card is still fully seated in the PCIE x8/x16 slot as
sometimes the process of securing the card causes the card to become unseated.
x. Connect a fiber/twinax cable, multi-mode for short range (SR) optics or single-mode for long
range (LR) optics, to the Ethernet adapter or regular Ethernet cable for the 1Gb Ethernet
adapter.
xi. Power on your system.
xii. Verify if the adapter was installed successfully by using the lspci command
For Chelsio adapters, the physical functions are currently assigned as:
Physical functions 0 - 3: for the NIC, SR-IOV functions of the adapter
Physical function 4: Currently not used
Physical function 5: for iSCSI
Physical function 6: for FCoE
Physical function 7: Currently not assigned
Once native network driver (cxl) is installed and loaded, examine the output of dmesg to see if
the card is discovered. You should see a similar output:
All 4-ports of T6425-CR adapter will be functional only if PCIe x8 -> 2x PCIe x4 slot
bifurcation is supported by the system and enabled in BIOS. Otherwise, only 2-ports
will be functional.
Note

Chapter I. Chelsio Unified Wire
Chelsio Unified Wire for VMware ESXi 6.5 10
The above outputs indicate the hardware configuration of the adapter as well as serial number.
Network device names for Chelsio’s physical ports are assigned using the following
convention: the port farthest from the motherboard will appear as the first network
interface. However, for T5 40G adapters, the association of physical Ethernet ports
and their corresponding network device names is opposite. For these adapters, the
port nearest to the motherboard will appear as the first network interface.
Note

Chapter I. Chelsio Unified Wire
Chelsio Unified Wire for VMware ESXi 6.5 11
3. Software/Driver Update
For any distribution specific problems, please check README and Release Notes included in
the release for possible workaround.
Please visit Chelsio Download Center for regular updates on various software/drivers. You can
also subscribe to our newsletter for the latest software updates.

Chapter II. Native Network Driver with SR-IOV Support
Chelsio Unified Wire for VMware ESXi 6.5 12
II. Native Network Driver with SR-IOV Support
Chapter II. Native Network Driver with SR-IOV Support
Chelsio Unified Wire for VMware ESXi 6.5 13
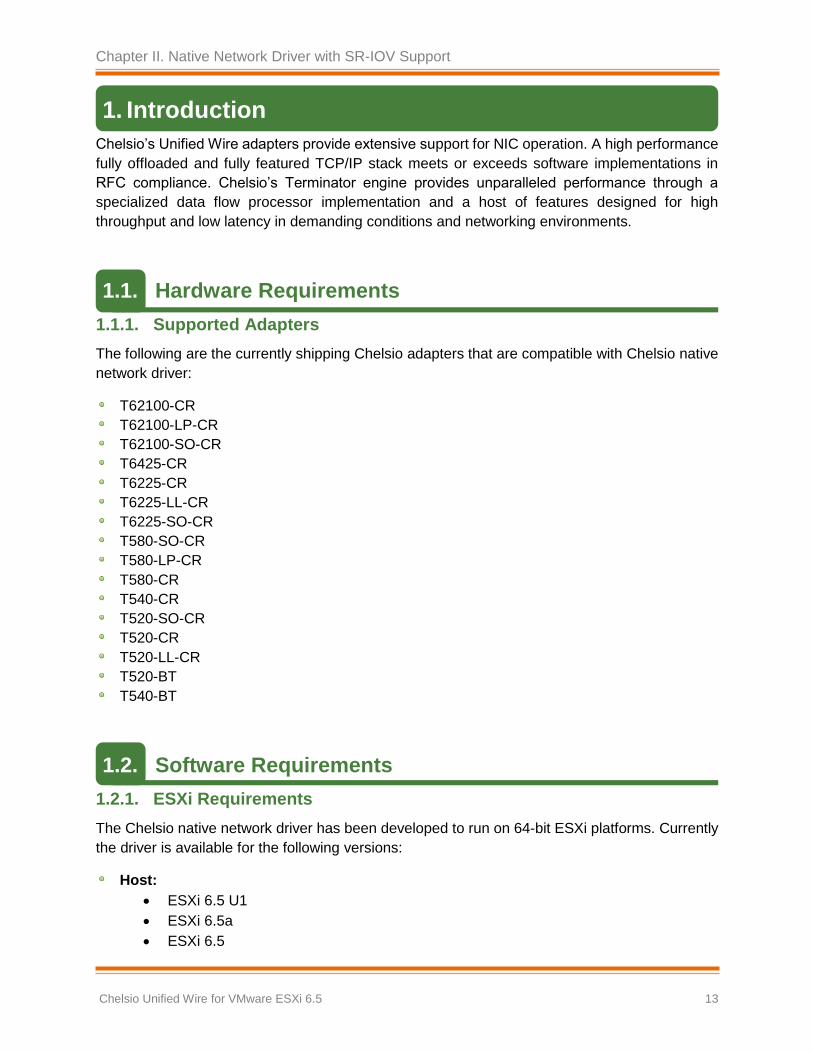
1. Introduction
Chelsio’s Unified Wire adapters provide extensive support for NIC operation. A high performance
fully offloaded and fully featured TCP/IP stack meets or exceeds software implementations in
RFC compliance. Chelsio’s Terminator engine provides unparalleled performance through a
specialized data flow processor implementation and a host of features designed for high
throughput and low latency in demanding conditions and networking environments.
1.1. Hardware Requirements
1.1.1. Supported Adapters
The following are the currently shipping Chelsio adapters that are compatible with Chelsio native
network driver:
T62100-CR
T62100-LP-CR
T62100-SO-CR
T6425-CR
T6225-CR
T6225-LL-CR
T6225-SO-CR
T580-SO-CR
T580-LP-CR
T580-CR
T540-CR
T520-SO-CR
T520-CR
T520-LL-CR
T520-BT
T540-BT
1.2. Software Requirements
1.2.1. ESXi Requirements
The Chelsio native network driver has been developed to run on 64-bit ESXi platforms. Currently
the driver is available for the following versions:
Host:
• ESXi 6.5 U1
• ESXi 6.5a
• ESXi 6.5
Chapter II. Native Network Driver with SR-IOV Support
Chelsio Unified Wire for VMware ESXi 6.5 14
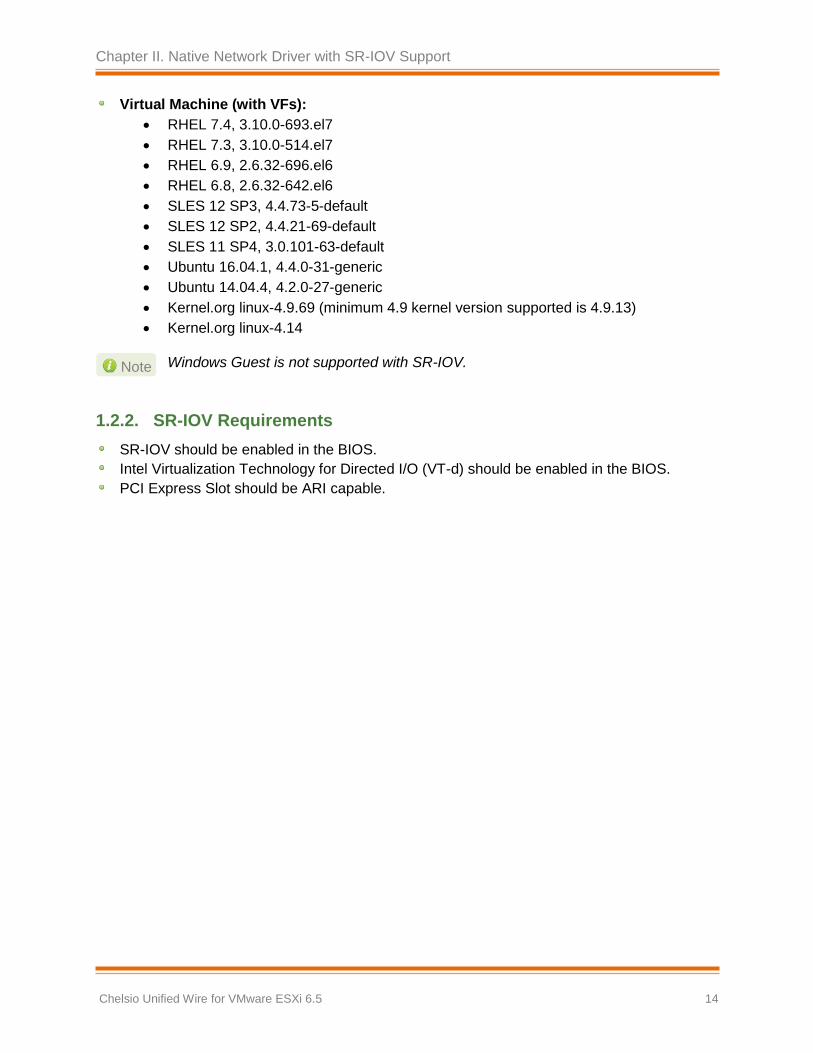
Virtual Machine (with VFs):
• RHEL 7.4, 3.10.0-693.el7
• RHEL 7.3, 3.10.0-514.el7
• RHEL 6.9, 2.6.32-696.el6
• RHEL 6.8, 2.6.32-642.el6
• SLES 12 SP3, 4.4.73-5-default
• SLES 12 SP2, 4.4.21-69-default
• SLES 11 SP4, 3.0.101-63-default
• Ubuntu 16.04.1, 4.4.0-31-generic
• Ubuntu 14.04.4, 4.2.0-27-generic
• Kernel.org linux-4.9.69 (minimum 4.9 kernel version supported is 4.9.13)
• Kernel.org linux-4.14
1.2.2. SR-IOV Requirements
SR-IOV should be enabled in the BIOS.
Intel Virtualization Technology for Directed I/O (VT-d) should be enabled in the BIOS.
PCI Express Slot should be ARI capable.
Windows Guest is not supported with SR-IOV. Note

Chapter II. Native Network Driver with SR-IOV Support
Chelsio Unified Wire for VMware ESXi 6.5 15
2. Software/Driver Installation
i. Download the driver package from Chelsio Download Center.
ii. Unzip the driver package:
[root@host:~] unzip <driver_package>.zip
iii. Put the host in maintenance mode using the vSphere (desktop or web) Client.

Chapter II. Native Network Driver with SR-IOV Support
Chelsio Unified Wire for VMware ESXi 6.5 16
iv. Install the Native Network driver (cxl):
[root@host:~] cp cxl-*.vib /productLocker/
[root@host:~] cp cxl-*.vib /var/log/vmware/
[root@host:~] esxcli software vib install -v /productLocker/cxl-*.vib --no-
sig-check
v. After installation completes successfully, exit from maintenance mode and reboot the host.

Chapter II. Native Network Driver with SR-IOV Support
Chelsio Unified Wire for VMware ESXi 6.5 17
3. Software/Driver Loading
After rebooting the ESXi Host, the driver will load automatically. However, it is possible to
manually load the driver by using the command below:
[root@host:~] vmkload_mod cxl
Execute the below command so that device manager performs a rescan:
[root@host:~] kill -SIGHUP $(cat /var/run/vmware/vmkdevmgr.pid)
Chapter II. Native Network Driver with SR-IOV Support
Chelsio Unified Wire for VMware ESXi 6.5 18
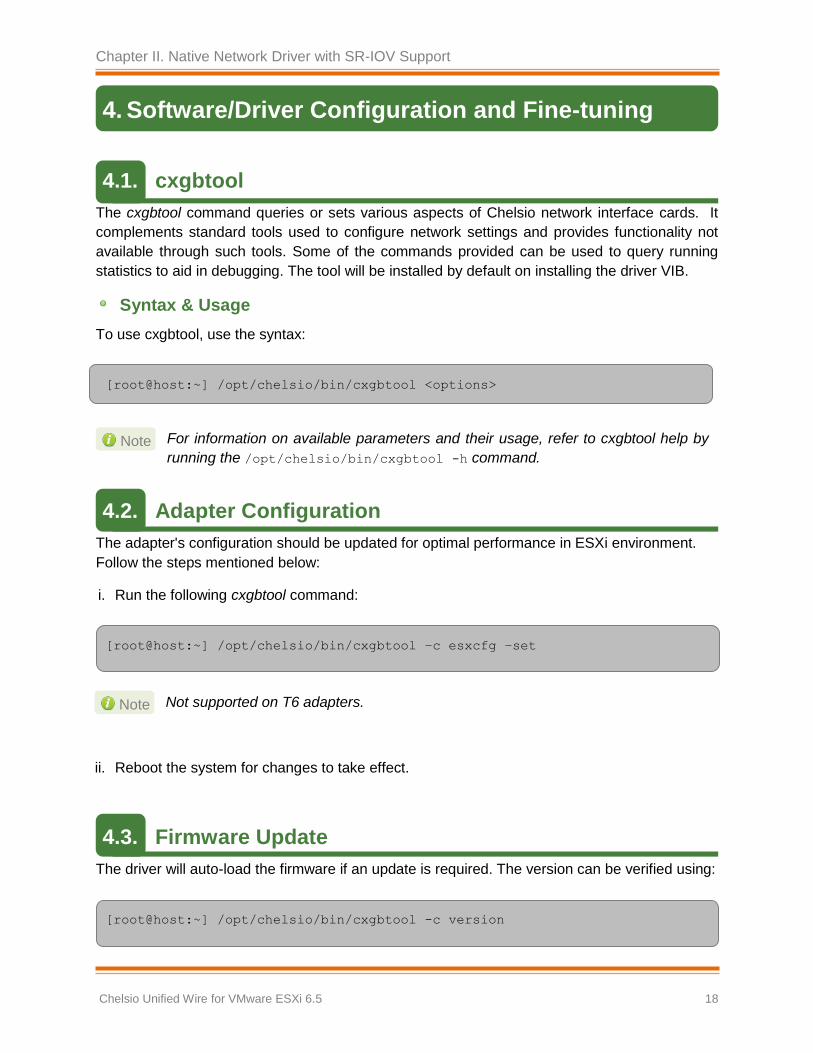
4. Software/Driver Configuration and Fine-tuning
4.1. cxgbtool
The cxgbtool command queries or sets various aspects of Chelsio network interface cards. It
complements standard tools used to configure network settings and provides functionality not
available through such tools. Some of the commands provided can be used to query running
statistics to aid in debugging. The tool will be installed by default on installing the driver VIB.
Syntax & Usage
To use cxgbtool, use the syntax:
[root@host:~] /opt/chelsio/bin/cxgbtool <options>
4.2. Adapter Configuration
The adapter's configuration should be updated for optimal performance in ESXi environment.
Follow the steps mentioned below:
i. Run the following cxgbtool command:
[root@host:~] /opt/chelsio/bin/cxgbtool –c esxcfg –set
ii. Reboot the system for changes to take effect.
4.3. Firmware Update
The driver will auto-load the firmware if an update is required. The version can be verified using:
[root@host:~] /opt/chelsio/bin/cxgbtool -c version
For information on available parameters and their usage, refer to cxgbtool help by
running the /opt/chelsio/bin/cxgbtool -h command. Note
Not supported on T6 adapters. Note

Chapter II. Native Network Driver with SR-IOV Support
Chelsio Unified Wire for VMware ESXi 6.5 19
4.4. Connecting a Virtual Machine
Follow the steps mentioned below to connect Chelsio adapter to a virtual machine:
i. Create a new virtual switch:
[root@host:~] esxcfg-vswitch -a vSwitchN
ii. Link a Chelsio adapter to the newly created virtual switch:
[root@host:~] esxcfg-vswitch -L vmnicN vSwitchN
iii. Create a new port group on the vSwitch:
[root@host:~] esxcfg-vswitch -A <port group name> vSwitchN
iv. From the vSphere client, right-click on the virtual machine, select the virtual network adapter
to be used, and attach the newly created port group.
4.5. Tuning vMotion for vSAN
While creating a vSAN you may encounter out of memory issues, resulting in vMotion timing
out. To avoid this, follow the steps mentioned below on all ESXi hosts in the vSAN:
i. Set the low-memory packet heap value to the maximum supported value of 512:
[root@host:~] esxcli system settings kernel set -s netPktHeapMaxMBPerGB -v
512
ii. Set the networking packet buffer pool size to the maximum supported value of 200:
[root@host:~] esxcli system settings kernel set -s netPktPoolMaxMBPerGB -v
200
iii. Reboot the host.

Chapter II. Native Network Driver with SR-IOV Support
Chelsio Unified Wire for VMware ESXi 6.5 20
iv. Enable maximum RSS queues:
[root@host:~] vmkload_mod cxl rss_q=1
4.6. Virtual Functions (SR-IOV)
4.6.1. Instantiate VFs
Follow the steps mentioned below to instantiate virtual functions:
i. max_vfs is a comma separated module parameter that specifies the maximum number of VFs
per port. Load the Native Network driver (cxl) with max_vfs parameter and set it to a non-zero
value. In case of multiple adapters, use ',,' to separate the number of VFs per adapter:
[root@host:~] esxcfg-module cxl -s max_vfs=W,X,,Y,Z
Where,
W: Number of VFs per port 0 of adapter 0.
X: Number of VFs per port 1 of adapter 0.
Y: Number of VFs per port 0 of adapter 1.
Z: Number of VFs per port 1 of adapter 1.
E.g. - To instantiate 3 VFs for port 1 of adapter 0 & 4 VFs for port 0 of adapter 1:
[root@host:~] esxcfg-module cxl -s max_vfs=0,3,,4,0
ii. Verify max_vfs setting using the -g option:
[root@host:~] esxcfg-module -g cxl
E.g.:
[root@host:~] esxcfg-module -g cxl
cxl enabled = 1 options = 'max_vfs=2,2'
A maximum of 16 VFs can be instantiated per port.
Note

Chapter II. Native Network Driver with SR-IOV Support
Chelsio Unified Wire for VMware ESXi 6.5 21
iii. Reboot the ESXi host for changes to take effect.
iv. Check if VFs were instantiated successfully on the PCI bus by either using the shell prompt
(using lspci) or vSphere GUI (under Host > Configuration>Advanced setting)
• Unloading driver when VFs are attached to VMs is not supported by VMware.
• VMs with SRIOV interface might not power on with "out of MSI-X vectors"
message in vmkernel.log. To resolve this issue, you need to add
"pciPassthru<VF_ID>.maxMSIXvectors" parameter to VMs configuration file.
Maximum value allowed for this param is 31. It is recommended to set the value
according to the following equation:
pciPassthru<VF_ID>.maxMSIXvectors = <Number of CPUs in Win VM> + 2
For more information refer to VMware documentation.
• Windows Guest is not supported with SR-IOV.
Note

Chapter II. Native Network Driver with SR-IOV Support
Chelsio Unified Wire for VMware ESXi 6.5 22
4.6.2. Assigning VFs to VMs
Once the VFs are instantiated successfully, it’s time to attach them to the virtual machine. For
instructions on how to assign virtual functions to a virtual machine, please refer to VMware's
official documentation.
4.6.3. Using VFs in Linux VM
To use the newly attached VFs in a virtual machine, follow the steps mentioned below:
i. Power-on the Virtual Machine with VF attached to it.
ii. Verify that the Chelsio VF shows up in the VM using the lspci command. You should see a
similar output:
[root@host~]# lspci | grep Chelsio
00:08:0 Ethernet controller: Chelsio Communications Inc T580-LP-CR Unified
Wire Ethernet Controller [VF]
iii. Download the latest Chelsio Unified Wire for Linux driver package, from Chelsio Download
Center.
iv. Untar the tarball using the following command:
[root@host~]# tar zxvf ChelsioUwire-x.xx.x.x.tar.gz
v. Change you current working directory to ChelsioUwire-x.xx.x.x directory and install the VF
driver using the following command:
[root@host~]# make vnic_install
vi. Load the VF driver in the VM using the below command:
[root@host~]# modprobe cxgb4vf
To know more about Chelsio Virtual Function driver, please refer Chelsio Unified
Wire for Linux User’s Guide.
Note

Chapter II. Native Network Driver with SR-IOV Support
Chelsio Unified Wire for VMware ESXi 6.5 23
4.6.4. Example
i. In this example, 2 VFs are instantiated per port, hence a total of 4 VFs instantiated on the
host. The host is then rebooted.
[root@host:~] esxcfg-module cxl -s max_vfs=2,2
[root@host:~] reboot
ii. 4 VMs are setup in the following combination:
• VF0 of PF0 (VF marked with the bus-id <PCIslot.01.0>) is assigned to VM1
• VF1 of PF0 (VF marked with the bus-id <PCIslot.01.4>) is assigned to VM2
• VF0 of PF1 (VF marked with the bus-id <PCIslot.01.1>) is assigned to VM3
• VF1 of PF1 (VF marked with the bus-id <PCIslot.01.5>) is assigned to VM4
iii. VMs are powered up one after another.
iv. VF driver (cxgb4vf) is installed and loaded in all the VMs.
The above configuration will result in the following connectivity:
• VFs of the same port can communicate with each other. i.e. VM1 can communicate with
VM2, and VM3 can communicate with VM4.
• VFs of port 0 (VM1 and VM2) will be able to communicate with any peer connected to
port 0 of the network adapter.
• VFs of port 1 (VM3 and VM4) will be able to communicate with any peer connected to
port 1 of the network adapter.
4.7. VXLAN
Virtual Extensible LAN (VXLAN) is a network virtualization technique that uses overlay
encapsulation protocol to provide Ethernet Layer 2 network services with extended scalability and
flexibility. VXLAN extends the virtual LAN (VLAN) address space by adding a 24-bit segment ID
and increasing the number of available logical networks from 4096 to 16 million, thereby
addressing the scalability and network segmentation issues associated with large cloud
computing deployments. Furthermore, VXLAN provides a cost-effective software-defined
networking (SDN) solution for migration of a large number of VMs over large distances using
existing hardware and software resources.
The following sections describe the method to setup a VXLAN using Chelsio adapter:

Chapter II. Native Network Driver with SR-IOV Support
Chelsio Unified Wire for VMware ESXi 6.5 24
4.7.1. ESXi 6.5a
Configuring Adapters
For T6 adapters, VXLAN offload is enabled by default on loading the driver.
Creating Cluster
i. Log in to vCenter Server through vSphere Web Client using a web browser.

Chapter II. Native Network Driver with SR-IOV Support
Chelsio Unified Wire for VMware ESXi 6.5 25
ii. Click on Hosts and Clusters tab in the Object Navigator. Right-click on your vCenter server
and select New Datacenter.
iii. Provide a name for the new datacenter and click OK.
iv. Right-click on the newly created datacenter and select New Cluster.
Chapter II. Native Network Driver with SR-IOV Support
Chelsio Unified Wire for VMware ESXi 6.5 26
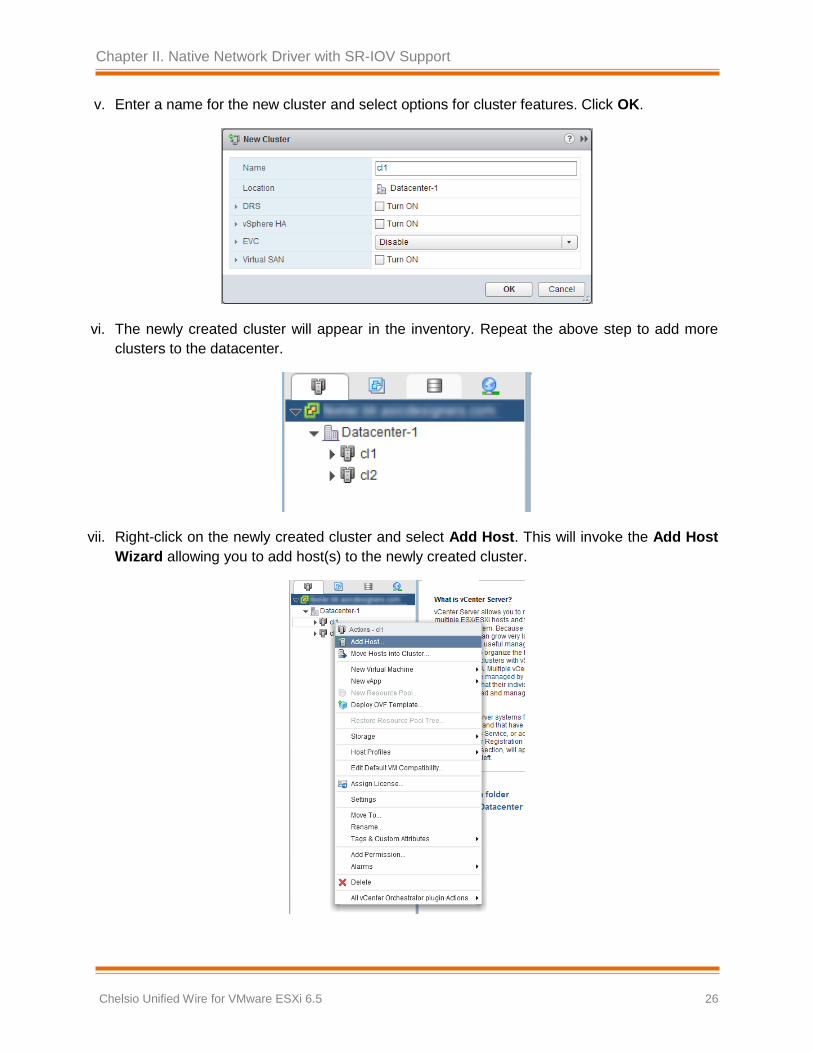
v. Enter a name for the new cluster and select options for cluster features. Click OK.
vi. The newly created cluster will appear in the inventory. Repeat the above step to add more
clusters to the datacenter.
vii. Right-click on the newly created cluster and select Add Host. This will invoke the Add Host
Wizard allowing you to add host(s) to the newly created cluster.

Chapter II. Native Network Driver with SR-IOV Support
Chelsio Unified Wire for VMware ESXi 6.5 27
viii. Provide name or IP address of the host, username and password, and other configuration
details. Click Next.
ix. Review the information provided and click Finish.
Creating Distributed Switch
i. Log in to vCenter Server through vSphere Web Client using a web browser.
ii. Click on Networking tab.
iii. Right-click on your datacenter and select Distributed Switch > New Distributed Switch.

Chapter II. Native Network Driver with SR-IOV Support
Chelsio Unified Wire for VMware ESXi 6.5 28
iv. Enter a name for the switch and click Next.
v. Select the required switch version and click Next.

Chapter II. Native Network Driver with SR-IOV Support
Chelsio Unified Wire for VMware ESXi 6.5 29
vi. Select the required number of uplinks for your setup. Please note that the number of uplinks
must be equal or less than the number of adapters to be used for each host. Click Next.
vii. Review the settings and click Finish.

Chapter II. Native Network Driver with SR-IOV Support
Chelsio Unified Wire for VMware ESXi 6.5 30
viii. The newly created switch will appear in the inventory.
ix. Right-click on the switch and select Add and Manage Hosts.

Chapter II. Native Network Driver with SR-IOV Support
Chelsio Unified Wire for VMware ESXi 6.5 31
x. Select Manage host networking and click Next.
xi. Click Attached hosts. Select member hosts to add and click OK.

Chapter II. Native Network Driver with SR-IOV Support
Chelsio Unified Wire for VMware ESXi 6.5 32
xii. Click Next and select the appropriate network adapters tasks to perform. Click Next.
xiii. Here you can add physical network adapters to the switch. Select the adapter and
click Assign uplink.

Chapter II. Native Network Driver with SR-IOV Support
Chelsio Unified Wire for VMware ESXi 6.5 33
xiv. Select an uplink for the adapter and click OK and then Next.
xv. In this step, you can view the VMkernel adapters automatically added to the hosts. If VXLAN
modules are already installed using NSX Manager, you can also view the VXLAN Port group
associated to the respective host in distributed switch. Click Next.

Chapter II. Native Network Driver with SR-IOV Support
Chelsio Unified Wire for VMware ESXi 6.5 34
xvi. Review the impact status of the configuration. Click Next.
xvii. Review the settings and click Finish.

Chapter II. Native Network Driver with SR-IOV Support
Chelsio Unified Wire for VMware ESXi 6.5 35
Setting up VXLAN
i. Follow the steps mentioned in VMware’s NSX installation guide to install and configure NSX
Manager.
ii. Make certain that vCenter Server is registered with NSX manager successfully. Networking
& Security link should appear in both Home and Navigator panes. Click on the link in any of
the two panes.
iii. In the Navigator pane, click on Installation and then Host Preparation tab. Select the IP of
the required NSX manager from the drop-down menu.

Chapter II. Native Network Driver with SR-IOV Support
Chelsio Unified Wire for VMware ESXi 6.5 36
iv. In the Installation Status column for the required cluster, click on options ( ) and select
Install.
v. Click Yes to confirm. Installation progress will be shown in the Recent Tasks pane.
vi. In the VXLAN column for the required cluster, click on options ( ) and select Configure
VXLAN.

Chapter II. Native Network Driver with SR-IOV Support
Chelsio Unified Wire for VMware ESXi 6.5 37
vii. Select the distributed switch created previously from the drop-down menu. Provide details
like VLAN ID, IP addressing and Teaming policy and click OK.
viii. Click on the Logical Network Preparation tab and then Segment ID. Set the range for
Segment ID pool and Multicast addresses. Click OK.
Chapter II. Native Network Driver with SR-IOV Support
Chelsio Unified Wire for VMware ESXi 6.5 38
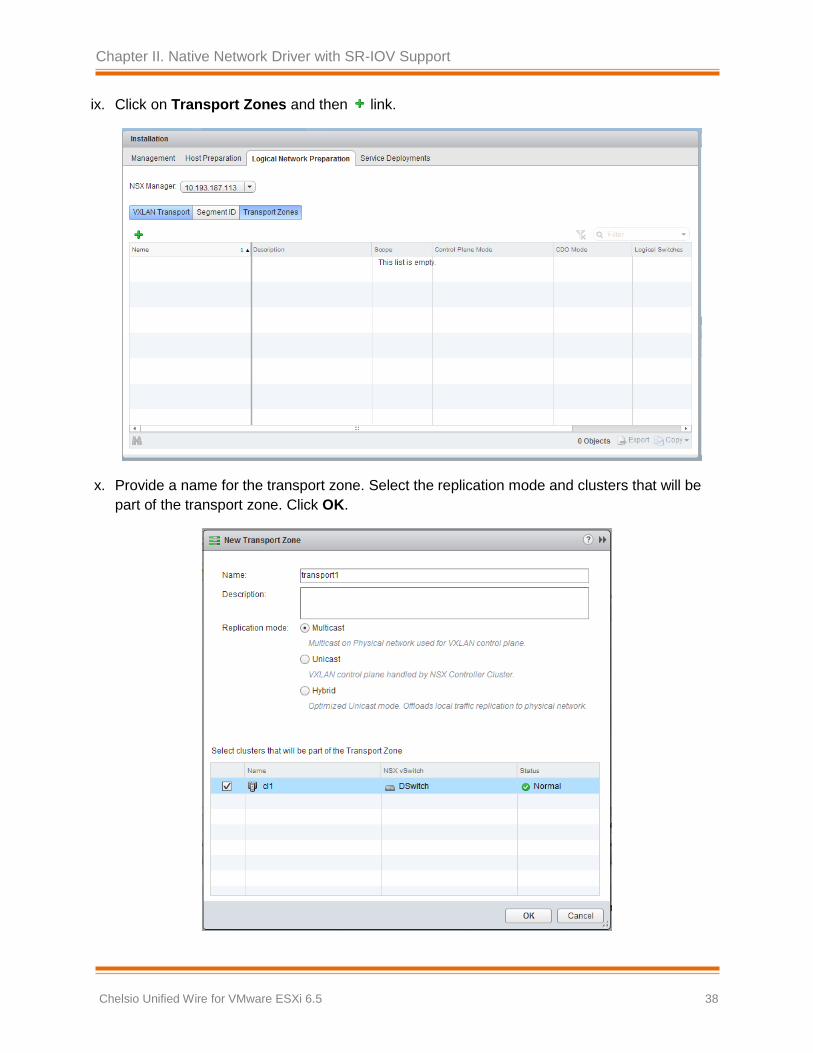
ix. Click on Transport Zones and then link.
x. Provide a name for the transport zone. Select the replication mode and clusters that will be
part of the transport zone. Click OK.

Chapter II. Native Network Driver with SR-IOV Support
Chelsio Unified Wire for VMware ESXi 6.5 39
xi. In the Navigator pane, select Logical Switches under Networking & Security and then
link.
xii. Provide a name for the logical switch and select the transport zone that was previously
created. Change the replication mode if required and Click OK.
Chapter II. Native Network Driver with SR-IOV Support
Chelsio Unified Wire for VMware ESXi 6.5 40
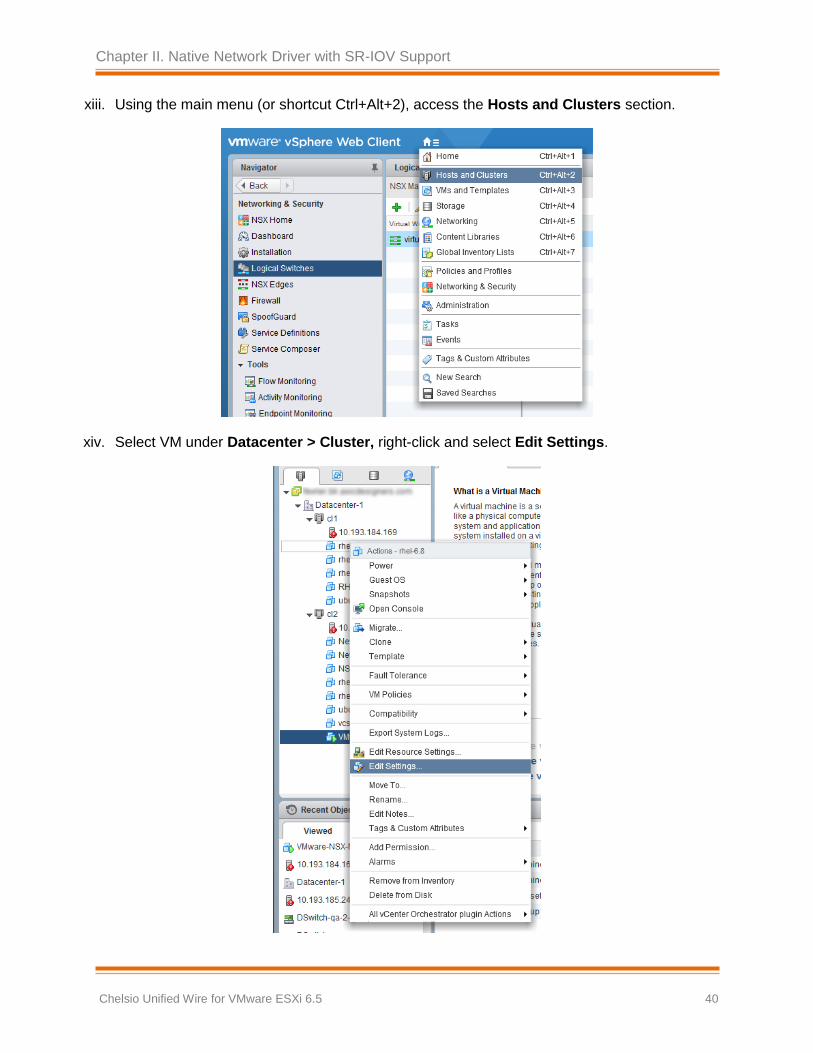
xiii. Using the main menu (or shortcut Ctrl+Alt+2), access the Hosts and Clusters section.
xiv. Select VM under Datacenter > Cluster, right-click and select Edit Settings.

Chapter II. Native Network Driver with SR-IOV Support
Chelsio Unified Wire for VMware ESXi 6.5 41
xv. In the New device drop-down menu, select Network and then click Add. This will add a
New Network entry under Virtual Hardware tab.

Chapter II. Native Network Driver with SR-IOV Support
Chelsio Unified Wire for VMware ESXi 6.5 42
xvi. In the New Network drop-down menu, select Show more networks. Add the logical switch
created previously. Click OK and then OK again.

Chapter II. Native Network Driver with SR-IOV Support
Chelsio Unified Wire for VMware ESXi 6.5 43
xvii. Repeat the above step for all the VMs in the cluster. All the VMs added to the VXLAN will
now be able to communicate successfully.

Chapter II. Native Network Driver with SR-IOV Support
Chelsio Unified Wire for VMware ESXi 6.5 44
5. Software/Driver Uninstallation
Follow the steps mentioned below to uninstall the driver:
i. Put the host in maintenance mode using the vSphere (desktop or web) Client:

Chapter II. Native Network Driver with SR-IOV Support
Chelsio Unified Wire for VMware ESXi 6.5 45
ii. Uninstall the driver:
[root@host:~] esxcli software vib remove -n cxl
iii. Reboot the host:
[root@host:~] reboot

Chapter III. iSCSI Offload Initiator Driver
Chelsio Unified Wire for VMware ESXi 6.5 46
III. iSCSI Offload Initiator Driver

Chapter III. iSCSI Offload Initiator Driver
Chelsio Unified Wire for VMware ESXi 6.5 47
1. Introduction
The Chelsio Unified Wire series of adapters are Independent Hardware iSCSI adapters. They
support iSCSI acceleration and iSCSI Direct Data Placement (DDP) where the hardware handles
the expensive byte touching operations, such as CRC computation and verification, and direct
DMA to the final host memory destination:
• iSCSI PDU digest generation and verification
On transmit -side, Chelsio hardware computes and inserts the Header and Data digest into
the PDUs. On receive-side, Chelsio hardware computes and verifies the Header and Data
digest of the PDUs.
• Direct Data Placement (DDP)
Chelsio hardware can directly place the iSCSI Data-In or Data-Out PDU's payload into pre-
posted destination host-memory buffers based on the Initiator Task Tag (ITT) in Data-In or
Target Task Tag (TTT) in Data-Out PDUs.
PDU Transmit and Recovery
On transmit-side, Chelsio hardware accepts the complete PDU (header + data) from the host
driver, computes and inserts the digests, decomposes the PDU into multiple TCP segments
if necessary, and transmit all the TCP segments onto the wire. It handles TCP retransmission
if needed.
On receive-side, Chelsio hardware recovers the iSCSI PDU by reassembling TCP segments,
separating the header and data, calculating and verifying the digests, then forwarding the
header to the host. The payload data, if possible, will be directly placed into the pre-posted
host DDP buffer. Otherwise, the data will be sent to the host too.
1.1. Hardware Requirements
1.1.1. Supported Adapters
The following are the currently shipping Chelsio adapters that are compatible with Chelsio iSCSI
Offload Initiator driver:
T62100-CR
T6225-CR
This is an alpha release. Note
Chapter III. iSCSI Offload Initiator Driver
Chelsio Unified Wire for VMware ESXi 6.5 48
1.2. Software Requirements
1.2.1. ESXi Requirements
The Chelsio iSCSI Offload Initiator driver has been developed to run on 64-bit ESXi platforms.
Currently the driver is available for the following version(s):
ESXi 6.5 U1
ESXi 6.5a
ESXi 6.5

Chapter III. iSCSI Offload Initiator Driver
Chelsio Unified Wire for VMware ESXi 6.5 49
2. Software/Driver Installation
Native Network driver (cxl) is required for iSCSI Offload Initiator driver to work. Hence, ensure
that the driver is installed and loaded as described in the Native Network Driver chapter before
proceeding.
i. Put the host in maintenance mode using the vSphere (desktop or web) Client.

Chapter III. iSCSI Offload Initiator Driver
Chelsio Unified Wire for VMware ESXi 6.5 50
ii. Install the iSCSI driver components cheiscsi and chelsio-esx-libcheiscsi_ima.so:
[root@host:~] cp cheiscsi-*.vib /productLocker/
[root@host:~] cp cheiscsi-*.vib /var/log/vmware/
[root@host:~] cp chelsio-esx-libcheiscsi_ima.so-*.vib /productLocker/
[root@host:~] cp chelsio-esx-libcheiscsi_ima.so-*.vib /var/log/vmware/
[root@host:~] esxcli software vib install -v /productLocker/cheiscsi-*.vib -
-no-sig-check
[root@host:~] esxcli software vib install -v /productLocker/chelsio-esx-
libcheiscsi_ima.so-*.vib --no-sig-check
iii. After installation completes successfully, exit from maintenance mode and reboot the host.

Chapter III. iSCSI Offload Initiator Driver
Chelsio Unified Wire for VMware ESXi 6.5 51
3. Software/Driver Loading
After rebooting the ESXi Host, the driver will load automatically. However, it is possible to
manually load the driver. You will need to perform a rescan after loading each driver component.
[root@host:~] vmkload_mod cheiscsi
[root@host:~] kill -SIGHUP $(cat /var/run/vmware/vmkdevmgr.pid)
[root@host:~] vmkload_mod chelsio-esx-libcheiscsi_ima.so
[root@host:~] kill -SIGHUP $(cat /var/run/vmware/vmkdevmgr.pid)

Chapter III. iSCSI Offload Initiator Driver
Chelsio Unified Wire for VMware ESXi 6.5 52
4. Software/Driver Configuration and Fine-tuning
The following sections describe the method to configure Chelsio iSCSI Offload Initiator and
connect to target.
4.1. Configuring Initiator
i. Log in to vCenter Server through vSphere Web Client using a web browser.
ii. If you have already created and configured the host intended to be used as initiator, skip to
step (iii)
a. Under Hosts and Clusters, right-click and click New Datacenter… Provide a name
and Click OK.
b. Right-click on the newly created datacenter and click Add Host... Follow onscreen
instructions and provide information to add the host. Click Finish.
iii. Select the host and under the Configure tab, select Storage Adapters. This will display the
list of available Chelsio iSCSI adapters.
You can also view the list in CLI using:
[root@host:~] esxcli iscsi adapter list

Chapter III. iSCSI Offload Initiator Driver
Chelsio Unified Wire for VMware ESXi 6.5 53
iv. In the Adapter Details section, click Network Settings tab and then Edit.
v. Configure IP for the adapter and click OK. You can configure either IPv4 or IPv6 or both.

Chapter III. iSCSI Offload Initiator Driver
Chelsio Unified Wire for VMware ESXi 6.5 54
vi. For changes to take effect, rescan the iSCSI adapter using Rescan.

Chapter III. iSCSI Offload Initiator Driver
Chelsio Unified Wire for VMware ESXi 6.5 55
4.2. Connecting to Target
There are two methods to discover and connect to targets:
• Dynamic Discovery: Discovers all the available targets for a given target server.
• Static Discovery: Discovers a specific target by manually entering target information.
4.2.1. Dynamic Discovery
• Adding Target Server
i. Select the iSCSI adapter to connect to the target and under the Targets tab, select Dynamic
Discovery.

Chapter III. iSCSI Offload Initiator Driver
Chelsio Unified Wire for VMware ESXi 6.5 56
ii. Click Add, and provide the iSCSI target server IP. Click OK.

Chapter III. iSCSI Offload Initiator Driver
Chelsio Unified Wire for VMware ESXi 6.5 57
iii. For changes to take effect, rescan the iSCSI adapter using Rescan.
iv. All the available LUNs discovered on the given target server will be displayed in the Devices
tab. You can perform various tasks like detach, rename, erase partitions, etc.
The Paths tab displays LUN status and allows you to enable or disable them.
These LUNs can now be attached to VMs or can be used to store VMs.

Chapter III. iSCSI Offload Initiator Driver
Chelsio Unified Wire for VMware ESXi 6.5 58
• Removing Target Server
i. Under Targets tab, select Dynamic Discovery.
ii. Select the target server, click Remove and then Yes to confirm.
iii. The iSCSI server will also be listed as static target under Static Discovery, hence needs to
be removed from here as well. Select the server, click Remove and then Yes to confirm.
iv. For changes to take effect, rescan the iSCSI adapter using Rescan.

Chapter III. iSCSI Offload Initiator Driver
Chelsio Unified Wire for VMware ESXi 6.5 59
Static Discovery
• Adding Target Server
i. Select the iSCSI interface to connect to the target and under the Targets tab, select Static
Discovery.

Chapter III. iSCSI Offload Initiator Driver
Chelsio Unified Wire for VMware ESXi 6.5 60
ii. Click Add, and provide the iSCSI target server IP and target IQN. Click OK.

Chapter III. iSCSI Offload Initiator Driver
Chelsio Unified Wire for VMware ESXi 6.5 61
iii. For changes to take effect, rescan the iSCSI adapter using Rescan.
iv. All the available LUNs discovered on the given target server will be displayed in the Devices
tab. You can perform various tasks like detach, rename, erase partitions, etc.
The Paths tab displays LUN status and allows you to enable or disable them.
These LUNs can now be attached to VMs or can be used to store VMs.

Chapter III. iSCSI Offload Initiator Driver
Chelsio Unified Wire for VMware ESXi 6.5 62
• Removing Target Server
i. Under Targets tab, select Static Discovery.
ii. Select the target server, click Remove and then Yes to confirm.
iii. For changes to take effect, rescan the iSCSI adapter using Rescan.
4.3. Configurable Options
The option to edit general initiator properties like alias and name is available under the Properties
tab, whereas advanced parameters like Digest, MTU, etc., can be changed in the Advanced
Options tab.
To change target server’s advanced parameters, use the Advanced option under the Targets
tab.

Chapter III. iSCSI Offload Initiator Driver
Chelsio Unified Wire for VMware ESXi 6.5 63
5. Software/Driver Uninstallation
Follow the steps mentioned below to uninstall the iSCSI Offload Initiator driver:
i. Put the host in maintenance mode using the vSphere (desktop or web) Client:
ii. Uninstall the driver:
[root@host:~] esxcli software vib remove -n cheiscsi
[root@host:~] esxcli software vib remove -n chelsio-esx-libcheiscsi_ima.so
iii. Reboot the host:
[root@host:~] reboot
Before proceeding, please ensure that no iSCSI session or connection is active and
running.
Note

Chapter IV. Appendix
Chelsio Unified Wire for VMware ESXi 6.5 64
IV. Appendix

Chapter IV. Appendix
Chelsio Unified Wire for VMware ESXi 6.5 65
Chelsio End-User License Agreement (EULA)
Installation and use of the driver/software implies acceptance of the terms in the Chelsio End-
User License Agreement (EULA).
IMPORTANT: PLEASE READ THIS SOFTWARE LICENSE CAREFULLY BEFORE DOWNLOADING OR OTHERWISE
USING THE SOFTWARE OR ANY ASSOCIATED DOCUMENTATION OR OTHER MATERIALS
(COLLECTIVELY, THE "SOFTWARE"). BY CLICKING ON THE "OK" OR "ACCEPT" BUTTON YOU AGREE
TO BE BOUND BY THE TERMS OF THIS AGREEMENT. IF YOU DO NOT AGREE TO THE TERMS OF THIS
AGREEMENT, CLICK THE "DO NOT ACCEPT" BUTTON TO TERMINATE THE INSTALLATION PROCESS.
1. License. Chelsio Communications, Inc. ("Chelsio") hereby grants you, the Licensee,
and you hereby accept, a limited, non-exclusive, non-transferable license to install and
use the Software with one or more Chelsio network adapters on a single server computer
for use in communicating with one or more other computers over a network. You may also
make one copy of the Software in machine readable form solely for back-up purposes,
provided you reproduce Chelsio's copyright notice and any proprietary legends included
with the Software or as otherwise required by Chelsio.
2. Restrictions. This license granted hereunder does not constitute a sale of the
Software or any copy thereof. Except as expressly permitted under this Agreement, you
may not:
(i) reproduce, modify, adapt, translate, rent, lease, loan, resell, distribute, or create
derivative works of or based upon, the Software or any part thereof; or
(ii) make available the Software, or any portion thereof, in any form, on the Internet.
The Software contains trade secrets and, in order to protect them, you may not decompile,
reverse engineer, disassemble, or otherwise reduce the Software to a human-perceivable
form. You assume full responsibility for the use of the Software and agree to use the
Software legally and responsibly.
3. Ownership of Software. As Licensee, you own only the media upon which the Software
is recorded or fixed, but Chelsio retains all right, title and interest in and to the
Software and all subsequent copies of the Software, regardless of the form or media in
or on which the Software may be embedded.
4. Confidentiality. You agree to maintain the Software in confidence and not to disclose
the Software, or any information or materials related thereto, to any third party without
the express written consent of Chelsio. You further agree to take all reasonable
precautions to limit access of the Software only to those of your employees who reasonably
require such access to perform their employment obligations and who are bound by
confidentiality agreements with you.
5. Term. This license is effective in perpetuity, unless terminated earlier. You may
terminate the license at any time by destroying the Software (including the related
documentation), together with all copies or modifications in any form. Chelsio may
terminate this license, and this license shall be deemed to have automatically
terminated, if you fail to comply with any term or condition of this Agreement. Upon any
termination, including termination by you, you must destroy the Software (including the
related documentation), together with all copies or modifications in any form.
6. Limited Warranty. If Chelsio furnishes the Software to you on media, Chelsio warrants
only that the media upon which the Software is furnished will be free from defects in

Chapter IV. Appendix
Chelsio Unified Wire for VMware ESXi 6.5 66
material or workmanship under normal use and service for a period of thirty (30) days
from the date of delivery to you.
CHELSIO DOES NOT AND CANNOT WARRANT THE PERFORMANCE OR RESULTS YOU MAY OBTAIN BY USING
THE SOFTWARE OR ANY PART THEREOF. EXCEPT FOR THE FOREGOING LIMITED WARRANTY, CHELSIO
MAKES NO OTHER WARRANTIES, EXPRESS OR IMPLIED, AND HEREBY DISCLAIMS ALL OTHER WARRANTIES,
INCLUDING, BUT NOT LIMITED TO, NON-INFRINGEMENT OF THIRD PARTY RIGHTS, MERCHANTABILITY
AND FITNESS FOR A PARTICULAR PURPOSE. Some states do not allow the exclusion of implied
warranties or limitations on how long an implied warranty may last, so the above
limitations may not apply to you. This warranty gives you specific legal rights and you
may also have other rights which vary from state to state.
7. Remedy for Breach of Warranty. The sole and exclusive liability of Chelsio and its
distributors, and your sole and exclusive remedy, for a breach of the above warranty,
shall be the replacement of any media furnished by Chelsio not meeting the above limited
warranty and which is returned to Chelsio. If Chelsio or its distributor is unable to
deliver replacement media which is free from defects in materials or workmanship, you
may terminate this Agreement by returning the Software.
8. Limitation of Liability. IN NO EVENT SHALL CHELSIO HAVE ANY LIABILITY TO YOU OR ANY
THIRD PARTY FOR ANY INDIRECT, INCIDENTAL, SPECIAL, CONSEQUENTIAL OR PUNITIVE DAMAGES,
HOWEVER CAUSED, AND ON ANY THEORY OF LIABILITY, ARISING OUT OF OR RELATED TO THE LICENSE
OR USE OF THE SOFTWARE, INCLUDING BUT NOT LIMITED TO LOSS OF DATA OR LOSS OF ANTICIPATED
PROFITS, EVEN IF CHELSIO HAS BEEN ADVISED OF THE POSSIBILITY OF SUCH DAMAGES. IN NO
EVENT SHALL CHELSIO'S LIABILITY ARISING OUT OF OR RELATED TO THE LICENSE OR USE OF THE
SOFTWARE EXCEED THE AMOUNTS PAID BY YOU FOR THE LICENSE GRANTED HEREUNDER. THESE
LIMITATIONS SHALL APPLY NOTWITHSTANDING ANY FAILURE OF ESSENTIAL PURPOSE OF ANY LIMITED
REMEDY.
9. High Risk Activities. The Software is not fault-tolerant and is not designed,
manufactured or intended for use or resale as online equipment control equipment in
hazardous environments requiring fail-safe performance, such as in the operation of
nuclear facilities, aircraft navigation or communication systems, air traffic control,
direct life support machines, or weapons systems, in which the failure of the Software
could lead directly to death, personal injury, or severe physical or environmental
damage. Chelsio specifically disclaims any express or implied warranty of fitness for
any high risk uses listed above.
10. Export. You acknowledge that the Software is of U.S. origin and subject to U.S.
export jurisdiction. You acknowledge that the laws and regulations of the United States
and other countries may restrict the export and re-export of the Software. You agree
that you will not export or re-export the Software or documentation in any form in
violation of applicable United States and foreign law. You agree to comply with all
applicable international and national laws that apply to the Software, including the
U.S.
Export Administration Regulations, as well as end-user, end-use, and destination
restrictions issued by U.S. and other governments.
11. Government Restricted Rights. The Software is subject to restricted rights as
follows. If the Software is acquired under the terms of a GSA contract: use, reproduction
or disclosure is subject to the restrictions set forth in the applicable ADP Schedule
contract. If the Software is acquired under the terms of a DoD or civilian agency
contract, use, duplication or disclosure by the Government is subject to the
restrictions of this Agreement in accordance with 48 C.F.R. 12.212 of the Federal

Chapter IV. Appendix
Chelsio Unified Wire for VMware ESXi 6.5 67
Acquisition Regulations and its successors and 49 C.F.R. 227.7202-1 of the DoD FAR
Supplement and its successors.
12. General. You acknowledge that you have read this Agreement, understand it, and that
by using the Software you agree to be bound by its terms and conditions. You further
agree that it is the complete and exclusive statement of the agreement between Chelsio
and you, and supersedes any proposal or prior agreement, oral or written, and any other
communication between Chelsio and you relating to the subject matter of this Agreement.
No additional or any different terms will be enforceable against Chelsio unless Chelsio
gives its express consent, including an express waiver of the terms of this Agreement,
in writing signed by an officer of Chelsio. This Agreement shall be governed by
California law, except as to copyright matters, which are covered by Federal law. You
hereby irrevocably submit to the personal jurisdiction of, and irrevocably waive
objection to the laying of venue (including a waiver of any argument of forum non
conveniens or other principles of like effect) in, the state and federal courts located
in Santa Clara County, California, for the purposes of any litigation undertaken in
connection with this Agreement. Should any provision of this Agreement be declared
unenforceable in any jurisdiction, then such provision shall be deemed severable from
this Agreement and shall not affect the remainder hereof. All rights in the Software not
specifically granted in this Agreement are reserved by Chelsio. You may not assign or
transfer this Agreement (by merger, operation of law or in any other manner) without the
prior written consent of Chelsio and any attempt to do so without such consent shall be
void and shall constitute a material breach of this Agreement.
Should you have any questions concerning this Agreement, you may contact Chelsio by
writing to:
Chelsio Communications, Inc.
209 North Fair Oaks Avenue,
Sunnyvale, CA 94085
U.S.A


