TECHLAM®TECHNICAL GUIDE
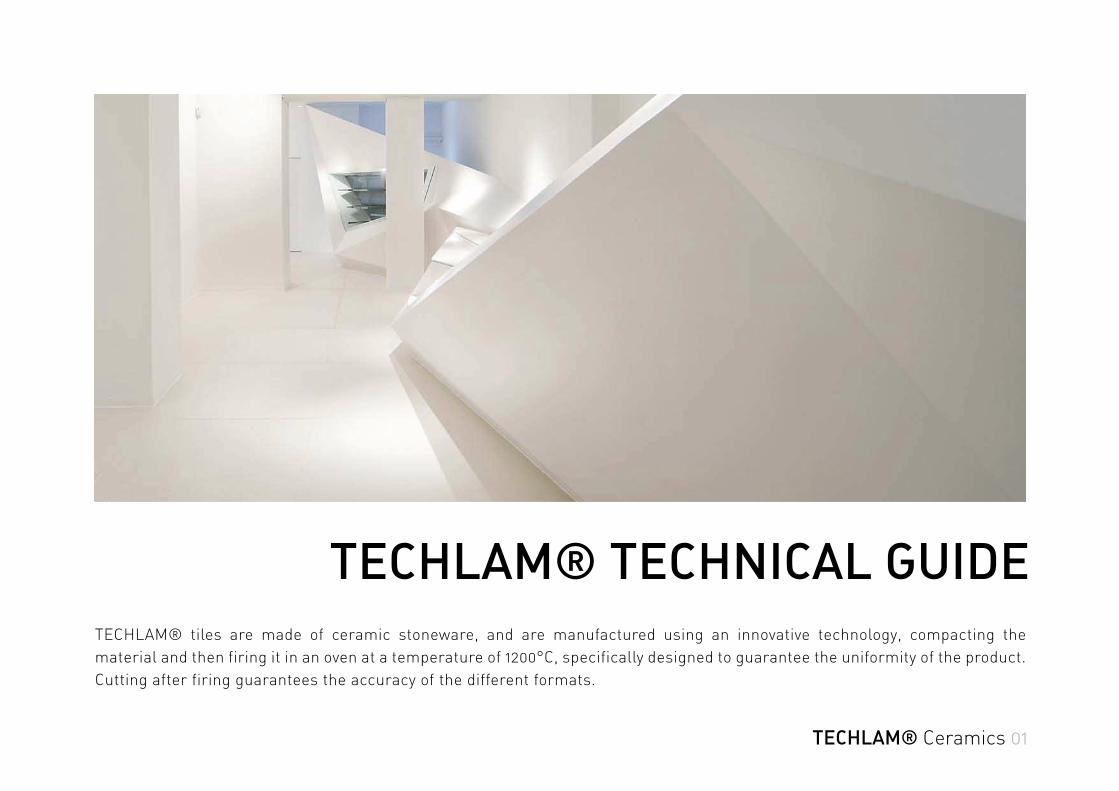
TECHLAM® TECHNICAL GUIDE
TECHLAM® tiles are made of ceramic stoneware, and are manufactured using an innovative technology, compacting the
material and then firing it in an oven at a temperature of 1200°C, specifically designed to guarantee the uniformity of the product.
Cutting after firing guarantees the accuracy of the different formats.
TECHLAM® Ceramics 01

THICKNESS
TECHLAM® is available in different thicknesses,
TECHLAM® Ceramics 02
each one intended for a different use.

TECHLAM® 3 mm
TECHLAM® Ceramics 03
Thickness
CHARACTERISTICS
A ceramic tile. Thickness: 3 mm Weight: 7,1 kg/m²
INTENDED USE
Construction sector:
!!"#$%&'()!'(*%&'#&!+(,!%-*%&'#&!.+//0!
+(,!1%'/'()0!+(,!&##20!30'()!+,4%0'$%5
6(*%&'#&!,%0')(!+(,!,%1#&+*'()!0%1*#&5

TECHLAM® 3+
TECHLAM® Ceramics 04
Thickness
CHARACTERISTICS
A ceramic tile reinforced with glass fibre netting on the back. Thickness: 3,5 mm Weight: 7,8 kg/m²
INTENDED USE
Construction sector:
!Covering exterior paving and interior flooring by laying on existing materials with adhesive in areas where traffic is not so heavy.
!Covering walls, both interior and exterior, roofs and ceilings, using adhesive.
!Ventilated façades.
Interior design and decorating sector.
TECHLAM® 5 mm
TECHLAM® Ceramics 05
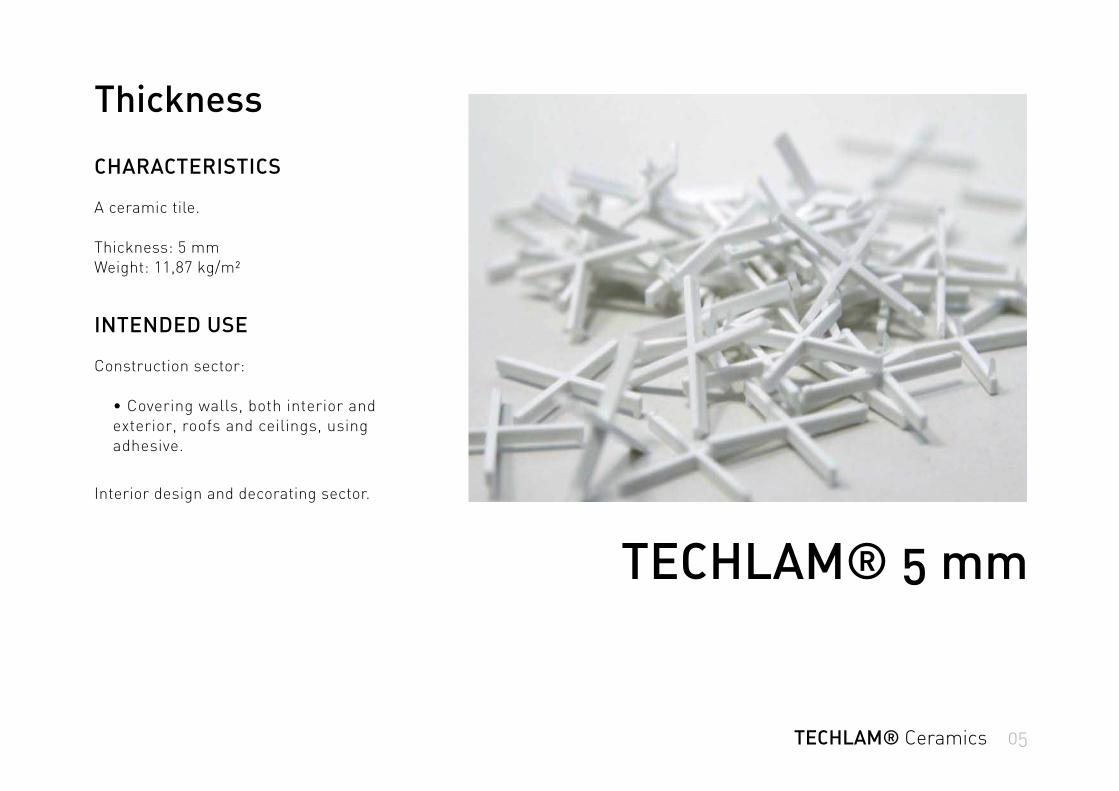
Thickness
CHARACTERISTICS
A ceramic tile.
Thickness: 5 mm Weight: 11,87 kg/m²
INTENDED USE
Construction sector:
overing walls, both interior and exterior, roofs and ceilings, using adhesive.
Interior design and decorating sector.

TECHLAM® 5+
TECHLAM® Ceramics 06
Thickness
CHARACTERISTICS
A ceramic tile reinforced with glass fibre netting on the back.
Thickness: 5,5 mm Weight: 12,57 kg/m²
INTENDED USE
Construction sector:
!"#$%&'()!*+,,-!+(.!&##/-0!1#23!'(2%&'#&!
+(.!%42%&'#&!5-'()!+.3%-'$%0!'(!+&%+-!*'23!
medium-high traffic.
Interior design and decorating sector.

TECHLAM® 5+5
TECHLAM® Ceramics 07
Thickness
CHARACTERISTICS
A ceramic sandwich tile created by superimposing two TECHLAM® 3 mm tiles of with glass fibre netting between them. Thickness: 7 mm Weight: 15 kg/m²
INTENDED USE
Construction sector:
!"#$%&'()!*+,,-!+(.!&##/-0!1#23!'(2%&'#&!
+(.!%42%&'#&0!5-'()!+.3%-'$%0!'(!+&%+-!*'23!
high traffic.
Interior design and decorating sector.

SIZES
TECHLAM® is available in panels of up to 3000x1000 mm,
providing unique solutions for all kinds of applications in the fields of architecture and interior design.
TECHLAM® Ceramics 08
TECHLAM® Ceramics 09
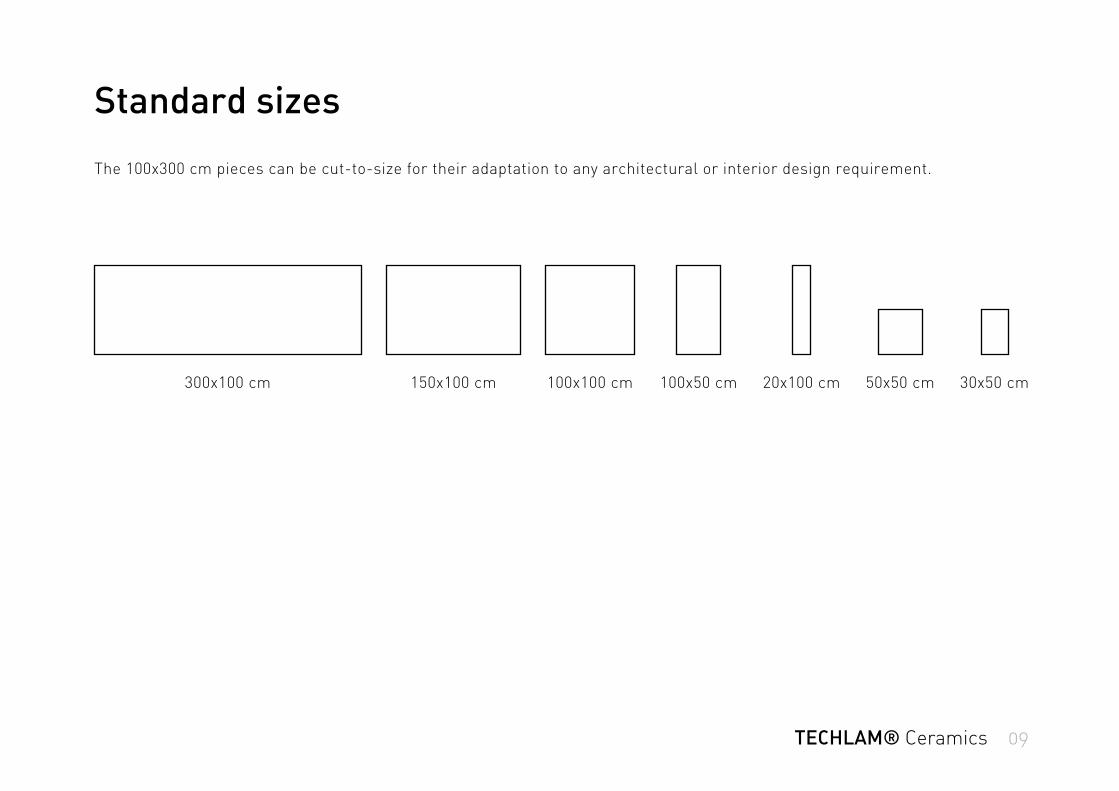
Standard sizes
300x100 cm
The 100x300 cm pieces can be cut-to-size for their adaptation to any architectural or interior design requirement.
150x100 cm 100x100 cm 100x50 cm 20x100 cm 50x50 cm 30x50 cm

PACKAGING
TECHLAM® Ceramics 10
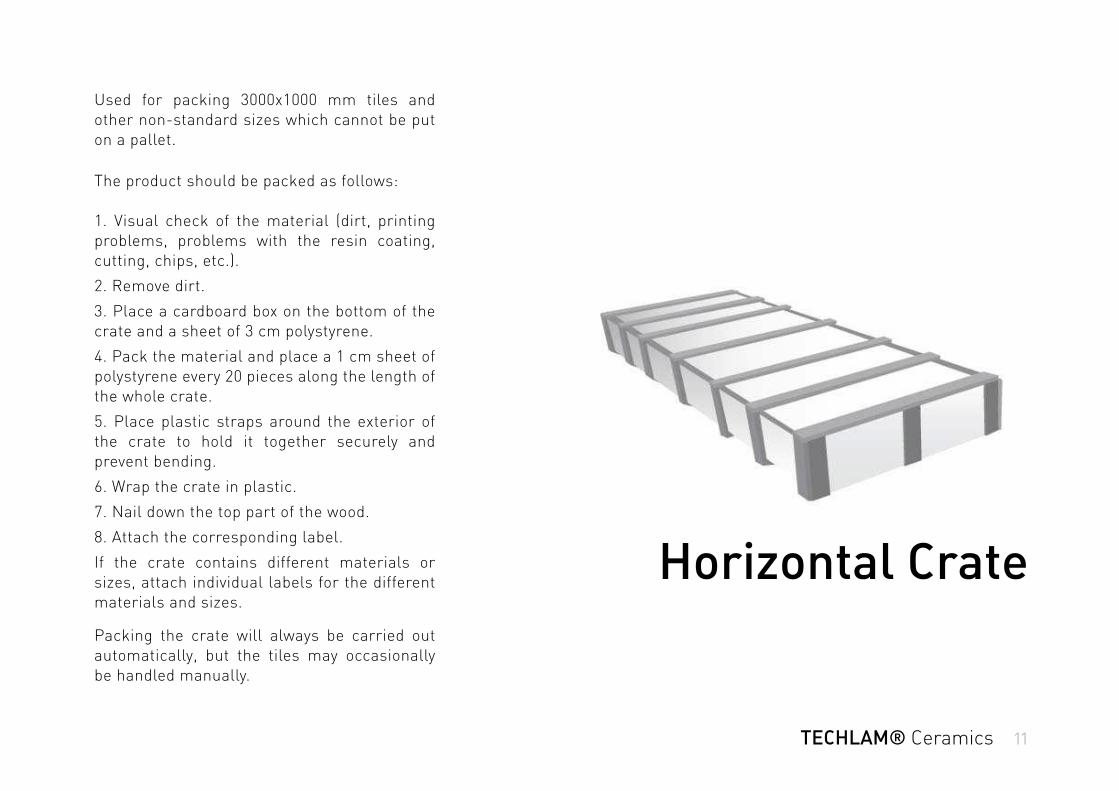
Horizontal Crate
TECHLAM® Ceramics 11
Used for packing 3000x1000 mm tiles and other non-standard sizes which cannot be put on a pallet.
The product should be packed as follows: 1. Visual check of the material (dirt, printing problems, problems with the resin coating, cutting, chips, etc.).
2. Remove dirt.
3. Place a cardboard box on the bottom of the crate and a sheet of 3 cm polystyrene.
4. Pack the material and place a 1 cm sheet of polystyrene every 20 pieces along the length of the whole crate.
5. Place plastic straps around the exterior of the crate to hold it together securely and prevent bending.
6. Wrap the crate in plastic.
7. Nail down the top part of the wood.
8. Attach the corresponding label.
If the crate contains different materials or sizes, attach individual labels for the different materials and sizes.
Packing the crate will always be carried out automatically, but the tiles may occasionally be handled manually.

Vertical crate
TECHLAM® Ceramics 12
Used for packing tiles of 3000x1000 mm and other non-standard sizes which cannot be put on a pallet.
The product should be packed as follows: 1. Visual check of the material (dirt, printing problems, problems with the resin coating, cutting, chips, etc.).
2. Remove dirt.
3. Place a sheet of 3 cm polystyrene along the bottom of the crate.
4. Pack the material horizontally and place a 1 cm sheet of polystyrene every 20 pieces along the whole crate.
5. Nail the side panel of the crate closed.
6. Turn the crate so that it is vertical.
7. Wrap the crate in plastic.
8. Nail down the wooden top.
9. Place plastic straps around the exterior of the crate to hold it together securely and prevent bending.
10. Attach the corresponding label. If the crate contains different materials or sizes, attach individual labels for the different materials and sizes.
Packing the crate will always be carried out automatically, but the tiles may occasionally be handled manually.
This type of packing is used for transport in a container or by air.

Pallet / Crate
TECHLAM® Ceramics 13
Used for packing small and standard size materials.
The material can be packed either in boxes or not, where the boxed pieces are packed vertically (except for the 100 x100 cm) and the unboxed pieces are packed horizontally.
The product should be packed as follows: 1. Visual check of the material (dirt, printing problems, problems with the resin coating, cutting, chips, etc.).
2. Remove dirt.
3. Place a cardboard box and a sheet of 3 cm polystyrene along the bottom of the crate.
4. For boxed material: Pack the material in the corresponding box and place on the pallet as specified.
5. For unboxed material: Place the material on the pallet and put a 1 cm sheet of polystyrene every 25 pieces along the length of the whole crate.
6. Place plastic straps around the exterior of the crate to hold it together securely and add corner protectors.
7. Wrap the pallet in plastic.
8. Attach the corresponding label. If the crate contains different materials or sizes, attach individual labels for the different materials and sizes.
There is no difference between the quantities held by the crate and the pallet.
These types of packaging differ in terms of the amount of wood protection and the type of transport they are going to be used for, the crate for a container, the pallet for a lorry.

TECHLAM® Ceramics 14
!"#$%&'#($)*(%$+#$%,-#.$/*%$/0$%"#$12,%#$+3$%4/$5#/5'#$(%,.6&.7$/55/(&%#$#,1"$/%"#28
$9/'6$%"#$%&'#($4&%"$+/%"$",.6($,.6$'&0%$*5$('/4'3$%/7#%"#28
$:"#.$%"#$%&'#$&($;#2%&1,'<$'&0%$&%<$-##5&.7$&%$(%2,&7"%8
$=#;#2$5',1#$%"#$%&'#$6&2#1%'3$/.$%"#$0'//28$>'4,3($#.(*2#$%",%$&%$&($5',1#6$/.$(/)#$0/2)$/0$(*55/2%8
$?/;#$%"#$,2)($0*2%"#2$,5,2%$,.6$('/4'3$5*%$%"#$%&'#$6/4.$/.$%"#$0'//28
$>'4,3($5',1#$(/)#$(/2%$/0$52/%#1%&/.$/.$%"#$0'//2$+#0/2#$5*%%&.7$%"#$%&'#$6/4.8
$>.3$%4&(%&.7$),3$1,*(#$",&2'&.#$12,1-($4"&1"$),3$/.'3$+#$6#%#1%#6$,0%#2$%"#$%&'#($",;#$+##.$',&68$!,-#$(5#1&,'$1,2#$4&%"$",.6'&.7$&%$/.$(&%#$@#78$/.$(%,&2(A8
:"#.$'&0%&.7$,.6$)/;&.7$+*.6'#($/0$BCCCDECCC$))$%&'#($4&%"$,$0/2-F'&0%$%2*1-$/2$12,.#<$&%$&($&)5/2%,.%$%/$5&1-$*5$%"#$5,1-,7#$&.$%"#$1#.%2#$/0$%"#$'/.7$(&6#<$0*''3$ #D%#.6&.7$ %"#$ 0/2-($ 4"&1"$)*(%$ (*55/2%$ %"#$0*''$6#5%"$/0$%"#$5,''#%8
G0$%"#$5,''#%$&($5&1-#6$*5$+3$%"#$("/2%$(&6#<$,($),3$",55#.$4"#.$*.'/,6&.7$1/.%,&.#2(<$&%$&($.#1#((,23$%/$*(#$+',6#($4&%"$,$)&.&)*)$'#.7%"$/0$H8I)8

Packaging - Transport
TECHLAM® Ceramics 15
* Number of crates
Packaging/Transport Container Cont. 20 foot Cont. 40 foot
Horizontal Crate 22 (*) 8 (*) 20 (*)
Vertical Crate no 4 (*) no

TECHLAM® Packaging
TECHLAM® Ceramics 16
Thickness 3 mm 3+ 5 mm 5+ 3+3 5+5
Low Horizontal Crate (3190x1170x260mm) 25 20 15 13 10 7
High Horizontal Crate (3190x1170x380mm) 50 40 30 27 25 15
Vertical Crate (3190x550x1330mm) 130 110 78 74 65 44
Special Crate 1500x1000 60 50 40 35 30 -
Crate 1000x1000 125 100 80 67 50 -
Crate 1000x500 mm 200 200 160 135 115 -
Crate 500x500 mm 400 400 320 265 230 -
mm
mm
High Horizontal Crate Dimensions 3190x1170x380 Weight 80 Kgs
Low Horizontal Crate
3190x1170x260
65 Kgs
Vertical Crate
3190x550x1330
175 Kgs
Note: Approximate number of tiles
mm
mm
mm

DRILLING AND CUTTING
TECHLAM® Ceramics 17

TECHLAM® Ceramics 18
Drilling
TECHLAM® can be drilled easily using diamond tools for glass and
ceramic tiles, either dry or with water. Before starting any operation,
make sure you have a clean and flat work surface.
Check that the circular drills and diamond discs to be used in the angle
grinders are in good condition. After cutting the tiles they must be handled
and placed with the greatest care.
When using handheld drilling tools, tungsten drill bits can be used with
electric drills.
If using these tools, we recommend that you:
1. Cool the drilling area with water.
2. Start drilling at a slow speed.
3. Don’t press too hard.

TECHLAM® Ceramics 19
During the use of drills, do not use percussion mode
for drilling.
Drilling tools

TECHLAM® Ceramics 20
Cutting
TECHLAM® 3mm and TECHLAM® 3+ panels can be cut using a glass cutter, a handheld tile cutter, an electric disc cutter or a
handheld grinding machine. TECHLAM® 3+3 panels should be cut using handheld grinding machines or electric disc cutters.
If you are making special cuts or shapes, use a water jet system or the cutting benches usually used by marble cutters and glaziers.
As with any conventional ceramic product, these panels should be cut and drilled from the front of the panel to the back of the panel.
Cutting tools
Handheld glass cutter. Silberschnitt Bohle model:
Silberschnitt is a glass cutter with a glass cutting wheel and a plastic handle for
a better grip. When cutting Techlam 3mm and Techlam 3mm+ panels, it is
important to keep the handheld glass cutter in contact with the scored line
throughout the process.
To ensure that the cut is as straight as possible, the aluminium bars generally
used by builders can help. Once the cut has been made, the two pieces of
Techlam can simply be broken apart. When using Techlam 3mm+ panels, the
ceramic area is firstly cut using a general cutter and then the glass fibre is cut.
TECHLAM® Ceramics 21
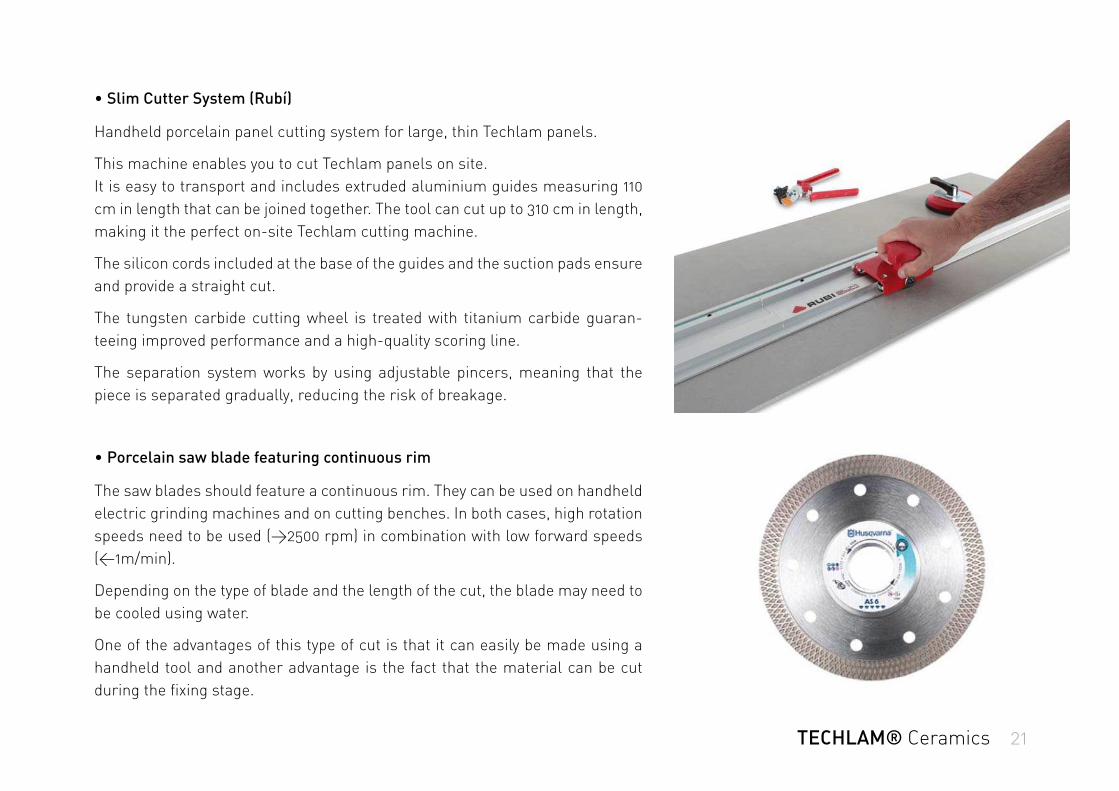
Slim Cutter System (Rubí)
Handheld porcelain panel cutting system for large, thin Techlam panels.
This machine enables you to cut Techlam panels on site.
It is easy to transport and includes extruded aluminium guides measuring 110
cm in length that can be joined together. The tool can cut up to 310 cm in length,
making it the perfect on-site Techlam cutting machine.
The silicon cords included at the base of the guides and the suction pads ensure
and provide a straight cut.
The tungsten carbide cutting wheel is treated with titanium carbide guaran-
teeing improved performance and a high-quality scoring line.
The separation system works by using adjustable pincers, meaning that the
piece is separated gradually, reducing the risk of breakage.
Porcelain saw blade featuring continuous rim
The saw blades should feature a continuous rim. They can be used on handheld
electric grinding machines and on cutting benches. In both cases, high rotation
speeds need to be used (>2500 rpm) in combination with low forward speeds
(<1m/min).
Depending on the type of blade and the length of the cut, the blade may need to
be cooled using water.
One of the advantages of this type of cut is that it can easily be made using a
handheld tool and another advantage is the fact that the material can be cut
during the fixing stage.

TECHLAM® Ceramics 22
!"#$!%&'$(!)*(%!+$!%,-$.!/*%! /0! %#$! 12,%$! +3! %4/!5$/5'$!(%,.6&.7!/55/(&%$!$,1#!/%#$28
!9/'6!%#$!%&'$(!4&%#!+/%#!#,.6(! ,.6! '&0%! *5! ('/4'3!%/7$%#$28
! :#$.! %#$! %&'$! &(! ;$2%&1,'<!'&0%!&%<!-$$5&.7!&%!(%2,&7#%8
! =$;$2! 5',1$! %#$! %&'$!6&2$1%'3!/.!%#$!0'//28!>'4,3(!$.(*2$! %#,%! &%! &(! 5',1$6! /.!(/)$!0/2)!/0!(*55/2%8
!?/;$!%#$!,2)(!0*2%#$2!,5,2%!,.6!('/4'3!5*%!%#$!%&'$!6/4.!/.!%#$!0'//28
!>.3!%4&(%&.7!),3!1,*($!#,&2'&.$! 12,1-(! 4#&1#!1,.! /.'3! +$! 6$%$1%$6!,0%$2!%#$3!#,;$!+$$.!',&68!",-$! (5$1&,'! 1,2$! 4&%#!#,.6'&.7!&%!/.!(&%$!@$78!/.!(%,&2(A!
B0! ($;$2,'! #/'$(! #,;$! %/! +$! ),6$! &.! /.$! %&'$<! 4$!2$1/))$.6!*(&.7!"CD9E>?F!GH8
B%!&(!&)5/2%,.%!%/!*($!6&,)/.6!6&(1(!/0!6&00$2$.%!72,6$(!%/!,1#&$;$!%#$!1/22$1%!0&.&(#!,.6!,;/&6!(#,25!$67$(8
The drilling, cutting and bevelling process

INSTALLING ON PAVING
TECHLAM® Ceramics 23
TECHLAM® Ceramics 24
Installing on Paving
TECHLAM® 3+, TECHLAM® 5, 5 + and 3+3 can be laid on any
type of substrate found in a building provided they have the
correct properties for installation. It is important to know that
that correct installation of the product depends to a great
extent on the conditions of the tiles and substrate. Before
starting to lay the tiles, whatever the substrate is, it is
important to check that it has the following properties:
!!"#!$%!&'()*+#+*,!-.++!'-!/.+0%+1!'$*!023!34%#5
! "#! $%! 3.,1! 023! 3'+%! 2'#! 607+! 02,! .+%$340*! &+(+2#1! .+%$2! '.!
loose particles and that they are firmly fixed. If there are
problems with the above, it is vital to clean the surface and
remove the residue.
!!!"#!(4%#!8+!&'()*+#+*,!.+%$%#02#!023!&'()0
!!!"#!(4%#!8+!-*0#5!96+!-*0#2+%%!&02!8+!&6+&:+3!;$#6!0!<!(+#+.%!
ruler by placing it on the substrate in all directions. The
acceptable tolerance is 3 mm. It is also important to fill in the
uneven areas with appropriate levelling products.
!! ! "#!(4%#!8+!%4--$&$+2#*,!60.3!023!(+&602$&0**,!.+%$%#02#!#'!
the tensions consistent with its intended use.
!!"#!(4%#!8+!%4--$&$+2#*,!#6$&:5
!!"#!(4%#!607+!%)0&+%!0.'423!#6+!)+.$(+#+.!023!='$2#%!#'!
allow for expansion.
As well as the general properties needed for all types of subs-
trates:
The tiles of traditional cement must be dry, compact and com-
pletely homogenous. It normally takes 7-10 days for every cm
thickness of the tiles and substrate to dry. This information
should be communicated to the Site Manager/Architect or
person in charge of the site.
When the concrete supports have cured sufficiently (at least
three month). It is necessary to check that there are no cracks,
irregularities on the surface, loose particles, old adhesive,
anti-vaporising treatments and other substances which could
affect the adhesion of the tiles. The substrate must also have
structural joints and partition joints calculated according to
the size and type of the surface. It is also vital to insulate the
tiles from any source of rising damp.
The tiles must be sanded, cleaned of dust, dried and have a
permitted damp content less than or equal to 0.5%.

TECHLAM® Ceramics 25
The tiles and substrates of the radiant paving must be stable,
have already undergone the shrinking process, not have
cracks, be filled with epoxy resin products and have a good
mechanical resistance to the predicted stresses in their
intended use. It is essential to check that the heating has been
turned on, keeping in mind the curing times of the tiles and
substrates predicted for the material used. It must also be
checked that thermal shock has occurred, bearing in mind the
guidelines supplied by the manufacturer.
It is important to use a flexible or highly flexible adhesive
capable of allowing for the expansion of the tiles and
substrates, so absorbing the stresses generated in the
covering.
Quick-drying tiles and substrates are both quick-drying and
are subject to controlled contraction; carry out the installation
and keep in mind the times given by the manufacturer for the
material used.

TECHLAM® Ceramics 26
Laying on already existing paving
Before laying it is important to ensure that the existing paving is dry, solid, stable, firmly
fixed to the substrate and has no loose parts. The substrate must be perfectly flat (a
maximum tolerance of 3 mm is admissible). Check the substrate is flat using a ruler of at
least 2 meters in length.
Uneven surfaces must be filled with specific levelling products.
Before laying, clean the substrate with a solution of water and caustic soda and then
thoroughly rinse.
Where it cannot be cleaned with chemicals, we recommend using mechanical abrasion,
which is obligatory for marble, wood and PVC coverings.
Follow the adhesive manufacturer’s instructions on improving adhesion to the substrate to
be covered.
When laying on existing ceramic, stone, marble, terracotta and PVC floorig, remove any oil,
wax and grease.
!"#$%!&'()%*!+%!,'-./$01!2'%3!0#$!,'-./$0!3+4%!0+!5'-$!4++36
!"#$%!&'()%*!+%!4++3!2/-7'8$2!)0!)2!)9,+-0'%0!0#'0!0#$!2/-7'8$!)2!,$-7$80&(!3-(!'%3!0#'0!0#$!
wood surfaces are laid according to the manufacturer’s instructions.

TECHLAM® Ceramics 27
Adhesive and Laying
Check that the tiles, substrate or existing flooring is perfectly flat. Uneven surfaces can be filled in with levelling products.
The choice of trowel depends on the finish and the flatness of the substrate and is directly proportional to the size of the tile. As a
general rule, for a tile measuring 1000x1000 mm, we recommend using a 6 mm notched trowel for the substrate and a 3mm notched
trowel for the back of the tile.
Apply the adhesive to the whole of both surfaces without leaving any gaps, first on the back of the tile and then on the substrate,
ensuring that the corners and the edges are completely covered without leaving any air pockets between the substrate and the tile.
Always spread the adhesive only on the side on which the tile is to be laid, to avoid a film forming on the surface which may affect
adhesion.
Place the tile gently on its long side, lean it over and lower it into place on the substrate.
Position the spacers to create the joint you want. We recommend using suction pads to facilitate exact positioning of the tile.
Tap the surface with a rubber trowel to get rid of holes and air bubbles. Always check that the corners and edges have stuck perfectly.
Do not walk on the tiles during or after laying, keeping in mind the drying times given by the adhesive manufacturer.

TECHLAM® Ceramics 28
Joints
We recommend a minimum joint of 2 mm for laying inside which must be calculated according to the size of the tile, the area and
presence of radiating floors. For laying outside we recommend a minimum joint of 5 mm which must be calculated according to the
size, temperature fluctuations and the colour of the tile.
We recommend checking that tiles and substrates outside are not affected by rising damp. It is essential to choose the materials to
be used according to the width and the desired finish of the joints. We recommend following the times given by the adhesive
manufacturer before grouting the joints. Either cement or epoxy resin based products can be used. These adhesives guarantee
greater uniformity and colour retention over time.
Expansion Joints
During the process of laying the tiles it is essential to respect all the structural expansion joints in the substrate. With very large
areas make partition joints of approx 8-10mm, dividing up the area as follows:
!"#!$%&$'!()*+!+),+!*%$--).!$#/!'01'*%$*&'!'012&.*!*3!435&4&#*!$#/!1&#/)#,6!30*')/&!)*!)'!#&.&''$%7!*3!+$5&!'80$%&'!3-!9:;<4<!=*+&!
longer side must never be longer than 4m).
!>#!'*$1?&!$%&$'!)#/33%'!*+&%&!40'*!1&!23)#*'!$@@%3A)4$*&?7!&5&%7!<B:<C!4<D
!E$F&!23)#*'!$%30#/!*+&!@&%)4&*&%6!?$7)#,!GHIJKLEM!$@@%3A)4$*&?7!C:N44!-%34!($??'6!&/,&'!$#/!.3%#&%'!4$F)#,!'0%&!*+)'!'@$.&!
)'!#3*!-)??&/!)#!(+&#!,%30*)#,!*+&!*)?&'D!I35&%!*+&!&A@$#')3#!23)#*'!()*+!&/,)#,!'*%)@'!3%!3*+&%!@%3/0.*'!/&'),#&/!-3%!*+)'!@0%@3'&D
O@&.)-7)#,!*+&!')P&!$#/!*+&!-%&80&#.7!3-!*+&!23)#*'!)'!*+&!%&'@3#')1)?)*7!3-!*+&!O)*&!E$#$,&%QL%.+)*&.*!3%!*+&!@&%'3#!)#!.+$%,&!3-!*+&!
site.

INSTALLING ON WALL COVERING
TECHLAM® Ceramics 29

TECHLAM® Ceramics 30
Installing on wall covering
TECHLAM® 3 y TECHLAM® 3+ can be laid on concrete or exterior walls rendered with cement. Where there is a mixture of substrates
on a reinforced concrete and brickwork structure the wall must be rendered before installing, using a reinforcing mesh at least where
there is a variety of materials. The render must be capable of taking a ceramic covering and therefore be made of cement mortar which
guarantees high mechanical resistance to bending and adhesion to the walls (adhesion value to the substrate of approximately 10
kg/cm2). The substrate must be flat, not have cracks, stable and have undergone normal drying shrinkage, unevenness areas in the
surface must have been filled with levelling products. The cracks or fissures due to shrinkage must be cleaned of dust and sealed with
the appropriate materials.
Before starting installation, ensure that the substrate is dry, free of dust, grease, oil and loose particles or that they are not fixed
(cement, paint, lime) which will have to be removed in an appropriate manner.
Selecting size and joints
Laying on exterior façades is subject to large fluctuations in temperature: When deciding on tile size we therefore recommend taking
into account exposure to the sun, geographical position and the tile colour (dark colours, particularly black, retain heat more and are
therefore subject to greater thermal expansion).
The choice of the format to be used on the façade must be calculated carefully so as to enable the operator to do the job properly
(handling, application of adhesive to both surfaces and hitting the tile) bearing in mind the height of the wall and the equipment
(scaffolding, cranes, lifts). As a general rule we recommend reducing the size of the tile with increasing height. Be sure to follow the
existing regulations in the country where the work is being carried out. Wide joints must be used in the installation: We generally
recommend a joint of 5-10mm which must be calculated according to the climatic conditions and the dimensions of the tile. Respect
structural joints and make partition joints at the height of string course, corners and edges and every 9-12m2 with the longer side less
than 4 mm.
The joints must be sealed with the appropriate materials available on the market.
Installing on interior walls

TECHLAM® Ceramics 31
Installing on wall covering
Installing on interior walls
The substrate must be flat, free of cracks and stable. Uneven surfaces must be filled with levelling products, the cracks and fissures
caused by shrinking must be cleaned of dust and sealed with the appropriate materials.
TECHLAM® can also be installed on existing coverings: Before laying, it is important to be sure that the existing flooring is dry, solid,
stable, firmly fixed to the substrate and does not have any loose parts. The substrate must be flat, free of cracks and stable. Uneven
surfaces must be filled with specific levelling products.
Before laying, clean the substrate with a solution of water and caustic soda and then thoroughly rinse. Where it is not possible to clean
it with chemicals we recommend mechanical abrasion.
Selecting size and joints
The selection of size and type must also be based on the handling and logistics possible on the site. For coverings with a lot of holes or
complicated handling (for example, a small bathroom) we recommend using TECHLAM® 3+. We recommend joints of at least 1,5 mm
which must be calculated according to the format of the tile and dimensions of the wall to be covered.
We recommend following the times given by the adhesive manufacturer before grouting the joints. Either cement or epoxy resin based
products can be used. These adhesives guarantee greater uniformity and colour retention over time.
Respect structural joints and make partition joints at the height of the string course, corners and edges and approximately every 20-
25m2 of the surface.
The joints must be sealed with the appropriate materials available on the market.

TECHLAM® Ceramics 32
Adhesive and laying
It is important to use a flexible or highly flexible adhesive capable of following the natural movement of the covering and absorbing the
stresses generated in the substrate. With very absorbent renders it may be necessary to use a professional water based sealant,
according to the instructions supplied by the manufacturer of the adhesive chosen.
Apply the adhesive to both surfaces without leaving gaps, both on the substrate and the tile, ensuring that the corners and edges are
thoroughly covered. The quantity of adhesive used must be directly proportional to the dimensions of the tile and the properties of the
substrate.
The person installing the tiles will choose the trowels to be used: As a general rule we recommend using flat trowels or those with 3
mm notches on the tile and 6-9mm slanted notches on the substrate. It is important that sufficient adhesive is used to ensure that air
pockets between the tile and the substrate are eliminated. Only spread the adhesive on the substrate to avoid a film forming on the sur-
face which may affect adhesion. TECHLAM® 3 can be installed in interiors (without glass fibre) in the largest sizes 500x1000 mm by
applying adhesive to the substrate with a 6 mm notched spatula which must in any case be checked according to the substrate.
Complete the operation by tapping on the surface with special rubber trowels to guarantee perfect adhesion and remove any air poc-
kets.

EDGING STRIPS
There are edging strips on the market to complete the process installation, which are produced by different manufacturers for
corners, ends, decorative strips, edges, expansion joints and perimeter borders with the correct thicknesses for TECHLAM®.
TECHLAM® Ceramics 33

CLEANING AND MAINTENANCE
TECHLAM® Ceramics 34
TECHLAM® Ceramics 35
TECHLAM® is extremely easy to clean. For the best results we nevertheless recommend the following. It is important to carry out
tests beforehand on a small part of the material with the product to be used, to check that it does not damage the surface. Neutral
or alkaline detergents, not acid-based, must be used to clean the Cosmos and Helios collection.
Cleaning after installation
After finishing installation the ceramic surface must be cleaned to remove any contaminants (cement films, residual cement). It is
vital to carry out this operation correctly, as if it is done badly or too quickly, it may result in grout haze which will affect daily
cleaning. To clean properly we always recommend following the instructions provided by the manufacturers of the cements and
adhesives used in the installation, relating to waiting times, products which can be used and how to use them. With large surfaces
we recommend using a mechanical polisher with soft pads.
We do not recommend cleaning after installation when the temperature is high, the cooler times of the day are more appropriate.
Cleaning cement products
Residual cement, limescale, grout and cement mortars can be removed when and how indicated by the manufacturer using
de-scaling products. These products must be used according to the manufacturer’s instructions.
In any case, bear in mind that apart from the properties of the detergent used, this operation may be more or less aggressive
depending on:
! Possible use of abrasive substances.
!!"#$%#&'()&#!*+,-+!(#$%#&'()&#.!/'0!$'1#!'!2#(#&-#0(!$3&#!'--&#..,4#56!!
!!730('/(!(,$#!*830-#&!/30('/(!(,$#!,0/&#'.#.!(+#!&,.1!39!/+#$,/'8!'(('/156
After cleaning with chemicals it is essential to rinse with clean water. It is also essential to immediately remove residual cement
mortar with additives (resins, latex, etc.)

TECHLAM® Ceramics 36
Cleaning epoxy products
Residual epoxy mortars must be removed immediately after installation with a sponge and abundant clean water. Then thoroughly
clean with alkaline detergent, carefully following the instructions given on the products used.
Normal Cleaning
Grease removing products or neutral detergents can be used for day-to-day cleaning of TECHLAM® tiles. These must be diluted in
water according to the instructions given on the packaging. Shiny films may form on the surface of the tile over time with the use of
normal detergents. Pouring some drinks, such as cola, water and wine on the flooring may remove these films and re-establish their
original appearance. The parts with opaque grout haze are therefore the only clean areas of the flooring. To prevent accumulation of
wax and the formation of shiny films we recommend using only neutral detergents for day-to-day cleaning whereas all the flooring
will have to be dewaxed to remove all these deposits.
Extraordinary Cleaning
To remove particularly stubborn stains or residues we generally recommend cleaning initially with abundant running hot water.
If this is not sufficient, increasingly aggressive cleaning techniques can be used depending on the properties of the cause of the
stains:
!!"#!$%&'()*!$+$,)-()./0%!1%'%(2%$'.
!!3-()./0%!1%'%(2%$'.
!!34/1!+(!*+5!"#!1%'%(2%$'.!6%74%8'!9+(!:+.;+.!)$1!#%*/+.<
!!=+*0%$'!-).%1!1%'%(2%$'.!6%74%8'!9+(!:+.;+.!)$1!#%*/+.<

TECHLAM® Ceramics 37
Cleaning recommendationsFinal clean-up
Having fixed the panels, it is extremely important to thoroughly clean them in order to remove all excess grout and general building
dirt. We recommend you use a slightly acidic detergent for this task, such as FILADETERDEK. This product will not let off toxic fumes
and it is kind to the grouting, materials and the user. Materials fixed using an epoxy or resin based grout should be cleaned using a pro-
duct designed specifically for epoxy based dirt, such as FILAC310.
Maintenance
To ensure the flooring tiles remain in good condition, we recommend using a highly effective, neutral detergent, such as
FILACLEANER. In the event of heavy dirt that has been embedded over time, we recommend you look at the table below to find the per-
fect Fila product.
Note: During the polishing process applied to porcelain flooring (Viso series), the micropores on the surface open meaning that they
are more likely to be stained by certain liquids. It is therefore very important that any agent that could harm the polished porcelain
flooring (oils, fizzy drinks, alcoholic and acidic drinks, etc) is cleaned as quickly as possible using water in order to minimize its exposu-
re time to the tiles. If this is not done, the flooring may be damaged.
Type of embedded dirt Fila product
DETERDEK
FILACR10
DGREASER
FILANOPAINT STAR
FILASOLV
Fixing cement, lime, metal scratches and rust.
Epoxy based, enamel and resinous grout.
Drink, food, grease, oil, rubber, dyes, pen, drops of plastic-based paint.
Graffiti, acrylic spray, alkyd and nitro-synthetic paints.
Candle wax, tree resin, adhesive tape and tar.

USES DEPENDING ON THICKNESSES AND
COLLECTION
TECHLAM® Ceramics 38

TECHLAM® Ceramics 39
Uses depending on Thickness
Interior Walls
3 3+ 3+3 5+55
Interior Floors
Exterior Walls
Exterior Floors
Vanity Tops - Kitchens
High Transit Floors
Refurbishment directly over existing walls
Composite panels(Aluminium, plywood, plasterboard)
5+
Refurbishment directly over existing floors
Skirting

TECHLAM® Ceramics 40
Uses depending on Collections
Floors
Basic Hydra Vulcano Blizzard Madeira Déco VisoNatura
Walls
Fittings
Zahir

RECOMMENDED ADHESIVES
TECHLAM® Ceramics 41

TECHLAM® Ceramics 42
Installing in Interiors
Installing on interior flooring on cement screeds or on existing ceramic (tiles with or without glass fibre reinforcing netting).
RECOMMENDED ADHESIVES
NORMAL SETTING FAST SETTING
Size of the tile
Adhesive
Degree of comp.
with EN 12004
Adhesive
Degree of comp. with EN 12004
<5000 cm² (The bigger side must not
be more than100 cm)
KERAFLEX MAXI S1
ULTRALITE S1
C2TE S1
C2TE S1
GRANIRAPID
ULTRALITE S1 QUICK
C2F S1
C2FT S1
> 5000 cm²
KERABOND + ISOLASTIC
ULTRALITE S2
C2E S2
C2E S2
ELASTORAPID
ULTRALITE S2 QUICK
C2FTE S2
C2FE S2

TECHLAM® Ceramics 43
Installing on interior underfloor heating (tiles with or without glass fibre reinforcing netting).
RECOMMENDED ADHESIVES
NORMAL SETTING FAST SETTING
Size of the tile
Adhesive Adhesive
<5000 cm²
(The bigger side must not be more than100 cm)
KERABOND + ISOLASTIC
ULTRALITE S2
C2E S2
C2E S2
ELASTORAPID
C2FTE S2
> 5000 cm²
KERAQUICK +
LATEX PLUS
C2FT S2
Degree of comp.
with EN 12004
Degree of comp.
with EN 12004

TECHLAM® Ceramics 44
Installing on interior walls (tiles with or without glass fibre reinforcing netting).
RECOMMENDED ADHESIVES
NORMAL SETTING FAST SETTING
Size of the tile
Adhesive
with EN 12004 Adhesive
Degree of comp. with EN 12004
<5000 cm² (The bigger side must not
be more than 100 cm)
KERAFLEX MAXI S1
ULTRALITE S1
C2TE S1
C2TE S1
GRANIRAPID
ULTRALITE S1 QUICK
C2F S1
C2FTE S1
> 5000 cm²
KERABOND + ISOLASTIC
ULTRALITE S2
C2E S2
C2E S2
ELASTORAPID
ULTRALITE S2 QUICK
C2FTE S2
C2FE S2
Degree of comp.

TECHLAM® Ceramics 45
Installing Outside
Adhesives for installing on façades of tiles without glass fibre reinforcing netting.
RECOMMENDED ADHESIVES
NORMAL SETTING FAST SETTING
Size of the tile
Adhesive Degree of comp.
with EN 12004 Adhesive
Degree of comp.
with EN 12004
<5000 cm²
be more than 100 cm)
KERAFLEX MAXI S1
ULTRALITE S1
C2TE S1
C2TE S1
ELASTORAPID
ULTRALITE S1 QUICK
C2FTE S2
C2FTE S1
> 5000 cm²
KERABOND + ISOLASTIC
ULTRALITE S2
C2E S2
C2E S2
KERAQUICK + LATEX PLUS
ULTRALITE S2 QUICK
C2FT S2
C2FE S2
(The bigger side must not

TECHLAM® Ceramics 46
RECOMMENDED ADHESIVES
NORMAL SETTING FAST SETTING
Size of the tile
AdhesiveDegree of
comp. with EN 12004
Adhesive Degree of
comp. withEN 12004
<5000 cm² (The bigger side
must not be more than100 cm)
KERABOND + ISOLASTIC
ULTRALITE S2
C2E S2
C2E S2 ULTRALITE S2 QUICK C2FE S2
> 5000 cm²
KERALASTIC T
R2T KERAQUICK + LATEX
PLUS C2FT S2

TECHLAM® Ceramics 47
Installing on Special Substrates
Adhesives for installing in interiors on damp-proofing systems (tiles with or without glass fibre reinforcing netting).
RECOMMENDED ADHESIVES
NORMAL SETTING FAST SETTING
Size of the tile
Adhesive Degree of comp. with
EN 12004 Adhesive
Degree of comp. with
EN 12004
<5000 cm² (The bigger side
must not be more than 100 cm)
KERAFLEX MAXI S1
ULTRALITE S1
C2TE S1
C2TE S1
ELASTORAPID
ULTRALITE S1 QUICK
C2FTE S2
C2FT S1
> 5000 cm²
KERABOND + ISOLASTIC
ULTRALITE S2
C2E S2
C2E S2
KERAQUICK + LATEX PLUS
ULTRALITE S2 QUICK
C2FT S2
C2FE S2


