IATH Best Practices Guide to Digital Panoramic Photography
EditEd by Sarah WEllS, barry GroSS, MichaEl GroSS, and bErnard FriSchEr

ii

EditorS: Sarah Wells
Barry Gross
Michael Gross
Bernard Frischer
contributorS:Brian Donovan
Barry Gross
Michael Gross
Eugene Johnson
Worthy Martin
Lisa Reilly
Will Rourke
Ken Stuart
Michael Tuite
Tom Watson
Madelyn Wessel
thankS to:
Daniel PittiRick MandelkornGretchen Wagner
IATH Best Practices Guide to Digital Panoramic Photography

ii
© 2007 by The Board of Visitors of the University of Virginia. All rights reserved.
Cover photo by Barry and Michal Gross. Cover art by Karey Helms/IATH.Photo pg. i by Brian Donovan.
iii
Table of Contents
1. ovErviEW and objEctivES .................................................................61.1. Who iS thiS GuidE For? ............................................................................ 61.2. introduction and ExaMplES ...................................................................... 71.3. briEF hiStory and uSE oF panoraMic photoGraphy ...................................... 81.4. baSic diGital panoraMic photoGraphy MEthodS ........................................ 131.5. hoW to uSE thiS GuidE........................................................................... 14
2. prE-production ..........................................................................172.1. EStabliShinG projEct GoalS ..................................................................... 172.2. chooSinG thE SitE ................................................................................. 182.3. chooSinG SitE nodES ............................................................................. 182.4. EnvironMEntal conSidErationS/SchEdulinG thE Shoot ............................... 212.5. EquipMEnt ............................................................................................ 222.6. travEl prEparationS ............................................................................... 352.7. local SitE liaiSon (Mr. Fix-it/FixEr) ......................................................... 412.8. SitE accESS and rESourcES ....................................................................... 432.9. budGEt ................................................................................................ 46
3. copyriGht and pErMiSSionS ............................................................503.1. copyriGht ............................................................................................ 513.2. Fair uSE and dE MiniMiS uSE ................................................................. 533.3. contract vErSuS copyriGht ................................................................... 533.4. pErMiSSionS and rElEaSES ........................................................................ 543.5. pErMitS and inSurancE ........................................................................... 553.7. intErnational copyriGht ....................................................................... 573.8. additional rESourcES and rEFErEncES .................................................... 58
4. panoraMa crEation (part 1): MEthodS and tEchniquES For capturinG iMaGES .......................................................................60
4.1. introduction to typES oF diGital panoraMa photoGraphy and StructurES .. 604.2. introduction to photoGraphy and diGitization ...................................... 614.3. SElEctinG iMaGE FilE ForMatS .................................................................. 614.4. uSinG iMaGE capturinG SyStEMS and lEnSES ............................................... 634.5. panoraMic tripod hEadS ........................................................................ 704.6. photoGraphic WorkFloW ...................................................................... 71
iv
5. additional rElatEd MEdia .............................................................775.1. objEct/invErSE panoraMaS ...................................................................... 775.2. audio ................................................................................................. 795.3. vidEo panoraMa (MovinG iMaGE) ............................................................. 805.4. aSSociatEd hardWarE and SoFtWarE ....................................................... 82
6. panoraMa crEation (part 2): StitchinG and rEndErinG ..................846.1. introduction to thE StitchinG and rEndErinG procESS .............................. 846.2. prEparinG raW data ............................................................................... 846.3. SoFtWarE.............................................................................................. 856.4. color ManaGEMEnt on thE coMputEr ...................................................... 886.5. hdr and MultiplE ExpoSurE coMpoSitinG ............................................... 886.6. StitchinG thE panoraMa ......................................................................... 886.7. batch procESSinG, ScriptS ....................................................................... 896.8. rEndErinG thE panoraMa ....................................................................... 906.9. hot SpotS, (hypEr)linkS, and ExEcutablE ScriptS ........................................ 926.10. EMbEddinG author inForMation, WatErMarkS, SpritE trackS, and copyriGht ............................................................................................. 926.11. convErtinG hiStorical iMaGES ............................................................... 93
7. StandardS For data docuMEntation .............................................967.1. introducinG StandardS For data docuMEntation .................................... 967.2. doMain SpEciFic data docuMEntation StandardS ...................................... 977.3. introduction to MEtadata .................................................................... 977.4. controllEd vocabulary ....................................................................... 987.5. rESourcE diScovEry MEtadata ................................................................. 987.6. tErMinoloGy rESourcES and claSSiFication SchEMES ................................... 997.7. phySical GEo-rEFErEncinG ....................................................................... 99
8. rESourcE dElivEry and uSEr iSSuES ...............................................1018.1. ovErviEW oF rESourcE dElivEry iSSuES and uSEr intErFacE (vr tourS) ....... 1018.2. viEWinG platForM ................................................................................ 1018.3. prESEntation: SoFtWarE and viEWinG optionS ......................................... 1028.4. aliaSinG, Moiré pattErnS, and othEr viEWinG pitFallS and SolutionS ........ 1048.5. incorporatinG additional MEdia ........................................................... 1068.6. virtual tourS ..................................................................................... 1078.7. applyinG panoraMaS ............................................................................ 109
v
8.8. track Synchronization ....................................................................... 1108.9. controllinG accESS ............................................................................ 110
9. uSE ...........................................................................................1149.1. uSE oF panoraMaS and vr in thE lEcturE/claSSrooM/lab/hoME ................ 1149.2. Scholarly uSE .................................................................................... 1159.3. practical uSE For EnGinEErS and architEctS ............................................ 1179.4. intErnEt ............................................................................................. 1189.5. publicationS ....................................................................................... 1189.6. hand-hEld dEvicE at SitE/landScapES ...................................................... 1199.7. hiStorical and hEritaGE SitE prESErvation and rEStoration ..................... 119
10. StoraGE and prESErvation .........................................................12110.1. lonG-tErM phySical StoraGE .............................................................. 12210.2. diGital prESErvation StratEGiES .......................................................... 12210.3. thE Global diGital prESErvation arEna ................................................ 123
11. concluSion .............................................................................125
appEndix 1. author contact inForMation ........................................127
appEndix 2. iMaGE capturE WorkFloW ...............................................129
appEndix 3. iMaGE prE-procESSinG, StitchinG, and rEndErinG WorkFloW .....................................................................130
appEndix 4. SaMplE batch ScriptS ......................................................132
panoiMaGESortEr.pl ......................................................................132
ptMacpanoiMaGESortEr.pl .............................................................134
appEndix 5. htMl and <EMbEd> ExaMplES .....................................138
rEFErEncES ......................................................................................139
1. ovErviEW and objEctivES
1.1. Who iS thiS GuidE For?
The IATH Best Practices Guide to Digital Panorama Photography is written for researchers and photographers looking to use digital technology to build digital panoramas of cultural heritage sites, architecture, and art works. There are several types of expertise required to create this kind of tool, and the guide contains advice and guidance on some of the technical, administrative, legal, and interpretive issues that may arise at each step of the process.
The contents are designed for three groups of users: the commissioner, the photographer, and the developer. The commissioner is the person or group who commissions the panorama, whether for research or educational use. In many cases the photographer and developer are the same person, but this guide deals with their tasks separately: the photographer is the person (or persons) who travels to the site and creates the source images and the developer creates digital panoramas from the source images and makes them available in some way, usually through a virtual tour on a website.
This guide will focus mainly on the workflow for academic uses of panoramic photography. The guide aims to give practical guidance on the many issues involved in the creation and use of digital panoramas, as well as to provide suggestions for the creative use of the resource. We urge the reader to begin by considering the project's end use, the intended audience and their information needs. These considerations will be the crucial basis for numerous decisions that need to be made throughout the process. For example, if the end user will be viewing the panorama on a normal computer display and will not need to zoom in on decorative details of a building, then lower resolution JPEGs will be sufficient in the initial data capture phase. However, if zoom functionality will be important to the end users or if the panorama is to be printed by offset press or larger display prints, then the data capture process must yield high-resolution TIFs.
We advise both novices and experts to read the entire guide. There are many steps involved in this type of undertaking and even a seasoned photographer may not have
7
thought of all of them. Many of the topics are interrelated and various aspects of the topics are covered throughout the guide.
Please note that the guide assumes a general knowledge of photography, computer literacy, and experience in travel. There are many fine books and web sites that specialize in those topics and readers are encouraged to seek them out. Whenever possible, World Wide Web links are provided to illustrate examples and point towards further information.
1.2. introduction and ExaMplES
Panoramas began as a way to broaden the field of view of ordinary cameras, but have evolved through digital techniques to provide an entire "sphere of view," that is the entire field of view surrounding one point in space. The "sphere" is further enhanced by zoom options that allow the viewer to focus on details that would normally be difficult to discern from the original vantage point. Multiple panorama techniques extend the range of viewpoints and provide a functionality for more complete guided tours. This evolution of digital panorama photography has made it particularly well-suited to virtual representation of three-dimensional sites such as architecture, archaeological sites, and sculptural works and when documenting geographically or politically inaccessible places.
Digital panoramic photography is sometimes referred to as "QTVR," referring to Apple's QuickTime Virtual Reality software. "QTVR" is not quite accurate at two levels: other companies provide software with much of the same functionality, and the fixed point of view (albeit with pan and zoom) on each panorama does not allow the unrestricted "fly through" control that is often part of "virtual reality" displays. To obtain the "fly through" functionality, virtual reality displays are most often based on Computer Aided Design (CAD) modeling, in which case the structures and textures on the surfaces of those structures are computer generated. In contrast, the panorama displays are more realistic in that they derive from photographs of the original building, site or sculpture.
Digital panoramas, as with other digital presentation methods, do provide a very natural connection to additional information sources that enable extremely rich guided tour experiences. At its most intricate, multiple digital panoramas are combined into a virtual tour that provides varied viewpoints into and about a space, accompanied by ambient three-dimensional audio recorded on-site and video clips and additional high-resolution still images. As with any guided tour, a floor plan of the space provides the visitor with an important abstraction for orientation and navigation. In the digital media domain, the floor plan can be made interactive and thus form the basis of a deeper understanding of the space through the availability of additional contextualizing information.
Digital panoramas have recently been used in the classroom and for scholarly research. There are many wonderful examples of stand-alone digital panorama and full-featured virtual tours available via the World Wide Web. A few notable sites are:
8
BetterLight• The Original Worldwide Panorama Event• Panoramas.dk• A Virtual Walking Tour: The Alhambra• A Virtual Walking Tour: The Suleymaniye Mosque•
There are also good websites and lists that provide guidance on the creation and displaying of digital panoramas. For example, Panoguide has guidance on creating and displaying panoramas as well as an active user forum.
1.3. briEF hiStory and uSE oF panoraMic photoGraphy
Human vision is essentially a spherical panorama of approximately 140°. Although our vision is in sharp focus only in the center, our peripheral vision is sharp enough to help us navigate safely. The seamless flow of information in vision is intellectually beyond computing. We can identify and avoid an obstacle that we have seen days or months in the past. The importance of panorama as a human experience can be found in Paleolithic cave art dating from 35,000 years ago in Chaveut and Lascaux, France. These unconstrained artists drew grazing animals and carnivores on the walls and ceilings up to fifteen meters in width.
Over time, the proportions of five units in one dimension and four in the other became normal in response to the media that conveyed the image; canvas stretched over wood frames, book printing and, more recently, early photographic processes.
The notion of a sweeping panoramic view goes back well beyond the invention of photography. The Roman poet Horace, in one of his odes, complains of hilltops with fine views being levelled for the building of houses, and Pliny the Younger refers to the importance of panoramic views to the owners of Roman villas. At the excavated Roman seaside town of Herculaneum, some of the finest houses were positioned overlooking the Bay of Naples. There has been a long tradition of drawn and painted depictions of panoramic views (usually thought of as panoramic if width exceeds height by a factor of 2:1 or greater).
However the word "panorama" itself did not enter the language until it was coined in the late eighteenth century to specifically describe a new type of large curved painting depicting vistas,1 an early example being those of Edinburgh by Robert Barker (who received a patent for his method) exhibited in London in 1792. These large-scale works were mounted on the inside surface of a cylinder and viewed from the cylinder’s center, generally with an attempt to fill the viewer’s field of view through the full 360° and create
1. With the disappearance of the art form it was invented to describe, the original, quite specific, definition has now been effectively replaced by other usage and meanings: a circular or extra-wide vista, overview, even a survey. These new forms themselves developed not long after the term was coined.
9
a sense of immersion. During the nineteenth-century displays of this kind — usually depicting landscapes or historical events and created by teams of specialist artists — grew in size, ingenuity, and variety. They were generally exhibited in specially built rotundas and enjoyed great popularity. Many of these works were of epic proportions, perhaps ten meters high and one hundred meters or more long.
Soon after the 1839 introduction of the first widely used photographic process (the daguerreotype), photographers were rotating their cameras to capture several views of a scene, then assembling the resulting pictures to create the impression of a single panoramic image (although these would almost inevitably be flawed by visible seams and jarring mismatches of perspective). This period also saw early experiments with rotating cameras or lenses and curved focal planes in efforts to overcome these deficiencies. As time went on, especially after the introduction of flexible film in 1887, many new and increasingly successful cameras were specifically designed to create seamless panoramic images. One such improvement was the short rotation or swing lens camera, which typically captured a horizontal field of view of 100-140° or so. Other designs allowed for full 360° rotation; the rotational scanning camera employed clockwork or motorized systems to synchronize the rotation of the entire camera. During exposure the film moved around a curved focal plane. A narrow slit (typically less than one millimeter wide) often interposed between lens and film, so that the scene was "painted" onto the film during the rotation. Descendants of such cameras, in one form or another, continue to be manufactured and used today.2 Both of these types of cameras produced images with cylindrical perspective, an unavoidable result of their rotation: straight horizontal lines in the subject take on distinctive cigar-shaped curves once imaged (though not vertical features, as with fish-eye lenses). Another invention was the fixed lens camera, where the perspective was rectilinear (i.e., normal). Most conventional cameras use this approach; it employs stationary lenses and flat film planes, relying on the use of wide angle lenses and/or extended film planes to achieve a panoramic field of view. Another variant is the panoramic pinhole camera.
2. Some typical modern examples of short rotation cameras include the Noblex, Widelux, and Horizon. Full rotation models include the Hulcherama and Seitz Roundshot. Of the latter group there are now digital models, which include (at the time of writing) the Panoscan, the Seitz Super Digital model, Spheron, and others.
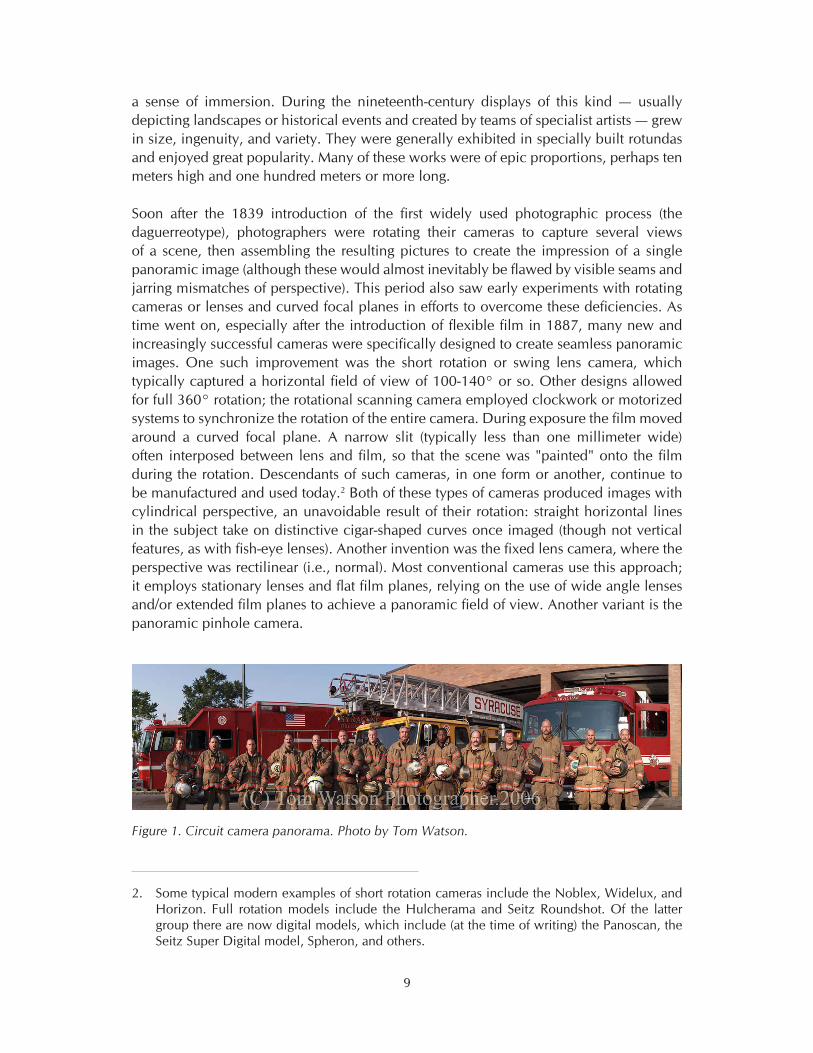
Figure 1. Circuit camera panorama. Photo by Tom Watson.
10
A student engineer, named Arthur C. Pillsbury, invented the circuit camera in 1906. Today we take “circuit” to mean an electronic circuit, but the circuit camera was a spring-wound, gear-driven camera weighing about twenty pounds. It exposed a piece of 8"x20” negative film which was then contact-printed on photographic paper. These cameras are still in use. Many veterans of World Wars I and II had their platoon pictures taken with the circuit camera.3If the negative and print were properly fixed and washed, these images last hundreds of years. With digital technology we can recreate the look of the circuit camera portrait (Fig.1). The image, when reproduced with archival ink on acid-free paper, will last an estimated two hundred years.
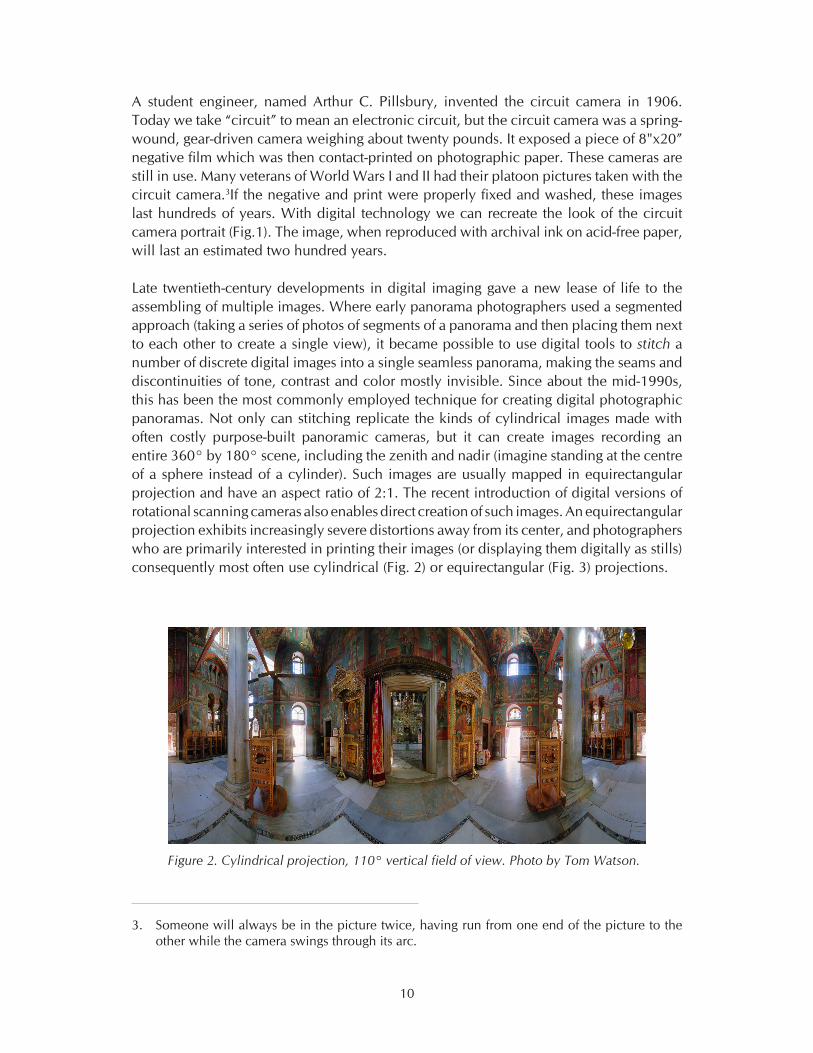
Late twentieth-century developments in digital imaging gave a new lease of life to the assembling of multiple images. Where early panorama photographers used a segmented approach (taking a series of photos of segments of a panorama and then placing them next to each other to create a single view), it became possible to use digital tools to stitch a number of discrete digital images into a single seamless panorama, making the seams and discontinuities of tone, contrast and color mostly invisible. Since about the mid-1990s, this has been the most commonly employed technique for creating digital photographic panoramas. Not only can stitching replicate the kinds of cylindrical images made with often costly purpose-built panoramic cameras, but it can create images recording an entire 360° by 180° scene, including the zenith and nadir (imagine standing at the centre of a sphere instead of a cylinder). Such images are usually mapped in equirectangular projection and have an aspect ratio of 2:1. The recent introduction of digital versions of rotational scanning cameras also enables direct creation of such images. An equirectangular projection exhibits increasingly severe distortions away from its center, and photographers who are primarily interested in printing their images (or displaying them digitally as stills) consequently most often use cylindrical (Fig. 2) or equirectangular (Fig. 3) projections.
3. Someone will always be in the picture twice, having run from one end of the picture to the other while the camera swings through its arc.
Figure 2. Cylindrical projection, 110° vertical field of view. Photo by Tom Watson.
11
It also became possible to view digital panoramas on computer displays in such a way that the images are warped back into ‘normal’ rectilinear perspective (image-based rendering). These systems offered viewers interactivity: by clicking and dragging with a mouse, any arbitrary viewpoint could be panned left and right, and up and down. This interactive immersion in a scene naturally invites comparison with concurrent developments in virtual reality systems and recalls the experience of viewing nineteenth-century painted panoramas where the viewer’s position near the center of a cylindrical environment provided a natural perspective.
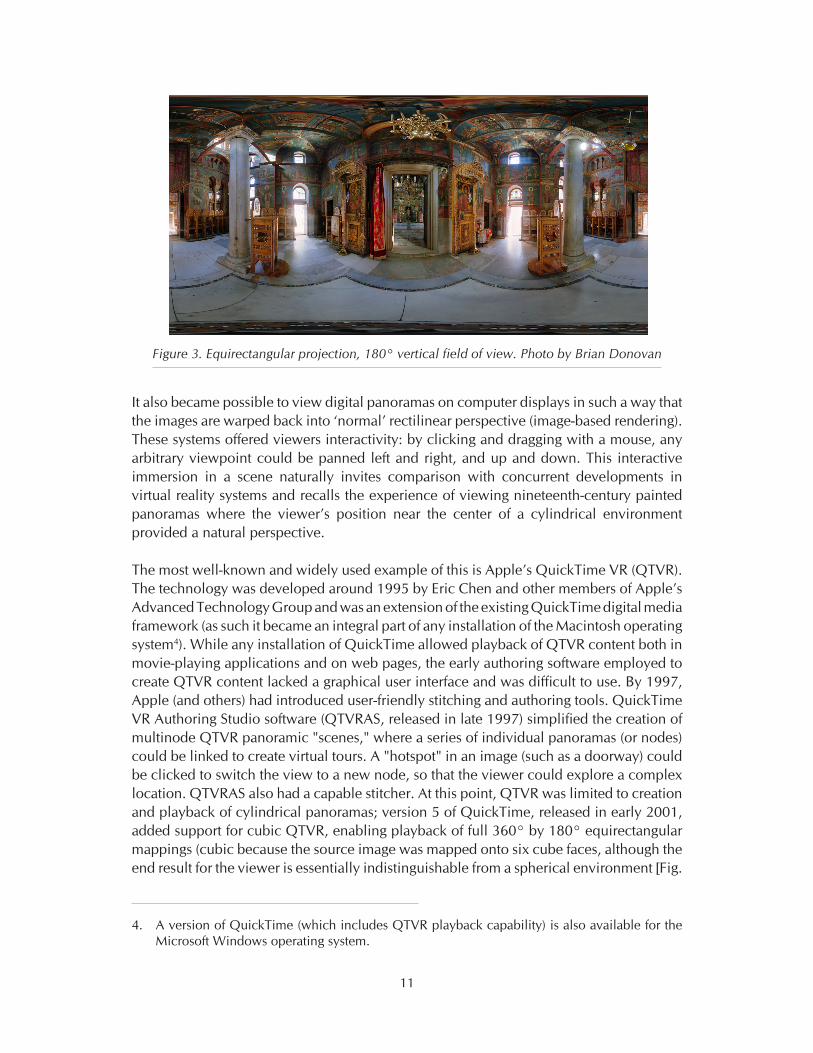
The most well-known and widely used example of this is Apple’s QuickTime VR (QTVR). The technology was developed around 1995 by Eric Chen and other members of Apple’s Advanced Technology Group and was an extension of the existing QuickTime digital media framework (as such it became an integral part of any installation of the Macintosh operating system4). While any installation of QuickTime allowed playback of QTVR content both in movie-playing applications and on web pages, the early authoring software employed to create QTVR content lacked a graphical user interface and was difficult to use. By 1997, Apple (and others) had introduced user-friendly stitching and authoring tools. QuickTime VR Authoring Studio software (QTVRAS, released in late 1997) simplified the creation of multinode QTVR panoramic "scenes," where a series of individual panoramas (or nodes) could be linked to create virtual tours. A "hotspot" in an image (such as a doorway) could be clicked to switch the view to a new node, so that the viewer could explore a complex location. QTVRAS also had a capable stitcher. At this point, QTVR was limited to creation and playback of cylindrical panoramas; version 5 of QuickTime, released in early 2001, added support for cubic QTVR, enabling playback of full 360° by 180° equirectangular mappings (cubic because the source image was mapped onto six cube faces, although the end result for the viewer is essentially indistinguishable from a spherical environment [Fig.
4. A version of QuickTime (which includes QTVR playback capability) is also available for the Microsoft Windows operating system.
Figure 3. Equirectangular projection, 180° vertical field of view. Photo by Brian Donovan
12
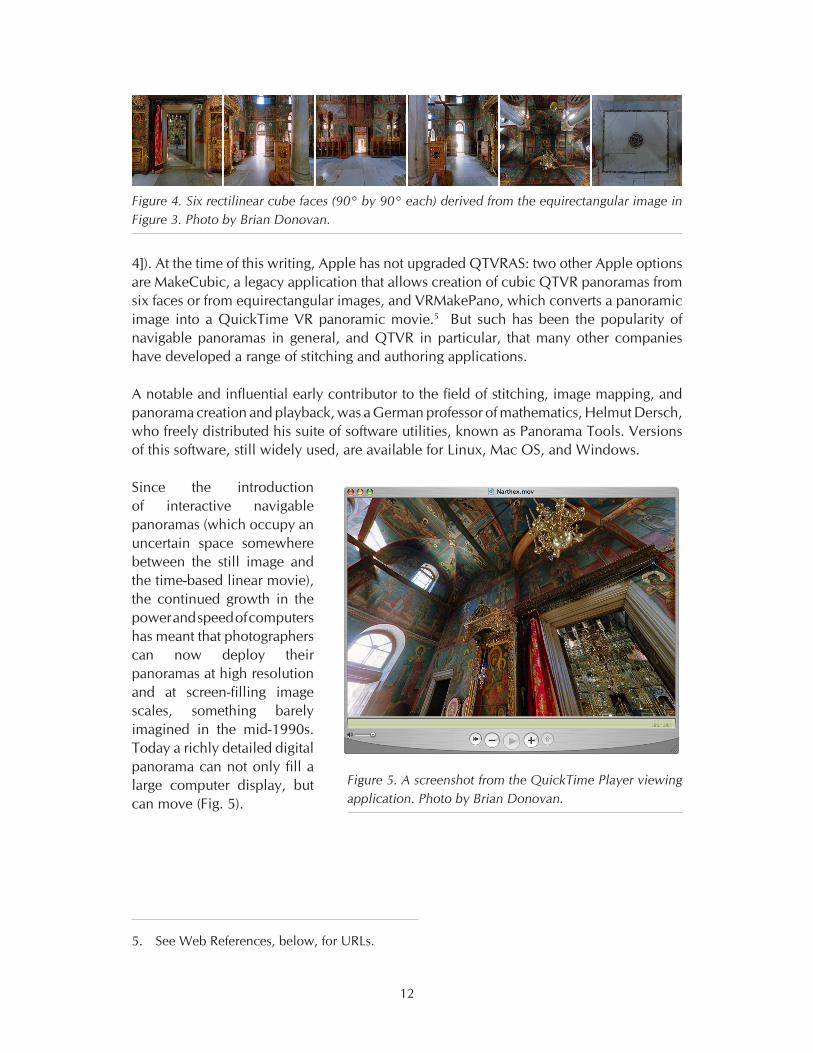
4]). At the time of this writing, Apple has not upgraded QTVRAS: two other Apple options are MakeCubic, a legacy application that allows creation of cubic QTVR panoramas from six faces or from equirectangular images, and VRMakePano, which converts a panoramic image into a QuickTime VR panoramic movie.5 But such has been the popularity of navigable panoramas in general, and QTVR in particular, that many other companies have developed a range of stitching and authoring applications.
A notable and influential early contributor to the field of stitching, image mapping, and panorama creation and playback, was a German professor of mathematics, Helmut Dersch, who freely distributed his suite of software utilities, known as Panorama Tools. Versions of this software, still widely used, are available for Linux, Mac OS, and Windows.
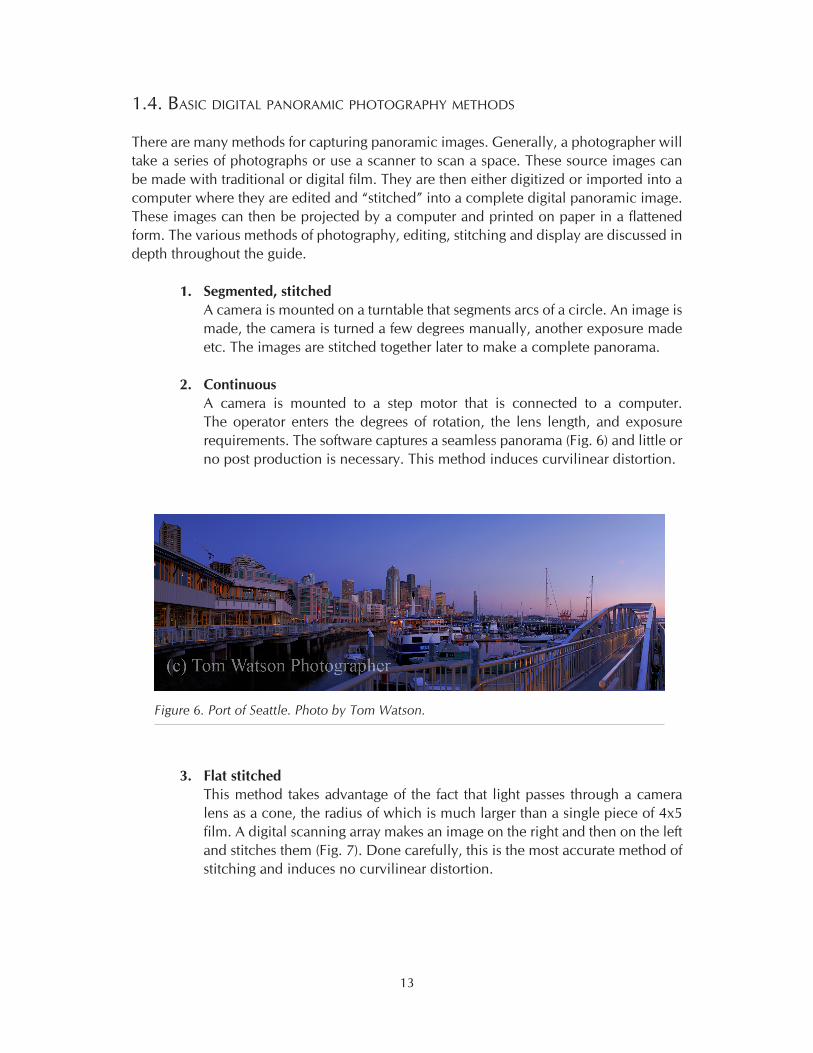
Since the introduction of interactive navigable panoramas (which occupy an uncertain space somewhere between the still image and the time-based linear movie), the continued growth in the power and speed of computers has meant that photographers can now deploy their panoramas at high resolution and at screen-filling image scales, something barely imagined in the mid-1990s. Today a richly detailed digital panorama can not only fill a large computer display, but can move (Fig. 5).
5. See Web References, below, for URLs.
Figure 5. A screenshot from the QuickTime Player viewing application. Photo by Brian Donovan.
Figure 4. Six rectilinear cube faces (90° by 90° each) derived from the equirectangular image in Figure 3. Photo by Brian Donovan.
13
1.4. baSic diGital panoraMic photoGraphy MEthodS
There are many methods for capturing panoramic images. Generally, a photographer will take a series of photographs or use a scanner to scan a space. These source images can be made with traditional or digital film. They are then either digitized or imported into a computer where they are edited and “stitched” into a complete digital panoramic image. These images can then be projected by a computer and printed on paper in a flattened form. The various methods of photography, editing, stitching and display are discussed in depth throughout the guide.
Segmented, stitched1. A camera is mounted on a turntable that segments arcs of a circle. An image is made, the camera is turned a few degrees manually, another exposure made etc. The images are stitched together later to make a complete panorama.
Continuous2. A camera is mounted to a step motor that is connected to a computer. The operator enters the degrees of rotation, the lens length, and exposure requirements. The software captures a seamless panorama (Fig. 6) and little or no post production is necessary. This method induces curvilinear distortion.
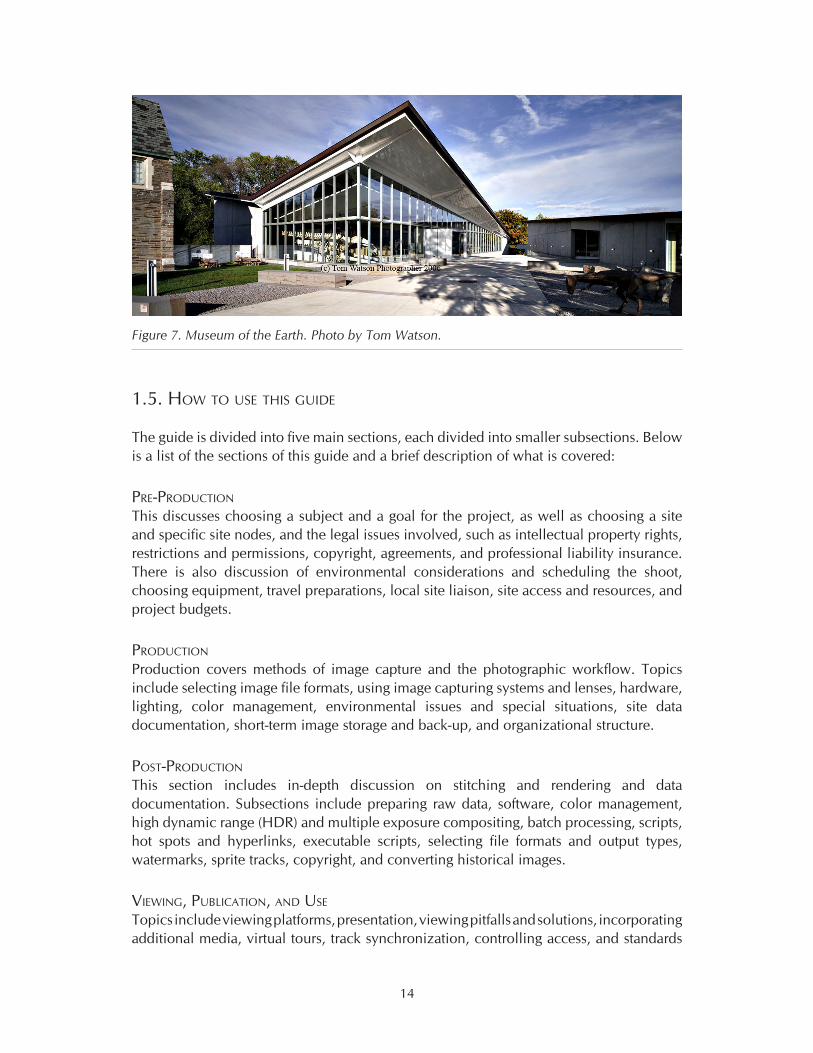
Flat stitched3. This method takes advantage of the fact that light passes through a camera lens as a cone, the radius of which is much larger than a single piece of 4x5 film. A digital scanning array makes an image on the right and then on the left and stitches them (Fig. 7). Done carefully, this is the most accurate method of stitching and induces no curvilinear distortion.
Figure 6. Port of Seattle. Photo by Tom Watson.
14
1.5. hoW to uSE thiS GuidE
The guide is divided into five main sections, each divided into smaller subsections. Below is a list of the sections of this guide and a brief description of what is covered:
prE-production
This discusses choosing a subject and a goal for the project, as well as choosing a site and specific site nodes, and the legal issues involved, such as intellectual property rights, restrictions and permissions, copyright, agreements, and professional liability insurance. There is also discussion of environmental considerations and scheduling the shoot, choosing equipment, travel preparations, local site liaison, site access and resources, and project budgets.
production
Production covers methods of image capture and the photographic workflow. Topics include selecting image file formats, using image capturing systems and lenses, hardware, lighting, color management, environmental issues and special situations, site data documentation, short-term image storage and back-up, and organizational structure.
poSt-production
This section includes in-depth discussion on stitching and rendering and data documentation. Subsections include preparing raw data, software, color management, high dynamic range (HDR) and multiple exposure compositing, batch processing, scripts, hot spots and hyperlinks, executable scripts, selecting file formats and output types, watermarks, sprite tracks, copyright, and converting historical images.
viEWinG, publication, and uSE
Topics include viewing platforms, presentation, viewing pitfalls and solutions, incorporating additional media, virtual tours, track synchronization, controlling access, and standards
Figure 7. Museum of the Earth. Photo by Tom Watson.

15
for data interchange. The section also discusses some possible applications for the end-user, including use of panoramas and VR in the lecture/classroom/labs/home, scholarly use, practical use for engineers, hand-held devices at site/landscapes, and historical and heritage site preservation and restoration.
prESErvation
This section focuses on the long term physical storage and preservation of the archive and the global digital preservation arena
16
WEb rEFErEncES
Arthur C. Pillsbury. http://en.wikipedia.org/wiki/Arthur_Clarence_Pillsbury
BetterLight Large Format Photography. http://betterlight.com
Chaveut. http://www.culture.gouv.fr/culture/arcnat/chauvet/en/index.html
Lascaux. http://www.culture.gouv.fr/culture/arcnat/lascaux/en/
Helmut Dersch suite of tools. http://webuser.fh-furtwangen.de/~dersch/
MakeCubic. http://developer.apple.com/quicktime/quicktimeintro/tools/index.html
The Original Worldwide Panorama Event, March 20, 2004. http://geoimages.berkeley.edu/worldwidepanorama/wwp304/
Panoramas.dk. http://www.panoramas.dk
Panoguide. http://www.panoguide.com
A Virtual Walking Tour: The Alhambra. http://www.saudiaramcoworld.com/issue/200604/
A Virtual Walking Tour: The Suleymaniye Mosque http://www.saudiaramcoworld.com/issue/200605/
VRMakePano. http://developer.apple.com/samplecode/vrmakepano/index.html
17
2. prE-production
2.1. EStabliShinG projEct GoalS
As with any project, goals must be clearly identified and defined. This is particularly crucial for digital panorama production, since all later steps will be directed by what is accomplished in the data-acquistion phase. For the purposes of this document, the final authority on the project goals is the person or group commissioning the work, referred to here as "commissioner."
The commissioner determines the primary subject of the project, the primary audience and the overall intent of providing access to that subject and related contextual information. The subject may be a cultural heritage site, a built work of architecture, an art object, or some other kind of significant physical space. The extent and scale of that space must be delineated and then the coverage of the space determined. Since each panorama is anchored at a single viewpoint, the selection of the viewpoint (or sequence of viewpoints for multi-node panoramas) will determine the portions of the space presented to the audience.
However, simple percent-of-coverage is not the only goal: the commissioner should weigh intellectual, creative, physical, and professional aspects of the access to the physical space to be provided by the panoramas. Often there is much more happening in a space than simply the architecture. Works of art in context, such as an altar or statuary, can be photographed and generated into an object panorama (see section 5.1). The intended perspective of the viewing audience should also be considered and what, if any, contextual information will be required.
Lastly, consider how the final product will be used. This depends in part on who will be using the work, but also on who will be generating the data and creating the end-user presentation. Will it be projected alongside conventional slides onto a screen during lectures, or will it be used by students at home? Will it be distributed over the internet to viewers with slow internet connnections or via school equipment that is configured to specific settings? Will narration be required to provide context and explanations? This type of planning will save many hours of work later on.
18
A digital panorama project is a lengthy process and requires sharp and sustained focus. Competing priorities and a lack of necessary skills have led to mixed results for many ambitious technology projects undertaken by large universities: it may be wise to outsource elements of the project to third-party contractors that specialize in digital panoramas and web design. Depending on resources and budget, hiring external contractors may be the most cost-effective, efficient, and successful method for completing the project.
2.2. chooSinG thE SitE
After the subject has been chosen it is important to evaluate practical access issues. There are many factors to consider, the most important of which is access. It may not be possible to actually carry out a photographic campaign of the site. The choice of subject may seem easy but often a site is physically inaccessible due to restoration work, unsafe conditions, or legal and adminstrative restrictions. In these cases the commissioner should re-evaluate the subject and chose an acceptable alternative. These kinds of problems may not become obvious until the photographer actually arrives at the site. For example, suppose that the commissioner wishes to photograph a Greek temple, and the subject is the Temple of Athena on the Acropolis in Athens. Everything seems fine until the photographer flies to Greece and discovers that the temple is completely obscured by scaffolding and cranes. A flexible commissioner might switch the focus to Paestum instead. For both the photographer and commissioner, it is helpful to have a local contact, whether a fixer, historian, or other expert at the shoot if at all possible to avoid these types of unexpected problems (see section 2.7).
2.3. chooSinG SitE nodES
In an ideal shoot, there is unlimited time on location to capture panoramas, and the photographer can record every nuance and a few extras that might turn out to be interesting. Unfortunately, this happy circumstance rarely occurs, forcing the commissioner and photographer to compromise between time limits, access restrictions, and factors beyond the tteam’s control. Accordingly, plan the shoot as carefully as possible to maximize everyone's efforts. This does not just mean shooting as many panoramas as possible, but also choosing which ones will best illustrate a point and bring the space to the viewer.
If possible, study existing floor plans and illustrations and consider line-of-site from any given node to any other, especially if they will be linked together via hotspots in panoramas (e.g., a clickable doorway that leads from one room to another), or to a particular feature that might be highlighted. Start by working with a copy of a floorplan. Mark all of the places you intend to shoot a node in order of importance. If you start at the entrance to a building, you might logically move a little way in and shoot another node, to create a virtual tour. Or, you might be better off moving all the way to the other end of the building in order to shoot it first. This choice will require more time between nodes, but will capture more of the space in case something goes wrong. Trade-offs like this should be expected and planned for, and the prioritized list of nodes should reflect the diminishing importance of each one.
19
Be sure to consider natural and permanent light when planning the nodes. Very few panographers attempt to light their scenes for a number of reasons (see sections 2.8 and 4.6.1). If the panorama represents a moment in time, the viewer would see various lights and cables somewhere in the photograph. If the photographer shoots still frames or multiple passes with a scanning camera, it may be possible to shift artificial lights around so that equipment does not appear in the final scene. However, there is a risk of the natural light changing significantly during that time, and blending or combining images will raise problems. Light reflects and interacts in both obvious and subtle ways that may result in extensive post-production work. Time of day and seasonal changes both affect lighting, and should be taken into consideration with choosing and prioritizing nodes. When shooting a cathedral, for example, it might be preferable to photograph a node on one side of the building in the morning and a node on the opposite side in the afternoon, in order to maximize light coming from each direction. Between those two critical times, the photographer can shoot other nodes that rely less on the light's direction. When shooting exteriors, it may be best to shoot when the sun passes directly overhead or to wait until the sun is low, for the shadows it will cast (but keep in mind that anything in the direction of the sun will wash out). Plan for the sun's movements rather than reacting to them at the shoot.
Consider also the ramifications of placing the camera in relation to the sun or other bright lights. Practically speaking, best results maybe be obtained by shooting in the shadow of a column, utility pole, or other object. Bright lights will wash out a panorama and effectively blind viewers for that portion of the panorama. Putting the camera in a shadow, however, makes it possible to shoot into the light while also achieving a useful result. In some cases, it avoids serious problems such as blooming and lens flare (where a camera's pixels produce pure white informationless data). If there is a choice between putting the camera in a shadow and not, almost always choose the shadow. Aside from blocking the light, shooting from within a shadow negates the problem of shifting light. Even a quickly shot panorama can have tripod shadows between the first still image and the last or the beginning and end of a scan. The sun may appear to move slowly overhead, but shadows can shift significantly in a short period of time and when the tripod shadows in different images fail to align it results in extra work in post-production. Minimizing shifting shadows is one good reason to shoot with the sun as high as possible.
Other practical and predictable factors include traffic (both foot and vehicular); natural elements such as water, snow, rain clouds, dirt, or mud; barriers; safety; permissions; copyright; background; and security. Setting up to shoot a node where many people are walking by may be awkward, particularly if people are not supposed to end up in the image. They may bump the photographer or the equipment and if they are too prominent in the panorama there may be problems with privacy. Similarly, shooting a node near heavy traffic can be dangerous, especially when the photographer's attention is directed at the camera. If you use a scanning camera that feeds into a computer, the choice of nodes may be restricted by the immediate terrain (the laptop should not be sitting in the mud). If ropes or gates block access to particular areas, it might be possible to reach
20
over or through them and shoot from the other side without crossing the barricade.1 It is sometimes necessary to choose a location that is less than optimal but better for the equipment and the photographer. Line of sight can play prominently in spherical panoramas because viewers can look in every direction. If node placements are chosen for optimal viewing in a particular direction, it may compromise what the viewer sees when turning around. Sometimes just a meter's difference will capture both the desired feature and eliminate less desireable objects in the reverse view. The commissioner and photographer should build in enough flexibility to allow for these kinds of small changes on site.
Many places restrict who may access particular areas, but every effort should be made to shoot panoramas in such places, for the simple reason that they are not normally accessible. Shooting in restricted areas can substantially enhance the subject matter for viewers who have no other way of seeing that material.
The commissioner should also consider the artistic quality of each panorama. Placing the tripod in the dead center of a room may show a balanced view in all directions, but unless some particular feature lies directly overhead or below, an off-center location may give a better result. Consider placing the camera somewhere that will offer viewers both foreground and background changes. Placing the camera in the center of the room will minimize features, but placing it nearer to or further from items within the room will heighten and sustain viewer interests.
Placing the camera directly above or beneath particular features will also make the panorama more interesting. If possible, give them something besides ceiling and sky when they look up, and provide them with more than bare floor or dirt when they look down. If the photographer can shoot a node directly on top of a small wall or beneath an overhang, for example, it encourages the viewers to take full advantage of fully spherical panoramas (since, in addition to spinning around, they can look up and down). People like to see the entire context of a place and anything that enhances their experience can only improve the result.
Once all of the shooting subjects are selected, consider the height of your camera. For a given set of nodes, it makes sense to keep the camera height the same through the panorama, so that viewers do not become confused or disoriented. Placing the camera at about eye-level makes sense if the panorama is to show an average person's viewpoint. Alternatively, it might be better to reflect a child's viewpoint or to place the camera on a raised platform or crane so as to get a clearer, straight-on view of the subject matter.
1. This was done in one location in Rome; a locked metal gate prevented access to a small room, however the bars were wide enough apart that it was possible to set up a tripod and digital scanning camera within the locked area while leaving the controlling laptop on the outside. The entire unit was disassembled outside the gate, then reassembled inside, with cables running out to the controlling computer. The effort resulted in scanning the inside room, which otherwise would not have been visible if the panorama was made outside the locked gate.
21
Whatever the choice, especially if it is not an intuitive location, it should be explained in the accompanying documentation.
No amount of pre-shoot preparation will substitute for securing the cooperation and expertise of those responsible for the site. Good communication will ensure a smooth time in the field and secure access to restricted areas or at special times (such as before public visiting hours begin). Likewise, every detail of a shoot should be discussed and agreed upon by the commissioner and photographer.
With all of the above in mind, then:
Prioritize node choices to achieve the goal• Choose both subjective and objective views where possible• Shoot everything possible while on site• Pick the best work for the final compilation•
2.4. EnvironMEntal conSidErationS/SchEdulinG thE Shoot
Environmental considerations are not limited to the weather. Unique obstacles, such as religious services, holidays, festivals, siesta periods, and local customs, may interfere with a shooting schedule. It is important to research local customs (including appropriate attire) before arriving at the shoot. Some research with travel agencies, web sites, and local site liaisons (see section 2.7, below) will save time and money.
As discussed above, predicting and tracking the light source on site is critical. The sun and weather play a huge role in the success of a shoot. Artificial light is not desireable for photographing a spherical panorama, so most panoramic photographers use natural light available at predicted times whenever possible. For example, when photographing a cathedral, capture the eastern end (chevet or apse) in the morning, the southern and northern transept mid-day, and the western façade in the afternoon setting sun. The time of year also plays an important role in dictating the quality of light. In the northern hemisphere the summer solstice, June 21, provides the most light to work with. This is usually the preferable time of year to shoot. There are exceptions to this: certain buildings, such as Die Wies in Bavaria, are better shot on a sunny day in the middle of winter, when the light reflects off the snow and through the fenestration up into the dome and vaults.
Though the standard procedure for photographing architecture with natural light is to use sunny skies for the exterior and overcast skies for more even lighting in the interior, a creative photographer will constantly monitor weather and clouds to make the best of any weather situation. Clouds can be used to the photographer's advantage, providing the softer lighting often desired for interior shots, then parting to provide bright sun for an exterior shot. Even rain can create interesting effects; details of gargoyles spouting runoff water highlight the usefulness of otherwise ornamental features. While day-to-day weather and local cloud movements cannot be predicted in advance, normal weather conditions for the site can be checked through on-line and book resources such as The Weather Channel, The Weather Underground, and the Lonely Planet guidebooks.
22
2.5. EquipMEnt
Nearly any kind of still camera (digital or film) can be used to create panoramas (see section 5.3 for discussion of video panorama). Note that this equipment can be quite expensive, up to tens of thousands of dollars. In most cases, the photographer will probably use his or her own equipment on the shoot. However, it is in the commissioner's interest to know something about the equipment used for this type of photography and to know something about its limitations. The following discussion provides a guide to the pros and cons of various digital camera designs, which fall into two broad groups: single-shot systems (i.e., point and shoot SLR cameras), and those that methodically scan the image (i.e., cameras equipped with a scanning back). Generally, single-shot cameras (and accessories) produce pictures that must be stitched together to produce a panorama, while scanning systems produce panoramas that require less post-production processing.
When it comes to choosing your panorama tools, it is reasonable to buy as much as you can afford but it is not always best to purchase the most expensive equipment. It might be better to purchase two identical systems in case of mechanical problems, accident, or theft. From time to time, used digital scanning camera systems can be purchased in online auction houses: such devices produce very high quality results, but the complexity of their components leaves much that can go wrong. It may be better to purchase two or even three sets of gear that produce good results rather than one set that produces outstanding images. A digital scanning camera system consists of a camera, lens, laptop computer (screen, logic board, hard drive, disc drive), application software, operating system, cables, computer battery, camera battery, adapters, and a tripod. That's at least thirteen vulnerable points: the camera could be knocked over and its lens destroyed, the laptop may freeze, etc., and it may be difficult or impossible to fix equipment on site. Though these systems produce excellent results, they can prove fragile. If your system will include specialized components, you may not be able to purchase replacements from a camera shop down the street, even in major metropolitan areas. If you can afford a redundant system of this type and ensure its security in the field, by all means do so.
For most educators and scholars, a mid-level DSLR (such as the Canon 30D or Nikon D70) will be sufficient and will achieve appropriate quality. Generally, point-and-shoot digital cameras are undesirable because of the difficulty in controlling exposure settings and attaching external lenses. Many budgets that cannot encompass a high-end system can find funds for a high-quality camera and an identical model purchased for back-up. In terms of field use, this reduces risk to far fewer potential points of failure and a shorter time for recovery. A local camera shop is much more likely to be able to replace any of these components from stock or a back-up unit might be express-shipped if necessary. The flexibility offered by commonly used equipment is a big benefit. Alternatively, it might be feasible to have two sets of gear operating in the field at all times, with more than one person operating them, for faster coverage of a site.
When choosing equipment, don't forget to account for time and money required for software and post-production processing. Images collected by scanning systems are more
23
easily and quickly converted into panoramas, but the required software may have to be purchased separately (especially for second-hand equipment). Still-shot cameras have a wide range of available image-stitching packages, but they may require much more pre- and post-production time to generate top-quality panoramas. If you use a still-shot camera, a precision panorama camera mount is an invaluable accessory. However, don't try to save money by using a low-quality panorama head, since that will lead to manual adjustment in the post-production stitching stage. The image will "float" between frames in each set of images. When pixels are misaligned, they must be corrected by hand in post-production in order to create a good panorama. Each pair of images must be precisely aligned, a time-consuming and exacting process. With high-precision panorama heads, sets of images overlap each other exactly and can be immediately batch-processed.
iMaGE capturE SyStEMSThere are several flavors of image capture systems can be used to create panoramas, including:
Point-and-shoot• Digital SLR (DSLR)• Automatic scanning systems (35mm-equivalent, medium, and large format), such as • Panoscan and BetterLightVideo cameras• Geared roll film cameras•
Whatever system you end up with will require the same basic elements:a camera, a lens, a tripod that allows for accurate rotation of the lens, and a method of capturing images.2
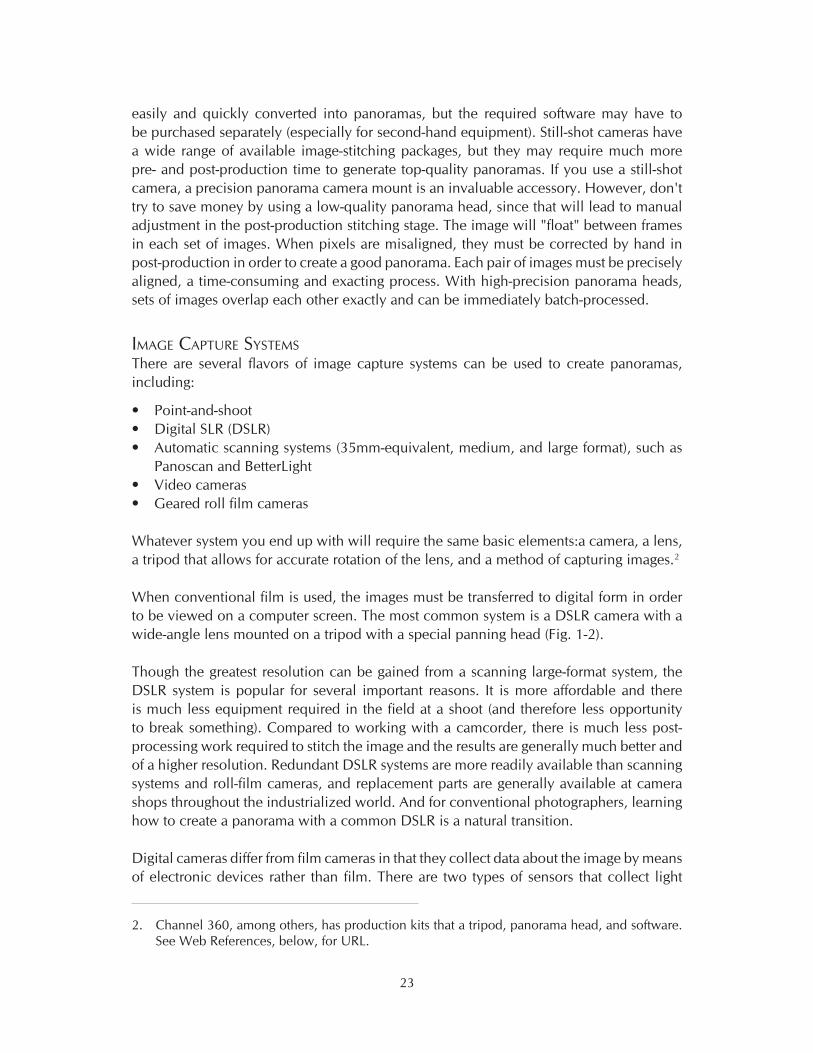
When conventional film is used, the images must be transferred to digital form in order to be viewed on a computer screen. The most common system is a DSLR camera with a wide-angle lens mounted on a tripod with a special panning head (Fig. 1-2).
Though the greatest resolution can be gained from a scanning large-format system, the DSLR system is popular for several important reasons. It is more affordable and there is much less equipment required in the field at a shoot (and therefore less opportunity to break something). Compared to working with a camcorder, there is much less post-processing work required to stitch the image and the results are generally much better and of a higher resolution. Redundant DSLR systems are more readily available than scanning systems and roll-film cameras, and replacement parts are generally available at camera shops throughout the industrialized world. And for conventional photographers, learning how to create a panorama with a common DSLR is a natural transition.
Digital cameras differ from film cameras in that they collect data about the image by means of electronic devices rather than film. There are two types of sensors that collect light
2. Channel 360, among others, has production kits that a tripod, panorama head, and software. See Web References, below, for URL.
24
data about the image, charge-coupled devices (CCD) and complementary metal–oxide–semiconductors (CMOS). Most digital cameras use CCDs, but there are subtle but relevant differences between how these two types of sensors read and record data. CMOS chips have a lower light sensitivity and are generally more susceptible to noise, but use much less power and are therefore well-suited to smaller cameras. CCDs, on the other hand, are more susceptible to becoming dusty, requiring more frequent cleaning. A full discussion is outside the parameters of this guide, but information can be found on several web sites.3
lEnSESAnyone who spends time looking at a variety of panoramas will notice the difference between those shot with an 8mm lens and those taken with a 15mm lens. A smaller lens has a greater field of view but objects will appear to be further away and can have an apparent distortion on the edges when a panorama changes view (although this can be adjusted in post-production). Some viewers have strong aesthetic preferences for one or the other. There are implications to lens size that may be relevant when choosing equipment. The ability to zoom in on details in a panorama is greatly affected by the lens. If the camera has a CCD chip one square centimeter in size, for example, the amount of detail captured on with an 8mm lens will be far less than with a 15mm lens, because the light captured from a much greater field of view must necessarily fall on the same space that captures more detail in a smaller field of view with a longer lens. This translates directly into the effective zoom achievable in the final panorama. The trade-off comes with the number of images needed to capture an entire sphere: an 8mm lens might do it in four frames, whereas a 15mm lens might need twenty. (The terms used here, smaller/shorter and larger/longer refer simply to the number of the lens; the actual physical size of the lens does not necessarily correlate).
3. Wikipedia has entries on the CCD and CMOS chips. For basic information on digital cameras, HowStuffWorks has a more general comprehensive entry (see Web References, below, for URLs).
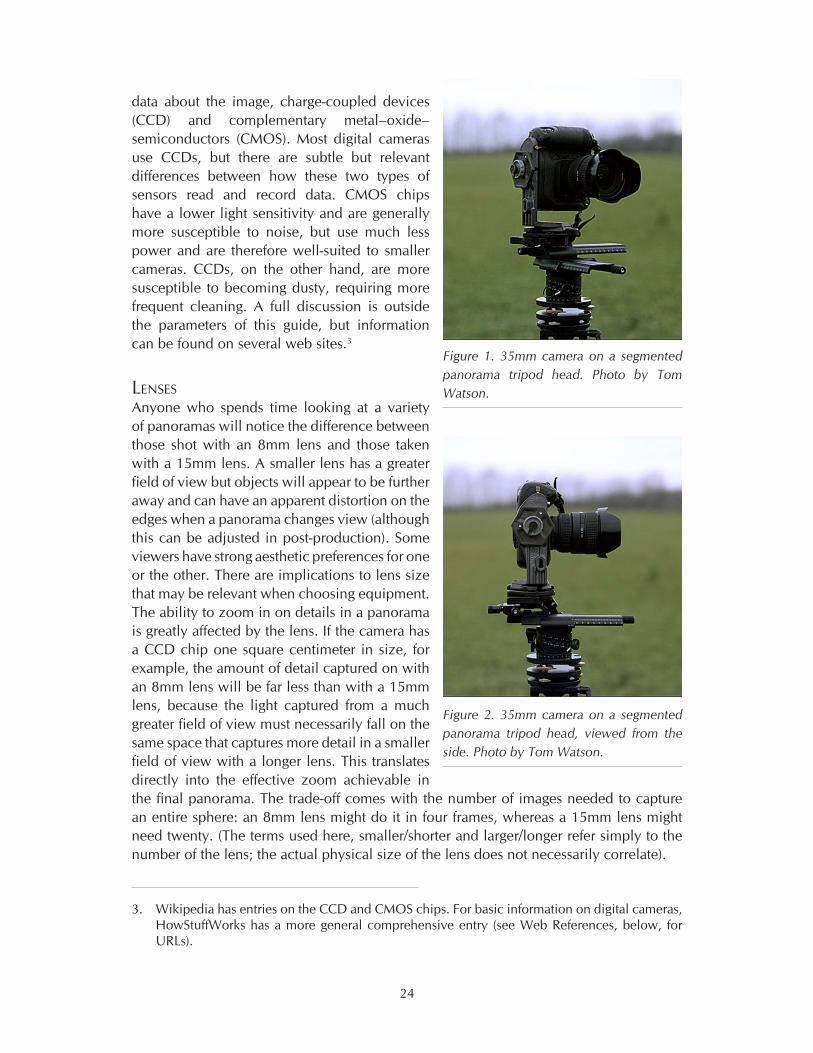
Figure 1. 35mm camera on a segmented panorama tripod head. Photo by Tom Watson.
Figure 2. 35mm camera on a segmented panorama tripod head, viewed from the side. Photo by Tom Watson.
25
Many photographers prefer to use a wide-angle rectilinear lens with minimal distortion. Fish-eye lenses are also popular because fewer images are required to capture the 360° field of view. However, there are limited software applications that can stitch these images due to patent issues. There are one-shot lenses that are capable of capturing the entire 360° in a single image, but these provide the least amount of resolution and are incapable of capturing complete spherical views.
tripod and tripod hEadA panoramic tripod head is an important piece of equipment that is used to position the lens at the point of rotation (see section 4.4). Mounted on any normal, sturdy photography tripod, the head also allows for even measuring of rotation angles, both horizontally and vertically. Most are manually operated, but some (such as the Panoscan system) rotate automatically. A good panoramic tripod head will allow for proper positioning of the camera so as to avoid parallax. Parallax is the apparent displacement or difference in apparent direction of an object as seen from two different points not on a straight line with the object. In other words, it is the apparent doubling of objects in an image, and is a problem that plagues panoramic practitioners. It is essential to properly adjust the panoramic tripod head so that as you rotate the camera, the point of rotation equals the nodal point of the lens. When the head is not properly adjusted, even by a few millimeters, parallax will occur. Refer to various “how-to” websites such as PanoGuide for tutorials on how to properly adjust your tripod head. Manfrotto, Kaidan, and 360Precision produce good quality panoramic heads.
rESolution rEquirEMEntSA common question asked is: How much data do I need to collect? It depends in part on what you intend to do with it. Current library collection standards for scanned film require 3000 pixels on the long axis, shot on 100-400 speed film. If the panorama is only going to be viewed on a typical computer monitor, it should be at least 72 dpi. If it will be printed, it needs to be at least 300 dpi (or whatever the printer specifies). It is advisable, though, to collect data at as high a resolution as possible, so as to have more options in post-production. The systems that provide the highest resolution are the automatic scanning systems. The resulting files may be very large, however, and may require an external hard drive for storage in the field.
travElinG With EquipMEntLast but not least, be sure to consider international shipping and customs laws before you invest thousands of dollars. There are strict regulations for shipping hi-tech equipment over international borders and there are limitations to the amount and weight of luggage that can be carried onto an airplane. Travelling is discussed in greater depth in a later chapter, but in general do not attempt to travel with more equipment than the carrier or country permit.
26
toM WatSon: buildinG a ScanninG SyStEM
Digital scanning backs have been in use for about ten years. They are derived from satellite imaging systems. Because scanning backs are scientific instruments that require a computer to run them, they have been used mainly in art galleries, museums, libraries, universities and offset printing companies where accurate color and precise detail are necessary to record art works and text. However, they are becoming more popular among architectural and landscape photographers migrating from film to digital while using the view camera they already own. The scanning back used with the Panowide adapter motorized tripod head is optimal for producing panoramas of various dimensions and ratios including 360° cylindrical and spherical panoramas. Two early adopters of digital scanning backs are Stephen Johnson and Shelley Lake. Pixel Light and Richardson Photography also use this technology.
The Better Light scanning back is engineered to slip into the film slot of a view camera. A view camera allows independent displacement of the lens plane and the film plane. To be sure, using a view camera is slower and a more contemplative way of making images, but it offers important advantages for image control. When creating a single image, the photographer can apply front and back rise or fall, swings, tilts and shifts to control focus, depth of field and parallel line convergence (the Scheimpflug principle). When creating a 360° panorama, the use of rise and fall changes the horizon line. Using tilt can change the depth of field. For flat stitch panoramas the rear shift movement is extremely useful.1
The look and feel of the scanning back are thoroughly professional. The insert is a thin, torsionally rigid box within which a precision step motor turns a gear drive that moves the Kodak trilinear sensor across the scanner opening, 72 x 96mm in dimension. The inner workings of the electronics are best described by this excerpt from the Better Light web site:
The trilinear sensor is mounted in a ball bearing carriage that glides on a precision track cut into the metal body frame, and is accurately positioned by a matched polymer nut and stainless steel drive screw directly coupled to a high-torque step motor with up to 6400 micro-steps per revolution, for outstanding smoothness at any motor speed. This motor is driven by a dedicated microcontroller that also controls the sensor’s exposure and timing, for crystal-accurate synchronization of these important functions.
1. For more information, see “View camera” in Wikipedia, The Luminous Landscape, MAGNAchrom, or Using the View Camera by Steve Simmons (Amphoto Books, 1992) (see Web References, below, for URLs).

27
Within the image sensor, three rows of light-sensitive photodiodes are each covered by a red, green, or blue color filter, making the entire row sensitive to only one primary color. While Kodak’s trilinear sensors use CCD (charge-coupled device) technology like many other digital cameras, in these devices the CCD structures are “blind” (not sensitive to light), and serve only as charge transport “conveyor belts” to carry the individual pixel signals from the photodiodes to an output amplifier for each row. Because there is no need to have the three rows of photodiodes immediately adjacent to each other, a wide CCD structure is positioned adjacent to each row of photodiodes, with the necessary electrical couplings between them. The CCD structure is wider than the photodiode structure so it can carry bigger charge packets (more electrons), which improves dynamic range.
Because of this dual photodiode/CCD structure, these sensors can be reading out three previous rows of color pixel information via the CCD structures while the next three rows of color pixels are being collected in the photodiodes. This allows continuous exposure and readout of the sensor during a scan, without requiring any mechanical shutter. Better Light scanning backs do not stop and start the scanning mechanism to allow the data-collection system to “catch up” – instead, the sensor is always moved smoothly and continuously throughout each capture.
Better Light scanning backs are widely acknowledged among digital photographers as the definitive image quality standard.
My system consists of a laptop computer, an external 80GB hard drive, a 4x5 view camera, a Better Light Scanning Back inserted into the camera, a tripod with a panorama adapter motor, and a small two-pound battery to power the scanning back (Fig. 3). Cables connect the scanning back and the panowide adapter motor, so as to coordinate the scan with the camera’s rate of rotation. When I have set up my equipment, I enter lens length, rotation, and
Figure 3. Tom Watson’s typical panorama photography set-up. Photo by Tom Watson.
28
exposure values into the laptop and begin the scan. The Better Light software first runs and displays a pre-scan, which is 12% of the full resolution. Upon seeing the pre-scan, I can decide whether to change any settings before running the full scan. This all is run from the laptop. Once the full-resolution scan is recorded on the hard drive, I move it to my laptop and view it in Photoshop to verify my choices are correct. Voila! The panorama is 99% complete. Later in the day, I will make another copy on a disc or external hard drive, but very little post-processing will be required. The panorama is contained within a single image, so there is no stitching or pixel manipulation needed. I sometimes scan an image three times (once for the mid-values, once for the highlights, and once for the shadows) and composite the three scans together.
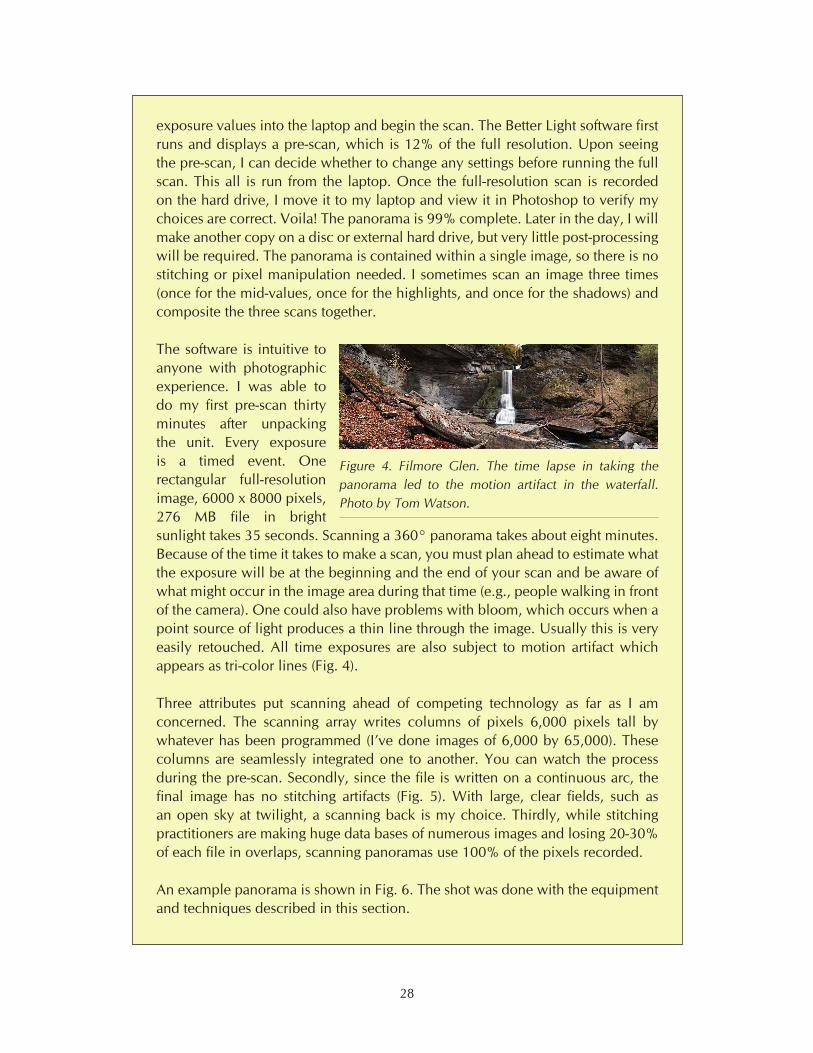
The software is intuitive to anyone with photographic experience. I was able to do my first pre-scan thirty minutes after unpacking the unit. Every exposure is a timed event. One rectangular full-resolution image, 6000 x 8000 pixels, 276 MB file in bright sunlight takes 35 seconds. Scanning a 360° panorama takes about eight minutes. Because of the time it takes to make a scan, you must plan ahead to estimate what the exposure will be at the beginning and the end of your scan and be aware of what might occur in the image area during that time (e.g., people walking in front of the camera). One could also have problems with bloom, which occurs when a point source of light produces a thin line through the image. Usually this is very easily retouched. All time exposures are also subject to motion artifact which appears as tri-color lines (Fig. 4).
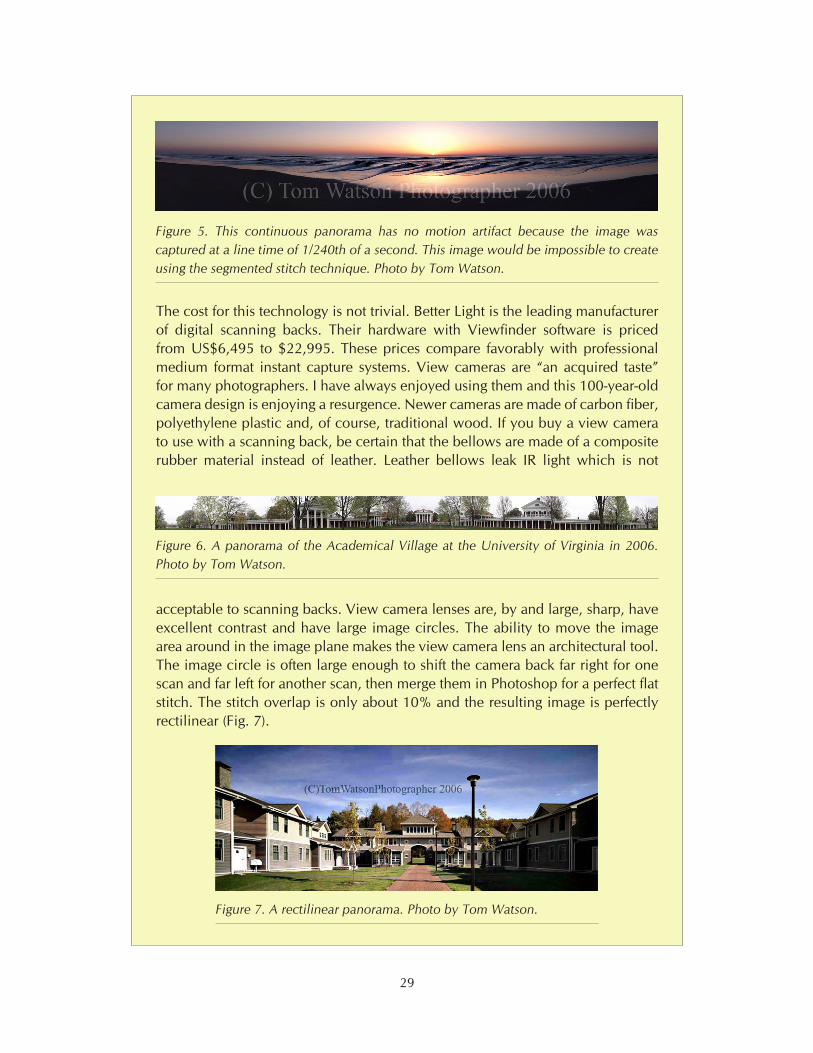
Three attributes put scanning ahead of competing technology as far as I am concerned. The scanning array writes columns of pixels 6,000 pixels tall by whatever has been programmed (I’ve done images of 6,000 by 65,000). These columns are seamlessly integrated one to another. You can watch the process during the pre-scan. Secondly, since the file is written on a continuous arc, the final image has no stitching artifacts (Fig. 5). With large, clear fields, such as an open sky at twilight, a scanning back is my choice. Thirdly, while stitching practitioners are making huge data bases of numerous images and losing 20-30% of each file in overlaps, scanning panoramas use 100% of the pixels recorded.
An example panorama is shown in Fig. 6. The shot was done with the equipment and techniques described in this section.
Figure 4. Filmore Glen. The time lapse in taking the panorama led to the motion artifact in the waterfall. Photo by Tom Watson.
29
The cost for this technology is not trivial. Better Light is the leading manufacturer of digital scanning backs. Their hardware with Viewfinder software is priced from US$6,495 to $22,995. These prices compare favorably with professional medium format instant capture systems. View cameras are “an acquired taste” for many photographers. I have always enjoyed using them and this 100-year-old camera design is enjoying a resurgence. Newer cameras are made of carbon fiber, polyethylene plastic and, of course, traditional wood. If you buy a view camera to use with a scanning back, be certain that the bellows are made of a composite rubber material instead of leather. Leather bellows leak IR light which is not
acceptable to scanning backs. View camera lenses are, by and large, sharp, have excellent contrast and have large image circles. The ability to move the image area around in the image plane makes the view camera lens an architectural tool. The image circle is often large enough to shift the camera back far right for one scan and far left for another scan, then merge them in Photoshop for a perfect flat stitch. The stitch overlap is only about 10% and the resulting image is perfectly rectilinear (Fig. 7).
Figure 5. This continuous panorama has no motion artifact because the image was captured at a line time of 1/240th of a second. This image would be impossible to create using the segmented stitch technique. Photo by Tom Watson.
Figure 6. A panorama of the Academical Village at the University of Virginia in 2006. Photo by Tom Watson.
Figure 7. A rectilinear panorama. Photo by Tom Watson.

30
I carry to each job, a full view camera set and a special view camera with a machined rigid bellows. This special view camera, manufactured by SK Grimes, speeds up the image making process and has an extremely low wind profile.
The Better Light panorama adapter is the other big cost item (about $4,000). It is a step motor-driven automated tripod head. The step motor has zero gear lash which in practical terms means the camera’s rotation will start, stop and return to a precise pixel (Fig. 8-10). Images that are precisely the same can be layered or rendered by high dynamic range image software.
The Panoscan camera is another camera to be evaluated for panorama imaging. The trilinear image sensor and viewfinder software are supplied by Better Light. The camera engineering, original thinking on panorama production and uses (law enforcement) are the effort of Panoscan.
Other factors that should be considered before investing in a system:
Complexity: Any digital photographer working at this level has become comfortable with complex systems, but that is a factor with any panorama system. We all must carry the camera, tripods, laptop, cords, batteries, external hard drives, etc. A scanning camera kit contains more parts, but the image quality and the foreshortened workflow benefits outweigh the extra bits of hardware.
Reliability: The Better Light scan back has been very reliable, in my experience. In five years of ownership, I have never had to return one for repair. The scanning insert is strongly built and protects the CCD from dust and damage. The image sensor is easily cleaned at any time dust is detected.
Workflow: With the camera mounted on the pano adapter and the image plane plumb and level on the tripod, the scanning operator can pre-scan an image in seconds, recompose the image by adjusting the software settings, make
Figure 8. Better Light scan back mounted on a Better Light Panowide adapter. Photo by Tom Watson.
31
exposure determinations, examine a histogram for the entire image, and plan multiple scans. The panorama can be loaded into Photoshop and examined for faults at very high resolution. The image is contained on a hard drive (mine is 80GB), which should be backed up for redundancy reasons.
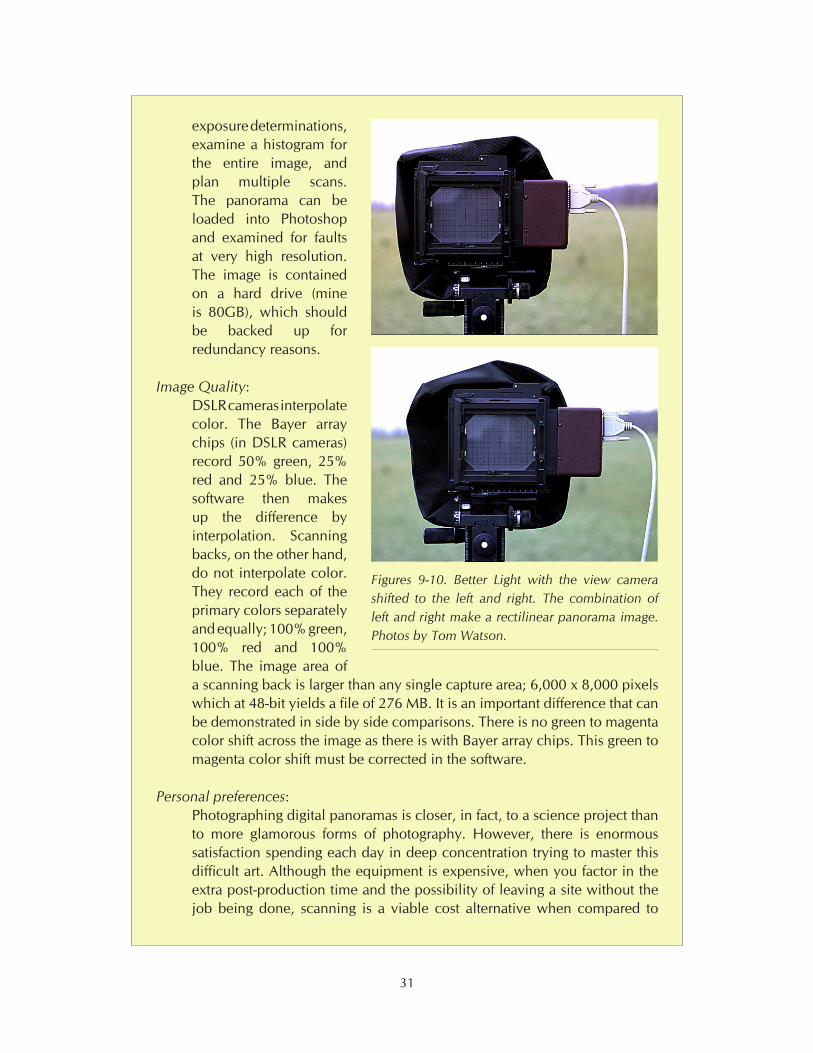
Image Quality: DSLR cameras interpolate color. The Bayer array chips (in DSLR cameras) record 50% green, 25% red and 25% blue. The software then makes up the difference by interpolation. Scanning backs, on the other hand, do not interpolate color. They record each of the primary colors separately and equally; 100% green, 100% red and 100% blue. The image area of a scanning back is larger than any single capture area; 6,000 x 8,000 pixels which at 48-bit yields a file of 276 MB. It is an important difference that can be demonstrated in side by side comparisons. There is no green to magenta color shift across the image as there is with Bayer array chips. This green to magenta color shift must be corrected in the software.
Personal preferences: Photographing digital panoramas is closer, in fact, to a science project than to more glamorous forms of photography. However, there is enormous satisfaction spending each day in deep concentration trying to master this difficult art. Although the equipment is expensive, when you factor in the extra post-production time and the possibility of leaving a site without the job being done, scanning is a viable cost alternative when compared to
Figures 9-10. Better Light with the view camera shifted to the left and right. The combination of left and right make a rectilinear panorama image. Photos by Tom Watson.
32
other techniques, at least to this writer. The image quality, expressed as an inkjet print or a 4-color offset job, is the most compelling in the long history of photography.
Digital vs. Film: Cold weather is a big disadvantage to digital photographers. The imaging chip is not supposed to be subjected to below freezing temperatures. LCD displays begin to gray out when subjected to cold, batteries loose power quickly and in general digital cameras are not as hardy as film cameras. With film, the lubricant in the shutter blades may slow the shutter closer so that over exposure becomes a problem. In extreme cases, roll film becomes brittle and will break. All other considerations favor digital production vs. film production, in my opinion.
How much data do we need to collect? The Better Light workflow is done entirely in a TIF format. We hope that this is a stable format that will be useful well into the future. For now, working entirely in TIF and resampling for other uses into JPEG is our working method. Our files are large enough to meet ever increasing computer and internet speed capabilities. With programs like load-on-demand Zoomify, one can view enormous files over the internet.
Why i do What i do
I am closing in on forty years as a professional photographer. I am grateful that my family life and my career were and are so harmonious. Intrinsically, I am the happiest I have ever been as a photographer and these last five years I consider to be the high point of my career for these reasons:
Freedom from the environment of chemical photography• Superior image quality of the digital file• Digital work flow• The profound pleasure of working with large 48-bit color files•
Most readers to this guide will not have spent thousands of hours processing color film (good for you!). Photographs without film grain and the longer contrast scales of digital files are more beautiful. The digital workflow supports Ansel Adams’ “previsualization concept,” which loosely stated, says that as you set up your camera, you are envisioning the final print. We have digital image tools that Mr. Adams never imagined, but would wholeheartedly embrace. He was an artist and a technician. Combining the 1860s’ technology of the view camera and a large-format digital back are the most powerful set of tools in the history of photography. I am happy to be one of the practitioners.
33
2.5.1 SyStEMS rEquirinG StitchinG
In the early days of digital panorama creation (the mid-1990s), the usual method was to use a 35mm film camera equipped with a wide-angle lens, orient the camera in portrait mode, and take a dozen or so shots while rotating the camera in roughly equal steps through a 360° circle. With this technique, the camera should ideally be mounted on a tripod and the camera’s position on the tripod should be offset so that the axis of rotation passes through a point in the optical system (commonly termed the "nodal point" and usually located somewhere through the body of the lens), in order to avoid or at least reduce parallax. Photographers used either homemade camera-mounting brackets or purchased specially designed tripod heads from commercial suppliers.
In its essentials, this method is still being used although as digital camera design and capability have improved, film has fallen out of favor; today the overwhelming majority of stitched panoramas are derived from born-digital images. Also, since the advent of cubic and spherical panoramas, there is a need to shoot more than just a single row of pictures around if the zenith and nadir of a scene are to be recorded.
A system for good-quality stitched output might consist of:
Camera1. :Preferably (but by no means necessarily) a DSLR model. The main advantage of the DSLR design is the ability to use interchangeable lenses.
Lens2. A rectilinear wide angle typically in the range of 14-24mm focal length (35mm equivalent) or a fish-eye (either circular or full frame). Longer focal lengths can be used; they will yield higher resolutions but require more pictures and a lengthier stitching time; fish-eye lenses are widely used because a full scene can be captured with a smaller number of shots.4
Tripod and panoramic tripod head3. While some adventurous workers in the field have made very successful hand-held panoramas, the use of a tripod and panoramic head really is recommended.
2.5.2 SyStEMS not rEquirinG StitchinG
Stitching can be a vexing and time-consuming process. Errors such as ghosting and mismatched features require often difficult digital retouching and repair in an image-editing application. As part of the stitching process, captured images almost always require remapping from their rectilinear or fish-eye perspective to cylindrical or spherical
4. However fish-eye images often need to be remapped to rectilinear projection, as some stitching software will not otherwise work with them.
34
projections, and image quality can be somewhat degraded by this transformation. Shooting a series of pictures takes time, and non-static features in the scene (clouds, people, vehicles) move between exposures, resulting in ghosting, stitching errors, and associated problems. These difficulties can be largely overcome by non-stitching techniques, in which the camera captures a panoramic scene in a single exposure. There are three basic approaches you can use:
Rotational cameras1. There are different designs, some home-brewed, mostly commercially manufactured. They come in both film and digital versions with varying image scales or film formats. All have the ability to capture a panoramic scene in a single exposure/rotation (and without resorting to a panoramic tripod head). If the objective is to produce an interactive 360° panorama, one stitch is required to join up the two ends so that the image wraps, but this is a trivial matter requiring only an image editor. The main disadvantage of these cameras is that they are expensive (particularly the digital models) relative to the more modest equipment needs where stitching is employed.
One-shot or single-shot systems2. A relatively recent development has been the introduction of devices employing parabolic mirrors, the reflection of which can be imaged with conventional digital cameras. A single picture of the reflected scene can then be processed with software to output a cylindrical image.5 Advantages: one shot; no stitching; capturing subject motion; ease of use; can be used with wide variety of cameras. The main disadvantage is that the panorama’s resolution can only be as good as that of a single frame taken with the digital camera.
Scanning systems3. Digital scanning backs, originally developed by the military for satellite imagery, are similar to and provide equivalent resolution to medium- and large-format film cameras. Instead of capturing a sequence of individual shots like a digital single-lens reflex (DSLR), they scan the view and create a single complete panoramic image on the spot. With newer systems, the resolution is truly enormous, and the viewer can zoom in to incredible detail. One major difference between panoramic scanners and DLSR setups is that they require a computer be physically connected to the camera in order to operate. This may increase set-up time and introduce another level of complexity in the system. Another consideration is the large file size, which not all computers can handle. While the files can be downsampled to reduce size, they may actually provide far more data than the project requires.
5. At the time of writing, commercial models include systems such as BeHere, Egg Solution, Remote Reality, 0-360, and 360 One VR Kaidan (see Web References, below, for URLs).
35
2.6. travEl prEparationS
EquipMEntTraveling with photographic equipment can be quite challenging. There are changeable restrictions on carry-on, checked baggage, and customs for all forms of travel. It is generally not a good idea to check expensive and delicate equipment into an airplane hold. Luggage is often mishandled and thefts do occur. Whenever humanly possible, carry media, film, and equipment by hand. The particular risks will vary depending on the destination and type of travel.
Check with airlines a few weeks before departure to allow sufficient time to pack gear properly, and be aware of last-minute restrictions or political events that may complicate the trip. Also check the Warsaw convention, an international agreement that regulates liability of international airlines for passengers and baggage. It limits an airlines liability for lost or damaged equipment to a startlingly low number (around US$25 per kilogram of cargo and US$500 for carried baggage). Warsaw was amended in 1955 at the Hague and in 1999 at Montreal, but the revised amounts are still small (approximately US$1500 for baggage and US$25 per kilogram for cargo). Independently purchased travel insurance may offer more coverage. Be sure to check that it covers property in transit, not just at the destination.
Because baggage regulations are becoming more restrictive as of late, it may be necessary to either check or ship luggage. ATA cargo cases (such as Pelican ATA) can be custom-made and are probably the most reliable option when carry-on is not an option. However, beware government import/export restriction when moving hi-tech equipment. For example, shipping computers and hi-tech equipment into Italy is notoriously difficult.
Using luggage Carnet forms sometimes facilitates the process. These are essentially passports for gear: some countries require them when bringing in professional equipment. The Carnet is an international customs document to be presented at each port of entry. It is an itemized list of goods or equipment upon which no duties, fees or taxes are to be collected because the goods or equipment is to be reexported within twelve months. Think of it as a passport for objects. There are yellow, green and white counter foils for custom agents to sign and stamp upon entry and exit from each country traveled through. Failure to obtain entry stamps and signatures or exit stamps and signatures may result in a penalty of up to 40% of the listed value at the next point of entry.
Carnets are issued by the Corporation of International Business (see Web References for URL). They maintain an excellent website where one can browse all the categories of interest and assess quickly how to proceed, and a help line (1-800-282-2900). The application fee and the bond posting for US$10,000 worth of equipment would cost approximately US$300. When starting a journey from the US, be sure that US Customs has done its job of checking serial numbers, signing and stamping the Carnet before checking in with the airline. This will protect against eager US tax collectors. Note, though, that many countries, such as those in the Middle East, do not accept the Carnet.
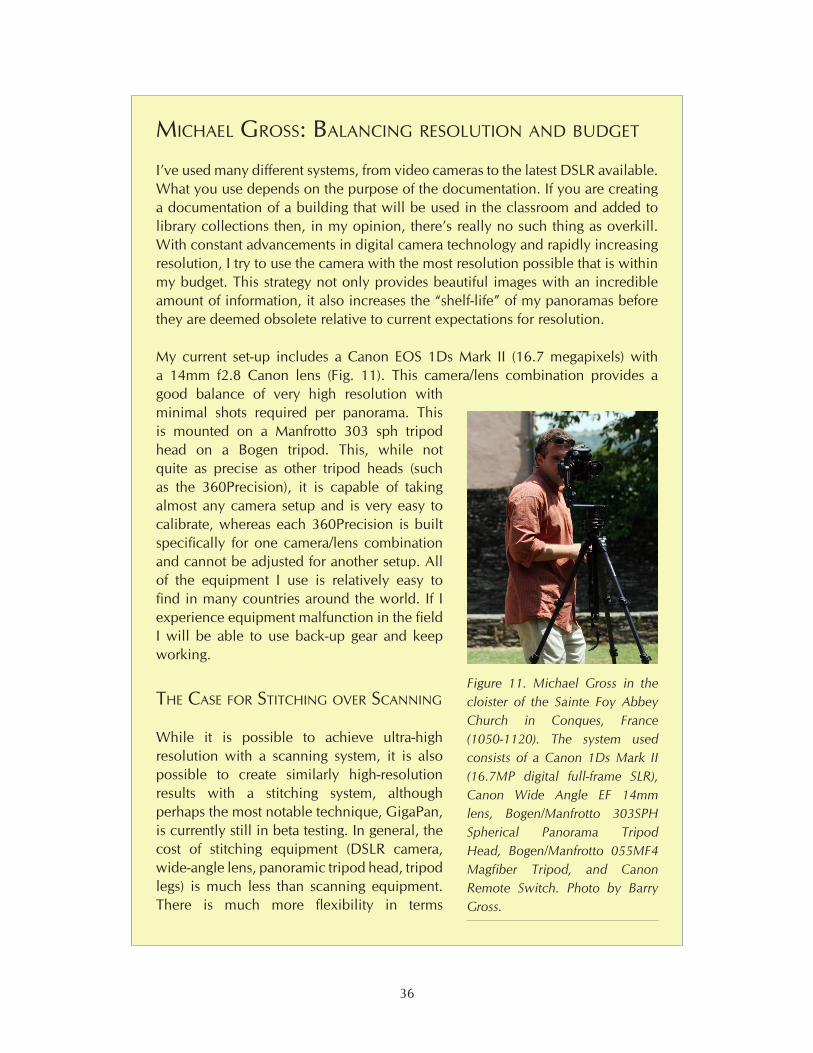
36
MichaEl GroSS: balancinG rESolution and budGEt
I’ve used many different systems, from video cameras to the latest DSLR available. What you use depends on the purpose of the documentation. If you are creating a documentation of a building that will be used in the classroom and added to library collections then, in my opinion, there’s really no such thing as overkill. With constant advancements in digital camera technology and rapidly increasing resolution, I try to use the camera with the most resolution possible that is within my budget. This strategy not only provides beautiful images with an incredible amount of information, it also increases the “shelf-life” of my panoramas before they are deemed obsolete relative to current expectations for resolution.
My current set-up includes a Canon EOS 1Ds Mark II (16.7 megapixels) with a 14mm f2.8 Canon lens (Fig. 11). This camera/lens combination provides a good balance of very high resolution with minimal shots required per panorama. This is mounted on a Manfrotto 303 sph tripod head on a Bogen tripod. This, while not quite as precise as other tripod heads (such as the 360Precision), it is capable of taking almost any camera setup and is very easy to calibrate, whereas each 360Precision is built specifically for one camera/lens combination and cannot be adjusted for another setup. All of the equipment I use is relatively easy to find in many countries around the world. If I experience equipment malfunction in the field I will be able to use back-up gear and keep working.
thE caSE For StitchinG ovEr ScanninG
While it is possible to achieve ultra-high resolution with a scanning system, it is also possible to create similarly high-resolution results with a stitching system, although perhaps the most notable technique, GigaPan, is currently still in beta testing. In general, the cost of stitching equipment (DSLR camera, wide-angle lens, panoramic tripod head, tripod legs) is much less than scanning equipment. There is much more flexibility in terms
Figure 11. Michael Gross in the cloister of the Sainte Foy Abbey Church in Conques, France (1050-1120). The system used consists of a Canon 1Ds Mark II (16.7MP digital full-frame SLR), Canon Wide Angle EF 14mm lens, Bogen/Manfrotto 303SPH Spherical Panorama Tripod Head, Bogen/Manfrotto 055MF4 Magfiber Tripod, and Canon Remote Switch. Photo by Barry Gross.

37
of suitable equipment and compatibility. There are fewer parts to the system, therefore fewer weak points where the system could fail in the field and cripple a shoot.
There is a notable difference in the time required to shoot images intended for HDR or composite images. The photographer must take at least three exposures (shadows, mid-tones, highlights). With scanning, each 360° exposure takes eight minutes, which adds up to at least twenty-four minutes for all three bracketed exposures. That is long enough for the light to shift, people to move through and around the subject, etc. Two panoramas might take about an hour to capture. With stitching, the photographer can use automated exposure bracketing for any given frame (or all frames), adding negligible additional time. With a stitching setup, a photographer can capture one panorama in a few minutes, allowing for many more panoramas in one hour. If time at a shoot is limited and the goal of a shoot is to capture as many panoramas as possible, it makes more sense to shoot more panoramas with a DSLR/stitching setup, even if it means more time in post-production.
Proponents of scanning often point out that 20-30% of each file is “lost” during the stitching process due to overlap. However, the photographer has the freedom to use a longer lens, thus permitting more frames per panorama, and increasing the overall resolution of the panorama. And if “decent” resolution is all a commissioner is after, then stitching may yet provide sufficient results. I have been achieving 75 megapixels with my current DSLR/stitcher setup.
brian donovan: FilM vErSuS diGital capturE
In the early period of digital panorama creation, film was the preferred option as digital cameras were in their infancy, and relatively expensive. At the time of writing however, digital cameras are by far the most frequently used for image capture. And with good reason — an obvious disadvantage with film is that it has to be digitized. This adds another step in the workflow and costs more in both time and money (not to mention problems with dust, scratches, and fingerprints). However, there is another side to this coin: color negative film does offer one outstanding characteristic of particular interest to the panoramic photographer, and that is its very high dynamic range. Digital camera sensors (and traditional color transparency film) have a more limited capability than negative film when it comes to compressing the range of brightness in a subject in a single exposure. This is especially pertinent for spherical panoramas, which might include the sun in the zenith and deep shadow in the nadir. Photographers using digital cameras
38
have developed a number of strategies for dealing with this problem, including compositing and, more recently, high dynamic range imaging (HDRI) techniques; but these techniques are generally not straightforward to implement. A color negative, it could be argued, is in itself a ready-made high dynamic range image, and while obtaining good scans from color negatives (especially of high-contrast subjects) is not always the easiest of tasks, standard image-editing skills can be used to tease out the desired detail in both highlight and shadow areas (nor will the latter suffer from the noise often evident in digital images).
At the time of writing, there is much discussion of digital preservation strategies, and possible long-term problems with archiving media such as CD and DVD-ROMs. If nothing else, film has certainly proved itself to be a long-lived and compact data storage medium.
There is also that hard-to-define ‘look’ of film; the grain, the grittiness, that sets it apart from the digital image with its own characteristics (lack of grain, color fringing, shadow noise) all of which give it a recognizable appearance. This is a simple matter of personal preference.
Finally, there is the advantage of being able to revisit and rescan old negatives as better film scanners become available or your scanning skills improve. Whatever the reason, a carefully stored negative still has all that image information locked in its grain structure awaiting reinterpretation. If we regard scanning as a variation on traditional printing, just another way of making a final positive image, then a familiar quotation from the great photographer (and master print-maker) Ansel Adams seems pertinent:
The negative is comparable to the composer’s score and the print to its performance. Each performance differs in subtle ways.1
It would not be so easy for the digital photographer to reinterpret a set of JPEG files taken for a stitched panorama. Depending on the original exposures, highlight and shadow details that were not recorded or were clipped are irrecoverable, and other image qualities, such as white balance, can only be modified by so much before the image is adversely affected. Having said that, there is a sort of digital equivalent to the color negative, and that is the RAW file format, a high-
1. Ansel Adams, The Print (Ansel Adams Photography, Book 3) (Boston: New York Graphic Society, 1984).
39
The CIB website has upbeat and positive language, but it is a news event when another country became Carnet-compliant.
Veteran travelers know that frustration abounds at ports of entry and will have all paperwork in order. Another thing to keep in mind is to always maintain a pleasant tone of voice, relaxed body language and gesture towards the exit saying, "où sont les taxis?"
FilMThe main concern for photographers travelling with film is the possibility of fogging caused by airport security screening. The ideal strategy would be to obtain film on site, and have it developed locally. But of course this is not always practical and it may not be possible to obtain particular types of film locally and/or find suitable processing labs.
Undeveloped film (whether exposed or unexposed6) should never be placed in checked baggage where it is likely to be subject to high-intensity X-ray inspection but instead should always be placed in carry-on baggage. However, even the radiation from the lower-intensity scanners typically employed for carry-on baggage may cause fogging of higher speed films (say ASA/ISO 800 or above) and of slower films if exposed repeatedly through multiple passes through such systems. There is considerable anecdotal evidence (at the time of writing) that medium-speed films can withstand multiple passes through carry-on inspection systems in North America and Europe with no noticeable effects. Lead-lined bags will offer a level of protection in theory, but they will also probably attract attention during the screening process, requiring hand-inspection, or even higher-intensity X-ray examination. In the US at least, it is possible to request that film (and camera equipment)
6. Film that has been developed will of course be unaffected by X-ray inspection.
bit-depth image2 that, to some extent at least, does embody some of the qualities of the negative. But not all digital cameras offer RAW as an option, and, because it generates large files, only a minority of photographers at present routinely use it to create source files for their panoramas.
In the film vs. digital debate, it seems clear that at the start of the twenty-first century digital has resoundingly won the day, and for very many good reasons. And yet, and yet… for those few diehards among us still using film, it may be just a little while yet before the darkroom door is closed for the last time.
2. Many digital cameras can also save high-bit-depth images in formats like TIFF. This also allows for more extensive image manipulation in subsequent editing (as compared with 8-bit formats such as JPEG) but is not as versatile as RAW.
40
be hand-inspected at security checkpoints. Manual inspection policies in other countries will vary.
SaFEtySecurity and safety for both people and equipment is a constant consideration. At the risk of pointing out the obvious, when faced with the choice of losing equipment or risking injury remember that equipment can always be replaced. Some tips to traveling safely:
Whenever possible, do not travel alone.• Always keep a low profile when moving about a city or in transportation centers, such • as airports and train stations. Keep equipment packed and inconspicuous.Avoid storing equipment in cases with obvious logos that suggest valuable contents.• Be aware of your surroundings. Thieves may wait to steal equipment or money after • a shoot, so it is a good idea to take a cab directly from the site back to the hotel and store all gear safely before going out again.
For tips on traveling safely, refer to the Savvy Traveler web site, The Washington Post Travel Section, and The New York Times Travel section. Since many national and regional newspapers are available on the web, it may also be worthwhile to read the local news when making travel plans (Newslink.org has links to papers all over the world) and to consult the U.S. State Department about travel considerations for the area.
Some regions of the world are simply too dangerous to visit. In these cases it may be possible to hire local photographers. If necessary, it may be possible to arrange a training session in a neutral country.
inSurancEGet proper travel health insurance and equipment insurance and be sure to read the fine print: many policies do not cover equipment "in transit" (while it is traveling on an airplane or being shipped). And many policies that claim to cover equipment in transit in fact only cover catastrophic events, such as floods and fires. In that case, if boxes disappear or equipment breaks, tough luck. One of the best options is to ship equipment with FedEx and to declare the value of the packages. This is similar to insurance, but they will replace the equipment (rather than issue a claim check). However, be aware that when the declared value of the equipment will be used when calculating duties. Many film photographers develop their negatives at a trusted local developer before returning home in order to avoid problems with x-ray scanners at airports. The Large Format Photography Forum has a section on Location and Travel (see Web References for URL), including discussions on traveling with film. When entering a country it may be a good idea to avoiding mentioning travel for work or study unless you have a work or student visa. Immigration customs, police, and other border officials can be unpredictable in some countries and it may be difficult to gain entry. While not sanctioned by the writers or
41
distributors of this guide, in some situations it may be necessary to pay over-the-counter fees to officials or administrators. 7
In some cases, professional liability insurance may be required to protect against damage caused by the photographer. Some locations may require a minimum US$1 million in coverage.
backinG up dataRedundant copies of data are an excellent idea, but when traveling overseas it is even better to maintain copies of data on multiple continents. One option is to send back-up DVDs to a trusted recipient back home during the trip. In that case, it is wise declare a value of US$1 for the data so as to avoid hefty import/export tariffs and questions about conducting work without a work permit.
2.7. local SitE liaiSon (Mr. Fix-it/FixEr)
The local site liaison, a.k.a the Fixer or Mr. Fix-It, can be an invaluable assistant. This is a local person who knows the proper procedures for getting necessary permissions to shoot, is familiar with local customs, and is familiar with the area. He (or she) can be especially helpful in a country with a lot of red tape, such as Italy. A Mr. Fix-It can also provide on-going services such as:
translator• driver / guide• information on local customs and food• help finding the best photo shop for film, development, and repair• intimate knowledge of the site and other sites that may not yet have been considered•
A good site liaison is generally a local scholar, photographer, filmmaker, or local guide who lives in the area and is hired to deal with logistics on a local level. Contact local academic institutions and post a request for a local liaison to university list servers, or check with local guide companies, travel guides, hotels, movie/film companies, cultural attachés, embassies, state department recommendations, or local press contacts. In some countries (Germany and England in particular) taxi drivers often are very knowledgeable and can be hired as a guide for the day. Be sure to negotiate compensation in advance. With the right local guidance, the shoot will go smoothly and everyone will be happy.
othEr prEparationSBring a letter of introduction from the commissioner, institution, or university. The letter should be notarized and could even include certifications by “apostille” (a seal attesting that a notary is registered, which is accepted as the recognition of other countries’ official documents under the 1961 Hague Convention). Business cards, as well as many copies of
7. Transparency International (http://www.transparency.org) maintains several lists and surveys of patterns of corruption and bribery around the world.
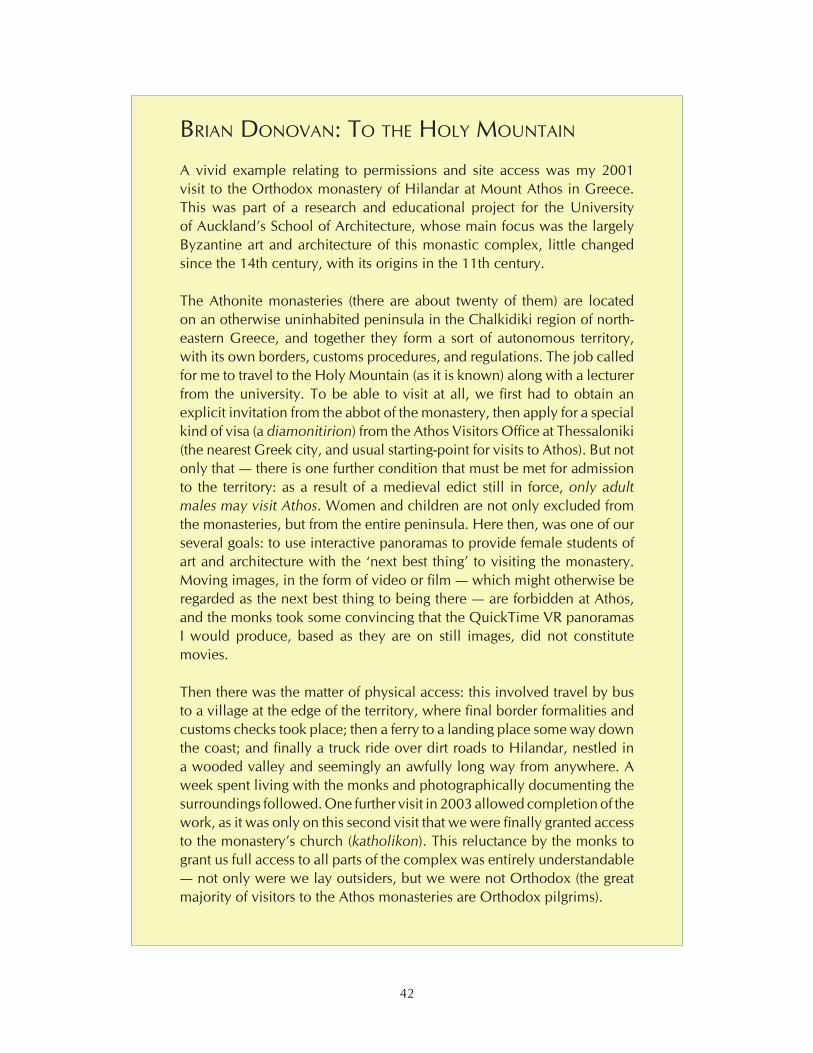
42
brian donovan: to thE holy Mountain
A vivid example relating to permissions and site access was my 2001 visit to the Orthodox monastery of Hilandar at Mount Athos in Greece. This was part of a research and educational project for the University of Auckland’s School of Architecture, whose main focus was the largely Byzantine art and architecture of this monastic complex, little changed since the 14th century, with its origins in the 11th century.
The Athonite monasteries (there are about twenty of them) are located on an otherwise uninhabited peninsula in the Chalkidiki region of north-eastern Greece, and together they form a sort of autonomous territory, with its own borders, customs procedures, and regulations. The job called for me to travel to the Holy Mountain (as it is known) along with a lecturer from the university. To be able to visit at all, we first had to obtain an explicit invitation from the abbot of the monastery, then apply for a special kind of visa (a diamonitirion) from the Athos Visitors Office at Thessaloniki (the nearest Greek city, and usual starting-point for visits to Athos). But not only that — there is one further condition that must be met for admission to the territory: as a result of a medieval edict still in force, only adult males may visit Athos. Women and children are not only excluded from the monasteries, but from the entire peninsula. Here then, was one of our several goals: to use interactive panoramas to provide female students of art and architecture with the ‘next best thing’ to visiting the monastery. Moving images, in the form of video or film — which might otherwise be regarded as the next best thing to being there — are forbidden at Athos, and the monks took some convincing that the QuickTime VR panoramas I would produce, based as they are on still images, did not constitute movies.
Then there was the matter of physical access: this involved travel by bus to a village at the edge of the territory, where final border formalities and customs checks took place; then a ferry to a landing place some way down the coast; and finally a truck ride over dirt roads to Hilandar, nestled in a wooded valley and seemingly an awfully long way from anywhere. A week spent living with the monks and photographically documenting the surroundings followed. One further visit in 2003 allowed completion of the work, as it was only on this second visit that we were finally granted access to the monastery’s church (katholikon). This reluctance by the monks to grant us full access to all parts of the complex was entirely understandable — not only were we lay outsiders, but we were not Orthodox (the great majority of visitors to the Athos monasteries are Orthodox pilgrims).
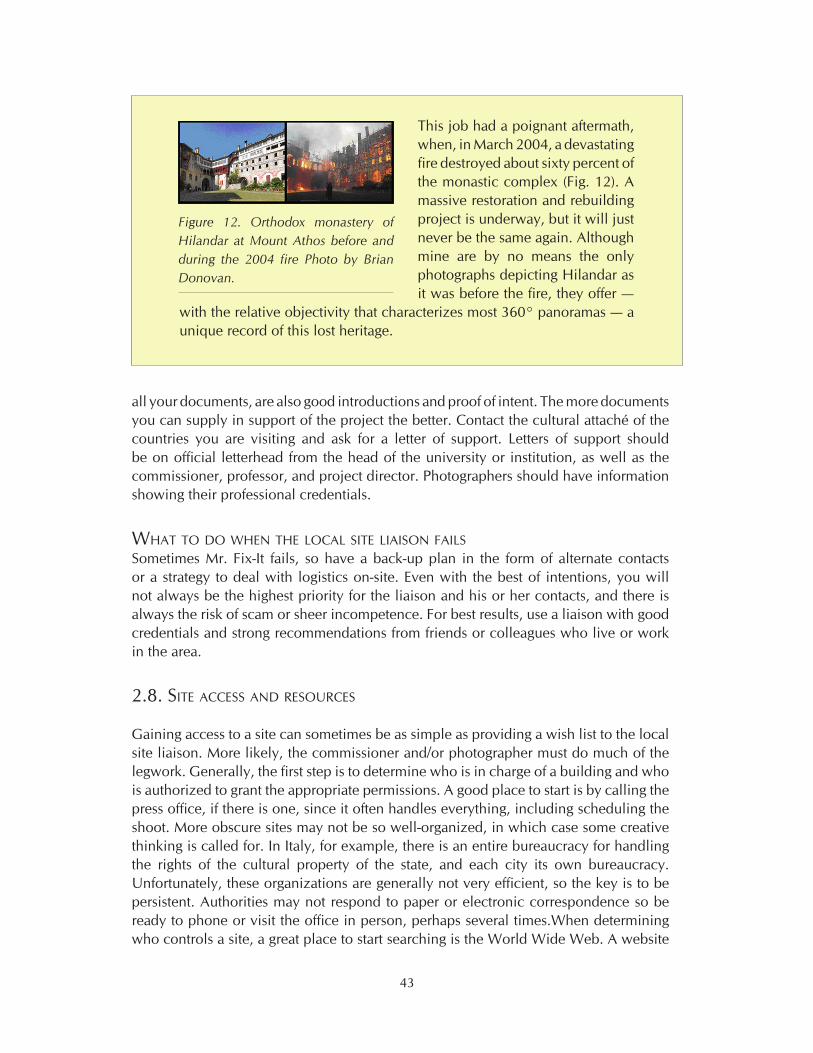
43
all your documents, are also good introductions and proof of intent. The more documents you can supply in support of the project the better. Contact the cultural attaché of the countries you are visiting and ask for a letter of support. Letters of support should be on official letterhead from the head of the university or institution, as well as the commissioner, professor, and project director. Photographers should have information showing their professional credentials.
What to do WhEn thE local SitE liaiSon FailSSometimes Mr. Fix-It fails, so have a back-up plan in the form of alternate contacts or a strategy to deal with logistics on-site. Even with the best of intentions, you will not always be the highest priority for the liaison and his or her contacts, and there is always the risk of scam or sheer incompetence. For best results, use a liaison with good credentials and strong recommendations from friends or colleagues who live or work in the area.
2.8. SitE accESS and rESourcES
Gaining access to a site can sometimes be as simple as providing a wish list to the local site liaison. More likely, the commissioner and/or photographer must do much of the legwork. Generally, the first step is to determine who is in charge of a building and who is authorized to grant the appropriate permissions. A good place to start is by calling the press office, if there is one, since it often handles everything, including scheduling the shoot. More obscure sites may not be so well-organized, in which case some creative thinking is called for. In Italy, for example, there is an entire bureaucracy for handling the rights of the cultural property of the state, and each city its own bureaucracy. Unfortunately, these organizations are generally not very efficient, so the key is to be persistent. Authorities may not respond to paper or electronic correspondence so be ready to phone or visit the office in person, perhaps several times.When determining who controls a site, a great place to start searching is the World Wide Web. A website
This job had a poignant aftermath, when, in March 2004, a devastating fire destroyed about sixty percent of the monastic complex (Fig. 12). A massive restoration and rebuilding project is underway, but it will just never be the same again. Although mine are by no means the only photographs depicting Hilandar as it was before the fire, they offer —
with the relative objectivity that characterizes most 360° panoramas — a unique record of this lost heritage.
Figure 12. Orthodox monastery of Hilandar at Mount Athos before and during the 2004 fire Photo by Brian Donovan.

44
for the site may have phone numbers or the name of a foundation or group that supports the site. The following are some examples of different types of sites and who controls them:
Religious Site• (e.g. church, mosque, temple): depends on who owns the building. Begin with the religious office. In Italy, the building may be controlled by one of the various soprintendenze (e.g. Soprintendenza Archeologica di Roma; Soprintendenza Beni Ambientali e Architettonici di Roma).
Public Space• (e.g. square, street, park): Contact the city film commission (in Italy, the Soprintendenza di Film) for permits.
Archaeological Site• : If the site is an active dig, contact the archaeologist or institution who is in conducting the research. In Italy, try the Soprintendenza Archeologica for the city where the site is located.
Museum• : Press office for the museum.
Library• : It depends on who owns the library — e.g., a university, religious organization, city, or non-profit organization.
Residence• : A private individual; foundation or cultural trust (generally a trust will preserve buildings by a particular architect, e.g., the Frank Lloyd Wright Preservation Trust).
Private Company• (e.g. bank): Contact the public relations office or the office manager for the company.
Government Building• (e.g. City Hall): Contact the building management office or visit the tourism office.
School/University Campus• : Contact the public relations department or the Office of the Architect.
Transportation Hub• (e.g. airport terminal, train station): Contact the press department of the transportation authority, often a division of city government or an independent public authority. Security clearance is likely a requirement for photographers, particularly for airport terminals, and may take an extended period of time to obtain.
Besides the initial challenge of gaining access, the project staff or photographer must study and secure required resources for a shoot: power, lighting, storage, transportation, translators, etc.
poWErPower requirements are often tricky. Older buildings have a limited number of power outlets, and they are often not conveniently located and are not grounded. Old buildings tend to have old wiring that cannot handle the high amp requirements of electronic equipment and lights especially (remember, watts = volts x amps). America uses 110 volts, 60 Hz. In Europe and other parts of the world, they use 220-240 volts, 50 Hz. Many power adapters for battery chargers and computers are capable of handling both systems, but check the label before relying on them. Different countries use different
45
shapes for their power outlets. Steve Kropla's Help for World Travelers has information on international electrical settings and telephone connections.
The easiest solution is to buy a travel kit with all possible adapters, and bring as many as might be required. Remember that at any given time on a shoot power might be needed to run a computer, charge camera batteries, back up data to an external hard drive, and run lights.
liGhtinGUnlike traditional architectural photographers, panoramic photographers generally prefer to rely on natural lighting. Artificial lighting increases the complexity of a shoot by an order of magnitude, and introduces problems that would otherwise not exist. For example, a wall with a fresco must maintain a certain temperature range and environment, and the use of bright, hot lights might be prohibited. Also, site managers prefer to keep the equipment used to a minimum so as to avoid interference with the normal flow of visitors. One tripod is normally not a problem, but lighting equipment can present quite an obstacle. Furthermore, in a 360° scan the equipment will be visible.
StoraGE oF EquipMEnt and caSESKeep equipment cases out of view of the shot whenever possible, for the sake of both convenience and security. Be sure to find a secure place to store the cases, such as an office, security desk, or the locked trunk of a car.
roadS and tranSportation to thE SitEMany sites are located in cities with a plethora of transportation options. In some cases, it will be easiest to drive to the site, but be aware that parking can be an issue, especially if the site is in a crowded or insecure area. Cabs are a good option but are not always reliable. Subways or trains are often cheap and reliable, but require carrying all of the equipment (up and down flights of narrow, steep, crowded stairs). Also keep in mind that during peak hours the carriage may well be standing room only and there may be a short window of time to maneuver through the crowd and off the train (not an easy task with large, heavy cases).
Sites that are not located in major metropolitan areas present a different set of problems. In Europe, the train system is wide-spread and generally good, but there are still many places that are a long and expensive cab rides from the closest train station. In this situation, it may make sense to rent a car.
tranSlatorS and cultural liaiSonSA local site liaison can be very useful in handling language and cultural issues. This is discussed in depth in section 2.7.
46
2.9. budGEt
There are three tiers of production systems — call them base, average, and platinum — and the best choice depends on the balance between requirements and resources. The commissioner should discuss the differences in quality verses acceptable costs with the photographer well before the shoot (see section 2.5 for information about equipment options). It should also be clear what costs the commissioner will cover and what costs the photographer will cover. For example, is the photographer responsible for getting travel insurance and liability coverage for possible damage to the site?
The commissioner's budget should include production, post-production and long-term maintenance of the project. It will need to encompass the following categories:
EquipMEntThis covers all the equipment for the shoot, such as: camera, remote switch, flash media, lenses and filters, tripod head and legs, laptop computer, stitching software and image editing software, flash media card reader, travel cases and backpacks, power adapters, and external data storage. Normally the photographer owns or has access to most of this equipment and has to purchase only a few items specifically for the project, such as stitching software and the panoramic tripod head. It may also be possible to rent or borrow individual pieces of equipment. Universities may have equipment loan pools or an art department that will loan equipment for special projects.
travElThis generally includes flights, travel insurance, local transportation, hotels, per diem food costs, communications, guidebooks, and maps.
FEES/licEnSESBesides visa fees for entering some countries, there may be fees for use of a site. Many sites waive fees for educational use of site photographs, many charge a reduced or full fee. This can range from just a few dollars to hundreds of dollars (the average is between US$100 - $300), but in rare cases the fees can range in the thousands. If the photographer is hired as a contractor, then he or she will also be paid an honorarium. The local site liaison will also negotiate a fee, generally a daily rate (see section 2.7). Extra liability insurance for the photographer or the commissioner may also be required, depending on the site and subject. There may also be access fees for entering the site or for using the site at night or when it is closed to the public. Finally, it may be necessary to pay officials on-site for travel permits, equipment use, etc.
If legal consultants are required to write up releases and licensing agreements, those fees should be included in this category.
If the project is being funded by federal or non-profit grant agencies or administered by a university or institution, be sure that these costs are covered in the proposed budget
47
and that the institute grant administration procedures will allow the costs to be paid with grant monies.
poSt-productionUnless the project is being run by a university department that can provide post-production facilities and labor, post-production costs will include purchase or use or hardware (computers), software, and labor involved in turning the source images into the final product.
MaintEnancE oF archivEThis often-overlooked item involves the long-term maintenance of the archive. As network infrastructures, operating systems, and viewing platforms and software change, the archive must be adaptable in order to remain accessible and useful. As of this writing, there is no open-source software for viewing digital panoramas. It is unwise to assume that commercial software manufacturers will continue to distribute and provide support for current versions of viewing software forever. It is not enough to store work in a secure and stable environement: it will require further investments of time and effort to remain accessible to future users.

48
WEb rEFErEncES
360Precision. http://www.360precision.com
Apostille Information. http://www.state.gov/m/a/auth/c1267.htm
BetterLight. http://www.BetterLight.com
Corporation of International Business. https://www.atacarnet.com
GigaPan. http://gigapan.org
HowStuffWorks entry on digital cameras. http://electronics.howstuffworks.com/digital-camera.htm
Kaidan. http://www.kaidan.com
Large Format Photography Forum. http://www.largeformatphotography.info/forum/index.php
MAGNAchrom. http://www.magnachrom.com
Manfrotto. http://www.manfrotto.com
Montreal convention. http://www.jus.uio.no/lm/air.carriage.unification.convention.montreal.1999/
The New York Times Travel section. http://travel.nytimes.com
Newslink.org. http://newslink.org
Lonely Planet. http://www.lonelyplanet.com/
The Luminous Landscape. http://www.luminous-landscape.com
PanoGuide. http://www.panoguide.com
Panoscan. http://www.panoscan.com
Pilgrimage Church of Wies, Bavaria (Die Wies). http://www.williams.edu/art/architectureVR/dieWies/pagesSmall/ext.html
Pixel Light. http://www.pixellight.com
Richardson Photography. http://www.richpix.com

49
Savvy Traveler. http://www.maxablog.com
Shelley Lake. http://www.shelleylake.com
SK Grimes. http://www.SKGrimes.com
Stephen Johnson. http://www.SJphoto.com
Steve Kropla’s Help for World Travelers. http://kropla.com
Transparency International. http://www.transparency.org
U.S. State Department. http://www.state.gov/travelandbusiness/
Warsaw convention. http://www.iata.org/NR/ContentConnector/CS2000/Siteinterface/sites/legal/file/ warsaw.pdf
The Washington Post Travel Section. http://www.washingtonpost.com/wp-dyn/content/artsandliving/travel/?nav=left
The Weather Channel. http://weather.com
The Weather Underground. http://wunderground.com
3. copyriGht and pErMiSSionS
Copyright, permissions, and future ownership of a project may seem to be secondary issues, especially when placed against the technical and administrative complexities of production and post-production work. However, these issues must be addressed early on in any project, ideally well before any money has been committed to traveling, equipment, or outside staff. The information in this section introduces these key legal issues that arise for commissioners, photographers, and project staff working both in the U.S. and abroad. This information is focused on U.S. law and is therefore less relevant to non-American readers, although the questions that arise are likely to be similar for all panorama project commissioners and creators.
The information contained in this section is not and should not be used as a substitute for legal counsel. It is intended to provide useful general advice for commissioners and creators of digital panoramas. Commissioners are strongly encouraged to contact their university’s or institute’s legal counsel and to work with experts who are familiar with the national and local laws for the area in which the photo shoot will take place. As the central underpinning of many of the legal issues that arise, copyright is fundamental here. But as one writer has put it: “in the United States, copyright law is pitilessly complicated....”1 When the added complexities of international copyright are added into the mix, it should be apparent that no guide can do more than alert the reader to the possibility of issues that must be examined on an individual basis in each project.
The listed books and websites found in section 3.8 should be a helpful source of additional information, but the common mantra of this section is:
When in doubt, ask an Expert.
1. Susan M. Bielstein, Permissions, A Survival Guide: Blunt Talk about Art as Intellectual Property, p. 17 (Chicago: The University of Chicago Press, 2006).
51
3.1. copyriGht
Copyright laws world-wide are designed to protect the ownership interests of the creators of original works. In the U.S., a work that is considered original and fixed, e.g., is in a tangible medium with some degree of permanence, is eligible for and is automatically given, copyright protection. The law grants a work’s owner certain rights, including the right to reproduce the work, distribute copies, and make derivative works.
Depending on whether a work has been published or not, whether the work was made by an individual or a group, and other factors, the exclusive rights of the copyright owner cover a range of anywhere from seventy years from the creator’s death, to 120 years from the date of creation. Because copyright requirements as well as copyright terms have changed repeatedly over the last century, determining whether or not an existing older work is protected by copyright can be a complex factual and legal endeavor. A widely-used chart compiled by Peter Hirtle at Cornell University is invaluable in describing U.S. copyright terms for works published both within the US and abroad.2 Stanford University recently launched a new web-accessible database of copyright renewal records received by the US Copyright Office between 1950 and 1993 for books published in the US between 1923 and 1963 that is also quite useful for research into the copyright status of printed works.3
uSinG thE WorkS oF othErS
Panorama commissioners and creators who intend to use the work of others (whether print, images, sound or other media) must be careful to address relevant copyright concerns under governing law. While many uses of portions of works under copyright may be allowable without seeking formal permission under the legal concepts of “Fair Use” (or, in Great Britain, “fair dealing”), these principles of law are complex, apply case-by-case, and are handled differently around the world. If you plan to publish your work, it is wise to consult with the publisher well in advance to gain some understanding of how the publisher will treat copyright permissions issues. If your work will be publicly distributed though an institutional website at your home institution, it is wise to research how the dissemination of copyrighted materials in your project will be viewed and what will be permitted.
protEctinG your oWn Work
For newly-created works (whether panorama or otherwise), there is no requirement of copyright registration in the U.S., although registration can confer special benefits to the copyright owner which should be thoughtfully considered. The U.S. Copyright Office Circular on “Copyright Basics” is a useful introduction to the registration process itself.4
2. http://www.copyright.cornell.edu/training/Hirtle_Public_Domain.htm
3. http://collections.stanford.edu/copyrightrenewals/bin/page?forward=home
4. http://www.copyright.gov/circs/circ1.html#hsc
52
opEn SourcE and crEativE coMMonS
Many in the academic, arts, and research communities find that conventional constructs of intellectual property ownership do not suit their needs, particularly where collaborative and inter-institutional projects are at issue or where the primary interest of the project “owners” is aimed at non-profit creative communities and learning. For software and similar hi-tech works, the Open Source Initiative has developed a series of licenses that allow the creators to shape the legal terms of access, collaboration, and use outside the scope of conventional sole ownership.5The Creative Commons organization also “provides free tools that let authors, scientists, artists, and educators easily mark their creative work with the freedoms they want it to carry.” The Creative Commons website is invaluable in addressing questions of ownership and sharing of text, images, software, and other intellectual property in new ways.6
Grant and inStitutional rEquirEMEntS
If your project is being funded by university monies or is performed by university personnel, the university may claim ownership of work under standard institutional policies governing intellectual property. Project participants from institutions of higher education should be careful to review the applicable policies, especially where university resources have been substantially utilized. Similarly, if the project is funded by government or foundation grants, the relevant funding organization may specify how grant-funded projects must be treated from an intellectual property perspective. For example, the Mellon Foundation requires that many of its digital projects be released into the academic and research communities with open source licensing such as the “Educational Community License” developed by the Open Source Initiative noted above.
clariFyinG Who actually oWnS a Work
If not delineated by institutional rule or grant requirements, who will own your panorama and the underlying material created to produce it? Many collaborative projects in creative and academic communities commence without the project participants having discussed and clarified their respective intellectual property rights. Often this is not a problem, especially where no one has an interest in commercial exploitation of the resulting project. But our advice is, don’t make assumptions; it’s better to work out issues of ownership in advance. Further, if you intend to commission work done by others, specific requirements apply under U.S. law to ensure that your contractors or subcontractors don’t walk away with independent intellectual property rights that could actually interfere with your use and dissemination of the materials (such as photographs) that they produced under contract for your project.
5. http://www.opensource.org
6. http://creativecommons.org
53
3.2. Fair uSE and dE MiniMiS uSE
U.S. law provides a safe haven, of sorts, for images of art (or advertisements, or billboards, or other objects entitled to copyright protection that are often found in public places), that are captured incidentally as part of photographic and film projects. Principles of both Fair Use and de minimis use may serve to protect against copyright infringement claims, particularly when the alleged “perpetrator” is engaged in a non-profit, research, educational, or artistic activity. However, these principles of law are applied in a case-by-case fashion and without predictable outcome in individual situations. Particularly where you are capturing a full image of a work of art that is still under copyright protection, it is important to explore whether you may need to seek permission.
Fair Use itself is a legal test that depends on a number of different factors. One of the key questions is the use you are going to make of an image. The result may vary depending on factors such as whether that use is for a publication or for teaching and study; and whether the image will be on a restricted, educational website or on a publicly accessible, unrestricted website. Because of the complicated nature of Fair Use, it is important to seek guidance from counsel, where possible. Other helpful resources including many thatofferspecificguidanceonFairUsearefoundinSection3.8below.
3.3. contract vErSuS copyriGht
Contracts or licenses that you enter into can restrict the uses you can make of an image, even if that use is otherwise permitted under copyright law. Contracts can be formed in a number of different ways, including through oral agreements, through letters that you write to gain permission to visit or photograph a site, or through more formal documents.
It is very important in all of these communications to work hard to prevent accepting conditions that will unduly limit the uses you will be able to make of a panoramic image. For example, if you indicate in a letter seeking access to a site that you will only use an image for a particular class, for a specific publication, in conjunction with an identified grant or project, or on a particular website, you may be contractually prohibited from using the image in another setting or for another purpose, even one that has an educational or research purpose. If you purchase a pass to enter a site, you may be subject to “fine print” you haven’t noticed that establishes — or purports to establish — contractual restrictions on your use of images made during a shoot. It is important to catch these constraints early and to negotiate changes you will need at the outset.
Again, this is an area where advice from counsel is recommended, but when in doubt it is often better to start with a broad permissions request that includes the right to utilize images made, for example, for any “educational, research or scholarly purpose and in any medium including print publications, web or digital media, or other forms of communication.” If you wish to obtain the rights to publish the images commercially, you should attempt to include such rights on your list of potential applications or uses as well.
54
3.4. pErMiSSionS and rElEaSES
Handling permissions and related legal issues affecting the taking of panorama images both within the U.S. and abroad is a complex task. Are you shooting in a public or private park or recreational area, a public or private building? Are there public law, contractual, or cultural restrictions that affect your access to or use of the space in question? Are you shooting in nature or will human subjects, buildings, or works of art be captured in your photographs?
pEoplE Depending on the shoot and the subject, people may appear in the image, either by design or circumstance. People provide a sense of scale or show how the space or object is used. However, taking photographs of people can raise legal and administrative problems for the photographer and the commissioner. Local authorities may object to photographs of women, children, participants in religious rites, protestors, or soldiers. People who happen to be in the area may not want their photos taken. Or they may want to be paid for it.
In many cases, model releases may be desirable from anyone who will appear in the panorama. The model release should include the following information:
The photographer’s and commissioner’s names• The rights being granted under the release, i.e., how the images will be used. It is • smart to obtain the broadest rights possible since it is difficult to anticipate the different media and projects your images might be used in.What time period the release document covers. It is smart to obtain perpetual rights • to use the images.The model’s name, address, a signature, and signing date.• If any compensation is being provided.• That the model gives up any claim to copyright of the image or right to inspect the • final product.
placES and WorkS
If other works appear (such as sculptures, paintings, buildings, etc.), it may be necessary to secure permissions from the owners of that work (even if the work is publicly funded and freely available to the public)7 as well as the owners of the underlying copyrights in that work (which is not typically the same as the owners of the objects or art themselves). Actually possessing a work of art is not the same as possessing the work’s copyright. In turn, a photograph of an object or picture may have a double set of copyrights, for both the object pictured and for the photograph itself. Your intended use of the work or any fees charged for access and distribution can also affect what rights need to be addressed. It is also important to recognize when you must obtain permission to shoot in
7. See also Sections 3.3.
55
a particular location, and if the owner intends to subject you to contractual responsibilities or limitations that may be incompatible with your project needs.
lanGuaGE and culturE
Releases or other legal documents will need to be produced in the relevant language and be cognizant of any particular legal or cultural issues (such as images of children and, in some countries, women, taking images of religious buildings and sites, etc.). There is no substitute for local knowledge of law and custom, so if you have hired a Mr. Fix-It, ask for guidance in how to avoid legal or cultural conflict. It may be wise to consult a local attorney, particularly if you are working in a country with anticipatable complexities of law or custom.
3.5. pErMitS and inSurancE
Permit and insurance coverage requirements for the photographer can vary according to country and location. Work undertaken in local, state, or federal parks or facilities that require a governmental permit in the United States, will typically include a requirement of insurance coverage and sometimes a bond.
The U.S. National Park Service’s rules state that “commercial filming activities taking place within a unit of the National Park system require a permit. Commercial filming includes capturing a moving image on film and video as well as sound recordings.” Further, still photographers require a permit when “1. the activity takes place at location(s) where or when members of the public are generally not allowed; or 2. the activity uses model(s), sets(s), or prop(s) that are not a part of the location’s natural or cultural resources or administrative facilities; or 3. Park would incur additional administrative costs to monitor the activity.”8
If a permit is required, “liability insurance naming the United States as additionally insured in an amount commensurate with the risk posed to park resources” is also a mandate. “You may also be asked to post a bond to ensure the payment of all charges and fees and the restoration of the area if necessary.”
Many insurance companies will issue short-term insurance policies to cover specific projects, and such companies are well acquainted with the special requirements imposed by governmental agencies. Nevertheless, it is important to research the insurance issues early so that costs are incorporated into your project budget and the schedule is not delayed by your inability to obtain a permit and insurance if such is required.
Beyond specific requirements imposed under governmental or private permits, it is important for panorama commissioners and producers to be savvy about liability issues and risks. If you are hiring others to do work in a dangerous area or foreign country,
8. http://home.nps.gov/applications/digest/permits.cfm?urlarea=permits
56
you may have special responsibilities as an employer or commissioner towards those individuals that must be addressed with your own legal counsel.
3.6. Additional Issues Relating to Architecture and Art
As noted above, when works of art or architecture are captured by panorama photography, special intellectual property issues arise. Paintings, sculpture, and other tangible forms of visual art have long been protected in the United States and most other nations. Unless specifically agreed to, physical ownership of a work of art does not bring with it ownership of the underlying rights of copyright, including the right to make and distribute visual images of the work of art. Thus, in most cases, exploration of your right to publish images of an artist’s work will require exacting research into life of the artist, not “simple” permission from the object’s current owner (although you will typically have to obtain permission from that current owner to engage in the photography in the first place, of course.) And, the duration of copyright is long. Susan Bielstein’s blunt description of the term and the complexity of determining copyright for works of art is well worth considering:
Unless your research [or in our case, images you’ve captured in a panaroma] posts you squarely in the mid-nineteenth century or earlier, you are probably dealing with at least some works that are in copyright. Even for many works created in the nineteenth century, you may not be in the clear, for today in most countries copyright terms are linked to the death date of an author. In the European Union and many other countries, the period of copyright protection is the life of the artist plus seventy years [her footnote adds: “Except, as noted earlier in Spain, where the term is the life of the artist plus eighty years, and in France, where military service during the two World wars has given artists a term of life of the artist plus 84 years and 203 days.”], a rule that applies regardless of when a work was created or first published…”9
thE SpEcial caSE oF architEcturE
U.S. copyright law long failed to protect works of architecture. In 1990, in part to bring the U.S. into conformity with other nations under the Berne Convention, the U.S. Congress enacted the Architectural Works Copyright Protection Act, Pub. L. No. 101-650, sections 701-706, 104 Stat. 5133 (1990) (codified throughout sections of the U.S. Copyright Statute, 17 U.S.C.A section 101 et. seq). This law now affords architects and designers a copyright interest in their completed architectural works; however, in a notable difference with the rules governing images of art, the law contains special and important exceptions allowingphotographyofworksofarchitecturefrompublicplaceswithouttheneedtoobtain permission. In the United States, the copyright in an architectural work that has been constructed does not include the right to prevent the making, distribution, or public
9. Bielstein, Permissions, supra at p. 16.
57
display of images of the work if the building is located in or ordinarily visible from a public place. However, different laws and local customs affect rights to make images of buildings in other countries and it is important that you familiarize yourself appropriately when working abroad.
3.7. intErnational copyriGht
There is no general “international” law of copyright; works of intellectual property are treated differently around the world. If you will be working in a foreign country and using images of art or other works protected as intellectual property, it is important to work with a knowledgeable attorney or other expert to gain basic insight into the legal landscape and cultural conventions surrounding copyright and the photography of cultural, religious, or iconic objects.
Despite the great diversity of national regulation of copyright around the world, as the U.S. Copyright Office points out in its Circular 38a - International Copyright Relations of the United States, “most countries offer protection to foreign works under certain conditions that have been greatly simplified by international copyright treaties and conventions.”10 There are two principal international copyright conventions, the Berne Union for the Protection of Literary and Artistic Property (Berne Convention) and the Universal Copyright Convention (UCC).
The Berne Convention guarantees that: “Authors shall enjoy, in respect of works for which they are protected under this Convention, in countries of the Union other than the country of origin, the rights which their respective laws do now or may hereafter grant to their nationals, as well as the rights specially granted by this Convention. “(Article 5.1) Berne signatory nations will enforce their own copyright laws to protect works that were created in other signatory nations and have the right to expect reciprocal treatment of their own works in foreign countries.
The World Intellectual Property Organization (WIPO), which was founded in 1967 to provide international protection of intellectual property, is a U.N. agency that administers IP matters and treaties, resolves international IP disputes, provides forums for debate, and promotes better understanding of IP. The WIPO web site11 is a useful resource for information on international IP laws and enforcement.
An international group of copyright scholars meeting under the rubric of the “Zwolle Group” has developed numerous papers and other materials addressing copyright from
10. http://www.copyright.gov/circs/circ38a.html#general
11. http://www.wipo.int/portal/index.html.en

58
an international perspective. These materials are very helpful in gaining a basic overview of how copyright is treated in areas pertinent to university scholarship.12
3.8. additional rESourcES and rEFErEncES
WEbSitES:
The United States Copyright Office’s information on copyright contains basic • information on U.S. Copyright coverage and registration procedures.http://www.copyright.gov/circs/circ1.html
The Visual Resources Association’s list of copyright resources and their Image • Collection Guidelines.http://www.vraweb.org/resources/ipr/copyright.html http://www.vraweb.org/resources/ipr/guidelines.html
The University of Texas, Austin has an excellent crash course on copyright as well as • other materials.http://www.utsystem.edu/ogc/intellectualproperty/cprtindx.htm.
Stanford University Libraries has a page on copyright and fair use.• http://fairuse.stanford.edu.
The University of Minnesota has a copyright information and copyright page and a • summary of four basic points that should be used when determining whether fair use can be applied to a particular use. A fair use Analysis Tool is also available.http://www.lib.umn.edu/copyrighthttp://www.lib.umn.edu/copyright/fairuse.phtml#fourfactorshttp://www.lib.umn.edu/copyright/checklist.phtml
Washington State University provides its faculty and students with information on • university publishing copyright.http://publishing.wsu.edu/copyright
The University of North Carolina maintains a table showing when U.S. works pass • into the public domain.http://www.unc.edu/~unclng/public-d.htm
Yale University Library has a web resource for university librarians about licensing • digital information.http://www.library.yale.edu/~llicense
University of Maryland University College’s Center for Intellectual Property has a list • of links. http://www.umuc.edu/distance/odell/cip/links.html
12. http://www.dlib.org/dlib/january07/crews/01crews.html and http://www.surf.nl/copyright/files/International_Comparative_Chart_ZwolleIII_1104.pdf
59
Catholic University’s Office of General Counsel has an excellent website on • copyright.http://counsel.cua.edu/copyright/index.cfm
Indiana University’s Copyright Management Center is an extraordinary resource.• http://www.copyright.iupui.edu
The Electronic Frontier Foundation’s mission is “defending freedom in the digital • world;” their website has a wide range of information resources on copyright.http://www.eff.org
Center For Social Media, part of the School of Communications at American University • contains links to papers, panels, videos, and documents centered on, among other things, copyright, fair use, and permissions.http://www.centerforsocialmedia.orghttp://www.centerforsocialmedia.org/keywords/copyright
Free Expression Policy Project (FEPP) at NYU Law School is a source on research and • advocacy on free speech, copyright, and media democracy. A good paper on fair use, “Will Fair Use Survive? Free Expression in the Age of Copyright Control,” is also on this site. http://www.fepproject.org/index.htmlhttp://www.fepproject.org/policyreports/fairuseflyer.html
uSEFul rEcEnt bookS:
Bert P. Krages, Legal Handbook for Photographers: The Rights and Liabilities of Making Images (Michelle Perkins ed., Amherst Media, Inc. 2002)
Susan M. Bielstein, Permissions, A Survival Guide: Blunt Talk about Art as Intellectual Property, (Chicago: The University of Chicago Press, 2006)
Richard Stim, Getting Permission: How to License & Clear Copyrighted Materials Online & Off, (NOLO Press 2004)
William Strong, The Copyright Book, 5th edition (MIT Press, 1999)
4. panoraMa crEation (part 1): MEthodS and tEchniquES For capturinG iMaGES
4.1. introduction to typES oF diGital panoraMa photoGraphy and StructurES
Any image that shows a view similar to or larger than that of the natural human field of view can be called panoramic, but for our purposes we will consider planar, cylindrical, spherical, cubical, and stereoscopic.
A planar/rectinilear panorama is displayed on a flat plane. A digital planar panorama is usually stored as a single, flat -stitch rectilinear rendering image that can be viewed using standard image viewing software.
Cylindrical panoramas depict a horizontal field of view that is 360° around but has vertical constraints. The limits of the vertical field of view depend on the equipment used and/or the way the image is cropped. If flattened out, horizontal lines that are straight in reality become curved, while straight vertical lines remain straight. A cylindrical panorama is intended to be viewed as if it were wrapped into the shape of a cylinder and viewed from within. The viewer must use special software that can display a wrapped image, such as Apple’s QuickTime Player, so as to avoid any unnatural curving or distortion. A digital cylindrical panorama is usually stored as a single .mov file, a single flattened image (with distortion), or as a series of rectilinear tile images within a single .mov file.
A spherical panoramic image shows the entire field of view from a single point, 360° horizontally and 180° vertically, allowing the viewer to look in every direction , including the zenith and nadir. The image is wrapped into a sphere and viewed from the center. A flattened spherical panorama is distorted in the horizontal direction, and also slightly distorted in the vertical direction, particularly at what would be the top and bottom “poles” of the sphere. When a sphere is flattened and stretched to fit in a rectangular frame, the distortion at the poles becomes extreme. A digital spherical panorama can be saved as a single .mov file and viewed with an application such as QuickTime, allowing the viewer to see the image without any unnatural distortion. It can also be saved as a single flattened image (with distortion), or as a series of six equirectangular cubical images. Each of these
61
planar images represent a cube face (front, back, left, right, up, and down) and look normal (or rectilinear) to the human eye.
Digital panoramas can also be in the stereoscopic format, where two images are captured only a few inches apart and later combined to form a single anaglyphic image. This allows for the effect of parallax, where objects in the foreground move in relation to those in the background. These images can be viewed using 3D color separation, polarizing, or shutter glasses, and give the viewer an enhanced sense of depth. Usually displayed in a cylindrical form, a digital stereoscopic image can be saved just like a normal cylindrical panorama as a single .mov file or a single flattened image (with distortion).
4.2. introduction to photoGraphy and diGitization
The panorama formats discussed here are processed and displayed in a digital environment, but the data they contain can be captured with either film or digital image capture systems. With the advent of digital cameras, digital photography has become a very popular method for capturing panoramic images. Born digital images go directly on a computer straight away, with no degradation in the transfer from camera to computer. If film is used, the photos need to be developed and scanned before they can be manipulated on the computer. This introduces the potential for “noise,” most commonly from dust or dirt on the image or the scanner. Traces of the print medium may also appear (as creases, seams, grain, or margins) once an image has been scanned. However, this does not mean that film should be avoided. There are potential benefits for capturing the images on film, such as the relative flexibility of film in capturing detail over a wide range of contrasting light. Each photographer has his or her own favored technique, and none is necessarily better than another. The overall skill of the content provider is the ultimate determining factor of the quality of the final panorama.
4.3. SElEctinG iMaGE FilE ForMatS
When choosing the best file format for a particular image, be aware that file format has a bearing on what equipment will be required as well as the use and quality of the final product, budgetary and time constraints, and the intended lifespan of source materials. Many digital SLR cameras can record images in both RAW files and varying sizes and qualities of the JPEG files. Some cameras will allow you to save both RAW and JPEG images simultaneously. The RAW file format produces much larger files than JPEG, so be sure to have sufficient memory to store, back up, and manipulate the files. A 32-bit PCMCIA card reader will speed up the transfer of images from the memory cards to a hard drive. Keep in mind that working with RAW images in post-production also requires additional time for finishing and converting the images before they can be used in creating a panorama.
Large-sized JPEGs are a common choice for the digital panorama photographer; the image quality can be very good. The file size is smaller than RAWs, enough so that it is feasible to take many additional photographs of varying bracketed exposures without having to
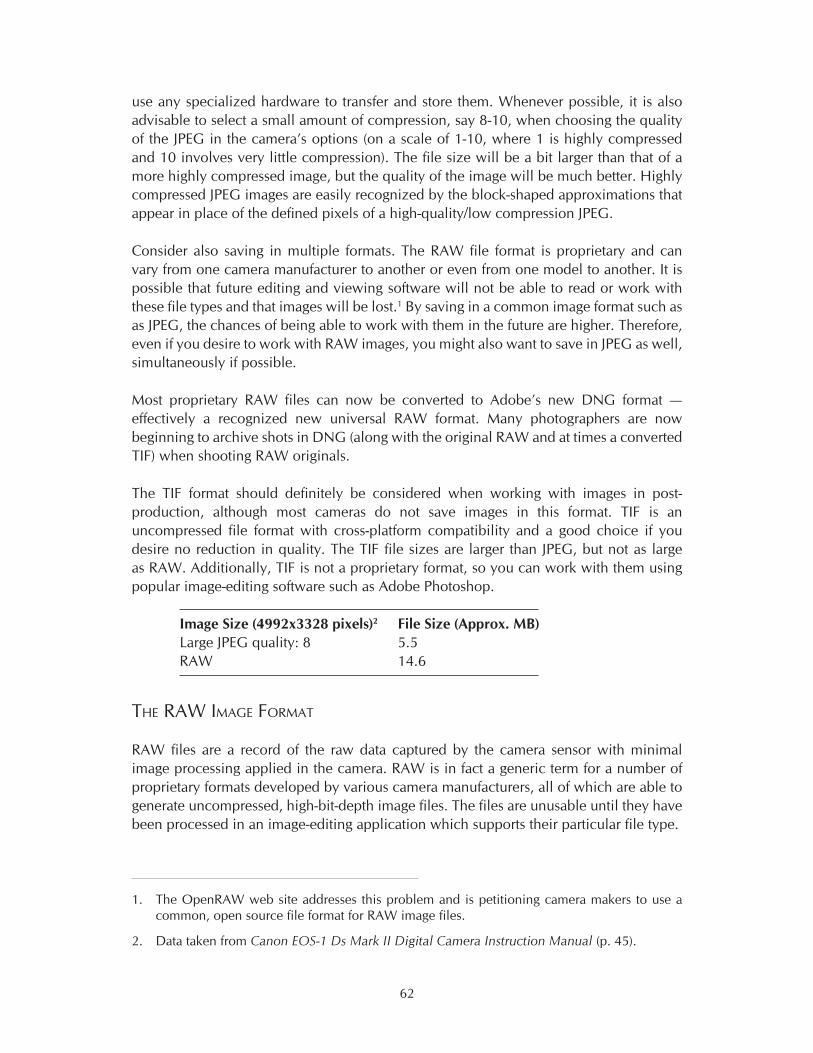
62
use any specialized hardware to transfer and store them. Whenever possible, it is also advisable to select a small amount of compression, say 8-10, when choosing the quality of the JPEG in the camera’s options (on a scale of 1-10, where 1 is highly compressed and 10 involves very little compression). The file size will be a bit larger than that of a more highly compressed image, but the quality of the image will be much better. Highly compressed JPEG images are easily recognized by the block-shaped approximations that appear in place of the defined pixels of a high-quality/low compression JPEG.
Consider also saving in multiple formats. The RAW file format is proprietary and can vary from one camera manufacturer to another or even from one model to another. It is possible that future editing and viewing software will not be able to read or work with these file types and that images will be lost.1 By saving in a common image format such as as JPEG, the chances of being able to work with them in the future are higher. Therefore, even if you desire to work with RAW images, you might also want to save in JPEG as well, simultaneously if possible.
Most proprietary RAW files can now be converted to Adobe’s new DNG format — effectively a recognized new universal RAW format. Many photographers are now beginning to archive shots in DNG (along with the original RAW and at times a converted TIF) when shooting RAW originals.
The TIF format should definitely be considered when working with images in post-production, although most cameras do not save images in this format. TIF is an uncompressed file format with cross-platform compatibility and a good choice if you desire no reduction in quality. The TIF file sizes are larger than JPEG, but not as large as RAW. Additionally, TIF is not a proprietary format, so you can work with them using popular image-editing software such as Adobe Photoshop.
ImageSize(4992x3328pixels)2 FileSize(Approx.MB)Large JPEG quality: 8 5.5RAW 14.6
thE raW iMaGE ForMat
RAW files are a record of the raw data captured by the camera sensor with minimal image processing applied in the camera. RAW is in fact a generic term for a number of proprietary formats developed by various camera manufacturers, all of which are able to generate uncompressed, high-bit-depth image files. The files are unusable until they have been processed in an image-editing application which supports their particular file type.
1. The OpenRAW web site addresses this problem and is petitioning camera makers to use a common, open source file format for RAW image files.
2. Data taken from Canon EOS-1 Ds Mark II Digital Camera Instruction Manual (p. 45).
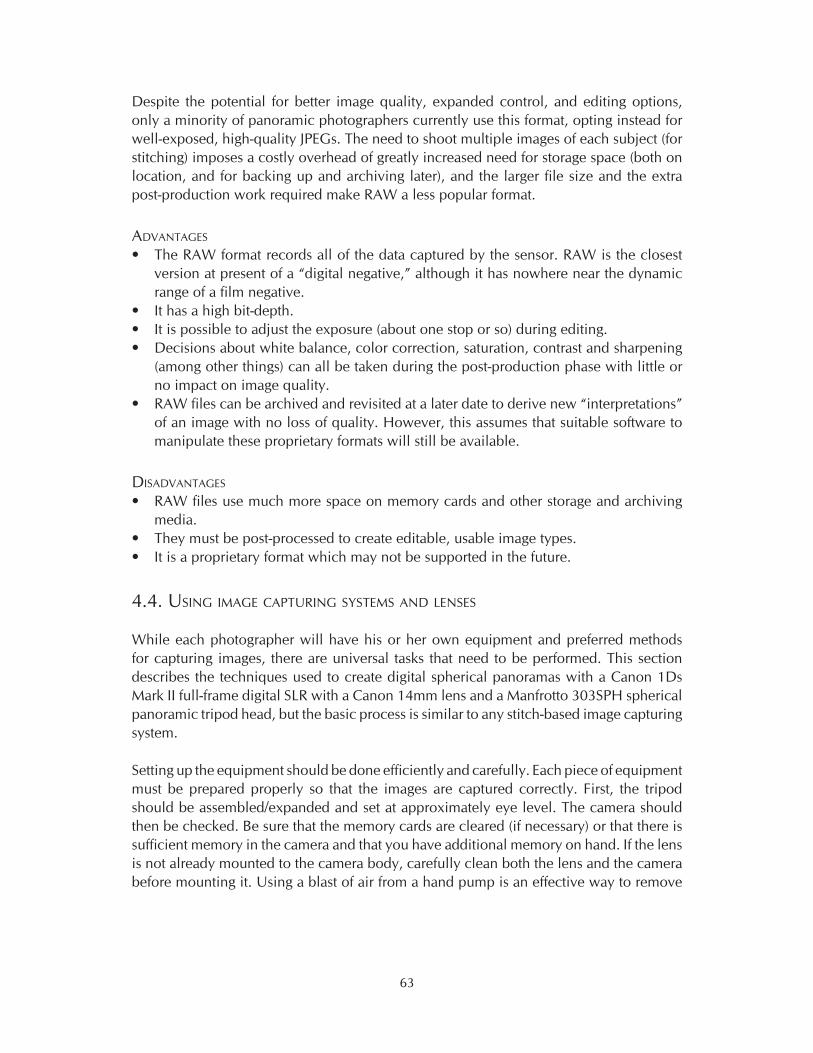
63
Despite the potential for better image quality, expanded control, and editing options, only a minority of panoramic photographers currently use this format, opting instead for well-exposed, high-quality JPEGs. The need to shoot multiple images of each subject (for stitching) imposes a costly overhead of greatly increased need for storage space (both on location, and for backing up and archiving later), and the larger file size and the extra post-production work required make RAW a less popular format.
advantaGES
The RAW format records all of the data captured by the sensor. RAW is the closest • version at present of a “digital negative,” although it has nowhere near the dynamic range of a film negative.It has a high bit-depth.• It is possible to adjust the exposure (about one stop or so) during editing.• Decisions about white balance, color correction, saturation, contrast and sharpening • (among other things) can all be taken during the post-production phase with little or no impact on image quality.RAW files can be archived and revisited at a later date to derive new “interpretations” • of an image with no loss of quality. However, this assumes that suitable software to manipulate these proprietary formats will still be available.
diSadvantaGES
RAW files use much more space on memory cards and other storage and archiving • media.They must be post-processed to create editable, usable image types.• It is a proprietary format which may not be supported in the future.•
4.4. uSinG iMaGE capturinG SyStEMS and lEnSES
While each photographer will have his or her own equipment and preferred methods for capturing images, there are universal tasks that need to be performed. This section describes the techniques used to create digital spherical panoramas with a Canon 1Ds Mark II full-frame digital SLR with a Canon 14mm lens and a Manfrotto 303SPH spherical panoramic tripod head, but the basic process is similar to any stitch-based image capturing system.
Setting up the equipment should be done efficiently and carefully. Each piece of equipment must be prepared properly so that the images are captured correctly. First, the tripod should be assembled/expanded and set at approximately eye level. The camera should then be checked. Be sure that the memory cards are cleared (if necessary) or that there is sufficient memory in the camera and that you have additional memory on hand. If the lens is not already mounted to the camera body, carefully clean both the lens and the camera before mounting it. Using a blast of air from a hand pump is an effective way to remove
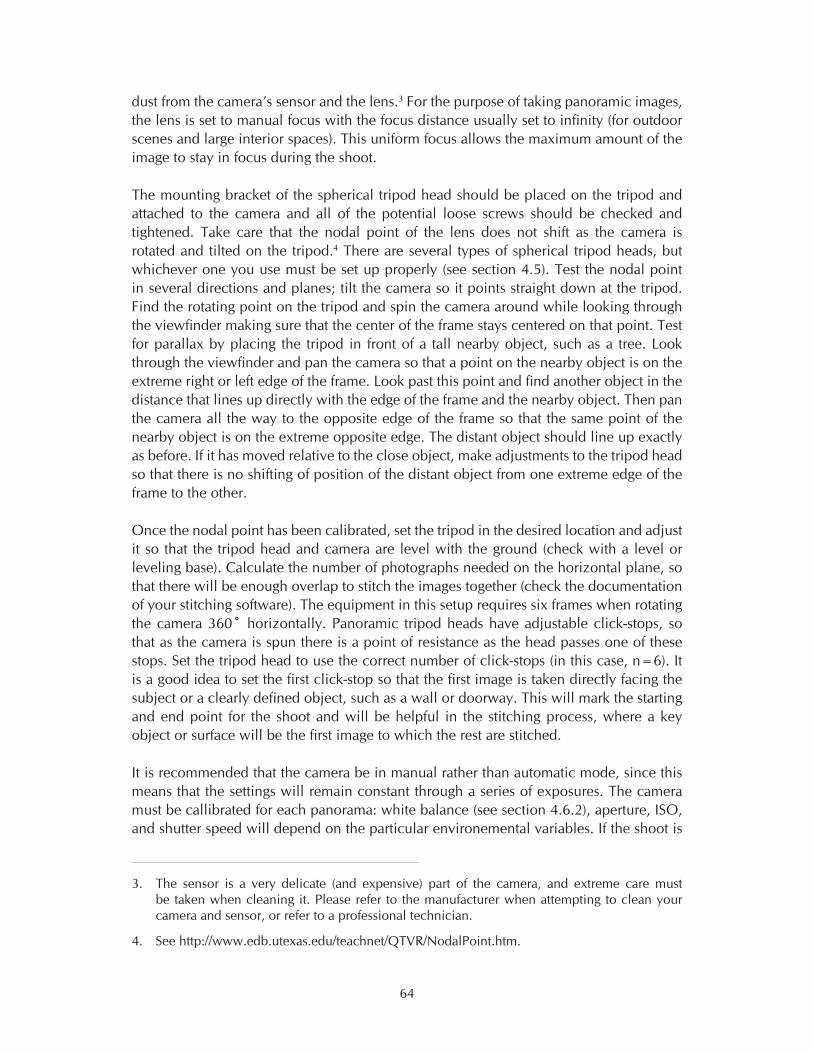
64
dust from the camera’s sensor and the lens.3 For the purpose of taking panoramic images, the lens is set to manual focus with the focus distance usually set to infinity (for outdoor scenes and large interior spaces). This uniform focus allows the maximum amount of the image to stay in focus during the shoot.
The mounting bracket of the spherical tripod head should be placed on the tripod and attached to the camera and all of the potential loose screws should be checked and tightened. Take care that the nodal point of the lens does not shift as the camera is rotated and tilted on the tripod.4 There are several types of spherical tripod heads, but whichever one you use must be set up properly (see section 4.5). Test the nodal point in several directions and planes; tilt the camera so it points straight down at the tripod. Find the rotating point on the tripod and spin the camera around while looking through the viewfinder making sure that the center of the frame stays centered on that point. Test for parallax by placing the tripod in front of a tall nearby object, such as a tree. Look through the viewfinder and pan the camera so that a point on the nearby object is on the extreme right or left edge of the frame. Look past this point and find another object in the distance that lines up directly with the edge of the frame and the nearby object. Then pan the camera all the way to the opposite edge of the frame so that the same point of the nearby object is on the extreme opposite edge. The distant object should line up exactly as before. If it has moved relative to the close object, make adjustments to the tripod head so that there is no shifting of position of the distant object from one extreme edge of the frame to the other.
Once the nodal point has been calibrated, set the tripod in the desired location and adjust it so that the tripod head and camera are level with the ground (check with a level or leveling base). Calculate the number of photographs needed on the horizontal plane, so that there will be enough overlap to stitch the images together (check the documentation of your stitching software). The equipment in this setup requires six frames when rotating the camera 360˚ horizontally. Panoramic tripod heads have adjustable click-stops, so that as the camera is spun there is a point of resistance as the head passes one of these stops. Set the tripod head to use the correct number of click-stops (in this case, n=6). It is a good idea to set the first click-stop so that the first image is taken directly facing the subject or a clearly defined object, such as a wall or doorway. This will mark the starting and end point for the shoot and will be helpful in the stitching process, where a key object or surface will be the first image to which the rest are stitched.
It is recommended that the camera be in manual rather than automatic mode, since this means that the settings will remain constant through a series of exposures. The camera must be callibrated for each panorama: white balance (see section 4.6.2), aperture, ISO, and shutter speed will depend on the particular environemental variables. If the shoot is
3. The sensor is a very delicate (and expensive) part of the camera, and extreme care must be taken when cleaning it. Please refer to the manufacturer when attempting to clean your camera and sensor, or refer to a professional technician.
4. See http://www.edb.utexas.edu/teachnet/QTVR/NodalPoint.htm.
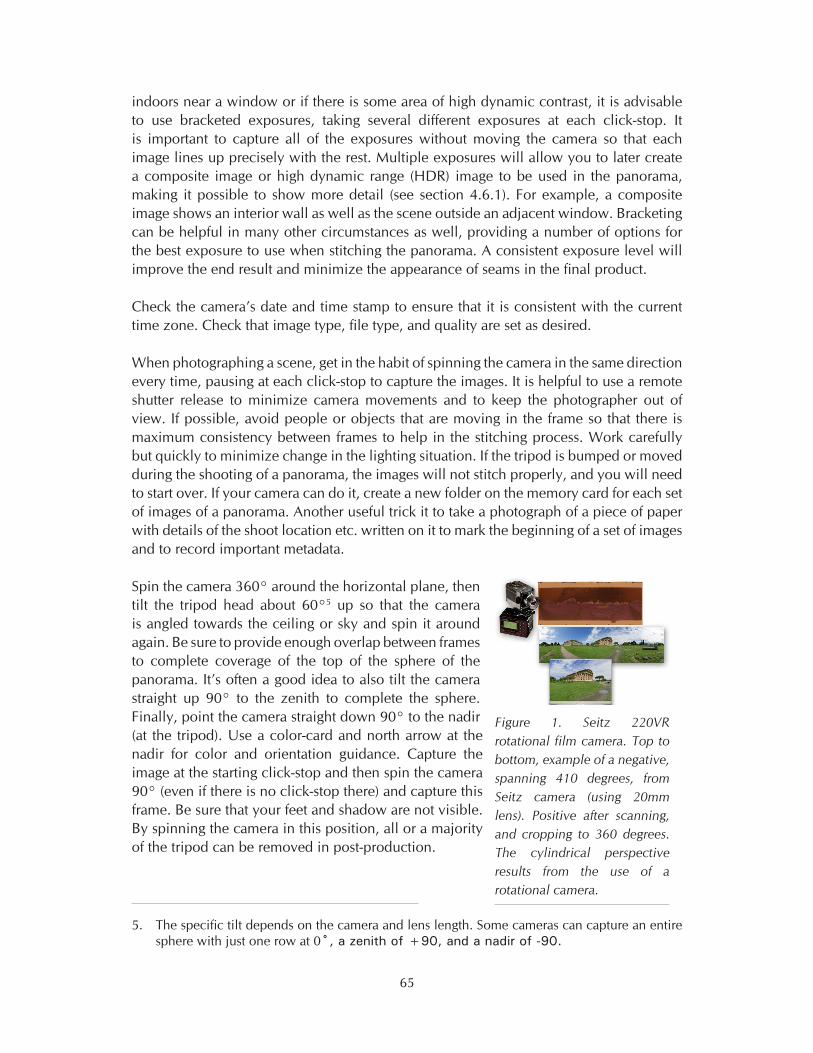
65
indoors near a window or if there is some area of high dynamic contrast, it is advisable to use bracketed exposures, taking several different exposures at each click-stop. It is important to capture all of the exposures without moving the camera so that each image lines up precisely with the rest. Multiple exposures will allow you to later create a composite image or high dynamic range (HDR) image to be used in the panorama, making it possible to show more detail (see section 4.6.1). For example, a composite image shows an interior wall as well as the scene outside an adjacent window. Bracketing can be helpful in many other circumstances as well, providing a number of options for the best exposure to use when stitching the panorama. A consistent exposure level will improve the end result and minimize the appearance of seams in the final product.
Check the camera’s date and time stamp to ensure that it is consistent with the current time zone. Check that image type, file type, and quality are set as desired.
When photographing a scene, get in the habit of spinning the camera in the same direction every time, pausing at each click-stop to capture the images. It is helpful to use a remote shutter release to minimize camera movements and to keep the photographer out of view. If possible, avoid people or objects that are moving in the frame so that there is maximum consistency between frames to help in the stitching process. Work carefully but quickly to minimize change in the lighting situation. If the tripod is bumped or moved during the shooting of a panorama, the images will not stitch properly, and you will need to start over. If your camera can do it, create a new folder on the memory card for each set of images of a panorama. Another useful trick it to take a photograph of a piece of paper with details of the shoot location etc. written on it to mark the beginning of a set of images and to record important metadata.
Spin the camera 360° around the horizontal plane, then tilt the tripod head about 60°5 up so that the camera is angled towards the ceiling or sky and spin it around again. Be sure to provide enough overlap between frames to complete coverage of the top of the sphere of the panorama. It’s often a good idea to also tilt the camera straight up 90° to the zenith to complete the sphere. Finally, point the camera straight down 90° to the nadir (at the tripod). Use a color-card and north arrow at the nadir for color and orientation guidance. Capture the image at the starting click-stop and then spin the camera 90° (even if there is no click-stop there) and capture this frame. Be sure that your feet and shadow are not visible. By spinning the camera in this position, all or a majority of the tripod can be removed in post-production.
5. The specific tilt depends on the camera and lens length. Some cameras can capture an entire sphere with just one row at 0˚, a zenith of +90, and a nadir of -90.
Figure 1. Seitz 220VR rotational film camera. Top to bottom, example of a negative, spanning 410 degrees, from Seitz camera (using 20mm lens). Positive after scanning, and cropping to 360 degrees. The cylindrical perspective results from the use of a rotational camera.
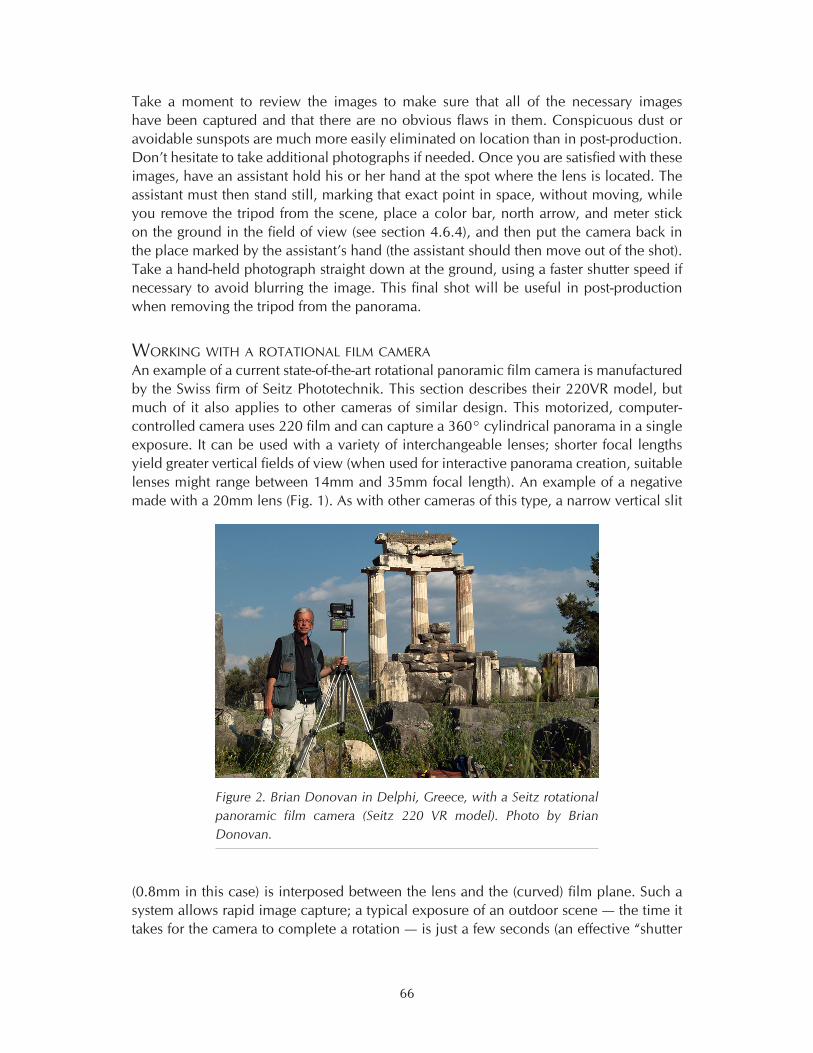
66
Take a moment to review the images to make sure that all of the necessary images have been captured and that there are no obvious flaws in them. Conspicuous dust or avoidable sunspots are much more easily eliminated on location than in post-production. Don’t hesitate to take additional photographs if needed. Once you are satisfied with these images, have an assistant hold his or her hand at the spot where the lens is located. The assistant must then stand still, marking that exact point in space, without moving, while you remove the tripod from the scene, place a color bar, north arrow, and meter stick on the ground in the field of view (see section 4.6.4), and then put the camera back in the place marked by the assistant’s hand (the assistant should then move out of the shot). Take a hand-held photograph straight down at the ground, using a faster shutter speed if necessary to avoid blurring the image. This final shot will be useful in post-production when removing the tripod from the panorama.
WorkinG With a rotational FilM caMEra An example of a current state-of-the-art rotational panoramic film camera is manufactured by the Swiss firm of Seitz Phototechnik. This section describes their 220VR model, but much of it also applies to other cameras of similar design. This motorized, computer-controlled camera uses 220 film and can capture a 360° cylindrical panorama in a single exposure. It can be used with a variety of interchangeable lenses; shorter focal lengths yield greater vertical fields of view (when used for interactive panorama creation, suitable lenses might range between 14mm and 35mm focal length). An example of a negative made with a 20mm lens (Fig. 1). As with other cameras of this type, a narrow vertical slit
(0.8mm in this case) is interposed between the lens and the (curved) film plane. Such a system allows rapid image capture; a typical exposure of an outdoor scene — the time it takes for the camera to complete a rotation — is just a few seconds (an effective “shutter
Figure 2. Brian Donovan in Delphi, Greece, with a Seitz rotational panoramic film camera (Seitz 220 VR model). Photo by Brian Donovan.
67
speed” of say 1/60 second), sufficient to capture moving elements in the scene without significant blurring.
Once a viewpoint for a scene has been chosen (and all the usual considerations for selecting camera position and height apply here) and a focal length selected, the tripod-mounted camera must be levelled, and the camera’s control unit programmed. First, choose between auto or manual exposure. In auto mode, the camera will perform an initial scan of the scene and set an exposure. This model also offers an option called “variation” in which it will also speed up and slow down during its rotation, the better to record detail in highlights and shadows respectively. In this case the initial scan displays the brightness levels graphically, as a kind of histogram. These values can be accepted, or further modified (smoothed, clipped and so on) by the photographer. Depending on the scene, this can be extremely useful, but, as with all automatic exposure systems, there are reasons to use the manual mode. In that case, take a light reading with an incident exposure meter, usually favoring the darker parts of the scene (color negative film’s wide
kEn Stuart: obSErvationS FroM thE FiEld
Having started making panoramas with a digital camcorder, then a 35mm film camera, then moving to a small fixed-lens digital point-and-shoot camera mounted on Kaidan Kiwi+ head, then on to a Panoscan Mark I digital scanning system, and then a handheld camera with a very wide-angle lens, I have settled with a Nikon D70/10.5mm lens mounted on a Precision360 panorama head. Many years of experience and experimentation lead me to believe this system minimizes problems and maximizes results and efficiency for a rather small budget. Given more funds, I would continue to use still shots rather than a scanning system, but I would purchase a higher-end camera with more resolution.
My workflow consists of shooting as many panoramas on site as time and circumstances allow, often shooting bracketed shots to maximize the chance of getting good images that can be blended in high-contrast situations. I shoot six images around, one up, one down, then pick up the tripod and shoot another one down, to cover the area masked by the tripod itself. The last shot will always be inconsistent, but with some Photoshop practice it usually proves sufficient for blending into the panorama.
The digital camera stores the images on one-gigabyte drives or cards, which usually fill up by the end of the session. In most cases I shoot high-quality JPEG images because RAW files require more space than I have available, and I am not producing documentary panoramas. In most cases I have a portable computer with me, so I transfer the images to it as soon as possible, and begin running Photoshop to batch-process them on the drive home, so that they all are rotated to vertical orientation and converted to TIF format by the time I arrive. Being a fan of letting computers do what they’re best at (tedious, repetitive processes), I
68
have written scripts to automate the image file processing and panorama-creation process as much as possible (see Appendix 4 for scripts, and section 6.7 for further discussion).
These scripts automatically create and name folders for all the nodes in a project and for each bracketed set, saving a lot of time that would otherwise be spent manually moving files around. The script also moves sets of files to each folder, and then makes a copy of a PTMac template file for each panorama (PTMac is an image-stitching application). The template file was created for use with the Precision360 panorama head with my particular make and model of camera; it instructs the image-stitching software how to deal with each image in terms of overlap, roll, pitch, and yaw. Once each node has a template file created for it, PTBatch software is used to load them all and allowed to chug away to create a whole series of equirectangular TIF files without further intervention. I then load these into CubicConverter’s batch processing queue and allow it to convert them to QTVR files.
After CubicConverter completes its work, I review the results. QTVR files immediately provide a very good idea of the general quality of the panorama and indicate problems related to contrast and exposure, or areas that require masking in the original photos (e.g., to remove objects affected by movement). At this point, I deal with ghosts and related problems that crop up when dealing with the original images. Ghosts become visible when a person appears in one image but not in the overlapping one and the stitching software blends the two images. To remove ghosts, apply an alpha mask layer in Photoshop to the still image, mask the undesired object, and then restitch the panorama using CubicConverter.
After all of the QTVR files are satisfactory, I revert to CubicConverter and have it create sets of cube-faces for each panorama from the still images (some of which may now have masks applied). The cube-face images provide the basis for dealing with the panorama when the viewer looks down. This is also the point at which I use Photoshop to deal with the tripod, either by blending with the last hand-held image taken, or by applying a graphic to hide the tripod. Once the bottom cube-face for each panorama has been dealt with, CubicConverter is run once again to convert all of the panoramas to equirectangular format.
Equirectangular images provide the basis for blending bracketed exposures of the same scene, sharpening, and adjusting lightness levels in Photoshop. Almost any image can be improved with Photoshop’s Unsharp Mask, Smart Sharpen, or other sharpening filters. When applying any sort of change to an image in Photoshop, always take advantage of its layers capability, and apply changes to a new layer rather than the original image. This allows easy undoing and fine-tuning as you see each effect affect the image. When satisfied, save the image as a Photoshop document (.psd) so that you can return to it later, then flatten the layers
69
and save it as a TIF file. You may want to save the flattened image in a couple of different sizes. In most cases Photoshop is the best tool for dealing with the images, especially if you intend to produce thumbnail preview panoramas as well as full-screen versions. In that case, for best results be sure to apply sharpening after you resize the images.
Once all of the equirectangular images receive attention, CubicConverter gets one last shot at them. This time batch mode is not used, because this is when the final QTVR file is created. The initial viewing direction and zoom factor are now set, as well as any limits to zooming in and out or tilting up and down. Further, we now have the ability to set compression factors, output size, and panning quality. One note about output size: setting it to 1024x768 or 400x300 pixels will result in a QTVR file of the specified size on the screen. However, the file size remains the same. If you want a smaller QTVR file to save bandwidth, you must start before this step and save your original image to a much smaller size in the first place.Note that CubicConverter will not adjust the overall resolution of the original image, only the viewing port into it, so you won’t achieve a smaller QTVR file.
At this point, our basic QTVR files have been created, but they’re not yet very useful for a viewer. They lack context. You could put them on a web server and write web pages that link to them and explain them. You might even have web pages that show text in one area and the QTVR file in another. For many purposes such a presentation results in perfectly adequate solution. There is little drawback to ending your efforts here: web pages are easy to update and don’t require a great deal of specialized knowledge to create and maintain.
For me, however, the next step involves a rather complicated program called LiveStage Pro (from Totally Hip Technologies). This authoring package offers tremendous power to those who deal with QuickTime VR files. It allows the creation of virtual tours, special effects, automatic view changes, linking hotspots, interactive maps, directional sound, scripted events: all the fancy things you might wish to incorporate into a full-scale multi-media production. LiveStage Pro is not for the timid or computer-shy. It takes a great deal of time to master, but the effort will reap impressive results for the serious QuickTime VR developer. For any given panorama project, I usually employ LiveStage Pro, but sometimes only minimally to add credits to the QTVR information tracks or implement automatic panning when a panorama file initially opens. In other cases, I use it to create many more interesting components, including compass bearings, pop-up maps, sound toggling, voice-overs, or other effects.
70
exposure latitude will tolerate a good deal of overexposure, so generally it is best to expose for the shadows, or at least lean in that direction).
With the exposure settings made, one must then input the desired degrees of image capture; this can be almost any value, from just 45° to more than 360°, the only practical limit being the length of the film. For a typical 360° panorama you might use a value of 420°, to allow sufficient overlap for the single stitch needed in post-production to “wrap” the two ends of the image. Other settings requiring input include the focal length of the lens and focus distance (usually infinity for an outdoor scene). Once the exposure is started, it is just a matter of ducking down beside the tripod to get out of shot, or, for a lengthier exposure (which can be up to ten minutes or more in a gloomy interior) to walk around behind the camera (Fig. 2) or even go away out of shot altogether for a coffee. That done, it’s time to decide if further shots are needed, either to bracket exposures, or perhaps, if the scene contained say people moving about, to have a second shot to combine with the first to exclude certain scene elements.
Finally, be sure to note key attributes of the shoot — date, time, exposure, maybe GPS data — as an aide-mémoire (a film camera will not record this metadata). Then, and also as a result of using a film camera, you will have the often anxious wait until the film is processed, and the process of post-production (scanning the negatives, image-editing, and QTVR authoring) can begin.
4.5. panoraMic tripod hEadS
There are several types of spherical tripod heads. Some are fixed and designed for specific camera and lens combinations, while others require calibration and can be adjusted for many different setups. The Manfrotto 303SPH can be adjusted for use with different cameras and lenses. If you calibrate the tripod head properly, you will avoid parallax. The Precision360 tripod head is a fixed system that is designed for a specific setup. With this system no calibration is needed, and the results will be consistently proper. KAIDAN is another popular panoramic head manufacturer, with models such as the Kiwi+ and the QuickPan heads.
There are pros and cons to each type of system. When using the Precision360, the perfect calibration will provide a set of images that will stitch the same way every time. This allows automated stitching scripts, such as Ken Stuart’s Perl scripts. The calibration of the tripod head does not need to be checked, allowing for faster setup. Multiple exposures will line up perfectly, even if the tripod head is rotated around in-between shots, making for better composite and HDR results. However, if the tripod head bends or breaks while on the road, it may be difficult to fix or replace it, so it may be best to have a back-up tripod head, just in case. Similarly, if the camera breaks, the back-up camera and lens must have the exact same physical dimensions in order to use the same Precision360 tripod head.
71
On the other hand, a non-fixed tripod head fits with various cameras and is made up of smaller, easier-to-find, and less expensive pieces (and therefore easier to fix). This is less of a financial and administrative burden. Additionally, if the calibration of the tripod head is compromised, it might be possible to simply make a few adjustments to get back up and running. However, calibration must routinely be checked during the set-up process. A system made up of smaller independent parts can potentially lead to a less stable, predictable, and precise unit, especially after heavy use. This lack of precision means that the images may not be captured the exact same way each time, thus making it difficult or impossible to use automated scripts to stitch the panorama. There is a small amount of “float” at each click-stop, especially after heavy use, which means that pixels will not line up exactly the same way from pane to pane. If multiple exposures are needed, but the tripod head is moved between shots, they might not line up exactly, making it more difficult to create composite images in post-production.
4.6. photoGraphic WorkFloW
Work efficiently but allow enough time to capture quality images properly and to get as much data as possible. Fix problems on-site wherever possible. For example, upon review of the images in the camera while at the shoot, it is easier and much less time-consuming to remove a trash can from the scene and shoot that frame again, rather than attempting to take it out during post-production. While much can be done in post-production and some things are simply out of the photographer’s control, it is best to take the time to get the best quality images while on location.
It is good practice to build a proxy panorama (a low-resolution quick stitch and rendering) while still on or near the shoot so as to ensure that the images are usable and correct. Resample a set of images to low-resolution versions and stitch together a rough panorama as a sort of test run. This will confirm that the tripod head, if adjustable, was calibrated properly and will expose any problems that may have been overlooked during the shoot. A proxy panorama will also make it easier to locate the exact position, should the need arise to return to the location.
Similarly, when shooting with film it is good practice is to have it developed at a trusted shop before leaving town. This will provide some quality assurance. This will also help protect against damage to undeveloped film that can occur with exposure to airport scanning machines.
Proper tripod positioning is a fundamental issue. The panorama needs to include areas or objects of interest chosen by the commissioner. This often includes locations where a viewer would naturally be standing or walking (e.g., in front of a frequently used doorway or on a path), perhaps within view of a preceding panorama site. In such cases crowd control can be a problem. It is sometimes desirable to use bystanders to create a sense of scale, and to show the current use of the site (see section 4.6.4), but it is always important to protect your equipment. And, of course, the images must be consistent from one frame
72
to the next. When bystanders are included, it may be necessary to get model releases or permission from local authorities (see section 3.4).
4.6.1. liGhtinG
Under most circumstances, it is preferable to use available natural light. This will produce a realistic representation, and it is often important to show the effects of natural light in the space. Adding unnatural light may undermine the intentions of the architect and distort the space (see sections 2.3 and 2.8).
Relying solely on natural light avoids all of the problems introduced with artificial light. Lighting apparatus are often bulky, heavy, fragile, and expensive. Voltage differs around the world, so either an unwieldy transformer or an additional set of light bulbs may be required (i.e. 120V in the USA, 220V in Europe, 240V in the UK). Power can often be difficult, since older spaces may have outdated, unsafe, or non-existent electrical systems. Artificial lights may need to be moved so that they do not appear in the images, adding to the challenge of keeping the light even as the camera pans across the scene.
Matching the color of artificial light with existing natural light is another challenge. Tungsten bulbs can be matched to the sunlight coming through the windows by using blue (or CTB – Color Temperature Blue) gels. However, it is difficult to obtain a perfect match, and gels reduce the amount of light thrown. Larger spaces require more light and more power, increasing the expense and difficulty.
HMI (Hydrargyrum Medium arc Iodide) lights put out an extraordinary amount of light that matches the color temperature of sunlight, thus eliminating the need for filters and gels. The downsides are the very high price of the equipment, and the weight of the high-voltage transformer needed to supply power. Again, moving the equipment during the shoot makes even lighting of the scene difficult. Flashes mounted on a camera’s hot shoe or used externally bring with them similar considerations and concerns as other types of artificial lights.
One solution to a low-light situation is multiple exposures. Photographing with a long exposure captures detail even in dark areas. However, while details in shadow increase, high-contrast areas such as light sources (windows, light bulbs) can become overexposed. When a light source is in the frame, capture many exposures, ranging from a long exposure metered to the shadows through to a short exposure metered to the light source and highlights. This will allow for a composite image in post-production that shows the wall, the window, and even the scene outside the window.
High Dynamic Range (HDR) images are a type of composite image that can combine many exposures over a wide dynamic range. Computer software takes the various exposures and flattens them out so that no area of the resultant image is over- or underexposed. Results can vary depending on the software used, the quality and variety of the source images, and the amount of contrast in the frame.
73
4.6.2. color ManaGEMEnt/WhitE balancE in thE FiEld
Properly setting the white balance of the camera will ensure that the color of the resultant image is accurate. There are several choices when setting the camera’s white balance. A white object or an 18% gray card sets the custom white balance of some cameras. With some DSLRs, take a photo of the card, making sure it fills the frame, and then select it as the white balance source. You can also rely on the camera’s automatic white balance setting. This does not require any set-up, and will work quite effectively in any setting although it can lead to different frames of a single panorama having different white balances.
One way to ensure accurate color is to use a color control device (see section 4.6.4), which allows adjustments in post-production to correct for any color discrepancy. Regardless, it is important to check the results before leaving the site for accurate color.
If the site already has artificial lights, it may be necessary to ask the site’s authorities to turn them off. They can throw off the white balance, and the lights and the areas they illuminate may be incorrectly colored in the image. A long exposure time with available natural light will overexpose artificial lights and create unnecessary areas of high contrast. It is best to avoid them altogether if possible by having them turned off before the shoot.
4.6.3. EnvironMEntal iSSuES and SpEcial SituationS
Panographers are always at the mercy of Mother Nature. Generally, grey, overcast skies are often best for interior photography, because the light is diffuse and even, and casts fewer shadows that might shift quickly. Sunny, clear skies are usually desired for exterior photography, to maximize the illumination of the subject. Pre-dawn or night shoots shift concern to moonlight, city lights, and artificial illumination of the subject.
If weather conditions produce rain, snow, or other types of precipitation, it may be difficult or even impossible to work outside. It is therefore advisable to be flexible and allow for alternate dates. Where necessary, bring an umbrella and hope for the best.
The commissioner may desire a particular environmental condition to bring out a particular detail. For example, snow on the ground reflects light into interior spaces. Bright direct sunlight can create strong shadows that are an important aspect of the architect’s design. Take these possibilities into account when choosing the date and season in which to work. Research likely environmental conditions and be prepared for possible problems in the shooting schedule (see section 2.4).
4.6.4. SitE data docuMEntation
The viewer should be offered as much information as possible. A number of variables can be documented on site to add context and ensure accuracy. A north arrow placed in
74
the scene, added during the shoot orients the subject. A meter stick, level, or some other object that provides a sense of scale is also helpful. As long as it is permissible, including people in the shot can provide useful or even vital information about the scale of an object or space as well as its current use (e.g., worshippers moving through a sacred space).
When adding items to the scene, try to make their placement as discrete as possible, and definitely try to avoid obstructing a detail or object of interest. If this is unavoidable, take photographs both with and without the items, so as to have more options in post-production.
It is essential to include a form of color control, such as a color bar containing several colors splotches. These can later be used to ensure the accuracy of the colors in the image by comparing the colors on the bar with the those colors on the computer display.
Geo-referencing or Global Positioning System (GPS) data are also quite valuable and add to the body of contextual information associated with the panorama and site.6 The data from the GPS unit(s) can be digitally associated with the images taken at a particular position by synchronizing the timecode from both the GPS unit and the camera. Assuming that the GPS readings and the panoramic images are taken at approximately the same time, the metadata can serve to link images with a particular location.
4.6.5. Short-tErM back-up
Back-up digital images as soon as possible. It is imperitive to have redundant copies of the data on at least two independent systems in case one of them becomes lost, corrupted, or damaged. The back-up procedure should be routine but it should not cut into the time allotted for image capture. If it is possible, download images from the camera to a laptop while still on site and free up the camera. Do not delete images from the camera until they have been backed up on more than one drive. A card reader and multiple memory cards will also keep the camera free to continue to capture photographs. A 32-bit PCMCIA card reader can deliver a high data transfer rate as compared to one with a USB connection. If the laptop’s hard drive lacks the necessary space, consider using a mobile hard drive that does not require external power. Even an iPod makes a fine short-term back-up device.
When using film, have it developed before leaving the area, if possible. Better yet, scan and back-up the images before leaving.
Duplicate sets of data should also be sent to separate geographic locations. Burn and send DVDs home or to some other secure location. That way, if equipment is damaged, lost, or stolen while still on the road, the data will be intact.
6. Depending on the accuracy of the GPS device, it might be best to use multiple devices and take the average..
75
4.6.6. Short-tErM StoraGE oF iMaGES and orGanizational StructurE
When backing up images after a shoot, use the opportunity to organize and label files so that they can be easily sorted and accessed. This should be done while the information is still fresh in everyone’s memory. Document as many relevant details as possible, especially when photographing multiple sites on a single trip. At minimum, save images of a particular site in a single folder. Better yet, put sets of images of single panoramas in separate sets of folders labeled with precise locations. Create a hierarchical system with as many levels as needed. The individual panorama folder should reside in the folder dedicated to the site, which should in turn be in the city folder, in the appropriate state folder, and finally within the country folder. See section 6.3.1 for more about file and directory naming and organization.
Organizing images immediately after a shoot also is a good opportunity to review the results and see if any shots need to be repeated.

76
WEb rEFErEncES
KAIDAN. http://www.kaidan.com
LiveStage Pro. http://www.totallyhip.com/livestage.html
Manfrotto. http://www.manfrotto.com
OpenRAW. http://www.openraw.org
Precision360. http://www.360precision.com
77
5. additional rElatEd MEdia
5.1. objEct/invErSE panoraMaS
Panoramas show a scene from a single anchored point in space looking out in all directions. Virtual reality (VR) objects can be thought of as an inverse of a panorama, where an object is at a single anchored point in the center and the viewer can examine the object from multiple points in space around it. Each successive frame depicts the subject from a slightly altered viewpoint, combining a series of images directed in at an object from many angles around it. This effect is achieved by either moving the camera around a stationary object or keeping the camera still and gradually rotating the object (e.g., placing it on a lazy Susan), capturing an image at each pause.
There is no minimum nor maximum number of images required to create a VR object, just as long as there is more than one image in the series. Of course, the more images used and the fewer differences between each frame, the smoother the rotation will appear. Rotation can be limited to show only a portion of the subject or it can be looped to show the subject in the round. Images can be captured around the subject within a single plane to form a single-row cylindrical object and then displayed in an application such as QuickTime Player.
Images from more than one vertical plane can be combined to create a multi-row object. These multiple rows can be arranged as a cylinder, keeping the line of sight parallel to the ground, simply raising and lowering the camera’s height. They can also be arranged as a sphere or hemisphere where the camera swings up and over the subject, always pointing in at it, so that images in the highest row point straight down at the subject. Equipment is manufactured precisely for this purpose, where the subject is placed on a rotating surface, and a camera is mounted on an arm that swings in an arc up and over the object.1 This keeps the distance of the camera from the subject uniform in every direction, helping to keep the rotation smooth. Viewing this type of VR object in QuickTime Player is similar to viewing a single-row object, although in addition to moving the mouse left and right
1. Kaidan’s web site has a page showing tips and possible set-ups for mounting the object and camera.
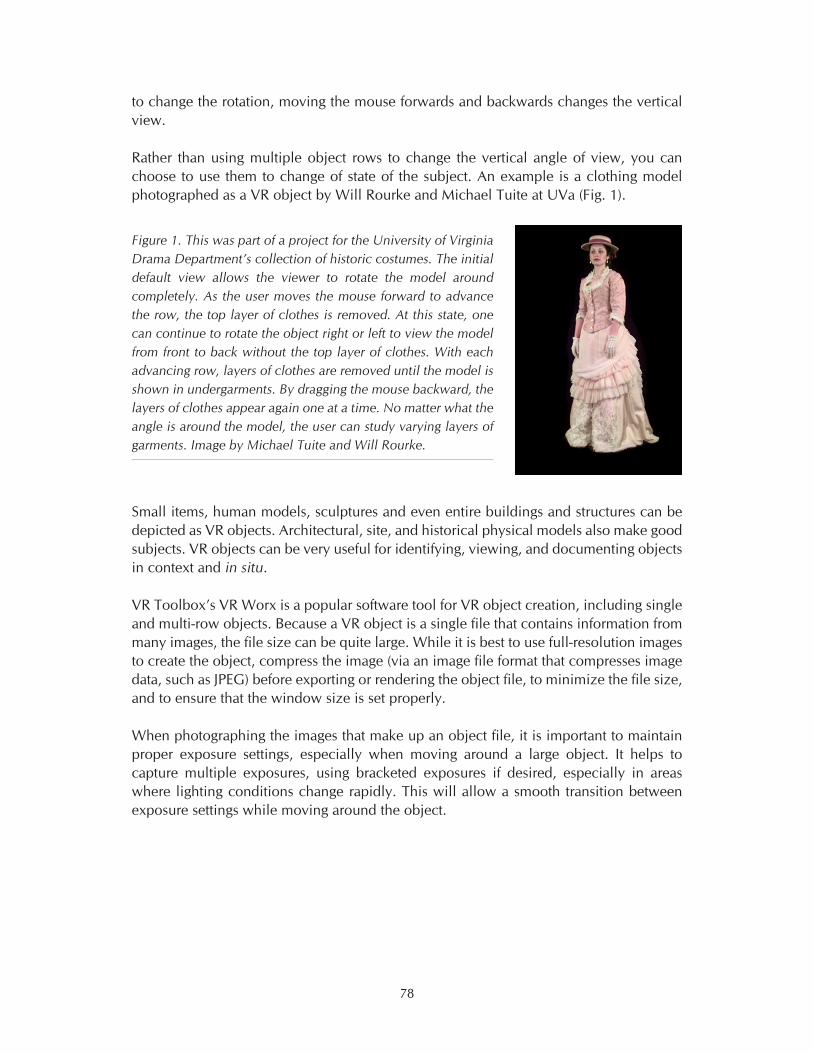
78
to change the rotation, moving the mouse forwards and backwards changes the vertical view.
Rather than using multiple object rows to change the vertical angle of view, you can choose to use them to change of state of the subject. An example is a clothing model photographed as a VR object by Will Rourke and Michael Tuite at UVa (Fig. 1).
Small items, human models, sculptures and even entire buildings and structures can be depicted as VR objects. Architectural, site, and historical physical models also make good subjects. VR objects can be very useful for identifying, viewing, and documenting objects in context and in situ.
VR Toolbox’s VR Worx is a popular software tool for VR object creation, including single and multi-row objects. Because a VR object is a single file that contains information from many images, the file size can be quite large. While it is best to use full-resolution images to create the object, compress the image (via an image file format that compresses image data, such as JPEG) before exporting or rendering the object file, to minimize the file size, and to ensure that the window size is set properly.
When photographing the images that make up an object file, it is important to maintain proper exposure settings, especially when moving around a large object. It helps to capture multiple exposures, using bracketed exposures if desired, especially in areas where lighting conditions change rapidly. This will allow a smooth transition between exposure settings while moving around the object.
Figure 1. This was part of a project for the University of Virginia Drama Department’s collection of historic costumes. The initial default view allows the viewer to rotate the model around completely. As the user moves the mouse forward to advance the row, the top layer of clothes is removed. At this state, one can continue to rotate the object right or left to view the model from front to back without the top layer of clothes. With each advancing row, layers of clothes are removed until the model is shown in undergarments. By dragging the mouse backward, the layers of clothes appear again one at a time. No matter what the angle is around the model, the user can study varying layers of garments. Image by Michael Tuite and Will Rourke.
79
5.2. audio
The addition of audio recorded on-site can greatly increase the immersive effect of a virtual tour. Environmental sound recorded both inside and outside of a site can help users grasp a space’s acoustical properties, physical size, and setting. There are several ways to capture on-site audio.
Whenever possible, maintain high fidelity in audio recordings. The equipment should be an appropriate size for travel (such as a hand-held device), dependable, affordable, and readily available. It should also run on an independent power source, such as a rechargeable battery.
One popular choice is a small minidisk (MD) unit.2 The results are acceptable and come in stereo channels, the hardware is relatively inexpensive and runs on rechargeable batteries, and MDs hold a large amount of information and are available in many places. However, MD recorders use a compression scheme to reduce the size of data stored on the media, which reduces the resolution of the audio to a degree. For many purposes, though, MD audio is perfectly acceptable.
If you are already traveling with a video camera, it is a natural choice for capturing audio. MiniDV video cameras produce excellent audio recordings without employing the compression schemes that MDs use. Rechargeable batteries are standard and designed to last for long periods of time. If you trust a camera’s ability to capture video, then you can certainly depend on it when it comes time to capture audio. MiniDV tapes are inexpensive and can be found most everywhere. High-end miniDV cameras feature 2-channel XLR inputs for use with quality microphones. Note that using microphones that are not mounted on the camera’s body reduces the risk of camera noise (the sound of the camera’s motors and gears) appearing on the audio track. Capturing video and audio simultaneously can be useful even if your intentions were originally only for the audio component. If the commissioner decides to use the video component as well, the audio context will be enhanced.
DAT (Digital Audio Tape) is perhaps the industry standard for high quality digital audio recording. Handheld, portable devices are available, and are very reliable. Often they will feature dual XLR inputs. The tapes hold an immense amount of data, and the results are top notch. The units can be less affordable, but, as the saying goes, you get what you pay for.
Another option might be to record audio with an iPod or a similar digital audio device. They are available with external microphones and can be famously large in capacity. It is worth investigating the emerging possibilities here.
2. The Minidisc Community Portal is an excellent resource about Minidiscs. Tape.com has a page of technical information and tips for recording media of all types, including MDs. Nickspicks.com is another useful resource.
80
It is also possible to record directly to a laptop computer, given the proper software and system capabilities (see section 5.4, below). There is a wide variety of possible hardware and software combinations for each platform. Check your system documentation for specifications and instructions.
The choice of microphone will change depending on the sound source. To capture the ambient sound of a room, use an omni-directional microphone. To hone in on a particular sound, such as the trickling of a fountain, use a directional microphone. When working outdoors, make sure to bring a wind shield fitted for the microphone. The presence of that little piece of foam can make the difference between good results and worthless noise.
Again, it is important to consider back-up equipment and plans. If replacement parts are needed, it helps to have a popular brand-name device, increasing the chances of finding the necessary bits abroad. Test the unit prior to departure to ensure it will deliver the desired results and run through the complete workflow, including audio capture, transfer of data from device to computer, exporting files, and post-production editing.
Capture sounds of interest that provide information about the acoustical properties of a space, such as an organ resonating in a cathedral. Pay attention to distinct contextual sounds that are unique to a site, such as bells tolling in an Italian piazza. Try to get an example of sounds that reveal the current use of the space. When embedded alongside a panorama, the sounds of the site bring the image to life.
5.3. vidEo panoraMa (MovinG iMaGE)
A video camera was one of the most popular methods for capturing digital panoramas when the technology was first introduced in the mid- to late-1990s. Set-up for this system is a matter of putting the video camera on a tripod and rotating the tripod head all the way around, making sure to pause at each click stop. The pauses must be long enough to avoid shutter blur; at least a momentary rest at each click stop. The camera’s automatic mode manages the image capture settings well enough, and there is little need for review after the shoot. After the camera has panned all the way around, the images can be imported by taking a screen capture at each pause, choosing the clearest frame available. Then stitch the images together into a panorama (see section 6.6).
Unfortunately, the downsides to using a video camera are numerous. Most important is the drastic reduction in image resolution when compared to a high-end digital SLR camera. Images captured from a video camera can produce cylindrical panoramas and spherical panoramas only if the video camera can be properly fitted to a spherical tripod head. Because a video camera is generally bigger, bulkier, and heavier that a DSLR camera, portability and convenience may be problems. In most cases, a video camera cannot fine-tune exposure settings as well as an SLR camera, and a bracketing function is not possible. This makes creating composite images in post-production more complex.
81
It is another thing altogether to include videos within a panorama. Those interested in enlivening static panoramas with areas of linear video can do so through authoring packages that offer this capability. Such software may or may not be available for a given platform and may or may not work with QuickTime, so options both for development and playback should be studied carefully. The video in this kind of development can be embedded within an authoring program (such as Flash or LiveStage Pro) on its own track and then activated through a clickable hotspot within the panorama.
Embedded video allows, for example, a television screen within a panorama to display video clips when a person clicks it in the panorama. The amount of time, skill, and effort needed to achieve a reasonably good effect of this nature will likely require serious commitment to mastering an authoring package. A less sophisticated approach would simply make the monitor clickable and launch a linear video in the full window or in another window.
In addition to flat linear video, developers using sophisticated authoring packages can embed animations, people, or objects shot on green-screen backgrounds. Combining any of these media types within a spherical panorama will require above-average skills with multi-media development packages. Search the Internet with phrases such as “embedding video within panoramas” or “video embedded in panoramas” to find the latest offerings of packages that offer these capabilities.
Currently the cutting edge of panorama development seems to be multi-camera linear video panoramas, videoramas, or motion VR. At present the results in this area usually end up at low-resolution and can be rather disorienting to the user. For an example, see An Inexpensive Panorama Video System, a cylindrical video panorama whose view can be changed at will. Other experiments simply point a single camera at a spherical mirror rather than stitching multiple video streams together. In any case, immersive interactive panoramas have not yet reached a quality level suitable for creating archival records or sustained or detailed viewing and may be limited to a cylindrical rather than spherical presentation.
In 2006, Clifford Ross from NYC, with assistance from Israeli brothers Liron and Tal Unreich from Tel Aviv, designed and tested the R2 camera, a high-resolution digital video camera that shoots 360° using nine cameras, nine mirrors, and nine microphones arrayed in a circle and mounted on a tripod. The R2 is a unique and experimental device, and its use is certainly not yet the norm in the industry, but it is another version of a video camera digital panorama system.3
3. See also Nick Paumgarten’s description of the R2 in action in “Bad-Ass Camera” in The New Yorker (21 Aug 2006).
82
5.4. aSSociatEd hardWarE and SoFtWarE
There are as many video cameras as there are budgets. Try to use the best one you can afford. Pay attention to the number of CCDs and their (combined) resolution, to the audio components, and to the quality of the results. If you only need to capture video for use on the web, there’s no need to buy an IMAX camera. Look for a camera with good manual controls and easy access to those controls. Avoid models that require navigating a menu system in order to get to the exposure settings, such as iris and shutter speed.
Using a video camera in conjunction with a steadying device or a Steadicam will increase the amount of useable video. Good results come from using a tripod, though in skilled hands a hand-held camera can also provide good video.
Video editing software is abundant. Choose the software that will do what you need it to do. Apple Finalcut Pro, Avid, Adobe Premiere, and iMovie are current standard software packages, each with various features and learning curves. If you intend to edit your own video, try to experiment with several applications first before investing your money and time.
Audio editing software is similarly diverse: ProTools, Digital Performer, Cubase, Apple Logic, SoundForge, Peak, GarageBand, iTunes, Audacity (freeware), and more. The same principals as above apply here. Look for software that meets your needs but does not place excessive demands on your time and budget. You are not preparing a recording of a full symphony orchestra: in most cases, you only need to crop the desired sound clips and export them as MP3 files. For this task, simple software will do the trick.
83
WEb rEFErEncES
An Inexpensive Panorama Video System. http://www.vrhotwires.com/InexpensivePanoramicVideo6.html
Apple Logic. http://www.apple.com/logicpro/
Audacity. http://www.afreecodec.com/win/317/audicity-audio-recorder/
Cubase. http://www.steinberg.net/27_1.html
Digital Performer. http://www.motu.com/
GarageBand. http://www.apple.com/ilife/garageband/
iTunes. http://www.apple.com/itunes/
Minidisc Community Portal. http://www.minidisc.org
Nickspicks.com. http://www.nickspicks.com/
Peak. http://www.bias-inc.com/products/
ProTools. http://www.digidesign.com/intl_selector.cfm?
R2 camera. http://cliffordross.com
SoundForge. http://www.sonycreativesoftware.com/products/soundforgefamily.asp
Tape.com. http://www.tape.com
VR Worx. http://www.vrtoolbox.com/vrthome.html
6. panoraMa crEation (part 2): StitchinG and rEndErinG
6.1. introduction to thE StitchinG and rEndErinG procESS
The process of compiling source images into a single panoramic image is commonly referred to as “stitching.” This generally involves two steps: stitching the images together and rendering the stitched images into the appropriate output file format. This chapter will guide you through converting source images into a final product, a panorama that will be used by students, scholars, architects, historians, etc.
Good project management is the key to successful post-production work. There are many considerations that need to be balanced, including budget, timeline, and staff workload. The process involves specialized skills and can be time-consuming and expensive. If a technical support staff is available, it would be wise to take advantage of it and any other resources offered by the commissioner’s institution or school. While the photography might take just a few hours, post-production can take weeks. The time required varies tremendously, since it is dependent on several factors:
How much computer memory and processing power are available?• What is the size, resolution and compression of the images?• How well were the camera and tripod calibrated during the photography shoot?• What are the skill sets of the technical staff?• How much material will be processed?•
6.2. prEparinG raW data
Stitching and rendering a panorama requires common photo-editing software packages as well as a suite of specialized software. Here are some of the more popular software applications, listed according to a normal post-production workflow.

85
iMaGE broWSinG
Bridge (part of the Adobe Creative Suite 3). • Aperture (Apple)• ACDSee (ACD Systems)•
iMaGE EditinG
Photoshop CS3 (part of the Adobe Creative Suite 3) (Adobe)• DxO Optics Pro (DxO Labs)• CorelDRAW and Paint Shop Pro (Corel)•
panoraMa StitchinG
PTgui, developed by Helmut Dersch • Enblend (New House Internet Services)• QuickTime VR Authoring Studio (Apple is no longer distributing this software, but it • may be available on older machines [Classic OS 9.x Mac platform])REALVIZ Stitcher (REALVIZ)• VR Worx (VR Toolbox)• Panoweaver (Easypano)• Photovista Panorama (iSeeMedia) • Autostitch (University of British Columbia)•
The features and strengths of some of the more popular applications will be covered in the next section.
6.3. SoFtWarE
Post-production begins with organizing the raw data. This includes browsing and evaluating the quality and usefulness of the images. If the source images are on film, this is when they should be digitized. Be sure to maintain back-up copies of data throughout the process.
6.3.1 broWSinG and Evaluation
Normal photographic coverage of a cultural heritage site can produce hundreds (if not thousands) of images. It is impossible to overstate the importance of proper file management. It is a vitally important task and requires planning and regular maintenance. If not handled properly, information may be lost, tasks skipped or repeated, files misplaced, and the entire project can become tangled up in knots. There are many software applications that can help organize large collections of images by viewing, sorting, and assigning keywords to every image, thereby creating a database-like structure. These applications
86
are very useful for standard photography, but, since the end-product of a digital panorama project is in fact a composite of many images, they are not practical in this case.
An easier way to manage data organization for panoramas is to build and maintain an intuitive directory structure that is independent of the software. In computer science and in taxonomy this is referred to as a tree structure. The root is the top-level directory, which contains the entire project. The branches contain more detailed level of specificity (for example, countries). These levels contain ever greater levels of specificity (such as cities and towns and then individual buildings). This continues to individual nodes (the leaves) that hold images of a particular location or day of shooting.
There are two major components: file names and file control. File names help in tracking data, versions, and revision histories. File control is concerned with creating, copying, moving, deleting, and so on. Most operating systems allow a great deal of flexibility with file names, allowing very long file names with non-alphanumeric characters such as “!” and “#” or allowing names without a suffix to indicate file format (such as “.txt” or “.jpg”). While it may seem a good idea at the time to call an image “take#4,” someone looking at the file later may have no idea what the subject was, how to open it, or why this particular version is different from takes #1-3. These kind of names can also destroy data: if files are transfered between machines with an FTP application (such as Fetch or SecureFX), the software may balk at non-alphanumeric characters or even corrupt the file. Image manipulation applications may have trouble opening files without a suffix that identifies the file’s format, even if the file is in fact the proper type.
To avoid these problems, observe good practice and name files in a consistent and informative form. Use a name of no more than twenty alphanumeric characters and a suffix of three characters that indicate the file’s format. If more than one person will be handling the images, establish agreed-upon naming conventions that allow everyone to know what information is stored where and what formats are used. Try to avoid obscure or complex file names, such as “jk113004_124_2.gif.” Not only is this kind of name hard to remember and difficult to use, but the content and version information in the name is unreasonably obscure.
A good naming convention for the directories is also important. The images will go through several stages and the naming system should reflect the status of the files within each directory. It is a good idea to have a directory for files that will not be used as well as a directory for files that need extra processing, such as groups of bracketed images that will be used for high-dynamic range (HDR) compositing. For example, here is one possible system of five main image directories:
Unprocessed: files straight from the camera• Processed: images that have been processed (rotated, etc.)• Unused: images that will not be included in the stitched panorama• WIP: “Works-In-Progress,” such as HDR composites• Final: work files for stitching, as well as the final outputs: QTVR movies, cylindrical or • spherical and cubical renderings
87
A browsing application (such as Adobe’s Bridge) allows for easy drag-and-drop organizational ability without having to toggle back and forth with the operating system’s file system.
Maintaining an organized structure such as this begins during the production phase (see section 4.6), and maintained throughout the entire course of the project. At the end of every shoot, the photographer should upload all of the day’s images onto his or her computer and fit it into the directory tree structure right then and there while the information needed is still fresh.
Run a quick quality assessment of images for focus; balanced exposure; tourist traffic (especially on the edges of the images); lack of major dust and sunspots; completeness of the panorama (ensuring that there are no missing shots). If there are bracketed exposures, this is the time to choose which shots can be used.
6.3.2 diGitization and ScanninG
Many photographers choose to shoot their source images with traditional analogue film. This entails the extra step of scanning the images into digital form in order to proceed. A scanner with automatic slide or filmstrip feeder is the ideal tool.1 For large format negatives, use a high-resolution flatbed scanner with an illuminated back. Be sure to properly adjust the scanners settings before conducting the scan. (For more in-depth instruction on film scanning, see additional sources such as ”Creating Digital Resources for the Visual Arts: Standards and Good Practice” by Visual Arts Data Service.)
6.3.3 back-up oF data
Any seasoned computer user knows that Murphy’s Law prevails, especially regarding computer hard drives and external FireWire or USB units. It is crucial to save multiple copies of all work on multiple drives that are used solely for back up and are dedicated to only one project at a time. RAID drives (redundant array of independent disks) are popular for their robustness and ease of use, but suffer two major disadvantages: they are very expensive and come as a single unit in one geographical location. Using a series of multiple identical drives is more cost-effective and the drives can be stored in several physical locations. This strategy is more time-consuming, but it is a good idea to have at least two identical back-up drives supplementing the main working drive (i.e., the computer’s internal hard drive).
Back-up should occur weekly at minimum, if not daily. This schedule can be automated by a number of web-based backup services or simply done manually. If the drives are part of a network at a university, many IT departments will schedule automatic nightly or weekly back-ups.
1. The Nikon Super Cool Scan 4000 ED, for example.
88
6.4. color ManaGEMEnt on thE coMputEr
It is essential to have a properly calibrated display when editing digital photographs. The colorspace, or ICC profile, of the editing software should also be consistent with that of the camera. Some common color profiles are sRGB, AdobeRGB. Photoshop CS2 will automatically detect the color space of the camera based on the metadata associated saved in the image file. There are many books available for in-depth coverage of this topic.
6.5. hdr and MultiplE ExpoSurE coMpoSitinG
Dynamic range refers to the range of light that is visible to the human eye or a single image/photograph. The human eye can see a much wider dynamic range than a modern digital camera. When looking at a stained glass window, for example, the eye can see not only the color and details of the glass but also the tracery and framing around it. A single digital photograph cannot capture such a wide luminance range; either the window will be visible and the wall and tracery will be black (cold), or the wall and tracery will be visible but the window will have lost all its color and show up white (hot). This problem can be solved, to a large extent, with multiple exposures, which can be used to create a composite image during post-production. When shooting interiors and exteriors, especially with high-contrast areas such as strong light and shadows, or bright windows and dark walls, it is a good idea to bracket shots up and down 2/3, 1, or more F-stops. In extreme situations, increase the F-stop bracket or take multiple sets of bracketed photos.
The additional exposures will provide data that can later be manipulated in image editing software with layer or alpha masks, so that all areas of a photograph will be visible and areas that were previously too hot or cold can be corrected. Some applications include features for automating computer-generated HDR images based on a series of varying exposures taken from the exact same position. This often produces wonderful results, though a bit of extra work is needed to makes the images useful for the stitching software. (A standard DSLR camera creates 8-bit images. The resulting HDR images are 16-bit or 32-bit, and will need to be translated back to 8-bit before the stitching software will be able to read the files.) Another problem to avoid is when the levels of an image do not match an adjacent image in the panorama sequence, resulting in awkward stitching and visible seams. Creating composites by hand is often the more efficient way to produce the correct results.2
6.6. StitchinG thE panoraMa
There are many software applications available for stitching panoramas, both open-source and proprietary. Not all programs perform the same tasks: some are capable of producing
2. See Photoshop Masking & Compositing by Katrin Eismann, published by New Riders, for in-depth coverage on this specialized technique.
89
a wide range of output, including cubic and spherical renderings, while others create just cylindrical panoramas. Some include the option to create object files, both single-row and multi-row objects. Each program has its own unique interface and stitching method, though all follow a similar workflow that looks something like this:
Import source images into the stitching environment• Align the images relative to one another by either overlapping two or more images or • setting common “anchor points” — physical features clearly visible in each image.Render the output.•
Stitching can be a very finicky and time-consuming process, and often requires tweaking various settings to place the images precisely in line. If the panorama is part of a larger set of panoramas that will be interconnected, add any hyperlink hotspots just before rendering.
Before importing images it is often necessary to pre-process the images in a photo editing application, such as Photoshop. It is almost always necessary to rotate the image 90° so that it is oriented properly. When working with images taken with a fish-eye lens, it is necessary to “defish” them, that is, to convert them to rectilinear or cylindrical projection.3 Despite an attempt by certain commercial companies to patent methods for processing fish-eye images for panoramas, the technology has been around for much longer. Even certain rectilinear images, such as those taken with a rectilinear 14mm or 15mm lens, have a small amount of barrel distortion that should be corrected. Two common issues with wide-angle lenses are vignetting, a reduction in brightness toward the periphery of an image, and soft lens focus due to chromatic or spherical aberration. These can all be corrected or at least mitigated with a number of applications, including Photoshop, DxO Optics, and LensDoc (Andromeda Software). Wherever possible, use batch scripts (see section 6.7, below).
If a scanning or circuit-style camera was used to create their source image, the process is slightly different. The main advantage is that the only stitching necessary is to join the two ends of the panorama together. A well-executed image will have a small bit of overlap on the ends so that blending can occur. The zenith and nadir shots may be added if creating a cubic or spherical panorama. If no nadir shot was taken, consdier using the nadir to display information such as metadata, geo-reference, contextual info, location, author, and copyright.
6.7. batch procESSinG, ScriptS
When creating several panoramas, a great deal of time can be saved by batch processing. Instead of manually creating and naming folders, sorting and moving files, grouping them together, editing configuration text files by hand, etc., let the computer do the work.
3. You can download DeFish from http://www.worldserver.com/turk/quicktimevr/fisheye.html.
90
Two Perl scripts written by Ken Stuart can be downloaded and used for this task: PanoImageSorter.pl and PTMacPanoImageSorter.pl (see appendix 4). Both process the images in a folder, sorting them into subfolders in sets of images composing a node, and then into sub-subfolders within each node for sets of bracketed shots. The latter adds the incorporation of a PTMac template file for each set of images, so that PTBatch can be used to create panoramas en masse. The scripts save a lot of time in manually creating a whole series of folders for a project, and then moving them all around appropriately, and then editing a template file to specify the location of each set of panorama images. The first script will run on any system with Perl installed, including all modern Macintosh computers. The second script uses a Perl module specific to the Macintosh and assumes the use of PTMac (a Macintosh-based image-stitching application).
In each script, a number of comment lines (starting with #) explain the variables expected (such as the path and folder containing the images, the number of nodes, their names, and the number of shots per node and the number of brackets per shot). To run a script, enter command-line mode, change folders to wherever you placed the script and type “perl PanoImageSorter.pl” or “perl PTMacPanoImageSorter.pl” after editing their variable values.
Before running PTMacPanoImageSorter.pl, the MacPerl module must be installed, even though Macintosh computers include Perl, so that the script may set the file type to be compatible with PTBatch. In order to install MacPerl, install the Apple Developer Tools software called XCode, which may require you to register as an Apple Developer but incurs no cost, and MacPerl from CPAN, a Perl module storehouse (the download link is in the upper right corner). After downloading and uncompressing MacPerl, open a Terminal session and change directories to the newly created folder. Once there, type “make test” and then, after it completes its tasks, type “make install” to finish the installation of MacPerl. Without MacPerl, the script can create copies of a PTMac template file, but PTBatch will not recognize the copies. Other utilities exist to change Macintosh file types, so if the installation and of MacPerl does not go well, place a # character at the beginning of the two script lines that reference MacPerl and use alternative means to change the PTMac template files’ file type.
6.8. rEndErinG thE panoraMa
A panorama can be rendered out as several different formats, called projections: cylindrical, equirectangular, also called spherical, cubical (six equirectangular cube faces), and any number of viewing formats, such as QTVR, Spi-V, and Shockwave.
Each stitching application has varying options for rendering, and each option has its own set of parameters. For example, when rendering to QTVR, set the window size (the size of the QuickTime player window), default pan, tilt, and zoom, and level of compression. For cylindrical, spherical, and cubical renderings the programmer can choose from many compression codecs, and can set the render area.

91
Some rendering engines are better than others, and there is external software that will improve the rendering process. For example, the open-source application Enblend may be a better choice than the blending software that comes integrated with the stitching application. However, Enblend can only be used in conjunction with certain projections (spherical and cylindrical) so it may be necessary to convert the output from one projection to another.
Sometimes the resulting image has flaws, such as tears, visible seams, ghosting, and artifacts. These can be corrected in image editing software. Ghosting, a common issue, occurs when a person toward the edge of an image moves before the next shot in the sequence can be taken. One way to fix this is to create a composite using one of the source images. Because straight lines look curved in a spherical projection, it may be easier to convert it to rectilinear cube faces, where the lines appear straight, before making the composite. In order to avoid the reduction of quality when a JPEG image is compressed more than once, it is good practice to render in uncompressed TIF format until the final rendering, which can be JPEG.
In the interest of long-term preservation, it is good practice to render out to several different formats, as well as storing the source images. A good preservation strategy will include source images and the final output (often QTVR), as well as spherical and cubical renderings. Preservation is discussed in depth in section 10 of this guide.
a notE about qtvr
There is room for confusion about the use of the term QTVR. It has become so common that it is often used as a generic synonym to refer to any digital panorama. However, it properly refers to a QuickTime VR file, which is based on Apple’s QuickTime technology and which was designed to provide a 3D feel to images. Apple released QuickTime VR Authoring Studio (QTVRAS), a software package for creating QTVR movies and images, in 1998 and it became a standard tool for digital panoramas. Apple no longer supports this tool and did not upgrade it for the OS X platform. It is still possible to purchase old copies of QTVRAS, but it only works on the Classic (OS 9.x) Mac platform. Apple publishes a list of third-party software companies that sell QTVR authoring software.
QTVR files have an .mov exension and are played in a panorama viewer such as the QuickTime player, CubicNavigator, Pangea, or a Java viewer. Virtually every panorama stitching software can output QTVR files.
92
6.9. hot SpotS, (hypEr)linkS, and ExEcutablE ScriptS
Most stitching programs offer the possibility of embedding “hot spots” within the QTVR movie. A hot spot is an area of the panorama that has been image-mapped, so when the mouse passes over the hot spot the cursor changes to indicate the existence of the hot spot. When clicked, any number of actions might be launched: loading a new panorama (navigational link), loading a detail image, loading a video file, opening a website, launching an executable script, etc. One of the most common uses of hot spots is in virtual tours that link a series of panoramas together. This is achieved by creating a single- or double-linked graph (the graph being the floor plan of a building, where the panoramas are the nodes, and the directional connections between the nodes are the hot spots). The advantage of a single-linked graph is that the user’s visit is directed. That is, one can proceed to the following panorama in a series of panoramas in a progression that is pre-programmed. This works well for presentations and editorial uses, such as a magazine web-feature. The usefulness of a double-linked graph is that the user is free to move about the space and move back and forth between nodes without having to restart the entire tour. This is ideal for individual study of a building.
There are many software applications available for developing virtual tours. Virtual tours are discussed further in section 8.6. Complex web development, however, is beyond the scope of this guide. The World Wide Web has a plethora of resources for web development. Two notable sites are the Apple Developer and Webmonkey. Sample HTML code, including <embed> tags, is available in Appendix 5.
6.10. EMbEddinG author inForMation, WatErMarkS, SpritE trackS, and copyriGht
Either as part of the rendering process, or after the QTVR has been created, it is possible to add annotations that are embedded into the file. This information can be viewed anytime through the playback application, such as QuickTime player or Cubic Navigator. Several applications, including QuickTime Pro and LiveStage Pro, allow the programmer to embed and edit annotations after the files have been rendered. Any number of the various annotations may be provided:
Name• Copyright• Description• Artist• Author• Creation Date• Software• URL Link• Information• Keywords• Comment•
93
Adding redundant protections never hurts. It is good practice to embed a visible copyright on the panoramic image itself, as well as a watermark. A good place for a visible copyright mark (©) is at the bottom of the panorama, in the nadir shot, looking straight down. This is where the tripod stood, and the hole left in the shot is a great location for author and copyright information.
6.11. convErtinG hiStorical iMaGES
Because the panoramic photographic process has been around for over 150 years, there are many examples of historical panoramas, found on many different photographic formats. The circuit camera creates one single panoramic image, while many photographers used standard cameras to create a series of images that comprise a panoramic view. Regardless of the format, any of these historical images can be digitized and converted into digital format. The tricky part is finding the right scanner for the job. A flatbed scanner can not scan images bigger than the scanner surface (8.5” x 11” for many models). For large jobs, a drum scanner, or handheld scanning device might be needed. Once the image is digitized, follow the steps provided in this guide appropriate for the specific format of the image, whether it is a series of overlapping images or one single panoramic image.

94
WEb rEFErEncES
ACDSee. http://www.digitalriver.com/v2.0-img/operations/acdsys/html/060926/ acdsee_1.html
Adobe Creative Suite. http://www.adobe.com/creativesuite/
Apple Aperture. http://www.apple.com/aperture/
Apple Developer. http://developer.apple.com/quicktime
Apple list of 3rd party QTVR software. http://www.apple.com/quicktime/resources/tools/qtvr.html
Autostitch. http://www.cs.ubc.ca/~mbrown/autostitch/autostitch.html
CorelDRAW. http://www.corel.com/servlet/Satellite/us/en/Product/1153321305884
Corel Paint Shop Pro. http://www.corel.com/servlet/Satellite/us/en/Product/1155872554948
Creating Digital Resources for the Visual Arts: Standards and Good Practice. http://vads.ahds.ac.uk/guides/creating_guide/contents.html
DeFish. http://www.worldserver.com/turk/quicktimevr/fisheye.html
DxO Optics Pro. http://www.dxo.com/intl/photo/dxo_optics_pro/
Enblend. http://enblend.sourceforge.net
LensDoc. http://home.surewest.net/frcn/LensDoc.html
MacPerl. http://search.cpan.org/~cnandor/Mac-Carbon-0.76/MacPerl/MacPerl.pm
Panoweaver. http://www.easypano.com/panorama-software/pano-index.html
Photoshop Masking & Compositing. http://www.photoshopmasking.com/
Photovista Panorama. http://www.iseephotovista.com/products/panorama/product_info.html
PTgui. http://www.ptgui.com
QuickTime VR. http://www.apple.com/quicktime/technologies/qtvr/

95
REALVIZ Stitcher. http://stitcher.realviz.com/index.php?language=EN
VR Worx. http://www.vrtoolbox.com/qtvrproducts.html
Webmonkey. http://www.webmonkey.com
XCode. http://developer.apple.com/tools/xcode/index.html

7. StandardS For data docuMEntation
7.1. introducinG StandardS For data docuMEntation
Data documentation has several functions. It records where images, text, and other forms of digital data are from, how the data was generated and what form it is in, and describes its location and use, so that users know what information is where and which data it describes. This data is often generated and maintained on an ad hoc basis, since while it is clearly useful information it may not be clear how it will be utilized over the long-term.
It is all too easy to spend many hours of work documenting a panorama only to end up with a mass of data that makes no sense to anyone outside the project. Or, the data may not match up with the system used by the library or archive that will be distributing and preserving the panorama. To avoid this problem, academic and archival communities have developed sets of data documentation standards which are accepted and supported by large segments of these communities. If the commissioner has arranged in advance for the project to be collected and archived by a museum or library, the project staff will probably know to generate or modify documentation according to that institution’s accepted standards. If not, it may seem easier to develop internal methods for tasks such as naming files and keeping track of copyright information. Unfortunately, this strategy is likely to backfire in the long run. If the project migrates to an archive five years after it has been created, important information such as the name of the photographer or permissions may have been lost, corrupted, or just never written down. Using widely accepted standards for generating and organzing data means that the data will be in a recognized and supported form.
It is infinitely easier to generate and organize this information correctly when the work is first done rather than patching it together later, so the project commissioner is strongly encouraged to teach everyone working on the project how to document and maintain the project’s data.
97
7.2. doMain SpEciFic data docuMEntation StandardS
The Arts and Humanities Data Service’s AHDS Visual Arts center in the UK distributes a guide on “Creating Digital Resources for the Visual Arts,” written around 2000. It has useful advice on data documentation and domain specific data documentation standards. Domain specific documentation refers to standards that are accepted or required by certain groups (e.g., standards that are used by specific fields of study or types of research). This is outside of the parameters of this guide and is best done by the commissioner.
The AHDS Visual Arts guide suggests looking at three factors when deciding which standards to use: fitness for purpose, reputation, and existing experience. The standards used should be appropriate and relevant to the work and its use, well established and documented, and (ideally) be familiar to the project staff or whoever is handling data documentation.
7.3. introduction to MEtadata
Metadata is data that describes data. In the case of photography, it includes the subject of the photo, where and when it was taken, who was the photographer, and what equipment was used. In the case of digital works in a library or archives, metadata is generated and used to control, distribute, and maintain institutional resources. This information is vital to the use and long-term survival of digital panoramas, not only because it allows them to be properly cataloged, but also because it enables the work to be preserved. Properly planned, metadata not only describes the content of the work but also how it was built and how it can be stored and (if necessary) repaired or duplicated. Metadata standards such as METS can also include rights information and contact information for the work’s creators.
Depending on the project, you can store metadata in different forms. Text file formats such as HTML and XML can make metadata part of the content. Image files can store metadata in a header file or in a separate file or database. Audio visual file metadata can be stored in a separate file or database.
There are various categories and standards that are commonly used by archives and libraries, such as METS, Dublin Core, MIX, SMIL, and MARC. Note that different standards accomplish different goals and that metadata is often grouped into categories. Broadly speaking, administrative metadata tracks and manages data; descriptive metadata identifies and describes data; and structural metadata records the relationships between the data. If a panorama is going to be collected and distributed by a library or archive, the commissioner or project staff should consult a metadata expert at the library or archive to be sure that the proper information is generated and recorded. Photographers and programmers often keep this information in their heads or in their own records. In order to be sure that it is gathered accurately and in a useful form, the project staff may want to develop forms to be filled in while on-site and during post-production.
98
7.4. controllEd vocabulary
A controlled vocabulary is a set of terms for defining or describing information resources, such as subject headings and index listings. It is similar to a multiple choice list, where the user can choose from a set of pre-determined phrases to describe a particular attribute. Controlled vocabularies are particularly useful for large and complex projects, since they ensure that the information will be formatted and generated consistently.
If the project is going to be collected and archived by a library or archive, the project staff may need to use specific controlled vocabularies for metadata or cataloging purposes.
7.5. rESourcE diScovEry MEtadata
When a user looks up a book in a library catalog, he or she is referred to as discovering a resource. Discovery metadata is information that identifies and describes a resource and its location in a physical or digital collection, such as the title, author, publication data, call number, and URL. There are several commonly used standard sets of discovery metadata, although individual collections or groups of collections may have their own discovery metadata. The Library of Congress has a page listing standards for research description, digital libraries, and resource retrieval protocols. Dublin Core, is a well-known and widely used system and probably the easiest to work with. The list of elements that it covers includes:
Title• Subject• Description• Type• Source• Coverage• Creator• Publisher• Contributor• Rights• Date• Format• Identifier• Language• Audience• Provenance•
The Visual Resources Association Core 4.0 is designed for cultural heritage resources. Documentation includes descriptions of elements and examples.
99
This information is relevant to a panorama if the project is going to be collected and archived by a library or archive. In this case, the project staff may need to follow that institution’s guidelines for generating this type of information.
7.6. tErMinoloGy rESourcES and claSSiFication SchEMES
Vocabulary databases and classification schemes are standard controlled vocabularies that are used by groups of researchers in certain academic fields. The J. Paul Getty Trust Vocabulary Program offers three sets of vocabularies databases: the Art and Architecture Thesauraus, the Union List of Artist Names, and the Getty Thesaurus of Geographic Names. These are commonly used in art, art history, architecture, and so forth.
The Library of Congress subject headings are a commonly used classification scheme and are published in a multi-volume set of its subject headings.
7.7. phySical GEo-rEFErEncinG
Geo-referencing matches a project with a real-world physical location. It can be as simple as a map reference for the city or area where a panorama was shot or as detailed as a GPS mash-up with GoogleEarth. The tools and possible applications are constantly changing and a useful discussion is outside the scope of this guide. Web sites such as Google Maps Mania and GISuser.com may be good sources of inspiration and instruction. However, note that any geo-referencing should be documented according to commonly accepted metadata standards.

100
WEb rEFErEncES
Creating Digital Resources for the Visual Arts. http://vads.ahds.ac.uk/guides/creating_guide/contents.html
Dublin Core. http://dublincore.org
J. Paul Getty Trust Vocabulary Program. http://www.getty.edu/research/conducting_research/vocabularies/
GISuser.com. http://gisuser.com
GoogleEarth. http://earth.google.com
Google Maps Mania. http://googlemapsmania.blogspot.com/
Library of Congress standards. http://www.loc.gov/standards/
MARC. http://www.loc.gov/marc/
METS. http://www.loc.gov/standards/mets/
MIX. http://www.loc.gov/standards/mix/
SMIL. http://www.w3.org/AudioVideo/
Visual Resources Association Core 4.0. http://www.vraweb.org/projects/vracore4/index.html

101
8. rESourcE dElivEry and uSEr iSSuES
8.1. ovErviEW oF rESourcE dElivEry iSSuES and uSEr intErFacE (vr tourS)
There are many ways to view digital panoramas: over the Internet via a web browser, on a DVD-ROM, or directly off of a computer’s hard drive. Each of these methods has choices and limitations for preferred viewing options. Because of the vide variety of playback applications it is possible to view panoramas on almost any type of modern computer or operating system. No special display or projector is required; any properly calibrated color display will do. And the software required to view digital panoramas is (more likely than not) already installed on the user’s computer or easily accessible.
However, internet connections can be slow or limited and publicly available machines may be constrained or out-of-date. DVDs and hard drives are convenient and can include necessary software, but of course the user has to be in the same location as the disc or drive, limiting access and distribution. There are other factors that may influence choice of one delivery system over another, including the panorama’s size, complexity, and intended audience.
8.2. viEWinG platForM
Because computer hardware evolves so quickly, it is difficult to attempt to nail down specific standards for the minimum and platinum systems for viewing digital panoramas. Successful deployment depends largely on file size, network speed, memory and power of the computer, quality of graphics hardware and amount of video RAM, playback software and compression used, and many other factors. Be sure to check the minimum and recommended system requirements provided with the viewing software that will be displaying the panoramas. In general, most viewing software requires either a Windows or Macintosh OS X system with at least 256 MB RAM, and a fairly new video card (probably from within the last five years). The user will also need a mouse or trackball and a keyboard to interact with the panoramas.
Depending on the intended audience, the ideal deployment strategy may be aimed at several types of viewing environments in order to take full advantage of high-resolution
102
images. One arrangement might be to offer a full-resolution version via DVD-ROM and optical fiber intranet commonly used by many colleges and universities and a lower resolution internet version better suited to a wide audience. Alternatively, both full- and low-resolution versions could be offered on-line.
Display devices include CRT, LCD, plasma flat panels, and large-scale LCD multimedia projectors. Any of these is perfectly acceptable, but a higher quality display will show higher quality images. The larger the projected image, the more realistic it will feel to the audience, particularly with high-resolution panoramas. One of the main advantages to a high-quality display is that more colors will be visible. A CRT display may have thousands of colors while a cinema LCD can reproduce millions of colors. A high-quality LCD is fine for individual use, but when presenting in a classroom or lecture hall, an XGA with 1024 x 768 resolution with at least 35,000 ANSI lumens would be required.
There are also software packages being developed for viewing panoramas on portable devices, such as cellphones and PDAs. While the viewing quality is not going to be as detailed or high-quality as on a larger monitor and there are complications with navigation and file access, there are practical uses to being able to download panorama data onto a small handheld device. Possible applications might be for patrons visiting museum exhibits or buildings, tourists in scenic areas, or classes touring historic sites. Helmut Dersch has written several software applications for placing panoramas on handheld devices and in PDF files.
8.3. prESEntation: SoFtWarE and viEWinG optionS
There are many options to choose from for viewing digital panoramas. There are essentially three methods for viewing these files: via a web browser or locally from a DVD-ROM or off a computer’s hard drive. Below are some of the more popular playback applications that allow viewing of panoramas over the Internet and embedded within a webpage:
QuickTime Player/Pro• SPi-V (hardware accelerated, based on Shockwave 3D)• Java• SpinControl (based on the QuickTime Player)• iPix• PTviewer• PangeaVR (OpenGL accelerated)• ActiveX (for PCs)• Flash (based on Shockwave 3D)•
Some of these players can simply be embedded into an HTML page, while others require a bit more coding. The vast majority of users will have the QuickTime player installed on their machines, though SPi-V and Java viewers are becoming more prevalent. Most modern web browsers will be able to use these playback applications, notable Mozilla Firefox, Apple Safari, Shiira (Mac only), and Camino (Mac only). While this allows for easy
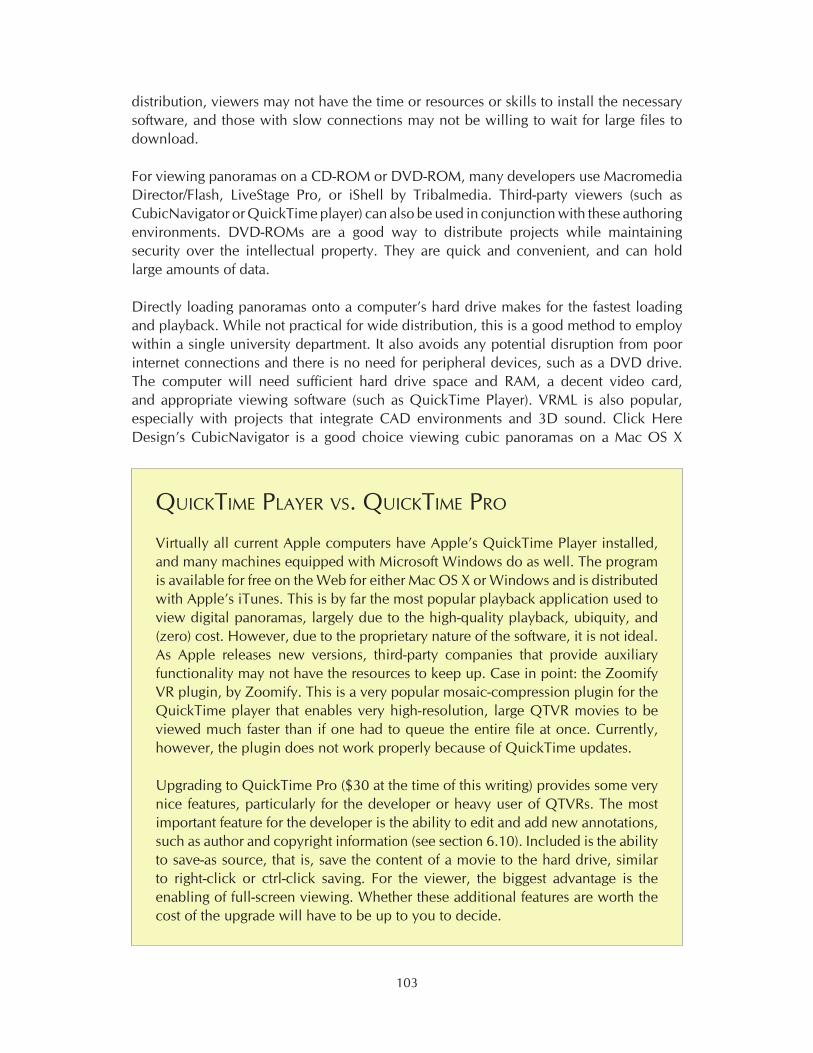
103
distribution, viewers may not have the time or resources or skills to install the necessary software, and those with slow connections may not be willing to wait for large files to download.
For viewing panoramas on a CD-ROM or DVD-ROM, many developers use Macromedia Director/Flash, LiveStage Pro, or iShell by Tribalmedia. Third-party viewers (such as CubicNavigator or QuickTime player) can also be used in conjunction with these authoring environments. DVD-ROMs are a good way to distribute projects while maintaining security over the intellectual property. They are quick and convenient, and can hold large amounts of data.
Directly loading panoramas onto a computer’s hard drive makes for the fastest loading and playback. While not practical for wide distribution, this is a good method to employ within a single university department. It also avoids any potential disruption from poor internet connections and there is no need for peripheral devices, such as a DVD drive. The computer will need sufficient hard drive space and RAM, a decent video card, and appropriate viewing software (such as QuickTime Player). VRML is also popular, especially with projects that integrate CAD environments and 3D sound. Click Here Design’s CubicNavigator is a good choice viewing cubic panoramas on a Mac OS X
quicktiME playEr vS. quicktiME pro
Virtually all current Apple computers have Apple’s QuickTime Player installed, and many machines equipped with Microsoft Windows do as well. The program is available for free on the Web for either Mac OS X or Windows and is distributed with Apple’s iTunes. This is by far the most popular playback application used to view digital panoramas, largely due to the high-quality playback, ubiquity, and (zero) cost. However, due to the proprietary nature of the software, it is not ideal. As Apple releases new versions, third-party companies that provide auxiliary functionality may not have the resources to keep up. Case in point: the Zoomify VR plugin, by Zoomify. This is a very popular mosaic-compression plugin for the QuickTime player that enables very high-resolution, large QTVR movies to be viewed much faster than if one had to queue the entire file at once. Currently, however, the plugin does not work properly because of QuickTime updates.
Upgrading to QuickTime Pro ($30 at the time of this writing) provides some very nice features, particularly for the developer or heavy user of QTVRs. The most important feature for the developer is the ability to edit and add new annotations, such as author and copyright information (see section 6.10). Included is the ability to save-as source, that is, save the content of a movie to the hard drive, similar to right-click or ctrl-click saving. For the viewer, the biggest advantage is the enabling of full-screen viewing. Whether these additional features are worth the cost of the upgrade will have to be up to you to decide.
104
machine. The major advantage of this application is that it employs OpenGL, a feature of the computer’s graphics hardware that comes with most computers built after the mid-1990s, instead of relying on a software engine as the QuickTime Player does. The result is amazingly smooth motion (panning, tilting and zooming), even when viewing very high-resolution panoramas. Additional features of this program include fully customizable controllers and cursors, automated motion, and hot spots in VR tours.
It is possible to display panoramas within a presentation program, such as PowerPoint (Microsoft) or Keynote (Apple), or to integrate panoramas with playback in QuickTime Player or the SPi-V engine. It is also possible to create a “kiosk” presentation for museum settings. This generally gives the user access to the panorama/virtual tour but blocks access to any other computer functions.
8.4. aliaSinG, Moiré pattErnS, and othEr viEWinG pitFallS and SolutionS
The perceived on-screen image quality of a digital panorama when viewed in a playback application (both when the image is static, or moving during panning) is the result of a very complex interaction between many factors, including:
Size and tiling of the source image• Type of compression (codec) used, and degree of compression• Degree of sharpening of the source image (if any)• Settings chosen for quality (motion and static) during authoring (QuickTime VR only) • Size of the playback window• Display calibration•
Undesirable effects can include moiré patterns; other unwanted image artifacts, often arising from aliasing; posterization (banding in areas where there should be smooth tonal gradients, such as skies).
The smoothness of the moving image during panning is also a factor. In large part, this is a function of the power and speed of the particular computer system being used; the “on-the-fly” image warping taking place in real time during playback — to restore rectilinear perspective to cylindrical, spherical, or equirectangular source images — is in most players (such as Apple’s QuickTime Player) achieved by software-based rendering, and is reliant in large part on the computer’s CPU.
It is difficult to devise hard-and-fast procedures that will eliminate these problems, but here are a few factors to consider.
SizE oF thE SourcE iMaGE
This will vary depending on the intended use and distribution of the final product. For deployment over the web, smaller images (and hence movies with smaller file sizes) have faster downloads. For deployment by means of DVDs or local files, larger images show more detail, allow greater zooming capability, and are capable of effective full-screen

105
playback. For example, a 2000-pixel-wide image would be acceptable if playback was in a small window (such as 360 x 240). For more detail (allowing greater useful zooming) and a larger playback window the source image could be around 3000 to 5000 pixels wide. For effective full-screen presentations, it might be 6000 pixels or more across. Some authoring applications suggest or require that the source image’s pixel dimensions be divisible by 4 (or even 96 in the case of QuickTime VR Authoring Studio); check instructions for individual applications.
tilinG
This refers to the way QuickTime VR panoramas are diced into rectangular tiles during the authoring process, so as to enable efficient playback when panning. Some authoring applications enable manipulation of the number and even the ordering of tiles.
When saving a QTVR panorama file, there is a setting for “tiles” or “tiling.” This indicates how many sections each cube face is divided into, with a 1x1 setting meaning no division, and a 2x2 meaning four tiles, up to 8x8 for 64 tiles. Choosing more tiles may make a panorama file appear to load faster because the viewer will see many smaller parts of a cube face appear quickly rather than larger blank areas that fill more slowly. Higher numbers of tiles may result in better performance when viewing a panorama, especially in motion, if the machine displaying it lacks sufficient processing or graphics card capabilities to render smoothly as the view changes. Increasing tiling may increase file size however (although not necessarily to a significant point). Tile settings probably won’t matter all that much, with high-bandwidth internet connections, high-speed media drives, and fast CPUs and graphic cards. However, a little experimentation may lead to one choice over another for purely aesthetic reasons.
coMprESSion (codEc)While source images should as a rule be uncompressed, interactive panoramas derived from them can use a variety of compression schemes (codecs). At the time of writing, by far the most widely used codec for photographic images is Photo-JPEG.
SharpEninG
Almost all digital panoramas, whether scanned from film or stitched, will benefit from some careful sharpening at the end of the production process and before conversion to interactive movies. But, as with digital imaging in general, sharpening should be limited to no more than required for the final product. Overly aggressive sharpening may result in shimmering or moiré-like effects.
Motion and Static quality
Most authoring applications for QuickTime VR movies offer the ability to change these image quality settings, which affect the degree of anti-aliasing applied to images in the viewer when either moving or at rest. Their usual defaults are to set anti-aliasing to off (for better responsiveness) while panning, and on when the image is stopped.
106
SizE oF playback WindoW
As computers have increased in power and speed, and faster connections have become widely available, the trend has been to increase the size of the playback window. Full screen interactive panoramas are now commonly encountered. Larger windows require larger, more detailed source images, especially where zooming is enabled. Note that there is a difference between window size and file size (see section 4.4).
diSplay calibration
Panoramas (and indeed all digital images) should be authored and viewed on computer displays that are properly calibrated and profiled to produce accurate color. There are a number of utilities available to help achieve this, some using software only, and other more advanced systems using hardware.
poStErization
This appears as banding or striations most noticeable in areas of even tone or gradients such as skies, and can result from one (or both) of two main causes: source images that have been too-heavily processed, evidenced by gaps or “combing” in their histograms; and viewing certain movies on computer displays set to 16-bit color. (For the best viewing of interactive panoramas, and indeed for any serious work with digital images, displays should be set to 24-bit or higher.)
ScrEEn rEndErinG
The CPU-intensive task of displaying an interactive panoramic movie during panning can result in a perceived sluggishness or jerkiness where slower computers and/or large movies are concerned. An alternative method of displaying many VR formats is to use hardware-accelerated OpenGL rendering, which, by using the computer’s graphics card rather than software rendering, will provide very smooth, fluid rendering both in a window or at full screen. At the time of writing, a number of such systems are available or in development, two of the most widely used being CubicNavigator and PangeaVR.
8.5. incorporatinG additional MEdia
When incorporated into a larger virtual presentation with audio, video, and other types of multimedia, the immersive effect of digital panoramas is greatly enhanced. The acoustic quality of a building is often as important as the visual (e.g., performance halls, libraries, and religious architecture). Video can provide a directed view and seamlessly demonstrate the transition from room to room as one moves throughout a building. Incorporating CAD reconstructions of a site that is no longer standing can provide an experience that hasn’t been possible for thousands of years.
Many virtual tour authoring packages and stitching programs provide a tool for creating hot spots to be embedded within a panorama (see section 6.9).
107
Ambient audio recorded at the site can be an exciting effect in a virtual tour (see section 5.2). This audio can either be embedded into the QTVR file, or can be embedded in the HTML as an MP3 or other file type. It is possible to include several different audio tracks in one panorama, and when the user pans around the image, the audio tracks can respond by fading left-right and increase or decrease volume, creating a 3D effect (see section 8.8).
Incorporating clickable maps and plans with “you are here” symbols adds another dimension of understanding to the virtual presentation. Plans aid not only in the understanding of the physical space in relation to the location of the panoramas, but are useful navigational tools, particularly in large areas with many node locations.
There is no limit to the possibilities for creating fully featured multimedia presentations. The subject of building virtual tours is discussed further below.
8.6. virtual tourS
Stand-alone panoramas work very well for many educational and documentary purposes. However, in many cases incorporating panoramas into a larger multimedia presentation provides a deeper and more interesting view of the subject. The simplest method is just to add one or more panoramas to a web page with text and external sound files. For optimal results, though, a full-featured authoring package (such as LiveStage Pro) allows the developer to incorporate elements, such as directional sound, reactive compass bearings, and animation that give viewers a better sense of location and direction; interactive clickable maps to select nodes; transitions between nodes; voiceovers; and hotspots that jump from one node to another (or to still images, other URLs, etc.).
The full use of authoring packages of this sort lies beyond the scope of this document, but commissioners with access to technical support staff and interest in producing high-end virtual tours should take advantage of local resources. University academic or IT departments may already own the appropriate software and offer training. Given the power of authoring packages, anyone delving into them for the first time should be prepared for a steep learning curve. Such projects might be best given to students already comfortable with multimedia authoring and interested in learning new software packages.
When virtual tours are used in lectures, museum exhibits, or some other situation that involves repeated presentations of the material, it may be best to generate scripted routines that can be executed with the click of a button. For example, if the presenter wants to discuss the features appearing in a panorama’s opening window, then pan right 30° and up 45° to show a second feature, breaking the flow of the lecture while fumbling with a trackpad and trying to change the view smoothly and steadily distracts the presenter as well as the audience. While this kind of transition gets easier with experience, it would be much easier to click one or two keys and start a script that moves down a pre-set path, so that the presenter can continue talking while the panorama changes. This type of script
108
can be added by an authoring package or found on the support web sites devoted to the authoring package, if the package itself does not include them.
Before/after and real life/virtual comparisons of reconstructed or recently discovered sites can also be useful and insightful. One nice way to demonstrate data of this type is to run two or more panorama files showing the same location in different states. Some authoring packages allow two or more panorama files to be synchronized on the same screen, so that each panorama has the same view as the other. When the viewer pans, tilts, or zooms in one panorama those actions are mirrored in the other. This allows comparisons of objects or data from an identical point of view. Alternatively, the viewer might want to see two completely different panoramas, so as to contrast different but similar sites.
uSinG livEStaGE ScriptS to proGraM a routE With prE-dEtErMinEd pointS
Using interactive panoramas in a classroom setting can give viewers a strong sense of place when looking at architecture and can be used effectively to show context and detail in parallel with lecture material. However, an otherwise effective presentation can be disrupted by the requirement for precise control at the computer, especially when it is not optimally placed or lighted for easy use of keyboard or mouse to control pan, tilt, rotation, and zoom in a panorama.
Scripting packages are the solution to this. An authoring product can assign a key or a short combination of keys to set a sequence of events, which can then be run during a presentation or lecture. This avoids fiddling with navigating and panning and allows control over speed and direction of movement. The scripts can be matched up to the cadence of the presentation, so that the narrator or lecturer can concentrate on the audience rather than the technology.
For example, imagine a lecture on the interior space of an important building, using a pair of panoramas that illustrate key points. It might be accompanied by a script such as this:
Open panorama A and wait thirty seconds.1.
Over a span of sixty seconds, pan 30° to the right and tilt up 10°, zoom in by a factor 2. of two, then wait 300 seconds.
Over a span of ten seconds, pan 10° to the right, then wait 180 seconds.3.
Over a span of twenty seconds, pan 45° back to the left, tilt down 30°, automatically 4. click an embedded hotspot on a doorway, which leads to panorama B.
Over a span of 120 seconds pan 360°, then tilt up 90° and zoom in by a factor of 5. three. Wait 600 seconds.
Over a span of thirty seconds tilt down 90°, zoom back to the original magnification 6. factor, then pan 180° and click a doorway hotspot leading back to panorama A and load it.
109
This could be started with a single key stroke. Conditional statements or status checks could be added so that the narrator could interrupt the script during the talk. The panning can be set to end at an exact or relative location and can be precisely timed to allow for a given chunk of narration. For example, step three above could also be set to start 300 seconds from when it is stopped or 300 seconds after step two ends. A “cancel” option to terminate the script might also be helpful.
A script like this is relatively easy to program once the software has become familiar. It may take patience and dedication to master use of timeline, scripting, and adding tracks. However, these authoring applications are very powerful and may be worth the investment.1
8.7. applyinG panoraMaS
Panoramic images can be used to add detail to 3D, VR, and CAD environments. It is possible to apply photographs to the surface of polygonal wire-frames as a sort of texture, lending realism to a 3D model that a synthetic texture created artificially by computer cannot. A model’s geometry may have varying levels of detail, ranging from simple geometric shapes to complex polygons of minute detail. Laser and multi-spectral scanners can help capture a high level of spatial detail. Applications such as 3D Studio Max and Rhino can “bake” photo-realistic textures onto object surfaces to create models that virtually represent a site to a remarkable extent. The inclusion of additional media (section 5), such as audio recorded on-site, can greatly enhance the immersive qualities of a virtual model.
Specialized viewing software may be needed to view 3D virtual reality models. Additionally, the large amounts of data these models generate require a highly capable computer system.
Photogrammetry is a technique that uses images of a single object from various viewpoints to create a 3D environment. Software such as RealVIZ’s ImageModeler and VTour identify like-objects in several images. These can then be extruded into polygonal forms to create a wire form that give depth to a scene, adding a third dimension to what was previously a set of 2D images.
These techniques can help create a highly immersive virtual experience of an existing site. They are also helpful in creating a representation of a site undergoing restoration or reconstruction and for combining photo-realism with computer-created structure and forms.
1. Anyone working with LiveStage Pro should also have Matthew Peterson’s Interactive QuickTime: Authoring Wired Media (Morgan Kaufmann Publishers, 2004) close to hand.
110
8.8. track Synchronization
It will greatly extend the usefulness of immersive panoramas if you can use an authoring tool to add synchronized components to their presentations. This kind of software allows the addition of such things as:
A rotating arrow on a map to show direction of view.• A scrolling compass wheel to show a bearing. • A sound file linked to an object in the panorama, such that panning causes the source • of the sound to float from one speaker to another for listeners with stereo sound.A parallel panorama meant to show the same node at a different time or under different • conditions (when one panorama is panned, the other automatically turns to match the same point of view).A parallel panorama generated from software (rather than a photograph) to show the • same point of view, such as a site now in ruins, with a virtual reconstruction of how it might have looked.
Essentially, a program such as LiveStage Pro uses a large workspace to lay out a project where the panorama appears in one area and other components, such as a map or plan, alongside. The user can then add an arrow graphic, for example, orient it, and bind it to the panorama’s view through the use of synchronized tracks. Moveable components of this sort are often called sprites and can be controlled through the authoring package’s scripting components as well. When complete, the authoring package generates a file that includes the panorama as well as the sprites.
The inclusion or creation of these components into a virtual tour or web page requires some expertise with authoring packages but usually provide results worth the efforts to learn.
8.9. controllinG accESS
Total protection of panorama files is impossible: determined users will usually find a way. That being said, there are a number of techniques that can discourage unauthorized access and copying. The various options available depend on delivery methods (such as web page or CD-ROM), the authoring platform, the security requirements of the institute distributing the panorama, and the technical abilities of the project staff. Consult the technical support staff to see what options are available. Full discussion of these can be found on Apple’s web site and in the book QuickTime 6 for Macintosh & Windows.
QuickTime offers some basic approaches to preventing unauthorized copying as detailed in Gulie (2004: 95-99) and Stern and Lettieri (2003: 418-422). Essentially, someone creating a QuickTime panorama can disable the “Save As” feature to prevent making copies from QuickTime’s own menu or from the QuickTime viewer plugin used within a web page. This approach, however, does not prevent someone from duplicating an
111
entire CD-ROM of panoramas nor block a web user from copying the original file from the browser’s cache when using the Internet to view the panorama.
If you want to protect your web-based panoramas you may be able to achieve a level of security well beyond the reach of all but the most determined and knowledgeable copiers, depending on your technical expertise and willingness to research the latest options and approaches. For example, the aforementioned authors detail how to create pointer files and provide tools to create them, however these may not work on your system.
The basic idea is that you store the original panoramas on your web server but do not embed them directly into web pages. Instead, you create files that point to the panoramas and then embed the pointer files within the web page. The pointer files themselves cannot be saved and and cannot be played directly - they work only when they have access to the original file. One drawback of this system is that no one can see your panoramas unless they have Internet access, your server is available, and you haven’t moved or removed the original files. Of course creating and managing the pointer files requires more work.
QuickTime itself, like other panorama creation and viewing packages, does offer a feature that may serve to prevent most copying when a panorama is embedded within a web page. As detailed on Apple’s QuickTime tutorial web site2, the QTSRCDONTUSEBROWSER parameter used with the <EMBED> tag will cause the browser to not cache the file. Despite this attribute, someone might still view the source of the web page to find the URL of the QuickTime movie and load it directly.
2. http://www.apple.com/quicktime/tutorials/embed2.html

112
WEb rEFErEncES
3D Studio Max. http://usa.autodesk.com/adsk/servlet/index?id=5659302&siteID=123112
ActiveX. http://www.activex.com
Apple QuickTime tutorials. http://www.apple.com/quicktime/tutorials/
Camino. http://www.caminobrowser.org
CubicNavigator. http://www.clickheredesign.com.au/cubicnavigator/
Director. http://www.adobe.com/products/director/
Firefox. http://www.mozilla.org
Flash. http://www.macromedia.com/software/flash/about/
Helmut Dersch. http://webuser.fh-furtwangen.de/~dersch/
ImageModeler. http://imagemodeler.realviz.com/products/IM/index.php?language=EN
iPix. http://www.ipix.com
iShell. http://www.tribalmedia.com/?gclid=COCUlvOH_YwCFSQYZAodDmEiiA
Keynote. http://www.apple.com/iwork/keynote/
LiveStage Pro. http://www.totallyhip.com/livestage.html
OpenGL. http://www.opengl.org
PangeaVR. http://www.pangeasoft.net/pano/plugin/pangeavr.html
PowerPoint. http://office.microsoft.com/en-us/powerpoint/default.aspx
PTviewer. http://www.fsoft.it/panorama/ptviewer.htm
Rhino. http://www.rhino3d.com
Safari. http://www.apple.com/safari/
Shiira. http://shiira.jp/en

113
SPi-V. http://fieldofview.com/spv
SpinControl. http://spincontrol.cheathamlane.net/
VTour. http://imagemodeler.realviz.com/products/VT/index.php?language=EN
9. uSE
9.1. uSE oF panoraMaS and vr in thE lEcturE/claSSrooM/lab/hoME
The great advantage of using panoramas of buildings in the classroom is that they can replicate the actual experience of being in a space. Students become interested in the spatial experience of the building to a much greater degree, so much so that gasps from the audience often mark the first use of digital panoramas in a class. Students who have never visited Charlottesville find themselves at the center of Mr. Jefferson’s Lawn, able to look around them as if they were actually standing there. One caveat is that the instructor (or whoever is navigating) must learn to move the image slowly and steadily, however, so that the class doesn’t get simulator sickness. If a quick movement is necessary, the lecturer should warn the audience.
The images themselves allow the instructor to skip much of the contextual explanation required when showing slides, since the information is available on screen. On the other hand, because movement through the building must be slow for the sake of the viewers, instructors may find themselves covering fewer buildings per class. Cutting down on examples is not necessarily a bad thing, particularly in introductory courses and when buildings and objects can be presented in compelling ways. The technology works particularly well for rotating the object and showing sculptures in the round. For sculpture attached to buildings, such as Vézelay or Chartres, panoramas can demonstrate the relationship between the sculpture and the building, and show architecture in a most revealing way. Audio features can make the acoustical properties of a structure apparent. For example, the abbey church at Neresheim has a nine-second delay that can be experienced through a recording of the organ and chanting monks.
Alternatively, panoramas can be used for independent study. Students who have used digital panoramas on their own computers report that panoramas make it possible to comprehend the totality of a structure, which helps tremendously in studying individual buildings. Instructors might assign the study of particular panoramas for paper topics or for prepared exam questions. Even a building as complex as Rem Koolhaas’s Central Library in Seattle can be mastered from panoramas, as long as the panoramas are accompanied by clear diagrams of the structural systems.
115
The principal drawback is that the instructor can have only one image on the screen at a time. The simplest way around this is to use panoramas together with slides projected on the same screen or wall. For example, to explain the promenade through the Bibliothèque Ste. Gêneviève, the instructor might show a slide of the plans of all three floors on the wall next to the digital views of the outside and inside. Supplementary slides can also incorporate comparative or historical material into the lecture. If the classroom has two digital projectors, the instructor can project a panorama and a PowerPoint summary at the same time. Regardless, the instructor should supplement panoramas with other kinds of simultaneous projection. Digital panoramas should not replace traditional slide presentations but add depth and interest to them.
Any new technology takes time to master and it would be wise to practice with dry runs and workshops before debuting it in the classroom. Plot the course of the movement through the space, coordinate the accompanying slides, and then run through the lecture several times before going public. It is also wise to plan ahead for technical problems: back-up the panorama on a CD or DVD and bring it to class, especially if data is being accessed via the internet. If several buildings are being discussed in one lecture, set them up ahead of time so that the presentation can go smoothly from one building to the next.
9.2. Scholarly uSE
Many of the reasons for using panoramas in scholarly work are the same as those for classroom use. First and foremost among these is that digital panoramic photography provides a more accurate sense of space than 2D images. This provides a sense of immediacy and replicates the seamlessness of seeing the actual space or object. It also facilitates research into spatial relationships in individual buildings or sites, making these relationships apparent in a way that flat images or even site visits may not. John Dobbins, Art History professor at the University of Virginia, notes that using a 360° panoramic image of Pompeii allows him to analyze a complex intersection between the forum and the areas of the city that lie beyond it. Rather than relying on a series of fragmented still photographs, he can move smoothly through the site to understand the overall relationship in all of its complexity. Unlike videos, where the videographer controls the image, the digital panorama user has total control over the movement and speed of the image, although restricted by the position of nodes.
In addition to the spatial component, contextual relationships, larger scale studies, and collaborative work all benefit from this technology. Dietrich Neumann, Art History professor at Brown University, has said that digital panoramas were invaluable in his study of the relationship between the lighting programs of the Wrigley Building and Tribune Tower. Through the use of panoramic images of Chicago, he can study and demonstrate the correspondence between the lighting programs of the two buildings. In some cases, the high resolution and accuracy of the images brings out details of building sequence, materials and chronology that are actually less apparent on site.
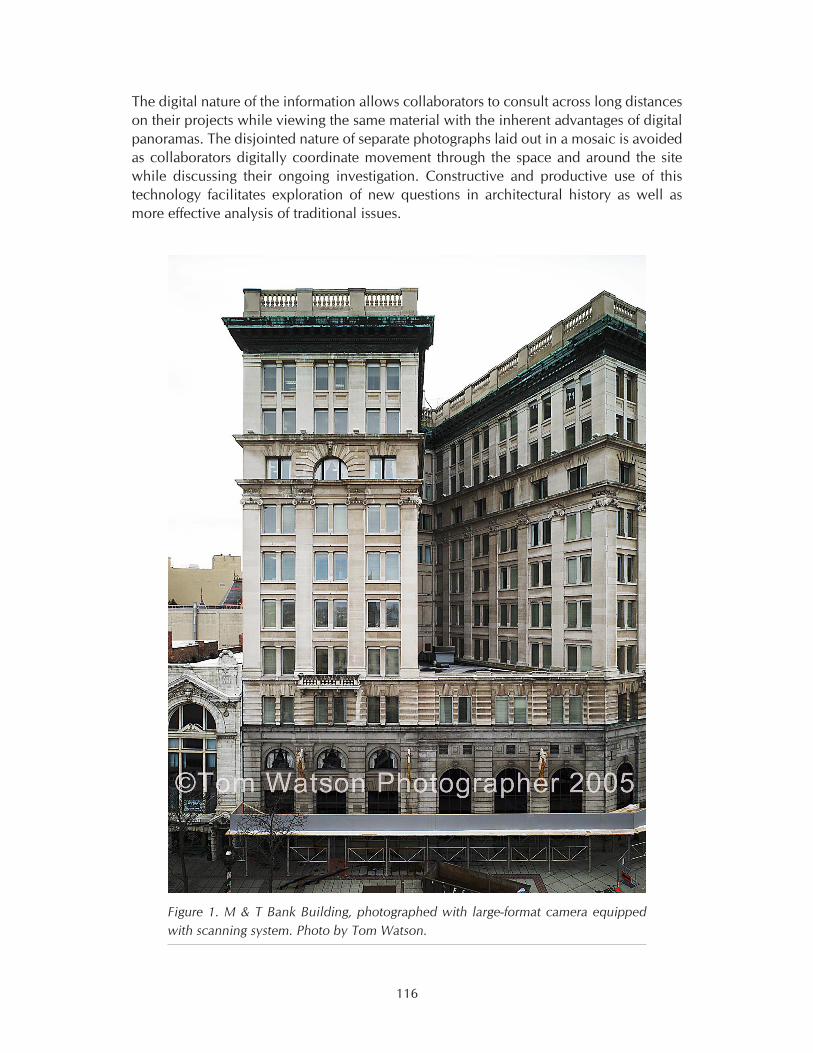
116
The digital nature of the information allows collaborators to consult across long distances on their projects while viewing the same material with the inherent advantages of digital panoramas. The disjointed nature of separate photographs laid out in a mosaic is avoided as collaborators digitally coordinate movement through the space and around the site while discussing their ongoing investigation. Constructive and productive use of this technology facilitates exploration of new questions in architectural history as well as more effective analysis of traditional issues.
Figure 1. M & T Bank Building, photographed with large-format camera equipped with scanning system. Photo by Tom Watson.

117
9.3. practical uSE For EnGinEErS and architEctS
photoMEtricS FroM diGital iMaGES
All digital images are gridded images produced by rows of pixels arranged in x and y alignment. By using a known measurement, such as the length of a brick, it is possible to assign pixel value to this known measurement. Once the pixel/brick ratio is established, the pixels per foot is easily determined and one can take measurements from any flat surface. Caution: The image plane of the camera must be kept perpendicular to the surface.
Tom Watson’s image files of the 100-year-old M & T Bank Building (Fig. 1-3) were loaded into AutoCAD. The images replaced the usual line drawings generated by laborious manual methods and all masonry surveying engineering and dimensioning were taken from the image files.
SoFtWarE
The ability to make pixel measurements is a property of simple software such as Photoshop and more powerful programs such as AutoCAD.
Figure 3. Detail of M & T Bank Building photo shown in Figure 1. Photo by Tom Watson.
Figure 2. M & T Bank Building in AutoCAD. Photo by Tom Watson.
118
hardWarE
Any digital camera will produce a file suitable for measurement. However, image resolution is directly related to usefulness as a measurement tool. If the goal is to see small details (high resolution images) are powerful analytical tools.
photoMEtricS
Panoscan recently introduced new software, PanoMetric, which allows measurement of a panorama image (photometrics). This method uses a stereo panoramic image with a precise distance between image centers, that is processed in panometric software to allow the user to make measurements within the panorama.
9.4. intErnEt
The internet is a wonderful tool for distributing virtual tour and multimedia projects to specific communities on campus or across the globe. With ever-increasing bandwidth and faster, less expensive computers available, it is possible to do things today that even five years ago would have required specialized hardware and would have been the purview of the technological elite. The data transfer barriers of yesterday are quickly being eliminated, particularly on local, ultra high-speed optical fiber networks regularly found on academic campuses. New panoramas are posted regularly, on specialist sites such as panoramas.dk and on general interest sites such as YouTube. There is enormous creativity and inspiration on display, in both subject matter and presentation of information.
It is easy to create multiple versions of a digital panorama with varying resolutions and file size, so that users can choose the version of the project that best matches their computer speed and Internet connection. Note that for internet distribution it is important to provide the basic contextual information about the subject being shown in the images. Data documentation and metadata is discussed in section 7.
9.5. publicationS
As digital photography technology improves and the quality of digital panoramas increases, the general public is becoming more familiar with them. We are beginning to see this technology permeating the world of publishing. Textbooks are beginning to be sold with DVD-ROM supplements and dedicated websites that provide digital images that are greatly enhancing the student’s learning experience. These new tools often provide high-resolution zoomable images, usually more than are available on the printed pages, as well as digital panoramas. An accompanying website provides a place where the publisher can provide new information and corrections. A DVD supplement can provide full-resolution panoramas as well as the necessary viewing software. Some publishers and on-line archives provide software that allow scholars to use digital images to create PowerPoint-like presentations, similar to the way slide libraries work in conjunction with lectures. As time goes on, the prevalence of digital images and panoramas in the
119
academic world will only increase, opening a world of possibilities for educator and scholars alike.
9.6. hand-hEld dEvicE at SitE/landScapES
In the future it may be possible to use a hand-held device at an archaeological site or landscape that, using GPS technology, will be able to provide a computer-generated view of how it looked at certain points in time. This would be a modern version of the Then and Now series of books that a visitor can purchase at an archaeological site like the Roman Forum.
9.7. hiStorical and hEritaGE SitE prESErvation and rEStoration
Besides being a useful tool for scholars, educators, and students, high-quality high-resolution digital panoramas serve as an important historical documentation of a site that provides a relatively objective 360° view — a record of how a place looked at a certain point in time. The importance and uniqueness of this type of documentation is exemplified in two separate projects.
Brian Donovan’s documentation of the Orthodox monastery of Hilandar at Mount • Athos in Greece. The monastery suffered a devastating fire in 2004 that destroyed about sixty per cent of the monastic complex, and Donovan’s work is a unique record of much of what was lost. (See Donovan’s account in section 2.8.)
The Mellon International Dunhuang Archive, undertaken by a team from Northwestern • University, in collaboration with the Dunhuang Research Academy (China). Members of the team photographed wall paintings and grottos in dozens of Buddhist cave grottos along the Silk Route in the Gobi Desert. They then stitched the images together to create 2D and 3D representations of the cave walls. Parts of the walls of the cave grottos supporting the mural paintings have since fallen down, and while these panoramic photography campaigns do not represent the only images of how these sites once were, they do offer unique views that provide intricate detail, often difficult to see in situ, now impossible to visit and see in person.

120
WEb rEFErEncES
AutoCAD. http://www.autodesk.com
Hilandar at Mount Athos. http://hilandar.creative.auckland.ac.nz
Mellon International Dunhuang Archive. http://www.artstor.org/info/collections/mida.jsp
PanoMetric. http://www.panoscan.com/PanoMetric/
Panoramas.dk. http://www.panoramas.dk
YouTube. http://www.youtube.com
121
10. StoraGE and prESErvation
Although storage and preservation may not seem high priorities when planning a digital panorama project, they are vital to the long-term survival of the data.
Storage and preservation needs will vary from one project to another, depending in part on what media was used in production. Printed photographs, slide negatives, and digital photos all have different requirements. Since digital resources require software and hardware to be accessible by users, long-term preservation plans should include these factors.
If the project data is stored in a library or archive, the data should be consistent with the institution’s guidelines. It would be wise to consult with a member of the library or archive staff early on in the project’s timeline, so that you are aware in advance of what kind of material the archive can accept and what metadata it requires. This discussion should also cover whether or not the archived material will be made accessible to users, how access will be controlled, and what kind of long-term maintenance will be required.
There are many resources regarding storage and preservation of digital and film materials. American National Standards Institute (ANSI) and the International Standards Organization (ISO) have produced a series of standards for archival-quality materials for long-term storage of photographic materials, and these standards are observed by most manufacturers of quality archival materials. Some other resources that may be useful are:
The World Wide Web Consortium (W3C)• The Web Standards Projects •
The Society of American Archivists (SAA) offers courses and resources on archival practices and principles. Their web site is aimed at archivists and librarians, but it is a good source of information about current archival practices and issues.
122
10.1. lonG-tErM phySical StoraGE
Physical records would include photographic prints, paper records, slides, film negatives, and audio and video storage devices such as CDs and tapes. Data on media such as CDs and tapes require controlled storage conditions and some kind of player. The shelf-life of media such as CDs and DVDs can vary, so it is worth using archival quality media (well-made and reliable for burning and storing data). Technology is constantly evolving, so at some point the devices and media used to store and play your data will be outdated or difficult to maintain. At that point, the data must be migrated to another media or format. This is best done in consultation with a trained archivist who is familiar with the technical and adminstrative requirements of the project and the software involved.
In the case of paper records, prints, and film, the data they contain can be copied but some data or metadata may be lost in the process. For best results, these items should be professionally archived. Regardless, consider following commonly accepted best practices when generating this material.1 Consult with a local university library or archive for further guidance.
10.2. diGital prESErvation StratEGiES
Digital resources are, generally, more difficult to preserve than physical objects. As with physical objects, they require space, environmental controls, and good administrative practices, but they also require viable file formats, media and hardware, and software used for storing and accessing the data. Depending on how complex the project is (e.g., multiple panoramas, textual commentary, additional media), there may be several applications and devices required to access and use the resources it employs.
The simplest type of preservation is to make multiple copies of the source files and necessary applications. In the short- and medium-term that can be done by copying the files onto archival-quality DVDs or CDs that are stored in a safe and reliable location. This can be done independently of a library or archive, but it is does not guarantee access to the materials. If the storage media are compromised, there is not much that can be done (hence the need for multiple copies). Furthermore, if DVD- and CD-drives are replaced by superior technology, it may become difficult or impossible to retrieve your data. Similarly, software applications, whether open source or proprietary, are vulnerable and may become obselete. If the viewing software is no longer viable, it may be necessary to revisit the project and decide whether or not to emulate it with current software.
If the project is being stored at an archive or library, the preservation staff will most likely migrate project data to other storage media as necessary, thereby providing a
1. E.g., the National Archives of Australia has a page describing the specifications for acceptable archival paper. The Northeast Document Conservation Center offers free preservation advice to individuals and has range of leaflets covering document and photograph storage, handling, and management.
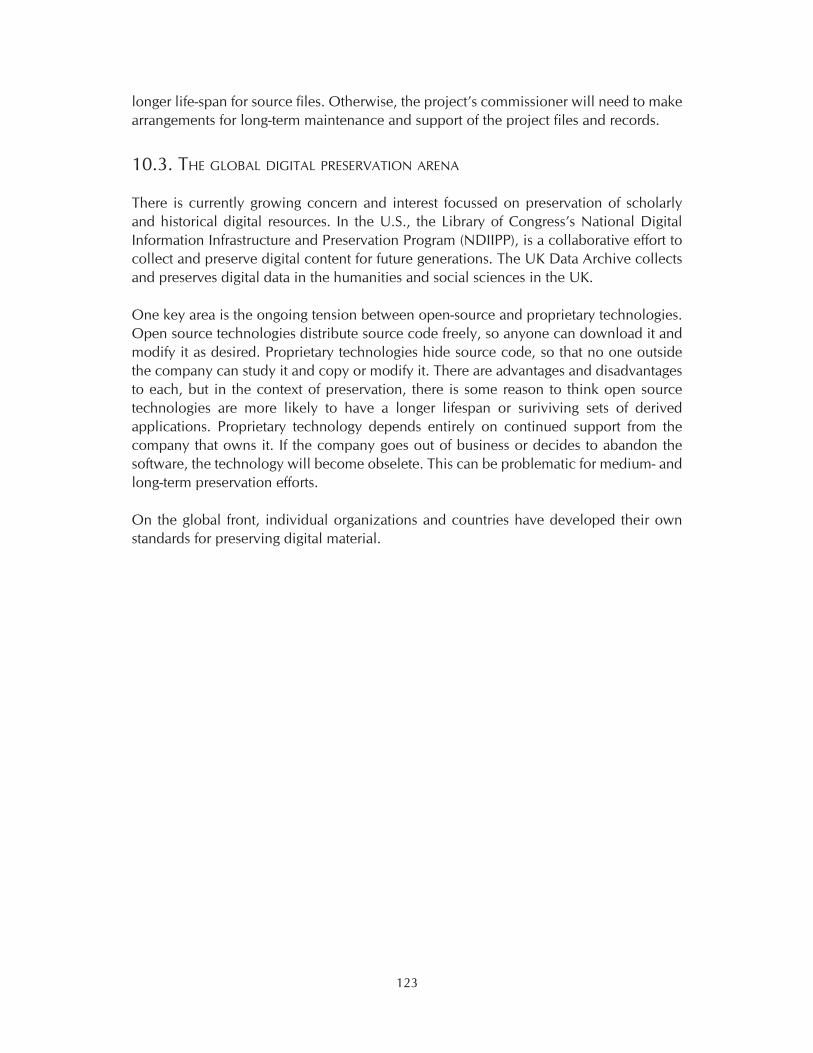
123
longer life-span for source files. Otherwise, the project’s commissioner will need to make arrangements for long-term maintenance and support of the project files and records.
10.3. thE Global diGital prESErvation arEna
There is currently growing concern and interest focussed on preservation of scholarly and historical digital resources. In the U.S., the Library of Congress’s National Digital Information Infrastructure and Preservation Program (NDIIPP), is a collaborative effort to collect and preserve digital content for future generations. The UK Data Archive collects and preserves digital data in the humanities and social sciences in the UK.
One key area is the ongoing tension between open-source and proprietary technologies. Open source technologies distribute source code freely, so anyone can download it and modify it as desired. Proprietary technologies hide source code, so that no one outside the company can study it and copy or modify it. There are advantages and disadvantages to each, but in the context of preservation, there is some reason to think open source technologies are more likely to have a longer lifespan or suriviving sets of derived applications. Proprietary technology depends entirely on continued support from the company that owns it. If the company goes out of business or decides to abandon the software, the technology will become obselete. This can be problematic for medium- and long-term preservation efforts.
On the global front, individual organizations and countries have developed their own standards for preserving digital material.

124
WEb rEFErEncES
American National Standards Institute (ANSI). http://www.ansi.org
International Standards Organization (ISO). http://www.iso.org
National Archives of Australia archival paper specifications. http://www.naa.gov.au/recordkeeping/preservation/aqt/rules/rules_technical_specs.html
National Digital Information Infrastructure and Preservation Program (NDIIPP). http://www.digitalpreservation.gov/library/
Northeast Document Conservation Center. http://www.nedcc.org/home.php
Society of American Archivists (SAA). http://www.archivists.org/index.asp
UK Data Archive. http://www.data-archive.ac.uk/
Web Standards Projects. http://www.webstandards.org
World Wide Web Consortium. http://www.w3.org
125
11. concluSion
New technologies are constantly being developed that will improve or replace the tools and methods described in this guide. Panorama makers have always taken advantage of new technologies to try to push the envelope and create new vistas, showing things that could not otherwise be seen. It is not wise to ignore the constant march of technology, but it is also not wise to let technology take precedence over artistic and scholarly priorities. Exciting new tools will enhance, not replace, analytical thought, creative effort, and professional standards.
There are several new tools and research projects right now that offer new paths and possibilities to digital panoramas. Microsoft recently released videos showing its research on Photosynth, which uses collections of digital photos to automatically generate 3D models of buildings and even entire cities. The software is still immature and the quality and usefulness of the models it creates will depend on the quality of the photos used and metadata provided, but it may be an intriguing opportunity.
REALVIZ’s VTour creates a 3D environment from a single panorama or sets of panoramas. REALVIZ also sells ImageModeler, which creates 3D models from several photos taken around an object. Both tools can export data into file formats appropriate for Maya and Google Earth.
Google SketchUp is a 3D modeling tool. As its name suggests, it is intended to use for conceptual design. It could be a useful addition to a panorama, perhaps for adding recreations of destroyed or lost buildings or for analysing design and architectural history.
Revit, currently being developed by Autodesk, is another exciting design tool. It is based on a BIM CAD paradigm that allows study of a building’s structure via cut-away views and hiding layers (such as the roof or walls).

126
WEb rEFErEncES
Google SketchUp. http://sketchup.google.com
REALVIZ. http://www.realviz.com
Revit. http://www.revit.com

127
appEndix 1. author contact inForMation
brian donovan
http://cad.auckland.ac.nz/index.php?p=staff_detail.php&upi=bdon014Photographer Center for Flexible and Distance LearningUniversity of Auckland
bErnard FriSchEr
http://www.iath.virginia.edu/%7Ebf3e/revision/bio_short.htmlDirector, IATHUniversity of Virginia
MichaEl GroSS
http://[email protected], Media SpecialistUniversity of Virginia
barry GroSS
http://[email protected], Media SpecialistUniversity of Virginia
EuGEnE johnSon
http://www.williams.edu/Art/wcart/faculty/johnson_ej/ejohnson.htm Professor of ArtWilliams College
Worthy Martin
http://www.cs.virginia.edu/brochure/profs/martin.html Associate Director, IATHUniversity of Virginia
liSa rEilly
http://www.arch.virginia.edu/faculty/LisaReilly/ Associate Professor, Architectural HistoryUniversity of Virginia

128
Will rourk
[email protected] Media Specialist, Digital Media CenterUniversity of Virginia Library
kEn Stuart
[email protected] Photographer
MichaEl tuitE
[email protected] Digital Media LabUniversity of Virginia Library
toM WatSon
http://www.tomwatsonphotography.com Photographer
Sarah WEllS
[email protected] and Technical Communications Officer, IATHUniversity of Virginia
MadElyn WESSEl
http://curry.edschool.virginia.edu/index.php?option=com_currypeople&userid=mfw2y&task=detail Special Advisor/Liaison to the General Counsel for the University of Virginia Libraries
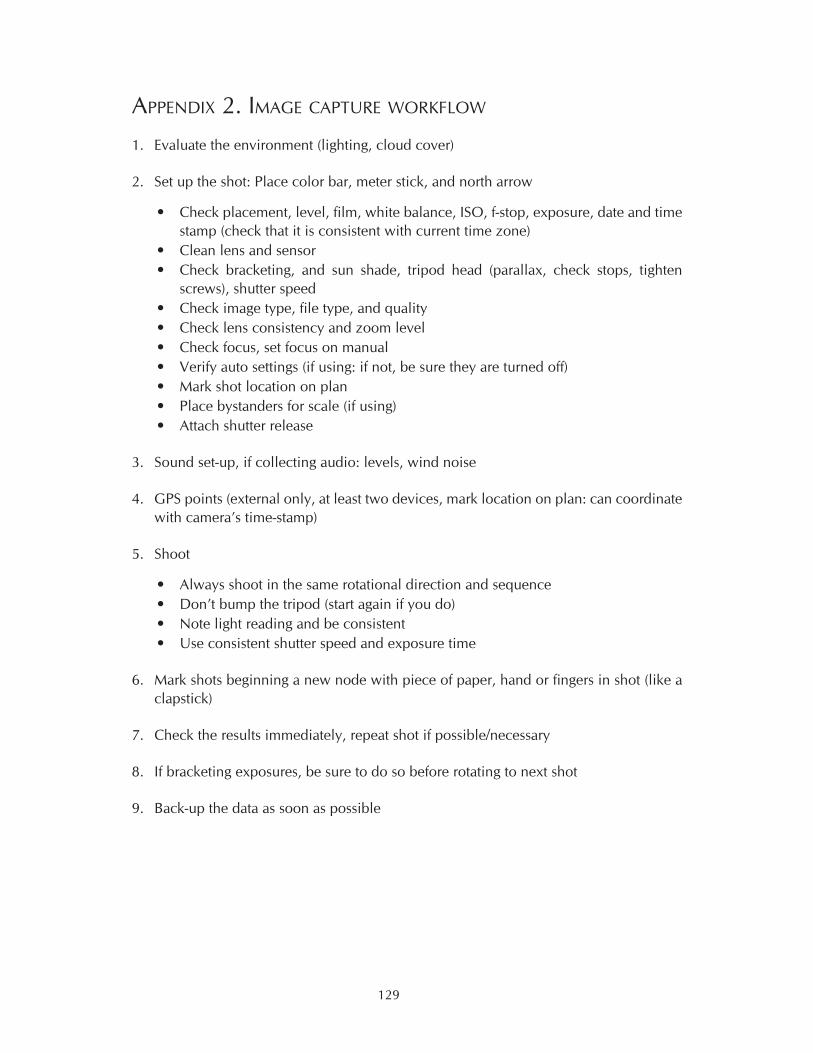
129
appEndix 2. iMaGE capturE WorkFloW
Evaluate the environment (lighting, cloud cover)1.
Set up the shot: Place color bar, meter stick, and north arrow2.
Check placement, level, film, white balance, ISO, f-stop, exposure, date and time • stamp (check that it is consistent with current time zone)Clean lens and sensor• Check bracketing, and sun shade, tripod head (parallax, check stops, tighten • screws), shutter speedCheck image type, file type, and quality• Check lens consistency and zoom level• Check focus, set focus on manual• Verify auto settings (if using: if not, be sure they are turned off)• Mark shot location on plan• Place bystanders for scale (if using)• Attach shutter release•
Sound set-up, if collecting audio: levels, wind noise3.
GPS points (external only, at least two devices, mark location on plan: can coordinate 4. with camera’s time-stamp)
Shoot 5.
Always shoot in the same rotational direction and sequence• Don’t bump the tripod (start again if you do)• Note light reading and be consistent• Use consistent shutter speed and exposure time•
Mark shots beginning a new node with piece of paper, hand or fingers in shot (like a 6. clapstick)
Check the results immediately, repeat shot if possible/necessary7.
If bracketing exposures, be sure to do so before rotating to next shot8.
Back-up the data as soon as possible9.
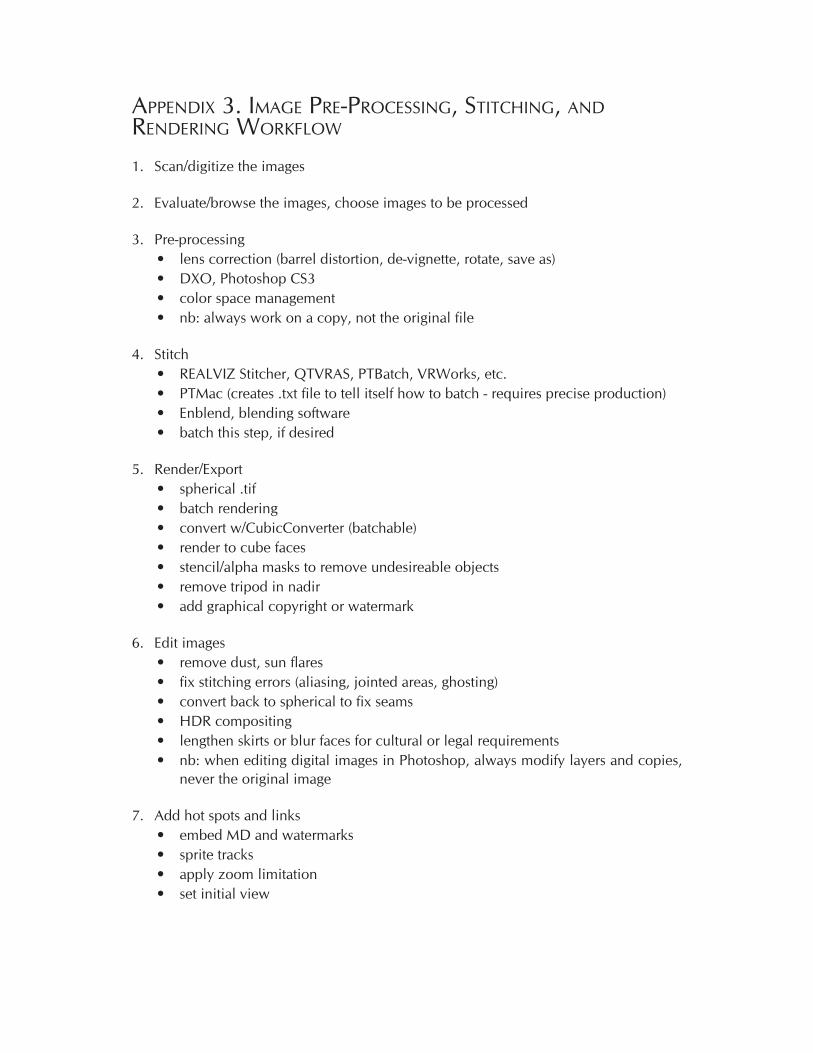
appEndix 3. iMaGE prE-procESSinG, StitchinG, and rEndErinG WorkFloW
Scan/digitize the images1.
Evaluate/browse the images, choose images to be processed2.
Pre-processing3. lens correction (barrel distortion, de-vignette, rotate, save as)• DXO, Photoshop CS3• color space management• nb: always work on a copy, not the original file•
Stitch 4. REALVIZ Stitcher, QTVRAS, PTBatch, VRWorks, etc.• PTMac (creates .txt file to tell itself how to batch - requires precise production)• Enblend, blending software• batch this step, if desired•
Render/Export 5. spherical .tif• batch rendering• convert w/CubicConverter (batchable)• render to cube faces• stencil/alpha masks to remove undesireable objects• remove tripod in nadir• add graphical copyright or watermark•
Edit images 6. remove dust, sun flares• fix stitching errors (aliasing, jointed areas, ghosting)• convert back to spherical to fix seams• HDR compositing• lengthen skirts or blur faces for cultural or legal requirements• nb: when editing digital images in Photoshop, always modify layers and copies, • never the original image
Add hot spots and links 7. embed MD and watermarks• sprite tracks• apply zoom limitation• set initial view•

131
Convert panorama into final formats8. multiple files and formats for access and preservation• file size and window size• resolution•
Back-up9.
appEndix 4. SaMplE batch ScriptS
Contains two scripts by Ken Stuart: PanoImageSorter.pl and PTMacPanoImageSorter.pl (for MacPerl).
panoiMaGESortEr.pl #!/usr/bin/perl# This script takes sets of pano image files and sorts them into # folders and bracketed sets, saving a lot of time compared to # manually creating new folders, naming them, and then moving # files from the original to the sets. The specified folder must # contain a complete sets of files, i.e., if there are 10 nodes # and each node consists of 8 shots, each of which has 3 bracketed # images, then the folder must contain 240 images exactly.
use strict;
# Path and name of folder with pano images, e.g. # /Users/jdoe/Desktop/Panos/originalsmy $StartingFolder = “/Users/kenstuart/Desktop/originals”;
# Path and name of folder to store sorted images.my $EndingFolder = “/Users/kenstuart/Desktop/project”;
# Number of images per pano, usually 4-8, including top and # bottom.my $NumberOfImagesPerPano = 8;
# Number of frames per shot, usually 3 if bracketing, or 1 if # no bracketing.my $NumberOfBrackets = 3;
# Names, in order, that you want to call bracketed sets, e.g., # normal, dark, light. You should have the same number of terms # as number of brackets; if no brackets, you may wish to have a # generic term.my @BracketNames = (“Normal”, “Dark”, “Light”);
# Number of nodes shot.my $NumberOfNodes = 17;
# Enter a set of names for the folders that will contain each # node, e.g., apse, nave, northaisle, southaisle. If you leave # the list of node names blank, the script will assign them names
133
# in the format “Node_n” where n is the number of the node. # my @NodeNames = (“A”, “B”, “C”);my @NodeNames = ();my $number = 0;if ($#NodeNames == -1) { for (my $i=1; $i<=$NumberOfNodes; $i++) { if ($i < 10) {$number = “0”.$i;} else {$number = $i;} push(@NodeNames, “Node_”.$number); }}
# Enter file extension used to in image filenames, usually either # .jpg or .tif.my $ImageFileNameExt = “.jpg”;
# Check starting folder.unless (-e $StartingFolder) {print “Could not find starting folder $StartingFolder. Please check its name in this script on and on the machine. Names may be case-sensitive, and should not contain certain special characters such as spaces, slashes or colons. Cannot continue until problem is resolved.\n\n”; exit;}
# Load image files into a list and sort it.opendir (DIRLIST, $StartingFolder) || die print “Cannot open directory $@.”;my @ImageFiles = grep {/$ImageFileNameExt$/i} readdir(DIRLIST);@ImageFiles = sort(@ImageFiles);close (DIRLIST);
# Confirm correct number of images in directory.my $neededImages = $NumberOfImagesPerPano * $NumberOfBrackets * $NumberOfNodes;my $imageCount = $#ImageFiles+1;print “Number of images needed: $neededImages; number found in $StartingFolder: $imageCount\n”;if ($neededImages != $imageCount) { print “Cannot continue. Please check numbers and image set.\n\n”;exit;}
# Make destination folder.unless (-e $EndingFolder) {mkdir $EndingFolder;}
# Make new folders for each node and each bracket and move images # to them.
134
my $count = 0;foreach my $nodeName (@NodeNames) { for (my $i=0; $i<$NumberOfImagesPerPano; $i++) { unless (-e “$EndingFolder/$nodeName”) {mkdir “$EndingFolder/$nodeName”;} foreach my $bracketName (@BracketNames) { unless (-e “$EndingFolder/$nodeName/$bracketName”) {mkdir “$EndingFolder/$nodeName/$bracketName”;} print “Moved $StartingFolder/@ImageFiles[$count] to $EndingFolder/$nodeName/$bracketName/@ImageFiles[$count]\n”; rename (“$StartingFolder/@ImageFiles[$count]”, “$EndingFolder/$nodeName/$bracketName/@ImageFiles[$count]”); $count++; } }}
ptMacpanoiMaGESortEr.pl#!/usr/bin/perl# This script takes sets of pano image files and sorts them into # folders and bracketed sets, saving a lot of time compared to # manually creating new folders, naming them, and then moving # files from the original to the sets. The specified folder must # contain a complete sets of files, i.e., if there are 10 nodes # and each node consists of 8 shots, each of which has 3 bracketed # images, then the folder must contain 240 images exactly.
# This script also loads a PTMac template file, modifies it to use # the images files, and saves it for use in PTBatch.use strict;use MacPerl; # Used to set file type and creator for output template file, so # that PTBatch recognizes it.
# Path and name of folder with pano images, e.g. /Users/jdoe/ # Desktop/Panos/originalsmy $StartingFolder = “/Users/kenstuart/Desktop/Carter”;
# Path and name of folder to store sorted images.my $EndingFolder = “/Users/kenstuart/Desktop/Carter”;
# Path and name of PTMac template file.my $PTMacTemplateFile = “/Users/kenstuart/Desktop/template.ptmac”;
135
# Number of images per pano, usually 4-8, including top and # bottom.my $NumberOfImagesPerPano = 9;
# Number of frames per shot, usually 3 if bracketing, or 1 if # no bracketing.my $NumberOfBrackets = 1;
# Names, in order, that you want to call bracketed sets, e.g., # normal, dark, light. You should have the same number of terms # as number of brackets; if no brackets, you may wish to have a # generic term.my @BracketNames = (“Auto”);
# Number of nodes shot.my $NumberOfNodes = 17;
# Enter a set of names for the folders that will contain each # node, e.g., apse, nave, northaisle, southaisle. If you leave # the list of node names blank, the script will assign them names # in the format “Node_n” where n is the number of the node.# my @NodeNames = (“A”, “B”, “C”);my @NodeNames = ();my $number = 0;if ($#NodeNames == -1) { for (my $i=1; $i<=$NumberOfNodes; $i++) { if ($i < 10) {$number = “0”.$i;} else {$number = $i;} push(@NodeNames, “Node_”.$number); }}
# Enter file extension used to in image filenames, usually either # .jpg or .tif.my $ImageFileNameExt = “.tif”;
# Load PTMac template file into memory.open(TEMPLATE, $PTMacTemplateFile) || die (“Could not find starting folder $PTMacTemplateFile. Please check its name in this script on and on the machine. Names may be case-sensitive, and should not contain certain special characters such as spaces, slashes or colons. Cannot continue until problem is resolved.\n\n”);my @template = <TEMPLATE>;close(TEMPLATE);my $template = “”;foreach my $line (@template) {$template .= $line;}

136
# Check starting folder.unless (-e $StartingFolder) {print “Could not find starting folder $StartingFolder. Please check its name in this script on and on the machine. Names may be case-sensitive, and should not contain certain special characters such as spaces, slashes or colons. Cannot continue until problem is resolved.\n\n”; exit;}
# Load image files into a list and sort it.opendir (DIRLIST, $StartingFolder) || die print “Cannot open directory $@.”;my @ImageFiles = grep {/$ImageFileNameExt$/i} readdir(DIRLIST);@ImageFiles = sort(@ImageFiles);close (DIRLIST);
# Confirm correct number of images in directory.my $neededImages = $NumberOfImagesPerPano * $NumberOfBrackets * $NumberOfNodes;my $imageCount = $#ImageFiles+1;print “Number of images needed: $neededImages; number found in $StartingFolder: $imageCount\n”; if ($neededImages != $imageCount) { print “Cannot continue. Please check numbers and image set.\n\n”;exit;}
# Make destination folder.unless (-e $EndingFolder) {mkdir $EndingFolder;}
# Make new folders for each node and each bracket and move images # to them. Also, create PTMac template file for each node/ # bracket.my $count = 0;my %templates;my $templateFileName = “”;my $templateStr = “”;foreach my $nodeName (@NodeNames) { for (my $i=0; $i<$NumberOfImagesPerPano; $i++) { unless (-e “$EndingFolder/$nodeName”) {mkdir “$EndingFolder/$nodeName”;} foreach my $bracketName (@BracketNames) { unless (-e “$EndingFolder/$nodeName/$bracketName”) { mkdir “$EndingFolder/$nodeName/$bracketName”; $templates{$bracketName} = $template; }

137
print “Moved $StartingFolder/@ImageFiles[$count] to $EndingFolder/$nodeName/$bracketName/@ImageFiles[$count]\n”; rename (“$StartingFolder/@ImageFiles[$count]”, “$EndingFolder/$nodeName/$bracketName/@ImageFiles[$count]”); $templateStr = “$EndingFolder/$nodeName/$bracketName/@ImageFiles[$count]”; $templateStr =~ s#/#:#g; $templates{$bracketName} =~ s/path:filename/$templateStr/is; $count++; } } while((my $key, my $value) = each(%templates)) { # Save template file. $templateFileName = “$EndingFolder/$nodeName”.”_”.”$key.ptmac”; open(TEMPLATE, “>$templateFileName”); print TEMPLATE $value; close (TEMPLATE); MacPerl::SetFileInfo(“PTMC”, “TEXT”, $templateFileName); }}

appEndix 5. htMl and <EMbEd> ExaMplES
1. htMl ExaMplE oF norMal qtvr EMbEd taG
<embed src=”panorama.mov” width=500 height=416 alt=”Panorama” cache=”true” kioskmode=”true” controller=”true” scale=”toFit” pluginspage=”http://www.apple.com/quicktime/download/”></embed>
2. htMl ExaMplE oF FullScrEEn qtvr EMbEd taG
<object classid=”clsid:02BF25D5-8C17-4B23-BC80-D3488ABDDC6B”codebase=http://www.apple.com/qtactivex/qtplugin.cab width=”100%” height=”99%” ><param name=”src” value=”panorama.mov”><param name=”controller” value=”true”><param name=”scale” value=”tofit”><param name=”autoplay” value=”false”><param name=”cache” value=”true”><embed src=”panorama.mov” width=”100%” height=”99%” controller=”true” scale=”tofit” autoplay=”false” cache=”true” type=”video/quicktime” pluginspage=”http://www.apple.com/quicktime/download/”></embed>
3. applE dEvElopEr connEction WEbSitE: “EMbEddinG quicktiME For WEb dElivEry”
Please see developer.apple.com/quicktime/quicktimeintro/tools/embed.html. The site includes detailed information on QuickTime Embed Tag Attributes.
4. java
Please see http://developer.apple.com/quicktime/qtjava/
139
rEFErEncES
bookS
Adams, Ansel. The Print (Ansel Adams Photography, Book 3). Boston: New York Graphic Society, 1984.
Comment, Bernard. The Panorama. Trans. Anne-Marie Glasheen. London: Reaktion Books, 1999.
Eismann , Katrin. Photoshop Masking & Compositing. Berkeley, CA: New Riders, 2004.
Gulie, Steven. QuickTime for the Web: For Windows and Macintosh. 3rd ed. San Francisco, CA: Morgan Kaufmann Publishers, 2004.
Oettermann, Stephan. The Panorama: History of a Mass Medium. Trans. D.L. Schneider. New York: Zone Books, 1997. Originally published as Das Panorama: Die Geschichte eines Massenmediums (Frankfurt: Syndikat, 1980).
Peterson, Matthew R. Interactive QuickTime: Authoring Wired Media. San Francisco, CA: Morgan Kaufmann Publishers, 2004.
Simmons, Steve. Using the View Camera. New York, NY: Watson-Guptill/Amphoto Books, 1999.
Stern, Judith and Robert Lettieri. QuickTime 6 for Macintosh & Windows. Berkeley, CA: Peachpit Press, 2003.
WEb SitES
copyriGht and pErMiSSionS
Georgia Harper. @ollectanea: Collected Perspectives on Copyright. http://chaucer.umuc.edu/blogcip/collectanea/ (9 Feb. 2007).
[see list in section 3.8 for complete list]
EquipMEnt and SErvicES
0-360. http://www.0-360.com
360Precision. http://www.360precision.com/360/360.cfm
BeHere. http://www.behere.com

140
BetterLight Large Format Photography. http://betterlight.com
Canon Digital Cameras. http://www.canon.com http://www.usa.canon.com/home (U.S. site)
Channel360 Immersive Imaging Gear. http://www.channel360.com
Egg Solution. http://www.eggsolution.com
Kaidan. http://www.kaidan.com
Manfrotto. http://www.manfrotto.com
Nikon Digital Cameras. http://www.nikonworld.com http://www.nikonusa.com (U.S. site)
Panoscan. http://www.panoscan.com
Pixel Light Digital Imaging Services. http://www.pixellight.com
Remote Reality. http://www.remotereality.com
S.K. Grimes Services for Large Format Photographers. http://www.skgrimes.com
ExaMplES
Clifford Ross | R2 Camera. http://cliffordross.com/R2/R2_design_01.php?page=technical&tech=r2&techsub=r22%82%22=s1
Gross Brothers Media. http://www.grossbrothersmedia.com
Hilander Panoramas. http://hilandar.creative.auckland.ac.nz
International VR Photographers Association (IVRPA). http://ivrpa.org
An Inexpensive Panorama Video System. http://www.vrhotwires.com/InexpensivePanoramicVideo6.html
Mellon International Dunhuang Archive. http://www.artstor.org/info/collections/mida.jsp
The Original Worldwide Panorama Event, March 20, 2004. http://geoimages.berkeley.edu/worldwidepanorama/wwp304/
Panoramas.dk. http://www.panoramas.dk
141
Pilgrimage Church of Wies, Bavaria (Die Wies). http://www.williams.edu/art/architectureVR/dieWies/pagesSmall/ext.html
Richardson Photography. http://www.richpix.com/portfolio/05_panoramic/panoramic_01.html
Stephen Johnson Digital Panoramic Photographs. http://www.sjphoto.com/digital_pano.html
Shelley Lake. http://www.shelleylake.com
A Virtual Walking Tour: The Alhambra. http://www.saudiaramcoworld.com/issue/200604
A Virtual Walking Tour: The Suleymaniye Mosque. http://www.saudiaramcoworld.com/issue/200605
audio rESourcES
Minidisc Community Portal. http://www.minidisc.org
Nickspicks. http://www.nickspicks.com
Tape.com. http://www.tape.com
GEnEral
Boniface, Russell. “Architects Zoom in on the Benefits of Digital Photography.” AIArchitect (3 Feb. 2007). http://www.aia.org/aiarchitect/thisweek05/tw0225/ 0225bp_digitalphotography.htm (3 Feb. 2007).
Grout, Catherine et al. “Creating Digital Resources for the Visual Arts: Standards and Good Practice.” Visual Arts Data Service and University of Bristol. http://vads.ahds.ac.uk/guides/creating_guide/contents.html (26 June 2007).
HowStuffWorks. http://electronics.howstuffworks.com/digital-camera.htm
photoGraphy rESourcES
Large Format Photography Forum. http://www.largeformatphotography.info/forum/index.php
The Luminous Landscape. http://www.luminous-landscape.com
MAGNAchrom. http://www.magnachrom.com

142
Panoguide. http://www.panoguide.com
Digital Photography Review. http://www.dpreview.com/
SoFtWarE rESourcES
“Copy-Protecting Movies.” QuickTime Developer Series. 2002. http://developer.apple.com/documentation/Quicktime/QT4WebPage/samplechap/ special-8.html (3 Feb. 2007).
“LiveStage Professional.” Totally Hip Technologies. 2004. http://www.totallyhip.com/livestage.asp (3 Feb. 2007).
“QuickTime Tools and Utilities.” Apple QuickTime Developer. 2005. http://developer.apple.com/quicktime/quicktimeintro/tools/ (3 Feb. 2007).
3D Studio Max. http://usa.autodesk.com/adsk/servlet/index?id=5659302&siteID=123112
Adobe Creative Suite. http://www.adobe.com/products/creativesuite/
ACDSee. http://www.digitalriver.com/v2.0-img/operations/acdsys/html/060926/acdsee_1.html
ActiveX. http://www.activex.com
Aperture. http://www.apple.com/aperture/
Audacity Audio Recorder. http://www.afreecodec.com/win/317/audicity-audio-recorder/
AutoCAD. http://www.autodesk.com
Autostitch. http://www.cs.ubc.ca/~mbrown/autostitch/autostitch.html
CorelDRAW. http://www.corel.com/servlet/Satellite/us/en/Product/1153321305884
Corel Paint Shop Pro. http://www.corel.com/servlet/Satellite/us/en/Product/1155872554948
Cubase. http://www.steinberg.net/27_1.html
CubicNavigator. http://www.clickheredesign.com.au/cubicnavigator/
DeFish. http://www.worldserver.com/turk/quicktimevr/fisheye.html

143
DevalVR. http://www.devalvr.com
Digital Performer. http://www.motu.com
DxO Optics Pro. http://www.dxo.com/intl/photo/dxo_optics_pro/
Enblend. http://enblend.sourceforge.net
Flash. http://www.macromedia.com/software/flash/about/
GarageBand. http://www.apple.com/ilife/garageband/
GISuser. http://gisuser.com
Google Earth. http://earth.google.com
Google Maps Mania. http://googlemapsmania.blogspot.com
Google SketchUp. http://sketchup.google.com
iPix. http://www.ipix.com
iShell. http://www.tribalmedia.com
iTunes. http://www.apple.com/itunes/
ImageModeler. http://imagemodeler.realviz.com/products/IM/index.php?language=EN
LensDoc (Andromeda Software). http://home.surewest.net/frcn/LensDoc.html
LiveStage Pro. http://www.totallyhip.com/livestage.html
Logic Pro. http://www.apple.com/logicpro/
MakeCubic. http://developer.apple.com/quicktime/quicktimeintro/tools/index.html
PangeaVR. http://www.pangeasoft.net/pano/plugin/pangeavr.html
PanoMetric. http://www.panoscan.com/PanoMetric/
Panoweaver. http://www.easypano.com/panorama-software/pano-index.html
Peak. http://www.bias-inc.com/products/

144
Photovista Panorama. http://www.iseephotovista.com/products/panorama/product_info.html
Photoshop. http://www.adobe.com/products/photoshop/index.html
ProTools. http://www.digidesign.com
PTGui. http://www.ptgui.com
PTviewer. http://www.fsoft.it/panorama/ptviewer.htm
QuickTime. http://developer.apple.com/quicktime/
QuickTime VR. http://www.apple.com/quicktime/technologies/qtvr/
REALVIZ. http://www.realviz.com
Revit. http://www.revit.com
Rhino. http://www.rhino3d.com
SoundForge. http://www.sonycreativesoftware.com/products/soundforgefamily.asp
SpinControl. http://spincontrol.cheathamlane.net
SPi-V. http://fieldofview.com/spv
VRMakePano. http://developer.apple.com/samplecode/vrmakepano/index.html
VRWorx. http://www.vrtoolbox.com/qtvrproducts.html
VTour. http://imagemodeler.realviz.com/products/VT/index.php?language=EN
Webmonkey. http://www.webmonkey.com
MEtadata rESourcES
Dublin Core. http://dublincore.org
Getty Vocabulary Program. http://www.getty.edu/research/conducting_research/vocabularies/
Library of Congress Standards. http://www.loc.gov/standards/
Library of Congress Subject Headings. http://www.loc.gov/cds/lcsh.html

145
MARC. http://www.loc.gov/marc/
METS. http://www.loc.gov/standards/mets/
MIX. http://www.loc.gov/standards/mix/
SMIL. http://www.w3.org/AudioVideo/
Visual Resources Association. http://www.vraweb.org/projects/vracore4/index.html
StoraGE and StandardS rESourcES
American National Standards Institute (ANSI). http://www.ansi.org
International Standards Organization (ISO). http://www.iso.org.
National Archives of Australia. http://www.naa.gov.au/recordkeeping/preservation/aqt/rules/rules_technical_specs.html
National Digital Information Infrastructure and Preservation Program (NDIIPP).
http://www.digitalpreservation.gov/library/
Northeast Document Conservation Center. http://www.nedcc.org/resources/leaflets.list.php
Society of American Archivists (SAA). http://www.archivists.org/index.asp
UK Data Archive. http://www.data-archive.ac.uk
The Web Standards Projects. http://www.webstandards.org
The World Wide Web Consortium. http://www.w3.org
travEl rESourcES
Corporation of International Business (ATA Carnet Export Documents). https://www.atacarnet.com
Lonely Planet. http://www.lonelyplanet.com
NewsLink: Newspapers of the World. http://newslink.org
The New York Times Travel Section. http://travel.nytimes.com

146
Rudy Maxa’s Savvy Traveler Blog. http://www.maxablog.com
Steve Kropla’s Help for World Travelers. http://kropla.com
Transparency International. http://www.transparency.org
U.S. State Department. http://www.state.gov/travelandbusiness/
U.S. State Department Apostille Information. http://www.state.gov/m/a/auth/c1267.htm
The Washington Post Travel Section. http://www.washingtonpost.com/wp-dyn/content/artsandliving/travel/?nav=left


![MASTER REPORT REVIEW OF GENERAL PANORAMIC OPTICAL … · and security, panoramic endoscope, machine vision, panoramic projection system, and so on [1, 2]. Panoramic lens systems can](https://cdn.vdocuments.net/doc/165x107/5e184f54abc03831285efb0b/master-report-review-of-general-panoramic-optical-and-security-panoramic-endoscope.jpg)