LDK Experiment 6: Microcontroller Circuits alearn.sparkfun.com tutorial
Available online at: http://sfe.io/t49
Contents
IntroductionGather MaterialsPositive TracesNegative TracesExample ProjectsResources and Going Further
Introduction
Welcome to experiment 6 of the LilyPad Design Kit, where you’ll dive into the design and creationof a microcontroller circuit.
A microcontroller is a tiny computer that can be programmed to intake information and regulatepower to your circuit, letting you control lights, sensors, sound, movement, and a number of otherfactors. Ultimately this will let you make projects that are unique, customized to your needs, andinteractive! We won't be programming this controller, it comes pre-programmed, but you'll learn howto connect the parts. When you're ready to program your own circuit, it will go together the sameway!
Suggested Reading
Before we begin, here are a few resources you might find helpful:
Previous LDK Tutorials
LDK Experiment 1: Lighting Up a Basic CircuitLDK Experiment 2: Multiple LED CircuitsLDK Experiment 3: Buttons and SwitchesLDK Experiment 4: Make Your Own ButtonLDK Experiment 5: Create Your Own Switch
Other Relevant Tutorials
Integrated CircuitsAnalog vs DigitalPulse Width Modulation (PWM)
Page 1 of 13
LDK Experiment 6: Microcontroller Circuits SparkFun Wish
List
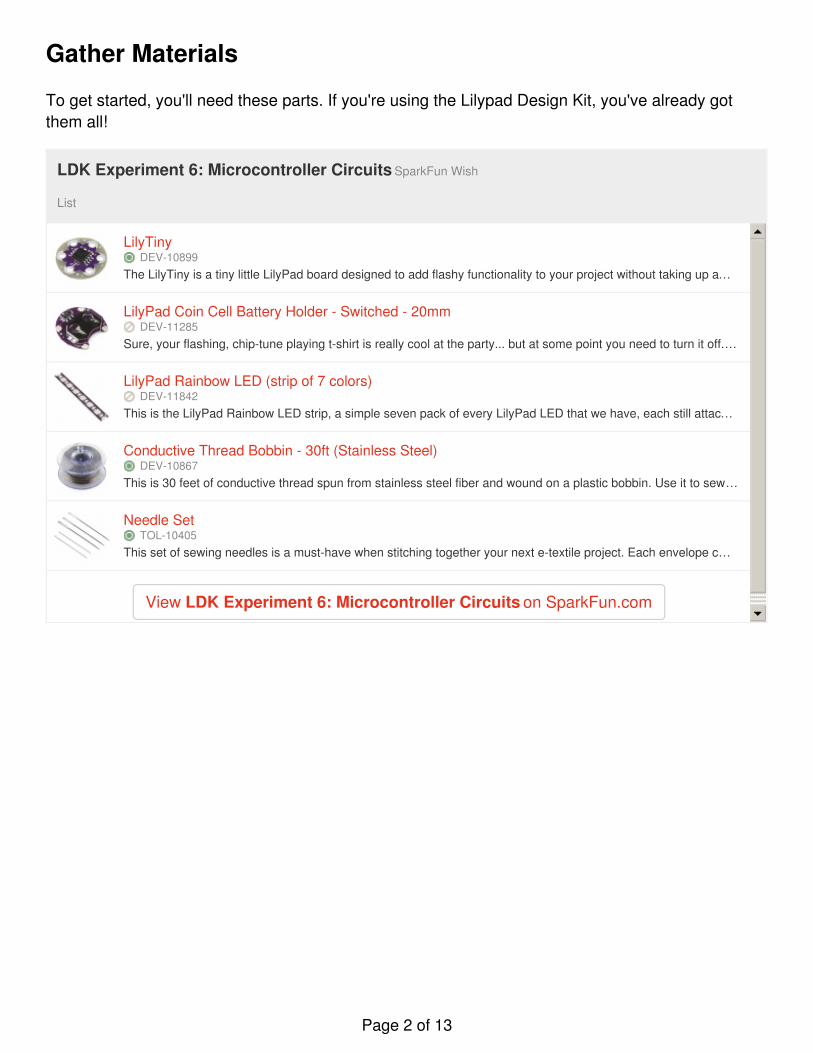
Gather Materials
To get started, you'll need these parts. If you're using the Lilypad Design Kit, you've already gotthem all!
LilyTinyDEV-10899
The LilyTiny is a tiny little LilyPad board designed to add flashy functionality to your project without taking up a…
LilyPad Coin Cell Battery Holder - Switched - 20mmDEV-11285
Sure, your flashing, chip-tune playing t-shirt is really cool at the party... but at some point you need to turn it off.…
LilyPad Rainbow LED (strip of 7 colors)DEV-11842
This is the LilyPad Rainbow LED strip, a simple seven pack of every LilyPad LED that we have, each still attac…
Conductive Thread Bobbin - 30ft (Stainless Steel)DEV-10867
This is 30 feet of conductive thread spun from stainless steel fiber and wound on a plastic bobbin. Use it to sew…
Needle SetTOL-10405
This set of sewing needles is a must-have when stitching together your next e-textile project. Each envelope c…
View LDK Experiment 6: Microcontroller Circuits on SparkFun.com
Page 2 of 13
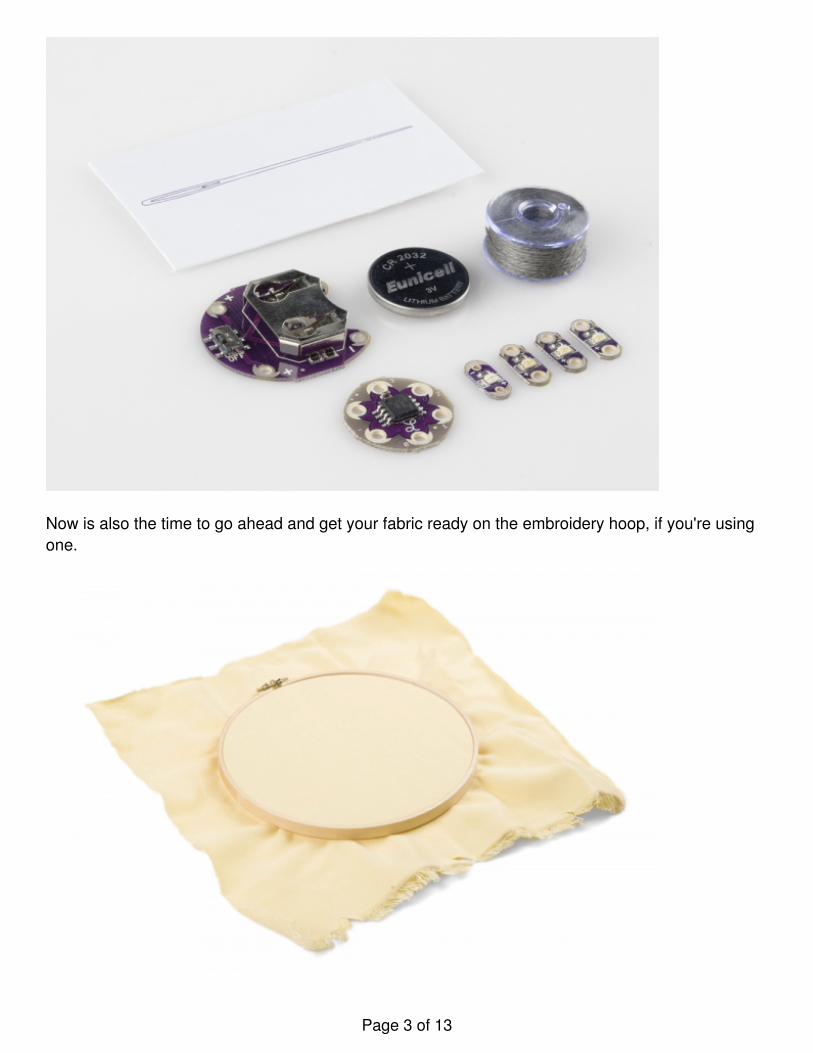
Now is also the time to go ahead and get your fabric ready on the embroidery hoop, if you're usingone.
Page 3 of 13
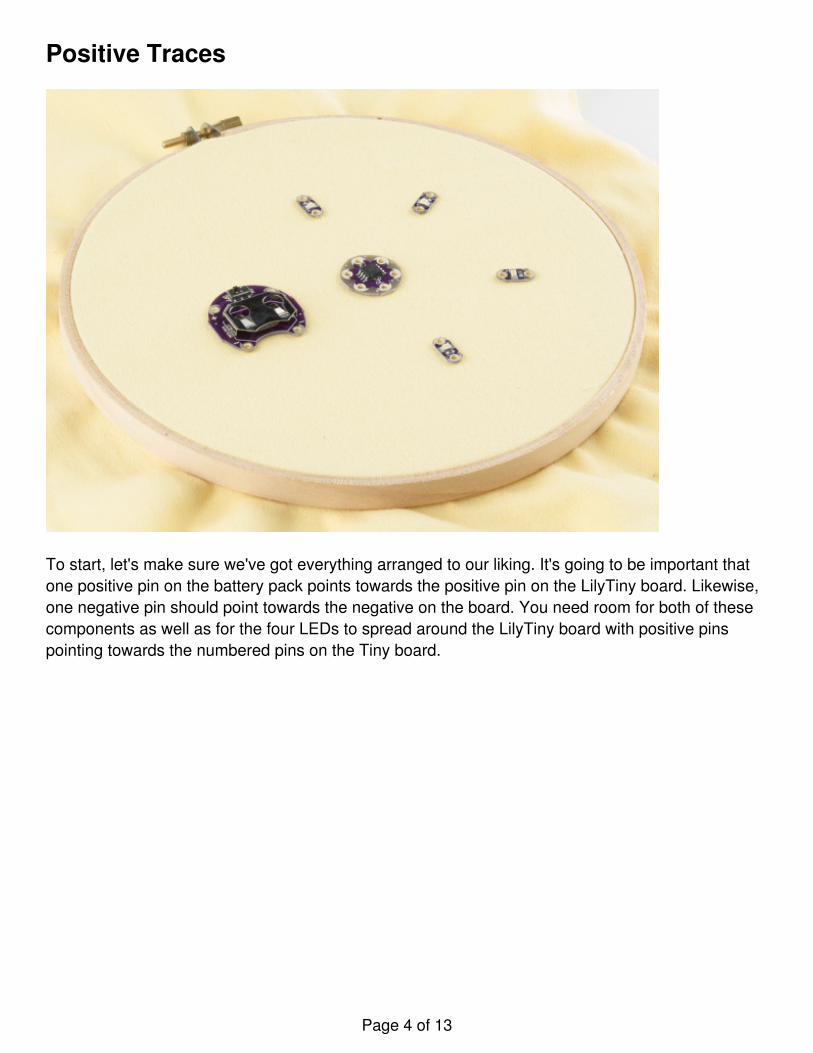
Positive Traces
To start, let's make sure we've got everything arranged to our liking. It's going to be important thatone positive pin on the battery pack points towards the positive pin on the LilyTiny board. Likewise,one negative pin should point towards the negative on the board. You need room for both of thesecomponents as well as for the four LEDs to spread around the LilyTiny board with positive pinspointing towards the numbered pins on the Tiny board.
Page 4 of 13
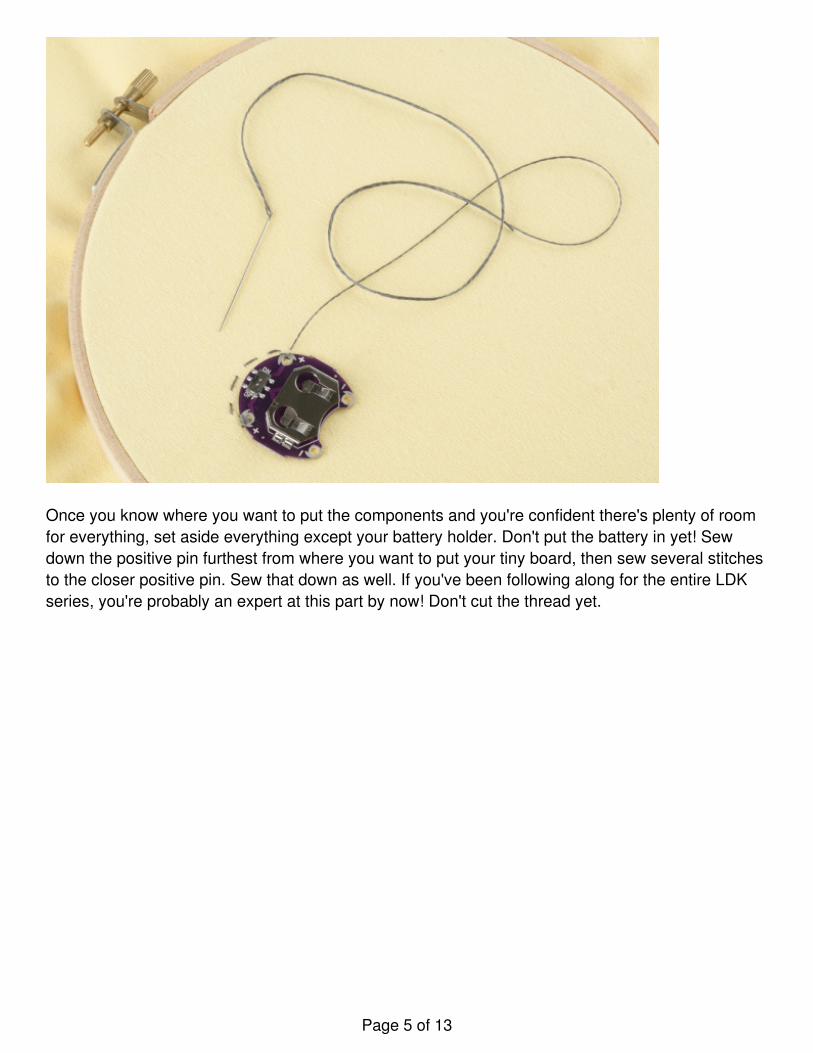
Once you know where you want to put the components and you're confident there's plenty of roomfor everything, set aside everything except your battery holder. Don't put the battery in yet! Sewdown the positive pin furthest from where you want to put your tiny board, then sew several stitchesto the closer positive pin. Sew that down as well. If you've been following along for the entire LDKseries, you're probably an expert at this part by now! Don't cut the thread yet.
Page 5 of 13
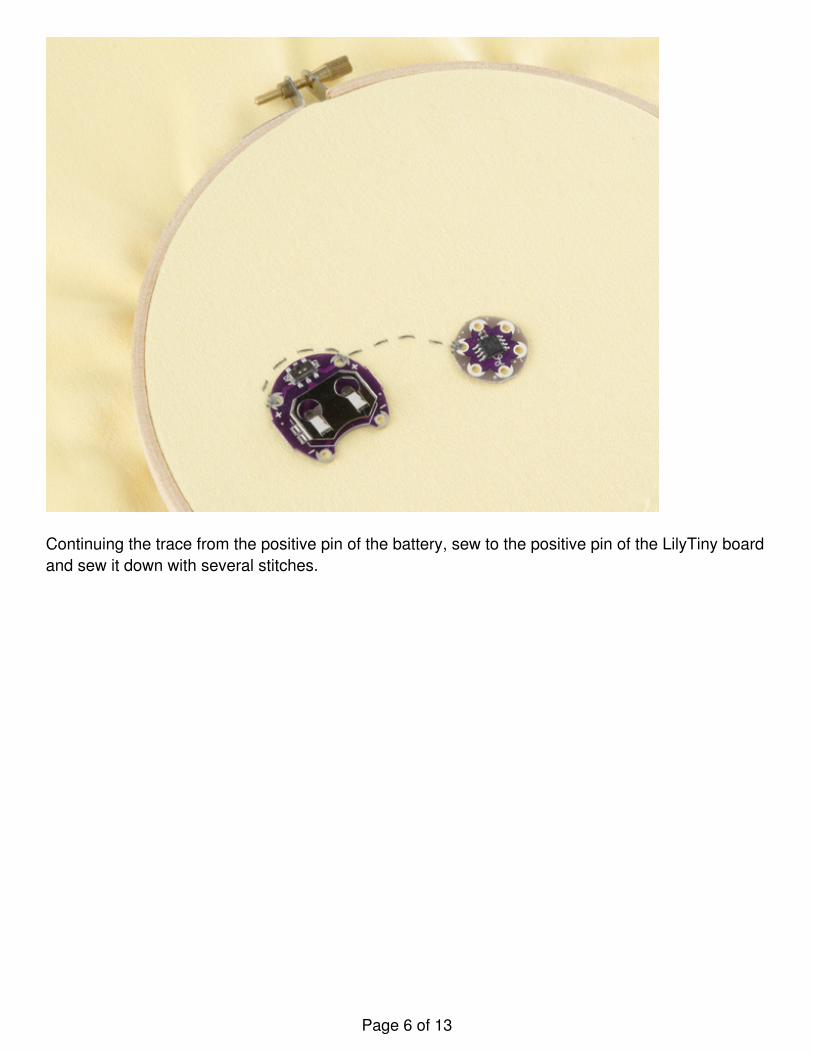
Continuing the trace from the positive pin of the battery, sew to the positive pin of the LilyTiny boardand sew it down with several stitches.
Page 6 of 13
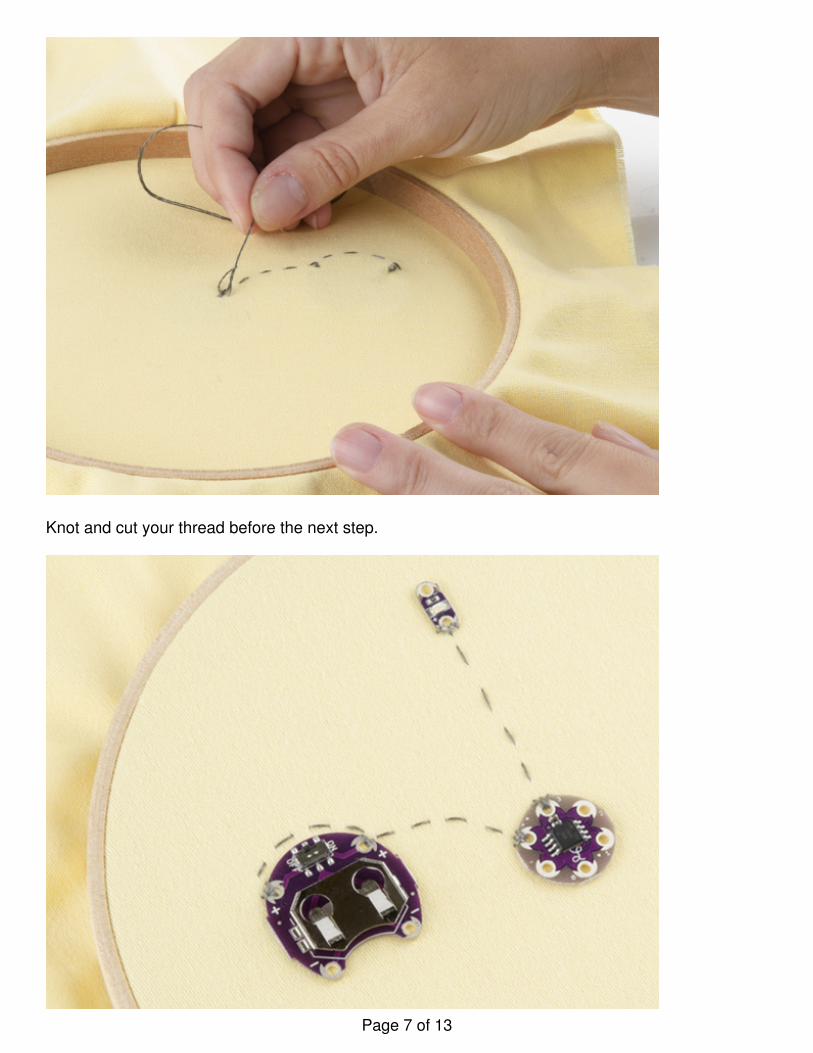
Knot and cut your thread before the next step.
Page 7 of 13
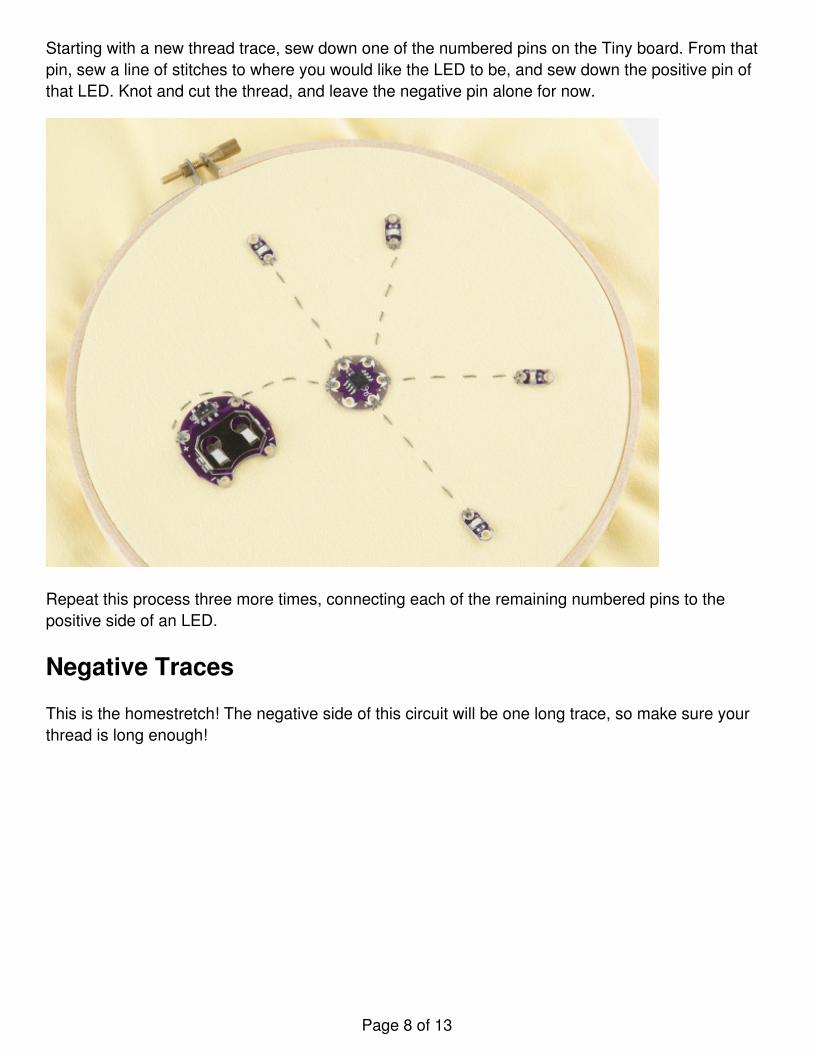
Starting with a new thread trace, sew down one of the numbered pins on the Tiny board. From thatpin, sew a line of stitches to where you would like the LED to be, and sew down the positive pin ofthat LED. Knot and cut the thread, and leave the negative pin alone for now.
Repeat this process three more times, connecting each of the remaining numbered pins to thepositive side of an LED.
Negative Traces
This is the homestretch! The negative side of this circuit will be one long trace, so make sure yourthread is long enough!
Page 8 of 13
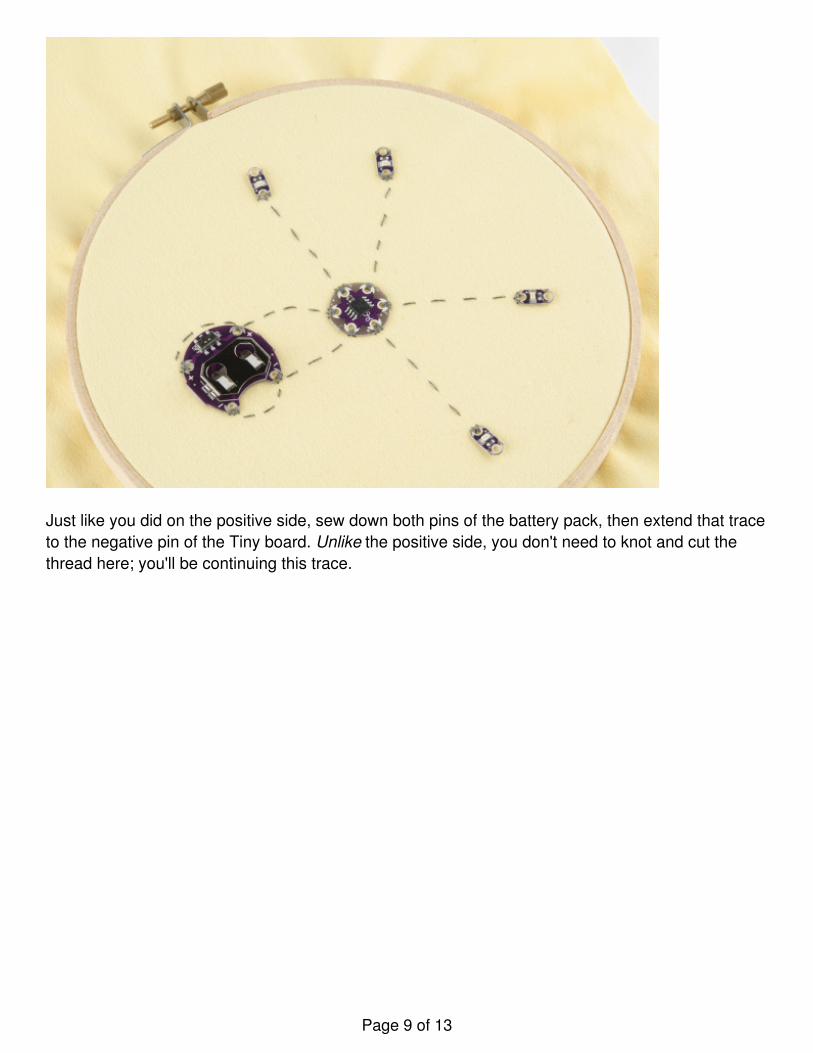
Just like you did on the positive side, sew down both pins of the battery pack, then extend that traceto the negative pin of the Tiny board. Unlike the positive side, you don't need to knot and cut thethread here; you'll be continuing this trace.
Page 9 of 13
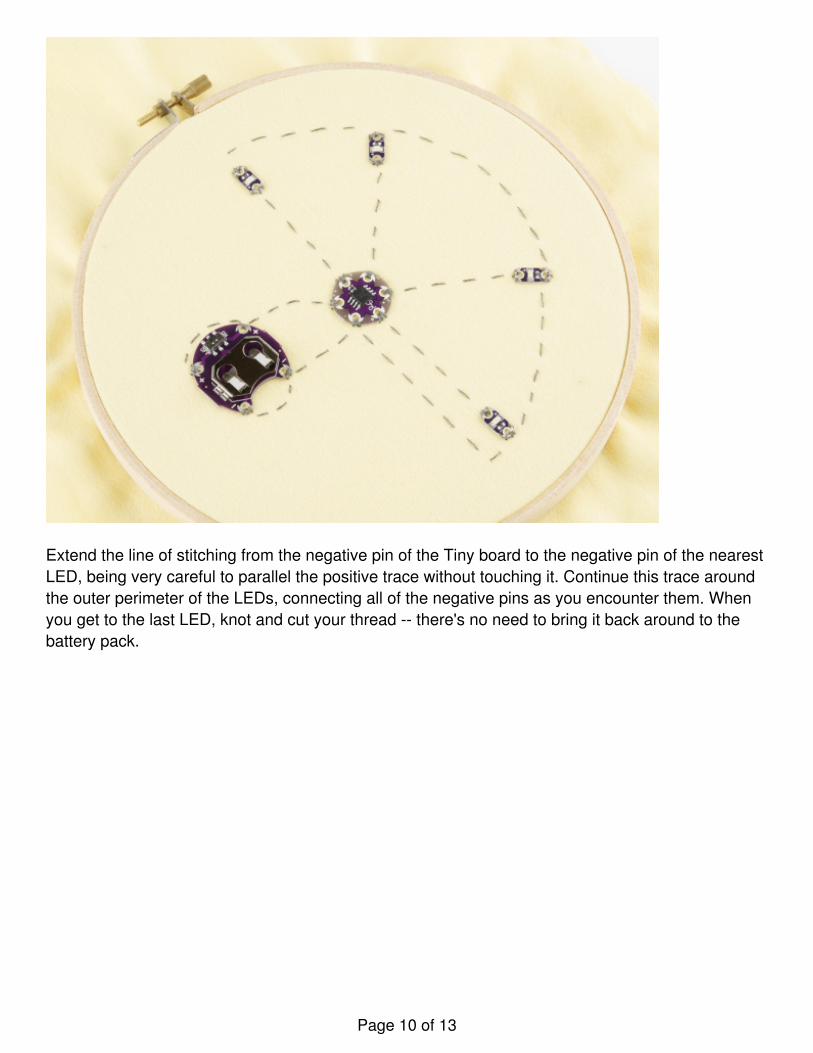
Extend the line of stitching from the negative pin of the Tiny board to the negative pin of the nearestLED, being very careful to parallel the positive trace without touching it. Continue this trace aroundthe outer perimeter of the LEDs, connecting all of the negative pins as you encounter them. Whenyou get to the last LED, knot and cut your thread -- there's no need to bring it back around to thebattery pack.
Page 10 of 13
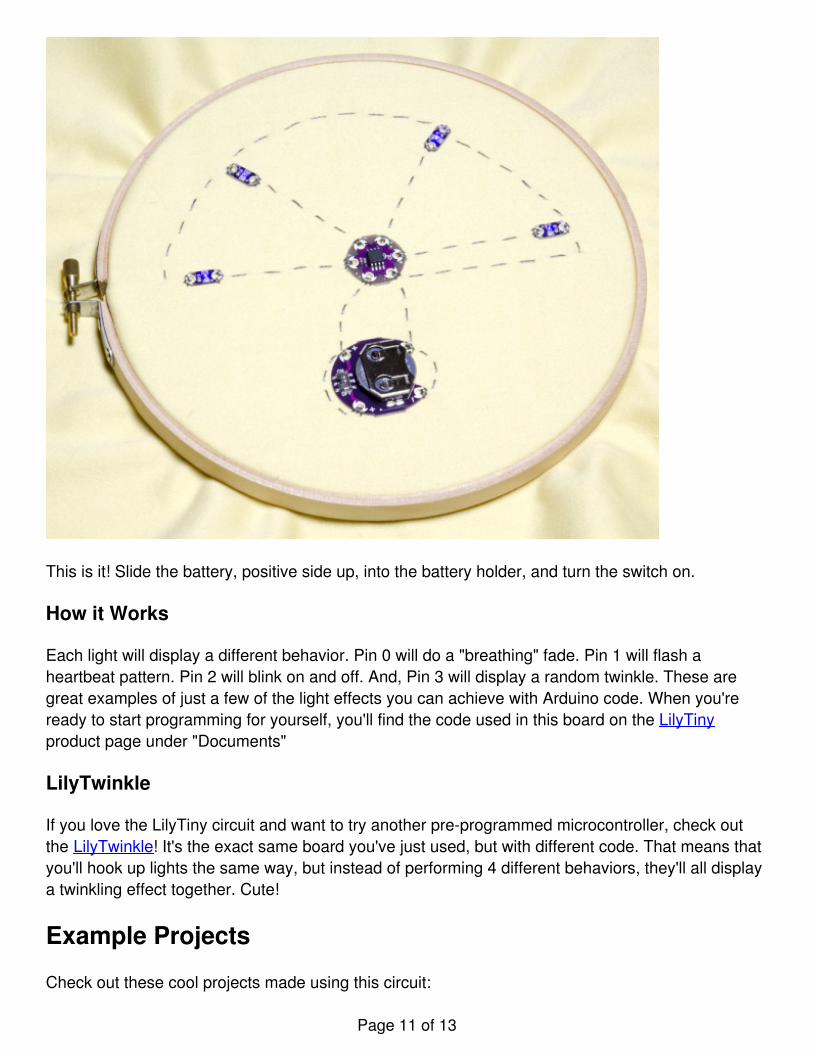
This is it! Slide the battery, positive side up, into the battery holder, and turn the switch on.
How it Works
Each light will display a different behavior. Pin 0 will do a "breathing" fade. Pin 1 will flash aheartbeat pattern. Pin 2 will blink on and off. And, Pin 3 will display a random twinkle. These aregreat examples of just a few of the light effects you can achieve with Arduino code. When you'reready to start programming for yourself, you'll find the code used in this board on the LilyTinyproduct page under "Documents"
LilyTwinkle
If you love the LilyTiny circuit and want to try another pre-programmed microcontroller, check outthe LilyTwinkle! It's the exact same board you've just used, but with different code. That means thatyou'll hook up lights the same way, but instead of performing 4 different behaviors, they'll all displaya twinkling effect together. Cute!
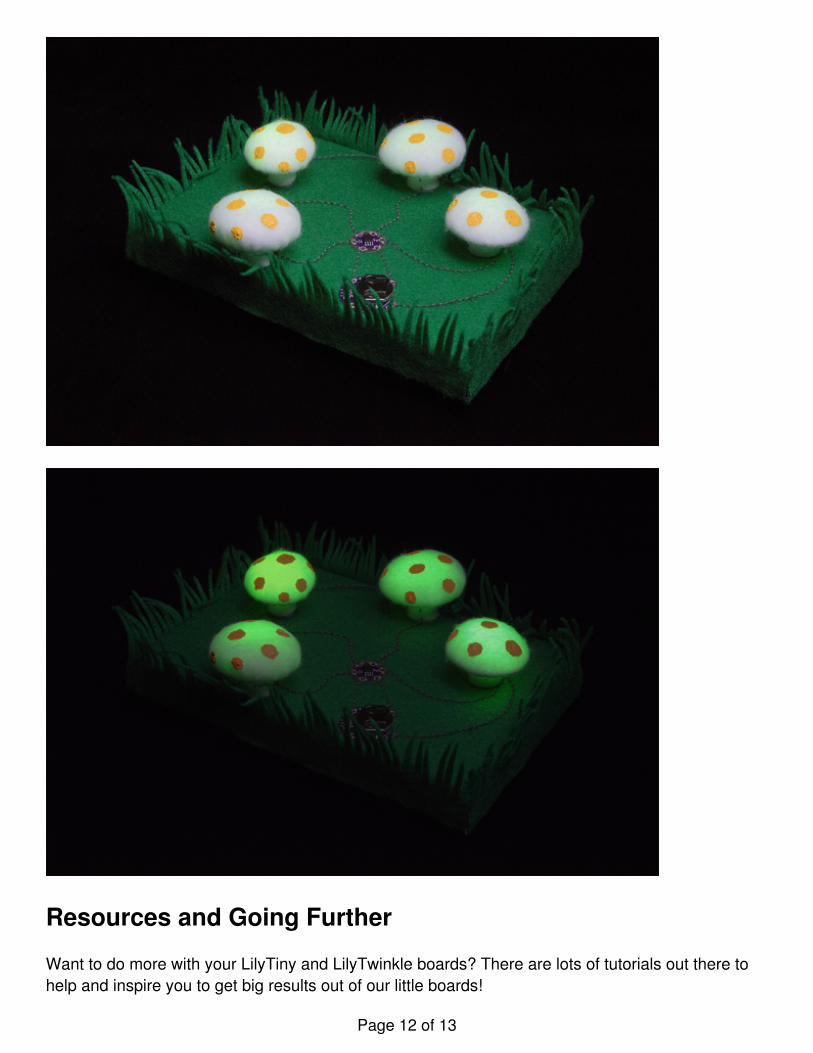
Example Projects
Check out these cool projects made using this circuit:
Page 11 of 13
Resources and Going Further
Want to do more with your LilyTiny and LilyTwinkle boards? There are lots of tutorials out there tohelp and inspire you to get big results out of our little boards!
Page 12 of 13

LilyTwinkle Firefly JarLilyTwinkle PaintingMy Drunk Kitchen Talking Harto ApronLilyTiny Monster TutorialLED Feelings PizzaProtoSnap LilyPad Development Simple Hookup GuideWhat is an Arduino?
learn.sparkfun.com | CC BY-SA 3.0 | SparkFun Electronics | Niwot, Colorado
Page 13 of 13


