Online Quilt Magazine – Vol. 2 No. 8
© Online Quilt Magazine.com All Rights Reserved P a g e | 1
Online Quilt Magazine.com
How To Master
Independent
Quilting
Designs
What’s New
from The Fat
Quarter Shop
TWO TWO TWO TWO
Bonus Bonus Bonus Bonus
ProjectsProjectsProjectsProjects
Quilt
Backing
Ideas
Top 8
Quilting
Niches To
Sell In
Vol.2 No.8 – August 2011
Online Quilt Magazine – Vol. 2 No. 8
© Online Quilt Magazine.com All Rights Reserved P a g e | 2
Online Quilt Magazine Table of Contents
Quilt Backings ……………………………………………………………………………………………………………………….…….Page 4
Let’s Master Independent Quilting Designs! ………………………………………………………………………….…….Page 7
Top 8 Quilting Niches To Sell In Online ……………………………………………………………………………………..…Page 12
PROJECT - Quarter Square Triangles Quilt …..……………………………………………………………………………….Page 14
Hints & Tips from Brannie …………………………………………………………………………………………………………….Page 19
What’s New From The Fat Quarter Shop ………………………………………………………………………………………Page 21
PROJECT – Clove Teapot Stand ………………………………………………………………………………………………….….Page 25
Get Ready to Quilt Your Quilt ……………………………………………………………………………………………………….Page 27
Poem – 14,287 Pieces of Fabric ……………………………………………………………………………………………..…....Page 30
BLOCK OF THE MONTH – Cross Number 9 Block ……..........................................................................Page 31
Today's Tips.........................................................................................................................................Page 34
Quilters' Horoscope.............................................................................................................................Page 35
YES – We Want To hear From You.......................................................................................................Page 36
Cover Photo of “Butterfly Flight“ from www.Quilts-n-Bags.com
Online Quilt Magazine – Vol. 2 No. 8
© Online Quilt Magazine.com All Rights Reserved P a g e | 3
Letter from the Editor
Jody Anderson
Hi!
Now that we’re in the second half of the year, the weeks are just RUSHING by! I don’t want to be the
first to say it, but it will be Christmas before we know it, so if you’ve a spare minute here or there, it
might pay to start thinking about what you need to get ready for this year’s Festive Season. If you’re
planning on making some presents – get a head start now, or decide now if you need a new tree skirt or
mats for your table. We have a couple of quick projects to consider in this issue for you anyway…
This issue also has a few great articles on quilting too. Penny covers quilt backings, and Leah has some
fantastic tips on how to get you started with your own Independent Quilting Designs. Check out her
‘how to’ diagrams and you’ll be all set to start!
Sadly, this is the last month for our Quilters’ Horoscope too, but we have another special monthly item
to slot in there from next month, and I’m sure you’re going to enjoy that!!
Have a great month!
Jody
Online Quilt Magazine – Vol. 2 No. 8
© Online Quilt Magazine.com All Rights Reserved P a g e | 4
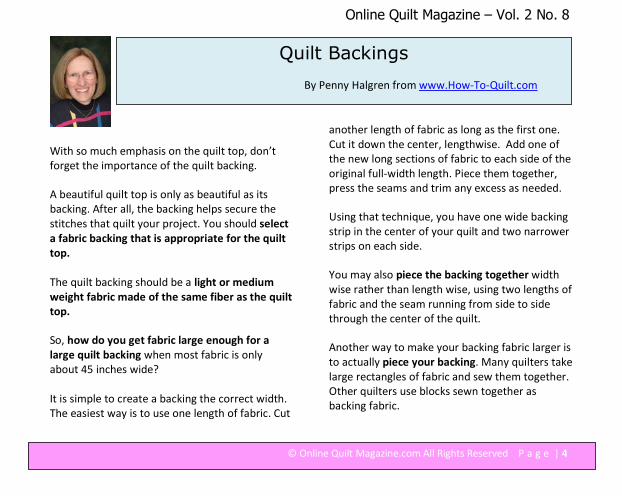
With so much emphasis on the quilt top, don’t
forget the importance of the quilt backing.
A beautiful quilt top is only as beautiful as its
backing. After all, the backing helps secure the
stitches that quilt your project. You should select
a fabric backing that is appropriate for the quilt
top.
The quilt backing should be a light or medium
weight fabric made of the same fiber as the quilt
top.
So, how do you get fabric large enough for a
large quilt backing when most fabric is only
about 45 inches wide?
It is simple to create a backing the correct width.
The easiest way is to use one length of fabric. Cut
another length of fabric as long as the first one.
Cut it down the center, lengthwise. Add one of
the new long sections of fabric to each side of the
original full-width length. Piece them together,
press the seams and trim any excess as needed.
Using that technique, you have one wide backing
strip in the center of your quilt and two narrower
strips on each side.
You may also piece the backing together width
wise rather than length wise, using two lengths of
fabric and the seam running from side to side
through the center of the quilt.
Another way to make your backing fabric larger is
to actually piece your backing. Many quilters take
large rectangles of fabric and sew them together.
Other quilters use blocks sewn together as
backing fabric.
Quilt Backings
By Penny Halgren from www.How-To-Quilt.com
Online Quilt Magazine – Vol. 2 No. 8
© Online Quilt Magazine.com All Rights Reserved P a g e | 5
If you are piecing your backing, you may want to
keep in mind whether the fabric you are using for
your backing will show through to the front of
your quilt.
Several years ago I made an Irish Chain quilt using
white fabric and green fabric. I decided to piece
the backing using a light fabric in addition to a
brown fabric. i didn't realize until after the quilt
was finished, that the brown cast a shadow onto
the front of the quilt.
What made it especially bad was that the brown
was in two strips on the top and bottom of the
quilt back, with the light fabric in between. This
showed through onto the front and made two
darker strips on the top and bottom of the quilt.
Very disappointing!
In short, here are a couple of things to keep in
mind as you piece the backing:
* Use fabric that won’t show through to the front
of your quilt, creating a kind of shadow
* The seams in your quilt backing may make it
difficult to quilt, especially if you are hand
They Laughed When I Said
I was Going to Make
a Quilt with Curves Because They Knew
I Had Just Barely Learned How to Quilt -
But Their Laughter Turned to Amazement
When They Saw My Beautiful Quilt
With Its Perfect Curves
The idea of making a quilt for quilting daughter, Stephanie's Sunday
School teacher was mine. But, it wasn't my idea at all to make a quilt
that had all of those curves in it!
After all, I had been quilting for only a few years, and was still trying
to master sewing straight seams with perfect quarter inch seam
allowances. Now you can avoid all of the stress of figuring out how to
sew quilts with beautiful curves!
Our brand new Secrets for Sewing Perfect Curves in Quilts DVD
Mentor includes an amazing amount of information to make your
curved quilting even easier than if you simply attended a workshop.
Check it out: http://www.how-to-quilt.com/quiltswithcurves.php
Online Quilt Magazine – Vol. 2 No. 8
© Online Quilt Magazine.com All Rights Reserved P a g e | 6
quilting. Keeping the number of seams on your
backing at a minimum might be a good plan
* You may sew two lengths of fabric together
creating a seam through the center of your quilt.
Often it is better to run the seam in the backing
from side to side instead of from top to bottom.
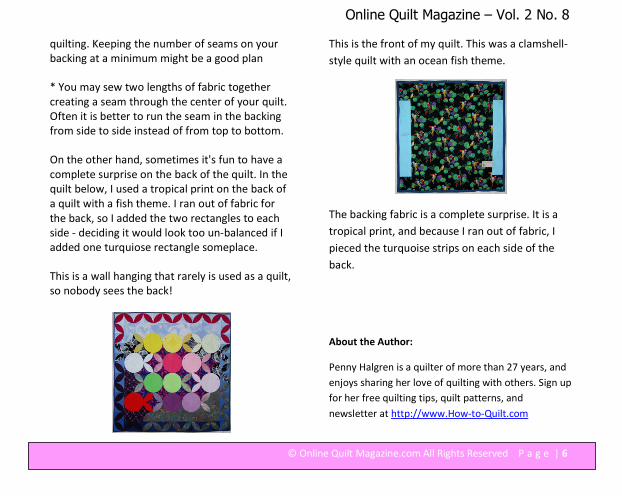
On the other hand, sometimes it's fun to have a
complete surprise on the back of the quilt. In the
quilt below, I used a tropical print on the back of
a quilt with a fish theme. I ran out of fabric for
the back, so I added the two rectangles to each
side - deciding it would look too un-balanced if I
added one turquiose rectangle someplace.
This is a wall hanging that rarely is used as a quilt,
so nobody sees the back!
This is the front of my quilt. This was a clamshell-
style quilt with an ocean fish theme.
The backing fabric is a complete surprise. It is a
tropical print, and because I ran out of fabric, I
pieced the turquoise strips on each side of the
back.
About the Author:
Penny Halgren is a quilter of more than 27 years, and
enjoys sharing her love of quilting with others. Sign up
for her free quilting tips, quilt patterns, and
newsletter at http://www.How-to-Quilt.com
Online Quilt Magazine – Vol. 2 No. 8
© Online Quilt Magazine.com All Rights Reserved P a g e | 7
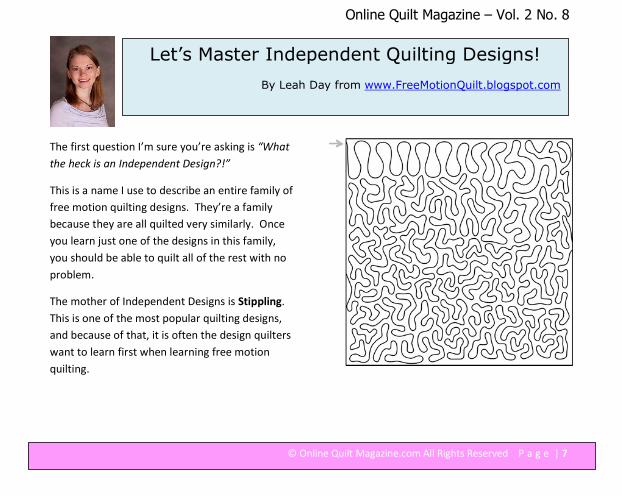
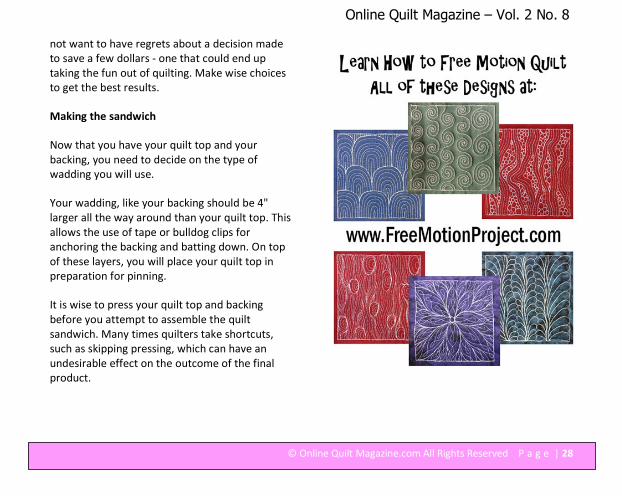
The first question I’m sure you’re asking is “What
the heck is an Independent Design?!”
This is a name I use to describe an entire family of
free motion quilting designs. They’re a family
because they are all quilted very similarly. Once
you learn just one of the designs in this family,
you should be able to quilt all of the rest with no
problem.
The mother of Independent Designs is Stippling.
This is one of the most popular quilting designs,
and because of that, it is often the design quilters
want to learn first when learning free motion
quilting.
Let’s Master Independent Quilting Designs!
By Leah Day from www.FreeMotionQuilt.blogspot.com
Online Quilt Magazine – Vol. 2 No. 8
© Online Quilt Magazine.com All Rights Reserved P a g e | 8
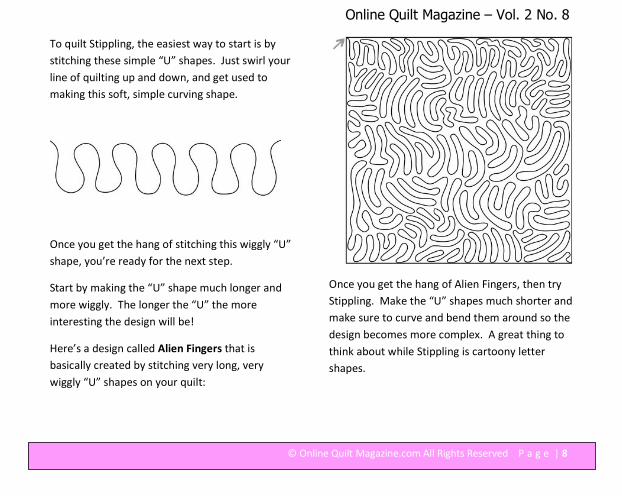
To quilt Stippling, the easiest way to start is by
stitching these simple “U” shapes. Just swirl your
line of quilting up and down, and get used to
making this soft, simple curving shape.
Once you get the hang of stitching this wiggly “U”
shape, you’re ready for the next step.
Start by making the “U” shape much longer and
more wiggly. The longer the “U” the more
interesting the design will be!
Here’s a design called Alien Fingers that is
basically created by stitching very long, very
wiggly “U” shapes on your quilt:
Once you get the hang of Alien Fingers, then try
Stippling. Make the “U” shapes much shorter and
make sure to curve and bend them around so the
design becomes more complex. A great thing to
think about while Stippling is cartoony letter
shapes.
Online Quilt Magazine – Vol. 2 No. 8
© Online Quilt Magazine.com All Rights Reserved P a g e | 9
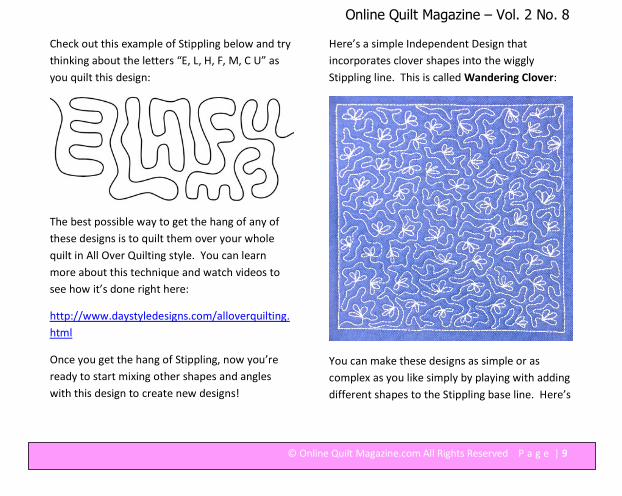
Check out this example of Stippling below and try
thinking about the letters “E, L, H, F, M, C U” as
you quilt this design:
The best possible way to get the hang of any of
these designs is to quilt them over your whole
quilt in All Over Quilting style. You can learn
more about this technique and watch videos to
see how it’s done right here:
http://www.daystyledesigns.com/alloverquilting.
html
Once you get the hang of Stippling, now you’re
ready to start mixing other shapes and angles
with this design to create new designs!
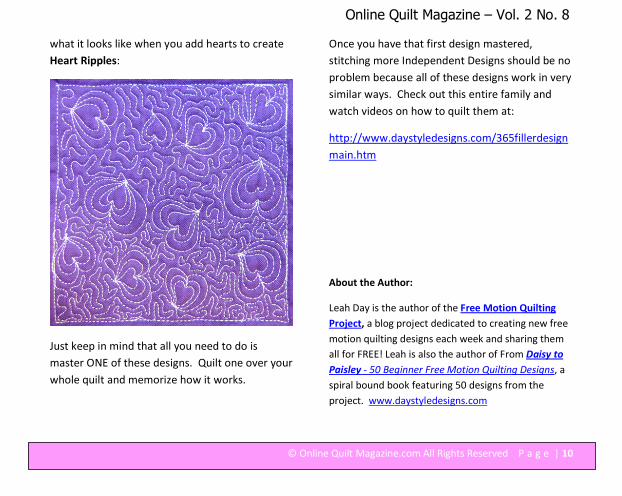
Here’s a simple Independent Design that
incorporates clover shapes into the wiggly
Stippling line. This is called Wandering Clover:
You can make these designs as simple or as
complex as you like simply by playing with adding
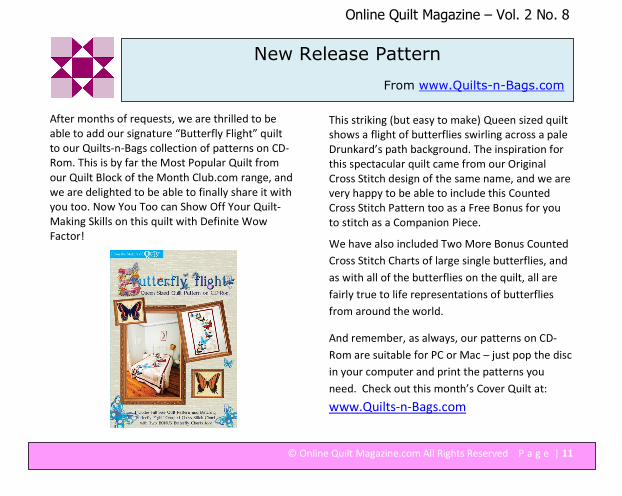
different shapes to the Stippling base line. Here’s
Online Quilt Magazine – Vol. 2 No. 8
© Online Quilt Magazine.com All Rights Reserved P a g e | 10
what it looks like when you add hearts to create
Heart Ripples:
Just keep in mind that all you need to do is
master ONE of these designs. Quilt one over your
whole quilt and memorize how it works.
Once you have that first design mastered,
stitching more Independent Designs should be no
problem because all of these designs work in very
similar ways. Check out this entire family and
watch videos on how to quilt them at:
http://www.daystyledesigns.com/365fillerdesign
main.htm
About the Author:
Leah Day is the author of the Free Motion Quilting
Project, a blog project dedicated to creating new free
motion quilting designs each week and sharing them
all for FREE! Leah is also the author of From Daisy to
Paisley - 50 Beginner Free Motion Quilting Designs, a
spiral bound book featuring 50 designs from the
project. www.daystyledesigns.com
Online Quilt Magazine – Vol. 2 No. 8
© Online Quilt Magazine.com All Rights Reserved P a g e | 11
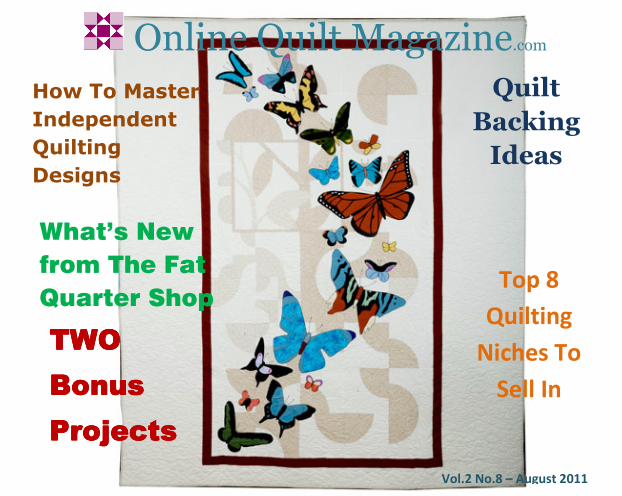
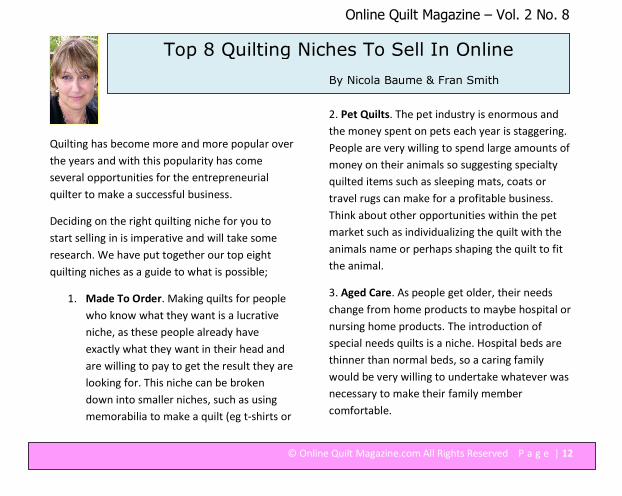
After months of requests, we are thrilled to be
able to add our signature “Butterfly Flight” quilt
to our Quilts-n-Bags collection of patterns on CD-
Rom. This is by far the Most Popular Quilt from
our Quilt Block of the Month Club.com range, and
we are delighted to be able to finally share it with
you too. Now You Too can Show Off Your Quilt-
Making Skills on this quilt with Definite Wow
Factor!
This striking (but easy to make) Queen sized quilt
shows a flight of butterflies swirling across a pale
Drunkard’s path background. The inspiration for
this spectacular quilt came from our Original
Cross Stitch design of the same name, and we are
very happy to be able to include this Counted
Cross Stitch Pattern too as a Free Bonus for you
to stitch as a Companion Piece.
We have also included Two More Bonus Counted
Cross Stitch Charts of large single butterflies, and
as with all of the butterflies on the quilt, all are
fairly true to life representations of butterflies
from around the world.
And remember, as always, our patterns on CD-
Rom are suitable for PC or Mac – just pop the disc
in your computer and print the patterns you
need. Check out this month’s Cover Quilt at:
www.Quilts-n-Bags.com
New Release Pattern
From www.Quilts-n-Bags.com
Online Quilt Magazine – Vol. 2 No. 8
© Online Quilt Magazine.com All Rights Reserved P a g e | 12
Quilting has become more and more popular over
the years and with this popularity has come
several opportunities for the entrepreneurial
quilter to make a successful business.
Deciding on the right quilting niche for you to
start selling in is imperative and will take some
research. We have put together our top eight
quilting niches as a guide to what is possible;
1. Made To Order. Making quilts for people
who know what they want is a lucrative
niche, as these people already have
exactly what they want in their head and
are willing to pay to get the result they are
looking for. This niche can be broken
down into smaller niches, such as using
memorabilia to make a quilt (eg t-shirts or
photos) or providing quilted products for
bedrooms only.
2. Pet Quilts. The pet industry is enormous and
the money spent on pets each year is staggering.
People are very willing to spend large amounts of
money on their animals so suggesting specialty
quilted items such as sleeping mats, coats or
travel rugs can make for a profitable business.
Think about other opportunities within the pet
market such as individualizing the quilt with the
animals name or perhaps shaping the quilt to fit
the animal.
3. Aged Care. As people get older, their needs
change from home products to maybe hospital or
nursing home products. The introduction of
special needs quilts is a niche. Hospital beds are
thinner than normal beds, so a caring family
would be very willing to undertake whatever was
necessary to make their family member
comfortable.
Top 8 Quilting Niches To Sell In Online
By Nicola Baume & Fran Smith
Online Quilt Magazine – Vol. 2 No. 8
© Online Quilt Magazine.com All Rights Reserved P a g e | 13
4. Wheelchair quilts. People in wheelchairs often
suffer from the hard surface of the chair and a
quilted blanket made to measure for the
wheelchair could make all the difference. When
thinking of wheelchairs also think about carry
bags that could be secured to the chair or arm
rests, etc. These could also be made to measure
and produced in colors to standout and give the
wheelchair a bit of personality.
5. Holiday Quilts. Making quilts associated with
special holidays, Easter, Christmas, Halloween,
Passover, etc. People tend to dress their homes
for holidays so producing quilts with holiday
themes meets the need of the customer.
6. Baby Quilts. Cradle and cot quilt sets have
always been extremely popular so think of a twist
to make yours stand out, such as made to
measure or individualized in some way. A new
child is a very special event and nurseries are a
very big part of getting ready, with much thought
going into the decorating and design.
7. Baby Quilted Sleeping Bags. Babies need
portable sleeping bags so they can sleep
comfortably where ever they happen to be.
Warm strong and washable are the things to
think about in this category.
8. Using One Type of Fabric. Being known for
producing quilts made from one type of fabric is
another niche. Try for instance, silk or second
hand kimono fabric. The emphasis in this niche is
to be the expert on a particular fabric which
people want to have quilts made from.
We hope these quilting niche ideas have started
you thinking about the possibilities of starting
your own quilting venture and have stirred your
imagination to come up with some of your own
that inspire you to create a business that you will
be proud of and will allow you to quilt to your
heart’s content.
Article Source: http://EzineArticles.com/2968738.

Online Quilt Magazine – Vol. 2 No. 8
© Online Quilt Magazine.com All Rights Reserved P a g e | 14
Quarter Square Triangles Quilt
By Rose Smith from www.ludlowquiltandsew.co.uk
You can make quarter square triangle units with just two
colours and then the patchwork squares all look the same or
you can use several colours and come up with some lovely
blocks, but you do need to watch out for mirror images. For
this quilt I have used the simplest quarter square triangle
blocks, but I've given some examples of the more complicated
ones at the end of the article.
The quilt block that I have chosen delights in the name of Swamp Angel and is basically a square
surrounded by half square triangle blocks and quarter square triangle blocks. To make a lap quilt (or
throw) measuring 64" by 46", I have made six of the Swamp Angel blocks and used a wide border with
quarter square triangles in the corners. I have used five different fabrics.
Cut two strips across the width of two of the
fabrics 6.1/2" wide and cut them at 6.1/2"
intervals to make squares. You should get six
squares from each strip of fabric. Place a square
of each colour with right sides together and mark
a line along the diagonal.
Online Quilt Magazine – Vol. 2 No. 8
© Online Quilt Magazine.com All Rights Reserved P a g e | 15
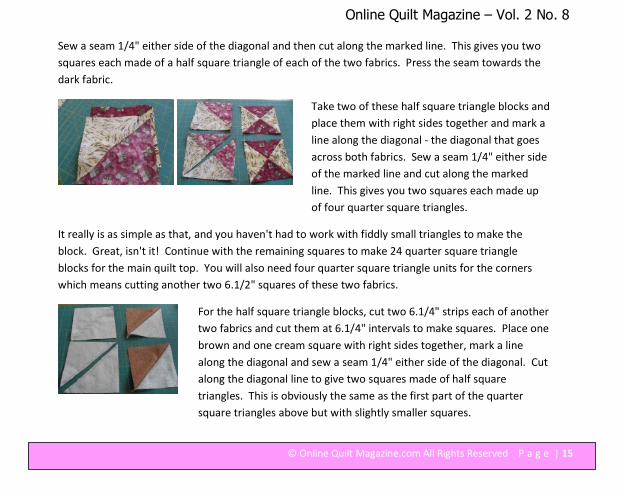
Sew a seam 1/4" either side of the diagonal and then cut along the marked line. This gives you two
squares each made of a half square triangle of each of the two fabrics. Press the seam towards the
dark fabric.
Take two of these half square triangle blocks and
place them with right sides together and mark a
line along the diagonal - the diagonal that goes
across both fabrics. Sew a seam 1/4" either side
of the marked line and cut along the marked
line. This gives you two squares each made up
of four quarter square triangles.
It really is as simple as that, and you haven't had to work with fiddly small triangles to make the
block. Great, isn't it! Continue with the remaining squares to make 24 quarter square triangle
blocks for the main quilt top. You will also need four quarter square triangle units for the corners
which means cutting another two 6.1/2" squares of these two fabrics.
For the half square triangle blocks, cut two 6.1/4" strips each of another
two fabrics and cut them at 6.1/4" intervals to make squares. Place one
brown and one cream square with right sides together, mark a line
along the diagonal and sew a seam 1/4" either side of the diagonal. Cut
along the diagonal line to give two squares made of half square
triangles. This is obviously the same as the first part of the quarter
square triangles above but with slightly smaller squares.
Online Quilt Magazine – Vol. 2 No. 8
© Online Quilt Magazine.com All Rights Reserved P a g e | 16
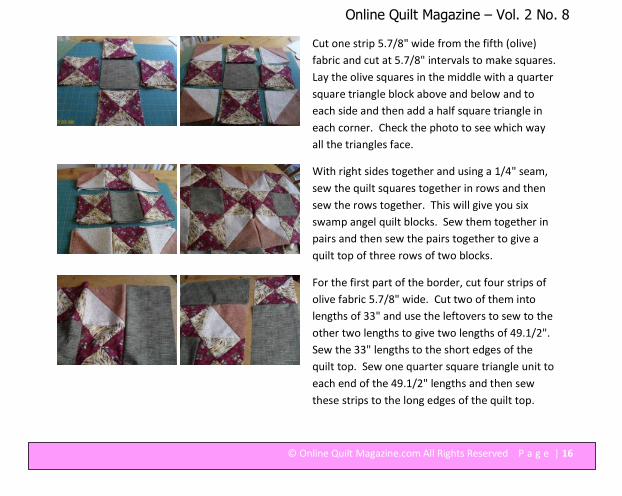
Cut one strip 5.7/8" wide from the fifth (olive)
fabric and cut at 5.7/8" intervals to make squares.
Lay the olive squares in the middle with a quarter
square triangle block above and below and to
each side and then add a half square triangle in
each corner. Check the photo to see which way
all the triangles face.
With right sides together and using a 1/4" seam,
sew the quilt squares together in rows and then
sew the rows together. This will give you six
swamp angel quilt blocks. Sew them together in
pairs and then sew the pairs together to give a
quilt top of three rows of two blocks.
For the first part of the border, cut four strips of
olive fabric 5.7/8" wide. Cut two of them into
lengths of 33" and use the leftovers to sew to the
other two lengths to give two lengths of 49.1/2".
Sew the 33" lengths to the short edges of the
quilt top. Sew one quarter square triangle unit to
each end of the 49.1/2" lengths and then sew
these strips to the long edges of the quilt top.

Online Quilt Magazine – Vol. 2 No. 8
© Online Quilt Magazine.com All Rights Reserved P a g e | 17
The quarter square triangle units were going to be
right in the corners of the quilt top but then I
decided that I wanted to frame them. To do this
cut two lengths of cream fabric 43" by 2.1/2" and
sew them to the short edges of the quilt top. Cut
two lengths 59.1/2" by 2.1/2" and sew them to
the long edges of the quilt top.
The quarter square triangle quilt top is now ready to be layered, quilted and bound. It's a very simple
design but gives practice in both half square triangle units and quarter square triangle units.
Now for the other options when making quarter
square triangle units.
If you sew together a half square triangle unit with
a plain square you get two blocks as shown on the
right. Note that the yellow/red triangles are
reversed to give mirror images.
Online Quilt Magazine – Vol. 2 No. 8
© Online Quilt Magazine.com All Rights Reserved P a g e | 18
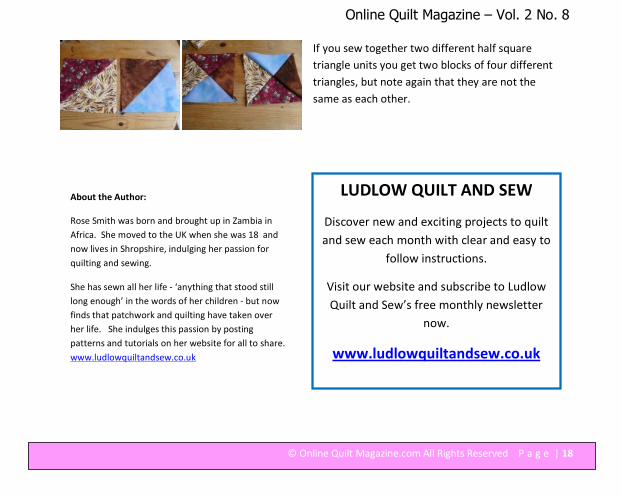
If you sew together two different half square
triangle units you get two blocks of four different
triangles, but note again that they are not the
same as each other.
About the Author:
Rose Smith was born and brought up in Zambia in
Africa. She moved to the UK when she was 18 and
now lives in Shropshire, indulging her passion for
quilting and sewing.
She has sewn all her life - ‘anything that stood still
long enough’ in the words of her children - but now
finds that patchwork and quilting have taken over
her life. She indulges this passion by posting
patterns and tutorials on her website for all to share.
www.ludlowquiltandsew.co.uk
LUDLOW QUILT AND SEW
Discover new and exciting projects to quilt
and sew each month with clear and easy to
follow instructions.
Visit our website and subscribe to Ludlow
Quilt and Sew’s free monthly newsletter
now.
www.ludlowquiltandsew.co.uk

Online Quilt Magazine – Vol. 2 No. 8
© Online Quilt Magazine.com All Rights Reserved P a g e | 19
When my Mum and Dad get tired of quilting, we
can go for a holiday in our bus. Dad took all the
seats out of a big bus and built a table with seats
and a bed. There is also a fridge for my food and
various things for me to play with.
The first time we went for a big trip, they stopped
for the night at a farm a long way from here. I
always travel in a harness and sit on a chair under
the table. When we stop, they let me off to run
around.
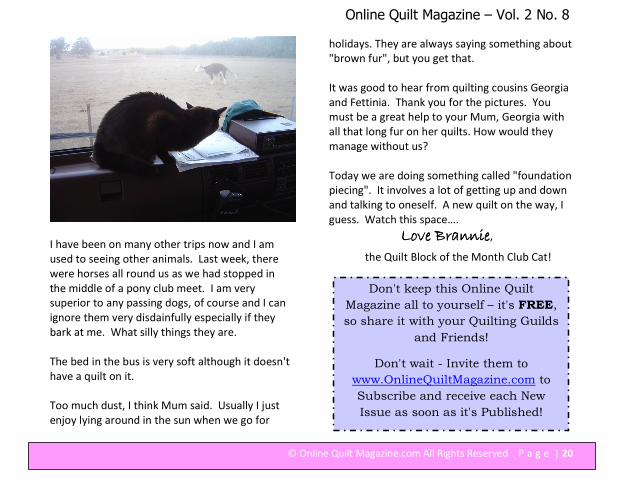
The first thing I do is go to the front window to
check out the view.
Now you know I am an inside cat with a sheltered
existence, so imagine my fright when I jumped up
only to find two of the biggest ‘dogs’ you could
imagine, right there looking in the window!! I
was stuck! I frizzed up and froze. If I could only
keep still they mightn't notice me.
They were chewing and chewing and staring right
at me and occasionally one would say,
"Mmmmmm."
Were they chewing a cat?? I couldn't move, but
gradually they strolled away and with the
greatest care and stealth I was able to creep
down from the window. Whew!
What were they? Mum laughed at me and took a
photo; they didn't seem to realize the danger I
was in.
Hints and Tips From Brannie
By "Brannie" Mira-Bateman
Online Quilt Magazine – Vol. 2 No. 8
© Online Quilt Magazine.com All Rights Reserved P a g e | 20
I have been on many other trips now and I am
used to seeing other animals. Last week, there
were horses all round us as we had stopped in
the middle of a pony club meet. I am very
superior to any passing dogs, of course and I can
ignore them very disdainfully especially if they
bark at me. What silly things they are.
The bed in the bus is very soft although it doesn't
have a quilt on it.
Too much dust, I think Mum said. Usually I just
enjoy lying around in the sun when we go for
holidays. They are always saying something about
"brown fur", but you get that.
It was good to hear from quilting cousins Georgia
and Fettinia. Thank you for the pictures. You
must be a great help to your Mum, Georgia with
all that long fur on her quilts. How would they
manage without us?
Today we are doing something called "foundation
piecing". It involves a lot of getting up and down
and talking to oneself. A new quilt on the way, I
guess. Watch this space….
Love BrannieLove BrannieLove BrannieLove Brannie,
the Quilt Block of the Month Club Cat!
Don't keep this Online Quilt
Magazine all to yourself – it's FREE,
so share it with your Quilting Guilds
and Friends!
Don't wait - Invite them to
www.OnlineQuiltMagazine.com to
Subscribe and receive each New
Issue as soon as it's Published!

Online Quilt Magazine – Vol. 2 No. 8
© Online Quilt Magazine.com All Rights Reserved P a g e | 21
We're pleased to be able to bring you a selection
each month of the Newest Fabric Releases and
the new season fabric "must haves".
Amelia by Me and My Sister Designs for Moda
Amelia is full of soft and feminine floral shapes
with a BRIGHT attitude! It started out with
stronger flower shapes and morphed into
something completely different and softer.
Amelia with her sweet florals begged to be
printed on flannel, too, so we were happy to
oblige in favor of an extra cuddly cloth.
Amelia by Me and My Sister Designs is available
in fat quarter bundles, fat eighth bundles, jelly
rolls, layer cakes, charm packs, cotton and flannel
yardage. Don’t miss our Easy as Ten Quilt Kit, as
some cheer to your day in no time!
View this range at:
http://www.fatquartershop.com/Amelia-Moda-
Fabrics-Me-and-My-Sister-Designs.asp
What's New from The Fat Quarter Shop
by Kimberly Jolly from www.FatQuarterShop.com

Online Quilt Magazine – Vol. 2 No. 8
© Online Quilt Magazine.com All Rights Reserved P a g e | 22
Buttons & Blooms by Whimsicals for Red Rooster
Buttons & Blooms by Whimsicals for Red Rooster
combines motifs from both sewing and gardening
in her newest fabric collection. The thematic quilt
panel includes one large block and two smaller
blocks that depict a button tree and flower
garden tenderly cared for by a sweet friend. The
panel's side borders will work well as frames for
pillows or handles for a tote!
Soft, warm colors are used throughout the
collection that uses Terri's signature neutral
palette accented with redwood, faded denim and
silver gray. Your creative ideas are sure to flow
when using this delightful fabric collection!
Available in fat quarter bundles and yardage.
You’ll love our Buttons and Blooms Quilt Kit!
Check it out at:
http://www.fatquartershop.com/Whimsicals-Fabric-
Red-Rooster-Fabrics.asp
Hometown by Sweetwater for Moda
Online Quilt Magazine – Vol. 2 No. 8
© Online Quilt Magazine.com All Rights Reserved P a g e | 23
Hometown, everybody has one, or two or three.
See if you can spot your hometown in
Sweetwater’s latest collection for Moda!
Dots and spots, stripes and criss-cross prints are
all great accents to the main “town square” print.
Muted shades of red, mustard, gray and blue give
this collection classic appeal.
Available in fat quarter bundles, jelly rolls, layer
cakes, charm packs and cotton and canvas
yardage. Rediscover your hometown with our
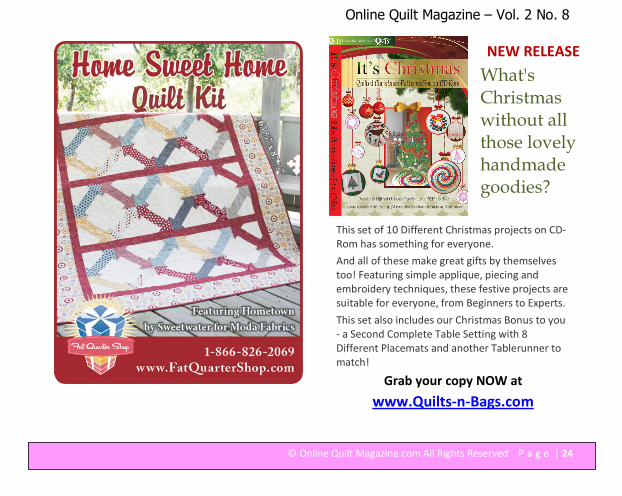
exclusive Home Sweet Home Quilt Kit!
See this collection at:
http://www.fatquartershop.com/Hometown-
Sweetwater-Moda-Fabrics.asp
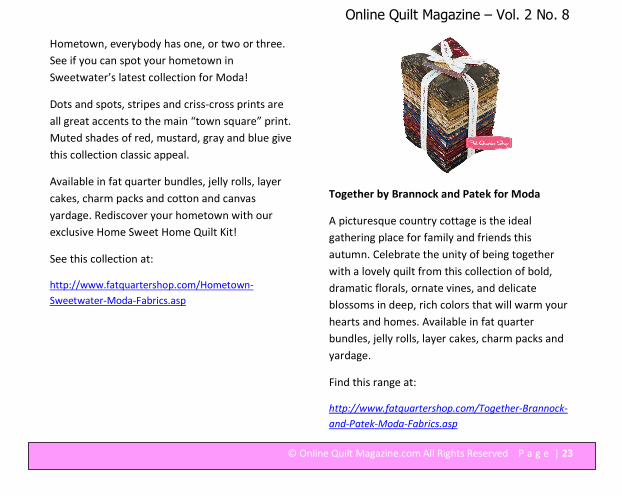
Together by Brannock and Patek for Moda
A picturesque country cottage is the ideal
gathering place for family and friends this
autumn. Celebrate the unity of being together
with a lovely quilt from this collection of bold,
dramatic florals, ornate vines, and delicate
blossoms in deep, rich colors that will warm your
hearts and homes. Available in fat quarter
bundles, jelly rolls, layer cakes, charm packs and
yardage.
Find this range at:
http://www.fatquartershop.com/Together-Brannock-
and-Patek-Moda-Fabrics.asp
Online Quilt Magazine – Vol. 2 No. 8
© Online Quilt Magazine.com All Rights Reserved P a g e | 24
NEW RELEASE
What's Christmas without all those lovely handmade goodies?
This set of 10 Different Christmas projects on CD-
Rom has something for everyone.
And all of these make great gifts by themselves
too! Featuring simple applique, piecing and
embroidery techniques, these festive projects are
suitable for everyone, from Beginners to Experts.
This set also includes our Christmas Bonus to you
- a Second Complete Table Setting with 8
Different Placemats and another Tablerunner to
match!
Grab your copy NOW at
www.Quilts-n-Bags.com

Online Quilt Magazine – Vol. 2 No. 8
© Online Quilt Magazine.com All Rights Reserved P a g e | 25
Although most of us aren't really ready to think
about it yet, Christmas is getting closer and
closer, and it's time to start thinking about
presents for friends and family.
This Clove Teapot Stand is very quick and super
easy to make, and would make a great present
for a friend, or to put with something else as part
of a bigger present.
This teapot stand or trivet is made from a single
piece of fabric, and filled with rice and whole
cloves, so that when a hot teapot is placed on the
stand, the heat releases the scent of the cloves
for a deliciously warm spicy aroma.
You will need:
A piece of fabric measuring 8 ½ x 16 ½ inches.
Approx 1 cup of dry rice
Approx 2 teaspoons whole cloves
Bonus Project – Clove Teapot Stand
From www.QuiltBlockoftheMonthClub.com

Online Quilt Magazine – Vol. 2 No. 8
© Online Quilt Magazine.com All Rights Reserved P a g e | 26
To Make:
Fold fabric in half with right sides together. With
the folded edge at the bottom, sew down both
side seams with a ¼ inch seam.
Turn right sides out and using a lead pencil or
blue water erasable pen, mark inch-wide lines
down the length, parallel with your side seams.
You should have 7 lines marked.
Starting at the bottom folded edge, sew up each
line through both thicknesses, stopping about a
½ inch from the top.
Using a funnel (much easier this way!) fill each
row with a mixture of rice and cloves until it's
also just under ½ inch from the top.
Carefully tuck in your seam allowance along the
top, pin, and topstitch to close your filled rows.
All done! Time to put the kettle on and make a
pot to tea to try this out for yourself!
Online Quilt Magazine – Vol. 2 No. 8
© Online Quilt Magazine.com All Rights Reserved P a g e | 27
When it comes to quilt making the final product is
a reflection of the skill of the quilter.
Accomplished quilters know how all of the steps
in the process are essential to the outcome of the
quilt. Even preparing your quilt top is important
and is not the time to take shortcuts.
Here are some handy tips to make getting your
quilt ready for quilting easier - without
compromising on quality.
Choosing the backing
How much backing you will need depends on the
size of your quilt. It is best if it is 4" larger all the
way around than your quilt top. This will require
the backing to be 8" wider in width and 8" longer
in length than the size of your quilt top.
If you are joining two pieces of fabric together for
use as a backing, it is best that you make the join
on the lengthwise grain. Sewing the material in
this manner will produce the absolute best
"environment" for the back of your quilt,
ensuring fewer problems when pinning and
machine quilting.
Many quilters like to "piece" the backing for their
quilt, using up left over fabric. It is important that
you are aware that this can create problems for
you when you attempt to machine quilt the quilt.
The possibility of the fabric "swimming" and
creating puckering is much higher when the
backing has many joins, as they are not always on
the straight grain.
For easier and more successful quilting try to stick
to just one join down the lengthwise grain. Once
you have completed pinning your quilt, you do
Get Ready To Quilt Your Quilt
By Bev McClune
Online Quilt Magazine – Vol. 2 No. 8
© Online Quilt Magazine.com All Rights Reserved P a g e | 28
not want to have regrets about a decision made
to save a few dollars - one that could end up
taking the fun out of quilting. Make wise choices
to get the best results.
Making the sandwich
Now that you have your quilt top and your
backing, you need to decide on the type of
wadding you will use.
Your wadding, like your backing should be 4"
larger all the way around than your quilt top. This
allows the use of tape or bulldog clips for
anchoring the backing and batting down. On top
of these layers, you will place your quilt top in
preparation for pinning.
It is wise to press your quilt top and backing
before you attempt to assemble the quilt
sandwich. Many times quilters take shortcuts,
such as skipping pressing, which can have an
undesirable effect on the outcome of the final
product.
Online Quilt Magazine – Vol. 2 No. 8
© Online Quilt Magazine.com All Rights Reserved P a g e | 29
Pinning the quilt top
What is one of the most important tips for
pinning a quilt top? Use only good quality
stainless steel safety pins.
Using cheap pins in your quilt can end up being a
very expensive lesson. What if something
happens and you have to postpone the quilting?
If you have used inferior pins, you run the risk of
rust ruining your quilt.
The ideal pin size is approximately 1¼" long pin.
As the pin needs to go through three layers, any
smaller will be too hard to close. A larger gauge
pin will leave too big of a hole. Remember to use
the good quality pins found at your quilt shop. If
you use cheap pins you risk having rust ruin your
quilt.
A great tool that makes pin basting your quilt
layers easier, safer and faster is the KwikKlip.
Using KwikKlip the safety pins close with ease,
preventing broken nails, pricked fingers and sore
fingertips. The time it takes to pin baste is
reduced dramatically.
Choosing marking tools
There are some great choices when it comes to
marking quilt designs - there is no need to get in a
sweat about it!
The decision depends on what type of design you
desire on your quilt. Some options are: freezer
paper, quilt and tear paper, Clover blue washout
marker, Clover Chaco liner, and Clover water
soluble pencils. Often a quilting class is the ideal
place to gain skills, learn in detail about the
different alternatives and discover which you
prefer.
Templates are used by some quilters, but are not
as popular a choice as the other options for
marking. They can be clumsy and restricting to
use. They are a more expensive choice and do not
always offer the flexibility that the other marking
alternatives provide.
Since discovering quilting ten years ago Bev McClune has become
an award winning domestic machine quilter, a professional
machine quilter and a popular tutor. She has four how-to quilt
DVD's available at http://www.quiltersworld.com.au
Article Source: http://EzineArticles.com/?expert=Bev_McClune
Online Quilt Magazine – Vol. 2 No. 8
© Online Quilt Magazine.com All Rights Reserved P a g e | 30
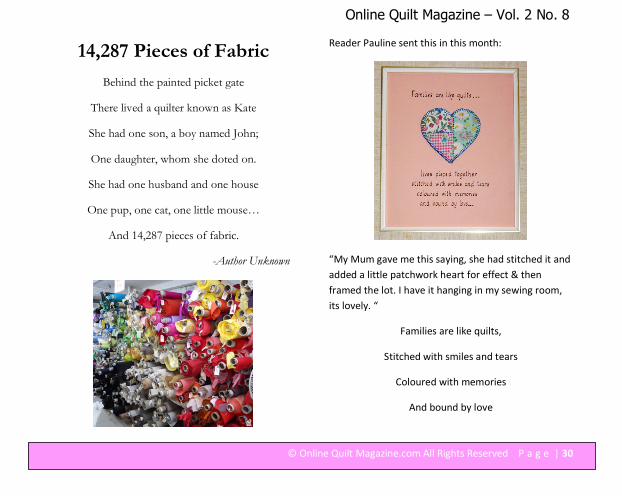
Reader Pauline sent this in this month:
“My Mum gave me this saying, she had stitched it and
added a little patchwork heart for effect & then
framed the lot. I have it hanging in my sewing room,
its lovely. “
Families are like quilts,
Stitched with smiles and tears
Coloured with memories
And bound by love
14,287 Pieces of Fabric
Behind the painted picket gate
There lived a quilter known as Kate
She had one son, a boy named John;
One daughter, whom she doted on.
She had one husband and one house
One pup, one cat, one little mouse…
And 14,287 pieces of fabric.
-Author Unknown
Online Quilt Magazine – Vol. 2 No. 8
© Online Quilt Magazine.com All Rights Reserved P a g e | 31
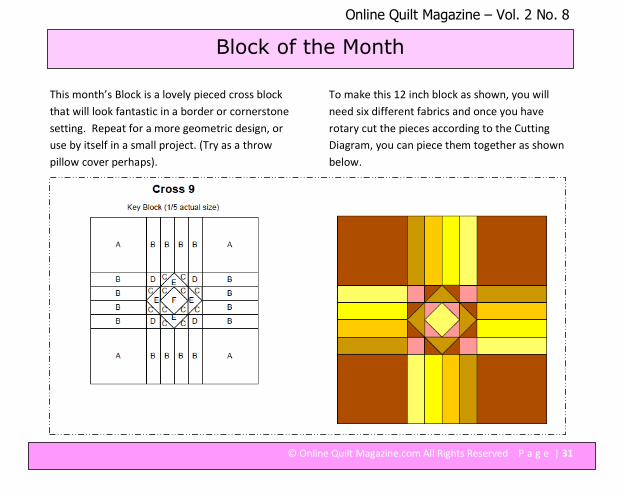
This month’s Block is a lovely pieced cross block
that will look fantastic in a border or cornerstone
setting. Repeat for a more geometric design, or
use by itself in a small project. (Try as a throw
pillow cover perhaps).
To make this 12 inch block as shown, you will
need six different fabrics and once you have
rotary cut the pieces according to the Cutting
Diagram, you can piece them together as shown
below.
Block of the Month

Online Quilt Magazine – Vol. 2 No. 8
© Online Quilt Magazine.com All Rights Reserved P a g e | 32

Online Quilt Magazine – Vol. 2 No. 8
© Online Quilt Magazine.com All Rights Reserved P a g e | 33

Online Quilt Magazine – Vol. 2 No. 8
© Online Quilt Magazine.com All Rights Reserved P a g e | 34
Today’s Tips:
Reader Lynne sent in her ironing tip:
“Mix equal amounts of water and vinegar in a
spray bottle and spray fabrics or clothes, brilliant,
no smell and what could be cheaper to buy, than
vinegar.
I find that if you use pressure cans of spray
starch, that in time if fabric, garments or linen are
stored for a while, rust marks appear.”
And Reader Jackie in Wales sent in a couple of
her own:
“First, instead of temporary adhesive spray which
is just sooo expensive in the UK I use the cheapest
hairspray I can find. It really works well. The
largest quilt I've used it on is a single.
I use the Sharon Schamber method of layering
using planks of wood - where she tacks/ bastes I
spray. If you don't know about this method
there's a youtube video of it.
Second, I use a teflon sheet anchored down with
masking tape as a slider sheet when I Free Motion
Quilt. As I was having difficulties with Free
Motion Quilting a friend told me about the
pink slider which again is expensive and I had just
bought a teflon sheet to put in my oven.
So nothing to lose, I tried it and it made moving
the quilt much easier. Still need hours of practise
but with this and you sending me to Leah
Day's site I have hopes that I will finally "crack"
the FMQ technique.”
Great tips ladies, and thanks for sharing!!
Send your tips to share to Jody at
[email protected] and we’ll include
them in a future issue.
Online Quilt Magazine – Vol. 2 No. 8
© Online Quilt Magazine.com All Rights Reserved P a g e | 35
Quilters' Horoscope
By Pauline Rogers from www.QuiltersWorld.com.au
A humourous compilation of character traits of quilters according to their zodiac signs. Compiled by a
quilting tutor with over twenty years’ experience teaching patchwork and quilting but zero years writing
horoscopes.
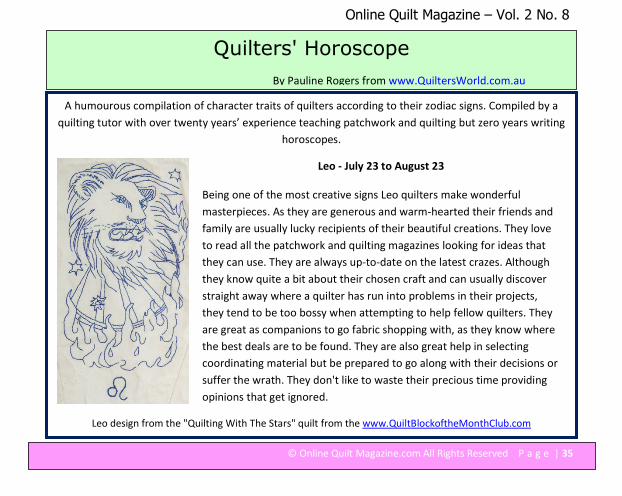
Leo - July 23 to August 23
Being one of the most creative signs Leo quilters make wonderful
masterpieces. As they are generous and warm-hearted their friends and
family are usually lucky recipients of their beautiful creations. They love
to read all the patchwork and quilting magazines looking for ideas that
they can use. They are always up-to-date on the latest crazes. Although
they know quite a bit about their chosen craft and can usually discover
straight away where a quilter has run into problems in their projects,
they tend to be too bossy when attempting to help fellow quilters. They
are great as companions to go fabric shopping with, as they know where
the best deals are to be found. They are also great help in selecting
coordinating material but be prepared to go along with their decisions or
suffer the wrath. They don't like to waste their precious time providing
opinions that get ignored.
Leo design from the "Quilting With The Stars" quilt from the www.QuiltBlockoftheMonthClub.com
Online Quilt Magazine – Vol. 2 No. 8
© Online Quilt Magazine.com All Rights Reserved P a g e | 36
YES, We Want to Hear From
You!
As our Online Magazine continues to grow each
month, we need your feedback in order for us to
continue to improve our publication for you.
• We want to know how you liked it.
• We want to know the topics you're
interested in.
• We want to know if you have any
suggestions, Hints or Tips of your own that
you'd like included, or if you know anyone
we should include a story on!
Please send me an email with your Testimonial,
Tip, Suggestion or Enhancement – I'd love to hear
from you!
Send all emails to:
If you'd like to submit an Article, or a Project
for Publication, or take advantage of our Very
Very Reasonable Advertising Rates, please
email details or queries to Jody at
"Quilt-y" Sayings…
� In the crazy quilt of life, I'm
glad you're in my block of
friends.
� LOST: Husband, dog, and
sewing machine. Reward
offered for sewing machine!


