Download - Science Unit of Work; Let's get Mixing!

Year 2 Chemical Science
Let’s get mixing!
Phase Lesson OverviewEngage Lesson 1: Week 1
Exploring mixtures. Children’s ideas about mixtures.
The purpose of this lesson is to capture students’ interest and curiosity about materials and mixtures. To discover the students’ ideas and conceptions about mixtures. Students will be asked to categorise items as mixtures or non-mixtures. Students will also be asked what a mixture is and to draw a picture of a mixture and write what it is, what is it used for and who makes it.
Explore Lesson 2: Week 2 Mixtures in the Kitchen.
Lesson 3: Week 2T&E‘Crew Stew’
Lesson 4: Week 3Let’s add Water
This lesson is designed to provide experience with solid and solid mixtures and an introduction to solid– liquid mixtures. This lesson uses food products as this is where many students have previous experience with mixing. During the early part of the lesson students will make different mixtures with the ingredients and attempt to separate them. To end this lesson students will assist the teacher make muesli and chocolate crackles.
The students are studying a series of books on Pirates. This week the students will have been reading a book called ‘Crew Stew’ by Lisa Thompson (2007). In this book a stew is made from tomato, potato, onion, carrot and a salty sea sock. In the T&E lesson the students will make this stew replacing the sock with sock shaped bacon. Students will produce a Power point presentation.
In this lesson the students will investigate what happens when water is added to several of materials. This involves making solid-liquid mixtures, liquid-liquid mixtures and solutions. Students experience uses of mixtures outside the kitchen – glue and bubble mixture.The students will study the grapheme ue as in glue this week. These mixtures will be left for the water to evaporate and students will observe them at the start of the next Science lesson.
Explain Lesson 5: Week 4We’re not mixed up about mixtures!
Students will observe the mixtures from last week’s ‘Let’s add Water Lesson’. Students will view an interactive whiteboard presentation of the work they have done in this unit so far. Students will be explicitly taught the scientific definition of a mixture. Students will create a Power point presentation about mixtures.
Elaborate Lesson 6: Week 5Pirate Soup – Oops!
Lesson 7: Week 6Recycling Paper
The students will be asked to make Pirate Soup. Oops the pirates have already had lunch on the island. The students will have to predict and plan how to separate the items in soup. The students then test and evaluate their plan.
The students will look at how mixtures can be used to remake waste paper into new paper.
Evaluate Lesson 8: Week 7
Lesson 9: Week 8
Review previous lessons on mixtures and combining materials by viewing an interactive whiteboard presentation. EVALUATE student learning using worksheets and making a class book.
Students will learn about ochre pigments used by the Aboriginal people. Students will mix ochre with water to make paint. The students will paint a picture using the ochre paint which tells the story of their learning journey in Science this term.

General Capabilities
Cross-Curriculum Priorities
Science Overarching Ideas
Australian Curriculum Science
Science Understanding Science as a Human Endeavour Science Inquiry Skills
ACSSU031 Different materials can be combined, including by mixing, for a particular purpose.
ACSHE034 Science involves asking questions about, and describing changes in, objects and events.
ACSHE035 People use science in their daily lives, including when caring for their environment and living
ACSIS037 Respond to and pose questions, and make predictions about familiar objects and events.
ACSIS038 Participate in different types of guided investigations to explore and answer questions, such as manipulating materials, testing ideas, and accessing information sources.
Integrated Unit of Work on (topic): Let’s get mixing! Year Level: 2
Literacy NumeracyInformation and Communication
TechnologyCritical and Creative Thinking
Intercultural Understanding Personal and Social Competence Ethical Behaviour
Aboriginal & Torres Strait Islander Histories and Cultures
Asia & Australia’s Engagement with Asia
Sustainability
Pattern, Order and Organisation Form and Function Stability and Change
Scale and Measurement Matter and Energy Systems

things. ACSIS039 Use informal measurements in the collection and recording of observations, with the assistance of digital technologies as appropriate.
ACSIS040 Use a range of methods to sort information, including drawings and provided tables.
ACSIS214 Through discussion, compare observations with predictions.
ACSIS041 Compare observations with those of others.
ACSIS042 Represent and communicate observations and ideas in a variety of ways such as oral and written language, drawing and role play.
Exemplar Texts
Students have previously studied Science in Year 1 and Year 2, Term 1 using the Primary Connections units of work.Students studied push and pull forces, including water, in the preceding term.
Crew Stew (Thompson, 2007) Once I Was a Cardboard Box…Now I’m a book About Polar Bears (Pointier, 2009)Boats and Ships (Pike, 2007a) Follow the Paper Trail (DLDTGW, 2010)Words for Writing (Pike, 2007b) Warlugulong (Tjapaltjarri and Tjapaltjarri, 1976)
This unit links Science to Literacy, Numeracy, Technology and Enterprise (Major), Society and Environment (Minor) and The Arts (Minor).
Lesson number: 1 (120min) Lesson title: Exploring mixtures: Children’s ideas about mixtures.
ENGAGE To capture students’ interest and find out what they think they know about the key concepts. To elicit students’ questions about the key concepts.
Inspiration taken from the Primary Connections unit planner
SelectedLearning Outcomes (AC)
Learning Experiences Resources Teaching Strategies and Group Structure (whole class, small groups or individual)
Literacy Focuses

ScienceACSSU031ACSHE034
ACSHE035
EnglishACELA1461ACELA1462ACELA1470ACELY1666ACELY1671ACELY1789ACELY1673
Students will:
1. Students are to ‘think, pair, share’ what mixtures are and what examples they can think of. Following this students’ will participate in a short class discussion of what mixtures are and provide examples of mixtures they know.
2. Students (in pairs) will move around ‘stations’ and observe and ‘play’ with several items that are mixtures and non-mixtures. There will be one interview station where the pairs video their partner answering the question ‘What is a mixture’. Students will move around as many stations that time permits. In their pairs students will observe items, they will discuss whether they believe they are mixtures or not and give reasons for their classification.
3. Individually students are required to draw a picture of a mixture. The students are to write what the mixture is, what it is used for and who makes it. The students will use the ‘My Mixture’ worksheet.
Items for mixture and non-mixture classification:
Packet cake mix Sugar Muesli Rice bubbles Paint Clag glue Water Cordial Sand Sand and gravel
Disposable plastic bowls, plastic spoons and magnifying glasses for students to use to investigate their items.
Interactive whiteboard (IWB) (or large butcher’s type paper if an IWB is unavailable) to record students’ initial ideas of mixtures and their classifications of the items with their reasoning.
Classification table. Worksheet.Worksheet ‘My Mixture’See Resources Appendix 1
1. Think, Pair, Share / Group Discussion - Think, Pair and Share followed by a class discussion on the topic. The purpose of this activity is to ‘switch the students’ brains onto the topic’ and give them time to think about what a mixture is before attempting the classification. Individual, pairs and whole class.
2. Classification - Students will observe the items and discuss and classify in their pairs. Small group.
3. Drawing and Independent Writing - Students are required to complete a drawing and explanation of a mixture individually. Teacher is to read through the requirements of the worksheet with the class. Individual
Differentiation: Student with low literacy skills is to have teacher assistance with the ‘My Mixture’ worksheet to record his/her answers about their mixture. Teacher is to write the student’s answers on an extra worksheet and read back to the student while pointing to each word. Student is then to copy onto their own worksheet.
Inspiration for structure taken from the example Toy Program provided.
Oral Language:Students demonstrate oral language skills when they:
Participate in a think, pair, share and discuss their ideas with a partner.
Interview and be interviewed about ‘What is a mixture’.
Writing:Students demonstrate writing capabilities when they:
Provide written descriptions of the mixture they have drawn in the worksheet ‘My Mixture’.

Caution: Students must be advised not to taste or eat any of the items they are investigating.
Lesson number: 2 (120min) Lesson title: Mixtures in the Kitchen. Inspiration for this lesson was taken from the Primary Connections ‘Mix it up” book. (Australian Academy of Science, 2012)
EXPLORE To provide hands-on experiences of the phenomenon or concept. To provide shared experiences of the phenomenon or concept.
Inspiration taken from the Primary Connections unit planner
SelectedLearning
Outcomes(AC)
Learning Experiences Resources Teaching Strategies and Group Structure (whole class, small
groups or individual)
Literacy Focuses

ScienceACSSU031ACSHE034ACSHE035ACSIS038ACSIS041ACSIS042
EnglishACELA1461ACELA1462ACELA1470ACELY1666ACELY1671ACELY1673
MathematicsACMMG061
Students will:
1. Explore solid-solid mixtures. A selection of solid items will be placed on the group
(approx. 5-6 students per group) desks. The items will be; rice bubbles, cocoa, icing sugar, oats, sultanas and wheat-flakes.
Students will be asked to make two mixtures using two items in each mixture. The students will make their mixtures in plastic bowls.
The students will draw pictures of their mixtures, write what materials they put in each mixture and write a description of the mixture. The first page of the worksheet ‘In the Kitchen’ is designed to scaffold this work.
2. Explore separating the students’ solid-solid mixtures. Groups are to look at the tools provided and discuss
which ones would be best for the different mixtures in their group.
Students will attempt to separate their mixtures. A selection of separating tools will be placed in the
middle of the group for the students to use. The students will assess whether their mixtures can be
separated or not. Students will identify what tools they used to separate their mixture. Students will write a description of how they separated their mixtures. The second page of the ‘In the Kitchen’ Worksheet is designed to scaffold this work.
3. Students will participate in a class discussion of students’ mixtures and what they used to separate them.
4. What mixtures could we make with these items? Using rice bubbles, icing sugar, cocoa and copha the
students will make chocolate crackles. (Each student will be given one at recess the following day)
Using oats, wheat flakes, sultanas, chopped dried
Materials for making mixtures: Rice bubbles Cocoa Icing Sugar Oats Sultanas Wheat-Flakes Plastic bowls Plastic spoons
Tools for separating mixtures: Plastic Forceps (1 set
per student) Fine mesh sieves (1 per
pair of students) Coarse mesh sieve (1
per pair of students)The fine and course mesh sieves are made from disposable cardboard coffee cups with the base removed and replaced with either fine or course mesh.
Choc Crackles and Muesli:Measuring cups and spoons, mixing bowl and spoons, container and microwave or stove to melt copha, 22+ patty cases for Choc Crackles and 22+ zip-lock bags for the muesli.
Worksheet ‘In the Kitchen’ for students to complete.Table template for class discussion of mixtures.
Making Solid- Solid mixtures.Students will individually make their mixtures from the group’s materials.Students will observe their mixtures and draw a picture and write a description of their mixture. Individual.
Separating Solid-Solid mixtures.Students will individually attempt to separate their mixtures using the group’s tools. The students will discuss in their groups which tools they think will work best for the mixtures in their groups. They will investigate separating their mixtures with the tools. The students will record if they could separate their mixture, what tools they used and write a description of how they separated the materials independently. Individual and group.
Class discussion of students’ mixtures and if and how they were separated.Whole class.
Make Chocolate Crackles and Muesli. This is to be teacher directed with individual students taking part by measuring and mixing the
Inspiration for structure taken from the example Toy Program provided.
Oral Language:Students demonstrate oral language skills when they:
Participate in group discussions about the separating tools and which ones would be best for the different mixtures.
Participate in class discussion about the mixtures they made and how they separated them.
Vocabulary:Students demonstrate vocabulary when they:
Use appropriate vocabulary to describe the materials, mixtures and tools.
Add to the class word wall containing suitable vocabulary for the Year 2 Chemical Science: Materials – Combinations and Mixtures unit.
Writing:Students demonstrate writing capabilities when they:Provide written descriptions of their mixtures and if and how they separated them.
Differentiation: Student with low literacy skills is to have teacher assistance with the ‘’In the Kitchen’ worksheet to record his/her answers about their mixture. Teacher is to write the student’s answers on an extra worksheet and read back to the student while pointing to each word. Student is then to copy onto their own worksheet.

apricot and sunflower seeds the students will make muesli. (Each student will take a portion home)
Recipes for Chocolate Crackles and Muesli.See Resources Appendix 2
materials.Whole class.
Lesson number: 3 Technology and Enterprise Lesson title: Crew Stew
EXPLORE To provide hands-on experiences of the phenomenon or concept. To provide shared experiences of the phenomenon or concept.
Inspiration taken from the Primary Connections unit planner
SelectedLearning Outcomes
(AC)Learning Experiences Resources Teaching Strategies and Group
Structure (whole class, small groups or individual)
Literacy Focuses

ScienceACSSU031ACSHE034ACSHE035ACSIS037ACSIS042
EnglishACELA 1461ACELA1462ACELA1463ACELA1466ACELA1470ACELT1592ACELY1671ACELY1674
T&EM1.2
Understands that when selecting materials, their
properties are considered.M2.2
Selects and uses equipment with increasing accuracy and control to safely manipulate
and process materials.I2.1
Understands that information is used, created,
constructed, stored and transmitted in different
ways.I2.2
Uses techniques to access, record, store, manipulate and transmit information and create information
products.TS 2.2
Identifies, understands and safely applies operational
procedures when using familiar equipment for
routine tasks.TS 2.3
Identifies the necessary skills and independently
Students will:
1. Students will listen to the teacher read ‘Crew Stew’ (Thompson, 2007) and read the repeated lines at loud with the teacher.
2. Explore making a mixture of solids and liquids to eat. Students will make ‘Crew Stew’. Students will show good hygiene by washing their hands with soap. Students will prepare the vegetables for the ‘Crew Stew’ by peeling and chopping. Students will add the vegetables, water to the pot. Teacher to take photos while the students are working. Teacher is to discretely place the bacon socks into the stew as done by the cook in ‘Crew Stew’.
3. Students will observe and discuss what the mixture looked like when the ingredients are combined. Students will observe and discuss whether we could separate the mixture. The stew will then be put on the stove to cook.
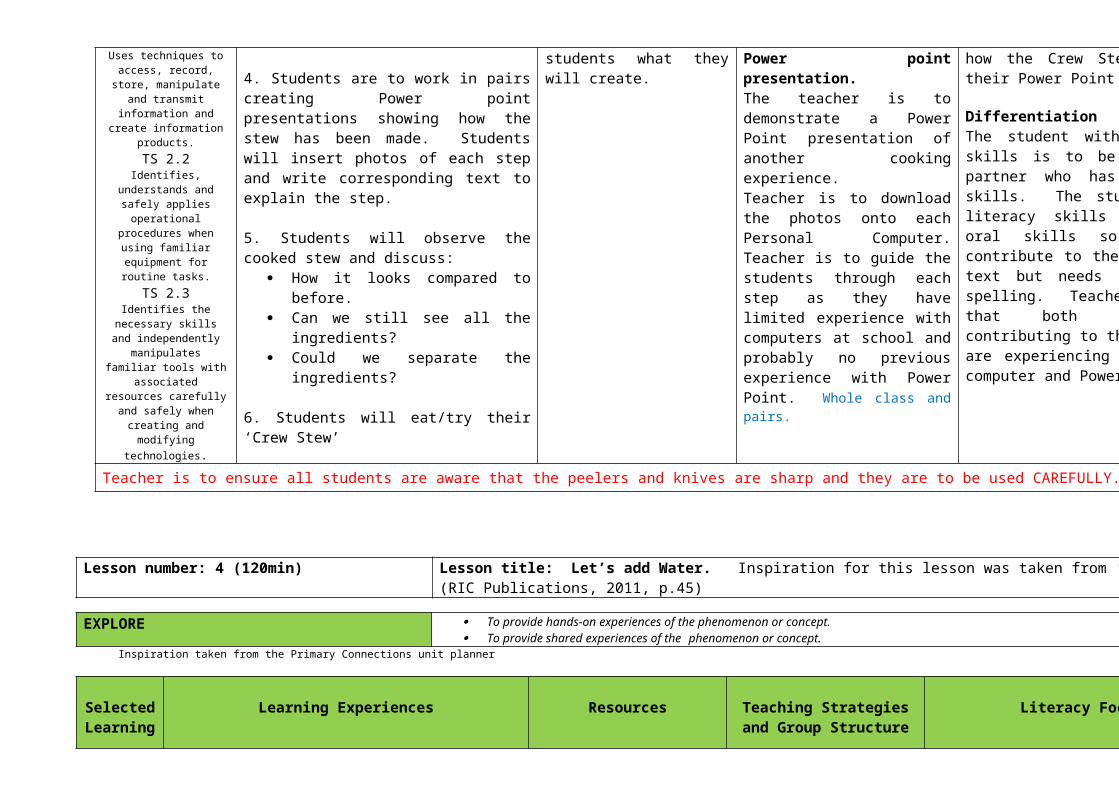
4. Students are to work in pairs creating Power point presentations showing how the stew has been made. Students will insert photos of each step and write corresponding text to explain the step.
5. Students will observe the cooked stew and discuss:
How it looks compared to before. Can we still see all the ingredients? Could we separate the ingredients?
6. Students will eat/try their ‘Crew Stew’
Big Book: ‘Crew Stew’ (Thompson, 2007).
Ingredients and equipment to make ‘Crew Stew’:
Large Pot Stirring spoon Peelers Knifes Chopping boards Carrots Potatoes Tomatoes Onions Sock shaped bacon Stove
Cards for each student with a vegetable and a job. For example carrot – peeling.
CameraComputers – one for each pair of students.Demonstration Power point slide to show students what they will create.
Listening and choral reading to the story ‘Crew Stew’. Whole class.
Making the ‘Crew Stew’Students are to be divided into four groups with each group preparing one ingredient. The groups are to fairly divide up the peeling and chopping so that everyone gets a go. Teacher is to demonstrate one set of ingredients (1 carrot, 1 potato, one onion, 1 tomato). Individual vegetable – job cards are to be handed out so that each student has the opportunity to participate. Whole class and group.
Observing and discussing the ‘Crew Stew’.Whole class.
Power point presentation.The teacher is to demonstrate a Power Point presentation of another cooking experience.Teacher is to download the photos onto each Personal Computer. Teacher is to guide the students through each step as they have limited experience with computers at school and probably no previous experience with Power Point. Whole class and pairs.
Inspiration for structure taken from the example Toy Program provided.
Oral Language:Students demonstrate oral language skills when they:
Listen and participate in the reading of ‘Crew Stew’ (Thompson, 2007)
Participate in group discussions about the ‘Crew Stew’ mixture.
Participate in class discussion about the cooked ‘Crew Stew’.
Vocabulary:Students demonstrate vocabulary when they:
Use appropriate vocabulary to describe the ingredients and equipment.
Add to the class word wall containing suitable vocabulary for the Year 2 Chemical Science: Materials – Combinations and Mixtures unit.
Writing:Students demonstrate writing capabilities when they:Provide written descriptions of how the Crew Stew was made in their Power Point presentation.
DifferentiationThe student with poor literacy skills is to be placed with a partner who has good literacy skills. The student with poor literacy skills has reasonable oral skills so is able to contribute to the content of the text but needs assistance with spelling. Teacher is to ensure that both students are contributing to the text and both are experiencing the use of the computer and Power Point.

manipulates familiar tools with associated resources carefully and safely when
creating and modifying technologies.
Teacher is to ensure all students are aware that the peelers and knives are sharp and they are to be used CAREFULLY.
Lesson number: 4 (120min) Lesson title: Let’s add Water. Inspiration for this lesson was taken from ‘Australian Curriculum Science - Year 2 (RIC Publications, 2011, p.45)
EXPLORE To provide hands-on experiences of the phenomenon or concept. To provide shared experiences of the phenomenon or concept.
Inspiration taken from the Primary Connections unit planner
SelectedLearning
Outcomes (AC)
Learning Experiences Resources Teaching Strategies and Group Structure (whole class,
small groups or individual)
Literacy Focuses
ScienceACSSU031ACSHE034ACSHE035ACSIS037ACSIS038ACSIS040ACSIS214ACSIS041ACSIS042
EnglishACELA1460ACELA1461ACELY1666ACELY1789ACELY1671ACELY1673
MathematicsACMMG061
Students will:
1. In pairs students will make the following mixtures: Salt + Water Oil + Water Flour + Water Sugar + Water Detergent + water
Before making each mixture the students are to predict what they think will happen.Students will measure the materials for each mixture into the labeled container and then mix.Students will draw and describe what happened.
2. Students will then discuss what happened when the materials were combined and how this compared to their predictions - in their pairs (2 minutes) and then in their desk groups (5 minutes).
3. Students will then have a whole class discussion about what happened. Teacher demonstration of dissolving salt in water and sugar in water followed by students tasting the solutions to see if the salt and sugar are still in the water.
4. Students are to think, pair and share their ideas of what the mixtures could be used for. Class discussion about what the mixtures could be used for. Students will be shown an example of paste glue (Clag). Students will be given pipe cleaners to make a bubble blower and then test their detergent and water mixture as a bubble mixture.
5. Students will think, pair and share whether the different mixtures could be separated if so how. Students will follow this with a class discussion. The students’ mixtures are to be kept and left open to the air to observe next week.
Materials and equipment for the ‘Let’s add water’ activity.
Amount required per pair: 5 Clear plastic cups 5 Plastic spoons Half cup measure Quarter cup measure Water Sugar Salt Flour Vegetable oil Detergent 2 Pipe cleaners
Also 1 Clag style glue for the class and 4 buckets to collect waste.
Work sheet ‘Let’s add water’See Resources Appendix 3
Half cup and quarter cup measures can be made from disposable plastic cups marked at the required measure.
‘Let’s add water’ activity. Students will predict, make mixture, observe and communicate findings. This activity is carried out in pairs. Small Group
Discussion of their observations compared to their predictions. Think, pair and share, group discussion, class discussion. Individual, small and larger group and whole class.
Discussion of what they think the mixtures could be used for. Think, pair and share followed by class discussion.Individual, small group and whole class
Students will make a bubble blower and use their detergent and water mixture. Individual.
Discussion whether they think the mixtures could be separated. Individual, small group and whole class.
Inspiration for structure taken from the example Toy Program provided.
Oral Language:Students demonstrate oral language skills when they:
Participate in group and class discussion about their observations compared to their predictions.
Participate in group and class discussions about what their mixtures might be used for.
Participate in class discussion about whether they think the mixtures could be separated.
Vocabulary:Students demonstrate vocabulary when they:
Use appropriate vocabulary to describe the materials, mixtures and tools.
Add to the class word wall containing suitable vocabulary for the Year 2 Chemical Science: Materials – Combinations and Mixtures unit.
Writing:Students demonstrate writing capabilities when they:Provide written predictions and observations of their mixtures.
Differentiation: Student with low literacy skills is to have teacher assistance with the ‘’Let’s add water’ worksheet to record his/her answers about their mixture. Teacher is to write the student’s answers on an extra worksheet and read back to the student while pointing to each word. Student is then to copy onto their own worksheet.

Lesson number: 5 (120min) Lesson title: We’re not mixed up about mixtures!
EXPLAIN To support students to develop explanations for experiences and make representations of developing conceptual understanding. To introduce current scientific views.
Inspiration taken from the Primary Connections unit planner
SelectedLearning
Outcomes (AC)
Learning Experiences Resources Teaching Strategies and Group Structure (whole class, small groups or individual)
Literacy Focuses

ScienceACSSU031
EnglishACELA146
0ACELA146
1ACELY1666ACELY1789ACELY1671ACELY1673
Students will:
1. Students will observe their mixtures from last week’s lesson ‘Let’s Add Water’. Students will observe discuss what has happened to them, firstly in their pairs then in their desk groups followed by a class discussion. Students will participate in a class discussion whether their mixtures from last week can be separated.
2. Students will look at photographs of the mixtures they have made over the past few weeks and participate in a class discussion about them.
3. Students will think, pair and share what they think mixtures are. Pairs of students are to write a sentence or two about what mixtures are.
4. The students will read their definitions to the class. Teacher is to record points on the board.
5. Students will listen to the scientific definition of a mixture. Students will participate in a class discussion about how their definitions are similar or different to the scientific definition.
6. Students will work in pairs to create a Power point presentation explaining what a mixture is and providing examples. Students will insert photos of the example mixtures and insert text describing what the mixture was made of and the features of the mixture.
Mixtures from last week which have been left out for the water to evaporate.
Photographs of the mixtures students have made into an interactive whiteboard presentation.
Lined paper for students to record their definition of a mixture.
Whiteboard to record students’ definitions of mixtures and to compare to scientific definition.
Personal Computers, 1 for each pair of students.
Photos of the mixtures placed in a file on the computers.
Mixtures from ‘Let’s Add Water’.The students observe the mixtures. Students participate in a pair, small group and class discussions about what has happened and whether the mixtures could (have been) separated. Whole class.
Students will look at photographs of the mixtures they have made as a guided recall. Students will participate in a class discussion using vocabulary and teacher defining vocabulary from the word wall about the mixtures they have made. Whole class.
Students’ will participate in a think, pair and share exercise about what they think mixtures are. Pairs of students will write their own definitions. Small group.
Students will read their definitions to the class. The teacher is to write points of the definition on the White Board. Teacher is to provide scientific definition and discuss with class how their definitions are similar or different to the scientific definition. Differences are to be explained to students, if students provide qualities of mixtures such as they make something new it is to be explained that some materials when mixed together make another material and this is called a chemical reaction and will be the fun and interesting topic they will explore in a future year. Using the descriptors from the students’ definitions a scientific class definition of mixtures is to be written. Whole class.
Power point presentation.Teacher is to guide students through each step of the creating the Power Point presentation. Students are to create their own text on each slide.
Inspiration for structure taken from the example Toy Program provided.
Oral Language:Students demonstrate oral language skills when they:
Participate in small group and a class discussion about the mixtures from ‘Let’s Add Water”
Participate in class discussion about the mixtures they have made over the past few weeks.
Participate in a think, pair and share about what is a mixture.
Vocabulary:Students demonstrate vocabulary when they:
Use appropriate vocabulary to describe the ingredients, mixtures and equipment..
Use and add to the class word wall suitable vocabulary for the Year 2 Chemical Science: Materials – Combinations and Mixtures unit.
Writing:Students demonstrate writing capabilities when they:Write their definitions of a mixture.Create text in their Power Point presentation.
DifferentiationThe student with poor literacy skills is to be placed with a partner who has good literacy skills. The student with poor literacy skills has reasonable oral skills so is able to contribute to the content of the text but needs assistance with spelling. Teacher is to ensure that both students are contributing to the text and both are experiencing the use of the computer and Power Point.

Lesson number: 6 (120min) Lesson title: Pirate Soup – Oops! Inspiration from this lesson was taken from online lesson plan ‘Alien Soup’ (rebnewt (user name from TES connect), n.d.)
ELABORATE To challenge and extend students’ understanding in a new context or make connections to additional concepts through a student-planned investigation. To support students to plan and conduct an investigation.
Inspiration taken from the Primary Connections unit planner
SelectedLearning
Outcomes (AC)
Learning Experiences Resources Teaching Strategies and Group Structure (whole class, small groups or individual)
Literacy Focuses

ScienceACSSU031ACSHE034ACSIS037ACSIS038ACSIS040ACSIS214ACSIS041ACSIS042
EnglishACELA1460ACELA1461ACELY1666ACELY1789ACELY1671ACELY1673
MathematicsACMMG061
Students will:
1. In pairs students will make a mixture ‘Pirate Soup’ following the recipe provided.
2. Students will use their prior learning and experience in this unit to carry out an activity/investigation to separate the ingredients of the Pirate Soup. The students will work in pairs. The students will work in pairs to complete a plan to separate the ingredients using the planning worksheet.
3. After teacher has checked plan and asked questions to prompt any required changes the students will carry out their separation of the materials.
4. The students will assess their separation of ingredients. Students will record any difficulties experienced and suggest improvements to the method they used.
5. Students will tour the class observing other groups separations. One student in the pair is to remain by their mixtures to explain details of their separation while the other student observes other groups separations. The students are then to swap roles and the exercise is repeated.
6. Students will participate in a class discussion on the separation of the materials. How did the order in which materials were separated affect the separation? What equipment was used successfully and unsuccessfully?
Pirate Soup Recipe – 1/student.See Resources Appendix 4
Materials and equipment to make Pirate soup. Per pair:
Gravel Sand 5 paperclips 7 beads Water 1 plastic cup 1 plastic spoon ½ cup measure
Pirate Soup Separation Plan worksheet – 1/pair.See Resources Appendix 4
Separation equipment. Per Pair.
Forceps Fabric filter (made
like sieves) Fine mesh sieve Course mesh sieve Containers
Pirate Soup – How did the separation work? Worksheet – 1/studentSee Resources Appendix 4.
Making Pirate Soup.Teacher will read through recipe with the students. In pairs students will make their ‘Pirate Soup’. Whole class and small group.
Separate the materials:Using the worksheet as a guide, students will develop their plan to attempt to separate the materials out of the ‘Pirate Soup’. Students will work in pairs. Teacher is to observe the students’ work asking guiding questions such as: “What would happen if you used this piece of equipment first? What would it separate?Small group.
Students will attempt to separate the materials in the ‘Pirate Soup’ using the plan they developed.Small group.
Students will assess how successful their separation of the materials was. They are able to discuss in their pairs but the students must each fill in their own work sheet. Small group and individual.
Class Gallery WalkStudents in each pair will take a turns being the spokesperson for their separation and the gallery viewer. Independent and whole class.
Students will participate in a class discussion on the separation of the materials. Whole class.
Inspiration for structure taken from the example Toy Program provided.
Oral Language:Students demonstrate oral language skills when they:
Use language to negotiate group work with their partner.
Participate in paired discussions to plan their separation.
Participate in discussion with their partner to assess how successful their separation was. Where they went well. What they would do differently next time.
Provide informative information to class mates when they are the spokesperson for their pair.
Ask questions of their class mates about their separation on the materials.
Participate in class discussion on the separation of the ‘Pirate Soup’
Vocabulary:Students demonstrate vocabulary when they:
Use appropriate vocabulary to describe the materials, mixtures and tools.
Add to and use the class word wall containing suitable vocabulary for the Year 2 Chemical Science: Materials – Combinations and Mixtures unit.
Writing:Students demonstrate writing capabilities when they:
Provide a written plan for separating the materials in the ‘Pirate Soup’
Provide written evaluations of the separation they carried out.
Differentiation: Student with low literacy skills is to have teacher assistance with the worksheet to record his/her answers about their mixture. Teacher is to write the student’s answers on an extra worksheet and read back

to the student while pointing to each word. Student is then to copy onto their own worksheet.
Lesson number: 7 (120min) Lesson title: Let’s recycle – using mixtures.
ELABORATE To challenge and extend students’ understanding in a new context or make connections to additional concepts through a student-planned investigation. To support students to plan and conduct an investigation.
Inspiration taken from the Primary Connections unit planner
SelectedLearning Outcomes
(AC)
Learning Experiences Resources Teaching Strategies and Group Structure (whole class, small
groups or individual)
Literacy Focuses

ScienceACSSU031ACSHE034ACSHE035ACSIS038ACSIS042
EnglishACELA1461ACELA1462ACELA1463ACELY1666ACELY1789
S&ER2.1
Understand that people use a variety of
resources to make different goods or
services in an attempt to satisfy needs and
wants.R2.2
Understand that people manage the use of
resources in different ways.
Students will:
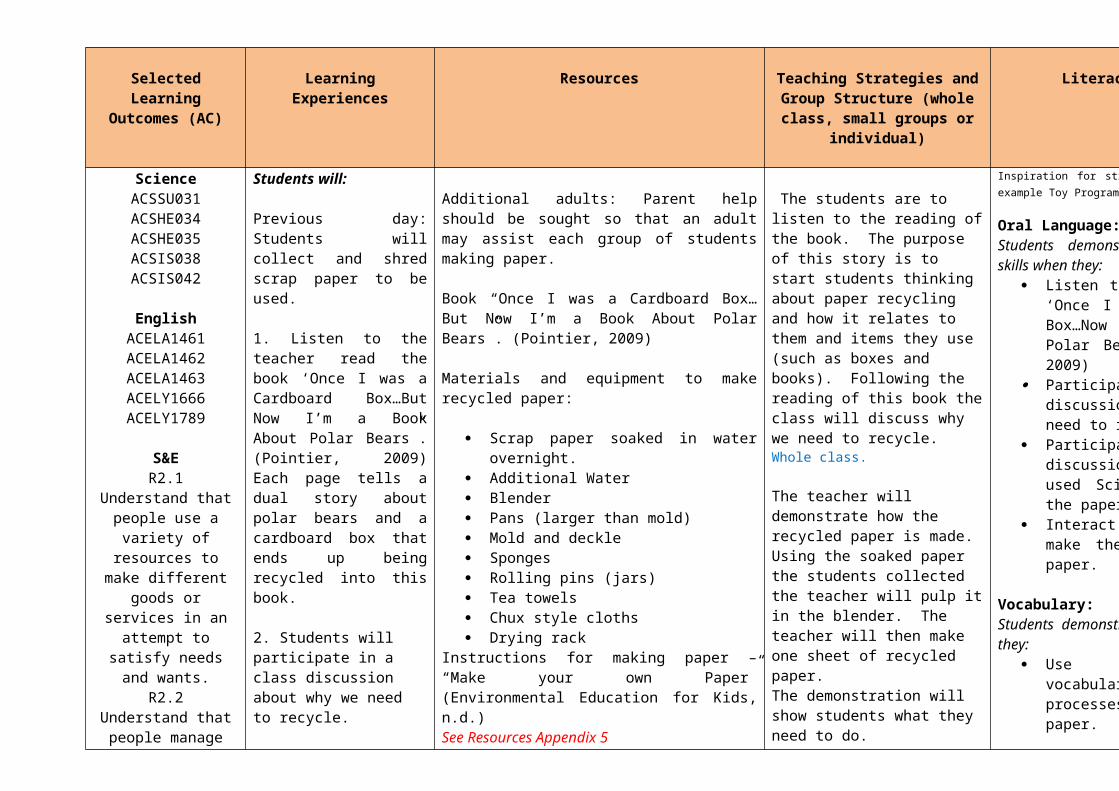
Previous day: Students will collect and shred scrap paper to be used.
1. Listen to the teacher read the book ‘Once I was a Cardboard Box…But Now I’m a Book About Polar Bears”. (Pointier, 2009) Each page tells a dual story about polar bears and a cardboard box that ends up being recycled into this book.
2. Students will participate in a class discussion about why we need to recycle.
3. Students are to observe the teacher demonstrate how to make recycled paper.
4. In groups, with an adult helper, students are to make their own recycled paper.
4. Students will participate in a class discussion about how we have used the Science of mixtures to make our own recycled paper.
5. Students will watch the video ‘Follow the Paper Trail’.
Additional adults: Parent help should be sought so that an adult may assist each group of students making paper.
Book “Once I was a Cardboard Box…But Now I’m a Book About Polar Bears”. (Pointier, 2009)
Materials and equipment to make recycled paper:
Scrap paper soaked in water overnight. Additional Water Blender Pans (larger than mold) Mold and deckle Sponges Rolling pins (jars) Tea towels Chux style cloths Drying rack
Instructions for making paper – “Make your own Paper” (Environmental Education for Kids, n.d.)See Resources Appendix 5
Video “Follow the paper trail’http://www.youtube.com/watch?v=ohv9y8Bi3fU(DLDTGW, 2010)
The students are to listen to the reading of the book. The purpose of this story is to start students thinking about paper recycling and how it relates to them and items they use (such as boxes and books). Following the reading of this book the class will discuss why we need to recycle.Whole class.
The teacher will demonstrate how the recycled paper is made. Using the soaked paper the students collected the teacher will pulp it in the blender. The teacher will then make one sheet of recycled paper.The demonstration will show students what they need to do.Whole class.
The students will work in small groups to make their own paper. Each student is to make one sheet of paper. An adult will be present to assist students if required. Small group.
The students will participate in a discussion to clarify and share ideas about how they used mixtures to make their recycled paper. Whole class.
Students will watch a video to see how paper recycling is done commercially.Whole class.
Inspiration for structure taken from the example Toy Program provided.
Oral Language:Students demonstrate oral language skills when they:
Listen to the reading of ‘Once I was a Cardboard Box…Now I’m a Book About Polar Bears’. (Pointier, 2009)
Participate in group discussions about the need to recycle paper.
Participate in class discussion about how we used Science to recycle the paper.
Interact in groups to make their own recycled paper.
Vocabulary:Students demonstrate vocabulary when they:
Use appropriate vocabulary to describe processes to recycle paper.
Add to the class word wall containing suitable vocabulary for the Year 2 Chemical Science: Materials – Combinations and Mixtures unit.
DifferentiationIs not required for this lesson.

This lesson will be followed with a series of lessons writing a persuasive text on the recycling of paper.
Lesson number: 8 (90min) Lesson title: Putting it together - combining materials and mixing. Inspiration for this lesson was taken from the Primary Connections ‘Mix it up” book. (Australian Academy of Science, 2012). P.62-65.
EVALUATE To provide opportunities for students to review and reflect on their learning and represent what they know.
Inspiration taken from the Primary Connections unit planner
SelectedLearning
Outcomes (AC)
Learning Experiences Resources Teaching Strategies and Group Structure (whole class, small groups or individual)
Literacy Focuses
ScienceACSSU031
EnglishACELA1460ACELA1461ACELA1467ACELA1470ACELY1666ACELY1789ACELT1671ACELY1673
Students will:
1. Review previous lessons on mixtures and combining materials by viewing an interactive whiteboard presentation which includes photos of their work and experiences in this unit.
2. Participate in a discussion about their experience with combining materials and mixtures.
3. Write a definition of mixtures.
4. Each student will make a page for a mix and match book of mixtures. Choose a mixture from the selection provided by the teacher. Complete the worksheet that will become their page in the book.
5. Students are to read and share their page to a partner.
6. Students are to look through the class book with the teacher.
Presentation made by the teacher to provide a review of the unit thus far for the students. Presentation is to use words from the word wall and photos of the students doing their practical work.
Variety of mixtures for students to use to make their page in the book. At least enough for 1 per student, preferably more to provide choice.
Cover page for class mix and match mixtures book.Also comb binding ring and one A4 piece of card (for back) for the class mixtures book.Binding machine.Scissors.
Worksheets:1 – Combining materials (1/student)2 – What is a mixture? (1/student)3 – My Mixture – page for the class book. Preferably printed on thick paper. (1/student)See Resources Appendix 6
Viewing of presentation providing the students with a recap of what they have been doing and learning the previous weeks. Whole class.
Class discussion about the presentation, combining materials and mixtures and what we been learning. How have students’ ideas changed? What have you learnt about combining materials? Do you think you would classify the items from week 1 differently now?Whole class.
“Combining materials” (worksheet). This worksheet is to provide students to show what they know about combining materials. Did different sections of their pirate ship need different materials. Why did they choose the materials they used?Individual.
“What is a mixture?” (worksheet) This for the students to show, and the teacher to learn, what exactly students now know about mixtures. Did their answers change from week 1? Do the students now hold the scientific conception of what a mixture is?Individual
Mix and Match book about mixtures. This activity provides another opportunity for students to demonstrate their knowledge of mixtures. In this activity the students are producing a page that will become part of a book. The students will draw and write short text for this page. The students will share their page with a partner. Individual and small group.
The book will be produced in the classroom during this lesson. This is so that the students can see their completed work and so that they can have fun looking through it and seeing combinations that still make sense and others that are nonsense. Whole class.
Inspiration for structure taken from the example Toy Program provided.
Oral Language:Students demonstrate oral language skills when they:
View the presentation of their learning journey.
Participate in a class discussion about their learning journey.
Read their page to a partner. View and comment on the class book.
Vocabulary:Students demonstrate vocabulary when they:
Use appropriate vocabulary to describe the materials and mixtures.
Writing:Students demonstrate writing capabilities when they:Provide written descriptions of why they chose the materials they used to make their pirate ship.Provide a written definition of a mixture.Provide text to for their page in the class book on mixtures.
Differentiation: Student with low literacy skills is to have teacher assistance with the writing involved for the worksheets. For this lesson the teacher is to transcribe the student’s answers on to the worksheets.

Lesson number: 9 (120min.) Lesson title: Paint Mixtures - Ochre
EVALUATE To provide opportunities for students to review and reflect on their learning and represent what they know.
Inspiration taken from the Primary Connections unit planner
SelectedLearning
Outcomes (AC)
Learning Experiences Resources Teaching Strategies and Group Structure (whole class, small groups or individual)
Literacy Focuses

ScienceACSSU031ACSHE035
EnglishACELA1460ACELA1461ACELY1666ACELY1789
S&EC2.1
Understands that
people belong to cultural
groups that have
particular forms of cultural
expression.
The ArtsAI2
The student:Uses own
ideas,experiences
andobservations
in themaking of arts works
through structuredactivities.
Students will:
1. Participate in a class discussion about what the Australian Aborigines used to paint. View the ochre samples brought in by the teacher. Further discussion about how the Aboriginal people used the ochre as paint by mixing it with water, saliva, egg, blood and other things.
2. Students are to participate in a class discussion about how some Aboriginal people use art to tell a story. Teacher to provide examples.
3. Students will produce an ochre painting in the style of an Aboriginal story map to represent their learning journey this term. The students will represent in their drawings what they liked and disliked about the term’s unit.
(a) Students will observe the some of the symbols used by Aboriginal people. As a class they will devise a set of symbols to use for their artwork.
(b) As a class students will observe the teacher demonstration of crushing up the ochre.
(c) Students will draw a draft/plan of their painting in pencil on a sheet of paper.
4. The students will work in groups of 3-4 to mix ground ochre with a water and glue mixture. The glue is to be mixed 1 part glue to 9 parts water. There are four different coloured ochres and each student will mix at least one.
5. The students will paint the story of their learning journey this term.
6. The students are to share and inform another two students about their painting.
Materials and Equipment:Ochre (4 colours)Paint brushesPaper for draft drawings.Paper for paintingWaterGlue
Examples of Aboriginal Art that have an obvious story map. ‘Warlugulong’ by Tjapaltjarri and Tjapaltjarri (1976) which can be found in the resource set ‘Focus on Art in Society’ (n.d.) by Macmillan Teacher Resources.
Information (for teacher) and examples of Aboriginal symbols. See Resources Appendix 6
Teacher directed class discussion about the Ochre and how Aboriginal people use art to tell a story. Some students may have knowledge of Aboriginal Art methods and by introducing this topic as a class discussion it allows these students to share their knowledge. Teacher is to ensure that the required knowledge is included.Whole Class.
The class is to work together to develop a set of symbols for the class to use. Whole Class.
Teacher demonstration to crush the ochre.Whole Class.
Students are to draw a draft plan.Individual.
Students are to work in groups to mix their ochre paint. Small Group.
Students are to work individually on their painting. Individual.
Students are to explain their painting and the story with it to two other students. Individual.
Inspiration for structure taken from the example Toy Program provided.
Oral Language:Students demonstrate oral language skills when they:
Participate in a class discussion about ochres and storytelling in Aboriginal art.
Participate in class discussion to decide what symbols the class will use in their learning journey painting.
Tell other students about their painting.
Vocabulary:Students demonstrate vocabulary when they:
Use appropriate vocabulary to describe the ochre and Aboriginal style of art.
DifferentiationNo differentiation is required this lesson.


