Smart Classroom Instructions
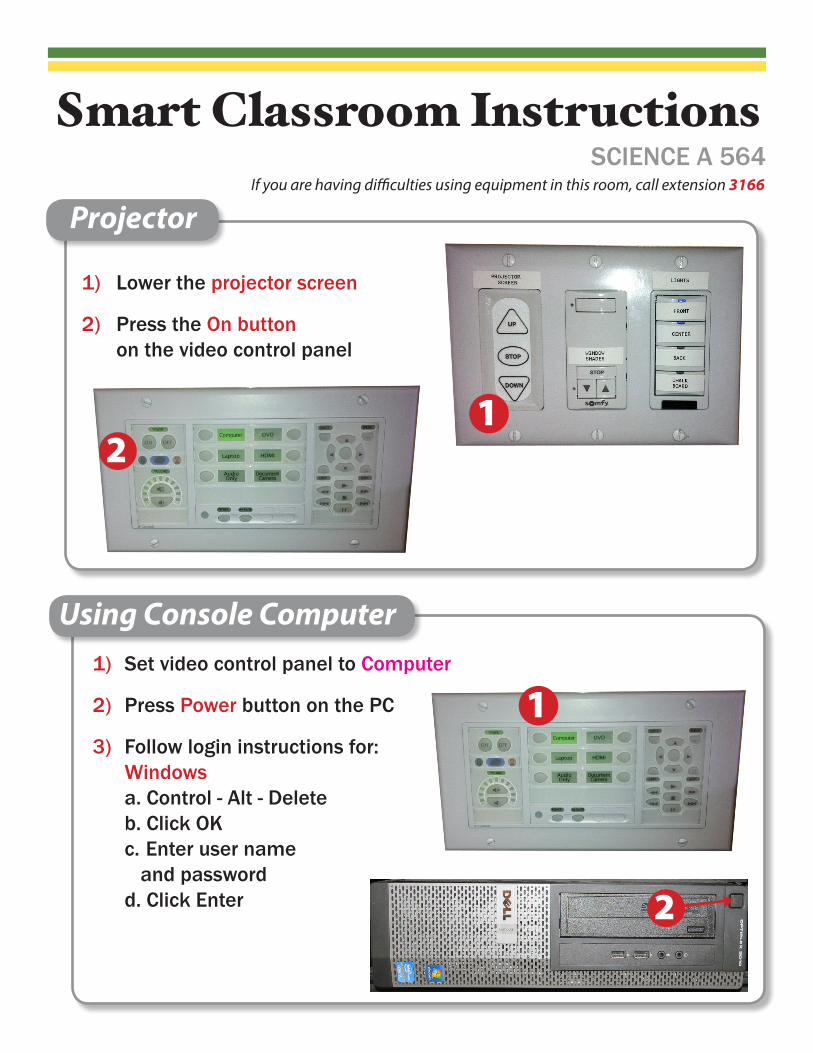
Projector
SCIENCE A 564
1) Lower the projector screen
2) Press the On button on the video control panel
Using Console Computer1) Set video control panel to Computer
2) Press Power button on the PC
3) Follow login instructions for: Windows a. Control - Alt - Delete b. Click OK c. Enter user name and password d. Click Enter
If you are having difficulties using equipment in this room, call extension 3166
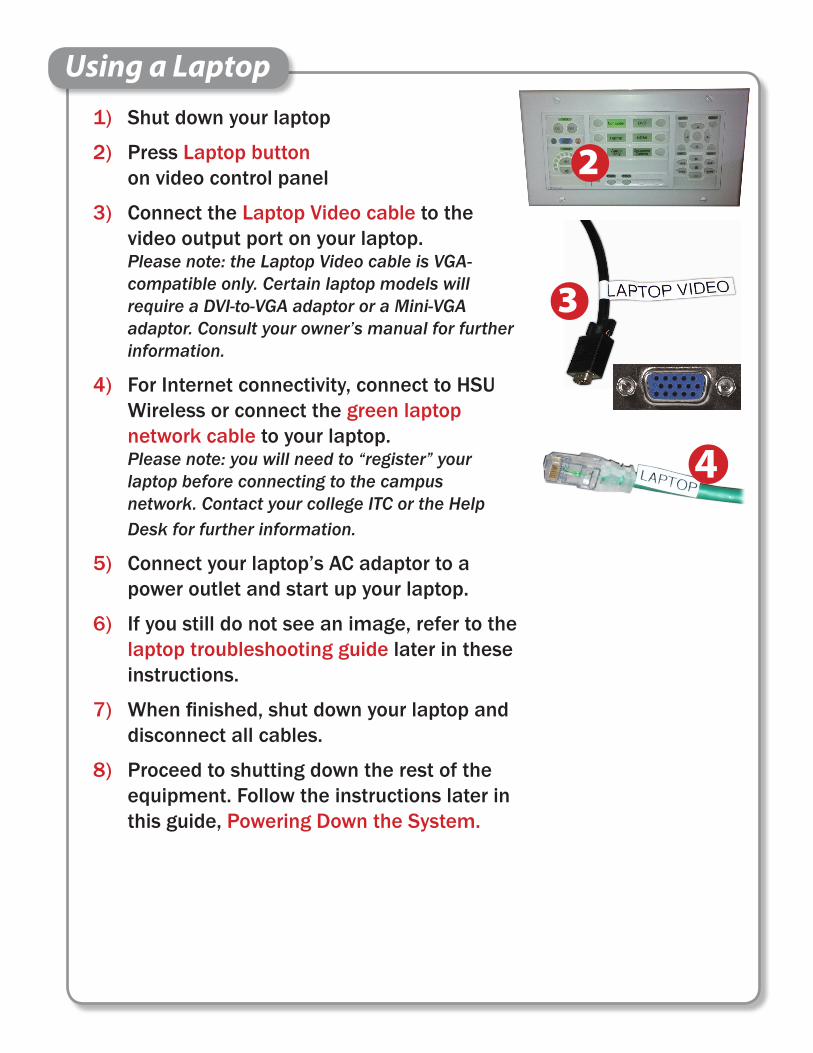
Using a Laptop1) Shut down your laptop
2) Press Laptop button on video control panel
3) Connect the Laptop Video cable to the video output port on your laptop. Please note: the Laptop Video cable is VGA-
compatible only. Certain laptop models will require a DVI-to-VGA adaptor or a Mini-VGA
adaptor. Consult your owner’s manual for further information.
4) For Internet connectivity, connect to HSU Wireless or connect the green laptop
network cable to your laptop. Please note: you will need to “register” your
laptop before connecting to the campus network. Contact your college ITC or the Help
Desk for further information.
5) Connect your laptop’s AC adaptor to a power outlet and start up your laptop.
6) If you still do not see an image, refer to the laptop troubleshooting guide later in these instructions.
7) Whenfinished,shutdownyourlaptopand disconnect all cables.
8) Proceed to shutting down the rest of the equipment. Follow the instructions later in this guide, Powering Down the System.
Playing a DVD/Blu-Ray
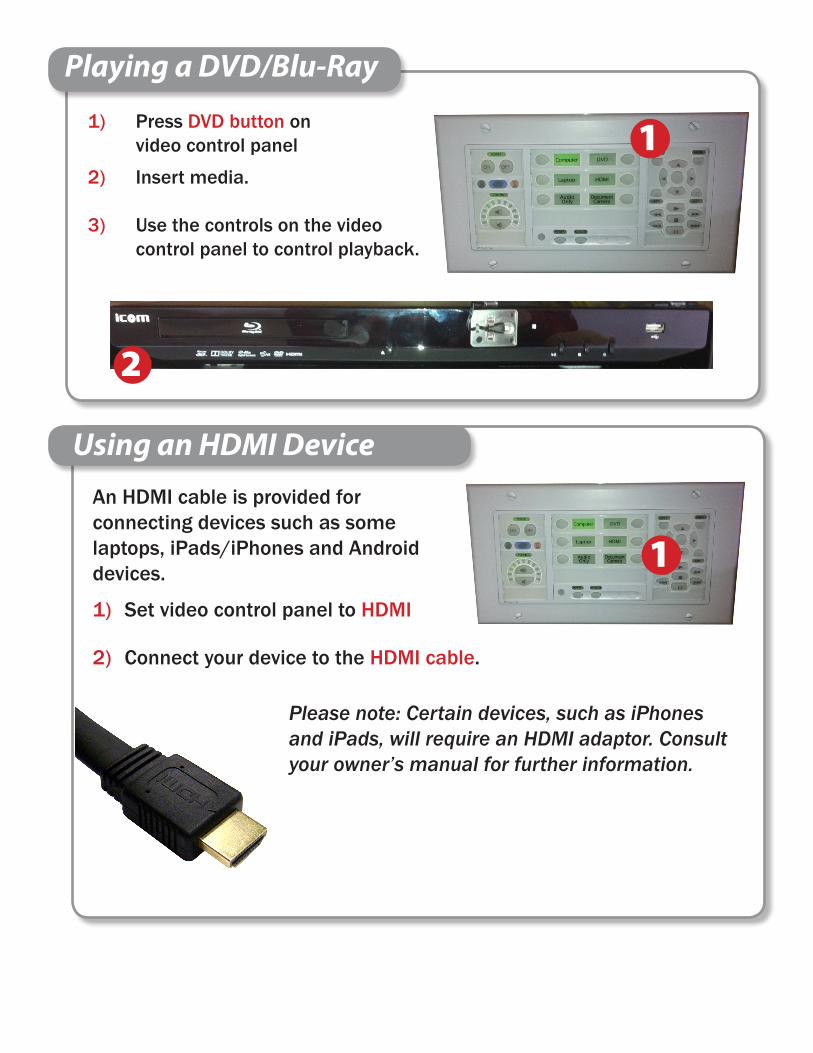
1) Press DVD button on video control panel
2) Insert media.
3) Use the controls on the video control panel to control playback.
An HDMI cable is provided forconnecting devices such as some laptops, iPads/iPhones and Android devices.
1) Set video control panel to HDMI
2) Connect your device to the HDMI cable.
Using an HDMI Device
Please note: Certain devices, such as iPhones and iPads, will require an HDMI adaptor. Consult your owner’s manual for further information.
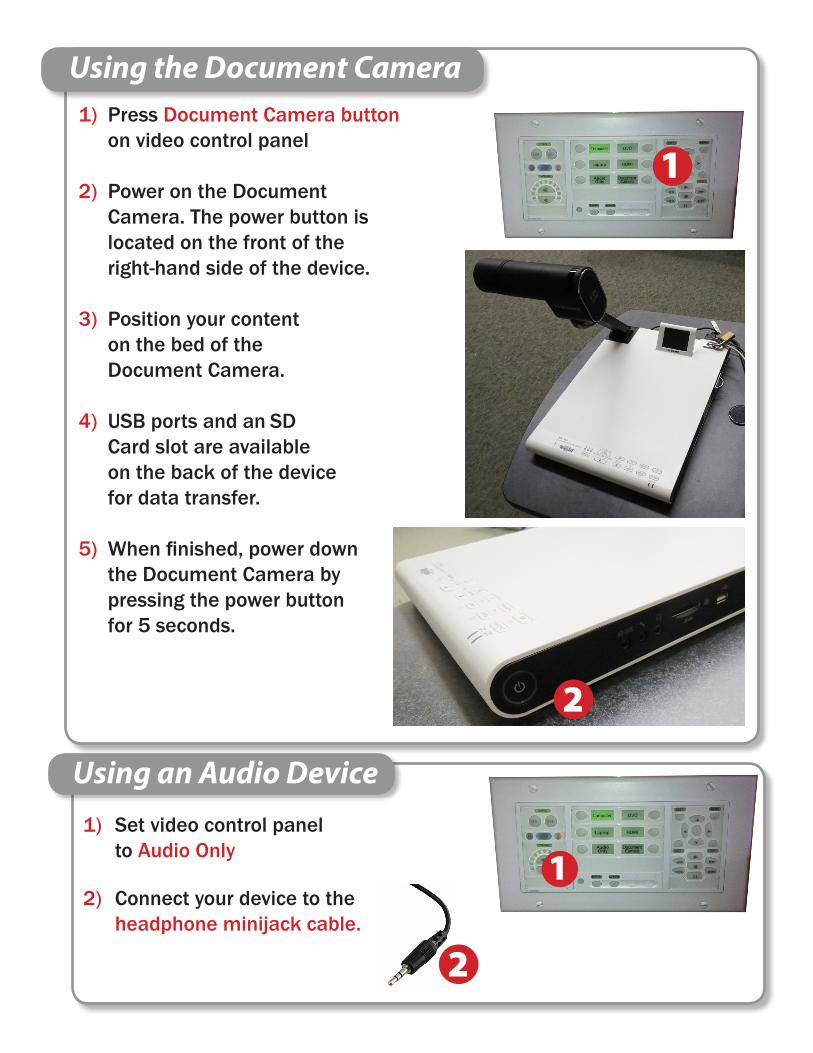
Using the Document Camera1) Press Document Camera button on video control panel
2) Power on the Document Camera. The power button is located on the front of the right-hand side of the device.
3) Position your content on the bed of the
Document Camera.
4) USB ports and an SD Card slot are available on the back of the device for data transfer.
5) Whenfinished,powerdown the Document Camera by
pressing the power button for 5 seconds.
1) Set video control panel to Audio Only
2) Connect your device to the headphone minijack cable.
Using an Audio Device
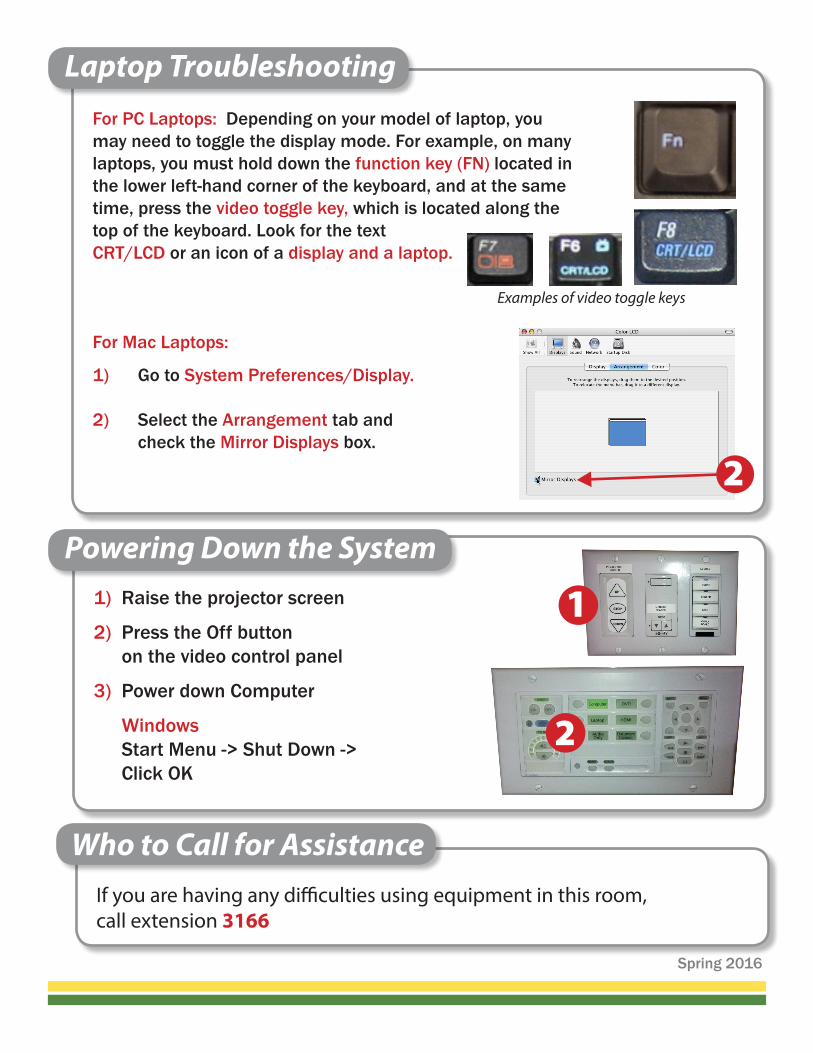
For PC Laptops: Depending on your model of laptop, you may need to toggle the display mode. For example, on many laptops, you must hold down the function key (FN) located in the lower left-hand corner of the keyboard, and at the same time, press the video toggle key, which is located along the top of the keyboard. Look for the textCRT/LCD or an icon of a display and a laptop.
For Mac Laptops:
1) Go to System Preferences/Display.
2) Select the Arrangement tab and check the Mirror Displays box.
Examples of video toggle keys
1) Raise the projector screen
2) Press the Off button on the video control panel
3) Power down Computer
Windows Start Menu -> Shut Down -> Click OK
Laptop Troubleshooting
Powering Down the System
Who to Call for AssistanceIf you are having any difficulties using equipment in this room, call extension 3166
Spring 2016


