
1
STEP 1
STEP 2 STEP 3

2
Description of Users
• END USER The company or person who owns or manages the site
• WORKGROUP Regional or sub groups associated with the END USER • CONTRACTOR Is the coordinator of the installer or Installation company
• INSTALLER The person who installs and performs the welding on site

3
Interactive Tracking System
STEP 1
The Major Oil Affiliate has to build up a new
site. The designated person
uploads the NEW SITE on the ITS as an END USER
They share the SITE information with
NUPIGECO and the Installer
STEP 2
NUPIGECO’s technical dept. will prepare and
upload the piping drawing and MTO on the
ITS if required
STEP 3
The INSTALLER has to completed the site.
They upload the welding report, the pressure test report, Smartcard No and the application form on
the ITS
The ITS is not an e-commerce application. It cannot be used to place orders with NUPIGECO. Read the WEB Site Terms of Use before using the ITS. The Interactive Tracking System (ITS) is a web-based application developed to keep track of SMARTFLEX installations through the use of the Bar Code Technology (Traceability). To access the ITS a password is required. Passwords are granted by the Global Account Manager further to a written request
SITE WARRANTY ISSUED END
4
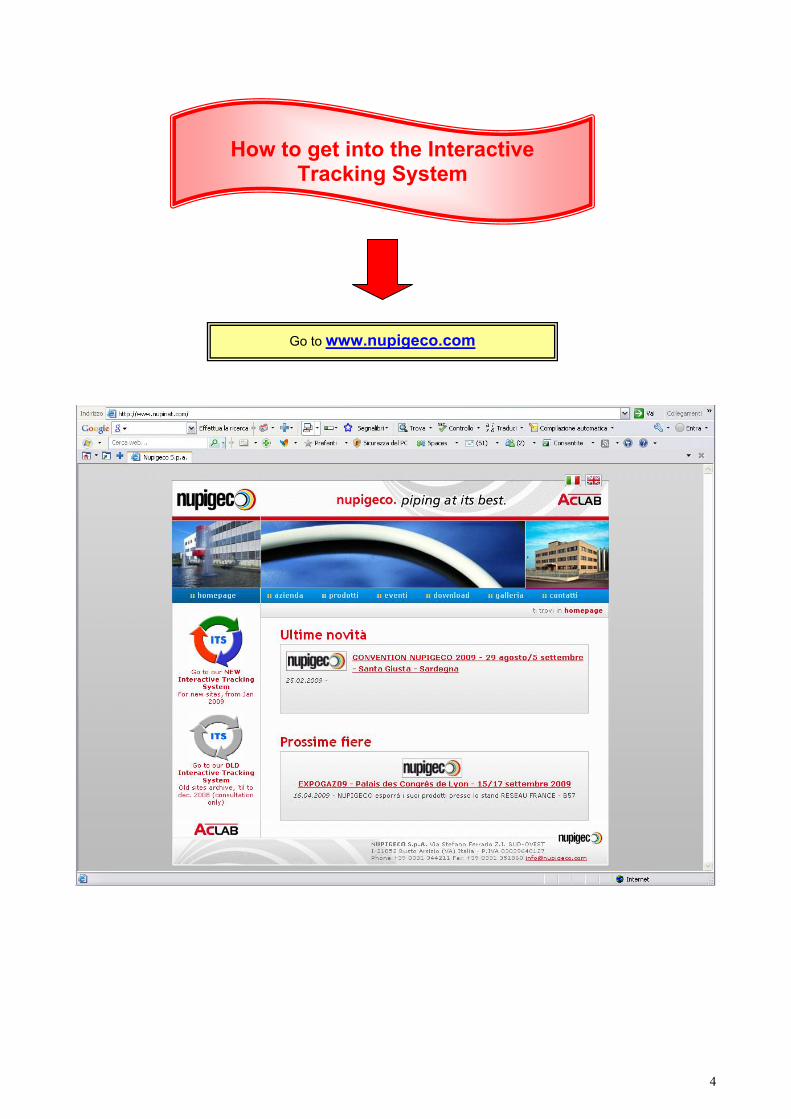
Go to www.nupigeco.com
How to get into the Interactive Tracking System
5
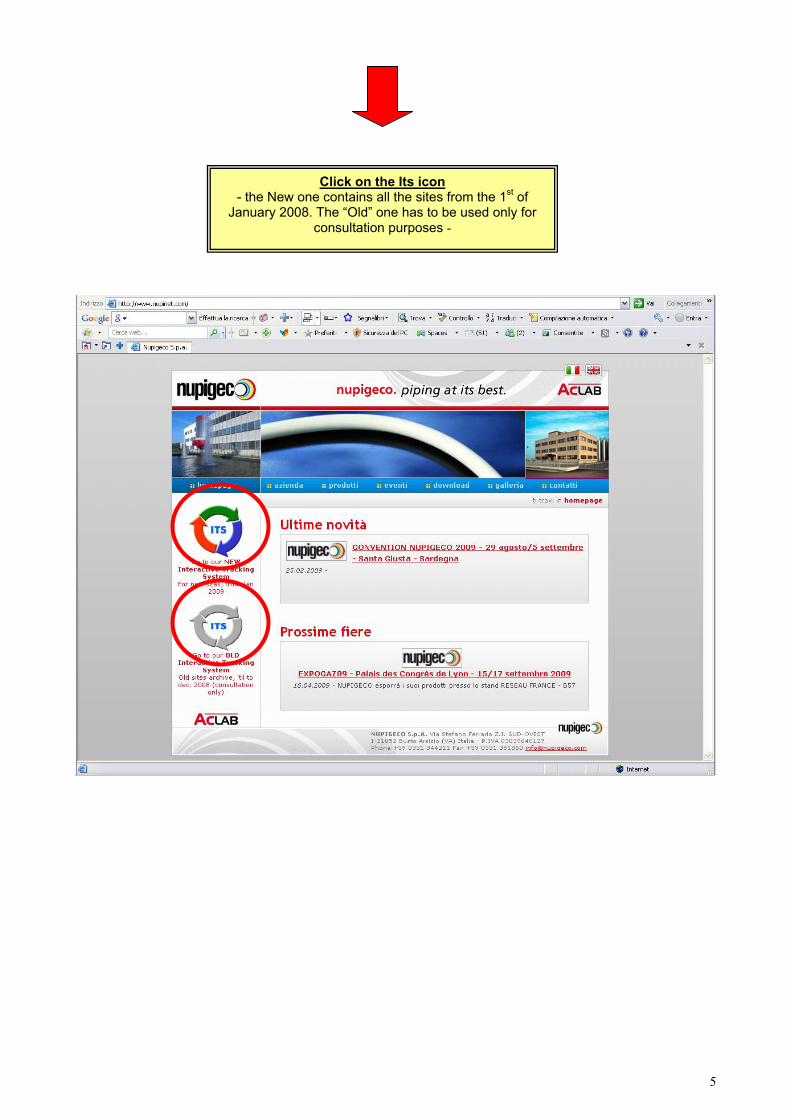
Click on the Its icon - the New one contains all the sites from the 1st of
January 2008. The “Old” one has to be used only for consultation purposes -
6
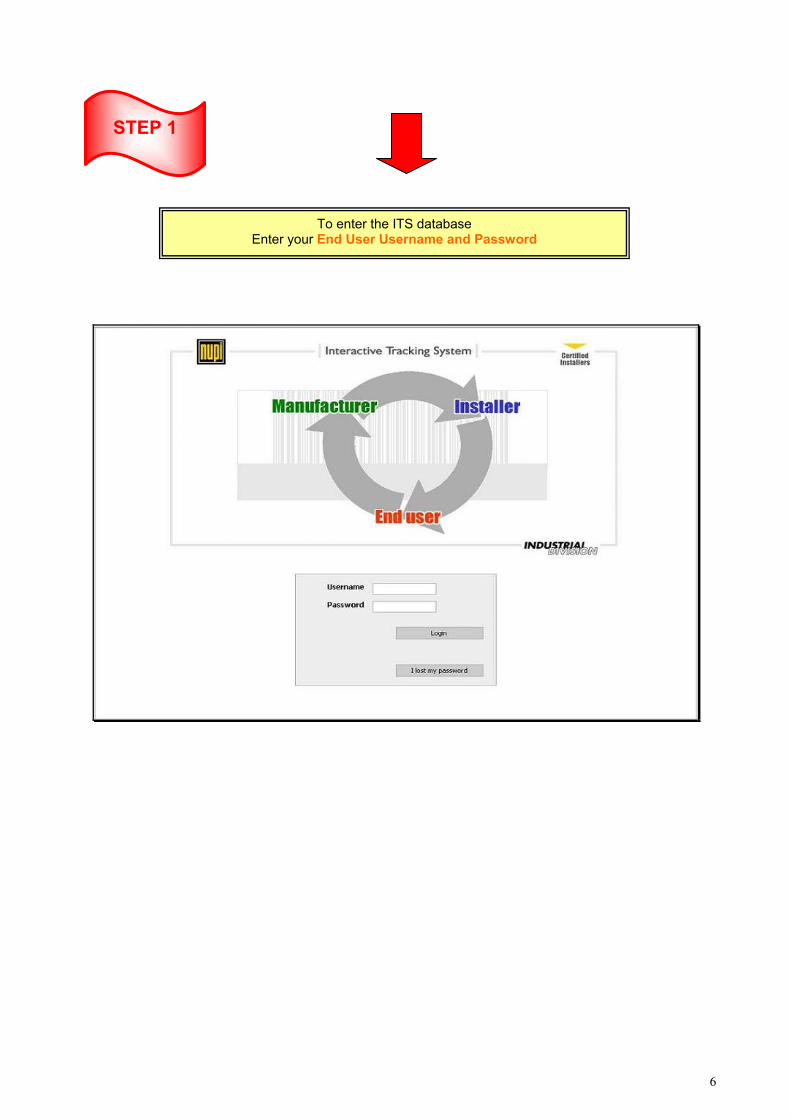
To enter the ITS database Enter your End User Username and Password
STEP 1
7
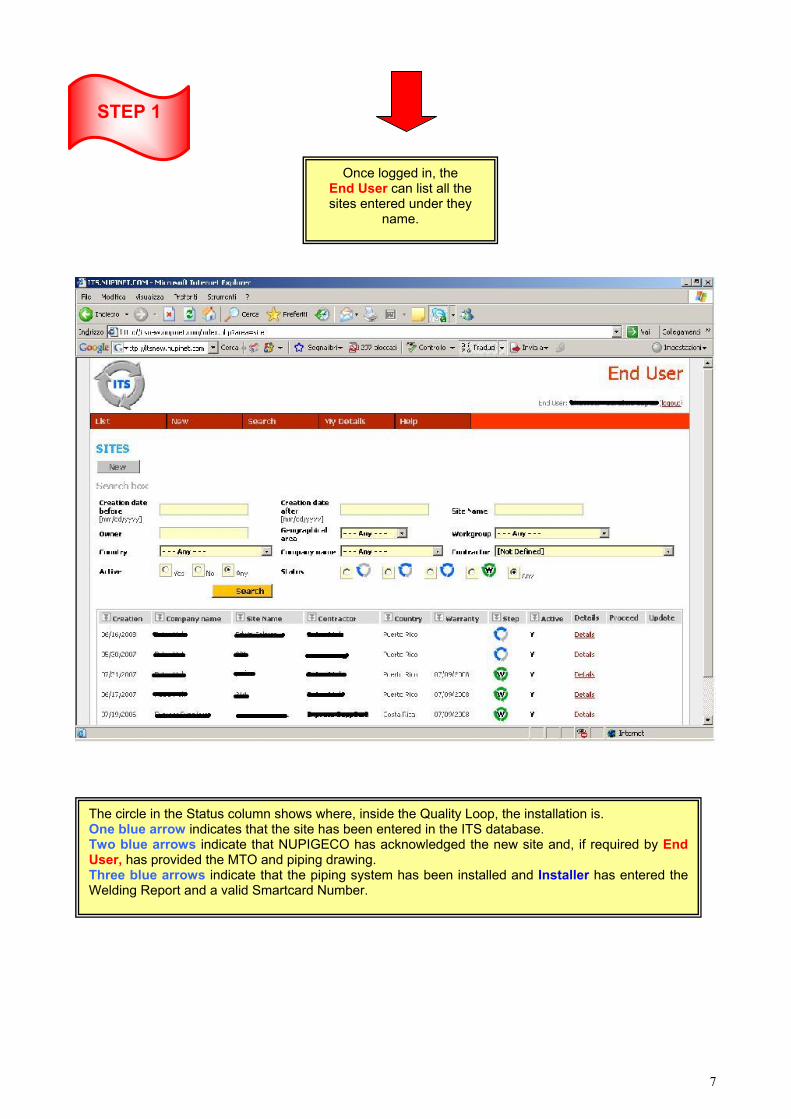
The circle in the Status column shows where, inside the Quality Loop, the installation is. One blue arrow indicates that the site has been entered in the ITS database. Two blue arrows indicate that NUPIGECO has acknowledged the new site and, if required by End User, has provided the MTO and piping drawing. Three blue arrows indicate that the piping system has been installed and Installer has entered the Welding Report and a valid Smartcard Number.
Once logged in, the End User can list all the sites entered under they
name.
STEP 1
8
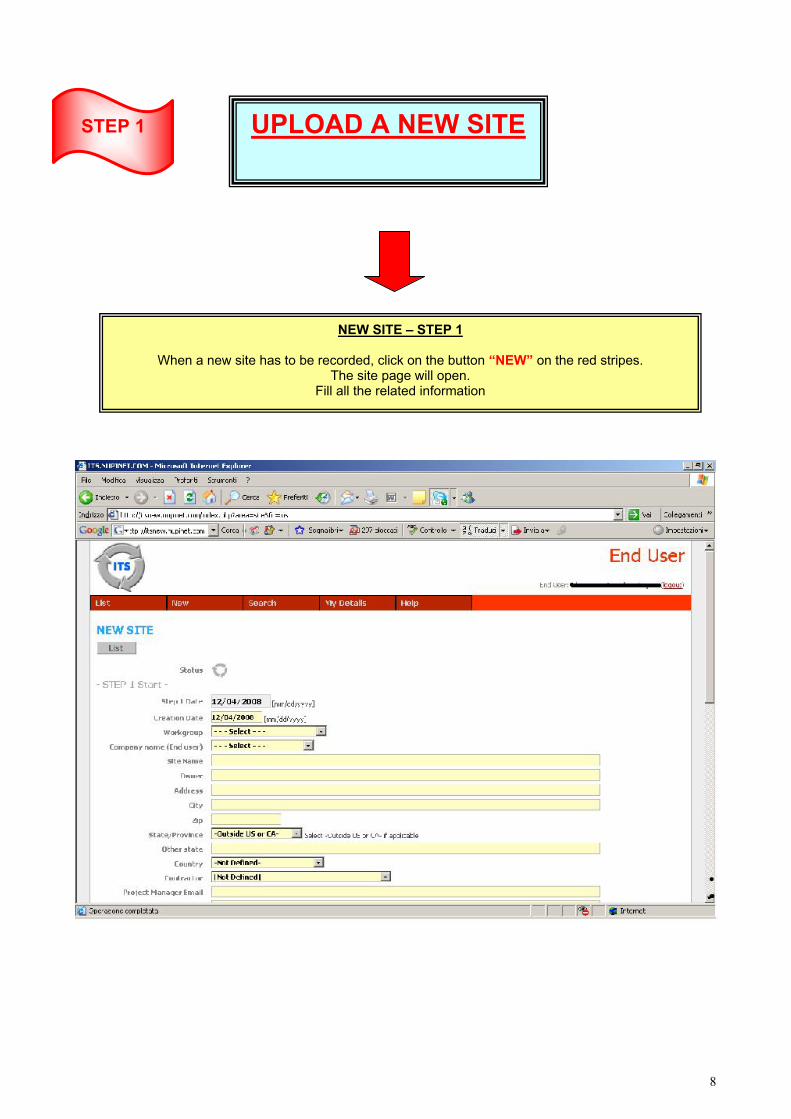
NEW SITE – STEP 1
When a new site has to be recorded, click on the button “NEW” on the red stripes. The site page will open.
Fill all the related information
UPLOAD A NEW SITESTEP 1
9
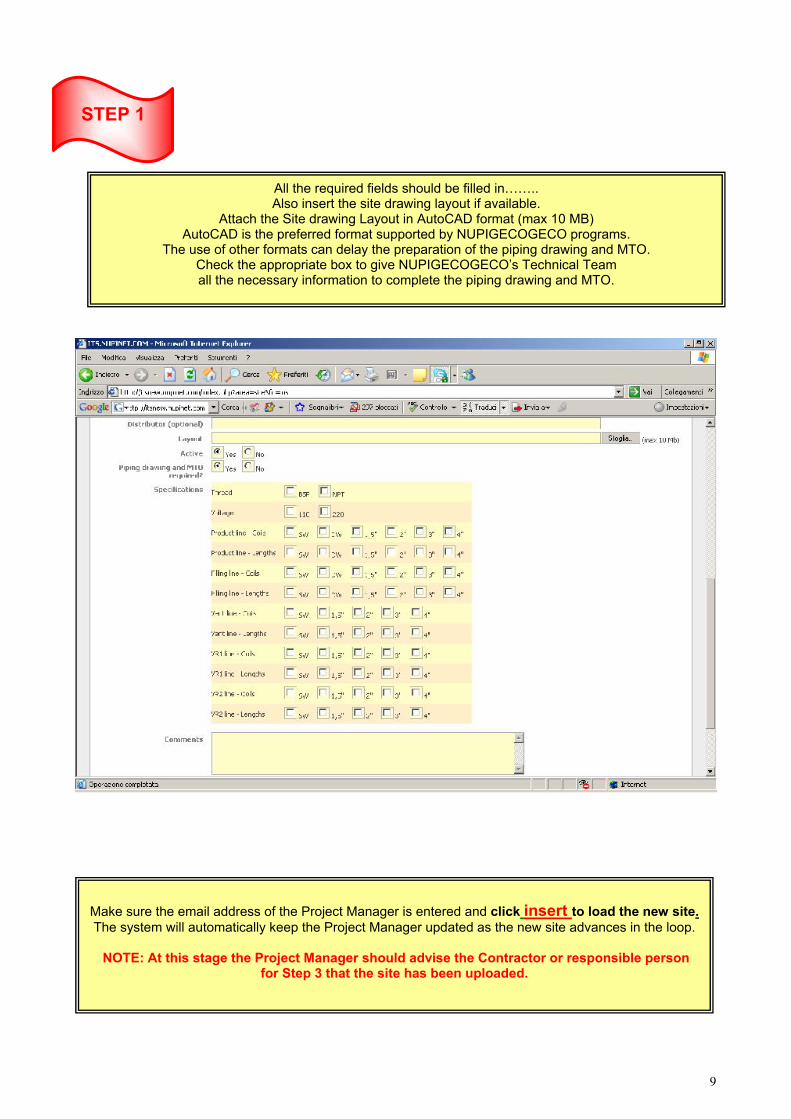
Make sure the email address of the Project Manager is entered and click insert to load the new site. The system will automatically keep the Project Manager updated as the new site advances in the loop.
NOTE: At this stage the Project Manager should advise the Contractor or responsible person
for Step 3 that the site has been uploaded.
All the required fields should be filled in…….. Also insert the site drawing layout if available.
Attach the Site drawing Layout in AutoCAD format (max 10 MB) AutoCAD is the preferred format supported by NUPIGECOGECO programs.
The use of other formats can delay the preparation of the piping drawing and MTO. Check the appropriate box to give NUPIGECOGECO’s Technical Team all the necessary information to complete the piping drawing and MTO.
STEP 1
10
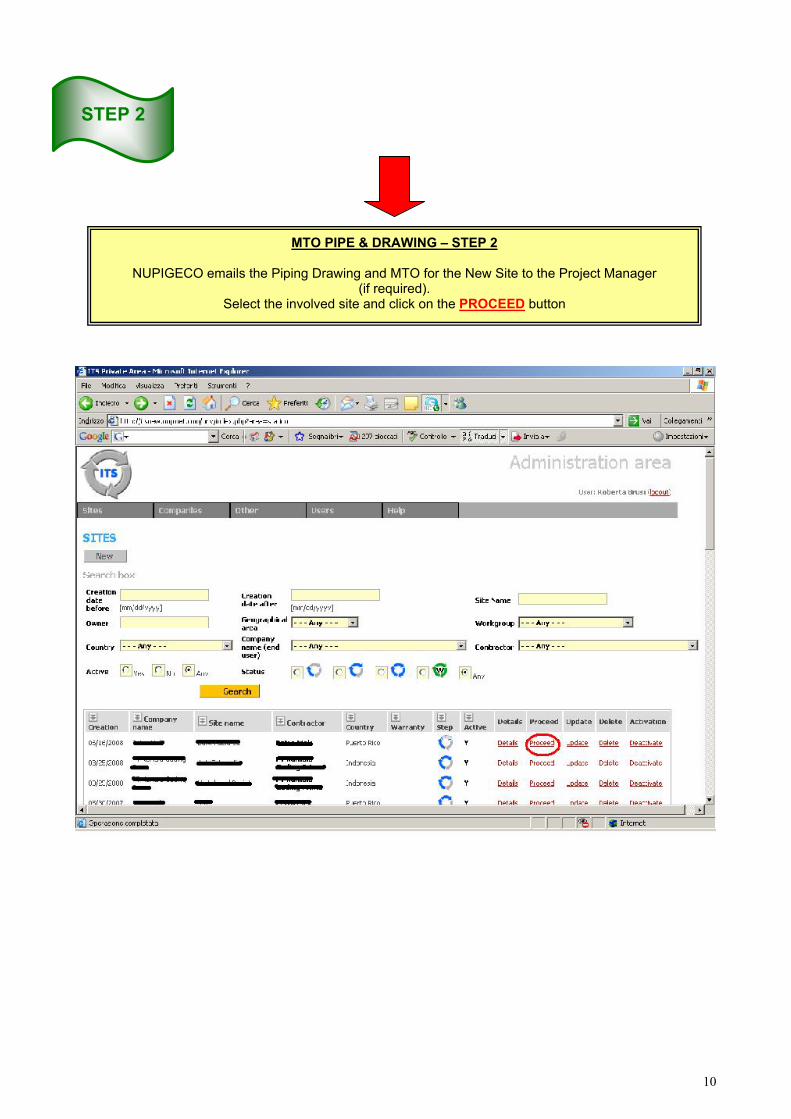
MTO PIPE & DRAWING – STEP 2
NUPIGECO emails the Piping Drawing and MTO for the New Site to the Project Manager (if required).
Select the involved site and click on the PROCEED button
STEP 2

11
Nuepigeco or an Administrator will upload the MTO and drawing….
STEP 2
12
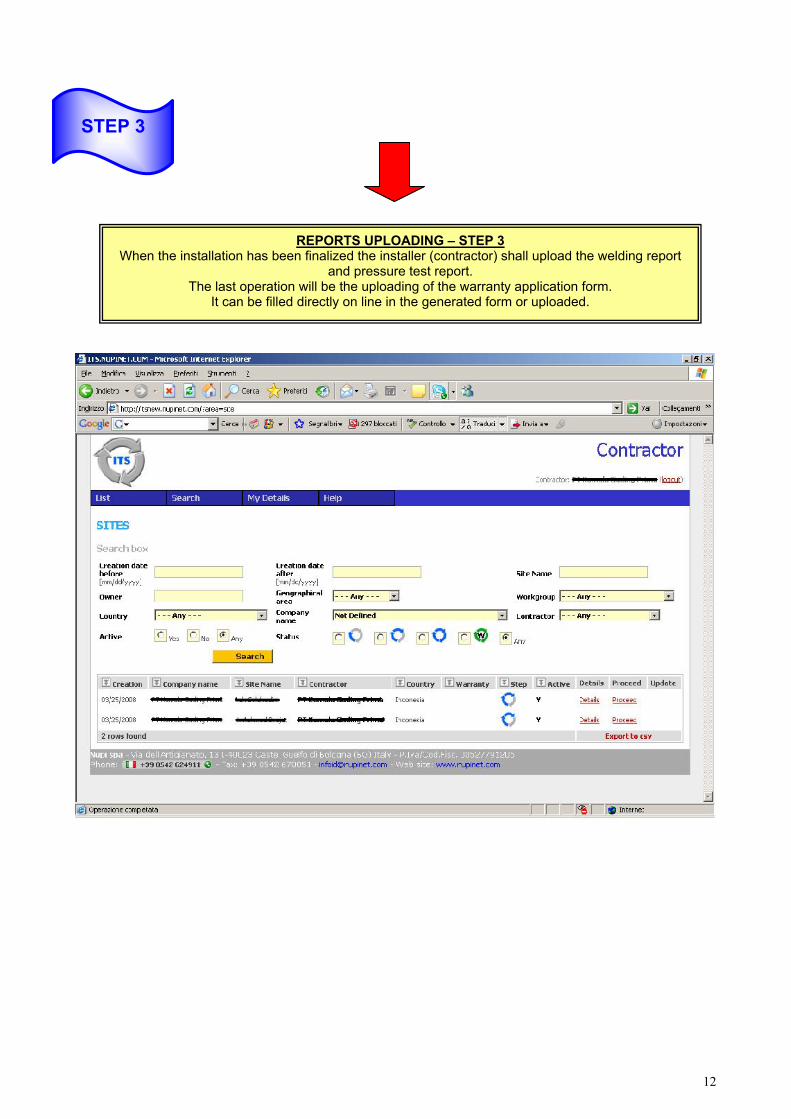
REPORTS UPLOADING – STEP 3 When the installation has been finalized the installer (contractor) shall upload the welding report
and pressure test report. The last operation will be the uploading of the warranty application form.
It can be filled directly on line in the generated form or uploaded.
STEP 3

13
When all the reports are uploaded and the warranty application form completed NUPIGECO will display the warranty symbol.
The certificate is available on line.
STEP 3
14
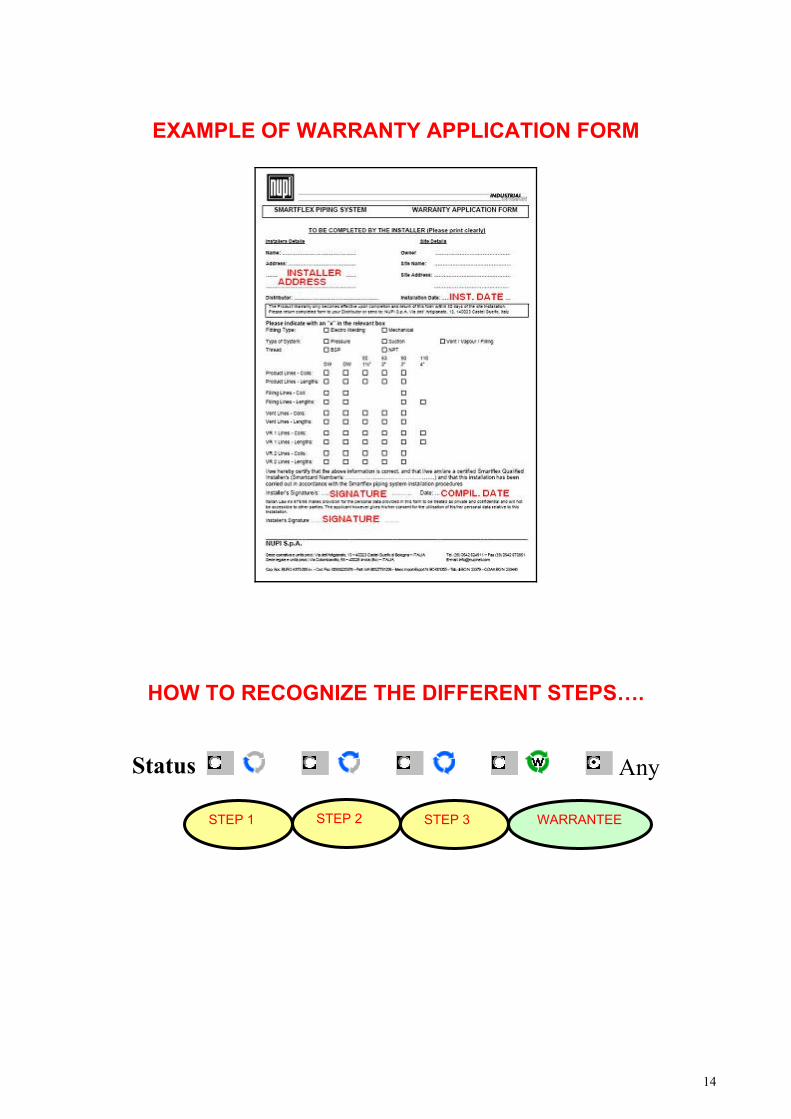
EXAMPLE OF WARRANTY APPLICATION FORM
HOW TO RECOGNIZE THE DIFFERENT STEPS….
Status Any
STEP 1 STEP 2 STEP 3 WARRANTEE


