Download - Tournament Management
Tournament Management
Sean Rose, Marketing Director
Today’s Agenda:
● Tournament Management Dashboard
● Creating A New Tournament
● Set Up Applications
● Create Divisions
● Build Field Permits
● Generate Schedules
● Communicate With Attendees
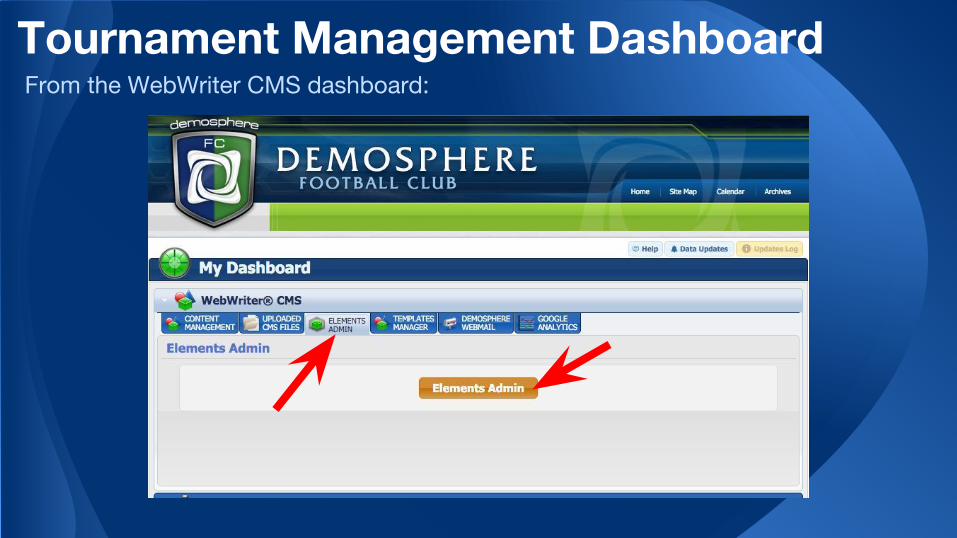
Tournament Management DashboardFrom the WebWriter CMS dashboard:
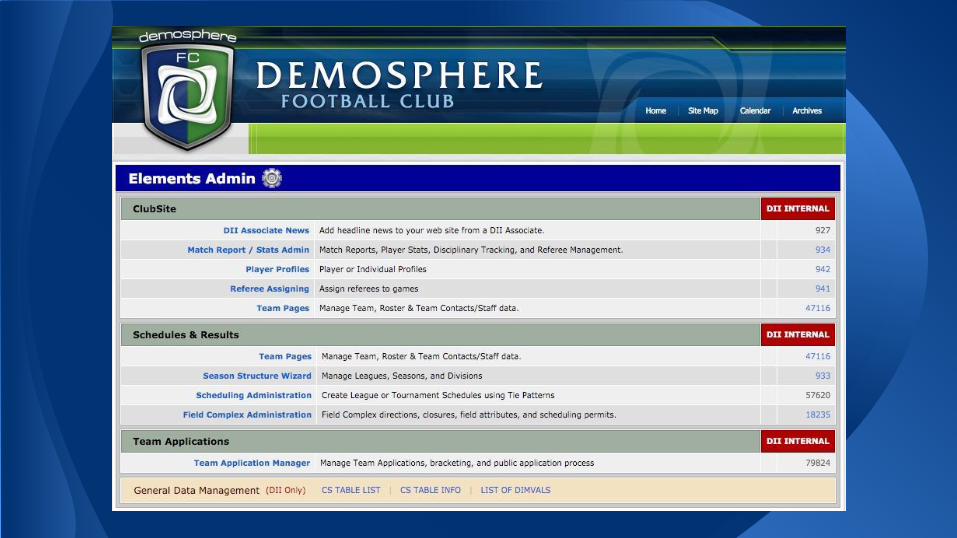
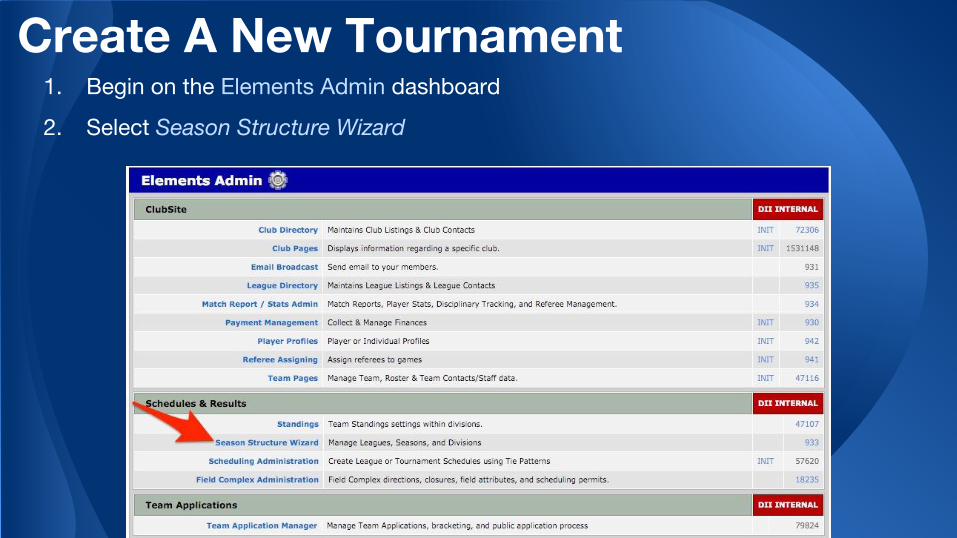
1. Begin on the Elements Admin dashboard
2. Select Season Structure Wizard
Create A New Tournament
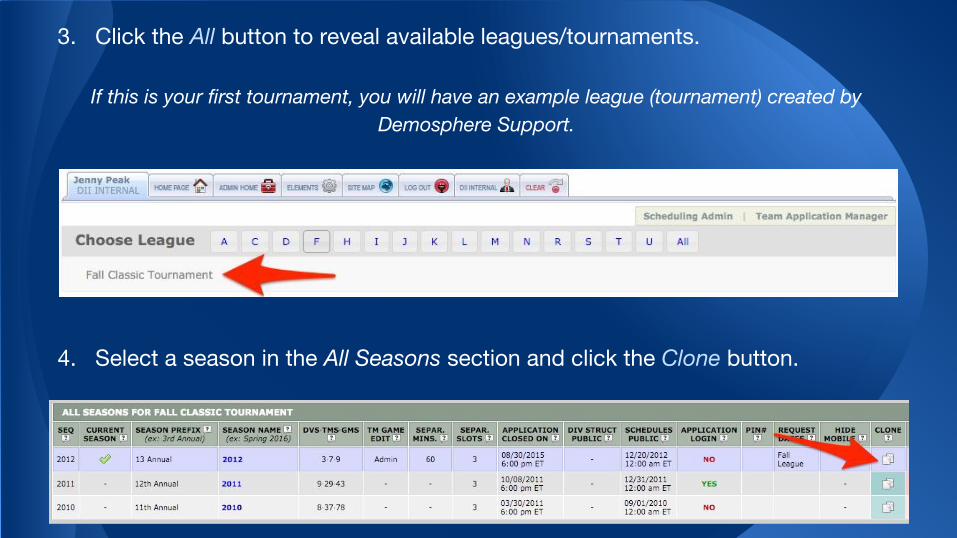
3. Click the All button to reveal available leagues/tournaments.
If this is your first tournament, you will have an example league (tournament) created by Demosphere Support.
4. Select a season in the All Seasons section and click the Clone button.
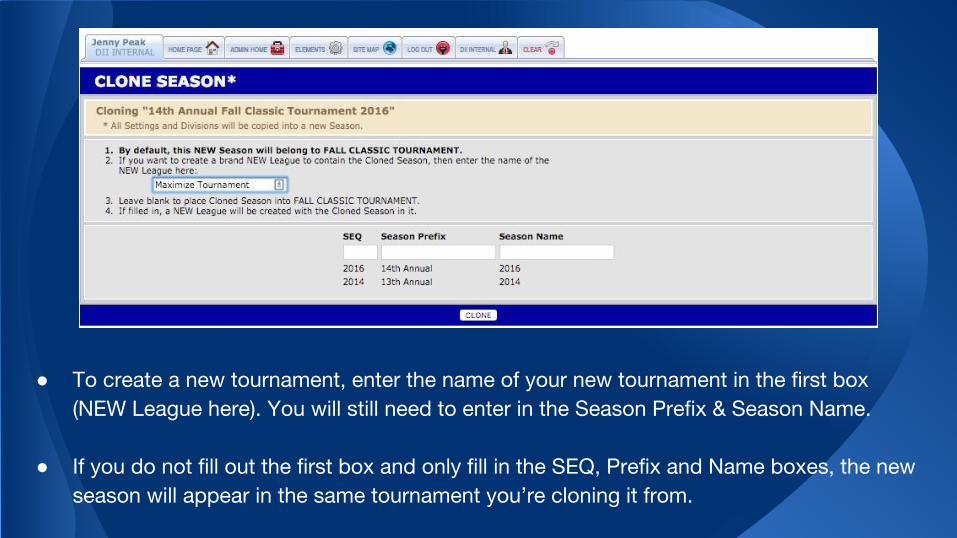
● To create a new tournament, enter the name of your new tournament in the first box (NEW League here). You will still need to enter in the Season Prefix & Season Name.
● If you do not fill out the first box and only fill in the SEQ, Prefix and Name boxes, the new season will appear in the same tournament you’re cloning it from.

5. Find the tournament you have just created in the list of Leagues.
6. Click the Edit All SETTINGS button in the top to customize the tournament.
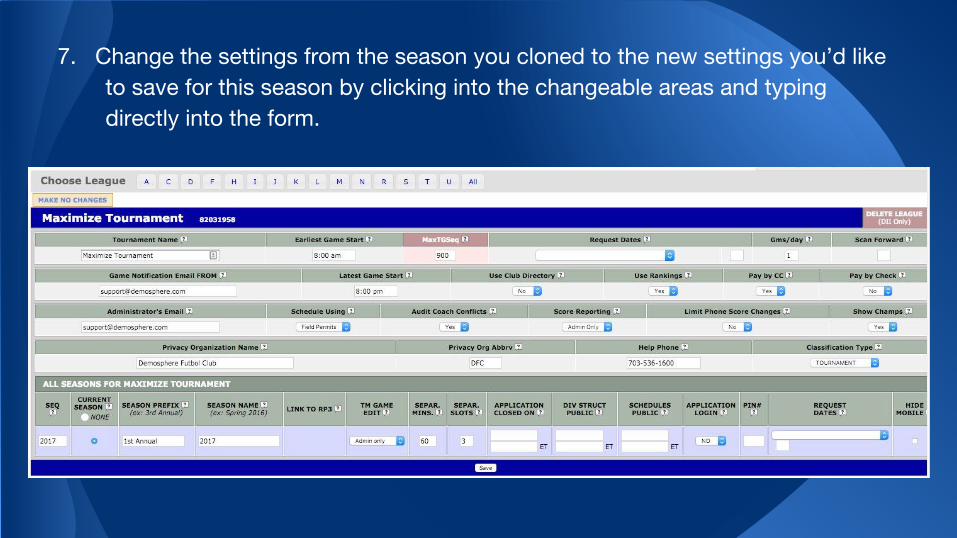
7. Change the settings from the season you cloned to the new settings you’d like to save for this season by clicking into the changeable areas and typing directly into the form.
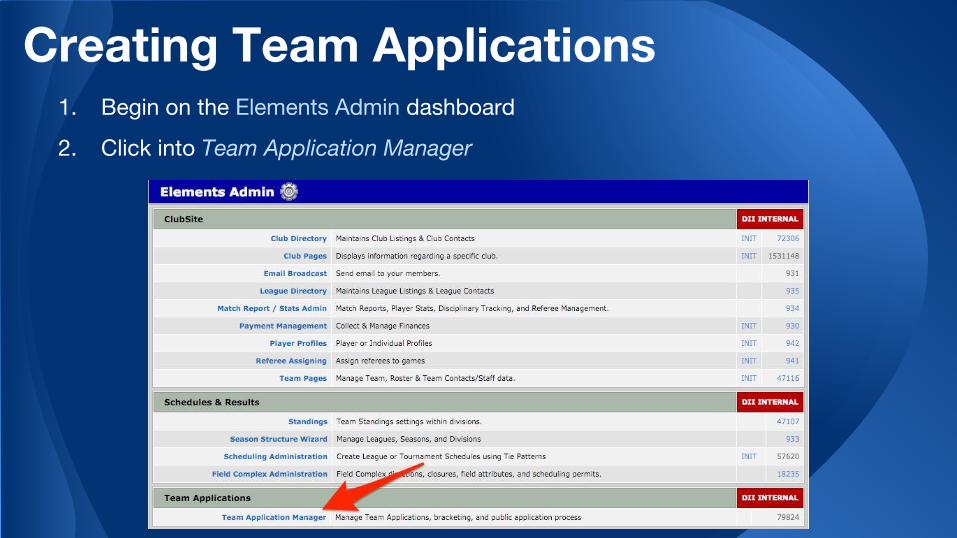
Creating Team Applications1. Begin on the Elements Admin dashboard
2. Click into Team Application Manager
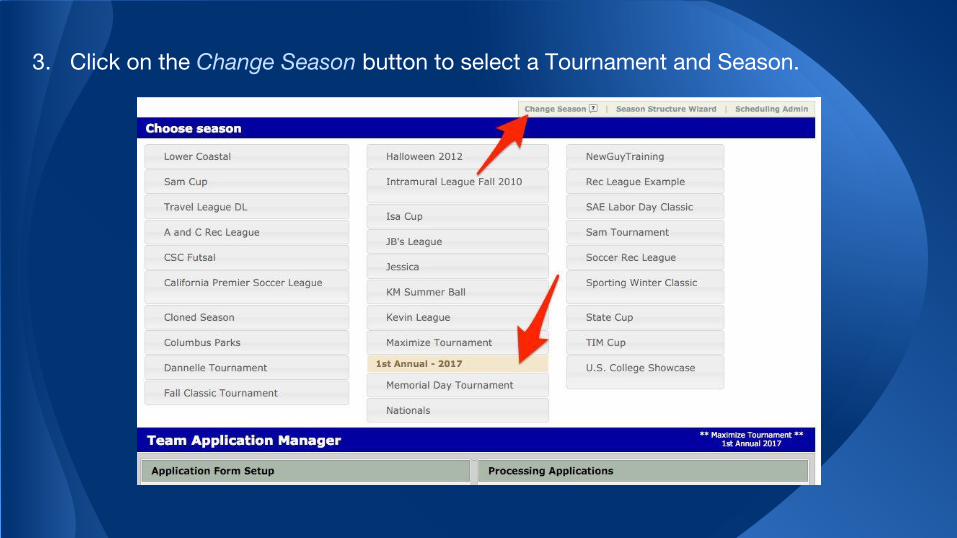
3. Click on the Change Season button to select a Tournament and Season.
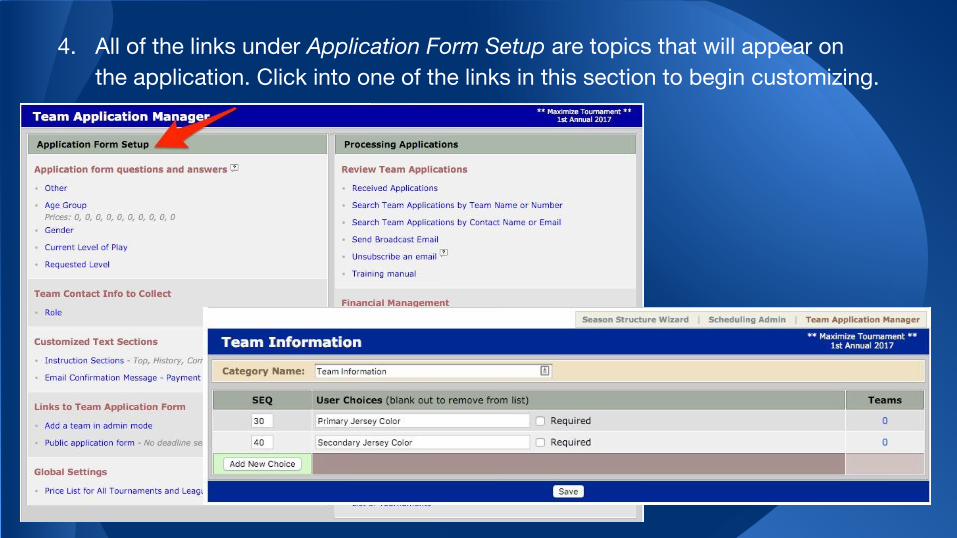
4. All of the links under Application Form Setup are topics that will appear on the application. Click into one of the links in this section to begin customizing.
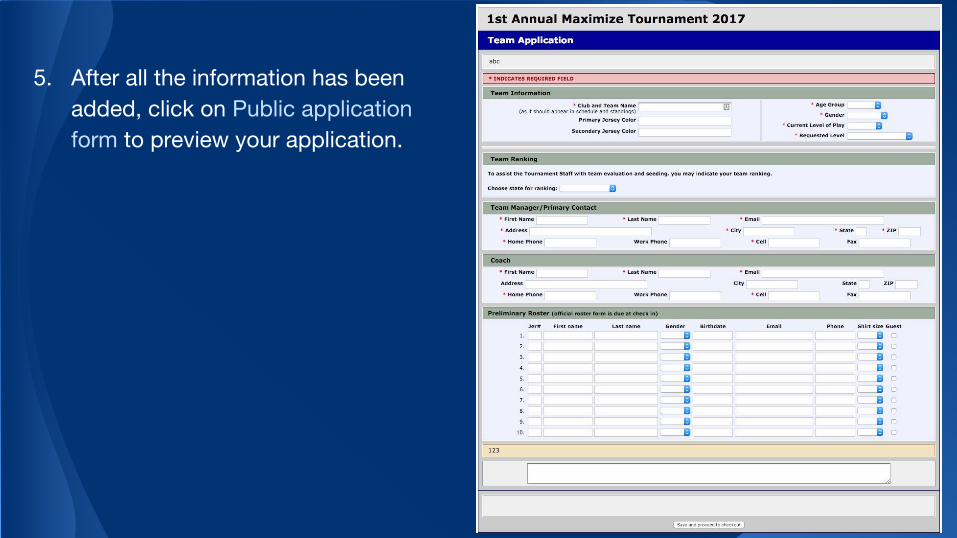
5. After all the information has been added, click on Public application form to preview your application.
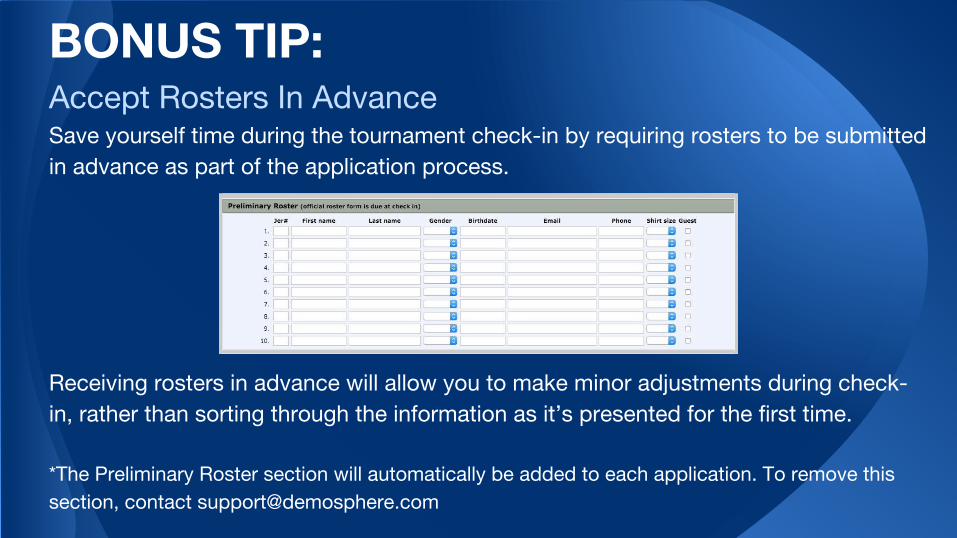
Accept Rosters In AdvanceSave yourself time during the tournament check-in by requiring rosters to be submitted in advance as part of the application process.
Receiving rosters in advance will allow you to make minor adjustments during check-in, rather than sorting through the information as it’s presented for the first time.
*The Preliminary Roster section will automatically be added to each application. To remove this section, contact [email protected]
BONUS TIP:
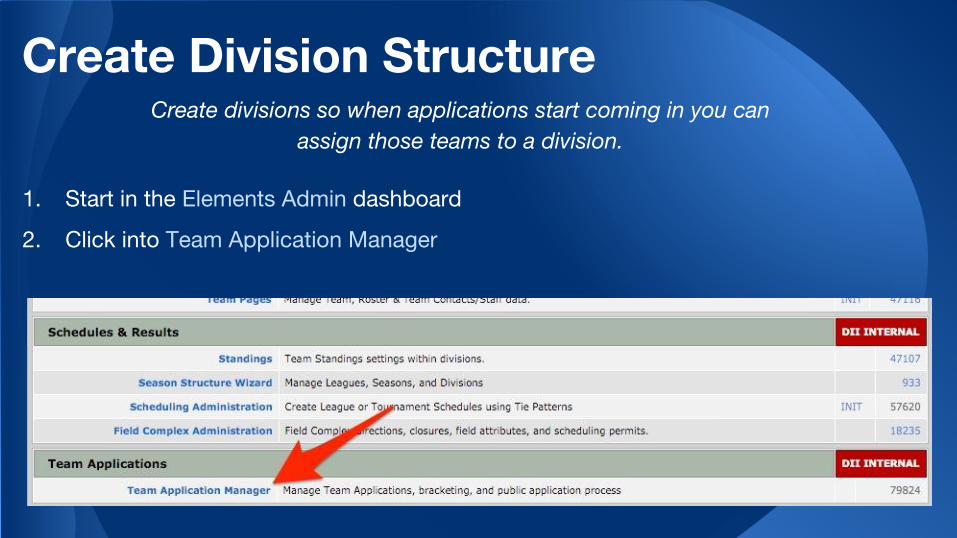
Create Division StructureCreate divisions so when applications start coming in you can
assign those teams to a division.
1. Start in the Elements Admin dashboard
2. Click into Team Application Manager
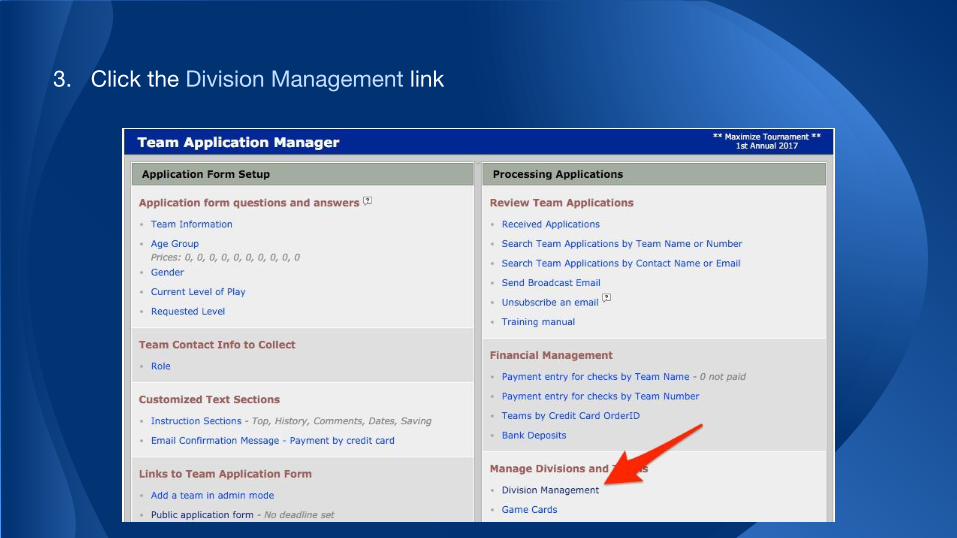
3. Click the Division Management link
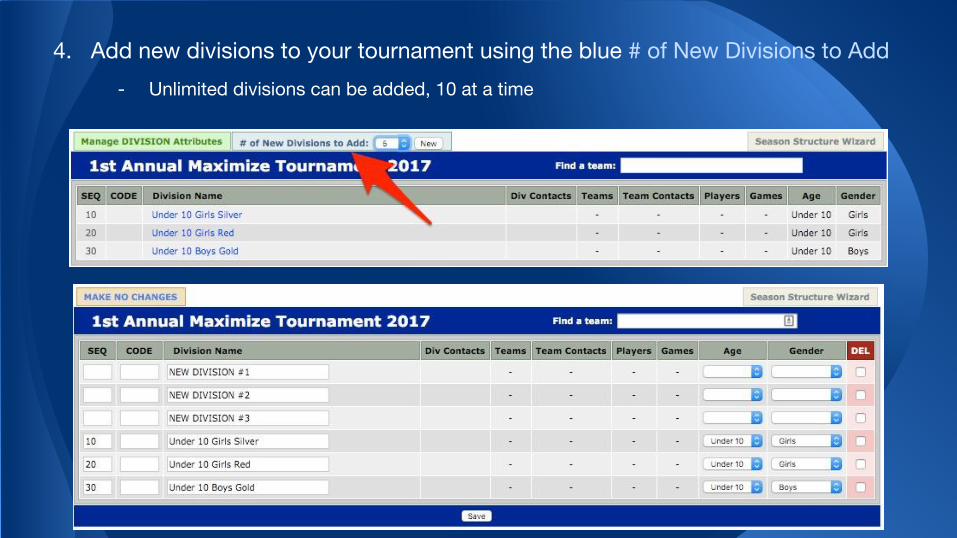
4. Add new divisions to your tournament using the blue # of New Divisions to Add
- Unlimited divisions can be added, 10 at a time
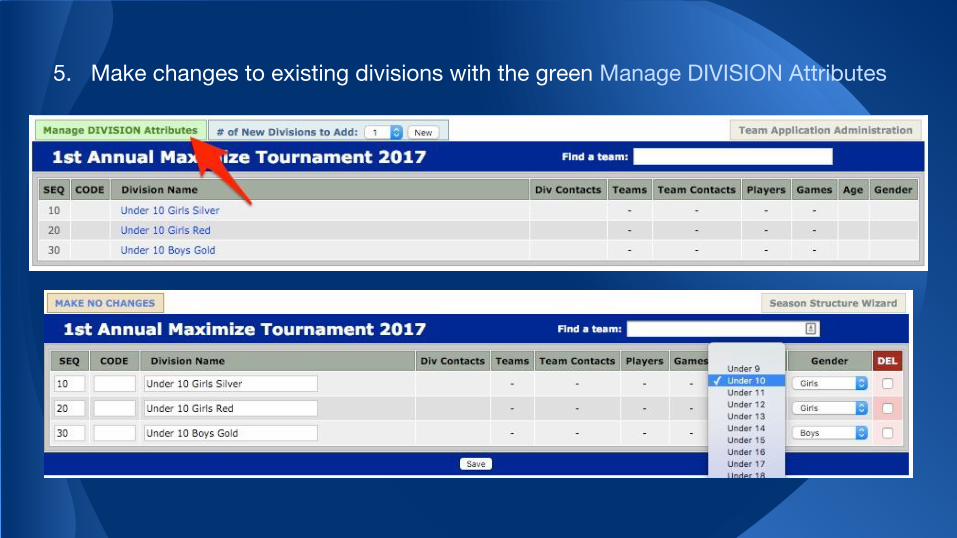
5. Make changes to existing divisions with the green Manage DIVISION Attributes
Plan your Division Structure before accepting applications
Plan your division structures far in advance. Set a desired number of teams in each division, and the appropriate matchup structure before opening the application process.
This will allow you to have preliminary schedules ready to go once the exact number of teams is available.
BONUS TIP:
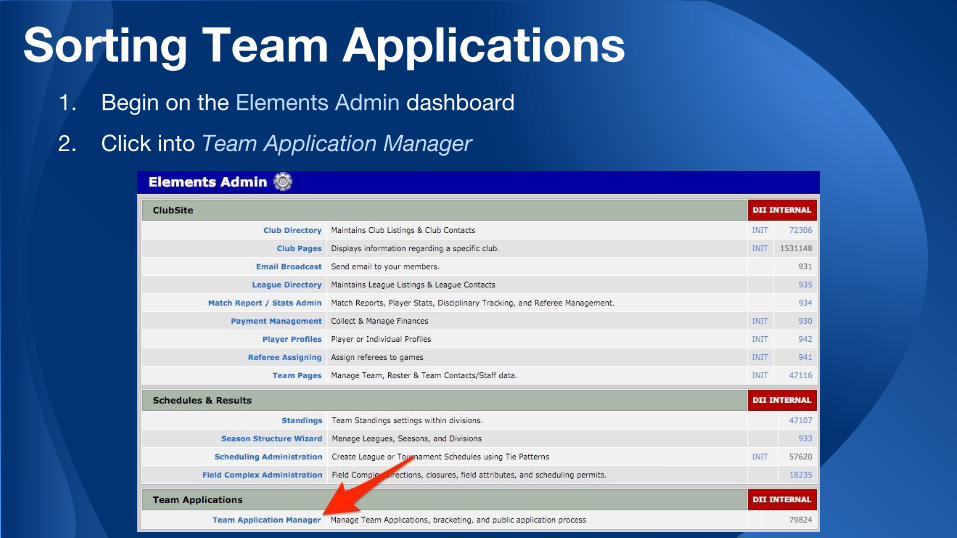
Sorting Team Applications1. Begin on the Elements Admin dashboard
2. Click into Team Application Manager
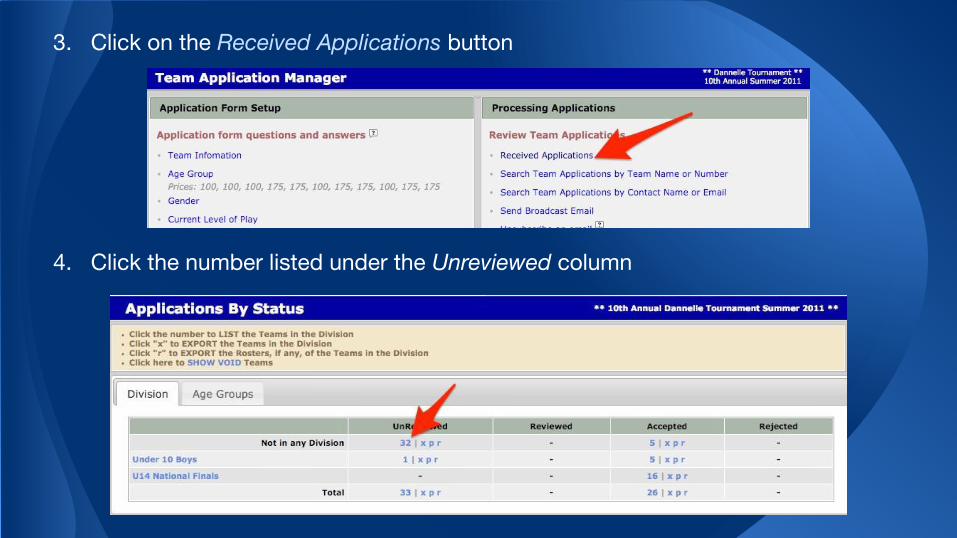
3. Click on the Received Applications button
4. Click the number listed under the Unreviewed column
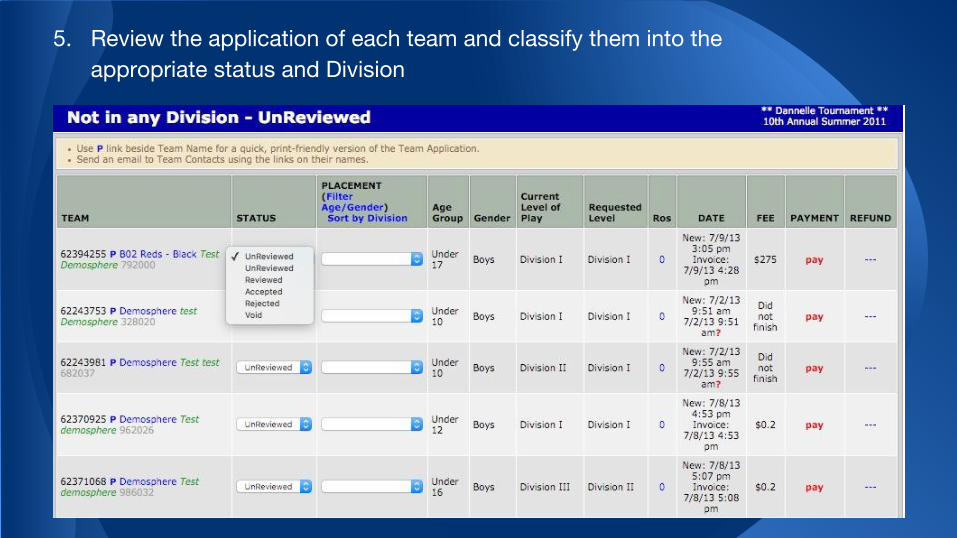
5. Review the application of each team and classify them into the appropriate status and Division
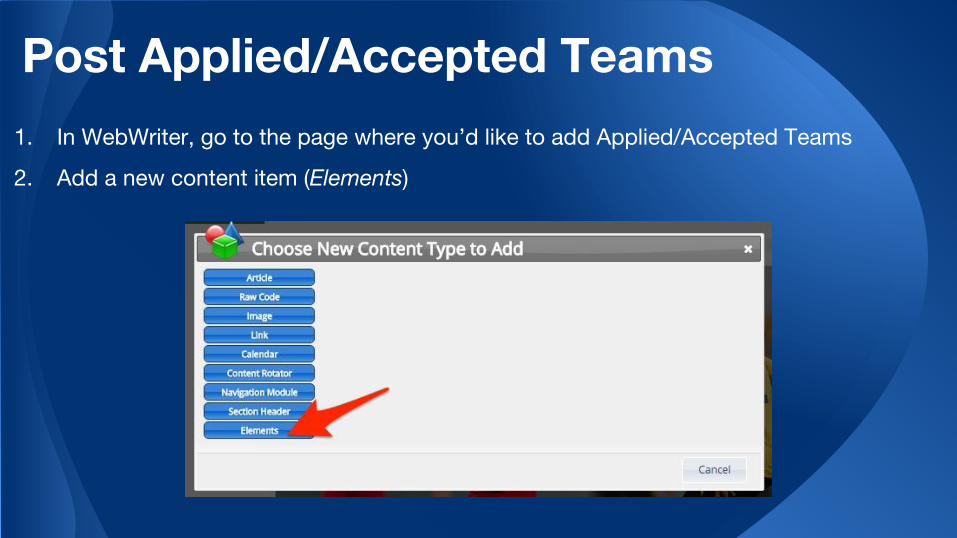
Post Applied/Accepted Teams1. In WebWriter, go to the page where you’d like to add Applied/Accepted Teams
2. Add a new content item (Elements)
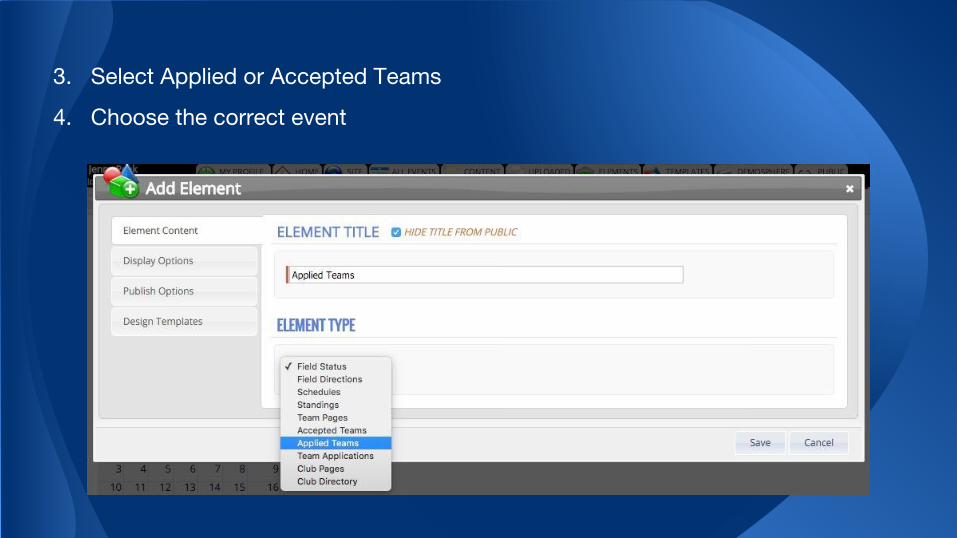
3. Select Applied or Accepted Teams
4. Choose the correct event
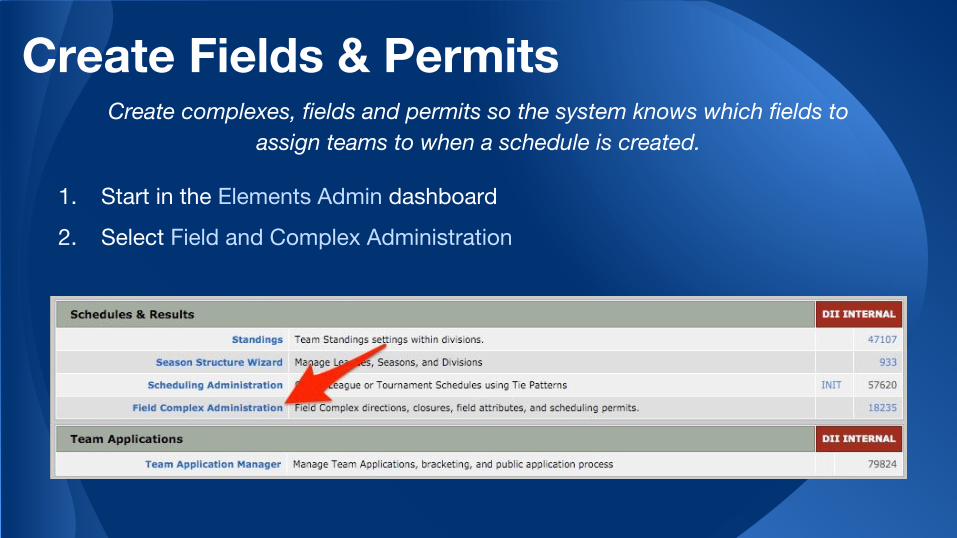
Create Fields & PermitsCreate complexes, fields and permits so the system knows which fields to
assign teams to when a schedule is created.
1. Start in the Elements Admin dashboard
2. Select Field and Complex Administration

3. Add a New Complex
4. Customize the name of the complex, address, etc.
5. Type in the name of a field a this complex
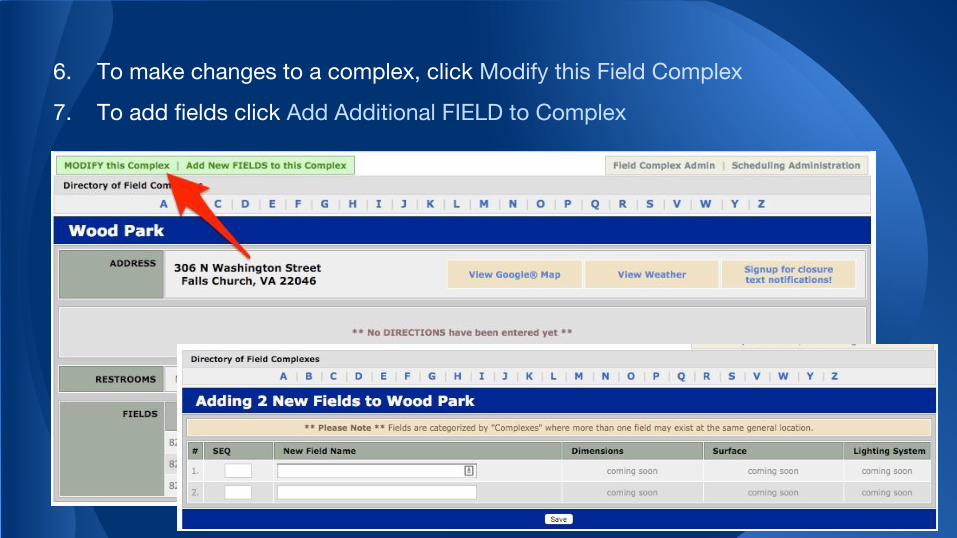
6. To make changes to a complex, click Modify this Field Complex
7. To add fields click Add Additional FIELD to Complex

8. Add permits to a field with Field Complex Admin and Maintain Field Permits
9. Select Add a New PERMIT GROUP
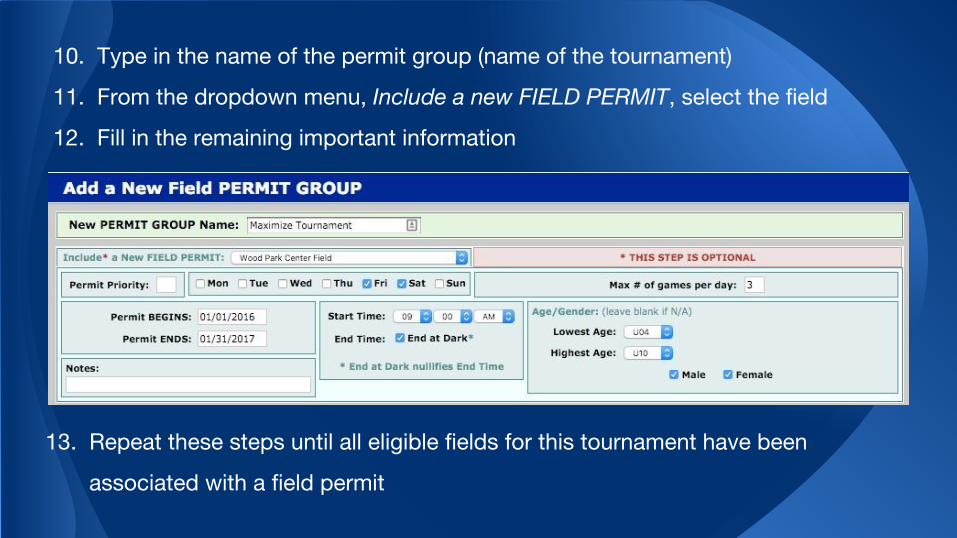
10. Type in the name of the permit group (name of the tournament)
11. From the dropdown menu, Include a new FIELD PERMIT, select the field
12. Fill in the remaining important information
13. Repeat these steps until all eligible fields for this tournament have been
associated with a field permit
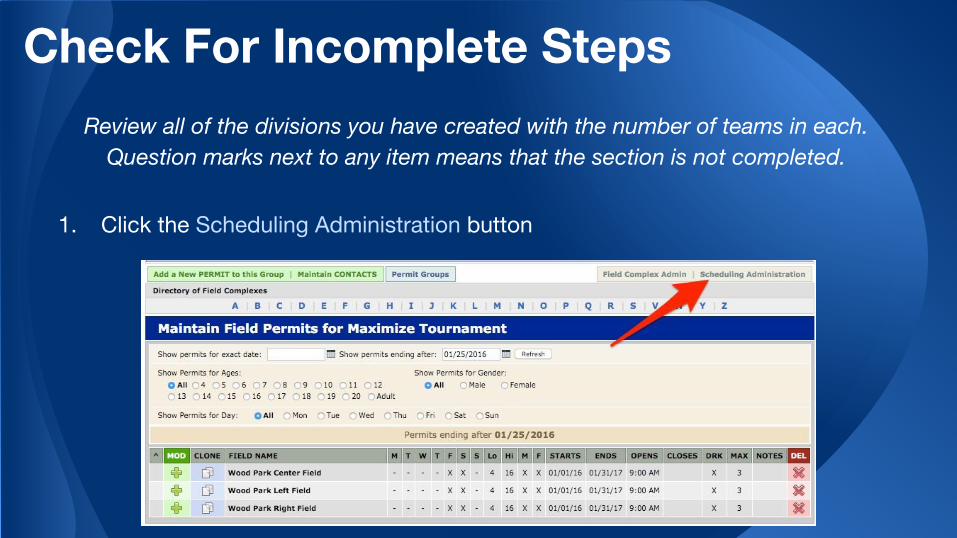
1. Click the Scheduling Administration button
Review all of the divisions you have created with the number of teams in each. Question marks next to any item means that the section is not completed.
Check For Incomplete Steps
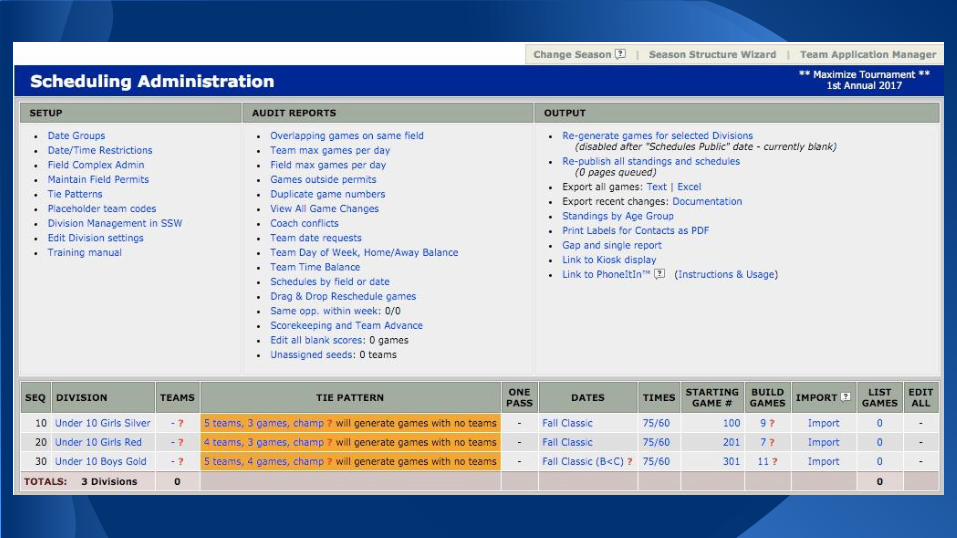
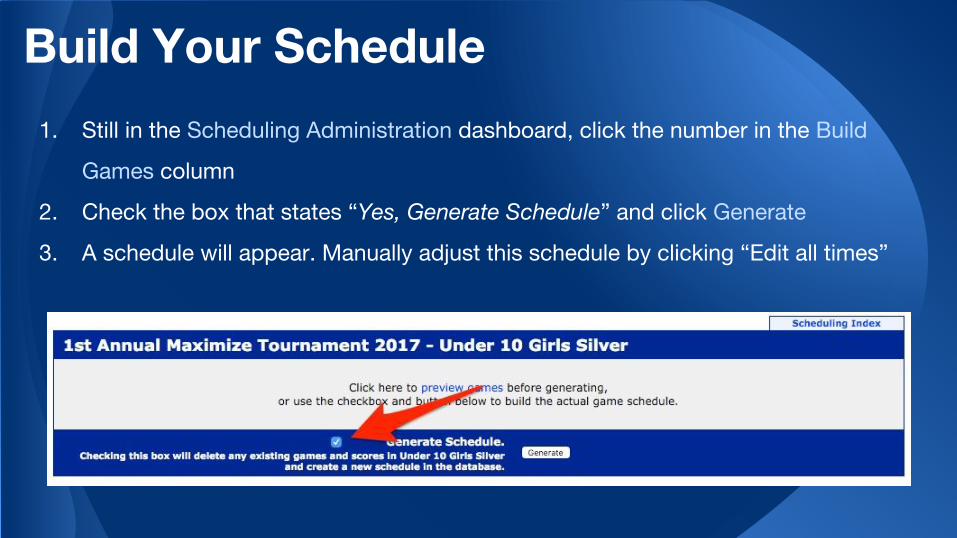
Build Your Schedule
1. Still in the Scheduling Administration dashboard, click the number in the Build
Games column
2. Check the box that states “Yes, Generate Schedule” and click Generate
3. A schedule will appear. Manually adjust this schedule by clicking “Edit all times”

Communicate With Your Seasons1. Start in the Elements Admin page
2. Click into Email Broadcast
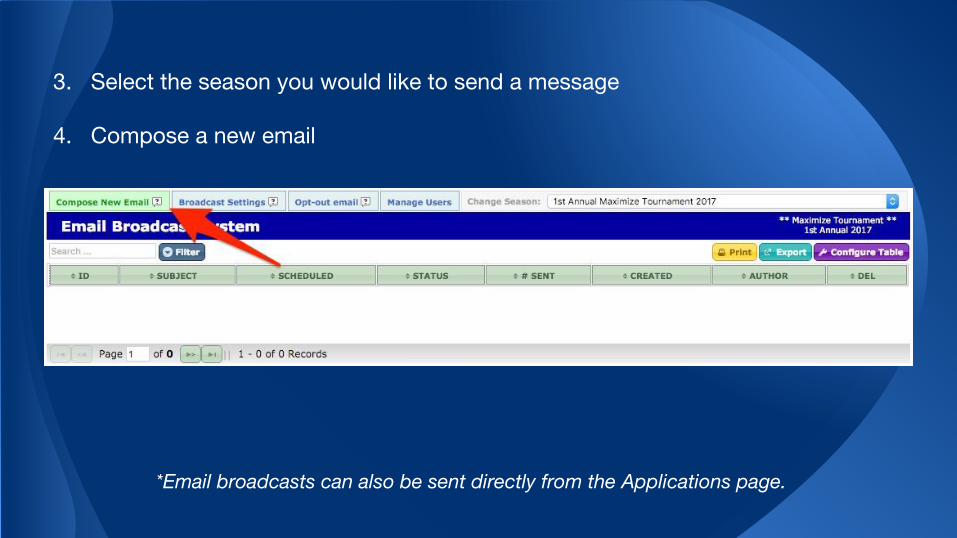
3. Select the season you would like to send a message
4. Compose a new email
*Email broadcasts can also be sent directly from the Applications page.
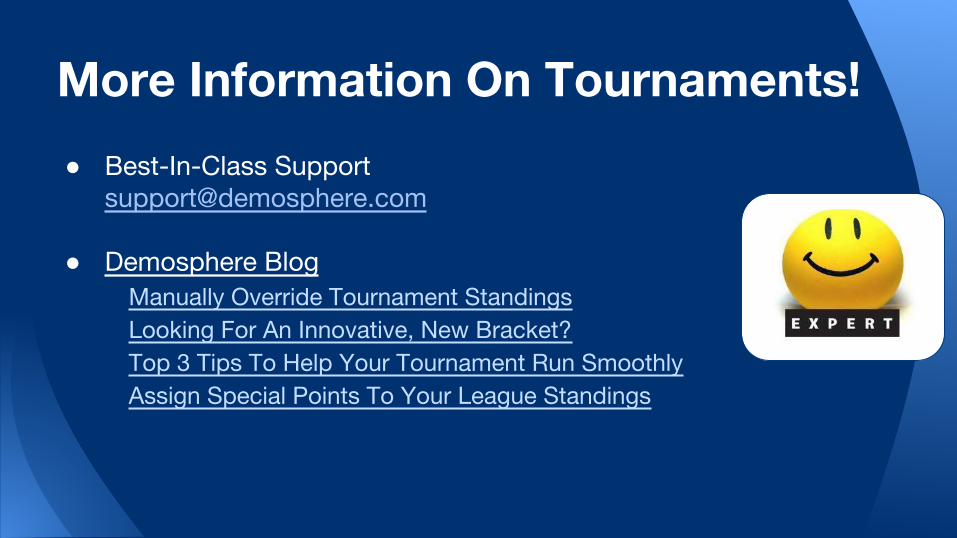
● Best-In-Class [email protected]
● Demosphere BlogManually Override Tournament StandingsLooking For An Innovative, New Bracket?Top 3 Tips To Help Your Tournament Run SmoothlyAssign Special Points To Your League Standings
More Information On Tournaments!