WARNING — Science Education Set. This set contains chemicals and/or parts that may be harmful if misused. Read cautions on individual containers and in manual carefully. Not to be used by children except under adult supervision.
E X PE R I M E NT M A N UA L
Rocket:
Warning! Do not
aim at eyes or face.
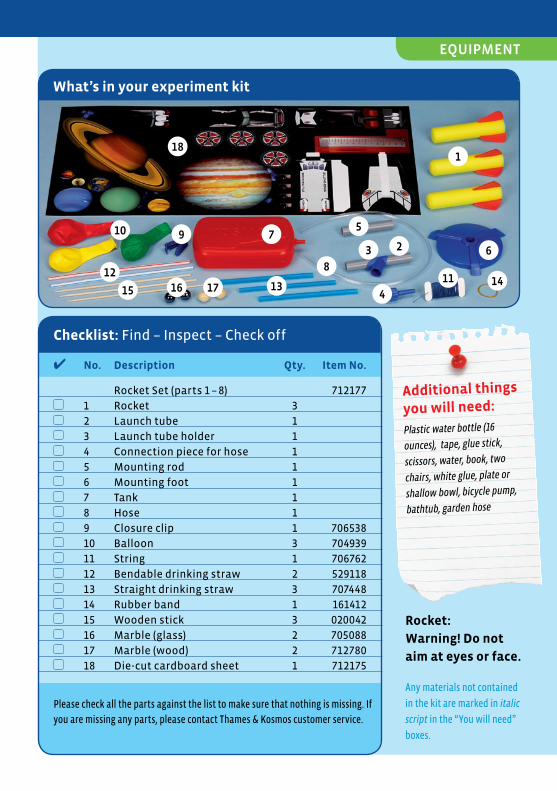
What’s in your experiment kit
Checklist: Find – Inspect – Check off
Any materials not contained
in the kit are marked in italic
script in the “You will need”
boxes.
Additional things
you will need:
Plastic water bottle (16
ounces), tape, glue stick,
scissors, water, book, two
chairs, white glue, plate or
shallow bowl, bicycle pump,
bathtub, garden hose
✔ No. Description Qty. Item No.
Rocket Set (parts 1 – 8) 712177
1 Rocket 3
2 Launch tube 1
3 Launch tube holder 1
4 Connection piece for hose 1
5 Mounting rod 1
6 Mounting foot 1
7 Tank 1
8 Hose 1
9 Closure clip 1 706538
10 Balloon 3 704939
11 String 1 706762
12 Bendable drinking straw 2 529118
13 Straight drinking straw 3 707448
14 Rubber band 1 161412
15 Wooden stick 3 020042
16 Marble (glass) 2 705088
17 Marble (wood) 2 712780
18 Die-cut cardboard sheet 1 712175
Please check all the parts against the list to make sure that nothing is missing. If
you are missing any parts, please contact Thames & Kosmos customer service.
1
3
8
6
11 1412
15 1316 174
2
5
18
7910
EQUIPMENT
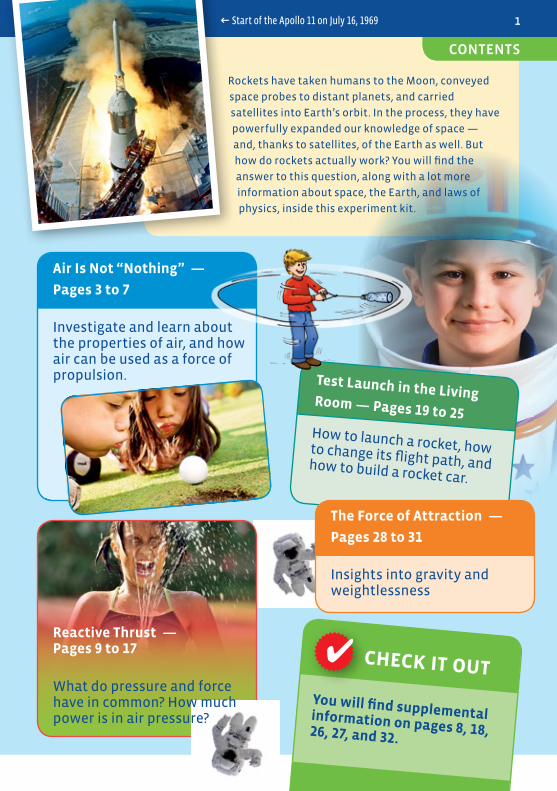
✔Reactive Thrust — Pages 9 to 17
What do pressure and force have in common? How much power is in air pressure?
Test Launch in the Living Room — Pages 19 to 25How to launch a rocket, how to change its flight path, and how to build a rocket car.
Rockets have taken humans to the Moon, conveyed
space probes to distant planets, and carried
satellites into Earth’s orbit. In the process, they have
powerfully expanded our knowledge of space —
and, thanks to satellites, of the Earth as well. But
how do rockets actually work? You will find the
answer to this question, along with a lot more
information about space, the Earth, and laws of
physics, inside this experiment kit.
CHECK IT OUT
You will find supplemental information on pages 8, 18, 26, 27, and 32.
Air Is Not “Nothing” —
Pages 3 to 7
Investigate and learn about the properties of air, and how air can be used as a force of propulsion.
The Force of Attraction —
Pages 28 to 31
Insights into gravity and weightlessness
← Start of the Apollo 11 on July 16, 1969
CONTENTS
1
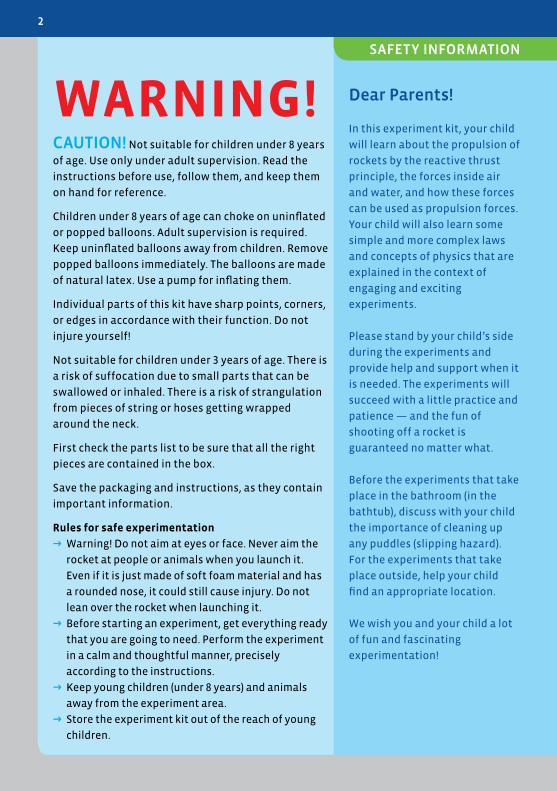
WARNING!
CAUTION! Not suitable for children under 8 years
of age. Use only under adult supervision. Read the
instructions before use, follow them, and keep them
on hand for reference.
Children under 8 years of age can choke on uninflated
or popped balloons. Adult supervision is required.
Keep uninflated balloons away from children. Remove
popped balloons immediately. The balloons are made
of natural latex. Use a pump for inflating them.
Individual parts of this kit have sharp points, corners,
or edges in accordance with their function. Do not
injure yourself!
Not suitable for children under 3 years of age. There is
a risk of suffocation due to small parts that can be
swallowed or inhaled. There is a risk of strangulation
from pieces of string or hoses getting wrapped
around the neck.
First check the parts list to be sure that all the right
pieces are contained in the box.
Save the packaging and instructions, as they contain
important information.
Rules for safe experimentation
→ Warning! Do not aim at eyes or face. Never aim the
rocket at people or animals when you launch it.
Even if it is just made of soft foam material and has
a rounded nose, it could still cause injury. Do not
lean over the rocket when launching it.
→ Before starting an experiment, get everything ready
that you are going to need. Perform the experiment
in a calm and thoughtful manner, precisely
according to the instructions.
→ Keep young children (under 8 years) and animals
away from the experiment area.
→ Store the experiment kit out of the reach of young
children.
Dear Parents!
In this experiment kit, your child
will learn about the propulsion of
rockets by the reactive thrust
principle, the forces inside air
and water, and how these forces
can be used as propulsion forces.
Your child will also learn some
simple and more complex laws
and concepts of physics that are
explained in the context of
engaging and exciting
experiments.
Please stand by your child’s side
during the experiments and
provide help and support when it
is needed. The experiments will
succeed with a little practice and
patience — and the fun of
shooting off a rocket is
guaranteed no matter what.
Before the experiments that take
place in the bathroom (in the
bathtub), discuss with your child
the importance of cleaning up
any puddles (slipping hazard).
For the experiments that take
place outside, help your child
find an appropriate location.
We wish you and your child a lot
of fun and fascinating
experimentation!
2
SAFETY INFORMATION

The rocket in this experiment kit is propelled by air. That’s
reason enough to study the properties of this substance a little
more closely. We need air to breathe and are constantly
surrounded by it, but we usually don’t think about it at all. Once
in a while, of course, it makes its presence clearly felt — such as
when a storm blows the roofs off of houses, uproots trees, or
sinks ships. But what is actually happening when you compress
air in order to propel a rocket?
A i r Is Not “N o t h i n g”
Air Is Not “Nothing” | 3

The apparently empty hose
YOU WILL NEED
→ hose
→ glass of water
→ plastic water bottle
(16 ounces)
HERE’S HOW
1. Hold your finger tightly over the upper
end of the hose and lower its other end
into a glass of water. The liquid will only
push a few millimeters into the hose, as
you can see through the glass.
2. You can perform the same experiment
with an empty plastic bottle, with the
same results.
3. But when you take your finger off the
upper end of the hose, the water will
rise up it to the same level as inside the
glass. The same thing would happen if
you poked a hole in the bottle.
The hose and the bottle are actually not
empty at all — they are filled with air.
True, you can’t see the air, but it won’t
let itself just get pushed out of the way
by the water. Only when it escapes can
the water enter and rise up the hose.
This fact comes in handy with diving
bells, which are open at the bottom and
nevertheless won’t fill up with water.
1
3
2
C WHAT’S HAPPENING?
4
EXPERIMENT 1

Compressed air
YOU WILL NEED
→ plastic bottle (16 ounces)
→ water tap
HERE’S HOW
1. Completely fill the bottle with water by
holding its opening under the tap and
repeatedly squeezing the bottle to make
the air escape as the water from the tap
gets sucked in.
2. Then hold your thumb over the opening
and try to compress the bottle by
squeezing its plastic sides together. You
will hardly be able to compress it at all.
3. Now let the water run out and hold your
thumb over the opening again. This
time, you will easily be able to push in
the sides of the bottle a little.
This experiment shows that air can
easily be compressed, and that it
expands again when the external
pressure lets up. Air is elastic, a property
that is put to use in air-filled soccer balls
and car tires. Water (and other liquids),
on the other hand, can hardly be
compressed at all, and solid materials
such as rocks are even less elastic.
1
3
2
TIP!
A child’s hands are
often too small to hold
the bottle closed. In
that case, just use the
screw-top lid!
C WHAT’S HAPPENING?
EXPERIMENT 2
Air Is Not “Nothing” | 5

HERE’S HOW
You should try this experiment
in the bathroom or outside!
1. Fill the bottle completely with water
and squeeze its sides together. The
water will shoot out.
2. Empty the bottle and repeat the
experiment. If you hold its opening near
your face as you quickly squeeze it, you
will feel the air escaping.
The force of your fingers creates
pressure inside the bottle when they
squeeze its sides together. This pressure,
in turn, pushes some of the water or air
out of the opening. This is similar to the
way a water pistol works. And it’s the
pressure created by the water plant that
makes water run out of the tap into your
sink.
1
2
Spray bottle
YOU WILL NEED
→ plastic bottle (16 ounces)
→ water tap
C WHAT’S HAPPENING?
6
EXPERIMENT 3
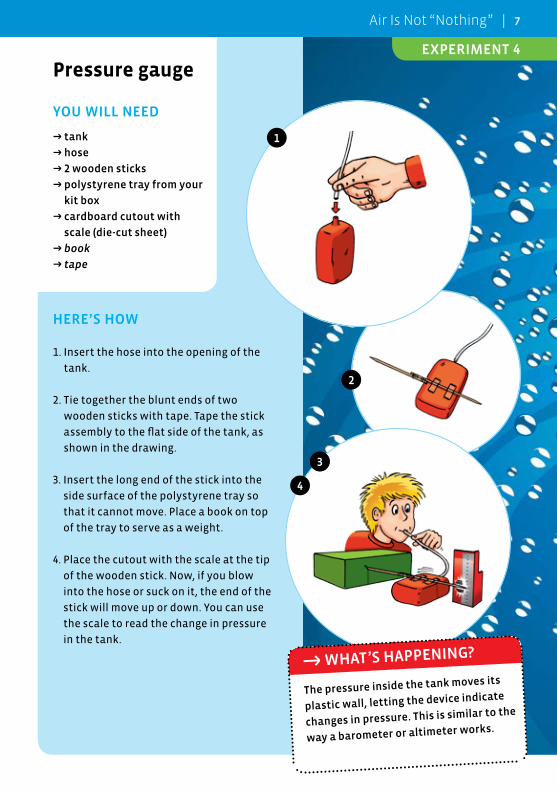
Pressure gauge
YOU WILL NEED
→ tank
→ hose
→ 2 wooden sticks
→ polystyrene tray from your
kit box
→ cardboard cutout with
scale (die-cut sheet)
→ book
→ tape
HERE’S HOW
1. Insert the hose into the opening of the
tank.
2. Tie together the blunt ends of two
wooden sticks with tape. Tape the stick
assembly to the flat side of the tank, as
shown in the drawing.
3. Insert the long end of the stick into the
side surface of the polystyrene tray so
that it cannot move. Place a book on top
of the tray to serve as a weight.
4. Place the cutout with the scale at the tip
of the wooden stick. Now, if you blow
into the hose or suck on it, the end of the
stick will move up or down. You can use
the scale to read the change in pressure
in the tank.
The pressure inside the tank moves its
plastic wall, letting the device indicate
changes in pressure. This is similar to the
way a barometer or altimeter works.
1
2
33
4
C WHAT’S HAPPENING?
EXPERIMENT 4
Air Is Not “Nothing” | 7

altimeter
Barometers…
… are used in many homes for forecasting the
weather. They have an enclosed container
connected to a pointer, with the container altering
its shape depending on the atmospheric pressure
and thus moving the pointer. When the weather
changes, there’s a change in air pressure (the
pressure that the layers of air exert on us), which is
what the barometer shows.
Air pressure changes with altitude as well: The
higher you climb, the lower the air pressure.
Mechanical altimeters make use of that fact. They
work similarly to weather barometers, except their
scale is divided into feet or meters.
The Power of the Wind
A strong wind can exert a
powerful force on
buildings or trees. At a
wind strength of 6, which
is when large branches
start to sway, the wind
exerts a pressure of 7
kilograms per square
meter. At a wind strength
of 10, which would be a
storm, the force is 36
kilograms. At hurricane
strength, the force is over
50 kilograms. At this
strength, the wind can
make walls collapse,
devastate entire forests,
rip off roofs, and even
blow cars off the street.
CHECK IT OUT✔
8 | Air Is Not “Nothing”
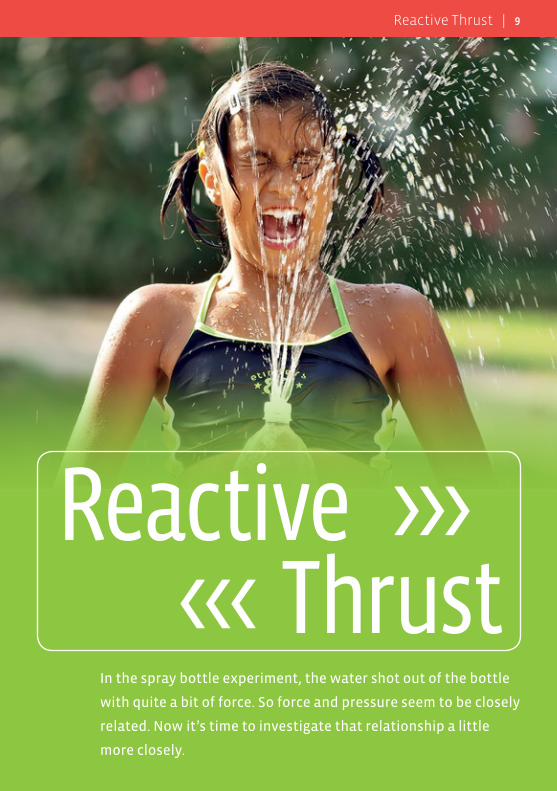
In the spray bottle experiment, the water shot out of the bottle
with quite a bit of force. So force and pressure seem to be closely
related. Now it’s time to investigate that relationship a little
more closely.
Reactive >>><<< Thrust
Reactive Thrust | 9

The power of flowing water
YOU WILL NEED
→ tank
→ hose
→ water tap
→ sink
HERE’S HOW
You should perform this experiment in the
bathroom!
1. Fill the tank with water and insert the
hose, letting the other end of the hose
hang loose over the sink.
2. Now squeeze the tank forcefully. A
stream of water will shoot out of the
hose opening, and the end of the hose
will move in the opposite direction from
the stream.
1
2
The stream of water is exerting reactive
thrust on the hose. In doing that, it is
obeying a law discovered by the English
physicist Isaac Newton (1642–1726) a
long time ago: every action has an equal
and opposite reaction. The water shoots
out of the hose, but pushes the hose in
the opposite direction at the same time.
All rockets work according to this
principle, as do jet planes.
C WHAT’S HAPPENING?
10
EXPERIMENT 5
blowhere
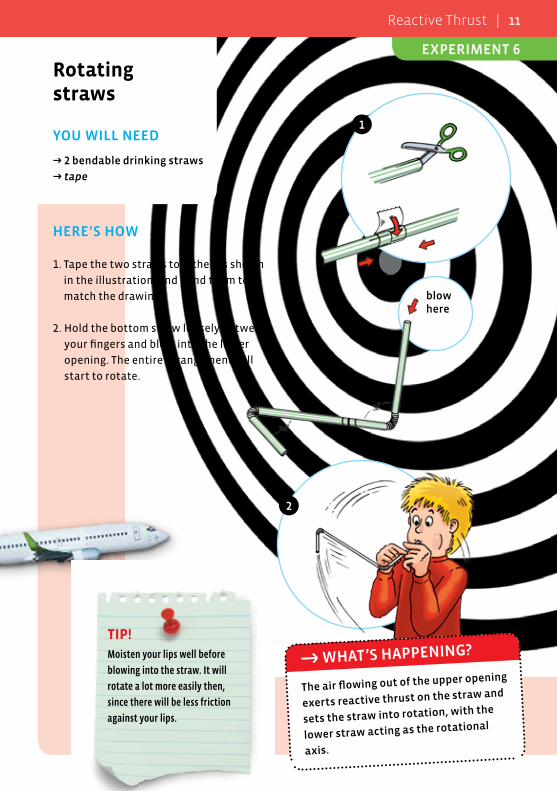
Rotating straws
YOU WILL NEED
→ 2 bendable drinking straws
→ tape
HERE’S HOW
1. Tape the two straws together as shown
in the illustration, and bend them to
match the drawing.
2. Hold the bottom straw loosely between
your fingers and blow into the lower
opening. The entire arrangement will
start to rotate.
The air flowing out of the upper opening
exerts reactive thrust on the straw and
sets the straw into rotation, with the
lower straw acting as the rotational
axis.
TIP!Moisten your lips well before
blowing into the straw. It will
rotate a lot more easily then,
since there will be less friction
against your lips.
2
1
C WHAT’S HAPPENING?
EXPERIMENT 6
Reactive Thrust | 11
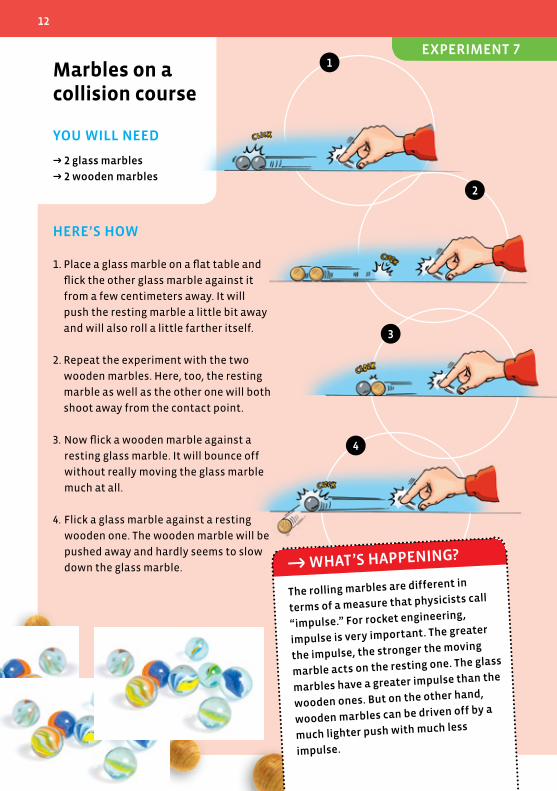
Marbles on a collision course
YOU WILL NEED
→ 2 glass marbles
→ 2 wooden marbles
HERE’S HOW
1. Place a glass marble on a flat table and
flick the other glass marble against it
from a few centimeters away. It will
push the resting marble a little bit away
and will also roll a little farther itself.
2. Repeat the experiment with the two
wooden marbles. Here, too, the resting
marble as well as the other one will both
shoot away from the contact point.
3. Now flick a wooden marble against a
resting glass marble. It will bounce off
without really moving the glass marble
much at all.
4. Flick a glass marble against a resting
wooden one. The wooden marble will be
pushed away and hardly seems to slow
down the glass marble.
The rolling marbles are different in
terms of a measure that physicists call
“impulse.” For rocket engineering,
impulse is very important. The greater
the impulse, the stronger the moving
marble acts on the resting one. The glass
marbles have a greater impulse than the
wooden ones. But on the other hand,
wooden marbles can be driven off by a
much lighter push with much less
impulse.
1
2
3
4
C WHAT’S HAPPENING?
12
EXPERIMENT 7
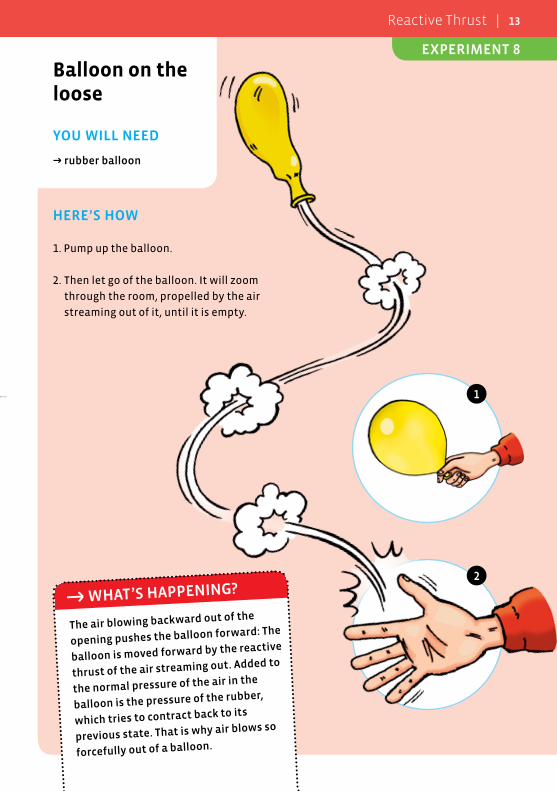
Balloon on the loose
YOU WILL NEED
→ rubber balloon
HERE’S HOW
1. Pump up the balloon.
2. Then let go of the balloon. It will zoom
through the room, propelled by the air
streaming out of it, until it is empty.
The air blowing backward out of the
opening pushes the balloon forward: The
balloon is moved forward by the reactive
thrust of the air streaming out. Added to
the normal pressure of the air in the
balloon is the pressure of the rubber,
which tries to contract back to its
previous state. That is why air blows so
forcefully out of a balloon.
1
2
C WHAT’S HAPPENING?
EXPERIMENT 8
Reactive Thrust | 13
glue
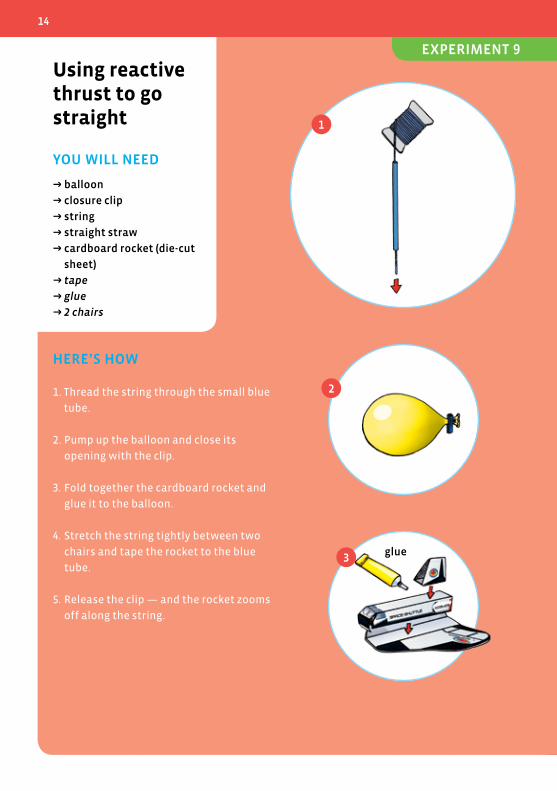
Using reactive thrust to go straight
YOU WILL NEED
→ balloon
→ closure clip
→ string
→ straight straw
→ cardboard rocket (die-cut
sheet)
→ tape
→ glue
→ 2 chairs
HERE’S HOW
1. Thread the string through the small blue
tube.
2. Pump up the balloon and close its
opening with the clip.
3. Fold together the cardboard rocket and
glue it to the balloon.
4. Stretch the string tightly between two
chairs and tape the rocket to the blue
tube.
5. Release the clip — and the rocket zooms
off along the string.
2
1
3
14
EXPERIMENT 9
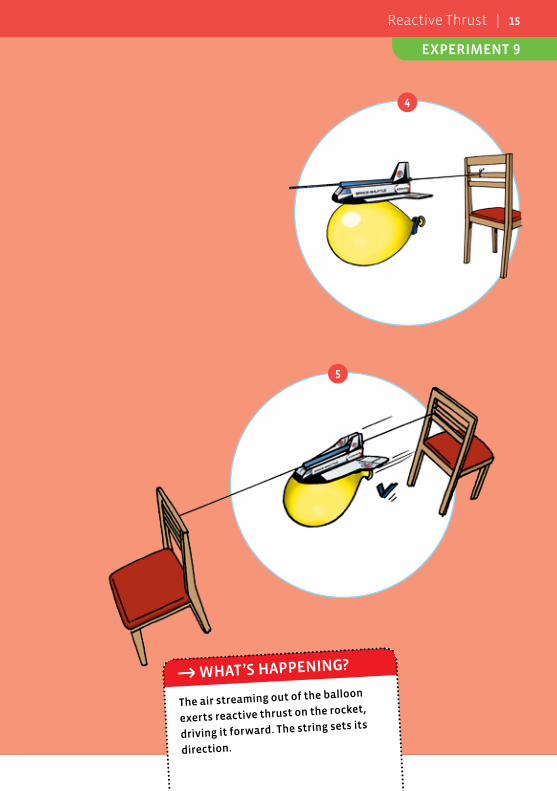
The air streaming out of the balloon
exerts reactive thrust on the rocket,
driving it forward. The string sets its
direction.
4
5
C WHAT’S HAPPENING?
EXPERIMENT 9
Reactive Thrust | 15
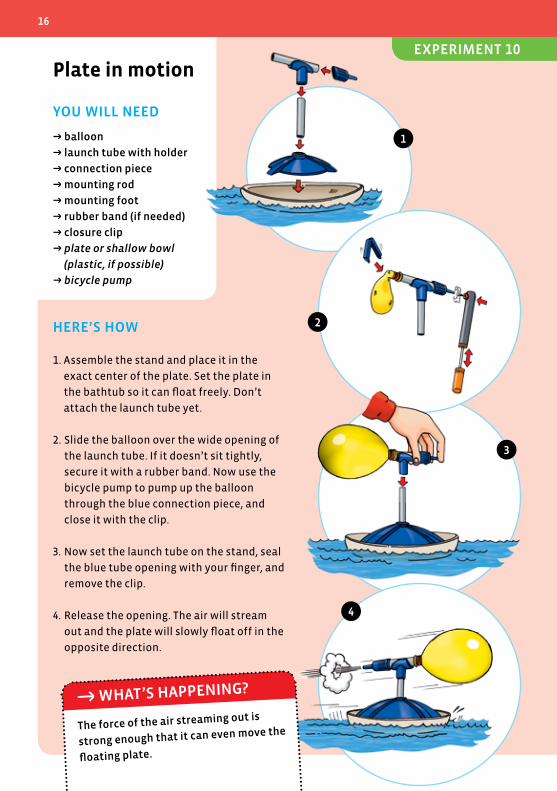
Plate in motion
YOU WILL NEED
→ balloon
→ launch tube with holder
→ connection piece
→ mounting rod
→ mounting foot
→ rubber band (if needed)
→ closure clip
→ plate or shallow bowl
(plastic, if possible)
→ bicycle pump
HERE’S HOW
1. Assemble the stand and place it in the
exact center of the plate. Set the plate in
the bathtub so it can float freely. Don’t
attach the launch tube yet.
2. Slide the balloon over the wide opening of
the launch tube. If it doesn’t sit tightly,
secure it with a rubber band. Now use the
bicycle pump to pump up the balloon
through the blue connection piece, and
close it with the clip.
3. Now set the launch tube on the stand, seal
the blue tube opening with your finger, and
remove the clip.
4. Release the opening. The air will stream
out and the plate will slowly float off in the
opposite direction.
The force of the air streaming out is
strong enough that it can even move the
floating plate.
1
2
3
4
C WHAT’S HAPPENING?
16
EXPERIMENT 10

Carousel in the bathtub
YOU WILL NEED
→ bendable straw
→ launch tube with balloon,
stand and plate from
Experiment 10
→ closure clip
→ scissors
→ tape
→ bicycle pump
HERE’S HOW
1. Cut both ends off of a drinking straw,
leaving just the bending joint with
about 2 centimeters of each arm.
2. Pump up the balloon as in Experiment
10, and seal it closed with the clip. Tape
one end of the remaining straw to the
blue part of the launch tube.
3. Now set the launch tube on the stand,
seal the opening of the straw with your
finger, and release the clip. Angle the
straw at about 90 degrees and let go of
the balloon. As the air streams out, the
plate starts to turn.
The air streaming out to the side
generates reactive thrust. Because this
does not happen in the center of the
plate, the plate starts to rotate. The
experiment shows how important it is
for the gases to exit the rear of a rocket
exactly in the center — otherwise, the
rocket would immediately go off course.
1
2
3
C WHAT’S HAPPENING?
EXPERIMENT 11
Reactive Thrust | 17

Using Nozzles to move through the air
Large modern airplanes are powered
by jet engines that are similar in
function to rocket engines. They
have a combustion chamber into
which air and fuel are injected. The
fuel burns with oxygen from the air,
producing hot combustion gases in
the process. As they escape through
nozzles at the rear, they provide the
airplane with some of its forward
motion, pushing it along by reactive
thrust.
Meanwhile, a turbine (a kind of
propeller) is used (with the help of
additional propellers) to take in
surrounding air, some of which is
compressed into the combustion
chamber. Most of the air, though, is
led past the turbine and surrounds
the combustion gases escaping to
the rear, which increases the thrust
as well as reducing the noise.
And this is the most important
difference compared to most
rockets: Rockets carry the oxygen
needed for combustion along with
them inside tanks, so they don’t
need to take in any air and can work
in the vacuum of space.
Impulse: critical for rocket engineering
Everybody know that a steel ball thrown
at a pane of glass will have a much greater
effect than a ball of polystyrene foam
flying just as fast. Physicists identify this
kind of difference in terms of a unit of
measurement called impulse. Impulse is
calculated from the mass of a body
multiplied by its speed. A rocket could also
be propelled (in principle) by pushing very
heavy objects out of its engine nozzle
relatively slowly.
In reality, however, gases (which are very
light, after all) are expelled at high speeds.
The combustion gases of modern rockets
race out of the nozzles at speeds of several
thousand meters per second. If the gases
are accelerated by electrical forces, small
quantities of fuel are often enough.
Something that is purely in the realm of
science fiction, on the other hand, is the
antimatter rocket drive. Still, it is
intriguing to think about the gigantic
distances that could be overcome with the
extreme amounts of energy that might be
released by antimatter.
CHECK IT OUT✔
18 | Reactive Thrust
Test Launch in the Living Room
In this chapter, you will finally have a chance to launch the
rocket that is contained in your experiment kit along with a
launch pad. You can use it to play a really neat game, and even to
build a rocket car.
Test Launch in the Living Room | 19

Launch pad on the table
YOU WILL NEED
→ rocket
→ launch tube with holder
→ connection piece
→ mounting rod
→ mounting foot
→ tank
→ hose
HERE’S HOW
1. Push the ends of the hose onto the blue
opening of the launch tube and the at-
tachment nipple of the tank.
2. Mount the stand and place the launch
tube in the holder.
3. Push the rocket onto the launch tube.
4. Push firmly on the tank. The rocket will
zoom off and fly a distance of several
meters.
5. Repeat the experiment. Try using your
foot or fist for the launch. Compare
flight distances.
By compressing the tank, you are
increasing the pressure inside it. That
makes the air escape in a burst. The
sudden burst of air provides the rocket
with reactive thrust and pushes it
forward.
1
3
4
2
C WHAT’S HAPPENING?
20
EXPERIMENT 12CAUTION!
Never aim the
rocket at
people or
animals! Make
sure that there
isn’t anybody
in the launch
path.

Just the right angle
YOU WILL NEED
→ rocket and launch pad
from Experiment 12
→ water tap
→ bathtub
→ garden hose
HERE’S HOW
1. This experiment is best performed
outside, such as on an open lawn or in a
field or meadow. Hold the tube in your
hand as you launch the rocket, trying
different launch angles (also known as
the angle of incidence). Each time, take
note how far the rocket flies. Is there an
angle that works best for making it fly
the farthest? What is the angle of your
launch pad stand?
2. A second test launch in the bathroom:
Fill the tank with water, attach the hose
to it, and squeeze the tank. The water
will shoot out the other end of the hose.
Again, try holding the end of the hose at
different angles. Which angle lets the
stream of water go the farthest?
3. Of course, you can also try it in the
garden using the garden hose. It’s best
to let a grown-up help you with this.There is, in fact, an ideal launch angle:
The rocket will fly the farthest when it is
shot at an angle of about 45 degrees, or
about halfway between vertical and
horizontal (as in your launch pad). The
stream of water will also go farthest if
you hold the hose nozzle at that angle.
1
2
3
C WHAT’S HAPPENING?
EXPERIMENT 13
Test Launch in the Living Room | 21
CAUTION!
Never aim the
rocket at
people or
animals! Make
sure that there
isn’t anybody
in the launch
path.
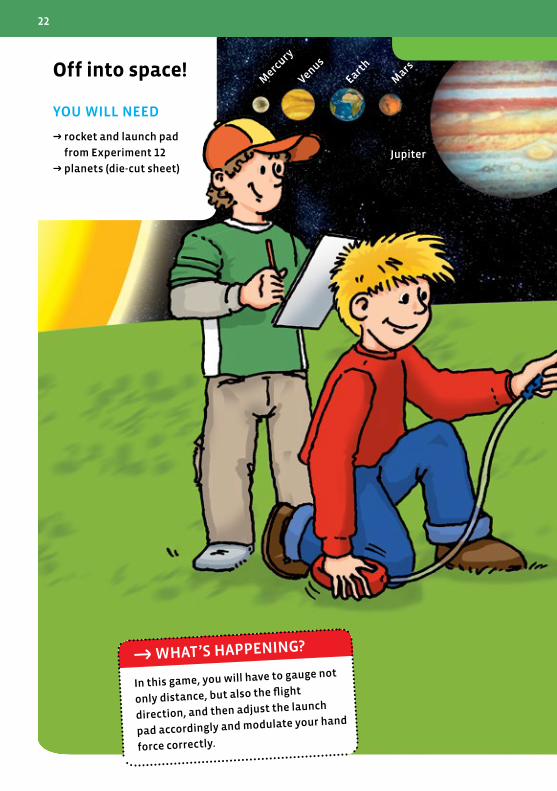
In this game, you will have to gauge not
only distance, but also the flight
direction, and then adjust the launch
pad accordingly and modulate your hand
force correctly.
Off into space!
YOU WILL NEED
→ rocket and launch pad
from Experiment 12
→ planets (die-cut sheet)
Merc
ury
Venus
Earth
Mars
Jupiter
C WHAT’S HAPPENING?
22
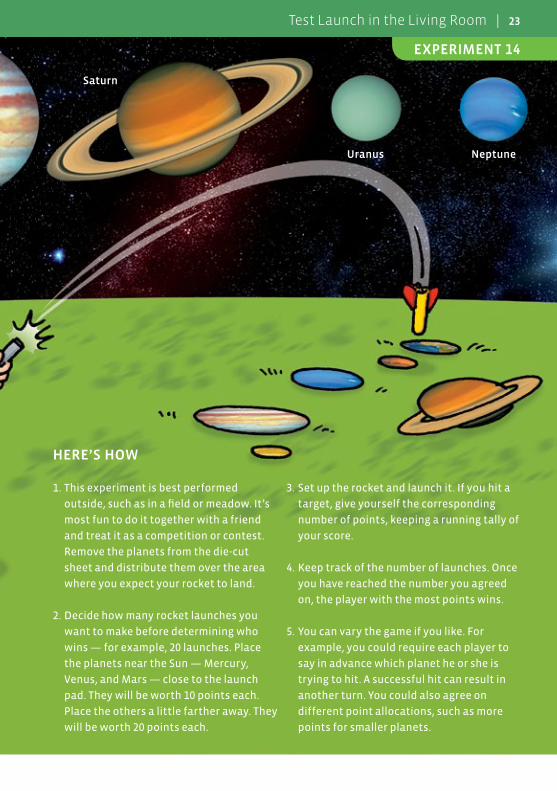
HERE’S HOW
1. This experiment is best performed
outside, such as in a field or meadow. It’s
most fun to do it together with a friend
and treat it as a competition or contest.
Remove the planets from the die-cut
sheet and distribute them over the area
where you expect your rocket to land.
2. Decide how many rocket launches you
want to make before determining who
wins — for example, 20 launches. Place
the planets near the Sun — Mercury,
Venus, and Mars — close to the launch
pad. They will be worth 10 points each.
Place the others a little farther away. They
will be worth 20 points each.
3. Set up the rocket and launch it. If you hit a
target, give yourself the corresponding
number of points, keeping a running tally of
your score.
4. Keep track of the number of launches. Once
you have reached the number you agreed
on, the player with the most points wins.
5. You can vary the game if you like. For
example, you could require each player to
say in advance which planet he or she is
trying to hit. A successful hit can result in
another turn. You could also agree on
different point allocations, such as more
points for smaller planets.
Saturn
Uranus Neptune
EXPERIMENT 14
Test Launch in the Living Room | 23

3
2
1Rocket car
YOU WILL NEED
→ rocket car (die-cut sheet)
→ balloon
→ closure clip
→ rubber band (if needed)
→ launch tube
→ 2 straight drinking straws
→ 2 wooden sticks
→ glue stick
→ tape
→ bicycle pump
HERE’S HOW
1. Remove the rocket car pieces
from the die-cut sheet.
2. Assemble the axles with the
wheels. If you like, you can
shorten the straws and wooden
sticks a little so that they don’t
stick out so far beyond the car’s
body. Start with one wheel and
glue it to the axle reinforcement
plate. Insert the stick with the
straw into that wheel, and then
add the second wheel with its
axle reinforcement.
3. Fold and glue the car’s body
together as shown in the
illustration. Secure the axles to
the bottom with tape.
24

Because the wooden axles turn so easily
inside the straw sections, the air
shooting out of the balloon is strong
enough to push the car several meters in
no time at all — farther than the rocket
flies, even.
6
4. Fit the balloon over the end of the
launch tube, holding it tight with the
rubber band if necessary. Wedge the
launch tube in the car’s body, and
secure it with tape (see arrow).
5. Pump up the balloon through the
launch tube opening and close it with
the clip. Look for a long, straight
stretch of floor to serve as your
racetrack.
6. Release the clip. The car will zoom off
across the floor.
54
C WHAT’S HAPPENING?
TIP!
If you have a friend who also has
a rocket kit, you can race your
cars against each other.
EXPERIMENT 15
Test Launch in the Living Room | 25
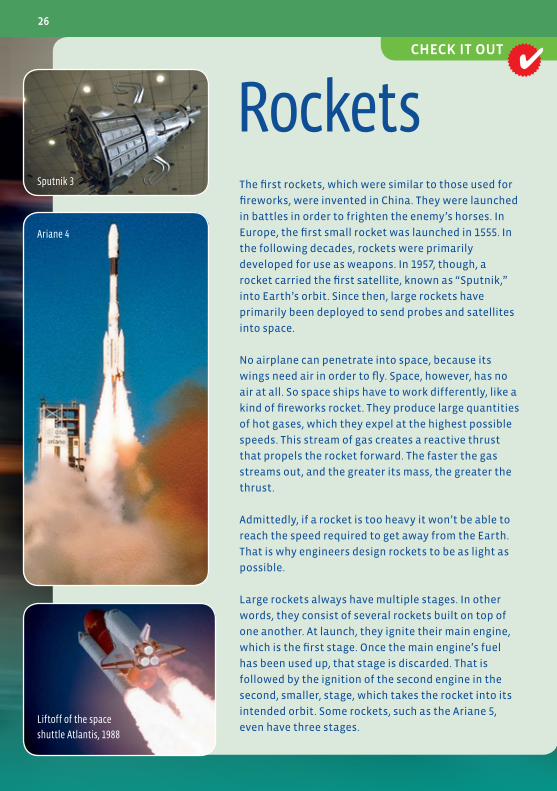
The first rockets, which were similar to those used for
fireworks, were invented in China. They were launched
in battles in order to frighten the enemy’s horses. In
Europe, the first small rocket was launched in 1555. In
the following decades, rockets were primarily
developed for use as weapons. In 1957, though, a
rocket carried the first satellite, known as “Sputnik,”
into Earth’s orbit. Since then, large rockets have
primarily been deployed to send probes and satellites
into space.
No airplane can penetrate into space, because its
wings need air in order to fly. Space, however, has no
air at all. So space ships have to work differently, like a
kind of fireworks rocket. They produce large quantities
of hot gases, which they expel at the highest possible
speeds. This stream of gas creates a reactive thrust
that propels the rocket forward. The faster the gas
streams out, and the greater its mass, the greater the
thrust.
Admittedly, if a rocket is too heavy it won’t be able to
reach the speed required to get away from the Earth.
That is why engineers design rockets to be as light as
possible.
Large rockets always have multiple stages. In other
words, they consist of several rockets built on top of
one another. At launch, they ignite their main engine,
which is the first stage. Once the main engine’s fuel
has been used up, that stage is discarded. That is
followed by the ignition of the second engine in the
second, smaller, stage, which takes the rocket into its
intended orbit. Some rockets, such as the Ariane 5,
even have three stages.
RocketsSputnik 3
Ariane 4
Liftoff of the space
shuttle Atlantis, 1988
CHECK IT OUT✔
26
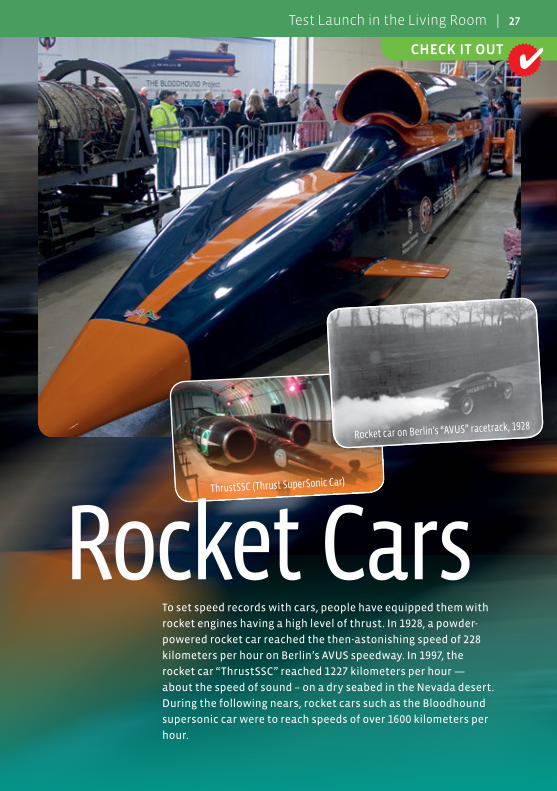
To set speed records with cars, people have equipped them with
rocket engines having a high level of thrust. In 1928, a powder-
powered rocket car reached the then-astonishing speed of 228
kilometers per hour on Berlin’s AVUS speedway. In 1997, the
rocket car “ThrustSSC” reached 1227 kilometers per hour —
about the speed of sound – on a dry seabed in the Nevada desert.
During the following nears, rocket cars such as the Bloodhound
supersonic car were to reach speeds of over 1600 kilometers per
hour.
Rocket CarsRocket car on Berlin’s “AVUS” racetrack, 1928
ThrustSSC (Thrust SuperSonic Car)
CHECK IT OUT✔
Test Launch in the Living Room | 27
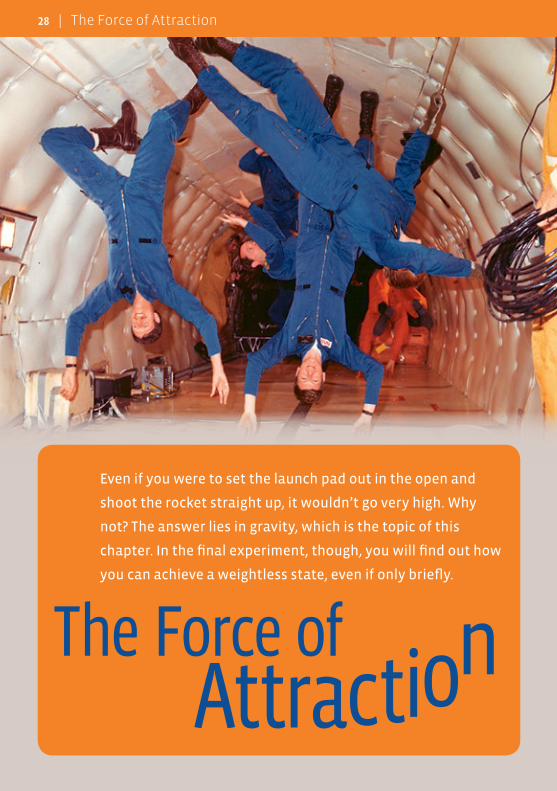
Even if you were to set the launch pad out in the open and
shoot the rocket straight up, it wouldn’t go very high. Why
not? The answer lies in gravity, which is the topic of this
chapter. In the final experiment, though, you will find out how
you can achieve a weightless state, even if only briefly.
The Force of Attraction
28 | The Force of Attraction
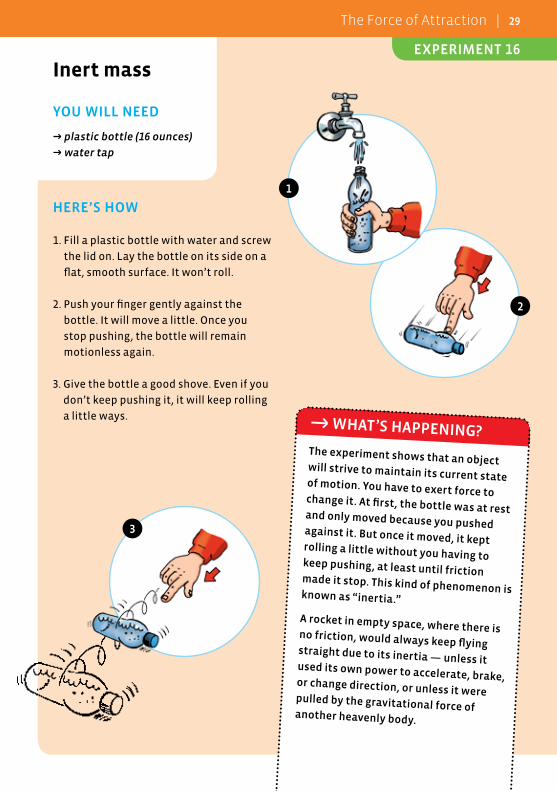
Inert mass
YOU WILL NEED
→ plastic bottle (16 ounces)
→ water tap
HERE’S HOW
1. Fill a plastic bottle with water and screw
the lid on. Lay the bottle on its side on a
flat, smooth surface. It won’t roll.
2. Push your finger gently against the
bottle. It will move a little. Once you
stop pushing, the bottle will remain
motionless again.
3. Give the bottle a good shove. Even if you
don’t keep pushing it, it will keep rolling
a little ways.
The experiment shows that an object will strive to maintain its current state of motion. You have to exert force to change it. At first, the bottle was at rest and only moved because you pushed against it. But once it moved, it kept rolling a little without you having to keep pushing, at least until friction made it stop. This kind of phenomenon is known as “inertia.”
A rocket in empty space, where there is no friction, would always keep flying straight due to its inertia — unless it used its own power to accelerate, brake, or change direction, or unless it were pulled by the gravitational force of
another heavenly body.
1
2
3
C WHAT’S HAPPENING?
EXPERIMENT 16
The Force of Attraction | 29
1
2
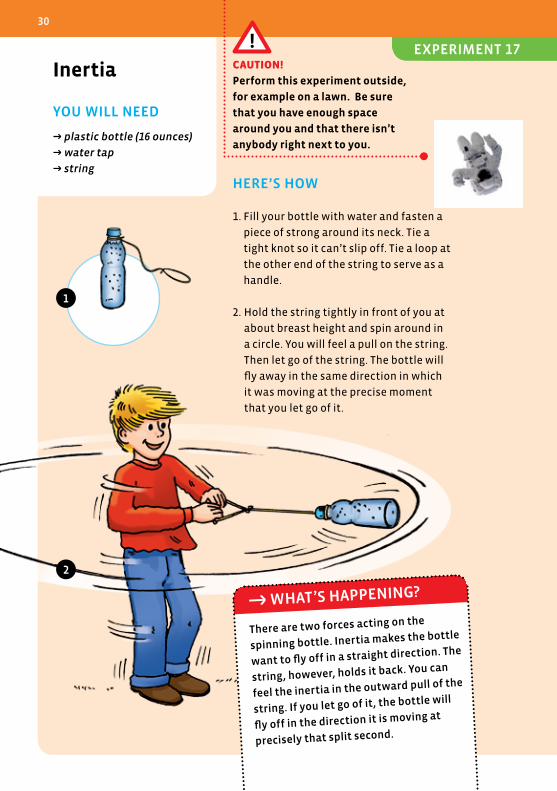
Inertia
YOU WILL NEED
→ plastic bottle (16 ounces)
→ water tap
→ string
HERE’S HOW
1. Fill your bottle with water and fasten a
piece of strong around its neck. Tie a
tight knot so it can’t slip off. Tie a loop at
the other end of the string to serve as a
handle.
2. Hold the string tightly in front of you at
about breast height and spin around in
a circle. You will feel a pull on the string.
Then let go of the string. The bottle will
fly away in the same direction in which
it was moving at the precise moment
that you let go of it.
There are two forces acting on the
spinning bottle. Inertia makes the bottle
want to fly off in a straight direction. The
string, however, holds it back. You can
feel the inertia in the outward pull of the
string. If you let go of it, the bottle will
fly off in the direction it is moving at
precisely that split second.
C WHAT’S HAPPENING?
30
EXPERIMENT 17CAUTION!
Perform this experiment outside,
for example on a lawn. Be sure
that you have enough space
around you and that there isn’t
anybody right next to you.
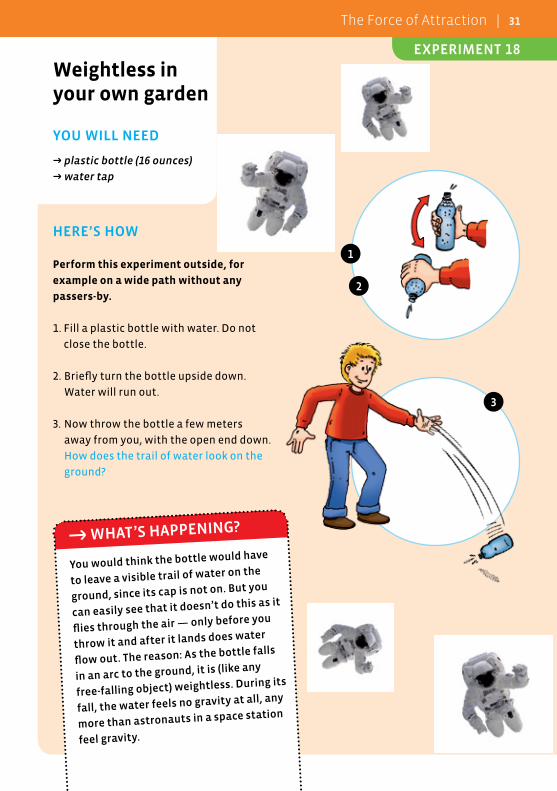
You would think the bottle would have
to leave a visible trail of water on the
ground, since its cap is not on. But you
can easily see that it doesn’t do this as it
flies through the air — only before you
throw it and after it lands does water
flow out. The reason: As the bottle falls
in an arc to the ground, it is (like any
free-falling object) weightless. During its
fall, the water feels no gravity at all, any
more than astronauts in a space station
feel gravity.
Weightless in your own garden
YOU WILL NEED
→ plastic bottle (16 ounces)
→ water tap
HERE’S HOW
Perform this experiment outside, for
example on a wide path without any
passers-by.
1. Fill a plastic bottle with water. Do not
close the bottle.
2. Briefly turn the bottle upside down.
Water will run out.
3. Now throw the bottle a few meters
away from you, with the open end down.
How does the trail of water look on the
ground?
1
2
3
C WHAT’S HAPPENING?
EXPERIMENT 18
The Force of Attraction | 31
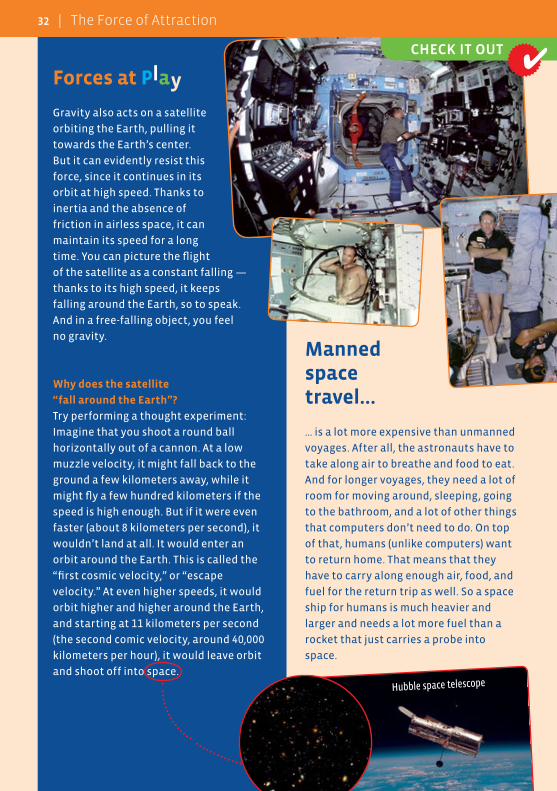
Manned space travel…
… is a lot more expensive than unmanned
voyages. After all, the astronauts have to
take along air to breathe and food to eat.
And for longer voyages, they need a lot of
room for moving around, sleeping, going
to the bathroom, and a lot of other things
that computers don’t need to do. On top
of that, humans (unlike computers) want
to return home. That means that they
have to carry along enough air, food, and
fuel for the return trip as well. So a space
ship for humans is much heavier and
larger and needs a lot more fuel than a
rocket that just carries a probe into
space.
Forces at Play
Gravity also acts on a satellite
orbiting the Earth, pulling it
towards the Earth’s center.
But it can evidently resist this
force, since it continues in its
orbit at high speed. Thanks to
inertia and the absence of
friction in airless space, it can
maintain its speed for a long
time. You can picture the flight
of the satellite as a constant falling —
thanks to its high speed, it keeps
falling around the Earth, so to speak.
And in a free-falling object, you feel
no gravity.
Why does the satellite
“fall around the Earth”?
Try performing a thought experiment:
Imagine that you shoot a round ball
horizontally out of a cannon. At a low
muzzle velocity, it might fall back to the
ground a few kilometers away, while it
might fly a few hundred kilometers if the
speed is high enough. But if it were even
faster (about 8 kilometers per second), it
wouldn’t land at all. It would enter an
orbit around the Earth. This is called the
“first cosmic velocity,” or “escape
velocity.” At even higher speeds, it would
orbit higher and higher around the Earth,
and starting at 11 kilometers per second
(the second comic velocity, around 40,000
kilometers per hour), it would leave orbit
and shoot off into space.
CHECK IT OUT✔
32 | The Force of Attraction
Hubble space telescope

Kosmos Quality and Safety
More than one hundred years of expertise in publishing science experiment
kits stand behind every product that bears the Kosmos name. Kosmos
experiment kits are designed by an experienced team of specialists and
tested with the utmost care during development and production. With
regard to product safety, these experiment kits follow European and US
safety standards, as well as our own refined proprietary safety guidelines. By
working closely with our manufacturing partners and safety testing labs, we
are able to control all stages of production. While the majority of our products
are made in Germany, all of our products, regardless of origin, follow the same
rigid quality standards.
1st Edition 2012© 2012 Franckh-Kosmos Verlags-GmbH & Co. KG, Pfizerstrasse 5 – 7, 70184 Stuttgart, Germany
This work, including all its parts, is copyright protected. Any use outside the specific limits of the copyright law is prohibited and punishable by law without the consent of the publisher. This applies specifically to reproductions, translations, microfilming, and storage and processing in electronic systems and networks. We do not guarantee that all material in this work is free from other copyright or other protection.
Conception: Ruth SchildhauerEditing: Christiane Theis, lektorat&textlabor, GärtringenProject direction: Dr. Mark Bachofer, Ita MeisterProduct development: Elena RyvkinDesign and layout: Atelier Bea Klenk, Klenk/Riedinger
Project direction: Dr. Mark Bachofer,Text: Ruth Schildhauer, Dr. Rainer KötheProduct development: Elena RyvkinDesign and layout: Atelier Bea Klenk, Klenk/RiedingerIllustrations: Wolfgang Peschke, Peschke Grafik-Design, OstfildernPhotos: ag visuell , p. 6, 7; Alterfalter, p. 6; Andres Rodriguez, p. 1 ml, 2; Artur Synenko, p. 8; Carol Hyman, U1; Eric Isselée, p. 2; GAP artwork, p. 24, 25; Gerda Bermes, U1; Gina Sanders, p. 8; Lasse Kristensen, p. 1 bm, 30, 31; Lucky Dragon , p. 1 bl, 9, 10, 11; Mat Hayward, p. 1 tr, 16 l; mik ivan , p. 8; Moreno Novello, p. 8 tm; Paul W. Brian, p. 4, 5; picsfive, p. 11 ff.; remar , p. 12; Robert Hoetink, p. 8; seasonal art, p. 10; Taras Kovalchuk, p. 12; tiero, p. 25 bl; Tjefferson, U1/U4; virtua73, p. 16 (all ©fotolia.com); Bundesarchiv, p. 27 mr; Cmglee, p. 27 m; Enin Arsenij, p. 26 tl; Jeff Dahl, p. 15 tr (all wikipedia, CC-BY-SA-3.0); Tony Hisgett, p. 26, 27 (wikipedia CC-BY-2.0); NN, p. 10 (wikipedia public domain); NASA, p. 1 tl, 13, 14, 15 bl, 26 ml, 26 bl, 28, 32 tr, 32 b, 32 b; Oliver Klasen, Stuttgart, U1; Michael Flaig, pro-studios, Stuttgart, U1, U2
Packaging design and layout: Atelier Bea Klenk, Klenk/RiedingerPackaging photos: Gerda Bermes, Carol Hyman, Tjefferson (all ©fotolia.com); Pikarl (wikipedia public domain); Oliver Klasen , Stutt-gart; Michael Flaig, pro-studios, Stuttgart and illustration by Oliver Marraffa, Atelier Bea Klenk, BerlinQuiz flap photos: humbak, Delphimages, Tino Hemmann, Li-Bro, picsfive (all ©fotolia.com); NASA and Cmglee (wikipedia CC-BY-SA-3.0)
The publisher has made every effort to identify the owners of the rights to all photos used. If there is any instance in which the owners of the rights to any pictures have not been acknowledged, they are asked to inform the publisher about their copyright ownership so that they may receive the customary image fee.
1st English Edition © 2012 Thames & Kosmos, LLC, Providence, RI, U.S.A.® Thames & Kosmos is a registered trademark of Thames & Kosmos, LLC.Text and Concept: Ted McGuire; Additional Graphics and Layout: Dan FreitasDistributed in North America by Thames & Kosmos, LLC. Providence, RI 02903Phone: 800-587-2872; Email: [email protected]
Printed in Germany / Imprimé en Allemagne