dpc user manual - duplicate photo cleaner · 1 about duplicate photo cleaner duplicate photo...
TRANSCRIPT
Table of Contents About Duplicate Photo Cleaner..............................................................................................................1
Installing Duplicate Photo Cleaner.........................................................................................................2
Activate Duplicate Photo Cleaner License............................................................................................4
Scanning for Duplicate Images...............................................................................................................7
Managing Duplicate Images..................................................................................................................10
Duplicate Photo Cleaner Scan Modes.................................................................................................12
Configuring Duplicate Photo Cleaner Settings...................................................................................25
1
About Duplicate Photo Cleaner Duplicate Photo Cleaner is an advanced duplicate photo and image finder that can easily find and delete duplicate photos and graphics. It can also detect similar images and help you manage your photo library. With Duplicate Photo Cleaner you can:
• Find duplicate and similar images • Compare images by content • Compare images using three different scan modes • Preview scan results • Find duplicate JPG, PNG, JPEG, BMP, TIF, GIF, TIFF, ICO, PSD and
RAW files • Move or delete duplicates with ease • Manage duplicates in iPhoto and Photos (Mac only) • Manage duplicate and similar images in Adobe Lightroom v6 and
newer • Delete duplicates the safe way
Duplicate Photo Cleaner is a fast, responsive and easy to use application that will help both professional and amateur photographers organize their photo libraries.
2
Installing Duplicate Photo Cleaner Duplicate Photo Cleaner is easy to install on both Windows and Mac computers. Installing Duplicate Photo Cleaner on Windows To install Duplicate Photo Cleaner on Windows:
1. Download the installation file from http://www.duplicatephotocleaner.com/download
2. Locate the installation file on your computer and double-click on it to begin the installation process.
3. Depending on the operating system you use, you might get a UAC prompt asking you to allow or deny the action. Click Allow.
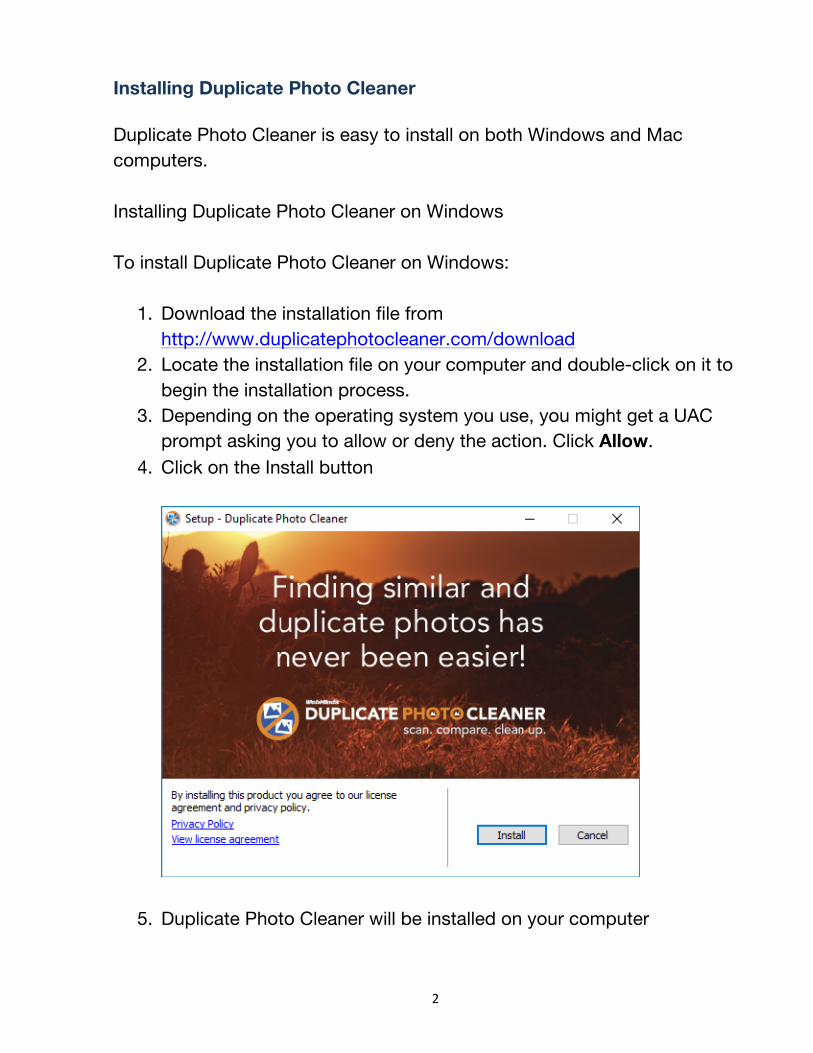
4. Click on the Install button
5. Duplicate Photo Cleaner will be installed on your computer
3
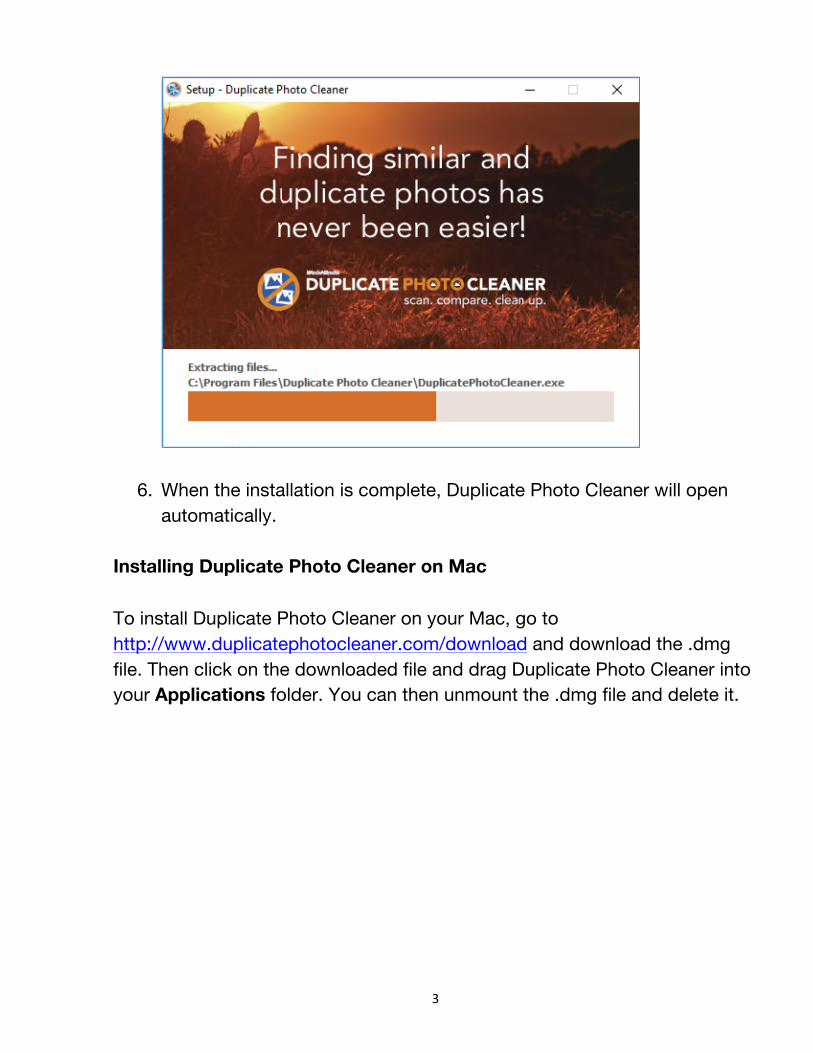
6. When the installation is complete, Duplicate Photo Cleaner will open automatically.
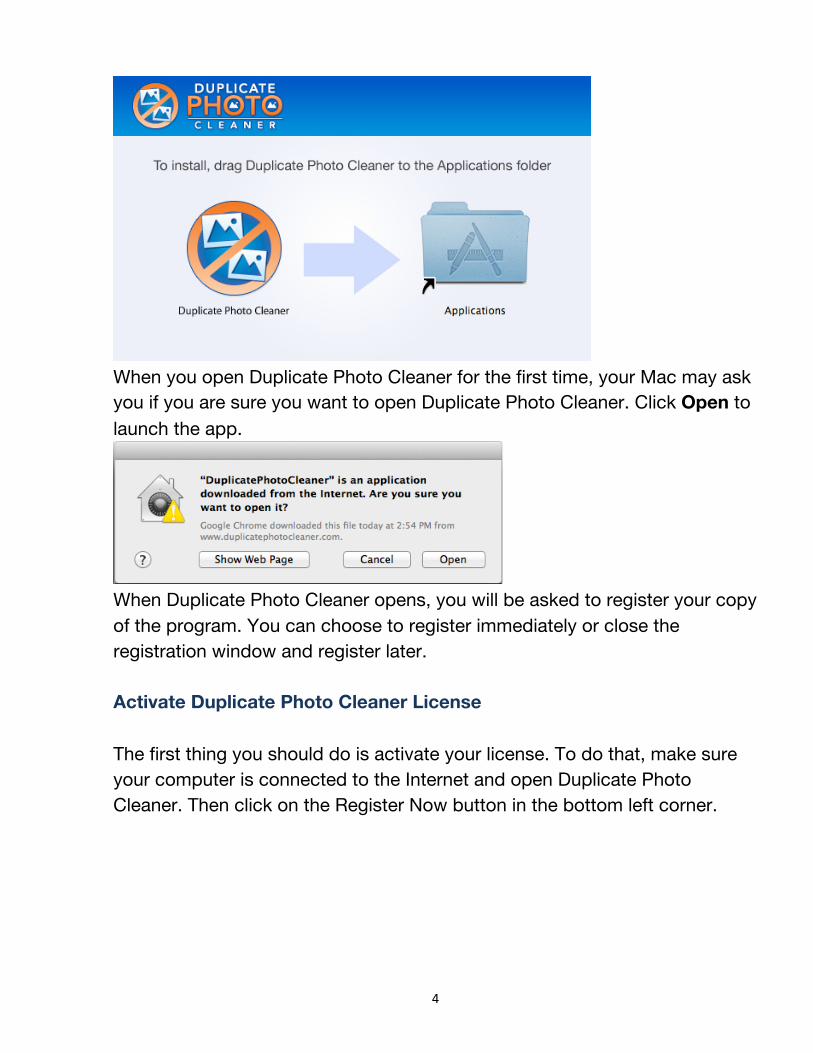
Installing Duplicate Photo Cleaner on Mac To install Duplicate Photo Cleaner on your Mac, go to http://www.duplicatephotocleaner.com/download and download the .dmg file. Then click on the downloaded file and drag Duplicate Photo Cleaner into your Applications folder. You can then unmount the .dmg file and delete it.
4
When you open Duplicate Photo Cleaner for the first time, your Mac may ask you if you are sure you want to open Duplicate Photo Cleaner. Click Open to launch the app.
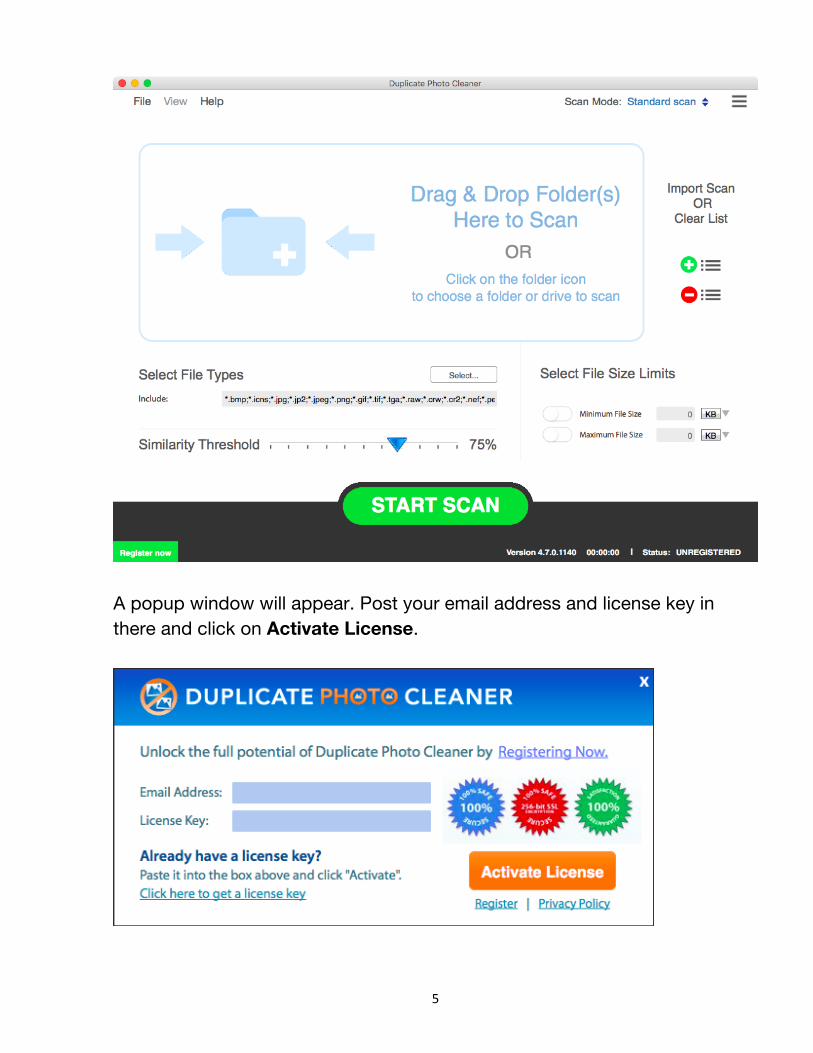
When Duplicate Photo Cleaner opens, you will be asked to register your copy of the program. You can choose to register immediately or close the registration window and register later. Activate Duplicate Photo Cleaner License The first thing you should do is activate your license. To do that, make sure your computer is connected to the Internet and open Duplicate Photo Cleaner. Then click on the Register Now button in the bottom left corner.
5
A popup window will appear. Post your email address and license key in there and click on Activate License.
6
Offline Activation If your computer is not connected to the Internet and there's no way for you to go online, follow these steps to activate your copy of Duplicate Photo Cleaner.
1. Purchase a license key and install Duplicate Photo Cleaner on your computer.
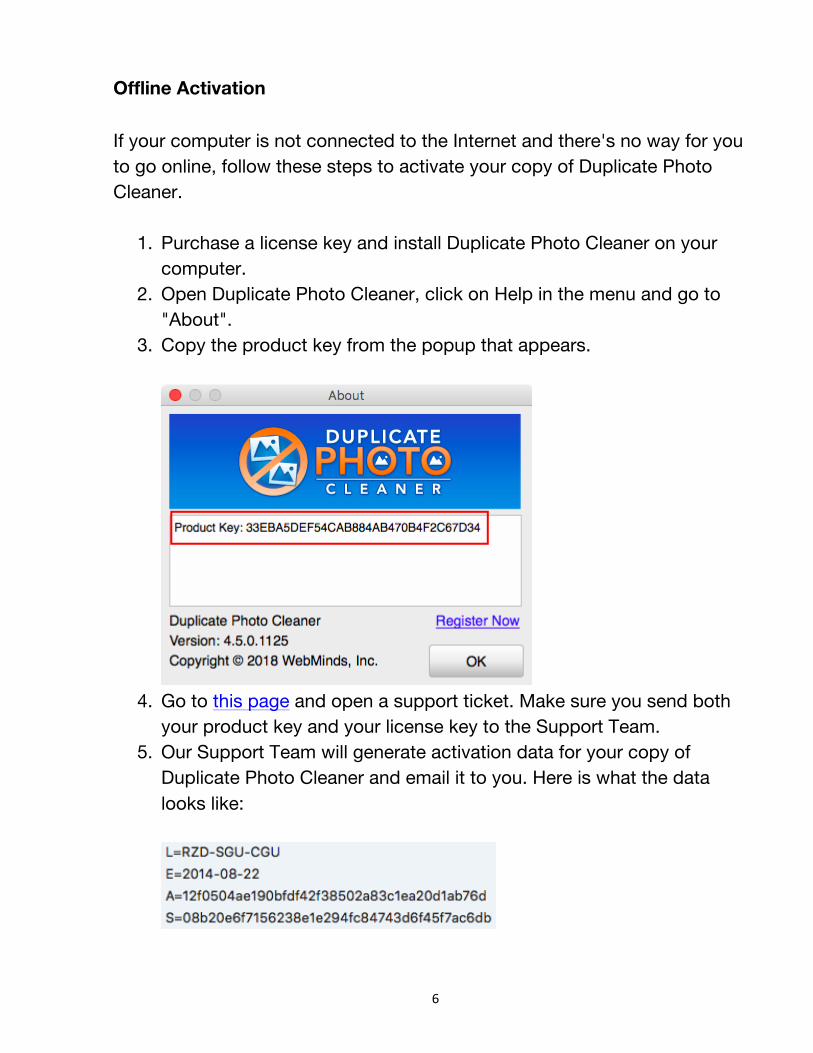
2. Open Duplicate Photo Cleaner, click on Help in the menu and go to "About".
3. Copy the product key from the popup that appears.
4. Go to this page and open a support ticket. Make sure you send both
your product key and your license key to the Support Team. 5. Our Support Team will generate activation data for your copy of
Duplicate Photo Cleaner and email it to you. Here is what the data looks like:
7
6. Copy the activation data from the email, save it as a text file and put the file on a flash drive.
7. Connect the flash drive to your offline computer, open the text file with the activation data, select all of it and copy it. Important: don't paste it anywhere at this point!
8. Open Duplicate Photo Cleaner. If you have valid activation data and if you've followed these steps correctly, your copy of Duplicate Photo Cleaner will become activated.
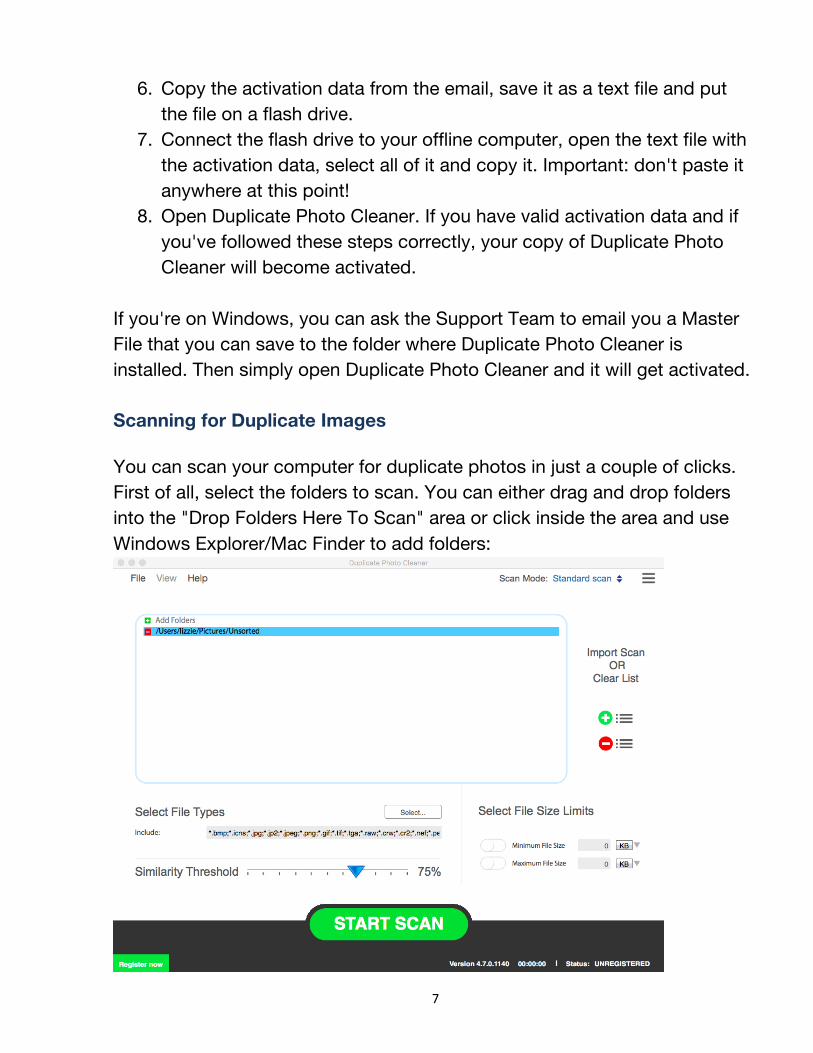
If you're on Windows, you can ask the Support Team to email you a Master File that you can save to the folder where Duplicate Photo Cleaner is installed. Then simply open Duplicate Photo Cleaner and it will get activated. Scanning for Duplicate Images You can scan your computer for duplicate photos in just a couple of clicks. First of all, select the folders to scan. You can either drag and drop folders into the "Drop Folders Here To Scan" area or click inside the area and use Windows Explorer/Mac Finder to add folders:

8
Then go to Settings and adjust the similarity threshold slider. If you want to scan for true duplicates, set it to 100%. And if you want to search for similar images, we recommend setting it to 70%.
Click OK to save the settings and go back to scanning. To start the scan, click on the Start Scan button to launch the scan:
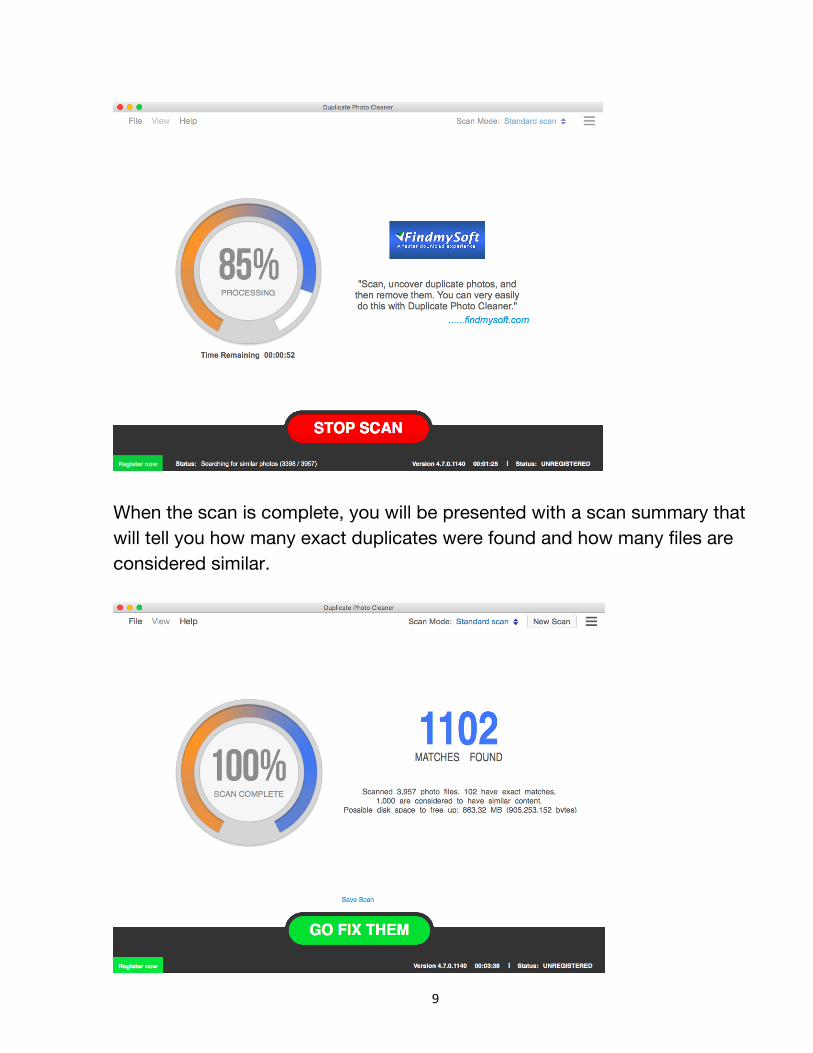
The scan time depends on several factors, such as the amount of images you're comparing, the scan mode you've selected, and the similarity threshold. The more images you scan in one go, the longer the scan will take.
9
When the scan is complete, you will be presented with a scan summary that will tell you how many exact duplicates were found and how many files are considered similar.
10
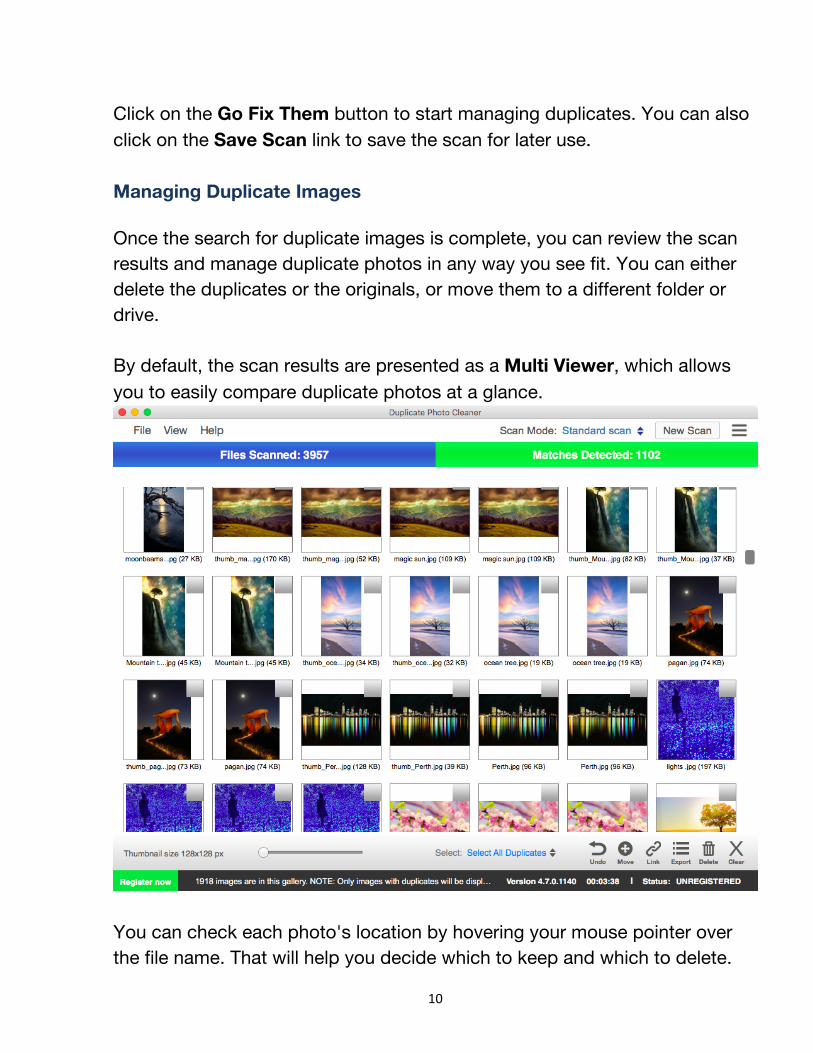
Click on the Go Fix Them button to start managing duplicates. You can also click on the Save Scan link to save the scan for later use. Managing Duplicate Images Once the search for duplicate images is complete, you can review the scan results and manage duplicate photos in any way you see fit. You can either delete the duplicates or the originals, or move them to a different folder or drive. By default, the scan results are presented as a Multi Viewer, which allows you to easily compare duplicate photos at a glance.
You can check each photo's location by hovering your mouse pointer over the file name. That will help you decide which to keep and which to delete.

11
To manage the duplicates, select the images and then select an action. You can manage duplicates one by one using the icons that appear on mouse hover (Move, View in Folder, and Delete), or select photos and manage them in bulk using the icons in the top right corner of the application window (Move, Delete, More). You can also export the scan results into a file for later use.
In addition to the Multi Viewer view mode, Duplicate Photo Cleaner can display images as a Table and as Tree. To switch between these view modes, click on the View Results menu item and select either Table or Tree.
12
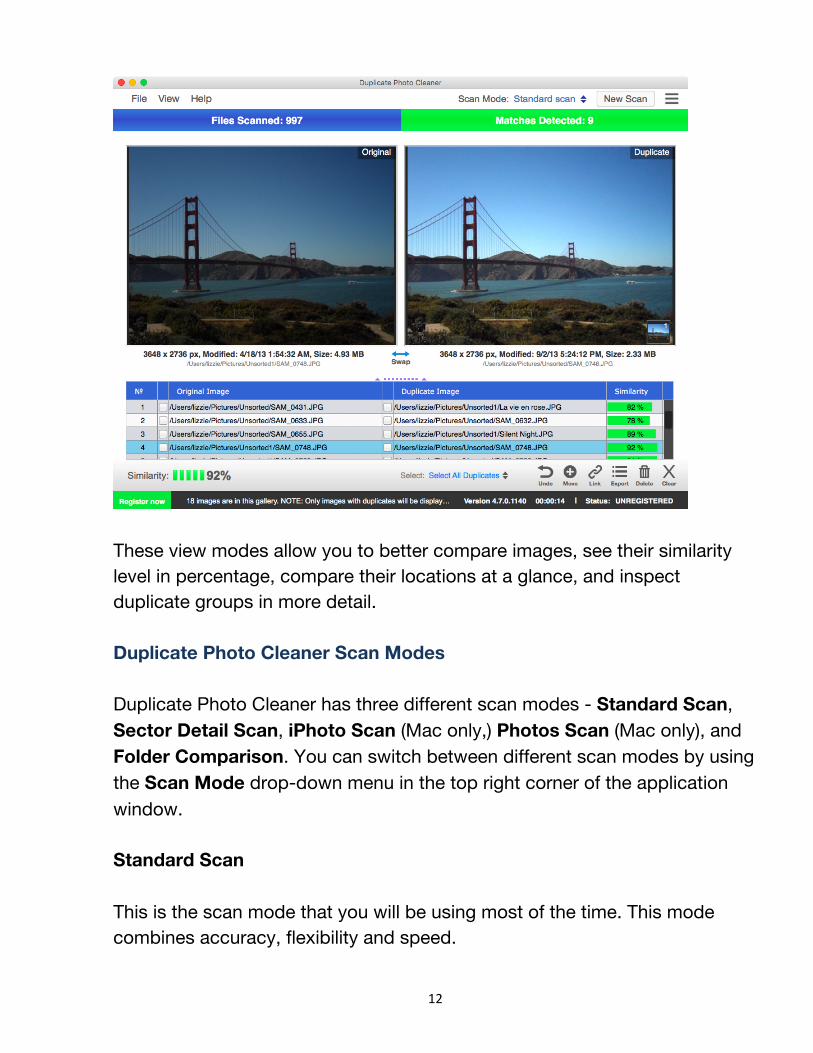
These view modes allow you to better compare images, see their similarity level in percentage, compare their locations at a glance, and inspect duplicate groups in more detail. Duplicate Photo Cleaner Scan Modes Duplicate Photo Cleaner has three different scan modes - Standard Scan, Sector Detail Scan, iPhoto Scan (Mac only,) Photos Scan (Mac only), and Folder Comparison. You can switch between different scan modes by using the Scan Mode drop-down menu in the top right corner of the application window. Standard Scan This is the scan mode that you will be using most of the time. This mode combines accuracy, flexibility and speed.
13
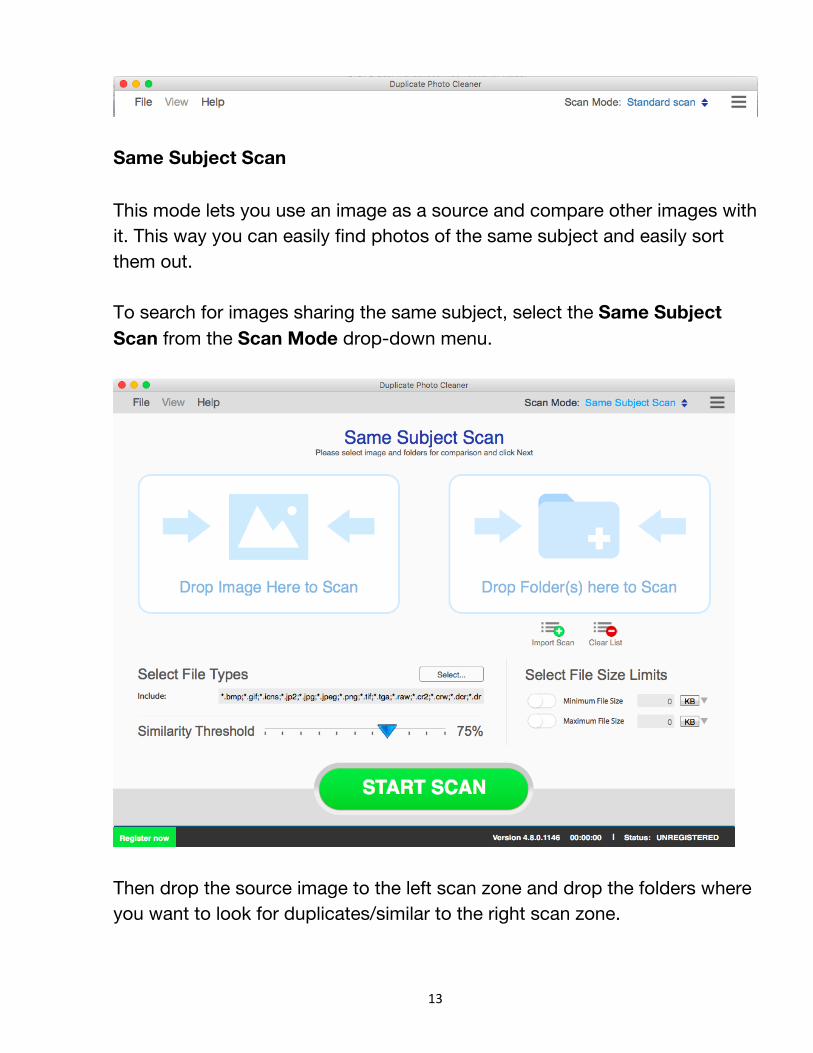
Same Subject Scan This mode lets you use an image as a source and compare other images with it. This way you can easily find photos of the same subject and easily sort them out. To search for images sharing the same subject, select the Same Subject Scan from the Scan Mode drop-down menu.
Then drop the source image to the left scan zone and drop the folders where you want to look for duplicates/similar to the right scan zone.
14
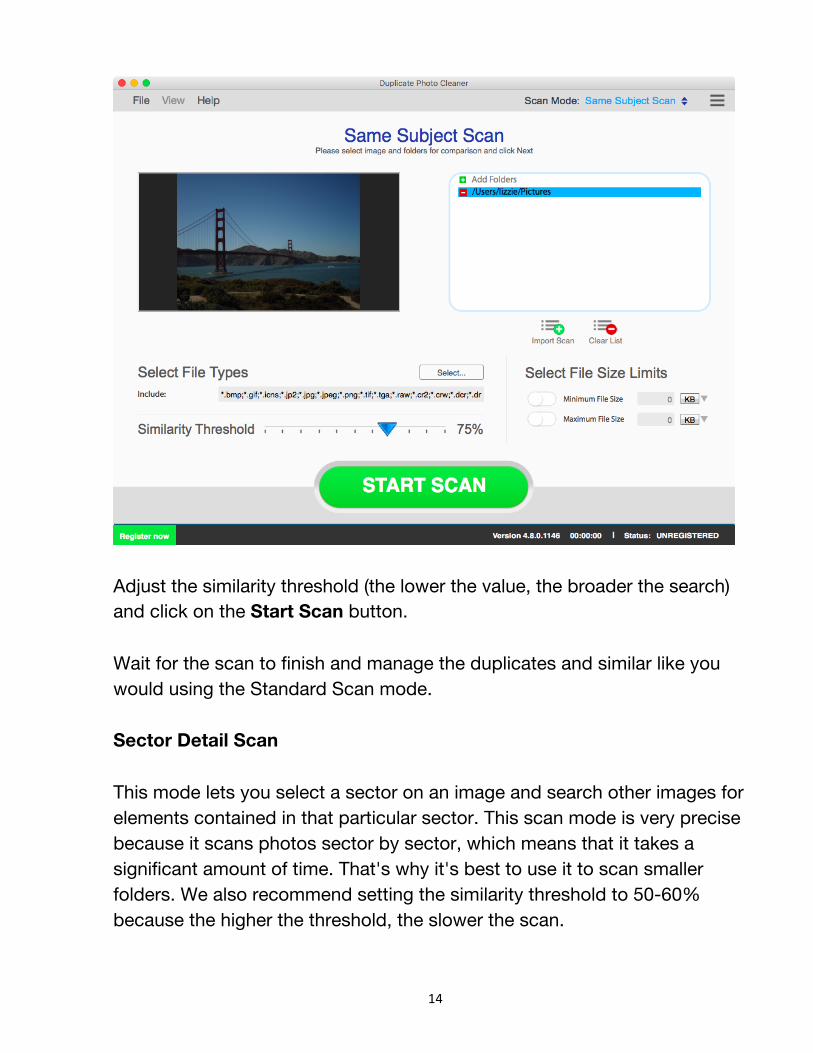
Adjust the similarity threshold (the lower the value, the broader the search) and click on the Start Scan button. Wait for the scan to finish and manage the duplicates and similar like you would using the Standard Scan mode. Sector Detail Scan This mode lets you select a sector on an image and search other images for elements contained in that particular sector. This scan mode is very precise because it scans photos sector by sector, which means that it takes a significant amount of time. That's why it's best to use it to scan smaller folders. We also recommend setting the similarity threshold to 50-60% because the higher the threshold, the slower the scan.
15
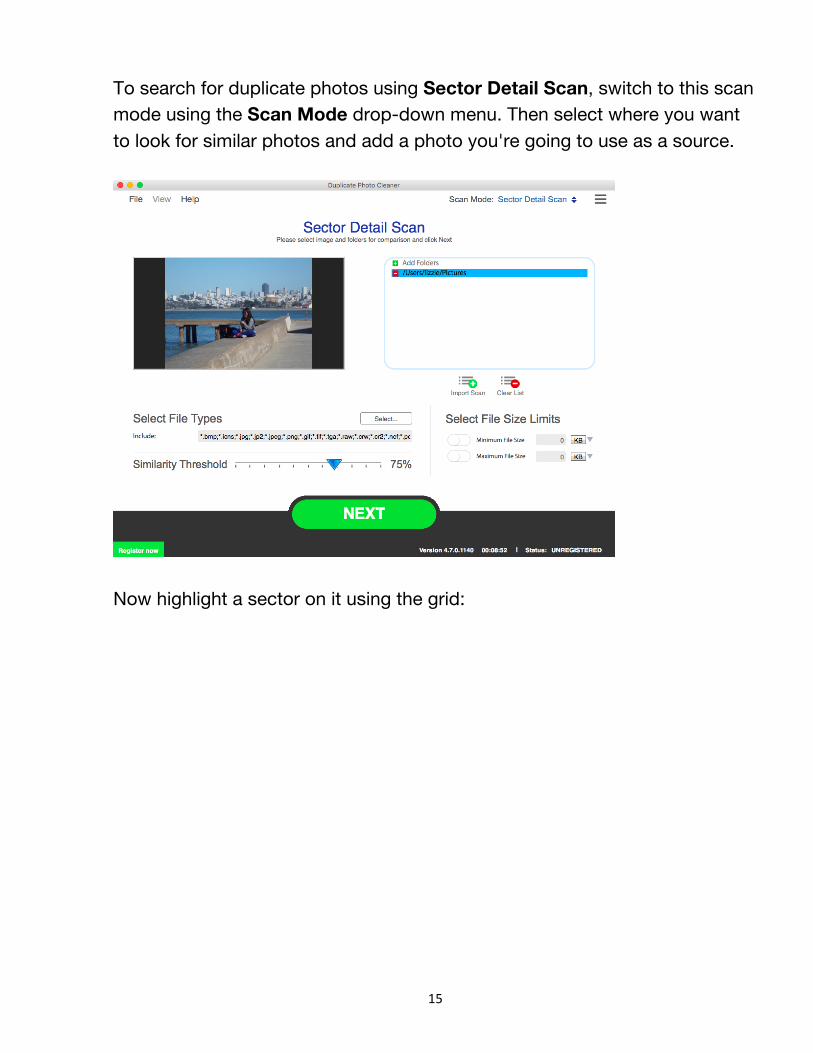
To search for duplicate photos using Sector Detail Scan, switch to this scan mode using the Scan Mode drop-down menu. Then select where you want to look for similar photos and add a photo you're going to use as a source.
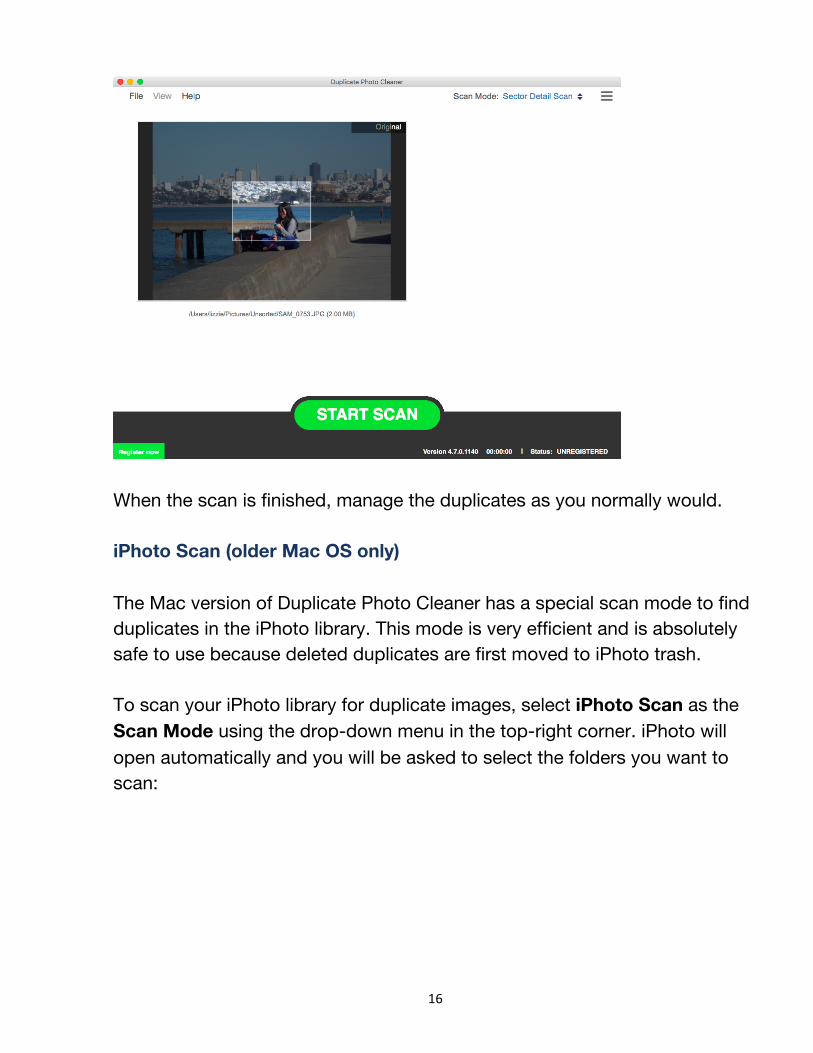
Now highlight a sector on it using the grid:
16
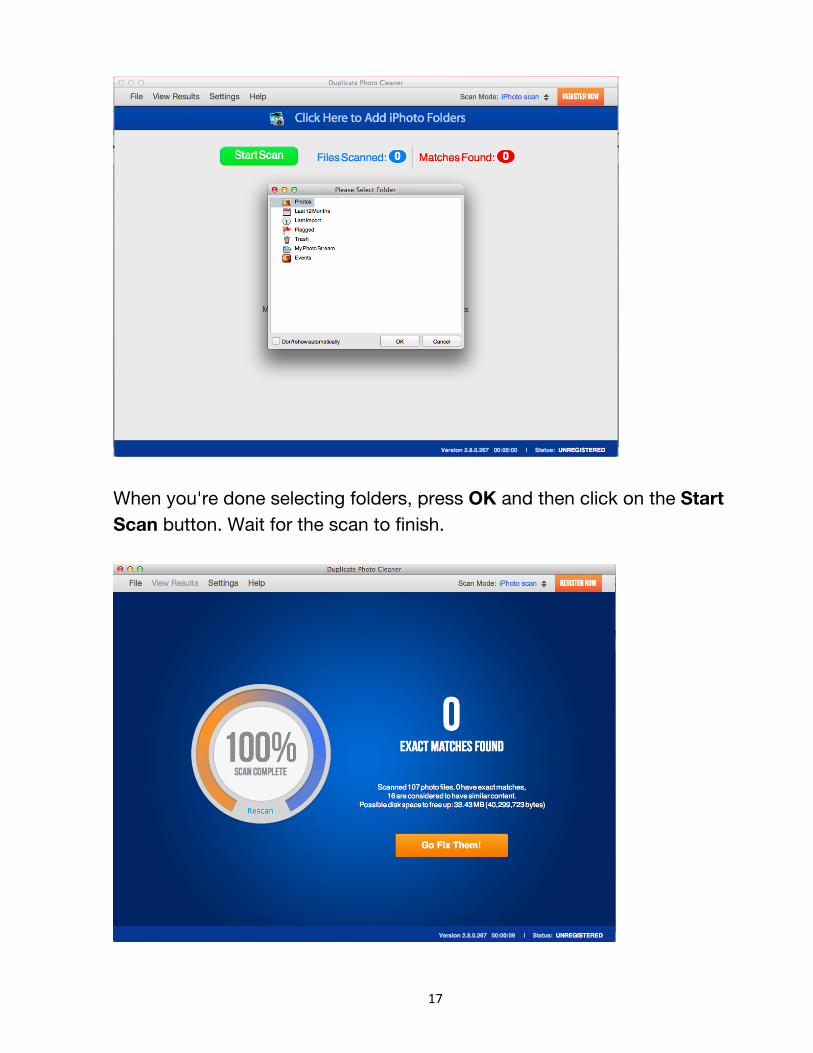
When the scan is finished, manage the duplicates as you normally would. iPhoto Scan (older Mac OS only) The Mac version of Duplicate Photo Cleaner has a special scan mode to find duplicates in the iPhoto library. This mode is very efficient and is absolutely safe to use because deleted duplicates are first moved to iPhoto trash. To scan your iPhoto library for duplicate images, select iPhoto Scan as the Scan Mode using the drop-down menu in the top-right corner. iPhoto will open automatically and you will be asked to select the folders you want to scan:
17
When you're done selecting folders, press OK and then click on the Start Scan button. Wait for the scan to finish.
18
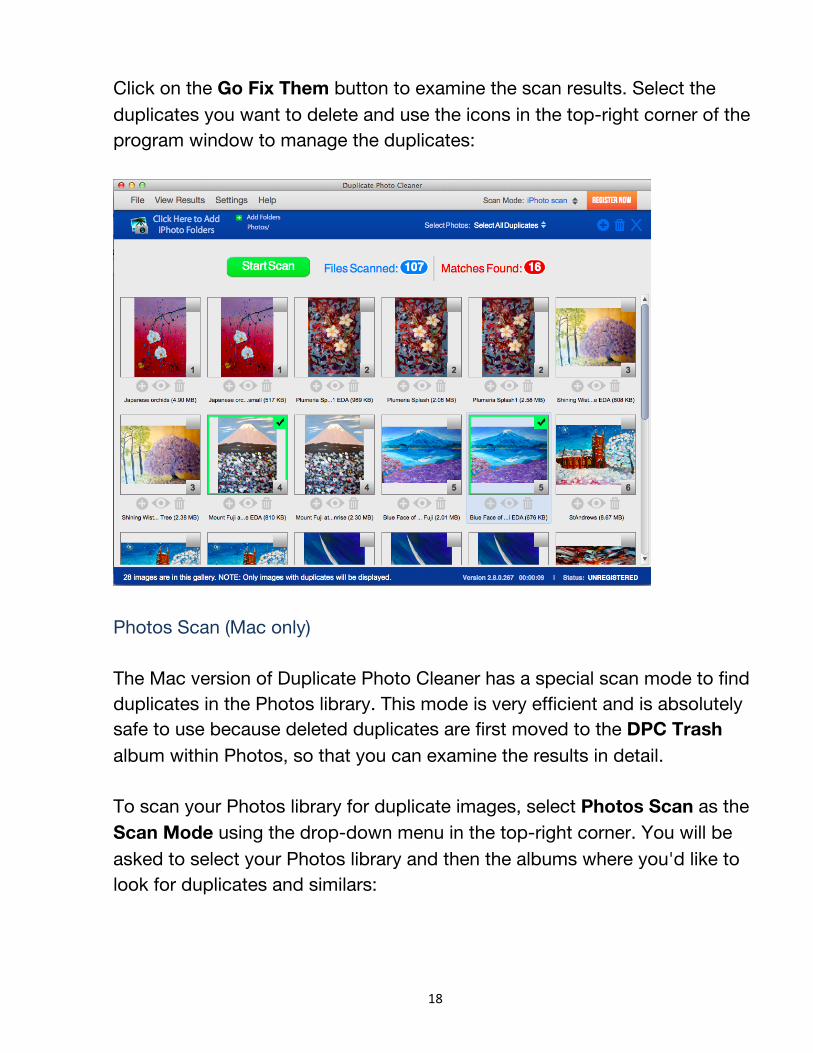
Click on the Go Fix Them button to examine the scan results. Select the duplicates you want to delete and use the icons in the top-right corner of the program window to manage the duplicates:
Photos Scan (Mac only) The Mac version of Duplicate Photo Cleaner has a special scan mode to find duplicates in the Photos library. This mode is very efficient and is absolutely safe to use because deleted duplicates are first moved to the DPC Trash album within Photos, so that you can examine the results in detail. To scan your Photos library for duplicate images, select Photos Scan as the Scan Mode using the drop-down menu in the top-right corner. You will be asked to select your Photos library and then the albums where you'd like to look for duplicates and similars:
19
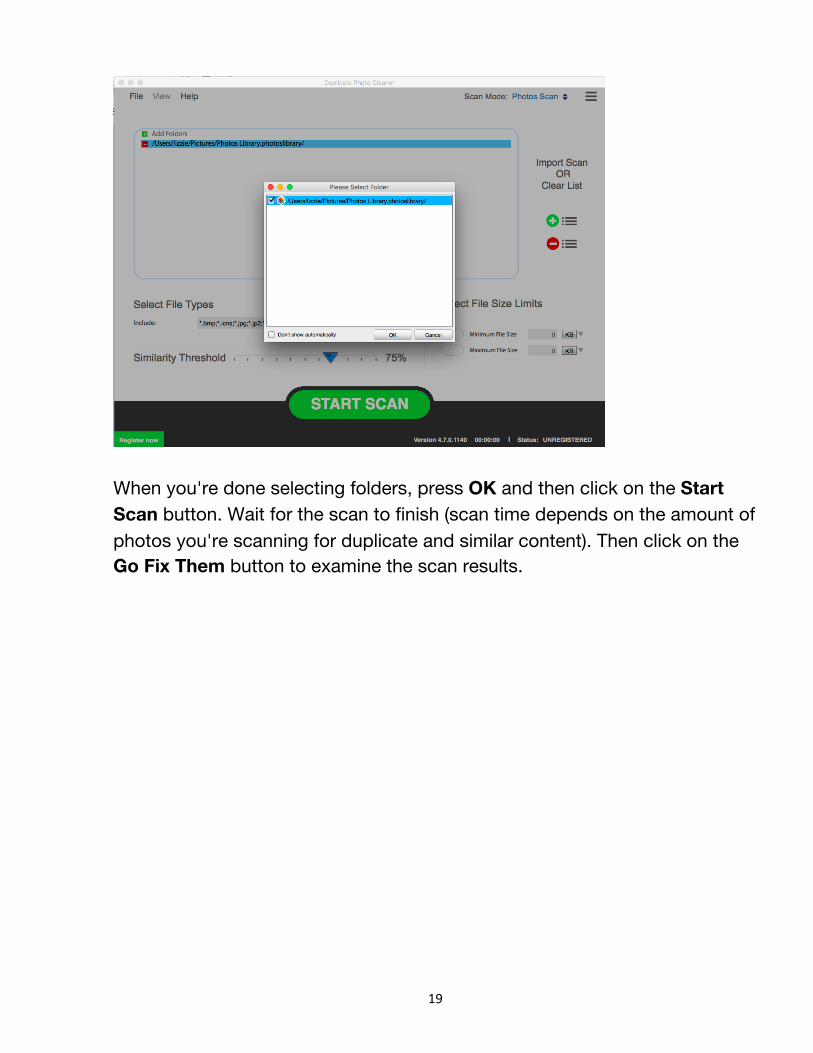
When you're done selecting folders, press OK and then click on the Start Scan button. Wait for the scan to finish (scan time depends on the amount of photos you're scanning for duplicate and similar content). Then click on the Go Fix Them button to examine the scan results.

20
Select the duplicates you want to delete and use the icons in the top-right corner of the program window to manage the duplicates:
21
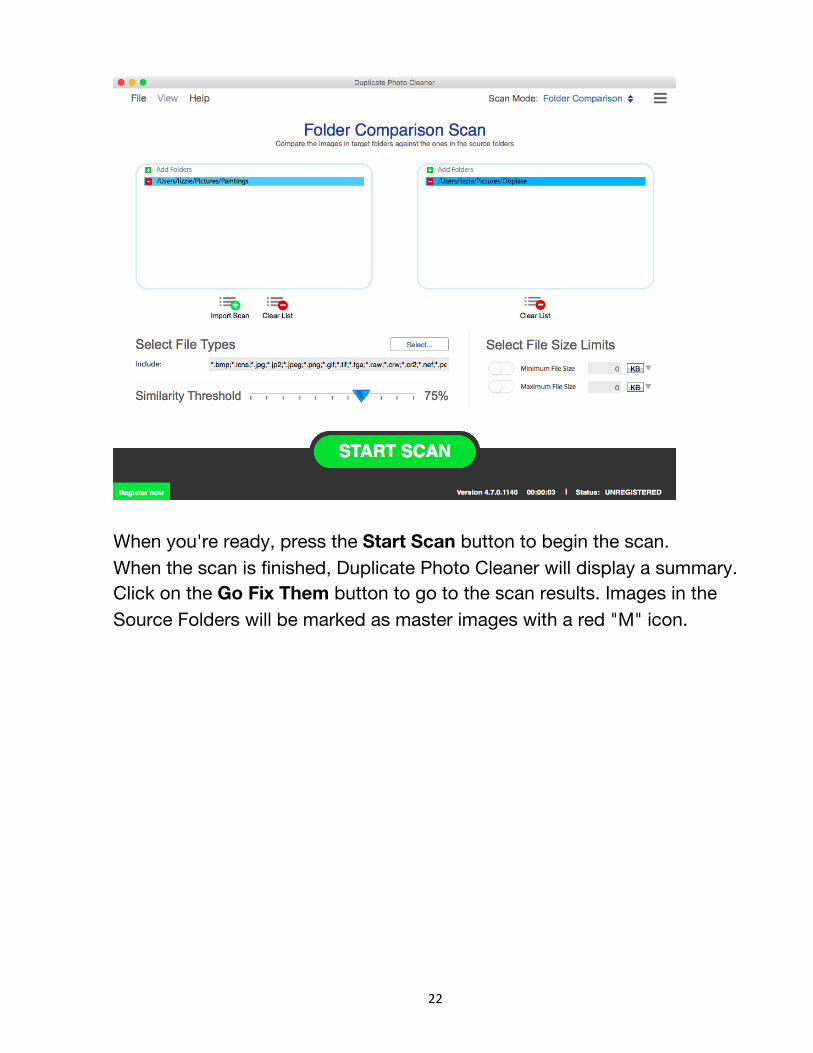
The duplicates will be placed in the DPC Trash album in Photos. Now open Photos and open the DPC Trash album. Select all the images you want to delete permanently, press Command + Delete and the duplicates will be gone. Folder Comparison This scan mode lets you compare folders against each other and is particularly useful when you need to compare images on a backup drive with the ones on your computer or merge two different folders. The Folder Comparison mode allows you to select source folders, images in which will be considered originals, and target folders, images in which will be considered copies if any duplicates are found. To scan your image folders using this mode, select Folder Comparison from the Scan Mode drop-down menu. Then add some source folders to the area on the left and some target folders to the area on the right.
22
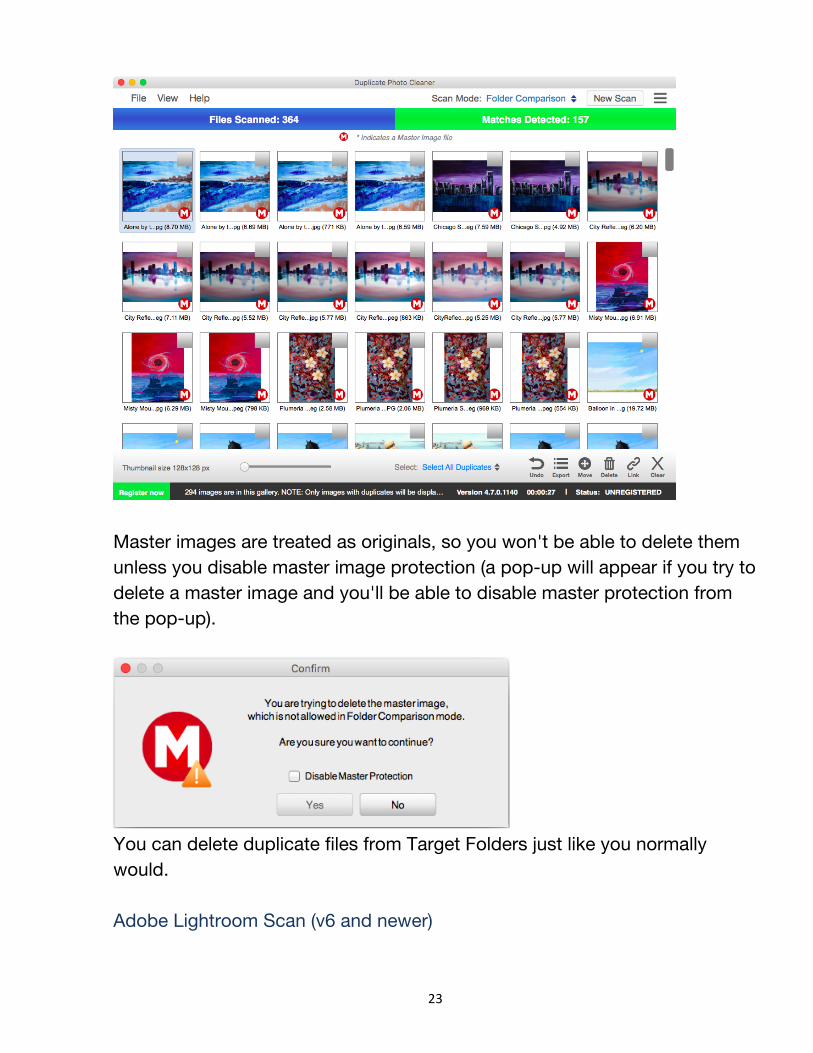
When you're ready, press the Start Scan button to begin the scan. When the scan is finished, Duplicate Photo Cleaner will display a summary. Click on the Go Fix Them button to go to the scan results. Images in the Source Folders will be marked as master images with a red "M" icon.
23
Master images are treated as originals, so you won't be able to delete them unless you disable master image protection (a pop-up will appear if you try to delete a master image and you'll be able to disable master protection from the pop-up).
You can delete duplicate files from Target Folders just like you normally would. Adobe Lightroom Scan (v6 and newer)
24
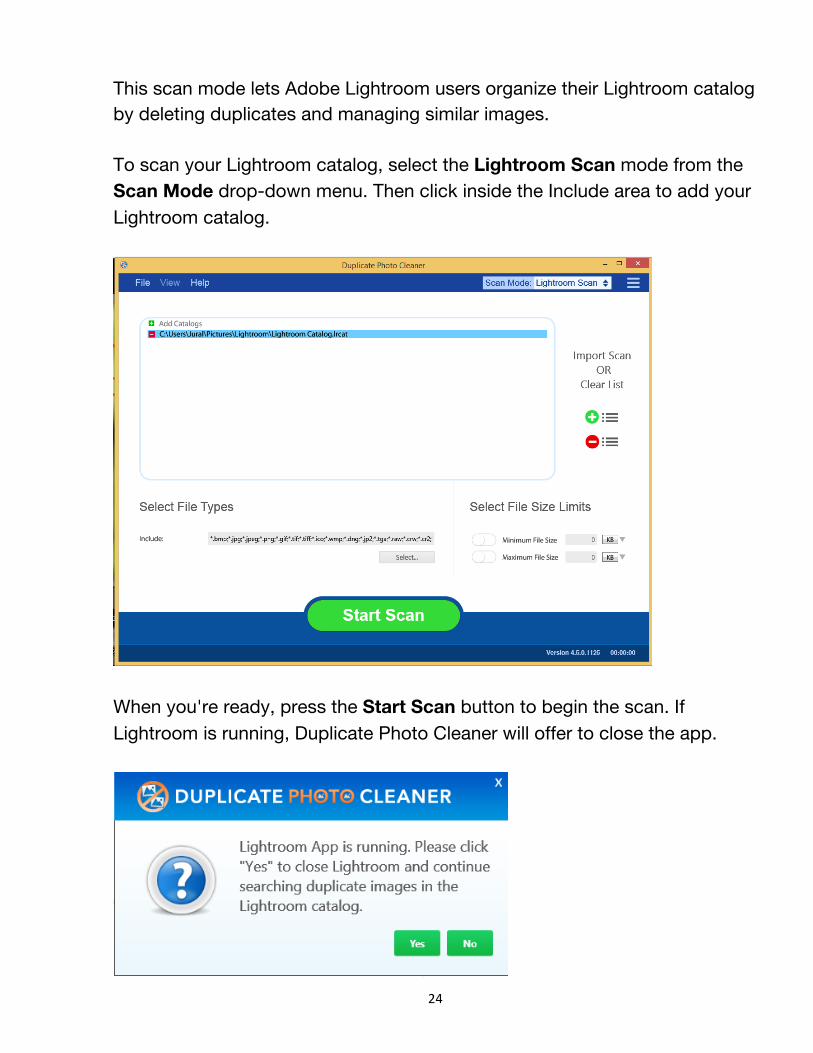
This scan mode lets Adobe Lightroom users organize their Lightroom catalog by deleting duplicates and managing similar images. To scan your Lightroom catalog, select the Lightroom Scan mode from the Scan Mode drop-down menu. Then click inside the Include area to add your Lightroom catalog.
When you're ready, press the Start Scan button to begin the scan. If Lightroom is running, Duplicate Photo Cleaner will offer to close the app.
25
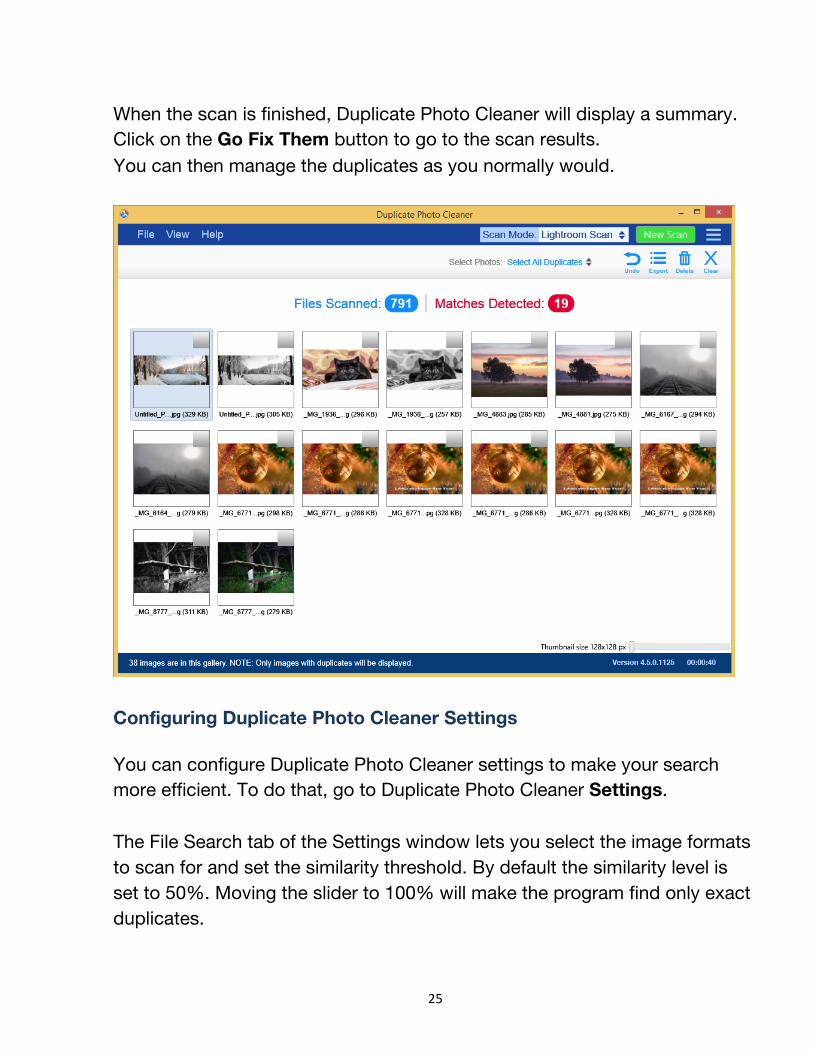
When the scan is finished, Duplicate Photo Cleaner will display a summary. Click on the Go Fix Them button to go to the scan results. You can then manage the duplicates as you normally would.
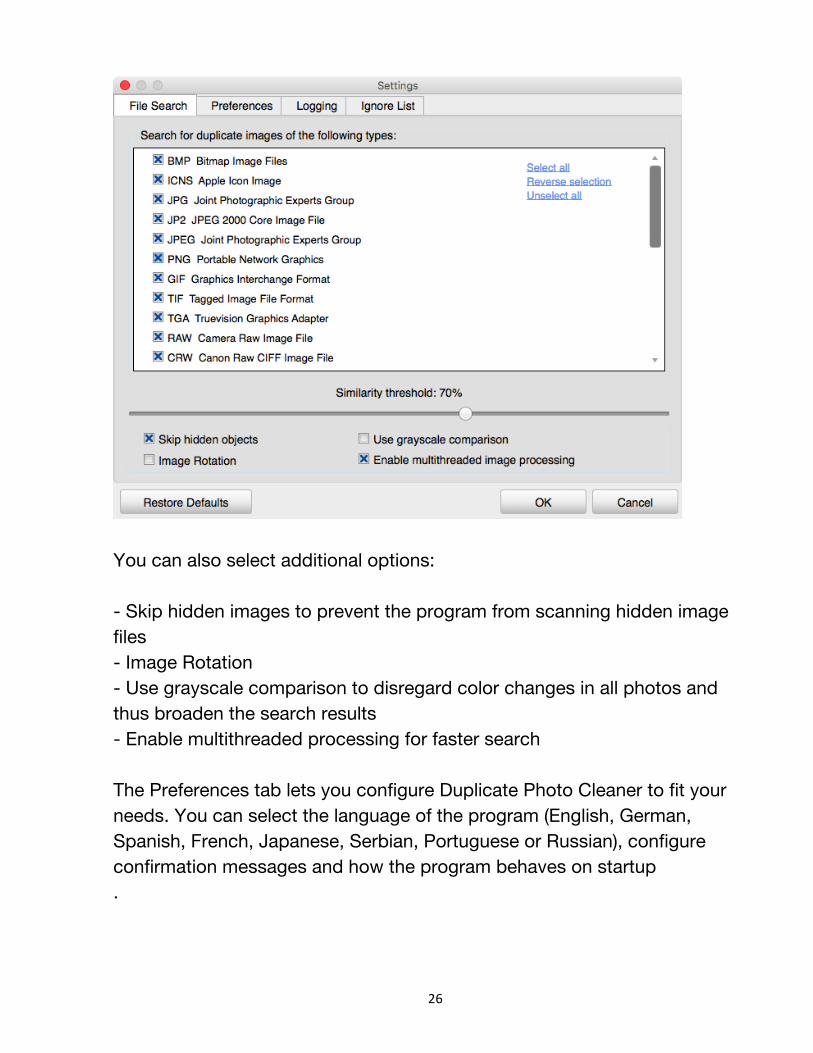
Configuring Duplicate Photo Cleaner Settings You can configure Duplicate Photo Cleaner settings to make your search more efficient. To do that, go to Duplicate Photo Cleaner Settings. The File Search tab of the Settings window lets you select the image formats to scan for and set the similarity threshold. By default the similarity level is set to 50%. Moving the slider to 100% will make the program find only exact duplicates.
26
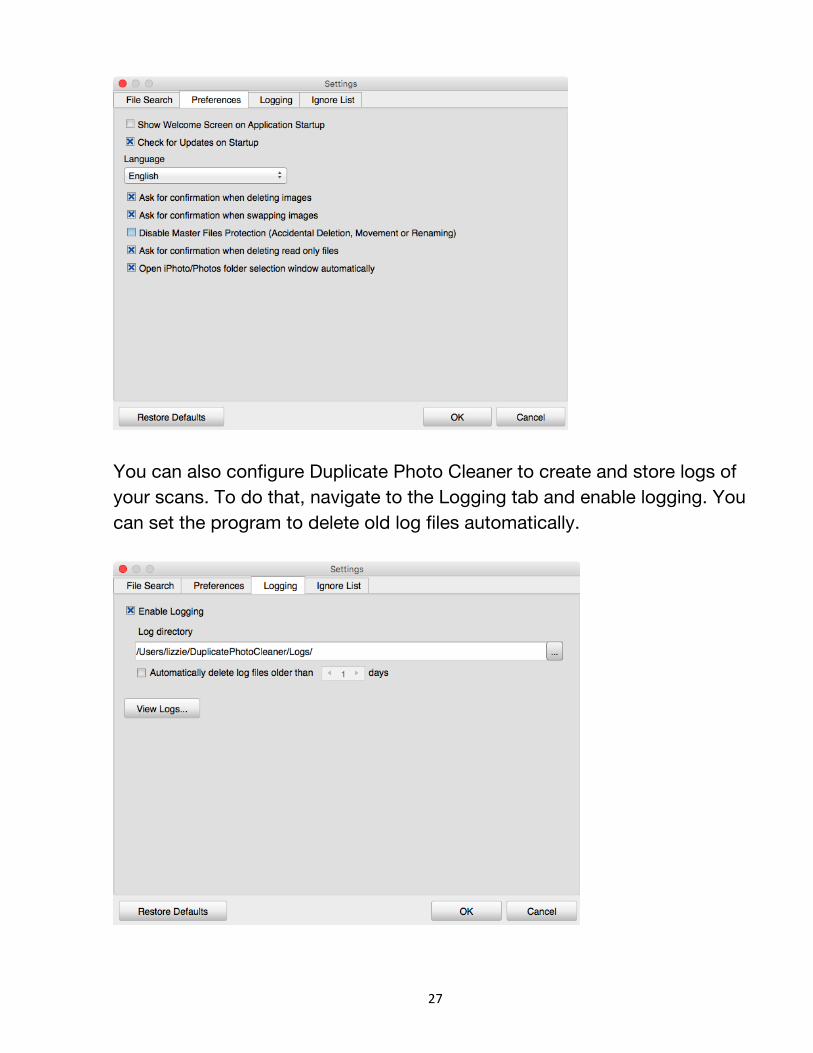
You can also select additional options: - Skip hidden images to prevent the program from scanning hidden image files - Image Rotation - Use grayscale comparison to disregard color changes in all photos and thus broaden the search results - Enable multithreaded processing for faster search The Preferences tab lets you configure Duplicate Photo Cleaner to fit your needs. You can select the language of the program (English, German, Spanish, French, Japanese, Serbian, Portuguese or Russian), configure confirmation messages and how the program behaves on startup .
27
You can also configure Duplicate Photo Cleaner to create and store logs of your scans. To do that, navigate to the Logging tab and enable logging. You can set the program to delete old log files automatically.
28
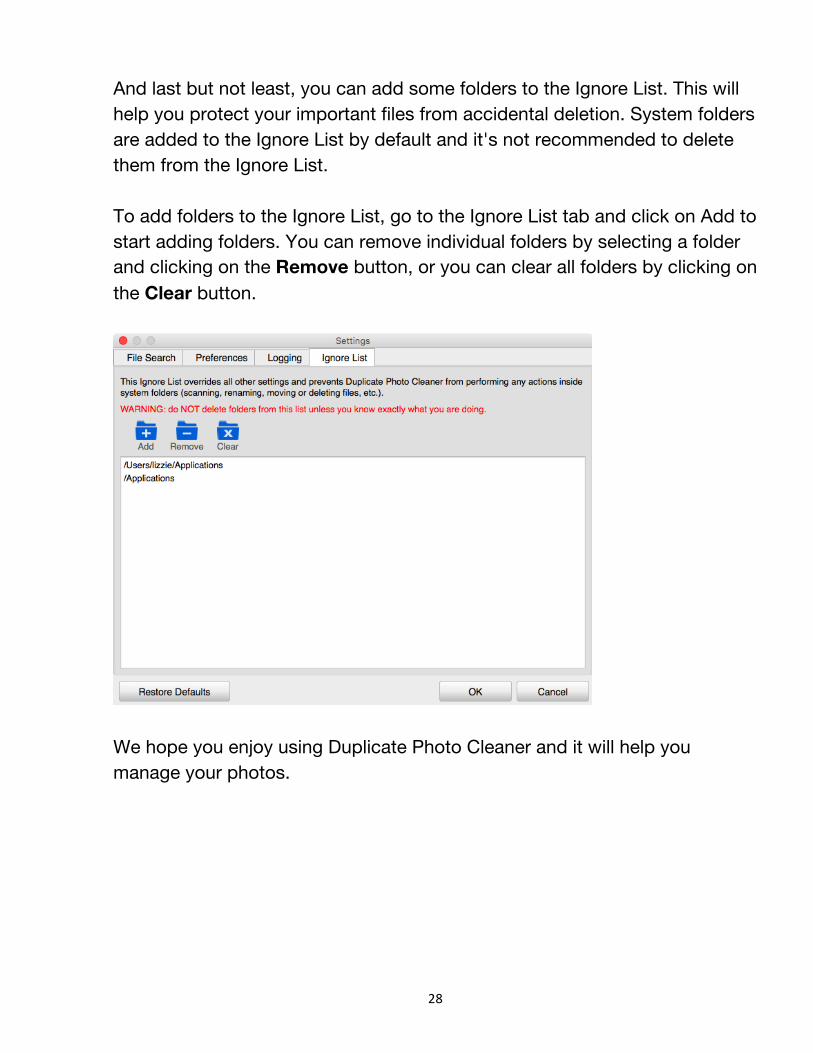
And last but not least, you can add some folders to the Ignore List. This will help you protect your important files from accidental deletion. System folders are added to the Ignore List by default and it's not recommended to delete them from the Ignore List. To add folders to the Ignore List, go to the Ignore List tab and click on Add to start adding folders. You can remove individual folders by selecting a folder and clicking on the Remove button, or you can clear all folders by clicking on the Clear button.
We hope you enjoy using Duplicate Photo Cleaner and it will help you manage your photos.