durabilt industries, llc pocahontas, ar 72455 phone: 870-892-4501 1
TRANSCRIPT

1
OPERATORS MANUAL
HCI2 SERIESHIGH CLEARANCE
RAKEDURABILT INDUSTRIES, LLC
Pocahontas, AR 72455 Phone: 870-892-4501 www.durabiltindustries.com

2
!
To the Owner/Operator/DealerAll implements with moving parts are potentially hazardous. There is no
substitute for a cautious, safe-minded operator who recognizes the potential hazards and follows reasonable safety practices. The manufacturer has
designed this implement to be used with all its safety equipment properly attached to minimize the chance of accidents.
BEFORE YOU START!!Read the safety messages on the implement as shown in your manual.
Observe the rules of safety and common sense!
IMPORTANT SAFETY INFORMATION!
Working with unfamiliar equipment can lead to careless injuries. Read this manual, and the manual for your tractor, before assembly or operating, to acquaint yourself with the machines. It is the rake owner’s responsibility, if this machine is used by any person other than yourself, is loaned or rented, to make certain that the operator, prior to operating:
1. Reads and understands the operator’s manuals. 2. Is instructed in safe and proper use.
The use of this equipment is subject to certain hazards which cannot be protected against by mechanical means or product design. All operators of this equipment must read and understand this entire manual, paying particular attention to safety and operating instructions, prior to using. If there is something in this manual youdo not understand, ask your supervisor, or your dealer, to explain it to you.Most accidents occur because of neglect or carelessness. Keep all helpers and bystanders twenty-five feet (25’) from an operating rake. Only properly trained people should operate this machine. It is recommended the tractor be equipped with a Rollover Protection System (ROPS) and a seat belt that is used. Always engageparking or place transmission in “Park” before dismounting tractor. Never leave equipment unattended with the tractor running.
THIS SYMBOL MEANS– ATTENTION!– BECOME ALERT!– YOUR SAFETY IS INVOLVED!
THIS SAFETY ALERT SYMBOL IDENTIFIES IMPORTANT SAFETYWARNING MESSAGES. CAREFULLY READ EACH WARNING MESSAGE THAT FOLLOWS. FAILURE TO UNDERSTAND AND OBEY A SAFETY WARNING, OR RECOGNIZE A SAFETY HAZARD, COULD RESULT IN AN INJURY OR DEATH TO YOU OR OTHERS AROUND YOU. THE OPERATOR IS ULTIMATELY RESPONSIBLE FOR THE SAFETY OF HIMSELF, AS WELL AS OTHERS, IN THE OPERATING AREA OF THE TRACTOR AND ATTACHED EQUIPMENT.
!

3
EQUIPMENT SAFETY GUIDELINES
Safety of the operator is one of the main concerns in designing and developing a new piece of equipment. Designers and manufacturers build in as many safety features as possible. However, every year many accidents occur which could have been avoided by a few seconds of thought and a more careful approach to handling equipment. You, the operator, can avoid many accidents by observing the following precautions in this section. To avoid personal injury, study the following precautions and insist those working with you, or for you, follow them. The term implement refers to the particular implement this operators manual is written for.
In order to provide a better view, certain photographs or illustrations in this manual may show an assembly with a safety shield removed. However, equipment should never be operated in this condition.
Keep all shields in place. If shield removal becomes necessary for repairs, replace the shield prior to use.
To prevent injury or death, use a tractor equipped with a Roll-Over Protective System (ROPS). Do not paint over, remove or deface any safety signs or warning signs on your equipment. Observe all safety signs and practice the instruction on them.
Never exceed the limits of a piece of machinery. If its ability to do a job, or to do so safely, is in question - DON’T TRY IT.
Do not modify the equipment in any way. Unauthorized modification may impair the function and/or safety and could affect the life of the equipment.
In addition to the design and configuration of this implement, including Safety Signs and Safety Equipment, hazard control and accident prevention are dependent upon the awareness, concern, prudence, and proper training of personnel involved in the operation, transport, maintenance, and storage of the machine. Refer also to Safety Messages and Operation instruction in each of the appropriate sections of the Tractor and Implement Manuals.
Pay close attention to the Safety Signs affixed to the Tractor and the Implement.Replace any CAUTION, WARNING, DANGER or instruction safety sign that is not readable or is missing. Location of such safety signs is indicated in this booklet.
Never use alcoholic beverages or drugs which can hinder alertness or coordination while operating thisequipment. Consult your doctor about operating this machine while taking prescription medications.
Review the safety instructions with all users annually.
This equipment is dangerous to children and persons unfamiliar with its operation. The operator should be a responsible adult familiar with farm machinery and trained in this equipment’s operations.
Do not allow persons to operate, assemble or service this implement until they have read this manual and have developed a thorough understanding of how to operate, assemble and service this implement.
!
4
Keep safety signs clean and legible at all times.
Replace safety signs that are missing or have become illegible.
Replaced parts that displayed a safety sign should also display the current sign.
Safety signs are available from your Distributor or Dealer Parts Department or the factory.
SAFETY SIGNS
Personal protection equipment including hard hat, safety glasses, safety shoes, and gloves are recommended during assembly, installation, operation, adjustment, maintaining, repairing, removal, or moving the implement. Do not allow long hair, loose fitting clothing or jewelry to be around moving parts.
PERSONAL PROTECTION
PROLONGED EXPOSURE TO LOUD NOISE MAY CAUSE PERMANENT HEARING LOSS! Tractors with or without attachments can often be noisy enough to cause permanent, partial hearing loss. We recommend that you wear hearing protection on a full-time basis if the noise in the Operator’s position exceeds 80db. Noise over 85db on a long-term basis can cause severe hearing loss. Noise over 90db adjacent to the Operator over a long-term basis may cause permanent, total hearing loss. NOTE: Hearing loss from loud noise (from tractors, chain saws, radios, and other such sources close to the ear) is cumulative over a lifetime without hope of natural recovery.Ensure implement is properly mounted, adjusted and in good operating condition.Please remember it is important that you read and heed the safety signs on the rake, and the safety rules set forth. Clean or replace all safety signs if they cannot be clearly read and understood. They are there for your safety as well as the safety of others. The safe use of this machine is strictly up to you, the operator.
All things with moving parts are potentially hazardous. There is no substitute for a cautious, safe-minded operator who recognizes potential hazards and follows reasonable safety practices. The manufacturer has designed this rake to be used with all of its safety equipment properly attached, to minimize the chance of accidents. Study this manual to make sure you have all safety equipment attached.
!
!
!
5
Hydraulic oil under high pressure can penetrate the skin. Make sure that all operating and service personnel know that in the event hydraulic fluid penetrates the skin, it must be surgically removed within a few hours by a doctor familiar with this form of injury, or gangrene may result.
If a safety shield or guard is removed for any reason, it must be replaced before the machine is again operated.
Before servicing the machine, engage the parking brake or place the transmission in “Park”, shut off the tractor and remove the key. Relieve all hydraulic pressure in lines.When the use of hand tools is required to perform any part of assembly, installation, adjustment, maintaining, repairing, removal, or moving the implement, be sure the tools used are designed and recommended by the toolmanufacturer for that specific task.
Personal protection equipment including hard hat, safety glasses, safety shoes, and gloves are recommended during assembly, installation, operation, adjustment, maintaining, repairing, removal, or moving the rake. Donot allow long hair, loose fitting clothing or jewelry to be around moving parts.
Always use two people or a mechanical lift device to handle heavy, unwieldy components during assembly, installation, removal, or moving the rake or components.
Never place any part of your body where it would be in danger if movement should occur during assembly, installation, operation, maintaining, repairing, removal, or moving the rake.
Never place yourself between the tractor and rake while implement is in operation.
Do not walk or work under a raised wings unless it is securely blocked or held in position. Do not depend on the tractor hydraulic system to hold the wing in place.
Never leave rake wings in the partially raised position. Always lower wings to the ground or to the transport position when storing.
Always install the transport lock pins before transporting or storing rake in the transport position.
A heavy load can cause instability of the tractor. Use extreme care during travel. Slow down on turns and watch out for bumps.
Safety Instructions
!

6
Be especially cautious on hill sides. Always operate tractor at a safe speed for the conditions experienced.
Do not allow riders on the rake or tractor at any time. There is no safe place for any riders.
Before you operate the implement, check over all pins, bolts and connections to be sure all are securely in place.
Replace any damaged or worn parts immediately.
Do not allow anyone who is not familiar with the safety rules and operation instructions to use this rake.
Never allow children to operate or be around this implement.
Use safety chain when towing implement.
Do not operate implement on steep hillsides.
Watch out for low overhead electrical wires and limbs when operating or transporting the implement. Check clearance of doorways when entering a building.
Always close ball valves on each hydraulic cylinder before transporting or storing the rake.
WARNING! NEVER INSERT FINGER IN A HOLE TO CHECK ALIGNMENT.
Always use care when operating rake.
ALWAYS OBEY SAFETY WARNINGS!
!
!
7
Comply with state and local laws governing highway safety and movement of farm machinery on public roads.
The use of flashing amber lights is acceptable in most localities. However, some localities prohibit their use. Local laws should be checked for all highway lighting and marking requirements.
When driving the tractor and equipment on the road or highway under 20 mph (32 kph) at night or during the day, use flashing amber warning lights and a slow moving vehicle (SMV) identification emblem. Except when prohibited by law.
Watch out for low overhead electrical wires and limbs when operating or transporting the implement. Check clearance of doorways when entering a building.
Always be sure the implement is in the proper raised position for transport.
Reduce speed when transporting mounted implements to avoid bouncing and momentary loss of steering control.
Plan your route to avoid heavy traffic.
Always shut off hydraulic transport lock valves before transporting.
Do not drink and drive!
Watch for traffic when operating near or crossing roadways.
Turn curves or go up or down hills only at a low speed and at a gradual steering angle. Make certain that at least 20% of the tractor’s weight is on the front wheels to maintain safe steerage. Slow down on rough or uneven surfaces, and loose gravel.
Use extreme care and maintain minimum ground speed when transporting on hillside, over rough ground and when operating close to ditches or fences. Be careful when turning sharp corners.
Never allow riders on either tractor or implement. Falling off can kill.Be a safe and courteous driver. Always yield to oncoming traffic in all situations, including narrow bridges, intersections, etc.
Do not exceed 20 mph (32 kph). Reduce speed on rough roads and surfaces.
TRANSPORT SAFETY!
8
Following operation, or when unhooking, stop the tractor, set the tractor brakes, lower wings all the way to the ground and release hydraulic pressure, disengage the PTO, shut off the engine and remove the ignition keys.
Store the unit in an area away from human activity.
Do not permit children to play on or around the stored unit.
Make sure all parked machines are on a hard, level surface and engage all safety devices.
If blocking is used, make sure it is solid and secure before leaving area.
Never stand between tractor and implement when tractor is being backed up to implement to hitch up implement.
STORAGE SAFETY!
ATTACHING HCI2 SERIES RAKE TO THE TRACTOR
Before hitching the rake to the tractor make sure both are in good operating condition. Slowly back up to the rake until the tractor drawbar lines up with the hitch clevis on the rake. Insert proper size hitch pin and retaining clip ( not included with rake). Adjust hitch clevis on rake so that horizontal part of the tongue is level.
Warning: do not stand between tractor and implement while tractor is being backed up to implement!
Plug both hydraulic hoses into tractor remotes.
PUTTING THE RAKE INTO WORKING POSITION AND ADJUSTING
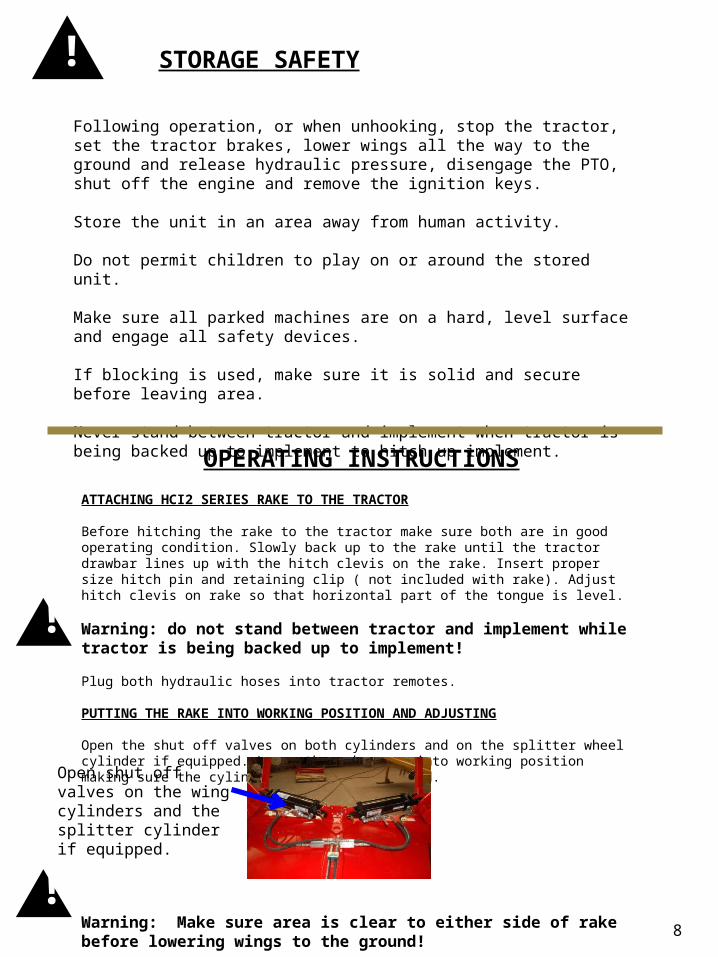
Open the shut off valves on both cylinders and on the splitter wheel cylinder if equipped. Lower the rake arms into working position making sure the cylinders are fully extended.
Warning: Make sure area is clear to either side of rake before lowering wings to the ground!
OPERATING INSTRUCTIONS
Open shut off valves on the wing cylinders and the splitter cylinder if equipped.
!
!

Using the tractor hydraulic remotes lower the wings to the ground, make sure the cylinders are extended all the way. If the cylinders are adjusted properly the rake wheels should be straight up and down or tilted in slightly at the top. If they are tilted out at the top then you will need to screw the cylinder clevis out to raise the pivot assembly and tilt the rake wheels in. Warning: Be sure to support the wing before removing the cylinder pin.
IMPORTANT: After hitching the rake to the tractor prior to operating, always lift both front and both rear rake wheels off of the ground to make sure they each have at least 8” to 10” of up travel, if there is not enough up travel then damage to the rake can occur!
9
Leveling the wings: If both wings are low in the front and high in the rear or vice versa then raise or lower the clevis hitch in the tongue to level the main arms. The retaining bolt for the wheel arms should be close to the center of the slotted hole in the main arm front to rear. If they are high in the front and low in the rear or vice versa then raise or lower tongue to make them all the same. The main arms must be close to level and the wheel arm retaining bolts close to the center of the slotted holes for the wheel arms to float properly!
WING ADJUSTMENT
10
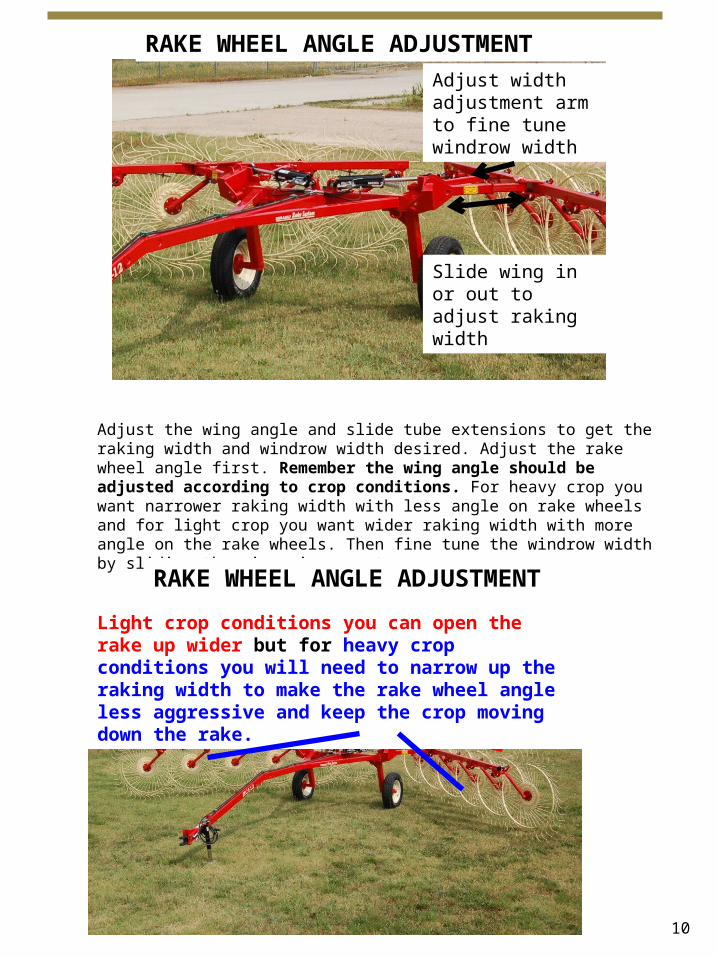
Adjust the wing angle and slide tube extensions to get the raking width and windrow width desired. Adjust the rake wheel angle first. Remember the wing angle should be adjusted according to crop conditions. For heavy crop you want narrower raking width with less angle on rake wheels and for light crop you want wider raking width with more angle on the rake wheels. Then fine tune the windrow width by sliding the wings in or out.
RAKE WHEEL ANGLE ADJUSTMENT
RAKE WHEEL ANGLE ADJUSTMENT Adjust width
adjustment arm to fine tune windrow width
Slide wing in or out to adjust raking width
Light crop conditions you can open the rake up wider but for heavy crop conditions you will need to narrow up the raking width to make the rake wheel angle less aggressive and keep the crop moving down the rake.
11
ADJUSTING INDIVIDUAL WHEEL ARM SPRING ON HCI2 RAKE
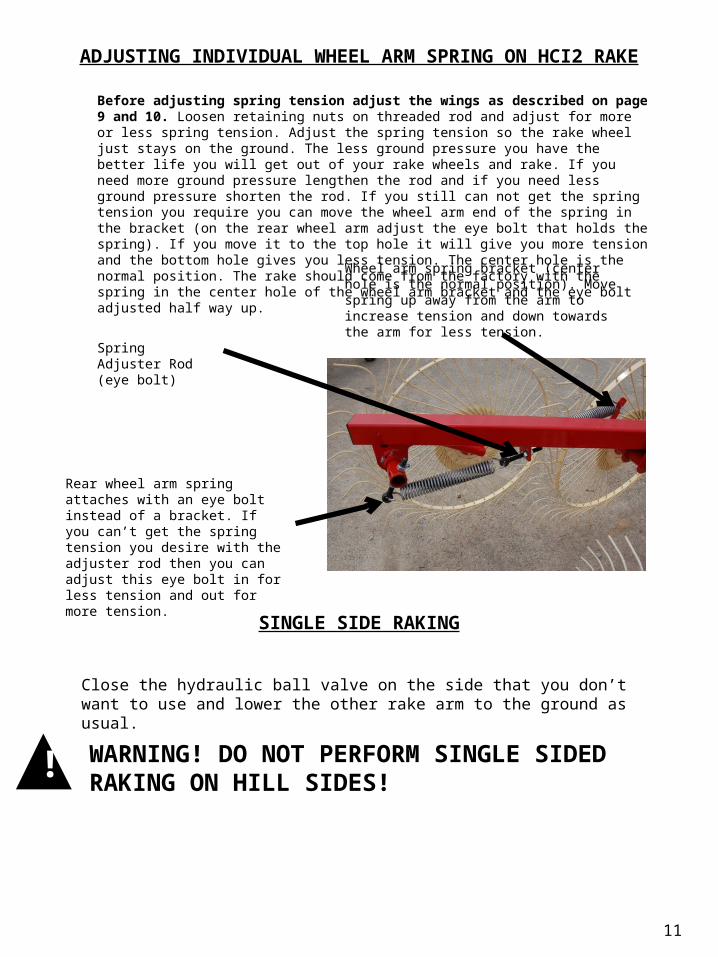
Before adjusting spring tension adjust the wings as described on page 9 and 10. Loosen retaining nuts on threaded rod and adjust for more or less spring tension. Adjust the spring tension so the rake wheel just stays on the ground. The less ground pressure you have the better life you will get out of your rake wheels and rake. If you need more ground pressure lengthen the rod and if you need less ground pressure shorten the rod. If you still can not get the spring tension you require you can move the wheel arm end of the spring in the bracket (on the rear wheel arm adjust the eye bolt that holds the spring). If you move it to the top hole it will give you more tension and the bottom hole gives you less tension. The center hole is the normal position. The rake should come from the factory with the spring in the center hole of the wheel arm bracket and the eye bolt adjusted half way up.
Spring Adjuster Rod (eye bolt)
Wheel arm spring bracket (center hole is the normal position). Move spring up away from the arm to increase tension and down towards the arm for less tension.
Rear wheel arm spring attaches with an eye bolt instead of a bracket. If you can’t get the spring tension you desire with the adjuster rod then you can adjust this eye bolt in for less tension and out for more tension.
SINGLE SIDE RAKING
Close the hydraulic ball valve on the side that you don’t want to use and lower the other rake arm to the ground as usual.
! WARNING! DO NOT PERFORM SINGLE SIDED RAKING ON HILL SIDES!
12
PUTTING THE RAKE INTO TRANSPORT POSITION
WARNING! Always tow rake at a safe speed for the conditions, slow down when turning to avoid rollover. Never exceed 25MPH! Always use safety flashers unless traffic laws prohibit it.
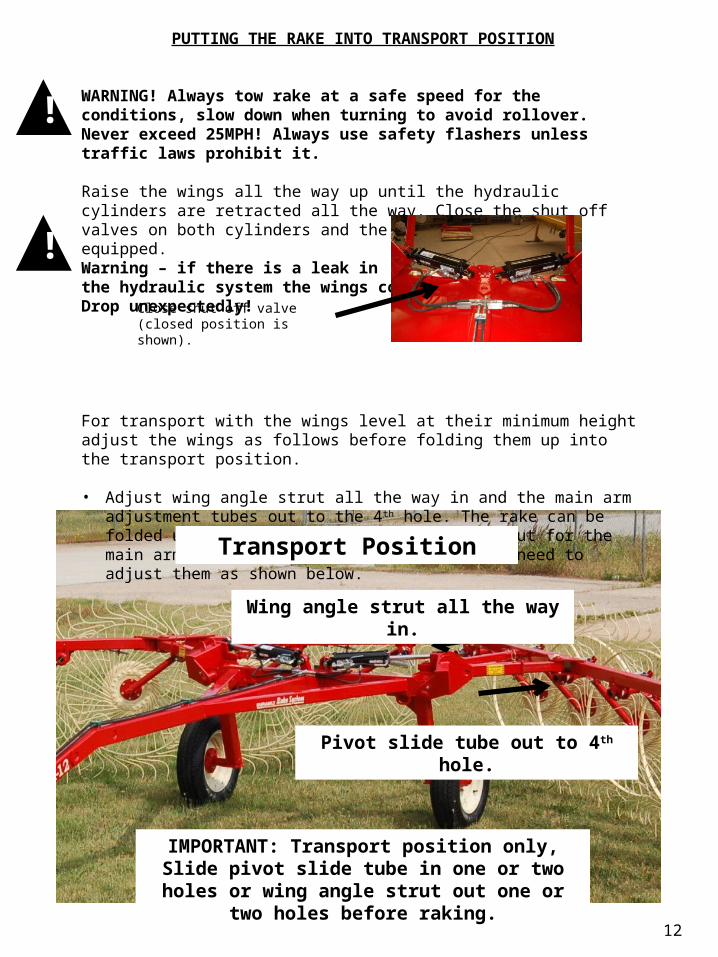
Raise the wings all the way up until the hydraulic cylinders are retracted all the way. Close the shut off valves on both cylinders and the splitter wheel if equipped.Warning – if there is a leak inthe hydraulic system the wings couldDrop unexpectedly!
For transport with the wings level at their minimum height adjust the wings as follows before folding them up into the transport position.
• Adjust wing angle strut all the way in and the main arm adjustment tubes out to the 4th hole. The rake can be folded up with the main arms at any angle but for the main arms to be level when folded you will need to adjust them as shown below.
Close shut off valve (closed position is shown).
!
Transport Position
Pivot slide tube out to 4th hole.
Wing angle strut all the way in.
!
IMPORTANT: Transport position only, Slide pivot slide tube in one or two holes or wing angle strut out one or two holes
before raking.
13
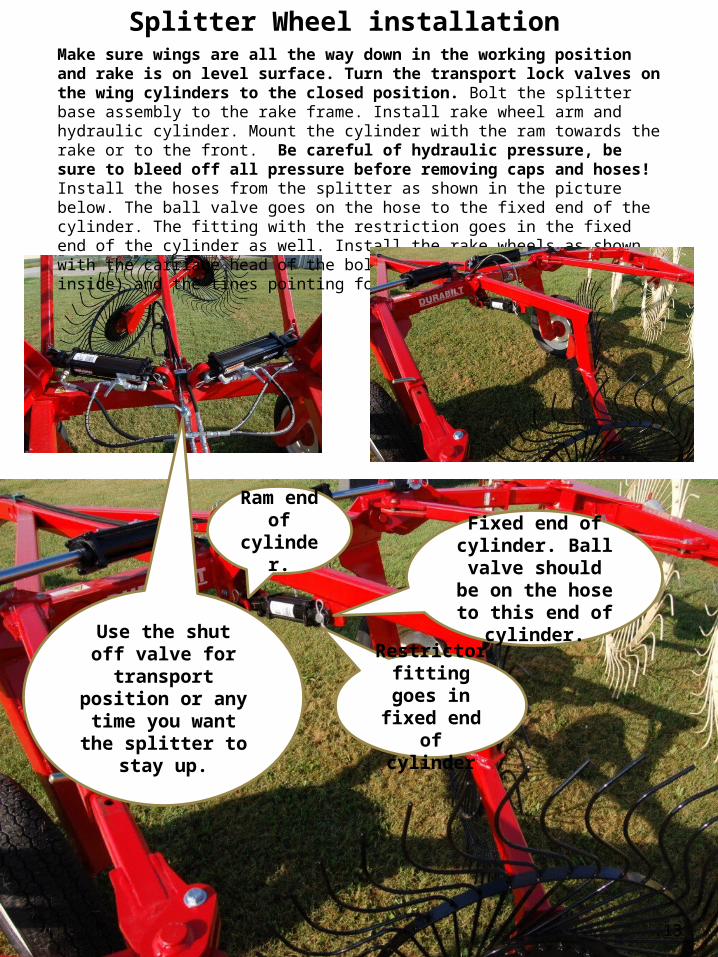
Splitter Wheel installation
Use the shut off valve for transport
position or any time you want the splitter to
stay up.
Make sure wings are all the way down in the working position and rake is on level surface. Turn the transport lock valves on the wing cylinders to the closed position. Bolt the splitter base assembly to the rake frame. Install rake wheel arm and hydraulic cylinder. Mount the cylinder with the ram towards the rake or to the front. Be careful of hydraulic pressure, be sure to bleed off all pressure before removing caps and hoses! Install the hoses from the splitter as shown in the picture below. The ball valve goes on the hose to the fixed end of the cylinder. The fitting with the restriction goes in the fixed end of the cylinder as well. Install the rake wheels as shown with the carriage head of the bolts facing the front (or inside) and the tines pointing forward.
Fixed end of cylinder. Ball valve should
be on the hose to this end of
cylinder.
Ram end of
cylinder.
Restrictor fitting goes in
fixed end of cylinder
14
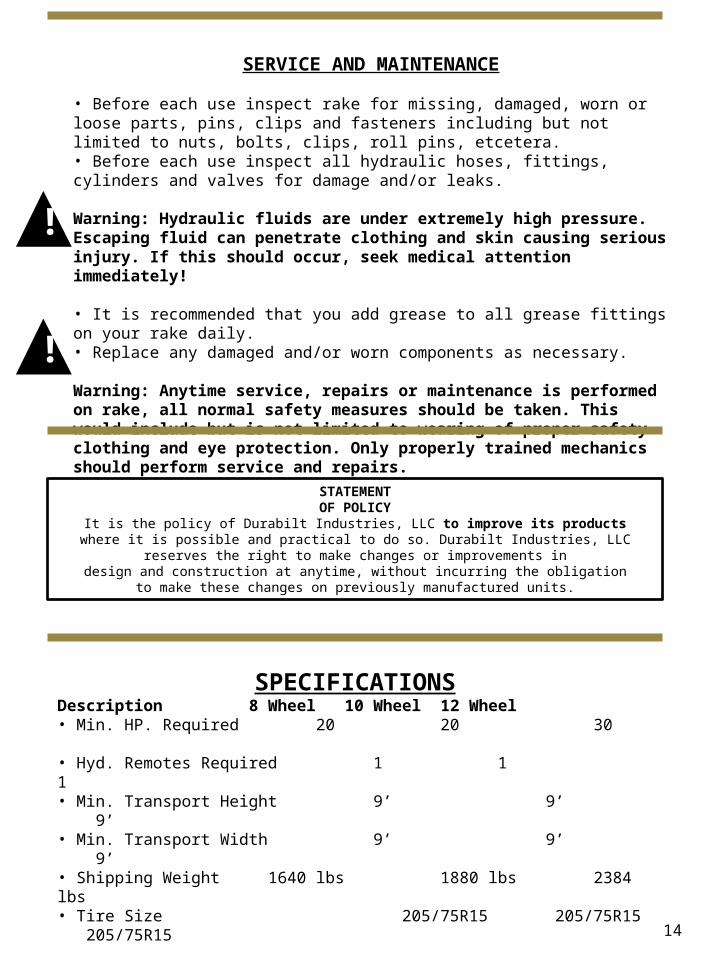
SERVICE AND MAINTENANCE
• Before each use inspect rake for missing, damaged, worn or loose parts, pins, clips and fasteners including but not limited to nuts, bolts, clips, roll pins, etcetera.• Before each use inspect all hydraulic hoses, fittings, cylinders and valves for damage and/or leaks.
Warning: Hydraulic fluids are under extremely high pressure. Escaping fluid can penetrate clothing and skin causing serious injury. If this should occur, seek medical attention immediately!
• It is recommended that you add grease to all grease fittings on your rake daily.• Replace any damaged and/or worn components as necessary.
Warning: Anytime service, repairs or maintenance is performed on rake, all normal safety measures should be taken. This would include but is not limited to wearing of proper safety clothing and eye protection. Only properly trained mechanics should perform service and repairs.
!
!
STATEMENTOF POLICY
It is the policy of Durabilt Industries, LLC to improve its productswhere it is possible and practical to do so. Durabilt Industries, LLC
reserves the right to make changes or improvements indesign and construction at anytime, without incurring the obligation
to make these changes on previously manufactured units.
SPECIFICATIONSDescription 8 Wheel 10 Wheel 12 Wheel• Min. HP. Required 20 20 30• Hyd. Remotes Required 1 1 1
• Min. Transport Height 9’ 9’ 9’• Min. Transport Width 9’ 9’ 9’• Shipping Weight 1640 lbs 1880 lbs 2384 lbs
• Tire Size 205/75R15 205/75R15 205/75R15
15
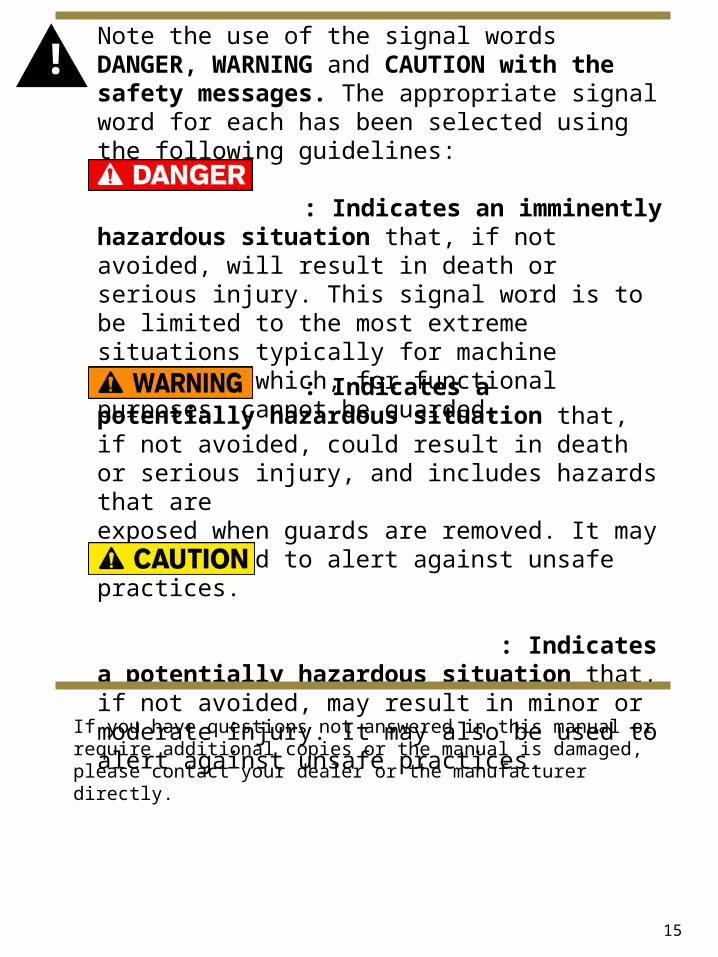
Note the use of the signal words DANGER, WARNING and CAUTION with the safety messages. The appropriate signal word for each has been selected using the following guidelines:
: Indicates an imminently hazardous situation that, if not avoided, will result in death or serious injury. This signal word is to be limited to the most extreme situations typically for machine components which, for functional purposes, cannot be guarded. : Indicates a potentially hazardous situation that, if not avoided, could result in deathor serious injury, and includes hazards that areexposed when guards are removed. It may also be used to alert against unsafe practices.
: Indicates a potentially hazardous situation that, if not avoided, may result in minor ormoderate injury. It may also be used to alert against unsafe practices.If you have questions not answered in this manual or require
additional copies or the manual is damaged, please contact your dealer or the manufacturer directly.
!

16
MAXIMUM SAFE TOWING SPEED
25 MPH
260040
ALWAYS USE WARNING
FLASHERS ON TRACTOR EXCEPT
WHEN PROHIBITED BY LAW 26004
1
PINCH POINT.Keep hands and fingers clear.
260045
(located on top of tongue at hitch clevis)
(located on top of tongue at hitch clevis)
(located on top of frame in front of hydraulic cylinders)
17
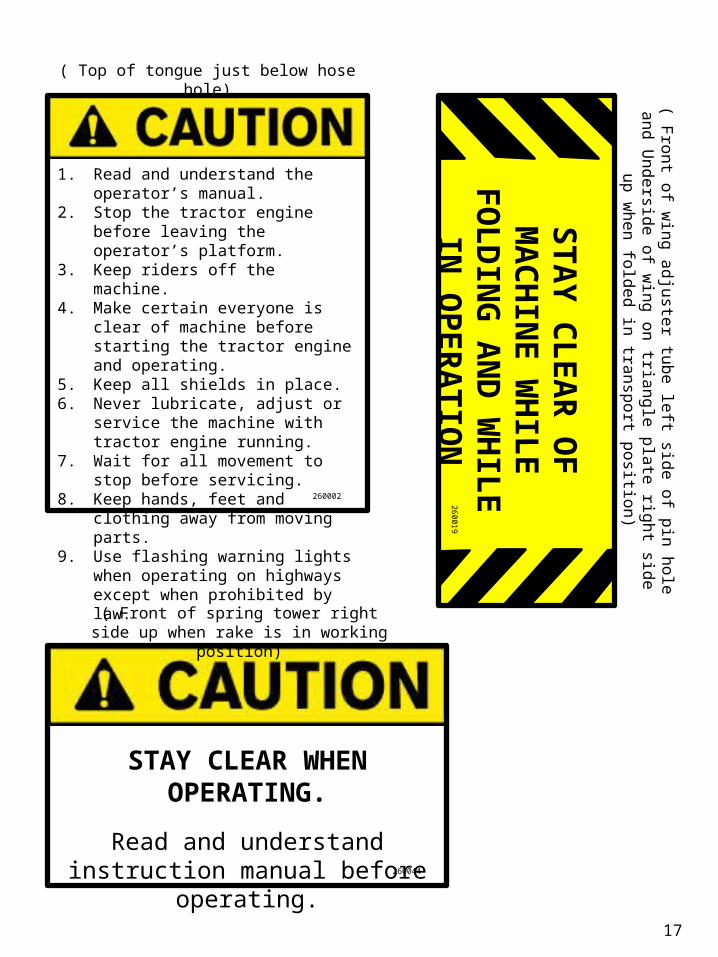
1. Read and understand the operator’s manual.
2. Stop the tractor engine before leaving the operator’s platform.
3. Keep riders off the machine.4. Make certain everyone is clear of
machine before starting the tractor engine and operating.
5. Keep all shields in place.6. Never lubricate, adjust or service the
machine with tractor engine running.7. Wait for all movement to stop before
servicing.8. Keep hands, feet and clothing away
from moving parts.9. Use flashing warning lights when
operating on highways except when prohibited by law. 260002
STAY CLEAR WHEN OPERATING.
Read and understand instruction manual before operating.
260044
( Top of tongue just below hose hole)
( Front of spring tower right side up when rake is in working position)
STAY CLEAR OF M
ACHIN
E W
HILE FO
LDIN
G AN
D W
HILE
IN O
PERATION
260019
( Front of wing adjuster tube left
side of pin hole and Underside of w
ing on triangle plate right side up w
hen folded in transport position)

18
DURABILT INDUSTRIES, LLC Phone: 870-892-4501
LIMITED WARRANTY (Effective November 24, 2008)
Durabilt Industries, LLC warrants its products to be free from defects in material or workmanship, under normal intended use, for a period of one year from the date of sale to the original private customer. The term of the warranty for commercial customers including rental operations is 6 months from date of original sale. This warranty is not transferable and is therefore valid only to the original customer or legal entity.
Durabilt Industries, LLC shall not be liable for any incidental or consequential loss or damages (including but not limited to loss of use, loss of profits and damage to the equipment to which the Durabilt unit may be attached) occurring for any reason at any time.
For the warranty to be valid the warranty registration card that you received with your machine must be filled out and on file with Durabilt Industries, LLC prior to any warranty repairs being performed. The warranty registration card must be filled out and mailed to Durabilt Industries, LLC within 30 days of purchase.
The Durabilt Industries, LLC limited warranty covers parts and labor for authorized repairs. All warranty repairs must be authorized by Durabilt Industries prior to the work being started. Call your dealer to schedule warranty repairs. Your dealer must request a warranty repair authorization number. This number must be provided on all warranty claims for them to be considered for reimbursement. In no event shall Durabilt’s liability exceed the purchase price of the unit.
The Limited Warranty is void if the product has been altered or modified in any way. Improper use, poor maintenance, abuse, accidental damage, alteration or removal of the serial number tag among other things or actions will void the limited warranty. This limited warranty does not cover wear items such as blades, hoses, tires, chains, couplers, etc. Depreciation due to normal wear is excluded from the warranty.
Only parts received from Durabilt Industries will be considered for reimbursement. Durabilt Industries, LLC reserves the right to alter, update or improve its products at any time without incurring any obligation to past customers.

19
20
DURABILTDurabilt Industries, LLC • Pocahontas, AR 72455 • Phone 870-892-4501