easicom 100 user guide - telephones uk
TRANSCRIPT

Easicom 100 User GuidePersonal organiser and handsfree telephone
This equipment is not designed for making emergency telephone callswhen the power fails. Alternative arrangements should be made foraccess to emergency services.

Please open this page for a further ‘at a glance’ guide to your Easicom 100.

Please open this page for an ‘at a glance’guide to your Easicom 100.

. . . . . . . . . . . . . . . . . . . . . . . . . . . . . . . . . . .. . . . . . . . . . . . . . . . . . . . . . . . . . . . . . . . . . .. . . . . . . . . . . . . . . . . . . . . . . . . . . . . . . . . . .. . . . . . . . . . . . . . . . . . . . . . . . . . . . . . . . . . .. . . . . . . . . . . . . . . . . . . . . . . . . . . . . . . . . . .. . . . . . . . . . . . . . . . . . . . . . . . . . . . . . . . . . .. . . . . . . . . . . . . . . . . . . . . . . . . . . . . . . . . . .. . . . . . . . . . . . . . . . . . . . . . . . . . . . . . . . . . .. . . . . . . . . . . . . . . . . . . . . . . . . . . . . . . . . . .. . . . . . . . . . . . . . . . . . . . . . . . . . . . . . . . . . .. . . . . . . . . . . . . . . . . . . . . . . . . . . . . . . . . . .. . . . . . . . . . . . . . . . . . . . . . . . . . . . . . . . . . .. . . . . . . . . . . . . . . . . . . . . . . . . . . . . . . . . . .. . . . . . . . . . . . . . . . . . . . . . . . . . . . . . . . . . .. . . . . . . . . . . . . . . . . . . . . . . . . . . . . . . . . . .. . . . . . . . . . . . . . . . . . . . . . . . . . . . . . . . . . .. . . . . . . . . . . . . . . . . . . . . . . . . . . . . . . . . . .. . . . . . . . . . . . . . . . . . . . . . . . . . . . . . . . . . .. . . . . . . . . . . . . . . . . . . . . . . . . . . . . . . . . . .. . . . . . . . . . . . . . . . . . . . . . . . . . . . . . . . . . .. . . . . . . . . . . . . . . . . . . . . . . . . . . . . . . . . . .. . . . . . . . . . . . . . . . . . . . . . . . . . . . . . . . . . .. . . . . . . . . . . . . . . . . . . . . . . . . . . . . . . . . . .. . . . . . . . . . . . . . . . . . . . . . . . . . . . . . . . . . .. . . . . . . . . . . . . . . . . . . . . . . . . . . . . . . . . . .. . . . . . . . . . . . . . . . . . . . . . . . . . . . . . . . . . .. . . . . . . . . . . . . . . . . . . . . . . . . . . . . . . . . . .. . . . . . . . . . . . . . . . . . . . . . . . . . . . . . . . . . .. . . . . . . . . . . . . . . . . . . . . . . . . . . . . . . . . . .. . . . . . . . . . . . . . . . . . . . . . . . . . . . . . . . . . .
power in use calls
secrecy handsfree
§ ©
eas comi 100
. .. . . . .
1
At a glance
In useLights up during a call.
Power lightLights up when mainspower is switched on.
Infrared receiverEnables you to make a handsfreecall when the organiser is removedfrom the base.
Microphone
VolumeAdjusts the ringer volumewhen not on a call. Adjuststhe handsfree volumeduring a call.
Secrecy Allows you to talk tosomeone close bywithout your callerhearing. LED lights upwhen secrecy function isswitched on.
Handsfree Lets you use themicrophone andloudspeaker for handsfreeoperation. The red LEDlights up when handsfreemode is switched on.
CRADLE
1 2 3
4 5 6
7 8 9
0
wxyz
mno
tuv
jkl
pqrs
ghi
abc def
✱§ ©A
edit
add
escok
menu del
3
4
¶
Ä
x P
–
+
R
.
CE/C
eas comi
EscTo move back to theprevious screen display, toexit the function.
Phone/OKDials telephone numbers.Confirms settings.
MenuPress to displaythe main menu onthe screen.
PowerSwitches the organiser onand off. When slotted in thecradle and connected to themains power, the organiseris permanently switched on.
RIGHT/LEFTUsed when selecting andsetting options.
DelLets you deleteentries.
AddUsed when adding newentries. Also used as theRecall button.
EditUsed when changingentries. Enter a pause in atelephone number.
UP/DOWNLets you scroll through the settings.
LCD Display
ORGANISER
Keypad

2
ResetResets the organiser to its default settingswithout losing any information stored onthe memory.
OrganiserMain battery compartment2 x AAA alkaline batteries (supplied)
Back up battery compartment1 x CR1616 battery (supplied)
Connection sockets– to mains power supply– to telephone socket– to attach a telephone – to PC or notebook computer
Main batteries
Back-upbattery
6vDC line phone PC


3
ContentsAt a glance 1
Introduction 4
Installing your Easicom 100 5
Using your Easicom 100 9
Using Select Services 25
Set up Options 30
Connecting to a switchboard/PBX 34
Maintenance 35
Help 36
Technical information 38
Index 39
Hints and tips boxesIn this user guide, we’ve included helpful tips and useful hints.They are shown in boxes.

Introduction Your Easicom 100 has been designed forease of use and made to the high standardsset by BT.
In order for the Caller Display feature toreceive and display the full range of callinformation, you must subscribe to the BTCaller Display Service. For more informationcall BT on Freefone 0800 800 150.
You can expect your Easicom 100 to giveyou many years of trouble free service.Please read the instructions carefullybefore use and keep this User Guide forfuture reference.
For your records
For warranty purposes, proof of purchase is required, so please keep your receipt.
Date of purchase:
Place of purchase:
Serial numbers:(on the underside of the cradle and the back of the organiser):
4
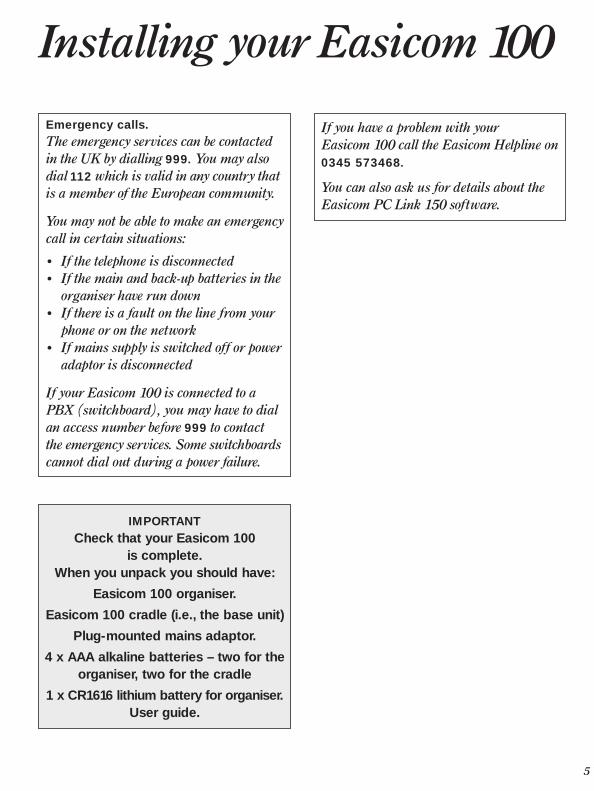
Installing your Easicom 100
Emergency calls. The emergency services can be contactedin the UK by dialling 999. You may alsodial 112 which is valid in any country thatis a member of the European community.
You may not be able to make an emergencycall in certain situations:
• If the telephone is disconnected• If the main and back-up batteries in the
organiser have run down• If there is a fault on the line from your
phone or on the network• If mains supply is switched off or power
adaptor is disconnected
If your Easicom 100 is connected to aPBX (switchboard), you may have to dialan access number before 999 to contactthe emergency services. Some switchboardscannot dial out during a power failure.
IMPORTANTCheck that your Easicom 100
is complete. When you unpack you should have:
Easicom 100 organiser.
Easicom 100 cradle (i.e., the base unit)
Plug-mounted mains adaptor.
4 x AAA alkaline batteries – two for theorganiser, two for the cradle
1 x CR1616 lithium battery for organiser.User guide.
If you have a problem with your Easicom 100 call the Easicom Helpline on0345 573468.
You can also ask us for details about theEasicom PC Link 150 software.
5

1 Install organiser batteriesMain batteries• Remove the main battery cover using a
small screwdriver or similar instrumentto release the clip.
• Insert two AAA alkaline batteries asshown.
Back-up battery• Pull out the plastic tab. The battery is
now connected. • To replace the back-up battery, see
page 36.
WarningUse only alkaline batteries in the organisermain battery compartment. For theorganiser back-up battery, use only lithiumCR1616 batteries.
Do not try to use any power supplyconnection except the one providedotherwise you may damage your Easicom100. It may also invalidate approval of thisapparatus.
Do not dispose of used batteries withgeneral household rubbish and do not burnthem.
Clean the organiser and cradle with a damp(not wet) cloth or antistatic wipe. Neverspray cleaning fluid directly onto theorganiser or base.
6
IMPORTANTOnce installed, do not take the
main batteries and the back-up batteryout at the same time, otherwise data
will be lost.
Main batteries
Back-upbattery
Plastic tap

3
2
4
Now plug in the 3-pin power adaptor intothe mains socket. When the power isswitched on, the cradle POWER lightcomes on.
Place the organiser in thecradle
Open the lid on the top of the cradle andslide the organiser along the guides andinto the connector.
Connect the telephone line cord
Plug the other end into the telephone linewall socket.
If you do not have modern phone sockets,call Freefone 0800 800 150 and ask for aBT engineer to come and fit the correcttype. This is a chargeable service.
Connect the power cable
Plug the power cable into the socketmarked 6vDC on the cradle. Run the cablethrough the channel on the underside ofthe cradle to prevent the plug from beingaccidentally pulled out.
7
6vDC line phone PC
6vDC line phone PC

5
6
7 Set the time and date
Press buttons in order shown
When the main menu is displayed
Enter the number 0 on thekeypad. (Or press the UP button tohighlight SET UP then press OK).
Press the 5 button. (Or the DOWNbutton to highlight TIME & DATE onthe menu).
Press the LEFT and RIGHT buttonsto highlight AM/PM for a 12 hourclock setting or 24 HOUR for a 24 hour clock setting.
Press the edit button.
Use the LEFT and RIGHT buttons tohighlight DAY/MONTH/YEAR/TIMEsetting you want.
Press the UP and DOWN buttons toadjust the setting.
Press the OK button to confirm.
You can also choose further set up optionsAlarm Clock p30Appointment Alarm p20Password p31Keypad Tone p31Memory/Battery Status p32LCD Contrast p32Automatic Shut Down p32Switchboard/PBX setting p34
OK
Ä
¶
©A
✱§
editP
–
©A
✱§
5jkl
0
Connect a telephone(optional)
So you can hold conversations not heardvia the loudspeaker, connect a telephone byplugging the telephone cable into the backof the Easicom cradle in the socket markedPHONE.
Switch the organiser on
Press the POWER button until theOrganiser switches on. The main menu isdisplayed.
If no buttons are pressed, the screenautomatically switches off after approximately2 minutes
8
6vDC line phone PCTo set the time and date manually
Battery saverIf you do not press any buttons on theorganiser after removing it from the cradle,the battery saver automatically switches thescreen off after 2 minutes. This time limitis adjustable. See Auto Shut Down p.32.
MENU
* T E L E P H O N E
1 . Q U I C K D I A L2 . P E R S O N A L3 . B U S I N E S S4 . A P P O I N T M E N T S5 . C A L C U L A T O R

9
Using your Easicom 100
to move back to the previous screendisplay to exit the function
to delete an entryclear, when in calculator mode
returns display to main menu.
Using the menu
There are two ways to reach the menuoption you want.
Either
Press the number next to the option.
Or
Press the UP or DOWN buttons toor highlight the options you want, then
press the OK button.
You can then use the add, edit anddel buttons as required.
OK
Ä
¶
menu
delCE/C
escThe organiser keypad
Each button lets you enter numbers, lettersand special symbols. These include / @ .and many more.
All calculator functions are markedin orange on the Organiser
to move the cursor to the left entera ✱ during a call.
to move the cursor to the right entera # during a caldecimal point, when in calculatormode
to move the cursor upmultiply, when in calculator mode
to move the cursor downdivide, when in calculator mode
to dial a number and to confirm a setting
equals, when in calculator mode
power switch, on and off
to begin editing entriessubtract, when in calculator modeto add a pause to telephonenumbers.
to add one entryplus, when in calculator mode recall
add+R
editP
–
I
OK=
Ä.––.
¶X
©A•
✱§
Using the organiser

Press buttons in order shown
are used to move the cursor to theright and left.
DeletePress the del button to delete thecharacter to the left of the cursor.Hold down the button for more thanone second to delete a whole nameor number.
Insert a characterPosition the cursor where you wantto insert and press the requiredcharacter button.
Entering details into theorganiser
Letters are entered by pressing the relevantbutton repeatedly.
When entering a name using the keypad, ifyou don’t press the button after one secondthe cursor moves to the next space.
Punctuation marks are given under the 1and 0 buttons.
For example, to store the name JOHN
4 5 6 GHI JKL MNO
del
✱§
©A
Press 5 on the organiser until Jappears in the display.
Then press 6 on the organiser untilthe display shows O.
Enter the H by pressing 4 on theorganiser until H appears on thedisplay.
Press 6 on the organiser until Nappears on the display. The wholename is now entered.
Press the OK button to confirm yourselection and return to the idlescreen.
To switch between upper and lowercase letters
KEYPAD Letters are displayed in upper casecapitals. To change to lower case,when you display the letter youwant, hold the button down until thecharacter changes.
KEYPAD To return a letter to upper case,highlight the character and holddown the appropriate button until itchanges back.
OK
6mno
4 ghi
6mno
5jkl
10
Controlling the cursor To make an entry

In handsfree mode:Press the handsfree button andspeak.
Or
Using an attached telephonePick up the handset and speak
Press the handsfree button on thecradle.
Or
If using an attached phone, replacethe handset.
Or
Press the OK button while thetelephone number is shown on thescreen. The number stays on screenfor approximately 20 seconds.
OK
handsfree
handsfree
Making and receiving telephone calls
You can dial with the organiser in or out ofthe cradle. The infrared link sends detailsfrom the organiser to the cradle when callsare made and received.
Press buttons in order shown
When the main menu is displayed:
Press the OK button.
KEYPAD Dial the number. If the organiser isoff the base, make sure the infraredlink is pointing at the base.
Press the OK button. Display showsDIALLING and the number is dialled.
You hear your call going throughand speak to your caller using themicrophone and loudspeaker in thecradle.
You can have a private conversion bypicking up the handset of a phoneconnected to your Easicom 100. Theloudspeaker is automatically cut off.You hear and talk to your callerthrough the telephone handset.
OK
OK
11
To make a call
To end a call
Please noteAfter the number has been dialled, thedisplay returns to idle.
Please noteIf you are dialling a number which hasbeen stored in one of the organiser’smemories, the display will show the namethat has been stored with the number.
2 : 1 1PM 24 AUG
RED IAL – PRESS OK
To receive a call

During a call
Press the volume control to increaseor decrease the loudspeaker volume.
When NOT making a callPress the volume control to increaseor decrease the ringer volume.
§ ©
§ ©
Press buttons in order shown
When the main menu is displayed:
Press the OK button.
Press the OK button. The lastnumber called is displayed
Press the OK button to dial thenumber.
You can prevent your caller fromhearing you while you hold aconversation with someone elseclose by.
During a call
Press the secrecy button.The secrecy light comes on.Your caller cannot hear you speak.
Resume talking to your caller bypressing the secrecy button again.The secrecy light goes off.
secrecy
secrecy
OK
OK
OK
12
2 : 1 1PM 24 AUG
RED IAL – PRESS OK
To use the secrecy button
To adjust the ringer volume
To adjust the call volumeTo redial the last number

Select QUICKDIAL from the main menu.
Press the UP or DOWN button tohighlight the Quickdial number youwant to change.
Press the edit button to start edit.
KEYPAD Use the keypad to change the nameand number.
Press the OK button to save theor entry or esc to cancel.
Press esc to cancel or OK to save.
Select QUICKDIAL from the main menu.
Press the DOWN button to highlightthe entry you want to delete.
Press the del button.
Press the OK button to delete theor entry or the esc button to cancel.esc
OK
del
Ä
OK
esc
esc
OK
editP
–
Ä
¶
13
To delete a Quickdial number
Using the Quickdial memory
Store up to 6 of your most frequentlydialled numbers in the Quickdial memory.You can also copy entries into Quickdialfrom the other directories.
Press buttons in order shown
Select QUICKDIAL from the main menu.
Press the DOWN button to highlightthe location under which you want tostore a number.
Press the add button. Screen shows
Use the keypad to enter thenumber and name
Press OK to save the entry oresc to cancel.
If you press esc, display asks forconfirmation. Press OK to save oresc to cancel.
del
OK
add+R
Ä
To add a Quickdial number
To edit a Quickdial number
QUICKD IALNAME&NUMBER

Press buttons in order shown
Select PERSONAL from the main menu.
Press the add button.
KEYPAD Use the keypad to enter theinformation you want
Press OK to save the entry oresc to cancel.esc
OK
add+R
Select QUICKDIAL from the main menu.
Press the button 1-6 to automaticallydial the number you want. (Or pressthe UP and DOWN buttons tohighlight the number you want andthen press the OK button.)
Using the Personal directory
You can store all your friends, family andnon-business contacts in a separatedirectory.
Entries in the Personal directory are storedin alphabetical order.
The Personal directory screen The Personal screen lets you store variousinformation in addition to each person’sname.
H = Home phone numberO = Office phone numberM = Mobile phone numberF = Fax numberP = Pager number
EMAIL = email addressNOTES = additional information
1-6
14
To dial a Quickdial number To add a Personal entry
PERSONAL
H :O :N :F :P :

You can copy a number from aPersonal entry to the Quickdialmemory.
Select PERSONAL from the main menu.
KEYPAD Highlight the name for the entryyou want to copy.
Press the OK button.
Highlight the number you want tocopy.
Press the add button. Displayshows COPY TO QUICKDIAL SCREEN.
Press the OK button to copy theor entry or esc to cancel.
If the Quickdial memory is full, thedisplay shows
Press the OK button to cancel.You must delete one of the existingQuickdial entries to create space forcopying another entry.
OK
esc
OK
add+R
Ä
¶
OK
Press buttons in order shown
Select PERSONAL from the main menu.
Find the name you want by enteringthe first letter (or letters) of theperson’s name. The screen showsall the names with or next to thoseletters. If necessary press the UPand DOWN buttons to highlight thename you want.
Press the edit button.KEYPAD Use the keypad to change the entry.
If required press the UP or DOWNor buttons to scroll to anther next
screen to edit other information.
Press OK to save the entry or or esc to cancel.esc
OK
Ä
¶
editP
–
Ä
¶
To copy a Personal entry
15
To edit a Personal entry
PERSONALNAME ONENAME TWONAME THREENAME FOURNAME F IVENAME S IX
PERSONALNAME ONEH : 1234567890O : 2345678901M : 3456789012F : 4567890123P : 5678901234
D IRECTORYFULL !
OK

16
Select PERSONAL from the main menu.
Find the name you want by enteringthe first letter (or letters) of theperson’s name. The screen showsall the names with or next to thoseletters. If no entry is listed underthe letter, the next entryalphabetically is shown. If necessarypress the UP and DOWN buttons tohighlight the name you want.
Press the OK button to display theinformation stored for that person.
Highlight the number you want todial.
Press the OK button. Display shows OK
Ä
¶
OK
Ä
¶
To dial a Personal number
PERSONALNAME ONENAME TWONAME THREENAME FOURNAME F IVENAME S IX
4 : I5 PM 18 APR
D IALL ING . . .NAME
1234567890
Press buttons in order shown
Select PERSONAL from the main menu.
Find the name you want by enteringthe first letter (or letters) of theperson’s name. The screen showsall the names with or next to thoseletters. If necessary press the UPand DOWN buttons to highlight thename you want.
Press the del button. Display shows
Press OK to delete the entry or escor to cancel.esc
OK
del
Ä
¶
To delete a Personal entry
PERSONALNAME ONENAME TWONAME THREENAME FOURNAME F IVENAME S IX
PERSONALNAME ONENAME TWONAME THREENAME FOURNAME F IVENAME S IX
DELETE?
OK ESC

Select BUSINESS from the main menu.
KEYPAD Highlight the company name youwant to edit.
Press the edit button.
KEYPAD Use the keypad to make the changesyou want.
Press OK to save the entry or escor to cancel.
Select BUSINESS from the main menu.
KEYPAD Highlight the company or individualname you want to delete.
Press the del button. Display shows
Press the OK button to delete theor entry or the esc button to cancel.esc
OK
del
esc
OK
editP
–
Using the Business directory
The Business directly lets you store acompany name and list a number of peopleunder each company name. You can alsoview individual details from the Personaldirectory.
Entries in the Business directory arestored in alphabetical order. Individualcontacts under a business name are alsostored in alphabetical order.
Press buttons in order shown
Select BUSINESS from the main menu.
Press the add button.
KEYPAD Use the keypad to enter theinformation you want.
Press OK to save the entry. Displayshows
KEYPAD Enter the details you want.
Press the OK button to save or escto cancel. When you press OK, the display allows you to enter thepersons details.
esc
OK
OK
add+R
To edit a Business entry
To change the personal details of a person’sname stored in Business directory, youmust first highlight the person’s name thenpress the edit button to display their details.
17
To add a Business entry
BUS INESS
BUS INESS
BUS INESSCOMPANY ONECOMPANY TWOCOMPANY THREECOMPANY FOURCOMPANY F IVECOMPANY S IX
To delete a Business entry
DELETE?
OK ESC

Select BUSINESS from the main menu.
KEYPAD Find the company name you wantby entering the first letter (or letters)of the Company’s name.
Press the OK button to display the list of names stored under thatcompany.
Highlight the person’s name youwant.
Press the OK button.
Highlight the number you wantto dial.
Press the OK button. Display shows OK
Ä
¶
OK
Ä
¶
OK
4 : I5 PM 18 APR
D IALL ING . . .NAME
1234567890
18
To dial a number in the Business directory
Press buttons in order shown
You can copy a number to theQuickdial memory.
Select BUSINESS from the main menu.
KEYPAD Highlight the phone number youwant to copy.
Press the add button. Display shows
Press the OK button to copy the entryor or esc to cancel.
If the Quickdial memory is full,press the OK button to cancel. Youmust delete one of the existingQuickdial entries to create space forcopying another entry.
OK
esc
OK
add+R
BUS INESSBUS INESS ONEH : 1234567890O : 2345678901M : 3456789012F : 4567890123P : 5678901234
To copy a Business entry
COPY TOQU ICKD IAL?
OK ESC

Select APPOINTMENTS from the main menu.
Press the add button.
KEYPAD Use the keypad to enter the detailsof your appointment, then add anyrelevant notes. Each appointmentmust have a title. Time settings forappointments are shown to thenearest 5 minutes.
Press the OK button to save theor entry or the esc button to cancel.esc
OK
add+R
Using the Appointments diary
You can keep track of appointments,meetings, schedules and other dates andtimes you have to remember. TheAppointments diary can contain up to 60separate entries.
Providing the appointments alarm is set toON, your Easicom 100 will give you an alertcall at any time up to 15 minutes beforeyour appointment. When the alarm goes off,the screen displays details of yourappointment. The appointment screen isdisplayed even if the alarm is not switched on.
You cannot set the alarm if you are enteringan appointment which is less than 15minutes after the current time and day.
Press buttons in order shown
Select APPOINTMENTS from the mainmenu.
To scroll through your appointments.
Press the OK button to display thehighlighted entry in full.
Press the esc button to return tothe appointments list.
esc
OK
Ä
¶
19
To browse through your appointments
APPO INTMENTS1 JUN 98 12 :00
T ITLE
NOTES :
To add an appointment
Appointment alarm
The appointment alarm is automatically setwhen you make an appointment time entry.Providing the appointment alarm is switchedon, the alarm will go off 15 minutes beforethe appointment time.
Select SET-UP from the main menu.
Now select APPOINTMENT ALARMfrom the set-up menu. Display shows
Highlight ON or OFF.
Press the OK button to confirm.OK
©A
✱§
Ä
¶
20
To switch the appointment alarm on and off
Press buttons in order shown
Select APPOINTMENTS from the mainmenu.
Highlight the entry you want tochange.
Press the edit button.
KEYPAD Use the keypad and cursor buttonsto change the details you want.
Press the OK button to save theor changes or the esc button to cancel.
Select APPOINTMENTS from the mainmenu.
Highlight the entry you want todelete.Press the del button. Display shows.
Press the OK button to delete or theor esc button to cancel.esc
OK
del
Ä
¶
esc
OK
editP
–
Ä
¶
To edit an appointment
To delete an appointment
APPO INTMENTS08 JUL/MEET ING (B ILL )15 JUL/FL IGHT31 JUL/DENT IST05 AUG/THEATRE12 AUG/MEET ING (BOB)18 AUG/SEM INAR
DELETE?
OK ESC
APPO INTM ’T ALARM
ON OFF

Using Notes
Your Easicom 100 can act as a notepad tokeep a record of important information.You can store up to 18 separate notes.
Press buttons in order shown
Select NOTES from the main menu.
Press the add button. Display shows
Use the keypad to write your note.You must give each note a title.
Press the OK button to save the or entry or the esc button to cancel.
Select NOTES from the main menu.
Highlight the title of the note youwant to view.
Press the edit button. KEYPAD Use the keypad to make changes.
Press the OK button to save or theor esc button to cancel.esc
OK
editP
–
Ä
¶
esc
OK
add+R
Using the calculator
The calculator buttons are:
Press buttons in order shown
Select CALCULATOR from the main menu.
Display shows
You can now use your Easicom 100as a calculator.
21
CALCULATOR
0 .
4 Equal OK BUTTON
2 Multiply UP ARROW BUTTON
3 Divide DOWN ARROW BUTTON
` Add ADD BUTTON
1 Subtract EDIT BUTTON
Clear/Clear AllCE/C (CE/C) DELETE BUTTON
z DECIMAL POINT #/LEFT ARROW BUTTON
To use the calculator
To edit a note
To add a note
NOTEST ITLE :
CONTENTS :

Press buttons in order shown
Select NOTES from the main menu.
Highlight the title of the note youwant to delete.
Press the del button to delete.
Press the OK button to confirm or or the esc button to cancel.
Select NOTES from the main menu.
Highlight the title of the note youwant to view.
Press the OK button.OK
Ä
¶
esc
OK
del
Ä
¶
To view a note
To delete a note
22
Caller DisplayYour Easicom 100 does not offer CallerDisplay. If you select Calls List from themenu, the screen shows ‘EASICOM 200FEATURE’. However, if you use yourEasicom 100 organiser with an Easicom200 cradle, your calls list can be updated.

Select USER INFO from themain menu.
Highlight the entry you wantto edit.Press the edit button.
Use the keypad to change theinformation.
Press the OK button to save the or entry or the esc button to cancel.
Select USER INFO from themain menu.
Highlight the entry you want todelete.
Press the del button.
Press the OK button to confirm or or the esc button to cancel.esc
OK
del
Ä
¶
esc
OK
editP
–
Ä
¶
User information
You can store important personal informationsuch as your Diving License, NationalInsurance and Passport numbers under UserInfo for easy reference at any time.
Press buttons in order shown
Select USER INFO from themain menu.
Press the add button.
Use the keypad to write theinformation. You must give eachentry a title.
Press the OK button to save or or the esc button to cancel.esc
OK
add+R
23
To add a User Info entry
To delete a User Info entry
To edit a User Info entry
Once your own telephone number has beenstored, it will automatically appear in theright place in the Call My Bill and Friends& Family sections in Select Services.

Press buttons in order shown
Select USER INFO from themain menu.
highlight the USER INFO entry you want to view
Press the OK button. The entry isdisplayed.
OK
Ä
¶
To view a User Info entry
24

Press buttons in order shown
Select SELECT SERVICES from themain menu.
Select CALL DIVERSION. Display shows
Press the OK button to contact theCall Diversion service.
The announcement asks you toenter the telephone number towhich you want your calls divertedfollowed by the # button.
Press the OK button to confirm thenumber.
Select SELECT SERVICES from themain menu.
Select CALL DIVERSION.
Highlight CANCEL.
Press the OK button.OK
Ä
OK
©A
OK
25
Using Select Services
Your Easicom 100 gives you easy access tothe following range of BT Select Services.
Friends & Family
Call My Bill
Call Waiting (Subscription service)
Call Diversion (Subscription service)
Reminder Call (Pay as you use)
For further information, see the SelectServices User Guide, supplied when yousubscribe to the services of your choice.
Call DiversionYour Easicom 100 can divert all yourincoming calls to another number whereyou can be reached
SELECT SERV ICES1 FR IENDS & FAM ILY2 CALL MY B ILL3 CALL WA IT ING4 CALL D IVERS ION5 REM INDER CALL
NoteIf you are not connected to the BT network,some of the services may not be available.Please contact your network provider.
To set Call Diversion
SELECT SERV ICESCALL D IVERS ION
SETCANCELCHECK
To cancel Call Diversion

26
Press buttons in order shown
You can check to see if Call Diversionis on or off.
Select SELECT SERVICES from themain menu.
Select CALL DIVERSION.
Highlight CHECK.
Press the OK button.OK
Ä
To check Call Diversion Friends and Family
Your Easicom 100 makes it easy to add orchange numbers for discounts with BT’sFriends & Family scheme. The telephonenumber of the Friends & Family service ispre-programmed into your Easicom 100.
You will need to follow these stepsto put in your telephone numberand your customer number beforeyou contact Friends and Family withyour Easicom 100.
Select SELECT SERVICES from themain menu.
Press OK to select Friends & Family.
Highlight TEL.
Press the edit button.
KEYPAD Enter your telephone number.
Press the DOWN button to highlightCUST NO.
KEYPAD Enter your BT CUSTOMERNUMBER .(This number appearson the top right hand corner of your bill.)
Press the OK button to save.OK
Ä
editP
–
¶
OK
To set Friends and Family for the first time

Call My Bill
This gives you the cost of calls recorded onyour telephone number since your last bill. Before phoning the Call My Bill service, youneed your BT customer number. This is inthe top right hand corner of your phone bill.
You will need to follow the stepsbelow to put in your telephonenumber and your customer numberbefore you contact Call My Bill withyour Easicom 100.
Press OK to select Call My Bill.
Highlight TEL.
Press the edit button.
KEYPAD Enter your telephone number.
Press the DOWN button to highlightCUST NO.
KEYPAD Enter your BT CUSTOMERNUMBER .(This number appearson the top right hand corner of your bill.)
Press the OK button to save.OK
Ä
editP
–
¶
OK
27
To set Call My Bill for the first time
Press buttons in order shown
Providing the above steps have beenfollowed the first time you contactFriends and Family with yourEasicom 100, you need only followthe steps below to quickly add orchange numbers.
When the main menu is displayed:
Select SELECT SERVICES from themain menu.
Press OK to select Friends & Family.The Friends & Family 0800 numberis automatically highlighted
Press the OK button. The number is dialled and the display highlights✱ ✱.
When requested press the OKbutton to send ✱ ✱. Displayhighlights your telephone number.
When requested press the OKbutton to send the telephonenumber. Display highlights yourcustomer number
When requested press the OKbutton to send customer number.
Now follow the instructions fromthe service to add or changenumbers. Press the OK button tosend each number.
OK
OK
OK
OK
OK
OK
To contact Friends and Family

28
Reminder Call
You can set your Easicom 100 to give you acall at a pre-arranged time...
Select SELECT SERVICES from themain menu.
Select REMINDER CALL.Display shows
Press the OK button. The ReminderCall is dialled.
Announcement asks you to enterthe time of your reminder callfollowed by the # button.
Press the OK button to confirm.
Select SELECT SERVICES from themain menu.
Select REMINDER CALL.
Highlight CANCEL.
Press the OK buttonOK
Ä
OK
OK
Ä
To set a reminder call
To cancel a reminder call
Press buttons in order shown
You can get an instant bill totalincluding all charges up to the lastworking day.
When the main menu is displayed:
Select SELECT SERVICES from themain menu.
Highlight CALL MY BILL.
Press the OK button. The Call MyBill number is displayed.
Press the OK button. The Call MyBill number is dialled.
Listen to the announcement for yourup to date bill.
Press the OK button. The number is dialled and the display highlights✱ ✱.
When requested press the OKbutton to send ✱ ✱. Displayhighlights your telephone number.
When requested press the OKbutton to send the telephonenumber. Display highlights yourcustomer number
When requested press the OKbutton to send customer number.
Now follow the instructions fromthe service to add or changenumbers. Press the OK button tosend each number.
OK
OK
OK
OK
OK
OK
OK
Ä
To use Call My Bill
SELECT SERV ICESREM INDER CALL
SETCANCELCHECK

Press buttons in order shown
Select SELECT SERVICES from themain menu.
Select CALL WAITING.
Press the OK button.
Select SELECT SERVICES from themain menu.
Select CALL WAITING.
Highlight OFF.
Press the OK button.
Select SELECT SERVICES from themain menu.
Select CALL WAITING.
Highlight CHECK.
Press the OK button.OK
Ä
OK
Ä
OK
29
To switch Call Waiting ON
To switch Call Waiting OFF
To check a Call Waiting

Press buttons in order shown
Select SET UP from the main menu.
Press the OK button.
Press the edit button.
Use the keypad and LEFT and RIGHTbuttons to set the time you want thealarm clock to ring.
Press OK to save or or esc to cancel.
Highlight ON or OFF. The alarm will not sound unless set to ON.
Press the OK button to save or escor to cancel.esc
OK
Ä
¶
esc
OK
©A
✱§
editP
–
OK
30
To set the alarm clock
Set up Options
Your Easicom 100 provides a range ofuseful features which you can adjust to suityour preferences.
Alarm Clock – set the time you want it toring every day.
Password – to help prevent unauthorisedaccess to the details in the organiser.
Keypad tones – switch off for silentoperation.
Memory optimise – refresh the memoryoccasionally to ensure maximum efficiency.
Battery status – check the status of yourorganiser batteries at any time.
Display contrast – adjust the brightnessfor easier viewing.
Automatic shutdown – switches off theorganiser screen when removed from thecradle to save battery power.
Time and Date – see page 8.
Appointment Alarm – see page 20.
Switchboard/PBX setting – see page 34.

31
Press buttons in order shown
You can use a password to preventunauthorised access to yourEasicom 100. The default setting isno password.
Once password protection isswitched on, every time you switchon the organiser, you will be askedto enter the password.
Select SET UP from the main menu.
Select PASSWORD.Display shows
Highlight ON or OFF.
Press the edit button.
KEYPAD Use the keypad to enter theinformation required. A passwordmust be a number of up to six digits.
Press the OK button or or esc to cancel.esc
OK
editP
–
Ä
Ä
To enter a password
PASSWORDNAME :TEL :OLD :NEW :CONF IRM :PASSWORD : ON OFF
If you make a mistake when confirmingthe new password, you are asked to enterit again.
Each time one of the buttons ispressed, the organiser gives a tone.You can switch this on or off. Thedefault setting is ON.
Select SET UP from the main menu.
Select KEYPAD TONE.Display shows
Highlight ON or OFF.
Press the OK button to save or or esc to cancel.esc
OK
Ä
Ä
Password noteIf you cannot remember the password,resetting your Organiser will enable you touse it again. (See page 33)
To switch the keypad tone on and off
KEYPAD TONE
ON OFF

Press buttons in order shown
When entries have been deleted or changed, memory can be usedinefficiently. To ensure you have themaximum amount of free space forentries it is a good idea to refreshthe memory every now and then.
Select SET UP from the main menu.
Select MEM/BAT STATUS.Display shows
Select manual to see how much
memory space is free. Display shows
Press OK. Screen shows OPTIMISINGthen COMPLETE.
Press the OK button.
Select SET UP from the main menu.
Select MEM/BAT status.
Select BATTERY to see the status ofthe organiser batteries.
Press the esc button to return tothe MEM/BAT status screen.
esc
Ä
Ä
OK
OK
Ä
Ä
Select SET UP from the main menu.
Select LCD CONTRAST.
Adjust the contrast between Lowand High.
Press the OK button to save or or esc to cancel.
Your Easicom 100 has been pre-setto automatically shut down 2minutes after the last button press.You can adjust Auto Shut Down tobetween 1-5 minutes.
Select SET UP from the main menu.
Select AUTO SHUT DOWN.
Select the number of minutesbetween 1-5, before Auto Shut Downoccurs.
Press the OK button to save or or esc to cancel.esc
OK
Ä
¶
Ä
esc
OK
©A
✱§
Ä
To adjust the display contrast
To check the battery status
To adjust the Auto Shut Down
32
To optimise the memory and view thememory status
MEM/BATT STATUS
1 . MEMORY2 . BATTERY
MEMORY
OPT IM ISE
96% FREE

33
Resetting the organiser
If you cannot remember the password, or ifthe organiser stops working, you can resetand re-start it without losing any of theinformation stored on the memory.
• Press the RESET button, located in theback-up battery compartment.
Please noteIf you want to reset and delete all the of thedata that has been entered, simply take the2 AAA batteries and the back-up batteryout of the organiser at the same time. Then re-install the batteries.

Connection information
Connection informationYour Easicom 100 can be connected to mostmodern switchboards.
If in doubt, your switch supplier ormaintainer should be able to offer help.Advice on connection to BT switchingsystems can be obtained by dialling BTFreefone 0800 800 152.
If you are connecting your Easicom 100 toa switchboard/PBX, you may need to dial anumber (e.g. 9) in order to get an outsideline. This number can be programmed intoyour Easicom 100. The directories arestored within the cradle. So if you have acradle for work and one for home, you cansimply transport the organiser between the two without having to re-programme allthe numbers.
34
Connecting to aswitchboard/PBX
Press buttons in order shown
The organiser must be placed on thecradle while you follow these steps.
Select SET UP from the main menu.
Select PBX SETTING.Display shows
If the organiser is not placed in thecradle, the display shows
Highlight ON or OFF.
Press the edit button.
KEYPAD Enter the code your switchboardrequires to get an outside line. YourEasicom 100 allows up to four digits.
Press the OK button to save or or esc to cancel.esc
OK
editP
–
Ä
Ä
To set the number for an outside line
PBX SETT INGNUMBER :
ON OFF
PBX SETT ING
PLACE IN CRADLETO ACCESS
OK
The number for an outside line will be lostif there is a power failure.
The organiser must be placed in thecradle while you follow the steps below.
35
Maintenance
GeneralSimply clean the Easicom 100 with a dampcloth (not wet) or an antistatic wipe.
Service
Within guaranteeIf you experience a problem with yourEasicom 100 or handset you should contactthe Easicom 100 Helpline on 0345 573464.Calls are charged at local call rates. If theproblem is not remedied, you will be advisedto contact you original point of purchase.
Some retailers offer extended warrantyschemes for cover outside the initial 12-month period. Please ask them for details.
Outside warrantyIf your Easicom 100 needs repair after thewarranty period has ended, call theEasicom 100 Helpline on 0345 573464 forinformation on our recommended repairagents.
If you have to return yourEasicom 100
Pack the cradle and handset securely,preferably in the original packaging. All parts must be returned including linecords, power supply unit and originalbattery. We cannot take responsibility forgoods damaged in transit.
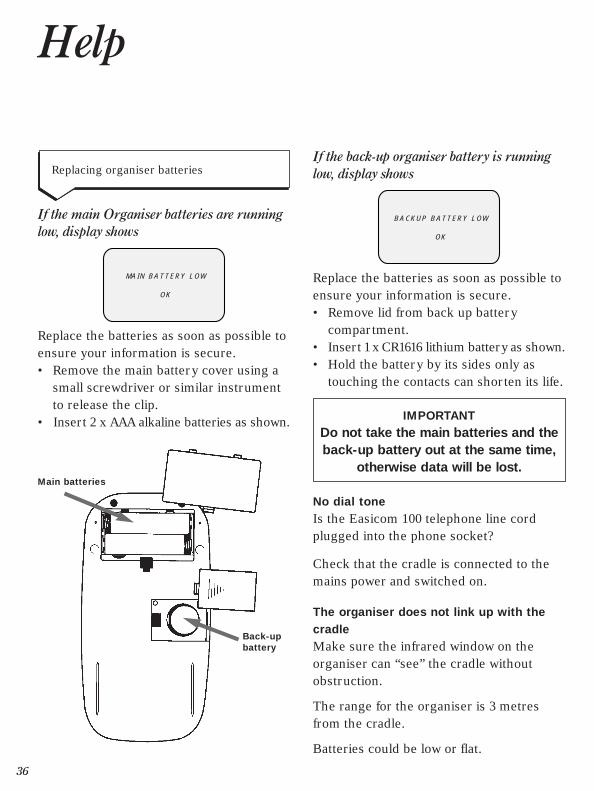
If the back-up organiser battery is runninglow, display shows
Replace the batteries as soon as possible toensure your information is secure.• Remove lid from back up battery
compartment.• Insert 1 x CR1616 lithium battery as shown.• Hold the battery by its sides only as
touching the contacts can shorten its life.
No dial toneIs the Easicom 100 telephone line cordplugged into the phone socket?
Check that the cradle is connected to themains power and switched on.
The organiser does not link up with thecradleMake sure the infrared window on theorganiser can “see” the cradle withoutobstruction.
The range for the organiser is 3 metresfrom the cradle.
Batteries could be low or flat.
36
Help
If the main Organiser batteries are runninglow, display shows
Replace the batteries as soon as possible toensure your information is secure.• Remove the main battery cover using a
small screwdriver or similar instrumentto release the clip.
• Insert 2 x AAA alkaline batteries as shown.
Replacing organiser batteries
IMPORTANTDo not take the main batteries and theback-up battery out at the same time,
otherwise data will be lost.
BACKUP BATTERY LOW
OK
MA IN BATTERY LOW
OK
Main batteries
Back-upbattery

37
No ring on cradleThe ringer volume may be turned down toolow. Press the volume switch on the cradleto increase the ringer volume.
Check that the Easicom 100 is plugged intothe phone socket.
Check that the cradle is plugged into themains power and switched on.
Organiser does not function at allTry resetting the organiser. See page 33.
Switchboard/PBX code does not get anoutside lineThere may have been a power failure andyour switchboard/PBX setting has beenlost. To check your setting see page 34.
You may need to enter a pause after theaccess code to allow enough time for theswitchboard/PBX to get an outside line.
Flashing IN USE lightThere is an incoming call
Your Easicom doesn’t disconnect from a call when the handset of an attachedtelephone is replaced.Check that your telephone is plugged intothe Easicom cradle rather than thetelephone wall socket.
Organiser seems to be getting slowerThe memory may be reaching its capacity.Try optimising the memory, see page 32.
If you are still experiencing difficulty, callthe Easicom 100 Helpline on 0345 573464.Lines open 8.30am-5.30pm, Monday-Friday and 12pm-5pm Saturday, excludingbank holidays.

38
Technical information
Environment
Your Easicom 100 should be kept free ofdust, moisture, high temperature andexcessive vibration. It should not be usedin the bathroom or near water.
It is only designed to be operated in anormal office or domestic environmentwhere the relative humidity does notexceed 60%.
How many phones can youhave?
All items of telephone equipment have aRinger Equivalence Number (REN), whichis used to calculate the number of itemsthat may be connected to any onetelephone line. Your Easicom 100 has aREN of 1. A total REN of 4 is allowed. If thetotal REN of 4 is exceeded, the telephonesmay not ring. With different telephonetypes there is no guarantee of ringing, evenwhen the REN is less than 4.
Signalling
The Easicom 100 only supports Touchtone®
dialling and Timed Break Recall.
Guarantee
If you own your Easicom 100 – underguarantee.
BT guarantee the product for one yearprovided that:
The equipment has only been used for itsproper purpose and has not been subjectedto misuse or has been wilfully ofaccidentally damaged.
The equipment has not been tampered withor repaired by anyone other than BT, itsstaff, or agents. If a fault does occur in thisproduct and you bought the unit yourself,provided that you return it to the place ofpurchase and produce your receipt, it willbe either repaired or replaced free ofcharge. The terms and conditions of thisguarantee do not affect your statutoryrights.
If you own your Easicom 100 – outsideguarantee.If your Easicom 100 needs repair after theguarantee period has ended, it must berepaired so as to comply with the approvalrequirements for connection to thetelephone network. We recommend thatyou call BT on Freefone 0800 800 150 orvisit your nearest BT shop, and you will beinformed of our recommended repairagents.

39
Index
Alarm clock 30Appointments diary 19Appointment alarm 20At a glance 1Auto shut down 32Batteries 6
backup 6, 36cradle 7organiser 6replacing 36
Battery memory 32Battery saver 8Business directory 17Calculator 21Connect a telephone 7Display contrast 32Emergency calls 5Ending calls 11Entering details 10Help 36Installing 6Introduction 4Keypad tone 31Making calls 11Maintenance 35Memory status 32Menu 9Notes 21Organiser keypad 9Organiser symbols 9Password 31Personal directory 14Power cable 7Quickdial 13Receiving calls 11Redial 12Reminder call 28
Resetting the organiser 33Secrecy button 12Select Services 25
Call Diversion 25Friends and Family 26Call my Bill 27Call Waiting 29Reminder Call 28
Set up options 30Switchboard/PBX 34Switching on 8Technical information 38Telephone line cord 7Time and date 8User Info 23Volume 12Warning 6

Offices in Europe, North America,Japan and Asia Pacific.
The Telecommunications services described in thispublication are subject to availability and may be modifiedfrom time to time. Services and equipment are providedsubject to British Telecommunications plc’s respectivestandard conditions of contract. Nothing in thispublication forms any part of any contract.
TouchtoneTM is a registered trade mark ofBritish Telecommunications plc in the UK.
© British Telecommunications plc 1997.Registered Office: 81 Newgate Street, London EC1A 7AJ.Registered in England No. 1800000.Printed in China. Issue No.1 (8/98) 4.Designed by The Art & Design Partnership Limited.