easy 503 italiano english il cronotermostato the ... 503... · art. 3.300.1766 - cr220 3.301.1767 -...
TRANSCRIPT

Art.3.300.1766 - CR2203.301.1767 - CR221
Il CronotermostatoThe Chronothermostat
Easy 503
ISTRUZIONI PER L’USO E L’INSTALLAZIONEPROGRAMMING INSTRUCTIONS AND INSTALLATION GUIDE
MadeMadeMadeMadeMadeinininininItalyItalyItalyItalyItaly
Easy 503Easy 503 Bianco/White
Easy 503 Antracite/Anthracite
ItalianoEnglish

DESCRIZIONE GENERALEDESCRIZIONE GENERALEDESCRIZIONE GENERALEDESCRIZIONE GENERALEDESCRIZIONE GENERALEEasy 503 è un cronotermostato elettronico giornaliero e setti-manale che permette di programmare la temperatura della vo-stra casa ogni ora del giorno per tutti i giorni della settimana.Easy 503 è dotato di un display retroilluminato convisualizzazione grafica delle temperature programmate,modificabili mediante comandi semplici e funzionali che ne fa-cilitano la programmazione.Easy 503 evita gli sprechi di energia azionando l’impianto di ri-scaldamento o condizionamento solo quando serve.
GENERAL DESCRIPTIONGENERAL DESCRIPTIONGENERAL DESCRIPTIONGENERAL DESCRIPTIONGENERAL DESCRIPTIONThe Easy 503 chronothermostat is a daily and weekly electronicchronothermostat that permits the programming of the tem-perature of your home every hour of the day, every day of theweek.The Easy 503 chronothermostat is equipped with a backlightdisplay and a graphic visualisation of the programmed tempe-rature that can bemodified by simple and functional commands that facilitate theprogramming. The Easy 503 chronothermostat avoids wastingenergy by activating the heating or air-conditioning system onlywhen needed.
Easy 503
2

Collegamento con bruciatore, caldaia murale, impianto dicondizionamento, valvola di zona con ritorno a molla (Fig.1A).Collegamento con valvola di zona (Fig.1B):
COLLEGAMENTO ELETTRICOCOLLEGAMENTO ELETTRICOCOLLEGAMENTO ELETTRICOCOLLEGAMENTO ELETTRICOCOLLEGAMENTO ELETTRICO
POWER CONNECTIONPOWER CONNECTIONPOWER CONNECTIONPOWER CONNECTIONPOWER CONNECTIONConnection to burner, wall-mounted boiler, air conditioningsystem, spring-return zone valve (Fig.1A).Connection to zone valve (Fig.1B).
3
INSTALLATIONINSTALLATIONINSTALLATIONINSTALLATIONINSTALLATIONEasy 503 can be directly installed on a 3 module recess box oron the wall. In either cases, it is advisable to position it at aheight of 1,5 meters from the wall, in a dry place, away fromdraughts and heat sources.
INSTALLAZIONEINSTALLAZIONEINSTALLAZIONEINSTALLAZIONEINSTALLAZIONEEasy 503 può essere installato direttamente su scatola da in-casso 3 moduli oppure su parete.In entrambi i casi l’altezza consigliata è di 1,5m dal pavimento,in luogo asciutto, esente da correnti d’aria e lontano da fontidi calore.
NC C NA NO
NC
ApreOpen
ChiudeClose
Easy 503
1 2 3C NA
NO
Fig.1B Easy 503
1 2 3
U
Fig.1A

Dopo aver effettuato il collegamento elettrico fissare la BASE(con le Fessure dell’ANTINA verso il basso) direttamente sullascatola da incasso 3 moduli, utilizzando le viti tipo “A” indotazione (Fig.2 ).Alzare il COPRIBATTERIE e fissare il FRONTALE sulla BASE utiliz-zando le viti tipo “B”. (Fig.3).Completare l’installazione abbassando il COPRIBATTERIE.
INSTALLAZIONE SU SCATOLA 503INSTALLAZIONE SU SCATOLA 503INSTALLAZIONE SU SCATOLA 503INSTALLAZIONE SU SCATOLA 503INSTALLAZIONE SU SCATOLA 503
INSTALLATION ONTO PATTRESS BOX 503INSTALLATION ONTO PATTRESS BOX 503INSTALLATION ONTO PATTRESS BOX 503INSTALLATION ONTO PATTRESS BOX 503INSTALLATION ONTO PATTRESS BOX 503After connecting the wiring, fix the BASE PLATE (with the slotsof the FLAP at the bottom) directly onto the three-gang pattressbox utilizing the type “A” screws supplied (Fig. 2). Lift theBATTERY COVER and fix the CHRONOTHERMOSTAT UNIT to theBASE PLATE utilizing the type “B” screws (Fig. 3).Complete the installation by lowering the BATTERY COVER.
Viti e tasselli in dotazioneScrew and plugs supplied
Scatola incassoPattress box
Fig.2
Base
Fessure AntinaFlap Slots
Viti “A”Screws “A”
4
A B C

INSTALLAZIONE A PARETEINSTALLAZIONE A PARETEINSTALLAZIONE A PARETEINSTALLAZIONE A PARETEINSTALLAZIONE A PARETEDopo aver fissato la base (con le Fessure dell’ANTINA verso ilbasso) alla parete mediante tasselli e viti (tipo “C”) in dotazio-ne, collegare elettricamente il cronotermostato e fissarlo allabase con le viti tipo “B”. Completare l’installazione abbassan-do il Copribatterie.
WALL INSTALLATIONWALL INSTALLATIONWALL INSTALLATIONWALL INSTALLATIONWALL INSTALLATIONAfter fixing the BASE PLATE (with the slots of the FLAP at thebottom) to the wall using the wall plugs and supplied type “C”screws, electrically connect the chronothermostat and fix it tothe BASE PLATE using the type “B” screws. Complete theinstallation by lowering the BATTERY COVER.
CopribatterieBattery Cover
FrontaleChronothermostat unit
Base
Viti “B”Screws “B”Fig.3
Fessure AntinaFlap Slots
Viti “C”Screws “C”
Base
CopribatterieBattery Cover
FrontaleChronothermostatunit
Viti “B”Screws “B”
5

ALIMENTAZIONEALIMENTAZIONEALIMENTAZIONEALIMENTAZIONEALIMENTAZIONEEasy 503 va alimentato con due comuni batterie AA (stilo) Alcalineda1,5V che ne garantiscono il funzionamento per almeno 2 anni.Per l’inserimento delle batterie sfilare il COPRIBATTERIE e posi-zionare le batterie facendo attenzione alla polarità indicata al-l’interno del vano. (Fig. 4)Easy 503 è dotato di due soglie di scarica delle batterie.Superata la prima soglia compare il simbolo BAT ( ) mentrel’apparecchio continua a funzionare regolarmente.Al raggiungimento della seconda, Easy 503 blocca completamentele sue funzioni di termoregolazione mentre il display presentasolo l’ora, il giorno ed il simbolo di batteria scarica ( )lampeggianti.Durante la sostituzione delle batterie i dati rimangono memo-rizzati per 30 secondi in assenza di alimentazione.
POWER SUPPLYPOWER SUPPLYPOWER SUPPLYPOWER SUPPLYPOWER SUPPLYThe Easy 503 chronothermostat is powered by two AA 1.5Valkaline batteries that ensure the chronothermostat operatesfor at least two years.To insert the batteries, slide out the BATTERY COVER and positionthe batteries in the correct polarity direction as indicated insidethe compartment (Fig. 4).The Easy 503 chronothermostat is equipped with two batterywarning discharge levels. When the first level is superseded thesymbol BAT BAT BAT BAT BAT appears ( ) whilst the chronothermostatcontinues to function correctly.On reaching the second level, the chronothermostat completelyblocks its functions of thermoregulation whilst the display showsthe hour, day and the flashing symbol of the discharged battery( ).Whilst substituting the batteries, the data remains memorizedfor 30 seconds in the absence of power.
6

Fig.4
INIZIALIZZAZIONEINIZIALIZZAZIONEINIZIALIZZAZIONEINIZIALIZZAZIONEINIZIALIZZAZIONEAppena alimentato Easy 503 effettua un ciclo di controllo ac-cendendo tutti i segmenti del display e attivando il carico perpochi secondi.Nel caso l’inizializzazione possa pregiudicare il corretto fun-zionamento del carico alimentare il cronotermostato prima dieffettuare i collegamenti elettrici.
INITIALISATIONINITIALISATIONINITIALISATIONINITIALISATIONINITIALISATIONAs soon as Easy 503 chronothermostat is fed power it carries outa control cycle switching on all segments of the display andactivating the charge for a few seconds. If the initialization mightprejudice the correct functioning of the charge, power up thechronothermostat before carrying out the electrical connections.
7

FUNZIONAMENTO E PROGRAMMAZIONEFUNZIONAMENTO E PROGRAMMAZIONEFUNZIONAMENTO E PROGRAMMAZIONEFUNZIONAMENTO E PROGRAMMAZIONEFUNZIONAMENTO E PROGRAMMAZIONEParticolare fondamentale del cronotermostato è il display gra-fico retroilluminato che presenta un diagramma composto da24 colonne rappresentanti le ore della giornata; l’altezza di ognicolonna indica la temperatura programmata per quell’ora. Il seg-mento in alto a sinistra (A in Fig.5), in corrispondenza dellescritte sovrastampate, indica il giorno al quale si riferisce ilprogramma.La temperatura programmata (B in Fig.5) vienevisualizzata in alto a destra durante la programmazione ed èidentificata dal lampeggio del giorno e del simbolo “CCCCC” indican-te i °C°C°C°C°C.Durante il funzionamento normale vengono visualizzati alter-nativamente, premendo il tasto °C/h°C/h°C/h°C/h°C/h (Fig.5), l’orario o la tem-peratura ambiente.Easy 503 appena alimentato presenta un diagramma standard diutilizzo, mentre l’orologio parte dall’ora 00.00 di Lunedì (LULULULULU).Per modificare il programma standard portarsi al giorno desi-derato mediante il tasto DAYDAYDAYDAYDAY (Fig.5) e variare il grafico giorna-liero utilizzando i quattro tasti centrali disposti a croce. I tasti+h+h+h+h+h e -h-h-h-h-h (Fig.5) spostano il cursore orizzontalmente lungo l’as-se delle ORE, mentre i tasti +°C+°C+°C+°C+°C e -°C-°C-°C-°C-°C (Fig.5) variano la tempe-ratura impostata.Utilizzando i quattro tasti a croce +h, -h, +°C, -°C ed il tastoUtilizzando i quattro tasti a croce +h, -h, +°C, -°C ed il tastoUtilizzando i quattro tasti a croce +h, -h, +°C, -°C ed il tastoUtilizzando i quattro tasti a croce +h, -h, +°C, -°C ed il tastoUtilizzando i quattro tasti a croce +h, -h, +°C, -°C ed il tastoDAY si può modificare il programma settimanale delle tem-DAY si può modificare il programma settimanale delle tem-DAY si può modificare il programma settimanale delle tem-DAY si può modificare il programma settimanale delle tem-DAY si può modificare il programma settimanale delle tem-perature in qualunque momentoperature in qualunque momentoperature in qualunque momentoperature in qualunque momentoperature in qualunque momento.L’incremento e il decremento minimo della temperatura impo-stata tramite i tasti +°C+°C+°C+°C+°C e -°C-°C-°C-°C-°C è di 0.1°C0.1°C0.1°C0.1°C0.1°C. Mantenendo premutoil tasto +°C+°C+°C+°C+°C o -°C -°C -°C -°C -°C l’incremento o il decremento diventa di 0.2°C0.2°C0.2°C0.2°C0.2°C.Dopo aver programmato il primo giorno si possono program-mare i restanti in due modi diversi:- Premendo il tasto DAY DAY DAY DAY DAY (F in Fig.5) si passa al giorno seguentevisualizzando il programma memorizzato (se non esiste verràvisualizzato il grafico standard) che potrà essere modificato comedescritto precedentemente.- Copiando il giorno appena programmato nel giorno succes-sivo attraverso la funzione COPY.COPY.COPY.COPY.COPY.
8

FUNCTIONING AND PROGRAMMINGFUNCTIONING AND PROGRAMMINGFUNCTIONING AND PROGRAMMINGFUNCTIONING AND PROGRAMMINGFUNCTIONING AND PROGRAMMINGA fundamental part of the chronothermostat is the backlightgraphic display that shows a diagram of 24 columns representingthe 24 hours of the day and the height of each column indicatesthe programmed temperature for that hour.The segment at the top on the right (A in Fig.5), incorrespondence to the overprinted writing indicates the day towhich the programme refers. The programmed temperature (Bin Fig.5) is visualised at the top on the right whilst programmingand is identified by the day flashing and the symbol “CCCCC” indicatingthe °C. During normal functioning, the hour or the ambient tem-perature are alternately visualised by pressing the °C/h°C/h°C/h°C/h°C/h key(Fig.5).A standard utilization diagram is shown once the Easy 503chronothermostat is powered on; the clock starts at 00.00 ofMonday (LU).To modify the programme, move to the desired day using theDAYDAYDAYDAYDAY key (Fig.5) and adjust the daily graphic utilizing the fourcentral keys designed in the shape of a cross. The +h+h+h+h+h and -h-h-h-h-hkeys (Fig.5) shift the cursor horizontally along the HOUR axis,whilst the +°C+°C+°C+°C+°C and -°C-°C-°C-°C-°C keys (Fig.5) adjust the set temperature.The weekly temperature programme can be modified at anyThe weekly temperature programme can be modified at anyThe weekly temperature programme can be modified at anyThe weekly temperature programme can be modified at anyThe weekly temperature programme can be modified at anymoment by utilising the four central keys designed in themoment by utilising the four central keys designed in themoment by utilising the four central keys designed in themoment by utilising the four central keys designed in themoment by utilising the four central keys designed in theshape of a shape of a shape of a shape of a shape of a cross (+h, -h, +°C and -°C) and the DAY key.(+h, -h, +°C and -°C) and the DAY key.(+h, -h, +°C and -°C) and the DAY key.(+h, -h, +°C and -°C) and the DAY key.(+h, -h, +°C and -°C) and the DAY key.The minimum increase/decrease of the set temperature usingthe +°C +°C +°C +°C +°C and -°C-°C-°C-°C-°C keys is 0.1°C0.1°C0.1°C0.1°C0.1°C. Keeping +°C+°C+°C+°C+°C or -°C -°C -°C -°C -°C key pressedthe increase/decrease becomes 0.2°C.After programming the first day, the following days can beprogrammed in two different ways:- Pressing the DAY DAY DAY DAY DAY key (F in Fig.5), the following day is visualizeddisplaying the memorized programme (if the previousprogrammed day does not exist, the standard graphic isvisualized) that can be modified as previously described.- Copying the day previously programmed into the successiveday using the COPYCOPYCOPYCOPYCOPY function.
9

TASTO COPYTASTO COPYTASTO COPYTASTO COPYTASTO COPYPer copiare il programma del giorno appena programmato inaltri giorni premere per due secondi il tasto COPY.Sul display apparirà la scritta COPY e lampeggerà il cursore delgiorno in cui copiare il programma. Con i tasti +h+h+h+h+h o -h-h-h-h-h si scor-rono i giorni della settimana e per confermare il GIORNO in cuicopiare il programma premere il tasto COPY.Per uscire dalla funzione COPY attendere qualche secondo sen-za premere alcun tasto.Terminata la programmazione dell’intera settimana non restache aggiornare l’ora ed il giorno premendo, mediante uno stru-mento appuntito, il tasto SET (G in Fig.5).
COPY KEYCOPY KEYCOPY KEYCOPY KEYCOPY KEYTo copy the programme of the day that was previouslyprogrammed in other days, press the COPY key for two seconds.The word COPY appears on the display and the cursor of theday in which the programme is to be copied flashes.Using the +h +h +h +h +h or -h -h -h -h -h key scroll the days of the week and to confirmthe DAY in which to copy the programme press the COPY key.To exit from the COPY function, wait a few seconds withoutpressing any key. Having finished programming the whole week,update the hour and the day by pressing the SET key using apointed object (Fig. 5).
TASTO SETTASTO SETTASTO SETTASTO SETTASTO SETCon il tasto SET (G in Fig.5) si potranno aggiornare l’ORA, iMINUTI e il GIORNO.
Alla pressione del tasto SET l’ORA inizierà a lampeggiare.Coi tasti +°C+°C+°C+°C+°C e -°C-°C-°C-°C-°C si regola l’ORA attuale.
Alla pressione del tasto +h+h+h+h+h ci si sposta sui MINUTI che inizie-ranno a lampeggiare.
10

I MINUTI vengono regolati coi tasti +°C+°C+°C+°C+°C e -°C -°C -°C -°C -°C .
Alla pressione del tasto +h+h+h+h+h ci si sposta sul GIORNO che inizieràa lampeggiare.Il GIORNO viene regolato coi tasti +°C+°C+°C+°C+°C e -°C -°C -°C -°C -°C .
Da questo momento Easy 503 inizia il suo regolare funziona-mento indicando ogni inserimento del carico (riscaldamento ocondizionamento) mediante l’accensione del simbolo della fiam-ma sul display (Fig.5).
SET KEYSET KEYSET KEYSET KEYSET KEYThe HOUR, MINUTES and DAY can be updated using the SET key(G in Fig.5).
Pressing the SET key, the HOUR starts flashing.The current HOUR is adjusted the using the +°C +°C +°C +°C +°C and -°C -°C -°C -°C -°C keys.
Pressing the +h+h+h+h+h key, the programming sequence shifts to theMINUTES which starts to flash.The MINUTES are adjusted using the +°C +°C +°C +°C +°C and -°C -°C -°C -°C -°C keys.
Pressing the +h key, the programming sequence shifts to theDAY which starts to flash.The DAY is adjusted using the +°C +°C +°C +°C +°C and -°C -°C -°C -°C -°C keys.
From this moment the Easy 503 chronothermostat starts itsnormal functioning, indicating each upload inserted (heating orair-conditioning) by the lighting up of the flame symbol on thedisplay (Fig. 5).
11

FUNZIONAMENTO MANUALEFUNZIONAMENTO MANUALEFUNZIONAMENTO MANUALEFUNZIONAMENTO MANUALEFUNZIONAMENTO MANUALEPremendo il tasto AUT/MAN (Fig.5) il cronotermostato entranel funzionamento manuale spegnendo il grafico (che rimanememorizzato) e accendendo il simbolo della mano (Fig.5).Ora Easy 503 si comporta come un semplice termostato am-biente dove la regolazione avviene impostando la temperaturacon i tasti +°C +°C +°C +°C +°C e -°C -°C -°C -°C -°C (O, P in Fig.5). La temperatura impostata,leggibile sul display, verrà mantenuta fino a che non si usciràdal funzionamento manuale, ripremendo il tasto AUT/MAN(modo di funzionamento automatico).
MANUAL FUNCTIONINGMANUAL FUNCTIONINGMANUAL FUNCTIONINGMANUAL FUNCTIONINGMANUAL FUNCTIONINGPressing the AUT/MAN key (Fig.5) the chronothermostat goesinto manual mode by closing the graphic display (which remainsmemorized) and lighting up the hand symbol (Fig. 5).Now the Easy 503 chronothermostat behaves like a normalambience thermostat where the adjustment of the temperatureis made by using the +°C+°C+°C+°C+°C and -°C-°C-°C-°C-°C keys (O and P in Fig.5).The set temperature read on the display remains as long as thechronothermostat is in manual mode (press the AUT/MAN keyto pass to automatic mode).
12
TASTO OFFTASTO OFFTASTO OFFTASTO OFFTASTO OFFPremendo per due secondi il tasto (R in Fig.5) si spegne ilcronotermostato.Easy 503 disattiverà le funzioni relative ai programmi impostati,che rimarranno comunque memorizzati, e visualizzerà alter-nativamente la scritta OFF con l’ora attuale o la temperaturarilevata. Per scegliere la visualizzazione dell’ORA piuttosto chedella temperature premere il tasto °C/h.°C/h.°C/h.°C/h.°C/h.Quando il cronotermostato è spento mantiene attiva la FUN-ZIONE ANTIGELO.Se la temperatura ambiente rilevata scende sotto i 7 °C 7 °C 7 °C 7 °C 7 °C (7°C –0.2°C=6.8°C) l’apparecchio aziona l’impianto per mantenere incircolazione l’acqua e impedire che si ghiacci nei tubi.

FUNZIONE RESETFUNZIONE RESETFUNZIONE RESETFUNZIONE RESETFUNZIONE RESETNel caso ci fosse la necessità di annullare il programma inserito(per esempio dopo una prova di programmazione) premerecontemporaneamente i tasti AUT/MAN AUT/MAN AUT/MAN AUT/MAN AUT/MAN e COPY COPY COPY COPY COPY (T, H in Fig.5)per circa due secondi;Easy 503 riparte con l’inizializzazione descritta in precedenza.
RESET FUNCTIONRESET FUNCTIONRESET FUNCTIONRESET FUNCTIONRESET FUNCTIONIf it becomes necessary to cancel the set programme (e.g., aftera programming test), simultaneously press the AUT/MAN andCOPY keys (T and H in Fig.5) for approximately two seconds.The Easy 503 chronothermostat restarts the initialisation proce-dure described previously.
OFF KEYOFF KEYOFF KEYOFF KEYOFF KEYThe chronothermostat is switched off by pressing the key(R in Fig.5) for two seconds.The Easy 503 chronothermostat will deactivate the functions re-lative to the set programmes, which anyway remainmemorized, and will alternately visualize the word OFF with thecurrent hour and the detected temperature.To visualize the HOUR instead of the temperature, press the °C/hC/hC/hC/hC/h key.When the chronothermostat is switched off, the ANTI-FREEZEFUNCTION remains active. If the ambient temperature detecteddrops below 7°C7°C7°C7°C7°C (7°C – 0.2°C = 6.8°C), the device activates theheating system to keep the water circulating to stop ice formingin the tubes.
13
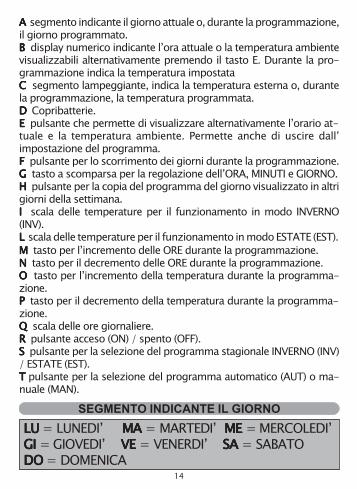
A A A A A segmento indicante il giorno attuale o, durante la programmazione,il giorno programmato.B B B B B display numerico indicante l’ora attuale o la temperatura ambientevisualizzabili alternativamente premendo il tasto E. Durante la pro-grammazione indica la temperatura impostataC C C C C segmento lampeggiante, indica la temperatura esterna o, durantela programmazione, la temperatura programmata.D D D D D Copribatterie.E E E E E pulsante che permette di visualizzare alternativamente l’orario at-tuale e la temperatura ambiente. Permette anche di uscire dall’impostazione del programma.F F F F F pulsante per lo scorrimento dei giorni durante la programmazione.G G G G G tasto a scomparsa per la regolazione dell’ORA, MINUTI e GIORNO.H H H H H pulsante per la copia del programma del giorno visualizzato in altrigiorni della settimana.IIIII scala delle temperature per il funzionamento in modo INVERNO(INV).LLLLL scala delle temperature per il funzionamento in modo ESTATE (EST).M M M M M tasto per l’incremento delle ORE durante la programmazione.NNNNN tasto per il decremento delle ORE durante la programmazione.O O O O O tasto per l’incremento della temperatura durante la programma-zione.P P P P P tasto per il decremento della temperatura durante la programma-zione.Q Q Q Q Q scala delle ore giornaliere.RRRRR pulsante acceso (ON) / spento (OFF).SSSSS pulsante per la selezione del programma stagionale INVERNO (INV)/ ESTATE (EST).T T T T T pulsante per la selezione del programma automatico (AUT) o ma-nuale (MAN).
14
LULULULULU = LUNEDI’ MA MA MA MA MA = MARTEDI’ ME ME ME ME ME = MERCOLEDI’GI GI GI GI GI = GIOVEDI’ VEVEVEVEVE = VENERDI’ SA SA SA SA SA = SABATODODODODODO = DOMENICA
SEGMENTO INDICANTE IL GIORNO

15
Indicazione modo di funzionamento INVERNOWINTER function mode indicationIndicazione modo di funzionamento ESTATESUMMER function mode indicationIndicazione modo di funzionamento MANUALEMANUAL function mode indicationIndicazione Indibatterie scaricheDISCHARGED battery indicatorIndicazione chiusura contatto relèRelay contact closed indicator
T R Q N O P M F H T R Q N O P M F H T R Q N O P M F H T R Q N O P M F H T R Q N O P M F H
set
S I A C B D LS I A C B D LS I A C B D LS I A C B D LS I A C B D L
EEEEEGGGGG
Fig.5

LULULULULU = Monday MA MA MA MA MA = Tuesday ME ME ME ME ME = WednesdayGI GI GI GI GI = Thursday VEVEVEVEVE = Friday SA SA SA SA SA = SaturdayDODODODODO = Sunday
16
A A A A A Segment indicating the current day or the programmed day,whilst programming.B B B B B Numerical display indicating the current hour or the ambienttemperature alternately made visible by pressing the E key. Whilstprogramming, it indicates the set temperature.C C C C C Flashing segment that indicates the external temperature or,whilst programming, the set temperature.D D D D D Battery cover.E E E E E Key that permits the alternate visualisation of the currenthour and the ambient temperature. It also permits the user toexit from the setting programme.F F F F F Key for scrolling the days whilst programming.G G G G G Recessed key for adjusting the HOUR, MINUTES and DAY.H H H H H Key for copying the programme of the day visualised toanother day of the week.IIIII Temperature scale for functioning in WINTER mode (INV).LLLLL Temperature scale for functioning in SUMMER mode (EST).M M M M M Key for increasing the HOURS whilst programming.NNNNN Key for decreasing the HOURS whilst programming.O O O O O Key for increasing the temperature whilst programming.P P P P P Key for decreasing the temperature whilst programming.Q Q Q Q Q Daily hour scale.R R R R R ON/OFF key.S S S S S Key for selecting the WINTER (INV) programme or SUMMER(EST) programme.TTTTT Key for selecting the automatic (AUT) programme or manual(MAN) programme
SEGMENT INDICATING THE DAY

GENERAL CONDITIONS OF WARRANTYGENERAL CONDITIONS OF WARRANTYGENERAL CONDITIONS OF WARRANTYGENERAL CONDITIONS OF WARRANTYGENERAL CONDITIONS OF WARRANTYTHE PRESENT CERTIFICATE IS THE ONLY DOCUMENT TO HAVETHE PRESENT CERTIFICATE IS THE ONLY DOCUMENT TO HAVETHE PRESENT CERTIFICATE IS THE ONLY DOCUMENT TO HAVETHE PRESENT CERTIFICATE IS THE ONLY DOCUMENT TO HAVETHE PRESENT CERTIFICATE IS THE ONLY DOCUMENT TO HAVETHE RIGHT OF REPARATION OF THE PRODUCT IN WARRANTYTHE RIGHT OF REPARATION OF THE PRODUCT IN WARRANTYTHE RIGHT OF REPARATION OF THE PRODUCT IN WARRANTYTHE RIGHT OF REPARATION OF THE PRODUCT IN WARRANTYTHE RIGHT OF REPARATION OF THE PRODUCT IN WARRANTY
- The product is warranted for 24 month from purchase date.- Any damages caused by tampering and incorrect use orinstallation will be not covered by warranty.- The warranty is valid only if is full compiled.- In case of defects covered by warranty, the producer willrepair or replace the free product.PERFORMANCES OUT OF WARRANTY:PERFORMANCES OUT OF WARRANTY:PERFORMANCES OUT OF WARRANTY:PERFORMANCES OUT OF WARRANTY:PERFORMANCES OUT OF WARRANTY:When warranty’s terms are spent, the eventual reparationswill debited in according to the replaced parts and to thehand costs.
CONDIZIONI GENERALI DI GARANZIACONDIZIONI GENERALI DI GARANZIACONDIZIONI GENERALI DI GARANZIACONDIZIONI GENERALI DI GARANZIACONDIZIONI GENERALI DI GARANZIAIL PRESENTE CERTIFICATO E' L' UNICO DOCUMENTO CHE DA'IL PRESENTE CERTIFICATO E' L' UNICO DOCUMENTO CHE DA'IL PRESENTE CERTIFICATO E' L' UNICO DOCUMENTO CHE DA'IL PRESENTE CERTIFICATO E' L' UNICO DOCUMENTO CHE DA'IL PRESENTE CERTIFICATO E' L' UNICO DOCUMENTO CHE DA'
DIRITTO ALLA RIPARAZIONE DEL PRODOTTO IN GARANZIADIRITTO ALLA RIPARAZIONE DEL PRODOTTO IN GARANZIADIRITTO ALLA RIPARAZIONE DEL PRODOTTO IN GARANZIADIRITTO ALLA RIPARAZIONE DEL PRODOTTO IN GARANZIADIRITTO ALLA RIPARAZIONE DEL PRODOTTO IN GARANZIA
- Il prodotto é GARANTITO per un periodo di 24 mesi dalladata di acquisto.- Non sono coperti da GARANZIA eventuali danni derivati damanomissioni, uso ed installazione errati o impropri.- La GARANZIA è valida solo se debitamente compilata.- In caso di difetti coperti da GARANZIA, il produttore riparerào sostituirà il prodotto gratuitamente.PRESTAZIONI FUORI GARANZIA:PRESTAZIONI FUORI GARANZIA:PRESTAZIONI FUORI GARANZIA:PRESTAZIONI FUORI GARANZIA:PRESTAZIONI FUORI GARANZIA:Trascorsi i termini o la durata della GARANZIA le eventualiriparazioni verranno addebitate in funzione alle parti sostituitee al costo della manodopera.
17

CERTIFICATO DI GARANZIACERTIFICATO DI GARANZIACERTIFICATO DI GARANZIACERTIFICATO DI GARANZIACERTIFICATO DI GARANZIADA COMPILARE E SPEDIRE IN CASO DI GUASTODA COMPILARE E SPEDIRE IN CASO DI GUASTODA COMPILARE E SPEDIRE IN CASO DI GUASTODA COMPILARE E SPEDIRE IN CASO DI GUASTODA COMPILARE E SPEDIRE IN CASO DI GUASTO
APPARECCHIO: APPARECCHIO: APPARECCHIO: APPARECCHIO: APPARECCHIO: Easy 503Easy 503Easy 503Easy 503Easy 503 Bianco Cod. 3.300.1766-CR220
Easy 503Easy 503Easy 503Easy 503Easy 503 Antracite Cod. 3.3001.1767-CR221
Numero di serie (s.n.) ________________________________________________________
RIVENDITORERIVENDITORERIVENDITORERIVENDITORERIVENDITORETimbro: Data di acquisto:
______/_____/_____UTILIZZATOREUTILIZZATOREUTILIZZATOREUTILIZZATOREUTILIZZATORECognome e nome _________________________________________________________
Via ____________________________________________________ n° ________________
C.A.P. _______________ Città ________________________________________________
Telefono __________________________________________________________________
WARRANTY CERTIFICATEWARRANTY CERTIFICATEWARRANTY CERTIFICATEWARRANTY CERTIFICATEWARRANTY CERTIFICATETO COMPILE AND SEND IN CASE OF DAMAGETO COMPILE AND SEND IN CASE OF DAMAGETO COMPILE AND SEND IN CASE OF DAMAGETO COMPILE AND SEND IN CASE OF DAMAGETO COMPILE AND SEND IN CASE OF DAMAGE
DEV ICEDEV ICEDEV ICEDEV ICEDEV ICE ::::: Easy 503Easy 503Easy 503Easy 503Easy 503 White Cod. 3.300.1766-CR220
Easy 503Easy 503Easy 503Easy 503Easy 503 Anthracite Cod. 3.301.1767-CR221
Serial number(s.n.)__________________________________________________________DEALERDEALERDEALERDEALERDEALERStamp: Date of purchase:
______/______/______USERUSERUSERUSERUSERSurname and name ________________________________________________________
Address _____________________________________________________ n°_________
City _____________________________________________________________________
Telephone_______________________________________________________________
18

CARATTERISTICHE TECNICHECARATTERISTICHE TECNICHECARATTERISTICHE TECNICHECARATTERISTICHE TECNICHECARATTERISTICHE TECNICHEAlimentazione: 2 batterie stilo alcaline AA da 1,5V.Autonomia batterie: oltre 2 anni.Display: retroilluminatoControllo automatico della scarica delle batterie con 2 soglie d’intervento.Sostituzione delle batterie senza perdita di dati.Campo di regolazione: da 5 a 30°C in inverno, da 15 a 35°C in estate.Differenziale termico: +0,2°C.Possibilità di programmare qualsiasi temperatura compresa nei campidi regolazione in ogni ora del giorno per tutti i giorni della settimana.Portata contatti: 230Vac 5A carico resistivo.Installazione: a parete oppure direttamente su scatola 503.Colori disponibili: bianco o grigio antracite.Dimensioni: 119 x 83 x 24 mmPeso: 180gr batterie incluse.-Dispositivo di controllo della temperatura di classe 1.-Contributo del dispositivo di controllo della temperatura all’effi-cienza stagionale di riscaldamento d’ambiente 1%. (in conformitàalla Direttiva 2010/30/CE Regolamento 811/2013/UE)
Power supply: two 1.5V AA alkaline batteries.Battery life: more than 2 years.Display: backlight display.Automatic control of the battery discharge with 2 warning levels.Substitution of the batteries without losing the data.Winter (INV) setting temperature range from 5°C to 30°C inclusive.Summer (EST) setting temperature range from 15°C to 35°C inclusive.Thermal difference scale: ± 0.2°C.Possibility of programming any inclusive temperature in the setting rangeevery hour of the day, every day of the week.Contact capacity: 230V AC 5A resistive load.Installation: wall mounted or directly onto a 503 pattress box.Available colours: white or anthracite grey.Dimensions: 119 mm x 83 mm x 24 mmWeight: 180grams, batteries excluded.-Device for controlling the temperature of class 1.-Contribution of the device temperature control efficiency seasonalheating environment 1%. (in accordance with Directive 2010/30 / EC Regulation811/2013/EU).
TECHNICAL CHARACTERISTICTECHNICAL CHARACTERISTICTECHNICAL CHARACTERISTICTECHNICAL CHARACTERISTICTECHNICAL CHARACTERISTIC
19

La ditta costruttrice si riserva il diritto di apportare qualsiasi modifica, estetica ofunzionale, senza preavviso alcuno ed in qualsiasi momento.
The manufacturer firm reserves the right to make any aesthetic or functionalmodificationswithout notice and at any moment.
D
is.10
3412
4a P
ROV
cod
.2.7
10.2
463
M
ade
in It
aly
Mad
e in
Ital
yM
ade
in It
aly
Mad
e in
Ital
yM
ade
in It
aly
GECA Srlvia E.Fermi, n°9825064 Gussago (BS) ItalyTel. +39 030 3730218www.gecasrl.it
Tecnocontrol Srlvia Miglioli, n°4720090 Segrate (MI) ItalyTel. +39 02 26922890www.tecnocontrol.it