easy java(script) manual wolfgang christian and francisco ... · "ejss manual" august 27,...
TRANSCRIPT

”EjsS Manual” August 27, 2014
Easy Java(script) Manual
Wolfgang Christianand
Francisco Esquembre

”EjsS Manual” August 27, 2014
”EjsS Manual” August 27, 2014
Chapter One
Installing and running Easy Java(script) Simulations
Machines should work. People should think. Richard Hamming
This chapter provides an overview of Easy Java(script) Simulations(EjsS for short), the high-level modeling and authoring tool that we usein our modeling and simulation process. We first describe the installationprocess and the file structure of our program, and then run the EjsS con-sole to get our first EjsS program on the screen. We describe how EasyJava(script) Simulations supports different programming languages for themodelling process. Subsequent chapters provide a step-by-step introductionto the different parts of the EjsS graphical user interface, as well as to themodelling process, one chapter per supported programming language.
1.1 ABOUT Easy Java(script) Simulations
Computer modeling is intimately tied to computer simulation. A model is aconceptual representation of a physical system and its properties and mod-eling is the process whereby we construct this representation. Computermodeling requires (1) a description and an analysis of the problem, (2) theidentification of the variables and the algorithms, (3) the implementation ona specific hardware-software platform, (4) the execution of the implementa-tion and analysis of the results, (5) refinement and generalization, and (6)the presentation of results. A computer simulation is an implementation ofa model that allows us to test the model under different conditions with theobjective of learning about the model’s behavior. The applicability of theresults of the simulation to those of the real (physical) system depends onhow well the model describes reality. The process of devising more generaland more accurate models is what science is about.
The implementation of a model and the visualization of its output re-quires that we program a computer. Programming can be fun, because itgives us complete control of every visual and numerical detail of the simu-lated world. But programming is also a technical task that can intimidate.

”EjsS Manual” August 27, 2014
2 CHAPTER 1
This technical barrier can, however, be lowered if we use an appropriatetool. Easy Java(script) Simulations is a modeling tool that has been de-signed to allow scientists, not only computer scientists, to create simulationsin different programming languages. Currently, Java and Javascript are thelanguages supported. EjsS simplifies this task, both from the technical andfrom the conceptual point of view.
EjsS provides a simple yet powerful conceptual structure for buildingsimulations. The tool offers a sequence of workpanels which we use to imple-ment the model and its graphical user interface. EjsS automates tasks suchas numerically solving ordinary differential equations, and animation (usingseparate threads, if required). The low-level communication between theprogram and the end-user that takes place at run-time, including handlingof mouse actions within the simulation’s graphical interface, is accomplishedwithout low-level programming.
Obviously, part of the task still depends on us. You are responsiblefor providing a model for the phenomenon and for designing and selectingan output view that shows the model’s main features. These high-leveltasks are more related to science than to programming. You are encouragedto devote your time and energy studying the science, something that thecomputer cannot do. The purpose of this document is to demonstrate thatthis computer modeling is not only possible but can be relatively easy, withthe help of Easy Java(script) Simulations.
1.2 INSTALLING AND RUNNING THE SOFTWARE
Let us begin by installing Easy Java(script) Simulations and running it.EjsS is a Java program that can be run under any operating system thatsupports a Java Virtual Machine (VM). Because Java is designed to beplatform independent, the EjsS user interface on Mac OS X, Unix, andLinux look very much the same, though they may present small differencesamong them. (We display the Mac OS X interface in the figures of thisdocument.)
If Easy Java(script) Simulations is not installed in your computer, youneed to do so now. To install EjsS, do the following:
1. Install the Java Runtime Environment. EjsS requires the JavaRuntime Environment (JRE), version 1.7 or later. The JRE mayalready be installed in your computer, but, if not, visit the Java site at<http://java.sun.com> and follow the instructions there to downloadand install the latest version.
2. Copy the EjsS distribution file to your computer. EjsS is dis-

”EjsS Manual” August 27, 2014
INSTALLING AND RUNNING Easy Java(script) Simulations 3
tributed in a compressed ZIP file that can be downloaded from EjsSweb site <http://www.um.es/fem/EjsWiki>. The distribution file willbe called something like EJS X.x yymmdd.zip. Here, the X.x char-acters stand for the actual version of the software, and yymmdd standsfor the date this version was created. (For instance, you can get some-thing like EJS 5.1 140901.zip.)
3. Uncompress EjsS. Uncompress the EjsS distribution file on yourcomputer’s hard disk to create a directory called EJS X.x (EJS 5.1in the example). The new directory contains the whole EjsS program.
In Unix-like systems, the EJS X.x directory may be uncompressed asread-only. Enable write permissions for the EJS X.x directory and allits subdirectories.
And that’s it! This is all that is needed to install EjsS. Once EasyJava(script) Simulations is installed in your computer, do the following torun EjsS :
Run the EjsS console. Inside the newly-created EJS X.x directory,you will find a file called EjsConsole.jar. Double-click it to run theEjsS console shown in Figure 1.1.
If double-clicking doesn’t run the console, open a system terminal win-dow, change to the EJS X.x directory, and type the command: java
-jar EjsConsole.jar. You’ll need to fully qualify the java commandif it is not in your system’s PATH.
Figure 1.1: The EjsS console.
You should see the console (Figure 1.1) and the file chooser dialog ofFigure 1.2, that we will describe below, on your computer display.
The EjsS console is not part of EjsS, but a utility used to launch one orseveral instances (copies) of EjsS and to perform other EjsS -related tasks.You can use the console to customize some aspects of how EjsS looks andbehaves at start up. 1 The console also displays EjsS program information
1For instance, set the Look and feel field to CROSS PLATFORM, the specific look and feel
”EjsS Manual” August 27, 2014
4 CHAPTER 1
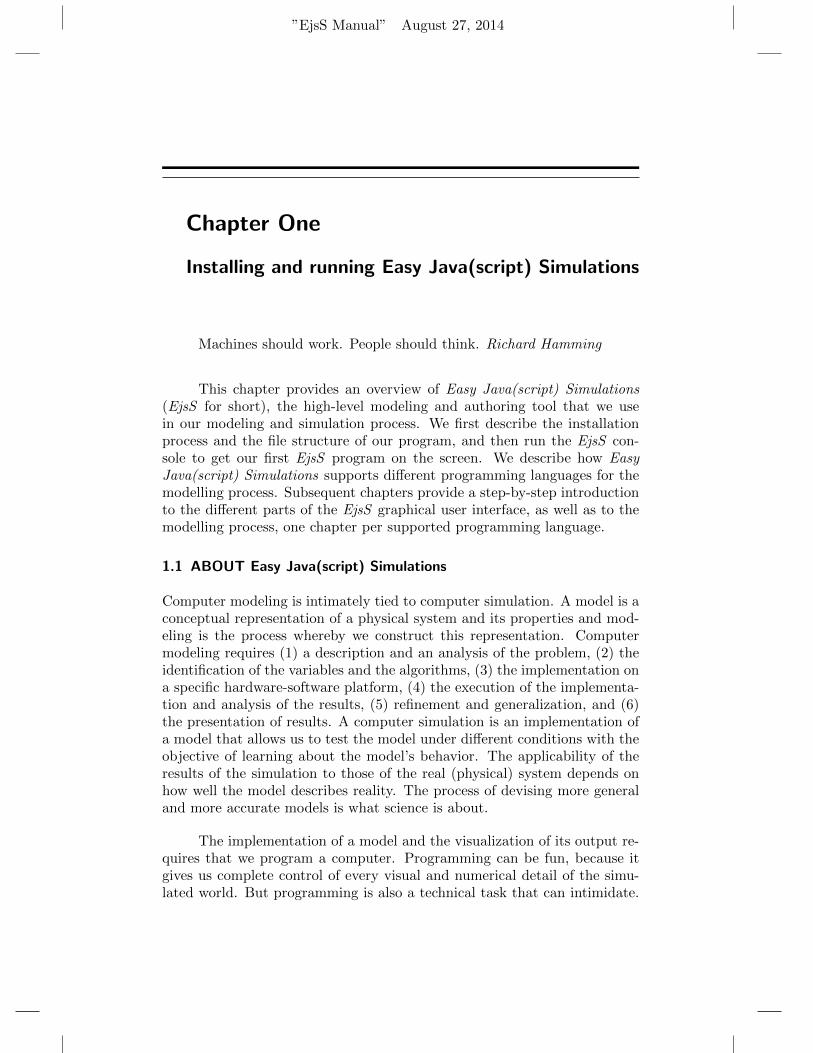
Figure 1.2: File chooser to select your workspace directory.
and error messages on its Output area tab, and we will refer to it fromtime to time in this document. The console creates an instance of EjsS atstart-up and exits automatically when you close the last running instanceof EjsS.
However, before the console can run EjsS right after installation, thefile chooser displayed in Figure 1.2 will appear, letting you select the direc-tory in the computer hard disk that you will use as your workspace. EjsSuses the concept of a workspace to organize your work. A workspace isa directory in your hard disk where EjsS stores your simulation files for agiven project. A workspace can contain an unlimited number of simulations.Inside a workspace directory, EjsS creates four subdirectories:
• config is the directory for user-defined configuration and options files.• export is the proposed target directory when EjsS generates files for
distribution.• output is the directory used by EjsS to place temporary files generated
when compiling a simulation.• source is the directory under which all your simulation (source and
auxiliary) files must be located.
When you first run EjsS, the console asks you to choose a workspacedirectory. This must be a writable directory anywhere in your hard disk.You can choose to use the workspace included in the distribution, i.e. theworkspace directory in the EJS X.x directory created when you unzippedthe EjsS bundle. But it is highly recommended to create a new directoryin your usual personal directory (or, better yet, in a cloud-accesible directory
identical across all platforms, and launch a new instance of EjsS to apply the change. We set thedefault look and feel to SYSTEM, the default for your platform. The one shown in this documentcorresponds to the characteristic Aqua look an feel of Mac OS X.
”EjsS Manual” August 27, 2014
INSTALLING AND RUNNING Easy Java(script) Simulations 5
— like Dropbox <http://dropbox.com>, or similar). The file dialog that al-lows you to choose the workspace has a check box that, when checked, willcopy all the examples files of the distribution to the new workspace. Leavethis check box checked and you will find some subdirectories in the sourcedirectory of your workspace which contain sample simulations. In particu-lar, the JavaExamples and JavascriptExamples directories described inlater chapters of this document.
Although generally not needed, you can create and use more than oneworkspace for different projects or tasks. The console provides a selectorto let you change the workspace in use and EjsS will remember the currentworkspace between sessions or even if you reinstall EjsS.
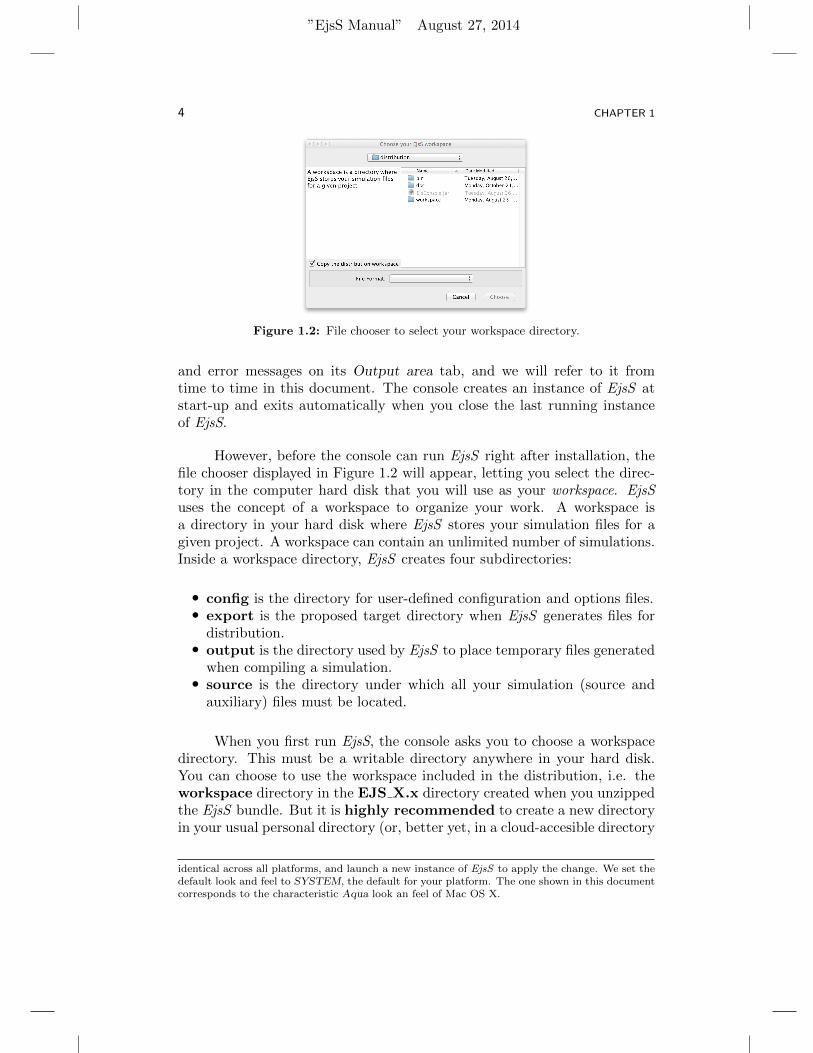
Finally, the first time you run EjsS, the program will also ask you tointroduce your name and affiliation (Figure 1.3). This step is optional butrecommended, since it will help you document your future simulations. Youcan choose to input or modify this information later using the options iconof EjsS ’ task bar.
Figure 1.3: Optionally input your name and affiliation.
1.3 THE GRAPHICAL USER INTERFACE
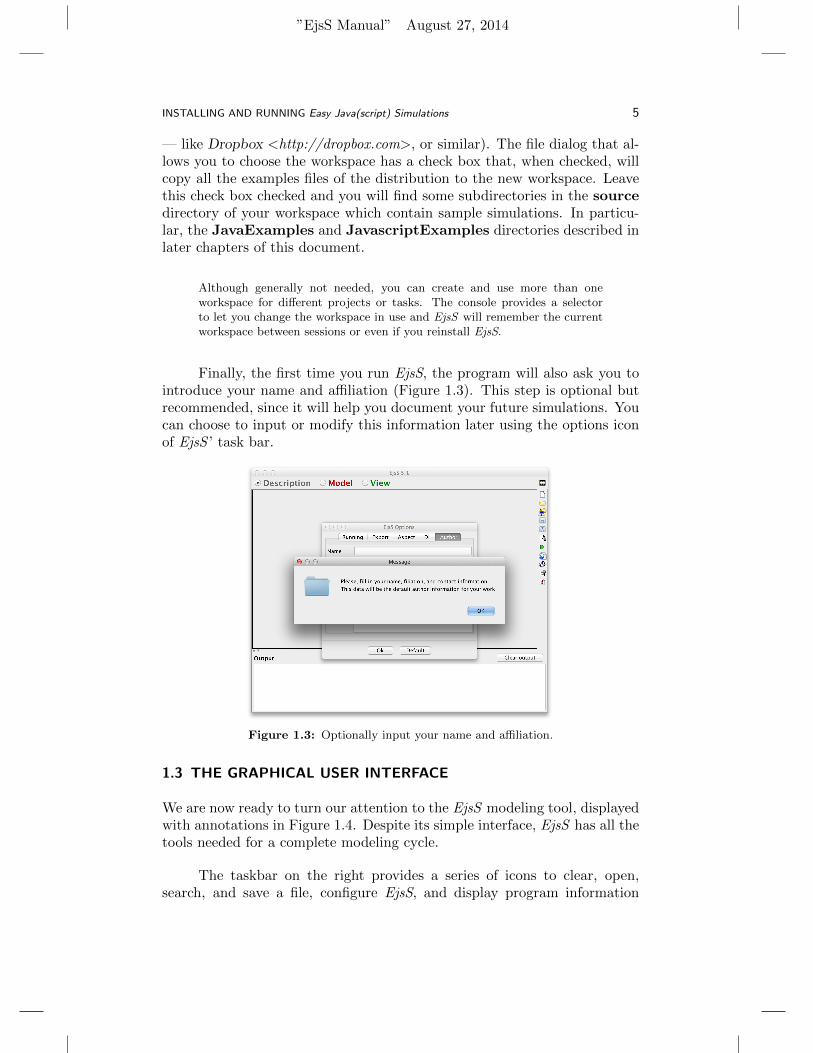
We are now ready to turn our attention to the EjsS modeling tool, displayedwith annotations in Figure 1.4. Despite its simple interface, EjsS has all thetools needed for a complete modeling cycle.
The taskbar on the right provides a series of icons to clear, open,search, and save a file, configure EjsS, and display program information
”EjsS Manual” August 27, 2014
6 CHAPTER 1
Figure 1.4: The Easy Java(script) Simulations user interface with annotations.
and help. It also provides icons to run a simulation and to package oneor more simulations in a self-contained file. Right-clicking on taskbar iconsinvokes alternative (but related) actions that will be described as needed.The bottom part of the interface contains an output area where EjsS dis-plays informational messages. The central part of the interface contains theworkpanels where the modeling is done.
Easy Java(script) Simulations provides three workpanels for modeling.The first panel, Description, allows us to create and edit multimedia HTML-based narrative that describes the model. Each narrative page appears ina tabbed panel within the workpanel and right-clicking on the tab allowsthe user to edit the narrative or to import additional narrative. The secondwork panel, Model, is dedicated to the modeling process. We use this panelto create variables that describe the model, to initialize these variables, andto write algorithms that describe how this model changes in time. The thirdworkpanel, View (or HtmlView for HTML5-based interfaces), is dedicatedto the task of building the graphical user interface, which allows users tocontrol the simulation and to display its output. We build the interfaceby selecting elements from palettes and adding them to the view’s Tree ofelements. For example, the Interface palette contains buttons, sliders, andinput fields and the 2D Drawables palette contains elements to plot 2D data.
Easy Java(script) Simulations supports more than one programminglanguages to implement the algorithms required for the modeling process.The interface of all of them is based on the same principles, and learningto use one of them, leads to understanding them all. We sometimes refer
”EjsS Manual” August 27, 2014
INSTALLING AND RUNNING Easy Java(script) Simulations 7
to the different interfaces of Easy Java(script) Simulations for the differentprogramming language, as the flavors of EjsS. Hence, we may refer to theJava flavor or the Javascript flavor of EjsS, for instance.
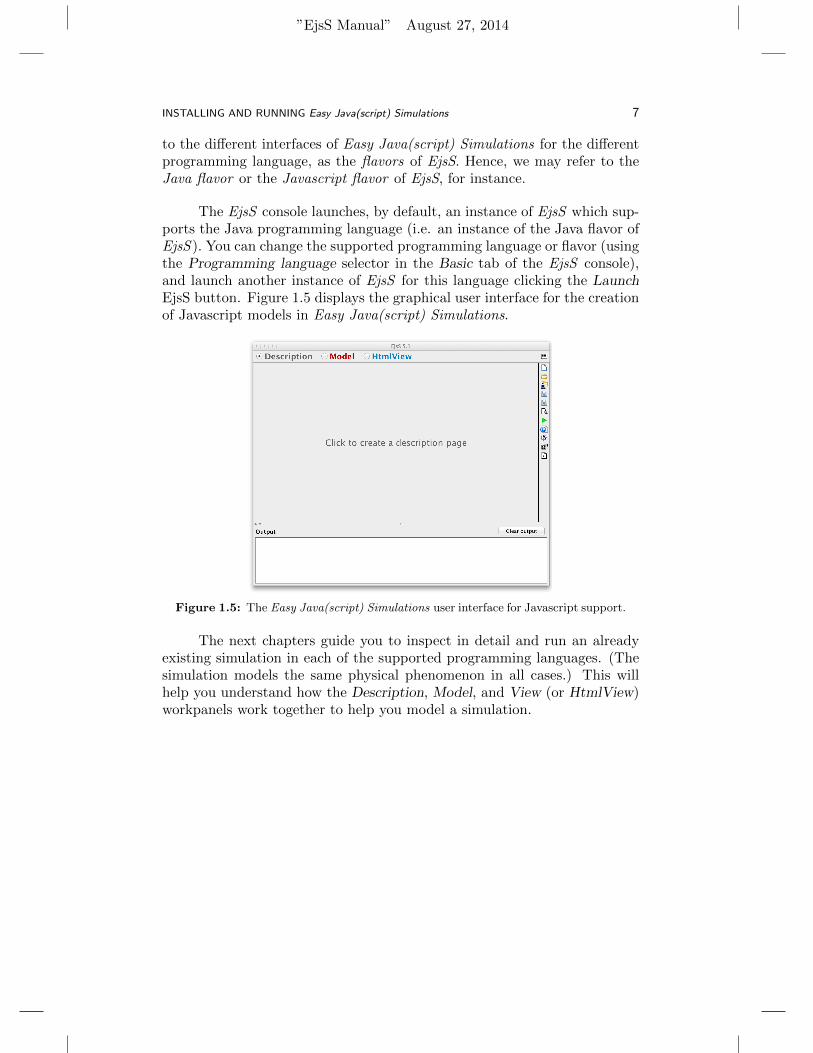
The EjsS console launches, by default, an instance of EjsS which sup-ports the Java programming language (i.e. an instance of the Java flavor ofEjsS ). You can change the supported programming language or flavor (usingthe Programming language selector in the Basic tab of the EjsS console),and launch another instance of EjsS for this language clicking the LaunchEjsS button. Figure 1.5 displays the graphical user interface for the creationof Javascript models in Easy Java(script) Simulations.
Figure 1.5: The Easy Java(script) Simulations user interface for Javascript support.
The next chapters guide you to inspect in detail and run an alreadyexisting simulation in each of the supported programming languages. (Thesimulation models the same physical phenomenon in all cases.) This willhelp you understand how the Description, Model, and View (or HtmlView)workpanels work together to help you model a simulation.

”EjsS Manual” August 27, 2014
Chapter Four
Converting from Java to Javascript
Everything must change so that everything can remain the sameGiuseppe di Lampedusa in ‘The Leopard’
In this chapter, we go through the process of porting an existing Javasimulation created with EjsS into an equivalent Javascript simulation. Thearchitecture of EjsS shows how this can be easily done, the HtmlView beingthe only part that needs to be re-created from scratch.
4.1 PORTING A SIMULATION
We choose an old friend, the MassAndSpring.ejs Java-based simulationstudied in Chapter 2 and plan to convert it into a pure Javascript one. Thecomplete process consists of the following steps:
1. Loading the .ejs file and saving it as a .ejss file.2. The Description remains basically untouched.3. In the Model tab, we need to edit the Java code in different editors
and convert it to equivalent Javascript code.4. The Java Swing-based View disappears and must be replaced by an
equivalent (or similar) HTML-based HtmlView
We describe in the next sections each of these steps to convert theMassAndSpring.ejs Java simulation into Javascript. The reciprocal pro-cess (that is, converting from Javascript to Java) is also possible and consistsof the same steps, if only in the opposite direction.
4.2 CREATING THE NEW FILE FROM THE OLD ONE
We begin by creating a new MassAndSpring.ejss file from the originalMassAndSpring.ejs one. Run the Javascript flavor of EjsS. Important,the Javascript flavor!
”EjsS Manual” August 27, 2014
54 CHAPTER 4
If you happen to have already a Java flavor of EjsS open, you can close it,you will not need it — for the time being.
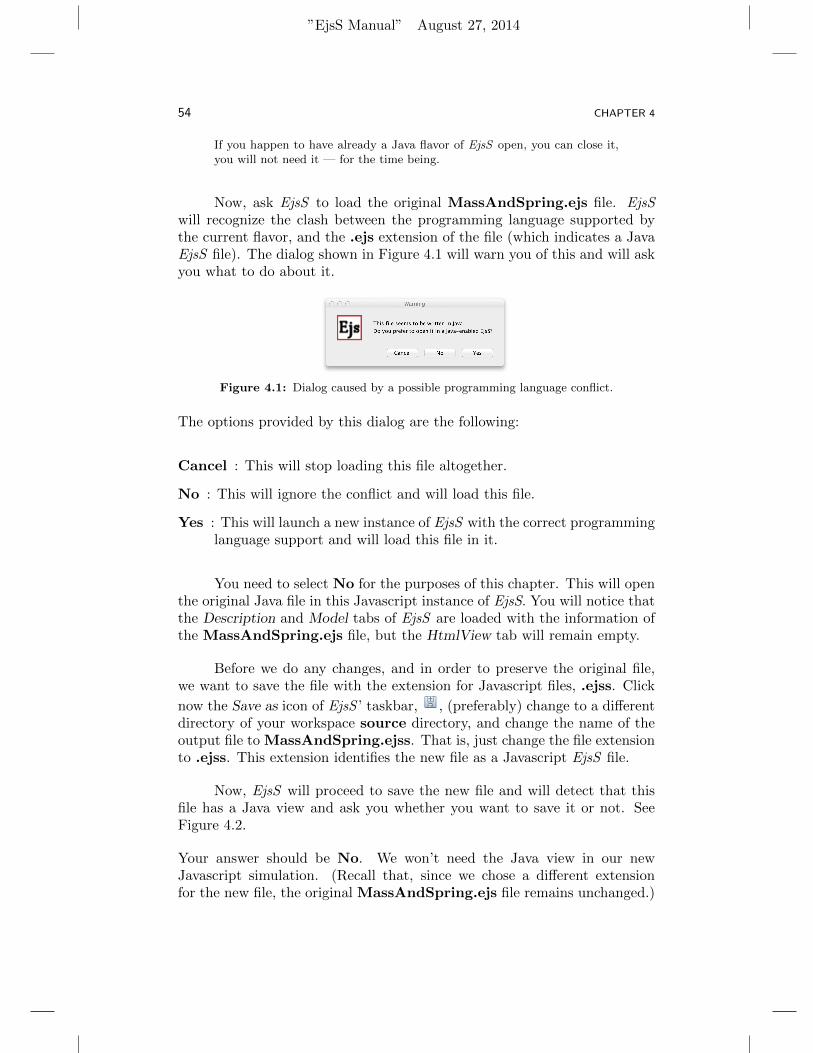
Now, ask EjsS to load the original MassAndSpring.ejs file. EjsSwill recognize the clash between the programming language supported bythe current flavor, and the .ejs extension of the file (which indicates a JavaEjsS file). The dialog shown in Figure 4.1 will warn you of this and will askyou what to do about it.
Figure 4.1: Dialog caused by a possible programming language conflict.
The options provided by this dialog are the following:
Cancel : This will stop loading this file altogether.
No : This will ignore the conflict and will load this file.
Yes : This will launch a new instance of EjsS with the correct programminglanguage support and will load this file in it.
You need to select No for the purposes of this chapter. This will openthe original Java file in this Javascript instance of EjsS. You will notice thatthe Description and Model tabs of EjsS are loaded with the information ofthe MassAndSpring.ejs file, but the HtmlView tab will remain empty.
Before we do any changes, and in order to preserve the original file,we want to save the file with the extension for Javascript files, .ejss. Click
now the Save as icon of EjsS ’ taskbar, , (preferably) change to a differentdirectory of your workspace source directory, and change the name of theoutput file to MassAndSpring.ejss. That is, just change the file extensionto .ejss. This extension identifies the new file as a Javascript EjsS file.
Now, EjsS will proceed to save the new file and will detect that thisfile has a Java view and ask you whether you want to save it or not. SeeFigure 4.2.
Your answer should be No. We won’t need the Java view in our newJavascript simulation. (Recall that, since we chose a different extensionfor the new file, the original MassAndSpring.ejs file remains unchanged.)

”EjsS Manual” August 27, 2014
CONVERTING FROM JAVA TO JAVASCRIPT 55
Figure 4.2: Dialog concerned about the existing Java view.
EjsS will have saved the new file and, if necessary, copied any auxiliary filesrequired by this simulation (if you changed the target directory), thus cre-ating a completely independent new simulation file. We are now ready tostart the transition to a pure Javascript simulation.
4.3 CHANGES TO THE DESCRIPTION
The good news for the Description is that no changes are really needed. TheDescription are just HTML pages that will work just fine for the Javascriptmodel.
If only, we recommended that you review your HTML files to makesure the HTML code in them is correctly formed. The reason is that, if youlater want to create an ePUB document with your Javascript simulation,EjsS needs the HTML code to be correct. More precisely, ePUB documentsrequire XHMTL files (which are basically more strictly enforced HTML files)and EjsS can either take XHTML files or try to convert your (correctlyformed) HTML files for it.
Typical editions required to make an HTML file correct include thefollowing:
• Make sure all HTML opening tags have their corresponding closingtag. In particular, paragraphs tags < p > need a matching < /p >.
• Make sure all HTML single tags have a closing /, as in < br/ >.
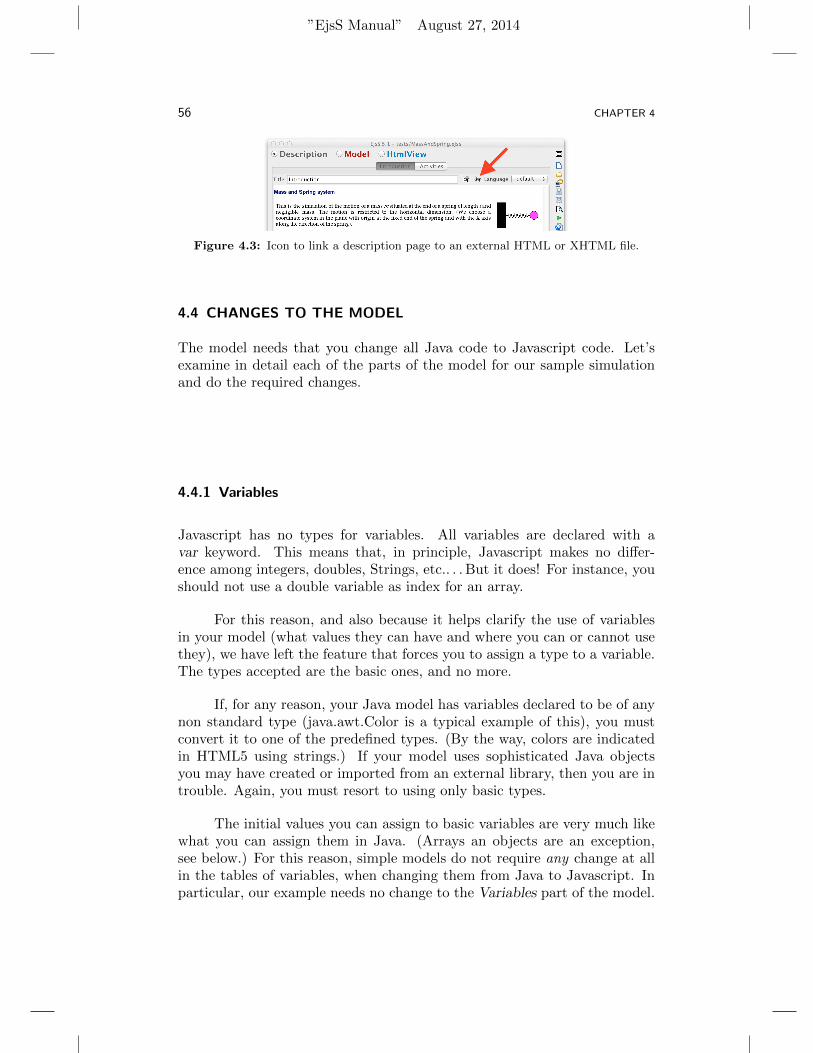
However, the best recommendation we can make to you, if you plan tocreate ePUB documents with your description pages in them, is that youcreate stand-alone valid XHTML file (you can validate them with free toolsavailable on the Internet) and use the Description feature that lets you linkyour pages to external HTML or XHTML pages (see Figure 4.3).
”EjsS Manual” August 27, 2014
56 CHAPTER 4
Figure 4.3: Icon to link a description page to an external HTML or XHTML file.
4.4 CHANGES TO THE MODEL
The model needs that you change all Java code to Javascript code. Let’sexamine in detail each of the parts of the model for our sample simulationand do the required changes.
4.4.1 Variables
Javascript has no types for variables. All variables are declared with avar keyword. This means that, in principle, Javascript makes no differ-ence among integers, doubles, Strings, etc.. . . But it does! For instance, youshould not use a double variable as index for an array.
For this reason, and also because it helps clarify the use of variablesin your model (what values they can have and where you can or cannot usethey), we have left the feature that forces you to assign a type to a variable.The types accepted are the basic ones, and no more.
If, for any reason, your Java model has variables declared to be of anynon standard type (java.awt.Color is a typical example of this), you mustconvert it to one of the predefined types. (By the way, colors are indicatedin HTML5 using strings.) If your model uses sophisticated Java objectsyou may have created or imported from an external library, then you are introuble. Again, you must resort to using only basic types.
The initial values you can assign to basic variables are very much likewhat you can assign them in Java. (Arrays an objects are an exception,see below.) For this reason, simple models do not require any change at allin the tables of variables, when changing them from Java to Javascript. Inparticular, our example needs no change to the Variables part of the model.
”EjsS Manual” August 27, 2014
CONVERTING FROM JAVA TO JAVASCRIPT 57
Arrays
Arrays are declared somewhat differently in Javascript. The editor for vari-ables in EjsS takes care of this and you need only to indicate the dimensions,as you would do in the Java flavor. However, giving an initial value to anarray is different, since Javascript uses square brackets as delimiters in anarray, while Java uses braces. Hence, an initial value like this in Java:
double[][] myArray = new double { {1.0,2.0,3.0}, {3.0,4.0,5.0} };
should be written as follows in Javascript:
var myArray = [ [1.0,2.0,3.0], [3.0,4.0,5.0]];
Also, resizing an array is different in Javascript. The Java syntax:
doubleArray = new double[n][m];
converts in Javascript to:
doubleArray = new Array(n);
for (var i=0; i<n; i++) doubleArray[i] = new Array(m);
(assuming n and m are valid integers). A final difference is that Javascriptdoes not guarantees to initialize to 0 the elements of the allocated array, norcheck for incorrect use of indexes.
Objects
Javascript supports the concept of an Object. Basic objects are just dictio-naries of other variables. You add variables to objects as follows:
var myObject = { };
myObject.name = "My object";
myObject.value = 3.0;
The use you make of these variables is up to you. Sophisticated use ofJavascript objects is allowed, though out of the scope of this manual.
”EjsS Manual” August 27, 2014
58 CHAPTER 4
Variables not declared
Finally, Javascript is a loose language and does not force you to declarevariables before using them. For instance, the code
n = 3;
_println ("n = "+n);
will produce the intended result, even if n has not been declared elsewhere.This may lead to undesired results, if you happen to type incorrectly oneof your variables. (Javascript will think it is a new one!) Watch for thiscaveat. EjsS tries to help you with this problem and incorporates a Lintprocessor 1 that looks for potential errors in your code, including this one.In occasions like the one described here, the EjsS Output area will displaya message like the following, when you try to run the simulation:
Lint error: ’n’ is not defined.
n=3; // > Initialization.Init Page:1
4.4.2 Pages of code
All pages of code in the Initialization, Evolution, Fixed relations and Cus-tom must be changed from Java to Javascript syntax. Fortunately, thesyntax of algorithms for both programming languages is very similar. Themain changes usually required for code in these parts of the model are thefollowing:
• Use var to declare local variables, instead of int, double, etc. Atypical place for this is in for loops.
• The scope of local variables is that of the block in which they are used.Even if you declare them after they are used. For this reason, it isrecommended to declare all variables for once at the beginning of eachpage of code.
• Function declaration in Javascript includes no information about thereturn type or the type of the parameters. A declaration of a Javafunction like this:
public double force (double time) {
1<http://en.wikipedia.org/wiki/Lint (software)>
”EjsS Manual” August 27, 2014
CONVERTING FROM JAVA TO JAVASCRIPT 59
return amp*Math.sin(freq*time);
}
turns into the following Javascript code:
function force (time) {
return amp*Math.sin(freq*time);
}
Our sample simulation requires no change of its Fixed relations pageof code, since the Java expressions:
T = 0.5*m*vx*vx;
V = 0.5*k*(x-L)*(x-L);
E = T + V;
are also valid Javascript expressions.
ODE editor
The use of the ODE editor, for evolution pages that require solving ordinarydifferential equations, is straightforward. The only obvious change is thatexpressions in the rate equations and code in preliminary code, events, andother pages of code, need to use valid Javascript syntax. The JavascriptODE editor implements, for the time being, less solvers than its Java coun-terpart. But the underlying code and mechanisms are exactly the same.
4.4.3 Model elements
The Javascript flavor of EjsS includes also the concept of Model elements,as a way to access third party Javascript libraries. However, the elementsprovided by the Java and Javascript flavors are completely different andthere is no attempt to make this implementation converge.
Model elements used by your simulation, should your original Javasimulation use them, are preserved to make you conscious of their need foryour model. But you must immediately remove them and replace them byequivalent Javascript model elements, or by your own coding.
In other words, porting from Java to Javascript (or viceversa) simula-tions that depend on the use of Model elements can be extremely difficult.
”EjsS Manual” August 27, 2014
60 CHAPTER 4
4.5 IMPLEMENTING AN HTML VIEW
One part of the simulation that needs to be completely created from scratchis the HtmlView. The reason is that creating graphical user interfaces withSwing (the Java library for interfaces) and HTML5 is based on completelydifferent principles. To name one, Swing is a window-oriented platform,while HTML5 is designed to be displayed inside a web browser in a singlewindow.
For this reason, we decided to create a number of pure HTML5 el-ements, based on our past experience with Java, but adopting a newerapproach, more natural to HTML5 and not restricted by backwards com-patibility issues. The result is a collection of HtmlView elements that youcombine (in a similar way to how you combined View elements) to createinterfaces of great quality and with the same flexibility as with the Javaversion.
An important difference with the Java flavor is that a simulation canhave more than one HtmlViews. Although many authors typically onlycreate one, we have provided this feature for situations where you want toplan to support devices with different sizes and orientations. Each HtmlViewyou create has a preferred with and height that you specify. In runtime, ifyou provided more than one HtmlViews, the simulation will use the one thatbest matches the device’ screen size and orientation.
In our case, we will create only one HtmlView that resembles the oneof the original Java version. So, click on the empty HtmlView panel to createan initially empty HtmlView.
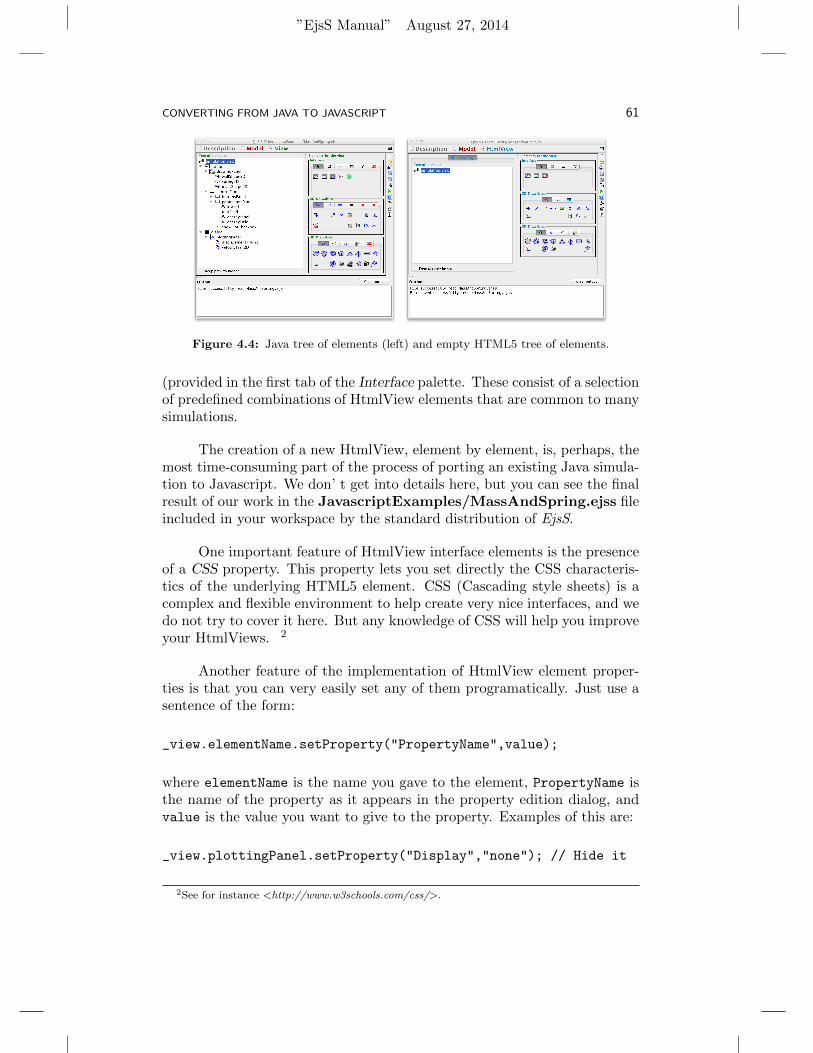
Now, it is a very good idea to launch a Java flavored instance of EjsSand load into it the original MassAndSpring.ejs file. The reason is that wewant to have both instances of EjsS, the Java and the Javascript flavors, sideby side, and inspect the Tree of View elements in the former, as we createand customise the Tree of HtmlView elements in the latter. Figure 4.4 showsboth views (the Javascript HtmlView still empty), side by side.
Your task consists now of creating the HtmlView by selecting the ele-ments provided by the HtmlView palette, in a way that mimics the selectiondone by the Java version. You will need to customise each HtmlView ele-ment’s properties to match the use of the model variables and actions thatwas done in the original Java view. (Recall to write valid Javascript codefor the action properties!)
A good way to speed up the process is to make use of Custom elements
”EjsS Manual” August 27, 2014
CONVERTING FROM JAVA TO JAVASCRIPT 61
Figure 4.4: Java tree of elements (left) and empty HTML5 tree of elements.
(provided in the first tab of the Interface palette. These consist of a selectionof predefined combinations of HtmlView elements that are common to manysimulations.
The creation of a new HtmlView, element by element, is, perhaps, themost time-consuming part of the process of porting an existing Java simula-tion to Javascript. We don’ t get into details here, but you can see the finalresult of our work in the JavascriptExamples/MassAndSpring.ejss fileincluded in your workspace by the standard distribution of EjsS.
One important feature of HtmlView interface elements is the presenceof a CSS property. This property lets you set directly the CSS characteris-tics of the underlying HTML5 element. CSS (Cascading style sheets) is acomplex and flexible environment to help create very nice interfaces, and wedo not try to cover it here. But any knowledge of CSS will help you improveyour HtmlViews. 2
Another feature of the implementation of HtmlView element proper-ties is that you can very easily set any of them programatically. Just use asentence of the form:
_view.elementName.setProperty("PropertyName",value);
where elementName is the name you gave to the element, PropertyName isthe name of the property as it appears in the property edition dialog, andvalue is the value you want to give to the property. Examples of this are:
_view.plottingPanel.setProperty("Display","none"); // Hide it
2See for instance <http://www.w3schools.com/css/>.
”EjsS Manual” August 27, 2014
62 CHAPTER 4
_view.bottomPanel.setProperty("Width",450); // Resize it
4.6 CONCLUSION
As conclusion for this chapter, we just repeat what we said at its begin-ning. Porting an existing Java simulation to a pure Javascript one is ratherstraightforward in EjsS, and consists of the following steps:
1. Loading the .ejs file and saving it as a .ejss file.2. Review the Description pages for HTML correctness.3. Edit the Java code in different editors of the Model to convert it to
equivalent Javascript code.4. Create a HTML-based HtmlView that mimics the original Java based
View.
Creating the HtmlView is, by far, the most time-consuming part of theprocess.