easy laravel
DESCRIPTION
Easy LaravelTRANSCRIPT
Easy Laravel 5A Hands On Introduction Using a Real-World Project
W. Jason Gilmore
This book is for sale at http://leanpub.com/easylaravel
This version was published on 2015-08-18
This is a Leanpub book. Leanpub empowers authors and publishers with the Lean Publishingprocess. Lean Publishing is the act of publishing an in-progress ebook using lightweight tools andmany iterations to get reader feedback, pivot until you have the right book and build traction onceyou do.
©2014 - 2015 W. Jason Gilmore
Also By W. Jason GilmoreEasy Active Record for Rails Developers
Easy E-Commerce Using Laravel and Stripe
Easy React
Dedicated to The Champ, The Princess, and Little Winnie. Love, Daddy
Contents
Introduction . . . . . . . . . . . . . . . . . . . . . . . . . . . . . . . . . . . . . . . . . . . . 1What’s New in Laravel 5? . . . . . . . . . . . . . . . . . . . . . . . . . . . . . . . . . . . 2About this Book . . . . . . . . . . . . . . . . . . . . . . . . . . . . . . . . . . . . . . . . . 2Introducing the TODOParrot Project . . . . . . . . . . . . . . . . . . . . . . . . . . . . . . 5About the Author . . . . . . . . . . . . . . . . . . . . . . . . . . . . . . . . . . . . . . . . 6Errata and Suggestions . . . . . . . . . . . . . . . . . . . . . . . . . . . . . . . . . . . . . 6
Chapter 1. Introducing Laravel . . . . . . . . . . . . . . . . . . . . . . . . . . . . . . . . . 7Installing Laravel . . . . . . . . . . . . . . . . . . . . . . . . . . . . . . . . . . . . . . . . 7Creating the TODOParrot Application . . . . . . . . . . . . . . . . . . . . . . . . . . . . . 14Configuring Your Laravel Application . . . . . . . . . . . . . . . . . . . . . . . . . . . . . 19Useful Development and Debugging Tools . . . . . . . . . . . . . . . . . . . . . . . . . . 22Testing Your Laravel Application with PHPUnit . . . . . . . . . . . . . . . . . . . . . . . 30Conclusion . . . . . . . . . . . . . . . . . . . . . . . . . . . . . . . . . . . . . . . . . . . . 33
IntroductionI’ve spent the vast majority of the past 15 years immersed in the PHP language. During this timeI’ve written seven PHP-related books, including a bestseller that has been in print for more thanten years. Along the way I’ve worked on dozens of PHP-driven applications for clients rangingfrom unknown startups to globally-recognized companies, penned hundreds of articles about PHPand web development for some of the world’s most popular print and online publications, andinstructed hundreds of developers in the United States and Europe. So you might be surprised tolearn that a few years ago I became rather disenchanted with PHP. It felt like there were moreexciting developments taking place within other programming communities, and wanting to bepart of that buzz, I wandered off. In recent years, I spent the majority of my time working on avariety of projects including among others several ambitious Ruby on Rails applications and even apretty amazing Linux-powered robotic device.
Of course, even during this time in the wilderness I kept tabs on the PHP community, watching withgreat interest as numerous talented developers worked tirelessly to inject that missing enthusiasmback into the language. Nils Adermann and Jordi Boggiano released the Composer¹ dependencymanager. The Framework Interoperability Group² was formed. And in 2012 the incredibly talentedTaylor Otwell³ created the Laravel framework⁴ which out of nowhere became the most popular PHPproject on GitHub, quickly surpassing projects and frameworks that had been actively developedfor years.
At some point I spent some time with Laravel and after a scant 30 minutes knew it was the realdeal. Despite being the latest in a string of high profile PHP frameworks, Laravel is incrediblypolished, offering a shallow learning curve, convenient PHPUnit integration, a great object-relational mapping solution called Eloquent, and a wide variety of other great features. Thereasoning behind this pragmatic approach is laid bare in the project documentation⁵, in which theLaravel development team describes their project goals:
Laravel aims to make the development process a pleasing one for the developer withoutsacrificing application functionality. Happy developers make the best code. To thisend, we’ve attempted to combine the very best of what we have seen in other webframeworks, including frameworks implemented in other languages, such as Ruby onRails, ASP.NET MVC, and Sinatra.
Now that’s something to get excited about! In the pages to follow I promise to add you to the ranksof fervent Laravel users by providing a wide-ranging and practical introduction to its many features.
¹https://getcomposer.org/²http://www.php-fig.org/³http://taylorotwell.com/⁴http://laravel.com/⁵http://laravel.com/docs/master
Introduction 2
What’s New in Laravel 5?
Laravel 5 is an ambitious step forward for the popular framework, offering quite a few new features.In addition to providing newcomers with a comprehensive overview of Laravel’s fundamentalcapabilities, I’ll devote special coverage to several of these new features, including:
• New Project Structure: Laravel 5 projects boast a revamped project structure. In Chapter 1 I’llreview every file and directory comprising the new structure so you know exactly where tofind and place project files and other assets..
• Improved Environment Configuration: Laravel 5 adopts the PHP dotenv⁶ package for envi-ronment configuration management. I think Laravel 4 users will really find the new approachto be quite convenient and refreshing. I’ll introduce you to this new approach in Chapter 1.
• Route Annotations: The routes.php file remains in place for Laravel 5, however users nowhave the choice of alternatively using route annotations for route definitions. I’ll show youhow to use route annotations in Chapter 2.
• Elixir: Elixir⁷ offers Laravel users a convenient way to automate various developmenttasks using Gulp⁸, among them CSS and JavaScript compilation, JavaScript linting, imagecompression, and test execution. I’ll introduce you to Elixir in Chapter 2.
• Flysystem: Laravel 5 integrates Flysystem⁹, which allows you to easily integrate yourapplication with remote file systems such as Dropbox, S3 and Rackspace.
• Form Requests: Laravel 5’s new form requests feature greatly reduces the amount of codeyou’d otherwise have to include in your controller actions when validating and processingform data. In Chapter 5 I’ll introduce you to this great new feature.
• Middleware: Laravel 5 introduces easy middleware integration. Middleware is useful whenyouwant to interact with your application’s request and response process in away that doesn’tpollute your application-specific logic. Chapter 7 is devoted entirely to this topic.
• Easy User Authentication: User account integration is the norm these days, however inte-grating user registration, login, logout, and password recovery into an application is oftentedious and time-consuming. Laravel 5 all but removes this hassle by offering these featuresas a turnkey solution. I’ll introduce you to these exciting capabilities in Chapter 6.
About this Book
This book is broken into eleven chapters and two appendices, each of which is briefly describedbelow.
⁶https://github.com/vlucas/phpdotenv⁷https://github.com/laravel/elixir⁸http://gulpjs.com/⁹https://github.com/thephpleague/flysystem
Introduction 3
Chapter 1. Introducing Laravel
In this opening chapter you’ll learn how to create and configure your Laravel project both usingyour existing PHP development environment and Laravel Homestead. I’ll also show you how toproperly configure your environment for effective Laravel debugging, and how to expand Laravel’scapabilities by installing several third-party Laravel packages that promise to supercharge yourdevelopment productivity. We’ll conclude the chapter with an introduction to PHPUnit, showingyou how to create and execute your first Laravel unit test!
Chapter 2. Managing Your Project Controllers, Layout, Views, andOther Assets
In this chapter you’ll learn how to create controllers and actions, and define the routes used to accessyour application endpoints using Laravel 5’s new route annotations feature. You’ll also learn how tocreate the pages (views), work with variable data and logic using the Blade templating engine, andreduce redundancy using layouts and view helpers. I’ll also introduce Laravel Elixir, a new feature formanaging Gulp¹⁰ tasks, and show you how to integrate the popular Bootstrap front-end frameworkand jQuery JavaScript library. We’ll conclude the chapter with several examples demonstrating howto test your controllers and views using PHPUnit.
Chapter 3. Talking to the Database
In this chapter we’ll turn our attention to the project’s data. You’ll learn how to integrate andconfigure the database, create and manage models, and interact with the database through yourproject models. You’ll also learn how to deftly configure and traverse model relations, allowingyou to greatly reduce the amount of SQL you’d otherwise have to write to integrate a normalizeddatabase into your application.
Chapter 4. Model Relations, Scopes, and Other Advanced Features
Building and navigating table relations is an standard part of the development process even whenworking on the most unambitious of projects, yet this task is often painful when working with manyweb frameworks. Fortunately, using Laravel it’s easy to define and traverse these relations. In thischapter I’ll show you how to define, manage, and interact with one-to-one, one-to-many, many-to-many, has many through, and polymorphic relations. You’ll also learn about a great feature knownas scopes which encapsulate the logic used for more advanced queries, thereby hiding it from yourcontrollers.
¹⁰http://gulpjs.com/
Introduction 4
Chapter 5. Integrating Web Forms
Your application will almost certainly contain at least a few web forms, which will likely interactwith the models, meaning you’ll require a solid grasp on Laravel’s form generation and processingcapabilities. While creating simple forms is fairly straightforward, things can complicated fast whenimplementing more ambitious solutions such as forms involving multiple models. In this chapterI’ll go into extensive detail regarding how you can integrate forms into your Laravel applications,introducing Laravel 5’s new form requests feature, covering both Laravel’s native form generationsolutions as well as several approaches offered by popular packages. You’ll also learn how to uploadfiles using a web form and Laravel’s fantastic file upload capabilities.
Chapter 6. Integrating Middleware
Laravel 5 introduces middleware integration. In this chapter I’ll introduce you to the concept ofmiddleware and the various middleware solutions bundled into Laravel 5. You’ll also learn how tocreate your own middleware solution!
Chapter 7. Authenticating and Managing Your Users
Most modern applications offer user registration and preference management features in order toprovide customized, persisted content and settings. In this chapter you’ll learn how to integrate userregistration, login, and account management capabilities into your Laravel application.
Chapter 8. Deploying, Optimizing and Maintaining YourApplication
“Deploy early and deploy often” is an oft-quotedmantra of successful software teams. To do so you’llneed to integrate a painless and repeatable deployment process, and formally define and schedulevarious maintenance-related processes in order to ensure your application is running in top form. Inthis chapter I’ll introduce the Laravel 5 Command Scheduler, which you can use to easily schedulerigorously repeating tasks. I’ll also talk about optimization, demonstrating how to create a fasterclass router and how to cache your application routes. Finally, I’ll demonstrate just how easy it canbe to deploy your Laravel application to the popular hosting service Heroku, and introduce LaravelForge.
Chapter 9. Creating a Restricted Administration Console
This chapter shows you how to identify certain users as administrators and then grant themaccess to a restricted web-based administrative console using a prefixed route grouping and custommiddleware.

Introduction 5
Chapter 10. Introducing the Lumen Microframework
This chapter introduces the new Laravel Lumen microframework. You’ll learn all about Lumenfundamentals while building a companionmicroservice for the TODOParrot companion application!
Chapter 11. Introducing Events
This chapter introduces Laravel Events, showing you how to create event handlers, event listeners,and integrate events into your application logic. You’ll also learn all about Laravel 5.1’s fascinatingevent broadcasting capabilities, accompanied by a real-world example.
Appendix A. Deploying Your Laravel Application to DreamHost
In this appendix you’ll learn how to configure Capistrano andGitHub to effortlessly deploy a Laravelproject to the popular hosting provider DreamHost. Even if you’re using another shared hostingprovider, much of what is discussed in this appendix will apply to your own specific circumstances.
Appendix B. Feature Implementation Cheat Sheets
The book provides occasionally exhaustive explanations pertaining to the implementation of keyLaravel features such as controllers, migrations, models and views. However, once you understandthe fundamentals it isn’t really practical to repeatedly reread parts of the book just to for instancerecall how to create a model with a corresponding migration or seed the database. So I thought itmight be useful to provide an appendix which offered a succinct overview of the steps necessaryto carry out key tasks. This is a work in progress, but already contains several pages of succinctexplanations.
Introducing the TODOParrot Project
Learning about a new technology is much more fun and practical when introduced in conjunctionwith real-world examples. Throughout this book I’ll introduce Laravel concepts and syntax usingcode found in TODOParrot¹¹, a web-based task list application built atop Laravel.
The TODOParrot code is available on GitHub at https://github.com/wjgilmore/todoparrot¹². It’sreleased under the MIT license, so feel free to download the project and use it as an additionallearning reference or in any other manner adherent to the licensing terms.
¹¹http://todoparrot.com¹²https://github.com/wjgilmore/todoparrot
Introduction 6
About the Author
W. Jason Gilmore¹³ is a software developer, consultant, and bestselling author. He has spent muchof the past 15 years helping companies of all sizes build amazing solutions. Recent projects include aRails-driven e-commerce analytics application for a globally recognized publisher, a Linux-poweredautonomous environmental monitoring buoy, and a 10,000+ product online store.
Jason is the author of seven books, including the bestselling “Beginning PHP and MySQL, FourthEdition”, “Easy Active Record for Rails Developers”, and “Easy PHP Websites with the ZendFramework, Second Edition”.
Over the years Jason has published more than 300 articles within popular publications such asDeveloper.com, JSMag, and Linux Magazine, and instructed hundreds of students in the UnitedStates and Europe. Jason is cofounder of the wildly popular CodeMash Conference¹⁴, the largestmulti-day developer event in the Midwest.
Away from the keyboard, you’ll often find Jason playing with his kids, hunched over a chess board,and having fun with DIY electronics.
Jason loves talking to readers and invites you to e-mail him at [email protected].
Errata and Suggestions
Nobody is perfect, particularly when it comes to writing about technology. I’ve surely made somemistakes in both code and grammar, and probably completely botched more than a few examplesand explanations. If you would like to report an error, ask a question or offer a suggestion, pleasee-mail me at [email protected].
¹³http://www.wjgilmore.com¹⁴http://www.codemash.org
Chapter 1. Introducing LaravelLaravel is a web application framework that borrows from the very best features of other popularframework solutions, among them Ruby on Rails and ASP.NET MVC. For this reason, if youhave any experience working with other frameworks then I’d imagine you’ll make a prettygraceful transition to Laravel-driven development. If this is your first acquaintance with framework-driven development, you’re in for quite a treat! Frameworks are so popular precisely because theydramatically decrease the amount of work you’d otherwise have to do by making many of themundane decisions for you, a concept known as convention over configuration¹⁵.
In this chapter you’ll learn how to install Laravel and create your first Laravel project. We’ll use thisproject as the basis for introducing new concepts throughout the remainder of the book, and to keepthings interesting I’ll base many of the examples around the TODOParrot application introducedin this book’s introduction. I’ll also introduce you to several powerful debugging and developmenttools that I consider crucial to Laravel development, showing you how to integrate them into yourdevelopment environment. Finally, I’ll show you how to configure Laravel’s testing environment inorder to create powerful automated tests capable of ensuring your Laravel application is operatingprecisely as expected.
I published this book on February 4, 2015, the very same day Laravel 5 officiallyreleased. Since then I’ve made more than one hundred improvements and expan-sions, and often fix any reported errata within a few days following notification (seehttp://easylaravelbook.com/changelog/). More recently this includes amajor book revisionto reflect Laravel 5.1 changes. If you find an issue please e-mail me at [email protected].
Installing Laravel
Laravel is a PHP-based framework that you’ll typically use in conjunction with a database such asMySQL or PostgreSQL. Therefore, before you can begin building a Laravel-driven web applicationyou’ll need to first install PHP 5.4 or newer and one of Laravel’s supported databases (MySQL,PostgreSQL, SQLite, and Microsoft SQL Server). Therefore if you’re already developing PHP-drivenweb sites and are running PHP 5.4 then installing Laravel will be a breeze, and you can jump aheadto the section “Creating the TODOParrot Application”. If this is your first encounter with PHP thenplease take some time to install a PHP development environment now. How this is accomplisheddepends upon your operating system and is out of the scope of this book, however there are plenty
¹⁵http://en.wikipedia.org/wiki/Convention_over_configuration
Chapter 1. Introducing Laravel 8
of available online resources. If you have problems finding a tutorial suitable to your needs, pleasee-mail me and I’ll help you find one.
Alternatively, if you’d rather go without installing a PHP development environment at this time,you have a fantastic alternative at your disposal called Homestead.
Laravel currently supports several databases, including MySQL, PostgreSQL, SQLite, andMicrosoft SQL Server.
Introducing Homestead
PHP is only one of several technologies you’ll need to have access to in order to begin buildingLaravel-drivenweb sites. Additionally you’ll need to install a web server such asApache¹⁶ or nginx¹⁷,a database server such asMySQL¹⁸ or PostgreSQL¹⁹, and often a variety of supplemental technologiessuch as Redis²⁰ and Grunt²¹. As youmight imagine, it can be quite a challenge to install and configureall of these components, particularly when you’d prefer to be writing code instead of grappling withconfiguration issues.
In recent years the bar was dramatically lowered with the advent of the virtual machine. A virtualmachine is a software-based implementation of a computer that can be run inside the confines ofanother computer (such as your laptop), or even inside another virtual machine. This is an incrediblyuseful bit of technology, because you can use a virtual machine to for instance run Ubuntu Linuxinside Windows 7, or vice versa. Further, it’s possible to create a customized virtual machine imagepreloaded with a select set of software. This image can then be distributed to fellow developers,who can run the virtual machine and take advantage of the custom software configuration. Thisis precisely what the Laravel developers have done with Homestead²², a Vagrant²³-based virtualmachine which bundles everything you need to get started building Laravel-driven websites.
Homestead is currently based on Ubuntu 14.04, and includes everything you need to get startedbuilding Laravel applications, including PHP 5.6, Nginx, MySQL, PostgreSQL and a variety of otheruseful utilities. It runs flawlessly on OS X, Linux and Windows, and Vagrant configuration is prettystraightforward, meaning in most cases you’ll have everything you need to begin working withLaravel in less than 30 minutes.
¹⁶http://httpd.apache.org/¹⁷http://nginx.org/¹⁸http://www.mysql.com/¹⁹http://www.postgresql.org/²⁰http://redis.io/²¹http://gruntjs.com/²²http://laravel.com/docs/homestead²³http://www.vagrantup.com/
Chapter 1. Introducing Laravel 9
Installing Homestead
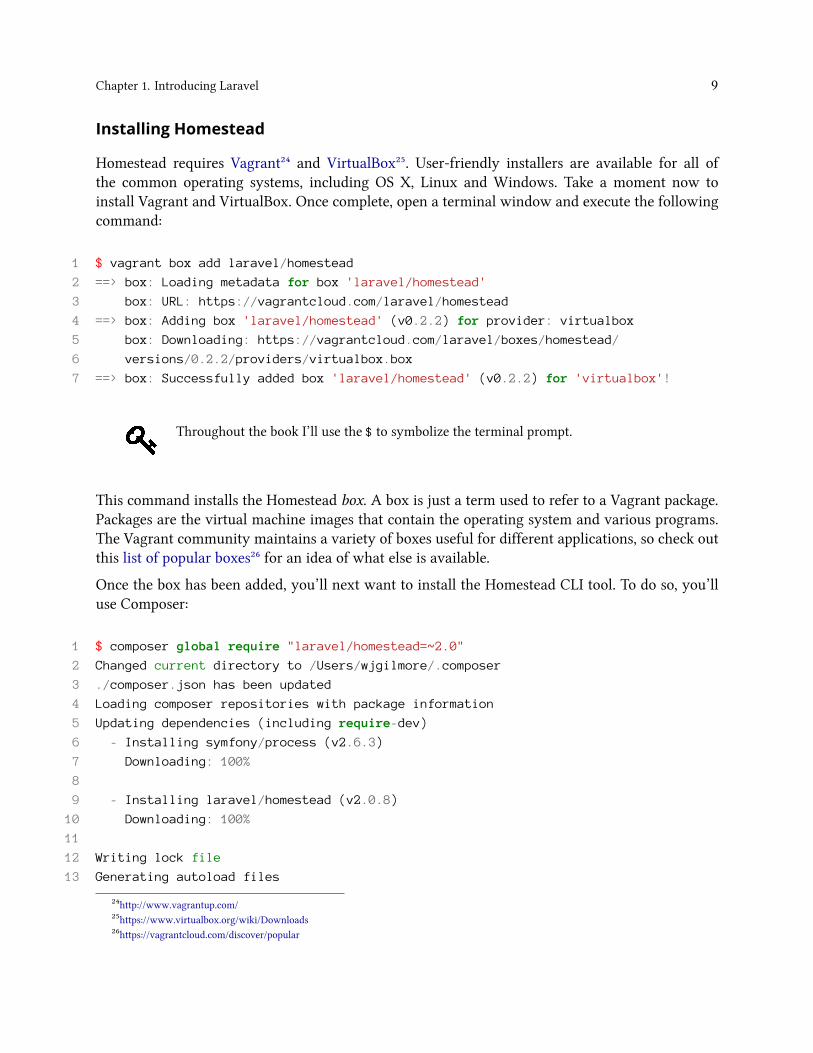
Homestead requires Vagrant²⁴ and VirtualBox²⁵. User-friendly installers are available for all ofthe common operating systems, including OS X, Linux and Windows. Take a moment now toinstall Vagrant and VirtualBox. Once complete, open a terminal window and execute the followingcommand:
1 $ vagrant box add laravel/homestead
2 ==> box: Loading metadata for box 'laravel/homestead'
3 box: URL: https://vagrantcloud.com/laravel/homestead
4 ==> box: Adding box 'laravel/homestead' (v0.2.2) for provider: virtualbox
5 box: Downloading: https://vagrantcloud.com/laravel/boxes/homestead/
6 versions/0.2.2/providers/virtualbox.box
7 ==> box: Successfully added box 'laravel/homestead' (v0.2.2) for 'virtualbox'!
Throughout the book I’ll use the $ to symbolize the terminal prompt.
This command installs the Homestead box. A box is just a term used to refer to a Vagrant package.Packages are the virtual machine images that contain the operating system and various programs.The Vagrant community maintains a variety of boxes useful for different applications, so check outthis list of popular boxes²⁶ for an idea of what else is available.
Once the box has been added, you’ll next want to install the Homestead CLI tool. To do so, you’lluse Composer:
1 $ composer global require "laravel/homestead=~2.0"
2 Changed current directory to /Users/wjgilmore/.composer
3 ./composer.json has been updated
4 Loading composer repositories with package information
5 Updating dependencies (including require-dev)
6 - Installing symfony/process (v2.6.3)
7 Downloading: 100%
8
9 - Installing laravel/homestead (v2.0.8)
10 Downloading: 100%
11
12 Writing lock file
13 Generating autoload files
²⁴http://www.vagrantup.com/²⁵https://www.virtualbox.org/wiki/Downloads²⁶https://vagrantcloud.com/discover/popular
Chapter 1. Introducing Laravel 10
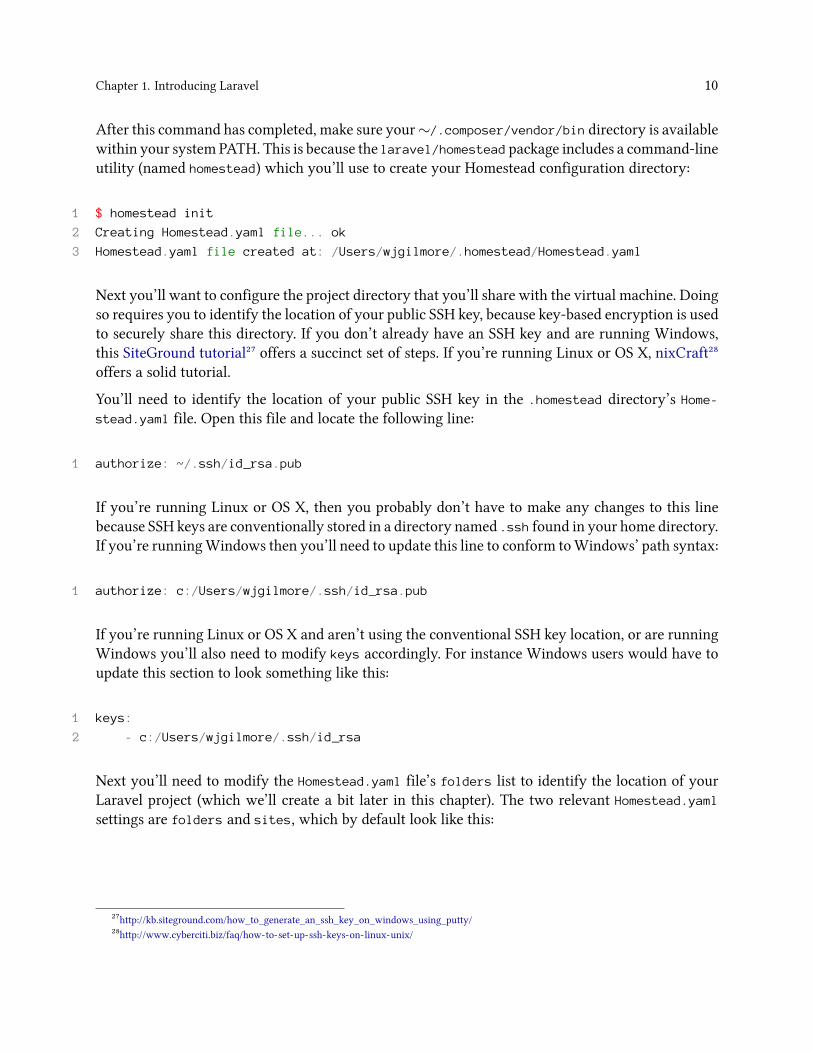
After this command has completed, make sure your∼/.composer/vendor/bin directory is availablewithin your system PATH. This is because the laravel/homestead package includes a command-lineutility (named homestead) which you’ll use to create your Homestead configuration directory:
1 $ homestead init
2 Creating Homestead.yaml file... ok
3 Homestead.yaml file created at: /Users/wjgilmore/.homestead/Homestead.yaml
Next you’ll want to configure the project directory that you’ll share with the virtual machine. Doingso requires you to identify the location of your public SSH key, because key-based encryption is usedto securely share this directory. If you don’t already have an SSH key and are running Windows,this SiteGround tutorial²⁷ offers a succinct set of steps. If you’re running Linux or OS X, nixCraft²⁸offers a solid tutorial.
You’ll need to identify the location of your public SSH key in the .homestead directory’s Home-
stead.yaml file. Open this file and locate the following line:
1 authorize: ~/.ssh/id_rsa.pub
If you’re running Linux or OS X, then you probably don’t have to make any changes to this linebecause SSH keys are conventionally stored in a directory named .ssh found in your home directory.If you’re runningWindows then you’ll need to update this line to conform toWindows’ path syntax:
1 authorize: c:/Users/wjgilmore/.ssh/id_rsa.pub
If you’re running Linux or OS X and aren’t using the conventional SSH key location, or are runningWindows you’ll also need to modify keys accordingly. For instance Windows users would have toupdate this section to look something like this:
1 keys:
2 - c:/Users/wjgilmore/.ssh/id_rsa
Next you’ll need to modify the Homestead.yaml file’s folders list to identify the location of yourLaravel project (which we’ll create a bit later in this chapter). The two relevant Homestead.yamlsettings are folders and sites, which by default look like this:
²⁷http://kb.siteground.com/how_to_generate_an_ssh_key_on_windows_using_putty/²⁸http://www.cyberciti.biz/faq/how-to-set-up-ssh-keys-on-linux-unix/
Chapter 1. Introducing Laravel 11
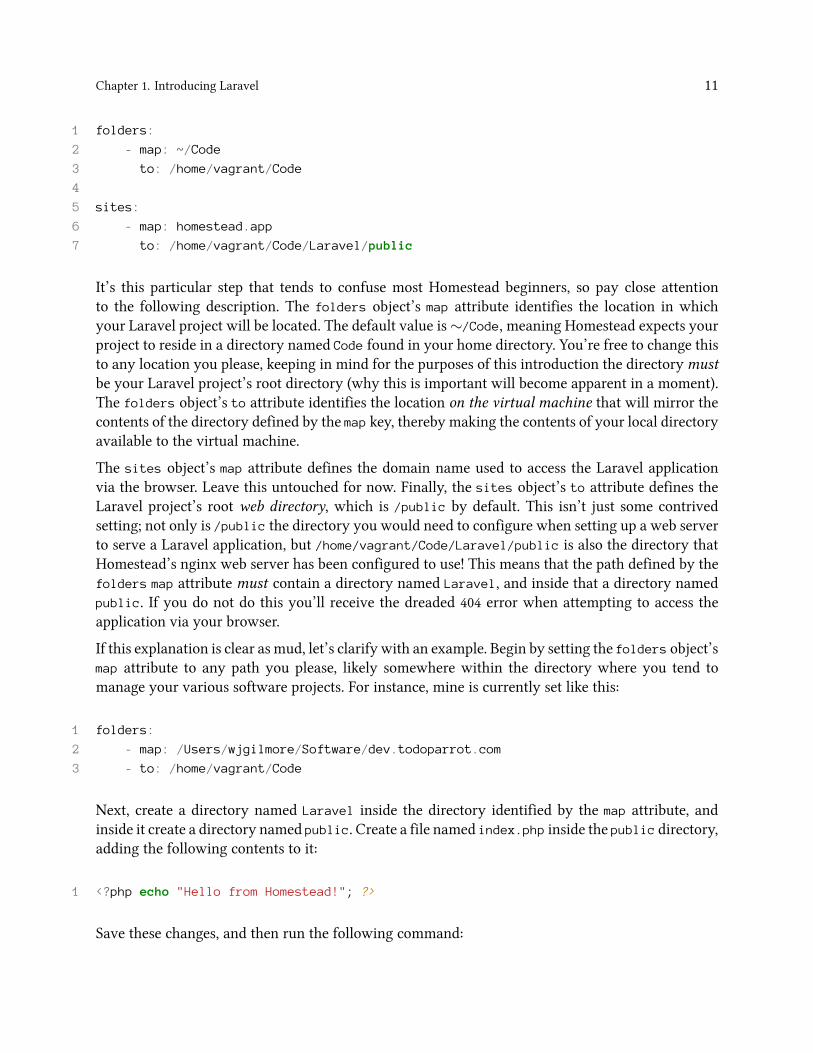
1 folders:
2 - map: ~/Code
3 to: /home/vagrant/Code
4
5 sites:
6 - map: homestead.app
7 to: /home/vagrant/Code/Laravel/public
It’s this particular step that tends to confuse most Homestead beginners, so pay close attentionto the following description. The folders object’s map attribute identifies the location in whichyour Laravel project will be located. The default value is∼/Code, meaning Homestead expects yourproject to reside in a directory named Code found in your home directory. You’re free to change thisto any location you please, keeping in mind for the purposes of this introduction the directorymustbe your Laravel project’s root directory (why this is important will become apparent in a moment).The folders object’s to attribute identifies the location on the virtual machine that will mirror thecontents of the directory defined by the map key, thereby making the contents of your local directoryavailable to the virtual machine.
The sites object’s map attribute defines the domain name used to access the Laravel applicationvia the browser. Leave this untouched for now. Finally, the sites object’s to attribute defines theLaravel project’s root web directory, which is /public by default. This isn’t just some contrivedsetting; not only is /public the directory you would need to configure when setting up a web serverto serve a Laravel application, but /home/vagrant/Code/Laravel/public is also the directory thatHomestead’s nginx web server has been configured to use! This means that the path defined by thefolders map attribute must contain a directory named Laravel, and inside that a directory namedpublic. If you do not do this you’ll receive the dreaded 404 error when attempting to access theapplication via your browser.
If this explanation is clear as mud, let’s clarify with an example. Begin by setting the folders object’smap attribute to any path you please, likely somewhere within the directory where you tend tomanage your various software projects. For instance, mine is currently set like this:
1 folders:
2 - map: /Users/wjgilmore/Software/dev.todoparrot.com
3 - to: /home/vagrant/Code
Next, create a directory named Laravel inside the directory identified by the map attribute, andinside it create a directory named public. Create a file named index.php inside the public directory,adding the following contents to it:
1 <?php echo "Hello from Homestead!"; ?>
Save these changes, and then run the following command:
Chapter 1. Introducing Laravel 12
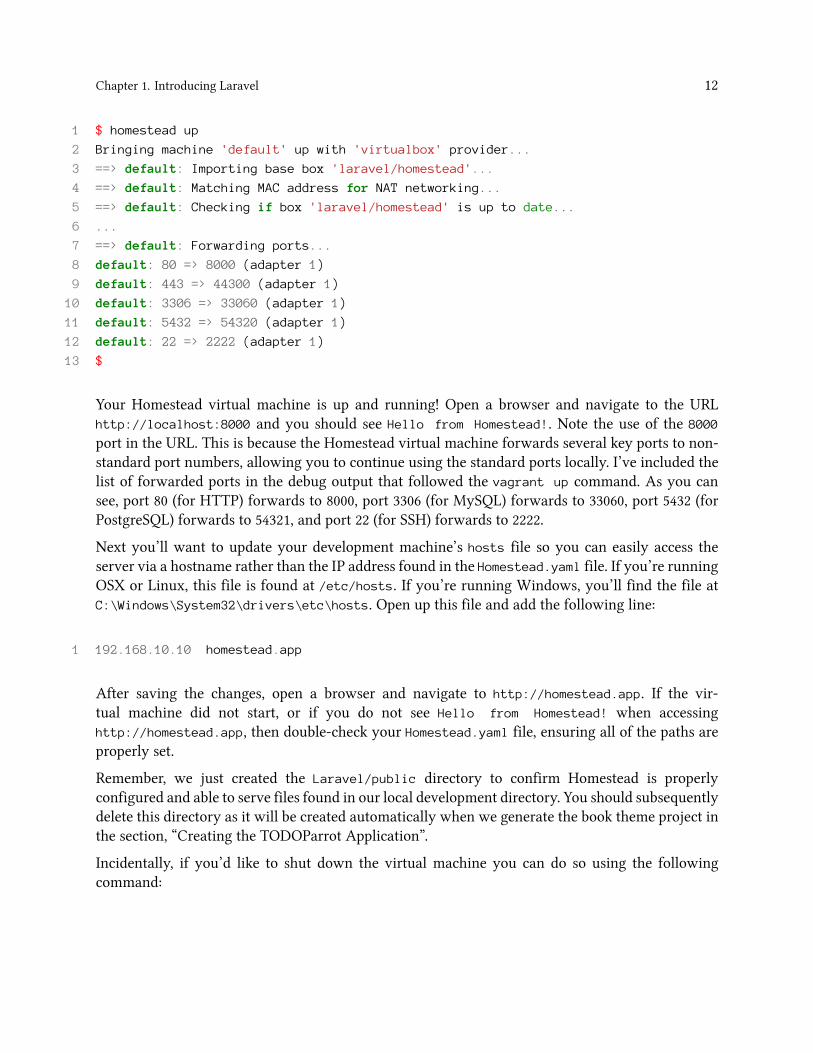
1 $ homestead up
2 Bringing machine 'default' up with 'virtualbox' provider...
3 ==> default: Importing base box 'laravel/homestead'...
4 ==> default: Matching MAC address for NAT networking...
5 ==> default: Checking if box 'laravel/homestead' is up to date...
6 ...
7 ==> default: Forwarding ports...
8 default: 80 => 8000 (adapter 1)
9 default: 443 => 44300 (adapter 1)
10 default: 3306 => 33060 (adapter 1)
11 default: 5432 => 54320 (adapter 1)
12 default: 22 => 2222 (adapter 1)
13 $
Your Homestead virtual machine is up and running! Open a browser and navigate to the URLhttp://localhost:8000 and you should see Hello from Homestead!. Note the use of the 8000
port in the URL. This is because the Homestead virtual machine forwards several key ports to non-standard port numbers, allowing you to continue using the standard ports locally. I’ve included thelist of forwarded ports in the debug output that followed the vagrant up command. As you cansee, port 80 (for HTTP) forwards to 8000, port 3306 (for MySQL) forwards to 33060, port 5432 (forPostgreSQL) forwards to 54321, and port 22 (for SSH) forwards to 2222.
Next you’ll want to update your development machine’s hosts file so you can easily access theserver via a hostname rather than the IP address found in the Homestead.yaml file. If you’re runningOSX or Linux, this file is found at /etc/hosts. If you’re running Windows, you’ll find the file atC:\Windows\System32\drivers\etc\hosts. Open up this file and add the following line:
1 192.168.10.10 homestead.app
After saving the changes, open a browser and navigate to http://homestead.app. If the vir-tual machine did not start, or if you do not see Hello from Homestead! when accessinghttp://homestead.app, then double-check your Homestead.yaml file, ensuring all of the paths areproperly set.
Remember, we just created the Laravel/public directory to confirm Homestead is properlyconfigured and able to serve files found in our local development directory. You should subsequentlydelete this directory as it will be created automatically when we generate the book theme project inthe section, “Creating the TODOParrot Application”.
Incidentally, if you’d like to shut down the virtual machine you can do so using the followingcommand:
Chapter 1. Introducing Laravel 13
1 $ homestead halt
2 ==> default: Attempting graceful shutdown of VM...
3 $
If you’d like to competely delete the virtual machine (including all data within it), you can use thedestroy command:
1 $ homestead destroy
SSH’ing Into Your Virtual Machine
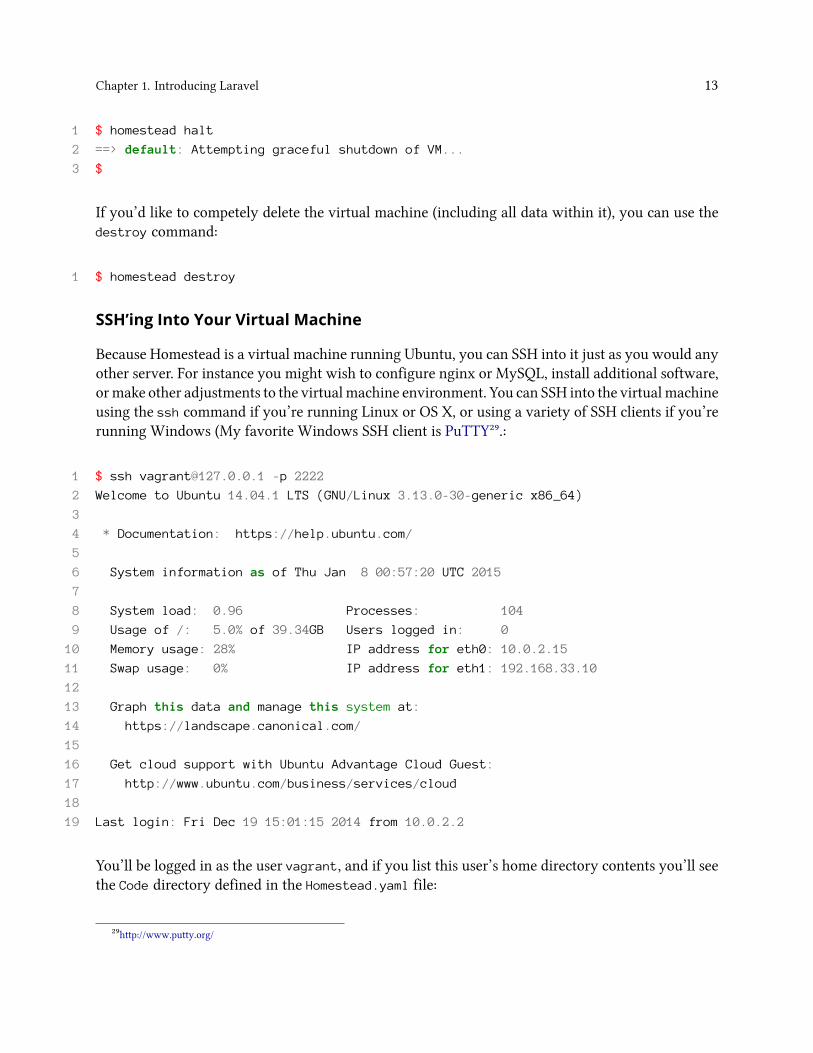
Because Homestead is a virtual machine running Ubuntu, you can SSH into it just as you would anyother server. For instance you might wish to configure nginx or MySQL, install additional software,ormake other adjustments to the virtualmachine environment. You can SSH into the virtualmachineusing the ssh command if you’re running Linux or OS X, or using a variety of SSH clients if you’rerunning Windows (My favorite Windows SSH client is PuTTY²⁹.:
1 $ ssh [email protected] -p 2222
2 Welcome to Ubuntu 14.04.1 LTS (GNU/Linux 3.13.0-30-generic x86_64)
3
4 * Documentation: https://help.ubuntu.com/
5
6 System information as of Thu Jan 8 00:57:20 UTC 2015
7
8 System load: 0.96 Processes: 104
9 Usage of /: 5.0% of 39.34GB Users logged in: 0
10 Memory usage: 28% IP address for eth0: 10.0.2.15
11 Swap usage: 0% IP address for eth1: 192.168.33.10
12
13 Graph this data and manage this system at:
14 https://landscape.canonical.com/
15
16 Get cloud support with Ubuntu Advantage Cloud Guest:
17 http://www.ubuntu.com/business/services/cloud
18
19 Last login: Fri Dec 19 15:01:15 2014 from 10.0.2.2
You’ll be logged in as the user vagrant, and if you list this user’s home directory contents you’ll seethe Code directory defined in the Homestead.yaml file:
²⁹http://www.putty.org/
Chapter 1. Introducing Laravel 14
1 vagrant@homestead:~$ ls
2 Code
If you’re new to Linux be sure to spend some time nosing around Ubuntu! This is a perfectopportunity to get familiar with the Linux operating system without any fear of doing seriousdamage to a server because if something happens to break you can always reinstall the virtualmachine!
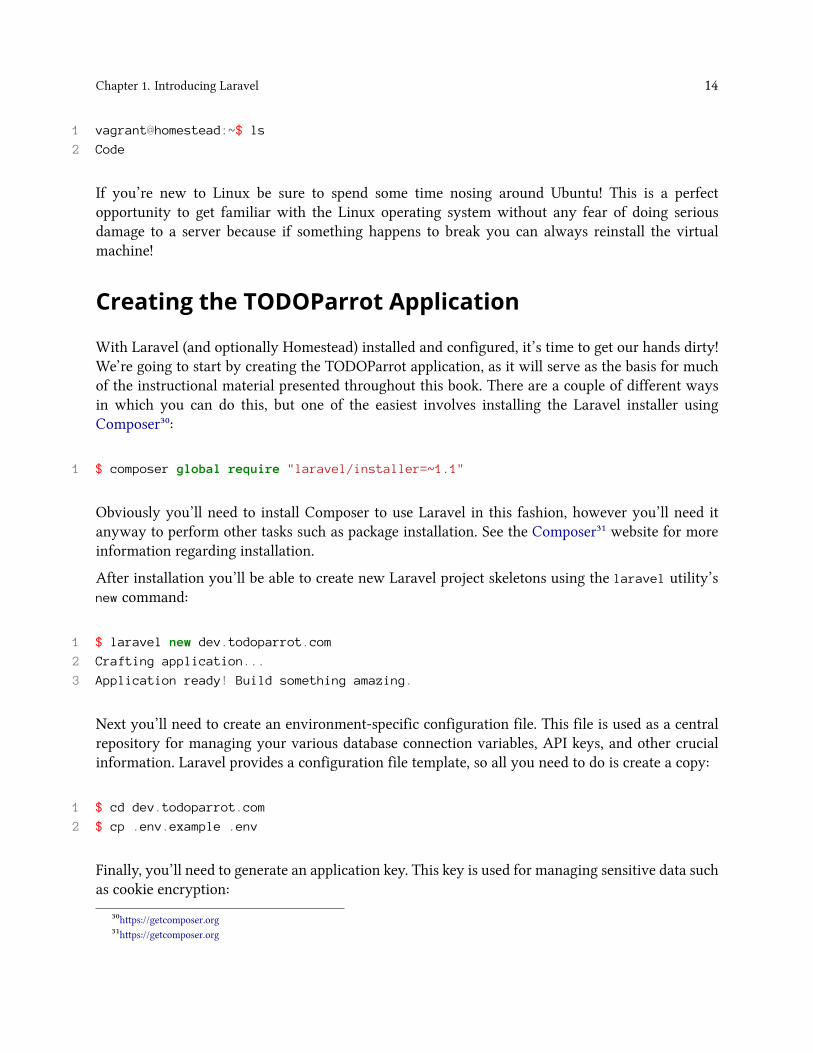
Creating the TODOParrot Application
With Laravel (and optionally Homestead) installed and configured, it’s time to get our hands dirty!We’re going to start by creating the TODOParrot application, as it will serve as the basis for muchof the instructional material presented throughout this book. There are a couple of different waysin which you can do this, but one of the easiest involves installing the Laravel installer usingComposer³⁰:
1 $ composer global require "laravel/installer=~1.1"
Obviously you’ll need to install Composer to use Laravel in this fashion, however you’ll need itanyway to perform other tasks such as package installation. See the Composer³¹ website for moreinformation regarding installation.
After installation you’ll be able to create new Laravel project skeletons using the laravel utility’snew command:
1 $ laravel new dev.todoparrot.com
2 Crafting application...
3 Application ready! Build something amazing.
Next you’ll need to create an environment-specific configuration file. This file is used as a centralrepository for managing your various database connection variables, API keys, and other crucialinformation. Laravel provides a configuration file template, so all you need to do is create a copy:
1 $ cd dev.todoparrot.com
2 $ cp .env.example .env
Finally, you’ll need to generate an application key. This key is used for managing sensitive data suchas cookie encryption:
³⁰https://getcomposer.org³¹https://getcomposer.org
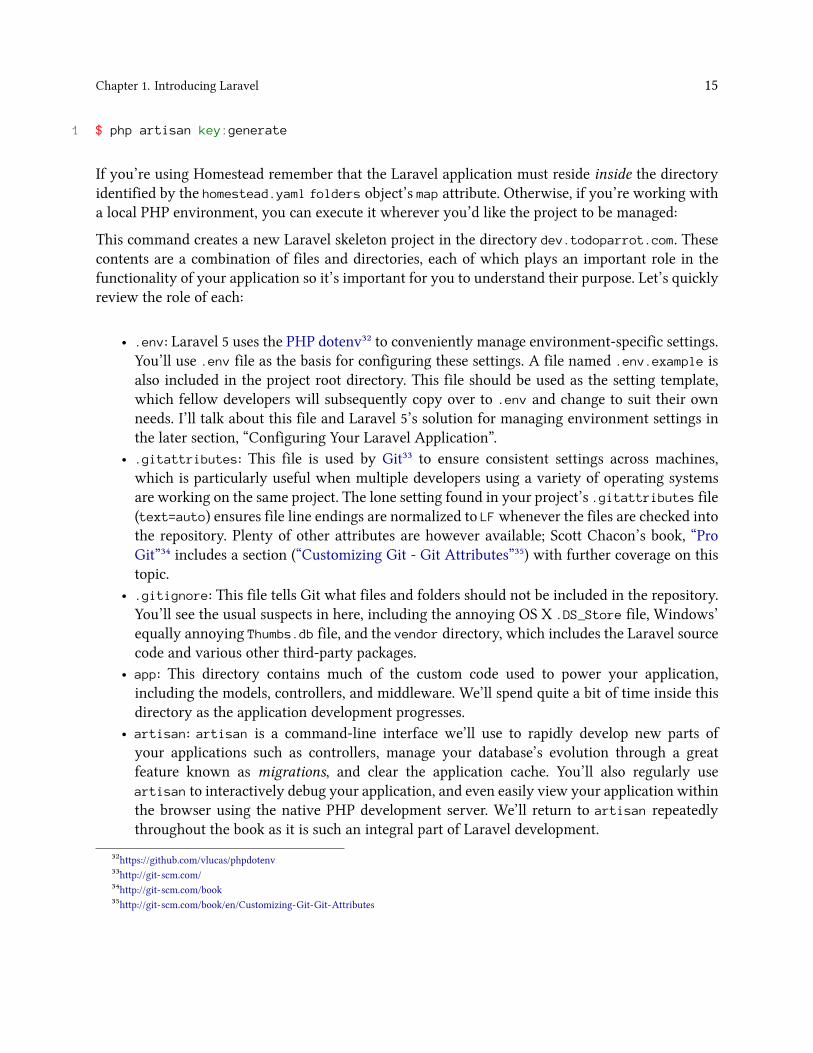
Chapter 1. Introducing Laravel 15
1 $ php artisan key:generate
If you’re using Homestead remember that the Laravel application must reside inside the directoryidentified by the homestead.yaml folders object’s map attribute. Otherwise, if you’re working witha local PHP environment, you can execute it wherever you’d like the project to be managed:
This command creates a new Laravel skeleton project in the directory dev.todoparrot.com. Thesecontents are a combination of files and directories, each of which plays an important role in thefunctionality of your application so it’s important for you to understand their purpose. Let’s quicklyreview the role of each:
• .env: Laravel 5 uses the PHP dotenv³² to conveniently manage environment-specific settings.You’ll use .env file as the basis for configuring these settings. A file named .env.example isalso included in the project root directory. This file should be used as the setting template,which fellow developers will subsequently copy over to .env and change to suit their ownneeds. I’ll talk about this file and Laravel 5’s solution for managing environment settings inthe later section, “Configuring Your Laravel Application”.
• .gitattributes: This file is used by Git³³ to ensure consistent settings across machines,which is particularly useful when multiple developers using a variety of operating systemsare working on the same project. The lone setting found in your project’s .gitattributes file(text=auto) ensures file line endings are normalized to LFwhenever the files are checked intothe repository. Plenty of other attributes are however available; Scott Chacon’s book, “ProGit”³⁴ includes a section (“Customizing Git - Git Attributes”³⁵) with further coverage on thistopic.
• .gitignore: This file tells Git what files and folders should not be included in the repository.You’ll see the usual suspects in here, including the annoying OS X .DS_Store file, Windows’equally annoying Thumbs.db file, and the vendor directory, which includes the Laravel sourcecode and various other third-party packages.
• app: This directory contains much of the custom code used to power your application,including the models, controllers, and middleware. We’ll spend quite a bit of time inside thisdirectory as the application development progresses.
• artisan: artisan is a command-line interface we’ll use to rapidly develop new parts ofyour applications such as controllers, manage your database’s evolution through a greatfeature known as migrations, and clear the application cache. You’ll also regularly useartisan to interactively debug your application, and even easily view your application withinthe browser using the native PHP development server. We’ll return to artisan repeatedlythroughout the book as it is such an integral part of Laravel development.
³²https://github.com/vlucas/phpdotenv³³http://git-scm.com/³⁴http://git-scm.com/book³⁵http://git-scm.com/book/en/Customizing-Git-Git-Attributes
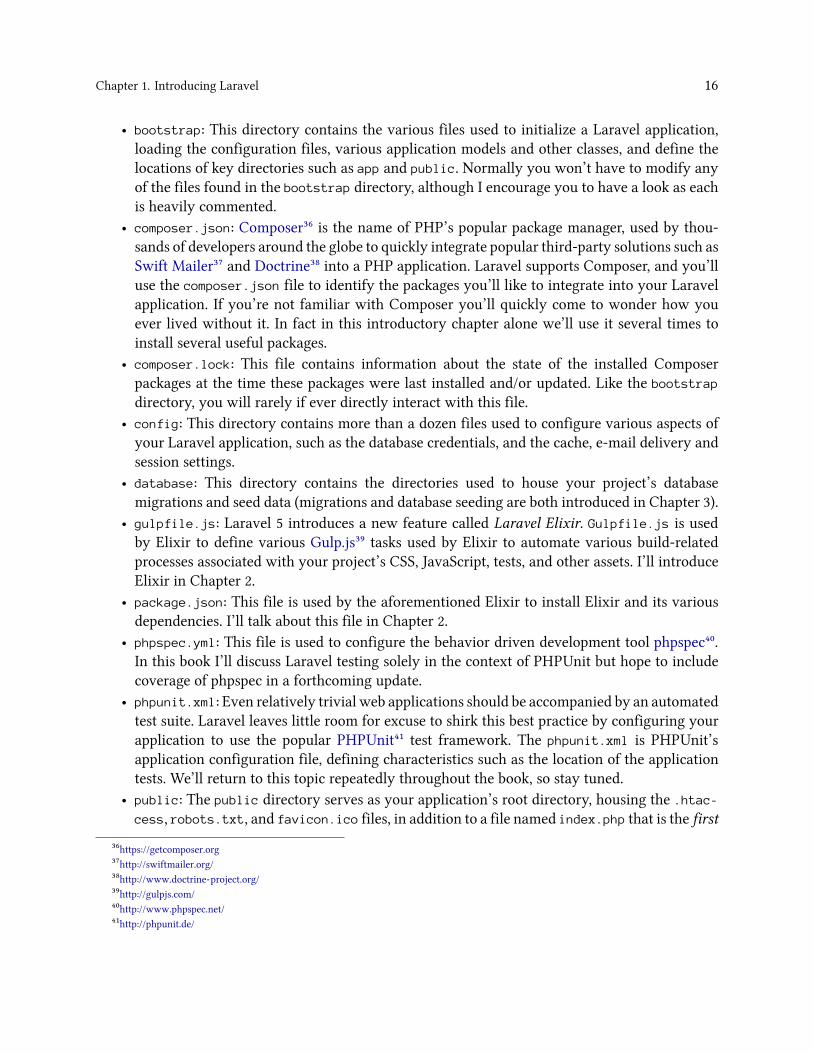
Chapter 1. Introducing Laravel 16
• bootstrap: This directory contains the various files used to initialize a Laravel application,loading the configuration files, various application models and other classes, and define thelocations of key directories such as app and public. Normally you won’t have to modify anyof the files found in the bootstrap directory, although I encourage you to have a look as eachis heavily commented.
• composer.json: Composer³⁶ is the name of PHP’s popular package manager, used by thou-sands of developers around the globe to quickly integrate popular third-party solutions such asSwift Mailer³⁷ and Doctrine³⁸ into a PHP application. Laravel supports Composer, and you’lluse the composer.json file to identify the packages you’ll like to integrate into your Laravelapplication. If you’re not familiar with Composer you’ll quickly come to wonder how youever lived without it. In fact in this introductory chapter alone we’ll use it several times toinstall several useful packages.
• composer.lock: This file contains information about the state of the installed Composerpackages at the time these packages were last installed and/or updated. Like the bootstrap
directory, you will rarely if ever directly interact with this file.• config: This directory contains more than a dozen files used to configure various aspects ofyour Laravel application, such as the database credentials, and the cache, e-mail delivery andsession settings.
• database: This directory contains the directories used to house your project’s databasemigrations and seed data (migrations and database seeding are both introduced in Chapter 3).
• gulpfile.js: Laravel 5 introduces a new feature called Laravel Elixir. Gulpfile.js is usedby Elixir to define various Gulp.js³⁹ tasks used by Elixir to automate various build-relatedprocesses associated with your project’s CSS, JavaScript, tests, and other assets. I’ll introduceElixir in Chapter 2.
• package.json: This file is used by the aforementioned Elixir to install Elixir and its variousdependencies. I’ll talk about this file in Chapter 2.
• phpspec.yml: This file is used to configure the behavior driven development tool phpspec⁴⁰.In this book I’ll discuss Laravel testing solely in the context of PHPUnit but hope to includecoverage of phpspec in a forthcoming update.
• phpunit.xml: Even relatively trivial web applications should be accompanied by an automatedtest suite. Laravel leaves little room for excuse to shirk this best practice by configuring yourapplication to use the popular PHPUnit⁴¹ test framework. The phpunit.xml is PHPUnit’sapplication configuration file, defining characteristics such as the location of the applicationtests. We’ll return to this topic repeatedly throughout the book, so stay tuned.
• public: The public directory serves as your application’s root directory, housing the .htac-cess, robots.txt, and favicon.ico files, in addition to a file named index.php that is the first
³⁶https://getcomposer.org³⁷http://swiftmailer.org/³⁸http://www.doctrine-project.org/³⁹http://gulpjs.com/⁴⁰http://www.phpspec.net/⁴¹http://phpunit.de/
Chapter 1. Introducing Laravel 17
file to execute when a user accesses your application. This file is known as the front controller,and it is responsible for loading and executing the application.
• readme.md: The readme.md file contains some boilerplate information about Laravel of thesort that you’ll typically find in an open source project. Feel free to replace this text withinformation about your specific project. See the TODOParrot⁴² README file for an example.
• resources: The resources directory contains your project’s views and localized languagefiles. You’ll also store your project’s raw assets (CoffeeScript, SCSS, etc.).
• storage: The storage directory contains your project’s cache, session, and log data.• tests: The tests directory contains your project’s PHPUnit tests. Testing is a recurring themethroughout this book, complete with numerous examples.
• vendor: The vendor directory is where the Laravel framework code itself is stored, in additionto any other third-party code. You won’t typically directly interact with anything found inthis directory, instead doing so through the artisan utility and Composer interface.
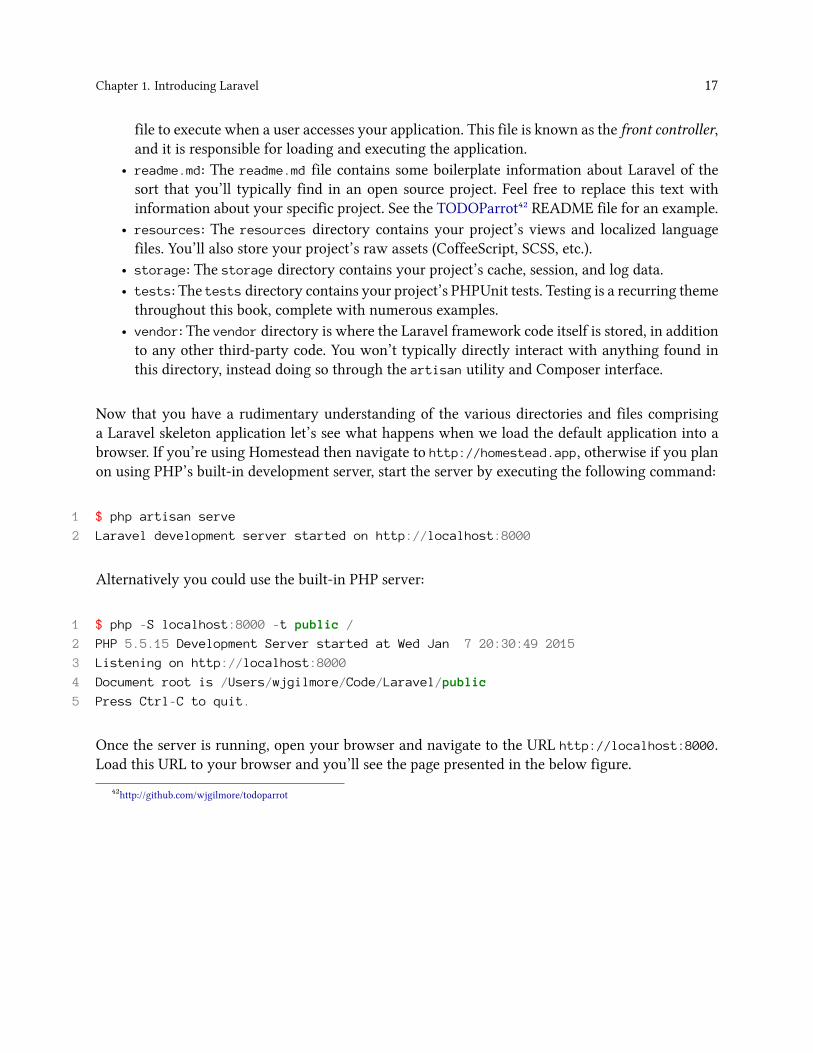
Now that you have a rudimentary understanding of the various directories and files comprisinga Laravel skeleton application let’s see what happens when we load the default application into abrowser. If you’re using Homestead then navigate to http://homestead.app, otherwise if you planon using PHP’s built-in development server, start the server by executing the following command:
1 $ php artisan serve
2 Laravel development server started on http://localhost:8000
Alternatively you could use the built-in PHP server:
1 $ php -S localhost:8000 -t public /
2 PHP 5.5.15 Development Server started at Wed Jan 7 20:30:49 2015
3 Listening on http://localhost:8000
4 Document root is /Users/wjgilmore/Code/Laravel/public
5 Press Ctrl-C to quit.
Once the server is running, open your browser and navigate to the URL http://localhost:8000.Load this URL to your browser and you’ll see the page presented in the below figure.
⁴²http://github.com/wjgilmore/todoparrot

Chapter 1. Introducing Laravel 18
The Laravel splash page
As you can see, the Laravel logo is presented in the default page. So where is this page and logolocated? It’s found in a view, and in the next chapter I’ll introduce Laravel views in great detail.
Setting the Application Namespace
Laravel 5 uses the PSR-4 autoloading standard⁴³, meaning your project controllers, models, and otherkey resources are namespaced. The default namespace is set to app, which is pretty generic. You’ll
⁴³http://www.php-fig.org/psr/psr-4/

Chapter 1. Introducing Laravel 19
likelywant to update your project’s namespace to something reasonably unique, such as todoparrot.You can do so using the artisan CLI’s app:name command:
1 $ php artisan app:name todoparrot
2 Application namespace set!
This command will not only update the default namespace setting (by modifying composer.json’sautoload/psr-4 setting), but will additionally updating any namespace declarations found in yourcontrollers, models, and other relevant files.
Configuring Your Laravel Application
Most web frameworks, Laravel included, offer environment-specific configuration, meaning youcan define certain behaviors applicable only when you are developing the application, and otherbehaviors when the application is running in production. For instance you’ll certainly want to outputerrors to the browser during development but ensure errors are only output to the log in production.
Your application’s default configuration settings are found in the config directory, and are managedin a series of files including:
• app.php: The app.php file contains settings that have application-wide impact, includingwhether debug mode is enabled (more on this in a moment), the application URL, timezone,locale, and autoloaded service providers.
• auth.php: The auth.php file contains settings specific to user authentication, including whatmodel manages your application users, the database table containing the user information, andhow password reminders are managed. I’ll talk about Laravel’s user authentication featuresin Chapter 7.
• broadcasting.php: The broadcasting.php is used to configure Laravel 5.1’s new eventbroadcasting feature. I discuss event broadcasting in Chapter 11.
• cache.php: Laravel supports several caching drivers, including filesystem, database, mem-cached, redis, and others. You’ll use the cache.php configuration file to manage varioussettings specific to these drivers.
• compile.php: Laravel can improve application performance by generating a series of files thatallow for faster package autoloading. The compile.php configuration file allows you to defineadditional class files that should be included in the optimization step.
• database.php: The database.php configuration file defines a variety of database settings,includingwhich of the supported databases the project will use, and the database authorizationcredentials.
• filesystems.php: The filesystems.php configuration file defines the file system your projectwill use to manage assets such as file uploads. Currently the local disk, Amazon S3, andRackspace are supported.

Chapter 1. Introducing Laravel 20
• mail.php: As you’ll learn in Chapter 5 it’s pretty easy to send an e-mail from your Laravelapplication. The mail.php configuration file defines various settings used to send those e-mails, including the desired driver (SMTP, Sendmail, PHP’s mail() function, Mailgun, andthe Mandrill API are supported). You can also direct mails to the log file, a technique that isuseful for development purposes.
• queue.php: Queues can improve application performance by allowing Laravel to offload time-and resource-intensive tasks to a queueing solution such as Beanstalk⁴⁴ or Amazon SimpleQueue Service⁴⁵. The queue.php configuration file defines the desired queue driver and otherrelevant settings.
• services.php: If your application uses a third-party service such as Stripe for paymentprocessing or Mandrill for e-mail delivery you’ll use the services.php configuration file todefine any third-party service-specific settings.
• session.php: It’s entirely likely your application will use sessions to aid in the management ofuser preferences and other customized content. Laravel supports a number of different sessiondrivers used to facilitate the management of session data, including the file system, cookies,a database, the Alternative PHP Cache⁴⁶, Memcached, and Redis. You’ll use the session.phpconfiguration file to identify the desired driver, and manage other aspects of Laravel’s sessionmanagement capabilities.
• view.php: The view.php configuration file defines the default location of your project’s viewfiles and the renderer used for pagination.
I suggest spending a few minutes nosing around these files to get a better idea of what configurationoptions are available to you. There’s no need to make any changes at this point, but it’s always niceto know what’s possible.
Programming Terminology AlertThe terms service provider and facade regularly make and appearance within Laraveldocumentation, tutorials and discussions. This is because Laravel was conceived withinteroperability in mind, providing the utmost flexibility in terms of being able to swap outfor instance one logging or authentication implementation for another, extend Laravel witha new approach to database integration, or enhance Laravel’s form generation capabilitieswith new features. Each of these distinct features are incorporated into Laravel via aservice provider, which is responsible for configuring the feature for use within a Laravelapplication. A list of service providers integrated into your newly created project can befound in the config/app.php file’s providers array. Laravel users will then typically usefacades to access the functionality made available by the classes integrated via the serviceproviders. A facade just facilitates interaction with these classes, and nothing more. Fornow that’s pretty much all you need to know about these two topics, but I thought atleast a cursory definition of each was in order since I’ll unavoidably use both terms in thischapter and beyond.
⁴⁴http://kr.github.io/beanstalkd/⁴⁵http://aws.amazon.com/sqs/⁴⁶http://php.net/manual/en/book.apc.php
Chapter 1. Introducing Laravel 21
Configuring Your Environment
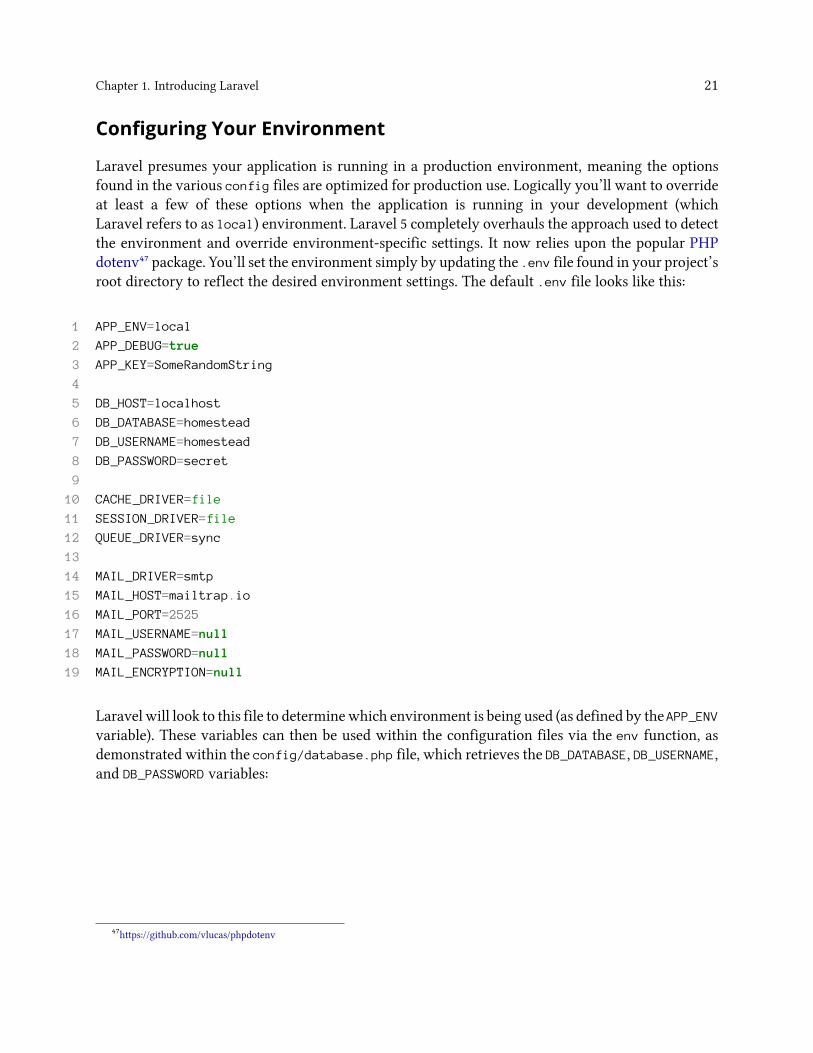
Laravel presumes your application is running in a production environment, meaning the optionsfound in the various config files are optimized for production use. Logically you’ll want to overrideat least a few of these options when the application is running in your development (whichLaravel refers to as local) environment. Laravel 5 completely overhauls the approach used to detectthe environment and override environment-specific settings. It now relies upon the popular PHPdotenv⁴⁷ package. You’ll set the environment simply by updating the .env file found in your project’sroot directory to reflect the desired environment settings. The default .env file looks like this:
1 APP_ENV=local
2 APP_DEBUG=true
3 APP_KEY=SomeRandomString
4
5 DB_HOST=localhost
6 DB_DATABASE=homestead
7 DB_USERNAME=homestead
8 DB_PASSWORD=secret
9
10 CACHE_DRIVER=file
11 SESSION_DRIVER=file
12 QUEUE_DRIVER=sync
13
14 MAIL_DRIVER=smtp
15 MAIL_HOST=mailtrap.io
16 MAIL_PORT=2525
17 MAIL_USERNAME=null
18 MAIL_PASSWORD=null
19 MAIL_ENCRYPTION=null
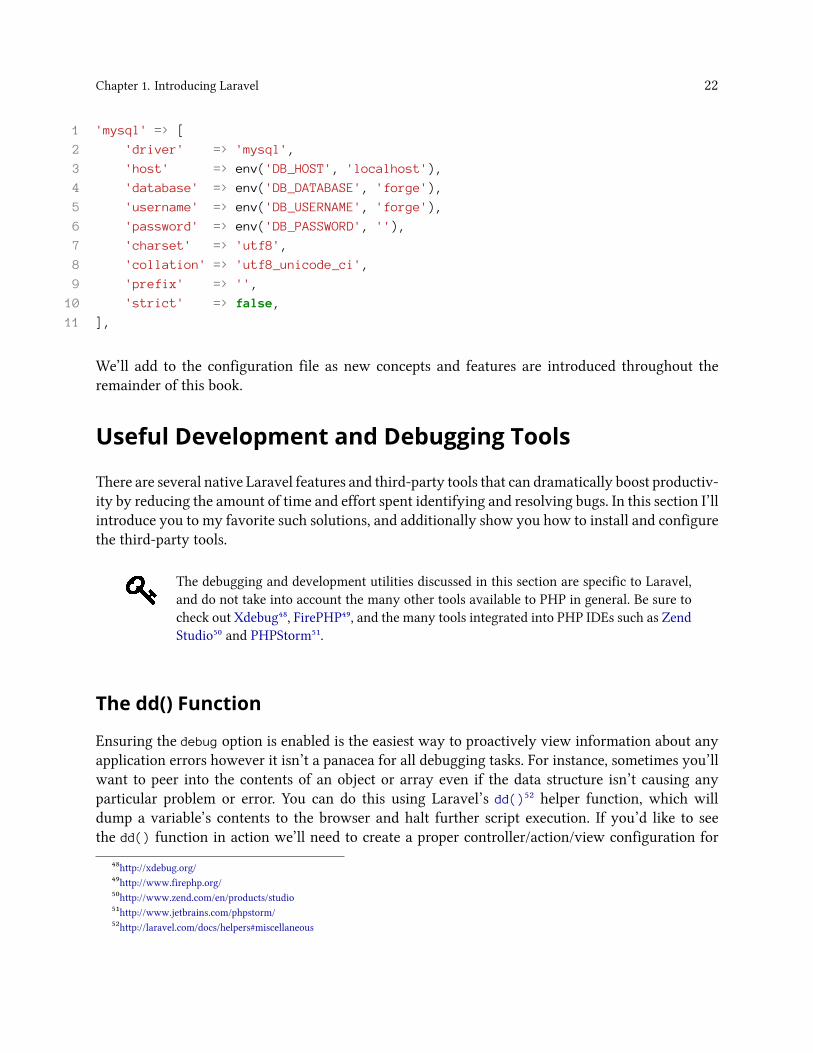
Laravel will look to this file to determinewhich environment is being used (as defined by the APP_ENVvariable). These variables can then be used within the configuration files via the env function, asdemonstrated within the config/database.php file, which retrieves the DB_DATABASE, DB_USERNAME,and DB_PASSWORD variables:
⁴⁷https://github.com/vlucas/phpdotenv
Chapter 1. Introducing Laravel 22
1 'mysql' => [
2 'driver' => 'mysql',
3 'host' => env('DB_HOST', 'localhost'),
4 'database' => env('DB_DATABASE', 'forge'),
5 'username' => env('DB_USERNAME', 'forge'),
6 'password' => env('DB_PASSWORD', ''),
7 'charset' => 'utf8',
8 'collation' => 'utf8_unicode_ci',
9 'prefix' => '',
10 'strict' => false,
11 ],
We’ll add to the configuration file as new concepts and features are introduced throughout theremainder of this book.
Useful Development and Debugging Tools
There are several native Laravel features and third-party tools that can dramatically boost productiv-ity by reducing the amount of time and effort spent identifying and resolving bugs. In this section I’llintroduce you to my favorite such solutions, and additionally show you how to install and configurethe third-party tools.
The debugging and development utilities discussed in this section are specific to Laravel,and do not take into account the many other tools available to PHP in general. Be sure tocheck out Xdebug⁴⁸, FirePHP⁴⁹, and the many tools integrated into PHP IDEs such as ZendStudio⁵⁰ and PHPStorm⁵¹.
The dd() Function
Ensuring the debug option is enabled is the easiest way to proactively view information about anyapplication errors however it isn’t a panacea for all debugging tasks. For instance, sometimes you’llwant to peer into the contents of an object or array even if the data structure isn’t causing anyparticular problem or error. You can do this using Laravel’s dd()⁵² helper function, which willdump a variable’s contents to the browser and halt further script execution. If you’d like to seethe dd() function in action we’ll need to create a proper controller/action/view configuration for
⁴⁸http://xdebug.org/⁴⁹http://www.firephp.org/⁵⁰http://www.zend.com/en/products/studio⁵¹http://www.jetbrains.com/phpstorm/⁵²http://laravel.com/docs/helpers#miscellaneous
Chapter 1. Introducing Laravel 23
the home page as Laravel 5.1 includes some unfortunate changes to the default home page behavior.If you’re new to concepts such as controllers, actions and views I suggest just skipping this sectionand returning to it after you’ve read chapter 2.
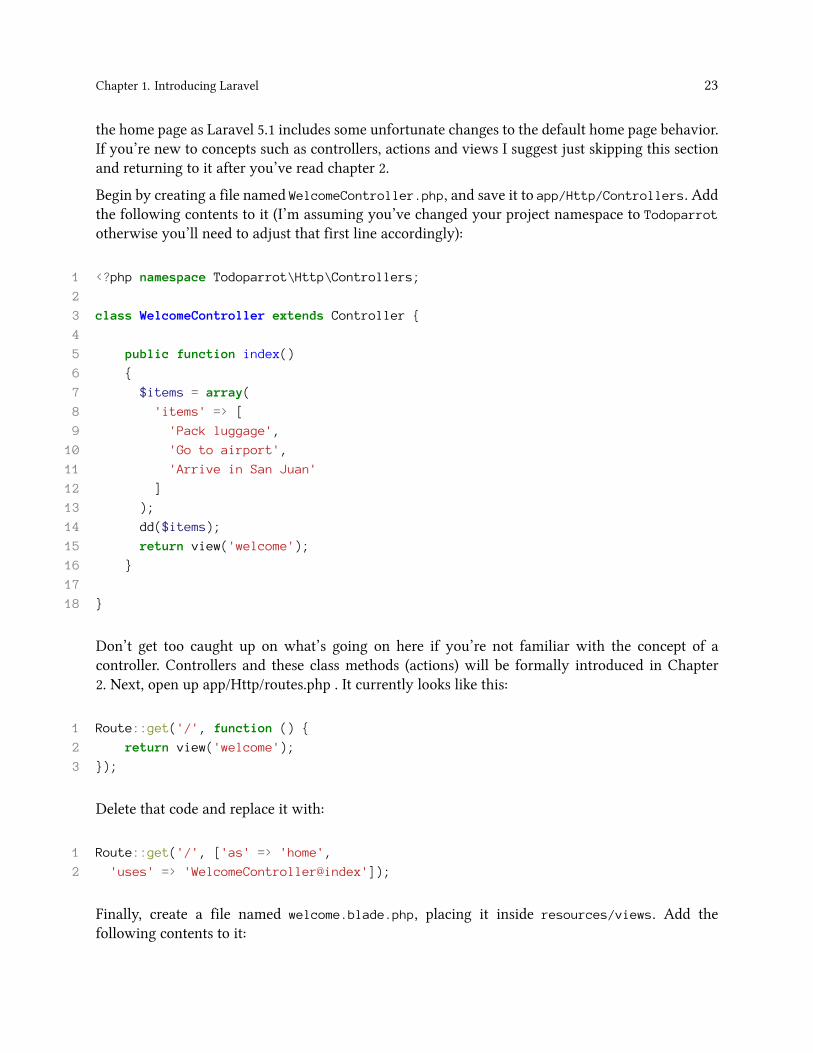
Begin by creating a file named WelcomeController.php, and save it to app/Http/Controllers. Addthe following contents to it (I’m assuming you’ve changed your project namespace to Todoparrot
otherwise you’ll need to adjust that first line accordingly):
1 <?php namespace Todoparrot\Http\Controllers;
2
3 class WelcomeController extends Controller {
4
5 public function index()
6 {
7 $items = array(
8 'items' => [
9 'Pack luggage',
10 'Go to airport',
11 'Arrive in San Juan'
12 ]
13 );
14 dd($items);
15 return view('welcome');
16 }
17
18 }
Don’t get too caught up on what’s going on here if you’re not familiar with the concept of acontroller. Controllers and these class methods (actions) will be formally introduced in Chapter2. Next, open up app/Http/routes.php . It currently looks like this:
1 Route::get('/', function () {
2 return view('welcome');
3 });
Delete that code and replace it with:
1 Route::get('/', ['as' => 'home',
2 'uses' => 'WelcomeController@index']);
Finally, create a file named welcome.blade.php, placing it inside resources/views. Add thefollowing contents to it:
Chapter 1. Introducing Laravel 24
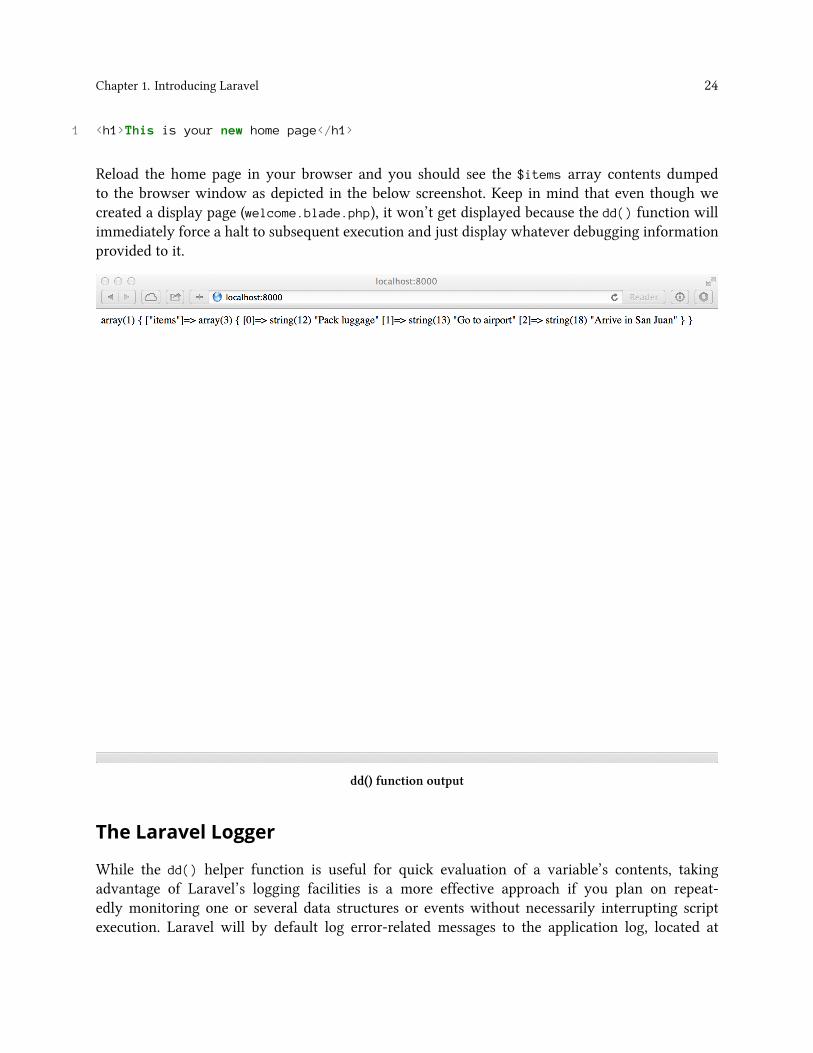
1 <h1>This is your new home page</h1>
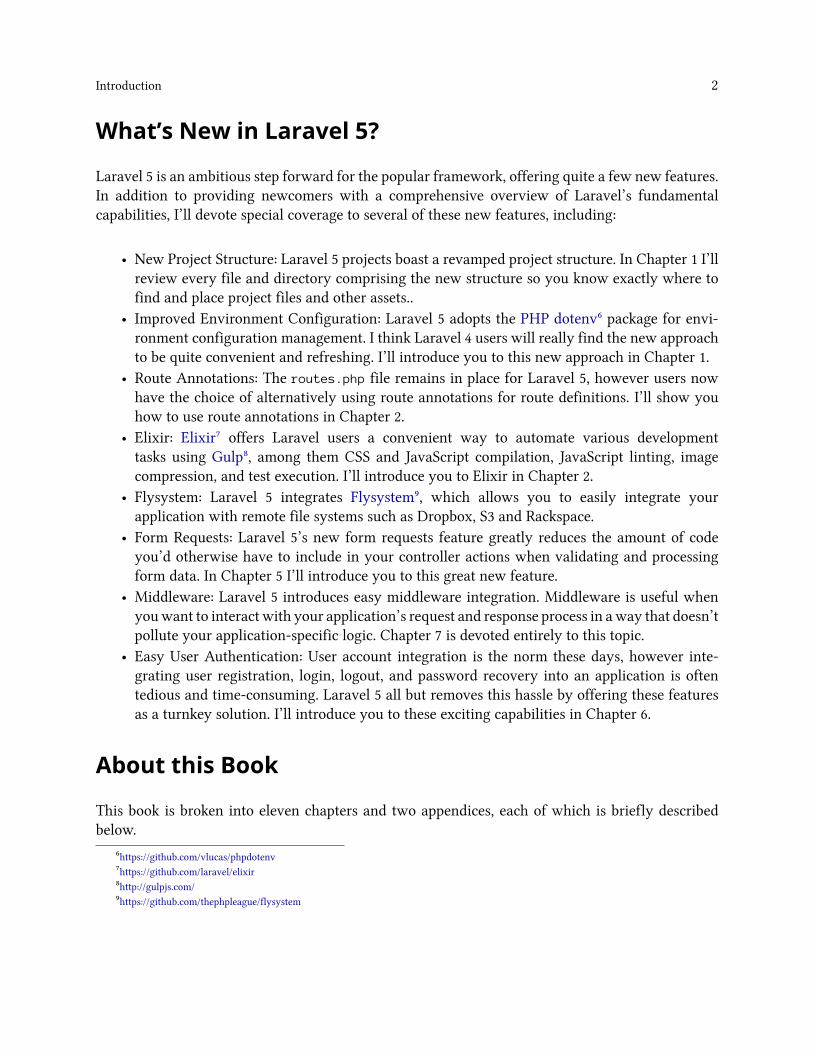
Reload the home page in your browser and you should see the $items array contents dumpedto the browser window as depicted in the below screenshot. Keep in mind that even though wecreated a display page (welcome.blade.php), it won’t get displayed because the dd() function willimmediately force a halt to subsequent execution and just display whatever debugging informationprovided to it.
dd() function output
The Laravel Logger
While the dd() helper function is useful for quick evaluation of a variable’s contents, takingadvantage of Laravel’s logging facilities is a more effective approach if you plan on repeat-edly monitoring one or several data structures or events without necessarily interrupting scriptexecution. Laravel will by default log error-related messages to the application log, located at
Chapter 1. Introducing Laravel 25
storage/logs/laravel.log. Because Laravel’s logging features are managed by Monolog⁵³, youhave a wide array of additional logging options at your disposal, including the ability to write logmessages to this log file, set logging levels, send log output to the Firebug console⁵⁴ via FirePHP⁵⁵, tothe Chrome console⁵⁶ using Chrome Logger⁵⁷, or even trigger alerts via e-mail, HipChat⁵⁸ or Slack⁵⁹.Further, if you’re using the Laravel 4 Debugbar (introduced later in this chapter) you can easilyperuse these messages from the Debugbar’s Messages tab.
Generating a custom log message is easy, done by embedding one of several available loggingmethods into the application, passing along the string or variable you’d like to log. Open theapp/Http/Controllers/WelcomeController.php file andmodify the indexmethod to look like this:
1 public function index()
2 {
3
4 $items = [
5 'Pack luggage',
6 'Go to airport',
7 'Arrive in San Juan'
8 ];
9 \Log::debug($items);
10 return view('welcome');
11
12 }
Save the changes, reload http://localhost:8000, and a log message similar to the following willbe appended to storage/logs/laravel.log:
1 [2015-01-08 01:51:56] local.DEBUG: array (
2 0 => 'Pack luggage',
3 1 => 'Go to airport',
4 2 => 'Arrive in San Juan',
5 )
The debug-level message is just one of several at your disposal. Among other levels are info, warning,error and critical, meaning you can use similarly named methods accordingly:
⁵³https://github.com/Seldaek/monolog⁵⁴https://getfirebug.com/⁵⁵http://www.firephp.org/⁵⁶https://developer.chrome.com/devtools/docs/console⁵⁷http://craig.is/writing/chrome-logger⁵⁸http://hipchat.com/⁵⁹https://www.slack.com/

Chapter 1. Introducing Laravel 26
1 \Log::info('Just an informational message.');
2 \Log::warning('Something may be going wrong.');
3 \Log::error('Something is definitely going wrong.');
4 \Log::critical('Danger, Will Robinson! Danger!');
Integrating the Logger and FirePHP
When monitoring the log file it’s common practice to use the tail -f command (available on Linuxand OS X) to view any log file changes in real time. You can however avoid the additional step ofmaintaining an additional terminal window for such purposes by instead sending the log messagesto the Firebug⁶⁰ console, allowing you to see the log messages alongside your application’s browseroutput. You’ll do this by integrating FirePHP⁶¹.
You’ll first need to install the Firebug and FirePHP⁶² extensions, both of which are available viaMozilla’s official add-ons site. After restarting your browser, you can begin sending log messagesdirectly to the Firebug console like so:
1 $monolog = \Log::getMonolog();
2
3 $items = ['Pack luggage', 'Go to airport', 'Arrive in San Juan'];
4
5 $monolog->pushHandler(new \Monolog\Handler\FirePHPHandler());
6
7 $monolog->addInfo('Log Message', array('items' => $items));
Once executed, the $items array will appear in your Firebug console as depicted in the belowscreenshot.
Logging to Firebug via FirePHP
Using the Tinker Console
You’ll often want to test a small PHP snippet or experiment with manipulating a particular datastructure, but creating and executing a PHP script for such purposes is kind of tedious. You can
⁶⁰https://getfirebug.com/⁶¹http://www.firephp.org/⁶²https://addons.mozilla.org/en-US/firefox/addon/firephp/
Chapter 1. Introducing Laravel 27
eliminate the additional overhead by instead using the tinker console, a command line-basedwindow into your Laravel application. Open tinker by executing the following command from yourapplication’s root directory:
1 $ php artisan tinker --env=local
2 Psy Shell v0.5.2 (PHP 5.5.21 — cli) by Justin Hileman
3 >>>
Notice tinker uses PsySH⁶³, a great interactive PHP console and debugger. PsySH is new to Laravel 5,and is a huge improvement over the previous console. Be sure to take some time perusing the featurelist on the PsySH website⁶⁴ to learn more about what this great utility can do. In the meantime, let’sget used to the interface:
1 >>> $items = ['Pack luggage', 'Go to airport', 'Arrive in San Juan'];
2 => [
3 "Pack luggage",
4 "Go to airport",
5 "Arrive in San Juan"
6 ]
Fromhere you could for instance learnmore about how to sort an array using PHP’s sort() function:
1 >>> var_dump($items);
2 array(3) {
3 [0]=>
4 string(12) "Pack luggage"
5 [1]=>
6 string(13) "Go to airport"
7 [2]=>
8 string(18) "Arrive in San Juan"
9 }
10 => null
11 >>> sort($items);
12 => true
13 >>> $items;
14 => [
15 "Arrive in San Juan",
16 "Go to airport",
17 "Pack luggage"
18 ]
19 >>>
⁶³http://psysh.org/⁶⁴http://psysh.org/
Chapter 1. Introducing Laravel 28
After you’re done, type exit to exit the PsySH console:
1 >>> exit
2 Exit: Goodbye.
3 $
PsySH can be incredibly useful for quickly experimenting with PHP snippets, and I’d imagineyou’ll find yourself repeatedly returning to this indispensable tool. We’ll take advantage of PsySHthroughout the book to get acquainted with various Laravel features.
Introducing the Laravel Debugbar
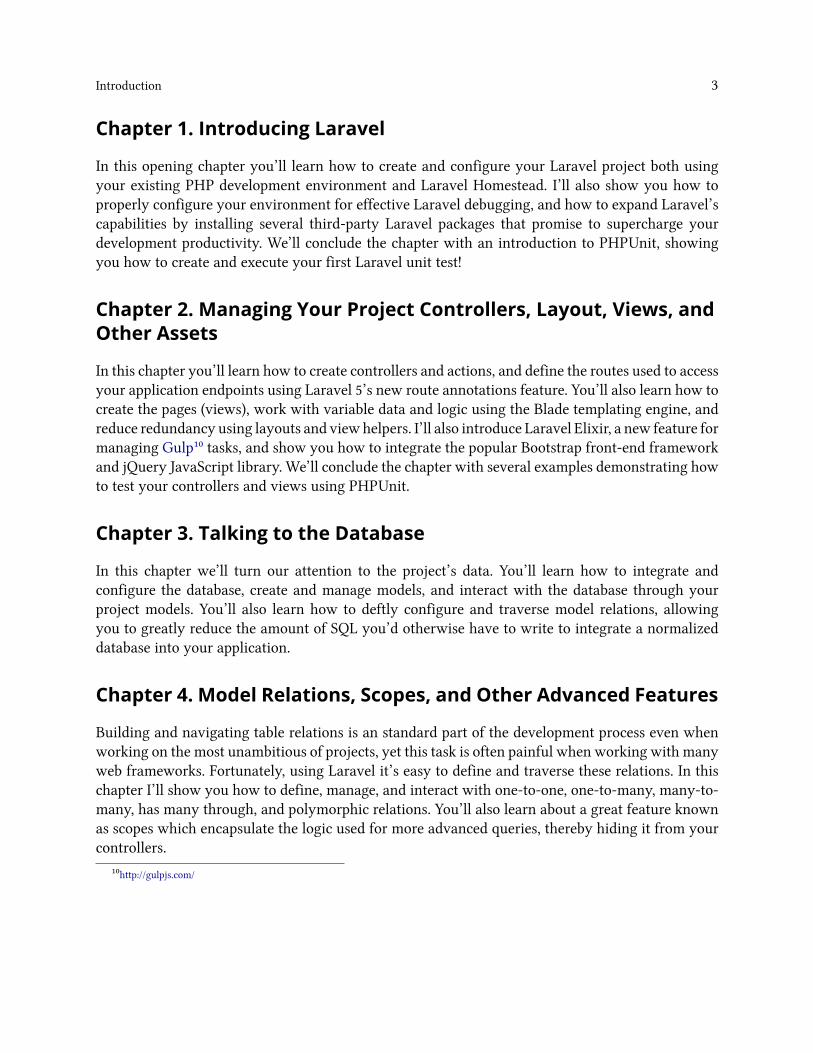
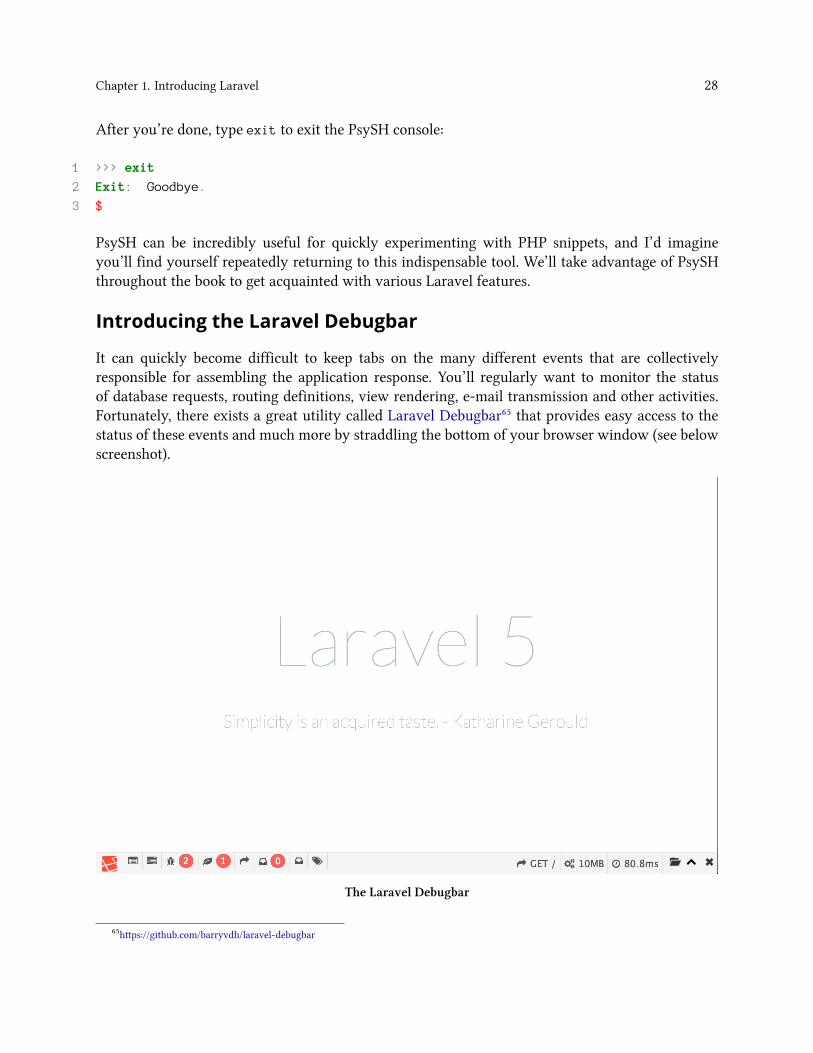
It can quickly become difficult to keep tabs on the many different events that are collectivelyresponsible for assembling the application response. You’ll regularly want to monitor the statusof database requests, routing definitions, view rendering, e-mail transmission and other activities.Fortunately, there exists a great utility called Laravel Debugbar⁶⁵ that provides easy access to thestatus of these events and much more by straddling the bottom of your browser window (see belowscreenshot).
The Laravel Debugbar
⁶⁵https://github.com/barryvdh/laravel-debugbar
Chapter 1. Introducing Laravel 29
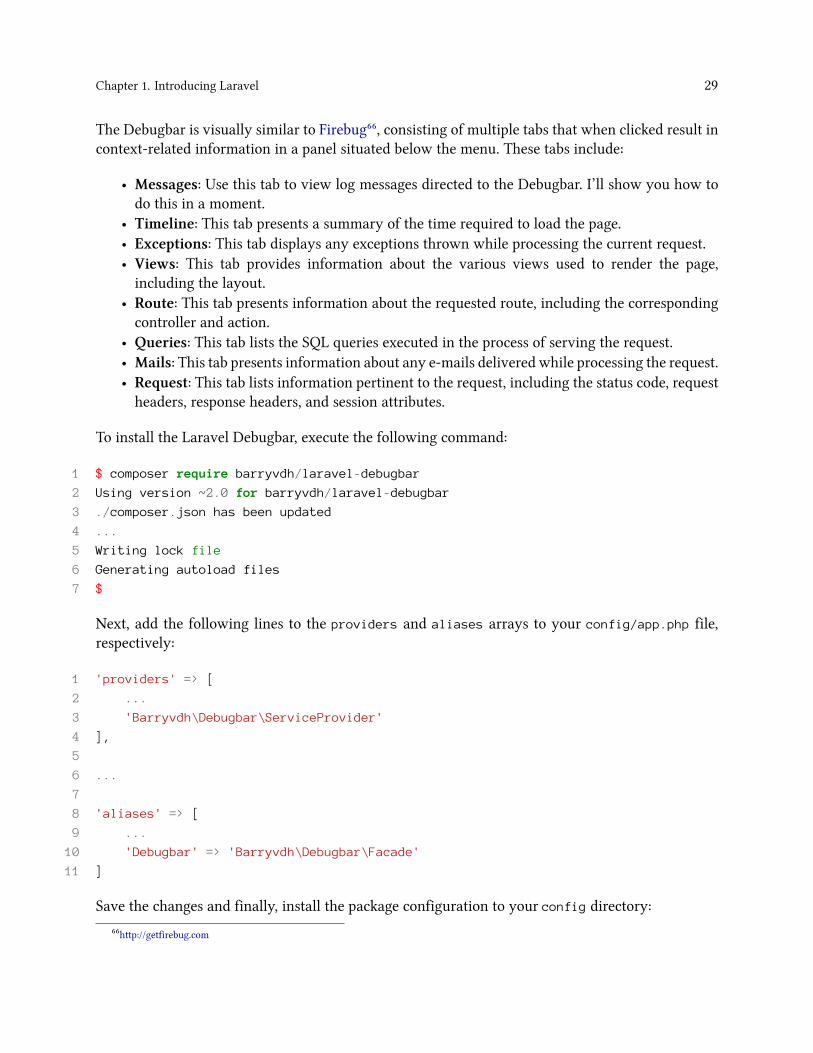
The Debugbar is visually similar to Firebug⁶⁶, consisting of multiple tabs that when clicked result incontext-related information in a panel situated below the menu. These tabs include:
• Messages: Use this tab to view log messages directed to the Debugbar. I’ll show you how todo this in a moment.
• Timeline: This tab presents a summary of the time required to load the page.• Exceptions: This tab displays any exceptions thrown while processing the current request.• Views: This tab provides information about the various views used to render the page,including the layout.
• Route: This tab presents information about the requested route, including the correspondingcontroller and action.
• Queries: This tab lists the SQL queries executed in the process of serving the request.• Mails: This tab presents information about any e-mails delivered while processing the request.• Request: This tab lists information pertinent to the request, including the status code, requestheaders, response headers, and session attributes.
To install the Laravel Debugbar, execute the following command:
1 $ composer require barryvdh/laravel-debugbar
2 Using version ~2.0 for barryvdh/laravel-debugbar
3 ./composer.json has been updated
4 ...
5 Writing lock file
6 Generating autoload files
7 $
Next, add the following lines to the providers and aliases arrays to your config/app.php file,respectively:
1 'providers' => [
2 ...
3 'Barryvdh\Debugbar\ServiceProvider'
4 ],
5
6 ...
7
8 'aliases' => [
9 ...
10 'Debugbar' => 'Barryvdh\Debugbar\Facade'
11 ]
Save the changes and finally, install the package configuration to your config directory:
⁶⁶http://getfirebug.com
Chapter 1. Introducing Laravel 30
1 $ php artisan vendor:publish
While you don’t have to make any changes to this configuration file (found in config/debug-
bar.php), I suggest having a look at it to see what changes are available.
Reload the browser and you should see the Debugbar at the bottom of the page! Keep in mind theDebugbar will only render when used in conjunction with an endpoint that actually renders a viewto the browser.
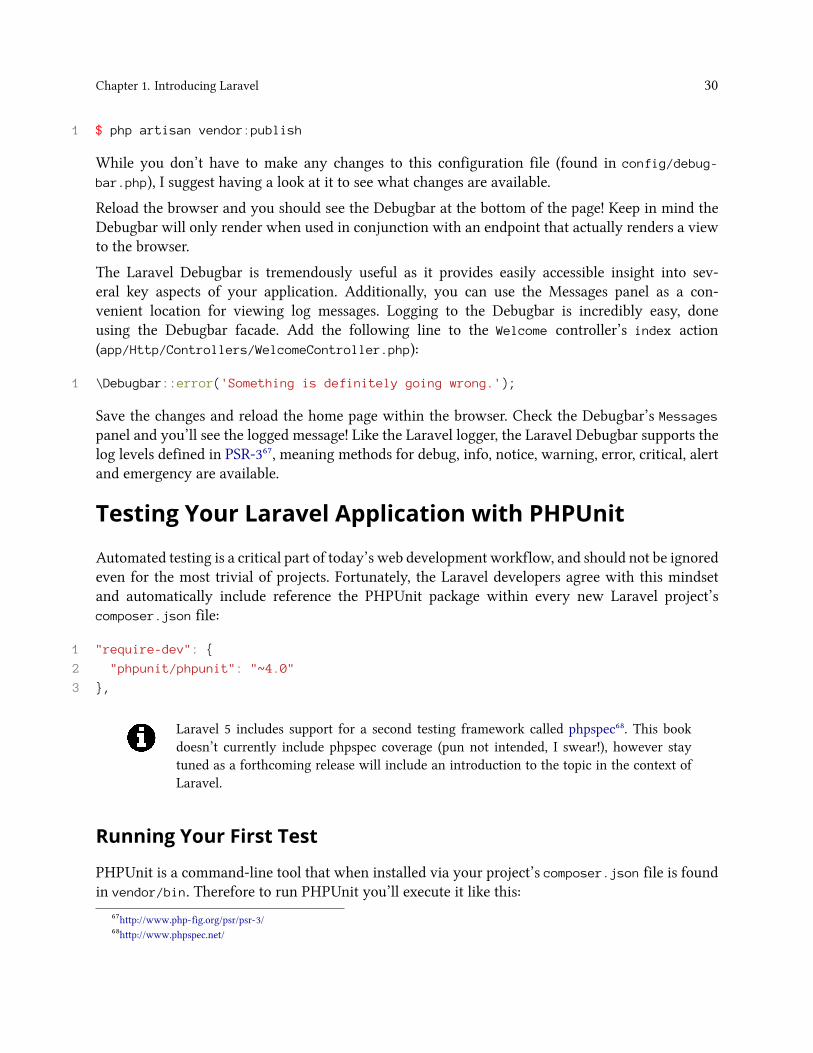
The Laravel Debugbar is tremendously useful as it provides easily accessible insight into sev-eral key aspects of your application. Additionally, you can use the Messages panel as a con-venient location for viewing log messages. Logging to the Debugbar is incredibly easy, doneusing the Debugbar facade. Add the following line to the Welcome controller’s index action(app/Http/Controllers/WelcomeController.php):
1 \Debugbar::error('Something is definitely going wrong.');
Save the changes and reload the home page within the browser. Check the Debugbar’s Messagespanel and you’ll see the logged message! Like the Laravel logger, the Laravel Debugbar supports thelog levels defined in PSR-3⁶⁷, meaning methods for debug, info, notice, warning, error, critical, alertand emergency are available.
Testing Your Laravel Application with PHPUnit
Automated testing is a critical part of today’s web development workflow, and should not be ignoredeven for the most trivial of projects. Fortunately, the Laravel developers agree with this mindsetand automatically include reference the PHPUnit package within every new Laravel project’scomposer.json file:
1 "require-dev": {
2 "phpunit/phpunit": "~4.0"
3 },
Laravel 5 includes support for a second testing framework called phpspec⁶⁸. This bookdoesn’t currently include phpspec coverage (pun not intended, I swear!), however staytuned as a forthcoming release will include an introduction to the topic in the context ofLaravel.
Running Your First Test
PHPUnit is a command-line tool that when installed via your project’s composer.json file is foundin vendor/bin. Therefore to run PHPUnit you’ll execute it like this:
⁶⁷http://www.php-fig.org/psr/psr-3/⁶⁸http://www.phpspec.net/
Chapter 1. Introducing Laravel 31
1 $ vendor/bin/phpunit --version
2 PHPUnit 4.7.2 by Sebastian Bergmann and contributors.
If you find typing vendor/bin/ to be annoying, consider making PHPUnit globally available, doneusing Composer’s global modifier. Rob Allen has written up a concise tutorial⁶⁹ showing you howthis is accomplished.
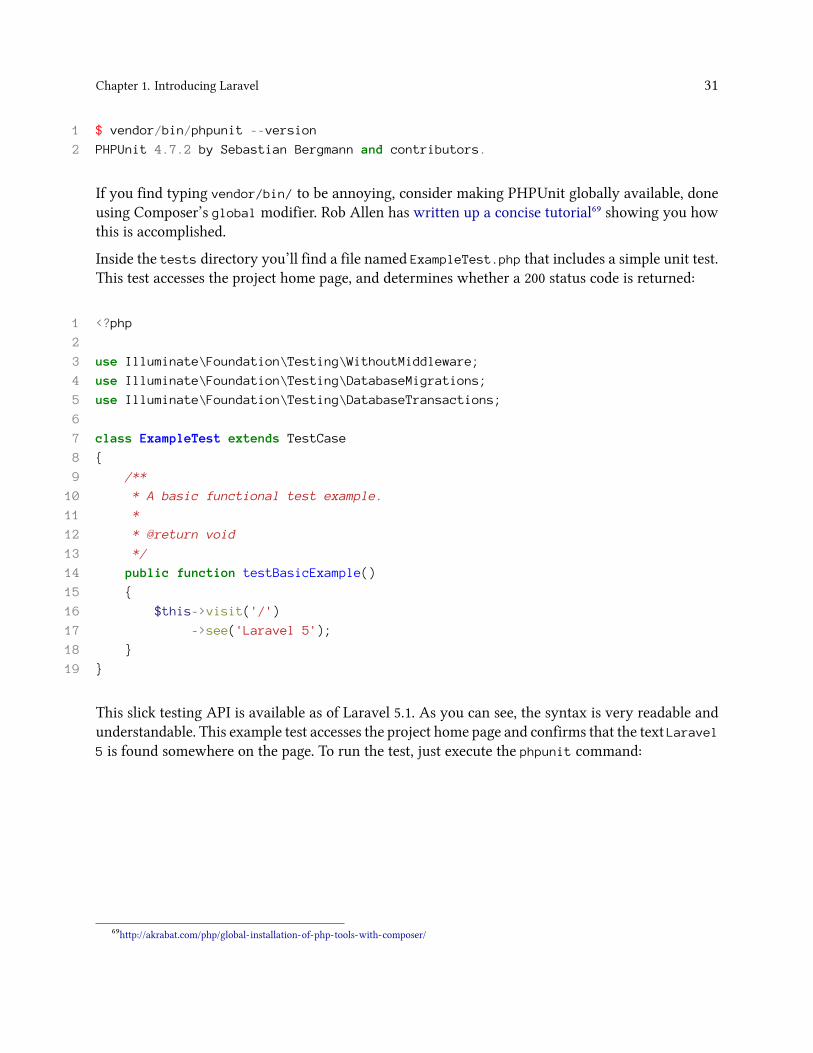
Inside the tests directory you’ll find a file named ExampleTest.php that includes a simple unit test.This test accesses the project home page, and determines whether a 200 status code is returned:
1 <?php
2
3 use Illuminate\Foundation\Testing\WithoutMiddleware;
4 use Illuminate\Foundation\Testing\DatabaseMigrations;
5 use Illuminate\Foundation\Testing\DatabaseTransactions;
6
7 class ExampleTest extends TestCase
8 {
9 /**
10 * A basic functional test example.
11 *
12 * @return void
13 */
14 public function testBasicExample()
15 {
16 $this->visit('/')
17 ->see('Laravel 5');
18 }
19 }
This slick testing API is available as of Laravel 5.1. As you can see, the syntax is very readable andunderstandable. This example test accesses the project home page and confirms that the text Laravel5 is found somewhere on the page. To run the test, just execute the phpunit command:
⁶⁹http://akrabat.com/php/global-installation-of-php-tools-with-composer/
Chapter 1. Introducing Laravel 32
1 $ vendor/bin/phpunit
2 PHPUnit 4.7.2 by Sebastian Bergmann and contributors.
3
4 .
5
6 Time: 615 ms, Memory: 12.00Mb
7
8 OK (1 test, 2 assertions)
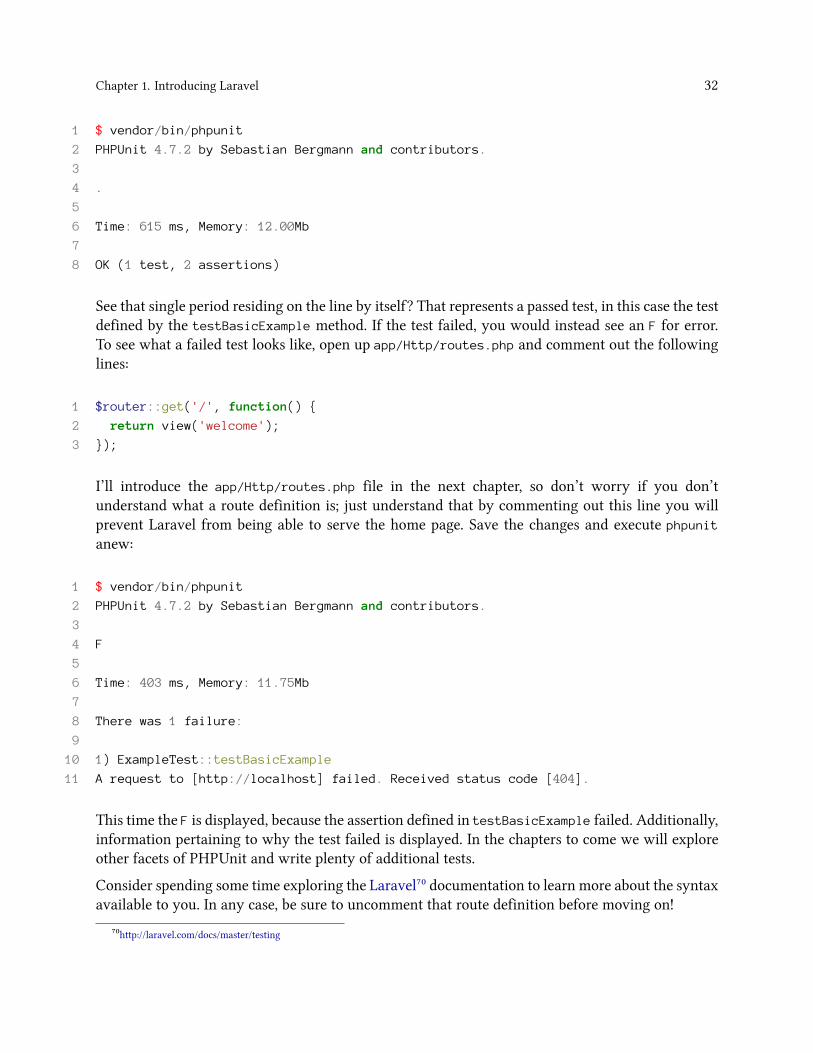
See that single period residing on the line by itself? That represents a passed test, in this case the testdefined by the testBasicExample method. If the test failed, you would instead see an F for error.To see what a failed test looks like, open up app/Http/routes.php and comment out the followinglines:
1 $router::get('/', function() {
2 return view('welcome');
3 });
I’ll introduce the app/Http/routes.php file in the next chapter, so don’t worry if you don’tunderstand what a route definition is; just understand that by commenting out this line you willprevent Laravel from being able to serve the home page. Save the changes and execute phpunit
anew:
1 $ vendor/bin/phpunit
2 PHPUnit 4.7.2 by Sebastian Bergmann and contributors.
3
4 F
5
6 Time: 403 ms, Memory: 11.75Mb
7
8 There was 1 failure:
9
10 1) ExampleTest::testBasicExample
11 A request to [http://localhost] failed. Received status code [404].
This time the F is displayed, because the assertion defined in testBasicExample failed. Additionally,information pertaining to why the test failed is displayed. In the chapters to come we will exploreother facets of PHPUnit and write plenty of additional tests.
Consider spending some time exploring the Laravel⁷⁰ documentation to learn more about the syntaxavailable to you. In any case, be sure to uncomment that route definition before moving on!
⁷⁰http://laravel.com/docs/master/testing
Chapter 1. Introducing Laravel 33
Conclusion
It’s only the end of the first chapter and we’ve already covered a tremendous amount of ground!With your project generated and development environment configured, it’s time to begin buildingthe TODOParrot application. Onwards!