elecon information technology ltd - mummum.mikrotik.com/presentations/in12/nilesh.pdf · mtcna...
TRANSCRIPT

Presented By: Nilesh Prajapati
MTCNA & MTCWE Elecon Information Technology Ltd.
1

EITL – A Part of ELECON Group of Companies. � EITL is the IT division of the Elecon group of companies
and has an experience of more than 19 years in the field of hardware, software and networking solutions. Situated in the heart of Vitthal Udyognagar an Industrial Estate and in the proximity of the educational town of Vallabh Vidyanagar, EITL is all set to reach new heights in the field of IT solutions.
� ELECON established in 1951, Elecon Engineering is located in Val labh Vidyanagar, India. Elecon manufacturers Helical gears, Spiral bevel and Helical gears, Planetary gears, Worm reduction gear unit, Coupling and gear boxes for highly specialized and precision application.
2

Solutions & Services § Wireless Networking Solutions
§ Wi-‐Fi Hotspot Solution
§ Mikrotik Consultancy
§ ISP Consultancy
§ Network Consultancy
§ IP Surveillance System
§ Hardware Sales & Services
3

Diagram
4

What we will Learn?
� Virtual Access Point.
� Hotspot Configuration.
� Radius Configuration.
� User Manager Configuration.
5

� Give Necessary IP address on Interfaces.
� Configure wlan1 as AP.
� First of all we will create 2 VAP as per the diagram.
� We will set Name, SSID & Master Interface.
6

Go to IP-‐Address
7

IP Address Configura6on
8

Access Point Configura6on
9

Virtual Access Point Configuration
10

Set Name
11

Set SSID, Master Interface
12

� Now we will assign IP address on our VAP Interface. � We will also create Hotspot on VAP interface. � Why Hotspot?
13

IP Address Configuration on VAP
14

IP Address Configuration on VAP2
15
Hotspot Cofiguration � Now We will configure hotspot on VAP interface for
Authentication.
16

Go to IP-‐Hotspot
17
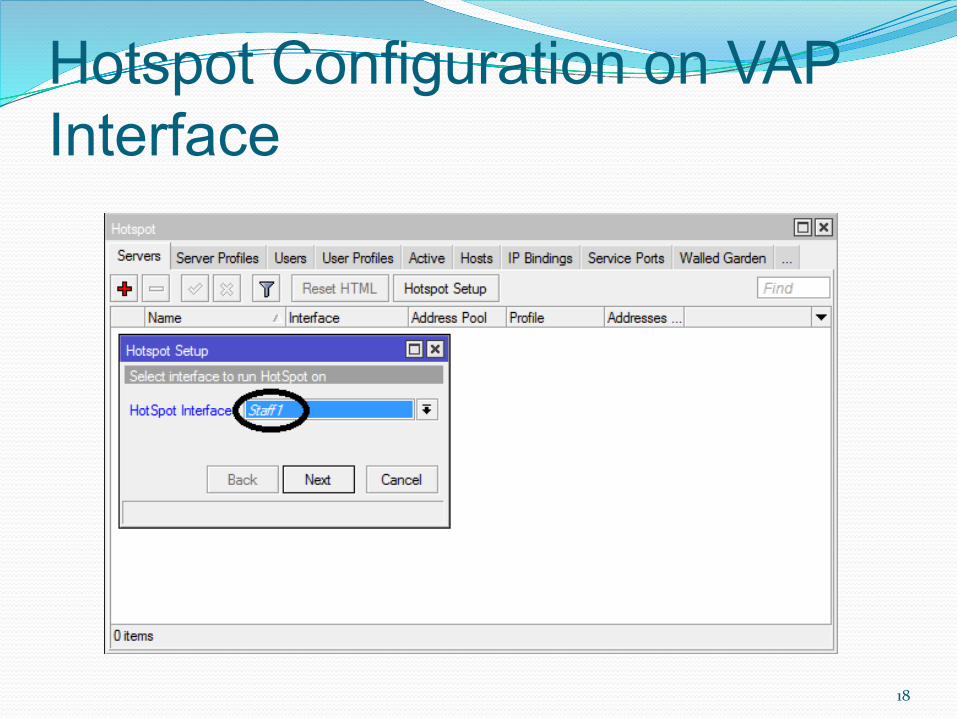
Hotspot Configuration on VAP Interface
18
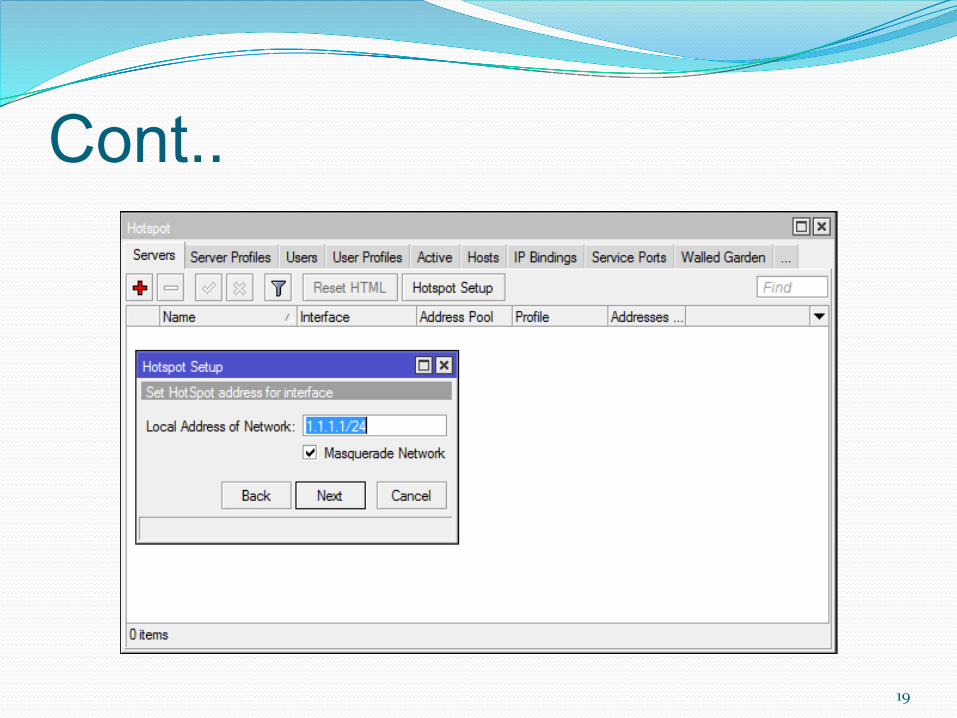
Cont..
19
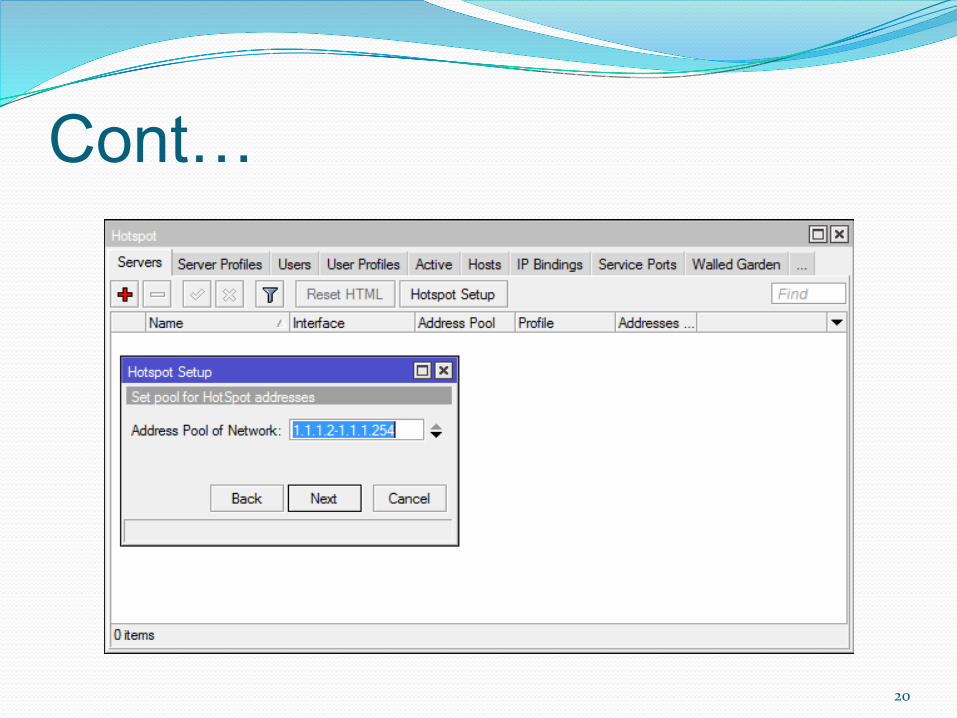
Cont…
20

Cont…
21

Cont…
22

Cont…
23

Cont…
24

Cont…
25

Cont…
26

� As per the diagram we can create another Hotspot
on student VAP Interface. � we will try to connect and Login on both VAP one by
one.
� We will see same Authentication page on both VAP.
� We can also login through same Username & password.
27

� Now we will try to do something different we can make different Authentication page for both VAP.
� For that we have to design different Authentication
Page and upload to the Mikrotik. � We can also create some users for both servers. � Now we have to edit Hotspot Server Profile of both
VAP.
28
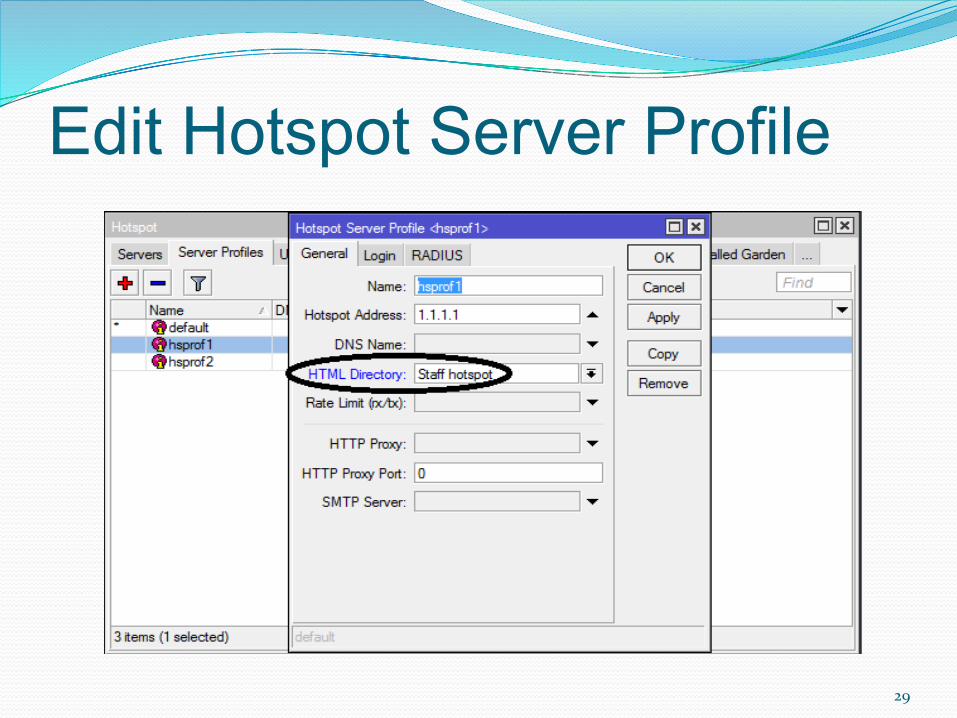
Edit Hotspot Server Profile
29
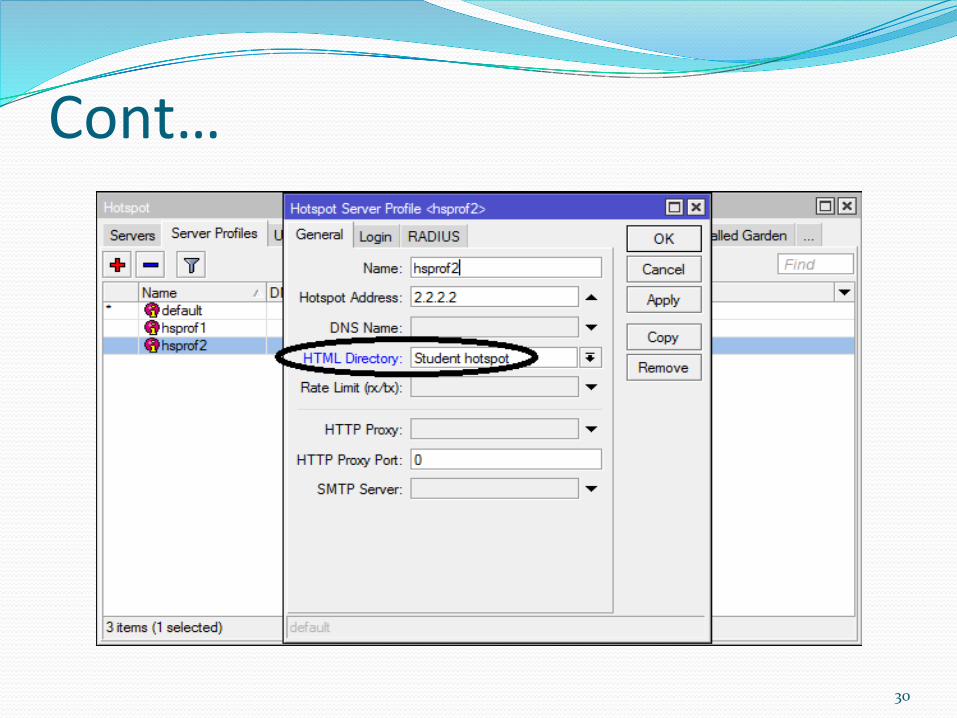
Cont…
30

Create User
31
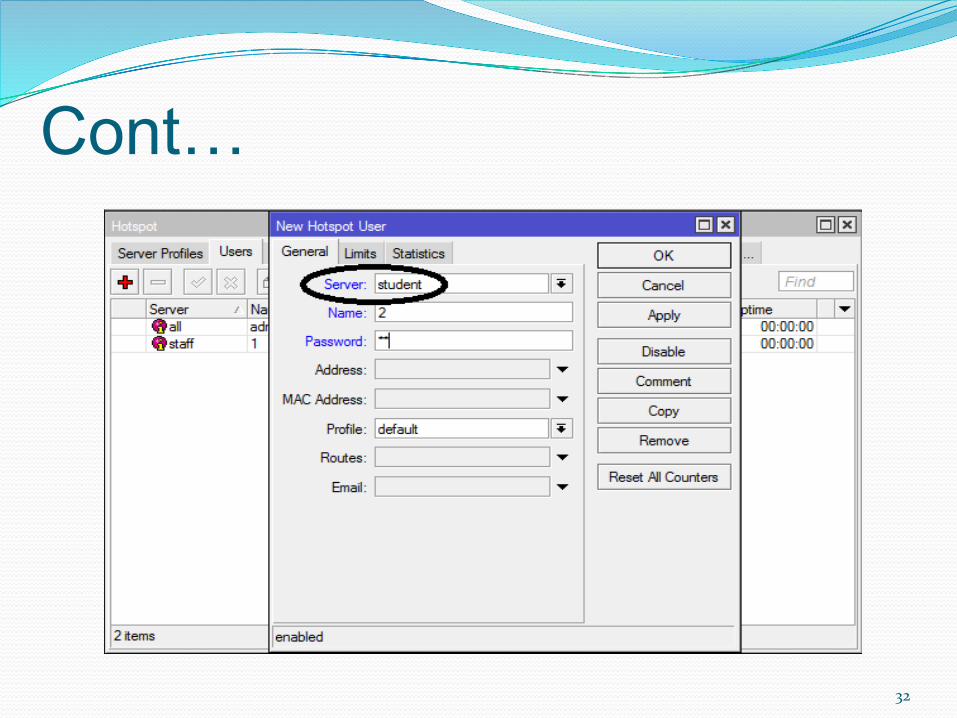
Cont…
32

� We can check the results as follows.
� Try to connect on both VAP and try to Login.
� We will see Different login page for both VAP.
� Particular user can only login to selected VAP.
33

� Guess that two different Database for Student and Staff Authentication is already created in different Radius Server.
� Now we will try to connect two different Radius Server from the same AP which is already configured.
� For that we have to edit Hotspot Server Profile. � We also have to create Radius Client to link with the
Radius Server.
34

Edit Hotspot Server Profile
35

Add any string to Domain
36

Radius Configuration
37
� Radius Server � We can create Radius server in Mikrotik. � For that we will configure Usermanager.
38

Usermanager Configuration � Add Router IP address & Shared secret � Add Limitation
� Add Profile
� Add User
39

Usermanager Login
40

Add Router
41

Create Limitation
42
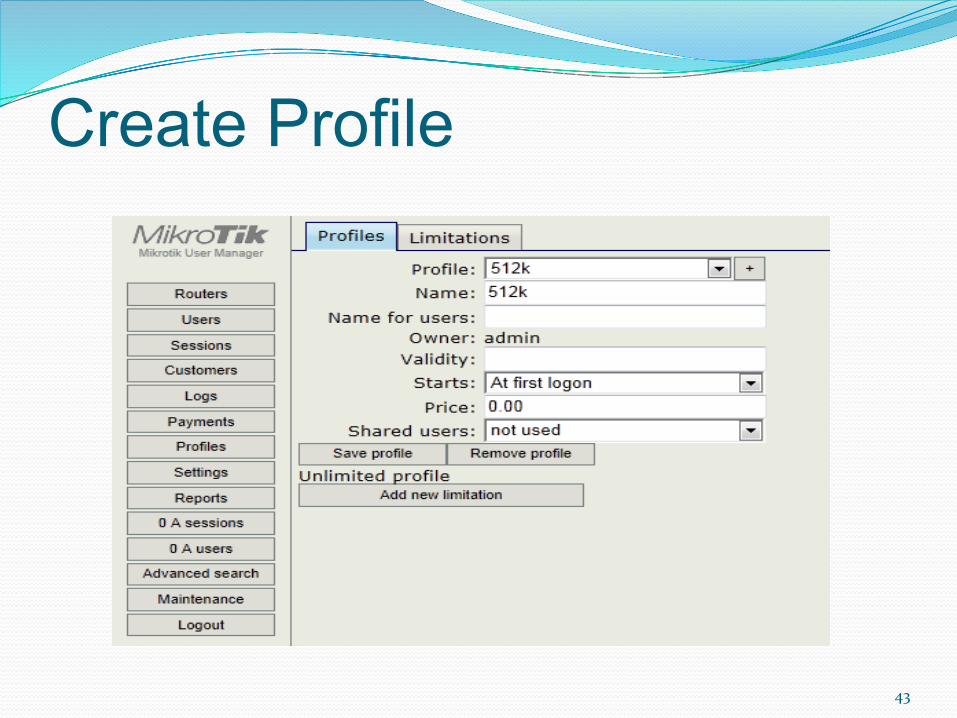
Create Profile
43

Set Day and Time
44

Check on limit
45
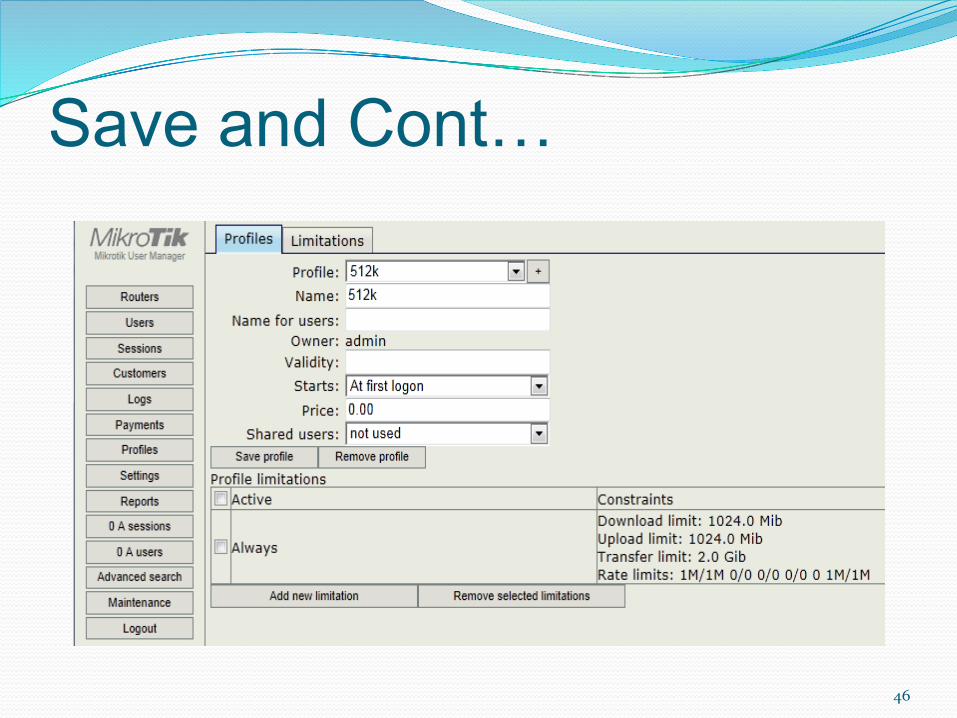
Save and Cont…
46

Create User
47

� Same way we can configure another usermanager. � we can check the results.
� We will try to authenticate from both VAP with different user name and password which we have created in our usermanager as per the diagram.
48
� We will see one more advance configuration of Usermanager.
� We will see number of Administrator can share same Usermanager as their own property.
� They can add their own Routers, Users, Profiles, limitations, etc.
� Nobody can see another Administrators configuration.
49
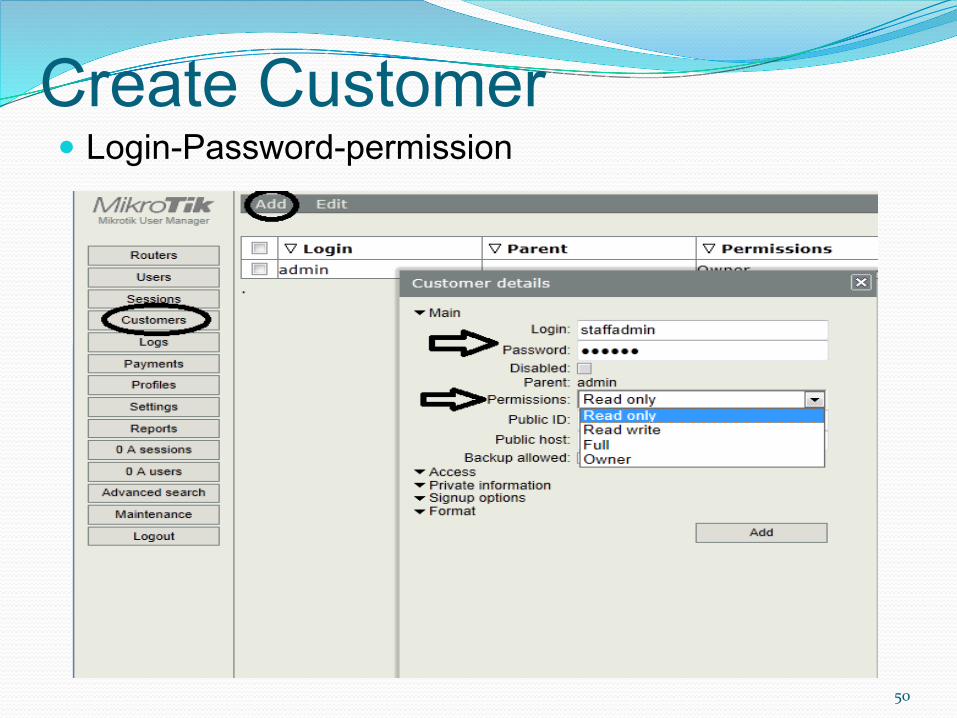
Create Customer � Login-Password-permission
50

Set Access
51

Set Private Information
52
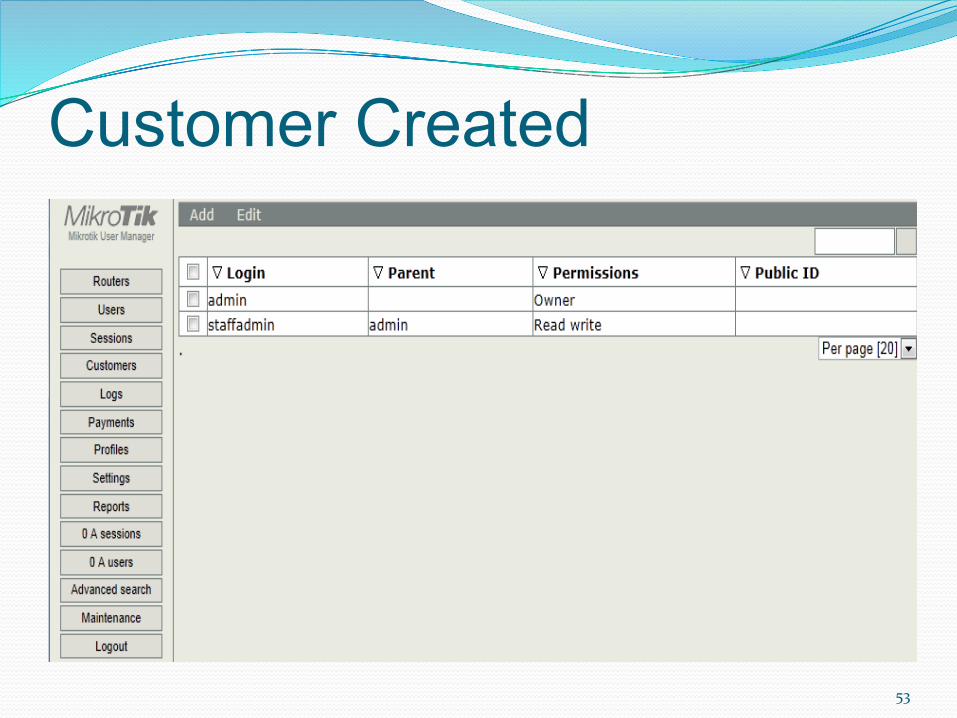
Customer Created
53

Summary � We can create 2 different network on one AP. � We can assign them diff. authentication to avoid confusion. � User request will authenticate from particular radius server. � We can create Packages as per our requirement � We can Limit Data transfer. � We can Limit speed for download & upload � We can create separate package for day & night � User can see his utilization. � User can pay online � User can change his password. � We can make multiple administrator on single server.
54

Thank you � Nilesh Prajapati
� ELECON Information Technology Ltd � MikroTik Certified Consultant
� Anand Sojitra Road, � Vallabh Vidyanagar – 388320
� Gujarat, India. � Phone : +91 2692 227275 / 99
� GSM : +91 98250 71429 � Email : [email protected] � Website : http://www.eleconinfotech.net
55